

Page 1

t6000 Client Software
A-61543
Part No. 9E4408
CAT No. 894 0132
User’s
Guide
Page 2

Contents
1 Introduction . . . . . . . . . . . . . . . . . . . . . . . . . . . . . . . . . . . . . . . . . . . . . . . . . 1
Starting the software. . . . . . . . . . . . . . . . . . . . . . . . . . . . . . . . . . . . . . . . . . . 1
Exiting the software . . . . . . . . . . . . . . . . . . . . . . . . . . . . . . . . . . . . . . . . . . . 2
2 Using the Software . . . . . . . . . . . . . . . . . . . . . . . . . . . . . . . . . . . . . . . . . . . . 3
The Kodak t6000 Client Software window . . . . . . . . . . . . . . . . . . . . . . . . . . 3
Capturing transactions . . . . . . . . . . . . . . . . . . . . . . . . . . . . . . . . . . . . . . . . . 4
Opening the processing date. . . . . . . . . . . . . . . . . . . . . . . . . . . . . . . . . . 5
Scanning deposits or payments. . . . . . . . . . . . . . . . . . . . . . . . . . . . . . . . 6
The main viewing window . . . . . . . . . . . . . . . . . . . . . . . . . . . . . . . . . . . . 8
Correcting amounts and balancing transactions . . . . . . . . . . . . . . . . . . 10
Releasing unbalanced transactions. . . . . . . . . . . . . . . . . . . . . . . . . . . . .11
Correcting unbalanced transactions . . . . . . . . . . . . . . . . . . . . . . . . . . . 12
The Zoom function. . . . . . . . . . . . . . . . . . . . . . . . . . . . . . . . . . . . . . . . . 13
Image quality issues for transactions . . . . . . . . . . . . . . . . . . . . . . . . . . 14
Duplicate item checking for transactions . . . . . . . . . . . . . . . . . . . . . . . . 15
Deferring transactions . . . . . . . . . . . . . . . . . . . . . . . . . . . . . . . . . . . . . . . . 16
The Deferred Transactions window . . . . . . . . . . . . . . . . . . . . . . . . . . . . 17
Processing deferred deposits . . . . . . . . . . . . . . . . . . . . . . . . . . . . . . . . 18
Transmitting transactions . . . . . . . . . . . . . . . . . . . . . . . . . . . . . . . . . . . . . . 19
The Transmit window. . . . . . . . . . . . . . . . . . . . . . . . . . . . . . . . . . . . . . . 19
Transmitting transactions. . . . . . . . . . . . . . . . . . . . . . . . . . . . . . . . . . . . 21
Closing the processing date . . . . . . . . . . . . . . . . . . . . . . . . . . . . . . . . . . . . 22
End of the day . . . . . . . . . . . . . . . . . . . . . . . . . . . . . . . . . . . . . . . . . . . . . . 23
Printing and exporting reports . . . . . . . . . . . . . . . . . . . . . . . . . . . . . . . . . . 25
Researching transactions . . . . . . . . . . . . . . . . . . . . . . . . . . . . . . . . . . . . . . 28
Accessing the Image Viewer window . . . . . . . . . . . . . . . . . . . . . . . . . . 28
Buttons on the Image Viewer window . . . . . . . . . . . . . . . . . . . . . . . . . . 29
Deleting transactions . . . . . . . . . . . . . . . . . . . . . . . . . . . . . . . . . . . . . . . 29
Selecting a different date other than the current date . . . . . . . . . . . . . . 30
Searching for a specific item . . . . . . . . . . . . . . . . . . . . . . . . . . . . . . . . . 30
Virtual endorsement deposit and payment transactions . . . . . . . . . . . . 31
A-61543 December 2005 i
Page 3

1 Introduction
The Kodak t6000 Software is a set of client/server software products
that enable companies to transmit images of checks as soon as they
are scanned to the appropriate financial institution for digital processing
and settlement. This enables money to be moved the same day, which
generally speeds cash flow. In addition this software provides
operational efficiencies, greater security and accuracy, less labor and
reduced costs and time because checks no longer have to be
physically transported for processing.
This User’s Guide will provide information and procedures for:
• Logging into and exiting the Kodak t6000 Client Software
• Capturing images of checks received using the Kodak t6000 Client
Software and Kodak i6030 Check Scanner
• Correcting item data after capture, if necessary
• Balancing the deposit or the payment
• Electronically transmitting deposit or payment balances to the bank
or third-party clearing house
• Ending the processing day
• Creating processing reports
• Researching captured items
Starting the software To start the Kodak t6000 Client Software:
1. Double-click on the Kodak t6000 Client Software icon.
2. Type the login name assigned to you in the Login field and press
Tab.
3. Enter your password and press Enter.
NOTE: If your security configuration contains more than one domain,
you may also see a Domain field. If the Domain field is
displayed, select the correct domain from the drop-down list.
A-61543 December 2005 1
Page 4
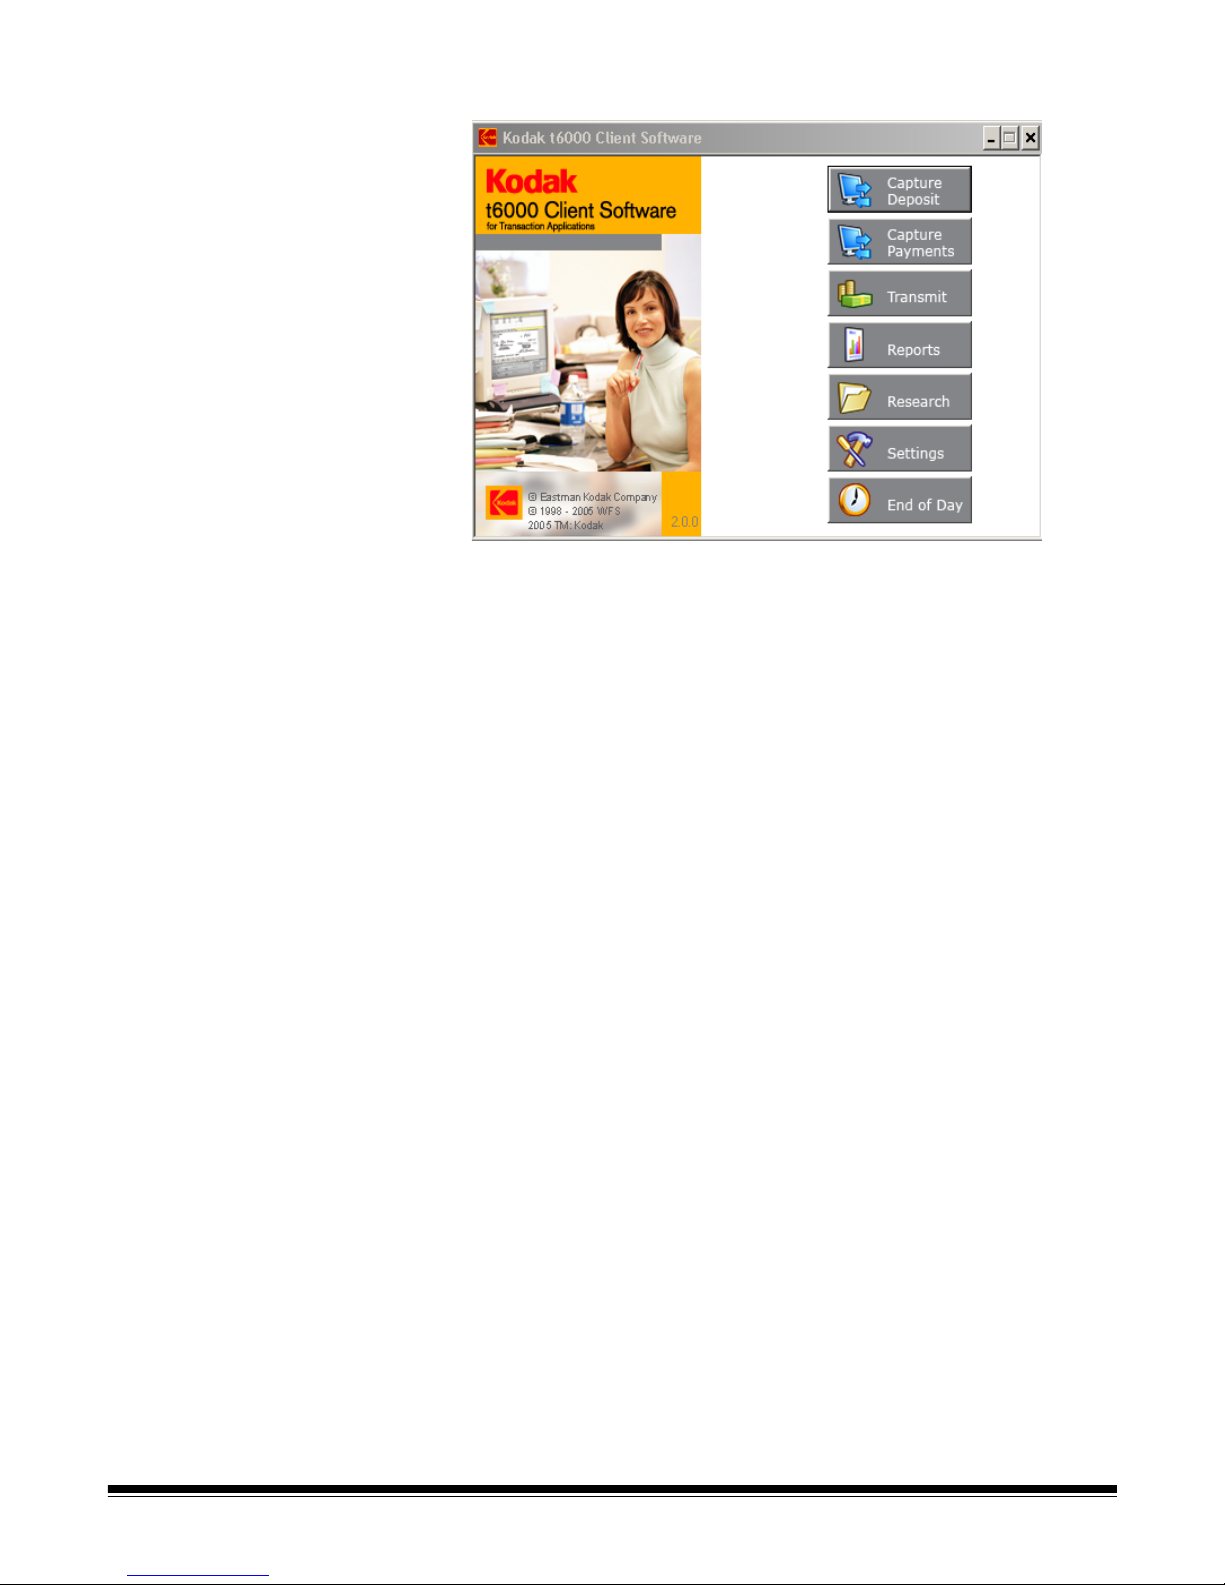
The main Kodak t6000 Client Software window will be displayed:
NOTE: The main Kodak t6000 Client Software window only displays the
processing functions assigned to you. The windows that are
illustrated in this User’s Guide will describe all features of the
Kodak t6000 Client Software.
Exiting the software To exit the Kodak t6000 Client Software:
• Click the Close box in the upper right-hand corner of the Kodak t6000
Client Software window.
2 A-61543 December 2005
Page 5
2 Using the Software
This chapter provides an overview of the windows you can access
when using the client software, as well as procedures for your typical
workflow process:
• Open a processing date
• Capture transactions (deposits or payments)
• Transmit transactions (deposits or payments)
• Print or export production reports, if required
• View images of transactions
• Close the processing date
• End of the day processing
The Kodak t6000
Client Software
window
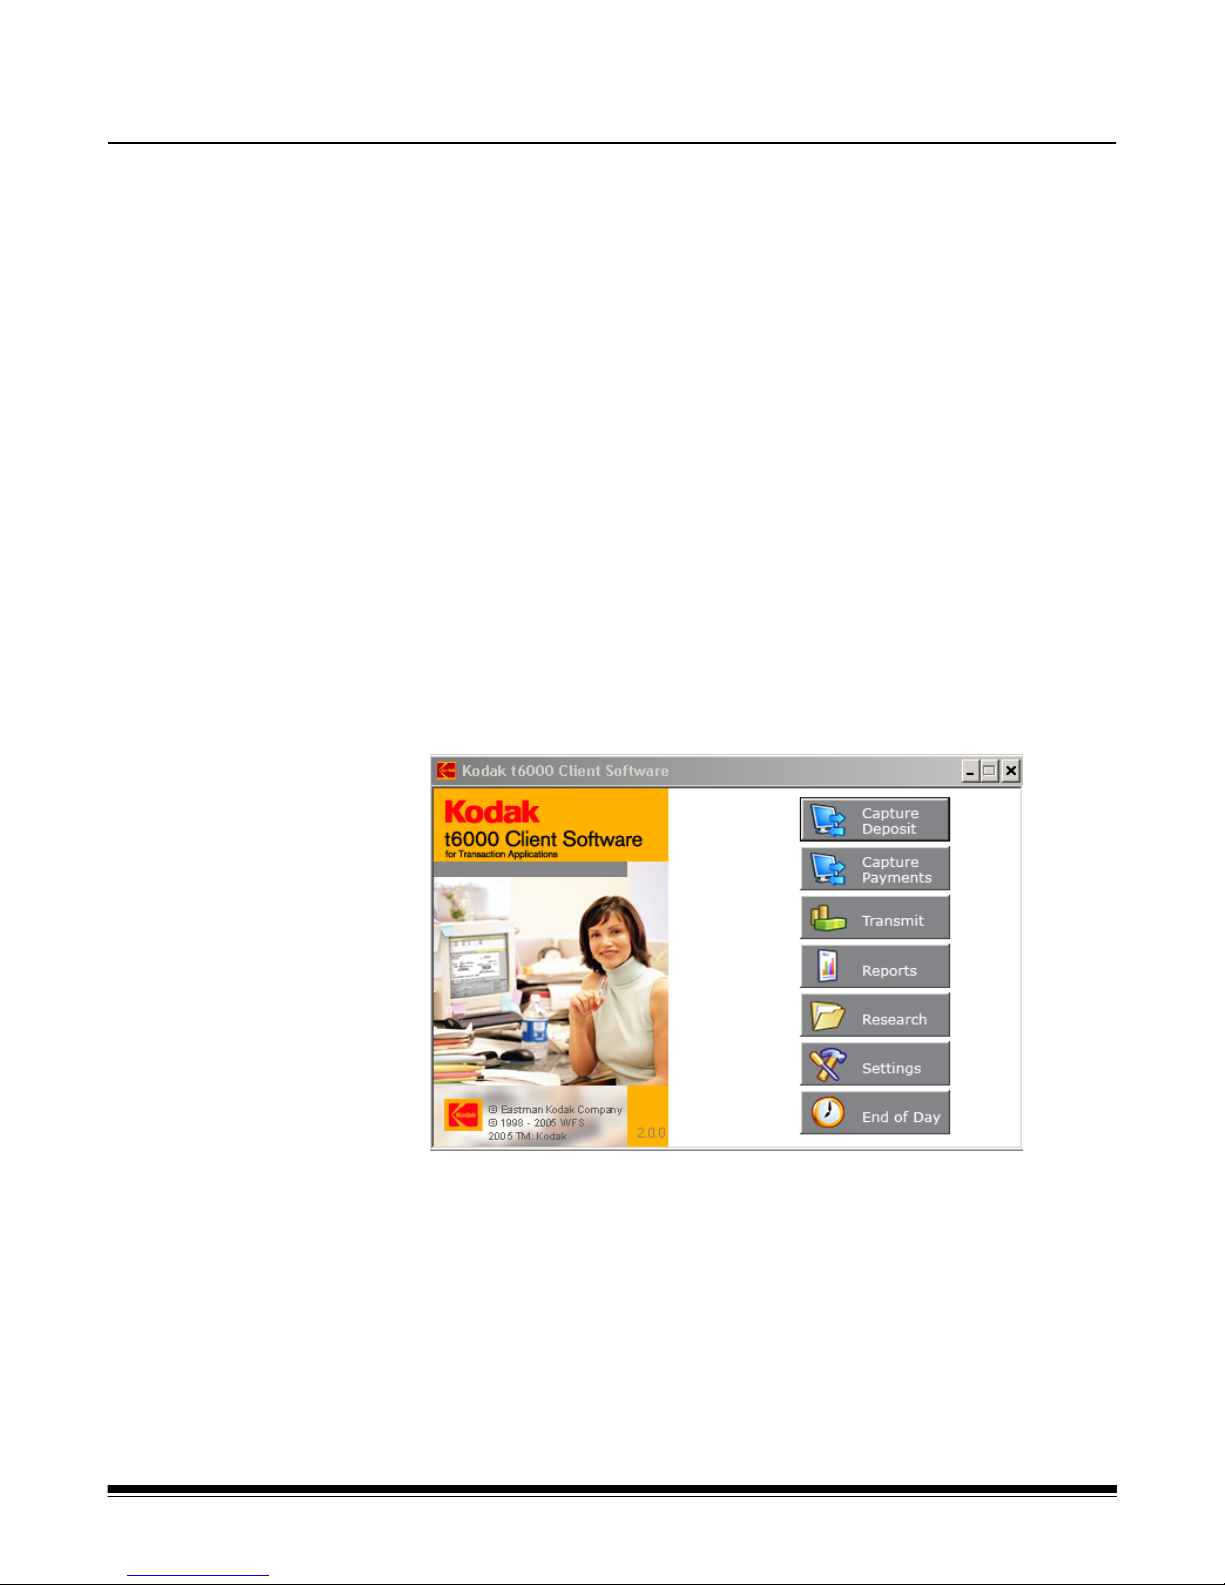
When you log into the client software, the Kodak t6000 Client Software
window is displayed.
NOTE: Whether you are scanning and processing deposits or scanning
and processing payments, the dialog boxes that are displayed
and the workflow process, are basically the same. This User’s
Guide illustrates the “Deposits version” of the dialog boxes. If
you are scanning payments, you will see the “Payments
version” of the dialog boxes.
A-61543 December 2005 3
This dialog box provides access to the following options:
Capture Deposit — allows you to open and close processing days and
capture items for deposit. See the section entitled, “Capturing
transactions” for more information.
Capture Payments — allows you to open and close processing days
and capture items for payment. See the section entitled, “Capturing
transactions” for more information.
Transmit — allows you to send all pending batches to the bank or
processing center. See the section entitled, “Transmitting transactions”
for more information.
Page 6

Reports — allows you to run a report for a selected day and/or print or
export the report. See the section entitled, “Printing reports” for more
information.
Research — allows you to view the images of the deposits or
payments. See the section entitled, “Researching transactions” for
more information.
Settings — if you have access to this option, refer to the
Administrator’s Guide for Kodak t6000 Server Software for more
information.
End of Day — after you have transmitted all batches for the current
processing or receive date, select this option to end the day. See the
section entitled, “End of the day” for more information.
Capturing
transactions
1. From the Kodak t6000 Client Software dialog box, select Capture
Deposit or Capture Payments. The Capture Deposits/Capture
Payments window will be displayed:
4 A-61543 December 2005
Scan Deposits/Scan Payments — displays the Scan Deposits/Scan
Payments window which allows you to set up your scan session and
scan checks.
Continue Deferred — allows you to resume scanning of previously
deferred deposits/payments.
Open Processing Date — displays the Select Processing Date dialog
box which allows you to select the date that you want to process
transactions.
Close Processing Date — allows you to close a selected processing
date after all transactions have been completed.
Exit — when selected, closes the capture function of the Kodak t6000
Client Software.
Page 7
Opening the processing
date
Before scanning and processing transactions, you must open a
processing date.
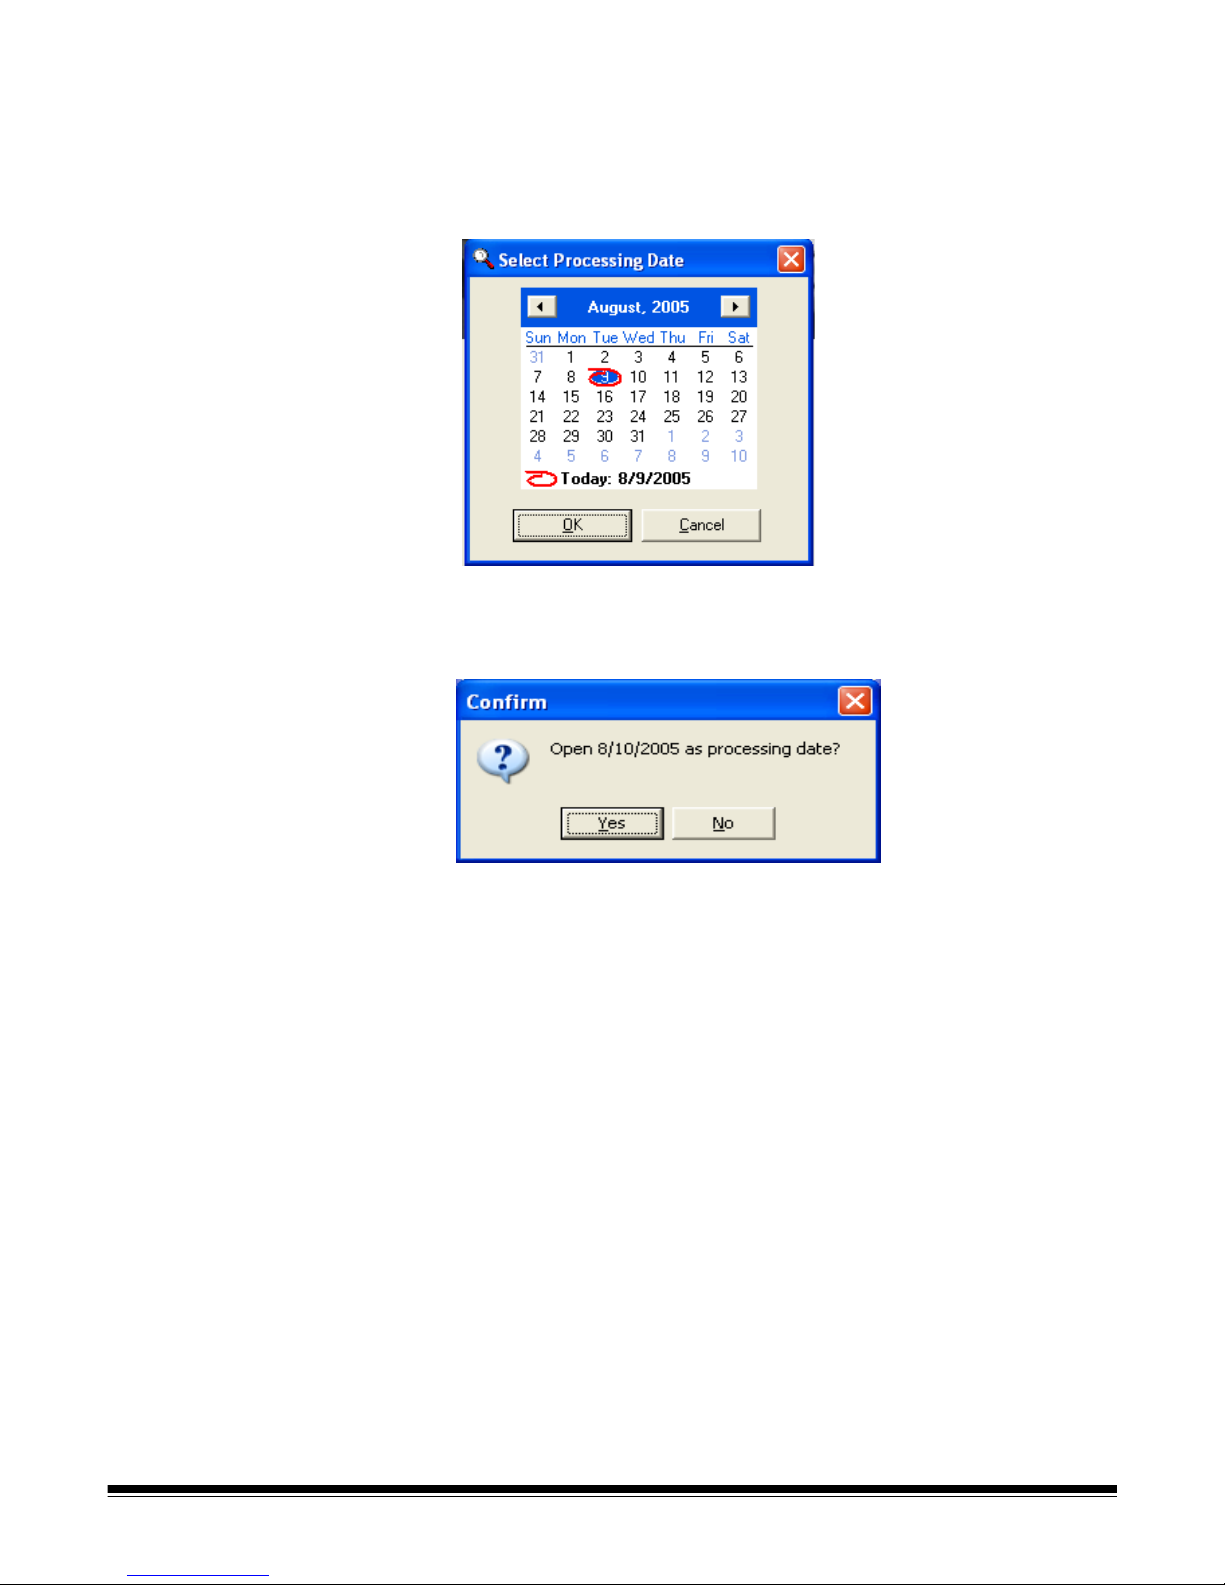
1. From the Capture window, click Open Processing Date. The Select
Processing Date dialog box will be displayed. The current date will
be highlighted on the calendar.
2. If you are not processing using the current date, select the desired
date.
3. Click OK. The Confirm dialog box will be redisplayed.
4. Click Yes.
A-61543 December 2005 5
Page 8
Scanning deposits or
payments
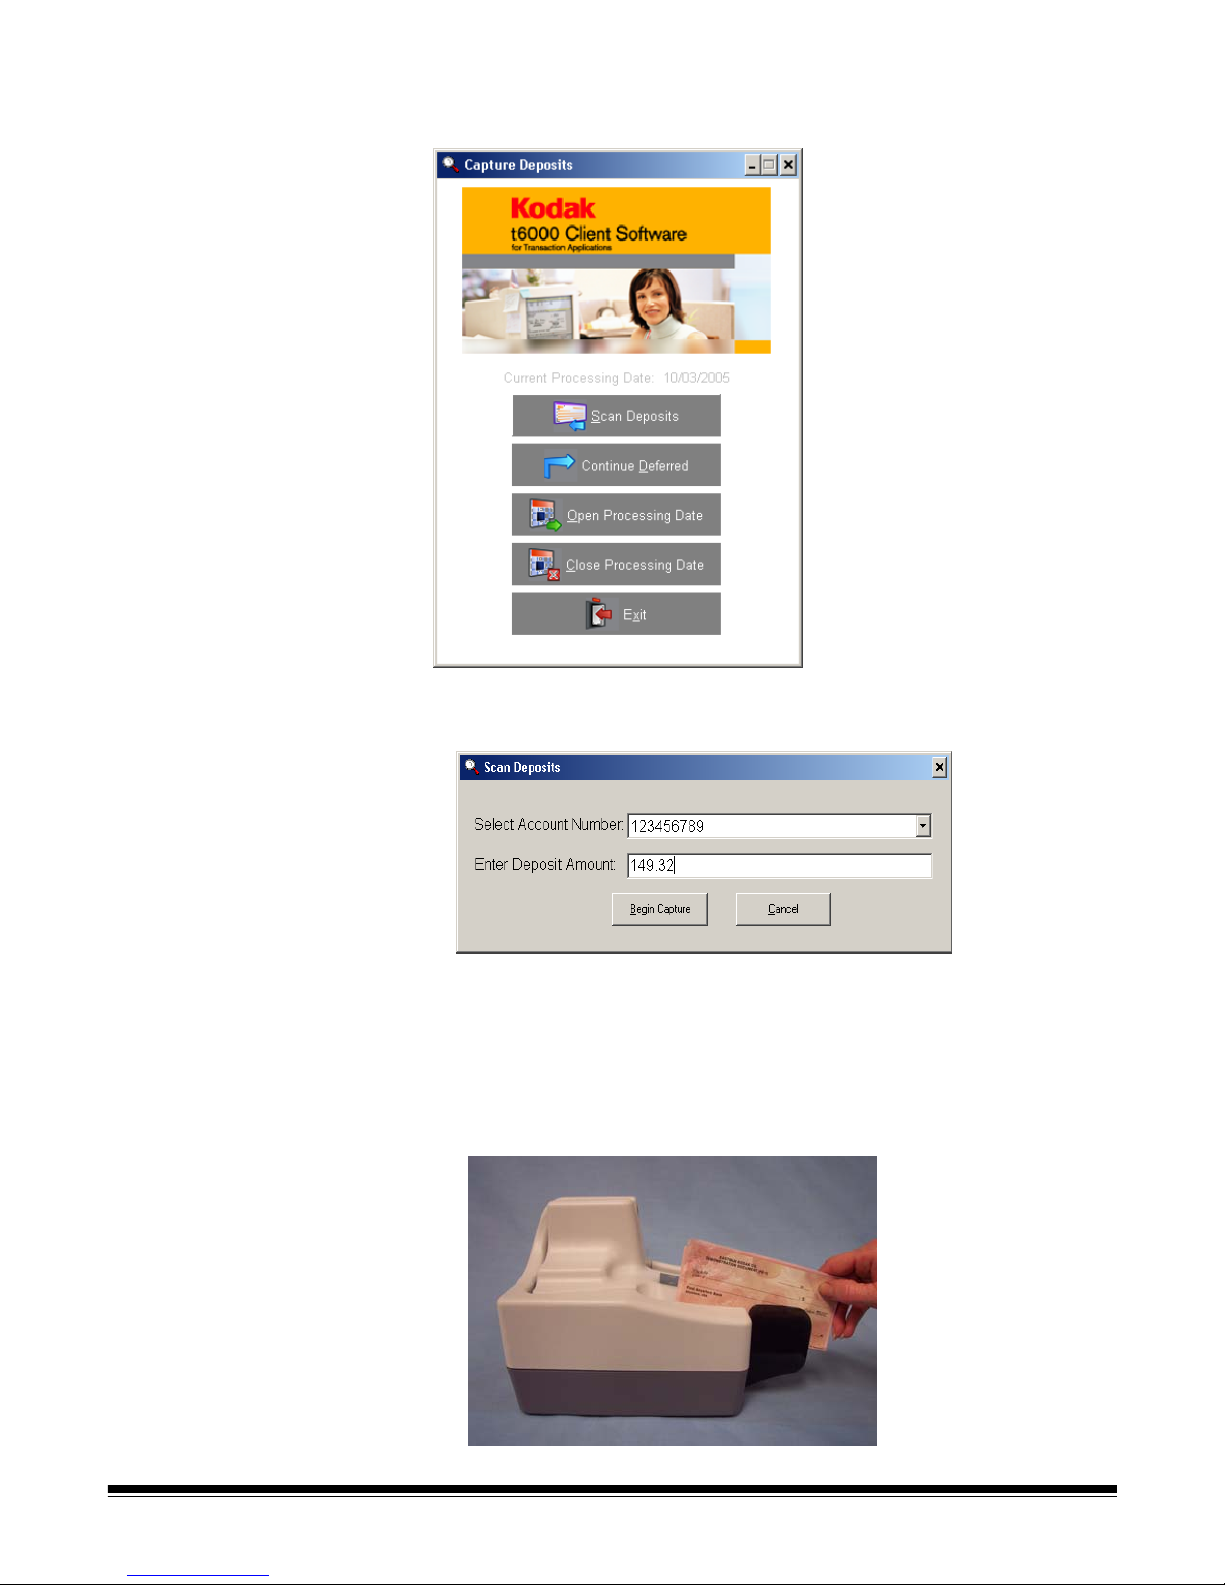
After your have opened your processing date, use the Scan Deposits/
Scan Payments function to start scanning your checks.
1. Click Scan Deposits/Scan Payments. The Scan Deposits/Scan
Payments dialog box will be displayed:
2. Select the Account Number from the drop-down list and press Tab.
3. Enter the amount of the deposit/payment in the Enter Deposit
Amount (or Enter Payment Amount) field. You do not need to
enter a decimal if the amount is a whole number (e.g., $450.00,
enter 450).
4. Place the checks into the automatic feeder of the scanner.
6 A-61543 December 2005
Page 9
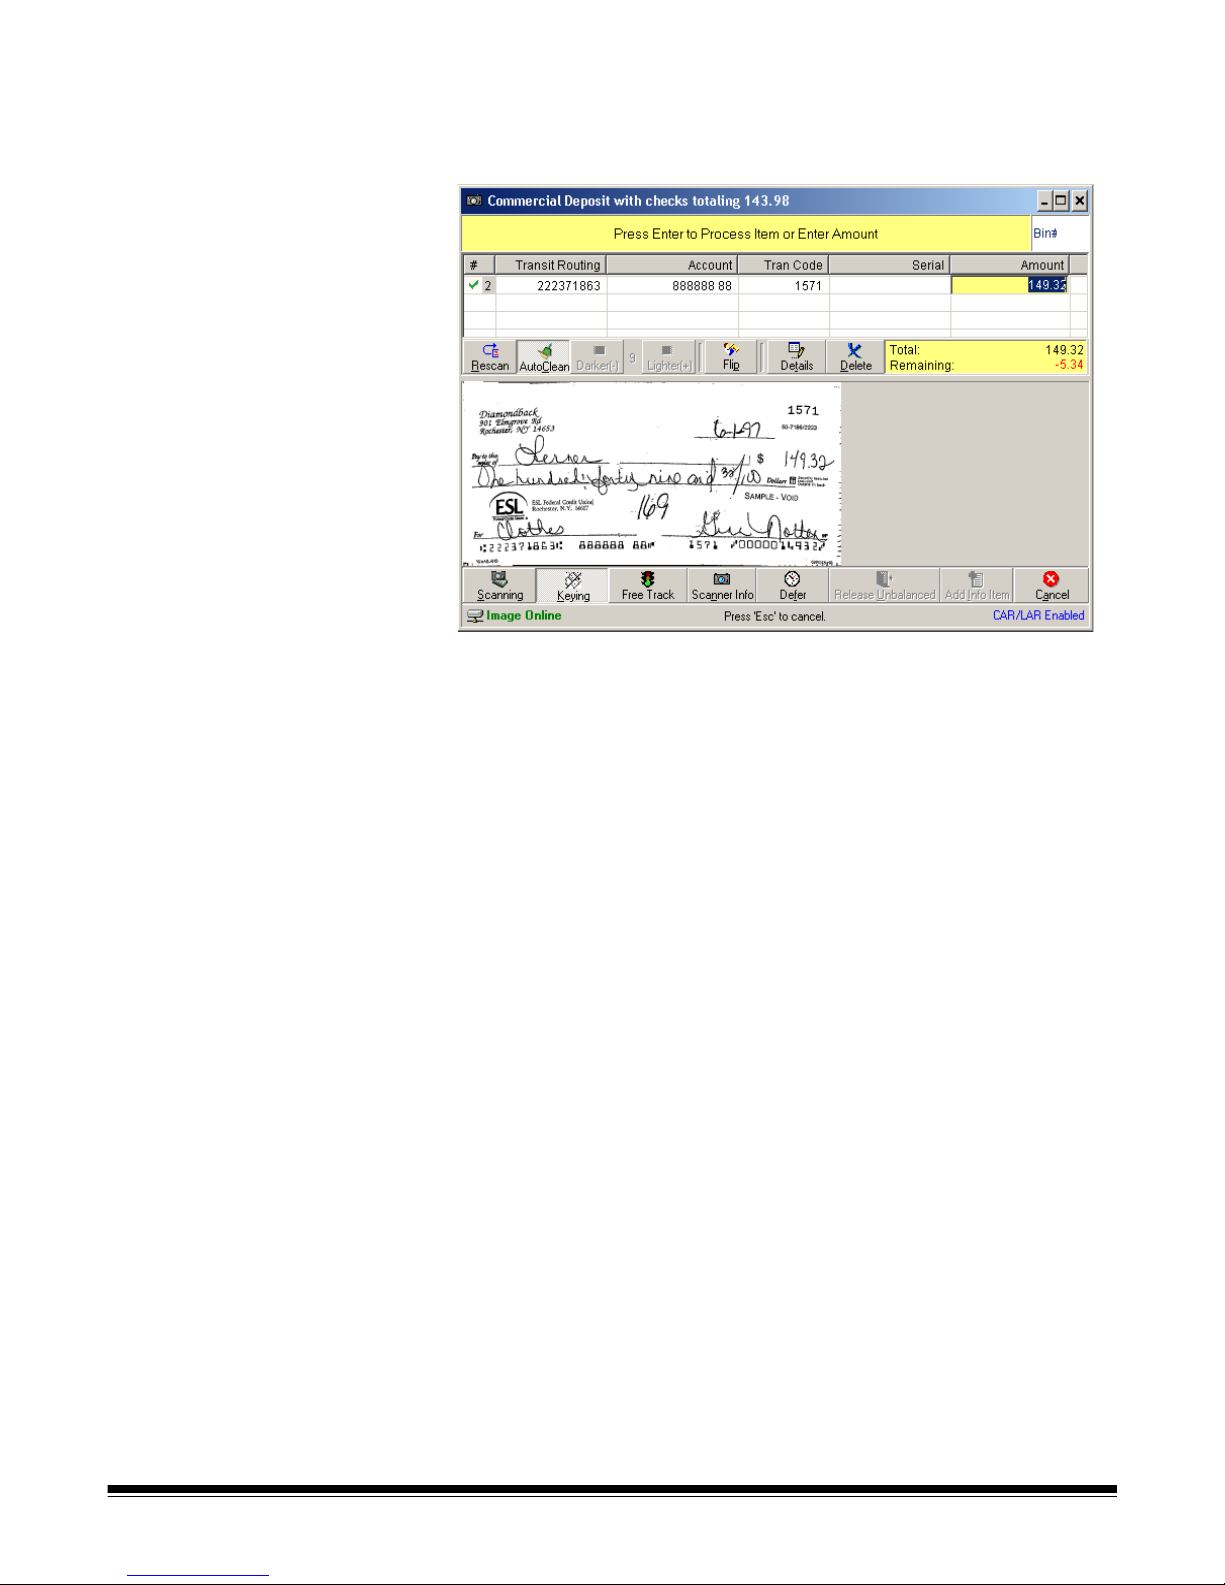
5. Click Begin Capture. The scanner will begin scanning the checks.
As the checks are being scanned, the scanned checks will be listed
in the top portion of the main viewing window.
If you select Keying, the check image will be displayed in the
bottom portion of the main viewing window and the Amount field will
be open for editing.
A-61543 December 2005 7
Page 10
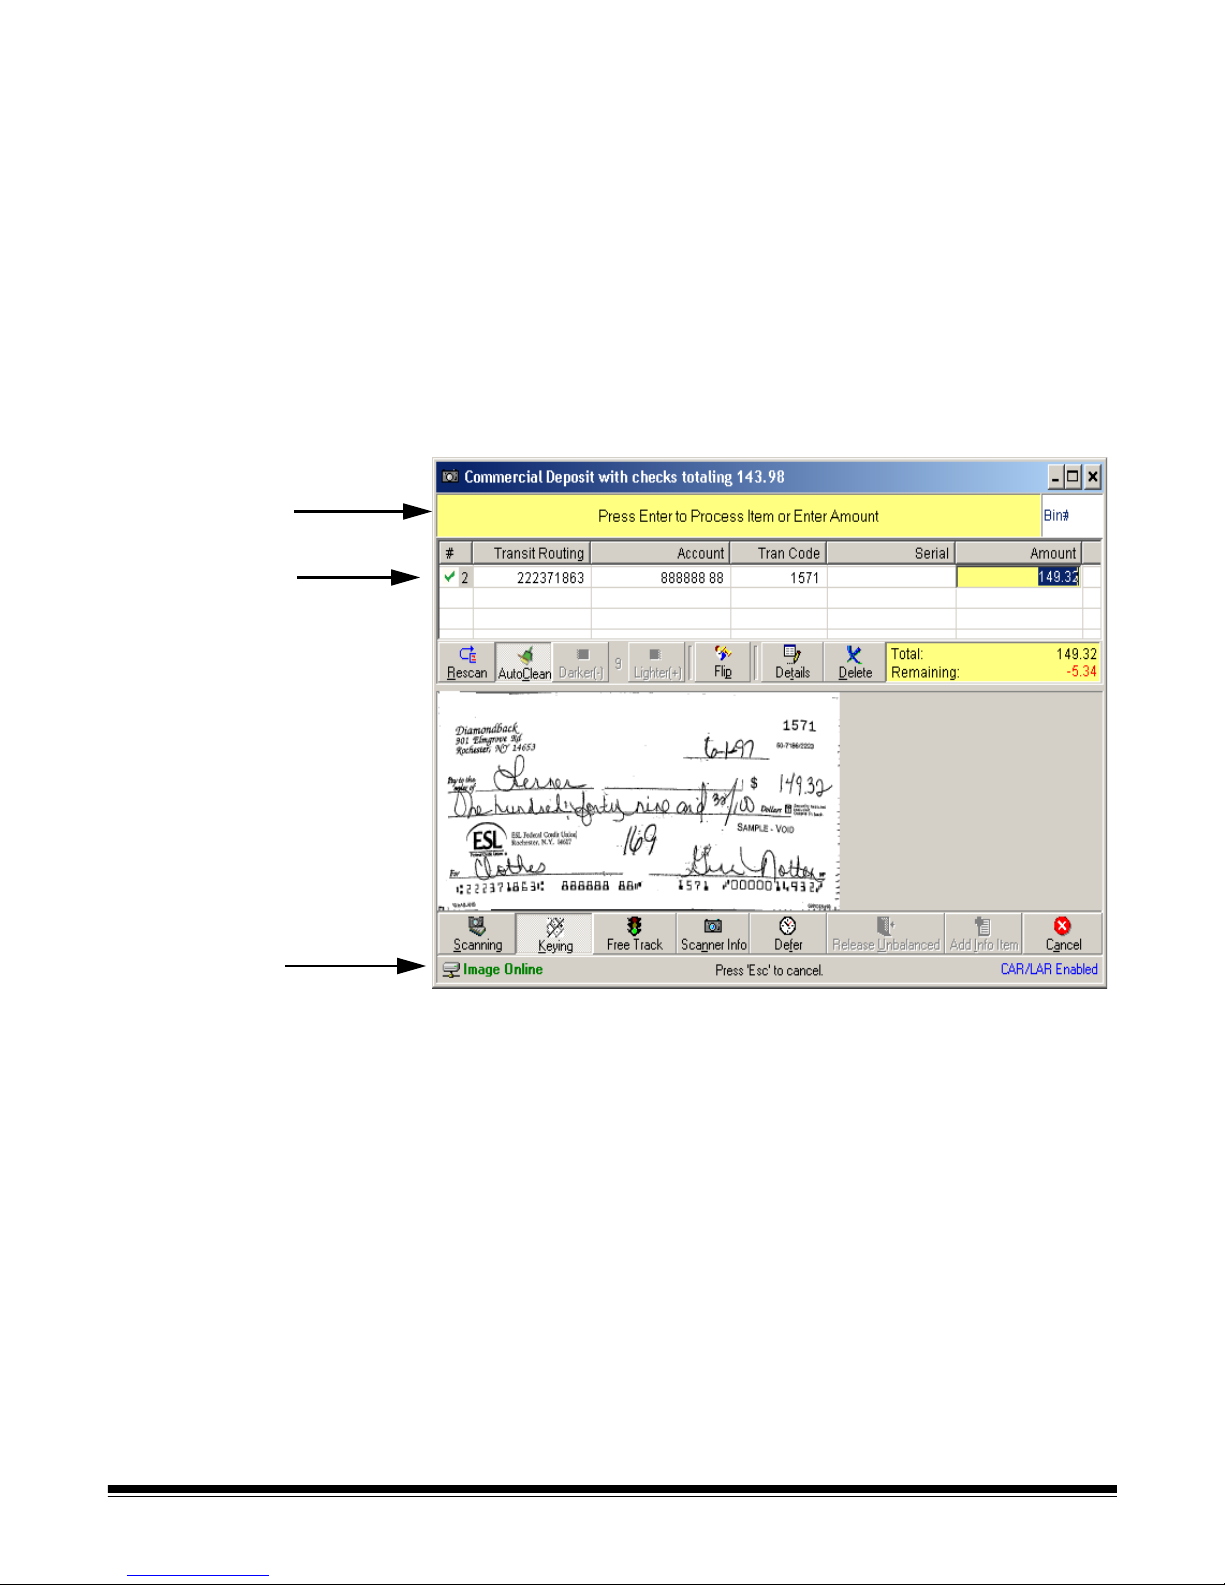
The main viewing
window
Message bar
Item status
Whether you are capturing deposits or payments the windows that you
access are the same with the exception of the title of the window.
For the purpose of this manual, this section describes the “capture
deposit” functionality of the software. If you are processing payments,
the functionality is the same, but the title of the displayed window is
different.
• The main viewing window for capturing deposits is called the
Commercial Deposit window.
• The main viewing window for capturing payments is called the
Lockbox Payment window.
Following is a description of the fields and buttons on the main viewing
window.
Status bar
Message bar — located at the top of the main viewing window,
displays the status and or any related messages.
Item status — the fields at the top of the main viewing window are filled
in with information retrieved from the check as it is being scanned.
• If the software cannot read the amount on the check, a red “x” will be
displayed in the # field.
• If a green checkmark is displayed, the check has been successfully
read.
• If the Rescan icon is displayed, rescan the check.
When you select Keying, the Amount field will be opened for editing
and you can enter the correct amount.
Status bar — provides the status of the transaction and whether CAR/
LAR is enabled or disabled.
8 A-61543 December 2005
Page 11
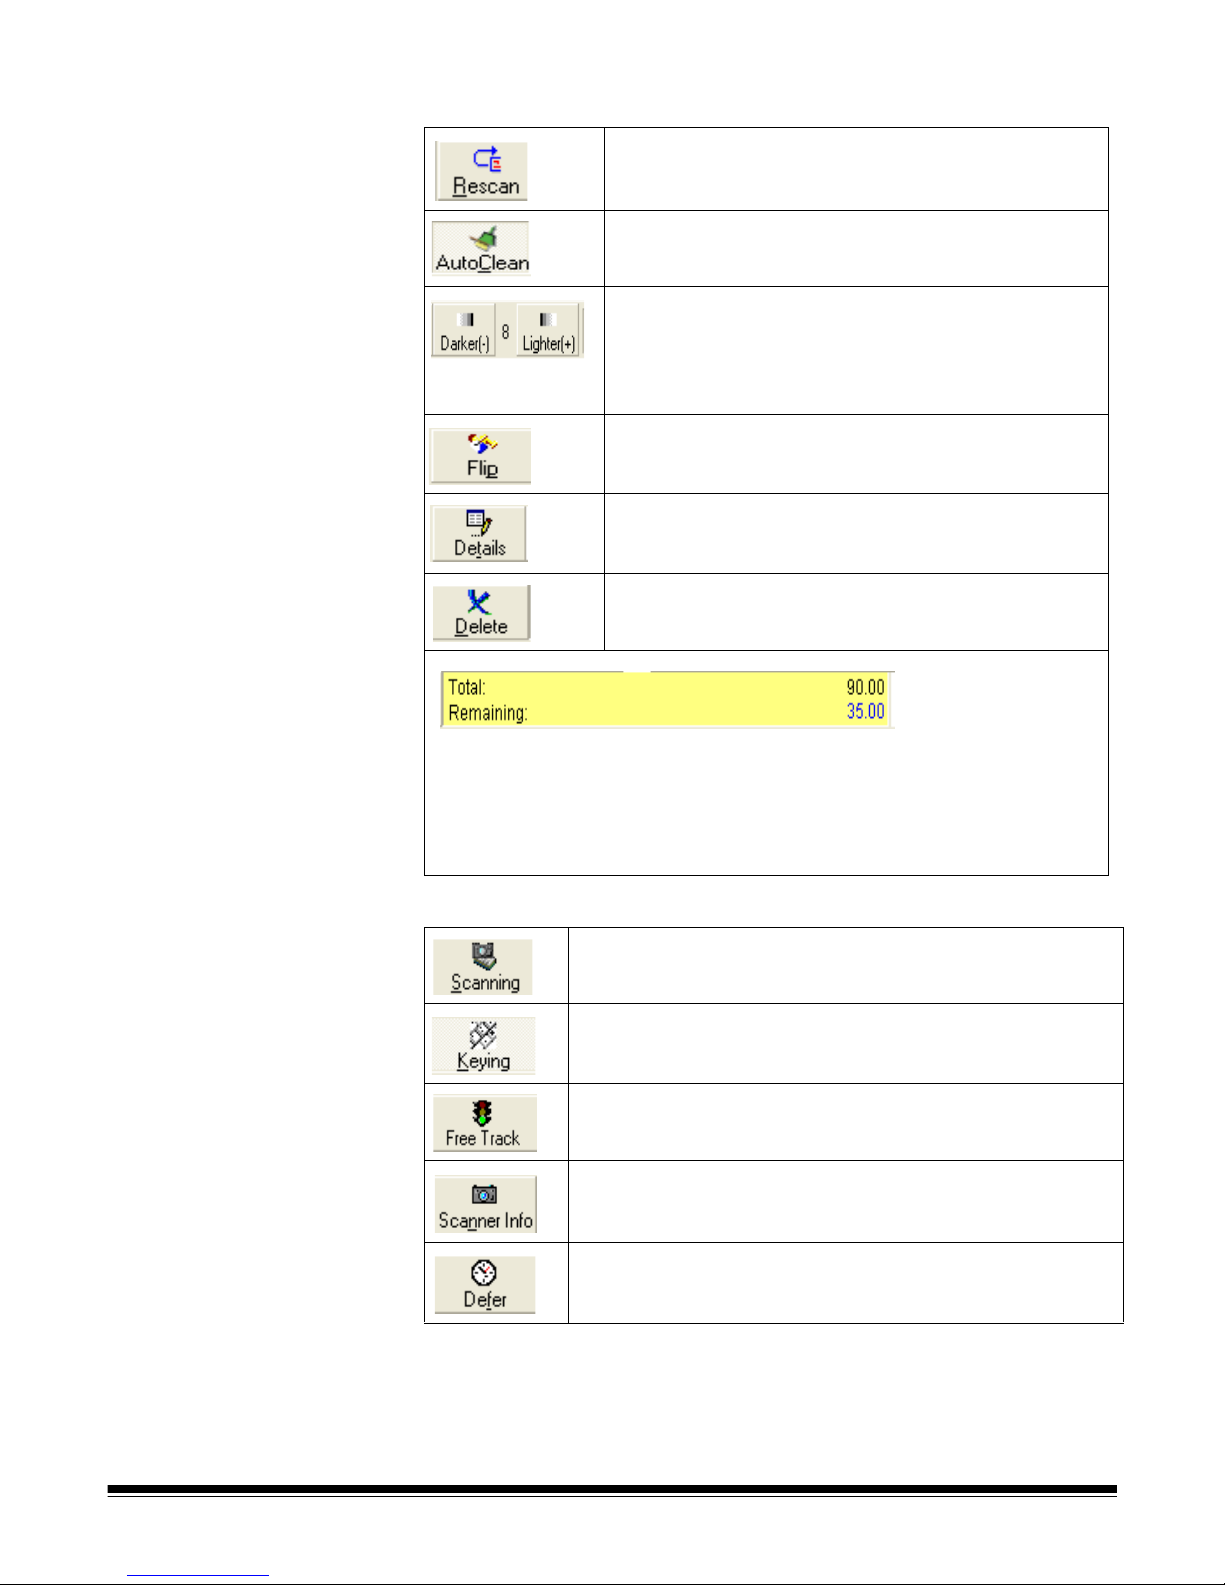
Top tool bar
Rescan — click Rescan when you need to rescan the
check.
AutoClean — click AutoClean and rescan the item to
obtain a sharper image.
Darker (-) and Lighter (+) — if the image is difficult to
read, click the Darker or Lighter buttons to adjust the
resolution. As you click Darker or Lighter, the number in
the middle changes: 1 = darkest, 14 = lightest. When the
value is set as you like, rescan.
Flip — displays the back of the image.
Details — displays the Details window which provides
information about the selected image (i.e., Item name,
Bin #, Pocket #, User ID, etc.).
Delete — deletes the image.
Total — displays the total amount of the deposit or payment.
Remaining — if the amount that you entered in the Scanned Deposit dialog
box matches the actual total amount scanned, the value in the field will be 0.
If any other amount is displayed, make the necessary corrections to balance
the Remaining value to 0.
Bottom tool bar
Scanning — starts the scanning process.
Keying — when selected, will display an image of the
scanned check and open the Amount field at the top of the
main viewing window for editing.
Free Track — runs the transport of the scanner to clear any
jammed documents from the paper path.
Scanner Info — displays the Scanner Settings dialog box
which provides technical information about the scanner.
Defer — postpones a transaction and will place the item in a
Defer status to finish processing at a later time.
A-61543 December 2005 9
Page 12

Release Unbalanced — provides several options of what you
can to do with the transaction. See the section entitled,
“Releasing unbalanced transactions” later in this section.
Add Info Item — if this option is enabled at installation, you
will be able to scan paper deposit tickets. At the beginning of
a transaction, after scanning the paper deposit ticket, you can
click this button to scan an additional deposit slip or other
document that is informational and does not affect balancing.
Cancel — deletes the transaction. When you click Cancel, a
confirmation box will be displayed asking you if you are sure
that you want to delete this transaction.
Correcting amounts and
balancing transactions
After all checks for deposit/payment have been scanned:
1. Select Keying to open the Amount field on the main viewing window
for editing.
2. Enter or correct the amounts of checks where the software was
unable to read the amount. Items with the red “x” or a Rescan icon
are the only ones that need to be corrected.
3. Make all the necessary corrections. Press Enter after each amount
that you correct. When the deposit/payment is in balance, the
following message will be displayed.
10 A-61543 December 2005
4. Click OK to save the deposit/payment.
Page 13

Releasing unbalanced
transactions
Depending upon the setup of your system, you may have the ability to
release transactions that are not balanced to the central site.
1. From the main viewing window, select the transaction you want to
release.
2. Click the Released Unbalanced button. The Reason for
Unbalanced Transaction dialog box will be displayed.
3. Select a reason why the transaction does not balance.
4. Click OK.
A-61543 December 2005 11
Page 14

Correcting unbalanced
transactions
Situations may occur during processing that could cause the
transaction to be out of balance. Some reasons for this are:
• a check amount was read or keyed incorrectly
• checks were double-fed during the scanning process
• the initial amount of the deposit/payment was entered incorrectly
Your application may be configured to allow you to release unbalanced
transactions. However, if you must balance before release, follow the
steps below:
1. When you reach the last check in the transaction and press Enter, a
message box will be displayed showing you the amount entered
and the scanned amount.
2. Select which amount is correct, either Entered Amount or
Scanned Amount.
Scanned Amount is Correct
1. If the Scanned Amount is correct, click Scanned Amount and the
Scan Deposits/Scan Payments dialog box will be displayed:
2. Enter the correct amount in the Enter Deposit Amount field.
3. Click Begin Capture. The main viewing window will be redisplayed
so you can complete the transaction.
Entered Amount is Correct
If the entered amount is correct, click Entered Amount and the main
viewing window will be displayed.
1. Edit any of the check amounts and press Enter, or scan any missed
or double-fed checks.
The message Deposit amount XX has been accepted will be
displayed.
12 A-61543 December 2005
2. Click OK.
Page 15

The Zoom function Occasionally you may encounter a check that does not scan well. You
can:
• use the AutoClean button and rescan the item to see if you can
obtain a clearer image or,
• use the Darker or Lighter buttons to change the resolution and then
rescan the item to obtain a clearer image.
After you have obtained the clearest image possible, if you cannot read
the check amount, you can zoom in on a specific area of the image.
• Hold down the left mouse button and drag a rectangle around the
area of the image you want to enlarge and release the mouse button.
The image area of the screen is filled with the enlarged portion of the
image.
NOTE: To return the image to its original size, double-click the image.
A-61543 December 2005 13
Page 16

Image quality issues for
transactions
As you capture both deposit and payment transactions, it is very
important to capture clear images of the items you are scanning. The
images you create may be used in the future to verify the amount of an
item or payment, so the legibility of the item is key to the success of
remote capture.
Always look at each image to make certain it is readable as you capture
transactions. The image quality safeguard of the Kodak t6000 Client
Software can assist you in maintaining the image quality of your
payment or deposit checks.
The Kodak t6000 Client Software can be configured to check for a
variety of image quality conditions such as items that are too dark or too
light, clipped corners and torn items, etc. The examples below display
poor image quality:
Clipped corner Image too light
When the software detects a poor quality image, the following message
is displayed:
When this message is displayed, review the image and the physical
item and decide if you need to rescan the item to capture a better
quality, delete the item from the transaction or keep the poor quality
image and continue.
• If you keep the image, click Rescan and rescan the item to try and
capture a better quality image.
• If you want to delete the image and remove it from the transaction,
click Delete.
• If you want keep the poor quality image, click Continue Anyway.
14 A-61543 December 2005
Page 17

Duplicate item checking
for transactions
The Kodak t6000 Client Software helps you maintain the integrity of
your deposit and payment transactions by automatically checking for
duplicate items as you are capturing items. This feature reviews
specific criteria as it looks for duplicate items across transactions,
batches and dates. Duplicate checking can help protect you from
fraudulent practices and from accidentally including the same item in
multiple transactions.
When the duplicate checking feature detects an item that matches a
previously processed item, a window will be displayed with both images
and descriptions and the message, Is this a duplicate item? will be
displayed.
1. Compare the current item (the image at the top and the description
at the right) to the possible match (the image on the bottom and the
description at the right) and decide if the item is a duplicate.
2. Click Yes if the item is a duplicate and it will be removed from the
transaction or, click No, if the item is not a duplicate. This item will
remain in the transaction and be flagged for review at the central
site.
A-61543 December 2005 15
Page 18

Deferring
transactions
A deferred transaction is a deposit or payment in which all of the checks
were not scanned when you initially began to process the transaction.
Deferring a transaction allows you to save what you have captured so
far and come back to it later to finish the processing.
1. From the Capture Deposit/Payment window, click Defer. The
message, Enter the estimated number of documents remaining,
will be displayed.
2. Enter the approximate number of documents and click OK. You can
estimate the number of checks in a bundle. It does not have to be
exact.
3. When you are ready to process the deferred deposit/payment,
access the Capture Deposits/Capture Payments dialog box:
16 A-61543 December 2005
4. Click Continue Deferred. The Deferred Transactions window will
be displayed. Any deposits/payments that were deferred, but not yet
processed will be listed.
Page 19

The Deferred Transactions window
The Deferred Transactions window displays the following information:
Seq # — the number of the deposit/payment in the order it was
captured.
Account # — the number you selected when you setup scanning the
checks for deposit or payment from the Scan Deposits/Scan Payments
dialog box.
Amount — displays the total amount of the deferred transaction.
# Items — the number of checks scanned in the batch.
# Remaining — the number of additional checks to be scanned.
Status — displays the status of the deferred transactions:
• Unprocessed: no items have been scanned.
• High-speed captured: you are in “Keying” mode and no items have
an amount associated with them.
• Partial entry/high speed: you are in “Keying” mode and some items
have an amount associated with them.
• Partial high speed captured: you are in “Scanning” mode and some
items have been scanned already.
• Partial slow speed processed: you are in “Scanning” mode and
some items have been scanned and have an amount.
A-61543 December 2005 17
• Processing - User name: currently processing.
User Name — name of the user that placed the transaction in a
deferred status.
Page 20

Buttons:
Continue — displays the main viewing window (Commercial Deposit or
Lockbox Payments) which allows you to scan the remaining number of
checks.
Refresh List — refreshes and redisplays the information in the
Deferred Transactions window with the most current information.
Show Credit Ticket — the Credit Ticket Preview window will be
displayed showing the deposit or payment ticket associated with the
select deferred transaction.
Close — closes the Deferred Transactions window.
Processing deferred
deposits
1. Double-click a deposit to open it. The main viewing window will be
displayed.
2. Continue processing the deferred deposit by scanning more items
and complete and balance the deposit as described earlier in the
section entitled, “Scanning deposits or payments”.
3. When finished, you can go back to the Deferred Transactions
window and select another deferred transaction for processing.
18 A-61543 December 2005
Page 21

Transmitting
transactions
When you are ready to transmit deposits or payments, click Transmit
on the Kodak t6000 Client Software main window to display the
Transmit window.
The Transmit window The Transmit window displays all of the transmissions for the selected
date.
NOTE: When this window is displayed, the list box will be empty. See
the next section entitled, “Transmitting transactions” for more
information about displaying information on this window.
A-61543 December 2005 19
ID — the numeric identification assigned to the deposit or payment.
Work Type — lists whether the transaction is a deposit or payment.
Page 22

Items — displays how many items are contained in the deposit or
payment.
Amount — the total amount of the deposit or payment.
Status — displays one of the following based upon the current status of
the transmission:
• Released: transaction sent to the server
• Pending: transaction waiting to be transmitted
• Acknowledged: transaction has been received at the server
Post Date — after you have sent the transaction to the server, this field
will be updated with the date you transmitted the transaction.
Sent — displays the date and time the transaction was sent to the
server.
Date — select the date from the drop-down list that you want to
transmit images.
Build... — prepares all deposit batches for transmission and displays
the Build dialog box.
Transmit... — transmits all pending batches to the server. You can also
transmit each batch individually.
Refresh — updates the Transmit dialog box with the most current
information.
Work type to total — select either Deposits or Payments from the
drop-down list. Once selected, the totals in the Status box will reflect the
type of work you selected.
Status box — if you are processing deposit transaction batches as well
as payment transactions, you can quickly view the totals transmitted for
either type of work.
20 A-61543 December 2005
Page 23

Transmitting
transactions
To transmit transactions:
1. Select Transmit from the Kodak t6000 Client Software main
window:
The Transmit window will be displayed:
A-61543 December 2005 21
2. Select the date you want to transmit transactions from the Date
field.
3. Select the type of transactions you want to transmit from the Work
type to total field.
Page 24

4. Select Build. The Build dialog box will be displayed.
5. Click Yes. The Transmit window will be populated with the
transactions for the selected date.
6. Click Transmit. The Status, Post Date and Sent fields will be
updated with current information regarding the transmission.
Closing the processing
date
When you are finished scanning and processing transactions for the
day, you must close the processing date.
1. From the Capture window, click Close Processing Date.
22 A-61543 December 2005
The Confirm dialog box will be displayed:
2. Click Yes. The message The processing day has been closed will
be displayed.
3. Click OK.
Page 25

End of the day Before you can end the day, you must:
• Be sure all deferred transactions are processed. See the section
entitled, “Deferring transactions” for more information and
procedures.
• Be sure to close the processing date. See the section entitled, “Close
the processing date” for procedures.
• Be sure all transactions have been transmitted. See the section
entitled, “Transmitting transactions” for more information and
procedures.
To end the day:
1. From the Kodak t6000 Client Software main window, click End of
Day.
The End of Day dialog box will be displayed:
The current processing date will be displayed in the Select Date To
Close field. If the date you want to close is not displayed, you can
select the desired date from the drop-down list.
2. Click Send.
NOTE: If you are processing both deposits and payments, you must
close both dates separately before you end your day.
A-61543 December 2005 23
Page 26

After you have completed the End of Day procedures, the End of
Day Summary window will be displayed. The report contains
batches and amounts for both deposits and payments.
3. Click Print to preview the summary report.
24 A-61543 December 2005
Page 27

Printing and
exporting reports
A report summary is automatically displayed when you complete the
End of Day procedure. If you want to print or export the report or
choose a report from a previous date, you can locate and print/export
the reports by using the Reports option.
Printing reports
1. Click Reports.
The Reports Module window will be displayed.
A-61543 December 2005 25
There are two standard reports:
• Deposit Summary Report By Account
• Deposit Detail Report By Account
Both reports can be run from the Reports Module window.
2. The radio button next to Standard Reports should already be
checked. Use the drop-down arrow to select Deposit Summary
Report By Account from the list of available reports.
Page 28

3. Select the date for your report from the Date field.
4. Click Run Report. The report will be displayed in a preview window.
5. Click the Printer icon to send the report to the printer, or click the
Export icon to save and store the report in a different location.
Exporting Reports
If you choose to export the report, the Export Data dialog box will be
displayed.
1. The Format drop-down list provides several formats of how you
want to save the report. Select the type of format you want.
26 A-61543 December 2005
Page 29

2. Click OK. The Choose Export File window will be displayed.
NOTE: Depending on the selected format, other dialog boxes may
be displayed. For example, if you select Character-
separated values, the following dialog box will be
displayed. Make any necessary entries in the displayed
dialog boxes and click OK.
3. Select a folder where you would like to save the file.
4. Enter a Filename and select the type of file you want to save.
5. Click Save.
A-61543 December 2005 27
Page 30

Researching
transactions
You can research deposits and payments from within the Kodak t6000
Client Software and locate and view specific items if needed.
Accessing the Image
Viewer window
1. Click Research. The Image Viewer window will open. The left side
of the window displays a listing of transactions. The right side shows
the detail of the transaction that is highlighted in the listing.
28 A-61543 December 2005
2. Click the “+” in front of the deposit or payment to view a list of the
items it contains.
Page 31

3. Highlight an item on the left to view details on the right. The image
will display in the bottom portion of the window. You can also view
the image of the virtual deposit ticket or batch header.
Buttons on the Image
Viewer window
Previous — displays the previous item in the transaction.
Next — displays the next item in the transaction.
Flip — displays the back of the item, if it was captured.
Delete — deletes the entire transaction.
Print — prints the item that is displayed in the Image Viewer window.
Select Date — the current date is always displayed by default.
Search — allows you to quickly locate an item without scrolling through
all of the items.
Close — closes the Image Viewer window.
Deleting transactions To delete a transaction:
1. Highlight the transaction you want to delete.
2. Click Delete.
NOTE: You can only delete transactions that have not been transmitted
and released.
A-61543 December 2005 29
Page 32

Selecting a different date
other than the current
date
To view items from a previous date or from the archives:
1. Click Select Date. The Please Select View dialog box will be
displayed:
2. Click either Current or Archives.
3. Select a date from the Available Dates drop-down list.
4. Click OK.
Searching for a specific
item
Search fields
To search for an item:
1. Click Search. The Search Image Database dialog box will be
displayed:
2. Enter as much information as you have regarding your request in
the search fields at the bottom of the window.
30 A-61543 December 2005
3. Click Find Now. Items that are located will be listed in the upper
portion of the window.
4. Highlight the item you would like to see and click Open.
Page 33

Virtual endorsement
deposit and payment
transactions
The Kodak t6000 Client Software may be configured to add a virtual
endorsement to the check image once it is captured. This feature
allows you to add your business stamp to the checks virtually rather
than physically.
You will not see the endorsement on the physical check after it is
scanned, but it will be displayed on the image of the backside of the
check.
The endorsement will be placed vertically in a predefined area on the
back of the image and contain the alpha and/or numeric characters
designated by you or your financial institution. The illustration below
shows a “test endorsement” on the back of a captured check.
To view the virtual endorsement:
1. Click Research on the main Kodak t6000 Client Software window.
The Image Viewer window will be displayed.
A-61543 December 2005 31
2. Click the “+” in front of the deposit or payment to view a list of items
it contains.
3. Highlight the item on the left to view details on the right.
4. Click Flip to view the virtual endorsement.
Page 34

EASTMAN KODAK COMPANY
Document Imaging
Rochester, New York 14650
www.kodak.com/go/docimaging
Kodak is a trademark of Eastman Kodak
Company.
A-61543 12/2005
©Eastman Kodak Company, 2005
 Loading...