

Page 1
KODAK Personal
Picture Maker 200
Quick Start
www.kodak.com
Page 2

Edition: August 2000
The followingparagraph does not apply to any country where suchprovisions areinconsistent with local
law: LEXMARK PROVIDESTHIS PUBLICATION “AS IS” WITHOUT WARRANTY OF ANY KIND, EITHER
EXPRESS OR IMPLIED,INCLUDING, BUT NOT LIMITED TO, THE IMPLIED WARRANTIES OF
MERCHANTABILITY OR FITNESS FOR A PARTICULARPURPOSE. Some states do not allow disclaimer of
express or implied warranties in certain transactions; therefore, this statement may not apply to you.
This publication could include technical inaccuracies or typographical errors. Changes are periodically made to
the information herein; these changes will be incorporated in later editions. Improvements or changes in the
products or the programs described may be made at any time.
Comments about this publication may be addressed to Lexmark International, Inc., Department F95/032-2, 740
West New Circle Road, Lexington,Kentucky 40550, U.S.A. In the United Kingdom and Eire, send to Lexmark
International Ltd., Marketing and Services Department, Westhorpe House, Westhorpe, Marlow BucksSL7 3RQ.
Lexmark may use or distribute any of the information yousupply in any way it believes appropriate without
incurring any obligation to you. You can purchase additional copies of publications related to this product by
calling 1-800-553-9727. In the United Kingdom and Eire, call 0628-481500.In other countries, contact your point
of purchase.
References in this publication to products, programs, or services do not imply that the manufacturer intends to
make these available in all countries in which it operates. Any reference to a product, program, or service is not
intended to state or imply that only that product, program, or service may be used. Any functionally equivalent
product, program, or service that does not infringe any existing intellectual property right may be used instead.
Evaluation and verification of operation in conjunction with other products, programs,or services, exceptthose
expressly designated by the manufacturer, are the user’s responsibility.
Lexmark and Lexmark with diamond design are trademarks of Lexmark International, Inc., registered in the
United States and/or other countries.
Kodak is a trademark of Eastman KodakCompany.
Other trademarks are the property of their respective owners.
© Eastman Kodak Company 2000 and © Lexmark International, Inc. 2000 All rights reserved.
UNITED STATES GOVERNMENT RESTRICTED RIGHTS
This softwareand documentation areprovided with RESTRICTEDRIGHTS. Use, duplicationor disclosure bythe
Government is subject to restrictions as set forth in subparagraph (c)(1)(ii) of the Rights in Technical Data and
Computer Software clause at DFARS 252.227-7013 and in applicable FAR provisions:Lexmark International,
Inc., Lexington, KY 40550.
Page 3
Quick setup
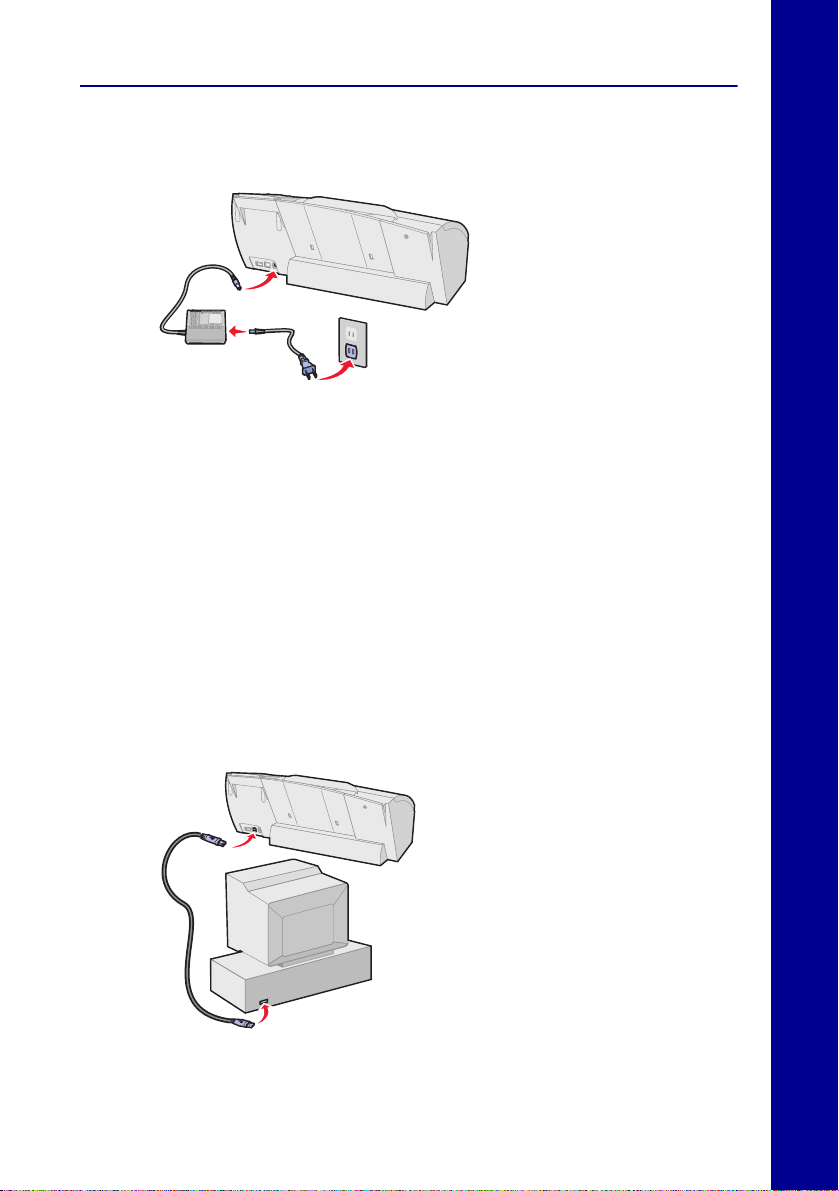
1 Connect the power supply
1
English English
2
NOTE: Step 2 is not required in the United States and Japan.
3
2 From the operator panel, select default settings for the following
items. For help using the operator panel, see page 4.
– Language
– Page size
3 Install the print cartridges. For help, see page 5.
4 Load paper. For help, see page 6.
5 Align the print cartridges. For help, refer to your
User’s Guide
.
6 To print from your computer,connect the USB cable to your printer,
and then to your computer.
English
7 Install printer software.
3
Page 4

For more information on setting up or using your printer with a computer,
refer to your
User’s Guide
.
Using the operator panel
EnglishEnglish
Use this... When you want to...
Menu button Enter and leave the menus.
Arrow button Navigate through the menus, and view photos.
Display window Raise the display to view the menus and photos.
English
Brightness control Adjust the brightness or contrast of the display.
Select button Select or deselect a photo, enter a submenu, or accept
View/Return button Change from one standard view to another, or return to
Arrow button
Menu button
Display window
Brightness
control
Select button
View/Return button
Print button
menu settings.
a previous menu level without saving changes from the
current menu option.
Print button Begin printing.
4
Page 5

Installing the print cartridges
Complete the following steps when inserting the print cartridges in your
printer. Make sure to match the cartridge cap color to the cartridge carrier
color.
2
1
WARNING:
Do not touch the
gold contact area.
3
SNAP
4
Printing photos
1 Load photo paper.
2 Insert camera card.
3 Select print settings.
English English
English
4 Press Print.
Important! For best print quality, we recommend KODAK Premium
Picture Paper.
5
Page 6

Loading paper
You can load up to 25 sheets of KODAK Premium Picture Paper.
EnglishEnglish
1 Pull out the paper support and paper exit tray.
Paper support
Paper exittray
2 Insert paper into the sheet feeder,glossy side up (for photo paper).
Make sure it is lined up with the right edge guide.
English
Paper guide
Release tab
Right edge
guide
3 Squeeze the release tab and the paper guide together, and then
slide the paper guide to the left edge of the paper.
6
Page 7

Inserting a camera card
You can insert a CompactFlash or SmartMedia camera card into your
printer. Before inserting a camera card into its card slot, lift the protective
cover located on the top of your printer.
Choosing a camera card slot
Your printer recognizes one source for photos at a time and searches for
photos in the following order:
• Left slot (CompactFlash)
• Right slot (SmartMedia)
• Optional external devices.
CompactFlash
SmartMedia
Gold contact area
Camera card
slot cover
English English
English
Consider the following information before inserting a camera card:
• If the camera card has a gold contact area, make sure the contact
area faces the front of your printer.
• If you are inserting a CompactFlash card, make sure the name
label faces the back of your printer.
• If your camera card or storage disk contains photo images, a
Reading Camera Card message appears in the display window.
The number of photos contained on the card is also displayed.
7
Page 8

© Eastman Kodak Company 2000 and
© Lexmark International, Inc. 2000 All rights reserved.
Printed in U.S.A.
This document is printed on recycled paper. 8/00
E.C. 6B0002 P/N 16B0122
 Loading...