

Page 1
Made in China for and distributed by
STRAND EUROPE LTD, Strand House, Yateley, GU46 6GE, UK
© 2018 STRAND EUROPE LTD
The KODAK trademark, logo and trade dress are used under
license from Eastman KODAK Company.
For information contact STRAND EUROPE LTD
www.kodakbatteries.com
KODAK
LED Floodlights
Page 2
These LED Floodlights feature 85% energy saving and water-resistant housing making them ideal for outside
120°
KODAK LED Floodlight and LED Motion Floodlight
directional lighting.
KODAK LED Motion Floodlight PIR sensor is triggered by infra-red sources such as humans, animals etc which come
into its detection range.
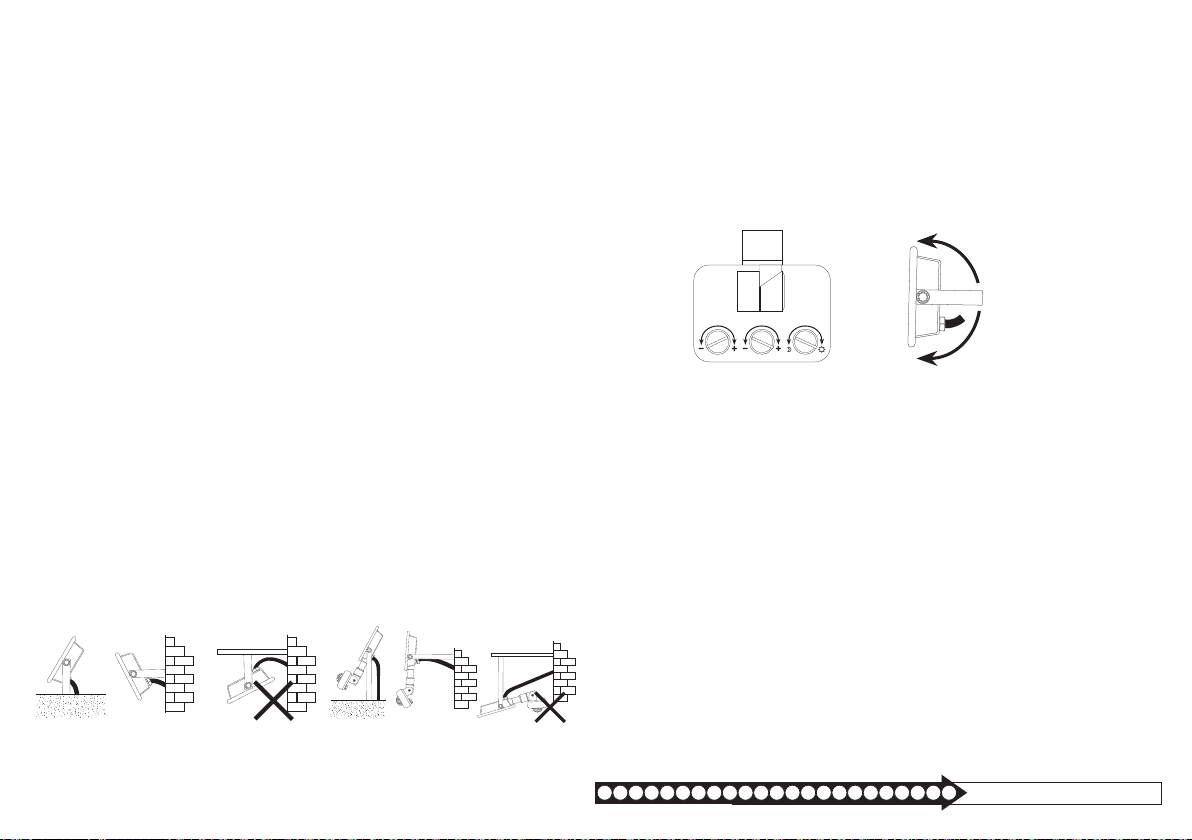
Sensitivity settings can be adjusted to work in dierent light levels: when the LUX dial is set to the ‘SUN’ position, the
sensor will work in the daytime and when set to the ‘MOON’ position it will sense movement in light levels less of than
3 lux.
The detection distance can be manually adjusted from 2m to 10m depending on the loodlights location and your
requirements. For a smaller detection range turn the SENS dial anticlockwise, for a wider range turn the SENS dial
clockwise. The maximum loodlight height for sensor detection is 2.5m
The LED Motion Floodlight features an adjustable time delay which will activate once the sensor has detected motion.
To adjust to the time for which the light is on, turn the ‘TIME’ dial anticlockwise or clockwise to suit your requirements.
The minimum time setting is approximately 7- 13 seconds, whereas the maximum is approximately 5 - 9 minutes.
Please note: Whilst these Floodlights do not need to be installed by a qualiied electrician, they should be itted to
standards in accordance with BS7671 and within the current guidelines of local and IEE wiring regulations. These
Installation Instructions should be followed to avoid the risk of electrical shock. We do recommend that you make
yourself aware of the regulations before undertaking any work and to consider getting the itting checked by a
qualiied electrician for safety.
Please note: This Floodlight should be itted by a competent person to local standards and guidelines. These
Installation Instructions should be followed to avoid the risk of electrical shock. We do recommend that you make
yourself aware of applicable regulations before undertaking any work and to consider getting the itting checked by
a qualiied electrician for safety.
PLEASE NOTE:
• Ensure the power supply is switched o before itting.
• This loodlight is for outdoor use only.
• This loodlight must be mounted on a non-lammable surface.
• Ensure adequate ventilation is between the loodlight and any object above, in front or to either side. Minimum
distance: 0.5m above, 0.3m to either side and 1.0m in front (see diagram).
• The loodlight can become hot during use. Please allow adequate cooling time before handling.
• This loodlight is of Class I construction and must be earthed.
• Please do not take the light apart to avoid damaging its water prooing.
• To avoid eye damage do not look directly into the lamp while it’s on.
• Voltage rating 220V to 240V 50/60HZ.
• Ensure the mains cable is at the bottom of the loodlight, towards the ground.
• Once adjusted for position ensure both screws in the bracket are fully tightened.
• Do not use if the glass is cracked or damaged.
Installation Instructions KODAK LED Floodlight and LED Motion Floodlight:
1. Turn o power.
2. Remove mounting bracket and use as a template to mark ixing holes.
3. Secure bracket in location.
4. Connect the loodlight’s cable to the mains electricity supply using an approved terminal block and ensuring the
correct polarity is observed.
5. Screw the mounting bracket back on to the light, adjusting the itting to the required angle before tightening
the bolts.
Wire connection guide
• The brown wire is connected to the L wire of mains electricity supply.
• The blue wire is connected to the N of mains electricity supply.
• The green/yellow wire is connected to the earth wire.
• Power Cord type: H05RNF 3 x 1.0mm
2
Testing the LED Motion Floodlight
1. Turn the SENS dial clockwise to the maximum setting, turn the TIME dial anti-clockwise to the minimum setting,
turn the LUX dial clockwise to the maximum (sun) setting.
2. When the power is irst switched on the light may not work, wait 30 seconds for the sensor to acclimatize before
re-testing. After this time, the sensor should detect a motion source (within its set range) and the light will come
on. After the set time the light will then switch o.
3. After 515 seconds trigger the sensor again, the sensor will detect the motion and the light will come on and
after the set delay will then switch o. The loodlight should not come on unless motion within its set range is
detected.
4. Turn the LUX knob anti-clockwise to the minimum setting (moon). When adjusted to less than 3 lux the light and
sensor should not work during daylight. If the sensor is covered or obscured by an object the motion sensor will
not work.
The normal operating duration for the light is 515 seconds, once the testing is complete make any inal adjustments
to the settings as required. Please ensure if testing in daylight the LUX knob is on the sun position otherwise the
sensor and light will not work.
120°
TIME SENS LUX
Maintenance Instructions
1. There are no user serviceable parts inside the loodlight. Do not attempt to disassemble.
2. Periodically wipe the housing with a clean, damp cloth, do not use chemicals.
Disposal
This product must be disposed of according to local regulations. For information about collection and disposal points
in your area please contact your local authority. Where possible please recycle all packaging.
Troubleshooting: KODAK LED Floodlight
The light does not work:
• Check the power switch is in the ON position
• Check all connections and wiring for the power and light are correct.
Troubleshooting: KODAK LED Motion Floodlight
The light does not work:
• Check the power switch is in the ON position
• Check all connections and wiring for the power and light are correct.
• Check the LUX setting is set correctly for the current light.
The sensitivity is poor:
• Check orientation of the sensor is correct and at the correct height.
• Check detection window is not obstructed.
• Make sure that the LUX knob is correctly set.
• Make sure that the SENS knob is correctly set.
Floodlight remains ON:
• Check the power is wired correctly and corresponds to the instructions.
• Make sure that the LUX knob is correctly set.
• Make sure that the Time knob is correctly set.
• Check if the temperature near the sensor is stable and not frequently changing, such as next to an air
conditioning unit or other heating sources etc.
EST
DECZ
DK ES
FR GE GR HU IT LT LV NLNOPL PT RO SE SK TRARUA FA
https://kodakbatteries.com/kodak-led-loodlights/
 Loading...