

Page 1

Release Notes
Leaf Capture
Software
Version 11.2.6 for Leaf AFi-II 10 and Aptus-II 10
Internal 739-00549A-EN
Page 2

Copyright
© Kodak 2009. All rights reserved. Kodak, Leaf, the Leaf logo, and Aptus are trademarks of Kodak.
This document is also distributed in Adobe Systems Incorporated's PDF (Portable Document Format). You
may reproduce the document from the PDF file for internal use. Copies produced from the PDF file must
be reproduced in whole.
Trademarks
Kodak and Leaf are trademarks of Kodak.
Adobe, Acrobat, Adobe Illustrator, Distiller, Photoshop, PostScript, and PageMaker are trademarks of
Adobe Systems Incorporated.
Apple, iMac, Power Macintosh, Mac OS, AppleShare, AppleTalk, TrueType, ImageWriter, and LaserWriter
are registered trademarks of Apple Computer, Inc. Macintosh is a trademark of Apple Computer, Inc.,
registered in the U.S.A. and other countries.
FCC Compliance
Any Kodak equipment referred to in this document complies with the requirements in part 15 of the FCC
Rules for a Class A digital device. Operation of the Kodak equipment in a residential area may cause
unacceptable interference to radio and TV reception, requiring the operator to take whatever steps are
necessary to correct the interference.
Equipment Recycling
In the European Union, this symbol indicates that when the last user wishes to discard this
product, it must be sent to appropriate facilities for recovery and recycling.
Contact your local Kodak representative or refer to http://www.kodak.com/go/recycle for
additional information on the collection and recovery programs available for this product.
Limitation of Liability
The product, software or services are being provided on an “as is” and “as available” basis. Except as may
be stated specifically in your contract, Kodak expressly disclaims all warranties of any kind, whether
express or implied, including, but not limited to, any implied warranties of merchantability, fitness for a
particular purpose and non-infringement.
You understand and agree that, except as may be stated specifically in your contract, Kodak shall not be
liable for any direct, indirect, incidental, special, consequential or exemplary damages, including but not
limited to, damages for loss of profits, goodwill, use, data or other intangible losses (even if Kodak has
been advised of the possibility of such damages), resulting from: (i) the use or the inability to use the
product or software; (ii) the cost of procurement of substitute goods and services resulting from any
products, goods, data, software, information or services purchased; (iii) unauthorized access to or
alteration of your products, software or data; (iv) statements or conduct of any third party; (v) any other
matter relating to the product, software, or services.
The text and drawings herein are for illustration and reference only. The specifications on which they are
based are subject to change. Kodak may, at any time and without notice, make changes to this document.
Kodak assumes no liability for technical or editorial errors or omissions made herein, and shall not be liable
for incidental, consequential, indirect, or special damages, including, without limitation, loss of use, loss or
alteration of data, delays, or lost profits or savings arising from the use of this document.
http://www.l
Internal
Revised 22 April 2009
eaf-photography.com
739-00549A-EN
Page 3

Contents
Introduction.......................................................................................................................................................1
New Features...................................................................................................................................................1
Uploading Firmware to Leaf AFi-II Camera Systems.......................................................................................3
Minimum System Requirements.......................................................................................................................4
Leaf Product Compatibility................................................................................................................................4
About Leaf Capture Installation........................................................................................................................4
General Leaf Tips.............................................................................................................................................6
Known Issues...................................................................................................................................................8
Page 4

Leaf Capture version 11.2.6
Release Notes
Introduction
Leaf® Capture is an image capture and processing workflow software that has
been designed for you to make the most of the images you take with your Leaf
products, and to improve your productivity.
The intuitive Leaf Capture user interface guides you through the image capture
workflow. Since you can use it to check and perfect your images while you shoot,
Leaf Capture serves as the ideal match for high-volume productions on tight
deadlines, such as catalog and fashion shoots. Leaf Capture enables you to
produce outstanding quality images with fine details and accurate colors. Since
the software is focused on professional photographic requirements, it supports
editing and managing of files in both tethered and portable shooting modes.
New Features
In addition to significant performance enhancements, the following features have
been added to this version of the Leaf Capture software:
ISO 80 Now Available
The Leaf AFi-II 10 and Aptus-II 10 imaging modules contain a new, high
performance sensor which has enabled Leaf to achieve better dynamic range,
and enables you to shoot with an ISO of 80. The ISO range now available is 80800 ISO.
Lens Calibration
The new lens calibration function offers significant improvements in image
quality for photographers using new Leaf AFi-II 10 and Leaf Aptus-II 10 backs.
You can create lens calibration files for any lens to optimize the performance of
the lens with the Leaf sensor. Lens calibration files are reference files that
‘describe’ certain characteristics of the lens so that you can obtain the best
quality available from your imaging module.
In an effort to simplify the process, each new Aptus-II 10 and AFi-II 10 is now
shipped with an additional installation CD containing factory defined lens
calibration files for some of the most commonly used lenses. These files are
customized and tested for each sensor individually. Customers can still use Leaf
Capture v11.2.6 to create additional customized lens calibration files as needed.
These files reside in the Leaf Tables/Lens Calibration folder.
1
Page 5
Leaf Capture version 11.2.6
Release Notes
For more information on using lens calibration files, refer to the Lens Calibration
Guide for Leaf AFi-II 10 and Aptus-II 10 Camera Backs (p/n 731-01750A-EN, on
http://www.leaf-photography.com/imgs/uploads/technical%20bulletins/
Lens_Calibration_Guide_for_Leaf_AFi-II_10_and_Aptus-II_10.pdf
Please note that although the coming version of Leaf RAW converter, due for
release soon, will provide full support for all Leaf RAW files, the currently
available version of Leaf RAW Converter does not support RAW files captured
with a Leaf Aptus-II 10 or Leaf AFi-II 10 in which lens calibration optimization has
been implemented. If you wish to use one of the many third party image editor or
workflow management packages that support Leaf files, Leaf Capture can still be
used to batch convert these images for external processing if desired.
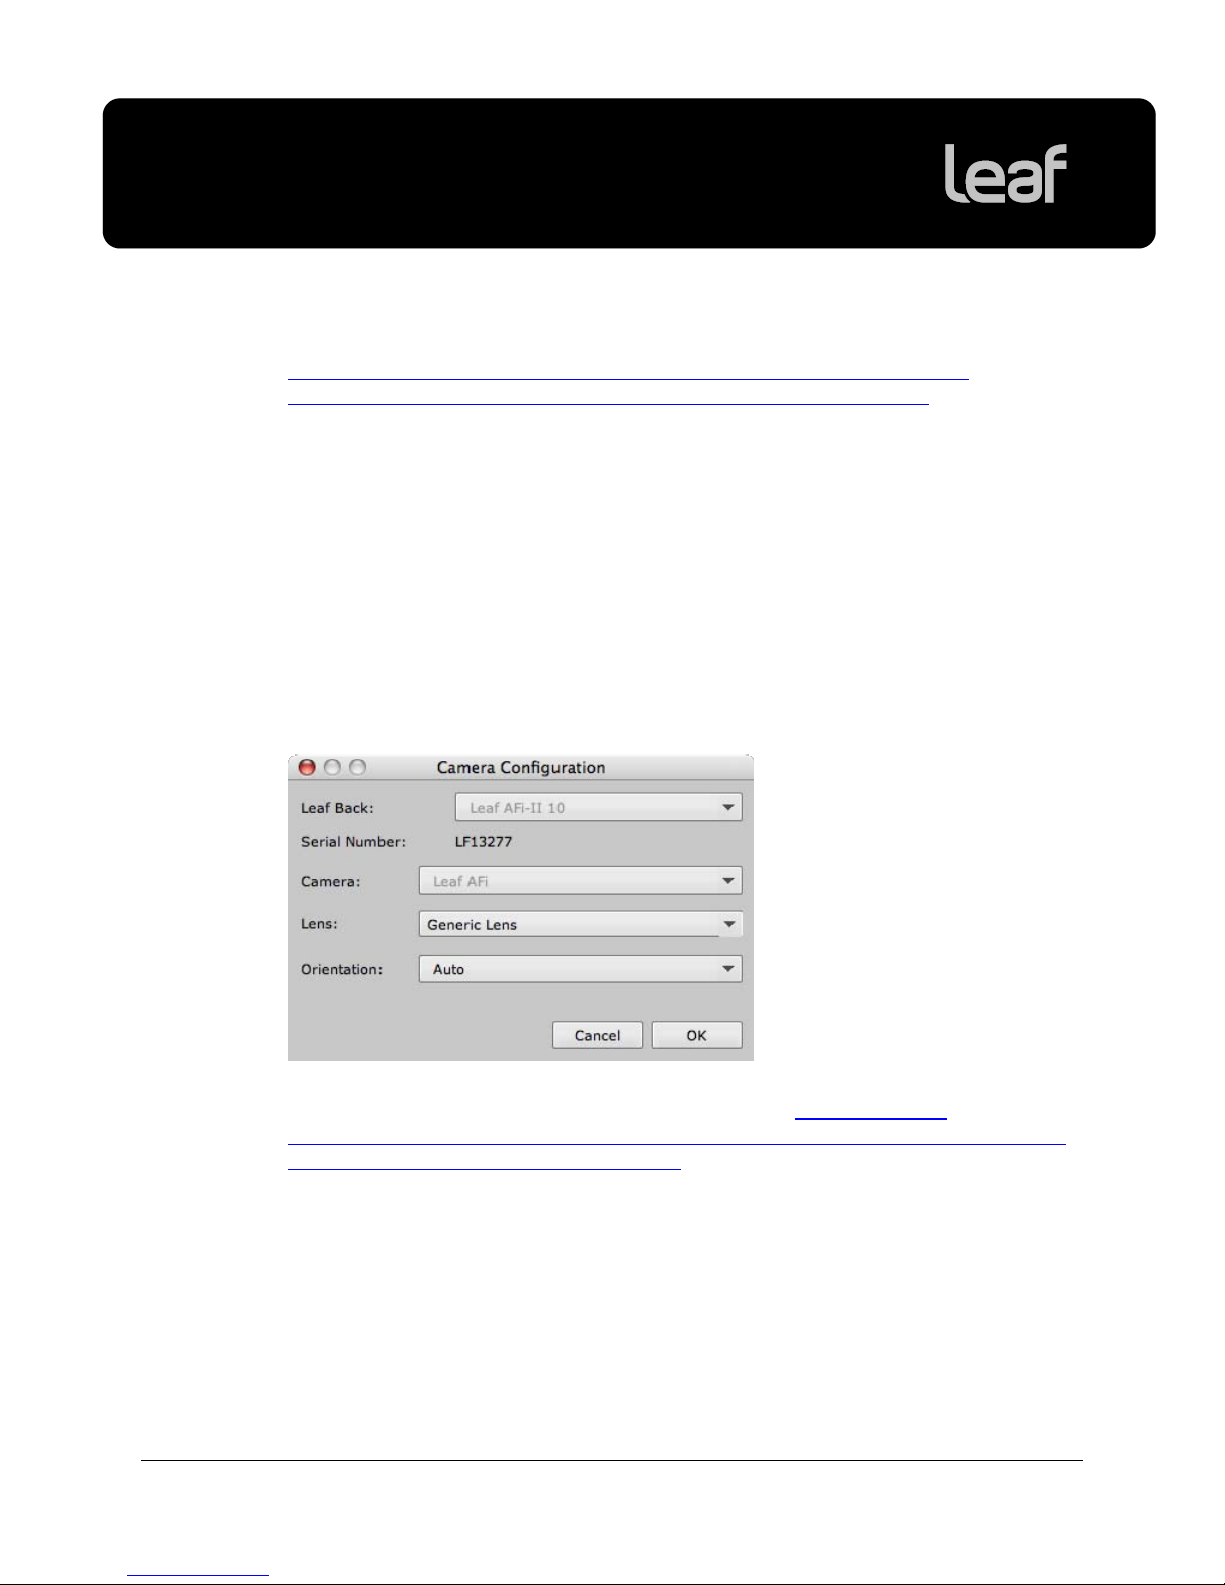
Working with Lens Calibration Files
In the Camera Configuration dialog box, you can now select the lens calibration
file that you wish to apply to your shots. This could be a custom made calibration
file, or the appropriate lens calibration file from the Lens Calibration Data CD.
).
Use the reference table in the Lens Calibration Guide for Leaf AFi-II 10 and
Aptus-II 10 Camera Backs (p/n 731-01750A-EN, on http://www.leaf-
photography.com/imgs/uploads/technical%20bulletins/Lens_Calibration_Guide_
for_Leaf_AFi-II_10_and_Aptus-II_10.pdf
calibration file for the lens you are using.
Enhanced Color Look (ICC Input Profiles)
This version contains enhanced color look profiles.
2
), to determine the correct lens
Page 6

Leaf Capture version 11.2.6
Release Notes
Uploading Firmware to Leaf AFi Camera Systems
When connecting a Leaf AFi camera system to Leaf Capture v11.2.6 for the first
time, follow this procedure to ensure that the new firmware will be loaded to the
camera system:
1. Launch the Leaf Capture software.
2. Connect your imaging module to the computer.
The firmware is uploaded. When complete, if your camera system was turned
off, a message appears prompting you to turn on the camera system.
3. Turn on the camera system and press the shutter release button lightly until
you encounter resistance.
Important: The v2.13 firmware is compatible with Leaf Capture versions 11.2.3
and higher. After connecting and upgrading to the new firmware, you cannot
work with Leaf Capture versions 11.2.0.2 and earlier.
Should you need to roll back to v11.2.0.2 or earlier, you need to start the camera
in boot mode and reinstall the earlier firmware using Leaf Capture v11.2.0.2. For
a detailed description of the procedure, refer to the Firmware update was
unsuccessful section in the Troubleshooting chapter of your Leaf AFi-II User
Guide.
3
Page 7

Leaf Capture version 11.2.6
Release Notes
Minimum System Requirements
The following system components are required for running the Leaf Capture
software:
PowerPC-based Macintosh Intel-based Macintosh
Processor Dual Core/Processor G5 Intel® Core™ Duo or Xeon®
Processor speed 1.8 GHz 1.83 GHz
Memory 2 GB 2 GB
Operating system Mac OS X, version 10.5 Mac OS X, version 10.5
Leaf Product Compatibility
This version of the Leaf Capture software supports Leaf AFi-II 10 camera
systems and Aptus-II 10 imaging modules.
About Leaf Capture Installation
Installing Leaf Capture
The Leaf Capture installation wizard requires that no other applications are
running during the installation. If you are working in other applications, make sure
you save your work before launching the Leaf Capture installation.
When installing Leaf Capture version 11.2.6, you are requested in insert the Lens
Calibration Data CD. If your Leaf product came with a second installation CD,
insert it now and then click OK. For other Leaf products, click Skip. If you have
the CD, you should insert it in order to ensure that the unique lens calibration
files are installed on your computer. This installation workflow should be followed
every time you install Leaf Capture version 11.2.6 on computers that you work
with.
4
Page 8
Leaf Capture version 11.2.6
Release Notes
Computer Restarts After Installation
If a driver that is new to your computer is installed during the Leaf Capture
version 11.2.6 software installation, Leaf Capture restarts your computer at the
end of the installation. If you are working in other applications, make sure you
save your work first.
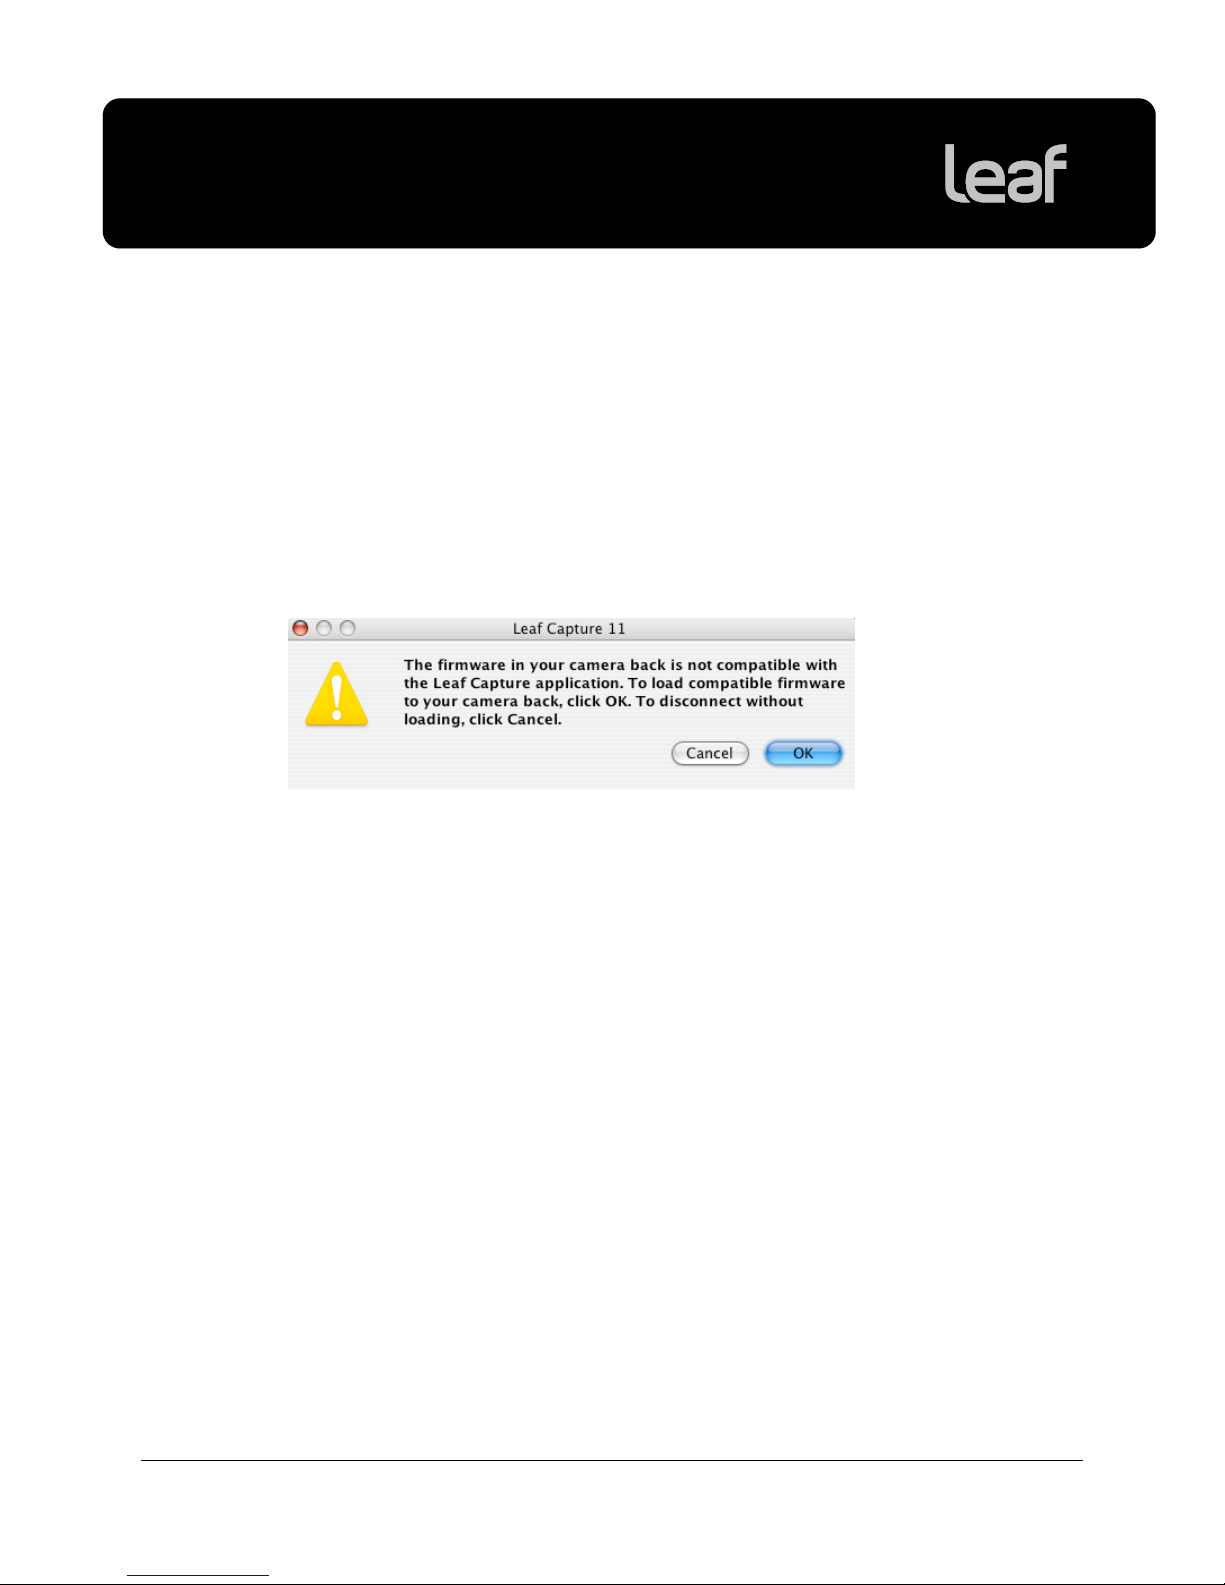
Updating the Imaging Module Firmware
When you connect your imaging module to the Leaf Capture software, the
following message appears:
Click OK. The imaging module firmware is updated.
This process takes approximately 10 minutes.
After uploading the firmware, turn the imaging module off and on again.
Preferences are Reset After Installation
The installation automatically resets your Leaf Capture preferences.
Note: If you have multiple user accounts, the preferences are reset only for the
user who installs the Leaf Capture software. All other users must manually reset
their preferences:
Locate Applications > Leaf Capture 11 > Utilities, and double-click Reset
Preferences.
5
Page 9

Leaf Capture version 11.2.6
Release Notes
General Leaf Tips
Opening Images in Third Party Applications
To open images taken in portable mode in third party applications, follow this
workflow:
Open the files in Leaf Capture.
Click Save or Save As to save the files.
Open the files in the third party application.
Using your CF Card in Multiple Imaging Modules
When using a CF card in multiple imaging modules, it is recommended that you
perform a quick format each time you switch the card between imaging modules.
Switching Between Shooting Modes
When switching from portable to tethered mode, wait for the CF card icon to stop
running before connecting the FireWire cable to your computer.
When tethered, eject the CF card via the Apple
disconnect the FireWire cable only when the connect icon
®
Macintosh® desktop, and
is green.
Using a Second Battery with Your Leaf AFi/AFi-II Imaging Module
If you are using a second battery on the Leaf AFi or AFi-II imaging module, you
must manually switch off the imaging module in the following circumstances:
When you shut down the Leaf AFi or AFi-II camera system
When the camera system enters power save mode
Conserving Battery Power
Working in mirror-up mode can consume a lot of battery power. To conserve
your batteries, minimize the time you work in mirror-up mode.
Locating the Leaf Tables
The Leaf tables are located under Leaf Images > Leaf Tables in the Pictures
folder of each user.
6
Page 10

Leaf Capture version 11.2.6
Release Notes
Firmware Files Change in Location
The firmware files are now located in the application package.
Undoing Unsaved Changes
To undo unsaved changes to image settings, select In File in the predefined
settings list.
Applying the Settings of One File to Another File
To find out how to apply a file’s settings to another file, see Leaf Technical
Bulletin #2, How to adjust multiple images, available at:
http://www.leaf-photography.com/support/techbulletin
Removing a CompactFlash Card From a Leaf Imaging Module
In Tethered Mode, Connected to a Macintosh Computer
.
To remove the CF card from the Leaf imaging module, click Disconnect in
the Leaf Capture software, and eject the CF card via the Apple Macintosh
desktop.
Removing the CompactFlash
while shooting in tethered mode stops the communication.
®
(CF) memory card from the Leaf imaging module
In Portable Mode
Before you remove the CF card from the imaging module, make sure that the CF
card icon is not showing.
Shooting While the Imaging Module Is Busy
Wait until the busy symbol disappears before shooting.
Working with Seamless Switch
When disconnecting the FireWire cable in tethered mode while a CF card is
inserted in the imaging module, a message appears in the Leaf Capture
software. Click OK before reconnecting the cable.
7
Page 11

Leaf Capture version 11.2.6
Release Notes
Known Issues
This section lists known problems in the Leaf Capture software and imaging
module. They may be outstanding issues from a previous release, or new
problems. When a problem listed here is resolved, the solution is described in
the Fixed Issues section of the release notes for the next version of the Leaf
Capture software.
Leaf Capture Software Issues
Predefined Settings List
After adjusting and saving an image, then adding multiple images and applying
the change to the selection, the active setting is lost from the predefined settings
list if you remove any image from the selection.
Workaround: Save the images after applying the change.
Gray Balance Picker in Live View
In live view, after you click using the gray balance picker tool, the cursor
changes from the picker to the regular mouse pointer. However, if you continue
to click the live view display, the gray balance is updated according to the spot
you clicked.
Workaround: After using the gray balance picker to achieve a gray balance you
are happy with, choose another tool to disable the gray balance picker.
Moving a Moiré Reduction Selection over the Display
When moving a moiré reduction selection over the zoomed-in image in the
display, mouse-control of the selection is lost when you reach the edge. Click the
selection again to regain control.
Dragging and Dropping after Processing
You cannot drag and drop files to a different partition after processing.
Workaround: In the Edit menu, select Copy to Folder or Move to Folder to
copy or move your files.
8
Page 12

Leaf Capture version 11.2.6
Release Notes
File Names Including Forward Slash Character
When processing images with the forward slash “/” character in the file name,
the Leaf Capture software stops responding. Do not use this character in file
names.
Misleading Message After Reconnecting After Shooting with a
Custom Lens Calibration File
When you disconnect the imaging module from the Leaf Capture software by
way of clicking disconnect or closing Leaf Capture, but not physically
disconnecting the FireWire cable, the custom lens calibration file is still loaded in
the imaging module.
Upon reconnection, the imaging module searches for the custom lens calibration
file on your computer. If you changed the location or name of the custom lens
calibration file, a message appears warning you that it cannot locate the custom
lens calibration file, and that it will use the default lens calibration file.
However, for as long as the imaging module is not physically disconnected, it
retains the custom lens calibration file in its memory, and continues to use the
custom lens calibration file until you load a new file, or until you physically
disconnect the imaging module by removing the FireWire cable.
Workaround: If you want to use the default lens calibration file, either disconnect
and reconnect by physically removing and replacing the FireWire cable, or
reload the default lens calibration file.
Moving Folders in the Browse Tree
After you move folders in the Browse panel directory area, the contents of the
moved folder are not displayed.
Workaround: To view the folder’s contents, select another folder and then select
the folder that you are working on.
Proofing Output Color at a Magnification Greater Than 70%
If you select a CMYK print space or a limited gamut RGB working space on the
Process panel’s Color tab, the correct color is displayed in the Detail pane or in
the Preview area only when the image is magnified at a level greater than 70%.
Workaround: To proof output color, view the image in the Detail pane or Preview
area at a magnification level greater than 70%.
Help System
At this time, the help system is available only in English.
9
Page 13

Leaf Capture version 11.2.6
Release Notes
Leaf AFi Camera System Issues
Limitations with Cable Release
Cable release has the following limitations:
You cannot use cable when the camera system is set to B or T modes.
When pressing the cable release button in single mode, the camera shoots
continually. For one shot, press once.
You cannot activate the self-timer using the cable release.
Shooting Using the AFi-II 10 Imaging Module with Mamiya RZ
Camera
When shooting continuously without waiting for the ready beep, and with no
defined orientation, in some cases the images are taken with incorrect
orientation.
Workaround: In portable mode, set the orientation of your shot to in the camera
settings menu in Camera view:
Tap Orientation.
Tap an orientation.
Tap ok.
In tethered mode, select an orientation in the camera settings in Leaf Capture.
10
 Loading...