

KitchenAid 5KES100 INSTRUCTION FOR USE

ARTISAN™ ESPRESSO MACHINE
GUIDE TO EXPERT RESULTS
English
Model 5KES100
Espresso Machine
1
Table of Contents
Espresso Machine Safety ........................................................................................2
Important Safeguards ...............................................................................................3
Electrical Requirements ...........................................................................................3
Model 5KES100 .............................................................................................................4
Espresso Machine Features ...................................................................................4
Preparing the Espresso Machine for Use .....................................................6
Attach the Cup Rail ..........................................................................................6
Remove and Wash the Water Tank ........................................................6
Fill and Rinse the Boilers ...............................................................................6
Brewing Espresso .........................................................................................................7
Frothing and Steaming Milk .................................................................................9
Preparing Cappuccino ...................................................................................9
Dispensing Hot Water ............................................................................................10
Care & Cleaning .........................................................................................................10
Before Cleaning the Espresso Machine ...........................................10
Cleaning the Frothing Arm and Nozzle ..........................................10
Cleaning the Housing and Accessories .........................................10
Cleaning the Shower Screen ..................................................................11
Priming After Long Periods of Non-Use .........................................11
Descaling .............................................................................................................11
Troubleshooting Problems .................................................................................11
What is Espresso? ......................................................................................................12
Overextraction and Underextraction .........................................................12
Before Brewing: The Elements of a Great Espresso ............................12
Fresh Coffee Beans ........................................................................................12
Great Tasting Water .......................................................................................12
The Right Grind – and Grinder .............................................................12
Espresso Brewing Technique ............................................................................13
Brewing Temperature ..................................................................................13
Grinding ...............................................................................................................13
Dosing ...................................................................................................................13
Leveling ................................................................................................................13
Tamping ...............................................................................................................14
Volume ..................................................................................................................14
Extraction Rate .................................................................................................14
The Golden Crema ........................................................................................14
Troubleshooting Espresso as it Brews ..............................................15
A Glossary of Espresso Drinks ...........................................................................15
Household KitchenAid™ Espresso Machine Warranty .....................16
Service Centers ...........................................................................................................16
Customer Service......................................................................................................16
English
Espresso Machine Safety
Your safety and the safety of others are very important.
We have provided many important safety messages in this manual and on your appliance. Always read and obey all safety
messages.
This is the safety alert symbol.
This symbol alerts you to potential hazards that can kill or hurt you and others.
All safety messages will follow the safety alert symbol and either the word “DANGER” or “WARNING.” These
words mean:
You can be killed or seriously injured if you don’t immediately follow
Danger
instructions.
You can be killed or seriously injured if you don’t follow instructions.
Warning
All safety messages will tell you what the potential hazard is, tell you how to reduce the chance of injury, and tell you
what can happen if the instructions are not followed.
2
IMPORTANT SAFEGUARDS
When using electrical appliances, basic safety precautions should always be followed, including the following:
1. Read all instructions.
2. Do not touch hot surfaces. Use handles or knobs.
3. To protect against fire, electric shock and personal injury do not immerse cord, plugs, or appliance in water or other
liquids.
4. This appliance is not intended for use by persons (including children) with reduced physical, sensory or mental capabilities, or
lack of experience and knowledge, unless they have been given supervision or instruction concerning use of the appliance by
a person responsible for their safety. Children should be supervised to ensure that they do not play with the appliance.
5. Unplug from outlet when not in use and before cleaning. Allow to cool before putting on or taking off parts, and before
cleaning.
6. Do not operate any appliance with a damaged cord or plug, or after appliance malfunctions or has been damaged in any manner.
Return the appliance to the nearest authorized service center for examination, repair or adjustment.
7. The use of accessory attachments not recommended by the appliance manufacturer may result in fire, electric shock, or personal
injury.
8. Do not use outdoors.
9. Do not let cord hang over edge of table or counter, or touch hot surfaces.
10. Do not place on or near a hot gas or electric burner, or in a heated oven.
11. Always switch the appliance off, then plug cord into the wall outlet. To disconnect, turn the appliance off, then remove plug
from wall outlet.
12. Do not use appliance for other than intended household use.
13. Use extreme caution when using hot steam.
SAVE THESE INSTRUCTIONS
This appliance is marked according to the European directive
2002/96/EC on Waste Electrical and Electronic Equipment
(WEEE).
By ensuring this product is disposed of correctly, you will
help prevent potential negative consequences for the
environment and human health, which could otherwise be
caused by inappropriate waste handling of this product.
The symbol
accompanying the product, indicates that this appliance may
Volts: 230-240 Volts A.C.
Hertz: 50 Hz
NOTE: To reduce the risk of electrical shock, the plug will fit in
an outlet only one way. If the plug does not fit in the outlet,
contact a qualified electrician. Do not modify the plug in any
way.
on the product, or on the documents
Electrical Requirements
not be treated as household waste. Instead it shall be handed
over to the applicable collection point for the recycling of
electrical and electronic equipment.
English
Disposal must be carried out in accordance with local
environmental regulations for waste disposal.
For more detailed information about treatment, recovery and
recycling of this product, please contact your local city office,
your household waste disposal service or the shop where you
purchased the product.
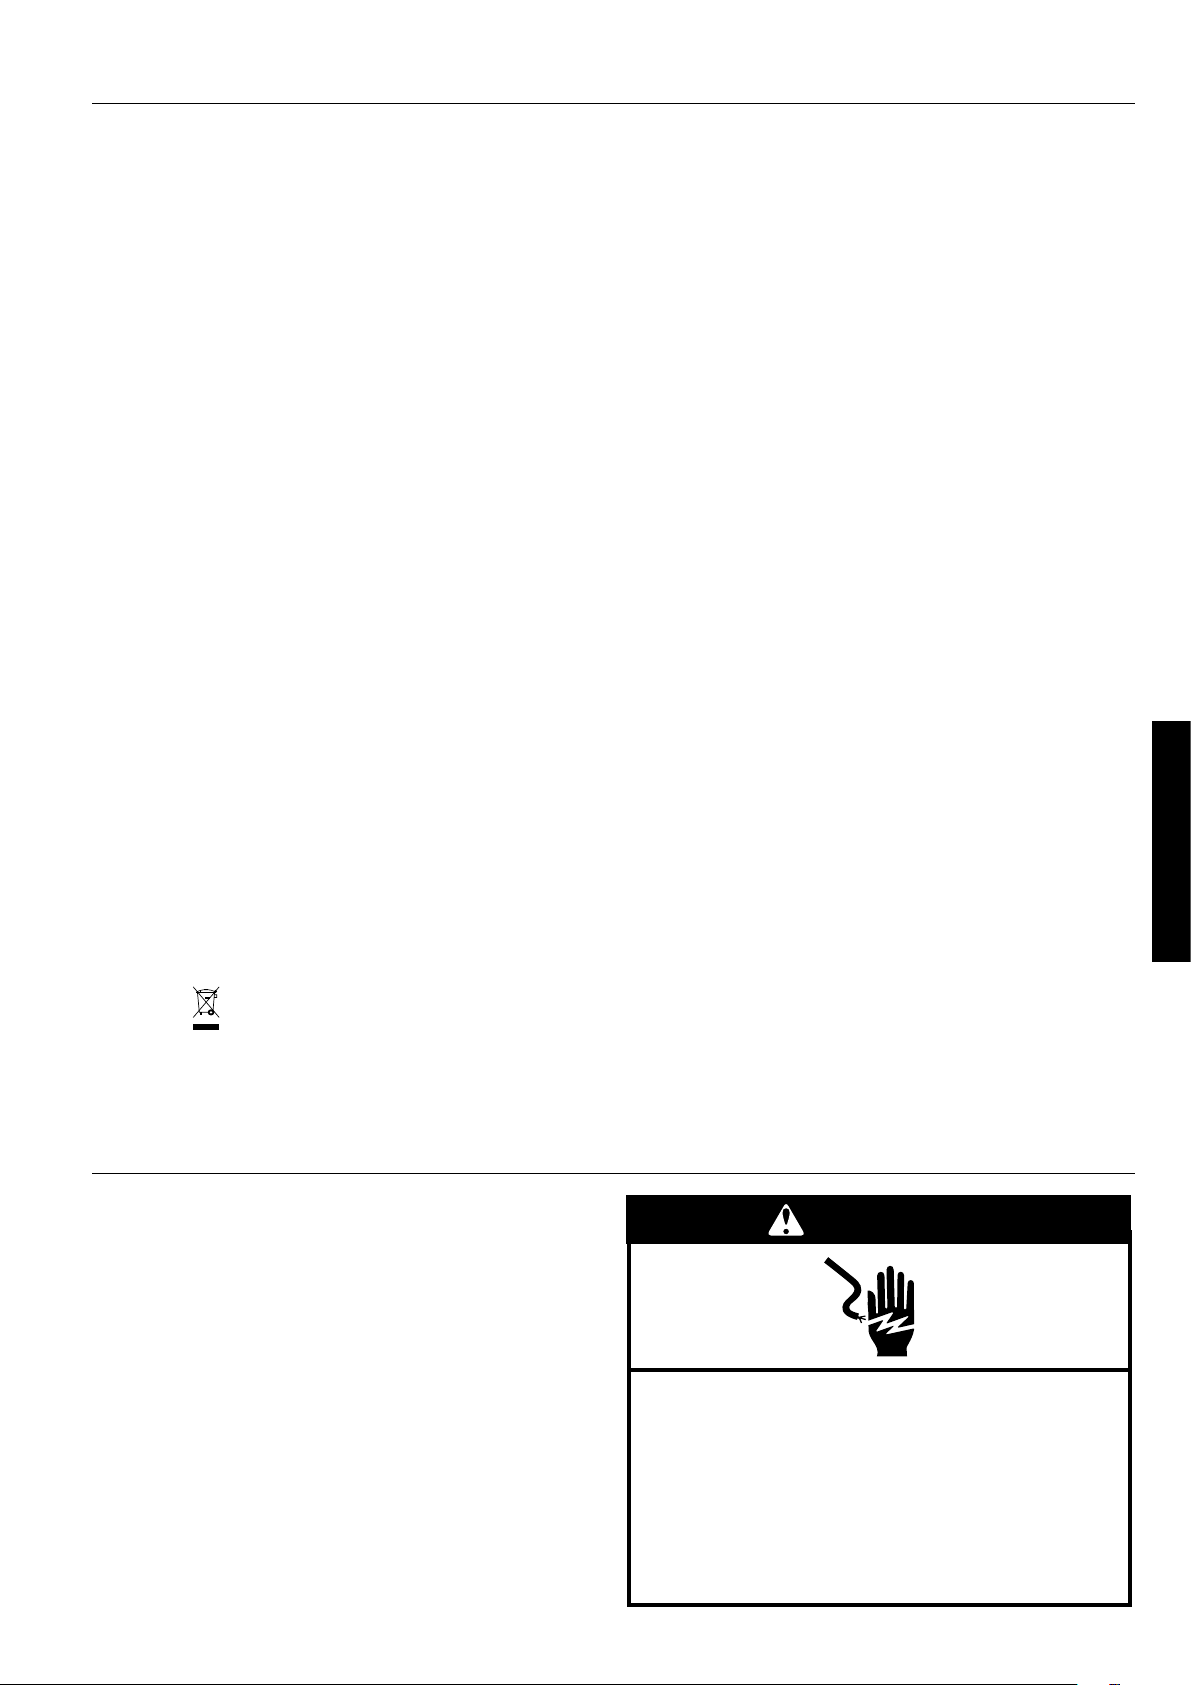
Warning
A short power-supply cord is provided to reduce the risk
resulting from becoming entangled in or tripping over a longer
cord. Do not use an extension cord. If the power supply cord is
too short, have a qualified electrician or serviceman install an
outlet near the appliance.
Electrical Shock Hazard
Plug into a grounded outlet.
Do not remove ground prong.
Do not use an adapter.
Do not use an extension cord.
Failure to follow these instructions can result in
death, fire or electrical shock.
3
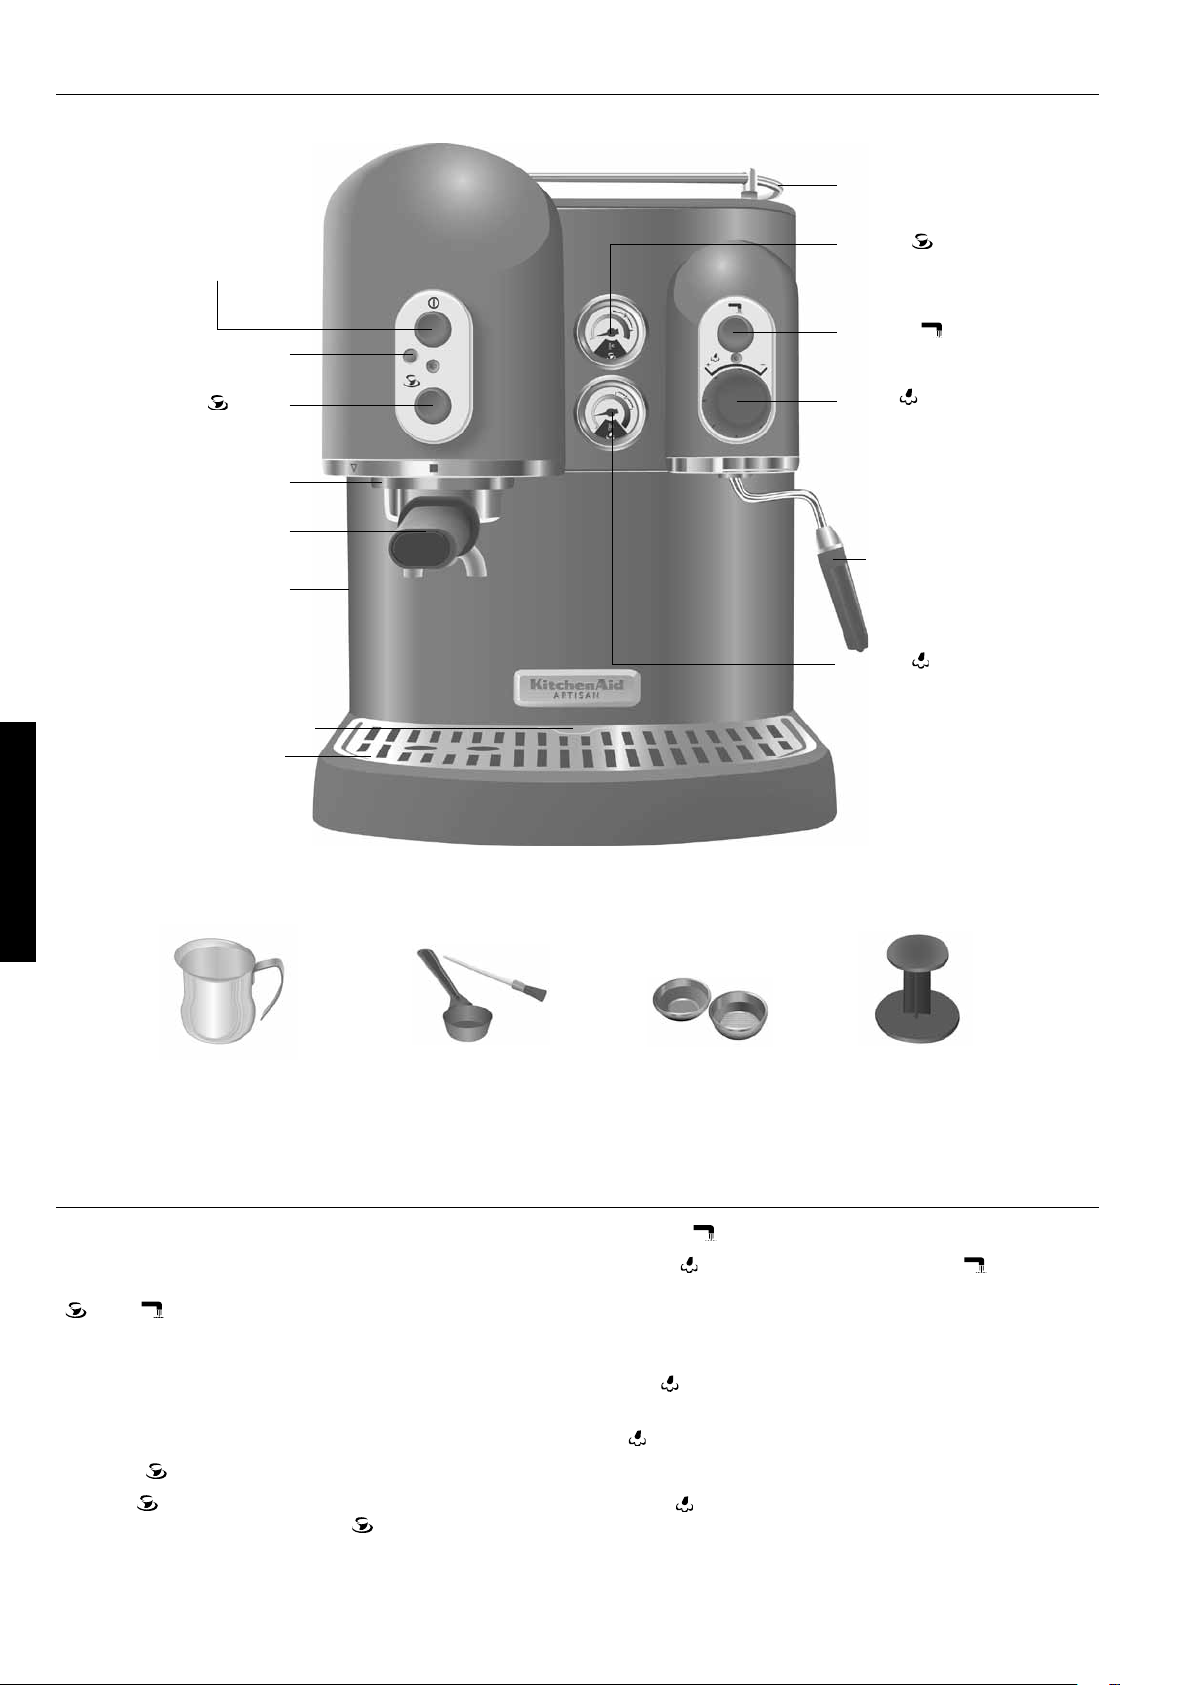
O/I Power Switch
Model 5KES100
Cup Rail
Espresso ( ) Boiler
Temperature Gauge
English
Power-On (I) Indicator
Espresso ( ) Button
Brew Head
Filter holder
Water Tank
(in back)
Drip Tray Indicator
Drip Tray
Model 5KES100
Espresso Machine
Hot Water (
Button
Steam ( ) Dial
Frothing Arm &
Nozzle
Frothing (
Temperature Gauge
)
) Boiler
Frothing Jug
Coffee Scoop and
Shower-Screen Brush
Espresso Machine Features
O/I Power Switch
Press once to turn the espresso machine on, press again to turn
off. When on, the dual boilers begin heating and the
” and “ ” buttons will function.
“
Power-On (I) Indicator
When the espresso machine is on, the indicator light will be
illuminated.
Espresso (
Press the “
espresso. To stop brewing, press the “ ” button a second time.
) Button
” button to activate the water pump for brewing
Filter Baskets
Tamper
Hot Water ( ) Button
When the “
” dial is open, press and hold the “ ” button to
activate the water pump and dispense hot water from the
frothing arm. Pump shuts off automatically when the button is
released.
Steam (
) Dial
To dispense steam or hot water through the frothing arm, open
” dial by turning it counter-clockwise. The volume of
the “
steam is controlled by the dial position: rotate the dial counterclockwise for more steam, clockwise for less. To turn off steam,
close the “ ” dial by rotating it clockwise until it stops.
4

Espresso Machine Features
Brew Head
Commercial-size brew head is chrome-plated brass for
exceptional durability and brew temperature stability.
Brewing boiler is bolted directly to group head, so brew
group heats quickly and thoroughly.
Frothing Arm & Nozzle
Dispense steam or hot water through
the frothing arm. Arm pivots horizontally and vertically to
provide a convenient position. Nozzle enhances frothing and is
removable for cleaning.
Drip Tray
Large, removable drip tray catches spills and is dishwasher-safe
if placed in the top rack. Tray features a removable stainless
steel drip plate.
Drip Tray Full Indicator
The indicator tip rises above the drip plate when the drip tray is
nearly full.
Water Tank
The removable water tank slides left or right for easy filling, and
features easy-to-see “max” (1.8 liters) and “min” fill lines.
Translucent tank shows the water level at a glance. Tank can be
washed in the top rack of a dishwasher.
Cup Rail
Top of unit accommodates 4 to 6 espresso cups for warming.
Stainless steel cup rail helps prevent breakage.
Espresso (
Dial gauge indicates when espresso boiler has reached
optimum brewing temperature.
Frothing (
Dial gauge indicates when frothing boiler has reached
optimum steaming temperature.
) Boiler Temperature Gauge
) Boiler Temperature Gauge
Filter holder
Commercial-size filter holder features chrome-plated brass
construction and an easy-to-grip flared handle. Attaches to the
brew head with a firm twist to the right.
Filter Baskets
Stainless steel filter baskets snap into filter holder. Use the small
capacity basket for a single cup (30 ml) of espresso, and the
large capacity basket for two cups (60 ml). The small basket also
accommodates paper coffee pods.
Frothing Jug
The 255 ml capacity stainless steel jug is invaluable
for frothing.
Tamper
Evenly tamps coffee into the filter basket.
Coffee Scoop and Shower-Screen Brush
Use one level scoop of coffee for each cup (30 ml) of espresso.
The shower-screen brush will help keep the brew head and
shower screen free of grounds.
Not Shown:
Dual Boilers
Separate boilers eliminate the wait single-boiler machines
require when switching between frothing and brewing. Boiler
heating elements never touch water: they are located on the
outside of the boiler for superb brew temperature consistency
and burnout-resistance. Quick heating boilers reach operating
temperatures in at least 6 minutes.
Drip-Free System with 3-Way Solenoid Valve
A 3-way solenoid valve virtually eliminates drips by instantly
reducing pressure in the brew group when the pump is
switched off. The filter holder can be removed immediately after
brewing without a messy spray of coffee grounds.
15 Bar Pump
Self-priming water pump comfortably supplies the 9 bars of
pressure that perfect espresso demands.
English
5
 Loading...