

Page 1
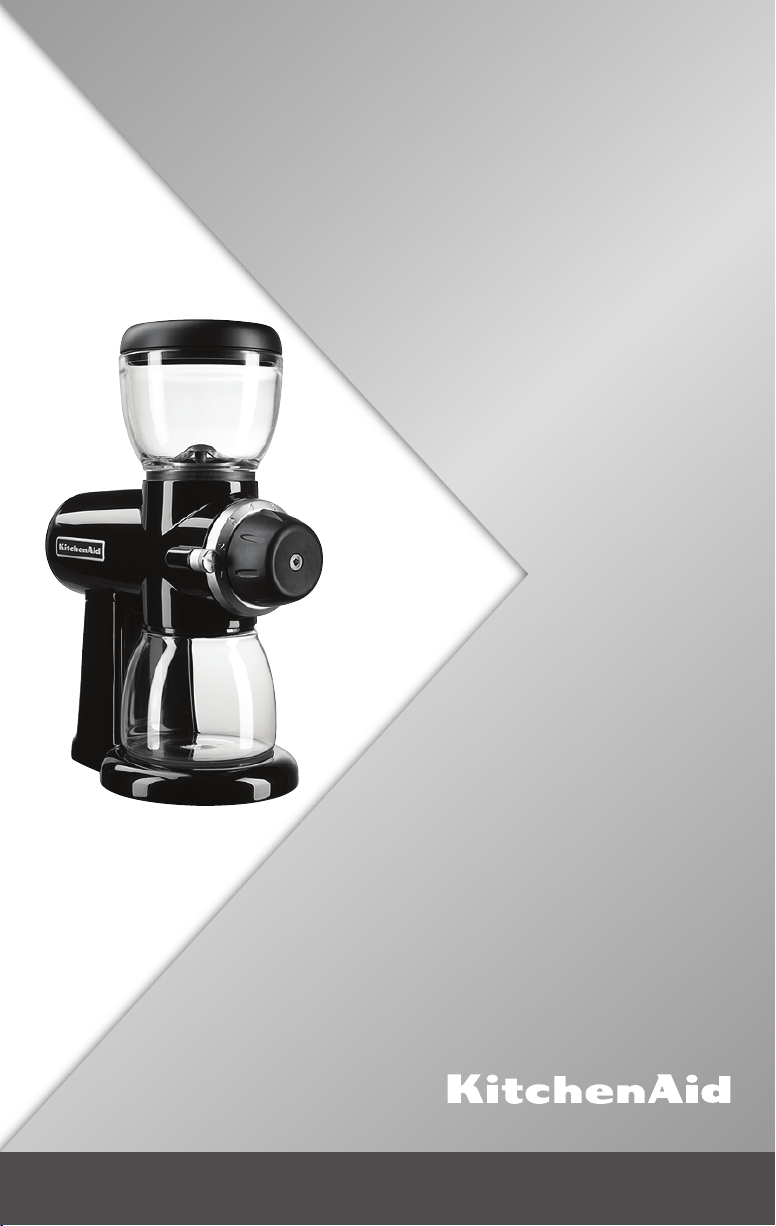
5KCG0702
Page 2
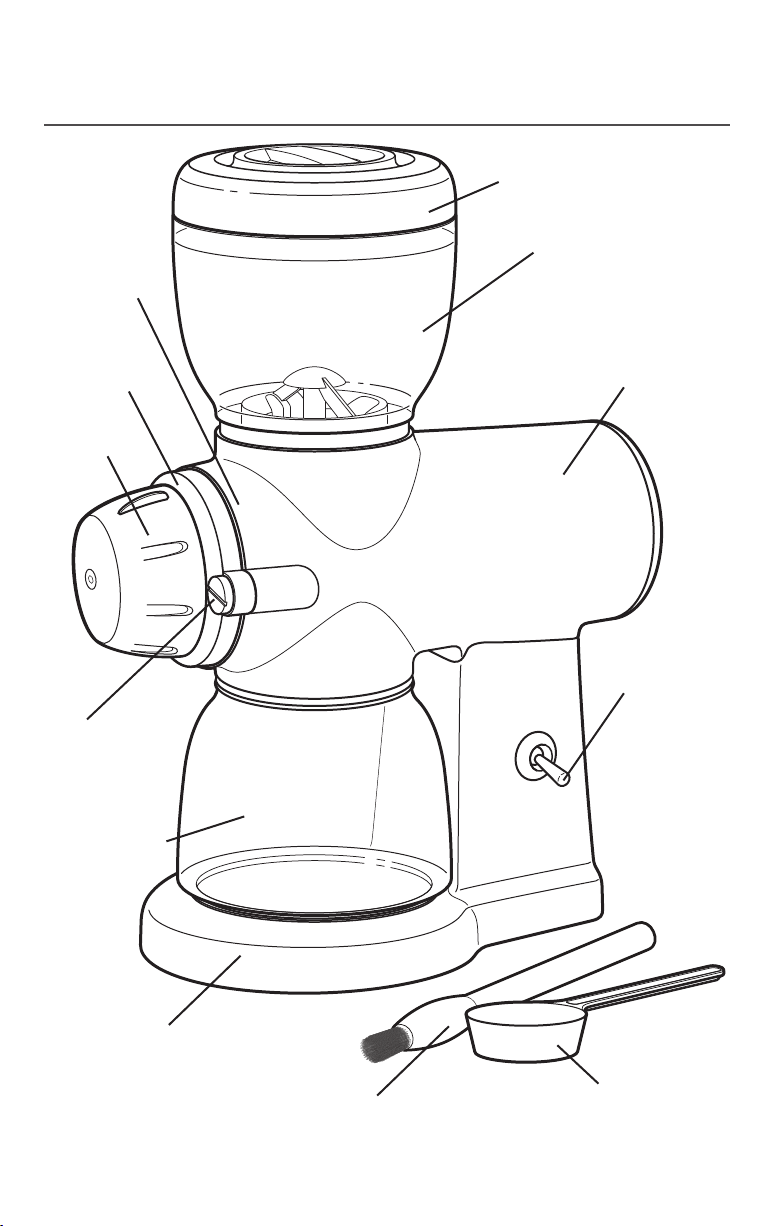
PARTS AND FEATURES
PARTS AND ACCESSORIES
Hopper lid
Easy access
stainless
steel burrs
15 grind
settings
Grind
control dial
Faceplate
assembly
and screws (2)
200 g glass hopper
Die cast
metal body
Power
switch
200 g glass
grind jar
Jar
platform
Cleaning
brush
NOTE: Store your Burr Grinder and all accessories in the provided storage box. Be sure
to keep out of the reach of small children.
2 | PARTS AND FEATURES
Coffee
scoop
Page 3
BURR GRINDER SAFETY
IMPORTANT SAFEGUARDS
When using electrical appliances, basic safety
precautions should always be followed, including
the following:
1. Read all instructions.
2. To protect against risk of electric shock, do not put the
Burr Grinder in water or other liquid.
3. Close supervision is necessary when any appliance
is used by or near children.
4. Children shall not play with the appliance.
5. This appliance shall not be used by children.
6. Keep the appliance and its cord out of reach of
children.
7. Unplug the Burr Grinder from the outlet when not
in use, before putting on or taking off parts, and
before cleaning.
8. Avoid contacting moving parts.
BURR GRINDER SAFETY | 3
Page 4

BURR GRINDER SAFETY
9. Do not operate any appliance with a damaged cord
or plug, or after the appliance malfunctions or is
dropped or damaged in any manner. Return the
appliance to the nearest authorized service facility
for examination, repair, or electrical or mechanical
adjustment.
10. The use of attachments not recommended or sold by
KitchenAid may cause re, electric shock, or injury.
11. Do not use outdoors.
12. Do not let cord hang over edge of table or counter,
or touch hot surfaces.
13. Check the bean hopper for the presence of foreign
objects before using.
14. Appliances can be used by persons with reduced
physical, sensory or mental capabilities or lack of
experience and knowledge if they have been given
supervision or instruction concerning the use of the
applicance in a safe way and if they understand the
hazards involved.
15. After grinding one full hopper of coffee beans (200g),
please wait for one minute before attempting to grind
a second full hopper of coffee beans (200g). After
grinding two full hoppers of coffee beans, please wait
until the unit cools down to room temperature if you
need to grind more.
SAVE THESE INSTRUCTIONS
This product is designed for household use only.
4 | BURR GRINDER SAFETY
Page 5
BURR GRINDER SAFETY
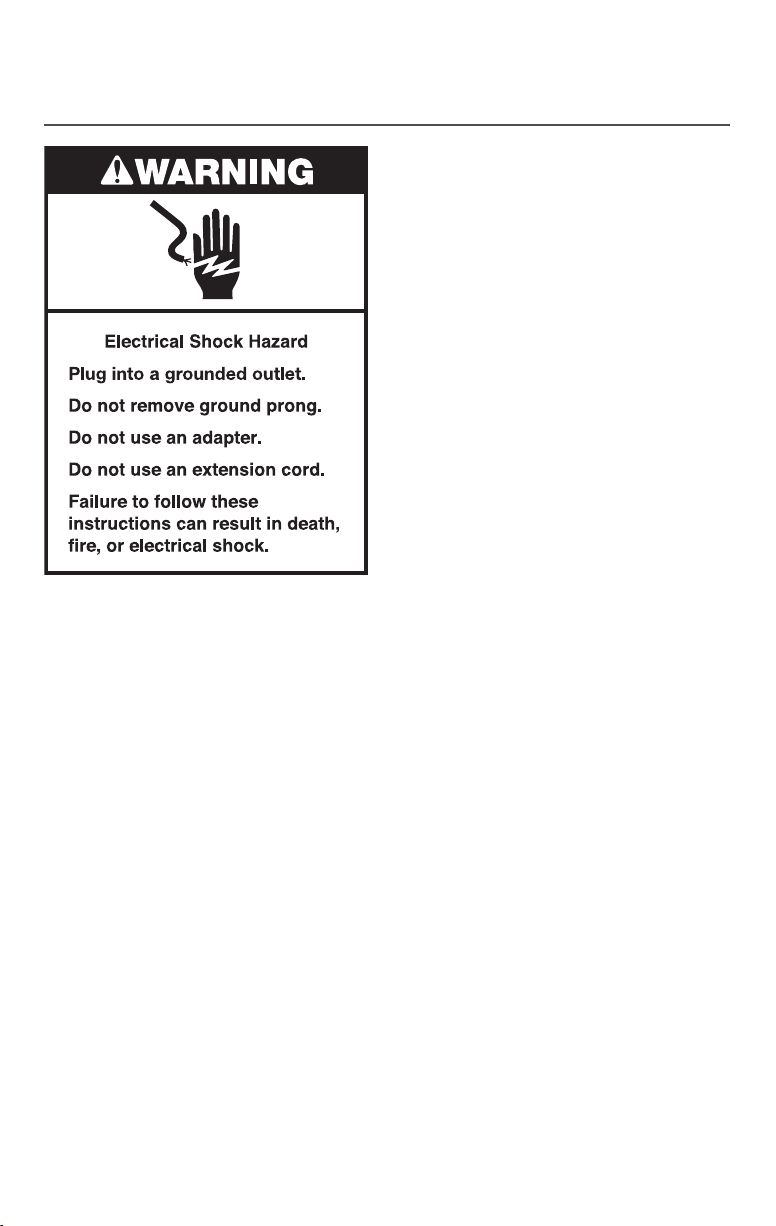
ELECTRICAL REQUIREMENTS
Voltage: 220-240 Volts A.C. only
Frequency: 50-60 Hz
Wattage: 220-240 Watts
NOTE: This Burr Grinder has a grounded
plug. To reduce the risk of electrical shock,
the plug will t in an outlet only one way. If
the plug does not t in the outlet, contact
a qualied electrician. Do not modify the
plug in any way.
A short power-supply cord is provided
to reduce the risk resulting from becoming
entangled in or tripping over a longer cord.
Extension cords are available and may be
used if care is exercised in their use.
If a longer extension cord is used:
The marked electrical rating of the
extension cord should be at least
as great as the electrical rating of
the appliance.
• The extension cord should be a
grounding-type cord.
• The cord should be arranged so it
will not drape over the countertop
or tabletop where it can be pulled
on by children or tripped over.
BURR GRINDER SAFETY | 5
Page 6

USING THE BURR GRINDER
NOTE: The bean hopper holds a maximum of 200 g (7 oz) of beans.
HELPFUL TIP: Because partially ground coffee beans may remain between the burrs
after the Burr Grinder is turned off, it may be easier to select a ner grind setting while
the Burr Grinder is running.
This Burr Grinder offers 15 different grind levels, available in half-step increments from
1 to 8. Select the grind by turning the grind control dial to the desired setting on the
grind level ring, as shown in this chart. With continued use, you will be able to rene
the setting to match your own tastes.
GRIND
FINE ESPRESSO 325 microns 8
MEDIUM
COARSE FRENCH PRESS 1250 microns 1
COFFEE
TYPE
SIPHON
POUR OVER
AUTOMATIC DRIP
AVERAGE
GRIND SIZE
750 microns 6
SETTING
6 | BURR GRINDER SAFETY
Page 7

USING THE BURR GRINDER
ASSEMBLING AND RUNNING THE BURR GRINDER
NOTE: Before using the Burr Grinder, wipe the motor housing and cord with a clean
damp cloth. Wash the bean hopper and lid, and ground jar in hot soapy water, then
rinse and dry; or, wash in the top rack of a dishwasher.
Make certain the Burr Grinder is
unplugged. Attach the bean hopper
1
to the top of the motor housing,
turning clockwise until snug.
Fill the bean hopper and then attach
3
the lid.
Slide the ground jar onto the
jar platform, making certain it
2
is centered in the middle.
Select your desired grind setting,
4
using the “Grind setting chart”.
USING THE BURR GRINDER | 7
Page 8

USING THE BURR GRINDER
Plug the Burr Grinder into a
grounded outlet.
Flip the POWER switch up to turn
on, and begin grinding your coffee.
5
Flip the POWER switch down when
you have ground the desired amount
of coffee.
8 | USING THE BURR GRINDER
After grinding, remove the ground
jar from the Burr Grinder, and scoop
6
out the ground coffee.
Page 9

USING THE BURR GRINDER
ADJUSTING THE BURRS FOR A FINER OR COARSER GRIND
If you’re an espresso or French Press acionado, you may wish to adjust the factory
setting of the cutting burrs to provide optimum performance for your style of brewing.
Make sure the bean hopper is
empty; then, flip the POWER switch
1
up to turn on and run for a few
seconds to clear any debris.
Using a 4 mm allen wrench or a hexhead screwdriver, remove the screw
from the front of the grind control
dial by turning it counterclockwise.
3
You will be able to see the grind
control gear after the dial is
removed.
For maximum grind fineness: Turn
the grind control dial to level 8.
2
For maximum grind coarseness:
Turn the grind control dial to level 1.
For maximum grind fineness: Flip
the POWER switch up to turn on
the Burr Grinder.
4
For maximum grind coarseness:
You do not need to turn the Burr
Grinder on while adjusting the burrs.
NOTE: If you cannot get the exact
maximum coarseness of grind you prefer
by adjusting the Burr Grinder while it is
off, try adjusting with the Burr Grinder
turned on.
USING THE BURR GRINDER | 9
Page 10

USING THE BURR GRINDER
For maximum grind fineness: Turn
the grind control gear clockwise,
one “click” at a time until you hear
a distinct grating or rubbing sound
5a
that signifies the burrs are touching.
Then, turn the grind control gear
one “click” counterclockwise. The
grating or rubbing sound will stop.
Flip the POWER switch off.
If you adjusted for maximum grind
fineness: Reattach the grind control
dial, making certain the dial indicator
points to grind level 8.
6
If you adjusted for maximum grind
coarseness: Reattach the grind
control dial, making certain the dial
indicator points to grind level 1.
For maximum grind coarseness:
Turn the grind control gear
counterclockwise, one “click” at
5b
a time until the clicking sound
diminishes and the gear offers
little resistance to being turned.
IMPORTANT: If the Burr Grinder produces a grating or “rubbing” sound during use,
the burrs have been improperly adjusted. Damage to the burrs will result. Readjust
the burrs immediately.
10 | USING THE BURR GRINDER
Page 11

CARE AND CLEANING
CLEANING THE BURR GRINDER AND BURRS
IMPORTANT: To avoid damage, never wash or immerse the Burr Grinder main body,
cutting burrs, burr-shaft assembly, or face plate in water, or place in the dishwasher.
The bean hopper and lid and grind jar are dishwasher safe. Top rack only.
After using the Burr Grinder, remove
the bean hopper and lid, and grind
jar. Wash these pieces by hand with
1
a soft cloth, in warm sudsy water;
or, wash in the top rack of the
dishwasher.
Remove the faceplate assembly by
loosening the screws on either side.
3
Screws can be loosened by hand.
IMPORTANT: If the Burr Grinder is used frequently, the burrs should be cleaned
regularly for best performance. Cleaning enables the burrs to achieve the nest,
most consistent grinds possible.
Clean the Burr Grinder main body
and all its parts by hand only.
Wash with a soft, damp cloth. Dry
2
thoroughly with a soft dry cloth. Do
not wash in the dishwasher. Do not
immerse in water.
Pull the burr-shaft assembly out to
clean with the other parts. Using the
burr-cleaning brush, clean the burr
4
mounted on the burr-shaft assembly
and the burr mounted in the motor
housing.
CARE AND CLEANING | 11
Page 12

TROUBLESHOOTING
If your Burr Grinder should malfunction or fail to operate during use, please check
the following:
- If the Burr Grinder runs when switched
on, but coffee does not grind: The burrs
require cleaning or are worn. Refer
to “Care and cleaning” section for
detailed information on cleaning
the cutting burrs.
- If the Burr Grinder is operating normally,
but stops abruptly: Immediately turn
off the Burr Grinder. A coffee bean,
may have jammed the cutting burrs.
Refer to “Care and cleaning” section
for detailed information on cleaning
the cutting burrs.
- If the grind is too coarse, or the Burr
Grinder isn’t producing an acceptable
range of grinds: Refer to the “Adjusting
the burrs for a ner or coarser grind”
section for more information.
If the problem is not due to one of
the above items, see your warranty.
Do not return the Burr Grinder to the
- Is the Burr Grinder plugged in? Check to
see if the Burr Grinder is plugged into a
grounded outlet. If it is, unplug the Burr
Grinder, then plug it into the same outlet
again. If it still does not work, check the
fuse or circuit breaker on the electrical
circuit the Burr Grinder is connected
to and make sure the circuit is closed.
If it does not run after taking these
steps, a foreign object may be jamming
the cutting burrs. Refer to “Care and
cleaning” section for detailed information
on cleaning the cutting burrs.
retailer, as they do not provide service.
12 | TROUBLESHOOTING
Page 13

Page 14

Page 15

Page 16

W10790652A
Specications subject to change without notice.
© 2015. All rights reserved.
07/15
 Loading...