How it Works
Log In / Sign Up
Buy Points
How it Works
FAQ
Contact Us
Questions and Suggestions
Users
Kenwood
Loading...
K
KDCS-4060-RG
KDCS-4060-RYA
KDCS-4060-RYG
KDCW-5041-UA
KDCW-5041-UG
KDCX692
3
KDCZ-727
KDG119S
KDG2019V
2
KDG217S
2
KDG29MR
2
KDGC719MP
KDGCX89
KDGMPV7019
KDS-100
3
KDS-P100
2
KDS-P110
KDS-P900
5
KDS-P901
2
KDV-3241Y
11
KDV-412
4
KDV-415U
KDV-4244
14
KDV-4544
14
KDV-5234
9
KDV-5234Y
KDV-5241U
6
KDV-5241UY
2
KDV-5244U
15
KDV-5544U
14
KDV-7241
13
KDV-7241U
KDV-7241Y
2
KDV-C810
3
KDV-C820
6
KDV-C830
5
KDV-C840
5
KDV-C860
5
KDV-MP3346
2
KDV-MP3346M
3
KDV-MP4339
3
KDV-MP4439
4
KDV-MP4443
2
KDV-MP5032
4
KDV-MP5042U
4
KDV-MP5443U
2
KDV-MP6032U
5
KDV-MP6333
5
KDV-MP6339U
5
KDV-MP6433
5
KDV-MP6439U
5
KDV-MP7032
4
KDV-MP7339
4
KDV-MP735
8
KDV-MP7439
4
KDV-MP765
3
KDV-S210P
2
KDV-S211P
KDV-S220P
2
KDV-S221P
2
KDVS-230-P
2
KDVS-240-P
2
KDV-S250P
3
KDV-U4349
3
KDV-U4349M
3
KDV-U4449
3
KDV-Z920DVD
KDV-Z930
2
KDV-Z940
2
KDV-Z960
2
KDW1274W
2
KDW12SL3A
2
KDW12SS
KDW12SS/B
KDW12ST3A
2
KDW243A
KDW24FI
KDW24FI/B
KDW45S13
KDW45X10
KDW45X13
KDW4TTSL
2
KDW60S12
2
KDW60T18
KDW60W10
2
KDW60X10
KDW60X13
KDW60X18
KDW8ST2A
KDWTTB10
KE-205
4
KE-2060
KE-294
KE-597
7
KE-7090
KE-894
3
KEC-1000
2
KEC-101
KEC-1100
KEC-1921
Loading...
Loading...
Nothing found
KDV-MP6439U
User Manual
8 pgs
184.16 Kb
0
User Manual
6 pgs
503.29 Kb
0
User Manual
52 pgs
3.43 Mb
0
User Manual [ar]
52 pgs
3.46 Mb
0
User Manual [zh]
52 pgs
3.77 Mb
0
Table of contents
Loading...
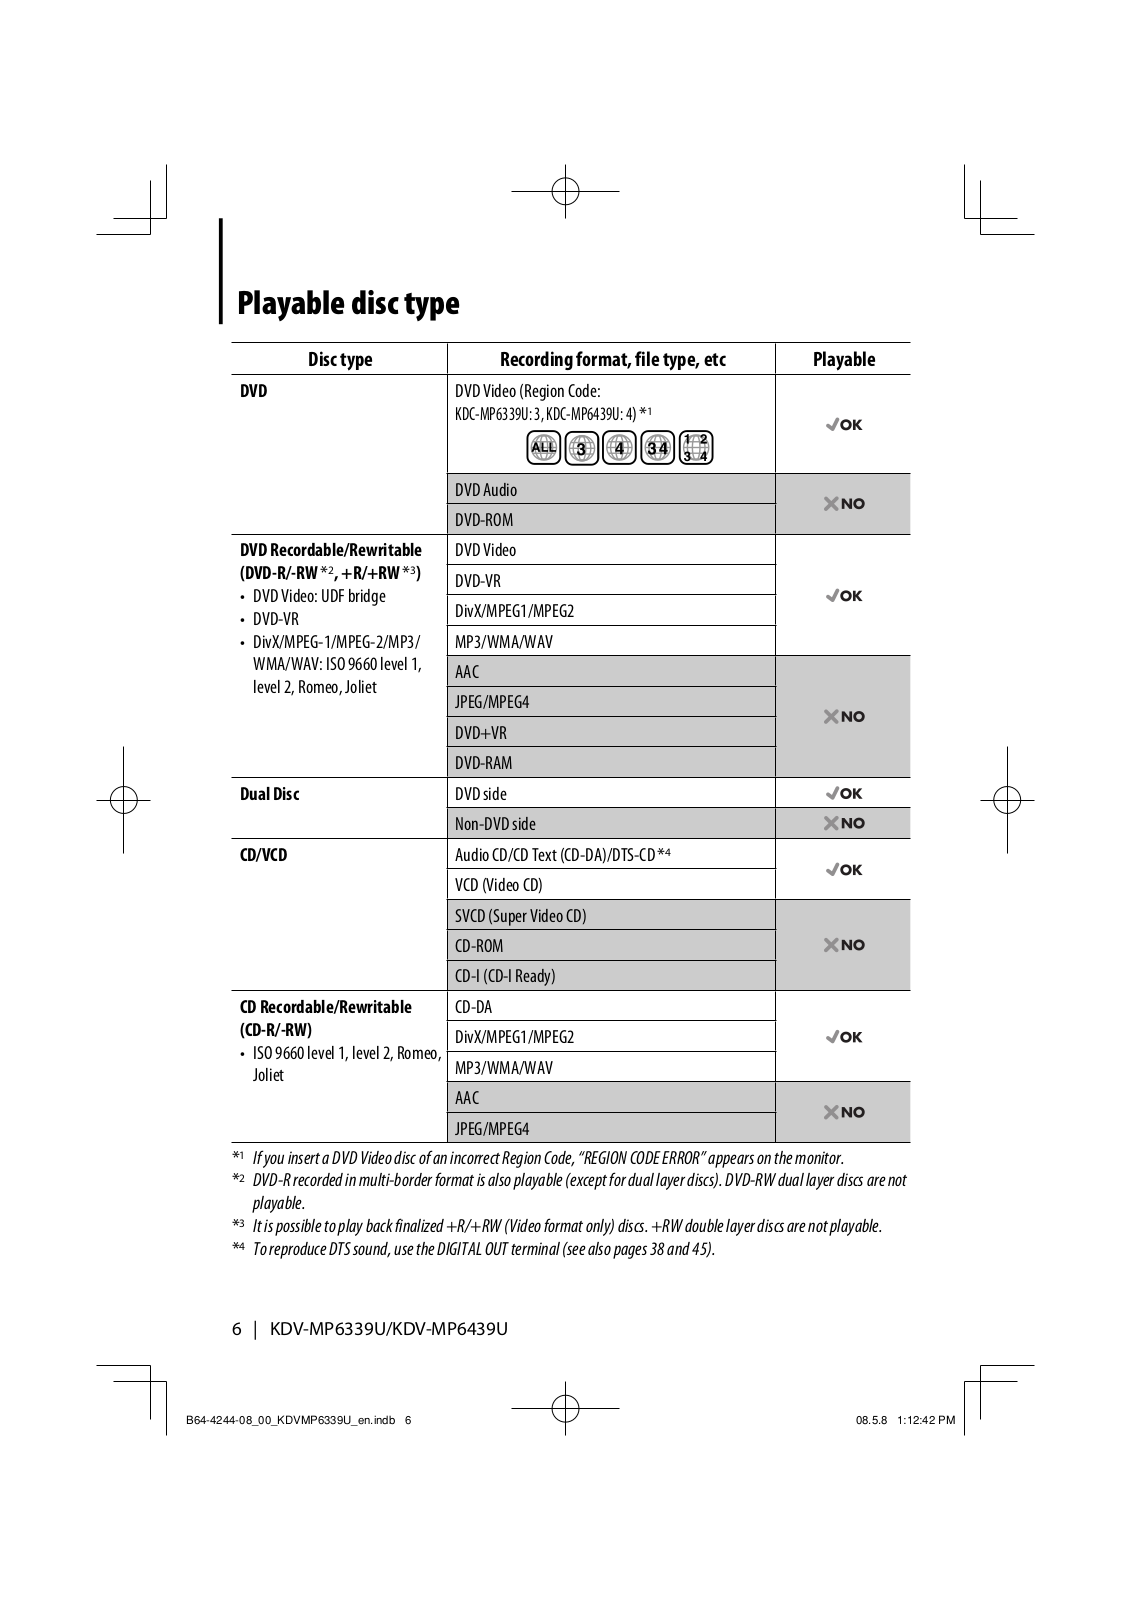
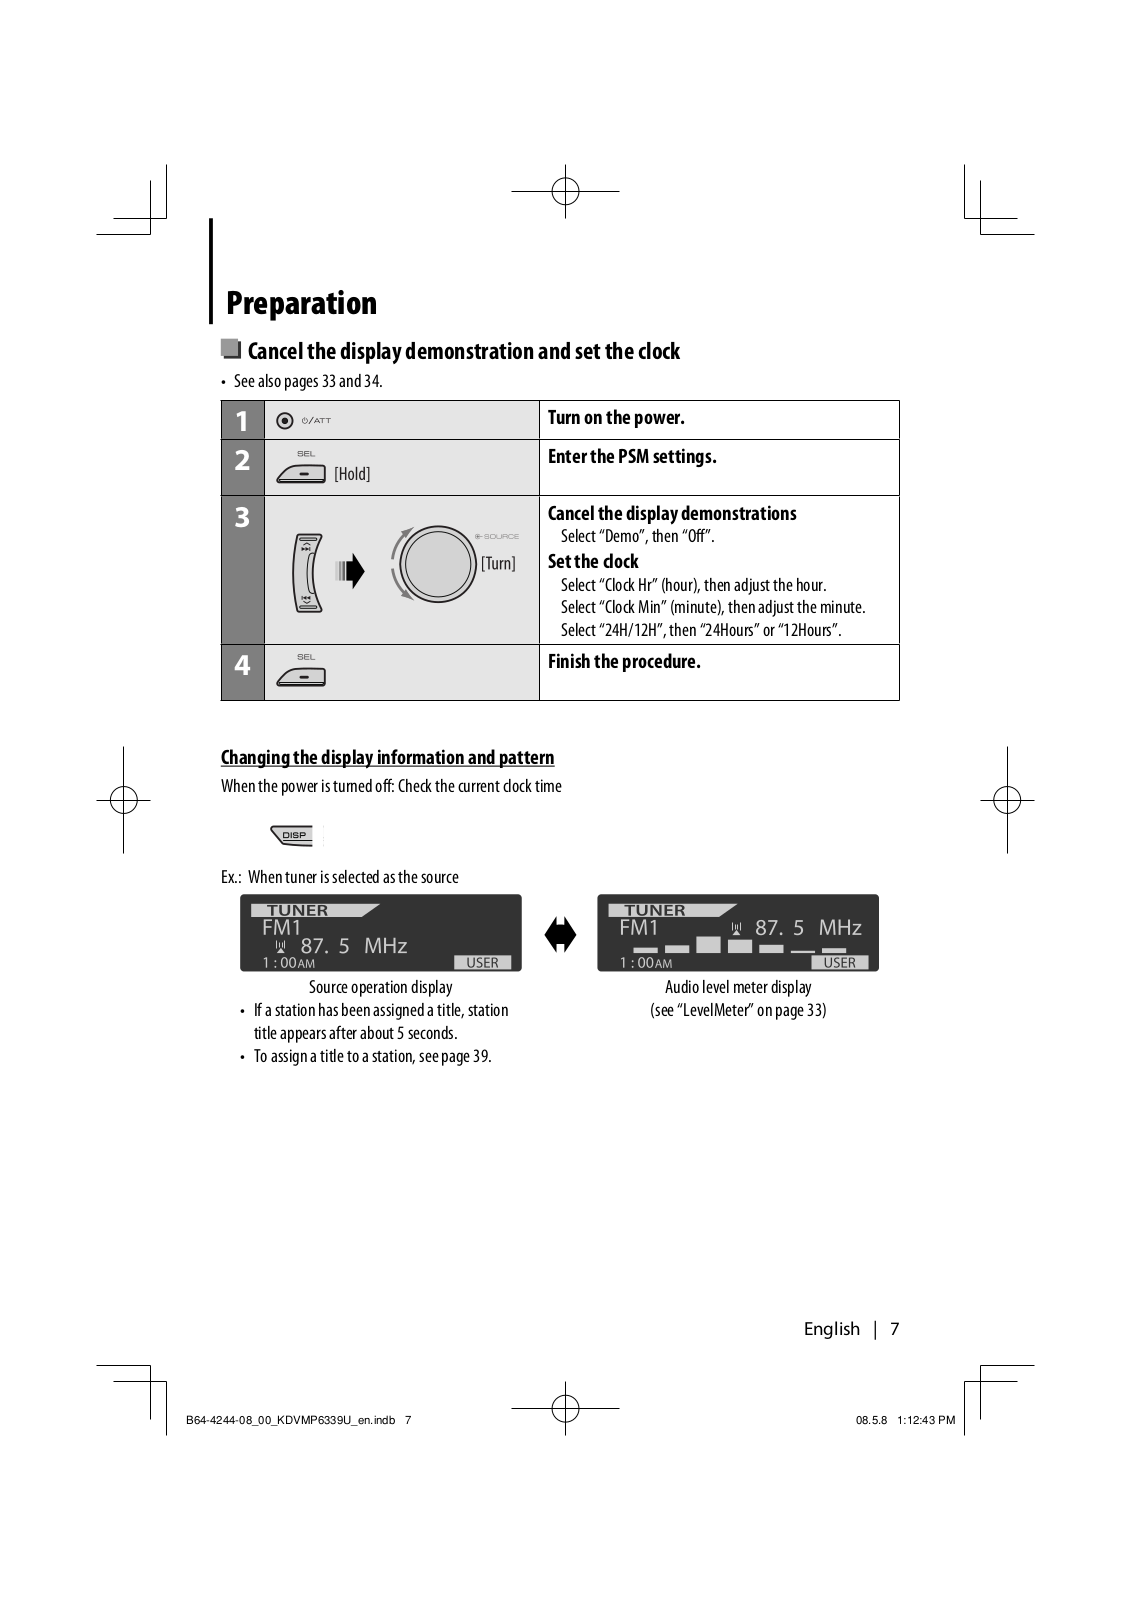
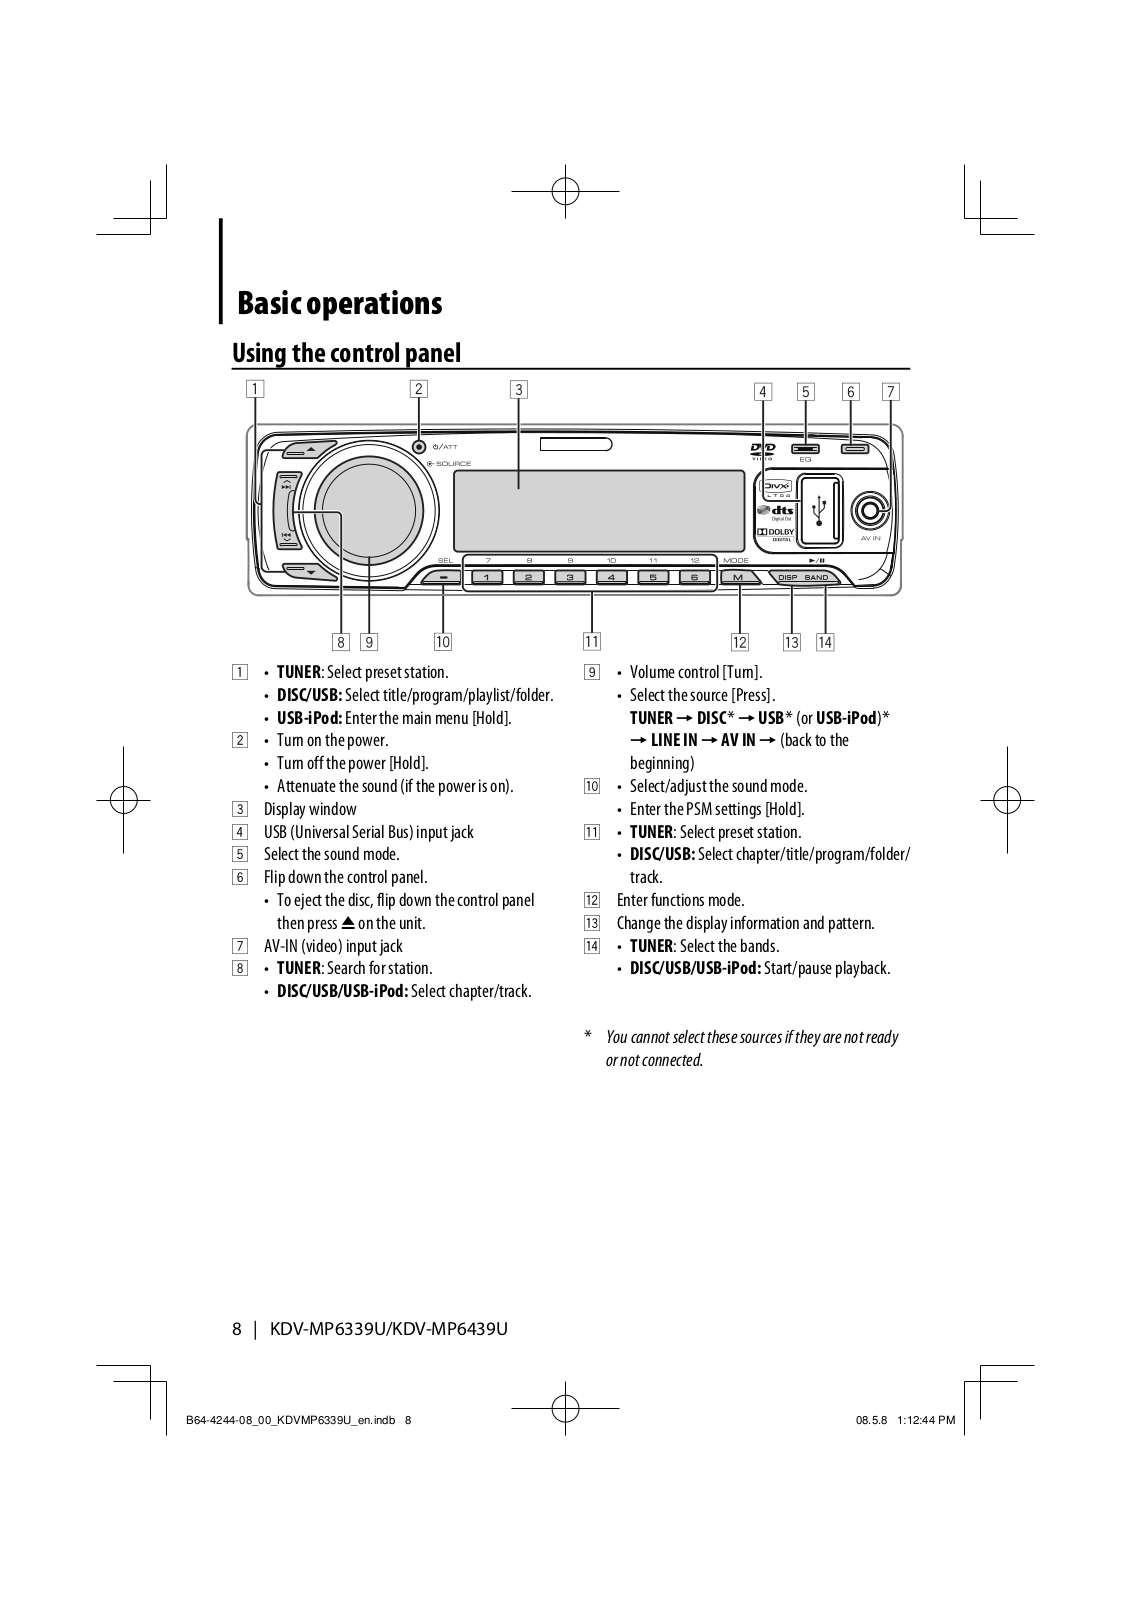
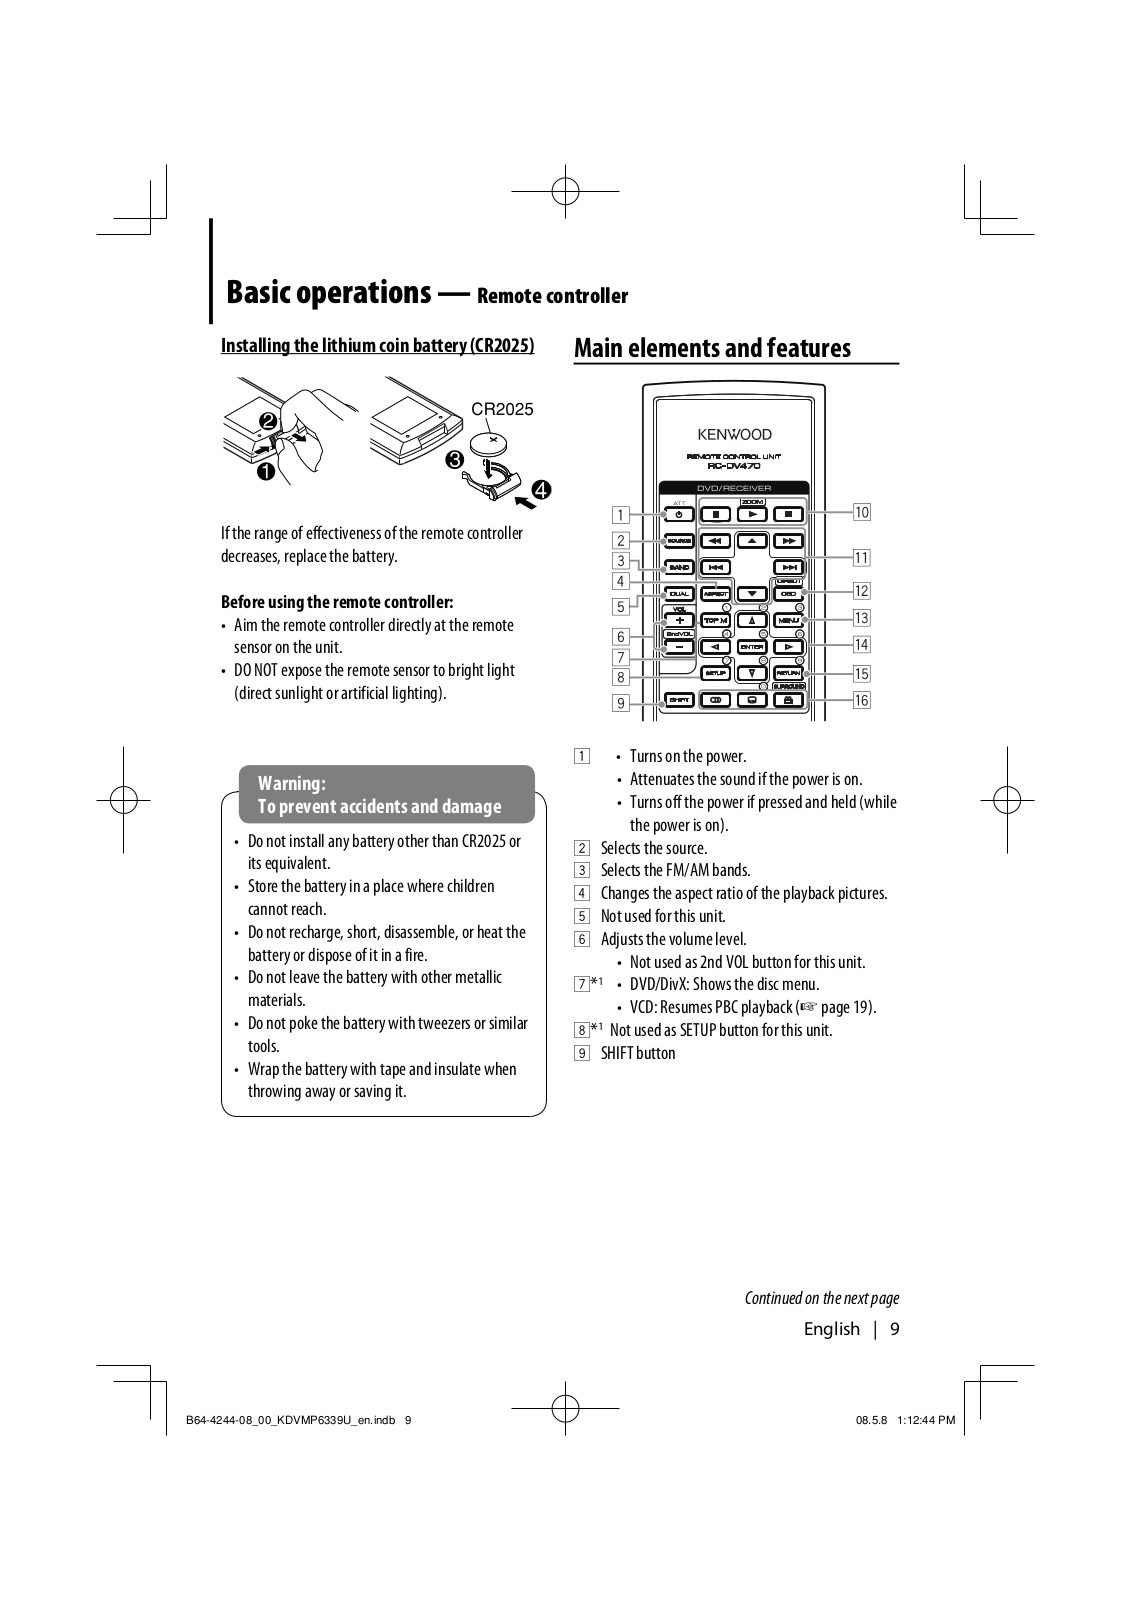
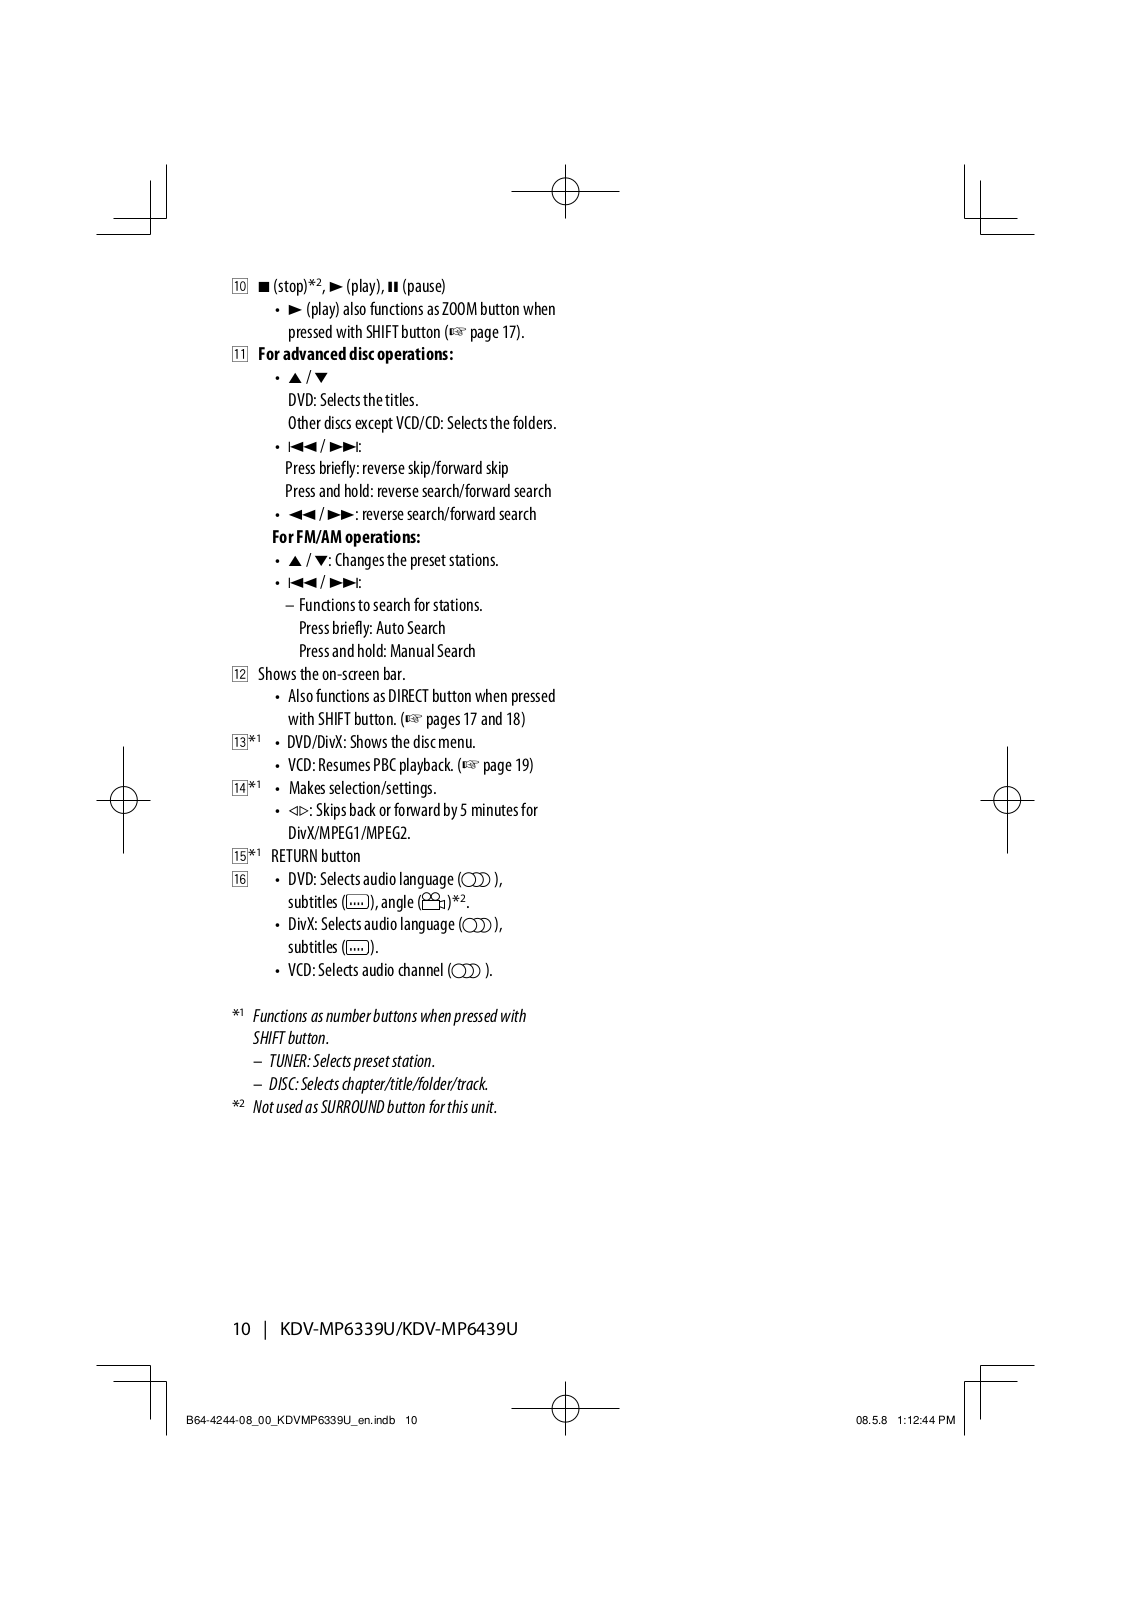
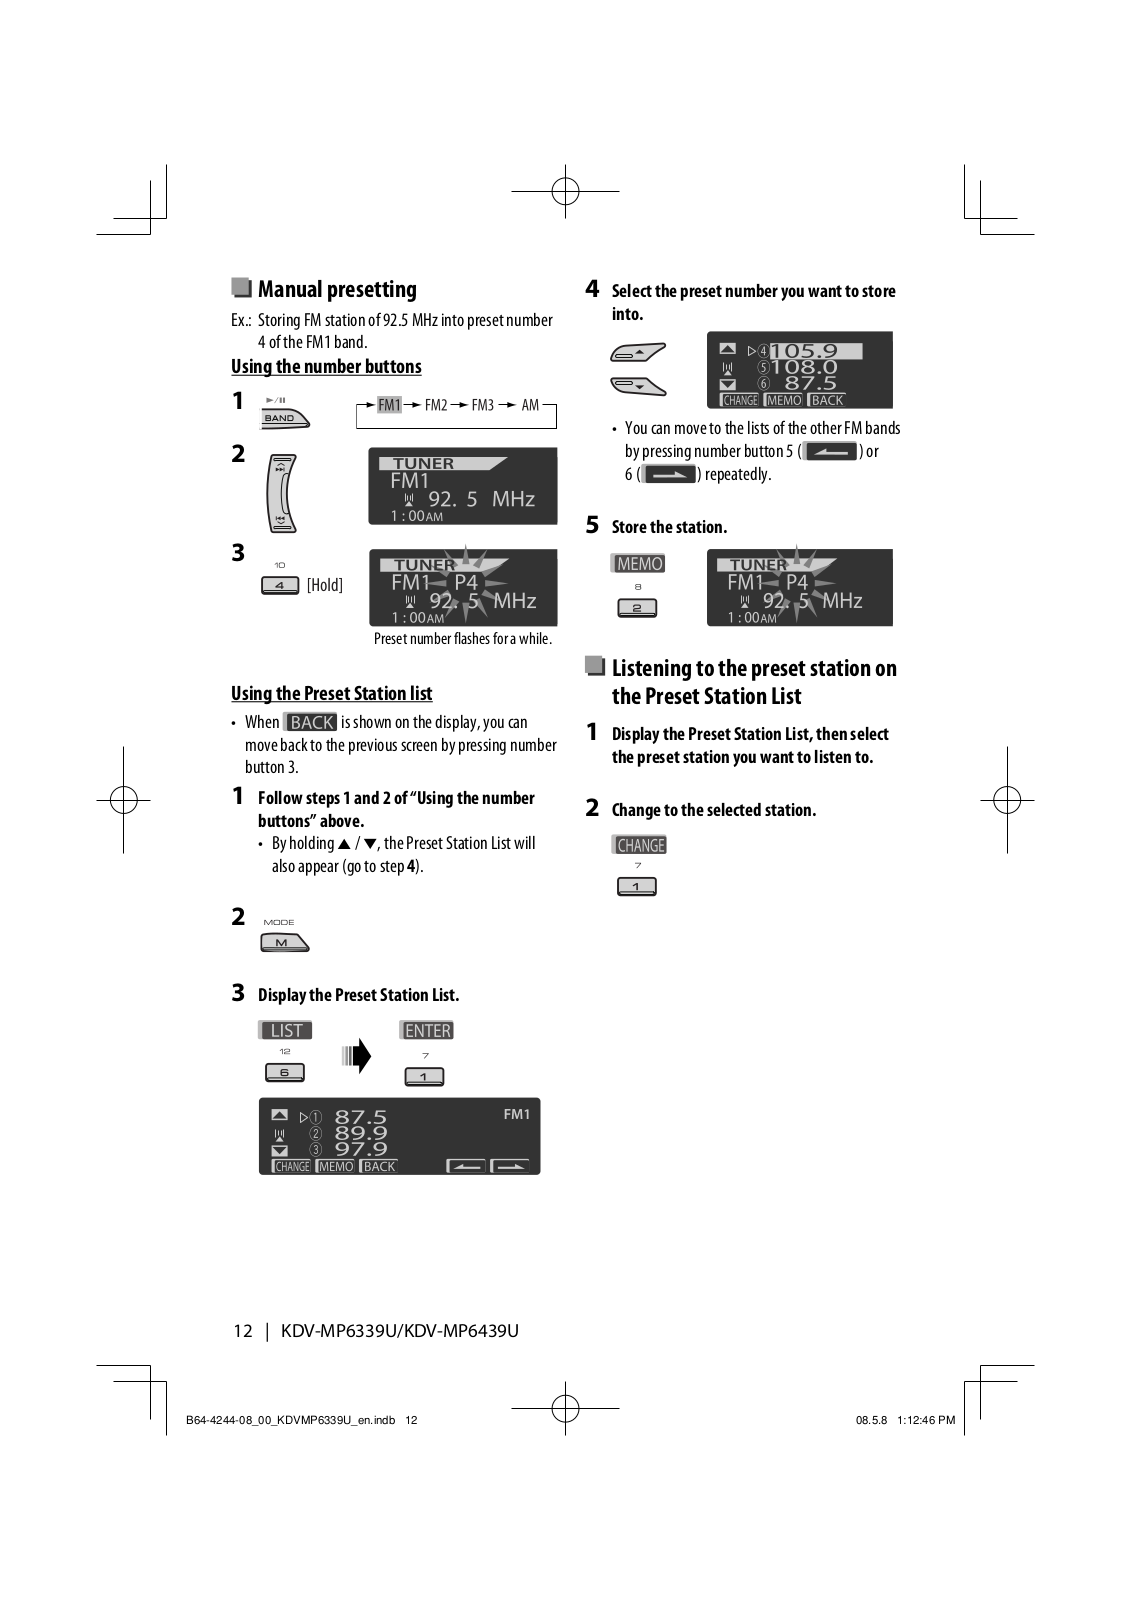
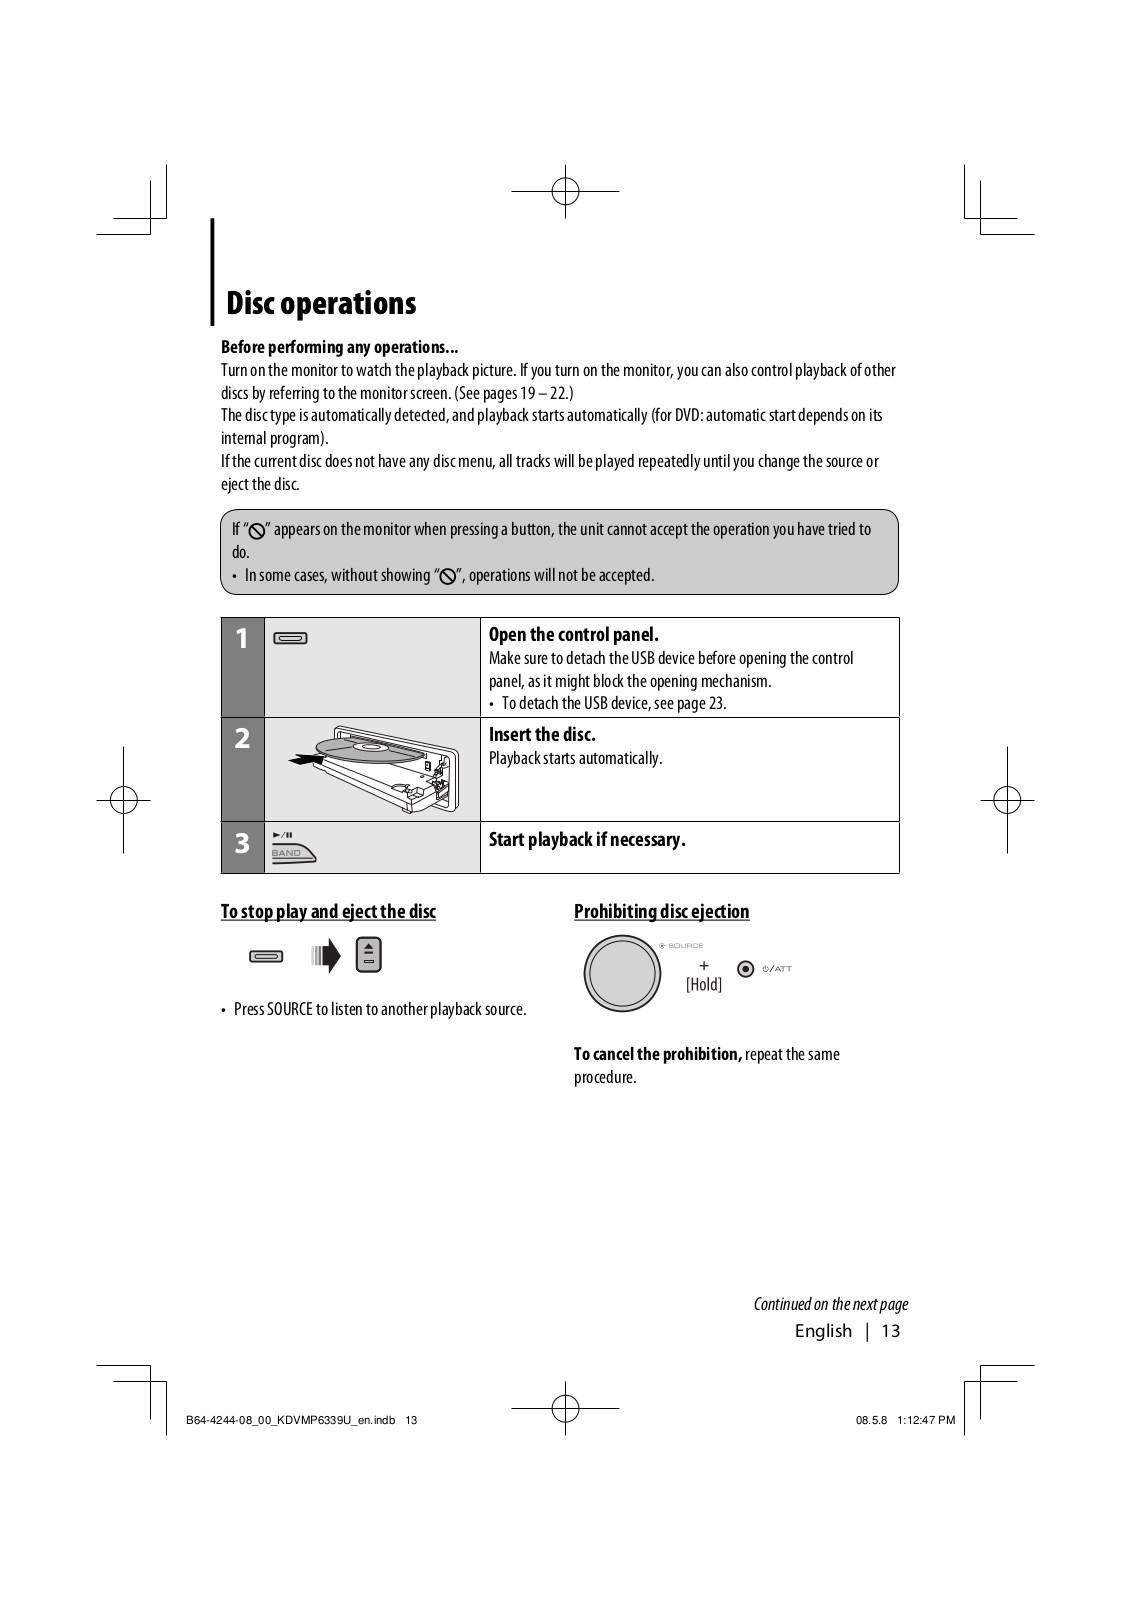
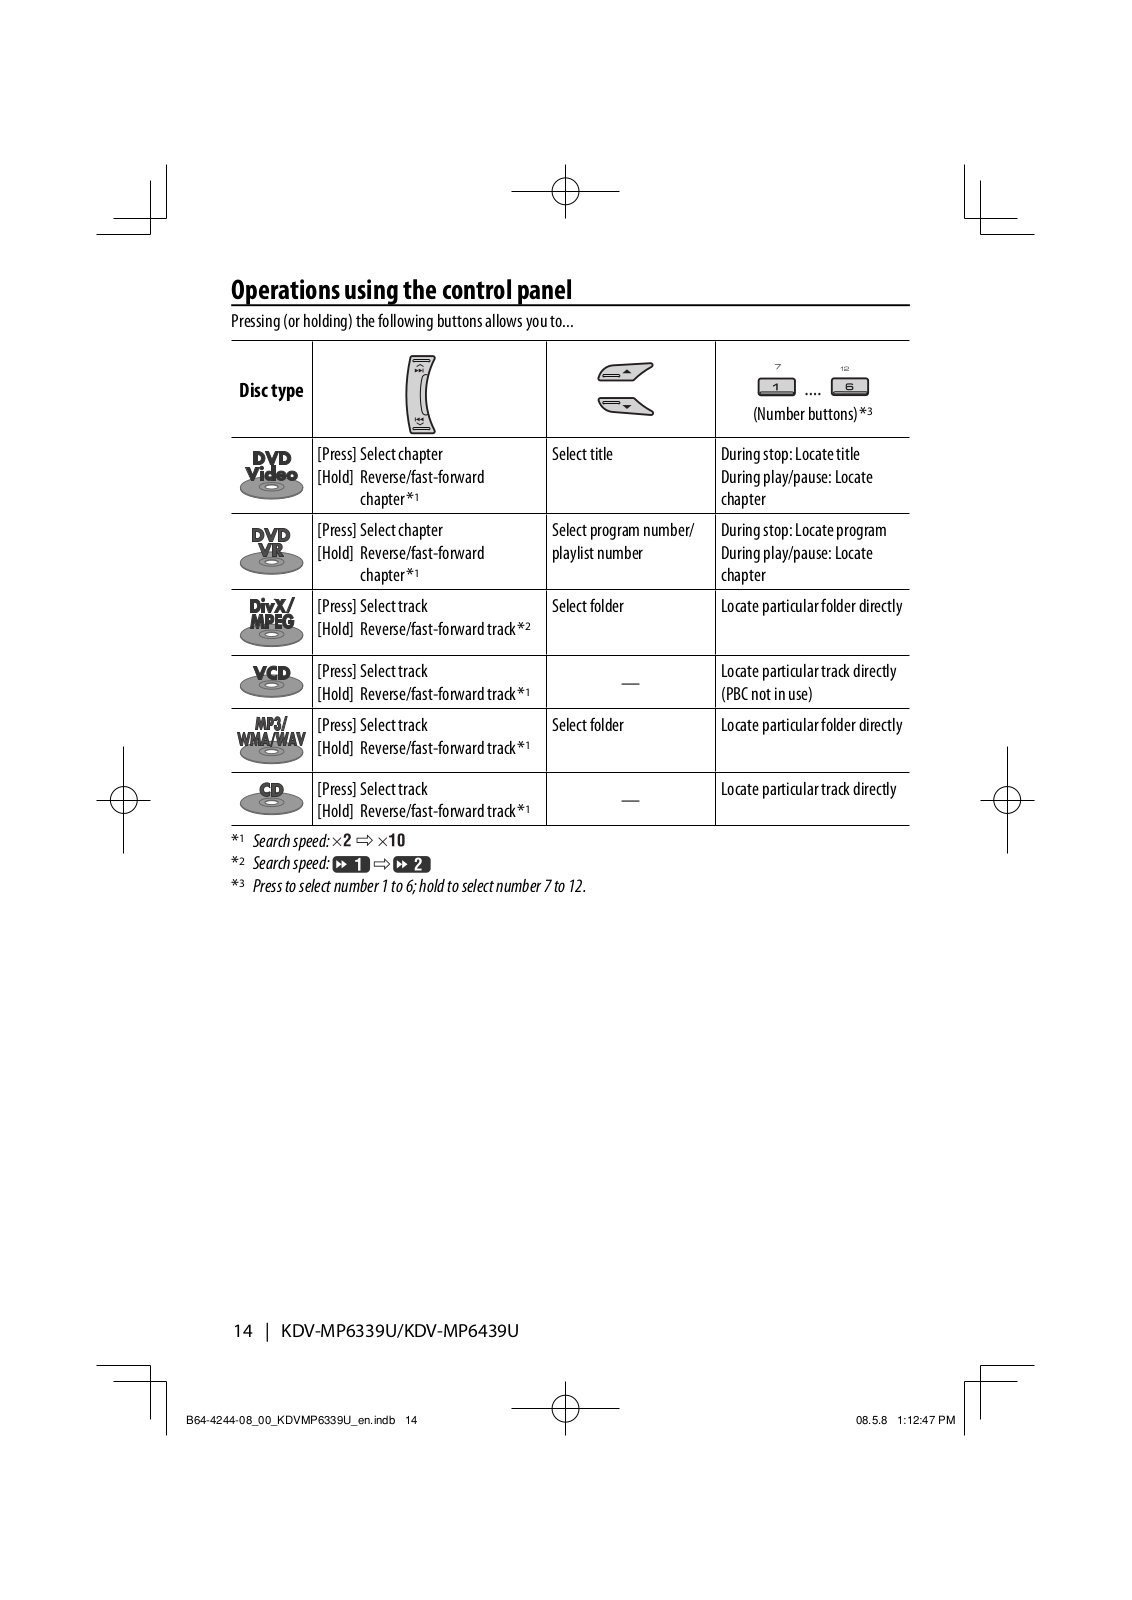
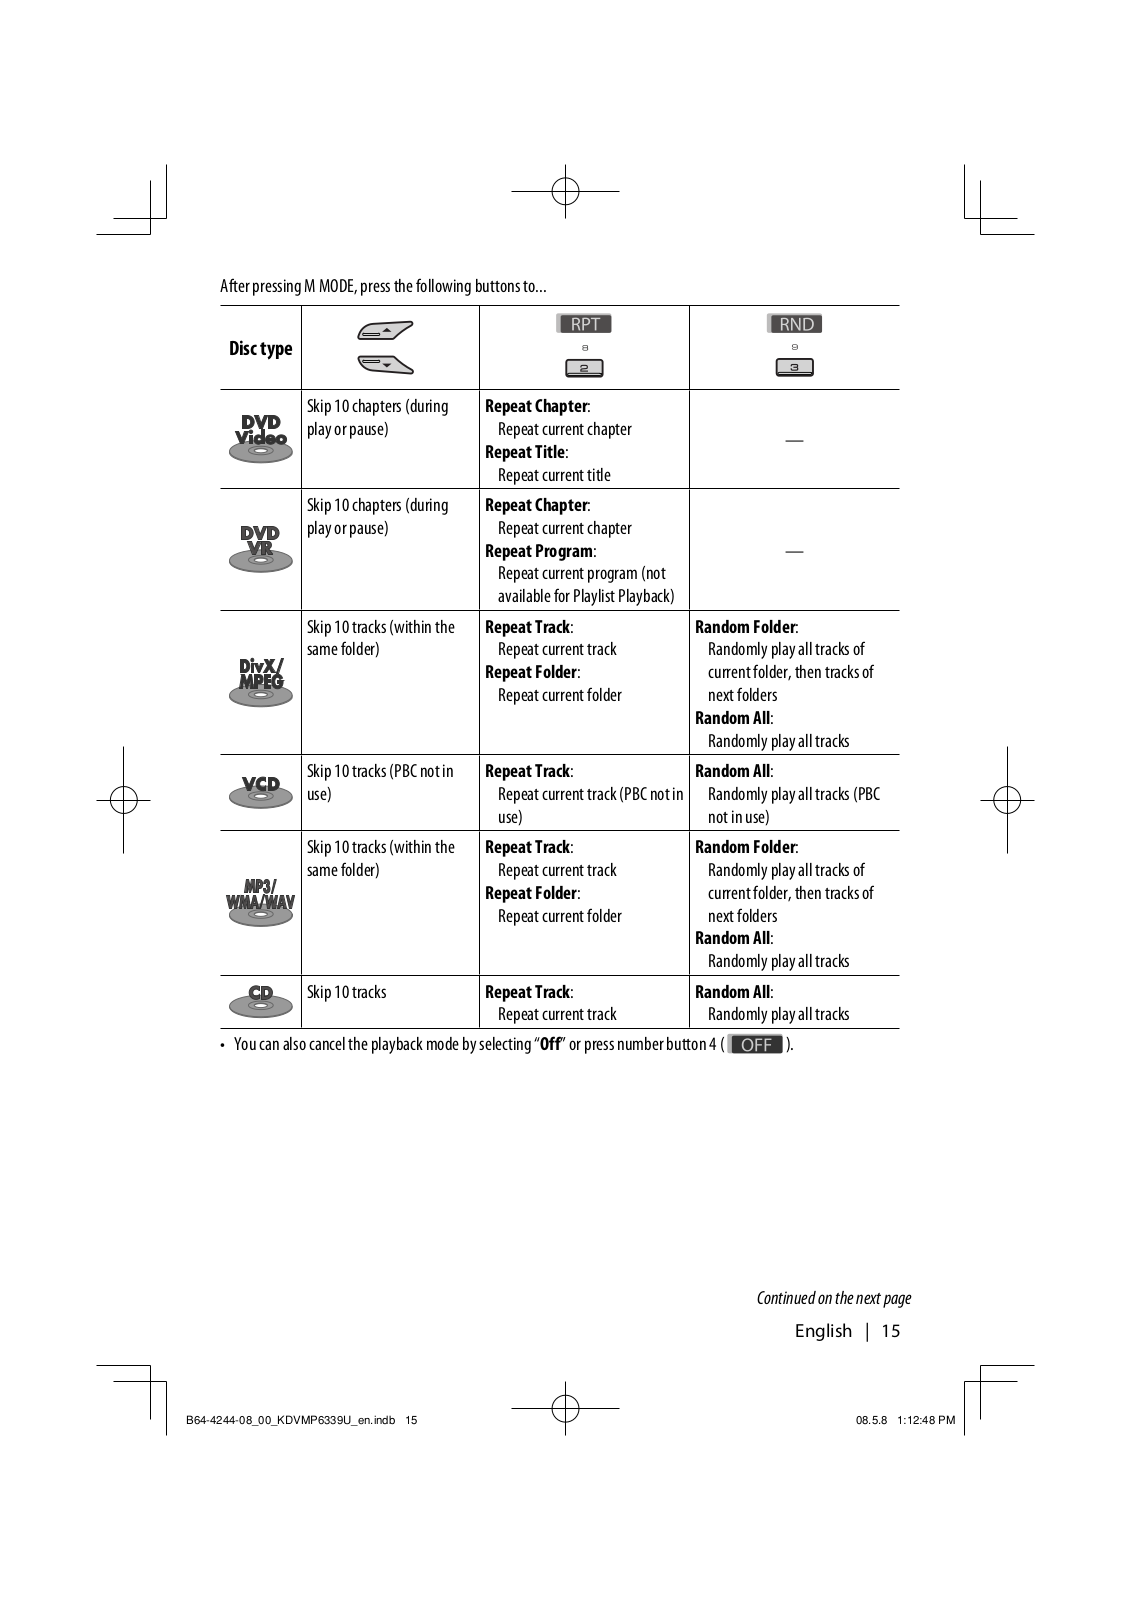
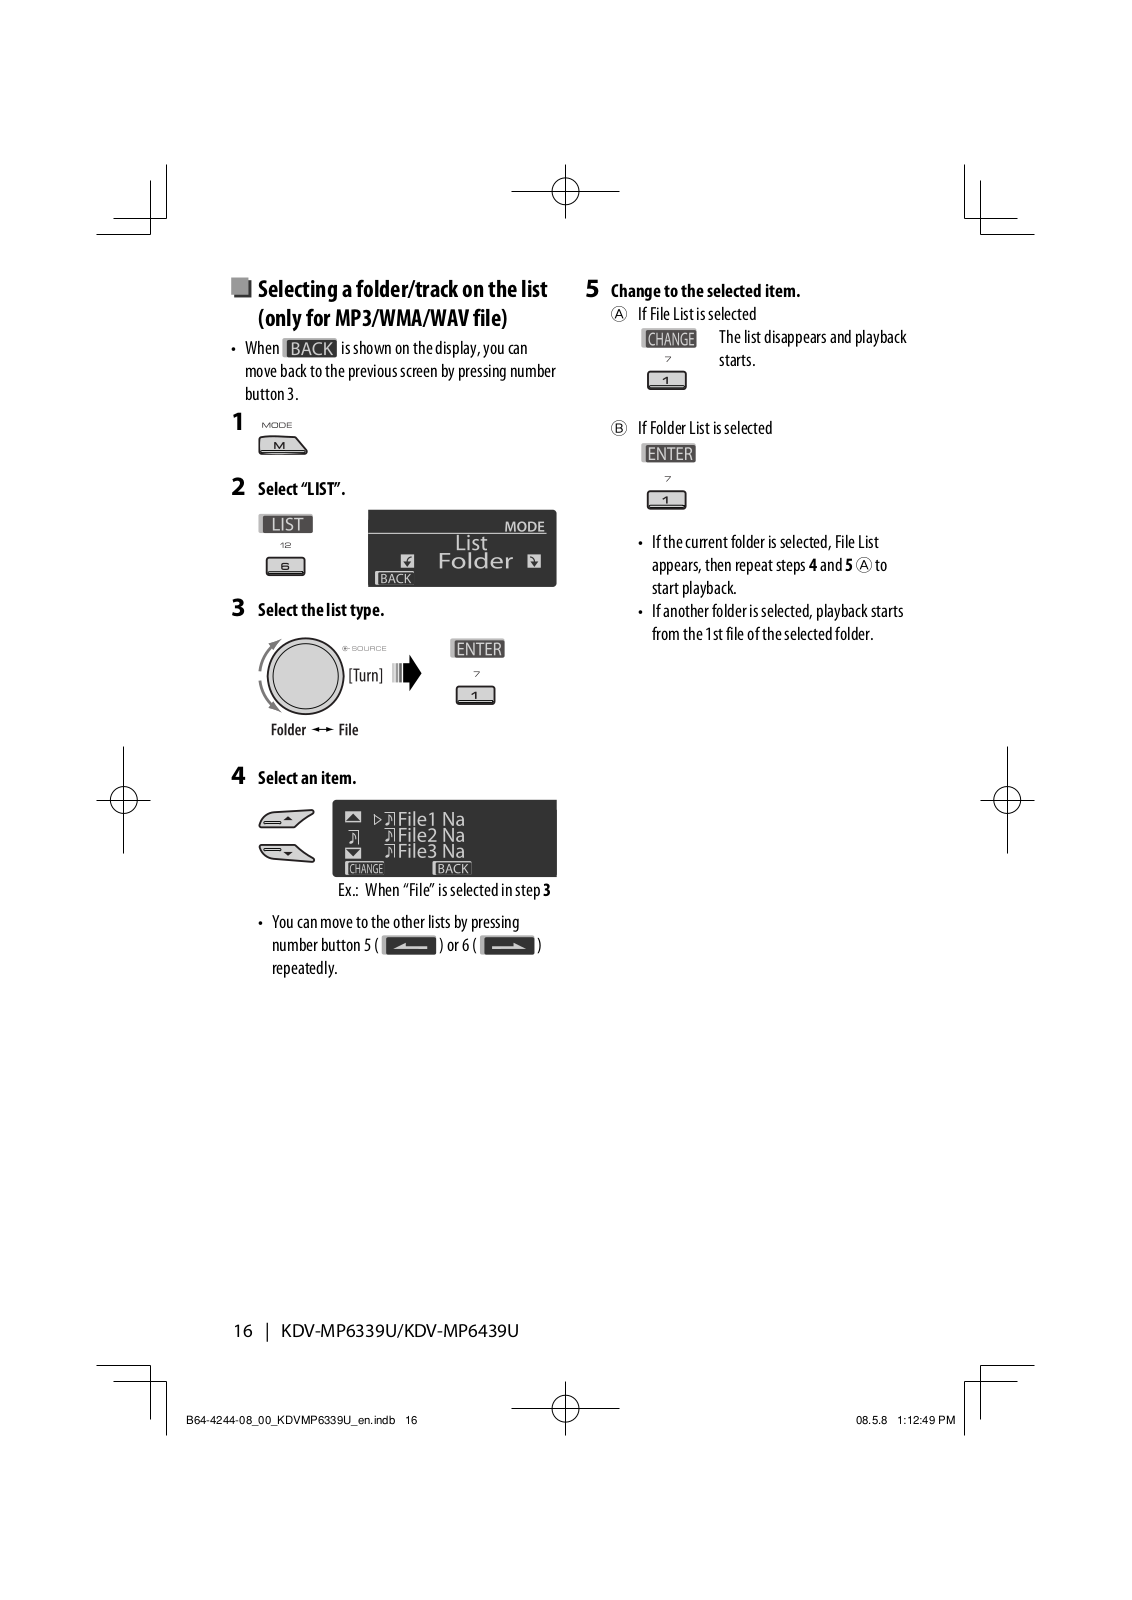
Kenwood KDV-MP6439U, KDV-MP6339U User Manual
...
Kenwood User Manual
Download
Specifications and Main Features
Frequently Asked Questions
User Manual
Download
Loading...
+
36
hidden pages
Unhide
You need points to download manuals.
1 point = 1 manual.
You can buy points or you can get point for every manual you upload.
Buy points
Upload your manuals
 Loading...