

DNX8160S
DNX8160SM
DNX8160DABS
GPS NAVIGATION SYSTEM
Quick Start Guide
• Updated information (the latest Instruction Manual, system updates, new functions, etc.) is available from
<http://www.kenwood.com/cs/ce/>.
B5K-0220-00 b (MN/M2N/XN)© 2016 JVC KENWOOD Corporation
Contents
Before use .................................................................................2
About the Quick star t guide ..........................................................................2
How to read this manual ..................................................................................2
Precautions ............................................................................................................... 2
Safety Precautions and Impor tant Information ................................ 4
Initial settings .......................................................................... 5
Initial setup ................................................................................................................5
Basics .......................................................................................... 6
Functions of the Buttons on the Front Panel ..................................... 6
How to insert an SD Card ................................................................................. 6
Operating with the HOME Screen ............................................................. 7
Common Operations .........................................................................................8
Navigation ................................................................................ 9
How to Use the Navigation System .......................................................... 9
DVD/ VCD ................................................................................ 10
Playing a disc..........................................................................................................10
Playback operations ..........................................................................................11
Video menu operations ..................................................................................11
Discs/ USB/ iPod/ SD/ APP ................................................12
Preparation ..............................................................................................................12
How to Play Music ..............................................................................................13
Playback operations ..........................................................................................13
Apple CarPlay ........................................................................................................14
Android Auto™ ......................................................................................................15
Mirroring Operation ..........................................................................................15
Radio/ Digital Radio ............................................................16
Radio Basic Operation......................................................................................16
Digital Radio Basic Operation .....................................................................16
Bluetooth smartphone ......................................................18
Register your smartphone to the unit ..................................................18
Receive a phone call .........................................................................................18
Make a phone call ...............................................................................................19
Controlling Audio ................................................................20
Controlling General Audio ........................................................................... 20
Equalizer Control ................................................................................................20
Installation .............................................................................. 21
Before Installation ...............................................................................................21
Installing the unit ............................................................................................... 22
About this Unit ......................................................................29
Before use
About the Quick start guide
This Quick Star t Guide describes basic functions of this unit.
For functions not described in this Guide, refer to the
Instruction Manual on the following website:
http://manual.kenwood.com/edition/im391/
To refer to Instruction manual, a PC loaded with Microsoft®
Windows XP/Vista/7/8/10 or Mac OS X® 10.4 or later is required
in addition to Adobe® Reader™ 7.1 or Adobe® Acrobat® 7.1 or
late r.
The Instruction manual is subject to change for modification
of specifications and so forth. Be sure to download the latest
edition of the Instruc tion manual for reference.
How to read this manual
• The panels shown in this guide are examples used to
provide clear explanations of the operations. For this
reason, they may be different from the actual panels.
• In operation procedures, bracket shape indicates the key or
button you should control.
< >: indicates the name of panel buttons.
[ ]: indicates the name of touch keys
Precautions
#WARNING
Ñ To prevent injury or re, take the following
precautions:
• To prevent a short circuit, never put or leave any metallic
objects (such as coins or metal tools) inside the unit.
• Do not watch or fix your eyes on the unit’s display when
you are driving for any extended period.
• If you experience problems during installation, consult
your KENWOOD dealer.
Ñ Precautions on using this unit
• When you purchase optional accessories, check with
your KENWOOD dealer to make sure that they work with
your model and in your area.
• You can select language to display menus, audio file
tags, etc. See U ser Interfa ce Setup (P.66) in the
Instruction Manual.
• The Radio Data System or Radio Broadcast Data System
feature won’t work where the ser vice is not supported
by any broadcasting station.
• The unit may not function properly if the connec tors
between the unit and front panel are dirty. Detach the
front panel and clean the connector with a cotton swab
gently, being careful not to damage the connector.
Ñ Precautions on battery
• Put the remote control in a place where it will not
move during braking or other operations. A dangerous
situation could result, if the remote control falls down
and gets wedged under the pedals while driving.
• Do not leave the battery near fire or under direct
sunlight. A fire, explosion or excessive heat generation
may result.
• Do not recharge, short, break up or heat the battery
or place it in an open fire. Such actions may cause the
battery to leak fluid. If spilled fluid comes in contact with
your eyes or on clothing, immediately rinse with water
2
Before use
and consult a physician.
• Place the battery out of reach of children. In the unlikely
event that a child swallows the battery, immediately
consult a physician.
Ñ Protecting the monitor
• To protect the monitor from damage, do not operate
the monitor using a ballpoint pen or similar tool with
the sharp tip.
Ñ Lens fogging
When you turn on the car heater in cold weather, dew or
condensation may form on the lens in the disc player of
the unit. Called lens fogging, this condensation on the lens
may not allow discs to play. In such a situation, remove the
disc and wait for the condensation to evaporate. If the unit
still does not operate normally after a while, consult your
KENWOOD dealer.
Ñ Precautions on handling discs
• Do not touch the recording surface of the disc.
• Do not stick tape etc. on the disc, or use a disc with tape
stuck on it.
• Do not use disc t ype accessories.
• Clean from the center of the disc and move outward.
• When removing discs from this unit, pull them out
horizontally.
• If the disc center hole or outside rim has burrs, use the
disc only after removing the burrs with a ballpoint pen
etc.
• Discs that are not round cannot be used.
• 8-cm (3 inch) discs cannot be used.
• Discs with coloring on the recording sur face or discs that
are dirty cannot be used.
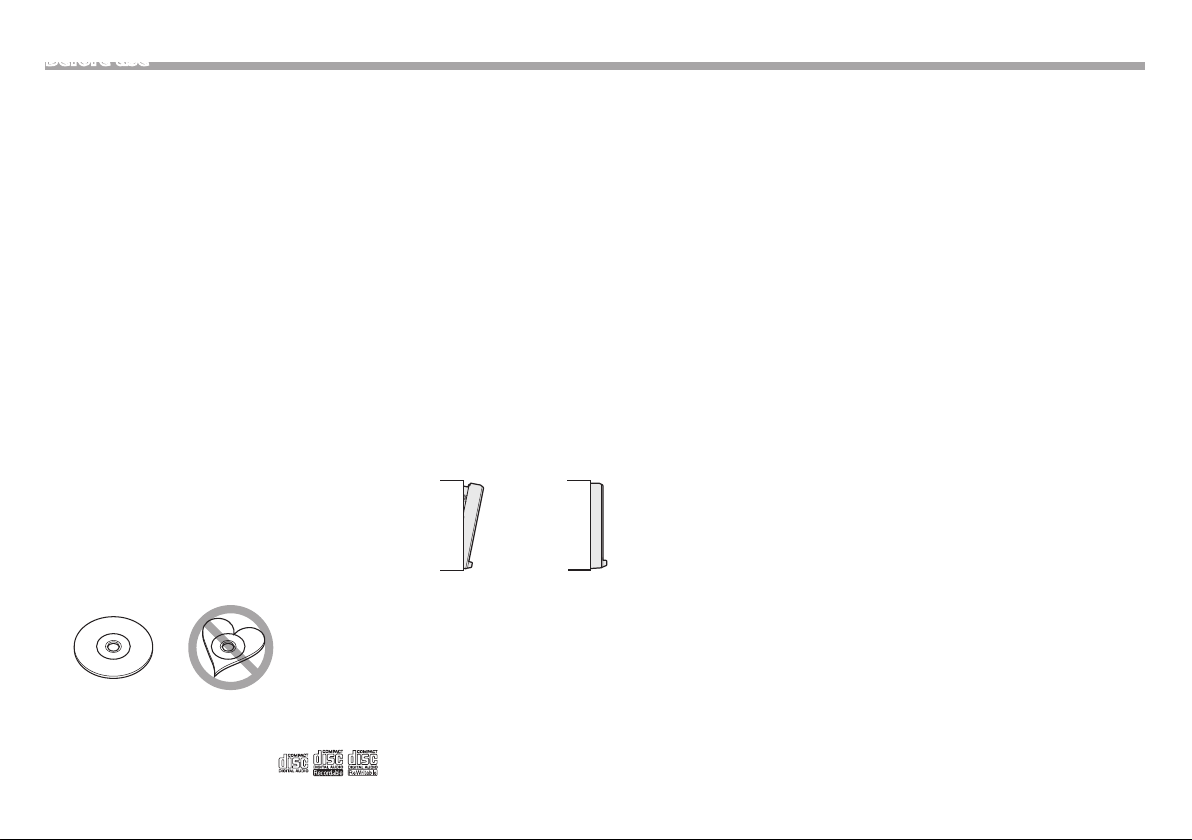
• This unit can only play the CDs with
This unit may not correctly play discs which do not have
the mark.
• You cannot play a disc that has not been finalized. (For
the finalization process see your writing soft ware, and
your recorder instruction manual.)
Ñ Acquiring GPS signal
The first time you turn on this unit, you must wait while
the system acquires satellite signals for the first time.
This process could take up to several minutes. Make sure
your vehicle is outdoors in an open area away from tall
buildings and trees for fastest acquisition.
After the system acquires satellites for the first time, it will
acquire satellites quickly each time thereaf ter.
Ñ About the front panel
When removing the produc t from the box or installing it,
the front panel may be positioned at the angle shown in
(Fig. 1). This is due to the characteristics of mechanism the
product is equipped with.
When the product is first powered on works properly, the
front panel will automatically move into the position (initial
setting angle) shown in (Fig. 2).
(Fig. 1) (Fig. 2)
Ñ Cleaning the Unit
If the front panel of this unit is stained, wipe it with a
dry sof t cloth such as a silicon cloth. If the front panel is
stained badly, wipe the stain off with a cloth moistened
with neutral cleaner, then wipe it again with a clean soft
dry cloth.
! CAUTION
• Applying spray cleaner directly to the unit may affect its
mechanical parts. Wiping the front panel with a hard cloth
or using a volatile liquid such as thinner or alcohol may
.
scratch the sur face or erase screened print.
English |
3

Before use
Safety Precautions and Important Information
Read this information carefully before starting to operate the
KENWOOD Car Navigation System and follow the instructions
in this manual. Neither KENWOOD nor Garmin shall be liable
for problems or accidents resulting from failure to obser ve
the instructions in this manual.
#WARNING
Failure to avoid the following potentially hazardous
situations could result in an accident or collision resulting
in death or serious injur y.
When navigating, carefully compare information displayed
on the navigation system to all available navigation sources,
including information from street signs, visual sightings,
and maps. For safety, always resolve any discrepancies or
questions before continuing navigation.
Always operate the vehicle in a safe manner.
Do not become distrac ted by the navigation system while
driving, and always be fully aware of all driving conditions.
Minimize the amount of time spent viewing the screen of
the navigation system while driving, and use voice prompts
when possible.
Do not enter destinations, change settings, or access any
functions requiring prolonged use of the navigation system
controls while driving. Stop your vehicle in a safe and legal
manner before attempting such operations.
Keep the system volume at a low enough level to be able to
hear outside noises while driving. If you can no longer hear
outside noises, you may be unable to react adequately to the
traffic situation. This may cause accidents.
The navigation system will not display the correct current
position of the vehicle the first time it is used after purchase,
or if the vehicle battery is disconnected. GPS satellite signals
will soon be received, however, and the correc t position will
be displayed.
Be careful of the ambient temperature. Using the navigation
system at ex treme temperatures can lead to malfunction or
damage. Also note that the unit can be damaged by strong
vibration, by metal objects, or by water getting inside the
unit.
#CAUTION
Failure to avoid the following potentially hazardous
situations may result in injury or propert y damage.
The navigation system is designed to provide you with
route suggestions. It does not reflect road closures or road
conditions, weather conditions, or other factors that may
affect safety or timing while driving.
Use the navigation system only as a navigational aid. Do
not attempt to use the navigation system for any purpose
requiring precise measurement of direction, distance,
location, or topography.
The Global Positioning System (GPS) is operated by the
United States government, which is solely responsible for
its accuracy and maintenance. The government system
is subject to changes that could affect the accuracy and
performance of all GPS equipment, including the navigation
system. Although the navigation system is a precision
navigation device, any navigation device can be misused or
misinterpreted and, therefore, become unsafe.
IMPORTANT INFORMATION
Ñ Vehicle Battery Preservation
This navigation system can be used when the ignition key
is turned to ON or ACC. To preserve the battery, however,
it should be used with the engine running whenever
possible. Using the navigation system for a long time
with the engine switched off can cause the battery to run
down.
Ñ Map Data Information
One of the goals of Garmin is to provide customers with
the most complete and accurate cartography that is
available to us at a reasonable cost. We use a combination
of governmental and private data sources, which we
identify in product literature and copyright messages
displayed to the consumer. Virtually all data sources
contain some inaccurate or incomplete data. In some
countries, complete and accurate map information is
either not available or is prohibitively expensive.
4
Initial settings
Various setup screens appear automatically before using.
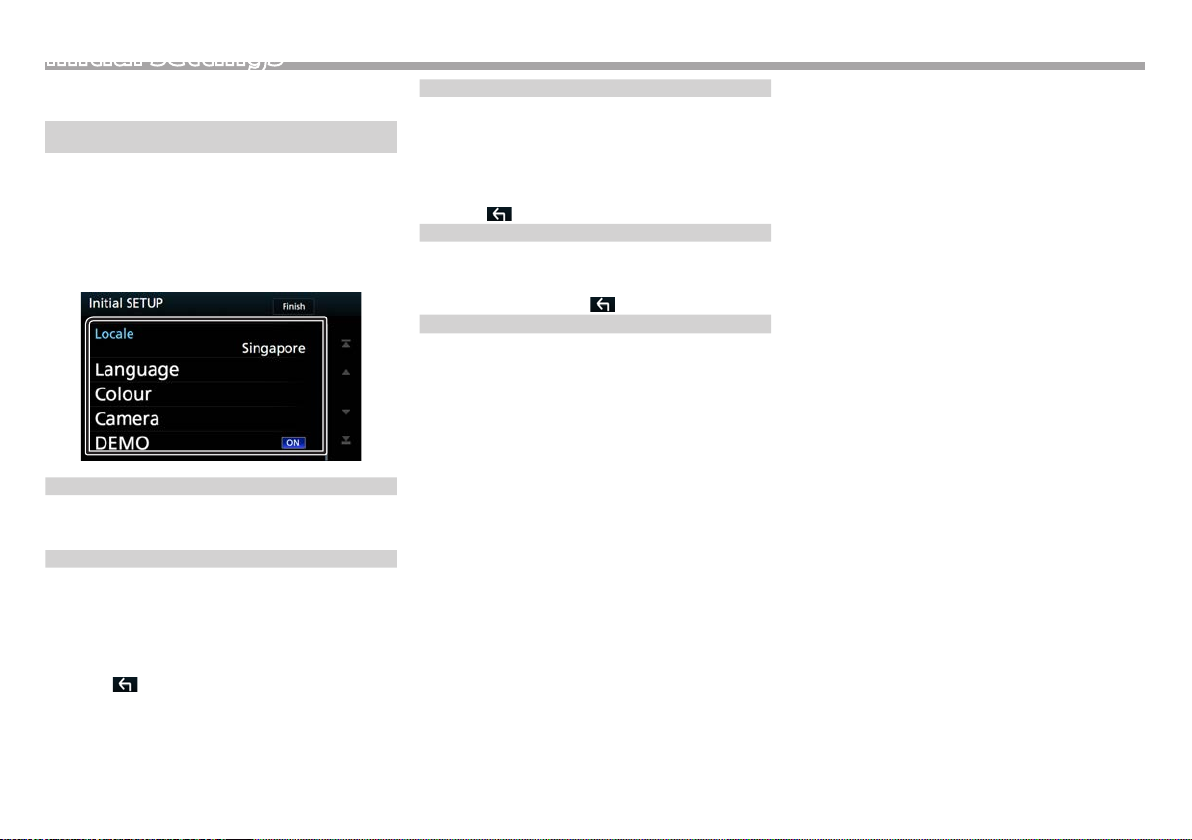
Initial setup
When you rst turn on the unit, the screen of the
conguration setting will appear.
1 Turn the ignition key of your car to ACC.
The unit is turned on.
Initial SETUP screen appears.
2 Touch the corresponding key and set the value.
Locale
Select the country for the navigation system.
1) Touch [Locale].
2) Select the desired country.
Language
Select the language used for the control screen and setting
items. Default is “British English(en)”. (Instruction Manual
P.6 6)
1) Touch [Language].
2) Touch [Language Select].
3) Select the desired language.
4) Touch [
].
Colour
Set the screen and button illumination color. You can select
whether to perform color scan and adjust scanning color.
(Instruction Manual P.71)
1) Touch [Colour].
2) Touch [Panel Colour].
3) Select the desired color.
4) Touch [
Camera
Set the parameters for the camera. (Instruction Manual
P.73)
1) Tou ch [Cam era].
2) Set each item and touch [
DEMO
Set the demonstration mode. Default is “ON”.
1) Touch [DEMO] and set ON or OFF.
] twice.
].
3 Touch [Finish].
English |
5
BasicsBasics
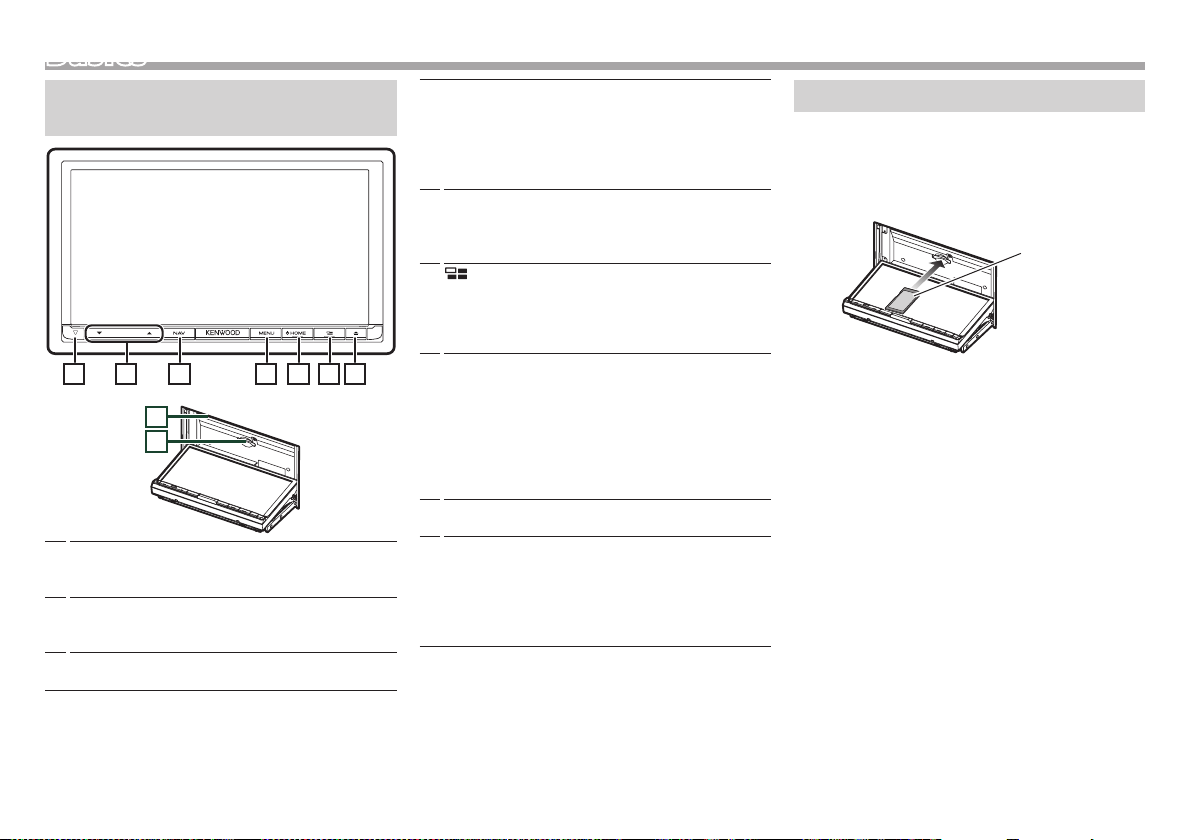
Functions of the Buttons on the Front Panel
1 2 3 4 5 6 7
9
10
s
1
• This indicator flashes when the vehicle ignition is off
(Instruction Manual P.70).
R , S (Vol ume)
2
• Adjusts volume. The volume will go up until 15 when
you keep pressing [ R ].
NAV
3
• Displays the navigation screen.
MENU
4
• Displays the popup menu screen.
• Pressing for 1 second switches view camera display
on/off. (DNX8160S/ DNX8160SM only)
• Pressing for 1 second turns the screen off.
(DNX8160DABS only)
HOME
5
• Displays the HOME screen (Instruction Manual P.14).
• Pressing for 1 second turns the power off.
• When the power off, turns the power on.
6
• Displays the APP (CarPlay/ Android Auto/ Mirroring)
screen.
• Pressing for 1 second displays the Voice Recognition
screen. (Instruction Manual P.61)
G
7
• Displays the Angle Adjust screen.
– [DISC EJECT]: Ejects the disc.
– [OPEN]: Fully opens the panel to the location of the
SD card slot.
• When the panel is opened, pressing closes the panel.
• To forcibly eject the disc, press it for 2 seconds and
touch [DISC EJECT] after the message is displayed.
Disc insert slot
8
• A slot to insert a disc media.
SD card slot
9
• A slot to insert an SD card.
See How to i nsert an SD Card (P.6).
• An SD card slot for upgrading the map. For how to
upgrade the map, refer to the instruction manual of
the navigation system.
How to insert an SD Card
1 Press <G> button.
2 Touch [OPEN] to the panel fully opens.
3 Hold the SD card with the label facing up, and
insert it into the slot until it clicks.
Labelled side
4 Press <G> button.
Ñ Eject an SD Card
1 Press <G> button.
2 Touch [OPEN] to the panel fully opens.
3 Push the SD card until it clicks and then remove
your finger from the card. The card pops up so
that you can pull it out with your fingers.
4 Press <G> button.
6

Basics
123
4
1
2
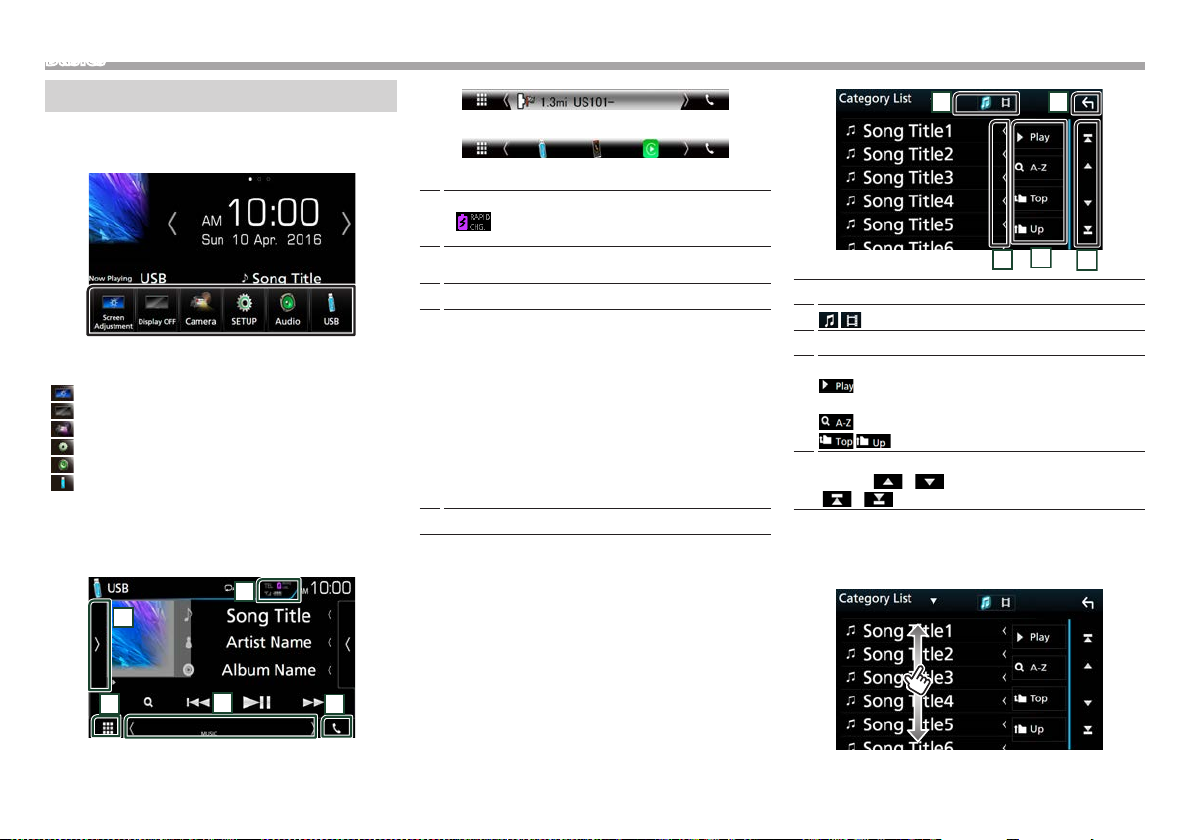
Operating with the HOME Screen
Most func tions can be performed from the HOME screen.
1 Press the <HOME> button.
HOME screen appears.
2 Flick the screen left or right to select the
widget.
Touch the widget to display the
detailed screen.
Ñ Selecting the playback source on the HOME
screen
Displays the source selection screen.
1
Short-cut buttons.
2
Displays the Hands Free screen ( P.19).
3
Displays the control screen of current source.
4
1 Touch [ ].
Source selection screen appears.
Displays the HOME screen.
1
Displays the SETUP screen.
2
Ñ Customizing Short-cut buttons on HOME
screen
You can arrange the position of the source icons as you
like.
1 Touch and hold the icon which you want to
move to go into the customizing mode.
2 Drag it where you want to move.
2 Flick the screen left or right to changes the
page.
3 Touch source icon to changes the playback
screen.
English |
7
Basics
4
5
3
1
2
5
4
1
2
3
Common Operations
Ñ Popup menu
1 Press the <MENU> button.
Touch to display the popup menu. The contents of the menu
are as follows.
: Displays the Screen Adjustment screen.
: Turns the display off.
: Displays the view camera.
: Displays the SETUP Menu screen.
: Displays the Audio Control Menu screen.
: Displays the control screen of current source. Icon
feature differs depending on the source.
Ñ Source control screen descriptions
There are some functions which can be operated from
most screens.
Navigation information
Short-cut buttons
Connected Bluetooth device information.
1
2
3
4
5
: Lights up when quick charging battery of the
connected iPod/ iPhone/ Smartphone.
Displays the function panel (other operation button
window).
Displays the source selection screen.
[<] [>] : The Secondar y screen changes every time you
touch it.
• Indicators: Displays the current source condition and
so on.
• Navigation information: Displays the current
location and the direction. The screen changes to the
navigation screen when you touch here.
• Short-cut buttons: The source changes to the one you
have set as a short-cut. For the short-cut setting, refer
to Customi zing Short- cut buttons o n HOME screen
(P.7).
Touch to display the Hands Free screen. (P.19 )
Ñ List screen
There are some common function keys in the list screens of
most sources.
Returns to previous screen.
1
: Displays music/movie file list.
2
Scrolls the displayed text.
3
Keys with various functions are displayed here.
4
: Plays all track s in the folder containing the
current track.
: Jump to the letter you entered (alphabet search).
: Moves to the upper hierarchy.
You can change the page to display more items by
5
pressing [
[
]/[ ].
]/[ ] : Displays the top or bottom page.
Ñ Flick scrolling
You can scroll the list screen by icking the screen up/
down.
Indicators
8
NavigationNavigation
1
2
3
4
5
1
234
5
678
9
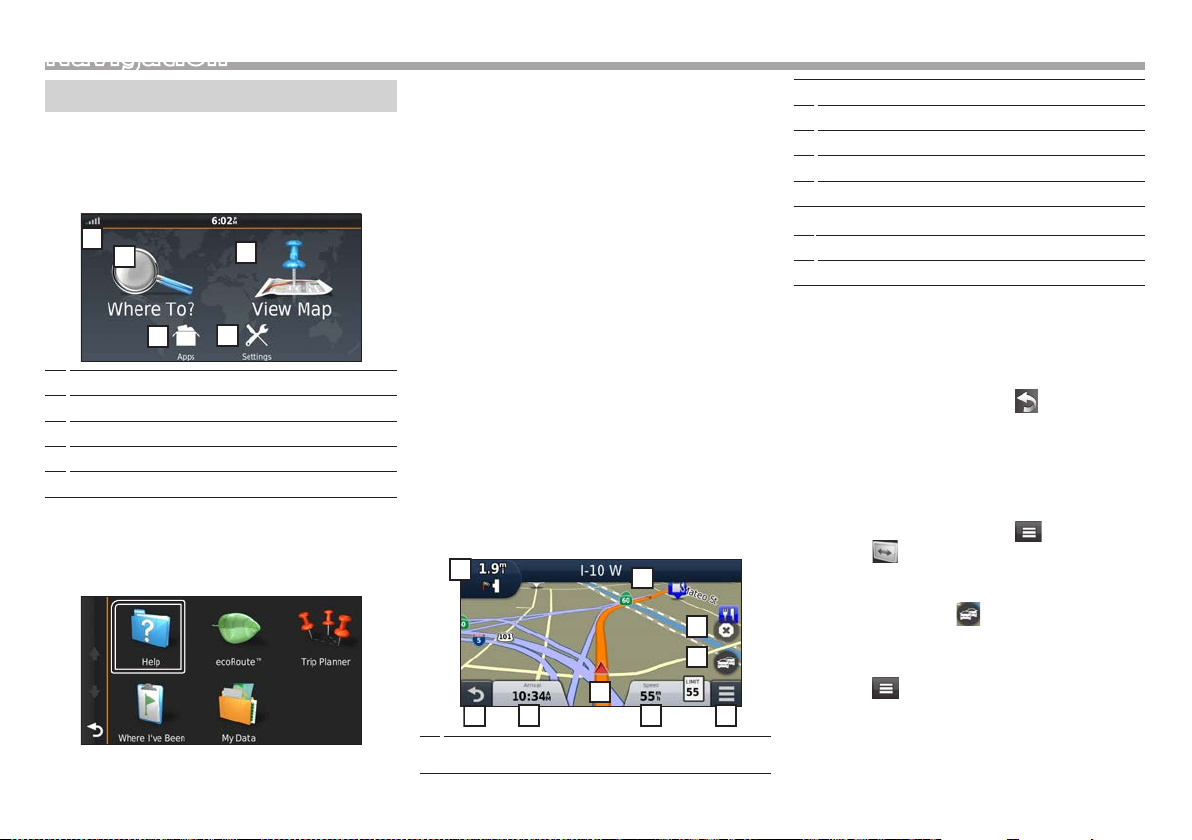
How to Use the Navigation System
1 Press the <NAV> button to display the
navigation screen.
2 Operate the desired function from the Main
Menu screen.
GPS satellite strength.
1
Finds a destination.
2
Views the map.
3
Uses the Apps such as ecoRoute and Help.
4
Adjusts the settings.
5
✎ NOTE
• You can get additional information about using the
navigation system from Help. To display Help, touch [Apps]
and then touch [Help].
• For more information about your navigation system,
download the latest version of the Owner’s Manual from
http://manual.kenwood.com/edition/im391/
3 Enter your destination and start the guidance.
Finding points of interest
1) Tou ch [Wh ere To? ].
2) Select a category and a subcategor y.
3) Select a destination.
4) To uc h [Go !] .
✎ NOTE
• To enter letters contained in the name, touch the Search
bar and enter the letters.
4 Follow your route to the destination.
✎ NOTICE
• The speed limit icon feature is for information only and
does not replace the driver’s responsibility to abide by all
posted speed limit signs and to use safe driving judgment
at all times. Garmin and JVC KENWOOD will not be
responsible for any traffic fines or citations that you may
receive for failing to follow all applicable traffic laws and
signs.
Your route is marked with a magenta line. As you travel,
your navigation system guides you to your destination
with voice prompts, arrows on the map, and directions at
the top of the map. If you depart from the original route,
your navigation system recalculates the route.
Views the Next Turn page or the junction view page,
1
when available.
Views the Turn List page.
2
Views the Where Am I? page.
3
Stops the currents route.
4
Displays traffic information on the route.
5
Returns to the Main menu.
6
Displays a different data field.
7
Views the Trip Computer.
8
Displays more options.
9
✎ NOTE
• Touch and drag the map to view a different area of the map.
• A speed limit icon could appear as you travel on major
roadways.
Adding a stop
1) While navigating a route, touch [ ] and then touch
[W here To? ].
2) Search for the extra stop.
3) To uch [Go !].
4) Touch [Add to Active Route] to add this stop before
your final destination.
Taking a detour
1) While navigating a route, touch [ ].
2) Touch [
Ñ Other Features
Manually avoiding trac on your route
1) From the map, touch [ ].
2) Touch [Traffic On Route].
3) If necessary, touch the arrows to view other traffic
delays on your route.
4) Touch [
Viewing the trac map
1) The traffic map shows color-coded traffic flow and
delays on nearby.
].
] > [Avoid].
English |
9
DVD/ VCDNavigation
About trac (DNX8160S/ DNX8160SM)
✎ NOTICE
• Traffic service is not available in some areas or countries.
• Garmin and JVC KENWOOD are not responsible for the
accuracy or timeliness of the traffic information. With
an FM traffic receiver, the navigation system can receive
and use traffic information. When a traffic message
is received, you can see the event on the map and
change your route to avoid the incident.
DVD/ VCD
Updating the software
To update the navigation system soft ware, you must
have an SD card, a USB mass storage device and an
internet connection.
1) Go to www.garmin.com/kenwood.
2) Select Update.
3) Follow the on-screen instructions.
Updating maps
You can purchase updated map data from Garmin
or ask your KENWOOD dealer or KENWOOD service
center for details.
1) Go to www.garmin.com/kenwood.
2) Select Update.
3) Follow the on-screen instructions.
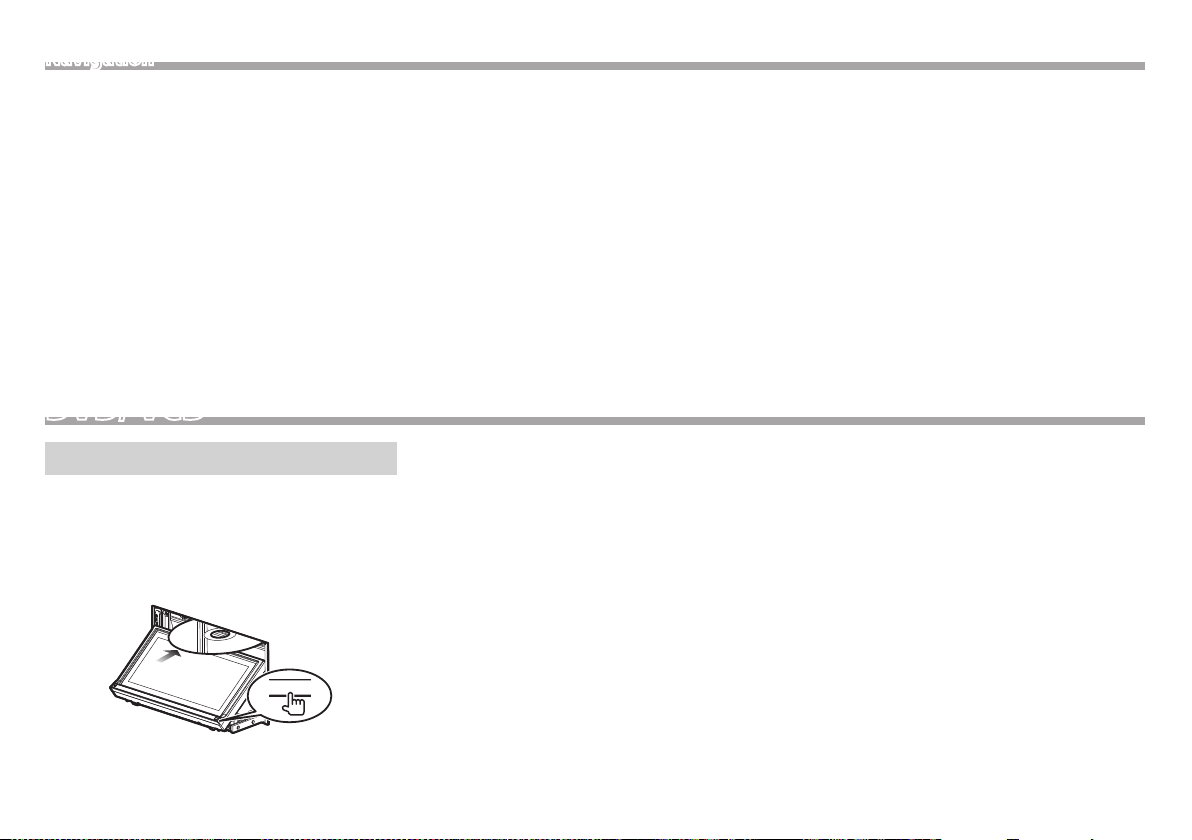
Playing a disc
Ñ Inserting a disc
1 Press the <G> button.
2 Touch [DISC EJECT] to open the front panel.
3 Insert the disc into the slot.
The panel closes automatically and playback starts.
0
10
Ñ Ejecting a disc
1) Press the <G> button.
2) Touch [DISC EJECT] to open the front panel. When
removing a disc, pull it horizontally.
3) Press the <G> button.
 Loading...