

Page 1

BLU-RAY DISC PLAYER
BD-7000
INSTRUCTION MANUAL
Declaration of Conformity with regard to
Manufacturer:
Kenwood Corporation
2967-3 Ishikawa-machi, Hachioji-shi, Tokyo, 192-8525 Japan
EU Representative's:
Kenwood Electronics Europe BV
Amsterdamseweg 37, 1422 AC UITHOORN, The Netherlands
the EMC Directive 2004/108/EC
© TINS-E918WJQZ
ORC9009-A
Page 2
OPERATION MANUAL
ENGLISH
Introduction
SAFETY / IMPORTANT INFORMATION
THE LIGHTNING FLASH WITH ARROWHEAD SYMBOL, WITHIN AN EQUILATERAL TRIANGLE, IS
INTENDED TO ALERT THE USER TO THE PRESENCE OF UNINSULATED “DANGEROUS VOLTAGE”
WITHIN THE PRODUCT’S ENCLOSURE THAT MAY BE OF SUFFICIENT MAGNITUDE TO CONSTITUTE A
RISK OF ELECTRIC SHOCK TO PERSONS.
THE EXCLAMATION POINT WITHIN AN EQUILATERAL TRIANGLE IS INTENDED TO ALERT THE USER TO
THE PRESENCE OF IMPORTANT OPERATING AND MAINTENANCE (SERVICING) INSTRUCTIONS IN THE
LITERATURE ACCOMPANYING THE APPLIANCE.
Before Applying Power
¤
Caution : Read this page carefully to ensure safe operation.
Units are designed for operation as follows.
Europe ............................AC 230 V only
Safety precautions
WARNING : TO PREVENT FIRE OR ELECTRIC SHOCK, DO NOT EXPOSE
THIS APPLIANCE TO RAIN OR MOISTURE.
CAUTION
RISK OF ELECTRIC SHOCK
DO NOT OPEN
CAUTION: TO REDUCE THE RISK OF ELECTRIC SHOCK, DO NOT REMOVE COVER
(OR BACK). NO USER-SERVICEABLE PARTS INSIDE. REFER SERVICING TO
QUALIFIED SERVICE PERSONNEL.
The marking of products using lasers
CLASS 1
LASER PRODUCT
The marking this product has been classified as Class 1. It means
that there is no danger of hazardous radiation outside the product.
Location: Bottom
1
Page 3

DEAR Kenwood CUSTOMER
Thank you for your purchase of the Kenwood Blu-ray Disc/DVD Player. To ensure safety and many
years of trouble-free operation of your product, please read the Important Safety Instructions carefully
before using this product.
IMPORTANT SAFETY INSTRUCTIONS
¤
Caution : Read this page carefully to ensure safe operation.
Read Instructions
– All the safety and operating instructions should be read
before the product is operated.
Retain Instructions
– The safety and operating instructions should be retained for
future reference.
Heed Warnings
– All warnings on the product and in the operating
instructions should be adhered to.
Follow Instructions
– All operating and use instructions should be followed.
1. Cleaning – Unplug this product from the wall outlet
before cleaning. Do not use liquid cleaners or aerosol
cleaners. Use a damp cloth for cleaning.
2. Attachments – Do not use attachments not
recommended by the product manufacturer as they may
cause hazards.
3. Water and Moisture – This product shall not be
exposed to dripping and splashing – for example, near a
bath tub, wash bowl, kitchen sink, or laundry tub; in a wet
basement; or near a swimming pool; and the like. Do not
place an object containing liquid, such as a flower vase, on
the appliance.
4. Accessories – Do not place this product on an unstable
cart, stand, tripod, bracket, or table. The product may fall,
causing serious injury to a child or adult, and serious damage
to the product. Use only with a cart, stand, tripod, bracket,
or table recommended by the manufacturer. Any mounting
of the product should follow the manufacturer’s instructions,
and should use a mounting accessory recommended by the
manufacturer.
A product and cart combination should be
moved with care. Quick stops, excessive force,
and uneven surfaces may cause the product
and cart combination to overturn.
5. Ventilation – Slots and openings in the cabinet are
provided for ventilation and to ensure reliable operation of
the product and to protect it from overheating, and these
openings must not be blocked or covered. The openings
should never be blocked by placing the product on a bed,
sofa, rug, or other similar surface. This product should not
be placed in a built-in installation such as a bookcase or rack
unless proper ventilation is provided or the manufacturer’s
instructions have been adhered to.
6. Power Sources – This product should be operated only
from the type of power source indicated on the product. If
you are not sure of the type of power supply to your home,
consult your product dealer or local power company.
7. CAUTION – Polarization – This product may be
equipped with a polarized alternating-current line plug (a
plug having one blade wider than the other). This plug will fit
into the power outlet only one way. This is a safety feature.
If you are unable to insert the plug fully into the outlet, try
reversing the plug. If the plug should still fail to fit, contact
your electrician to replace your obsolete outlet. Do not defeat
the safety purpose of the polarized plug.
8. Power Cord Protection – Power-supply cords
should be routed so that they are not likely to be walked
on or pinched by items placed upon or against them,
paying particular attention to cords at plugs, convenience
receptacles, and the point where they exit from the product.
9. Lightning – For added protection for this product during
a lightning storm, or when it is left unattended and unused
for long periods of time, unplug it from the wall outlet and
disconnect the antenna or cable system. This will prevent
damage to the product due to lightning and power-line
surges.
10. Overloading – Do not overload wall outlets, extension
cords, or integral convenience receptacles as this can result
in a risk of fire or electric shock.
11. Object and Liquid Entry – Never push objects of any
kind into this product through openings as they may touch
dangerous voltage points or short-out parts that could result
in a fire or electric shock. Never spill liquid of any kind on the
product.
12. Servicing – Do not attempt to service this product
yourself as opening or removing covers may expose you to
dangerous voltage or other hazards. Refer all servicing to
qualified service personnel.
13. Damage Requiring Service – Unplug this product
from the wall outlet and refer servicing to qualified service
personnel under the following conditions:
a) When the power-supply cord or plug is damaged,
b) If liquid has been spilled, or objects have fallen into the
product,
c) If the product has been exposed to rain or water,
d) If the product does not operate normally by following
the operating instructions.
e) If the product has been dropped or damaged in any
way, and
f) When the product exhibits a distinct change in
performance – this indicates a need for service.
g) If an abnormal smell or smoke is detected.
14. Replacement Parts – When replacement parts
are required, be sure the service technician has used
replacement parts specified by the manufacturer or have
the same characteristics as the original part. Unauthorized
substitutions may result in fire, electric shock, or other
hazards.
2
Page 4
IMPORTANT SAFETY INSTRUCTIONS
15. Safety Check – Upon completion of any service or
repairs to this product, ask the service technician to perform
safety checks to determine that the product is in proper
operating condition.
16. Wall or Ceiling Mounting – This product should be
mounted to a wall or ceiling only as recommended by the
manufacturer.
17. Heat – This product should be situated away from heat
sources such as radiators, heat registers, stoves, or other
products that produce heat. Do not place a flaming object,
such as a candle or lantern, or near the product.
18. Power Lines – An outside antenna system should not
be located in the vicinity of overhead power lines or other
electric light or power circuits, or where it can fall into such
power lines or circuits. When installing an outside antenna
system, extreme care should be taken to keep from touching
such power lines or circuits as contact with them might be
fatal.
Notes:
Item 7 is not required except for grounded or polarized
equipment.
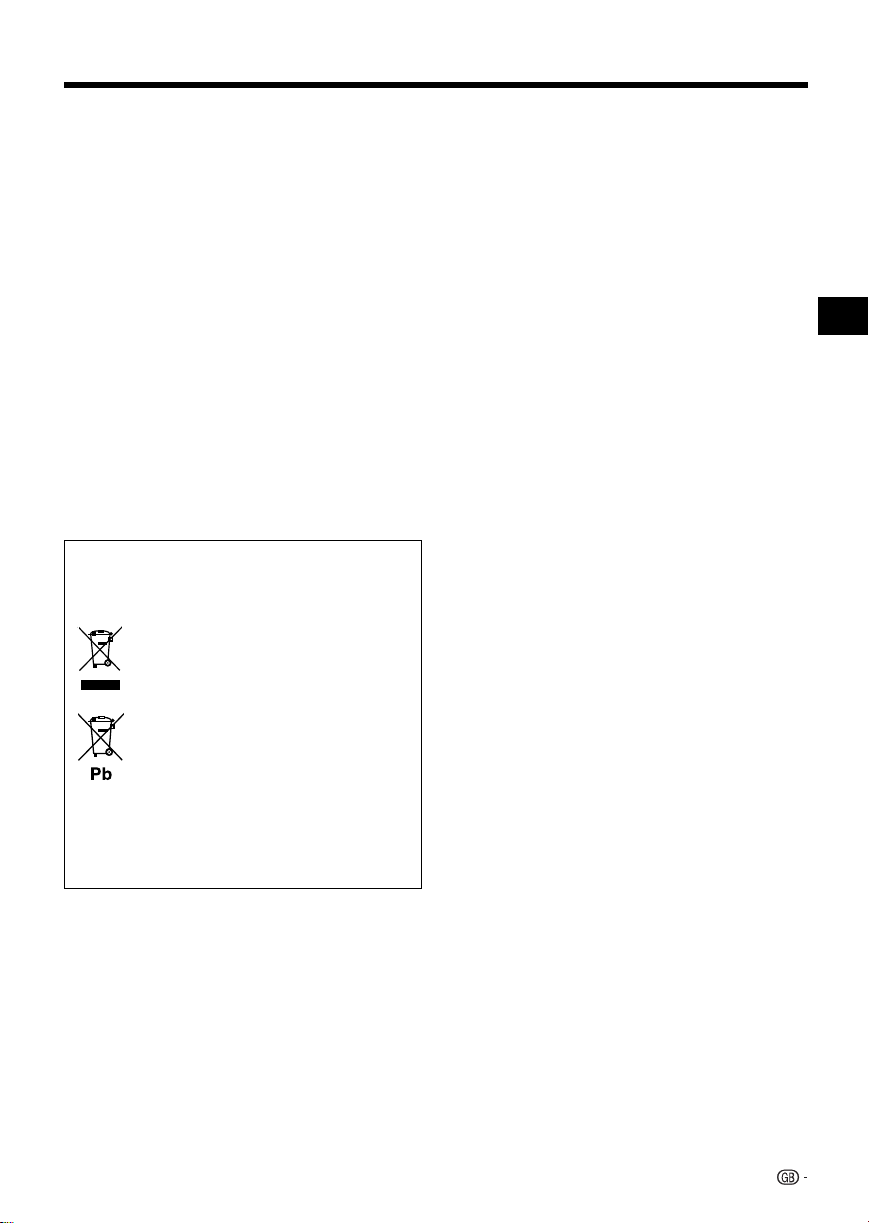
Information on Disposal of Old Electrical and
Electronic Equipment and Batteries (applicable for
EU countries that have adopted separate waste
collection systems)
Products and batteries with the symbol
(crossed-out wheeled bin) cannot be disposed
as household waste.
Old electrical and electronic equipment and
batteries should be recycled at a facility capable
of handling these items and their waste
byproducts.
Contact your local authority for details in
locating a recycle facility nearest to you.
Proper recycling and waste disposal will help
conserve resources whilst preventing
detrimental effects on our health and the
environment.
Notice: The sign “Pb” below the symbol for
batteries indicates that this battery
contains lead.
A. Information on Disposal for Users
(private households)
1. In the European Union
Attention: If you want to dispose of this equipment, please do
not use the ordinary dust bin!
Used electrical and electronic equipment must be treated
separately and in accordance with legislation that requires
proper treatment, recovery and recycling of used electrical
and electronic equipment.
Following the implementation by member states, private
households within the EU states may return their used
electrical and electronic equipment to designated collection
facilities free of charge*. In some countries* your local retailer
may also take back your old product free of charge if you
purchase a similar new one.
*) Please contact your local authority for further details.
If your used electrical or electronic equipment has batteries or
accumulators, please dispose of these separately beforehand
according to local requirements.
By disposing of this product correctly you will help ensure that
the waste undergoes the necessary treatment, recovery and
recycling and thus prevent potential negative effects on the
environment and human health which could otherwise arise
due to inappropriate waste handling.
2. In other Countries outside the EU
If you wish to discard this product, please contact your local
authorities and ask for the correct method of disposal.
For Switzerland: Used electrical or electronic equipment can
be returned free of charge to the dealer, even if you don’t
purchase a new product. Further collection facilities are listed
on the homepage of www.swico.ch or www.sens.ch.
B. Information on Disposal for Business
Users
1. In the European Union
If the product is used for business purposes and you want to
discard it:
Please contact your Kenwood dealer who will inform you
about the take-back of the product. You might be charged
for the costs arising from take-back and recycling. Small
products (and small amounts) might be taken back by your
local collection facilities.
For Spain: Please contact the established collection system
or your local authority for take-back of your used products.
Introduction
2. In other Countries outside the EU
If you wish to discard of this product, please contact your
local authorities and ask for the correct method of disposal.
3
Page 5

Contents
Introduction
SAFETY / IMPORTANT INFORMATION ..................1
Before Applying Power ...........................................1
DEAR Kenwood CUSTOMER .................................2
IMPORTANT SAFETY INSTRUCTIONS .............. 2-3
Contents ............................................................... 4-5
PRECAUTIONS ........................................................6
What would you like to do with this Player? .........7
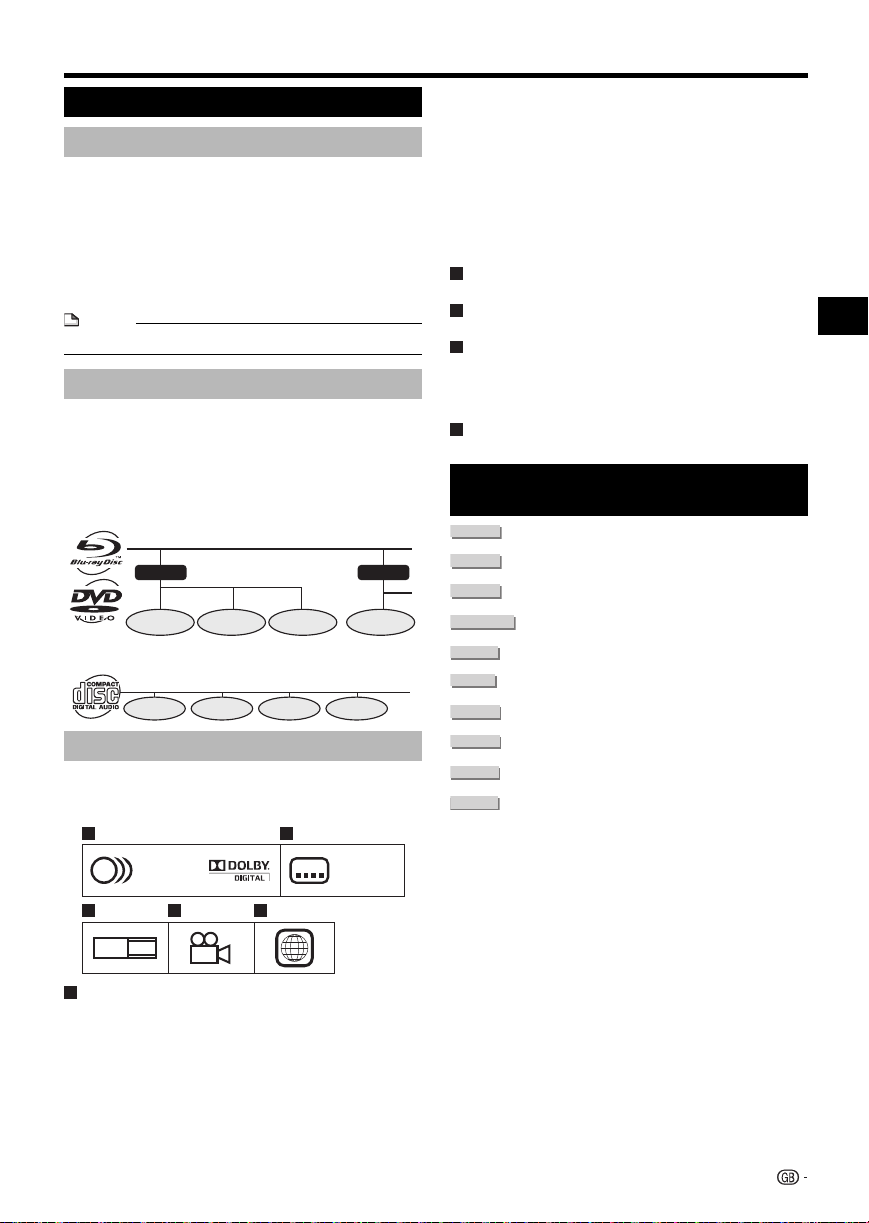
About Media Types ............................................ 8-11
Blu-ray Disc .................................................................. 8
Types of Discs that Can Be Used with This Player ......... 8
Discs that Cannot Be Used with This Player .................. 8
About Disc Contents ................................................... 11
BD Video ...............................................................11
Title, Chapter and Track ......................................... 11
Icons Used on DVD Video Disc Cases ................... 11
The Icons Used in This Operation Manual ...................11
Important Information ...........................................12
Disc Precautions ......................................................... 12
License and Copyright ................................................ 12
Getting Started ......................................................13
Major Components .......................................... 14-15
Main Unit (Front) .......................................................... 14
Main Unit (Rear) ..........................................................14
Remote Control Unit ...................................................15
Player setup location ............................................16
Removing and replacing the terminal cover ................. 16
Connection
Video Connection ..................................................17
Connecting to the HDMI Terminal ................................ 17
Audio Connection ..................................................18
Connecting to the Digital Audio Terminal ..................... 18
Broadband Internet Connection ..........................19
Internet Connection (LAN cable) .................................. 19
Playback
Before Starting Playback ................................ 20-23
Loading the Batteries in the Remote Control ............... 20
Approximate operating range of remote control ..... 20
Connecting the AC adapter......................................... 21
Turning the Power On ................................................. 21
Turning the power on ............................................. 21
Entering standby .................................................... 21
Indicators on the Player ......................................... 21
Language Setting ........................................................ 22
Changing the on-screen display language .............. 22
Operating a SHARP TV Using the Remote Control ...... 22
TV function control ................................................. 22
Turning Off the Indicator Lights....................................22
Using HDMI CEC ........................................................ 23
Controlling the Blu-ray disc player using
HDMI CEC ..........................................................23
Using 3D ..................................................................... 23
Video/Picture/Music Playback ....................... 24-30
Loading a Disc/Ejecting a Disc .................................... 24
BD/DVD Video Playback ............................................. 24
Displaying the disc information ............................... 24
BD/DVD Menus ..........................................................25
Start playback by selecting a title from the
top menu ............................................................25
Using the disc menu .............................................. 25
Using the pop-up menu ......................................... 25
Enjoying BONUSVIEW or BD-LIVE .............................. 26
Use of Picture in Picture function
(secondary audio/video playback)........................ 26
Virtual Package ...................................................... 26
BD-LIVE ................................................................. 26
DVD-R/-RW (VR format) / BD-RE/-R (BDAV format)
Playback .................................................................. 27
Playback by selecting a title ................................... 27
Playback by selecting a Playlist .............................. 27
Audio CD Playback ..................................................... 28
Playback from the beginning .................................. 28
To skip the track during playback ........................... 28
Operation procedure for the “Functions” menu ......28
Audio Data (MP3 File) Playback................................... 29
Playing back Audio data (MP3 files) ....................... 29
To play another file during Playback .......................29
To skip the file during Playback .............................. 29
Displaying Still Images (JPEG files) .............................. 30
Displaying Still Images (JPEG files) ......................... 30
Playing back Slide Show ........................................ 30
Setting slide show speed/repeat playback ............. 30
Playback Functions ......................................... 31-33
Fast Forward/Reverse (Search) ................................... 31
Skipping to the Next or the Start of the Current Chapter
(Track/Title) ...............................................................31
Pause/Frame Advance Playback ................................. 31
Slow Playback ............................................................31
Skip Search ................................................................ 31
Replay ........................................................................ 31
Repeat Playback of a Title or Chapter
(Repeat Playback) .................................................... 32
Partial Repeat Playback
(Repeat Playback of a Specified Part) ....................... 32
Displaying the Audio Information ................................. 33
Switching Subtitles...................................................... 33
Switching the Angle ....................................................33
Displaying the Angle Mark ........................................... 33
Settings During Playback ...............................34-35
Function Control .........................................................34
Function control operation procedure ....................34
Functions which can be set ................................... 35
4
Page 6

Contents
Settings
SETTINGS ......................................................... 36-44
Common operations ................................................... 36
Basic Operation for Playback Setting .......................... 36
Audio Video Settings ................................................... 37
Smart Settings ............................................................ 38
HDMI CEC .................................................................. 38
Playback Setting ......................................................... 38
On Screen Language .................................................. 39
Version ........................................................................ 39
System ....................................................................... 39
Communication Setup ...........................................40-41
When using a LAN Cable ....................................... 40
The operation procedure for inputting characters
manually .............................................................. 41
USB Memory Management ......................................... 42
Software Update Settings ...........................................43
Manual Update from USB memory device .............43
Digital Audio Output Selection Formats ....................... 44
Appendix
Troubleshooting ............................................... 45-46
To Reset this Player..................................................... 47
On-screen Error Messages ..................................48
Specifications ........................................................49
Glossary ........................................................... 50-52
About Software License ........................................53
What to do first:
Refer to “Getting Started” (p. 13) to prepare
for using this player.
Introduction (pp. 1–16)
Explains the important operation information.
Connection (pp. 17–19)
Shows the connecting options provided by
this Player.
Playback (pp. 20–35)
Shows simple playback and useful functions.
Settings (pp. 36-44)
Gives you more options to suit your
circumstances.
Appendix (pp. 45-53)
Provides troubleshooting tips and more
information.
The illustrations and on-screen displays in
this operation manual are for explanation
purposes and may vary slightly from the actual
operations.
5
Page 7

PRECAUTIONS
Precautions on viewing stereoscopic 3D images
• Do not view stereoscopic 3D images if you have a history of photosensitivity, heart disease or poor health. This may
cause the symptoms to worsen.
• If you experience any health problems such as fatigue and discomfort while viewing stereoscopic 3D images, immediately
discontinue viewing. Continuing viewing after symptoms appear may cause health risks. Take a break until the symptoms
have completely disappeared.
• Ages of 5–6 or over are recommended for viewing stereoscopic 3D images. Symptoms such as fatigue and discomfort
are difficult to determine in young children, therefore they may suddenly become ill. When viewing 3D images with
children, please watch for eye strain symptoms.
• When viewing stereoscopic 3D images, take a moderate break after watching one title. Viewing for extended periods may
cause visual strain.
Precautions when cleaning this product
• Turn off the main power and unplug the AC cord from the wall outlet before handling.
• To clean the outer cabinet, periodically wipe it with a soft cloth (cotton, flannel, etc.).
• For severe dirt, soak a soft cloth (cotton, flannel, etc.) in some neutral detergent diluted with water, wring the cloth out
thoroughly, wipe off the dirt, then wipe again with a soft, dry cloth.
• Do not use chemicals or a chemically treated cloth for cleaning. It may damage the cabinet finish.
6
Page 8

What would you like to do with this Player?
Watch high quality movies on Blu-ray
discs
This Player offers full high-definition Blu-ray disc
playback.
Video/Picture/Music Playback (p. 24)
Enjoy stereoscopic and powerful 3D
images
This player can play 3D content from 3D
compatible Blu-ray discs through an HDMI cable.
To watch 3D images, connect a 3D compatible TV
to this player using an HDMI cable and play the 3D
content while wearing 3D glasses.
Using 3D (p. 23)
Enjoy different kinds of media
sources
Use this player to enjoy video, picture or music
content from various types of media sources
such as DVDs, USB memory devices and via the
Internet.
About Media Types (pp. 8–11)
Video/Picture/Music Playback (p. 24)
Simple connection and operation
through HDMI
This Player is equipped with an HDMI terminal. You
can connect it to the TV using HDMI and no other
cable will be needed to enjoy movies. If your TV is
compatible with HDMI CEC, you can control both
the TV and this Player with simple operations.
Video Connection (p. 17)
Enjoy BD-LIVE functions through the
Internet
This Player is compatible with BD-LIVE. You can
enjoy bonus content such as movie trailers through
the Internet when playing back BD-Video discs
compatible with BD-LIVE.
Enjoying BONUSVIEW or BD-LIVE
(p. 26)
Introduction
7
Page 9
About Media Types
Blu-ray Disc
Blu-ray Disc is the ultimate next generation optical
media format, offering the following key features:
• Largest capacity (25 GB single layer – 50 GB dual layer)
– with over 5 times the amount of content possible with
current DVDs, particularly well suited for high definition
feature films with extended levels of interactive features
• Pristine picture quality with the capability for full high
definition 1920 x 1080p resolution
• Best audio possible with uncompressed surround sound
(higher quality than even theatre audio)
• Broadest industry support – ensuring more choice for
consumers in the marketplace
• Hardware products will be backward compatible with
DVDs, allowing continued enjoyment of existing DVD
libraries.
• Disc Durability – new breakthroughs in hard coating
technologies gives Blu-ray Discs the strongest resistance
to scratches and finger prints.
Types of Discs that Can Be Used
with This Player
• The following discs can be played back in this Player. Do
not use an 8 cm to 12 cm adapter.
• Use discs that conform to compatible standards as
indicated by the presence of official logos on the disc label.
Playback of discs not complying with these standards is not
guaranteed. In addition, the image quality or sound quality
is not guaranteed even if the discs can be played back.
Disc Type
BD
Region code
Video
B/ALL
BD-RE DL
BD-R DL
DVD
Region code
Video
2/ALL
ALL
2
DVD+RW/DVD+R
DVD-RW/DVD-R
DVD+R DL/DVD-R DL
1
Audio CD*
CD-RW/CD-R Audio CD
Recording
Format
— Audio
BDMV/BDAV
format
Video format Audio
Video/VR/
AVCHD format
(finalised disc
only)
DivX
2
JPEG*
3
MP3*
Audio CD
(CD-DA)
(CD-DA)
2
JPEG*
3
MP3*
DivX Audio
Contents
+ Video
(Movie)
+ Video
(Movie)
Audio
+ Video
(Movie)
Still image
(JPEG file)
Audio
Audio
Audio
Still image
(JPEG file)
Audio
+ Video
(Movie)
Disc
Size
12 cm
12 cm
8 cm
12 cm
8 cm
12 cm
8 cm
• BD/DVD video players and discs have region codes, which
dictate the regions in which a disc can be played. This
Player's region code is B for BD and 2 for DVD. (Discs
marked ALL will play in any player.)
• BD/DVD video operations and functions may be different
from the explanations in this manual and some operations
may be prohibited due to disc manufacturer's settings.
• If a menu screen or operating instructions are displayed
during playback of a disc, follow the operating procedure
displayed.
• The audio component of a DVD video recorded at 96
kHz (Linear PCM) will be output as 48 kHz audio during
playback.
NOTE
• Playback for some of the discs in the left side column
tables may not be possible depending on the disc.
• “Finalise” refers to a recorder processing a recorded disc
so that it will play in other DVD players/recorders as well
as this player. Only finalised DVD discs will play back in
this player. (This player does not have a function to finalise
discs.)
• Some discs cannot be played back depending on the
recording format.
Discs that Cannot Be Used with
This Player
The following discs cannot be played back or will
not play back properly on this Player. If such a
disc is mistakenly played back, speaker damage
may occur. Never attempt to play back these
discs.
CDG, Video CD, Photo CD, CD-ROM, CD-TEXT, SVCD,
SACD, PD, CDV, CVD, DVD-RAM, DVD-Audio, BD-RE
with the cartridge, CD-WMA
Discs with unusual shapes cannot be played.
• Discs with unusual shapes (heart-shaped or hexagonal
discs, etc.) cannot be used. The use of such discs will
cause malfunction.
The following BD video discs cannot be played.
• Discs not displaying “B” or “ALL” for the region code (discs
sold outside the authorised marketing area).*
• Discs produced illegally.
• Discs recorded for commercial use.
* The region code for this product is B.
The following DVD video discs cannot be played.
• Discs not displaying “2” or “ALL” for the region code (discs
sold outside the authorised marketing area).*
• Discs produced illegally.
• Discs recorded for commercial use.
* The region code for this product is 2.
8
Page 10

About Media Types
The following BD-RE/R, DVD-RW/R and
DVD+RW/R discs cannot be played.
• Discs on which data has not been recorded cannot be
played back.
• Kenwood cannot guarantee playback compatibility for
all self-recorded BD-discs because Blu-ray is a new and
evolving format. The playback compatibility will be affected
by your choice of BD-recorder, BD-disc and BD-burning
software. Please always ensure you are using the latest
software versions on all units and contact the individual
manufacturers for further help if required.
To avoid inconveniences, please check the playback
compatibility of your self-recorded disc before you
purchase this BD-player. For maximum playback
compatibility of self-recorded BD-discs Kenwood
recommends that the BDMV/BDAV standards are used. If
a playback issue occurs after purchase, please download
the latest software version for your BD-player from the
Kenwood internet page or ask your Kenwood-Dealer.
This BD-player uses the latest technology available at the
time of development and cannot guarantee support for
future enhancements or changes to the standard.
The following Audio CD*1 discs cannot be played.
• Discs containing a signal for the purpose of protecting
copyrights (copy control signal) may not be played back
with this Player.
• This Player has been designed on the premise of playing
back Audio CDs that comply with CD (Compact Disc)
standards.
The following CD-RW/R discs cannot be played.
• Discs on which data has not been recorded cannot be
played back.
• Discs recorded in a format other than an Audio CD and
JPEG/MP3 file format cannot be played back.
• Discs may not be played back depending on their
recording status or the status of the disc itself.
• Discs may not be played back depending on their
compatibility with this Player.
*2
About the JPEG file format
JPEG is a type of file format for storing still-image files
(photos, illustrations, etc.). The Player lets you play JPEG
format still-image files.
File formats that are not compatible.
• Still images in formats other than JPEG (such as TIFF)
cannot be played.
• There may be some files that cannot be played even if they
are in JPEG format.
• Progressive JPEG files cannot be played.
• Moving image files as well as Motion JPEG format files
cannot be played, even though they are JPEG files.
Other files that cannot be played back.
• You may not be able to play some still images which you
have created, touched up, copied or otherwise edited on
your computer.
• You may not be able to play some still images you have
processed (rotated or saved by overwriting other images
you have imported from the Internet or e-mail).
You may experience one or more of the following
symptoms when playing files.
• It may take some time to play files depending on the
number of folders, number of files and volume of data
involved.
• EXIF information will not be displayed. EXIF stands for
Exchangeable Image File Format, and is a standard for
storing interchange information in image files, especially
those using JPEG compression. (Refer to http://exif.org for
more information.)
*3
About the MP3 file format
MP3 files are audio data compressed in the MPEG1/2 Audio
layer-3 file format. “MP3 files” have “.mp3” as extensions.
(Some files that have “.mp3” extensions or files that have not
been recorded in MP3 format will produce noise or cannot be
played.)
Playing the MP3 file format
• The MP3 files are not played in the order they were
recorded.
• It is recommended to record data at a lower speed as data
recorded at a fast speed can produce noise and may not
be able to be played.
• The more folders there are, the longer the reading time.
• Depending on the folder tree, reading MP3 files can take
time.
• The playing time may not be correctly displayed during
MP3 file playback.
The following files cannot be played on this
player.
• When both Audio CD [CD-DA] format and JPEG/MP3 file
formats are recorded on a disc. (The disc is recognised to
be an Audio CD [CD-DA] only tracks in Audio CD [CD-DA]
format are played back.)
• Multi-session discs cannot be played.
Introduction
(Continued on the next page)
9
Page 11
About Media Types
About files/folders for Still images
(JPEG files) and audio data (MP3 files)
You can play still images (JPEG files) /audio data (MP3 files)
with this unit by making folder(s) on discs or USB memory
devices as shown below.
Example of a folder structure:
Root
001.jpg/001.mp3
xxx.jpg/xxx.mp3
01 Folder
xxx Folder
4
Including the root directory, the maximum number of
*
folders and files in each folder is limited to 256 in total.
File and folder requirements
• The discs or USB memory devices which this player can
play back (recognise) are limited to the following properties:
Contains EXIF format files (only JPEG files)
Picture resolution: Between 32 x 32 and 6528 x 3672
pixels (only JPEG files)
Maximum number of folders and files in each folder: 256
Maximum hierarchy level of folders: 5
File size: 8 MB or less (JPEG files)
200 MB or less (MP3 files)
NOTE
• File and folder names displayed on this player may differ
from those displayed on PCs.
4
*
Folder
001.jpg/001.mp3
255.jpg/255.mp3
001.jpg/001.mp3
256.jpg/256.mp3
4
*
001.jpg/001.mp3
256.jpg/256.mp3
4
*
4
*
About DivX VIDEO
DivX® is a digital video format created by DivX, Inc. This is an
official DivX Certified device that plays DivX video. Visit www.
divx.com for more information and software tools to convert
your files into DivX video.
About DivX VIDEO-ON-DEMAND
This DivX Certified® device must be registered in order to
play DivX Video-on-Demand (VOD) content. To generate the
registration code, locate the DivX VOD section in the device
setup menu. Go to vod.divx.com with this code to complete
the registration process and learn more about DivX VOD.
10
Page 12
About Media Types
About Disc Contents
BD Video
Enjoy BD-specific functions including BONUSVIEW (BD-ROM
Profile 1 Version 1.1), such as picture-in-picture, and BD-LIVE
(Page 26).
For the BD video discs compatible with BONUSVIEW/BDLIVE, you can enjoy additional contents by copying the data
from the discs or downloading it via the Internet. For instance,
this function is capable of playing the original movie as the
primary video while playing video commentary from the film
director on a small screen as a secondary video.
NOTE
• The available functions differ depending on the disc.
Title, Chapter and Track
• Blu-ray discs and DVDs are divided into “Titles” and
“Chapters”. If the disc has more than one movie on it, each
movie would be a separate “Title”. “Chapters”, on the other
hand, are subdivisions of titles. (See Example 1.)
• Audio CDs are divided into “Tracks”. You can think of a
“Track” as one tune on an Audio CD. (See Example 2.)
Example 1: Blu-ray disc or DVD
Title 1
Chapter 1 Chapter 2 Chapter 3
Title 2
Chapter 1
Example 2: Audio CD
Track 1 Track 2 Track 3
Track 4
Icons Used on DVD Video Disc Cases
The back of the case of a DVD that is commercially
available usually contains various information about the
contents of the disc.
1 2
1. English
2
2. Chinese
3 4 5
LB
16:9
2
213
546
2
1. English
2. Chinese
DTS
DTS is a digital sound system developed by DTS, Inc. for
use in cinemas.
Linear PCM
Linear PCM is a signal recording format used for Audio
CDs and on some DVD and Blu-ray discs. The sound
on Audio CDs is recorded at 44.1 kHz with 16 bits.
(Sound is recorded between 48 kHz with 16 bits and 96
kHz with 24 bits on DVD video discs and between 48
kHz with 16 bits and 192 kHz with 24 bits on BD video
discs.)
2
Subtitle languages
This indicates the kind of subtitles.
3
Screen aspect ratio
Movies are shot in a variety of screen modes.
4
Camera angle
Recorded onto some BD/DVD discs are scenes which
have been simultaneously shot from a number of
different angles (the same scene is shot from the front,
from the left side, from the right side, etc.).
5
Region code
This indicates the region code (playable region code).
The Icons Used in This Operation
Manual
........... Indicates the functions that can be performed
BD VIDEO
BD-RE
BD-R
DVD VIDEO
DVD-RW
DVD-R
AUDIO CD
CD-R
CD-RW
USB
for BD Video discs.
........... Indicates the functions that can be performed
for BD-RE discs.
........... Indicates the functions that can be performed
for BD-R discs.
....... Indicates the functions that can be performed
for DVD Video discs.
........... Indicates the functions that can be performed
for DVD-RW discs.
............ Indicates the functions that can be performed
for DVD-R discs.
........... Indicates the functions that can be performed
for Audio CDs.
........... Indicates the functions that can be performed
for CD-R discs.
........... Indicates the functions that can be performed
for CD-RW discs.
........... Indicates the functions that can be performed
for USB memory devices.
Introduction
1
Audio tracks and audio formats
DVD discs can contain up to 8 separate tracks with
a different language on each. The first in the list is the
original track.
This section also details the audio format of each
soundtrack — Dolby Digital, DTS, MPEG etc.
Dolby Digital
A sound system developed by Dolby Laboratories Inc.
that gives movie theatre ambience to audio output when
the Player is connected to a Dolby Digital processor or
amplifier.
11
Page 13
Important Information
Disc Precautions
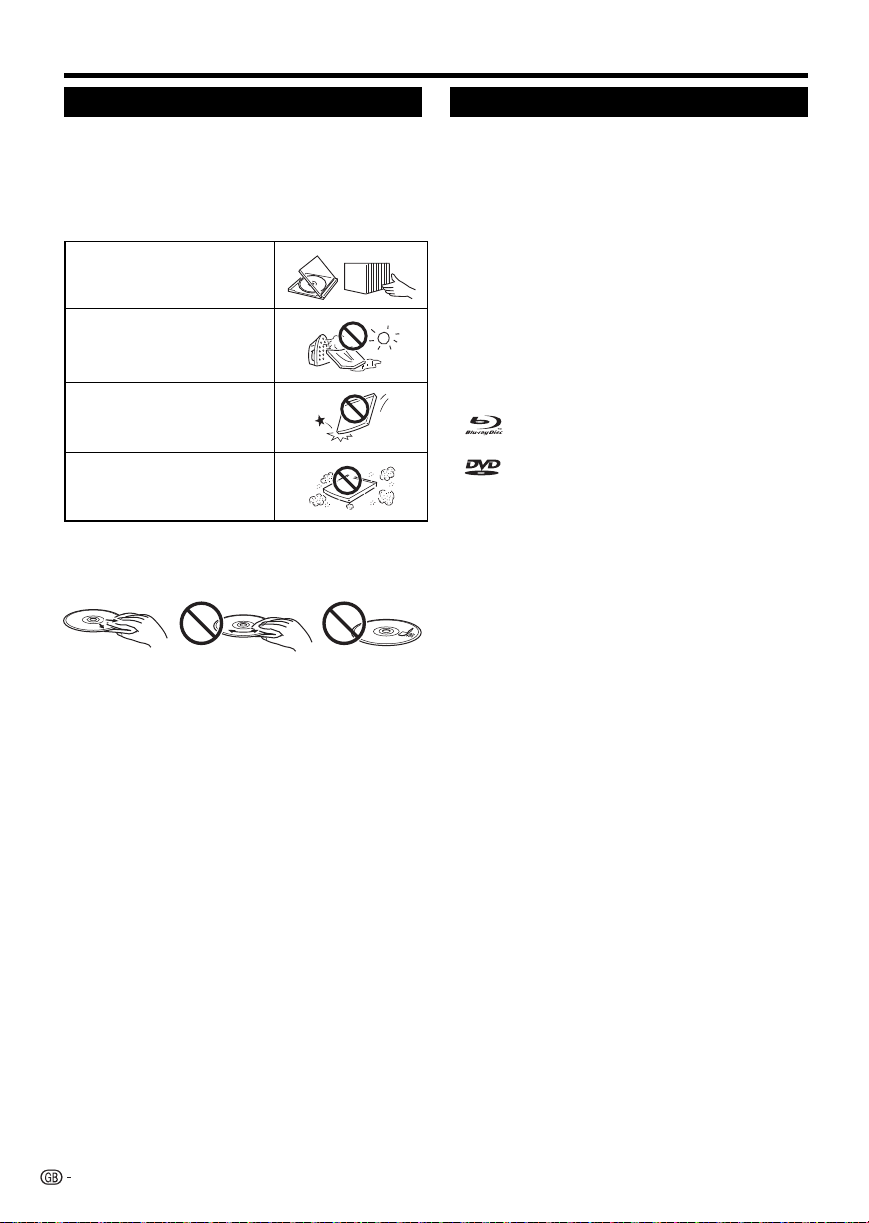
Be Careful of Scratches and Dust
• BD, DVD and CD discs are sensitive to dust, fingerprints
and especially scratches. A scratched disc may not be able
to be played back. Handle discs with care and store them
in a safe place.
Proper Disc Storage
Place the disc in the centre of the
disc case and store the case and
disc upright.
Avoid storing discs in locations
subject to direct sunlight, close to
heating appliances or in locations
of high humidity.
Do not drop discs or subject them
to strong vibrations or impacts.
Avoid storing discs in locations
where there are large amounts of
dust or moisture.
Handling Precautions
• If the surface is soiled, wipe gently with a soft, damp (water
only) cloth. When wiping discs, always move the cloth from
the centre hole toward the outer edge.
• Do not use record cleaning sprays, benzene, thinner, static
electricity prevention liquids or any other solvent.
• Do not touch the surface.
• Do not stick paper or adhesive labels to the disc.
• If the playing surface of a disc is soiled or scratched, the
Player may decide that the disc is incompatible and eject
the disc, or it may fail to play the disc correctly. Wipe any
dirt off the playing surface with a soft cloth.
Cleaning the Pick Up Lens
• Never use commercially available cleaning discs. The use
of these discs can damage the lens.
Warnings about dew formation
• Condensation may form on pick up lens or disc in the
following conditions:
− Immediately after a heater has been turned on.
− In a steamy or very humid room.
− When the Player is suddenly moved from a cold
environment to a warm one.
When condensation forms:
• It becomes difficult for the Player to read the signals
on the disc and prevents the Player from operating
properly.
To remove condensation:
• Take out the disc and leave the Player with the power
off until the condensation disappears. Using the Player
when there is condensation may cause malfunction.
License and Copyright
Audio-visual material may consist of copyrighted works which
must not be recorded without the authority of the owner of
the copyright. Refer to relevant laws in your country.
• “This item incorporates copy protection technology that is
protected by U.S. patents and other intellectual property
rights of Rovi Corporation. Reverse engineering and
disassembly are prohibited.”
• Manufactured under license from Dolby Laboratories.
“Dolby” and the double-D symbol are trademarks of Dolby
Laboratories.
• Manufactured under license under U.S. Patent #’s:
5,451,942; 5,956,674; 5,974,380; 5,978,762; 6,226,616;
6,487,535; 7,392,195; 7,272,567; 7,333,929; 7,212,872 &
other U.S. and worldwide patents issued & pending. DTS
and the Symbol are registered trademarks, & DTS-HD,
DTS-HD Master Audio | Essential and the DTS logos are
trademarks of DTS, Inc. Product includes software. ©DTS,
Inc. All Rights Reserved.
is a trademark.
•
• “BD-LIVE” logo is a trademark of Blu-ray Disc Association.
• is a trademark of DVD Format/Logo Licensing
Corporation.
• HDMI, the HDMI logo and High-Definition Multimedia
Interface are trademarks or registered trademarks of HDMI
Licensing LLC.
• “x.v.Colour” and “x.v.Colour” logo are trademarks of Sony
Corporation.
• Java and all Java-based trademarks and logos are
trademarks or registered trademarks of Sun Microsystems,
Inc. in the United States and/or other countries.
• “BONUSVIEW” logo is a trademark of Blu-ray Disc
Association.
• “AVCHD” and the “AVCHD” logo are trademarks of
Panasonic Corporation and Sony Corporation.
• “Blu-ray 3D” and “Blu-ray 3D” logo are trademarks of Bluray Disc Association.
• DivX®, DivX Certified® and associated logos are registered
trademarks of DivX, Inc. and are used under license.
12
Page 14
Getting Started
Step 1: Unpacking
Make sure the following accessories are provided with the product.
Remote control unit
(RC-D0713)
Pages 15 and 20
WARNING: The AC adapter and AC cord supplied with this player must not be used with other equipment.
AC adapters and AC cords other than the ones supplied must not be used with this player.
“AAA” size battery (g2)
Page 20 Page 21
AC adapter
(AC-120500A)
Page 21
AC cord
Introduction
Step 2: Selecting equipment to connect
Connection varies with the equipment used. Refer to Connection (Pages 17–19).
Turn off the devices before connecting.
Enjoying BD-LIVE
To enjoy BD-LIVE content on your TV, after an Internet connection is made, communication setup is required. Refer to
“Communication Setup” (Pages 40–41).
Step 3: Playing back video/picture/music content
Play back video, picture or music content from the desired media source such as Blu-ray and DVD discs.
Refer to Playback (Pages 20–35).
Step 4: Adjust settings to suit your preference
Adjust settings to enjoy various features and other functions for playing discs/content.
Refer to Settings (Pages 36–44).
13
Page 15

Major Components
Main Unit (Front)
1 Remote control sensor “TOP”
2 Disc slot (p. 24)
3 m (p. 24)
Main Unit (Rear)
4 a (On/Standby) indicator (p. 21)
5 3D indicator (pp. 21, 23)
6 USB terminal (p. 29)
NOTE
* When you insert or remove a USB memory
device, be sure to turn the main power off.
7 a (On/Standby) (p. 21)
8 Remote control sensor “FRONT”
9 Keylock indicator
Model label
1 Cooling fan
The cooling fan operates while the
power to the Player is on.
2 Terminal cover (p. 16)
3 Selector switch for Remote control
sensor (“TOP”/ “FRONT”)
4 DC IN terminal (p. 21)
NOTE
• Some optical and/or HDMI cables may not fit in the compartment.
14
5 OPTICAL DIGITAL OUT terminal (p. 18)
6 HDMI OUT terminal (p. 17)
7 ETHERNET terminal (p. 19)
8 Screw holes for VESA 75 Mount
Screw size: M4 (Maximum length = Mount plate thickness + 6 mm)
Recommended tightening torque for M4 screws: 1.2±0.1N·m (12.2±1kgf·cm)
Page 16
Major Components
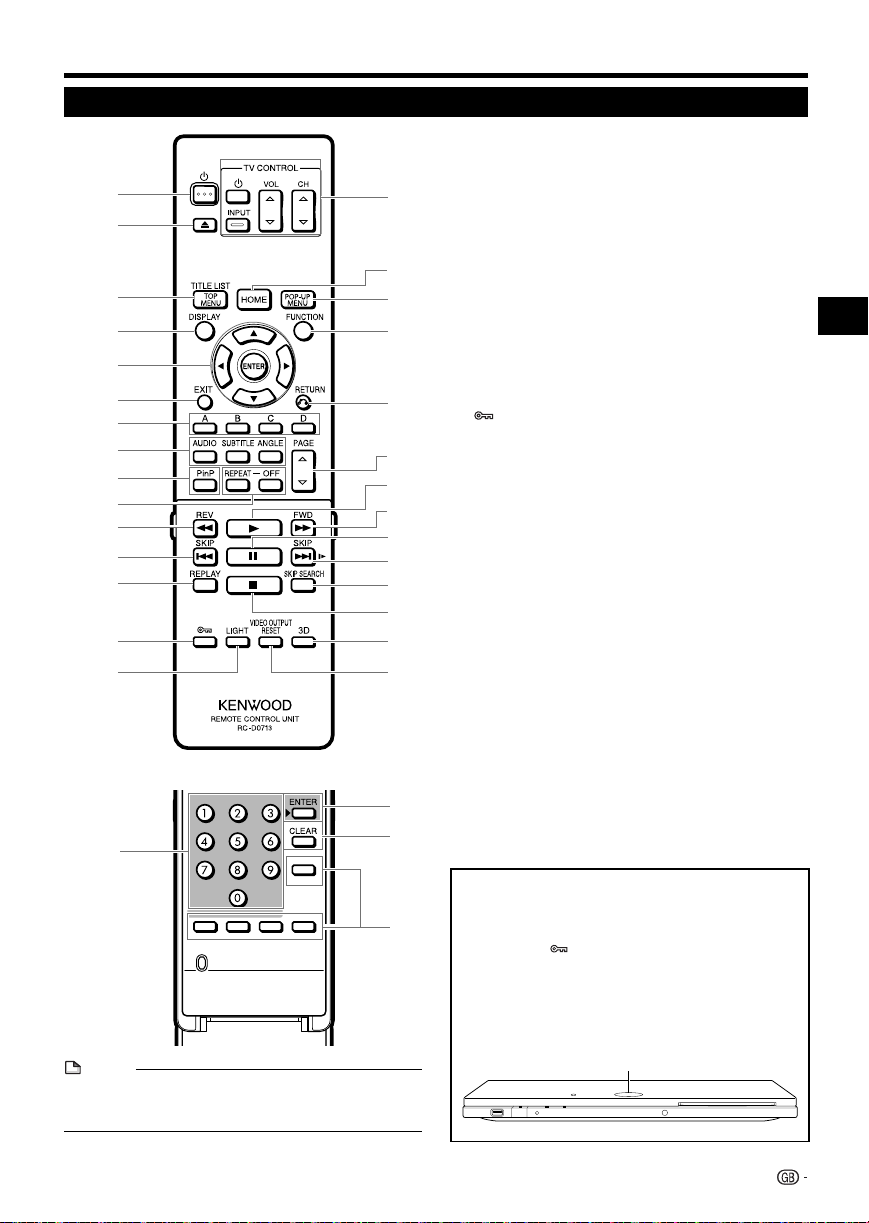
Remote Control Unit
Buttons under the cover
NOTE
• This remote control unit is equipped with two ENTER
buttons (5 and 31 listed above). The ENTER button under
the cover is useful when using with the number buttons.
1 a (On/Standby) (p. 21)
2 m (p. 24)
3 TOP MENU/TITLE LIST (pp. 25, 27)
4 DISPLAY (pp. 24, 32)
5 Cursor buttons (a/b/c/d), ENTER (pp. 22, 36)
6 EXIT (p. 36)
7 A (Red), B (Green), C (Yellow), D (Blue)
(pp. 27, 28, 30, 41)
8 AUDIO (p. 33), SUBTITLE (p. 33), ANGLE (p. 33)
9 PinP (p. 26)
10 REPEAT (p. 32), OFF (for REPEAT) (p. 32)
11 S REV (p. 31)
12 T SKIP (pp. 27, 31)
13 REPLAY (p. 31)
(Lock) (See below.)
14
15 LIGHT (p. 22)
16 TV CONTROL buttons (p. 22)
17 HOME (pp. 22, 36)
18 POP-UP MENU (p. 25)
19 FUNCTION (p. 34)
20 n RETURN (pp. 28, 32)
21 PAGE W/Y (p. 27)
22 d (Play) (p. 24)
23 V FWD (p. 31)
24 F (pp. 29, 31)
25 U SKIP/l (pp. 27, 31)
26 SKIP SEARCH (p. 31)
27 H (p. 24)
28 3D (p. 23)
29 VIDEO OUTPUT RESET (p. 37)
30 Number buttons (p. 35)
31 ENTER (p. 35)
This button is the same operation as 5 ENTER.
32 CLEAR (p. 40)
To clear the input number.
33 Non-functional buttons
They have no operation at all.
These buttons on the remote control are non-functional.
Keylock function
You can set the keylock to prevent accidental operations.
This function allows TVs compatible with HDMI CEC to
also perform a Key Lock on the player.
Press and hold (Lock) for more than 2 seconds.
• Each time you perform this operation, the function is
activated or deactivated.
In such cases, the Keylock indicator blinks.
• When operating the player in a status where the keylock
functions is set, the Keylock indicator will blink for
approximately 2 seconds.
Keylock indicator
Introduction
15
Page 17

Player setup location
Removing and replacing the
terminal cover
Before connecting the player to a TV, the AC adapter,
etc., remove the terminal cover on the bottom of the
player.
1 Remove the terminal cover on the bottom of the
player.
b Bottom side of the player
2 Make the necessary connections to the player
(Pages 17–19, 21).
3 Replace the terminal cover.
E Using the player in a horizontal position
Pass the cables through the centre of the
terminal cover.
b Bottom side of the player
Replace the terminal cover so the cables pass
through the centre of the cover.
Pass the cables through here.
b Bottom side of the player
Securing bracket for the HDMI cable
The terminal cover has a securing bracket to prevent
breakage of the HDMI cable. When the HDMI cable is
not passed straight through the securing bracket, the
terminal cover cannot be closed.
b Back of the terminal cover
Securing bracket for the HDMI cable
Installation precautions
Always install the system on a level, stable surface. When
installing on a stand or tabletop, be sure to confirm the
strength of the stand.
The magnetism from the speakers may cause color
irregularities on a nearby TV or PC screen. Always install the
speakers at a distance from a TV or PC.
¤
CAUTION
Observe the following cautions when installing the system
(Main unit and AC adaptor). Insufficient heat radiation may
build up internal heat and cause a malfunction or fire hazard.
• Do not place an object that may hinder heat radiation on
the system.
• Do not install the system on the back, on the side or
upside down.
• Do not place a cloth on the system or place it on a carpet
or cushion.
• Do not use the system in a poorly ventilated place.
Malfunction of the system
If the system does not function properly or the display shows
erroneous information even when the connections are made
correctly, reset the system (Page 47).
16
Installation example
Page 18

Connection
Video Connection
Connecting to the HDMI Terminal
• You can enjoy high quality digital picture and sound through the HDMI terminal.
• When you use HDMI CEC, make sure to use a certified HDMI cable.
• For details on digital audio output formats (PCM/bitstream), refer to the digital audio output format selection
table on page 44.
STEPS
1 Be sure to turn off this Player and the equipment before making any connections.
2 Firmly connect an HDMI cable (commercially available) to the HDMI terminals (1 and 2).
This Player
NOTE
• Audio transmitted in DTS-HD High
Resolution Audio and DTS-HD Master
Audio formats is output from the
HDMI terminal as Bitstream. Connect
an amplifier with a built-in decoder to
enjoy the fine sound quality.
• When using an HDMI output, 7.1 ch
Digital Output is available.
To HDMI OUT
1
terminal
(commercially available)
To HDMI IN
2
terminal
Projector AV receiver
HDMI cable
TV
Equipment with an HDMI terminal
Connection
After connecting
• If desired, connect audio equipment. (Page 18)
• If necessary, perform the Audio Video Settings. (Page 37)
• Refer to HDMI CEC function. (Pages 23 and 38)
• Prepare the desired disc or content and start playback. (Pages 24–30)
17
Page 19

Audio Connection
Connecting to the Digital Audio Terminal
• You can connect audio equipment or the TV to the OPTICAL DIGITAL OUT terminal.
• For details on digital audio output formats (PCM/bitstream), refer to the digital audio output format selection
table on page 44.
STEPS
1 Be sure to turn off this Player and the equipment before making any connections.
2 Firmly connect an optical digital cable (commercially available) to the optical digital audio terminals (1 and 2).
This Player
• When using OPTICAL DIGITAL OUT,
5.1 ch Digital Output is available.
7.1 ch Digital Output is not available.
NOTE:
7.1 ch Audio is available via the HDMI terminal.
NOTE
• Digital audio cannot be copied from the
OPTICAL DIGITAL OUT terminal.
To OPTICAL DIGITAL
OUT terminal
1
Audio equipment with a digital audio input terminal
After connecting
• If necessary, perform the Audio Video Settings. (Page 37)
• Prepare the desired disc or content and start playback. (Pages 24–30)
18
Optical digital cable
(commercially available)
AmplifierTV
To OPTICAL DIGITAL
AUDIO IN terminal
2
Page 20

Broadband Internet Connection
Internet Connection (LAN cable)
• By connecting this player to the Internet, you can enjoy a variety of content on your TV using BD-LIVE functions
and also perform software updates.
• When using the Internet, a broadband Internet connection as shown below is required.
STEPS
1 Be sure to turn off this Player and the equipment before making any connections.
2 Firmly connect a LAN cable (commercially available) to the ETHERNET terminal (1 and 2).
This Player
Connection
CAUTION
• When using a broadband Internet connection, a contract
with an Internet service provider is required. For more
details, contact your nearest Internet service provider.
• Refer to the operation manual of the equipment you have
as the connected equipment and connection method may
differ depending on your Internet environment.
NOTE
• Use a LAN cable/router supporting 10BASE-T/100BASETX.
• Kenwood cannot guarantee that all brands’ hubs will
operate with this player.
Internet Modem Hub or broadband router PC
To ETHERNET
terminal
LAN cable
(commercially available)
To LAN terminal
LAN
Example of a Broadband Internet Connection
After connecting
• Perform the communication settings. (Pages 40–41)
• When enjoying content on your TV using BD-LIVE functions, refer to BD-LIVE (Pages 26 and 39).
1
2
19
Page 21

Playback
Before Starting Playback
Loading the Batteries in the
Remote Control
1
Hold in the tab on the battery cover and pull the
cover towards the direction of the arrow.
2 Load the two “AAA” size batteries (R-03 size,
UM/SUM-4). Place batteries with their terminals
corresponding to the m and n indications in
battery compartment.
3 Insert the smaller tab of the battery cover into
the opening 1, and press down on the cover
until it clicks in place 2.
Approximate operating range of
remote control
You can select the remote control sensor used
depending on the orientation of the player.
Remote control sensor
¢
¢¢
¢
c Remote control unit
* Approx. 7 m from
the sensor
NOTE
• Do not subject the remote control unit to shock, water or
excessive humidity.
• The remote control unit may not function if the Player's
remote sensor is in direct sunlight or any other strong light.
• Incorrect use of batteries may cause them to leak or burst.
Read the battery warnings and use the batteries properly.
• Do not mix old and new batteries, or mix different brands.
• Remove the batteries if you will not use the remote control
unit for an extended period of time.
¤
CAUTION
• Do not use or store batteries in direct sunlight or other
excessively hot place, such as inside a car or near a heater.
This can cause batteries to leak, overheat, explode or
catch fire.
It can also reduce the life or performance of batteries.
20
Page 22

Before Starting Playback
Connecting the AC adapter
1 Plug the AC adapter cord in to the DC IN
terminal on the rear of the Player.
2 Plug the supplied AC cord into the AC adapter.
3 Then, plug into an AC outlet.
AC adapter
AC cord
¤
CAUTION
• Use the AC adapter (AC-120500A) provided with
this product.
NOTE
• Place the Player close to the AC outlet, and keep the
power plug within reach.
• TO PREVENT RISK OF ELECTRIC SHOCK, DO NOT
TOUCH THE UN-INSULATED PARTS OF ANY CABLES
WHILE THE AC CORD IS CONNECTED.
• The AC adapter may become warm after long-time use.
This is normal and does not indicate malfunction.
• If you are not going to use this Player for a long period of
time, be sure to remove the AC cord from the AC outlet.
Turning the power on
Press a on the remote control or on the Player to turn
on the power of the Player.
• The a (On/Standby) indicator lights green.
NOTE
• When you turn on this player for the first time after
purchase or when you turn on this player after you perform
“System Reset” (See page 39), the language setting screen
will be displayed, so please perform the language setting
(See step 4 of page 22).
Entering standby
Press a on the remote control or on the Player to
enter standby.
The system is using very weak current to maintain the
built-in memory. This is called Standby mode. When
system main unit is in this mode, you can turn it on
using the remote control.
• The a (On/Standby) indicator lights red.
• If you press a again immediately after entering standby,
the Player may not turn on. If this happens, wait for 10
seconds or more and then turn on the power again.
Indicators on the Player
a (On/Standby) indicator
Green on Power on
Red on Standby
3D indicator
Green on Video signal output is 3D images
(See page 23).
Playback
Turning the Power On
a
a (On/Standby) indicator
3D indicator
¤
CAUTION
• The power in this equipment will not be completely cut off
from the wall outlet when the standby switch is turned off.
Install the equipment so that the wall outlet is easily
accessible and, in case of emergency, immediately unplug
the power plug from the wall outlet.
Mains plug is used as the disconnect device, It shall remain
readily operable and should not be obstructed during
intended use.
(Continued on the next page)
21
Page 23

Before Starting Playback
Language Setting
Changing the on-screen display
language
1
Press HOME to display the menu screen.
• The same operation can be performed by pressing
ENTER after selecting the HOME icon on the Wall
Paper screen.
2 Press
3 Press
4 Press
a
/b to select “Settings”, then press
d or ENTER.
Movie
Picture
Music
Settings
a
/b to select “On Screen Language”,
then press d or ENTER.
(\KPV=PKLV:L[[PUNZ
:THY[:L[[PUNZ
/+40*,*
7SH`IHJR:L[[PUN
6U:JYLLU3HUN\HNL
*VTT\UPJH[PVU:L[\W
=LYZPVU
<:)4LTVY`4HUHNLTLU[
:VM[^HYL<WKH[L:L[[PUNZ
:`Z[LT
a
/b to select the language you want to
display on the screen, then press ENTER.
Operating a SHARP TV Using the
Remote Control
The Universal Remote Control may operate the basic
functions of the SHARP TV.
TV function control
• TV Power: a
• TV-AV Selector: INPUT
• TV Volume up/down: VOL W/Y
• TV Channel up/down: CH W/Y
Turning Off the Indicator Lights
If you feel that the indicators on the player are too
bright when watching movies, you can turn them off
except for the a (On/Standby) indicator.
Press LIGHT to turn the indicators on or off.
• Each time the button is pressed, the indicators are turned
on or off.
• The on/off setting can also be performed using the menu
screen (See page 38).
English Nederlands
Deutsch Svenska Magyar
Français Dansk Slovensky
Italiano Norsk
Español Suomi
Português Polski
Česky
Slovenščina
NOTE
• To select the DVD disc language, such as subtitle
language, etc., see page 25.
22
Page 24

Before Starting Playback
Using HDMI CEC
Controlling the Blu-ray disc player
using HDMI CEC
What you can do with HDMI CEC
When you connect this player to the LCD TV compatible
with HDMI CEC using an HDMI cable, you can perform the
functions listed below. (See page 17 for connecting to the
HDMI terminal).
E Automatic input select function
When you start playback of this player, the input selector of
the LCD TV will automatically switch to the LCD TV input
terminal connected to the player and the playback image
will appear on the screen, even if you are watching a TV
programme.
E Automatic power off function
If you turn off the LCD TV when this player is in stop mode,
the power of this player will be turned off automatically.
(However, when playing back a disc or other content using
this player, the power does not turn off.)
E Automatic power on function
When you switch to the LCD TV input terminal connected
to this player, the power of this player will be turned on
automatically.
NOTE
• In order to make HDMI CEC available, connect an LCD TV
to this player using an HDMI terminal. Set “HDMI CEC” to
“Yes” (See page 38).
Refer to the Operation Manual of the TV for details
regarding setup.
Using 3D
This sets output of 3D images.
To view 3D images, playback of 3D content (3D BD
video) is necessary with a 3D compatible TV and 3D
glasses in addition to this player.
Press 3D to change to the 3D mode.
• Each time the button is pressed, the mode switches
between “Auto(3D)” and “2D”.
The status of the selected mode will be displayed on the
TV screen.
Auto: Video signals are output as 3D when 3D content (3D
BD video) is played or as 2D when 2D content is played.
2D: Even if 3D content (3D BD video) is played, video signals
are output as 2D at all times.
• This setting (Auto(3D)/2D) can also be performed using the
menu screen (See page 39).
Regarding the 3D indicator
The 3D indicator lights green only when playing 3D content
(3D BD video) with the setting “Auto(3D)” selected.
3D indicator
NOTE
• The 3D mode can be switched only when playback is
stopped.
• Depending on the connected TV, the images during
playback may switch to 2D images due to changes in
the resolution, etc. Make sure the 3D image setting is
performed on the TV.
• The 3D images may not be output as set in “HDMI Video
Out”.
• When performing Fast Forward/Reverse, images are
shown in 2D.
Playback
¤
CAUTION
• When viewing 3D images, viewing for a long period of time
or lying on your back may cause eye strain and discomfort.
In addition, 3D images may affect the eyesight of young
children/infants, so keep them from viewing the images.
23
Page 25

Video/Picture/Music Playback
Loading a Disc/Ejecting a Disc
ma
1 Press a to turn on the power.
2 Load a disc into the disc slot.
• Insert the disc with the label face up.
• In case of disc recorded on both sides, face down the
side to play back.
To eject a disc
While in stop mode, press m.
BD/DVD Video Playback
BD-RBD VIDEO BD-RE
DVD VIDEO DVD-R
This section explains playback of commercially
available BD Video and DVD Video discs (like movies)
and recorded DVD-RW/R discs.
• This player supports DVD upscaling during DVD playback.
• For a description of other playback functions, refer to
“Playback Functions” on pages 31–33.
DVD-RW
NOTE
• The disc load time may vary depending on the disc.
Regarding playback of BD video discs
• Some of the newly released BD video discs cannot be
played back unless you update the player software to the
latest version. Therefore, it may be required to update the
software of the player.
Refer to page 43 for more information regarding software
updates for the player.
To stop playback
Press H.
Resume playback function
• If you press d (Play)next, playback will resume from
the point where the Player was previously stopped. To
playback from the beginning, cancel resume mode by
pressing H, then press d (Play). (This may not work
depending on the type of disc.)
NOTE
• Resume playback may not function depending on the disc.
Displaying the disc information
Press DISPLAY during playback.
• Each time you press DISPLAY, the display switches
as follows.
Disc Information Screen A
BD-VIDEO
1
2
3
4
1/1
10/1 1
00 :00 :12
03/:12:28
1 Load a disc.
• Playback may begin automatically, depending on the disc.
• Playback begins from the first title.
• The menu may be displayed first, depending on the
disc. Perform playback operation by following the
directions on the screen.
• When loading a disc containing 3D content (3D BD
video) with “Yes” selected in the “3D Notice” setting
(Page 39), playback will be stopped and the 3D notice
will be displayed on the TV screen. In such cases,
press ENTER for confirmation, and then playback will
start.
2 Press d (Play) if playback does not begin
automatically or playback is stopped.
24
Disc Information Screen B
4
00 :00 :12
03/:12:28
No Display
1 Type of disc
2 Title number being played / Total number of Titles
3 Chapter number being played / Total number of
Chapters
4 Elapsed playback time / Total playback time for the
Title
NOTE
• Disc Information Screen A disappears after about 1 minute
elapses without performing any operations.
• For some commercially-released BD VIDEO discs, the total
playback time display for the Chapter/Title may not appear.
Page 26

Video/Picture/Music Playback
BD/DVD Menus
• This section explains how to play back a BD/DVD
video disc with a top menu, disc menu or pop-up
menu.
• The titles listed in the top menu and a disc guide (for
options like subtitles and audio languages) are given
in the disc menu.
Start playback by selecting a title
from the top menu
BD VIDEO
1 Press TOP MENU/TITLE LIST.
2 Press
• The procedure explained on this page is the basic
Top menu
• With some BD/DVD discs, the top menu may be referred
• If no top menu is available, the TOP MENU/TITLE LIST
DVD VIDEO
• The top menu screen is displayed if present on the
BD/DVD video disc.
Example
;674,5<
1Haa
*SHZZPJ
a
/b/c/d to select the title, then press
ENTER.
• The selected title is played back.
3H[PU
9VJR
NOTE
operation procedure. Procedures vary depending on
the BD/DVD video disc, so you may need to follow the
instructions in the BD/DVD video disc manual or the
instructions displayed on the screen.
to as the “Title Menu”. Use TOP MENU/TITLE LIST on
the remote control when the instructions refer to “Title
Menu”.
button will have no effect.
Using the disc menu
DVD VIDEO
Example: Select “SUBTITLE LANGUAGE”.
1 Press TOP MENU/TITLE LIST.
• The disc menu screen is displayed if present on the
DVD video disc.
2 Press
3 Press
a
/b to select “SUBTITLE LANGUAGE”,
then press ENTER.
• The screen for selecting the subtitle language is
displayed.
Example
4,5<
(<+063(5.<(.,
:<);0;3,3(5.<(.,
(<+06
a
/b to select the subtitle language, then
press ENTER.
4 Press TOP MENU/TITLE LIST to exit.
Using the pop-up menu
BD VIDEO
1 Press POP-UP MENU during playback.
• The pop up menu screen is displayed.
• The menu contents displayed vary depending on the
disc. For details on how to see and operate the popup menu, refer to the manual for the disc.
Example
7VW\WTLU\
7YL]PV\ZWHNL
5L_[WHNL
2 Press a/b/c/d to select the desired item,
then press ENTER.
3 Press POP-UP MENU to exit.
• The pop-up menu will automatically disappear for
some discs.
Playback
(Continued on the next page)
25
Page 27

Video/Picture/Music Playback
Enjoying BONUSVIEW or BD-LIVE
BD VIDEO
This Player is compatible with additional functions of
BD-Video, BONUSVIEW (BD-ROM Profile 1 Version
1.1) and BD-LIVE.
For BD-Video discs compatible with BONUSVIEW, the
functions of Picture in Picture and Virtual Package are
available. For BD-LIVE compatible discs, you can enjoy
a variety of functions via the Internet in addition to the
BONUSVIEW functions.
Virtual Package/BD-LIVE data is saved in Local
Storage (USB memory device connected to this
Player). To enjoy these functions, connect a USB
memory device (2GB or greater) supporting USB 2.0
High Speed (480Mbit/s) to the USB terminal on this
player.
When you insert or remove a USB memory device, be sure to
turn the main power off.
USB memory
device
• If there is insufficient storage space, the data will not be
copied/downloaded. Delete unneeded data or use a new
USB memory device.
• If a USB memory device containing other data (previously
recorded) is used, the video and audio may not play back
properly.
• If the USB memory device is disconnected from this player
during playback of Virtual Package/BD-LIVE data, playback
of the disc will stop.
• Some time may be required for the data to load (read/write).
• Refer to “USB Memory Management” on page 42 for
erasing the Virtual Package data and the BD-LIVE data in
the USB memory device.
NOTE
• Kenwood cannot guarantee that all brands’ USB memory
devices will operate with this player.
• Only USB memory devices formatted with FAT 32/16 are
compatible.
When formatting a USB memory device using a PC,
perform the following settings.
Format File System: FAT32
Allocation Unit Size: Default Allocation Size
• Do not use a USB extension cable when connecting a USB
memory device to the USB terminal of the player.
− Using a USB extension cable may prevent the player
from performing correctly.
Use of Picture in Picture function
(secondary audio/video playback)
BD-Video that includes secondary audio and video
compatible with Picture in Picture can be played back
with secondary audio and video simultaneously as a
small video in the corner.
1 Press PinP during playback to show the
2-picture screen.
Primary
audio/video
Secondary
audio/video
2 To remove the secondary video, press PinP
again.
NOTE
• To listen to secondary audio, set the digital audio output
setting (See “Audio Out” on page 37) according to the
digital audio output format selection table on page 44.
• The secondary audio and video for Picture In Picture may
automatically play back and be removed depending on the
content. Also, playable areas may be restricted.
Virtual Package
For BD-Video discs compatible with Virtual Package,
data is copied from the discs or Internet to local
storage. It is automatically copied to the local storage
prior to playback. You can enjoy a variety of additional
functions including secondary video, secondary audio,
subtitles, movie trailers, etc.
• The playback methods vary depending on the disc. For
details, refer to the disc manual.
BD-LIVE
In this Player, a variety of contents with interactive
functions are available through BD-LIVE compatible Bluray discs by connecting to the Internet. You can enjoy
the download of bonus features such as latest movie
trailers to the USB memory device, communication
compatible BD-J interactive games, etc.
• The available functions differ depending on the disc.
NOTE
• Regarding playback method of BD-LIVE contents, etc.,
perform the operations in accordance with the instructions
in the BD disc manual.
• To enjoy BD-LIVE functions, perform the broadband
Internet connection (Page 19) and communication settings
(Pages 40–41).
• Refer to page 39 regarding the setup to restrict access to
BD-LIVE contents.
• If the BD-LIVE screen does not appear for a while after
you select the BD-LIVE function in the BD disc menu, the
USB memory device may not have enough free space. In
such cases, eject the disc from the player, and then erase
the data in the USB memory device in the “USB Memory
Management” menu on page 42.
26
Page 28

Video/Picture/Music Playback
DVD-R/-RW (VR format) / BD-RE/-R
(BDAV format) Playback
DVD-R
DVD-RW
You can play back a recorded disc (DVD: VR format
finalised disc only / BD: BDAV format disc only).
• For a description of other playback functions, refer to
”Playback Functions” on pages 31–33.
NOTE
• “Finalise” refers to a recorder processing a recorded disc
so that it will play in other DVD players/recorders as well
as this player. Only finalised DVD discs will play back in
this player. (This player does not have a function to finalise
discs.)
• Some discs cannot be played back depending on the
audio format.
• BD-RE/-R discs recorded from a BD recorder comply with
AACS copyright protection technology. As this player is not
intended to be compliant with AACS, such discs cannot be
played back.
(AACS: Advanced Access Content System)
BD-RE BD-R
Playback by selecting a title
1
Load a recorded disc.
• Disc playback will begin automatically.
• Playback begins from the first title.
2 Press H.
3 Press TOP MENU/TITLE LIST.
• The Title List screen is displayed.
Program 1
21/5 Fri 9:30 AM 110 Min.
110 Min.
Program
1
Select
1 Information of selected title
2 Title Name
3 Button Guide
• When loading a BD disc with usage restrictions placed
by a BD recorder, the password input screen appears.
Then, input your password.
If you input a wrong password three times, the disc
will be ejected. Load the disc into the disc slot again,
and then input a correct password.
4 Press
ENTER to start playback.
• If you want to select additional titles, switch pages by
pressing PAGE W/Y.
The same operation can be performed by pressing
KSKIP or LSKIP/l.
• You can playback by pressing d instead of pressing
ENTER.
1 Program 1
2 Program 2
3 Program 3
4 Program 4
5 Program 5
6 Program 6
Enter Return Exit
Recording Date
Recording Duration
a
/b to select the desired title, then press
C
21/5
15/6
3/7
18/9
20/9 Sat
25/9
Playlist
Fri
110 Min.
Fri
Mon
Thu
1/All 8 Titles
㪜㪯㪠㪫
56 Min.
40 Min.
20 Min.
60 Min.Thu
5 Press H to stop playback.
1
2
3
Playback
Playback by selecting a Playlist
1
Press C (Yellow) while the Title List screen is
displayed.
• The Playlist screen is displayed.
2 Press
a
/b to select the desired title, then press
ENTER to start playback.
3 Press H to stop playback.
(Continued on the next page)
27
Page 29

Video/Picture/Music Playback
Audio CD Playback
AUDIO CD
This Player can play back audio CDs.
• For a description of other playback functions, refer to
“Playback Functions” on pages 31–33.
Playback from the beginning
1
Load an audio CD.
• The CD screen is displayed.
(The CD screen is displayed only when a compact
disc recorded in the CD-DA format is inserted.)
• Playback may begin automatically, depending on the
disc.
Example: when playing back Track 6
n
o
s
c
u
n
F
t
a
T
c
0
k
6
r
0
0
0
:
1
a
T
0
c
5
1
k
r
2
a
T
c
k
r
3
a
T
c
k
r
4
a
T
c
k
r
5
a
T
c
k
r
6
a
T
c
k
r
1
6
:
0
5
2
1
0
:
0
5
3
2
3
:
0
5
4
0
3
:
0
4
5
4
4
:
0
5
6
0
8
:
i
6
2
1
/
0
0
0
0
1
1
:
:
+
R
L
1
5
0
8
:
O
f
f
6
/
2 Press d (Play) if playback does not begin
automatically or playback is stopped.
3
To pause the playback at any time, press F.
• Press F or d (Play) to return to playback.
4 Press H to stop playback.
NOTE
• Time display for each track will not be indicated on the
screen until the track is played back.
To skip the track during playback
Press KSKIP or LSKIP/l.
• Press KSKIP to skip backward.
• Press LSKIP/l to skip forward.
Operation procedure for the
“Functions” menu
1
Press D (Blue) (Functions) when the CD screen
is displayed.
• The “Functions” menu is activated.
n
o
s
c
u
n
F
t
a
T
0
c
3
k
r
0
0
0
:
1
a
T
0
c
1
r
k
2
3
4
5
6
2 Press
press ENTER.
• When playback is stopped, only “Track” can be
selected.
• For a description of each setting, see “Functions
which can be set” (Page 35).
3 Press
• Operations vary depending on the setting. Follow the
operation instructions on the screen.
a
T
0
c
2
r
k
a
T
0
c
3
r
k
a
T
0
c
4
k
r
a
T
0
c
5
k
r
a
T
0
c
6
k
r
a
/b to select the desired setting, then
a
/b/c/d to set, then press ENTER.
5
5
1
6
:
5
1
0
:
5
2
3
:
5
0
3
:
4
4
4
:
5
0
8
:
i
3
2
1
/
0
0
0
0
1
1
:
:
+
R
L
1
2
3
:
O
f
f
3
2
1
/
4 Press n RETURN or D (Blue) to exit the
“Functions” menu.
NOTE
• The displayed items vary depending on the disc.
• Audio channel and time skip functions are not available.
2
1
28
Page 30

Video/Picture/Music Playback
Audio Data (MP3 File) Playback
CD-R CD-RW
This Player can play back audio data (MP3 files)
recorded on CD-R/RW discs, DVD-R/RW discs and
USB memory devices.
• For details on the audio data that you can play using this
player, refer to page 9.
DVD-R
DVD-RW
USB
Playing back Audio data (MP3 files)
When you insert or remove a USB memory device, be
sure to turn the main power off.
1 Load a disc or insert a USB memory device
containing audio data (MP3 files), then press
HOME to display the menu screen.
2 Press
3 Press
4 Press
a
/b to select “Music”, then press d or
ENTER.
a
/b to select “DVD/CD*” or “USB
Memory Device”, then press d or ENTER.
* Display name varies depending on the type of media
inserted.
• If only a “DVD/CD” or a USB memory device is
inserted, the “DVD/CD” or “USB Memory Device”
selection screen does not appear. In such cases, after
step 2, proceed to step 4.
a
/b to select a folder or file.
• When you select a folder, press ENTER to open it,
and then press a/b to select a file in the folder.
Folder 1
5 Press ENTER to play back the selected file.
• Playback of the selected file will begin.
m
0
1
k
a
T
3
p
c
r
.
0
0
0
:
1
a
T
c
0
k
1
r
2
3
4
5
6
• When MP3 files are played, the “Functions” menu is
not available.
6
To pause the playback at any time, press F.
• Press F or d (Play) to return to playback.
.
a
T
c
0
2
k
r
.
a
T
0
c
3
r
k
.
a
T
0
c
4
k
r
.
a
T
0
c
5
k
r
.
a
T
0
c
6
k
r
.
5
1
:
m
p
3
m
p
3
m
p
3
m
3
p
m
3
p
m
3
p
1
2
1
/
1
1
0
0
0
0
:
:
M
1
P
3
e
S
o
e
r
t
6
–
5
1
6
:
5
1
0
:
5
2
3
:
5
0
3
:
4
4
4
:
5
0
8
:
1
/
7 Press H to stop playback.
To play another file during Playback
Press a/b to select the file you want to play, then
press ENTER.
• The chosen file will be played.
To skip the file during Playback
Press KSKIP or LSKIP/l.
• Press KSKIP to skip backward.
• Press LSKIP/l to skip forward.
1
2
Playback
CD
1 Folder 1
2 Folder 2
3 Folder 3
4 Folder 4
5 Track 01.mp3
6 Track 02.mp3
1/All 14 files and folders
NOTE
• The Fast Forward/Reverse function does not work.
• The Repeat function does not work.
• When data in the USB memory device is played back,
playback from the USB memory device will stop when m
on the remote control or the player is pressed or when a
disc is inserted into the player.
(Continued on the next page)
29
Page 31

Video/Picture/Music Playback
Displaying Still Images (JPEG files)
CD-R CD-RW
This Player can display still images (JPEG files)
recorded on CD-R/RW discs, DVD-R/RW discs and
USB memory devices.
• For details on the still images that you can display using
this player, refer to page 9.
• Still images are played one by one while during “Slide
show”, they are automatically replaced one after another.
DVD-R
DVD-RW
USB
Displaying Still Images (JPEG files)
When you insert or remove a USB memory device, be
sure to turn the main power off.
1 Load a disc or insert a USB memory device
containing Still Images (JPEG files), then press
HOME to display the menu screen.
2 Press
3 Press
4 Press
a
/b to select “Picture”, then press d or
ENTER.
a
/b to select “DVD/CD*” or “USB
Memory Device”, then press d or ENTER.
* Display name varies depending on the type of media
inserted.
• If only a “DVD/CD” or a USB memory device is
inserted, the “DVD/CD” or “USB Memory Device”
selection screen does not appear. In such cases, after
step 2, proceed to step 4.
a
/b to select a folder or file.
• When you select a folder, press ENTER to open it,
and then press a/b to select a file in the folder.
Folder 1
CD
1 Folder 1
2 Folder 2
3 Folder 3
4 Folder 4
5 Image 01.jpg
6 Image 02.jpg
1/All 14 files and folders
NOTE
• Thumbnail data will be displayed when JPEG files from a
digital camera contain thumbnail data.
• An icon will be displayed for JPEG files which do not
contain thumbnail data.
• When data in the USB memory device is played back,
playback from the USB memory device will stop when m
on the remote control or the player is pressed or when a
disc is inserted into the player.
5 Press ENTER to display the selected file.
• The selected still image appears on the screen.
1/77
6 Press KSKIP or LSKIP/l to replace
one image with another.
• The same operation can be performed by pressing
S REV/V FWD.
• Press n RETURN if you wish to return to the
selection screen.
7 To stop the still image display at any time, press
H.
Playing back Slide Show
1
To play back Slide Show, in Step 6 of the
“Displaying Still Images (JPEG files)”, press
d (Play) (Slide Show).
• The still images inside the selected folder are played
as a slide show.
2 To pause the playback at any time, press F.
• Press d (Play) to return to playback of a slide show.
3 To stop the playback at any time, press H.
Setting slide show speed/repeat
playback
1 Press D (Blue) (Slide Show Menu) while the
selection screen is displayed.
• The setting screen for “Slide Show Speed”/“Repeat
Mode Setting” appears.
2 Press
3 Press
4 Press
5 Press
a
/b to select “Slide Show Speed”, then
press d or ENTER.
a
/b to select the desired speed, then
press ENTER.
• The slide show speed may be selected from “Fast”,
“Normal”, “Slow1” and “Slow2”.
a
/b to select “Repeat Mode Setting”,
then press d or ENTER.
a
/b to select the desired item, then
press ENTER.
• The desired item may be selected from “Yes” or “No”.
6 Press EXIT to exit.
30
Page 32

Playback Functions
NOTE
• Some operations in the following playback functions
cannot be performed depending on the specifications of
the disc.
Pause/Frame Advance Playback
BD VIDEO BD-R BD-RE
DVD-RW
DVD VIDEO
The Pause function is enabled when F is pressed
during playback. (If you are playing back an audio CD,
audio data [MP3 files] or still images [JPEG files], these
will also pause.)
The Frame Advance Playback function is enabled when
L SKIP/l is pressed during pause.
• Frame Advance Playback may not function properly with
discs other than DVD-RW/R (VR format).
NOTE
• Some BD/DVD Video discs are not compatible with Pause/
Frame Advance Playback.
• Frame Reverse Playback cannot be performed with this
player.
• Frame Advance Playback does not work for BD-R/-RE.
DVD-R
Fast Forward/Reverse (Search)
BD VIDEO BD-R BD-RE
DVD-RW
DVD VIDEO
AUDIO CD
DVD-R
The Fast Forward/Reverse function is enabled when
G REV or J FWD is pressed during playback.
Example: When J FWD is pressed
• The search speed will change each time you press the
button.
When playing back a DVD
• You cannot perform Fast Forward/Fast Reverse from
one title and continue to another title (except when
playing audio CDs). At the end or beginning of the title,
Fast Forward/Fast Reverse will be cancelled and normal
playback will automatically resume.
NOTE
• Subtitles are not played back with BD/DVD video discs
during Fast Forward and Fast Reverse.
Skipping to the Next or the Start of
the Current Chapter (Track/Title)
BD VIDEO BD-R BD-RE
DVD-RW
DVD VIDEO
AUDIO CD CD-R CD-RW USB
The Skipping (to the beginning of a chapter, track or
title) function is enabled when T SKIP or
U SKIP/l is pressed during playback.
DVD-R
Slow Playback
BD VIDEO BD-R BD-RE
DVD-RW
DVD VIDEO
DVD-R
The Slow Playback function is enabled when
L SKIP/l or is pressed for more than 2
seconds during pause.
• Press d (Play) to return to normal playback.
NOTE
• This doesn't work for audio CDs.
• You cannot perform Slow Playback between titles. At the
end of the title, Slow Playback will be cancelled and normal
playback will automatically resume.
• Reverse Slow Playback cannot be performed with this
player.
Skip Search
BD VIDEO BD-R BD-RE
DVD-RW
DVD VIDEO
DVD-R
Playback skips 30 seconds ahead when SKIP SEARCH
is pressed during playback.
Replay
BD VIDEO BD-R BD-RE
DVD-RW
DVD VIDEO
Playback jumps back 10 seconds when REPLAY is
pressed during playback.
DVD-R
Playback
(Continued on the next page)
31
Page 33

Playback Functions
Repeat Playback of a Title or
Chapter (Repeat Playback)
BD VIDEO BD-R BD-RE
DVD-RW
DVD VIDEO
AUDIO CD
DVD-R
1 Play back the title or chapter you want to repeat.
2 Press REPEAT.
3 Press
4 Press ENTER.
a
/b to select the type of Repeat
Playback.
• Playback Title: Repeats the title currently being played
back.
• Playback Chapter: Repeats the chapter currently
being played back.
• Scene Selection: Repeats the specified scene of title
or chapter.
Playback Title
Playback Chapter
Scene Selection
• Press n RETURN to cancel without setting the
type of Repeat Playback.
• For Audio CD, you can select “Playing Disc”, “Playing
Track” and “Specify The Part” as Repeat Playback
options.
Example: Repeat playback of a title (TITLE)
BD-VIDEO
1/3
55/2
00 :20 :30
2 English
1
1 DTS
On Title Repeat
Partial Repeat Playback (Repeat
Playback of a Specified Part)
DVD-RW
DVD VIDEO
AUDIO CD
DVD-R
1 Press REPEAT during playback.
2 Press
a
/b to select “Scene Selection”, then
press ENTER.
• “Set Start Point” displays.
Playback Title
Playback Chapter
Set Start PointScene Selection
3 Press ENTER at the scene where you want to
set the start point.
• “Set End Point” displays.
4 Press ENTER at the scene where you want to
set the end point.
• You can press V FWD to fast forward to the scene
where you want to set the end point. When you reach
the desired scene, simply press I and then ENTER
to set the end point. To cancel Repeat Playback,
press REPEAT-OFF or REPEAT.
NOTE
• Press LSKIP/l, the Repeat Playback is cancelled
and the next chapter being play back.
• Press KSKIP once, the Repeat Playback is cancelled
and the player returns to the start of current chapter (track).
• If you press KSKIP again (within about 5 seconds)
the player will skip to the beginning of the previous chapter
(track).
• For Partial Repeat Playback, set the start and end points
within the same title.
• Repeat Playback may be forbidden depending on the disc.
• Partial Repeat Playback may not work in multi-angle
scenes.
• If you press DISPLAY, you can confirm the Repeat
Playback status.
On Title Repeat
5 Press REPEAT-OFF or REPEAT to return to
normal playback.
NOTE
• “Scene Selection” operation is not available for BD video.
32
Page 34

Playback Functions
Displaying the Audio Information
You can display the audio information on the disc
currently being played back by pressing AUDIO.
• The displayed contents vary depending on the disc.
BD VIDEO
DVD VIDEO
The audio channel currently being played back will be
displayed.
If multiple audio channels are recorded, you can switch
the audio channel by pressing AUDIO.
DVD-RW
DVD-R
When a recorded broadcast with stereo or
monaural audio is played back:
“Stereo” is displayed. (Audio cannot be switched.)
NOTE
• When you play a programme recorded in stereo or
monaural, and if you are listening to the Bitstream sound
via the digital output jack, you cannot select the audio
channel. Set the digital audio output setting to “PCM”
(Page 37).
• Settings for audio can also be changed in the Function
Control screen (Page 34).
• The operation of audio differs according to each disc. You
may need to refer to the operation manual of the disc.
• The display for audio information automatically disappears
after 5 seconds.
Switching Subtitles
BD VIDEO
If subtitles are provided in multiple languages, you can
switch between them.
Press SUBTITLE during playback.
• The display indicates the subtitle number currently being
• “–” is displayed if a disc has no subtitles.
• You can also select “Off”.
• Settings for subtitles can also be changed in the Function
• The operation of subtitles differs according to each disc.
• The display for subtitle information automatically
DVD VIDEO
played back, and the subtitles appear.
Each time SUBTITLE is pressed, the subtitles change.
NOTE
Control screen (Page 34).
You may need to refer to the operation manual of the disc.
disappears after 5 seconds.
Switching the Angle
BD VIDEO
If multiple angles are recorded, you can switch
between them.
Press ANGLE during playback.
• The display indicates the angle number currently being
To return to the previous angle, press ANGLE to cycle
through the angles until you return to the original angle.
• The displayed items vary depending on the disc.
• If you access the Function Control screen during playback
• The operation of angles differs according to each disc. You
• The display for angle information automatically disappears
DVD VIDEO
played back. Each time you press ANGLE, the angle
switches.
NOTE
of a BD/DVD video, it may be impossible to operate the
BD/DVD video playback. In cases like this, close the
Function Control screen.
may need to refer to the operation manual of the disc.
after 5 seconds.
Displaying the Angle Mark
BD VIDEO
You can change settings so that Angle Mark appears
in the right bottom part of the screen when multiple
angles are recorded. The settings can be changed in
“Settings” – “Playback Setting” – “Angle Mark Display”
(Page 38).
DVD VIDEO
Playback
33
Page 35

Settings During Playback
Function Control
BD VIDEO BD-R BD-RE
DVD-RW
DVD VIDEO
AUDIO CD
This allows you to adjust various settings at once, like
subtitles, angle settings and the title selection for Direct
Playback. You can adjust the video and audio to suit
your preferences. The operations are the same for BD
and DVD.
Function Control screen
1 Playback status display
Shows the operation status and the disc type.
2 Setting items
Selects a title (or track) or chapter for playback, or performs
video/audio settings.
• Title/Track Number (Direct Title/Track Skip)
• Chapter Number (Direct Chapter Skip)
• Playback Elapsed Time (Direct Time Skip)
• Subtitle Language
• Angle Number
• Audio
• Repeat
3 Operation guide display
Provides help on remote control button operations.
DVD-R
BD-VIDEO
1 / 3
5 5 / 2
0 0 : 2 0 : 3 0
2 English
1
1 DTS
Off
ENTER
Select Enter
㪜㪯㪠㪫
Exit
Return
3
1
2
Function control operation
procedure
1 Press FUNCTION during playback.
• The Function Control screen is displayed on the TV.
2 Press
3 Press
a
/b to select the desired setting, then
press ENTER.
• For a description of each setting, see “Functions
which can be set” (Page 35).
BD-VIDEO
1/3
5 5 / 2
0 0 : 2 0 : 3 0
2 English
1
1 DTS
Off
a
/b/c/d to set, then press ENTER.
• Operations vary depending on the setting. Follow the
operation instructions on the screen.
4 Press n RETURN or FUNCTION to close the
Function Control screen.
NOTE
• If “– –” is displayed for an option like title number or
subtitles, the disc has no titles or subtitles which can be
selected.
• The displayed items vary depending on the disc.
• If you access the Function Control screen during playback
of a BD/DVD video, it may be impossible to operate the
BD/DVD video playback. In cases like this, close the
Function Control screen.
34
Page 36

Settings During Playback
Functions which can be set
Title/Track Number (Direct Title/Track Skip)
• Shows the title number being played back (or track number when playing back an audio
CD). You can skip to the start of the title (or track).
• To skip to the start of a selected title (or track), press the Number buttons to enter the
title (or track) number when this option is highlighted.
Chapter Number (Direct Chapter Skip)
• Shows the chapter number being played back. You can skip to the start of the chapter.
• To skip to the start of a selected chapter, press the Number buttons to enter the
chapter number when this option is highlighted.
Playback Elapsed Time (Direct Time Skip)
• Shows the time elapsed from the beginning of the current disc title (or track). This lets
you skip to a specific time.
• Press c/d to select the Hour, Minute or Second, then press a/b or the Number
buttons to set the time. Press ENTER to start playback at the set time.
NOTE
• ENTER button under the Cover: Enters the input number.
• CLEAR button under the Cover: Clears the input number.
Subtitle Language
• Shows the currently selected subtitle language. If subtitles are provided in other
languages, you can switch to your preferred language.
Angle Number
• Shows the currently selected angle number. If the video is recorded with multiple angles,
you can switch the angle.
Playback
Audio
• Shows the currently selected type of audio. You can select the desired type of audio.
Repeat
• The current Title (or Chapter) or partial segments can be repeatedly played back. Repeat
Playback is also possible with the REPEAT button on the remote control.
NOTE
• These functions may not work with all discs.
35
Page 37

Settings
SETTINGS
Common operations
The “menu” enables various audio/visual settings and adjustments on the functions using the remote control unit.
You need to call up the On Screen Display to perform settings for this player. The following is the explanation for
the basic operations of the “menu”.
Example: Setting “HDMI CEC”
1
Movie
Picture
Music
Settings
3
Select the next item
Press a/b to select the desired item,
then press ENTER.
Press n RETURN to return to the
previous “menu” page.
Display the menu screen
Press HOME to display the menu screen.
• The same operation can be performed
by pressing ENTER after selecting the
HOME icon on the Wall Paper screen.
Press a/b to select “Settings”, then press
d or ENTER.
Basic Operation for Playback Setting
Example: Setting “Parental Control” under “Playback Setting”
1 Press HOME to display the menu screen.
• The same operation can be performed by pressing
ENTER after selecting the HOME icon on the Wall
Paper screen.
2 Press
3 Press
4 Press
5 Enter your 4-digit PIN code.
When setting the PIN code for the first time.
a
/b to select “Settings”, then press
d or ENTER.
a
/b to select “Playback Setting”, then
press d or ENTER.
a
/b to select “Parental Control”, then
press d or ENTER.
• When you operate this Player for the first time, the
PIN code setting screen will be displayed. See “When
setting the PIN code for the first time” below.
• You cannot move to the next setting screen until you
can input the correct PIN code.
1 To set the PIN code for the first time, press a/b
to select “Yes” to enter the PIN code setting
menu, then press d or ENTER.
2
4
2 Enter a 4-digit number for the PIN code, then
the same 4-digit number for confirmation.
3 Press ENTER to complete the PIN code setting
procedure and move to the next setting screen.
Select a menu item
Press a/b to select “HDMI CEC”, then
press d or ENTER.
(\KPV=PKLV:L[[PUNZ
:THY[:L[[PUNZ
/+40*,*
7SH`IHJR:L[[PUN
6U:JYLLU3HUN\HNL
*VTT\UPJH[PVU:L[\W
=LYZPVU
<:)4LTVY`4HUHNLTLU[
:VM[^HYL<WKH[L:L[[PUNZ
:`Z[LT
Exit the menu screen
Press HOME or EXIT to exit.
6 Press c/d to select the parental control level
for DVD VIDEO/BD-ROM, and then select the
country code. Press ENTER after making each
selection.
Example: when the selected parental control level is “8”
Parental Control
Disc Language
Angle Mark Display
PIN Code Setting
BD Internet Access
3D Mode
3D Notice
8 [Adult]
USA
7 Press HOME or EXIT to exit.
36
Page 38

SETTINGS
Audio Video Settings
TV Aspect Ratio
You can set the screen aspect ratio of the connected
TV, and adjust the video output.
If you switch your TV (i.e. because you have bought a
new one) and the screen aspect ratio of the connected
TV changes, you will have to change the “TV Aspect
Ratio” setting.
Item
Wide 16:9: Select this when connecting to a TV with a
16:9 screen aspect ratio.
Normal 4:3: Select this when connecting to a TV with a
4:3 screen aspect ratio.
<When selecting Normal 4:3>
Item
Letter Box: If you connect to a TV with a screen aspect
ratio of 4:3 and playback a disc with 16:9 video, the
video will be played back with black bands at the top
and bottom while maintaining the 16:9 ratio.
Pan Scan: If you connect to a TV with a screen aspect
ratio of 4:3 and playback a disc with 16:9 video, the
video will be played back with the left and right sides of
the image cut off to display in 4:3 screen aspect ratio.
(This function works if the disc is labelled for 4:3PS.)
HDMI Video Out
This sets the resolution of the HDMI video output.
Some TVs are not fully compatible with the Blu-ray
disc player, which may cause the image distortion.
In this case, press VIDEO OUTPUT RESET on the
remote control for five seconds. “HDMI Video Out” will
be reset to “Auto” (factory preset value).
Item
Auto, 1080p, 1080i, 720p, 576/480p
NOTE
• When the BD player is connected to a 1080p 24Hz
compatible TV and the “HDMI Video Out” is set to
“Auto”, 1080p 24Hz will automatically be displayed when
compatible discs are played back.
Audio Out
This lets you set the digital audio output format
according to the capabilities of the connected audio
equipment.
• To listen to the secondary audio of Blu-ray discs, select
“PCM” or “Bitstream (Mix)”.
• For details, refer to the digital audio output format selection
table on page 44.
Item
PCM, Bitstream (Mix), Bitstream
NOTE
• Make sure to select a compatible digital audio output
format, otherwise you will hear no sound or a garbled
noise.
• If the HDMI device (Receiver, TV) is not compatible with
compressed formats (Dolby digital, DTS), the audio signal
outputs as PCM.
• Secondary and Effect audio is not present on DVD video.
• This setting has no effect on the analogue (L/R) audio or
HDMI audio output to your TV. It is only valid for the optical
and HDMI audio output to a receiver.
• If you play MPEG audio soundtracks, the audio signal
format will be PCM regardless of digital audio output format
selection (PCM or Bitstream).
Dynamic Range Control
This lets you adjust the range between the loudest
and softest sounds (dynamic range) for playback
at average volume. Use this when it is hard to hear
dialogue.
Item
Normal: The same audio output range is played as the
original recorded audio output range.
Shift*: When Dolby Digital audio is played back, the
dynamic range of the audio is adjusted so that the
dialogue portion can be heard easily. (If the audio
sounds abnormal, set to “Normal”.)
Auto: When you play back audio in the Dolby TrueHD
format, the dynamic range is automatically adjusted.
* Lower the audio volume before setting. If you do not do so,
the speakers may emit a loud sound or excessive output
may be applied to the speakers.
Settings
(Continued on the next page)
37
Page 39

SETTINGS
Smart Settings
Auto Power Off
This sets the Player so that power is automatically shut
off if playback is stopped and you do not perform any
operations for about 10 minutes.
Item
Yes, No
Front LED
If you feel that the indicators on the player are too
bright when watching movies, you can turn them off
except for the a (On/Standby) indicator.
Item
On, Off
Screen Saver
This function helps prevent burn-in on the TV screen
by leaving the player with the power turned on for a
long period of time. This lets you set the length of time
before it activates.
Item
Off, 5min, 10min, 20min, 30min
HDMI CEC
You can select the usage for the HDMI CEC function.
Item
Yes, No
NOTE
• For details, refer to the operation manual of TV.
Playback Setting
Parental Control
This lets you set the Parental Control for BD-ROM/
DVD-video depending on the disc content.
The 4-digit PIN code number needs to be entered
before the Parental Control Levels and the Country
Code are set. The Parental Control Levels and the
Country Code cannot be set if a PIN code has not
been created or the PIN code is not entered.
• Select the rating level appropriate for the age of the user.
Item (Parental control level)
8 and Off: All BD-video/DVD-video can be played.
1–7: Prohibits play of BD-video/DVD-video with
corresponding ratings recorded on them.
Item (Country code)
Select the country code.
• The ratings differ according to the country.
NOTE
• Refer to “Basic Operation for Playback Setting” on page 36
for details.
Disc Language (Disc Priority Language)
This lets you select the language for subtitles, audio
and menus displayed on the screen.
Item (Subtitle)
Select the subtitle language you want to display.
Item (Audio)
Select the audio language you want to hear.
Item (Menu)
Select the menu language you want to display.
38
NOTE
• When “Auto” is selected, the priority language of the disc
will be played back.
Angle Mark Display
This lets you turn the Angle Mark Display on or off
when BD/DVD video recorded with multiple angles is
played back. (The Angle Mark is displayed in the lower
right screen.)
Item
Yes, No
Page 40

SETTINGS
PIN Code Setting
This sets the PIN code for setting or changing the
Parental Control Level.
Item
Yes: Enter the 4-digit number.
No
NOTE
• When you forget the PIN code, you can reset the current
PIN code using “System Reset” under “Settings”. (See this
page.)
• You can also set the new PIN code if desired.
BD Internet Access
This allows you to set access restriction to BD-LIVE
contents.
Item
Permit: Allows all BD-LIVE discs.
Limit: Allows only discs with owner certification.
Prohibit: Prohibits all BD-LIVE discs.
NOTE
• The available functions differ depending on the disc.
• Regarding playback method of BD-LIVE contents, etc.,
perform the operations in accordance with the instructions
in the BD disc manual.
• To enjoy BD-LIVE functions, perform the broadband Internet
connection (Page 19) and communication settings (Pages
40–41).
3D Mode
This sets output of 3D images.
To view 3D images, playback of 3D content (3D BD
video) is necessary with a 3D compatible TV and 3D
glasses in addition to this player.
Item
Auto: Video signals are output as 3D when 3D content
(3D BD video) is played or as 2D when 2D content is
played.
2D: Even if 3D content (3D BD video) is played, video
signals are output as 2D at all times.
¤
CAUTION
• When viewing 3D images, viewing for a long period of time
or lying on your back may cause eye strain and discomfort.
In addition, 3D images may affect the eyesight of young
children/infants, so keep them from viewing the images.
On Screen Language
You can set the language you want to display on the
screen.
Item
English, Deutsch, Français, Italiano, Español, Português,
Nederlands, Svenska, Dansk, Norsk, Suomi, Polski,
Česky, Magyar, Slovensky, Slovenščina
Version
When you select “Version”, the system software
version is displayed.
System
System Reset
You can reset all settings to the factory presets.
Item
Reset, Not Reset
DivX Register
The DivX registration code is displayed.
Item
Yes, No
NOTE
• To learn more, visit www.divx.com/vod.
DivX Deactivate
You can deactivate your DivX information on the player.
Item
Yes, No
NOTE
• To learn more, visit www.divx.com/vod.
Settings
3D Notice
This sets whether or not a notice is displayed (“Yes” or
“No”) on the connected TV every time 3D content (3D
BD video) is played.
Item
Yes, No
(Continued on the next page)
39
Page 41

SETTINGS
Communication Setup
This allows you to perform and/or change the
communication settings. This setting is required to use
BD-LIVE functions.
NOTE
• For manually performing the setting, the following
information of the connected router or modem is required.
Confirm the information prior to the setting.
− IP address, netmask, gateway, DNS address
When using a LAN Cable
NOTE
• Make sure that the LAN cable is connected to this player
if a wired Internet connection is made (See page 19). This
setting cannot be performed when a LAN cable is not
connected.
1 Press HOME to display the menu screen.
2 Press
3 Press
4 Press
5 Press
a
/b to select “Settings”, then press d or
ENTER.
a
/b to select “Communication Setup”,
then press d or ENTER.
a
/b to select “Ethernet Setup (Cable)”,
then press d or ENTER.
a
/b to select “Change”, then press
ENTER.
Setting the info. of the Ethernet
[Current Setup]
IP Address
Netmask
Gateway
DNS
• For initializing the current setting, select “Initialize”,
then press ENTER.
: Auto Setup
: Auto Setup
: Auto Setup
: Auto Setup
Change
Initialize
6 For setting the IP address, press c/d to select
“Yes” or “No”, then press ENTER.
Do you obtain the IP address
automatically?
IP Address
Netmask
Gateway
• If selecting “Yes”: The IP address is automatically
obtained.
• If selecting “No”: The IP address, netmask and
gateway are manually entered using the screen for
inputting characters. (See page 41.)
Regarding each of the setup values, confirm the
specifications of your broadband router.
7 Select “Next”, then press ENTER.
• If selecting “Yes” in the step 6, go to the step 9.
Yes No
Next
8 Enter your DNS address.
Enter your DNS address.
Primary
Secondary
Next
• The primary and secondary DNS addresses are
entered using the screen for inputting characters. (See
page 41.)
Regarding each of the setup values, confirm the
specifications of your broadband router.
9 Select “Next”, then press ENTER.
10 For testing the connection to the Internet, after
confirming the settings, press a/b to select
“Test”, then press ENTER.
• “Test” is available only when setting to obtain the IP
address automatically. “Test” cannot be selected if the
IP address has not been obtained automatically.
Confirm the current setting.
IP Address
Netmask
Gateway
DNS Address
MAC Address
• As a result of the test, if the Internet connection fails,
enter the setup values manually.
11 Press
a
/b to select “Complete”, then press
ENTER.
: xxx xxx xxx xxx
: xxx xxx xxx xxx
: xxx xxx xxx xxx
: xxx xxx xxx xxx
xxx xxx xxx xxx
: xx xx xx xx xx xx
Test
Complete
40
Page 42

SETTINGS
The operation procedure for
inputting characters manually
NOTE
• Numeric characters such as IP address can be entered on
the input screen either by selecting each of the characters
in the “Numeric” mode or using the Number buttons on
the remote control.
IP Address
Netmask
Gateway
123
1 Press ENTER at the boxes in which characters
are to be entered, and the input screen will
appear.
Numeric
Edit
1234567890
Selected by
pressing a/b
2 Press
a
/b to select the desired input mode.
Selected by
pressing c/d
3 Press c/d to select a number/character, then
press ENTER.
4 Repeat the step 3 to display all of the desired
characters/numbers in the input field.
Example: The screen for inputting numeric characters
123
Numeric
Edit
1234567890
NOTE
• Press n RETURN (Del.Char.) to delete a number/
character you have input.
Input numbers/characters can also be deleted by pressing
A (Red).
• To change a number/character you have input, press B
(Green) (Left) or C (Yellow) (Right) to select the number/
character you want to change, and press n RETURN
(Del.Char.). Then, press c/d to select a new number/
character you want to input, and press ENTER.
5 Press D (Blue) (Complete) to fix the numbers
which have been input.
IP Address
Netmask
Gateway
6
Repeat step 1 to 5 to finish inputting all the
required characters.
123
Input character list
1ABC (Alphabet/
numeric character)
Numeric
Sign
Edit
* The same operation as the coloured buttons and n RETURN can be performed by selecting
Num. ABC DEF GHI JKL MNO PQRS TUV WXYZ Spc.
Num. 1 2 3 4 5 6 7 8 9 0 ABC A B C a b c DEF D E F d e f
GHI G H I g h i JKL J K L j k l MNO M N O m n o
PQRS P Q R S p q r s TUV T U V t u v WXYZ W X Y Z w x y z
Spc. (space)
1 2 3 4 5 6 7 8 9 0
@ . , : ; _ - \ $ % ! ? & # + * = / | ˜ “ ‘ ˆ ` ( ) < > [ ]{ } Spc.
@ . , : @ . , : ; _ - \ ; _ - \ $ % ! ? $ % ! ?
& # + * & # + * = / | ˜ = / | ˜ “ ‘ ˆ ` “ ‘ ˆ `
( ) < > ( ) < > [ ]{ } [ ] { } Spc. (space)
Cancel Left Right Complete Del.Char.
each of the items and pressing ENTER.
“Del.Char.” stands for deleting characters.
(Continued on the next page)
Settings
41
Page 43

SETTINGS
Before using the USB memory device
CAUTION:
• Do not remove the USB memory device or unplug
the AC cord while the operations for “USB Memory
Management” or “Software Update (Manual Update
from USB memory device)” are being performed.
• Do not use a USB extension cable when connecting a
USB memory device to the USB terminal on the player.
− Using a USB extension cable may prevent the player
from performing correctly.
NOTE:
• Kenwood cannot guarantee that all brands’ USB
memory devices will operate with this player.
• Only USB memory devices formatted with FAT 32/16
are compatible.
When formatting a USB memory device using a PC,
perform the following settings.
Format File System: FAT32
Allocation Unit Size: Default Allocation Size
USB Memory Management
The following instructions explain how to delete data
such as the Virtual Package data and the BD-LIVE
data in a USB memory device.
4
Press a/b to select “USB Memory Management”,
then press
• The “USB Memory Management” screen is displayed.
• “No USB Memory” appears when no USB memory is
inserted.
d or
ENTER.
5 Press d or ENTER to proceed.
Erase: Deletes only BD-VIDEO data written on the USB
memory device such as BD-LIVE data.
• If you want to delete all of the data or delete only the
unneeded software update data after the software is
updated, delete the data on the USB memory device
using a PC.
6 Press
\
7 Start the process.
a
/b to select “Yes”, then press ENTER.
• The screen for the current operation will display.
Complete
OK
8 Press ENTER.
NOTE
• Data which has been saved to the player’s internal memory
(game score, etc.) will also be deleted.
When you insert or remove a USB memory device, be
sure to turn the main power off.
1 Insert the USB memory device into the USB
terminal on this player.
USB memory
device
2 Press HOME to display the menu screen.
3 Press
42
a
/b to select “Settings”, then press
dor ENTER.
Page 44

SETTINGS
Software Update Settings
Manual Update from USB memory
device
This function allows software updates by inserting a
USB memory device with the update file into the USB
terminal on this player.
• When a software update is performed, the software update
data must be written onto the USB memory device in
advance using a PC.
• The USB memory device must be clear of all files except
software update data to allow new software uploading.
• When software update data is released, copy the data onto
a USB memory device after downloading it to a PC.
• For methods such as downloading and copying to a USB
memory device, carefully read the description shown on
the website before performing the operation.
NOTE
• Only USB memory devices formatted with FAT 32/16 are
compatible.
When formatting a USB memory device using a PC,
perform the following settings.
Format File System: FAT32
Allocation Unit Size: Default Allocation Size
• Do not extract the firmware update file to any folders other
than the root directory on the USB memory device. The
firmware update file must be only one file directly in the root
directory.
¤
CAUTION
• Do not remove the USB memory device or unplug the AC
cord while the software is being updated.
When you insert a USB memory device, be sure to
turn the main power off.
1 Insert the USB memory device with the update
file into the USB terminal on this player.
USB memory
device
2 Press a to turn on the power.
• The screen shown in part 2 of step 9 will be
automatically displayed. (Go to part 2 of step 9.)
• If “No” is selected in part 2 of step 9 and wish to
update the software manually, perform the operations
from step 3.
3 Press HOME to display the menu screen.
4 Press
5 Press
a
/b to select “Settings”, then press
d or ENTER.
a
/b to select “Software Update
Settings”, then press d or ENTER.
6 Press d or ENTER to move to the menu to the
right.
7 Press
a
/b to select “USB Memory”, then press
ENTER.
8 Press ENTER to start checking data in the USB
memory device.
Insert USB memory device containing
the software update file.
OK
9 1 During the data checking, “Checking” blinks.
Now checking the data in USB memory device.
Checking
(Continued on the next page)
Settings
43
Page 45

SETTINGS
2 The current version of this unit software and the
version of the update file on the USB memory device
are displayed. To update this player software with
update file, select “Yes”, and press ENTER.
Software update file is detected in the USB memory device.
Start update?
Current Ver. :
Update Ver. :
3 If the USB memory device is not properly installed or
the correct update file cannot be found on the USB
memory device, an error message is displayed.
Check the file on the USB memory device, and then
reinsert the USB memory device correctly.
Software update file is not detected in the USB memory device.
Confirm that you have transferred the file
to the USB memory device and retry software update.
Confirm that you have inserted the USB memory device
into the correct device.
There is more than one software file
in the USB memory device.
Confirm that only the software update file is
in the USB memory device.
xxxxxxxxxx
yyyyyyyyyy
Yes
No
OK
OK
Digital Audio Output Selection Formats
10 Press ENTER to start updating.
• The screen becomes dark for a while until the update
screen can be displayed. Please wait for the update
screen to appear. Do not unplug the AC cord.
The picture will temporarily go dark until
the software update display appears.
Wait several minutes and do not unplug the AC cord.
OK
Now updating
Do not unplug AC cord.
*
Update Version
yyyyyyyyyy
30%
11 When the software is successfully updated, a
screen is displayed indicating that the update
process is completed.
• If the update has failed, check the file in the USB
device and try Software Update again.
12 Remove the USB memory device.
13 Press a to turn off the player.
• Delete unneeded software update data using a PC
after the software update process is completed.
Setup Definition
Output
terminal
PCM
PCM
Bitstream
(Mix)
Bitstream
Blu-ray discs may include three audio streams.
• Primary Audio: The audio soundtrack of the main feature
• Secondary Audio: Additional soundtrack such as director
• Interactive Audio: Interactive sounds will be heard when
Decodes Primary, Secondary
and Effect audio streams
together into PCM audio.
Decodes Primary, Secondary
and Effect audio streams
together into PCM audio, then
re-encodes the PCM audio
into DTS bitstream.
Outputs only the Primary
audio soundtrack (main
soundtrack of the movie) so
that your audio equipment
can decode the audio
bitstream. You will not hear
Secondary and Effect audio.
or actor’s commentary.
selected.
Interactive Audio is different on each Blu-ray Disc.
HDMI OUT PCM PCM PCM PCM PCM
OPTICAL PCM 2ch PCM 2ch PCM 2ch PCM 2ch PCM PCM 2ch PCM 2ch
HDMI OUT/
OPTICAL
HDMI OUT PCM
OPTICAL PCM 2ch
DTS DTS DTS DTS DTS
44
Audio Stream
Dolby
Digital
Dolby
Digital
Dolby
Digital
Plus
Dolby
Digital
Plus
Dolby
Digital
Dolby
TrueHD
Dolby
TrueHD
Dolby
Digital
DTS-HDHRDTS-HD
DTS
DTS
DTS
MA
PCM
7.1ch
5.1ch
DTS-HD HRDTS-HD
DTS-ES
5.1ch
DTS
PCM
7.1ch
DTS
5.1ch
MA
DTS-ES
5.1ch
Dolby
Digital
NOTE
• Digital audio cannot be copied from the OPTICAL DIGITAL
OUT terminal.
Page 46

Appendix
Troubleshooting
The following problems do not always suggest a defect or malfunction of this Player.
Refer to the problems and lists of possible solutions below before calling for service.
Power
Problem Possible causes and solutions
The Player power cannot be turned
on.
The Player power is turned off. • Is “Auto Power Off” set to “Yes”? When “Auto Power Off” is set to “Yes”, the
Basic Operation
Problem Possible causes and solutions
The remote control does not work. • Use the remote control within its operating range. (Page 20)
Cannot operate the Player. • Are you operating the Player within the specified operating temperature range?
Playback
Problem Possible causes and solutions
The Player cannot play a disc. • Take out the disc and clean it. (Page 12)
The disc is automatically ejected
after loading a disc.
Video stops. • Has the Player been subjected to shock or impact? Are you using it in an unstable
The Player makes a snapping sound
when starting playback or loading
a disc.
• Make sure that the AC adapter cord is connected to the DC IN terminal on the
rear of the player, the AC cord is connected to the AC adapter and the AC cord is
plugged into an AC outlet. (Page 21)
• Reset the player. (Page 47)
power will be automatically turned off after 10 continuous minutes of inactivity (no
playback). (Page 38)
• Replace the batteries. (Page 20)
• Reset the remote control.
− Press and hold 1 (the number button) first and then a on the remote control
together for more than 5 seconds.
(Page 49)
• Make sure that the disc is loaded properly (label-side up). (Page 24)
• Make sure that region code on the disc matches that of this Player. (Page 8)
• Allow any condensation in or near the Player to dry. (Page 12)
• Check that the disc is recorded in the compatible TV system (PAL or NTSC).
• The Player cannot play back video which was not recorded normally. (Page 8)
• Proper playback may be impossible due to the state of the disc recording, a
scratched, warped or dirty disc, the state of the pick-up, or compatibility issues
between this Player and the disc being used. (Pages 8, 12)
• When the recorded time of a disc is unusually short, playback may not be possible.
• BD-RE/R discs recorded in a format other than BDMV/BDAV cannot be played
back. (Page 8)
• Make sure that the disc is loaded properly (label-side up). (Page 24)
• Take out the disc and clean it. (Page 12)
• Make sure that the disc is playable. (Page 8)
location? The Player will stop if it senses shock or vibration.
• The player may sometimes make a snapping sound when starting playback if it has
not been operated in a while. These sounds are not malfunctions of the player but
are normal operating conditions.
Appendix
(Continued on the next page)
45
Page 47

Troubleshooting
Picture
Problem Possible causes and solutions
No picture. • Make sure that the cables are connected correctly. (Page 17)
Screen freezes and operation
buttons do not work.
Widescreen video appears vertically
stretched, or black bands appear at
the top and bottom of the screen.
Square noise (mosaic) appears on
the screen.
Audio is not output, or images are
not played back properly.
3D images cannot be output to a TV. • Is an HDMI cable used?
Noise appears on the screen. • When you watch TV broadcasts with the power of this player turned on, noise may
• Make sure that the connected TV or the AV receiver is set to the correct input.
(Page 17)
• Take out the disc and clean it. (Page 12)
• Make sure that region code on the disc matches that of this Player. (Page 8)
• There is no picture from the HDMI output.
− Are the settings performed correctly? Please check the settings. (Page 37)
• Turn off the power and turn on the power again.
• If the power is not turned off, perform a reset. (Page 47)
• Is the disc damaged or dirty? Check the condition of the disc. (Page 12)
• Is “TV Aspect Ratio” set to match the connected TV? (Page 37)
• If you are using a widescreen TV, is the “TV Aspect Ratio” set to “Wide”? (Page 37)
• Blocks in images may be visible in scenes with rapid movement due to the
characteristics of digital image compression technology.
• The audio may not be output or the images may not be played back properly for
some discs in which copyright-protected contents are recorded.
• Are a 3D compatible TV and 3D glasses used?
• Is a proper connection made between the HDMI OUT terminal of the player and the
HDMI input terminal of the 3D compatible TV?
• Is the 3D setting on this player correct? (Pages 23, 39)
• Is the 3D setting on the TV correct?
• Is a 3D compatible BD disc being played back?
appear on the TV screen. In such cases, turn off the power to this player or keep
this player away from the TV.
Sound
Problem Possible causes and solutions
No sound, or sound is distorted. • If the volume of the TV or amplifier is set to minimum, turn the volume up.
Audio is not output, or images are
not played back properly.
46
• There is no sound during still mode, slow motion playback, fast forward and fast
reverse. (Page 31)
• Check that the audio cable is connected correctly. (Page 18)
• Check that the cable plugs are clean.
• Take out the disc and clean it. (Page 12)
• Audio may not be output depending on the audio recording status, such as when
audio other than an audio signal or non-standard audio is recorded for the audio
content of the disc. (Page 8)
• The audio may not be output or the images may not be played back properly for
some discs in which copyright-protected contents are recorded.
Page 48

Troubleshooting
Network
Problem Possible causes and solutions
Cannot connect to the Internet.
Cannot download BD-LIVE contents. • Make sure that this player is connected to the Internet.
When the wired Internet connection is made
• Is the LAN cable connected properly?
• Is the wrong cable such as a modular cable used? Connect a LAN cable to the
ETHERNET terminal. (Page 19)
• Is the power for the connected equipment, such as a broadband router or modem
turned on?
• Is the broadband router and/or modem properly connected?
• Is the proper value(s) set in the network setting? Check “Communication Setup”.
(Pages 40–41)
• Is the USB memory device properly connected? Check that the USB memory
device is connected to the USB terminal of this Player.
• Check if the BD disc supports BD-LIVE.
• Check the setting for “BD Internet Access”. (Page 39)
Other
Problem Possible causes and solutions
The TV operates incorrectly. • Some TVs with wireless remote control capability may operate incorrectly when
The Player heats up during use. • When using this Player, the console cabinet may heat up depending on the usage
a (On/Standby) indicator will remain
lit.
using the remote control of this Player. Use such TVs away from this Player.
environment. This is not a malfunction.
• When the AC cord is removed from the outlet, the a (On/Standby) indicator will
remain lit for a short period. This is normal and is not a malfunction.
To Reset this Player
• If this Player receives strong interference from a source such as excessive static electricity,
strong external noise, malfunction of power supply, or voltage caused by lightning during
use or a wrong operation is sent to the Player, errors like the Player not accepting an
operation may occur.
Press and hold a on the Player until the a (On/Standby) indicator disappears.
• When a reset is performed while the power is on, the Player will turn off. Turn the power on again. At this point, it may take a
few moments for the system processing to finish before the Player is ready for use.
• Since all settings including the language setting stored in memory are also reset when a reset has been performed, they must
be set again.
• When the problem persists even after performing a reset, unplug the AC cord and plug it in again. If this does not solve the
problem, contact the nearest service centre approved by Kenwood.
a (On/Standby) indicator
a
Appendix
47
Page 49

On-screen Error Messages
The following messages appear on the TV screen in case of an error during operation.
Error message Possible Error Suggested Solution
Cannot play. • The disc cannot be played back with
Incompatible disc. • If you load a disc which cannot be
Cannot operate. • Occurs if an operation is incorrect.
This USB memory is not formatted
properly. Please format the memory in
USB memory management.
The Connected USB Memory cannot
be used. It should be compliant with
USB 2.0
this Player.
played with this Player (i.e. a scratched
disc), or if you load a disc upside down,
this message will appear, and the disc
will automatically pop out.
• Occurs if the loaded disc cannot be
played because it is a non-standard disc
or scratched, etc.
• Occurs if there is a formatting error.
• Occurs if the USB memory is not
formatted with FAT 32/16.
• Occurs if USB memory not compliant
with USB 2.0 High Speed (480Mbit/s) is
used (i.e. USB 1.0/USB 1.1).
• Check the disc, and load it correctly.
• Remove the disc.
• Format the USB memory again.
• Format the USB memory with your
PC.
• Connect USB 2.0 High Speed
(480Mbit/s) compliant USB memory.
—
48
Page 50

Specifications
Specifications are subject to change without notice.
General
Power requirements DC 12V, 2A (with the supplied AC adapter)
Power consumption (Normal) 17 W (with the supplied AC adapter at AC 230V, 50Hz)
Power consumption (Standby) 0.5 W (with the supplied AC adapter at AC 230V, 50Hz)
Dimensions
Weight Approx. 2.3 kg
Operating temperature 5°C to 35°C
Storage temperature –20°C to 60°C
Operating humidity 10 % to 80 % (no condensation)
TV systems PAL system/NTSC system
Playback
Playable discs BD-ROM, BD-RE, BD-R,
Region code B or ALL for BD, 2 or ALL for DVD
Input/Output
HDMI HDMI 19-pin standard connector (1080p 24Hz output)
Digital audio optical output Terminal: Square Optical terminal
USB input USB 2.0 High Speed (480Mbit/s) correspondence (for Local storage/Software
ETHERNET 10BASE-T/100BASE-TX
Power is automatically shut off if playback is stopped and you do not perform any
operations for about 10 minutes. (When “Auto Power Off” is set to “Yes”)
Approx. 430 mm g 36 mm g 218 mm (W g H g D)
(The system recorded on the disc is output.)
DVD Video, DVD+RW/+R/-RW/-R (Video/VR/AVCHD/JPEG file/MP3 file/DivX format),
Audio CD (CD-DA), CD-RW/R (CD-DA/JPEG file/MP3 file/DivX format)
HDMI® (Deep Colour, x.v.Colour, Dolby TrueHD, DTS-HD Master Audio | Essential)
update/JPEG, MP3 and DivX playback)
USB Memory device: Minimum memory capability 2GB or greater
AC Adapter
Power requirements AC 100–240V, 50/60Hz
Rated output DC 12V, 5A
Appendix
49
Page 51

Glossary
AVCHD (page 8)
AVCHD (Advanced Video Codec High Definition) refers
to a recording format (specification) for digital video
cameras which can record to a disc such as 8 cm
DVD disc and play back digital high definition images.
BDAV (page 8)
BDAV (Blu-ray Disc Audio/Visual, BD-AV) refers to one
of the application formats used for writable Blu-ray
discs such as BD-R, BD-RE, etc. BDAV is a recording
format equivalent to DVD-VR (VR mode) of the DVD
specifications.
BD-J application
The BD-ROM format supports Java for interactive
functions. “BD-J” offers content providers almost
unlimited functionality when creating interactive BDROM titles.
BD-LIVE (page 26)
A variety of interactive content is available from BDLIVE compatible Blu-ray discs via the Internet.
BDMV (page 8)
BDMV (Blu-ray Disc Movie, BD-MV) refers to one
of the application formats used for BD-ROM which
is one of the Blu-ray Disc specifications. BDMV is a
recording format equivalent to DVD-video of the DVD
specification.
BD-R (pages 8, 24)
A BD-R (Blu-ray Disc Recordable) is a recordable,
write-once Blu-ray Disc. Since contents can be
recorded and cannot be overwritten, a BD-R can be
used to archive data or for storing and distributing
video material.
BD-RE (pages 8, 24)
A BD-RE (Blu-ray Disc Rewritable) is a recordable and
rewritable Blu-ray Disc.
BD-ROM
BD-ROMs (Blu-ray Disc Read-Only Memory) are
commercially produced discs. Other than conventional
movie and video contents, these discs have enhanced
features such as interactive content, menu operations
using pop-up menus, selection of subtitle display, and
slide shows. Although a BD-ROM may contain any
form of data, most BD-ROM discs will contain movies
in High Definition format for playback on Blu-ray Disc
players.
Blu-ray Disc (BD) (page 8)
A disc format developed for recording/playing highdefinition (HD) video (for HDTV, etc.), and for storing
large amounts of data. A single layer Blu-ray Disc
holds up to 25 GB, and a dual-layer Blu-ray Disc holds
up to 50 GB of data.
Chapter number (pages 34, 35)
Sections of a movie or a music feature that are smaller
than titles. A title is composed of several chapters.
Some discs may only be comprised of a single
chapter.
Copy guard
This function prevents copying. You cannot copy discs
marked by the copyright holder with a signal which
prevents copying.
Deep Colour
Deep Colour can reproduce rich colours, increasing
the number of bits describing colours.
This Player is compatible with Deep Colour. You can
enjoy this function by connecting to a Deep Colour
compatible TV using an HDMI cable.
Disc menu (page 25)
This lets you select things like the subtitle language or
audio format using a menu stored on the DVD video
disc.
Dolby Digital
A sound system developed by Dolby Laboratories Inc.
that gives movie theatre ambience to audio output
when the product is connected to a Dolby Digital
processor or amplifier.
Dolby Digital Plus
A sound system developed as an extension to Dolby
Digital. This audio coding technology supports 7.1
multi-channel surround sound.
Dolby TrueHD
Dolby TrueHD is a lossless coding technology that
supports up to 8 channels of multi-channel surround
sound for the next generation optical discs. The
reproduced sound is true to the original source bit-forbit.
DTS
This is a digital sound system developed by DTS, Inc.
for use in cinemas.
DTS-HD High Resolution Audio
DTS-HD High Resolution Audio is a new technology
developed for the next generation high definition
optical disc format.
DTS-HD Master Audio
DTS-HD Master Audio is a lossless audio compression
technology developed for the next generation high
definition optical disc format.
DTS-HD Master Audio | Essential
DTS-HD Master Audio | Essential is a lossless audio
compression technology developed for the next
generation high definition optical disc format.
DVD upscaling (page 24)
Upscaling (upconverting) refers to a function of various
players and devices that enlarge the image size to fit the
size of the screen of video equipments such as a TV.
50
Page 52

Glossary
DVD video (pages 8, 24)
A disc format that contains up to eight hours of moving
pictures on a disc the same diameter as a CD. A singlelayer single sided DVD holds up to 4.7 GB; a double
layer single-sided DVD, 8.5 GB; a single layer doublesided DVD, 9.4 GB; double-layer double-sided DVD, 17
GB. The MPEG 2 format was adopted for efficient video
data compression. It is a variable rate technology that
encodes the data to according to the status of the video
for reproducing high-quality images. Audio information
is recorded in a multi-channel format such as Dolby
Digital, allowing for a realistic audio presence.
DVD+/-R (pages 8, 24)
A DVD+/-R is a recordable, write-once DVD. Since
contents can be recorded and cannot be overwritten,
a DVD+/-R can be used to archive data or for
storing and distributing video material. The DVD+/R has two different formats: VR format and Video
format. DVDs created in Video format have the same
format as a DVD video, while discs created in VR
(Video Recording) format allow the contents to be
programmed or edited.
DVD+/-RW (pages 8, 24)
A DVD+/-RW is a recordable and rewritable DVD. The
re-recordable feature makes editing possible. The
DVD+/-RW has two different formats: VR format and
Video format. DVDs created in Video format have the
same format as a DVD video, while discs created in
VR (Video Recording) format allow the contents to be
programmed or edited.
HDMI (page 17)
HDMI (High-Definition Multimedia Interface) is an
interface that supports both video and audio on
a single digital connection. The HDMI connection
carries standard to high definition video signals
and multi-channel audio signals to AV components
such as HDMI equipped TVs, in digital form without
degradation.
Interlace format
Interlace format shows every other line of an image
as a single “field” and is the standard method for
displaying images on television. The even numbered
field shows the even numbered lines of an image, and
the odd numbered field shows the odd numbered lines
of an image.
JPEG (pages 8, 9, 10, 30)
JPEG (Joint Photographic Experts Group) is a still
image data compression format and is used in most of
digital cameras.
Letter Box (LB 4:3) (page 37)
A screen size with black bars on the top and bottom
of the image to allow viewing of wide-screen (16:9)
material on a connected 4:3 TV.
Linear PCM Sound
Linear PCM is a signal recording format used for Audio
CDs and on some DVD and Blu-ray discs. The sound
on Audio CDs is recorded at 44.1 kHz with 16 bits.
(Sound is recorded between 48 kHz with 16 bits and
96 kHz with 24 bits on DVD video discs and between
48 kHz with 16 bits and 192 kHz with 24 bits on BD
video discs.)
MP3 (pages 8, 9, 10, 29)
MP3 files are audio data compressed in the MPEG1/2
Audio layer-3 file format. “MP3 files” have “.mp3” as
extensions.
MPEG-2
MPEG-2 (Moving Picture Experts Group phase 2) is
one of the video data compression schemes, which
is adopted for DVD videos and digital broadcasts
worldwide. Some Blu-ray Discs also use high bitrate
MPEG-2.
Multi Angle (pages 33–35)
This is a feature of DVD and BD video discs. In some
discs, the same scene is shot from different angles,
and these are stored in a single disc so you can enjoy
playback from each angle. (This function can be
enjoyed if the disc is recorded with multiple angles.)
Multi Audio
This is a feature of DVD and BD video discs. This
function makes it possible to record different audio
tracks for the same video, so you can enhance your
enjoyment by switching the audio. (You can enjoy
this function with discs recorded with multiple audio
tracks.)
Pan Scan (PS 4:3) (page 37)
A screen size that cuts off the sides of the image
to allow viewing of wide-screen (16:9) material on a
connected 4:3 TV.
Parental control (page 38)
In some digital broadcasts and BD/DVD video discs,
a control level for disc viewing is set depending on
the age of the viewer. With this Player, you can set the
control level for viewing such broadcasts and discs.
Pop-up menu (page 25)
An enhanced menu operation available on BD video
discs. The pop-up menu appears when POP-UP
MENU is pressed during playback, and can be
operated while playback is in progress.
Progressive format
Compared to the Interlace format that alternately
shows every other line of an image (field) to create one
frame, the Progressive format shows the entire image
at once as a single frame. This means that while the
Interlace format can show 30 frames/60 fields in one
second, the Progressive format can show 60 frames in
one second. The overall picture quality increases and
still images, text, and horizontal lines appear sharper.
Appendix
(Continued on the next page)
51
Page 53

Glossary
Region code (page 8)
Code identifying a geographic region of compatibility
for a BD/DVD.
Resume playback (page 24)
If you stop playback while it is in progress, the Player
stores the stop position in memory, and this function
lets you playback from that point.
Skip (pages 28, 29, 31)
This returns to the start of the chapter (or track) being
played, or skips to the next chapter (or track).
Subtitles (pages 33–35)
These are the lines of text appearing at the bottom of
the screen which translate or transcribe the dialogue.
They are recorded on many DVD and BD video discs.
Time number
This indicates the play time which has elapsed from
the start of a disc or a title. It can be used to find a
specific scene quickly. (It may not work with some
discs.)
Title number (pages 34, 35)
These numbers are recorded on DVD and Blu-ray
discs. When a disc contains two or more movies,
these movies are numbered as title 1, title 2, etc.
Top menu (page 25)
In a BD/DVD video, this is the menu for selecting
things like the chapter to be played back and the
subtitle language. In some DVD videos, the top menu
may be called the “Title Menu”.
Track number (pages 34, 35)
These numbers are assigned to the tracks which are
recorded on audio CDs. They enable specific tracks to
be located quickly.
x.v.Colour
x.v.Colour reproduces a greater range of colour than
before, showing almost all of the colours that the
human eye can detect. (Applicable for JPEG files only
with this system)
52
Page 54

About Software License
Information on the Software License for This Product
Software composition
The software included in this product is comprised of various software components whose individual copyrights are held by
Kenwood or by third parties.
Software developed by Kenwood and open source software
The copyrights for the software components and various relevant documents included with this product that were developed or
written by Kenwood are owned by Kenwood and are protected by the Copyright Act, international treaties, and other relevant
laws. This product also makes use of freely distributed software and software components whose copyrights are held by third
parties. These include software components covered by a GNU General Public License (hereafter GPL), a GNU Lesser General
Public License (hereafter LGPL) or other license agreement.
Obtaining source code
Some of the open source software licensors require the distributor to provide the source code with the executable software
components. GPL and LGPL include similar requirements. For information on obtaining the source code for the open source
software and for obtaining the GPL, LGPL, and other license agreement information, visit the following website:
http://www.kenwood.co.jp/gpl/
We are unable to answer any questions about the source code for the open source software. The source code for the software
components whose copyrights are held by Kenwood is not distributed.
Acknowledgements
The following open source software components are included in this product:
• directfb-extra • cairo • directfb • iconv • openssl • curl • freetype • jpeg • expat • mng • png • xml • zlib • kernel • net-tools
• GNU bash • busybox • cramfs • dhcpcd • e2fsprogs • fdisk • TinyLogin • sysutils • iptables • mtd-utils • ntfs-3g • sfdisk • hotplug
• utelnetd • procps • GNU termcap • libusb • uClibc • tcpdump • strace • hdparm • libpcap • portmap
Software License Notice
Software License Notice Requirements
The software components incorporated into this product include components whose copyright holders require license notices.
The license notices for these software components are shown below.
OpenSSL License
This product includes software developed by the OpenSSL Project for use in the OpenSSL Toolkit. (http://www.openssl.org)
Original SSLeay License
This product includes cryptographic software written by Eric Young (eay@cryptsoft.com).
BSD License
This product includes software developed by the University of California, Berkeley and its contributors.
Appendix
53
Page 55

 Loading...