

Page 1

CD RECEIVER
CD-RECEIVER
RECEPTEUR CD
CD-RECEIVER
KD-SHX701
ENGLISH
DEUTSCH
Detachable
SOURCE
TP/PTY
OK
BAND
BACK
DISP
MENU
This unit is equipped with the display demonstration. To cancel it, see page 9.
Dieses Gerät ist mit einer Demonstrationsfunktion für das Display ausgestattet. Auf
Seite 9 wird beschrieben, wie Sie diese Demonstrationsfunktion deaktivieren können.
Cet appareil est équipé d’une démonstration des affichages. Pour l’annuler, référez-
vous à la page 9.
Dit toestel heeft een display-demonstratiefunctie. Zie bladzijde 9 voor het annuleren
van deze functie.
For installation and connections, refer to the separate manual.
Für den Einbau und die Anschlüsse siehe das eigenständige Handbuch.
Pour l’installation et les raccordements, se référer au manuel séparé.
Bijzonderheden over de installatie en aansluiting van het apparaat vindt u in de
desbetreffende handleiding.
FRANÇAIS
KD-SHX701
NEDERLANDS
INSTRUCTIONS
BEDIENUNGSANLEITUNG
MANUEL D’INSTRUCTIONS
GEBRUIKSAANWIJZING
LVT1159-001A
[E/EX]
Page 2

Thank you for purchasing a JVC product.
Please read all instructions carefully before operation, to ensure your complete understanding and
to obtain the best possible performance from the unit.
ENGLISH
IMPORTANT FOR LASER PRODUCTS
1. CLASS 1 LASER PRODUCT
2. CAUTION: Do not open the top cover. There are no user serviceable parts inside the unit;
leave all servicing to qualified service personnel.
3. CAUTION: Visible and invisible laser radiation when open and interlock failed or defeated.
Avoid direct exposure to beam.
4. REPRODUCTION OF LABEL: CAUTION LABEL, PLACED OUTSIDE THE UNIT.
Warning:
If you need to operate the receiver while
driving, be sure to look ahead carefully or
you may be involved in a traffic accident.
How to reset your unit
Press the reset button on the control panel
using a ball-point pen or a similar tool.
This will reset the built-in microcomputer.
Your preset adjustments—such as preset
channels or sound adjustments—will also be
erased.
Notice:
The display window built in this receiver has been produced with high precision, but it may
have some ineffective dots. This is inevitable and is not malfunction.
CAUTIONS:
• Do not insert 8 cm discs (single CDs) into
the loading slot. (Such discs cannot be
ejected.)
• Do not insert any disc of unusual shape—
like a heart or flower; otherwise, it will
cause a malfunction.
• Do not expose discs to direct sunlight or
any heat source or place them in a place
subject to high temperature and humidity.
Do not leave them in a car.
For security reasons, a numbered ID card
is provided with this unit, and the same ID
number is imprinted on the unit’s chassis.
Keep the card in a safe place, as it will
help the authorities to identify your unit if
stolen.
2
Page 3

Contents
How to reset your unit ..................................... 2
Important! (How to read this manual) .............4
Main Features ................................................ 4
Preparation (Remote Controller
—RM-RK300)................................................ 5
Location of the Buttons ................................. 6
Basic Operations ............................................ 8
Canceling the display demonstration...............9
Setting the clock ............................................ 10
Radio Operations......................................... 11
Listening to the radio..................................... 11
Storing stations in memory............................13
Tuning in to a preset station .......................... 14
Changing the display pattern ......................... 14
FM RDS Operations.................................... 15
Searching for your favorite programme ........ 15
Using the Standby Reception ........................ 16
Tracking the same programme
—Network-Tracking Reception.............. 18
Using Programme Search .............................. 19
Basic Disc Operations ................................. 21
Advanced Disc Operations..........................23
Locating a folder/track .................................. 23
Selecting playback modes—MODE..............24
Prohibiting disc ejection ................................ 25
Changing the display pattern ......................... 25
Sound Adjustments—
Selecting the DSP modes—DSP ................... 26
Making sound natural .................................... 28
Selecting preset sound modes—EQ .............. 29
Storing your own sound modes ..................... 29
Daily Use......................26
Sound Adjustments—
Setting the basic sound selection
menu—SEL............................................. 30
Graphic Displays .........................................32
Basic procedure ............................................. 32
Downloading the files....................................33
Deleting the files............................................34
Deleting all files ............................................ 36
Activating the downloaded files .................... 36
General Settings—PSM .............................. 37
Basic procedure ............................................. 37
Other Main Functions ................................. 42
Assigning titles to the sources ....................... 42
Changing the control panel angle .................. 43
Detaching the control panel........................... 43
Basic CD Changer Operations ................... 44
Advanced CD Changer Operations ........... 46
Locating a disc...............................................46
Locating a folder/track .................................. 46
Selecting playback modes—MODE..............47
Changing the display pattern ......................... 48
External Component Operations ............... 49
Changing the display pattern ......................... 49
DAB Tuner Operations ............................... 50
Listening to the DAB tuner ........................... 50
Storing DAB services in memory..................52
Tuning in to a preset service..........................53
Using the Standby Reception ........................ 53
Tracking the same programme
—Alternative Reception..........................56
Changing the display pattern ......................... 57
Maintenance ................................................. 58
More about This Receiver...........................59
Additional Information ............................... 62
Troubleshooting ........................................... 63
Specifications................................................65
Preference Settings ..... 30
ENGLISH
For safety....
• Do not raise the volume level too much, as
this will block outside sounds, making
driving dangerous.
• Stop the car before performing any
complicated operations.
Temperature inside the car....
If you have parked the car for a long time in hot
or cold weather, wait until the temperature in
the car becomes normal before operating the
unit.
3
Page 4

Important!
How to read this manual:
To make the explanations as simple and
easy-to-understand as possible, we have
ENGLISH
adapted the following methods:
• Some related tips and notes are
explained later in the sections “More
about This Receiver” (see page 59), but
not in the same section explaining the
operations. If you want to know more
about the functions, or if you have a doubt
about the function, go to the section and
you will find the answers.
Main Features
• Button operations are explained only with
the illustrations as follows:
Press briefly.
Press repeatedly.
or
Hold
Press and hold until your
desired response begins.
Press either
one.
Compression Compensative
Converter—CCC
CC Converter eliminates jitter and ripples,
achieving a drastic reduction in digital
distortion by processing the digital music data
in 24-bit quantization and by expanding the
sampling frequency to 176.4 kHz (for fs 44.1
kHz signals). This processing can be applied to
the analog sources as well as the digital
sources.
Digital Signal Processor (DSP) modes
The preset DSP modes can create a more
acoustic sound field inside your car
compartment, and give you a real “being there”
feeling.
BBE Digital
Digital* is a new digital processing
BBE
method to restore the brilliance and clarity of
the original live sound in recording, broadcasts,
etc.
BBE Digital adjusts the phase relationship
between the low, mid and high frequencies, so
that all frequencies reach the listener’s ears at
the proper time.
Color Graphic Display
The color display (256 × 64 pixels) built in this
receiver can reproduce 256 colors.
Image Converter Color
With Image Converter Color included in the
supplied CD-ROM, you can create your own
images and animations, and can display them
on the color graphic display.
Manufactured under license from BBE Sound,
*
Inc.
Licensed by BBE Sound , Inc. under
USP4638258, 5510752 and 5736897. BBE and
BBE symbol are registered trademarks of BBE
Sound, Inc.
4
Page 5

Preparation (Remote Controller—RM-RK300)
1
2
With the + side facing upwards
3
(back side)
Lithium coin battery
(CR2025)
WARNINGS on the battery:
• Store the battery in a place where children
cannot reach. If a child accidentally
swallows the battery, consult a doctor
immediately.
• Do not recharge, short, disassemble, or
heat the battery or dispose of it in a fire.
Doing any of these things may cause the
battery to give off heat, crack, or start a
fire.
• Do not leave the battery with other
metallic materials. Doing this may cause
the battery to give off heat, crack, or start
a fire.
• When throwing away or saving the battery,
wrap it in tape and insulate; otherwise, the
battery may start to give off heat, crack, or
start a fire.
• Do not poke the battery with tweezers or
similar tools. Doing this may cause the
battery to give off heat, crack, or start a
fire.
ENGLISH
CAUTION:
DO NOT leave the remote controller in a
place (such as dashboards) exposed to direct
sunlight for a long time. Otherwise, it may
be damaged.
This receiver is equipped with the steering wheel remote control function. If your car is
equipped with the steering wheel remote controller, you can operate this receiver using the
controller.
• See the Installation/Connection Manual (separate volume) for connection to utilize this
function.
5
Page 6

Location of the Buttons
Control panel
ENGLISH
1
23 4 5 6 7
SOURCE
TP/PTY
OK
BAND
BACK
DISP
MENU
89pqw e r
Remote controller
9
4
e
y
u
5
8
t
6
Page 7

1 0 (eject) / (angle) button
• Open/close the control panel (and eject
the disc, if any, when opened).
• Adjust the control panel angle if held
then pressed.
2 Remote sensor
DO NOT expose the remote sensor on
the control panel to strong light (direct
sunlight or artificial lighting).
3 TP/PTY button
Activates or deactivates TA Standby
Reception (and Road Traffic News
Standby Reception).
4 SOURCE button
Select the source.
5 4/¢ (
• Searches for stations (Auto Search) if
pressed, or
Skips frequencies after pressed and held
(Manual Search).
• Change the tracks on the disc.
• On the control panel only: while
operating the Menus, it works to select
the Menu items/values.
6 Color display window
7 Reset button
Reset the built-in microcomputer.
8 Volume (VOL) +/– button(s)
Adjust the volume level.
9
button
Turns on and off the power, and also
attenuates the sounds.
/ ) buttons
(Standby/On/Attenuator)
p DISP (BACK) button
• Change the information shown on the
display.
• When operating the Menus, it works as
the BACK button (to go back to the
previous step).
q BAND (OK) button
• Select the band for FM/AM and DAB.
• When operating the Menus, it works as
the OK button (to confirm your
selection).
w MENU button
Show the Main Menu (or erase it).
e 5/∞ buttons
• Change the services for DAB.
• Change the folder on the MP3/WMA
discs.
• On the control panel only: while
operating the Menus, it works to select
the Menu items/values.
(control panel release) button
r
Detach the control panel.
t Number buttons
• Select the preset station (or a service) if
pressed, or store a station (or a service)
if pressed and held.
• Select the tracks while playing CDs.
• Select the folders while playing MP3/
WMA discs.
• Select the discs while operating the CD
changer.
y ANGLE button
Adjust the control panel angle.
u BAND button
Select the band for FM/AM and DAB.
ENGLISH
7
Page 8

Basic Operations
1
ENGLISH
Turn on the power
4
Select the DSP mode and
sound mode as you want.
The Operation screen for last
selected source is recalled.
2
Select the source
SOURCE
• DAB: Without connecting the DAB tuner,
you cannot select DAB.
• CD: If a disc is not in the loading slot, you
cannot select CD as the source to play.
• CD-CH: Without connecting the CD
changer, you cannot select CD-CH (CD
changer).
• LINE-IN: Select the external component
(see page 49).
3
Adjust the volume
TUNER
LINE-IN
DAB
CD
CD-CH
• For details, see pages 26 to 31.
To drop the volume in a moment (ATT):
To restore the sound,
press it again.
To turn off the power:
Hold
CAUTION on Volume Setting:
Discs produce very little noise compared
with other sources. If the volume level is
adjusted for the tuner, for example, the
speakers may be damaged by the sudden
increase in the output level. Therefore,
lower the volume before playing a disc
and adjust it as required during playback.
8
Page 9

What information is shown on the display
The following information are shown commonly for all sources.
• If you press DISP on the control panel, the display will show the different information or
different screens. (Details about this will be explained later separately for each source.)
Current source
ENGLISH
Sound settings alternately appear
(pages 26 to 29).
○○○○○○○○○
Canceling the display demonstration
When shipped from the factory, display
demonstration has been activated, and starts
automatically when no operations are done for
about 20 seconds.
To cancel the display demonstration, follow
the procedure below:
1
While playing any source...
MENU
2
Move the cursor to “PSM” on the Main
Menu.
The Main Menu appears on
the display.
Cursor
Current source
information appears with its icon.
• Ex.: Station name (PS)/Station Frequency
3
Enter the PSM Menu.
OK
BAND
• If “Demo/Link” does not appear, press 5/
∞ repeatedly until it appears.
4
Select “Off.”
To exit from the Menu operation, press
MENU again.
To activate the display demonstration, repeat
the same procedure and select any one other
4
than “Off” in step
• For more details, see “To show the display
demonstration—Demo/Link” on page 39.
.
9
Page 10

○○○○○○○○○
Setting the clock
You can also set the clock system to 24 hours or
12 hours.
ENGLISH
1
While playing any source...
MENU
2
Move the cursor to “PSM” on the Main
Menu.
3
Enter the PSM Menu.
OK
BAND
The Main Menu appears on
the display.
Cursor
6
Select “Clock Min.”
7
Adjust the minute.
8
Select “24H/12H.”
9
Select “24Hours” or “12Hours.”
10
The last selected item appears (highlighted)
with the current setting.
4
Select “Clock Hr.”
5
Adjust the hour.
To exit from the Menu operation, press
MENU again.
Page 11

Radio Operations
○○○○○○○○
Listening to the radio
1
Select the Tuner
SOURCE
2
Select the band (FM/AM)
OK
BAND
FM1 FM2
FM3AM
3
Start searching for a station
“Auto Search” begins.
When a station is received, searching stops.
To stop searching, press the same button.
To tune in to a station manually
In step 3 above...
HoldHold
then
ENGLISH
This receiver has three FM bands (FM1, FM2,
FM3). You can use any one of them to listen to
an FM broadcast.
What information is shown on the display
The following information are shown commonly for tuner operations.
• If you press DISP on the control panel, the display will show the different information or
different screens (see page 14).
Current band
see page 12.
Station name (PS: see page 15)
(with its icon)
Activate “Manual
Search.”
Preset number if any
Station Frequency
(with its icon)
Programme Type
(PTY code: see page 20)
Select station
frequencies.
11
Page 12

When an FM stereo broadcast is hard to
receive:
1
While listening to an FM broadcast...
ENGLISH
MENU
2
Move the cursor to “MODE” on the
Main Menu.
3
Enter the FM MODE Menu.
OK
BAND
The last selected item appears (highlighted)
with the current setting.
4
Select “Mono.”
The Main Menu appears on
the display.
Cursor
To tune in FM stations only with strong
signals—LO/DX (Local/Distance-
extreme)
If received signals are weak, you may only hear
noises. By setting LO/DX to “Local,” you can
make this unit detects only stations with
sufficient signal strength while searching FM
stations.
1
While listening to an FM broadcast...
MENU
2
Move the cursor to “MODE” on the
Main Menu.
3
Enter the FM MODE Menu.
OK
BAND
The Main Menu appears on
the display.
Cursor
5
Select “On.”
On: Reception improves, but stereo
effect will be lost.
Off: Normally select this.
To exit from the Menu operation, press
MENU again.
12
On
Off
4
Select “LO/DX.”
5
Select “Local.”
DX
Local
DX: To tune in to all receivable stations.
• indicator lights up.
Local: To tune in to only stations with
sufficient signal strength.
• indicator lights up.
To exit from the Menu operation, press
MENU again.
Page 13

○○○○○○○○○
Storing stations in memory
You can preset 6 stations for each band.
Manual presetting
Ex. Storing an FM station of 92.5 MHz into
the preset number 3 of the FM1 band.
FM station automatic presetting—SSM
(Strong-station Sequential Memory)
• This is only for FM bands.
1
Select the FM band (FM1 – FM3) you
want to store FM stations into.
OK
BAND
FM1 FM2
FM3AM
2
While tuning in to an FM station...
MENU
3
Move the cursor to “MODE” on the
Main Menu.
4
Enter the FM MODE Menu.
OK
BAND
The Main Menu appears on
the display.
Cursor
OK
1
BAND
FM1 FM2
FM3AM
(in this example, FM1)
Tune in to a station
2
(in this example, of 92.5 MHz)
3
Display the Preset Station List of the
selected band.
Hold
• Station frequencies or station names (PS:
see page 15) of the preset stations are
shown on the list.
4
Select a preset number.
ENGLISH
5
Select “SSM.”
6
Start SSM.
OK
BAND
Local FM stations with the
strongest signals are searched
and stored automatically in the
selected FM band.
(Select “3” in this example).
• If the current band is FM, you can move
to the lists of the other FM bands by
pressing 4/¢ (
5
Store the station selected in step 2.
Hold
OK
BAND
/ ).
13
Page 14

○○○○○○○○○
Tuning in to a preset station
Using the remote controller, you can easily tune
in to a preset station.
ENGLISH
1
FM1 FM2
FM3AM
Select a preset number (1 – 6).
2
To select a preset station using the
Preset Station List
1
While listening to a station...
Hold
• Station frequencies or station names (PS:
see page 15) of the preset stations are
shown on the list.
2
Select a preset number.
• If the current band is FM, you can move
to the lists of the other FM bands by
pressing 4/¢ (
/ ).
○○○○○○○○○
Changing the display pattern
BACK
DISP
A window (see page 39) is displayed.
Clock time is displayed.
Semi-graphic screen*
14
then
OK
BAND
(Full graphic screen will be temporarily
Full graphic screen*
changed to the semi-graphic screen when
you operate the unit.)
Goes back to the initial display pattern.
*You can use your edited file for graphic screen
(see pages 32 to 36).
Page 15

FM RDS Operations
○○○○○○○○
Searching for your favorite
○○○○○○○○
programme
You can tune in to a station broadcasting
your favorite programme by searching for a
PTY code (see page 20).
• You can store your 6 favorite programme
types in the Preset PTY list.
1
While listening to an FM
station...
Hold
TP/PTY
2
Select “PTYSearch”
• After making sure that “PTYSearch” is
selected (highlighted)...
OK
BAND
Preset PTY Code List
appears.
3
• By pressing 4/¢ ( / ), you can also
4
PTY Search starts.
• If there is a station broadcasting a
Select a PTY code
move to the other PTY code lists.
Start PTY Search
OK
BAND
programme of the same PTY code as you
selected, that station is tuned in.
ENGLISH
What you can do with RDS
RDS (Radio Data System) allows FM stations to send an additional signal along with their
regular programme signals. For example, the stations send their station names (PS), as well as
information about what type of programme they broadcast, such as sports or music, etc.
By receiving the RDS data, this unit can do the following:
• Programme Type (PTY) Search
• Standby Reception of Traffic Announcement (TA) or your favorite programme (PTY)
• Programme Search
• Tracking the same programme automatically—Network-Tracking Reception
15
Page 16

To store your favorite programme types
in the Preset PTY Code List
When shipped from the factory, the following
6 programme types have been stored in the
Preset PTY List.
ENGLISH
6
Store the setting.
OK
BAND
1
Pop M
45
Classics
1
While listening to a station...
Hold
TP/PTY
2
Select “PTYMemory.”
3
Enter the PTY Memory setting screen.
OK
BAND
4
Select the preset number.
5
Select a PTY code.
2
Rock M Easy M
Affairs
3
6
Varied
7
Repeat Steps 4 to 6 to store other PTY
codes into other preset numbers.
8
Exit from the Preset Memory setting.
BACK
DISP
○○○○○○○○○
Using the Standby Reception
You can use two types of Standby Reception—
TA Standby Reception and PTY Standby
Reception.
Using TA Standby Reception
TA Standby Reception allows the unit to switch
temporarily to Traffic Announcement (TA)
from any source other than AM.
• If a station starts broadcasting a traffic
announcement, “Traffic News” appears on
the display, and this unit temporarily tunes in
to the station. The volume changes to the
preset TA volume level (see page 40).
To activate TA Standby Reception:
TP/PTY
16
TP indicator
(either lights up or flashes)
If the TP indicator lights up, TA Standby
•
Reception is activated.
Page 17

If the TP indicator flashes, TA Standby
•
Reception is not yet activated. (This occurs
when you are listening to an FM station
without the RDS signals required for TA
Standby Reception).
To activate TA Standby Reception, tune in to
another station providing these signals.
When you tune in to such a station, the TP
indicator stops flashing and remains lit. Now
TA Standby Reception is activated.
To deactivate the TA Standby Reception:
TP/PTY
The TP indicator goes off.
Using PTY Standby Reception
PTY Standby Reception allows the unit to
switch temporarily to your favorite programme
(PTY: Programme Type) from any source other
than AM.
3
Enter the PSM Menu.
OK
BAND
The last selected item appears (highlighted)
with the current setting.
4
Select “PTY Stnby (standby).”
5
Select a PTY code (see page 20).
Now PTY Standby Reception is activated
with a newly selected PTY code.
6
Finish the setting.
ENGLISH
To activate PTY Standby Reception
You can select your favorite programme type
for PTY Standby Reception. Once you select a
new PTY code following the procedure below,
PTY Standby Reception is automatically
activated.
1
While playing any source...
MENU
2
Move the cursor to “PSM” on the Main
Menu.
The Main Menu appears on
the display.
Cursor
MENU
PTY indicator
(either lights up or flashes)
• If the PTY indicator lights up, PTY Standby
Reception is activated.
If the PTY indicator flashes, PTY Standby
•
Reception is not yet activated.
To activate PTY Standby Reception, tune in
to another station providing these signals.
When you tune in to such a station, the PTY
indicator stops flashing and remains lit. Now
PTY Standby Reception is activated.
17
Page 18

To turn off and on the PTY Standby Reception
Once you activate the Reception by selecting a
PTY code (see page 17), you can deactivate and
activate it with the same PTY code by
ENGLISH
following the procedure below.
1
While listening to an FM broadcast...
MENU
2
Move the cursor to “MODE” on the
Main Menu.
The Main Menu appears on
the display.
○○○○○○○○○
Tracking the same programme—
○○○○○○○○○
Network-Tracking Reception
When driving in an area where FM reception is
not sufficient enough, this unit automatically
tunes in to another FM RDS station of the
same network, possibly broadcasting the same
programme with stronger signals.
• When shipped from the factory, NetworkTracking Reception is activated with “AF (see
the next page)” selected.
Programme “A” on
Frequency “01”
“A” on “05”
Cursor
3
Enter the FM MODE Menu.
OK
BAND
The last selected item appears (highlighted)
with the current setting.
4
Select “PTY.”
5
Turn off or on the Reception.
PTY code
(News, Affairs, etc.)
Off
PTY code: Activates the Reception with
the selected PTY code.
Off: Cancels the Reception.
To exit from the Menu operation, press
MENU again.
“A” on “03”
“A” on “02”
“A” on “04”
To change the Network-Tracking Reception
setting, follow the procedure below:
1
While playing any source...
MENU
2
Move the cursor to “PSM” on the Main
Menu.
The Main Menu appears on
the display.
Cursor
18
Page 19

3
Enter the PSM Menu.
OK
BAND
To deactivate Network-Tracking Reception,
follow the procedure above and select “Off” in
5
.
step
4
Select “AF-Regn’L (regional).”
5
Select an option.
AF AF Reg
Off
AF: The unit switches to another
station (the programme may
differ from the one currently
received.)
• The AF indicator lights up.
AF Reg: The unit switches to another
station broadcasting the same
programme.
• The REG indicator lights up.
Off*: Cancels the Reception.
• Neither the AF indicator nor
the REG indicator lights up.
* Displayed only when “DAB AF” is set to
“Off.” See page 56.
○○○○○○○○○
Using Programme Search
When you select a preset station, the station of
the frequency stored is tuned in.
However, when the preset station is an RDS
station, something different will happen with
Programme Search activated.
If the signals from that preset station are not
sufficient enough, this unit, using the AF
(Alternative Frequency) data, tunes in to
another station (which may be broadcasting the
same programme as the original preset station
is broadcasting).
To activate Programme Search, follow the
procedure below:
1
While playing any source...
MENU
2
Move the cursor to “PSM” on the Main
Menu.
The Main Menu appears on
the display.
ENGLISH
To exit from the Menu operation, press
MENU again.
AF or REG indicator lights up.
3
Enter the PSM Menu.
OK
BAND
Cursor
To be continued...
19
Page 20

4
Select “P-Search.”
To exit from the Menu operation, press
MENU again.
ENGLISH
5
Select “On.”
On
Off
On: Activates Programme Search.
Off: Cancels the Search.
PTY codes
News: News
Affairs: Topical programmes expanding on
current news or affairs
Info: Programmes which impart advice
on a wide variety of topics
Sport: Sport events
Educate: Educational programmes
Drama: Radio plays
Culture: Programmes on national or
regional culture
Science: Programmes on natural science
and technology
Varied: Other programmes like comedies
or ceremonies
Pop M: Pop music
Rock M: Rock music
Easy M: Easy-listening music
Light M: Light music
Classics: Classical music
Other M: Other music
Weather: Weather information
Finance: Reports on commerce, trading, the
stock market, etc.
Children: Entertainment programmes for
children
To deactivate Programme Search, follow the
procedure above and select “Off” in step
Social: Programmes on social activities
Religion: Programmes dealing with any
aspect of belief or faith, or the
nature of existence or ethics
Phone In: Programmes where people can
express their views either by
phone or in a public forum
Travel: Programmes about travel
destinations, package tours, and
travel ideas and opportunities
Leisure: Programmes concerned with
recreational activities such as
gardening, cooking, fishing, etc.
Jazz: Jazz music
Country: Country music
Nation M: Current popular music from
another nation or region, in that
country’s language
Oldies: Classic pop music
Folk M: Folk music
Document: Programmes dealing with factual
matters, presented in an
investigative style
5
.
20
Page 21

Basic Disc Operations
Hold
1
Open the control panel
The unit turns on, then...
2
Insert a disc
The unit draws the disc, the control panel
closes then goes back to the previous
position (see page 43), and playback starts
automatically.
To stop play and eject the disc:
To return the control
panel to its previous
position, press it again.
To fast-forward or reverse the track:
Fast-forwards.
Reverses.
To go to the next or previous tracks:
To next tracks.
To the beginning of the current track,
then the previous tracks.
To go to the next or previous folders:
For MP3/WMA discs only:
To next folders.
To previous folders.
• For MP3/WMA disc configuration, see
“About MP3 and WMA discs” on page
22.
ENGLISH
What information is shown on the display
The following information are shown commonly for disc operations.
• If you press DISP on the control panel, the display will show the different information or
different screens (see page 25).
ID3 Tag icon ( )
appears when tag is shown.
Disc type
Elapsed playing time
21
Page 22

• Display indications when inserting
an audio CD or a CD Text:
• Display indications when inserting
an MP3 or a WMA disc:
ENGLISH
1
*
Appear for CD Texts and CDs if it has been
assigned. (“No Name” appears if no name is
recorded or assigned).
2
*
Appear only for CD Texts. (“No Name” appears
if no name is recorded).
3
*
If “ID3 Tag” is set to “On” (see page 40), ID3 tag information will appear on the display.
The album name/performer with (disc) indicator appears on the display instead of the folder
name; while track title with (track) indicator appears instead of the track name.
(“No Name” also appears if no tag is recorded).
Total track number
Disc name*
1
Total play time
Track number
Track name*
Total track number
2
Total folder number
Track numberFolder number
Folder name*
3
Track name*
3
22
About MP3 and WMA discs
MP3 and WMA (Windows Media® Audio)
“tracks” (words “file” and “track” are used
interchangeably) are recorded in “folders.”
“Root” is similar to the root of a tree. Every
track and folder can be linked to and be
accessed from the root.
• When an MP3 or a WMA folder includes
an image <jcl> file edited by Image
Converter Color—supplied in the CDROM, you can show the image on the
display while the tracks in the folder are
played back. (See pages 39 and 60 for
details.)
Level 1 Level 2 Level 3 Level 4 Level 5
ROOT
: Folder with its play order
01
: MP3/WMA track with its
1
Hierarchy
01
05
1
2
play order
02 03
3
10
11
04
12
4
5
6
7
8
9
Page 23

Advanced Disc Operations
○○○○○○○○○
Locating a folder/track
• This function is only for MP3/WMA discs.
To locate a folder by displaying the
folder list of the current disc
• This function is only possible using the
buttons on the control panel.
1
While playing a disc...
Hold
2
Display the track list of the current
folder.
OK
BAND
3
Select the track you want.
ENGLISH
The current track is highlighted.
The current folder is highlighted.
2
Select the folder you want.
• If the disc includes more than 6 folders,
you can also display the other lists of
folders by pressing 4/¢ ( / ).
3
Start playing the folder from the first
track.
OK
BAND
To locate a track by displaying the track
list of the current folder
• This function is only possible using the
buttons on the control panel.
1
While playing a disc...
Hold
• If the folder includes more than 6 tracks,
you can also display the other lists of
tracks by pressing 4/¢ (
• If you press BACK, you can go back to
the folder list.
4
Start playing the track.
OK
BAND
To locate a track (or folder) directly
using the remote controller
• To select a track (or folder for MP3 and
WMA discs) number from 1 – 6:
• To select a track (or folder for MP3 and
WMA discs) number from 7 (1) – 12 (6):
/ ).
Hold
The current folder is highlighted.
To directly select the folders using the number
button(s), it is required that folders be assigned 2
digit numbers at the beginning of their folder
names—01, 02, 03, and so on.
23
Page 24

○○○○○○○○○
Selecting playback modes—MODE
You can use only one of the following playback
modes at a time.
ENGLISH
• Intro Scan: You can play back the first 15
seconds of each track sequentially.
• Repeat Play: You can repeat playback.
• Random Play: You can play back tracks at
random.
To use the playback modes
1
While playing a disc...
MENU
2
Move the cursor to “MODE” on the
Main Menu.
3
Enter the Disc MODE Menu.
OK
BAND
The Main Menu appears on
the display.
Cursor
6
Finish the setting.
OK
BAND
• Intro Scan modes
Mode Plays the beginnings of
Track : All tracks of the disc.
• While playing,
up.
Folder* : First tracks of all folders.
• While playing, lights
up.
Off : Cancels Intro Play.
• Repeat Play modes
Mode Plays repeatedly
Track : Current track.
• While playing,
up.
Folder* : All tracks of the current folder.
• While playing, lights
up.
Off : Cancels Repeat Play.
lights
lights
24
4
Select one of the playback modes.
EX.: When “Random” (Random Play) is
selected.
5
Select the setting you want.
• For details, see the
tables that follows.
• Random Play modes
Mode Plays randomly
Folder* : All tracks of the current folder, then
moves to the next folder and so on.
• While playing,
up.
Disc : All tracks on the disc.
• While playing, lights
up.
Off : Cancels Random Play.
* “Folder” can be selected for MP3 and WMA
discs only.
lights
Page 25

○○○○○○○○○
Prohibiting disc ejection
You can lock a disc in the loading slot.
• The control panel will open, but the disc will
not eject.
1
While playing any source...
Hold
(at the same time)
2
After making sure that “No Eject?” is
selected (highlighted)...
OK
BAND
○○○○○○○○○
Changing the display pattern
BACK
DISP
A window (see page 39) is displayed.
ENGLISH
“No Eject” flashes, and the disc cannot be
ejected.
To cancel the prohibition, repeat the same
procedure—press OK after “Eject OK?” is
selected (highlighted) in step 2.
“Eject OK” flashes.
Clock time is displayed.
Semi-graphic screen*
Full graphic screen*
(Full graphic screen will be temporarily
changed to the semi-graphic screen when
you operate the unit.)
Goes back to the initial display pattern.
*You can use your edited file for graphic screen
(see pages 32 to 36).
25
Page 26

Sound Adjustments
then
○○○○○○○○
Selecting the DSP modes—DSP
ENGLISH
You can create a more acoustic sound field
such as in a theater, hall, etc.
Available DSP modes:
• Theater / Hall / Club / Dome / Studio
• V.Cancel (Voice Cancel: Reduces the
vocal sounds. Good for mastering your
favorite songs—Karaoke.)
• Defeat (To cancel the DSP mode)
1
While playing any source...
MENU
2
Move the cursor to “DSP”
The Main Menu appears on
the display.
—Daily Use
4
Select one of the DSP modes
EX.: When “Theater” is selected.
To finish
MENU
5
Adjust the effect level (1 – 3)
then
To adjust the effect
level
OK
BAND
\ Go to step
5
.
26
The selected DSP effect level is valid for all
DSP modes except “V.Cancel.”
• As the number increases, the effect level
Cursor
3
Enter the DSP Menu
OK
BAND
The currently selected mode appears
(highlighted).
To cancel the DSP modes, select “Defeat” in step 3.
To finish
becomes stronger.
then
MENU
then
To make further
settings
OK
BAND
\ See page 27.
Page 27

To make further precise settings for the
DSP modes
You can also make further precise settings to
make the best sound field in your car
compartment. These settings you make are
valid for all DSP modes except “V.Cancel.”
Setting items:
The number of the built-in speakers:
Select the number of the speakers built in
your car—“2ch” or “4ch.”
• When you have four speakers (4ch) built
in your car, select your car size (see step
that follows).
Listening seat position:
Select the listening seat position where you
want to locate the sound image.
1
Repeat steps 1 to 4 on page 26 to select a
DSP mode (except “V.Cancel”).
4
• Press OK in step
2
Select the number of the built-in
speakers.
• Select “4ch” for the four speaker system,
and “2ch” for the two speaker system.
.
4
2ch
4ch
3
Select your listening seat position.
All Front
R.FrontL.Front
All : For all front and rear seats.
Front : For the both front seats.
R. Front : For the front right seat.
L. Front : For the front left seat.
4
If you select “4ch,” select your car size.
Middle Large
Compact
Middle : Select when the distance from
the rear speakers to the listening
seat position is almost equal to
that from the front speakers.
Large : Select when the distance from
the rear speakers to the listening
seat position is longer than that
from the front speakers.
Compact : Select when the distance from
the rear speakers to the listening
seat position is shorter than that
from the front speakers.
ENGLISH
BAND
then
OK
To exit from the Menu operation, press
MENU again.
27
Page 28

○○○○○○○○○
Making sound natural
This unit is equipped with two features to make
sound natural—CC Converter and BBE Digital.
ENGLISH
To activate Compression Compensative
(CC) Converter
CC Converter eliminates jitter and ripples,
achieving a drastic reduction in digital
distortion. This processing can be applied to the
analog sources as well as the digital sources;
therefore, you can obtain a natural sound field
from any source.
1
While playing any source...
MENU
2
Move the cursor to “CCC” on the Main
Menu.
The Main Menu appears on
the display.
To activate BBE Digital
Digital is a new digital processing method
BBE
to restore the brilliance and clarity of the
original live sound in recording, broadcasts, etc.
When a speaker reproduces sound, it introduces
frequency-dependent phase shifting, causing
high-frequency sounds to take longer to reach
the ear than low frequency sounds. BBE Digital
adjusts the phase relationship between the low,
mid and high frequencies by adding a
progressively longer delay time to the low and
mid frequencies, so that all frequencies reach
the listener’s ears at the proper time.
1
While playing any source...
MENU
2
Move the cursor to “BBE” on the Main
Menu.
The Main Menu appears on
the display.
3
Enter the CCC Menu.
OK
BAND
4
Select “On.”
• When “CCC” is turned on, the CCC
indicator is brightened in yellow on the
display.
• To cancel CC Converter, select “Off.”
To exit from the Menu operation, press
MENU again.
28
On
Off
Cursor
3
Enter the BBE Menu.
OK
BAND
4
Select the effect level.
Off 1
• As the number gets higher, the effect
level becomes stronger. When “BBE” is
turned on, the BBE indicator is
brightened in green (with its current
level) on the display.
• To cancel BBE Digital, select “Off.”
To exit from the Menu operation, press
MENU again.
Cursor
23
Page 29

○○○○○○○○○
Selecting preset sound modes—EQ
You can select a sound mode suitable to the
music genre.
Available sound modes:
• Hard Rock / R&B / Pop / Jazz / Dance /
Country / Reggae / Classic
• User 1 / User 2 / User 3
• Flat (To cancel the sound mode)
1
While playing any source...
MENU
2
Move the cursor to “EQ” on the Main
Menu.
The Main Menu appears on
the display.
○○○○○○○○○
Storing your own sound modes
You can adjust the sound modes and store your
own adjustments in memory.
1
Repeat steps 1 to 4 on the left column to
select a sound mode you want to adjust,
then...
OK
BAND
2
Make adjustments as you like.
ENGLISH
Cursor
3
Enter the EQ (equalizer) Menu.
OK
BAND
The currently selected mode appears
(highlighted).
4
Select (highlight) one of the preset EQ
modes.
EX.: When “Jazz” is selected.
To exit from the Menu operation, press
MENU again.
1) Press 4 (
frequency band—60Hz, 150Hz, 400Hz,
1kHz, 2.4kHz, 6kHz, 12kHz.
2) Press 5 (up) or ∞ (down) to adjust the
level of the selected band within the
range of –05 to +05.
3) Repeat steps 1) and 2) to adjust the other
frequency bands.
3
Finish adjustment.
OK
BAND
4
Select (highlight) one of the user sound
modes (User 1, User 2, or User 3) you
want to store into.
“Memory” appears for a while.
For details about the preset settings of each sound
mode, see page 62.
) or ¢ ( ) to select the
OK
then
BAND
29
Page 30

Sound Adjustments
○○○○○○○○
Setting the basic sound selection
ENGLISH
○○○○○○○○
menu—SEL
1
While playing any source...
—Preference Settings
5
Adjust the item
MENU
2
Move the cursor to “SEL”
3
Enter the SEL Menu
OK
BAND
The last selected mode appears
(highlighted).
4
Select a setting item
The Main Menu appears on
the display.
To adjust fader and balance:
To select the cutoff frequency and adjust
the subwoofer output level:
Cursor
To adjust the input level of each source:
To exit from the Menu operation
30
EX.: When “Sub Out” (subwoofer output)
is selected.
When selecting “Sub
Out” and “Fad/Bal,” press
OK to enter submenu.
then
OK
BAND
MENU
Page 31
To adjust fader and balance—Fad/Bal:
Adjust fader—speaker output balance between
the front and rear speakers.
• Upmost—front only
• Downmost—rear only
Adjust the balance—speaker output balance
between the left and right speakers.
To adjust the input level of each source
—VolAdjust:
This setting is required for each source except
FM. Before making an adjustment, select an
appropriate source for which you want to make
an adjustment.
Once you have made an adjustment, it is
memorized, and the volume level will
automatically increase or decrease by adjusted
level whenever you change the source.
ENGLISH
• Leftmost—left only
• Rightmost—right only
To adjust subwoofer output—Sub Out:
Select an appropriate cutoff frequency level
according to the subwoofer connected.
High: Frequencies higher than 115 Hz are
cut off to the subwoofer.
Middle: Frequencies higher than 85 Hz are cut
off to the subwoofer.
Low: Frequencies higher than 55 Hz are cut
off to the subwoofer.
Adjust the subwoofer output level.
• 0 (min.) to 8 (max.)
Adjust to match the input level to the FM sound
level.
• –5 (min.) to +5 (max.)
31
Page 32

Graphic Displays
○○○○○○○○
Basic procedure
ENGLISH
Before starting the following procedure,
prepare a CD-R including still images
(pictures) and animations (movies).
• With Image Converter Color included in
the supplied CD-ROM, you can create your
own images and animations. (The supplied
CD-ROM also includes sample images and
animations.)
1
Open the control panel
The unit turns on, then...
2
Insert the prepared CD-R
The unit draws the disc,
the control panel closes,
then goes back to the
previous position (see
page 43).
• If the disc includes playable audio files,
playback starts.
3
Display the Main Menu
MENU
4
Move the cursor to “PICT”
Cursor
5
Enter the PICT Menu
OK
BAND
The last selected item appears
(highlighted).
6
Select the item
EX.: When “Download” is selected.
• To download the file(s)
\ Download (see page 33):
Only possible when the source is “CD.”
• To delete the file(s)
\ Delete (see page 34)
• To delete all memorized files
\ AllDelete (see page 36)
Note: The picture quality of the
downloaded animation (movie) file may
decrease when it is shown on the
receiver's display (compared to its quality
on the PC).
32
Page 33

IMPORTANT:
• Refer to Image Converter Operation Guide (or Manual) included in the supplied CD-ROM.
• Still images (pictures) should have <jcl>, and animations (movies) should have <jca> as their
extension code in their file names.
• Before you download or delete the files, observe the following:
– Do not download a file while driving.
– Do not turn off the ignition key of the car while downloading or deleting a file.*
– Do not detach the control panel while downloading or deleting a file.*
* If you do it, the file download or deletion will not be done correctly.
○○○○○○○○○
Downloading the files
Download an animation (consisting of 55
frames maximum) or pictures (total of 18 still
images: each one frame—see also page 61)
which can be used for the graphic screen.
• It takes a long time to download an animation.
For details, see page 61.
• To activate the downloaded files, see page 36.
1
Repeat steps 1 to 6 on page 32 (in step
3
Select (highlight) a folder where the file
you want is located.
• If a disc includes more than 6 folders,
you can also display the other lists of
folders by pressing 4/¢ ( / ).
OK
BAND
then
6
select “Download”).
• Downloading is only possible when the
source is “CD.” If any source other than
“CD” is selected, “Download” will not be
shown as a PICT Menu item.
2
Select the file type—either “Picture”
<jcl> or “Movie” <jca>.
then
OK
BAND
The file list appears.
4
Select (highlight) a file to download.
• If the folder includes more than 6 files,
you can also display the other lists of files
by pressing 4/¢ (
/ ).
then
OK
BAND
ENGLISH
The folder list appears.
• Only the folders including the selected
file type <jcl> or <jca> are shown.
The confirmation screen appears.
To be continued...
33
Page 34

5
Download the file.
OK
BAND
ENGLISH
When download is complete, the file list
appears again.
6
Download more files if you want.
• To select a file from the same folder:
then
• To select a file from another folder:
BACK
DISP
To change the file type—“Picture” <jcl>
or “Movie” <jca> to download, exit from
the Menu operation by pressing MENU,
then repeat from the beginning.
To exit from the Menu operation, press
MENU again.
then
Repeat steps 3 to 5.
OK
BAND
○○○○○○○○○
Deleting the files
You can delete the files while playing any
source.
To delete the stored pictures one by one
1
Repeat steps 3 to 6 on page 32 (in step
6
select “Delete”).
2
Select “Picture.”
then
OK
BAND
3
Select “Delete.”
then
OK
BAND
34
The file list appears.
4
Select (highlight) a file to delete.
• If more than 6 files have been stored, you
can also display the other lists of files by
then
/ ).
OK
BAND
pressing 4/¢ (
The confirmation screen appears.
Page 35

5
Delete the file.
OK
BAND
4
Delete all pictures.
OK
BAND
When all pictures are deleted,
the PICT Menu appears again.
ENGLISH
When deletion is complete, the file list
appears again.
• If the PICT Menu appears, there are no
files stored. \ Press MENU.
6
Delete more files if you want.
4
• Repeat steps
To exit from the Menu operation, press
MENU again.
To delete all the stored pictures at a
time
1
Repeat steps 3 to 6 on page 32 (in step
select “Delete”).
2
Select “Picture”.
• See step
3
Select “AllDelete.”
and 5.
2
of the previous procedure.
To exit from the Menu operation, press
MENU again.
To delete the stored movie
1
Repeat steps 3 to 6 on page 32 (in step
select “Delete”).
2
Select “Movie”.
then
OK
BAND
6
The confirmation screen appears.
3
Delete the movie.
OK
BAND
When the movie is deleted, the
PICT Menu appears again.
6
then
OK
BAND
The confirmation screen appears.
To exit from the Menu operation, press
MENU again.
35
Page 36

○○○○○○○○○
then
Deleting all files
You can delete all stored files (pictures and
animation) at a time.
ENGLISH
1
Repeat steps 3 to 6 on page 32 (in step
select “AllDelete”).
2
Confirm your selection.
OK
BAND
The confirmation screen appears.
3
Delete all stored files.
OK
BAND
To exit from the Menu operation, press
MENU again.
○○○○○○○○○
Activating the downloaded files
1
While playing any source...
MENU
When all files are deleted, the
PICT Menu appears again.
The Main Menu appears on
the display.
4
Select “Pict.”
6
OK
BAND
5
Select the graphic screen type—
“Picture,” “Movie,” or “Slideshow.”
Picture: One of the stored pictures is
activated for your graphic
6
screen. \ Go to step
Movie:
Slideshow:All stored pictures are activated
6
If you have selected “Picture” or
“Movie” in the previous step, select the
file you want.
Your stored animation is
activated for your graphic
screen. \ Go to step 6.
and shown in sequence for your
graphic screen (UserSlide). \
Go to step 7.
.
36
2
Move the cursor to “PSM” on the Main
PSM Menu.
Cursor
3
Enter the PSM Menu.
OK
BAND
• Select “Default” to activate the
preinstalled file.
7
Finish the setting.
OK
BAND
Page 37

General Settings—PSM
○○○○○○○○
Basic procedure
You can change the Preferred Setting Mode
(PSM) items listed on the table that follows.
• When changing the “Pict” setting, see
“Activating the downloaded files” on page
36.
1
While playing any source...
4
Select a PSM item
ENGLISH
MENU
2
Move the cursor to “PSM”
3
Enter the PSM Menu
OK
BAND
The last selected item appears
(highlighted) with the current setting.
The Main Menu appears on
the display.
Cursor
EX.: When “Scroll” is selected.
5
Change or adjust the setting
6
Change or adjust other PSM
items
If necessary, repeat steps 4 and 5 to change
other PSM item settings.
To exit from the Menu operation
MENU
37
Page 38

Demo/Link
ENGLISH
WallPaper
Window
Pict
Clock Hr
PSM items Selectable settings Initial Pages
Demo/ImageLink
Wall Paper
Window
Picture
Clock hour
Demo
Standard1
Window1
Window4
Picture
0 — 23 (1 — 12)
ImageLink
Off
Standard3
Movie
Standard2
Window2
Window3
Slideshow
Demo
Standard1
Window
1
Picture
0 (0:00)
9, 39
39
39
36
10
Clock Min
24H/12H
Auto Adj
Scroll
Dimmer
Bright
ID3 Tag
PTY Stnby
AF-Regn’L
TA Volume
P-Search
IF Filter
*
DAB AF
Announce
Beep
Telephone
Amp Gain
Clock minute
Clock system
Auto clock adjustment
Scroll mode
Dimmer
Brightness
Tag display
PTY Standby
Alternative frequency/
regional reception
Traffic announcement
volume
Programme search
Intermediate frequency
filter
3
DAB Alternative
frequency
3
Announcement standby
*
Beep
Telephone mute
Amp gain control
00 — 59
12Hours 24Hours
Off On
Once
Auto
Auto
Off
Off
On
1 — 8
Off On
2
9 programme types
(see page 20)
Off
AF Reg
1
*
AF
Volume 00 — 50
(or Volume 00 — 30)
Off On
Wide Auto
Off On
9 announcement types
Off On
Muting1
HighPower
Off
Low Power
Off
Muting2
2
*
00(0:00)
24Hours
On
Once
Auto
8
On
News
AF
Volume 20
Off
Auto
On
Travel
On
Off
HighPower
10
10
39
40
40
40
40
17
19
40
20
40
56
54
41
41
41
*1Displayed only when “DAB AF” is set to “Off.”
*2Depending on the “Amp Gain” setting.
*3Displayed only when the DAB tuner is connected.
38
Page 39

To show the display demonstration—
Demo/Link
If no operation is done for about 20 seconds,
display demonstration starts.
• Demo: Display demonstration
(animation) appears.
• ImageLink:A still image included in an
MP3/WMA folder appears while
playing back the tracks in the
folder (see page 22).
• Off: Cancels the display
demonstration.
To show the small window on the
display—Window
You can show the level meters or scenery
pictures in the window.
• To show the window, press DISP repeatedly.
• Examples below are of disc playback.
• Window1:
ENGLISH
When “ImageLink” is selected
No sounds come out (“PLEASE WAIT” is shown
on the display) while reading an image included
in an MP3/WMA folder.
To select the background screen
—WallPaper
You can select the background screen of the
display window from the following.
• Examples below are of disc playback.
• Standard1:
• Standard2:
• Standard3:
• Window2:
• Window3:
• Window4:
To adjust the clock automatically
—Auto Adj
When shipped from the factory, the clock built
in this unit is set to be readjusted automatically
using the CT (Clock Time) data in the RDS
signal.
• On: Activates auto clock adjustment.
• Off: Cancels the adjustment.
39
Page 40

To select the scroll mode—Scroll
The entire text information is shown by
scrolling if it cannot be shown at a time.
• Once:
ENGLISH
While showing the disc information:
scrolls the disc information only
once.
While showing the DAB text: scrolls
the detailed DAB text.
• Auto:
While showing the disc information:
repeats the scroll (in 5-second
intervals).
While showing the DAB text: scrolls
the detailed DAB text.
• Off:
While showing the disc information:
cancels scroll mode.
While showing the DAB text: shows
only headline if any.
Even if the scroll mode is set to “Off,” you can
scroll the disc information by pressing DISP for
more than one second.
To turn the tag display on or off
—ID3 Tag
An MP3 and WMA track can contain track
information called “Tag” where its album
name, performer, track title, etc. are recorded.
• On: Shows the Tag display while playing
MP3 or WMA tracks.
• Off: Cancels the Tag display. Only the folder
name and track name appear.
For MP3 tracks only: There are two versions–
ID3v1 (ID3 Tag version 1) and ID3v2 (ID3 Tag
version 2). When both ID3v1 and ID3v2 are
recorded, ID3v2 will be shown.
To set the Traffic Announcement
volume—TA Volume
You can preset the volume level for TA Standby
Reception. When a traffic programme is
received, the volume level automatically
changes to the preset level.
To select the dimmer mode—Dimmer
When you turn on the car headlights, the
display and button illumination automatically
dims (Auto Dimmer).
• Auto: Activates Auto Dimmer.
• Off: Cancels Auto Dimmer.
• On: Always activates Dimmer.
To adjust the display brightness
—Bright
You can adjust the brightness to make the
display clear and legible.
To change the FM tuner selectivity
—IF Filter
In some areas, adjacent stations may interfere
with each other. If this interference occurs,
noise may be heard.
• Auto: When this type of interference occurs,
this unit automatically increases the
tuner selectivity so that interference
noise will be reduced. (But the stereo
effect will also be lost.)
• Wide: Subject to the interference from
adjacent stations, but sound quality
will not be degraded and the stereo
effect will not be lost.
40
Page 41

To turn on/off the key-touch tone—Beep
You can deactivate the key-touch tone if you do
not want it to beep each time you press a
button.
• On: Activates the key-touch tone.
• Off: Deactivates the key-touch tone.
To select the telephone muting
—Telephone
This mode is used when a cellular phone
system is connected. Depending on the phone
system used, select either “Muting1” or
“Muting2,” whichever mutes the sounds from
this unit. During telephone muting, disc play
pauses.
• Muting1: Selects this if this setting can
mute the sounds while using the
cellular phone.
• Muting2: Selects this if this setting can
mute the sounds while using the
cellular phone.
• Off: Cancels the telephone muting.
To select the amplifier gain control—
Amp Gain
You can change the maximum volume level of
this unit. When the maximum power of the
speakers is less than 50 W, select “Low Power”
to prevent them from being damaged.
• HighPower:You can adjust the volume level
from “0” to “50.”
• Low Power:You can adjust the volume level
from “0” to “30.”
• Off: Deactivates the built-in
amplifier. (Sounds come out
only from external amplifiers
connected to LINE OUT/
SUBWOOFER OUT plugs.)
You can use the following table to keep
memo of your own PSM settings.
Demo/Link
WallPaper
Window
Pict
Clock Hr
Clock Min
24H/12H
Auto Adj
Scroll
Dimmer
Bright
ID3 Tag
PTY Stnby
AF-Regn’L
TA Volume
P-Search
IF Filter
DAB AF
Announce
Beep
Telephone
Amp Gain
ENGLISH
41
Page 42

Other Main Functions
○○○○○○○○○
Assigning titles to the sources
ENGLISH
You can assign titles to 40 CDs (both in this
unit and in the CD changer), and the external
component.
Source Maximum number
CDs: 32 characters
External component: 16 characters
• You cannot assign a title to CD Text, MP3,
and WMA discs.
• For available characters, see page 62.
1
Prepare the source.
• For a CD in this unit: Insert a CD.
• For CDs in the CD changer: Select
“CD-CH,” then select a disc number.
2
After playback starts...
MENU
3
Move the cursor to “TITLE” on the
Main Menu.
The Main Menu appears on
the display.
5
Assign a title.
1) Select a character set.
BACK
DISP
2) Enter a character.
3) Move to the next character position.
4) Repeat steps 1) to 3) until you finish
entering the title.
To erase the characters...
Hold
BACK
DISP
The entire title (all entered
characters) are erased at a
time.
42
Cursor
4
Enter the TITLE Menu.
OK
BAND
Ex. When you have selected “CD” and assign
a title to the loaded disc
6
After the title entry is finished...
OK
BAND
• To cancel the title entry without
registration, press MENU.
Page 43

○○○○○○○○○
Changing the control panel angle
○○○○○○○○○
Detaching the control panel
You can change the angle of the control panel.
1
Hold
The current angle level is shown.
2
Angle 1
Angle 2
• When detaching and attaching the control
panel, be careful not to damage the
connectors.
Detaching the control panel
Before detaching the control panel, be sure to
turn off the power.
1
2
3
ENGLISH
Angle 4
You can use the ANGLE button on the
remote controller for changing the panel
angle.
On the remote controller
CAUTION:
NEVER insert your finger in between the
control panel and the unit, as it may get
caught or hurt.
Angle 3
Attaching the control panel
1
2
43
Page 44

Basic CD Changer Operations
Hold
With JVC MP3-compatible CD changer
ENGLISH
connected, you can play back your original
CD-Rs and CD-RWs recorded either in audio
CD format or in MP3 format.
1
Select CD changer
SOURCE
To select a disc:
See “Locating a disc” on page 46.
TUNER
LINE-IN
DAB
CD
CD-CH
To fast-forward or reverse the track:
Fast-forwards.
Reverses.
To go to the next or previous tracks:
To next tracks.
To the beginning of the current track,
then the previous tracks.
To go to the next or previous folders:
For MP3 discs only:
To next folders.
To previous folders.
• For MP3 disc configuration, see “About
MP3 and WMA discs” on page 22.
44
What information is shown on the display
The following information are shown commonly for CD changer operations.
• If you press DISP on the control panel, the display will show the different information or
different screens (see page 48).
ID3 Tag icon ( )
appears when tag is shown.
Disc type
Disc number
Elapsed playing time
Page 45

• Display indications when the
current disc is an audio CD or a CD
Text:
Track number
• Display indications when the current
disc is an MP3 disc:
ENGLISH
Disc name*
1
*
Appear for CD Texts and CDs if it has been
1
Track name*
2
Folder number
Track number
assigned. (“No Name” appears if no name is
recorded or assigned).
2
*
Appear only for CD Texts. (“No Name” appears
if no name is recorded).
Folder name*
3
*
If “ID3 Tag” is set to “On” (see page 40), ID3
3
Track name*
3
tag information will appear on the display.
The album name/performer with (disc)
indicator appears on the display instead of the
folder name; while track title with (track)
indicator appears instead of the track name.
(“No Name” also appears if no tag is
recorded).
It is recommended to use the JVC MP3-compatible CD changer with your unit.
• You can also connect the CH-X series CD changers (except CH-X99 and CH-X100).
However, they are not compatible with MP3 discs, so you cannot play back MP3 discs.
• You cannot use the KD-MK series CD changers with this unit.
Before operating your CD changer:
• Refer also to the Instructions supplied with your CD changer.
• You cannot control and play any WMA disc in the CD changer.
• If no discs are in the magazine of the CD changer or the discs are inserted upside down,
“No Disc” will appear. If this happens, remove the magazine and set the discs correctly.
• If no magazine is loaded in the CD changer, “No Magazine” appears. If this happens, insert
the magazine in the CD changer.
45
Page 46

Advanced CD Changer Operations
○○○○○○○○○
Locating a disc
ENGLISH
To locate a disc by displaying the disc
lists
• This function is only possible using the
buttons on the control panel.
1
While playing a disc...
Hold
The current disc is highlighted.
• The display show the six disc number (or
assigned names if any) including the
currently playing disc (highlighted).
• You can also display the other disc list by
pressing 4/¢ (
2
Select the disc you want to play.
3
Start playing the disc.
OK
BAND
To locate a disc directly using the
remote controller
• To select a disc number from 1 – 6:
/ ).
○○○○○○○○○
Locating a folder/track
• This function is only for MP3 discs.
To locate a folder by displaying the
folder list of the current disc
• This function is only possible using the
buttons on the control panel.
1
While playing a disc...
Hold
The current disc is highlighted.
2
Display the folder list of the current disc.
OK
BAND
The current folder is highlighted.
3
Select the folder you want.
• If the disc includes more than 6 folders,
you can also display the other lists of
folders by pressing 4/¢ (
4
Start playing the folder from the first
track.
OK
BAND
/ ).
• To select a disc number from 7 (1) – 12 (6):
46
Hold
Page 47

To locate a track by displaying the track
list of the current folder
• This function is only possible using the
buttons on the control panel.
1
While playing a disc...
Hold
The current disc is highlighted.
2
Display the folder list of the current disc.
OK
BAND
The current folder is highlighted.
3
Display the track list of the current
folder.
Hold
○○○○○○○○○
Selecting playback modes—MODE
You can use only one of the following playback
modes at a time.
• Intro Scan: You can play back the first 15
seconds of each track sequentially.
• Repeat Play: You can repeat playback.
• Random Play: You can play back tracks at
random.
To use the playback modes
1
While playing a disc...
MENU
2
Move the cursor to “MODE” on the
Main Menu.
The Main Menu appears on
the display.
ENGLISH
The current track is highlighted.
4
Select the track you want.
• If the folder includes more than 6 tracks,
you can also display the other lists of
tracks by pressing 4/¢ (
• To go back to the folder list and disc list,
press BACK once or twice.
5
Start playing the track.
OK
BAND
/ ).
Cursor
3
Enter the Disc MODE Menu.
OK
BAND
4
Select one of the playback modes.
EX.: When “Random” (Random Play) is
selected.
5
Select the setting you want.
• For details, see the
tables that follows.
6
Finish the setting.
OK
BAND
47
Page 48

• Intro Scan modes
Mode Plays the beginnings of
Track : All tracks of the current disc.
ENGLISH
• While playing, lights up.
Folder*:First tracks of all folders of the
current disc.
•While playing,
Disc : First tracks of all discs in the
magazine.
•While playing, lights up.
Off : Cancels Intro Play.
lights up.
○○○○○○○○○
Changing the display pattern
BACK
DISP
• Repeat Play modes
Mode Plays repeatedly
Track : Current track.
•While playing,
lights up.
Folder*:All tracks of the current folder.
•While playing, lights up.
Disc : All tracks of the current disc.
•While playing, lights up.
Off : Cancels Repeat Play.
• Random Play modes
Mode Plays randomly
Folder*:All tracks of the current folder, then
moves to the next folder and so on.
•While playing, lights up.
Disc : All tracks on the current disc.
•While playing,
lights up.
All : All tracks of all discs in the magazine.
•While playing, lights up.
Off : Cancels Random Play.
* “Folder” can be selected for MP3 discs only.
A window (see page 39) is displayed.
Clock time is displayed.
Semi-graphic screen*
Full graphic screen*
(Full graphic screen will be temporarily
changed to the semi-graphic screen when
you operate the unit.)
Goes back to the initial display pattern.
48
*You can use your edited file for graphic screen
(see pages 32 to 36).
Page 49

External Component Operations
You can connect an external component to
the LINE IN plugs on the rear.
1
Select the source
SOURCE
TUNER
LINE-IN
DAB
CD
CD-CH
2
Adjust the volume
3
Select the DSP mode and
sound mode as you want
• For details, see pages 26 to 31.
○○○○○○○○○○○○○○○○○○
Changing the display pattern
BACK
DISP
ENGLISH
A window (see page 39) is displayed.
Clock time is displayed.
Semi-graphic screen*
Full graphic screen*
(Full graphic screen will be temporarily
changed to the semi-graphic screen when
you operate the unit.)
Goes back to the initial display pattern.
*You can use your edited file for graphic screen
(see pages 32 to 36).
49
Page 50

DAB Tuner Operations
○○○○○○○○
Listening to the DAB tuner
ENGLISH
1
Select the DAB Tuner
3
Start searching for an
ensemble
SOURCE
2
Select the band
OK
BAND
This receiver has three DAB bands (DAB1,
DAB2, DAB3). You can use any one of them to
listen to a DAB service.
TUNER
LINE-IN
DAB1 DAB2
DAB
CD-CH
DAB3
CD
“Auto Search” begins.
When an ensemble is received, searching
stops.
To stop searching, press the same button.
4
Select a service (either primary
or secondary) to listen to
50
What is DAB system?
DAB can deliver CD quality sound without any annoying interference and signal distortion.
Furthermore, it can carry text, pictures, and data. In contrast to FM broadcast, where each
programme is transmitted on its own frequency, DAB combines several programmes (called
“services”) to form one “ensemble.” In addition, each “service”—called “primary service”—
can also be divided into its components (called “secondary service”). A typical ensemble has 6
or more programmes (services) broadcast at the same time.
It is recommended to use DAB (Digital Audio Broadcasting) tuner KT-DB1500 or
KT-DB1000 with this unit. If you have another DAB tuner, consult your JVC IN-CAR
ENTERTAINMENT dealer.
• Refer also to the Instructions supplied with your DAB tuner.
Page 51

What information is shown on the display
The following information are shown commonly for DAB tuner operations.
• If you press DISP on the control panel, the display will show the different information or
different screens (see page 57).
Preset number if any
Current band
Ensemble Label
Service Label
Programme Type
(PTY code: see page 20)
ENGLISH
To tune in to an ensemble manually
3
In step
Activate “Manual
Search.”
on page 50...
HoldHold
then
Select ensemble
frequencies.
When surrounding sounds are noisy
While driving, surrounding sounds will
interfere with your listening. Especially the low
level sounds will be hard to listen.
If this happens, you can reinforce the low level
sounds to improve your listening to.
• For this purpose, some service provides
Dynamic Range Control (DRC) signals
together with their regular programme
signals.
1
While listening to a service...
The Main Menu appears on
MENU
the display.
2
Move the cursor to “MODE” on the
Main Menu.
Cursor
3
Enter the DAB MODE Menu.
OK
BAND
The last selected item appears (highlighted)
with the current setting.
4
Select “DRC.”
To be continued...
51
Page 52
5
Select an option.
12
ENGLISH
1/2/3: The higher the number is, the
stronger the reinforcement
becomes.
Off: Cancel the effect.
To exit from the Menu operation, press
MENU again.
DRC indicator appears.
• The DRC indicator will be highlighted
) only when the unit received DRC
(
signals from the tuned service.
If it is not highlighted, this function does not
work.
Off
○○○○○○○○○
Storing DAB services in memory
3
You can preset 6 DAB services (primary
services) for each band.
Ex. Storing an ensemble (primary service) into
the preset number 6 of the DAB1 band.
OK
1
BAND
DAB1 DAB2
DAB3
(in this example, DAB1)
Select an ensemble (primary service).
2
3
Display the Preset Service List of the
selected band.
Hold
• Service Labels are shown on the list.
4
Select a preset number.
To search for your favorite service
You can search for any one of the PTY codes
(either Dynamic or Static PTY).
• Operations are exactly the same as explained
on pages 15 and 16 for FM RDS stations.
• You cannot store PTY codes separately for
the DAB tuner and for the FM tuner.
To store your favorite programme (service)
types, see page 16.
To search for your favorite programme
(service) type, see page 15.
• Search will be performed on the DAB tuner
only.
52
Do not press 4/¢ (
the list will change to that of the another
DAB band and the current presetting may
fail.
5
Store the service selected in step 2.
Hold
OK
BAND
/ ); otherwise,
Page 53

○○○○○○○○○
Tuning in to a preset service
○○○○○○○○○
Using the Standby Reception
Using the remote controller, you can easily tune
in to a preset service.
1
DAB1 DAB2
DAB3
Select a preset number (1 – 6).
2
To select a preset service using the
Preset Service List
1
While listening to a service...
Hold
• Service Labels are shown on the list.
2
Select a preset number.
• If you press 4/¢ (
move to the lists of the other bands.
To exit from the Preset Service List, press
MENU again.
/ ), you can
You can use three types of Standby Reception.
• Road Traffic News Standby Reception
• Announcement Standby Reception
• PTY Standby Reception
Using Road Traffic News Standby
Reception
Road Traffic News Standby Reception allows
the unit to switch temporarily to Road Traffic
News (or Traffic Announcement) from any
source except AM.
• If a Road Traffic News (or Traffic
Announcement) starts broadcasting, “Traffic
News” appears and the unit tunes in to the
service (or FM RDS station) broadcasting
Road Traffic News (or Traffic
Announcement). The volume changes to the
preset TA volume level (see page 40).
To activate Road Traffic News Standby
Reception (and TA Standby Reception):
TP/PTY
TP indicator
(either lights up or flashes)
If the TP indicator lights up, Road Traffic
•
News Standby Reception (or TA Standby
Reception) is activated.
– When a service which is supporting Road
Traffic News is received. This unit now
stands by for the Road Traffic News signal
reception—Road Traffic News Standby
Reception.
– When a service which is not supporting
Road Traffic News signal is received. This
unit now stands by for the TA signal
reception—TA Standby Reception (see
page 16).
ENGLISH
To be continued...
53
Page 54

If the TP indicator flashes, Road Traffic News
•
Standby Reception is not yet activated.
To activate Road Traffic News Standby
Reception, tune in to another DAB service
supporting these signals.
ENGLISH
When you tune in to such a service, the TP
indicator stops flashing and remains lit. Now
Road Traffic News Standby Reception is
activated.
To deactivate the Road Traffic News Standby
Reception (and TA Standby Reception):
TP/PTY
TP indicator goes off.
3
Enter the PSM Menu.
OK
BAND
The last selected item appears (highlighted)
with the current setting.
4
Select “Announce.”
5
Select an announcement type.
Using Announcement Standby
Reception
Announcement Standby Reception allows the
unit to switch temporarily to your favorite
service (Announcement type) from any source
except FM and AM.
To activate Announcement Standby Reception
You can select your favorite announcement
type for Announcement Standby Reception.
Once you select a new announcement type
following the procedure below, Announcement
Standby Reception is automatically activated.
1
While playing any source...
MENU
2
Move the cursor to “PSM” on the Main
Menu.
The Main Menu appears on
the display.
Cursor
Travel: Programmes about travel
destinations, package tours, and
travel ideas and opportunities
Warning: Warnings about earthquakes,
tsunami, etc.
News: News
Weather: Weather information
Event: Information about events,
concerts, etc.
Special: Special programmes expanding
on current news or affairs
Rad Inf: Radio information
Sports: Sport events
Finance: Reports on commerce, trading,
the stock market, etc.
Now Announcement Standby Reception is
activated with a newly announcement type.
54
Page 55

6
Finish the setting.
MENU
ANN indicator
(either lights up or flashes)
• If the ANN indicator lights up,
Announcement Standby Reception is
activated.
If the ANN indicator flashes, Announcement
•
Standby Reception is not yet activated.
To activate Announcement Standby
Reception, tune in to another service
providing these signals.
When you tune in to such a service, the ANN
indicator stops flashing and remains lit. Now
Announcement Standby Reception is
activated.
To turn of f or on Announcement Standby
Reception
Once you activate the Reception by selecting a
announcement type (see above), you can
deactivate and activate it with the same
announcement type by following the procedure
below.
1
While listening to a service...
MENU
The Main Menu appears on
the display.
3
Enter the DAB MODE Menu.
OK
BAND
The last selected item appears (highlighted)
with the current setting.
4
Select “Announce.”
5
Turn off or on the Announcement
Standby Reception.
Announcement type
(Travel, News, etc.)
Off
Announcement type:
Activates Announcement
Standby Reception with the
selected announcement type.
Off: Cancels the Reception.
To exit from the Menu operation, press
MENU again.
ENGLISH
2
Move the cursor to “MODE” on the
Main Menu.
Cursor
55
Page 56

Using PTY Standby Reception
PTY Standby Reception allows the unit to
switch temporarily to your favorite programme
(PTY: Programme Type) from any source
except AM stations.
ENGLISH
• Operations are exactly the same as explained
on pages 17 and 18 for FM RDS stations.
• You cannot use PTY Standby Reception
separately for the DAB tuner and for the FM
tuner.
To select your favorite PTY code for PTY
Standby Reception, see page 17.
To activate PTY Standby Reception, see page
17 and 18.
• You can activate and deactivate PTY Standby
Reception when the source is either “FM” or
“DAB.”
2
Move the cursor to “PSM” on the Main
Menu.
Cursor
3
Enter the PSM Menu.
OK
BAND
4
Select “DAB AF.”
○○○○○○○○○
Tracking the same programme—
○○○○○○○○○
Alternative Reception
You can keep listening to the same programme.
• While receiving a DAB service:
When driving in an area where a service
cannot be received, this unit automatically
tunes in to another ensemble or FM RDS
station broadcasting the same programme.
• While receiving an FM RDS station:
When driving in an area where a DAB
service is broadcasting the same programme
as the FM RDS station is broadcasting, this
unit automatically tunes in to the DAB
service.
To change the Alternative Reception setting,
follow the procedure below:
1
While playing any source...
MENU
The Main Menu appears on
the display.
5
Select an option.
On
Off
On: Tracks the programme among DAB
services and FM RDS stations.
• The AF indicator lights up on the
display.
Off: Cancels the Reception.
• The AF indicator goes off.
To exit from the Menu operation, press
MENU again.
To activate the Alternative Reception, follow
the procedure above and select “On” in step 5.
56
Page 57

○○○○○○○○○○○○○○○○○○○
Changing the display pattern
BACK
DISP
Clock time is displayed.
ENGLISH
Service frequency is displayed.
Dynamic Label Segment (DLS—DAB radio
text) is displayed.
A window (see page 39) is displayed.
Semi-graphic screen*
Full graphic screen*
(Full graphic screen will be temporarily
changed to the semi-graphic screen when
you operate the unit.)
Goes back to the initial display pattern.
*You can use your edited file for graphic screen
(see pages 32 to 36).
57
Page 58

Maintenance
How to clean the connectors
ENGLISH
Frequent detachment will deteriorate the
connectors.
To minimize this possibility, periodically wipe
the connectors with a cotton swab or cloth
moistened with alcohol, being careful not to
damage the connectors.
Connectors
Moisture condensation
Moisture may condense on the lens inside the
CD player in the following cases:
• After starting the heater in the car.
• If it becomes very humid inside the car.
Should this occur, the CD player may
malfunction. In this case, eject the disc and
leave the unit turned on for a few hours until the
moisture evaporates.
How to handle discs
When removing a disc from
its case, press down the center
holder of the case and lift the
disc out, holding it by the
edges.
• Always hold the disc by the edges. Do not
touch its recording surface.
When storing a disc into its case, gently insert
the disc around the center holder (with the
printed surface facing up).
• Make sure to store discs into the cases after
use.
To keep discs clean
A dirty disc may not play
correctly.
If a disc does become dirty, wipe
it with a soft cloth in a straight
line from center to edge.
• Do not use any solvent (for example,
conventional record cleaner, spray, thinner,
benzine, etc.) to clean discs.
To play new discs
New discs may have some rough
spots around the inner and outer
edges. If such a disc is used, this
unit may reject the disc.
To remove these rough spots, rub the edges
with a pencil or ball-point pen, etc.
Center holder
58
Do not use the following discs:
Warped
disc
Sticker
Sticker
residue
Disc
Stick-on
label
Page 59

More about This Receiver
○○○○○○○○○
Basic Operations
Turning off the power
• If you turn off the power while listening to a
disc, disc play will start from where playback
has been stopped previously, next time you
turn on the power.
○○○○○○○○○
Tuner Operations
Storing stations in memory
• When SSM is carried out for a band...
– All stations previously stored for the band
are erased and stations are stored newly.
– Received stations are preset in No.1 (lowest
frequency) to No.6 (highest frequency).
When SSM is over, the station stored in
No.1 will be automatically tuned in.
• When storing a station manually, a previously
preset station is erased when a new station is
stored in the same preset number.
• Preset stations are erased when the power
supply to the memory circuit is interrupted
(for example, during battery replacement). If
this occurs, preset the stations again.
FM RDS operations
• Network-Tracking Reception requires two
types of RDS signals—PI (Programme
Identification) and AF (Alternative
Frequency) to work correctly. Without
receiving these data correctly, NetworkTracking Reception will not operate.
• If Alternative Reception (for DAB: see page
56) is activated, Network-Tracking Reception
is also activated (“AF”) automatically. On the
other hand, Network-Tracking Reception
cannot be deactivated without deactivating
Alternative Reception.
• TA Standby Reception and PTY Standby
Reception will be temporarily canceled while
listening to an AM station.
○○○○○○○○○
Basic Disc Operations
General
• This unit has been designed to reproduce
CDs/CD Texts, and CD-Rs (Recordable)/
CD-RWs (Rewritable) in both audio and
MP3/WMA formats.
• The unit cannot read or play an MP3 track
without the extension code <mp3>, and a
WMA track without the extension code
<wma>.
• When a disc has been already loaded,
selecting “CD” for the playback source starts
disc play.
Inserting a disc
• When a disc is inserted upside down, the disc
automatically ejects.
• If you keep the control panel open for about 1
minute, the control panel returns to its
previous position.
Playing a disc
• While playing an audio CD: If a title has been
assigned to the audio CD (see page 42), it
will be shown on the display.
• While fast-forwarding or reversing on an
MP3 or WMA disc, you can only hear
intermittent sounds. (The elapsed playing
time also changes intermittently on the
display.)
ENGLISH
59
Page 60

When playing a CD-R or CD-RW
• Use only “finalized” CD-Rs or CD-RWs.
• Some CD-Rs or CD-RWs may not play back
on this unit because of their disc
ENGLISH
characteristics, and for the following causes:
– Discs are dirty or scratched.
– Moisture condensation on the lens inside
the unit.
– The pickup lens inside the unit is dirty.
• CD-RWs may require a longer readout time
since the reflectance of CD-RWs is lower
than that of regular CDs.
• Do not use following CD-Rs or CD-RWs:
– Discs with stickers, labels, or protective
seal stuck to the surface.
– Discs on which labels can be directly
printed by an ink jet printer.
Using these discs under high temperatures or
high humidity may cause malfunctions or
damage to discs. For example,
– Stickers or labels may shrink and warp a
disc.
– Stickers or labels may peel off so discs
cannot be ejected.
– Print on discs may get sticky.
Read instructions or cautions about labels and
printable discs carefully.
Changing the source
• If you change the source, playback also stops
(without ejecting the disc).
Next time you select “CD” for the playback
source, disc play starts from where it has
been stopped previously.
ImageLink
• ImageLink will not work in the following
cases:
– If no <jcl> file is included in an MP3/
WMA folder.
– If Intro Scan is activated.
– If the source is changed to another from
“CD.”
• If more than one <jcl> file are included in a
folder, a file with the youngest file number is
used for the graphic screen.
Ejecting a disc
• If the ejected disc is not removed within 15
seconds, the disc is automatically inserted
again into the loading slot to prevent it from
dust. (Disc will not play this time.)
○○○○○○○○○
Sound Adjustment—Daily Use
Selecting the DSP modes—DSP
• Effectiveness of “V.Cancel” depends on the
recording condition of the sources.
Especially, if you play back the following
sources you cannot get the satisfactory
results.
– Monaural sources such as AM and
monaural FM broadcasting programs,
– Multiplex sound sources, and
– Sources recorded with duets, strong echo, a
chorus, or only a few instruments.
• If “V.Cancel” is selected, CCC, BBE, and
preset sound modes (EQ) will not be adjusted
(“Fix” appears on the display.)
• When “4ch” is selected, rear speakers are
used only to reproduce reflections and
reverberations in order to creates a beingthere feeling in your car compartment.
• If fader or balance has been set close to its
extreme, appropriate effect may not be
obtained.
60
Page 61

Storing your own sound modes
• If you do not want to store your current
adjustment, but only to apply the adjustment
to the current playback source, press MENU
to go back to the operation screen of the
current source. Adjustment you made remains
effective until you select a sound mode.
○○○○○○○○○
Sound Adjustment—Preference Settings
• If you are using a two-speaker system, set the
fader level to “00.”
• Subwoofer out setting takes effect only when
a subwoofer is connected.
• You cannot adjust the input level—Volume
Adjustment—of the FM stations. If the
source is FM, “VolAdjust” will not be
adjusted (“Fix” appears).
○○○○○○○○○
General Settings—PSM
• To set the “PICT” setting as you like,
download the required files before setting. If
“Default” (for “Picture” and “Movie”) and
“No Slide” (for “Slideshow”) cannot be
changed to other options, required files have
not been downloaded.
• “Auto Dimmer” may not work correctly on
some vehicles, particularly on those having a
control dial for dimming. In this case, change
the “Dimmer” setting to any one other than
“Auto.”
• If you change the “Amp Gain” setting from
“HighPower” to “Low Power” while the
volume level is set higher than “30,” the unit
automatically changes the volume level to
“30.”
ENGLISH
○○○○○○○○○
Graphic Displays
Downloading (or deleting) files
• You can download a file only while selecting
“CD” for the playback source; on the other
hand, you can delete a file while selecting
any source.
• If you have already downloaded an
animation, downloading a new animation
deletes the previously stored animation.
• It takes a long time to download an animation.
– About 10 seconds for a still image (one
frame).
– About 1 minute for an animation of 55
frames.
• If a disc inserted does not include any <jcl>
and <jca> files, beeps sound when you try to
operate the downloading procedure.
• If you try to store a 19th image for picture
screen, “Picture Full” appears and you cannot
start downloading. Delete unwanted files
before downloading.
○○○○○○○○○
Other Main Functions
Assigning titles to the sources
• When you try to assign a title to a 41st disc,
“Name Full” appears and you cannot enter
the text entry mode. Delete unwanted titles
before assignment.
• When the CD changer is connected, you can
assign titles to CDs in the CD changer. These
titles can also be shown on the display if you
insert the CDs in this unit.
○○○○○○○○○
DAB Tuner Operations
• PTY Standby Reception works for the DAB
tuner only using a Dynamic PTY, but not a
Static PTY.
• TA Standby Reception for FM RDS station
and Road Traffic News Standby Reception
for DAB cannot be set separately. The TP/
PTY button always work for the both Standby
Reception modes when the DAB tuner is
connected.
61
Page 62

Additional Information
Preset EQ mode
ENGLISH
The table below shows the preset frequency level settings for each EQ mode.
Sound Preset equalizing values
Mode 60 Hz 150 Hz 400 Hz 1 kHz 2.4 kHz 6 kHz 12 kHz
Flat 00 00 00 00 00 00 00
Hard Rock +03 +03 +01 00 00 +02 +01
R & B +03 +02 +02 00 +01 +01 +03
Pop 00 +02 00 00 +01 +01 +02
Jazz +03 +02 +01 +01 +01 +03 +02
Dance +04 +02 00 –02 –01 +01 +01
Country +02 +01 00 00 00 +01 +02
Reggae +03 00 00 +01 +02 +02 +03
Classic +02 +03 +01 00 00 +02 00
User 1 00 00 00 00 00 00 00
User 2 00 00 00 00 00 00 00
User 3 00 00 00 00 00 00 00
62
Characters shown on the display
In addition to the Roman alphabets (A – Z, a – z), the following characters will be used to
show the various information on the display.
• You can also use the following characters to assign titles (see page 42).
Numbers and symbols
Upper case
Accented letters
Lower case
Page 63

Troubleshooting
What appears to be trouble is not always
serious. Check the following points before
calling a service center.
General
• Main menu screen or other screens
suddenly go off.
] There is a time limit for some operations.
In this case, if no operation is done for a
certain period, the current source
operation screen resumes.
• Sound is sometimes interrupted.
] You are driving on rough roads.
Stop playback while driving on rough
roads.
] Disc is scratched.
• Sound cannot be heard from the speakers.
] Connections are incorrect.
• “Connect Error” appears on the display.
] The control panel is not attached correctly.
Remove the control panel, wipe the
connector (see page 58), then attach it
again.
• “Reset P00” — “Reset P44” appears on the
display.
] Something is blocking the control panel
movement. Press the reset button (see
page 2). If it does not work, check the
installation (ex. whether screws longer
than specified are used or not).
FM/AM broadcast
• SSM automatic presetting does not work.
] Signals are too weak. Store stations
manually.
• Static noise is generated while listening to
the radio.
] The antenna is not connected firmly.
Disc playback—CD/CD-R/CD-RW
• Sounds are skipped or playback stops
suddenly.
] Disc is warped or sticker on the disc
comes off. Do not play such a disc.
• Disc cannot be played back.
] Disc is inserted upside down.
• Disc cannot be recognized (“No Disc,”
“Loading Error,” or “Eject Error”
flashes).
] The CD player may function incorrectly.
Press
for more than 2 seconds to display the
following screen.
Press ∞ to select “Emergency Eject?”
then press OK.
• Tracks on the CD-R/CD-RW cannot be
skipped.
] CD-R/CD-RW is not finalized.
• Disc cannot be ejected.
] Disc is locked. Unlock the disc (see page
25).
Disc playback—MP3/WMA
• Disc cannot be played back.
] MP3/WMA tracks do not have the
extension code—<mp3> or <wma> in
their file names.
] MP3/WMA tracks are not recorded in the
format compliant with ISO 9660 Level 1,
ISO 9660 Level 2, Romeo, or Joliet.
• Noise is generated.
] The current track is not an MP3/WMA file
(although it has the extension code—
<mp3> or <wma>).
and 0 at the same time
ENGLISH
63
Page 64

• Elapsed playing time is not correct.
] This sometimes occurs during play. This is
caused by how the tracks are recorded on
the disc.
ENGLISH
• “Not Support” appears and tracks skip.
] Tracks are not encoded in an appropriate
format.
] Copy-protected WMA tracks cannot be
played back.
• “No Files” appears for a while, then the
disc ejects.
] The current MP3/WMA disc does not
contain any MP3/WMA tracks.
• “No Music” appears.
] No MP3/WMA tracks are included in the
folder. Skip the folder.
] Only <jcl> and/or <jca> files are recorded
on the disc.
• Correct characters are not displayed (ex.
album name).
] This unit can only display a limited
number of special characters (see the
tables on page 62).
Sound adjustments
• CCC, BBE, and preset sound modes (EQ)
cannot be used.
] These sound adjustments cannot be
adjusted when “V.Cancel” is selected for
the DSP mode.
Graphics
• Download does not seem to finish.
] If you are trying to download an
animation of many frames, it takes a quite
long time (see page 61).
• Animation does not move.
] Temperature in the car compartment is
very low. Wait until the operating
temperature resumes.
Preferred Setting Modes—PSM
• You cannot select an image for “Picture”
and an animation for “Movie.”
] You can select an image only after
downloading the appropriate files in
memory.
CD changer operations
• “No Magazine” flashes.
] Magazine is not loaded in the CD
changer.
• “No Disc” flashes.
] No discs are in the magazine or the discs
are inserted upside down.
• “Reset 01” — “Reset 07” flashes.
] The built-in microcomputer in the CD
changer is malfunctioning. Press the reset
button of the CD changer.
• “Reset 08” flashes.
] This unit is not connected to a CD
changer correctly. Connect this unit and
the CD changer correctly and press the
reset button of the CD changer.
64
About mistracking:
Mistracking may result from driving on extremely rough roads. This does not damage the unit
and the disc, but will be annoying.
It is recommended to stop disc play while driving on such rough roads.
Page 65

Specifications
AUDIO AMPLIFIER SECTION
Maximum Power Output:
Front: 50 W per channel
Rear: 50 W per channel
Continuous Power Output (RMS):
Front: 19 W per channel into 4 Ω, 40 Hz
to 20 000 Hz at no more than
0.8% total harmonic distortion.
Rear: 19 W per channel into 4 Ω, 40 Hz
to 20 000 Hz at no more than
0.8% total harmonic distortion.
Load Impedance: 4 Ω (4 Ω to 8 Ω allowance)
Equalizer Control Range:
Frequencies: 60 Hz, 150 Hz, 400 Hz, 1 kHz,
2.4 kHz, 6 kHz, 12 kHz
Level: ±10 dB
Frequency Response: 40 Hz to 20 000 Hz
Signal-to-Noise Ratio: 70 dB
Line-In Level/Impedance:
LINE IN: 1.5 V/20 kΩ load
Line-Out Level/Impedance:
LINE OUT: 5.0 V/20 kΩ load (full scale)
Output Impedance: 1 kΩ
Other Terminals:
SUBWOOFER OUT
Changer control
Steering wheel remote input
TUNER SECTION
Frequency Range:
FM: 87.5 MHz to 108.0 MHz
AM: (MW) 522 kHz to 1 620 kHz
(LW) 144 kHz to 279 kHz
[FM Tuner]
Usable Sensitivity: 11.3 dBf (1.0 µV/75 Ω)
50 dB Quieting Sensitivity: 16.3 dBf (1.8 µV/75 Ω)
Alternate Channel Selectivity (400 kHz): 65 dB
Frequency Response: 40 Hz to 15 000 Hz
Stereo Separation: 35 dB
Capture Ratio: 1.5 dB
[MW Tuner]
Sensitivity: 20 µV
Selectivity: 65 dB
[LW Tuner]
Sensitivity: 50 µV
CD PLAYER SECTION
Type: Compact disc player
Signal Detection System: Non-contact optical
pickup (semiconductor laser)
Number of channels: 2 channels (stereo)
Frequency Response: 5 Hz to 20 000 Hz
Dynamic Range: 98 dB
Signal-to-Noise Ratio:102 dB
Wow and Flutter: Less than measurable limit
MP3 (MPEG Audio Layer 3)
Max. Bit rate: 320 Kbps
WMA (Windows Media
Max. Bit rate: 192 Kbps
GENERAL
Power Requirement:
Operating V oltage:DC 14.4 V
Grounding System: Negative ground
Allowable Operating Temperature:
Dimensions (W × H × D):
Installation Size:
182 mm × 52 mm × 157 mm
Panel Size: 188 mm × 58 mm × 13 mm
Mass: 1.7 kg (excluding accessories)
Design and specifications are subject to
change without notice.
®
Audio)
(11 V to 16 V allowance)
0°C to +40°C
ENGLISH
• Microsoft and Windows Media are either registered
trademarks or trademarks of Microsoft
Corporation in the United States and/or other
countries.
65
Page 66

Herzlichen Glückwunsch zum Kauf dieses JVC-Produkts.
Bitte lesen Sie alle Bedienungsanweisungen vor dem Betrieb gründlich durch, um richtiges
Verständnis des Geräts zu gewährleisten und die beste Leistung mit dem Gerät zu erzielen.
WICHTIG FÜR LASER-PRODUKTE
1. LASER-PRODUKT DER KLASSE 1
2. ACHTUNG: Die obere Abdeckung nicht öffnen. Das Gerät enthält keine Teile, die vom
Benutzer gewartet werden können. Wartungen nur von qualifziertem Fachpersonal durchführen
lassen.
DEUTSCH
3. ACHTUNG: Sichtbare und unsichtbare Laserstrahlung bei offenem Gerät und Defekt oder
Umgehen der Verriegelung. Setzen Sie sich dem Strahl nicht direkt aus.
4. ANBRINGEN DES ETIKETTS: WARNHINWEIS-ETIKETT, AUSSEN AM GERÄT
ANGEBRACHT.
Warnung:
Wenn Sie den Receiver beim Fahren
bedienen müssen, dürfen Sie nicht den Blick
von der Straße nehmen, da sonst die Gefahr
von Verkehrsunfällen besteht.
Zurücksetzen des Geräts
Drücken Sie die Rückstelltaste am
Bedienfeld mit einem Kugelschreiber oder
ähnlichen Gegenstand. Dadurch wird der
eingebaute Microcomputer zurückgesetzt.
Ihre aktuellen Voreinstellungen—wie
Festsender oder Klangeinstellungen—
werden ebenfalls gelöscht.
Hinweis:
Das in diesem Receiver eingebaute Displayfenster wurde mit hoher Präzision hergestellt, aber
es lässt sich nicht ausschließen, dass fehlerhafte Bildpunkte vorhanden sind. Das ist
unvermeidbar und keine Fehlfunktion.
ACHTUNG:
• Legen Sie keine 8-cm-Disks (Single-CDs)
in den Ladeschlitz ein. (Derartige Disks
können nicht ausgeworfen werden).
• Verwenden Sie keine Disks mit
unregelmäßigen Formen (z.B. Herzen oder
Blumen); andernfalls können
Fehlfunktionen auftreten.
• Setzen Sie Disks nicht direktem
Sonnenlicht oder hohen Temperaturen und
Feuchtigkeit aus. Bewahren Sie Disks
nicht im Fahrzeug auf.
Aus Sicherheitsgründen wird eine
nummerierte ID-Karte mit diesem Gerät
mitgeliefert, und die gleiche ID-Nummer
ist auf dem Chassis des Geräts
aufgedruckt. Die Karte muss an sicherer
Stelle aufbewahrt werden, da sie den
Behörden bei der Identifikation des Geräts
im Falle eines Diebstahls helfen kann.
2
Page 67

Inhalt
Zurücksetzen des Geräts .................................. 2
Wichtig! (Wie diese Anleitung gelesen wird) ..... 4
Hauptfunktionen ........................................... 4
Vorbereitung (Fernbedienung
—RM-RK300) ............................................ 5
Positionen der Tasten ..................................... 6
Grundlegende Bedienung ............................. 8
Abbrechen der Display-Demonstration ........... 9
Einstellung der Uhr ....................................... 10
Bedienung des Tuners .................................. 11
Rundfunkempfang ......................................... 11
Speichern von Sendern .................................. 13
Empfang von Festsendern ............................. 14
Anpassen des Anzeigemusters....................... 14
UKW-RDS-Funktionen ............................... 15
Suche nach bevorzugten Sendungen ............. 15
Verwenden des Standbyempfangs ................. 16
Dynamische Programmnachverfolgung
—Network-Tracking-Empfang ............... 18
Verwenden des Programmsuchlaufs .............. 19
Grundlegende Disk-Bedienung .................. 21
Erweiterte Disk-Bedienung......................... 23
Suchen nach Ordnern/Stücken ...................... 23
Auswählen von Wiedergabe-modi
—MODE ................................................. 24
Auswurfsperre ............................................... 25
Anpassen des Anzeigemusters....................... 25
Klangeinstellung—
Auswählen der DSP-Modi—DSP ................. 26
Natürlicher Klang .......................................... 28
Wählen der vorgegebenen Klangmodi
—EQ ....................................................... 29
Speichern Ihrer eigenen Klangmodi .............. 29
Klangeinstellung
Bevorzugte Einstellungen ........................... 30
—
Basiseinstellungen für das Klangmenü
—SEL ...................................................... 30
Tägliche Verwendung ...... 26
Graphische-Anzeigen .................................. 32
Grundlegendes Verfahren .............................. 32
Herunterladen der Dateien ............................. 33
Dateien löschen ............................................. 34
Alle Dateien löschen...................................... 36
Aktivieren der heruntergeladenen Dateien .... 36
Allgemeine Einstellungen—PSM ............... 37
Grundlegendes Verfahren .............................. 37
Weitere wichtige Funktionen ...................... 42
Zuweisen von Titeln zu Quellen.................... 42
Ändern des Bedienfeldwinkels ...................... 43
Abnehmen des Bedienfelds ........................... 43
Grundlegende CD-Wechsler-Funktionen ..... 44
Erweiterte CD-Wechsler-Funktionen ........ 46
Suchen von Disks .......................................... 46
Suchen nach Ordnern/Stücken ...................... 46
Auswählen von Wiedergabe-modi
—MODE ................................................. 47
Anpassen des Anzeigemusters....................... 48
Bedienung von externen Komponenten..... 49
Anpassen des Anzeigemusters....................... 49
DAB-Tuner-Funktionen .............................. 50
DAB-Tuner-Empfang .................................... 50
Speichern von DAB-Diensten ....................... 52
Empfang von Vorwahldiensten ...................... 53
Verwendung des Standbyempfangs ............... 53
Dynamische Programmverfolgung
—Alternativempfang ............................... 56
Anpassen des Anzeigemusters....................... 57
Wartung........................................................ 58
Weitere Informationen zu Ihrem
Receiver ...................................................... 59
Weitere Informationen ................................ 62
Störungssuche .............................................. 63
Technische Daten ......................................... 65
DEUTSCH
Zur Sicherheit....
• Stellen Sie die Lautstärke nicht zu hoch ei, da
dadurch Außengeräusche blockiert und das
Fahren gefährlich werden kann.
• Stoppen Sie das Fahrzeug, bevor Sie
komplizierte Vorgänge ausführen.
Temperatur im Fahrzeug....
Wenn ein Fahrzeug längere Zeit in heißem oder
kaltem Wetter geparkt wurde, warten Sie, bis
sich die Temperatur im Inneneraum
normalisiert hat, bevor Sie das Gerät betreiben.
3
Page 68
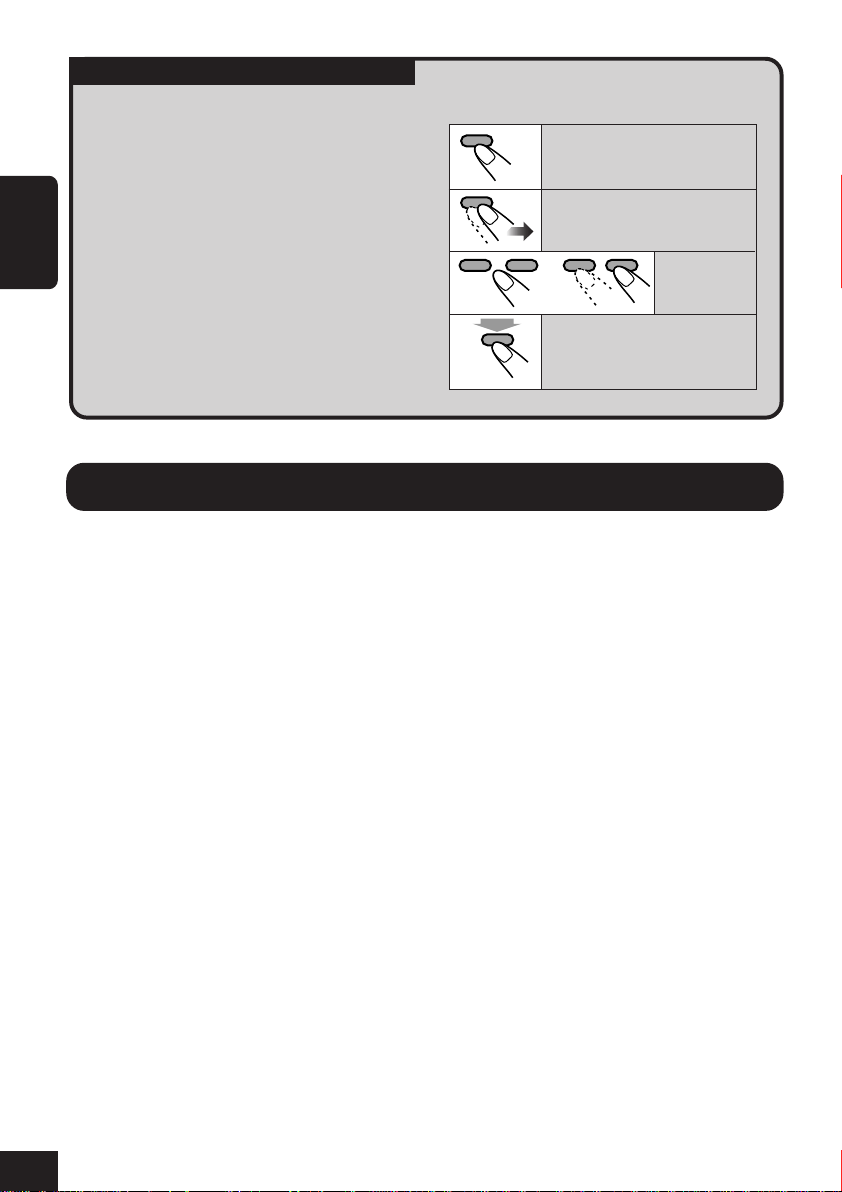
Wichtig!
Wie diese Anleitung gelesen wird:
Um die Erklärungen so einfach und
leichtverständlich wie möglich zu halten,
haben wir die folgenden Methoden
angewandt:
• Manche zugehörigen Tipps und
Hinweise werden später in den
Abschnitten „Weitere Informationen zu
DEUTSCH
Ihrem Receiver“ (siehe Seite 59)
gegeben aber nicht in dem Abschnitt,
der die Bedienung beschreibt. Wenn Sie
weiteres über die Funktionen wissen
wollen oder Fragen zur Funktion haben,
schlagen Sie in diesem Abschnitt nach.
Hauptfunktionen
• Tastenfunktionen werden ausschließlich
mit den folgenden Abbildungen erläutert:
Kurz drücken.
Wiederholt drücken.
Eine davon
drücken.
Hold
oder
Gedrückt halten, bis die
gewünschte Reaktion
beginnt.
Compression Compensative
Converter—CCC
Der CC-Konverter (KompressionsausgleichsKonverter) beseitigt Klangschwankungen und
Brummtöne, sodass die digitale Verzerrung
erheblich reduziert wird. Die digitalen
Musikdaten werden mithilfe der 24-BitQuantifizierung bei einer Abtastrate von
176,4 kHz (bei 44,1 kHz-Signalen) verarbeitet.
Diese Funktion kann sowohl für analoge als
auch für digitale Quellen verwendet werden.
DSP-Modi (Digital Signal Processor)
Mithilfe der vorprogrammierten DSP-Modi
können Sie in Ihrem Fahrzeug ein räumliches
Klangfeld erzeugen, sodass Sie sich wie im
Konzertsaal fühlen.
BBE Digital
Digital* ist eine neue digitale
BBE
Signalverarbeitungsmethode, die die Brillanz
und Transparenz von Originalaufnahmen,
Radiosendungen usw. wiederherstellt.
BBE Digital passt das Phasenverhältnis
zwischen niedrigen, mittleren und hohen
Frequenzen an, so dass alle Frequenzen das Ohr
des Hörers zur richtigen Zeit erreichen.
Farbgrafik-Display
Das integrierte Farb-Display des Receivers
unterstützt 256 Farben (256 x 64 Pixel).
Image Converter Color
Mit der Image Converter Color-Anwendung,
die sich auf der mitgelieferten CD-ROM
befindet, können Sie eigene Bilder und
Animationen erstellen und auf dem FarbgrafikDisplay wiedergeben.
Hergestellt unter Lizenz von BBE Sound, Inc.
*
Lizenziert durch BBE Sound , Inc. unter
USP4638258, 5510752 und 5736897. BBE und
das BBE Symbol sind eingetragene Marken von
BBE Sound, Inc.
4
Page 69

Vorbereitung (Fernbedienung—RM-RK300)
1
(Rückseite)
2
Mit der + Seite nach oben weisend
Lithiumknopfbatterie
(CR2025)
3
WARNUNGEN an der Batterie:
• Legen Sie die Batterie an einem Ort ab,
wo sie außer Reichweiter kleiner Kinder
ist. Falls ein Kind vesehentlich die
Batterie verschluckt, sofort einen Arzt
rufen.
• Die Batterie nicht aufladen, kurzschließen,
zerlegen, erhitzen oder in ein Feuer
werfen. Dadurch kann die Batterie sich
stark erhitzen, bersten oder explodieren.
• Die Batterie nicht zusammen mit anderen
Metallgegenständen ablegen. Dadurch
kann die Batterie sich stark erhitzen,
bersten oder explodieren.
• Beim Entsorgen oder Aufbewahren der
Batterie diese mit Klebeband umwickeln;
andernfalls kann die Batterie sich stark
erhitzen, bersten oder explodieren.
• Die Batterie nicht mit Pinzetten oder
ähnlichen Werkzeugen anstoßen. Dadurch
kann die Batterie sich stark erhitzen,
bersten oder explodieren.
DEUTSCH
ACHTUNG:
Lassen Sie die Fernbedienung NICHT an
einem Ort (wie etwa auf einer
Fensterablage) liegen, wo sie längere Zeit
direktem Sonnenlicht ausgesetzt ist.
Andernfalls kann sie beschädigt werden.
Dieser Receiver verfügt über eine Lenkradfernbedienfunktion. Wenn Ihr Fahrzeug mit einer
Lenkradferndienung ausgestattet ist, können Sie damit diesen Receiver steuern.
• Siehe Einbau/Anschlußanleitung (separates Dokument) bzgl. der Aktivierung dieser
Funktion.
5
Page 70

Positionen der Tasten
Bedienfeld
DEUTSCH
Fernbedienung
1
23 4 5 6 7
SOURCE
TP/PTY
OK
BAND
BACK
DISP
MENU
89pqw e r
9
4
y
u
e
5
8
t
6
Page 71

1 0 (Auswerfen)-Taste / (Winkel)-
Taste
• Öffnen/schließen Sie das Bedienfeld (und
werfen Sie beim Öffnen die Disk, falls
vorhanden, aus).
• Stellen Sie den Winkel des Bedienfelds
ein, indem Sie die Taste betätigen und
gedrückt halten.
2 Fernbedienungssensor
Setzen Sie den Fernbedienungssensor
am Bedienfeld KEINEM intensiven
Licht (direkte Sonneneinstrahlung oder
künstliches Licht) aus.
3 TP/PTY-Taste
Zum Aktivieren oder Deaktivieren des TA-
Standbyempfangs (und des
Verkehrsnachrichten-Standby-Empfangs).
4 SOURCE-Taste
Zur Auswahl der Quelle.
5 4/¢ (
• Sucht nach Sendern (Autom. Suchlauf)
wenn gedrückt, oder
Überspringt Frequenzen wenn gehalten
(Manuellen Suchlauf).
• Zum Wechseln der Titel auf der Disk.
• NUR an der Bedienfeld: Zur Auswahl
von Einträgen oder Werten in Menüs.
6 Farb-Display-Fenster
7 Rückstelltaste
Zum Zurücksetzen des eingebauten
Mikrocomputers.
8 Lautstärke (VOL) +/– -Taste(n)
Zum Einstellen der Lautstärke.
9
Taste
Zum Ein- und Ausschalten des Geräts und
zum Dämpfen des Tons.
/ )-Tasten
(Standby/Ein/Dämpfung)-
p DISP (BACK)-Taste
• Zum Ändern der auf dem Display
angezeigten Information.
• Wird innerhalb von Menüs als BACKTaste verwendet (zurück zum
vorhergehenden Schritt).
q BAND (OK)-Taste
• Zur Auswahl des Frequenzbereichs für
UKW/AM und DAB.
• Wird innerhalb von Menüs als OK-Taste
verwendet (zum Bestätigen von
Eingaben).
w MENU-Taste
Zum Ein- oder Ausblenden des
Hauptmenüs.
e 5/∞-Tasten
• Zum Ändern der DAB-Dienste.
• Zum Wechseln des Ordners auf MP3-/
WMA-Disks.
• NUR an der Bedienfeld: Zur Auswahl
von Einträgen oder Werten in Menüs.
(Bedienfeld-Freigabe)-Taste
r
Zum Abnehmen des Bedienfelds.
t Zifferntasten
• Wählen Sie den Festsender (oder einen
Dienst) durch kurzes Drücken, oder
halten Sie die Taste gedrückt, um einen
Sender (oder Dienst) zu speichern.
• Zur Auswahl von Stücken bei der
Wiedergabe von CDs.
• Zur Auswahl von Ordnern bei der
Wiedergabe von MP3-/WMA-Disks.
• Zur Auswahl von Disks bei der
Bedienung des CD-Wechslers.
y ANGLE-Taste
Zum Anpassen des Bedienfeldwinkels.
u BAND-Taste
Zur Auswahl des Frequenzbereichs für
UKW/AM und DAB.
DEUTSCH
7
Page 72

Grundlegende Bedienung
4
1
Schalten Sie das Gerät ein
Wählen Sie den gewünschten
DSP-Modus und -Klang.
Der Betriebsbildschirm für
die letzte gewählte Quelle
wird abgerufen.
DEUTSCH
2
Wählen Sie die Quelle
SOURCE
• DAB: Sie können DAB nur bei
angeschlossenem DAB-Tuner auswählen.
• CD: Wenn sich keine Disk im Ladeschacht
befindet, können Sie CD nicht als
Wiedergabequelle auswählen.
• CD-CH: Ohne Anschließen des CD-
Wechslers kann CD-CH (CD-Wechsler)
nicht als Wiedergabequelle gewählt
werden.
• LINE-IN: Wählen Sie eine externe
Komponente (siehe Seite 49).
TUNER
LINE-IN
DAB
CD
CD-CH
• Einzelheiten finden Sie auf Seite 26 bis 31.
Zum kurzzeitigen Senken der Lautstärke
(ATT):
Um die Lautstärke wieder
anzuheben, drücken Sie
die Taste erneut.
Zum Ausschalten:
Hold
3
Stellen Sie die Lautstärke ein
ACHTUNG bei der Lautstärkeeinstellung:
Disks erzeugen im Vergleich mit anderen
Quellen sehr geringes Rauschen. Wenn
der Lautstärkepegel z.B. für den Tuner
eingestellt wird, können die Lautsprecher
durch die plötzliche Signalspitze
beschädigt werden. Deshalb muss die
Lautstärke vor dem Abspielen einer CD
gesenkt und bei der Wiedergabe nach
Wunsch eingestellt werden.
8
Page 73

Auf dem Display angezeigt Informationen
Die folgenden Informationen werden für alle Quellen angezeigt.
• Wenn Sie auf dem Bedienfeld die DISP-Taste drücken, werden auf dem Sensordisplay die
entsprechenden Informationen bzw. Bildschirme angezeigt. (Einzelheiten zu den einzelnen
Quellen finden Sie weiter unten).
Aktuelle Quelle
DEUTSCH
Die Klangeinstellungen werden
alternierend angezeigt
(Seite 26 bis 29).
○○○○○○○○○
Abbrechen der Display-
○○○○○○○○○
Demonstration
Die Display-Demonstration ist ab Werk
standardmäßig aktiviert. Wenn über 20
Sekunden lang keine Eingabe erfolgt, wird die
Demonstration automatisch eingeblendet.
Um die Anzeige der Display-Demonstration
zu deaktivieren, gehen Sie folgendermaßen
vor:
1
Bei allen Quellen...
MENU
2
Setzen Sie den Cursor im Hauptmenü
auf „PSM“.
Das Hauptmenü erscheint auf
dem Display.
Das Symbol für die aktuelle
Quelle wird angezeigt.
• Bsp.: Sendernamen (PS)/Sendefrequenz
3
Öffnen Sie das PSM-Menü.
OK
BAND
• Wenn „Demo/Link“ nicht angezeigt wird,
drücken Sie wiederholt 5/∞ bis die
Anzeige erscheint.
4
Wählen Sie „Off“.
Um den Menüvorgang zu beenden, drücken
Sie erneut die MENU-Taste.
Zum Aktivieren der Display-Demonstration,
wiederholen Sie den Vorgang, wählen jedoch in
4
Schritt
• Weitere Informationen finden Sie unter
eine andere Taste als „Off“.
„Zur Anzeige der Display-Demonstration
—Demo/Link“ auf Seite 39.
Cursor
9
Page 74

○○○○○○○○○
Einstellung der Uhr
Sie können bei der Uhr zwischen dem 24Stunden- und dem 12-Stunden-Modus wählen.
1
Bei allen Quellen...
MENU
DEUTSCH
2
Setzen Sie den Cursor im Hauptmenü auf
„PSM“.
3
Öffnen Sie das PSM-Menü.
OK
BAND
Das Hauptmenü erscheint auf
dem Display.
Cursor
6
Wählen Sie „Clock Min“.
7
Stellen Sie die Minute ein.
8
Wählen Sie „24H/12H“.
9
Wählen Sie „24Hours“ oder „12Hours“.
10
Der aktuelle und der zuletzt ausgewählte
Eintrag (hervorgehoben) werden angezeigt.
4
Wählen Sie „Clock Hr“.
5
Stellen Sie die Uhrzeit ein.
Um den Menüvorgang zu beenden, drücken
Sie erneut die MENU-Taste.
Page 75

Bedienung des Tuners
○○○○○○○○
Rundfunkempfang
1
Wählen Sie den Tuner
SOURCE
2
Wählen Sie das gewünschte
Frequenzband (UKW/AM)
OK
BAND
FM1 FM2
FM3AM
3
Starten des Sendersuchlaufs
„Auto Search (Autom. Suchlauf)“ beginnt.
Wenn ein Sender empfangen wird, stoppt der
Suchlauf.
Um den Suchlauf zu stoppen, betätigen Sie
die Taste erneut.
So stellen Sie manuell Sender ein
3
Im obigen Schritt
HoldHold
...
dann
DEUTSCH
Aktivieren Sie den
Der Receiver empfängt 3 UKW-Bereiche
(FM1, FM2, FM3). Sie können auf allen 3
Kanälen UKW-Sender empfangen.
Auf dem Display angezeigt Informationen
Die folgenden Informationen werden für alle Tuner-Funktionen angezeigt.
• Wenn Sie auf dem Bedienfeld die DISP-Taste drücken, werden auf dem Sensordisplay die
entsprechenden Informationen bzw. Bildschirme angezeigt (siehe Seite 14).
Festsender-Nr. (falls vorhanden)
Aktuelles
Frequenzband
siehe Seite 12
Sendername (PS: siehe Seite 15) (mit Symbol)
„Manual Search
(Manuellen Suchlauf)“.
Senderfrequenz
(mit Symbol)
Programmtyp
(PTY-Code: siehe Seite 20)
Wählen Sie die
gewünschte
Empfangsfrequenz.
11
Page 76

Wenn Sie Schwierigkeiten haben, eine
Sendung in Stereo zu empfangen:
1
Beim Empfang eines UKW-Senders...
MENU
2
Setzen Sie den Cursor im Hauptmenü
auf „MODE“.
DEUTSCH
Das Hauptmenü erscheint auf
dem Display.
So wählen Sie nur UKW-Sender mit
ausreichend starkem Signal aus—
LO/DX (Local/Entfernt)
Beim Empfang von schwachen Signalen
kommt es zu Störgeräuschen. Indem Sie
LO/DX auf „Local“ setzen, können Sie das
Radio so einstellen, dass bei der Suche nur
UKW-Sender mit ausreichender Signalstärke
berücksichtigt werden.
1
Beim Empfang eines UKW-Senders...
MENU
Das Hauptmenü erscheint auf
dem Display.
Cursor
3
Öffnen Sie das FM MODE-Menü.
OK
BAND
Der aktuelle und der zuletzt ausgewählte
Eintrag (hervorgehoben) werden angezeigt.
4
Wählen Sie „Mono“.
5
Wählen Sie „On“.
On
Off
On: Der Empfang wird besser, jedoch
geht der Stereo-Effekt verloren.
Off: Wählen Sie im Normalbetrieb diese
Einstellung.
Um den Menüvorgang zu beenden, drücken
Sie erneut die MENU-Taste.
2
Setzen Sie den Cursor im Hauptmenü
auf „MODE“.
Cursor
3
Öffnen Sie das FM MODE-Menü.
OK
BAND
4
Wählen Sie „LO/DX“.
5
Wählen Sie „Local“.
DX
Local
DX: Zum Einstellen aller empfangbaren
Sender.
• Die
Local: Es werden nur Stationen mit
ausreichender Signalstärke
empfangen.
• Die -Anzeige leuchtet auf.
-Anzeige leuchtet auf.
12
Um den Menüvorgang zu beenden, drücken
Sie erneut die MENU-Taste.
Page 77

○○○○○○○○○
Speichern von Sendern
Sie können für jedes Frequenzband bis zu 6
Sender voreinstellen.
Manuelle Voreinstellung
Bsp. Speichern des UKW-Senders 92.5 MHz
unter der Festsendernummer 3 des
Frequenzbands FM1.
Automatische Voreinstellung von UKWSendern—SSM (Strong-Station
Sequential Memory)
Die Funktion ist nur für UKW-Sender verfügbar.
•
1
Wählen Sie den UKW-Frequenzbereich
(FM1 – FM3), auf dem Sie UKWStationen speichern möchten.
OK
BAND
FM1 FM2
FM3AM
2
Beim Einstellen eines UKW-Senders...
MENU
3
Setzen Sie den Cursor im Hauptmenü
auf „MODE“.
Das Hauptmenü erscheint auf
dem Display.
Cursor
OK
1
BAND
FM1 FM2
FM3AM
(in diesem Beispiel FM1)
Stellen Sie einen Sender ein.
2
(in diesem Beispiel 92.5 MHz)
3
Zeigt die Festsenderliste des
ausgewählten Frequenzbereichs an.
Hold
• In der Liste werden die Frequenzen bzw.
Namen (PS: siehe Seite 15) der
Festsender angezeigt.
4
Wählen Sie eine Festsendernummer.
DEUTSCH
4
Öffnen Sie das FM MODE-Menü.
OK
BAND
5
Wählen Sie „SSM“.
6
Starten Sie SSM.
OK
BAND
Die lokalen UKW-Sender im
ausgewählten Frequenzband mit
den stärksten Signalen werden
automatisch als Festsender
gespeichert.
(Wählen Sie in diesem Fall „3“).
• Wenn aktuell der Frequenzbereich UKW
eingestellt ist, können Sie die Liste der
weiteren Frequenzbereiche mit 4/¢
/ ) aufrufen.
(
5
Speichern Sie den in Schritt
eingestellten Sender.
Hold
OK
BAND
2
13
Page 78

○○○○○○○○○
Empfang von Festsendern
Sie können Festsender einfach über die
Fernbedienung aufrufen.
1
FM1 FM2
FM3AM
Wählen Sie eine Festsendernummer
2
DEUTSCH
(1 bis 6).
So wählen Sie einen Festsender aus der
Festsenderliste
1
Wenn ein Sender eingestellt ist...
Hold
○○○○○○○○○
Anpassen des Anzeigemusters
BACK
DISP
Ein Fenster wird angezeigt (siehe Seite 39).
Die Uhrzeit wird angezeigt.
14
• In der Liste werden die Frequenzen bzw.
Namen (PS: siehe Seite 15) der
Festsender angezeigt.
2
Wählen Sie eine Festsendernummer.
• Wenn aktuell der Frequenzbereich UKW
eingestellt ist, können Sie die Liste der
weiteren Frequenzbereiche mit 4/¢
/ ) aufrufen.
(
OK
BAND
dann
Halbgrafik-Bildschirm*
Vollgrafik-Bildschirm*
(Beim Bedienen der Gerät ändert sich der
Vollgrafik-Bildschirm vorübergehend in den
Halbgrafikbildschirm).
Zur Wiederherstellung des vorherigen
Anzeigemusters.
* Sie können für den Grafik-Bildschirm eine
benutzerdefinierte Datei verwenden
(siehe Seite 32 bis 36).
Page 79

UKW-RDS-Funktionen
○○○○○○○○
Suche nach bevorzugten
○○○○○○○○
Sendungen
Um eine bestimmte Sendung einzustellen,
können Sie nach deren PTY-Code suchen
(siehe Seite 20).
• In der PTY-Liste können Sie bis zu 6
Programmtypen speichern.
1
Während des Empfangs eines
UKW-Senders...
Hold
TP/PTY
2
Wählen Sie „PTYSearch“
• Nachdem Sie sichergestellt haben, dass
„PTYSearch“ ausgewählt ist
(hervorgehoben)...
OK
BAND
Die „Preset PTY Code“Liste wird angezeigt.
3
• Wenn Sie 4/¢ ( / ) drücken,
können Sie zur Liste der weiteren PTYCodes wechseln.
4
Der PTY-Suchlauf beginnt.
• Wenn ein Sender eine Sendung mit dem
PTY-Code ausstrahlt, den Sie gewählt
haben, wird dieser Sender eingestellt.
Wählen Sie einen PTY-Code
Starten Sie den PTY-Suchlauf
OK
BAND
DEUTSCH
Funktionen von RDS
Das RDS (Radio Data System)-Verfahren ermöglicht UKW-Sendern, außer dem Programmsignal
weitere Informationen zu versenden. Beispielsweise können der Name des Senders (PS),
Informationen zur Programmsparte (z.B. Sport oder Musik) usw. mitgesendet werden.
Beim Empfang von RDS-Daten sind auf dem Receiver folgende Funktionen verfügbar:
• Programmtypsuche (PTY-Suchlauf)
• Standbyempfang oder Verkehrsansagen (TA) oder bevorzugte Sendungen (PTY)
• Programmsuchlauf
• Dynamische Programmnachverfolgung—Network-Tracking-Empfang
15
Page 80

So speichern Sie bevorzugte
Programmtypen in der „Preset PTY
Code“-Liste
Bei Versand ab Werk sind standardmäßig die
folgenden 6 Programmtypen in der „Preset
PTY Code“-Liste gespeichert.
6
Speichern Sie die Einstellung.
OK
BAND
1
Pop M
45
Classics
DEUTSCH
1
Wenn ein Sender eingestellt ist...
Hold
TP/PTY
2
Wählen Sie „PTYMemory“.
3
Öffnen Sie den Bildschirm für die
Einstellung des PTY-Speichers.
OK
BAND
4
Wählt eine Festsendernummer.
5
Wählt einen PTY-Code.
Rock M Easy M
Affairs
2
3
6
Varied
7
Wiederholen Sie die Schritte 4 bis 6, um
weitere PTY-Codes Festsendernummern
zuzuweisen.
8
Verlassen Sie das Einstellungsmenü für
den Festsenderspeicher.
BACK
DISP
○○○○○○○○○
Verwenden des Standbyempfangs
Es stehen zwei Standbyempfangstypen zur
Auswahl—TA-Standbyempfang und PTY-
Standbyempfang.
Verwenden des TA-Standbyempfangs
Verkehrsansagen-Standby erlaubt es dem Gerät,
kurzfristig auf Verkehrsansagen (TA) von der
aktuellen Signalquelle (andere Quellen außer
AM) umzuschalten.
• Wenn ein Sender mit der Aussendung einer
Verkehrsansage beginnt, erscheint „Traffic
News“ im Display, und das Gerät schaltet
vorübergehend auf den Sender um. Die
Lautstärke schaltet auf den voreingestellten
TA-Lautstärkepegel um (siehe Seite 40).
So aktivieren Sie den TA-Standbyempfang:
TP/PTY
16
TP-Anzeige
(leuchtet auf oder blinkt)
Wenn die TP-Anzeige auf leuchtet, ist der
•
TA-Standbyempfang aktiviert.
Page 81

Wenn die TP-Anzeige blinkt, wird kein TA-
•
Standbyempfangssignal empfangen (Dies ist
der Fall, wenn Sie einen UKW-Sender hören,
bei dem die für den TA-Standbyempfang
erforderlichen RDS-Signale nicht
mitgesendet werden).
Zum Aktivieren des TA-Standbyempfangs
müssen Sie einen anderen Sender einstellen,
bei dem diese Signale mitgesendet werden.
Wenn Sie einen solchen Sender einstellen,
leuchtet die TP-Anzeige konstant. Der TAStandbyempfang ist jetzt aktiviert.
3
Öffnen Sie das PSM-Menü.
OK
BAND
Der aktuelle und der zuletzt ausgewählte
Eintrag (hervorgehoben) werden angezeigt.
4
Wählen Sie „PTY Stnby (standby)“.
DEUTSCH
So deaktivieren Sie den TA Standbyempfang:
TP/PTY
Verwenden des PTY-Standbyempfangs
PTY-Standby erlaubt es dem Gerät, kurzfristig
von der aktuellen Signalquelle auf Ihr
bevorzugtes Programm (PTY: Programmtyp)
umzuschalten (andere Quellen außer AM).
So aktivieren Sie den PTY-Standbyempfang
Sie können einen bevorzugten Programmtyp für
den PTY-Standbyempfang festlegen. Wenn Sie
nach dem unten beschriebenen Verfahren einen
neuen PTY-Code wählen, wird PTYStandyempfang automatisch aktiviert.
1
Bei allen Quellen...
MENU
2
Setzen Sie den Cursor im Hauptmenü
auf „PSM“.
Die TP-Anzeige erlischt.
Das Hauptmenü erscheint auf
dem Display.
5
Wählen Sie einen PTY-Code (siehe Seite
20).
Jetzt ist PTY-Standbyempfang mit einem
neu gewählten PTY-Code aktiviert.
6
Beenden Sie die Einstellung.
MENU
PTY-Anzeige
(leuchtet auf oder blinkt)
•
Wenn die PTY-Anzeige auf leuchtet, ist der
PTY-Standbyempfang aktiviert.
Wenn die PTY-Anzeige blinkt, ist der PTY-
•
Standbyempfang noch nicht aktiviert.
Zum Aktivieren des PTY-Standbyempfangs
müssen Sie einen anderen Sender einstellen,
bei dem diese Signale mitgesendet werden.
Wenn Sie einen solchen Sender abstimmen,
hört die PTY-Anzeige zu blinken auf und
leuchtet ständig. Der PTY-Standbyempfang
ist jetzt aktiviert.
Cursor
17
Page 82

Zum Ein- und Ausschalten des PTY-
Standbyempfangs
Wenn Sie den Empfang durch Wählen eines
PTY-Codes (siehe Seite 17) aktivieren, können
Sie ihn mit dem gleichen PTY-Code auf die
unten beschriebene Weise deaktivieren und
erneut aktivieren.
1
Beim Empfang eines UKW-Senders...
DEUTSCH
MENU
2
Setzen Sie den Cursor im Hauptmenü
auf „MODE“.
Das Hauptmenü erscheint auf
dem Display.
○○○○○○○○○
Dynamische
○○○○○○○○○
Programmnachverfolgung
○○○○○○○○○
—Network-Tracking-Empfang
Wenn Sie in einem Bereich unterwegs sind, in
dem kein guter UKW-Empfang möglich ist,
sucht die Gerät automatisch nach anderen
Frequenzen, auf denen das UKW-RDSProgramm möglicherweise besser empfangen
werden kann.
• Beim Versand ab Werk ist für den NetworkTracking-Empfang standardmäßig die Option
„AF (siehe nächste Seite)“ ausgewählt.
Programm „A“ auf
Frequenz „01“
„A“ auf „05“
Cursor
3
Öffnen Sie das FM MODE-Menü.
OK
BAND
Der aktuelle und der zuletzt ausgewählte
Eintrag (hervorgehoben) werden angezeigt.
4
Wählen Sie „PTY“.
5
Schalten Sie den Empfang ein oder aus.
PTY-Code
(News, Affairs, usw.)
Off
PTY-Code: Aktiviert den PTY-
Standbyempfang für den
ausgewählten PTY-Code.
Off: Beendet den Empfang.
„A“ auf „03“
„A“ auf „02“
„A“ auf „04“
Zum Ändern der Einstellung für den
Network-Tracking-Empfang gehen Sie
folgendermaßen vor:
1
Bei allen Quellen...
MENU
2
Setzen Sie den Cursor im Hauptmenü
auf „PSM“.
Das Hauptmenü erscheint auf
dem Display.
Cursor
Um den Menüvorgang zu beenden, drücken
Sie erneut die MENU-Taste.
18
Page 83

3
Öffnen Sie das PSM-Menü.
OK
BAND
4
Wählen Sie „AF-Regn’L (regional)“.
5
Wählen Sie eine Option.
AF AF Reg
Off
AF: Die Gerät schaltet zu einem
anderen Sender um (dabei
handelt es sich möglicherweise
nicht um die aktuell
empfangenen Sendung).
• Die AF-Anzeige leuchtet auf.
AF Reg: Die Gerät schaltet auf eine
andere Frequenz mit demselben
Programm um.
• Die REG-Anzeige leuchtet auf.
Off*: Beendet den Empfang.
• Weder die AF-Anzeige noch
die REG-Anzeige leuchten.
* Nur angezeigt, wenn „DAB AF“ auf „Off“
gestellt ist. Siehe Seite 56.
Um den Network-Tracking-Empfang zu
deaktivieren, wiederholen Sie das zuvor
beschriebene Verfahren, und wählen Sie in
5
Schritt
Verwenden des Programmsuchlaufs
Wenn Sie einen Festsender auswählen, wird
automatisch die entsprechende Frequenz
eingestellt.
Wenn es sich dabei jedoch um einen RDSSender handelt, geschieht bei Aktivierung der
Programmsuchlauf-Funktion Folgendes.
Wenn der Festsender nicht mit ausreichender
Signalstärke empfangen werden kann, wählt die
Gerät mithilfe der AF (Alternativfrequenz)Daten eine andere Frequenz mit demselben
Programm wie der Festsender aus (auf der
möglicherweise derselbe Sender ausgestrahlt
wird).
Um den Programmsuchlauf zu aktivieren,
gehen Sie folgendermaßen vor:
1
2
„Off“.
○○○○○○○○○
Bei allen Quellen...
MENU
Setzen Sie den Cursor im Hauptmenü
auf „PSM“.
Das Hauptmenü erscheint auf
dem Display.
DEUTSCH
Um den Menüvorgang zu beenden, drücken
Sie erneut die MENU-Taste.
Die AF- oder die REG-Anzeige leuchtet auf.
3
Öffnen Sie das PSM-Menü.
OK
BAND
Cursor
Fortsetzung...
19
Page 84

4
Wählen Sie „P-Search“.
5
Wählen Sie „On“.
On
Off
DEUTSCH
On: Aktiviert den Programmsuchlauf.
Off: Beendet die Suche.
PTY-Codes
News: Nachrichten
Affairs: Themenorientierte Sendungen zu
aktuellen Nachrichten oder
Meldungen
Info: Sendungen, die Ratschläge und
Informationen zu verschiedenen
Themen bieten
Sport: Sportereignisse
Educate: Sendungen mit Bildungsinhalten
Drama: Hörspiele
Culture: Sendungen mit kulturellen
Inhalten
Science: Sendungen zu
Naturwissenschaften und
Technologie
Varied: Sonstige Sendungen wie Comedy
oder Predigten
Pop M: Popmusik
Rock M: Rockmusik
Easy M: Unterhaltungsmusik
Light M: Leichte Musik
Classics: Klassische Musik
Other M: Sonstige Musik
Weather: Wetterbericht
Um den Menüvorgang zu beenden, drücken
Sie erneut die MENU-Taste.
Um den Programmsuchlauf zu deaktivieren,
wiederholen Sie das zuvor beschriebene
5
Verfahren, und wählen Sie in Schritt
Finance: Berichte aus dem Handel, über
Aktien usw.
Children: Unterhaltung für Kinder
Social: Sendungen zu sozialen Aktivitäten
Religion: Programme zu unterschiedlichen
Aspekten von Glauben oder Ethik
Phone In: Sendungen, an denen Hörer über
das Telefon teilnehmen können
Travel: Sendungen zu Reisezielen,
Ausflügen sowie Reisevorschläge
und Gelegenheiten
Leisure: Sendungen zu Freizeitaktivitäten
wie Haus und Garten, Kochen,
Angeln usw.
Jazz: Jazz-Musik
Country: Country-Musik
Nation M: Aktuelle populäre Musik aus einer
bestimmten Region oder einem
bestimmten Land
Oldies: Klassische Popmusik
Folk M: Volksmusik
Document: Dokumentarische Sendungen im
Reporter-Stil
„Off“.
20
Page 85

Grundlegende Disk-Bedienung
Hold
1
Öffnean Sie das Bedienfeld
Das Gerät schaltet sich ein...
2
Legen Sie eine Disk ein
Die Gerät zieht die Disk ein, das Bedienfeld
schließt sich und geht zur vorherigen
Position zurück (siehe Seite 43). Die
Wiedergabe beginnt automatisch.
So stoppen Sie die Wiedergabe und
werfen Sie die Disk aus:
Um das Bedienfeld in die
vorherige Position zu bringen,
drücken Sie die Taste erneut.
Zum schnellen Vorlaufen oder
Rücklaufen durch die Stück:
Vorspulen.
Zurückspulen.
Zum nächsten oder vorherigen
Stück gehen:
Zu den nächsten
Stücken.
Zum Anfang des laufenden Stück,
dann zum vorherigen Stück zurück.
Zum nächsten oder vorherigen
Ordner gehen:
Nur für MP3-/WMA-Disk:
Zu den nächsten
Ordnern.
Zu den vorherigen
Ordnern.
• Hinweise zur Konfiguration für MP3/
WMA-Disks finden Sie unter „Über
MP3-/WMA-Disks“ auf Seite 22.
DEUTSCH
Auf dem Display angezeigt Informationen
Die folgenden Informationen werden für alle Disk-Funktionen angezeigt.
• Wenn Sie auf dem Bedienfeld die DISP-Taste drücken, werden auf dem Sensordisplay die
entsprechenden Informationen bzw. Bildschirme angezeigt (siehe Seite 25).
Das ID3 Tag-Symbol ( ) erscheint,
wenn ein Tag angezeigt wird.
Disk-Typ
Abgelaufene Spielzeit
21
Page 86

• Display-Anzeige beim Einlegen von
Audio-CDs oder CD Text-Disks:
• Display-Anzeige beim Einlegen von
MP3- oder WMA-Disks:
Gesamt-Stücknummer
DEUTSCH
CD-Name*
1
Gesamtspielzeit
Stücknummer
Stückname*
Gesamt-Stücknummer
2
Gesamt-Ordnernummer
Ordnernummer
*1Erscheint für CD-Texts und CDs, falls
zugewiesen. („No Name“ erscheint, wenn kein
Name aufgezeichnet oder zugewiesen ist).
*2 Erscheint nur für CD-Texts. („No Name“
erscheint, wenn kein Name aufgezeichnet ist).
Ordnername*
3
Stückname*
*3Wenn „ID3 Tag“ auf „On“ gesetzt ist (siehe Seite 40), werden die ID3-Tag-Informationen auf dem
Bildschirm angezeigt.
Anstelle des Ordnernamens erscheint auf dem Display der Name des Albums/des Interpreten (disk).
Bei Stücken mit (Stück)-Anzeige wird der Name des Stück angezeigt.
(„No Name“ erscheint, wenn kein Tag vorhanden ist).
Stücknummer
3
Über MP3-/WMA-Disks
MP3- und WMA (Windows Media® Audio)„
Stück
“ (die Wörter „Datei“ und „
werden in dieser Anleitung mit gleicher
Bedeutung verwendet) sind in „Ordnern“
aufgezeichnet.
„Stammverzeichnis“ (engl. „Root“) entspricht
dem Stamm eines Verzeichnisbaums. Vom
Stammverzeichnis aus kann auf jeden
und jeden Ordner zugegriffen werden.
• Wenn MP3- oder WMA-Ordner <jcl>Dateien enthalten, die mit dem Image
Converter Color bearbeitet wurden (auf
der beiliegenden CD-ROM), können Sie
die gespeicherten Bilder bei der
Wiedergabe auf dem Display anzeigen.
(Weitere Informationen finden Sie auf
Seiten 39 und 60).
22
Stück
Stück
“
Ebene 1 Ebene 2 Ebene 3 Ebene 4 Ebene 5
ROOT
: Ordner mit seiner
01
: MP3/WMA-Stück mit seiner
1
Hierarchie
01
02 03
3
05
10
11
1
2
04
12
Wiedergabereihenfolge
Wiedergabereihenfolge
6
7
4
5
8
9
Page 87

Erweiterte Disk-Bedienung
○○○○○○○○○
Suchen nach Ordnern/Stücken
• Diese Funktion ist nur für MP3-/WMA-Disks
verfügbar.
So suchen Sie in der Ordnerliste der
aktuellen Disk nach einem Ordner
• Diese Funktion ist nur über die Tasten an der
Fernbedienung möglich.
1
Während der Wiedergabe einer Disk...
Hold
Der aktuelle Ordner wird hervorgehoben.
2
Wählen Sie den gewünschten Ordner.
• Wenn die Disk mehr als 6 Ordner umfasst,
können Sie die weiteren Ordnerlisten mit
4/¢ (
3
Starten Sie die Wiedergabe des Ordners
vom ersten Stück an.
OK
BAND
/ ) aufrufen.
2
Rufen Sie die Stückliste des aktuellen
Ordners auf.
OK
BAND
Der aktuelle Stücken wird hervorgehoben.
3
Wählen Sie das gewünschte Stück.
• Wenn der Ordner mehr als 6 Stücke
umfasst, können Sie die weiteren
Stücklisten mit 4/¢ (
• Um zur Ordnerliste zurückzukehren,
drücken Sie BACK (Zurück).
4
Starten Sie die Wiedergabe des Stücks.
OK
BAND
So suchen Sie mit der Fernbedienung
direkt nach einem Stück (oder Ordner)
• So wählen Sie eine Stücknummer (bzw. bei
MP3- und WMA-Disks Ordnernummer) von
1 – 6:
DEUTSCH
/ ) aufrufen.
So suchen Sie in der Stückliste des
aktuellen Ordners nach einem Stück
• Diese Funktion ist nur über die Tasten an der
Fernbedienung möglich.
1
Während der Wiedergabe einer Disk...
Hold
Der aktuelle Ordner wird hervorgehoben.
• So wählen Sie eine Stücknummer (bzw. bei
MP3- und WMA-Disks Ordnernummer) von
7 (1) – 12 (6):
Hold
Zur direkten Auswahl der Ordner mit Hilfe der
Nummerntaste(n) müssen den Verzeichnissen
zweistellige Nummern am Anfang der
Ordnernamen zugewiesen werden—01, 02, 03 usw.
23
Page 88

○○○○○○○○○
Auswählen von Wiedergabe-modi
○○○○○○○○○
—MODE
Sie können jeweils einen der folgenden
Wiedergabe-Modi verwenden.
• Intro Scan: Sie können die ersten 15
Sekunden jedes Stück der Reihe nach
wiedergeben.
• Repeat Play: Sie können die Wiedergabe
DEUTSCH
wiederholen.
• Random Play: Sie können Stück in
zufälliger Reihenfolge abspielen.
So verwenden Sie die Wiedergabe-Modi
1
Während der Wiedergabe einer Disk...
MENU
2
Setzen Sie den Cursor im Hauptmenü
auf „MODE“.
3
Öffnen Sie das Disk MODE-Menü.
OK
BAND
4
Wählen Sie einen Wiedergabe-Modus.
BSP.: Wenn „Random“ (Zufallswiedergabe)
5
Wählen Sie die gewünschte Einstellung.
Das Hauptmenü erscheint auf
dem Display.
Cursor
ausgewählt ist...
• Einzelheiten finden Sie
in der nachstehenden
Tabelle.
6
Beenden Sie die Einstellung.
OK
BAND
• Anspielen (Intro Scan)-Modi
Modus Spielt den Anfang von
Track : Alle Stück auf der Disk.
• Während der Wiedergabe leuchtet
auf.
Folder* : Der erste Stück in jedem Ordner.
• Während der Wiedergabe leuchtet
auf.
Off : Hebt das Anspielen auf.
• Wiederholungswiedergabe (Repeat Play)Modi
Modus Spielt wiederholt
Track : Aktueller Stück.
• Während der Wiedergabe leuchtet
auf.
Folder* : Alle Stück des aktuellen Ordners.
• Während der Wiedergabe leuchtet
auf.
Off : Hebt die Wiederholwiedergabe auf.
• Zufallswiedergabe (Random Play)-Modi
Modus Spielt zufällig
Folder* : Alle Stück des aktuellen Ordners,
dann die Stück des nächsten
Ordners usw.
• Während der Wiedergabe leuchtet
auf.
Disc : Allen Stück auf der Disk.
• Während der Wiedergabe leuchtet
auf.
Off : Hebt die Zufällswiedergabe auf.
* „Folder“ kann nur bei MP3- oder WMA-
Disks ausgewählt werden.
24
Page 89

○○○○○○○○○
Auswurfsperre
Sie können für eingelegte Disks eine
Auswurfsperre aktivieren.
• Wenn Sie das Bedienfeld öffnen, wird die
Disk nicht ausgeworfen.
1
Bei allen Quellen...
Hold
○○○○○○○○○
Anpassen des Anzeigemusters
BACK
DISP
(zur gleichen Zeit)
2
Nachdem Sie sichergestellt haben, dass „No
Eject?“ ausgewählt ist (hervorgehoben)...
OK
BAND
Die Meldung „No Eject“ blinkt auf dem
Display, und die Disk kann nicht
ausgeworfen werden.
Wiederholen Sie das Verfahren, um die Sperre
aufzuheben. Drücken Sie in Schritt
2
nach
Auswahl von „Eject OK?“ (hervorgehoben)
auf OK.
„Eject OK“ blinkt.
DEUTSCH
Ein Fenster wird angezeigt (siehe Seite 39).
Die Uhrzeit wird angezeigt.
Halbgrafik-Bildschirm*
Vollgrafik-Bildschirm*
(Beim Bedienen der Gerät ändert sich der
Vollgrafik-Bildschirm vorübergehend in den
Halbgrafikbildschirm).
Zur Wiederherstellung des vorherigen
Anzeigemusters.
* Sie können für den Grafik-Bildschirm eine
benutzerdefinierte Datei verwenden
(siehe Seite 32 bis 36).
25
Page 90

Klangeinstellung
dann
dann
○○○○○○○○
Auswählen der DSP-Modi—DSP
Sie können ein räumliches Klangfeld
erzeugen, das Ihnen ein Klangerlebnis wie
im Kino oder Theater verschafft.
Verfügbare DSP-Modi:
DEUTSCH
• Theater / Hall / Club / Dome / Studio
• V.Cancel (Gesangsunterdrückung:
Unterdrückt den Gesang. Eignet sich zur
Aufnahme eigener Karaoke-Songs).
• Defeat (Zur Deaktivierung des DSP-Modus)
1
Bei allen Quellen...
—Tägliche Verwendung
4
Wählen Sie einen DSP-Modus
BSP.: Wenn „Theater“ ausgewählt ist.
Zum Beenden
MENU
dann
Zur Anpassung der
Effektstufe
OK
BAND
MENU
2
Setzen Sie den Cursor im
Das Hauptmenü erscheint
auf dem Display.
Hauptmenü auf „DSP“
Cursor
3
Öffnen Sie das DSP-Menü
OK
BAND
Der aktuell ausgewählte Modus wird
(hervorgehoben).
\ Fahren Sie mit
Schritt
5
fort.
5
Passen Sie die Effektstufe an
(1 bis 3)
Die ausgewählte DSP-Effektstufe gilt für alle
DSP-Modi mit Ausnahme von „V.Cancel“
(Gesangsunterdrückung).
• Je höher der Wert, desto stärker der Effekt.
dann
Zum Beenden
MENU
Hinweise zu weiteren
Einstellungen
OK
BAND
\ finden Sie auf
Seite 27.
26
Um die DSP-Modi zu deaktivieren, wählen Sie in Schritt 3 „Defeat“.
Page 91

So verfeinern Sie die Einstellungen für
die DSP-Modi
Sie können auch weitere, genauere
Einstellungen vornehmen, um das bestmögliche
Klangfeld in Ihrem Fahrzeug zu erreichen.
Diese Einstellungen, die Sie vornehmen, gelten
für alle DSP-Modi außer „V.Cancel“.
Einstellbare Parameter:
Anzahl der eingebauten Lautsprecher:
Wählen Sie Anzahl der Lautsprecher aus,
die in Ihr Fahrzeug eingebaut sind—„2ch“
oder „4ch“.
• Wenn vier Lautsprecher (4ch) in Ihr
Fahrzeug eingebaut sind, wählen Sie die
Fahrzeuggröße aus (siehe nachstehenden
4
Schritt
Hörposition:
Wählen Sie die Hörposition aus, auf die das
Klangbild ausgerichtet werden soll.
1
2
).
Wiederholen Sie die Schritte 1 bis 4 auf
Seite 26, um einen DSP-Modus (außer
„V.Cancel“) auszuwählen.
4
• Drücken Sie in Schritt
Wählen Sie die Anzahl der integrierten
Lautsprecher.
• Wählen Sie „4ch“, wenn Ihr System über
vier Lautsprecher verfügt, bzw. wählen
Sie „2ch“, wenn Ihr System über zwei
Lautsprecher verfügt.
OK.
2ch
4ch
3
Wählen Sie Ihre Hörposition.
All Front
R.FrontL.Front
All :Für alle vorderen und hinteren
Sitzplätze.
Front :Für die beiden Frontsitze.
R. Front :Für den vorderen rechten Sitz.
L. Front:Für den vorderen linken Sitz.
4
Wenn Sie „4ch“ ausgewählt haben,
müssen Sie die Fahrzeuggröße angeben.
Middle Large
Compact
Middle : Auswählen, wenn der Abstand
von den hinteren Lautsprechern
zur Hörposition ungefähr gleich
zu dem der vorderen
Lautsprecher ist.
Large : Auswählen, wenn der Abstand
von den hinteren Lautsprechern
zur Hörposition größer ist als zu
den vorderen Lautsprechern.
Compact : Auswählen, wenn der Abstand
von den hinteren Lautsprechern
zur Hörposition kleiner ist als
zu den vorderen Lautsprechern.
Um den Menüvorgang zu beenden, drücken
Sie erneut die MENU-Taste.
DEUTSCH
OK
BAND
dann
27
Page 92
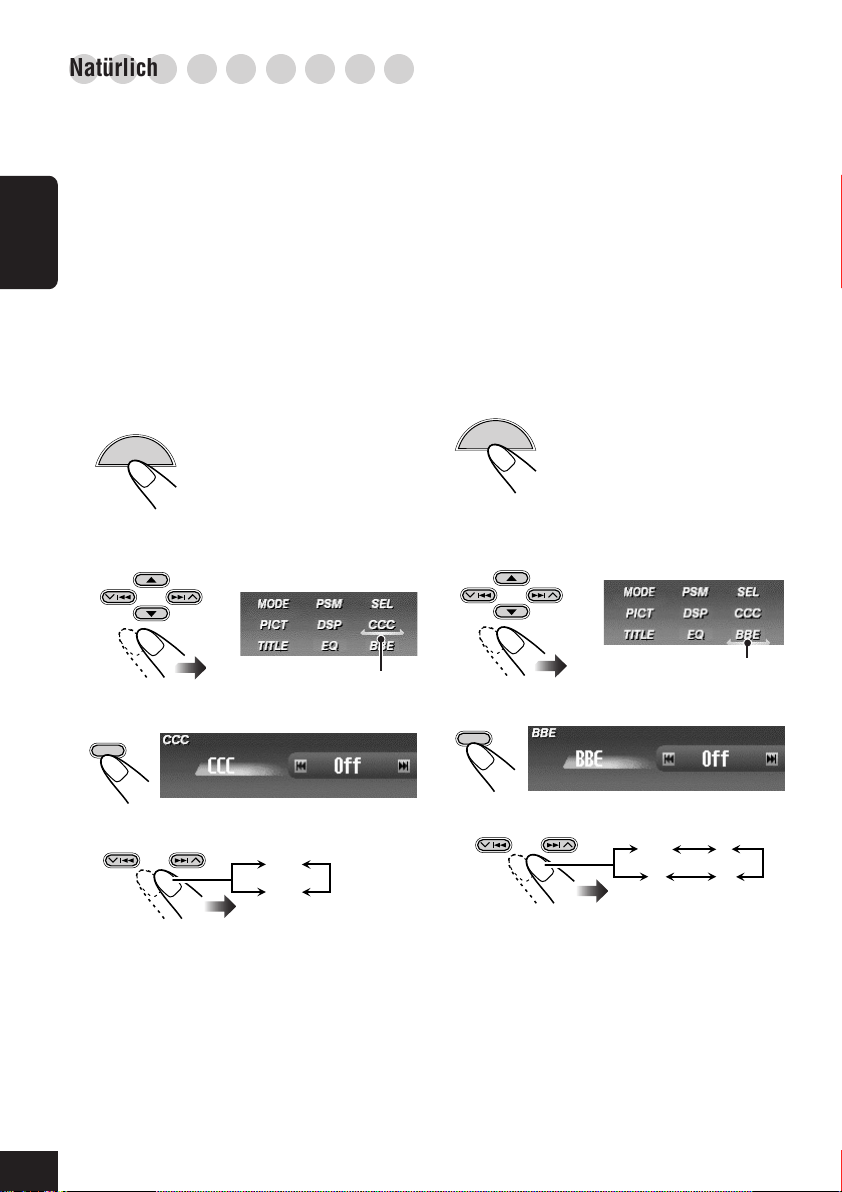
○○○○○○○○○
Natürlicher Klang
Diese Gerät verfügt über zwei Funktionen zur
Anpassung des Klangs—CC-Konverter und
BBE Digital.
So aktivieren Sie den Compression
Compensative (CC)-Konverter
Der CC-Konverter beseitigt
Klangschwankungen und Brummtöne, sodass
DEUTSCH
die digitale Verzerrung erheblich reduziert
wird. Diese Funktion kann sowohl für analoge
als auch für digitale Quellen verwendet werden.
Sie können daher stets ein natürliches
Klangfeld erzeugen.
1
Bei allen Quellen...
MENU
2
Setzen Sie den Cursor im Hauptmenü
auf „CCC“.
Das Hauptmenü erscheint auf
dem Display.
So aktivieren Sie BBE Digital
Digital ist eine neue digitale
BBE
Signalverarbeitungsmethode, die die Brillanz
und Transparenz von Originalaufnahmen,
Radiosendungen usw. wiederherstellt.
Lautsprecher, die Töne ausgeben, führen eine
frequenzabhängige Phasenverschiebung durch,
durch die Hochfrequenztöne länger benötigen,
um das Ohr zu erreichen, als
Niedrigfrequenztöne. BBE Digital passt das
Phasenverhältnis zwischen niedrigen, mittleren
und hohen Frequenzen an, indem stufenweise
eine längere Verzögerungszeit den niedrigen
und mittleren Frequenzen hinzugefügt wird, so
dass alle Frequenzen das Ohr des Hörers zur
richtigen Zeit erreichen.
1
Bei allen Quellen...
MENU
2
Setzen Sie den Cursor im Hauptmenü
auf „BBE“.
Das Hauptmenü erscheint auf
dem Display.
3
Öffnen Sie das CCC-Menü.
OK
BAND
4
Wählen Sie „On“.
On
Off
• Wenn „CCC“ eingeschaltet ist, leichtet
die CCC-Anzeige in gelb im Display.
• Um den CC-Konverter zu deaktivieren,
„Off“ zu wählen.
Um den Menüvorgang zu beenden, drücken
Sie erneut die MENU-Taste.
28
Cursor
Cursor
3
Öffnen Sie das BBE-Menü.
OK
BAND
4
Wählen Sie die Effekstufe.
Off 1
23
• Je höher der Wert, desto stärker der
Effekt. Wenn „BBE“ eingeschaltet ist,
leuchtet die BBE-Anzeige grün (mit dem
aktuellen Pegel) im Display.
• Um den BBE Digital zu deaktivieren,
„Off“ zu wählen.
Um den Menüvorgang zu beenden, drücken
Sie erneut die MENU-Taste.
Page 93

○○○○○○○○○
Wählen der vorgegebenen
○○○○○○○○○
Klangmodi—EQ
Sie können eine Klangmodus wählen, der dem
Musikgenre entspricht.
Verfügbare Klangmodi:
• Hard Rock / R&B / Pop / Jazz / Dance /
Country / Reggae / Classic
• User 1 / User 2 / User 3
• Flat (Um den Klangmodus zu deaktivieren)
1
Bei allen Quellen...
MENU
2
Setzen Sie den Cursor im Hauptmenü
auf „EQ“.
3
Öffnen Sie das EQ (Equalizer)-Menü.
OK
BAND
Der aktuell ausgewählte Modus wird
(hervorgehoben).
4
Wählen (hervorgehoben) Sie einen der
voreingestellten EQ-Modi aus.
Das Hauptmenü erscheint auf
dem Display.
Cursor
○○○○○○○○○
Speichern Ihrer eigenen Klangmodi
Sie können die Klangmodi anpassen und die
Änderungen speichern.
1
Wiederholen Sie die Schritte 1 bis 4 in der
linken Spalte, um einen anzupassenden
Klangmodus auszuwählen...
OK
BAND
2
Nehmen Sie die gewünschten
Anpassungen vor.
1) Drücken Sie 4 (
den Frequenzbereich auszuwählen—
60Hz, 150Hz, 400Hz, 1kHz, 2.4kHz,
6kHz, 12kHz.
2) Drücken Sie 5 (nach oben) oder ∞ (nach
unten), um den ausgewählten
Frequenzbereich von –05 bis +05
anzupassen.
3) Wiederholen Sie die Schritte 1) und 2) zur
Einstellung der anderen Frequenzbereiche.
3
Beenden Sie die Einstellung.
OK
BAND
) oder ¢ ( ), um
DEUTSCH
BSP.: Wenn „Jazz“ ausgewählt ist.
Um den Menüvorgang zu beenden, drücken
Sie erneut die MENU-Taste.
4
Wählen (hervorgehoben) Sie den
Anwender-Klangmodus (User 1, User 2
oder User 3), unter dem Sie die
Einstellung speichern möchten.
OK
dann
„Memory“ wird vorübergehend angezeigt.
Einzelheiten zu den Voreinstellungen für die
einzelnen Klangmodi finden Sie auf Seite 62.
BAND
29
Page 94

Klangeinstellung
○○○○○○○○
Basiseinstellungen für das
○○○○○○○○
Klangmenü—SEL
1
Bei allen Quellen...
DEUTSCH
2
Setzen Sie den Cursor im
Hauptmenü auf „SEL“
3
Öffnen Sie das SEL-Menü
OK
BAND
MENU
Das Hauptmenü erscheint
auf dem Display.
—Bevorzugte Einstellungen
5
Passen Sie die Einstellung an
So stellen Sie den Fader und die Balance ein:
So passen Sie die Schwellenfrequenz und
den Ausgangspegel des Subwoofers an:
Cursor
So stellen Sie den Eingangspegel für jede
Quelle ein:
30
Der zuletzt ausgewählte Modus wird
(hervorgehoben).
4
Wählen Sie eine Einstellung
BSP.: Wenn „Sub Out“ (Subwoofer-
Ausgabe) ausgewählt ist.
Wenn Sie „Sub Out“ oder
„Fad/Bal“ ausgewählt
haben, rufen Sie mit OK
das Hauptmenü auf.
dann
OK
BAND
So beenden Sie den Menü-Vorgang
MENU
Page 95

So stellen Sie den Fader und die
Balance ein—Fad/Bal:
Stellen Sie den Fader ein—Balance für die
Lautsprecherausgabe auf den vorderen und
hinteren Lautsprechern.
• Oberste Position—nur
vorne
• Unterste Position—nur
hinten
Stellen Sie die Balance ein—Balance für die
Lautsprecherausgabe auf den linken und
rechten Lautsprechern.
So stellen Sie den Eingangspegel für
jede Quelle ein—VolAdjust:
Diese Einstellung ist für jede Quelle
ausgenommen UKW erforderlich. Bevor Sie
eine Einstellung vornehmen, wählen Sie eine
anzupassende Quelle aus.
Nachdem Sie eine Einstellung vorgenommen
haben, wird diese gespeichert. Die Lautstärke
wird beim Wechsel der Quelle um den
eingestellten Wert angehoben oder abgesenkt.
Legen Sie die Einstellung so fest, dass der
Eingangspegel dem UKW-Lautstärkepegel
entspricht.
DEUTSCH
• Linke Position—nur
links
• Rechte Position—nur
rechts
So passen Sie die Subwoofer-Ausgabe
an—Sub Out:
Wählen Sie die gewünschte Schwellenfrequenz
für den angeschlossenen Subwoofer.
High:Höhere Frequenzen als 115 Hz
werden für den Subwoofer
unterdrückt.
Middle:Höhere Frequenzen als 85 Hz werden
für den Subwoofer unterdrückt.
Low:Höhere Frequenzen als 55 Hz werden
für den Subwoofer unterdrückt.
Stellen Sie den Ausgabepegel des Subwoofers
ein.
• 0 (min.) bis 8 (max.)
•–5 (min.) bis +5 (max.)
31
Page 96

Graphische-Anzeigen
○○○○○○○○
Grundlegendes Verfahren
Bevor Sie das nachstehende Verfahren
ausführen, legen Sie eine CD-R mit
Standbildern (Fotos) und Animationen
(Filmen) bereit.
• Mit der Image Converter Color
DEUTSCH
-Anwendung, die sich auf der
mitgelieferten CD-ROM befindet, können
Sie eigene Bilder und Animationen
erstellen. (Die mitgelieferte CD-ROM
enthält Beispielbilder und -Animationen).
1
Öffnen Sie das Bedienfeld
Das Gerät schaltet sich ein...
2
Legen Sie die bereitgelegte
CD-R ein
Die Gerät zieht die Disk
ein, das Bedienfeld
schließt sich und geht
zur vorherigen Position
zurück (siehe Seite 43).
• Wenn die Disk wiedergabefähige AudioDateien enthält, wird die Wiedergabe
gestartet.
4
Setzen Sie den Cursor auf
„PICT“
Cursor
5
Öffnen Sie das PICT-Menü
OK
BAND
Der zuletzt ausgewählte Eintrag
wird angezeigt (hervorgehoben).
6
Wählen Sie den Eintrag aus
BSP.: Wenn „Download“ ausgewählt ist.
• Zum Herunterladen der Datei(en)
\ Download (siehe Seite 33):
Nur möglich, wenn die Quelle „CD“ ist.
• Zum Löschen der Datei(en)
\ Delete (siehe Seite 34)
• Zum Löschen aller gespeicherten Dateien
\ AllDelete (siehe Seite 36)
32
3
Zeigen Sie das Hauptmenü an
MENU
Hinweis: Die Bildqualität der
heruntergeladenen Animation- (Film-)
Datei kann sinken, wenn sie auf dem
Display des Receivers gezeigt wird (im
Vergleich zur Qualität auf dem PC).
Page 97

WICHTIG:
• Beachten Sie die Image Converter-Bedienungsanleitung (Benutzerhandbuch) auf der
mitgelieferten CD-ROM.
• Standbildern (Fotos) ist die Dateinamenerweiterung <jcl>, Animationen (Filme) die
Dateinamenerweiterung <jca> hinzuzufügen.
• Bevor Sie Dateien herunterladen oder löschen, beachten Sie folgendes:
– Laden Sie keine Dateien herunter, während Sie das Auto steuern.
– Schalten Sie die Zündung des Fahrzeuges während des Herunterladens bzw. des Löschens
von Dateien nicht aus.*
– Nehmen Sie das Bedienfeld während des Herunterladens bzw. des Löschens von Dateien
nicht ab.*
* Andernfalls wird der Vorgang nicht ordnungsgemäß ausgeführt.
○○○○○○○○○
Herunterladen der Dateien
Laden Sie eine Animation (von 55 Aufnahmen)
oder Bilder (maximal 18 Standbilder mit je einer
Aufnahme, siehe auch auf Seite 61), die für den
Grafik-Bildschirm verwendet werden können.
• Das Herunterladen einer Animation nimmt
viel Zeit in Anspruch. Einzelheiten finden Sie
3
Wählen (hervorgehoben) Sie den Ordner
aus, in dem sich die gewünschte Datei
befindet.
• Wenn die Disk mehr als 6 Ordner
umfasst, können Sie die weiteren
Ordnerlisten mit 4/¢ (
aufrufen.
auf Seite 61.
•
Hinweise zum Aktivieren der heruntergeladenen
Dateien finden Sie auf Seite 36.
1
Wiederholen Sie die Schritte 1 bis 6 auf
Seite 32, und wählen Sie in Schritt
6
dann
„Download“.
• Das Herunterladen ist nur möglich, wenn
als Quelle „CD“ ausgewählt ist. Wenn
eine andere Quelle als „CD“ ausgewählt
ist, ist „Download“ nicht als PICTMenüeintrag verfügbar.
2
Wählen Sie den Dateityp—„Picture“
<jcl> oder „Movie“ <jca>.
dann
OK
BAND
Die Dateiliste wird angezeigt.
4
Wählen (hervorgehoben) Sie eine zu
herunterladende Datei aus.
• Wenn der Ordner mehr als 6 Dateien
umfasst, können Sie die weiteren
Dateilisten mit 4/¢ ( / ) aufrufen.
dann
/ )
OK
BAND
OK
BAND
DEUTSCH
Die Ordner-Liste erscheint.
• Nur die Ordner mit dem gewählten
Dateityp <jcl> oder <jca> werden gezeigt.
Der Bestätigungsbildschirm wird
angezeigt.
Fortsetzung...
33
Page 98

5
Laden Sie die Datei herunter.
OK
BAND
Nach Abschluss des Vorgangs wird
wieder die Dateiliste angezeigt.
DEUTSCH
6
Laden Sie bei Bedarf weitere Dateien
herunter.
• So wählen Sie eine Datei aus demselben
Ordner aus:
dann
• So wählen Sie eine Datei aus einem
anderen Ordner aus:
BACK
DISP
dann
Wiederholen Sie
anschließend die
Schritte
OK
BAND
3
bis 5.
○○○○○○○○○
Dateien löschen
Sie können Dateien löschen, während eine
andere Quelle wiedergegeben wird.
So löschen Sie einzelne gespeicherte
Bilder
1
Wiederholen Sie die Schritte 3 bis 6 auf
Seite 32, und wählen Sie in Schritt
6
„Delete“ (Löschen).
2
Wählen Sie „Picture“.
dann
OK
BAND
3
Wählen Sie „Delete“ (Löschen).
Zum Ändern des Dateityps—“Picture”
<jcl> oder “Movie” <jca> zum
Herunterladen beenden Sie den
Menübetrieb durch Drücken von MENU
und wiederholen Sie von Anfang an.
Um den Menüvorgang zu beenden, drücken
Sie erneut die MENU-Taste.
34
dann
OK
BAND
Die Dateiliste wird angezeigt.
4
Wählen (hervorgehoben) Sie eine zu
löschende Datei aus.
• Wenn die mehr als 6 Dateien gespeichert
wurden, können Sie die weiteren
Dateilisten mit 4/¢ (
dann
/ ) aufrufen.
OK
BAND
Der Bestätigungsbildschirm wird
angezeigt.
Page 99

5
Löschen Sie die Datei.
OK
BAND
4
Löschen Sie die alle Bilder.
OK
BAND
Nach Abschluss des
Löschvorgangs wird wieder das
PICT-Menü angezeigt.
Nach Abschluss des Vorgangs wird wieder
die Dateiliste angezeigt.
• Wenn keine gespeicherten Dateien
vorhanden sind, wird das PICT-Menü
angezeigt. \ Drücken Sie die MENUTaste.
6
Löschen Sie bei Bedarf weitere Dateien.
• Wiederholen Sie die Schritte 4 und 5.
Um den Menüvorgang zu beenden, drücken
Sie erneut die MENU-Taste.
So löschen Sie alle gespeicherten
Bilder auf einmal
1
Wiederholen Sie die Schritte 3 bis 6 auf
Seite 32, und wählen Sie in Schritt
„Delete“ (Löschen).
2
Wählen Sie „Picture“.
• Siehe Schritt 2 im vorhergehenden
Verfahren.
3
Wählen Sie „AllDelete“ (Alles löschen).
6
Um den Menüvorgang zu beenden, drücken
Sie erneut die MENU-Taste.
So löschen Sie den gespeicherten Film
1
Wiederholen Sie die Schritte 3 bis 6 auf
Seite 32, und wählen Sie in Schritt
„Delete“ (Löschen).
2
Wählen Sie „Movie“.
dann
OK
BAND
Der Bestätigungsbildschirm wird angezeigt.
3
Löschen Sie den Film.
OK
BAND
Nach Abschluss des
Löschvorgangs wird wieder das
PICT-Menü angezeigt.
6
DEUTSCH
dann
OK
BAND
Der Bestätigungsbildschirm wird
angezeigt.
Um den Menüvorgang zu beenden, drücken
Sie erneut die MENU-Taste.
35
Page 100

○○○○○○○○○
dann
Alle Dateien löschen
Sie können alle gespeicherten Dateien (Bilder
und Animationen) auf einmal löschen.
1
Wiederholen Sie die Schritte 3 bis 6 auf
Seite 32, und wählen Sie in Schritt
„AllDelete“ (Alles löschen).
DEUTSCH
2
Bestätigen Sie die Auswahl.
OK
BAND
Der Bestätigungsbildschirm wird
angezeigt.
3
Löschen Sie alle gespeicherten Dateien.
OK
BAND
Um den Menüvorgang zu beenden, drücken
Sie erneut die MENU-Taste.
○○○○○○○○○
Aktivieren der heruntergeladenen
○○○○○○○○○
Dateien
Nach Abschluss des
Löschvorgangs wird wieder das
PICT-Menü angezeigt.
4
Wählen Sie „Pict“.
6
OK
BAND
5
Wählen Sie den Grafik-Display-Typ—
„Picture“, „Movie“ oder „Slideshow“
(Diashow).
Picture: Eines der gespeicherten Bilder,
das für den Grafikbildschirm
aktiviert wurde. \ Fahren Sie
6
mit Schritt
Movie:
Slideshow: Alle gespeicherten Bilder werden
Eine der gespeicherten
Animationen wird für den
Grafik-Bildschirm verwendet.
\ Fahren Sie mit Schritt
aktiviert und nacheinander auf
dem Grafik-Bildschirm angezeigt
(UserSlide). \ Fahren Sie mit
Schritt 7 fort.
fort.
6
fort.
36
1
Bei allen Quellen...
MENU
2
Setzen Sie den Cursor im PSMHauptmenü auf „PSM“.
3
Öffnen Sie das PSM-Menü.
OK
BAND
Das Hauptmenü erscheint auf
dem Display.
Cursor
6
Wenn Sie im vorhergehenden Schritt
„Picture“ oder „Movie“ gewählt haben,
wählen Sie die gewünschte Datei.
• Wählen Sie „Default“ um die
vorinstallierte Datei zu aktivieren.
7
Beenden Sie die Einstellung.
OK
BAND
 Loading...