

Page 1
INSTRUCTIONS
BEDIENUNGSANLEITUNG / MODE D’EMPLOI
GEBRUIKSAANWIJZING / MANUAL DE INSTRUCCIONES
MANUALE DI ISTRUZIONI / INSTRUKTIONSBOG
KÄYTTÖOHJEET / ANVISNINGAR
BRUKSANVISNING /
HS-V4KITE
JLIP CAPTURE PACK
JLIP CAPTURE-PACK
ENSEMBLE JLIP CAPTURE
JLIP CAPTURE PAKKET
PAQUETE JLIP CAPTURE
PACCHETTO JLIP CAPTURE
JLIP CAPTURE PACK
JLIP-SIEPPAUSPAKKAUS
JLIP CAPTURE PACK
JLIP BILDEOVERFØRINGSPAKKE
BEFORE OPERATION
VOR DER INBETRIEBNAHME
AVANT DE COMMENCER
VOOR GEBRUIK
ANTES LA OPERACION
PRIMA DI INIZIARE
FØR BRUGEN
ENNEN KÄYTTÖÄ
INNAN DU SÄTTER IGÅNG
FØR BRUK
LYT0432-001A
ENGLISHDEUTSCHFRANÇAIS
NEDERLANDSCASTELLANO
ITALIANODANSKSUOMISVENSKANORSK
Page 2
CAUTIONS
Connection to the mains supply in the United Kingdom.
DO NOT cut off the mains plug from this equipment. If the plug fitted is not suitable for
the power points in your home or the cable is too short to reach a power point, then obtain
an appropriate safety approved extension lead or consult your dealer.
BE SURE to replace the fuse only with an identical approved type, as originally fitted, and
to replace the fuse cover.
If nontheless the mains plug is cut off ensure to remove the fuse and dispose of the plug
immediately, to avoid a possible shock hazard by inadvertent connection to the mains
supply.
If this product is not supplied fitted with a mains plug then follow the instructions given
below:
DO NOT make any connection to the Larger Terminal coded E or Green.
The wires in the mains lead are coloured in accordance with the following code:
If these colours do not correspond with the terminal identifications of your plug, connect
as follows:
Blue wire to terminal coded N (Neutral) or coloured black.
Brown wire to terminal coded L (Live) or coloured Red.
If in doubt — consult a competent electrician.
IMPORTANT (For owners in U.K.)
Blue to N (Neutral) or Black
Brown to L (Live) or Red
i
Page 3

Some Do’s And Don’ts On The Safe
Use Of Equipment
This equipment has been designed and manufactured to meet international safety standards
but, like any electrical equipment, care must be taken if you are to obtain the best results and
safety is to be assured.
DO read the operating instructions before you attempt to use the equipment.
DO ensure that all electrical connections (including the mains plug, extension leads and
interconnections between pieces of equipment) are properly made and in accordance with
the manufacturer's instructions. Switch off and withdraw the mains plug when making or
changing connections.
DO consult your dealer if you are ever in doubt about the installation, operation or safety of
your equipment.
DO be careful with glass panels or doors on equipment.
DON'T continue to operate the equipment if you are in any doubt about it working normally,
or if it is damaged in any way — switch off, withdraw the mains plug and consult your
dealer.
DON'T remove any fixed cover as this may expose dangerous voltages.
DON'T leave equipment switched on when it is unattended unless it is specifically stated that it
is designed for unattended operation or has a standby mode. Switch off using the
switch on the equipment and make sure that your family knows how to do this. Special
arrangements may need to be made for infirm or handicapped people.
DON'T use equipment such as personal stereos or radios so that you are distracted from the
requirements of road safety. It is illegal to watch television whilst driving.
DON'T listen to headphones at high volume, as such use can permanently damage your
hearing.
DON'T obstruct the ventilation of the equipment, for example with curtains or soft furnishings.
Overheating will cause damage and shorten the life of the equipment.
DON'T use makeshift stands and NEVER fix legs with wood screws — to ensure complete
safety always fit the manufacturer's approved stand or legs with the fixings provided
according to the instructions.
DON'T allow electrical equipment to be exposed to rain or moisture.
ABOVE ALL...
— NEVER let anyone especially children push anything into holes, slots or any other
opening in the case — this could result in a fatal electrical shock;
— NEVER guess or take chances with electrical equipment of any kind — it is better to be
safe than sorry!
ii
Page 4

2 EN
JVC SOFTWARE LICENCE AGREEMENT
TO CUSTOMERS:
MAKE SURE TO READ THIS CAREFULLY BEFORE OPENING THE SEALED SOFTWARE
PACKETS
Thank you for purchasing our product. In order to start using the software programme
enclosed, you are required to accept the terms and conditions of the agreement as provided below.
Software Licence Agreement
This is a legal agreement between you (either an individual or an entity) and Victor Company
of Japan, Limited (JVC). By opening the sealed software packages and/or by using the Programme, you are agreeing to be bound by the terms of this Agreement. Should you not agree
to the terms hereof, return the unopened software packets and the accompanying items to the
place where you obtained them.
1. GRANT OF LICENCE
This Licence Agreement (Agreement) permits you to use the software programme (Programme)
enclosed in this package and/or the accompanying written material (e. g. printed manuals).
Although you are also granted licence to load the Programme into temporary memory (i. e.
RAM) or install the Programme once into permanent memory (e. g. hard disk, CD-R, or other
storage device) of one (1) computer system, you are strictly prohibited to install the Programme on a network server for the sole purpose of internal distribution.
2. COPYRIGHT
Notwithstanding the provision of Article 1 hereof, any copyright in the Programme is owned
exclusively by JVC and is protected by the Japanese copyright law, copyright laws of other
countries, as applicable, and relevant provisions under international treaties including the
Berne Convention for the Protection of Literary and Artistic Works, as amended, and the
Universal Copyright Convention, as amended. Therefore, you must treat the Programme like
any other copyrighted material except that you may either (a) make one (1) copy of the Programme solely for your personal backup or archival purposes, or (b) transfer the Programme
to a single hard disk, provided that you keep the original solely for your personal backup or
archival purposes.
3. RESTRICTION ON THE PROGRAMME
You may not reverse engineer, decompile, disassemble, revise or modify the Programme,
except to the extent that such restriction is expressly prohibited by applicable law. JVC and its
distributors and dealers shall not be liable for any claims or defects etc. arising out of or in
connection with such prohibited activities as indicated in this Agreement.
4. OTHER RESTRICTIONS
You may not rent, lease or transfer the Programme to any third party nor let such a party use
the Programme.
IMPORTANT
Page 5

EN 3
5. LIMITED WARRANTY
JVC warrants that any media in which the Programme is embodied (e.g. floppy discs, CDROM, etc.) are free from any defects in materials and workmanship for a period of thirty (30)
days from the date of your purchase and that any hardware accompanying the Programme is
also free from defects to the extent provided in the attached Warranty Form. JVC’s entire
liability and your exclusive remedy in connection with the Programme shall be, at JVC’s option, either (a) return of the price paid, or (b) replacement of defective Programme media.
6. DISCLAIMER OF WARRANTIES
EXCEPT FOR THE EXPRESS W ARRANTIES ST A TED HEREIN AND TO THE EXTENT PERMITTED BY APPLICABLE LAW, JVC AND ITS SUPPLIERS DISCLAIM ANY OTHER WARRANTIES, EITHER EXPRESS OR IMPLIED, INCLUDING BUT NOT LIMITED TO IMPLIED
WARRANTIES OF MERCHANTABILITY AND FITNESS FOR A PARTICULAR PURPOSE IN
REGARD TO THE PROGRAMME AND THE ACCOMPANYING PRINTED MATERIALS.
7. LIMITED LIABILITY
TO THE EXTENT PERMITTED BY APPLICABLE LAW, IN NO EVENT SHALL JVC AND ITS
SUPPLIERS BE LIABLE FOR ANY INDIRECT, SPECIAL, INCIDENTAL OR CONSEQUENTIAL DAMAGES WHATSOEVER, REGARDLESS OF THE FORM OF ACTION WHETHER
IN CONTRACT, TORT, STRICT PRODUCT LIABILITY OR OTHERWISE (INCLUDING BUT
NOT LIMITED T O DAMAGES FOR LOSS OF PROFITS, BUSINESS INTERRUPTION, LOSS
OF BUSINESS INFORMATION OR ANY OTHER PECUNIARY LOSS) ARISING OUT OF OR
IN CONNECTION WITH THE USE OF OR INABILITY T O USE THE PROGRAMME, EVEN IF
JVC HAS BEEN ADVISED OF THE POSSIBILITY OF SUCH DAMAGES.
Victor Company of Japan, Limited
Page 6

4 EN
CONTENTS
CAUTION:
● Operate this equipment according to the operating procedures described in this manual.
● Use only the provided CD-ROM. Never use any other CD-ROM to run this software.
● Do not attempt to modify this software.
● Changes or modifications not approved by JVC could void user’s authority to operate the
equipment.
How to handle a CD-ROM
● Take care not to soil or scratch the mirror surface (opposite to the printed surface). Do
not write anything or put a sticker on either the front or back surface. If the CD-ROM gets
dirty, gently wipe it with a soft cloth outward from the centre hole using a circular
motion.
● Do not use conventional disc cleaners or cleaning spray.
● Do not bend the CD-ROM or touch its mirror surface.
● Do not store your CD-ROM in a dusty, hot or humid environment. Keep it away from
direct sunlight.
MAJOR FEATURES 5 – 6
GETTING STARTED 7
Provided Accessories .............................................................
7
Connectable Devices ..............................................................
7
Operating Environment ...........................................................
7
INSTALLATION 8 – 9
JLIP Video Capture................................................................
8
JLIP Video Producer ..............................................................
8
Adobe® Acrobat® Reader 3.0 ...................................................
8
Mr. Photo Gold ....................................................................
9
CONNECTIONS 10 – 11
Presto! Mr. Photo Gold 13 – 19
TECHNICAL SUPPORT FOR REGISTERED USERS 20 – 21
NOTICE FOR USERS 21
● The Readme.TXT file provides additional information for setup and information that is not
included in the instruction manual. Please read the file before installing the provided
software programme.
● You can find the latest information (in English) on the provided software programme at our
world wide web server at http://www.jvc-victor.co.jp.
NOTE:
The JLIP Video Capture/Producer instruction manual is also included on the CD-ROM in
PDF format. To open, double-click the file in the desired language. Note that Adobe
®
Acrobat® Reader must be installed to read PDF files.
Page 7
EN 5
Two software programmes are provided.
JLIP Video Capture
Video Capture Facility
Video images from a video camera can be
captured as still images with 16.77 million
colours through the serial port (RS-232C) of a
WindowsT-operated computer.
JLIP Control Facility
With a JLIP compatible video camera,
• all basic video operations can be
executed via the computer display;
• up to 99 images can be captured
automatically with Programme Video
Capture (playing tape — scanning —
transferring to PC).
JLIP Video Producer
JLIP Control Facility
With a JLIP-compatible video camera,
• all basic video operations can be
executed on the computer display;
• programmed video playback (up to 99
programmes) or assemble editing can be
performed.
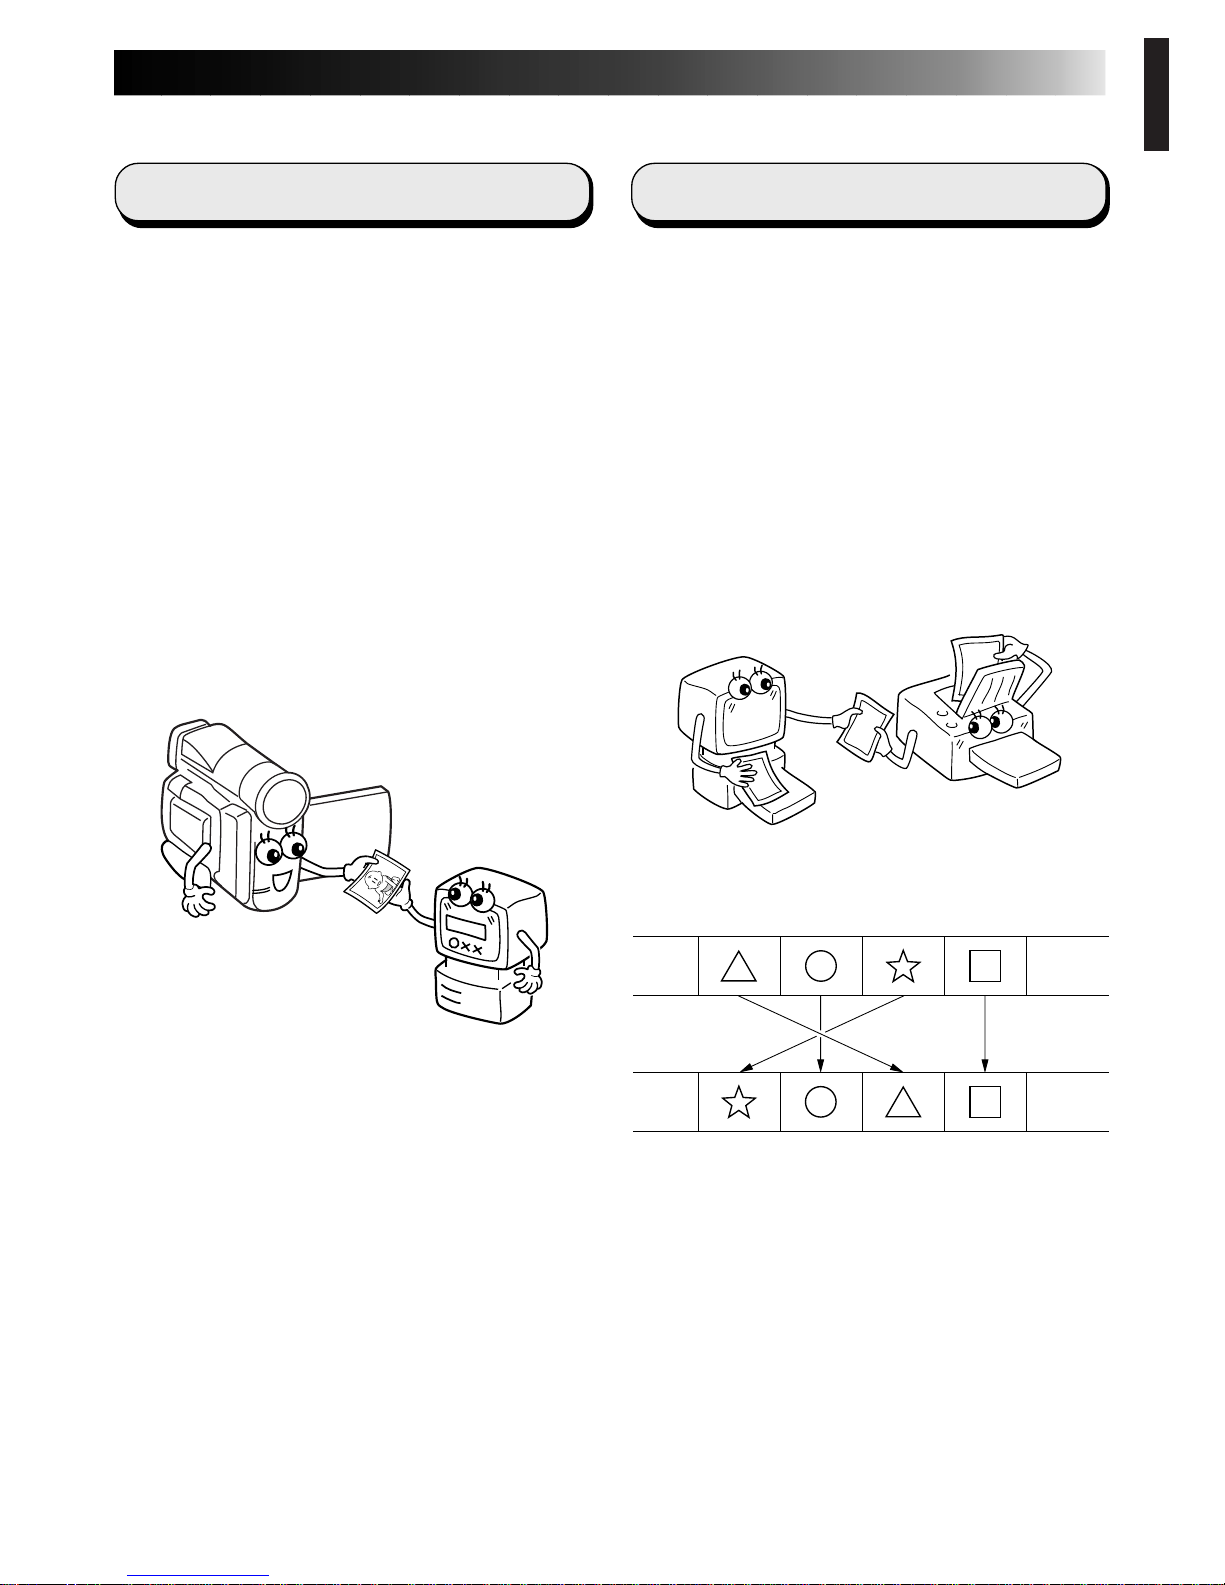
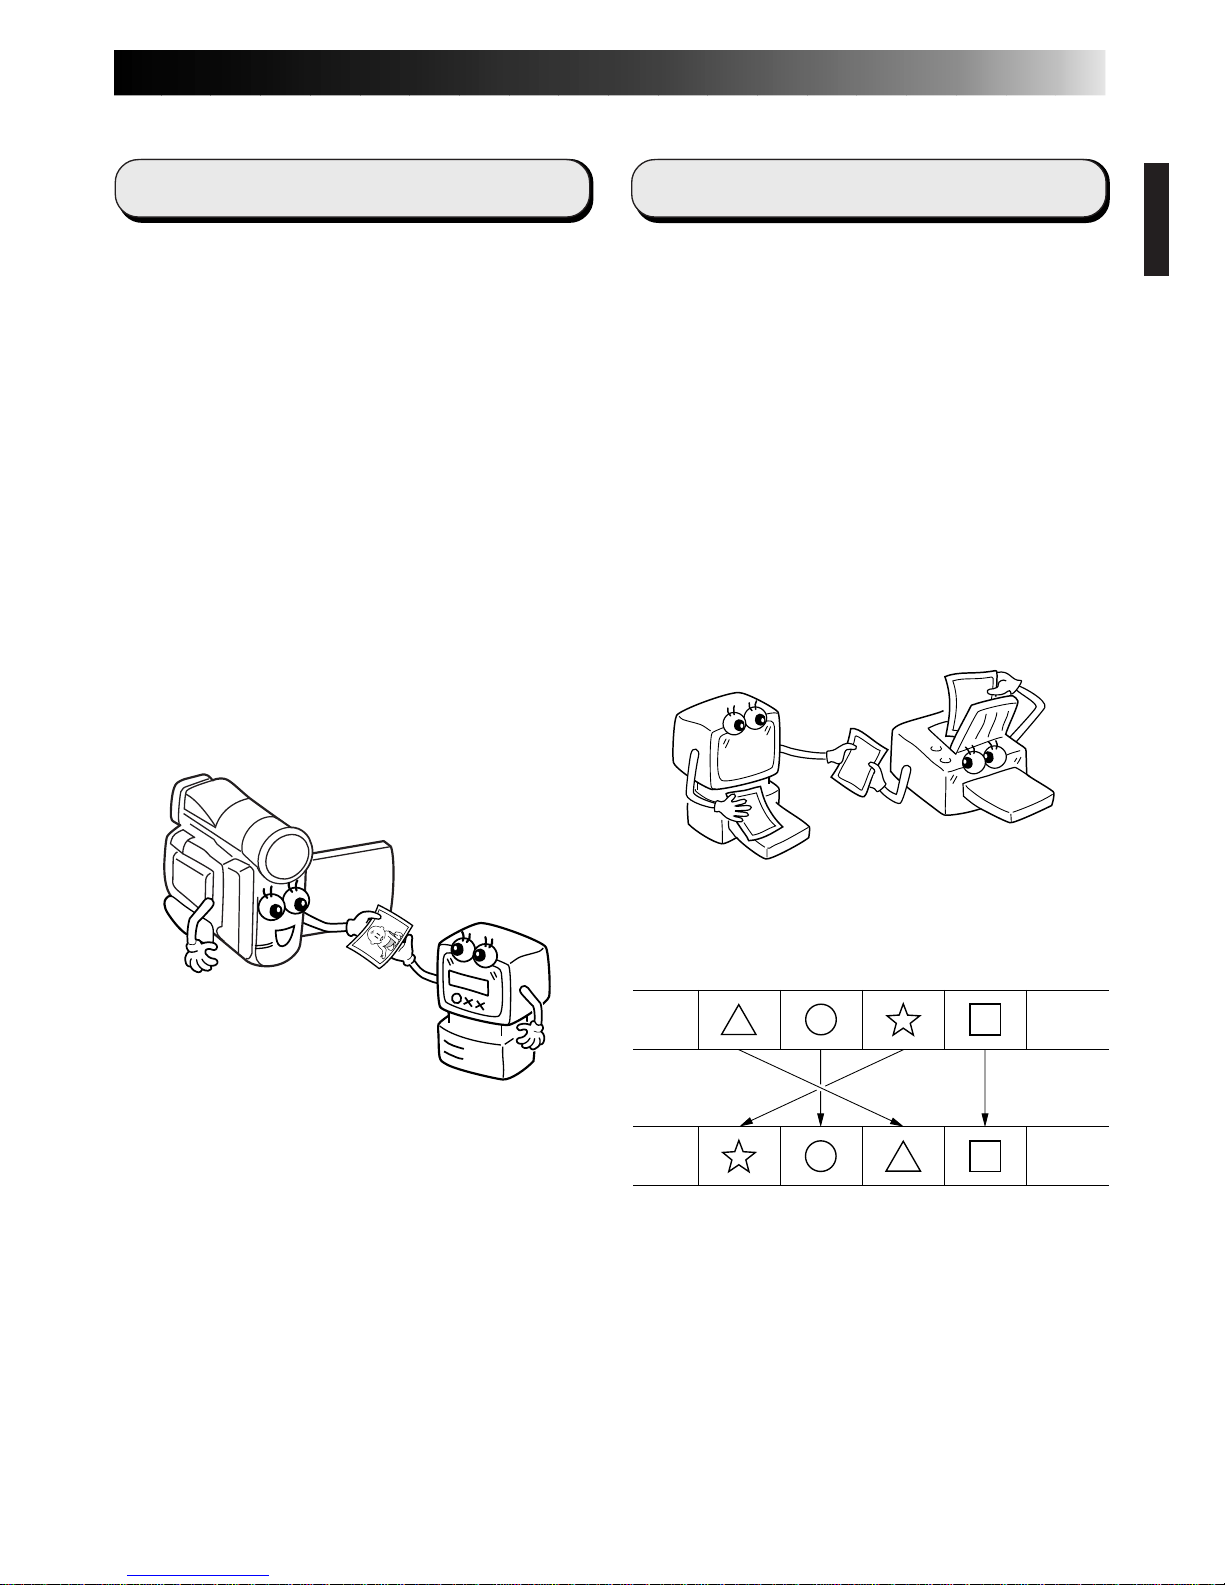
Assemble Editing
Selected scenes on a pre-recorded tape can
be edited in a specified sequence.
Pre-recorded tape
(on video camera)
Recording tape
(on VCR)
MAJOR FEATURES
Page 8

6 EN
Business presentations
Images captured from video can be incorporated into business documents to spice up
your presentations.
Internet homepage
Images captured from video can be incorporated in your Internet homepage using image
editing software.
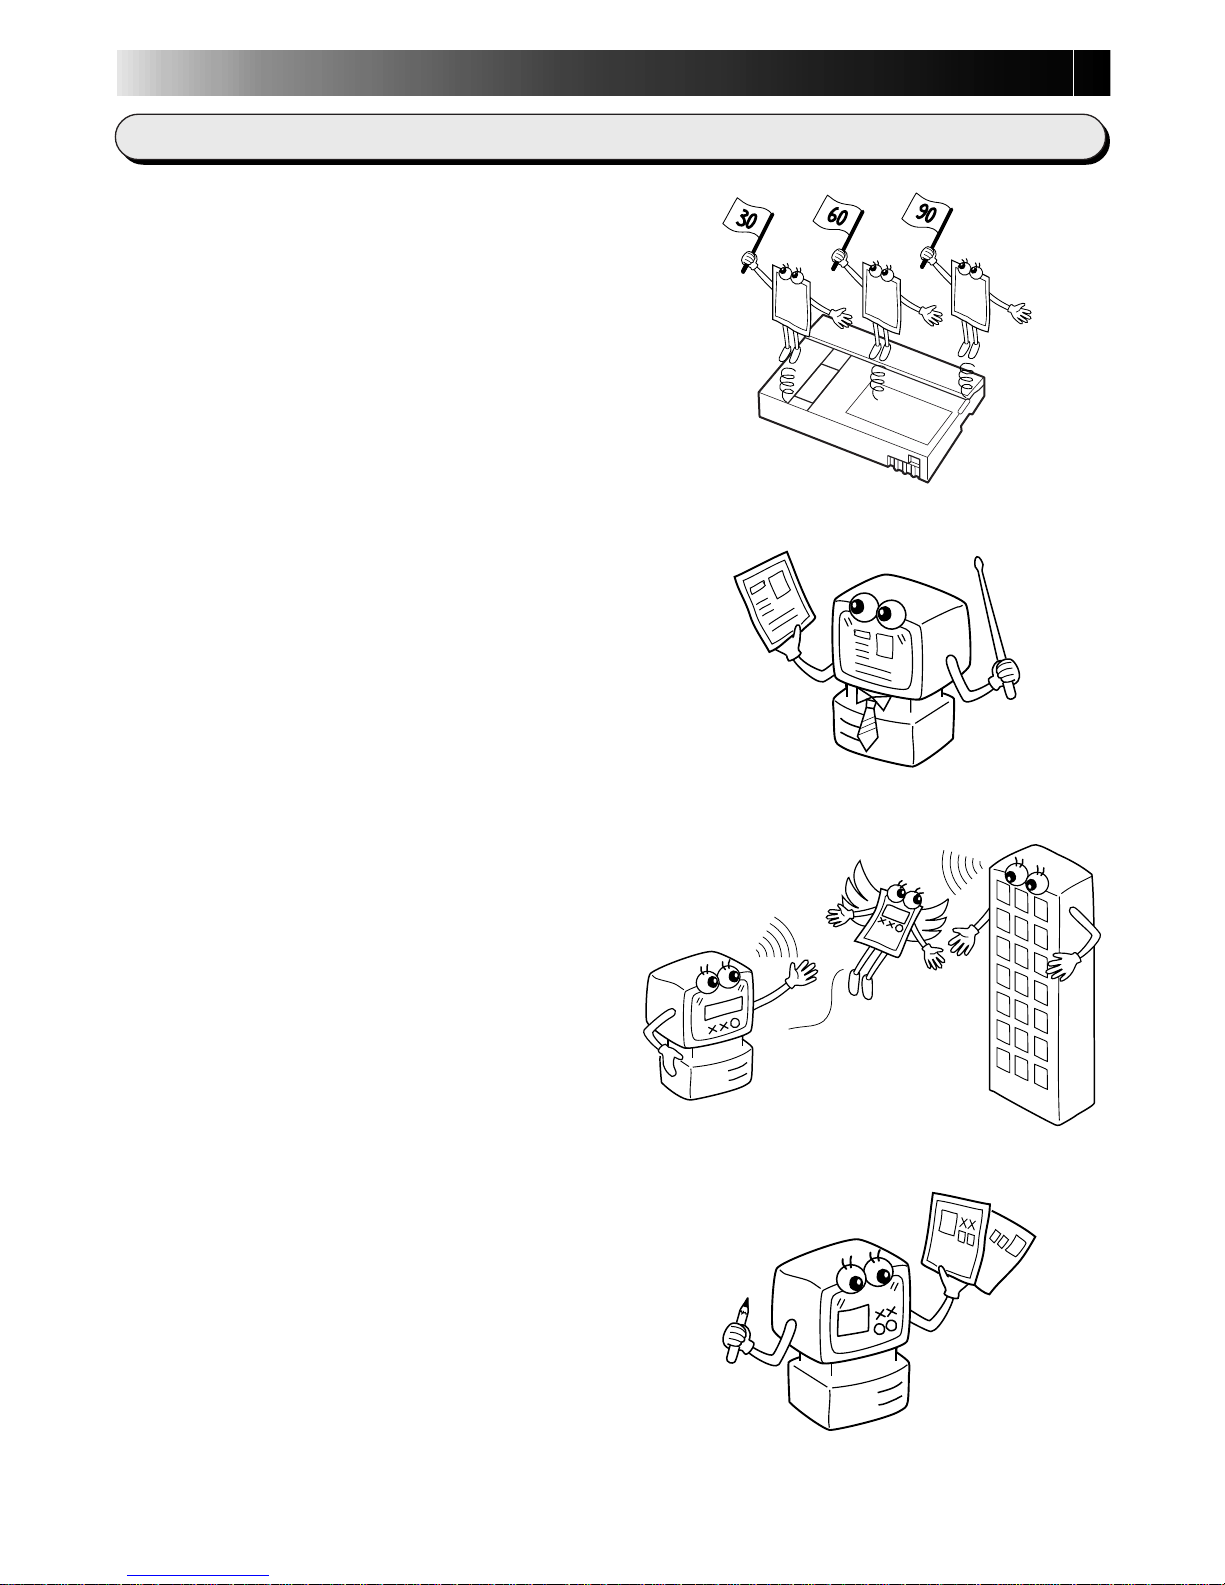
Advanced Applications
Create title indexes for your video
collection
Title index images can be captured from your
favorite recordings using the Interval Capture
mode. Print the captured index images on
your PC printer using the computer’s Print
Screen facility, then attach them to your
cassettes.
Video journal and postcards
Create your own original postcards, party
invitation cards and the like or keep a video
journal.
MAJOR FEATURES (cont.)
Page 9

EN 7
GETTING STARTED
Operating Environment
q Personal Computer with Microsoft® Windows® 95/Windows® 98
q CPU: Intel® Pentium® or better processor
q Minimum RAM requirement: 32 MB
q Available Hard Disk space of at least 10 MB for JVC Software
Recommended 140 MB for Presto! Mr. Photo Gold
(You can select which applications from Mr. Photo Gold you wish to install.)
q Colour display capable of at least 640 x 480 pixels, 256 colours
Recommended 1024 x 768 pixels, 16.77 million colours
q 1 free serial transmission port, compatible with 9600 bps or higher transmission
rate, connectable to RS-232C with 9 pin serial connector
(Recommended compatible with UART 16550A)
q Mouse (Windows® compatible)
q CD-ROM drive
NOTE:
An optional 9 pin serial conversion adapter is required for computers using a serial
communication port other than a standard 9 pin.
* The system requirements information above is not a guarantee that the provided
software will work on all personal computers meeting those requirements.
* Microsoft® and Windows® are either registered trademarks or trademarks of
Microsoft Corporation in the United States and/or other countries.
* is a registered trademark of JVC.
JLIP stands for Joint Level Interface Protocol, a new communication protocol which
allows AV units equipped with a JLIP terminal to be controlled by a personal
computer.
* Other product and company names included in this instruction manual are
trademarks and/or registered trademarks of their respective holders.
Connectable Devices
q JVC digital video cameras: GR-DVL20, GR-DVL30, GR-DVL40
PC Connection Cable
Provided Accessories
CD-ROM including:
•JLIP Video Capture
•JLIP Video Producer
•Presto! Mr. Photo Gold
•
Mr. Photo
•
PhotoAlbum
•
ImageFolio
Edit Cable (4 pole – 2 pole)
Page 10

8 EN
INSTALLATION
INSTALLATION
Refer to the Windows® 95/98 manual or your computer’s manual for details on basic
Windows® 95/98 operating procedures.
Installing JLIP Video Capture
1. Start up Windows®.
• Close any other applications that are running.
Make sure that there are no icons of other applications on the task bar.
2. Insert the CD-ROM into the CD-ROM drive.
Click Start on the task bar — Run.
3. Click Browse — CD-ROM icon in the Look in: column.
4. Double-click the JVC folder.
5. Double-click the Jcpt folder.
6. Double-click the Setup.exe icon.
7. Click OK.
The set-up programme will load. Follow the instructions that appear on the screen.
Installing JLIP Video Producer
1. Start up Windows®.
• Close any other applications that are running.
Make sure that there are no icons of other applications on the task bar.
2. Insert the CD-ROM into the CD-ROM drive.
Click Start on the task bar — Run.
3. Click Browse — CD-ROM icon in the Look in: column.
4. Double-click the JVC folder.
5. Double-click the Vdpro folder.
6. Double-click the Setup.exe icon.
7. Click OK.
The set-up programme will load. Follow the instructions that appear on the screen.
Installing Adobe® Acrobat® Reader 3.0
1. Start up Windows®.
• Close any other applications that are running.
Make sure that there are no icons of other applications on the task bar.
2. Insert the CD-ROM into the CD-ROM drive.
Click Start on the task bar — Run.
3. Click Browse — CD-ROM icon in the Look in: column.
4. Double-click the Reader folder.
5. Double-click the Setup.exe icon.
6. Click OK.
The set-up programme will load. Follow the instructions that appear on the screen.
NOTES:
• Close any other programmes running on the PC.
• Disable programmes that operate in the background, such as screen savers, e-mail
and communication software, virus checkers, schedulers, etc.
• Turn off file and printer sharing.
Page 11

EN 9
INSTALLATION
Refer to the Windows® 95/98 manual or your computer’s manual for details on basic
Windows® 95/98 operating procedures.
Installing NewSoft Presto! Mr. Photo/PhotoAlbum/ImageFolio
1. Start up Windows®.
• Close any other applications that are running.
Make sure that there are no icons of other applications on the task bar.
2. Insert the CD-ROM into the CD-ROM drive.
Click Start on the task bar — Settings — Control Panel.
3. Double-click Add/Remove Programs.
Click Install — Next — Browse — CD-ROM icon in the Look in: column.
4. Double-click the NewSoft folder.
5. Double-click Setup.exe.
6. Click Finish.
• Once the installation programme loads, follow the instructions displayed on your
screen.
7. Click Install in the Language Selection window.
• The installation programme will automatically detect the language being used in
the version of Windows® you are running.
8. Click Next> in the Select Components window.
• Click the check box to deselect any software you do not wish to install.
The set-up programme will load. Follow the instructions that appear on the screen.
STARTING UP JLIP Video Capture/Producer AND
Presto! Mr. Photo/PhotoAlbum/ImageFolio
1. Start up Windows®.
2. Click the Start button on the task bar.
• The Program menu appears on the screen.
3. Move the mouse pointer over the programme entry you want to run and click to
start the programme.
• The software you selected in step 3 starts up.
HOW TO CLOSE THE PROGRAMME
Click the Close button or select File — Exit.
Page 12
10 EN
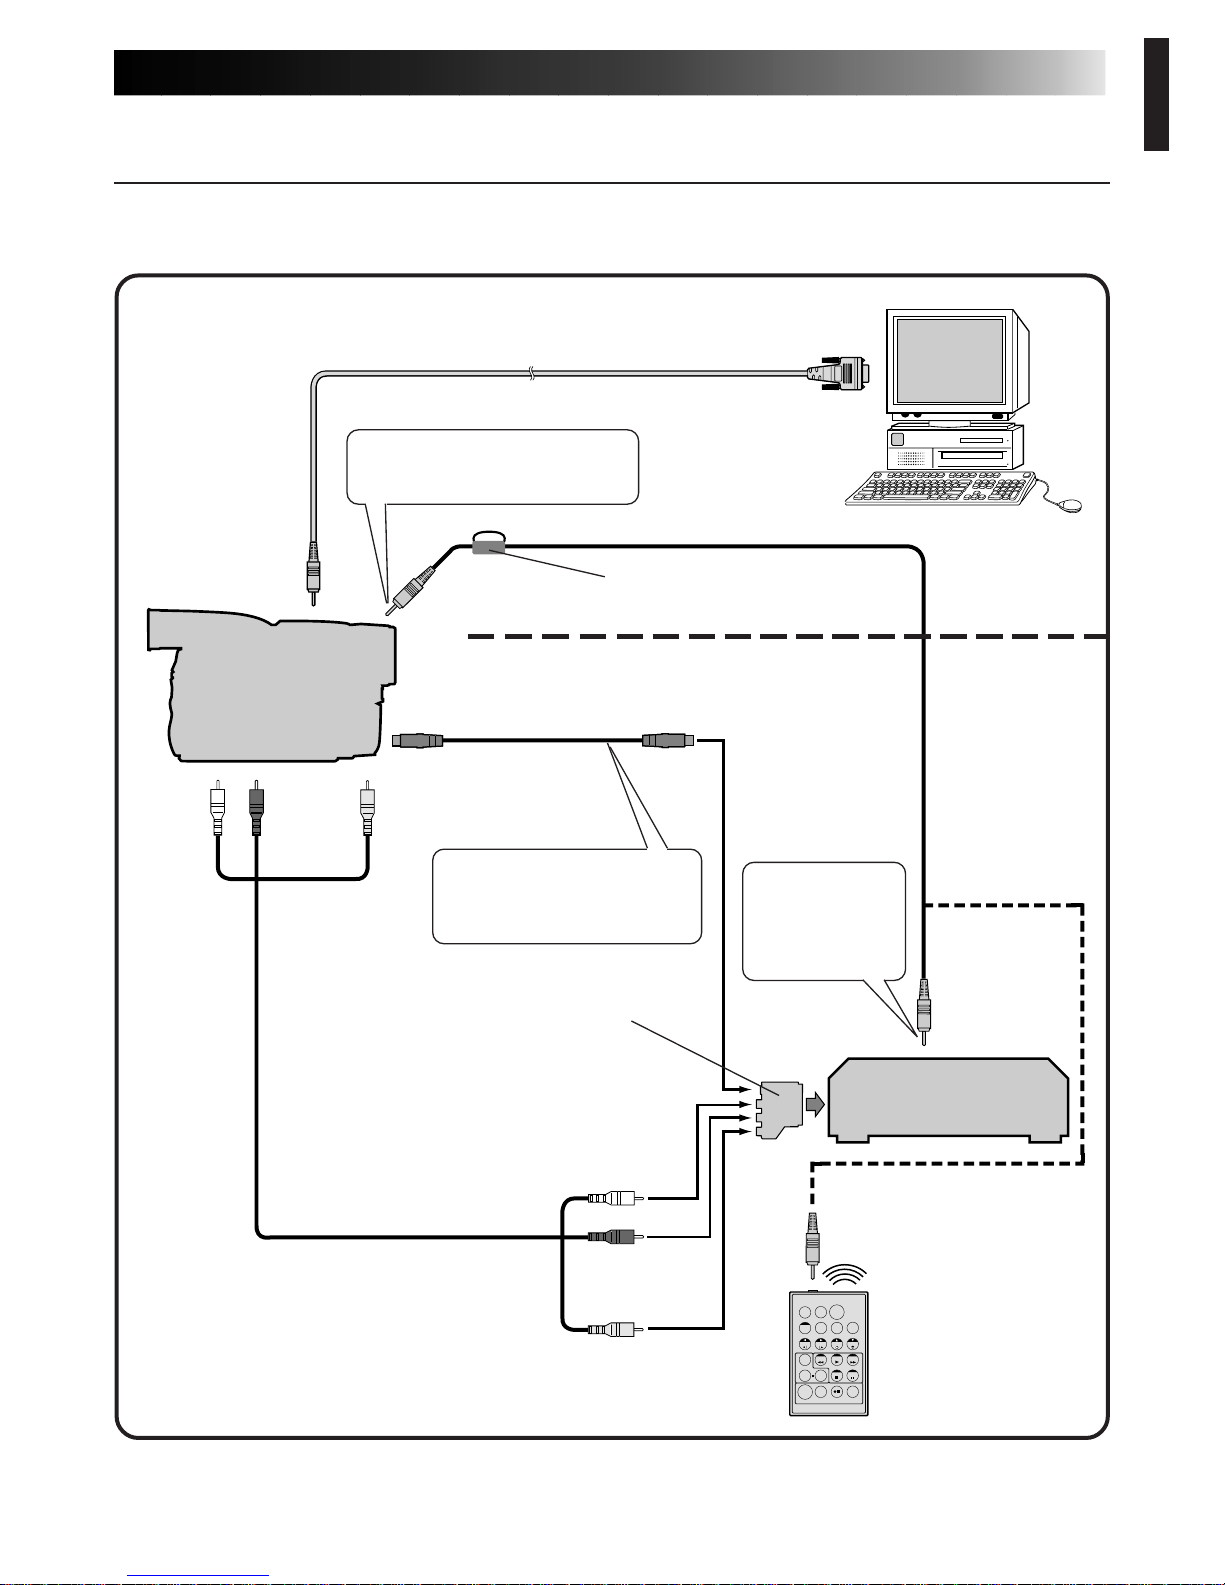
CONNECTIONS
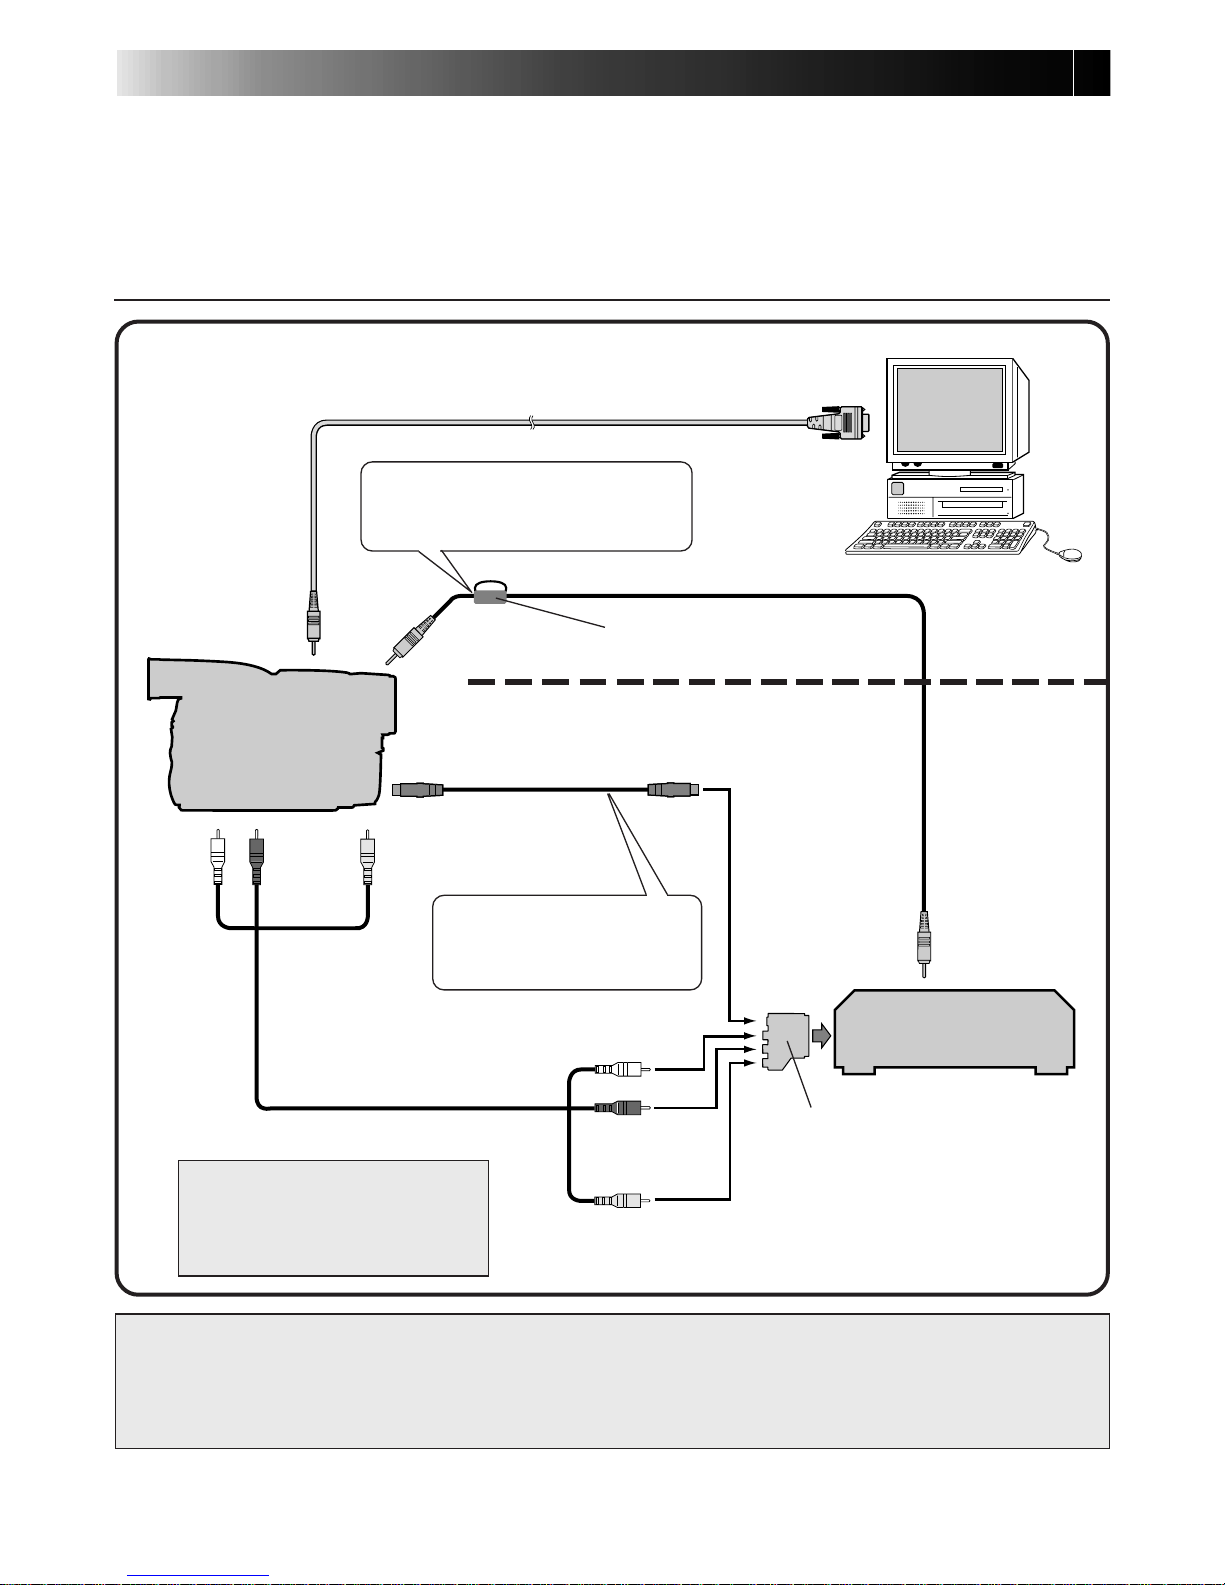
WHEN CONNECTED TO A VCR EQUIPPED WITH A JLIP JACK
When JLIP Video Producer is used:
When JLIP Video Capture is used:
To PC jack
To S OUT jack
S-VIDEO cable
AUDIO/VIDEO cable
To S-VIDEO
input jack
To JLIP jack
JLIP cable
To JLIP jack
PC connection cable (provided)
PC
To COM port
(RS-232C)
Video Camera
VCR
(Recording deck)
White to
AUDIO L
Red to
AUDIO R
Yellow to
VIDEO
White to
AUDIO
L
Red to
AUDIO
R
Yellow to
VIDEO
NOTE:
The JLIP cable is optional. Be sure to use the following:
•JLIP cable: PEAC0453
Consult your nearest JVC Technical Support Centre for details about availability (see page 20).
n To assure safety, make sure all units are turned off before making any connections.
n We recommend that you use the AC Power Adapter/Charger.
n When connecting a cable with a core filter attached, be sure to plug the connector equipped
with the core filter into the video camera.
n Do not make any connections to the video camera’s DV OUT connector.
Connect this if the video
source unit has an S-Video
input jack.
NOTE:
The JLIP cable can only be
used with JVC VCRs equipped
with a JLIP jack.
Core filter
Attach the core filter provided
with your video camera, referring
to its instruction manual.
If your VCR has a SCART
connector, use the cable
adapter.
Page 13
EN 11
TW
WHEN CONNECTED TO A VCR NOT EQUIPPED WITH A
JLIP JACK
When using a VCR not equipped with a JLIP jack, set your VCR brand using the remote control
unit, then perform editing using the remote control.
When JLIP Video Producer is used:
When JLIP Video Capture is used:
To PC jack
To S OUT jack
S-VIDEO cable
AUDIO/VIDEO cable
To S-VIDEO
input jack
Edit cable
(4 pole – 2 pole)
(provided)
To JLIP jack
PC connection cable (provided)
PC
To COM port
(RS-232C)
Video Camera
White to
AUDIO L
Red to
AUDIO R
Yellow to
VIDEO
White to
AUDIO
L
Red to
AUDIO
R
Yellow to
VIDEO
Connect this if the video
source unit has an S-Video
input jack.
Core filter
VCR
(Recording deck)
Connect here if the
recording deck doesn’t
have a remote pause jack.
Remote control unit
To remote
pause jack
Use the plug which has three
yellow rings around the pin.
Use the plug
which has one
black ring
around the pin.
If your VCR has a SCART
connector, use the cable
adapter.
Page 14

12 EN
MEMO
Page 15

EN 13
Mr. Photo Gold:
Presto! Mr. Photo
Presto! PhotoAlbum
Presto! ImageFolio
For Windows
Copyright © 1997-1998, NewSoft Technology Corp. All Rights Reserved.
* Please consult your nearest NewSoft service centre for technical support. (see
next page)
Page 16

14 EN
Technical Support
NewSoft international service centre:
U.S.A: 4113 Clipper Court, Fremont, CA 94538, USA
Tel: (1) 510-445-8600 Fax: (1) 510-445-8601
Technical Support Hot Line: (1) 510-445-8616
E-mail: tech@newsoftinc.com
http://www.newsoftinc.com
Taiwan: 9F, No. 68, Sec. 3, Nan-king E. Rd., Taipei, Taiwan, R.O.C.
Tel: (886) 2-2517-0750 Fax: (886) 2-2517-0760
Technical Support Hot Line: (886) 2-2517-0952
E-mail: support@newsoft.com.tw
http://www.newsoft.com.tw
Japan: 6-21-3 Shinbashi Minato-Ku, Tokyo 105-0004 Japan
Tel: (81) 3-5472-7008 Fax: (81) 3-5472-7009
E-mail: support@newsoft.co.jp
http://www.newsoft.co.jp
U.K.: The Software Centre, East Way,
East Mill Industrial Estate, Ivybridge
Devon, PL21 9PE, United Kingdom
Tel: (44) 01752-201148 Fax: (44) 01752-894833
France: Info Trade Centre
d’activités de I’Ourcq 45,
rue Delizy 93692 Pantin France
Tel: (33) 1-4810-7563 Fax: (33) 1-4810-7555
E-mail: infotrad@club-internet.fr
* ( ): Country code
Page 17

EN 15
Presto! Mr. Photo
Mr. Photo stores and catalogues all of your valuable photos. You can sort photos and
film “rolls” by date and title, or search by keyword, date, and other image properties.
Then drag-and-drop photos to the Application Bar to create photo masterpieces using
ready-made templates or design electronic photo albums. Click the Slide Show icon
to view selected photos in a “roll” of film, or drag-and-drop a photo to the E-mail
icon to send it to family and friends.
Features
● Acquire photos from digital cameras, scanners, floppy disks, PhotoCDs, and the
Internet.
● Catalogue photos in “rolls” of film that you can customize and rearrange.
● Enhance photos instantly (remove red-eye, adjust brightness/contract, blur/
sharpen).
● Drag-and-drop photos to print, e-mail, create HTML slide shows, or post on the
Internet.
● Drag-and-drop photos to other applications for further editing or creative projects.
● Save photos as a screen saver or as wallpaper.
● Print stickers, labels, and photo catalogues.
System Requirements
● Digital Camera plus digital camera software.
● Scanner, if you intend to scan photos.
● A PC with at least a 486 microprocessor (a Pentium processor is recommended)
and 16 MB RAM.
● Recommend at least 30 MB of hard disk space available after installation. Mr.
Photo will need this space to work in.
● A CD-ROM drive to load Mr. Photo.
● Super VGA display card.
NOTE:
The Mr. Photo Gold software can only be used with JVC digital video cameras in
conjunction with the JLIP Video Capture software.
Page 18

16 EN
Presto! PhotoAlbum
Presto! PhotoAlbum helps you create electronic photo albums that keep your memories alive forever. Just drag-and-drop photos, frames, clip art, textures, and special
effects. You can also personalize your albums with voice-overs and sound effects,
then produce album slide shows to post to the Internet or send completed albums by
e-mail.
Features
● Scan or import your photos from digital cameras and scanners.
● Auto colour correction for input photos.
● Drag-and-drop easy-editing operation.
● Photo Browser with thumbnail views of photos.
● Share albums with an Internet Browser.
● Library of over 500 pieces of clip art for decoration.
● Sound attachment with albums, pages and photos.
● Independent album playback support.
● Supports popular file formats: TIF, PCX, BMP, TGA, JPG, PCD, WMF, FPX, PNG,
etc.
System Requirements
● An IBM PC 486, Pentium or compatible computer.
● A CD-ROM drive.
● A hard disk drive with at least 50 MB space available to hold and run the pro-
gramme effectively.
● At least 16 MB of RAM (preferably 32 MB).
● MS Windows 95 or Windows NT 4.0.
Recommended System Requirements
● A sound card with a microphone.
● A colour printer.
● A network browser such as Internet Explorer 3.0 or Netscape Navigator 3.0, or
later.
Page 19

EN 17
Presto! ImageFolio
ImageFolio is a comprehensive multimedia image processing programme running
under MS Windows 95 or Windows NT. It enables you to process in detail on your
computer screen scanned images such as photographs, graphics and drawings, as
well as images captured from video devices such as a VCR, a laser disc, a digital
camera, a video capture box, etc.
You can create new images by using the powerful tools included in the software. Its
sophisticated set of image editing tools enables you to quickly sketch an image
canvas in order to create a new image, or to enhance pre-existing ones. With this
software, your imagination is your only limit!
Features
Image Input
● Captures images from flatbed/hand scanner, digital camera, capture box, etc.
● Auto & Semi-auto image stitching for inputting large-sized images.
● Loading/saving images with various popular file formats such as TIF, PCX, BMP,
TGA, JPG, PCD, WMF, PNG, etc.
● New Flash Pix format support.
Image Output
● Print colour-adjustment variations for examining the printing effect before actual
printing.
● OLE 2.0 support for stand-alone editing mode.
● Easy artwork design for home page production and HTML applications.
Image Editing and Processing
● Multiple-layer single document for complicated object organization.
● Drag-and-drop floating images among documents (moving a selected area to new
or other canvases).
● Precise colour selection by setting colour channels or choosing from a palette.
● Complete drawing and painting set of tools to work on images such as line, paint-
brush, airbrush, colour gradation, eraser, zoom, text, eyedropper, free-hand rotate,
hue/saturation brush, brightness/darkness brush, blur/sharpen brush, image hose,
etc.
● Definable image hose tool for quick insertion of image set on canvas.
● Anti-alias feature with all graphic tools to enhance the drawing effect.
● Full selection tools for easy masking of irregularities in objects.
● Creating magic 3D effects with definable light source for selected objects with one
touch.
Page 20

18 EN
● Generating object shadows in selectable light directions with one touch.
● Elegant templates provided for easy applications of daily-life photo usage.
● Image fine-tuning functions to adjust brightness, contrast, hue, saturation, tone
distribution (equalization) and so on.
● Multiple filters to produce special effects such as smooth, sharpen, edge detection,
emboss and mosaic.
● Effect browser providing previews in actual size of image, processed with all the
fine-tuning functions and filters.
● 16- and 32- bit Adobe™ plug-in filter interface support.
System Requirements
The following hardware devices and software are required to run the software:
● An IBM PC 486, Pentium or compatible computer.
● One CD-ROM drive.
● One hard disk drive with at least 60 MB space available to hold and run the
programme effectively.
● At least 8 MB of RAM (preferably 16 MB).
● MS Windows 95 or Windows NT.
To make fully efficient use of the programme, the following additional hardware and
software elements are highly recommended:
● 50 MB or more of virtual memory.
● A colour printer supported by MS Windows 95.
Presto! ImageFolio (cont.)
Page 21

EN 19
Installing Mr. Photo, PhotoAlbum and ImageFolio
Follow the steps below to install Mr. Photo, PhotoAlbum and ImageFolio.
1. Insert the programme CD into your CD-ROM drive.
2. Press the Start button and choose Run.
3. Type [drive]:\NewSoft\setup.exe and choose OK. The installation programme will
automatically detect the language being used in the version of Windows you are
running.
4. Follow the instructions on your screen as they appear.
Page 22

20 EN
TECHNICAL SUPPORT FOR REGISTERED USERS
JVC Support for:
JVC (U.K.) Limited
14 Priestley Way, London
NW2 7BA, United Kingdom
Tel : (0181) 450-3282
Fax : (0181) 452-2534
U.K. & IRELAND
JVC IRELAND
(Branch of JVC(U.K.)Limited)
JVC HOUSE Carriglea Industrial Estate
Naas Road, Dublin 12, Republic of Ireland
Tel : (01)-460-2288 Fax : (01) -456-7522
FRANCE
JVC FRANCE S.A. DIVISION VIDEO
102, boulevard Heloise,
95104 Argenteuil CEDEX, France
Tel : 01.39.96.33.33 Fax : 01.39.47.73.78
DEUTSCHLAND
JVC DEUTSCHLAND GMBH
Postfach 10 05 62, Grüner Weg 12, 61169
Friedberg/Hessen. Deutschland
Tel : (06031) 9390 Fax : (06031) 183 83
NEDERLAND
JVC NEDERLAND B.V.
JVC Plein DE Heyderweg 2,
2314 XZ Leiden, Nederland
Tel : (071) 5453333 Fax : (071) 5894674
BELGIQUE/LUXEMBOURG
JVC BELGIUM S.A.
Rue de la Petite lle 3 -1070 BRUXELLES, Belgique
Tel : (02) 529 42 11 Fax : (02) 520 83 12
BELGIE/LUXEMBURG
JVC BELGIUM N.V.
Klein Eilandstraat 3 - 1070 BRUSSEL, België
Tel : (02) 529 42 11 Fax : (02) 520 83 12
ESPAÑA
JVC ESPAÑA S.A.
Ctra. Gracia Manresa Km. 14' 750 Edificio Can
Castanyer, 08190 Sant Cugat del Vallés, España
Tfno : (93) 565 32 16 Fax : (93) 565 32 18
ITALIA
JVC ITALIA S.p.A.
Via Cassanese 224 Palazzo Tiepolo, 20090
Segrate Milano Oltre, Italia
Tel : (02) 26.99.161 Fax : (02) 26.92.1820
DANMARK
JVC DANMARK A/S
Helgeshøj Alle 30 DK-2630 Taastrup, Danmark
Tel : 43 50 90 00 Fax : 43 50 90 81
ÖSTERREICH
JVC AUSTRIA GMBH
Slamastrasse 43 A-1230, Wien, Austria
Tel : (0222) 610370 Fax : (0222) 6103777
SVERIGE
JVC SVENSKA AB
Veddestavãgen 15, 175 62 Jãrfälla-Stockholm, sweden
Tel : (08) 7950400 Fax : (08) 7950450
NORGE
JVC NORGE A/S
P.O.BOX 2012, Postterminalen 3103 Tonsberg, Norge
Tel : 33 36 52 00 Fax : 33 36 52 99
SUOMI
OY HEDENGREN AB
Mänkimiehentie 2 02780 Espoo, Finland
Tel : 9-68281 Fax : 9-810933
SCHWEIZ/SUISSE/SVIZZERA
SPITZER ELECTRONIC AG
Mühlemattsstrasse 13 4104 Oberwil, Suisse
Tel : 061 405 1111 Fax : 061 402 0434
PORTUGAL
ORIELA, SA
Campo de Santa Clara, 160-A, 1100, Lisboa, Portugal
Tel : 01 888 4731 Fax : 01 886 7871
GREECE
≥ªEπ·‹…£∑…Ω≥Á°√∑π≥ Eªª°fl °.E.
◊ƒ∂¤†∂Í› 62, 183 46 Ω∆fiÁ†‡∆, A¥≤v†, ´ªª°©°
Tel : 01-4832855 Fax : 01-4832557
For other countries, refer to the JVC Worldwide Service Network at http://
www.jvc-victor.co.jp/english/worldmap/index-e.html.
Page 23

EN 21
NewSoft Support for:
North America (U.S.A)
Technical Support Hotline:
Please e-mail: tech@newsoftinc.com or
call (510) 445-8616
www.newsoftinc.com
Europe
UK
The Software Centre, East Way, East Mill
Industrial Estate, Ivybridge, Devon, PL21
9PE, UK
Tel: (44) 1752-201148
Fax: (44) 1752-894833
France
Info Trade Centre d’activités de l’Ourcq
45, rue Delizy 93692 Pantin, France
Tel: (33) 1-4810-7563
Fax: (33) 1-4810-7555
Asia/Pacific (Taiwan, R.O.C.)
9F, NO68, Sec. 3, Nankig E. Rd., Taipei,
Taiwan, R.O.C.
Tel: (886) 2-2517-0750
Fax: (886) 2-2517-0760
support@newsoft.com.tw
www.newsoft.com.tw
NOTICE FOR USERS
Use of this software is authorized according to the terms of the software licence.
When contacting the nearest JVC office or agency in your country about this software
(refer to the JVC Worldwide Service Network at http://www.jvc-victor.co.jp/english/
worldmap/index-e.html), please fill out the following and have the appropriate
information ready.
Product Name
Model
Problem
Error Message
Manufacturer
Model Desktop Laptop
CPU
OS
Memory MB
Available Hard Disk Space MB
Please note that it may take some time to respond to your questions, depending on
their subject matter.
JVC cannot answer questions regarding specifications or performance of provided
NewSoft products, or basic operation of your PC.
PC
Page 24

2 DE
JVC SOFTWARE LIZENZVERTRAG
AN UNSERE KUNDEN:
BITTE LESEN SIE DIESE VEREINBARUNG VOR DEM ÖFFNEN DER VERSIEGELTEN
SOFTWARE-PAKETE SORGFÄLTIG DURCH
Vielen Dank für den Kauf unseres Produkts. Die Verwendung des beigefügten
Softwareprogramms setzt jedoch voraus, daß Sie sich verpflichten, folgende Bedingungen
der Vereinbarung zu akzeptieren.
Software-Lizenzvertrag
Die vorliegende Vereinbarung ist ein rechtsgültiger Vertrag zwischen Ihnen (entweder als
Einzelperson oder als Unternehmen) und der Firma Victor Company of Japan, Limited
(abgekürzt "JVC" genannt). Durch das Öffnen der versiegelten Softwarepakete und/oder die
V erwendung des Programms verpflichten Sie sich gleichzeitig zur Einhaltung der Bedingungen
der Vereinbarung. Falls Sie mit den Bedingungen dieser Vereinbarung nicht einverstanden
sein sollten, bitten wir Sie um die sofortige Rückgabe der ungeöffneten Softwarepakete mitsamt
den beigefügten Zubehörteilen an die Stelle, bei der Sie die Software gekauft haben.
1. ERTEILUNG DER LIZENZ
Aufgrund dieses Lizenzvertrags (der "Vertrag" genannt) sind Sie zur Verwendung des
beigefügten Softwareprogramms und/oder des Begleitmaterials (z.B. Handbücher) berechtigt.
Obwohl Sie ebenfalls die Lizenz erhalten, das Programm in einen temporären Speicher (z.B.
RAM-Speicher) oder nur einmal in den Festspeicher zu laden (z.B. auf die Festplatte, auf CDR oder sonstige Speichermedien) eines (1) Computersystems, ist es Ihnen strikt untersagt,
das Programm auf einen Netzwerk-Server zu installieren, mit dem ausschließlichen Zweck,
das Programm intern zu verteilen.
2. COPYRIGHT
Trotz der Bestimmung laut Artikel 1 dieser Vereinbarung gehört jegliches Copyright an dem
Programm ausschließlich JVC und unterliegt dem Schutz des japanischen Urheberrechts,
sowie ggf. auch den Urheberrechtsbestimmungen anderer Länder . Ferner unterliegt das Copyright den entsprechenden Bestimmungen internationaler Abkommen, einschließlich der
Bestimmungen der Berner Konvention über den Schutz literarischer und künstlerischer Werke,
in der jeweils aktuellen Fassung, und den Bestimmungen der Welt-Urheberrechts-Konvention
in der jeweils gültigen Fassung. Aus diesem Grund müssen Sie dieses Programm wie jedes
andere urheberrechtlich geschützte Material behandeln, ausgenommen, daß Sie entweder
(a) eine (1) Kopie des Programms erstellen können, die ausschließlich für Ihre persönlichen
Backup- und Archivierungszwecke bestimmt ist, oder (b) daß Sie das Programm auf eine
einzelne Festplatte kopieren können, vorausgesetzt, daß Sie das Originalprogramm
ausschließlich für Ihre persönlichen Backup- und Archivierungszwecke aufbewahren.
3. PROGRAMM-BESCHRÄNKUNGEN
Sie dürfen das Programm weder umkehren, noch technisch bearbeiten, entkompilieren, in
Einzelkomponenten zerlegen oder ändern, ausgenommen soweit diese Beschränkung laut
geltendem Gesetz ausdrücklich untersagt ist. JVC und seine Distributoren und V ertragshändler
haften nicht für etwaige Forderungen oder Mängel, etc., die aufgrund oder im Zusammenhang
mit solchen unzulässigen Aktivitäten entstehen (können), wie in vorliegender Vereinbarung
angegeben.
WICHTIG
Page 25

DE 3
4. SONSTIGE BESCHRÄNKUNGEN
Sie dürfen das Programm nicht an Dritte ausleihen, vermieten oder übertragen, noch dürfen
Sie die Verwendung des Programms durch Dritte zulassen.
5. BESCHRÄNKTE GEWÄHRLEISTUNG
Seitens der JVC wird garantiert, daß sämtliche Datenträger, die das Programm enthalten
(z.B. Floppy-Diskette, CD-ROM usw.) in bezug auf Material und Ausführung mängelfrei sind.
Diese Garantie gilt für die Dauer von dreißig (30) Tagen ab Kaufdatum. Ferner wird seitens
der JVC garantiert, daß die Begleit-Hardware des Programms ebenso mängelfrei ist, soweit
dies in der beigefügten Gewährleistungserklärung festgelegt ist. Die gesamte Haftung der
JVC und ihr einziges Rechtsmittel im Zusammenhang mit dem Programm besteht nach
Ermessen der JVC darin, daß Sie entweder (a) den gezahlten Kaufpreis zurückerstattet
bekommen, oder daß Ihnen (b) die fehlerhaften Programmedien ersetzt werden.
6. VERZICHT AUF GEWÄHRLEISTUNG
MIT AUSNAHME DER IN DIESER VEREINBAHRNG AUSDRÜCKLICH GENANNTEN
GARANTIEN UND SOWEIT DIES NACH GELTENDEM GESETZ ZULÄSSIG IST,
VERZICHTEN JVC UND DESSEN LIEFERANTEN AUF ETW AIGE SONSTIGE GARANTIEN
- UND ZW AR ENTWEDER AUSDRÜCKLICHE ODER STILLSCHWEIGENDE GARANTIEN EINSCHLIESSLICH U.A. STILLSCHWEIGENDE GARANTIEN IN BEZUNG AUF
HANDELSÜBLICHE QUALITÄT UND EIGNUNG FÜR EINEN BESTIMMTEN
VERWENDUNGSZWECK BEZÜGLICH DES PROGRAMMS UND DES GEDRUCKTEN
BEGLEITMATERIALS.
7. BESCHRÄNKTE HAFTUNG
SOWEIT DIES NACH GEL TENDEM GESETZ ZULÄSSIG IST, HAFTEN WEDER JVC NOCH
DESSEN LIEFERANTEN FÜR ETWAIGE INDIREKTE SCHÄDEN, NOCH FÜR SCHÄDEN
IN FORM VON HANDELSÜBLICHEN NEBENKOSTEN ODER FOLGESCHÄDEN WELCHER
ART AUCH IMMER, UND ZWAR UNABHÄNGIG VON DER ART DES VERFAHRENS, OB
AUFGRUND DER VERTRAGLICHEN HAFTUNG WEGEN UNERLAUBTER HANDLUNG,
STRIKTER PRODUKTHAFTUNG ODER AUS SONSTIGEN GRÜNDEN (EINSCHLIESSLICH
U.A. SCHÄDEN AUFGRUND VON ENTGANGENEM GEWINN, BETRIEBSUNTERBRECHUNGEN, VERLUST VON GESCHÄFTLICHEN INFORMATIONEN ODER SONSTIGE
FINANZIELLE VERLUSTE BZW. SCHÄDEN), FALLS SOLCHE SCHÄDEN AUFGRUND
ODER IM ZUSAMMENHANG MIT DER VERWENDUNG DES PROGRAMMS ODER WEGEN
DER NICHTVERWENDBARKEIT DES PROGRAMMS ENTSTEHEN, UND ZWAR AUCH
DANN, WENN JVC ÜBER DIE MÖGLICHKEIT SOLCHER SCHÄDEN INFORMIERT WURDE.
Victor Company of Japan, Limited
Page 26
4 DE
INHALT
ACHTUNG:
● Für alle Bedienschritte gelten die in dieser Anleitung enthaltenen Anweisungen.
● Ausschließlich die mitgelieferte CD-ROM verwenden. Niemals eine andere CD-ROM
verwenden, um diese Software zu nutzen.
● Diese Software darf nicht modifiziert werden.
● Änderungen oder Modifikationen ohne ausdrückliche Genehmigung von JVC können den
Entzug der Berechtigung zum Betreiben dieser Software zur Folge haben.
CD-ROM-Handhabung
● Die Signalseite (unbedruckt) stets frei von Verunreinigungen und Kratzern halten. Die
CD-ROM niemals beschriften oder bekleben! Verunreinigungen mit einem weichen Tuch
entfernen. Hierbei gerade von der CD-ROM-Mitte zur Kante wischen.
● Niemals herkömmliche Schallplattenreiniger oder Reinigungssprays verwenden.
● Die CD-ROM niemals biegen und niemals die Signalseite berühren.
● Die CD-ROM niemals an Orten aufbewahren, die Staub, extremem Temperaturen, hoher
Luftfeuchtigkeit oder direkter Sonneneinstrahlung ausgesetzt sind.
WESENTLICHE BESONDERHEITEN 5 – 6
VORBEREITENDE SCHRITTE 7
Mitgeliefertes Zubehör ...........................................................
7
Anschließbare Geräte.............................................................
7
Systemerfordernisse..............................................................
7
INSTALLATION 8 – 9
JLIP Video Capture................................................................
8
JLIP Video Producer ..............................................................
8
Adobe® Acrobat® Reader 3.0 ...................................................
8
Mr. Photo Gold ....................................................................
9
ANSCHLÜSSE 10 – 11
Presto! Mr. Photo Gold 13 – 19
TECHNISCHE UNTERSTÜTZUNG FÜR REGISTRIERTE
BENUTZER 20 – 21
BENUTZERHINWEIS 21
HINWEIS:
Auf der CD-ROM ist eine Bedienungsanleitung für die JLIP Video Capture/Producer-Software
im PDF-Format enthalten. Zum Öffnen das Icon der Datei (in der gewünschten Sprache)
doppelklicken. Zur Darstellung von PDF-Dateien muß Adobe
®
Acrobat® installiert sein.
q Die Datei Readme.TXT liefert zusätzliche Installationsangaben und weitere Informationen,
die nicht in dieser Anleitung enthalten sind. Bitte lesen Sie diese Text-Datei durch, bevor Sie
die mitgelieferte Software installieren.
q Sie finden zudem aktuelle Informationen (in englischer Sprache) im Internet unter dieser
world wide web-Adresse vor: http://www.jvc-victor.co.jp.
Page 27
DE 5
WESENTLICHE BESONDERHEITEN
Sie haben zwei Software-Programme zur Verfügung.
JLIP Video Capture-Software
Video-Capture-Modus
Videobilder von einem Camcorder können
als Capture-Bild in 16,77 Millionen Farben in
einem PC mit WindowsT-Betriebssystem über
die serielle Schnittstelle (RS-232C)
abgespeichert werden.
JLIP-Steuerprotokoll
Wenn Ihr Camcorder, JLIP-kompatibel ist:
• Sie können alle grundsätzlichen
Videofunktionen per PC-Bedienfeld
steuern.
• Bis zu 99 Bilder können mit der
programmierten Capture-Funktion
abgespeichert werden (Bandwiedergabe
— Bildabtastung — Bildübertragung zum
PC).
JLIP Video Producer-Software
JLIP-Steuerprotokoll
Wenn Ihr Camcorder, JLIP-kompatibel ist:
• Sie können alle grundsätzlichen
Videofunktionen per PC-BildschirmBedienfeld steuern.
• Bis zu 99 Szenen können zur Abspielung
oder für den Assemble-Schnitt ausgeführt
werden.
Assemble-Schnitt
Vorgewählte Szenen eines Videobandes
können in vorprogrammierter Reihenfolge
geschnitten werden.
Bespieltes Videoband
(Camcorder)
Neue Reihenfolge nach Schnittaufnahme
(Videorecorder)
Page 28
6 DE
WESENTLICHE BESONDERHEITEN (Forts.)
Anwendung bei Präsentationen
Capture-Bilder vom Videoband können
Arbeits- und Präsentationsunterlagen
beigefügt werden.
Bilder für Ihre Internet Homepage
Capture-Bilder vom Videoband können Sie
nun zur Homepage-Gestaltung einbeziehen
(mit geeigneter PC-Bildbearbeitungs-Software).
Erweiterte Anwendungsmöglichkeiten
Legen Sie einen Bild-Index für Ihre
Videocassetten an
Bei einem Videoband können. Bilder im
Capture-Intervall-Modus abgespeichert
werden. Diese Bilder können Sie dann mit
Ihrem PC-Drucker ausdrucken und auf dem
Cassettenetikett aufkleben.
Bilder für individuelle Postkarten oder
ein Video-Journal
Mit Capture-Bildern vom Videoband lassen
sich auch originelle Ideen wie Postkarten,
Einladungskarten oder ein Video-Journal
verwirklichen.
Page 29
DE 7
VORBEREITENDE SCHRITTE
Anschließbare Geräte
q JVC Digital-Camcorder: GR-DVL20, GR-DVL-30, GR-DVL40
Systemerfordernisse
q PC mit Betriebssystem Microsoft® Windows® 95/Windows® 98
q Prozessor: Intel® Pentium® oder besser
q Erforderlicher Arbeitsspeicher: Mind. 32 MB
q Erforderlicher freier Festplattenspeicher: Mind. 10 MB für JVC Software
140 MB (empfohlen) für Presto! Mr. Photo Gold
(Sie können die zu installierenden Mr. Photo Gold-Programme auswählen.)
q Erforderliche Farbbildauflösung: Mind. 640 x 480 Bildpunkte, 256 Farben
1024 x 768 Bildpunkte, 16,77 mio. Farben (empfohlen)
q Ein unbelegter serieller Anschluß (9600 bps oder höhere
Übertragungsgeschwindigkeit), der Anschluß an RS-232C-Schnittstelle mit
seriellem 9-pol. Steckverbinder (UART 16550A-kompatibel) wird empfohlen
q Maus (Windows®-kompatibel)
q CD-ROM-Laufwerk
Hinweis
Ist der am verwendeten PC vorhandene serielle COM-Port keine Standard-9-pol.Ausführung, wird ein serieller 9-pol.-Adapter (nicht mitgeliefert) erforderlich.
* Auch wenn Computer den Angaben der oben abgedruckten Systemerfordernisse
entsprechen, kann die Eignung der mitgelieferten Software für alle Computer nicht
garantiert werden.
* Microsoft® und Windows® sind eingetragene Warenzeichen oder Warenzeichen der
Microsoft Corporation in den Vereinigten Staaten und/oder weiteren Ländern.
* ist ein eingetragenes Warenzeichen von JVC.
JLIP ist die Abkürzung für Joint Level Interface Protocol, einem neuen
Datenübertragungs-protokoll, das die Anbindung von einem mit J-Anschluß
ausgestatteten Videogerät an einen PC und PC-gesteuerten Betrieb ermöglicht.
* Weitere in dieser Anleitung angeführte Produkt- und Firmennamen sind
Warenzeichen und/oder eingetragene Warenzeichen der Warenzeichen-inhaber.
CD-ROM:
•JLIP Video Capture
•JLIP Video Producer
•Presto! Mr. Photo Gold
•
Mr. Photo
•
PhotoAlbum
•
ImageFolio
PC-Anschlußkabel
Mitgeliefertes Zubehör
Editierkabel (4polig – 2polig)
Page 30

8 DE
INSTALLATION
INSTALLATION
Angaben zu den grundsätzlichen Bedienschritten für das Betriebssystem Windows® 95/98
entnehmen Sie bitte der zum Windows
®
95/98-Betriebsprogramm oder zum PC mitgelieferten
Bedienungsanleitung.
Installieren der JLIP Video Capture-Software
1. Starten Sie Windows®.
• Schließen Sie alle anderen Anwendungsprogramme.
Stellen Sie sicher, daß auf der Task-Leiste keine Icons anderer Anwendungsprogramme
gezeigt werden.
2. Legen Sie die CD-ROM in das CD-ROM-Laufwerk ein.
Klicken Sie auf der Task-Leiste zunächst Start und hierauf Ausführen an.
3. Klicken Sie Durchsuchen und dann bei Suchen in das CD ROM-Icon an.
4. Doppelklicken Sie den Ordner JVC.
5. Doppelklicken Sie den Ordner Jcpt.
6. Doppelklicken Sie das Icon Setup.Exe.
7. Klicken Sie OK an.
Das Setup-Programm wird geladen. Befolgen Sie die auf dem Bildschirm erscheinenden
Anweisungen.
Installieren der JLIP Video Producer-Software
1. Starten Sie Windows®.
• Schließen Sie alle anderen Anwendungsprogramme.
Stellen Sie sicher, daß auf der Task-Leiste keine Icons anderer Anwendungsprogramme
gezeigt werden.
2. Legen Sie die CD-ROM in das CD-ROM-Laufwerk ein.
Klicken Sie auf der Task-Leiste zunächst Start und hierauf Ausführen an.
3. Klicken Sie Durchsuchen und dann bei Suchen in das CD ROM-Icon an.
4. Doppelklicken Sie den Ordner JVC.
5. Doppelklicken Sie den Ordner Vdpro.
6. Doppelklicken Sie das Icon Setup.Exe.
7. Klicken Sie OK an.
Das Setup-Programm wird geladen. Befolgen Sie die auf dem Bildschirm erscheinenden
Anweisungen.
Installieren der Adobe® Acrobat® Reader (Version 3.0)-Software
1. Starten Sie Windows®.
• Schließen Sie alle anderen Anwendungsprogramme.
Stellen Sie sicher, daß auf der Task-Leiste keine Icons anderer Anwendungsprogramme
gezeigt werden.
2. Legen Sie die CD-ROM in das CD-ROM-Laufwerk ein.
Klicken Sie auf der Task-Leiste zunächst Start und hierauf Ausführen an.
3. Klicken Sie Durchsuchen und dann bei Suchen in das CD ROM-Icon an.
4. Doppelklicken Sie den Ordner Reader.
5. Doppelklicken Sie das Icon Setup.Exe.
6. Klicken Sie OK an.
Das Setup-Programm wird geladen. Befolgen Sie die auf dem Bildschirm erscheinenden
Anweisungen.
HINWEISE:
• Schließen Sie alle anderen Anwendungsprogramme.
• Schließen Sie alle Hintergrund-Programme (wie Bildschirmschoner, E-Mail- und
Kommunikations-Software, Virenschutzprogramme, Kalenderprogramme etc.).
• Deaktivieren Sie File Sharing und Printer Sharing.
Page 31

DE 9
INSTALLATION
Angaben zu den grundsätzlichen Bedienschritten für das Betriebssystem Windows® 95/98
entnehmen Sie bitte der zum Windows
®
95/98-Betriebsprogramm oder zum PC mitgelieferten
Beidenungsanleitung.
NewSoft Presto! Mr. Photo/PhotoAlbum/ImageFolio
1. Starten Sie Windows®.
• Schließen Sie alle anderen Anwendungsprogramme.
Stellen Sie sicher, daß auf der Task-Leiste keine Icons anderer Anwendungsprogramme
gezeigt werden.
2. Legen Sie die CD-ROM in das CD-ROM-Laufwerk ein.
Klicken Sie Start (auf der Task-Leiste) — Einstellungen — Systemsteuerung an.
3. Doppelklicken Sie Software.
Klicken Sie Installieren — Weiter — CD-ROM (Icon) in Spalte Durchsuchen an.
4. Doppelklicken Sie den Ordner NewSoft.
5. Doppelklicken Sie Setup.exe.
6. Klicken Sie Fertigstellen an.
• Wenn das Installationsprogramm läuft, gehen Sie einfach entsprechend den Bildschirm-
Anweisungen vor.
7. Klicken Sie Installieren im Fenster Sprachwahl an.
• Das Installationsprogramm erkennt automatisch die Sprache des installierten Windows®-
Betriebssystems.
8. Klicken Sie Weiter im Fenster Komponenten wählen an.
• Klicken Sie jeweils die Kontrollbox der Software an, die nicht installiert werden soll.
Das Setup-Programm wird geladen. Befolgen Sie die auf dem Bildschirm erscheinenden
Anweisungen.
SO STARTEN SIE DIE JLIP Video Capture/Producer-Software
UND Presto! Mr. Photo/PhotoAlbum/ImageFolio
1. Öffnen Sie Windows®.
2. Klicken Sie Start auf der Task-Leiste an.
• Das Programm-Menü wird aufgerufen.
3. Klicken Sie den Programmbereich, der geöffnet werden soll, an, um das Programm zu öffnen.
• Das in Schritt 3 gewählte Programm wird geöffnet.
SO SCHLIESSEN SIE DIE SOFTWARE
Klicken Sie auf das Schließfeld oder klicken Sie File — Exit an.
Page 32

10 DE
ANSCHLÜSSE
n Aus Sicherheitsgründen vor der Anschlußherstellung sicherstellen, daß alle Geräte
ausgeschaltet sind.
n Wir empfehlen, zur Camcorder-Stromversorgung den Netzadapter/Batterielader zu verwenden.
n Bei Verwendung eines mit einem Kabelfilter versehenen Anschlußkabels stets das Kabelfilter-
Kabelende am Camcorder anschließen.
n Die Buchse DV OUT des Camcorders darf nicht belegt sein!
BEI ANSCHLUSS AN EINEN VIDEORECORDER MIT JLIP-BUCHSE
JLIP-Kabel
An JLIP-Buchse
Bei Verwendung der JLIP Video Capture-Software:
An PC-Buchse
An COM-Port
(RS-232C)
PC-Anschlußkabel (mitgeliefert)
An JLIP-Buchse
Camcorder
Bei Verwendung der JLIP Video
Producer-Software:
An S OUT-Buchse
S-VIDEO-Kabel
An S-VIDEOEingang
PC
Videorecorder
(Aufnahmegerät)
HINWEIS:
Das JLIP-Kabel ist als Sonderzubehör erhältlich. Ausschließlich die folgende Kabelausführung
verwenden:
•JLIP-Kabel: PEAC0453
Informationen zur Erhältlichkeit dieses Kabels erhalten Sie bei Ihrem JVC Kundendienst
Center (siehe Seite 20).
Verwenden, wenn der
Videorecorder einen SVIDEO-Eingang besitzt.
HINWEIS:
JLIP-Kabelanschluß nur für JVC
Videorecorder mit JLIP-Buchse.
Weiß an
AUDIO L
Rot an
AUDIO R
Gelb an
VIDEO
AV-Kabel
Gelb an
VIDEO
Rot an
AUDIO
R
Weiß an
AUDIO
L
Kabelfilter
Bringen Sie den bei der Videokamera
mitgelieferten Kabelfilter an; beziehen Sie
sich hierzu auf dessen Anleitung.
Wenn Ihr Videorecorder
eine SCART-Buchse
besitzt, den Kabeladapter
verwenden.
Page 33

DE 11
TW
BEI ANSCHLUSS AN EINEN VIDEORECORDER OHNE JLIPBUCHSE
Wenn der verwendete Videorecorder keine JLIP-Buchse besitzt, an der Fernbedieneinheit den
Videorecorder-Herstellercode eingeben. Hierauf kann die Fernbedieneinheit zur
Schnittsteuerung eingesetzt werden.
Editierkabel
(4polig – 2polig)
(mitgeliefert)
Bei Verwendung der JLIP Video Capture-Software:
An PC-Buchse
An COM-Port
(RS-232C)
PC-Anschlußkabel (mitgeliefert)
An JLIP-Buchse
Camcorder
Bei Verwendung der JLIP Video
Producer-Software:
An S OUT-Buchse
S-VIDEO-Kabel
An S-VIDEOEingang
PC
Videorecorder
(Aufnahmegerät)
Verwenden, wenn der
Videorecorder einen SVIDEO-Eingang besitzt.
Weiß an
AUDIO L
Rot an
AUDIO R
Gelb an
VIDEO
AV-Kabel
Gelb an
VIDEO
Rot an
AUDIO
R
Weiß an
AUDIO
L
Hier anschließen,
wenn der
Aufnahmerecorder
keinen FernbedienPause-Eingang besitzt.
An
PauseEingang
Fernbedieneinheit
Verwenden Sie den Stecker, der am Stift
mit drei gelben Ringen versehen ist.
Verwenden Sie
den Stecker,
der am Stift mit
einem
schwarzen Ring
versehen ist.
Kabelfilter
Wenn Ihr Videorecorder
eine SCART-Buchse
besitzt, den Kabeladapter
verwenden.
Page 34

12 DE
MEMO
Page 35

DE 13
Mr. Photo Gold:
Presto! Mr. Photo
Presto! PhotoAlbum
Presto! ImageFolio
Für Windows
Copyright © 1997-1998, NewSoft Technology Corp. Alle Rechte vorbehalten.
* Bezüglich Kundendienst wenden Sie sich bitte an Ihr NewSoft Service Center.
(Siehe nächste Seite)
Page 36

14 DE
Kundendienst
NewSoft International Service Center:
U.S.A: 4113 Clipper Court, Fremont, CA 94538, USA
Tel: (1) 510-445-8600 Fax: (1) 510-445-8601
Technical Support Hot Line: (1) 510-445-8616
E-mail: tech@newsoftinc.com
http://www.newsoftinc.com
Taiwan: 9F, No. 68, Sec. 3, Nan-king E. Rd., Taipei, Taiwan, R.O.C.
Tel: (886) 2-2517-0750 Fax: (886) 2-2517-0760
Technical Support Hot Line: (886) 2-2517-0952
E-mail: support@newsoft.com.tw
http://www.newsoft.com.tw
Japan: 6-21-3 Shinbashi Minato-Ku, Tokyo 105-0004 Japan
Tel: (81) 3-5472-7008 Fax: (81) 3-5472-7009
E-mail: support@newsoft.co.jp
http://www.newsoft.co.jp
U.K.: The Software Centre, East Way,
East Mill Industrial Estate, Ivybridge
Devon, PL21 9PE, United Kingdom
Tel: (44) 01752-201148 Fax: (44) 01752-8948333
France: Info Trade Centre
d’activités de I’Ourcq 45,
rue Delizy 93692 Pantin France
Tel: (33) 1-4810-7563 Fax: (33) 1-4810-7555
E-mail: infotrad@club-internet.fr
* ( ): Landesvorwahl-Nummer
Page 37

DE 15
Presto! Mr. Photo
Mr. Photo speichert und katalogisiert alle Ihre wertvollen Fotos. Sie können Fotos und
Filme nach Datum und Titel sortieren oder nach Schlüsselwort, Datum und anderen
Bildeigenschaften suchen. Ziehen Sie danach die Fotos, und legen Sie sie auf der
Anwendungsleiste ab, um mit einsatzfertigen Vorlagen fotografische Meisterwerke zu
erstellen oder elektronische Photoalben zu entwerfen. Klicken Sie auf das Icon “DiaShow”, um alle in einem Film ausgewählten Fotos anzusehen, oder ziehen Sie ein
Foto, und legen Sie es auf dem E-Mail-Icon ab, um es an Familienangehörige oder
Freunde zu senden.
Funktionen
● Übertragen Sie Fotos von Digitalkameras, Scannern, Disketten, Foto-CDs und aus
dem Internet.
● Katalogisieren Sie Fotos in Filmen, die sich anpassen und neu anordnen lassen.
● Korrigieren Sie Fotos sofort (Rote-Augen-Effekt entfernen, Helligkeit/Kontrast
anpassen, Weichzeichnen/Schärfen).
● Übertragen Sie Fotos durch Ziehen und Ablegen zum Drucken, zum E-Mail-
Programm, zur Erstellung einer HTML-Dia-Show oder zum Senden im Internet.
● Ziehen Sie Ihre Fotos, und legen Sie sie in anderen Anwendungen zur
Weiterbearbeitung oder fur kreative Projekte ab.
● Speichern Sie Fotos als Bildschirmschoner oder Hintergrundbild.
● Drucken Sie Notizen, Etiketten und Fotokataloge.
Systemvoraussetzungen
● Digitale Kamera und Digitalkamera-Software.
● Scanner, wenn Sie Fotos scannen möchten.
● PC mit mindestens 486er Mikroprozessor (empfohlen wird ein Pentium-Prozessor)
und 16 MB RAM.
● Empfohlen werden mindestens 30 MB verfügbare Festplattenkapazität nach der
Installation. Mr. Photo benötigt diesen Platz zum Arbeiten.
● CD-ROM-Laufwerk zum Laden von Mr. Photo.
● Super-VGA-Grafikkarte.
HINWEIS:
Die Mr. Photo Gold-Software kann nur mit Digital-Videokameras von JVC in
Verbindung mit der JLIP Video Capture-Software verwendet werden.
Page 38

16 DE
Presto! PhotoAlbum
PhotoAlbum hilft Ihnen bei der Erstellung eines Fotoalbums, durch das Ihre
Erinnerungen immer lebendig bleiben. Ziehen Sie einfach Fotos, Rahmen, Clip-Art,
Strukturen und Spezialeffekt, legen Sie sie ab, und fügen Sie Sprache und Klangeffekte
hinzu. Sie können auch Ihren Alben durch Sprache und Klangeffekte ein persönliches
Flair verleihen, anschließend Album-Dia-Shows erstellen und im Internet ablegen
oder die vollständigen Alben als E-Mail senden.
Funktionen
● Übertragen Sie Fotos von Digitalkameras und Scannern.
● Automatische Farbkorrektur für übertragene Fotos.
● Einfaches Editieren im Drag & Drop-Modus.
● Foto-Browser mit Foto-Minibildern.
● Verwenden Sie Alben für einen Internet-Browser.
● Mehr als 500 Clip-Art-Vorlagen zur dekorativen Bildgestaltung.
● Klangeffekte für Alben, Seiten oder Fotos.
● Unterstützt eigenständige Albums-Wiedergabe.
● Unterstützt die wichtigsten Bildformate: TIF, PCX, Bitmap, TGA, JPG, PCD, WMF,
FPX, PNG etc.
Systemvoraussetzungen
● IBM PC 486, Pentium oder ein kompatibler Computer
● CD-ROM-Laufwerk
● Festplatte mit mindestens 50 MB freiem Speicherplatz für reibungslose
Speicherung und Ausführung des Programms
● Mindestens 16 MB RAM (32 MB empfohlen)
● MS Windows 95 oder Windows NT 4.0
Empfohlene Systemvoraussetzungen
● Sound-Karte mit Mikrofon
● Farbdrucker
● Web-Browser, z. B. Internet Explorer 3.0 oder Netscape Navigator 3.0 oder höher
Page 39

DE 17
Presto! ImageFolio
ImageFolio ist ein umfassendes multimediales Bildbearbeitungsprogramm, das unter
MS Windows 95 bzw. Windows NT ausgeführt wird. Mit diesem Programm können
Sie gescannte Bilder, z. B. Fotografien, Grafiken und Zeichnungen, aber auch Bilder,
die mit Videogeräten aufgenommen wurden, z. B. einem Videorecorder, einer Laser
Disk, einer digitalen Kamera etc., auf Ihrem Bildschirm bearbeiten.
Erstellen Sie neue Bilder mit den leistungsstarken Werkzeugen dieser Software. Oder
skizzieren Sie mit den ausgereiften Bildbearbeitungswerkzeugen ein Bild schnell auf
Leinwand, um so ein neues Bild zu erstellen oder um bereits bestehende zu
verbessern. Die einzige Einschränkung bei dieser Software ist Ihre Phantasie!
Funktionen
Bildeingabe
● Aufnehmen von Bildern mit Hand-Scannern, digitalen Kameras u. a.
● Automatisches und halbautomatisches Zusammenfügen von Bildern, damit auch
große Bilder eingelesen werden konnen.
● Laden/Speichern von Bildern unterschiedlicher Dateiformate, z. B. TIF, PCX, BMP,
TGA, JPG, PCD, WMF, PNG etc.
● Unterstützung für das Format New Flash Pix
Bildausgabe
● Verschiedene Druckfarbeneinstellungen zum Überprüfen des Druckeffekts vor dem
tatsächlichen Druck
● OLE 2.0-Unterstützung für den eigenständigen Bearbeitungsmodus
● Einfache Grafikbearbeitung für die Erstellung von Homepages sowie für HTML-
Anwendungen
Bildbearbeitung
● Dokument mit mehreren Ebenen für komplizierte Objektorganisation
● Frei bewegliche Drag & Drop-Bilder in Dokumenten (Verschieben eines
ausgewählten Bereichs in eine neue oder andere Leinwand)
● Exakte Farben durch die Auswahl von Farbkanälen oder Paletten
● Kompletter Zeichen- und Mal-Werkzeugsatz mit Werkzeugen wie Linie, Farbeimer,
Farbverlauf, Radiergummi, Zoom, Text, Pipette, Freihandrotation, Farbton/
Sättigung, Helligkeit/Kontrast, Pinsel zum Weich-/Scharfzeichnen, Bildschlauch
etc.
● Benutzerdefinierter Bildschlauch zum schnellen Einfügen von Bildern auf
Leinwand
● Anti-Alias-Funktion bei sämtlichen Grafikwerkzeugen zur Verbesserung des
Zeicheneffekts
● Komplette Auswahlwerkzeuge zum Verbergen von Unregelmäßigkeiten in
Objekten
Page 40

18 DE
● Erstellen von 3D-Effekten mit benutzerdefinierten Lichtquellen für ausgewählte
Objekte mit nur einem Handgriff
● Erstellen von Objektschatten über einen festgelegten Lichteinfall mit nur einem
Handgriff
● Ansprechende Vorlagen für einfache Foto-Anwendungen
● Funktionen zur Bildfeineinstellung, wie Helligkeit, Kontrast, Farbton, Sättigung,
Farbverlauf etc.
● Mehrere Filter für Spezialeffekte, z. B. Weichzeichnen, Scharfzeichnen, Prägen
und Mosaik
● Effekt-Browser mit Originalgrößenansicht von Bildern, die mit sämtlichen
Feineinstellungsfunktionen und Filtern bearbeitet wurden
● Schnittstellenunterstützung für 16- und 32-Bit Adobe™ Plug-In-Filter
Systemanforderungen
Die folgenden Hardware- und Software-Voraussetzungen müssen erfüllt sein, um die
Software auszuführen:
● Ein IBM PC 486, Pentium oder kompatibler Rechner
● Ein CD-ROM-Laufwerk
● Eine Festplatte mit mindestens 60 MB freiem Festplattenspeicher, damit das
Programm ordnungsgemäß installiert und ausgeführt werden kann
● Mindestens 8 MB RAM (vorzugsweise 16 MB)
● MS Windows 95 oder Windows NT
Um die Funktionen des Programms voll ausschöpfen zu können, werden die
folgenden zusätzlichen Hardware- und Software-Komponenten empfohlen:
● 50 MB oder mehr virtueller Speicher
● Ein von MS Windows 95 unterstützter Farbdrucker
Presto! ImageFolio (Forts.)
Page 41

DE 19
Mr. Photo, PhotoAlbum, und ImageFolio installieren
Befolgen Sie die unten aufgeführten Schritte, um Mr. Photo, PhotoAlbum, und
ImageFolio zu installieren.
1. Legen Sie die Programm-CD in das CD-ROM-Laufwerk ein.
2. Klicken Sie auf die Schaltfläche Start, und wählen Sie die Option Ausführen.
3. Geben Sie folgendes ein: [Laufwerk]:\NewSoft\setup.exe, und klicken Sie
anschließend auf OK. Das Installationsprogramm stellt automatisch die Sprache
der auf Ihrem Rechner installierten Windows-Version fest.
4. Befolgen Sie der Reihe nach die Anweisungen am Bildschirm.
Page 42

20 DE
TECHNISCHE UNTERSTÜTZUNG FÜR REGISTRIERTE BENUTZER
JVC-Unterstützung für:
Für andere Länder sind Informationen über das weltweite JVC-Kundendienstnetz
im Internet unter der Adresse http://www.jvc-victor.co.jp/english/worldmap/
index-e.html erhältlich.
PORTUGAL
ORIELA, SA
Campo de Santa Clara, 160-A, 1100, Lisboa, Portugal
Tel : 01 888 4731 Fax : 01 886 7871
GREECE
≥ªEπ·‹…£∑…Ω≥Á°√∑π≥ Eªª°fl °.E.
◊ƒ∂¤†∂Í› 62, 183 46 Ω∆fiÁ†‡∆, A¥≤v†, ´ªª°©°
Tel : 01-4832855 Fax : 01-4832557
SUOMI
OY HEDENGREN AB
Mänkimiehentie 2 02780 Espoo, Finland
Tel : 9-68281 Fax : 9-810933
SCHWEIZ/SUISSE/SVIZZERA
SPITZER ELECTRONIC AG
Mühlemattsstrasse 13 4104 Oberwil, Suisse
Tel : 061 405 1111 Fax : 061 402 0434
SVERIGE
JVC SVENSKA AB
Veddestavãgen 15, 175 62 Jãrfälla-Stockholm, sweden
Tel : (08) 7950400 Fax : (08) 7950450
NORGE
JVC NORGE A/S
P.O.BOX 2012, Postterminalen 3103 Tonsberg, Norge
Tel : 33 36 52 00 Fax : 33 36 52 99
DANMARK
JVC DANMARK A/S
Helgeshøj Alle 30 DK-2630 Taastrup, Danmark
Tel : 43 50 90 00 Fax : 43 50 90 81
ÖSTERREICH
JVC AUSTRIA GMBH
Slamastrasse 43 A-1230, Wien, Austria
Tel : (0222) 610370 Fax : (0222) 6103777
ESPAÑA
JVC ESPAÑA S.A.
Ctra. Gracia Manresa Km. 14' 750 Edificio Can
Castanyer, 08190 Sant Cugat del Vallés, España
Tfno : (93) 565 32 16 Fax : (93) 565 32 18
ITALIA
JVC ITALIA S.p.A.
Via Cassanese 224 Palazzo Tiepolo, 20090
Segrate Milano Oltre, Italia
Tel : (02) 26.99.161 Fax : (02) 26.92.1820
BELGIQUE/LUXEMBOURG
JVC BELGIUM S.A.
Rue de la Petite lle 3 -1070 BRUXELLES, Belgique
Tel : (02) 529 42 11 Fax : (02) 520 83 12
BELGIE/LUXEMBURG
JVC BELGIUM N.V.
Klein Eilandstraat 3 - 1070 BRUSSEL, België
Tel : (02) 529 42 11 Fax : (02) 520 83 12
DEUTSCHLAND
JVC DEUTSCHLAND GMBH
Postfach 10 05 62, Grüner Weg 12, 61169
Friedberg/Hessen. Deutschland
Tel : (06031) 9390 Fax : (06031) 183 83
NEDERLAND
JVC NEDERLAND B.V.
JVC Plein DE Heyderweg 2,
2314 XZ Leiden, Nederland
Tel : (071) 5453333 Fax : (071) 5894674
FRANCE
JVC FRANCE S.A. DIVISION VIDEO
102, boulevard Heloise,
95104 Argenteuil CEDEX, France
Tel : 01.39.96.33.33 Fax : 01.39.47.73.78
JVC (U.K.) Limited
14 Priestley Way, London
NW2 7BA, United Kingdom
Tel : (0181) 450-3282
Fax : (0181) 452-2534
U.K. & IRELAND
JVC IRELAND
(Branch of JVC(U.K.)Limited)
JVC HOUSE Carriglea Industrial Estate
Naas Road, Dublin 12, Republic of Ireland
Tel : (01)-460-2288 Fax : (01) -456-7522
Page 43

DE 21
Produktbezeichnung
Modell
Problem
Fehlermeldung
Hersteller
Modell Desktop Laptop
Prozessor
Betriebssystem
Arbeitsspeicher MB
Festplattenspeicher MB
Sie sind berechtigt, diese Software in Übereinstimmung mit der Software-Lizenz zu
verwenden.
Falls Sie Fragen zu dieser Software haben und die JVC Niederlassung oder den JVC
Service in Ihrem Land kontaktieren (siehe JVC Worldwide Service Network unter
http://www.jvc-victor.co.jp/english/worldmap/index-e.html), sollten Sie zunächst die
folgende Liste ausfüllen und bereithalten.
Computer
Bitte berücksichtigen Sie, daß sich zur Beantwortung Ihrer Anfrage – je nach
Gegenstand und Umfang Ihrer Anfrage – Wartezeiten nicht vermeiden lassen.
JVC kann Ihnen Fragen zu den Kenn- und Leistungsdaten der mitgelieferten
NewSoft-Produkte oder zur grundsätzlichen Funktionsweise Ihres Computers nicht
beantworten.
NewSoft-Unterstützung für:
Nordamerika (U.S.A.)
Hot-line für technische Unterstützung:
Wenden Sie sich bitte per e-mail an
tech@newsoftinc.com oder rufen
Sie (510) 445-8616
www.newsoftinc.com
Europa:
Großbritannien
The Software (Meg) Centre, East Way, East
Mill
Industrial Estate, Ivybridge, Devon, PL21
9PE, Großbritannien
Tel: (44) 1752-201148
Fax: (44) 1752-894833
Frankreich
Info Trade Centre d’activités de l’Ourcq
45, rue Delizy 93692 Pantin, Frankreich
Tel: (33) 1-4810-7563
Fax: (33) 1-4810-7555
Asien/Pazifik (Taiwan, R.O.C.)
9F, NO68, Sec. 3, Nankig E. Rd., Taipei,
Taiwan, R.O.C.
Tel: (886) 2-2517-0750
Fax: (886) 2-2517-0760
support@newsoft.com.tw
www.newsoft.com.tw
BENUTZERHINWEIS
Page 44

2 FR
CONTRAT DE LICENCE LOGICIEL JVC
POUR LA CLIENTELE:
VEUILLEZ BIEN LIRE CECI AVANT D’OUVRIR LES BOITES DE LOGICIEL SCELLEES
Nous vous remercions pour l’achat de notre produit. Avant de commencer à utiliser le
logiciel contenu dans ce paquet, vous devez accepter les clauses et conditions de la
convention suivante.
Convention de licence de logiciel
Il s’agit d’une convention légale entre vous (personne physique ou morale) et Victor Company
of Japan, Limited (JVC). En ouvrant les boîtes de logiciel scellées et/ou en utilisant le Programme, vous acceptez les clauses de cette convention. Si vous refusez ces clauses, rapportez
immédiatement les boîtes de logiciel non ouvertes ainsi que les documents d’accompagnement
à l’endroit où vous les avez obtenus.
1. ACCORD DE LICENCE
Cette convention de licence (Convention) vous permet d’utiliser le logiciel (Programme)
incorporé et/ou le matériel écrit d’accompagnement (p. ex. les manuels imprimés). En dépit
du fait que la licence vous autorise à charger le Programme dans la mémoire temporaire (c.à-d.RAM) ou d’installer le Programme une fois dans la mémoire permanente (p. ex. disque
dur, CD-R ou autre unité de stockage) d’un (1) système informatique, il vous est strictement
interdit d’installer le Programme sur un serveur de réseau dans le seul but d’une distribution
interne.
2. COPYRIGHT
Nonobstant la clause de l’article 1 de la présente convention, tout copyright dans le Programme est la propriété exclusive de JVC et est protégé par la loi japonaise sur les droits
d’auteur, les lois sur les droits d’auteur des autres pays, s’il y a lieu, et les clauses applicables
des traités internationaux, notamment de la Convention de Berne pour la protection de la
propriété artistique et littéraire, modifications incluses, et de la Convention universelle sur la
propriété littéraire, modifications incluses. Par conséquent, vous devez traiter le Programme
comme tout autre matériel sous copyright à la différence que vous pouvez soit (a) faire une
(1) copie du Programme seulement pour vos besoins privés de sauvegarde ou d’archivage,
ou (b) transférer le Programme sur un seul disque dur, sous réserve que vous conserviez
l’original seulement pour vos besoins privés de sauvegarde ou d’archivage.
3. RESTRICTIONS SUR LE PROGRAMME
Vous ne pouvez pas pratiquer d’ingénierie inversée, décompiler, désassembler, corriger ou
modifier le Programme, sauf dans la mesure où une telle restriction est formellement interdite
par une loi en vigueur. JVC, ses distributeurs et vendeurs ne seront pas responsables pour
toute réclamation ou défauts etc. résultant de ou en rapport avec de telles activités interdites
comme indiqué dans la présente convention.
4. AUTRES RESTRICTIONS
V ous ne pouvez pas louer, donner à bail ou transférer le Programme à une tierce personne ou
laisser une tierce personne utiliser le Programme.
IMPORTANT
Page 45

FR 3
5. ETENDUE DE LA GARANTIE
JVC garantit que tout support sur lequel le Programme est enregistré (p. ex. les disquettes,
CD-ROM, etc. ) est exempt de vices de matière et de fabrication; le matériel accompagnant le
Programme est également garanti contre tous défauts visés dans le certificat de garantie
joint. La garantie s’étend sur une durée de trente (30) jours à compter de la date de votre
achat. La garantie accordée par JVC et votre unique recours éventuel en ce qui concerne le
Programme seront, au choix de JVC, soit (a) le remboursement du prix payé, soit (b) le
remplacement du support défectueux du Programme.
6. EXCLUSION DE LA GARANTIE
HORMIS LA GARANTIE EXPRESSEMENT STIPULEE DANS LES PRESENTES ET DANS
LES LIMITES DE LA LEGISLATION EN VIGUEUR, JVC ET SES FOURNISSEURS
DECLINENT T OUTE AUTRE GARANTIE EXPLICITE OU IMPLICITE, EN CE COMPRIS LES
GARANTIES IMPLICITES DE COMMERCIALISATION ET ADEQUATION A DES FINS
SPECIFIQUES RELATIVES AU PROGRAMME ET AU MATERIEL IMPRIME
L’ACCOMPAGNANT.
7. LIMITE DE LA RESPONSABILITE
DANS LES LIMITES DE LA LEGISLATION EN VIGUEUR, JVC ET SES FOURNISSEURS
NE POURRONT ETRE TENUS POUR RESPONSABLES DE TOUT DOMMAGE INDIRECT,
SPECIAL, FORTUIT OU CONSECUTIF DE TOUTE NATURE GENERALEMENT
QUELCONQUE PAR CONTRAT, PREJUDICE, STRICTE RESPONSABILITE DU PRODUIT
OU AUTRE (EN CE COMPRIS ET SANS SE LIMITER AUX PERTES DE BENEFICES, INTERRUPTION DES AFFAIRES, PERTE D’INFORMATIONS COMMERCIALES OU TOUTE
AUTRE PERTE DE NA TURE PECUNIAIRE) RESUL T ANT DE OU RELATIVE A L ’UTILISA TION
OU L’IMPOSSIBILITE D’UTILISATION DU PROGRAMME, MEME SI JVC A ETE AVISE DE
L’EVENTUALITE DE TELS DOMMAGES.
Victor Company of Japan, Limited
Page 46

4 FR
ATTENTION:
● Faire fonctionner ce matériel en suivant les procédures de fonctionnement décrites dans ce
manuel.
● N’utiliser que le CD-ROM fourni. Ne jamais utiliser tout autre CD-ROM pour exécuter ce
logiciel.
● Ne pas tenter de modifier ce logiciel.
● Des changements ou modifications non approuvés par JVC pourraient annuler le droit de
l’utilisateur à faire fonctionner le matériel.
Comment manipuler un disque CD-ROM
● Faire attention de ne pas salir ou gratter la surface miroir (opposée à la surface imprimée).
Ne rien écrire dessus ni coller d’étiquette sur une face ou l’autre. Si le CD-ROM devient
sale, l’essuyer en douceur avec un chiffon doux vers l’extérieur en partant du trou central
en décrivant un mouvement circulaire.
● Ne pas utiliser de nettoyants de disque conventionnels ni des aérosols de nettoyage.
● Ne pas cintrer le CD-ROM ni toucher à sa surface miroir.
● Ne pas ranger votre CD-ROM dans un endroit sale, chaud ou humide. Ne pas le mettre
en plein soleil.
SOMMAIRE
PRINCIPALES CARACTÉRISTIQUES 5 à 6
INTRODUCTION 7
Accessories fournis................................................................
7
Appareils raccordables............................................................
7
Configuration minimum nécessaire..............................................
7
INSTALLATION 8 à 9
JLIP Video Capture................................................................
8
JLIP Video Producer ..............................................................
8
Adobe® Acrobat® Reader 3.0 ...................................................
8
Mr. Photo Gold ....................................................................
9
RACCORDEMENTS 10 à 11
Presto! Mr. Photo Gold 13 à 19
ASSISTANCE TECHNIQUE POUR LES UTILISATEURS
ENREGISTRÉS 20 à 21
NOTICE POUR LES UTILISATEURS 21
REMARQUE:
Le mode d’emploi JLIP Video Capture/Producer est également inclus sur le CD-ROM en
format PDF. Pour ouvrir, cliquer deux fois le fichier dans la langue désirée. Noter que
Adobe
®
Acrobat® Reader doit être installé pour lire des fichiers PDF.
● Le fichier Readme.TXT fournit des informations complémentaires pour le réglage et des
informations qui ne sont pas indiquées dans le mode d'emploi. Veuillez lire le fichier avant
d'installer le logiciel fourni.
● Vous pouvez trouver les informations les plus récentes (en anglais) sur le logiciel fourni sur
notre serveur www:
<www>http://www.jvc-victor.co.jp.
Page 47

FR 5
Deux programmes logiciels sont fournis.
Logiciel de capture vidéo JLIP
(JLIP Video Capture)
Fonction de capture vidéo (Video Capture)
Les images vidéo provenant d'un camescope
peuvent être saisies comme images fixes avec
16 millions 770.000 couleurs via le port série
(RS-232C) d'un ordinateur fonctionnant sur
WindowsT.
Fonction de contrôle JLIP (JLIP Control)
Avec un camescope compatible JLIP,
• toutes les opérations vidéo de base
peuvent être exécutées sur l'écran de
l'ordinateur.
• un maximum de 99 images peuvent être
automatiquement saisies par le programme de capture vidéo (lecture de
bande - exploration - transfert au PC).
Logiciel de production vidéo JLIP
(JLIP Video Producer)
Fonction de contrôle JLIP (JLIP Control)
Avec un camescope compatible JLIP,
• toutes les opérations vidéo de base
peuvent être exécutées sur l'écran de
l'ordinateur.
• la lecture vidéo programmée (jusqu'à 99
programmes) ou le montage par assemblage peut être effectué.
Montage par assemblage
Des scènes sélectionnées sur une bande préenregistrée peuvent être montées dans un
ordre spécifié.
Bande pré-enregistrée
(sur camescope)
Bande d'enregistrement
(sur magnétoscope)
PRINCIPALES CARACTÉRISTIQUES
Page 48

6 FR
Applications évoluées
Création d'index de titre pour votre
collection vidéo
Des images d'index de titre peuvent être
saisies parmi vos enregistrements favoris en
faisant appel au mode de capture à
intervalle. Imprimez les images d'index ainsi
saisies grâce à votre imprimante vidéo en
utilisant la fonction Impression Ecran de
votre ordinateur, puis collez-le sur vos
cassettes.
Journal vidéo et cartes postales
Donnez une touche personnelle à vos cartes
postales, vos cartes d'invitation ou créez
votre journal vidéo.
Site Internet
Des images saisies sur les bandes vidéo
peuvent être incorporées à votre site Internet
en faisant appel au logiciel de montage
d'image.
Présentation d'affaires
Des images saisies sur les bandes vidéo
peuvent être incorporées à des documents
professionnels pour donner plus de relief à
vos présentations.
PRINCIPALES CARACTÉRISTIQUES (Suite)
Page 49

FR 7
Appareils raccordables
q Camescopes numériques JVC: GR-DVL20, GR-DVL30, GR-DVL40
INTRODUCTION
Configuration minimum nécessaire
q Ordinateur personnel avec Microsoft® Windows® 95/Windows® 98
q Unité centrale: Processeur Intel® Pentium® ou meilleur
q 32 Mo de mémoire vive
q 10 Mo de disponible sur le disque dur pour logiciel JVC
140 Mo recommandé pour Presto! Mr. Photo Gold
(Vous pouvez sélectionner les applications de Mr. Photo Gold que vous voulez
installer.)
q Affichage 640 x 480 pixels, en 256 couleurs
1024 x 768 pixels, 16,77 millions de couleurs recommandé
q Port de communication série libre autorisant un débit de 9600 bps ou plus rapide,
raccordable en RS-232C par un connecteur 9 broches. (compatibilité
recommandée avec UART 16550A)
q Souris (compatible Windows®)
q Lecteur CD-ROM
REMARQUE
Un adaptateur 9 broches est nécessaire pour des ordinateurs disposant d’un port de
communication série d’un standard différent.
* Les paramètres décrits dans “Configuration minimum nécessaire” ne sont pas une
garantie que le logiciel fourni fonctionnera sur tous les ordinateurs répondant à ces
paramètres.
* Microsoft® et Windows® sont des marques déposées ou des marques de fabrique de
Microsoft Corporation aux Etats-Unis et/ou dans d’autres pays.
* est une marque déposée de JVC.
JLIP, les initiales de Joint Level Interface Protocol, est un nouveau protocole de
communication qui permet à des appareils audiovisuels munis d'une borne JLIP
d'être contrôlés par un ordinateur personnel.
* Les autres noms de produit et d’entreprise cités dans ce mode d’emploi sont des
marques de fabrique et/ou des marques déposées de leurs détenteurs respectifs.
CD-ROM comprenant:
• JLIP Video Caputre
• JLIP Video Producer
• Presto! Mr. Photo Gold
•
Mr. Photo
•
PhotoAlbum
•
ImageFolio
Câble de raccordement PC
Accessoires fournis
Câble de montage
(4 pôles – 2 pôles)
Page 50

8 FR
INSTALLATION
INSTALLATION
Se référer au manuel de Windows® 95/98 ou à celui de l’ordinateur pour des détails
sur les procédures de fonctionnement de base de Windows® 95/98.
Installation de JLIP Video Capture
1. Lancer Windows®.
• Fermer toute autre application qui serait en service.
S’assurer qu’il n’y a pas d’icône d’autres applications sur la barre des tâches.
2. Mettre en place le CD-ROM dans le lecteur de CD-ROM.
Cliquer Start sur la barre des tâches – Run.
3. Cliquer Browse – icône CD-ROM dans la colonne Look in:.
4. Cliquer deux fois sur le dossier JVC.
5. Cliquer deux fois sur le dossier Jcpt.
6. Cliquer deux fois sur l’icône Setup.exe.
7. Cliquer sur OK.
Le programme d’installation sera chargé. Suivre les instructions qui apparaissent sur l’écran.
Installation de JLIP Video Producer
1. Lancer Windows®.
• Fermer toute autre application qui serait en service.
S’assurer qu’il n’y a pas d’icône d’autres applications sur la barre des tâches.
2. Mettre en place le CD-ROM dans le lecteur de CD-ROM.
Cliquer Start sur la barre des tâches – Run.
3. Cliquer Browse – icône CD-ROM dans la colonne Look in:.
4. Cliquer deux fois sur le dossier JVC.
5. Cliquer deux fois sur le dossier Vdpro.
6. Cliquer deux fois sur l’icône Setup.exe.
7. Cliquer sur OK.
Le programme d’installation sera chargé. Suivre les instructions qui apparaissent sur l’écran.
Installation de Adobe® Acrobat® Reader 3.0
1. Lancer Windows®.
• Fermer toute autre application qui serait en service.
S’assurer qu’il n’y a pas d’icône d’autres applications sur la barre des tâches.
2. Mettre en place le CD-ROM dans le lecteur de CD-ROM.
Cliquer Start sur la barre des tâches – Run.
3. Cliquer Browse – icône CD-ROM dans la colonne Look in:.
4. Cliquer deux fois sur le dossier Reader.
5. Cliquer deux fois sur l’icône Setup.exe.
6. Cliquer sur OK.
Le programme d’installation sera chargé. Suivre les instructions qui apparaissent sur l’écran.
REMARQUES:
• Fermer tout autre programme en exécution sur le PC.
• Condamner les programmes qui fonctionnent en tâches de fond, tels les logiciels
économiseurs d’écran, de courrier électronique et de communication, les
contrôleurs de virus, les programmes d’emploi du temps, etc.
• Couper le partage de fichiers et d’imprimante.
Page 51

FR 9
INSTALLATION
Se référer au manuel de Windows® 95/98 ou à celui de l’ordinateur pour des détails
sur les procédures de fonctionnement de base de Windows® 95/98.
Installation de NewSoft Presto! Mr. Photo/PhotoAlbum/ImageFolio
1. Lancer Windows®.
• Fermer toute autre application qui serait en service.
S’assurer qu’il n’y a pas d’icône d’autres applications sur la barre des tâches.
2. Insérez le CD-ROM dans le lecteur de CD-ROM.
Cliquez sur Start sur la barre des tâches – Settings – Control Panel.
3. Cliquez deux fois sur Add/Remove Programs.
Cliquez sur l’icône Install – Next – Browse – CD ROM dans la colonne Look in:.
4. Cliquez deux fois sur le dossier NewSoft.
5. Cliquer deux fois sur Setup.exe.
6. Cliquer sur Finish.
• Une fois le programme d’installation chargé, suivez les instructions affichées sur
l’écran.
7. Cliquez sur Install dans la fenêtre Language Selection.
• Le programme d’installation détectera automatiquement la langue utilisée dans la
version Windows® que vous exécutez.
8. Cliquez sur Next> dans la fenêtre Select Components.
• Cliquez sur la case pour retirer la sélection de tout logiciel que vous ne voulez pas
installer.
Le programme d’installation sera chargé. Suivre les instructions qui apparaissent sur
l’écran.
LANCEMENT DE JLIP Video Capture/Producer ET DE
Presto! Mr. Photo/PhotoAlbum/ImageFolio
1. Lancer Windows®.
2. Cliquer sur la touche Start sur la barre des tâches.
• Le menu du programme apparaît sur l’écran.
3. Déplacer le curseur de la souris sur l’entrée du programme que vous voulez
exécuter et cliquer pour lancer le programme.
• Le programme que vous avez sélectionné dans l’étape 3 commence.
COMMENT REFERMER LE PROGRAMME
Cliquer sur la touche Close ou sélectionner File – Exit.
Page 52

10 FR
RACCORDEMENTS
EN UTILISANT UN MAGNETOSCOPE DISPOSANT D'UNE PRISE JLIP
n Pour des raisons de sécurité, bien s'assurer que l'alimentation de tous les appareils est
coupée avant de faire des raccordements.
n Nous vous recommandons d'utiliser l'adaptateur secteur/chargeur.
n En branchant un câble avec un filtre en ligne fixé, bien brancher la fiche avec le filtre en
ligne au camescope.
n Ne pas faire de raccordements à la prise DV OUT du camescope.
PC
Camescope
Raccorder ceci si
l'appareil vidéo a une
prise d'entrée S-Video.
Lorsque JLIP Video Producer est utilisé:
Lorsque JLIP Video Capture est utilisé:
Vers prise PC
Vers prise S OUT
Câble S-VIDEO
Vers prise d'entrée
S-VIDEO
Vers prise JLIP
Câble de raccordement PC (fourni)
Vers port COM
(RS-232C)
Vers prise JLIP
Câble JLIP
Magnétoscope
(Enregistreur)
Blanc
vers
AUDIO L
Rouge
vers
AUDIO
R
Jaune
vers
VIDEO
Câble AUDIO/VIDEO
Jaune vers
VIDEO
Blanc vers
AUDIO L
Rouge vers
AUDIO R
REMARQUE:
Le câble JLIP ne peut être utilisé
qu’avec des magnétoscopes JVC
disposant d’une prise JLIP.
REMARQUE:
Le câble JLIP est en option. Bien s’assurer d’utiliser le câble suivant:
•Câble JLIP: PEAC0453
Consulter le centre de service JVC le plus proche pour des détails sur sa disponibilité (voir
page 20).
Filtre en ligne
Fixer le filtre en ligne fourni avec
votre camescope, en se référant à
son mode d’emploi.
Si votre magnétoscope dispose
d'une prise péritélévision, utiliser
l'adaptateur de câble.
Placer le commutateur Y/C-CVBS
sur Y/C si votre magnétoscope
accepte le S-VHS sur sa prise péritel,
sur CVBS dans les autres cas.
Page 53

FR 11
TW
EN UTILISANT UN MAGNETOSCOPE SANS PRISE JLIP
En utilisant un magnétoscope sans prise JLIP, régler la marque de votre magnétoscope en
utilisant la télécommande, puis effectuer le montage en utilisant la télécommande.
PC
Camescope
Raccorder ceci si
l'appareil vidéo a une
prise d'entrée S-Video.
Lorsque JLIP Video Producer est utilisé:
Lorsque JLIP Video Capture est utilisé:
Vers prise PC
Vers prise S OUT
Câble S-VIDEO
Vers prise d'entrée
S-VIDEO
Vers prise JLIP
Câble de raccordement PC (fourni)
Vers port COM
(RS-232C)
Câble de montage
(4 pôles – 2 pôles)
(fourni)
Magnétoscope
(Enregistreur)
Blanc
vers
AUDIO L
Rouge
vers
AUDIO
R
Jaune
vers
VIDEO
Câble AUDIO/VIDEO
Jaune vers
VIDEO
Blanc vers
AUDIO L
Rouge vers
AUDIO R
Télécommande
Vers prise de
pause de télécommande
Raccorder ici si
l’enregistreur n’a pas de
prise de pause de
télécommande.
Utiliser la fiche qui a trois
bagues jaunes autour de la
broche.
Utiliser la fiche
qui a une
bague noire
autour de la
broche.
Filtre en ligne
Si votre magnétoscope dispose
d'une prise péritélévision, utiliser
l'adaptateur de câble.
Placer le commutateur Y/C-CVBS
sur Y/C si votre magnétoscope
accepte le S-VHS sur sa prise péritel,
sur CVBS dans les autres cas.
Page 54

12 FR
MEMO
Page 55

FR 13
Mr. Photo Gold:
Presto! Mr. Photo
Presto! PhotoAlbum
Presto! ImageFolio
Pour Windows
Copyright © 1997-1998, NewSoft Technology Corp. Tous droits réservés.
* Veuillez consulter le centre de service NewSoft le plus proche pour un
support technique. (Voir page suivante)
Page 56

14 FR
Service après-vente
NewSoft international service center:
U.S.A: 4113 Clipper Court, Fremont, CA 94538, USA
Tel: (1) 510-445-8600 Fax: (1) 510-445-8601
Technical Support Hot Line: (1) 510-445-8616
E-mail: tech@newsoftinc.com
http://www.newsoftinc.com
Taiwan: 9F, No. 68, Sec. 3, Nan-king E. Rd., Taipei, Taiwan, R.O.C.
Tel: (886) 2-2517-0750 Fax: (886) 2-2517-0760
Technical Support Hot Line: (886) 2-2517-0952
E-mail: support@newsoft.com.tw
http://www.newsoft.com.tw
Japan: 6-21-3 Shinbashi Minato-Ku, Tokyo 105-0004 Japan
Tel: (81) 3-5472-7008 Fax: (81) 3-5472-7009
E-mail: support@newsoft.co.jp
http://www.newsoft.co.jp
U.K.: The Software Centre, East Way,
East Mill Industrial Estate, Ivybridge
Devon, PL21 9PE, United Kingdom
Tel: (44) 01752-201148 Fax: (44) 01752-894833
France: Info Trade Centre
d’activités de I’Ourcq 45,
rue Delizy 93692 Pantin France
Tel: (33) 1-4810-7563 Fax: (33) 1-4810-7555
E-mail: infotrad@club-internet.fr
* ( ): Code de pays
Page 57

FR 15
Presto! Mr. Photo
Mr. Photo stocke et catégorise toutes vos précieuses photos. Vous pouvez trier vos
photos et films par date et par titre ou rechercher par mot-clé, date et toute autre
propriété de l'image. Faites ensuite glisser les photos vers la barre d'Applications pour
créer des chefs d'oeuvre photographiques au moyen de modèles prêts à l'emploi ou
pour concevoir des albums de photos électroniques. Cliquez sur l’icône Diaporama
pour visualiser toutes les photos sélectionnées dans un film, ou faites glisser une
photo sur l’icône Email pour l'envoyer à votre famille ou à vos amis.
Fonctionnalités
● Acquérez des photos à partir d'appareils photo numériques, de scanners, de
disquettes, de CD Photos et de l'Internet
● Cataloguez vos photos dans des films que vous pouvez personnaliser et
réorganiser
● Améliorez instantanément vos photos (suppression des yeux rouges, ajustement du
contraste, de la luminosité et de la netteté)
● Faites glisser les photos pour les imprimer, les envoyer par courrier électronique,
les insérer dans un diaporama HTML ou les poster sur Internet
● Faites glisser les photos vers d'autres applications pour une modification plus
approfondie ou pour les utiliser dans des projets novateurs
● Sauvegardez les photos en tant qu’écran de veille ou papier peint
● Imprimez des autocollants, des étiquettes ou des catalogues de photos
Besoins matériels
● Un appareil photo numérique accompagné de son pilote.
● Un scanner si vous envisagez de numériser des photos.
● Un PC avec au minimum un processeur 486 (un Pentium est recommandé) et
16 Mo de RAM.
● Au minimum 30 Mo d'espace disque disponible après installation. Mr. Photo a
besoin de cet espace pour pouvoir travailler.
● Un lecteur de CD-ROM pour charger Mr. Photo.
● Une carte vidéo super VGA.
REMARQUE:
Le logiciel Mr. Photo Gold ne peut être utilisé qu’avec des camescopes
numériques JVC de concert avec le logiciel JLIP Video Capture.
Page 58

16 FR
Presto! PhotoAlbum
Presto! PhotoAlbum vous aide dans la création d'albums de photos électroniques qui
conserveront pour toujours vos souvenirs. Il suffit de faire glisser les photos, cliparts,
cadres, textures et effets spéciaux et d'y ajouter des commentaires et effets sonores.
Vous pouvez également personnaliser vos albums avec des commentaires et des effets
sonores puis produire des diaporamas d'albums que vous pouvez poster sur Internet
ou envoyer des albums terminés par courrier électronique.
Fonctionnalités
● Acquérez des photos à partir d'appareils photo numériques et scanners
● Créez des pages d'album en utilisant des modèles prêts à l'emploi ou en créant les
vôtres
● Faites pivoter, redimensionnez et mettez en valeur les photos
● Ajoutez les photos, cadres, cliparts, textures et effets spéciaux en les faisant glisser
● Agrémentez les pages de l'album avec des légendes, un fond sonore, des narra-
tions et des effets sonores
● Partagez les albums terminés via courrier électronique ou postez-les sur Internet
Configuration requise
● Un PC compatible IBM à base de processeur 486 ou Pentium.
● Un lecteur de CD-ROM.
● Un disque dur avec au moins 50 Mo de libre pour contenir le programme et le
faire fonctionner correctement.
● Au moins 16 Mo de mémoire vive (32 Mo conseillés).
● Microsoft Windows 95 ou Windows NT 4.0.
Configuration conseillée
● Une carte son avec un micro
● Une imprimante couleur
● Un navigateur pour le World Wide Web, tel que Internet Explorer 3.0 ou Netscape
Navigator 3.0, ou ultérieur.
Page 59

FR 17
Presto! ImageFolio
ImageFolio est un logiciel de traitement d'images multimédia puissant fonctionnant
sous MS Windows 95 ou Windows NT. Il vous permet de traiter en détail sur l’écran
de votre ordinateur des images numérisées telles que des photographies, des
graphismes et des dessins, ainsi que des images capturées à l'aide de périphériques
vidéo, tels qu'un magnétoscope, un disque laser, un appareil photo numérique ou
tout outil de capture vidéo.
Vous pouvez créer de nouvelles images à l'aide d'outils puissants inclus dans le
logiciel. Sa collection d'outils de retouche d'image sophistiqués vous permet de créer
rapidement une zone de travail afin de composer une nouvelle image ou d’améliorer
des images existantes. Avec ce logiciel, votre imagination est votre seule limite !
Fonctionnalités
Insertion d'images
● Captures d'images à l'aide d'un scanner classique ou à main, d'un appareil photo
numérique ou de tout outil de capture, etc.
● Assemblage automatique et semi-automatique pour l'utilisation d'images de
grande taille
● Chargement/enregistrement d'images sous de nombreux formats de fichier bien
connus, tels que TIF, PCX, BMP, TGA, JPG, PCD, WMF, PNG, etc.
● Prise en charge du format New Flash Pix
Restitution d'images
● Variantes de réglage des couleurs à l'impression pour examiner le résultat à
l'impression avant d'imprimer réellement
● Prise en charge d'OLE 2.0 pour le mode de retouche autonome
● Création d'illustrations pour la composition de pages d'accueil et d'applications
HTML
Traitement et retouche d'images
● Documents multicalques pour l'organisation complexe d'objets
● Déplacement d'images flottantes parmi plusieurs documents à l'aide de la
fonctionnalité Glisser-déplacer (déplacement d'une zone sélectionnée vers des
zones de travail nouvelles ou existantes)
● Choix précis de couleurs grâce au réglage des couches calorimétriques ou à leur
sélection à partir d'une palette
● Collection complète d'outils de dessin pour retoucher des images, tels que les
outils Trait, Pinceau, Aérographe, Dégrade, Gomme, Loupe, Texte, Pipette, Rotation libre, Teinte/Saturation, Éclaircir/Obscurcir, Atténuation/Renforcement,
Projecteur d'images, etc.
● Outil Projecteur d'images réglable pour l'insertion rapide d'une collection
d'images dans une zone de travail
Page 60

18 FR
● Fonctionnalité Lisse avec tous les outils de graphisme pour améliorer la qualité de
dessin
● Outils de sélection permettant de masquer facilement les irrégularités des objets
● Création d'effets 3D magiques avec une source de lumière réglable pour des
objets sélectionnés en une seule touche
● Création d'ombres sur les objets avec possibilité de sélectionner la direction de la
lumière en une seule touche
● Modèles élégants fournis pour être facilement appliqués à l'utilisation de photos
de la vie quotidienne
● Fonctions de réglage de précision pour ajuster la luminosité, le contraste, la teinte,
la saturation, la répartition des tons (égalisation), etc.
● Filtres multiples pour produire des effets spéciaux, tels que l’atténuation, le
renforcement, le tracé des contours, l'estampage et l'effet mosaïque
● Explorateur d'effets fournissant des aperçus de l'image à sa taille réelle, traités
avec tous les filtres et les fonctions de réglage de précision
● Prise en charge de l'interface des filtres externes Adobe™ en version 16 et 32 bits
Configuration requise
Les périphériques matériels et les logiciels suivants sont nécessaires au
fonctionnement du logiciel :
● Ordinateur IBM PC 486, Pentium ou compatible
● Lecteur de CD-ROM
● Disque dur disposant au minimum de 60 Mo d'espace disque disponible pour
pouvoir installer et exécuter correctement le logiciel
● 8 Mo au minimum de mémoire vive (16 Mo recommandés)
● MS Windows 95 ou Windows NT
Pour que le logiciel puisse être exploité efficacement, les éléments matériels et
logiciels complémentaires suivants sont fortement recommandés :
● 50 Mo au minimum de mémoire virtuelle
● Imprimante couleur prise en charge par MS Windows 95
Presto! ImageFolio (Suite)
Page 61

FR 19
Installation de Mr. Photo, PhotoAlbum et ImageFolio
Suivez la procédure ci-après pour installer Mr. Photo, PhotoAlbum et ImageFolio.
1. Insérez le CD dans le lecteur de CD-ROM.
2. Cliquez sur le bouton Démarrer, puis sur Exécuter.
3. Tapez [lecteur]:\NewSoft\setup.exe, puis cliquez sur OK. Le programme
d'installation va détecter automatiquement la langue utilisée dans la version
Windows sur laquelle vous travaillez.
4. Suivez les instructions qui s'affichent.
Page 62

20 FR
ASSISTANCE TECHNIQUE POUR LES UTILISATEURS ENREGISTRÉS
Assistance JVC pour:
PORTUGAL
ORIELA, SA
Campo de Santa Clara, 160-A, 1100, Lisboa, Portugal
Tel : 01 888 4731 Fax : 01 886 7871
GREECE
≥ªEπ·‹…£∑…Ω≥Á°√∑π≥ Eªª°fl °.E.
◊ƒ∂¤†∂Í› 62, 183 46 Ω∆fiÁ†‡∆, A¥≤v†, ´ªª°©°
Tel : 01-4832855 Fax : 01-4832557
SUOMI
OY HEDENGREN AB
Mänkimiehentie 2 02780 Espoo, Finland
Tel : 9-68281 Fax : 9-810933
SCHWEIZ/SUISSE/SVIZZERA
SPITZER ELECTRONIC AG
Mühlemattsstrasse 13 4104 Oberwil, Suisse
Tel : 061 405 1111 Fax : 061 402 0434
DANMARK
JVC DANMARK A/S
Helgeshøj Alle 30 DK-2630 Taastrup, Danmark
Tel : 43 50 90 00 Fax : 43 50 90 81
ÖSTERREICH
JVC AUSTRIA GMBH
Slamastrasse 43 A-1230, Wien, Austria
Tel : (0222) 610370 Fax : (0222) 6103777
ESPAÑA
JVC ESPAÑA S.A.
Ctra. Gracia Manresa Km. 14' 750 Edificio Can
Castanyer, 08190 Sant Cugat del Vallés, España
Tfno : (93) 565 32 16 Fax : (93) 565 32 18
ITALIA
JVC ITALIA S.p.A.
Via Cassanese 224 Palazzo Tiepolo, 20090
Segrate Milano Oltre, Italia
Tel : (02) 26.99.161 Fax : (02) 26.92.1820
BELGIQUE/LUXEMBOURG
JVC BELGIUM S.A.
Rue de la Petite lle 3 -1070 BRUXELLES, Belgique
Tel : (02) 529 42 11 Fax : (02) 520 83 12
BELGIE/LUXEMBURG
JVC BELGIUM N.V.
Klein Eilandstraat 3 - 1070 BRUSSEL, België
Tel : (02) 529 42 11 Fax : (02) 520 83 12
DEUTSCHLAND
JVC DEUTSCHLAND GMBH
Postfach 10 05 62, Grüner Weg 12, 61169
Friedberg/Hessen. Deutschland
Tel : (06031) 9390 Fax : (06031) 183 83
NEDERLAND
JVC NEDERLAND B.V.
JVC Plein DE Heyderweg 2,
2314 XZ Leiden, Nederland
Tel : (071) 5453333 Fax : (071) 5894674
FRANCE
JVC FRANCE S.A. DIVISION VIDEO
102, boulevard Heloise,
95104 Argenteuil CEDEX, France
Tel : 01.39.96.33.33 Fax : 01.39.47.73.78
JVC (U.K.) Limited
14 Priestley Way, London
NW2 7BA, United Kingdom
Tel : (0181) 450-3282
Fax : (0181) 452-2534
U.K. & IRELAND
JVC IRELAND
(Branch of JVC(U.K.)Limited)
JVC HOUSE Carriglea Industrial Estate
Naas Road, Dublin 12, Republic of Ireland
Tel : (01)-460-2288 Fax : (01) -456-7522
SVERIGE
JVC SVENSKA AB
Veddestavãgen 15, 175 62 Jãrfälla-Stockholm, sweden
Tel : (08) 7950400 Fax : (08) 7950450
NORGE
JVC NORGE A/S
P.O.BOX 2012, Postterminalen 3103 Tonsberg, Norge
Tel : 33 36 52 00 Fax : 33 36 52 99
Pour les autres pays, référez-vous aux réseau d’assistance mondial de JVC à
http://www.jvc-victor.co.jp/english/worldmap/index-e.html
Page 63

FR 21
NOTICE POUR LES UTILISATEURS
L’utilisation de ce logiciel est autorisée selon les termes de la licence du logiciel.
Si vous avez besoin de contacter le bureau ou l’agence JVC dans votre pays à propos
de ce logiciel (se référer au réseau de service mondial JVC au http://www.jvcvictor.co.jp/engligh/worldmap/index-e.html), veuillez remplir la suite et avoir les
informations appropriées disponibles.
Nom du produit
Modèle
Problème
Message d’erreur
Fabricant
Modèle De bureau Portable
Unité centrale
Système d’exploitation
Mémoire Mo
Place disponible sur le disque dur Mo
PC
Veuillez noter qu’il peut falloir du temps pour répondre à vos questions, selon la
nature du sujet.
JVC ne peut pas répondre aux questions concernant les spécifications ou la
performance des produits NewSoft fournis, ni aux questions sur le fonctionnement
de base de votre ordinateur personnel.
Assistance NewSoft pour:
Amérique du Nord (États-Unis)
Ligne de soutien technique:
Veuillez envoyer un courrier électronique à :
tech@newsoftinc.com ou appeler le
(510) 445-8616www.newsoftinc.com
Europe
Royaume-Uni
The Software Centre, East Way, East Mil
Industrial Estate Ivybridge, Devon, PL21
9PE, Royaume-Uni
Téléphone: (44) 1752-201148
Télécopie: (44) 1752-894833
France
Info Trade Centre d’activités de l’Ourcq
45, rue Delizy 93692 Pantin, France
Téléphone: (33) 1-48-10-75-63
Télécopie: (33) 1-48-10-75-55
Asie/Pacifique (Taiwan, R.O.C)
9F, NO68, Sec. 3, Nankig E. Rd., Taipei,
Taiwan, R.O.C.
Téléphone: (886) 2-2517-0750
Télécopie: (886) 2-2517-0760
support@newsoft.com.tw
www.newsoft.com.tw
Page 64

2 NE
JVC SOFTWARE GEBRUIKSRECHTOVEREENKOMST
AAN ONZE KLANTEN:
LEES DEZE OVEREENKOMST ZORGVULDIG DOOR VOOR U DE VERZEGELDE
SOFTWARE PAKKETTEN OPEN MAAKT
Wij danken u voor de aanschaf van ons product. Voor u de bijgesloten
computerprogrammatuur gaat gebruiken, moet u akkoord gaan met de bepalingen en
voorwaarden in de onderstaande overeenkomst.
Gebruiksrechtovereenkomst voor software
Dit is een rechtsgeldige overeenkomst tussen u (natuurlijke persoon of rechtspersoon) en
Victor Company of Japan, Limited ("JVC"). Door de verzegelde softwarepakketten te openen
en/of door het programma te gebruiken, stemt u ermee in aan de bepalingen van deze
overeenkomst gebonden te zijn. Indien u niet instemt met de bepalingen van deze
overeenkomst, dient u de ongeopende softwarepakketten en daarbij behorende onderdelen
direct te retourneren aan de plaats van aankoop
1. VERLENING VAN HET GEBRUIKSRECHT
Deze gebruiksrechtovereenkomst (hierna te noemen "overeenkomst"), verleent u het recht
het softwareprogramma in deze verpakking ("programma") en/of het daarbij behorende
geschreven materiaal (bijvoorbeeld gedrukte handboeken) te gebruiken. Hoewel u het
programma mag laden in het tijdelijke geheugen (RAM) of het één maal mag installeren in het
permanente geheugen (bijvoorbeeld op vaste schijf, CD-R of een ander opslagmedium) van
één (1) computersysteem, is het ten strengste verboden het programma te installeren op een
netwerkserver met als enige doel de interne distributie van het programma.
2. AUTEURSRECHT
Niettegenstaande de bepalingen van artikel 1 van deze overeenkomst, berusten de
auteursrechten op het programma exclusief bij JVC, beschermd door de Japanse
auteursrechtregelgeving, regelgeving van andere landen, indien van toepassing, en relevante
bepalingen van internationale verdragen, waaronder de Berne Convention for the Protection
of Literary and Artistic Works, met amendementen, en de Universal Copyright Convention,
met amendementen. Derhalve dient u het programma te behandelen als ieder ander materiaal
waarop auteursrecht rust, behalve dat u of (a) één kopie van het programma mag maken,
uitsluitend voor persoonlijke backup- of archiefdoeleinden, of (b) het programma op één vaste
schijf mag installeren, mits u het origineel uitsluitend bewaart voor persoonlijke backup- of
archiefdoeleinden.
3. BEPERKINGEN OP HET PROGRAMMA
U mag het programma niet 'reverse engineeren', disassembleren, reviseren of aanpassen,
tenzij en voor zover deze beperking uitdrukkelijk is verboden op grond van toepasselijk
dwingend recht. JVC en zijn leveranciers kunnen niet aansprakelijk worden gesteld voor
schade, defecten, enz. die ontstaan uit of in samenhang met activiteiten die volgens deze
overeenkomst niet zijn toegestaan.
4. OVERIGE BEPERKINGEN
U mag het programma niet verhuren, in lease geven, overdragen of in gebruik geven aan
derden.
BELANGRIJK
Page 65

NE 3
5. BEPERKTE GARANTIE
JVC garandeert dat de media waarop het programma wordt geleverd (bijvoorbeeld diskettes,
CD-ROM etc.) geen gebreken vertonen wat betreft materiaal en vakmanschap gedurende
een periode van dertig (30) dagen na de datum van aankoop en dat bij het programma
geleverde hardware eveneens geen defecten vertoont wat betreft het genoemde in het
bijgesloten Garantieformulier. De gehele aansprakelijkheid van JVC en uw enige
verhaalsmogelijkheid met betrekking tot het programma is, ter keuze van JVC, ofwel (a)
terugbetaling van de aankoopprijs, of (b) vervanging van defecte media van het programma.
6. GEEN ANDERE GARANTIES
MET UITZONDERING VAN DE EXPLICIET IN DEZE OVEREENKOMST GENOEMDE
GARANTIE EN VOOR ZOVER IS TOEGESTAAN ONDER TOEPASSELIJK RECHT,
VERLENEN JVC EN ZIJN LEVERANCIERS GEEN ANDERE GARANTIE, NOCH
UITDRUKKELIJK NOCH IMPLICIET, DAARONDER MEDE BEGREPEN MAAR NIET
BEPERKT TOT IMPLICIETE GARANTIES BETREFFENDE VERKOOPBAARHEID OF
GESCHIKTHEID VOOR EEN BEPAALDE TOEPASSING, MET BETREKKING TOT HET
PROGRAMMA EN HET DAARBIJ BEHORENDE MATERIAAL.
7. GEEN AANSPRAKELIJKHEID VOOR INDIRECTE SCHADE
VOOR ZOVER IS TOEGESTAAN ONDER TOEPASSELIJK RECHT, IS JVC NOCH ZIJN
LEVERANCIERS AANSPRAKELIJK VOOR ENIGE INDIRECTE, BIJZONDERE,
INCIDENTELE OF VERVOLGSCHADE, ONGEACHT DE VORM VAN ACTIE, HETZIJ IN
CONTRACT , ONRECHTMA TIGE DAAD, STRIKTE PRODUCTAANSPRAKELIJKHEID OF OP
ANDERE WIJZE (DAARONDER BEGREPEN MAAR NIET BEPERKT TOT SCHADE DOOR
WINSTDERVING, BEDRIJFSONDERBREKING, VERLIES V AN BEDRIJFSINFORMA TIE OF
ANDER GELDELIJK VERLIES) DIE IS ONTSTAAN DOOR HET GEBRUIK OF
VERHINDERING TOT GEBRUIK VAN HET PROGRAMMA, OOK INDIEN JVC OP DE
HOOGTE GESTELD IS VAN HET RISICO VAN DERGELIJKE SCHADE.
Victor Company of Japan, Limited
Page 66

4 NE
INHOUDSOPGAVE
LET OP:
● Bedien de apparatuur in overeenstemming met de beschrijvingen en instructies in deze
gebruiksaanwijzing.
● Gebruik uitsluitend de bijgeleverde CD-ROM. Gebruik geen andere CD-ROM voor deze
software.
● Probeer geen veranderingen in deze software te maken.
● De gebruiker verliest mogelijk het recht op gebruik van de apparatuur door het maken van
veranderingen of modificaties zonder voorafgaande toestemming van JVC.
Juiste omgang met een CD-ROM
● Zorg dat er geen vuil of krassen komen op de glimmende onderkant (tegenover de labelkant). Schrijf niet op een CD-ROM en plak geen etiketten e.d. op de bovenkant of de
onderkant. Als een CD-ROM vuil is, kunt u deze met een zachte doek schoonvegen,
vanuit het midden naar de rand.
● Gebruik geen reinigingsmiddelen of antistatische spray voor conventionele
grammofoonplaten.
● Verbuig een CD-ROM niet en raak de glimmende onderkant niet met uw vingers aan.
● Bewaar uw CD-ROMs niet op een warme, stoffige of vochtige plaats. Laat niet in de volle
zon liggen.
BELANGRIJKSTE KENMERKEN 5 – 6
STARTEN 7
Bijgeleverde toebehoren .........................................................
7
Aansluitbare apparatuur .........................................................
7
Vereisten voor gebruik ...........................................................
7
INSTALLEREN 8 – 9
JLIP Video Capture................................................................
8
JLIP Video Producer ..............................................................
8
Adobe® Acrobat® Reader 3.0 ...................................................
8
Mr. Photo Gold ....................................................................
9
AANSLUITINGEN 10 – 11
Presto! Mr. Photo Gold 13 – 19
TECHNISCHE HULP VOOR GEREGISTREERDE
GEBRUIKERS 20 – 21
OPMERKING VOOR DE GEBRUIKER 21
OPMERKING:
De handleiding voor JLIP Video Capture/Producer staat ook in PDF formaat op de CD-ROM.
Om deze handleiding te openen dubbelklikt u het bestand in de gewenste taal. U moet
daarvoor wel Adobe
®
Acrobat® Reader op uw computer hebben geïnstalleerd.
● Het Readme.TXT bestand bevat aanwijzingen voor het installeren en daarnaast informatie in
aanvulling op de gebruiksaanwijzing. Lees dit bestand a.u.b. aandachtig door alvorens u het
programma gaat installeren.
● De meest recente informatie (in het Engels) treft u aan op onze World Wide Web-server via
de Internet-homepage: http://www.jvc-victor.co.jp.
Page 67

NE 5
BELANGRIJKSTE KENMERKEN
JLIP Video Capture programma
Video Capture voor vastleggen van
beelden
Videobeelden van een camcorder kunnen
worden vastgelegd als stilbeelden met een
resolutie van en 16,77 miljoen kleuren via de
seriële aansluiting (RS-232C) van een
computer met Windows
®
besturingssysteem.
JLIP bedieningsfuncties
Met een voor het JLIP systeem geschikte
camcorder kunt u:
• alle voornaamste videofuncties bedienen
via het beeldscherm van de computer;
• tot maximaal 99 beelden automatisch
vastleggen met behulp van de Program
Video Capture functie (afspelen van de
band — aflezen van de beelden —
gegevensoverdracht naar de personal
computer).
JLIP Video Producer programma
JLIP bedieningsfuncties
Met een voor het JLIP systeem geschikte
camcorder kunt u:
• alle voornaamste videofuncties bedienen
via het beeldscherm van de computer;
• geprogrammeerde video weergeven
(maximaal 99 programma’s) of een video
monteren.
Videomontage
Uit banden met video-opnamen kunt u de
gewenste scènes kiezen om die samen te
monteren tot uw eigen videoproductie.
Cassette met video-opnamen
(van een camcorder)
Samengemonteerde videoproductie
(op een videorecorder)
Twee afzonderlijke programma's zijn bijgeleverd.
Page 68

6 NE
Geavanceerde toepassingen
BELANGRIJKSTE KENMERKEN (vervolg)
Zaken-presentaties
De vastgelegde beelden van video-opnamen
zijn in te voegen in uw zakelijke
documentatie, om die pakkend en
aantrekkelijk te presenteren.
Internet-homepage
De vastgelegde beelden van video-opnamen
zijn in te voegen in een Internet-homepage,
met behulp van beeldverwerkende
programmatuur.
Samenstellen van een titelindex voor
uw videocollectie
Van uw favoriete video-opnamen kunt u een
reeks titel-indexbeelden vastleggen met de
interval-vastlegfunctie. De vastgelegde
indexbeelden kunt u vervolgens afdrukken
met uw PC printer en de Print Scherm functie
van uw personal computer, zodat u ze op uw
cassettes kunt plakken.
Video-dagboek en ansichtkaarten
Maak uw eigen originele ansichtkaarten,
uitnodigingskaarten e.d. of stel een videodagboek samen.
Page 69

NE 7
STARTEN
Vereisten voor gebruik
q Personal Computer met Microsoft® Windows® 95/Windows® 98
q CPU: Intel® Pentum® of betere processor
q Minimaal vereist RAM : 32 MB
q Minstens 10 MB ruimte beschikbaar op de harde schijf voor de JVC software.
140 MB aanbevolen voor Presto! Mr. Photo Gold.
(U kunt zelf bepalen welke applicaties van Mr. Photo Gold u wilt installeren.)
q Kleurenmonitor geschikt voor tenminste 640 x 480 beeldpunten, 256 kleuren.
1024 x 768 beeldpunten, 16,77 miljoen kleuren aanbevolen
q 1 vrije seriële transmissie-aansluiting, compatibel met 9600 bps of hogere
transmissiewaarde, aansluitbaar op RS-232C met 9-pen seriële aansluiting
(Aanbevolen compatibel met UART 16550A)
q Muis (geschikt voor Windows®)
q CD-ROM drive
OPMERKING
Een los verkrijgbare 9-pen seriële adapter is vereist voor computers die een andere
seriële aansluiting dan de standaard 9-pen aansluiting gebruiken.
* De informatie omtrent de systeemvereisten zoals hierboven aangegeven vormt geen
garantie dat de meegeleverde software inderdaad zal werken op alle personal
computers die aan deze vereisten voldoen.
* Microsoft® en Windows® zijn gedeponeerde handelsmerken of handelsmerken van
Microsoft Corporation in de V.S. en/of andere landen.
* is een gedeponeerd handelsmerk van JVC.
De afkorting JLIP staat voor Joint Level Interface Protocol, een nieuw
communicatie-protocol om video-apparatuur die is voorzien van een JLIP
aansluiting geschikt te maken voor bediening met een personal computer.
* Andere producten en namen van bedrijven die in deze gebruiksaanwijzing worden
vermeld, zijn gedeponeerde handelsmerken en/of handelsmerken van de
overeenkomende eigenaars.
Aansluitbare apparatuur
q JVC digitale videocamera's: GR-DVL20, GR-DVL30, GR-DVL40
CD-ROM met twee softwareprogramma's:
•JLIP Video Capture
•JLIP Video Producer
•Presto! Mr. Photo Gold
•
Mr. Photo
•
PhotoAlbum
•
ImageFolio
PC-verbindingskabel
Bijgeleverde toebehoren
Montagekabel (4 polig – 2 polig)
Page 70

8 NE
INSTALLEREN
INSTALLEREN
Zie de gebruiksaanwijzing van Windows® 95/98 en uw computer voor details
aangaande de basisbediening van Windows® 95/98.
Installeren JLIP Video Capture
1. Start Windows®.
• Sluit andere geopende applicaties.
Controleer dat er geen andere iconen van andere applicaties op de menubalk zijn.
2. Steek de CD-ROM in het CD-ROM station.
Klik op Start op de taakbalk — Run.
3. Klik op Browse — CD-ROM icoon in de Look in: kolom.
4. Dubbelklik de JVC map.
5. Dubbelklik de Jcpt map.
6. Dubbelklik de Setup.exe icoon.
7. Klik op OK.
Het installatieprogramma wordt nu geladen. Volg de aanwijzingen die op het scherm
verschijnen.
Installeren JLIP Video Producer
1. Start Windows®.
• Sluit andere geopende applicaties.
Controleer dat er geen andere iconen van andere applicaties op de menubalk zijn.
2. Steek de CD-ROM in het CD-ROM station.
Klik op Start op de taakbalk — Run.
3. Klik op Browse — CD-ROM icoon in de Look in: kolom.
4. Dubbelklik de JVC map.
5. Dubbelklik de Vdpro map.
6. Dubbelklik de Setup.exe icoon.
7. Klik op OK.
Het installatieprogramma wordt nu geladen. Volg de aanwijzingen die op het scherm
verschijnen.
Installeren Adobe® Acrobat® Reader 3.0
1. Start Windows®.
• Sluit andere geopende applicaties.
Controleer dat er geen andere iconen van andere applicaties op de menubalk zijn.
2. Steek de CD-ROM in het CD-ROM station.
Klik op Start op de taakbalk — Run.
3. Klik op Browse — CD-ROM icoon in de Look in: kolom.
4. Dubbelklik de Reader map.
5. Dubbelklik de Setup.exe icoon.
6. Klik op OK.
Het installatieprogramma wordt nu geladen. Volg de aanwijzingen die op het scherm
verschijnen.
OPMERKINGEN:
• Sluit andere programma’s die eventueel open staan op uw PC.
• Schakel programma’s die op de achtergrond werken, zoals screen-savers, e-mail
en communicatie software, virus checkers, agenda’s enz. uit.
• Schakel het delen van bestanden en printers met andere computers uit.
Page 71

NE 9
INSTALLEREN
Zie de gebruiksaanwijzing van Windows® 95/98 en uw computer voor details
aangaande de basisbediening van Windows® 95/98.
Installeren van NewSoft Presto! Mr. Photo/PhotoAlbum/ImageFolio
1. Start Windows®.
• Sluit andere geopende applicaties.
Controleer dat er geen andere iconen van andere applicaties op de menubalk zijn.
2. Doe de CD-ROM in de CD-ROM drive.
Klik op Start op de taakbalk — Settings — Control Panel.
3. Dubbelklik Add/Remove Programs.
Klik op Install — Next — Browse — CD-ROM icoon in de Look in: kolom.
4. Dubbelklik de NewSoft map.
5. Dubbelklik Setup.exe.
6. Klik op Finish.
• Als het installatieprogramma loopt, volgt u de instructies op het scherm.
7. Klik op Install en het Language Selection venster.
• Het installatieprogramma zal automatisch de taal van de Windows®-versie die u
gebruikt detecteren.
8. Klik op Next> in het Select Components venster.
• Klik op de afvink-vakjes om software die u niet wilt installeren af te voeren van de
lijst.
Het installatieprogramma wordt nu geladen. Volg de aanwijzingen die op het scherm
verschijnen.
OPSTARTEN VAN JLIP Video Capture/Producer EN Presto!
Mr. Photo/PhotoAlbum/ImageFolio
1. Start Windows®.
2. Klik op Start van de menubalk.
• Het programmamenu verschijnt op het scherm.
3. Plaats de muiswijzer op het te starten programma en klik om het programma te
starten.
• De software die u bij stap 3 geselecteerd heeft start op.
SLUITEN VAN HET PROGRAMMA
Klik op de Close knop (afsluiten) of kies File (bestand) — Exit (afsluiten).
Page 72

10 NE
AANSLUITINGEN
VERBINDEN MET EEN VIDEORECORDER DIE EEN JLIP
AANSLUITING HEEFT
Naar JLIP
aansluiting
n Voor de veiligheid moet u alle toestellen uitschakelen alvorens verbindingen te maken.
n Gebruik bij voorkeur de netadapter/acculader.
n Wanneer u enn kabel met een kernfilter aansluit, moet u er op letten dat u het uiteinde met
het kernfilter in de videocamera steekt.
n Maak geen verbinding met de DV OUT aansluiting van de camcorder.
Bij gebruik van JLIP Video Capture:
Naar PC
aansluiting
Naar JLIP aansluiting
PC verbindingskabel (meegeleverd)
Computer (PC)
Naar COM
aansluiting
(RS-232C)
Camcorder
Videorecorder
(opnamedeck)
OPMERKING:
De JLIP kabel is los verkrijgbaar. Verzeker u ervan dat u de volgende gebruikt:
•JLIP kabel: PEAC0453
Raadpleeg uw dichtst bijzijnde JVC Technisch Ondersteuningscentrum voor details omtrent
de verkrijgbaarheid hiervan (zie bladzijde 20).
Verbind deze indien het
videotoestel een S-video
ingangsaansluiting heeft.
OPMERKING:
De JLIP kable kan alleen gebruikt
worden met JVC videorecorders die
zijn uitgerust met een JLIP aansluiting.
Bij gebruik van JLIP Video Producer:
JLIP kabel
Naar S OUT aansluiting
S-VIDEO kabel
Naar S-VIDEO
ingangsaansluiting
AUDIO/VIDEO kabel
Wit met
AUDIO L
Rood met
AUDIO R
Geel met
VIDEO
Wit met
AUDIO L
Rood met
AUDIO R
Geel met
VIDEO
Kernfilter
Bevestig het kernfilter dat werd
meegeleverd met uw videocamera
volgens de handleiding.
Gebruik de kabeladapter
indien uw videorecorder
een SCART aansluiting
heeft.
Page 73

NE 11
TW
VERBINDEN MET EEN VIDEORECORDER DIE GEEN JLIP
AANSLUITING HEEFT
Bij gebruik van een videorecorder die geen JLIP aansluiting heeft, moet u het merk van de
videorecorder instellen met de afstandsbed iening en vervolgens de montage met die
afstandsbediening uitvoeren.
Bij gebruik van JLIP Video Capture:
Naar PC
aansluiting
Naar JLIP aansluiting
PC verbindingskabel (meegeleverd)
Computer (PC)
Naar COM
aansluiting
(RS-232C)
Camcorder
Videorecorder
(opnamedeck)
Verbind deze indien het
videotoestel een S-video
ingangsaansluiting heeft.
Bij gebruik van JLIP Video Producer:
Montagekabel
(4 polig – 2 polig)
(meegeleverd)
Naar S OUT aansluiting
S-VIDEO kabel
Naar S-VIDEO
ingangsaansluiting
AUDIO/VIDEO kabel
Wit met
AUDIO L
Rood met
AUDIO R
Geel met
VIDEO
Wit met
AUDIO L
Rood met
AUDIO R
Geel met
VIDEO
Sluit hierop aan als
de opnemende videorecorder geen
afstandspauzeaansluiting heeft.
Naar
afstandspauzeaansluiting
Afstandsbediening
Gebruik de stekker met drie
gele ringen rond de pen.
Gebruik de
stekker die
één zwarte
ring rond de
pen heeft.
Kernfilter
Gebruik de kabeladapter
indien uw videorecorder
een SCART aansluiting
heeft.
Page 74

12 NE
NOTITIES
Page 75

NE 13
Mr. Photo Gold:
Presto! Mr. Photo
Presto! PhotoAlbum
Presto! ImageFolio
Voor Windows
Copyright © 1997-1998, NewSoft Technology Corp. Alle rechten voorbehouden.
* Raadpleegt u alstublieft uw dichtst bij zijnde NewSoft servicecentrum voor
technische ondersteuning (zie de volgende bladzijde).
Page 76

14 NE
Technische ondersteuning
NewSoft international service center:
U.S.A: 4113 Clipper Court, Fremont, CA 94538, USA
Tel: (1) 510-445-8600 Fax: (1) 510-445-8601
Technical Support Hot Line: (1) 510-445-8616
E-mail: tech@newsoftinc.com
http://www.newsoftinc.com
Taiwan: 9F, No. 68, Sec. 3, Nan-king E. Rd., Taipei, Taiwan, R.O.C.
Tel: (886) 2-2517-0750 Fax: (886) 2-2517-0760
Technical Support Hot Line: (886) 2-2517-0952
E-mail: support@newsoft.com.tw
http://www.newsoft.com.tw
Japan: 6-21-3 Shinbashi Minato-Ku, Tokyo 105-0004 Japan
Tel: (81) 3-5472-7008 Fax: (81) 3-5472-7009
E-mail: support@newsoft.co.jp
http://www.newsoft.co.jp
U.K.: The Software Centre, East Way,
East Mill Industrial Estate, Ivybridge
Devon, PL21 9PE, United Kingdom
Tel: (44) 01752-201148 Fax: (44) 01752-894833
France: Info Trade Centre
d’activités de I’Ourcq 45,
rue Delizy 93692 Pantin France
Tel: (33) 1-4810-7563 Fax: (33) 1-4810-7555
E-mail: infotrad@club-internet.fr
* ( ): Landencode
Page 77

NE 15
Presto! Mr. Photo
Mr. Photo slaat al uw waardevolle foto’s op en plaatst deze in een catalogus. U kunt
foto’s en “filmrolletjes” op datum en titel sorteren of op trefwoord, datum en andere
eigenschappen van de afbeelding zoeken. Vervolgens sleept u de foto's naar de
toepassingsbalk om er met behulp van kant-en-klare sjablonen meesterwerken van te
maken of om elektronische fotoalbums te ontwerpen. Klik op het pictogram Slide
Show om alle geselecteerde foto's van een “filmrol” weer te geven of zet een foto op
het pictogram E-mail neer om de foto via e-mail naar vrienden of bekenden te sturen.
Kenmerken
● Haal foto's op vanuit digitale camera's, scanners, diskettes, PhotoCD's en Internet
● Foto’s van “filmrollen” catalogiseren die u kunt aanpassen en opnieuw
rangschikken
● Foto’s direct verbeteren (rode ogen verwijderen, helderheid/contrast aanpassen,
vervagen/scherpstellen)
● Foto’s slepen en neerzetten om ze af te drukken, per e-mail te versturen, HTML-
diavoorstellingen te maken of via Internet te versturen
● Foto’s naar andere toepassingen slepen en neerzetten waarin u projecten verder
kunt bewerken
● Foto’s als een schermbeveiliger of achtergrond opslaan
● Stickers, etiketten en fotocatalogi afdrukken
Systeemvereisten
● Digitale camera plus de software voor de digitale camera.
● Scanner, als u foto’s wilt inscannen.
● Een computer met tenminste een 486 microprocessor (Pentium-processor wordt
aanbevolen) en 16 MB RAM.
● Na de installatie nog minstens 30 MB vrije ruimte op de vaste schijf omdat die
ruimte nodig is om met Mr. Photo te kunnen werken.
● Een CD-ROM station om Mr. Photo te laden.
● Super VGA videokaart.
OPMERKING:
De Mr.Photo Gold software kan alleen samen met de JLIP Video Capture software
worden gebruikt met JVC digitale videocamera's.
Page 78

16 NE
Presto! PhotoAlbum
Met Presto! PhotoAlbum kunt u voor uw dierbare herinneringen elektronische
fotoalbums maken. Sleep foto’s, fotolijstjes, clipartafbeeldingen, structuren en
speciale effecten naar het album en zet ze daar neer. Vervolgens zou u commentaar
kunnen inspreken en geluidseffecten toevoegen en zo diavoorstellingen kunnen
maken die u als complete albums via Internet of e-mail naar familie of vrienden kunt
versturen.
Kenmerken
● Scannen of importeren van foto’s met digitale camera’s en scanners.
● Automatische kleurencorrecties in de ingelezen foto’s.
● Bewerken door slepen en neerzetten.
● Foto-browser met een miniatuurweergave van foto’s.
● Albums via Internet Browser met anderen delen.
● Bibliotheek met meer dan 500 clipartafbeeldingen voor verfraaien van foto’s.
● Toevoegen van geluid aan albums, pagina's en foto’s.
● Onafhankelijke afspeelfunctie voor albums.
● Ondersteuning van de bekende bestandsformaten: TIF, PCX, BMP, TGA, JPG, PCD,
WMF, FPX, PNG, enzovoort.
Systeemvereisten
● Een IBM PC 486, Pentium of compatibele computer.
● CD-ROM station.
● Vaste schijf met minstens 50 MB vrije schijfruimte die nodig is voor het goed
kunnen opslaan en uitvoeren van het programma.
● Ten minste 16 MB RAM (beter is 32 MB).
● MS Windows 95 of Windows NT 4.0.
Aanbevolen systeemvereisten
● Geluidskaart met een microfoon.
● Kleurenprinter.
● Netwerk-browser zoals Internet Explorer 3.0 of Netscape Navigator 3.0 of later.
Page 79

NE 17
Presto! ImageFolio
ImageFolio is een uitgebreid multimedia-programma voor het bewerken van
afbeeldingen onder MS Windows 95 of Windows NT. U kunt op detailniveau
ingescande afbeeldingen zoals foto's en tekeningen op een computer bewerken, maar
ook afbeeldingen die afkomstig zijn van beeldapparatuur, zoals videorecorder,
laserdisc, digitale camera, video capture box, enzovoort.
Met de krachtige gereedschappen in het programma kunt u nieuwe afbeeldingen
maken. De geavanceerde set met bewerkgereedschappen stelt u in staat snel een
doek voor een afbeelding te maken waarop u een nieuwe afbeelding kunt maken of
bestaande afbeeldingen kunt verfraaien. Bij dit programma is alleen uw verbeelding
de beperkende factor!
Kenmerken
Invoer van afbeeldingen
● Legt afbeeldingen vast die zijn gemaakt met flatbed of hand-scanners, digitale
camera, capture box, enzovoort.
● Automatisch en halfautomatisch aan elkaar hechten van afbeeldingen voor het
invoeren van zeer grote afbeeldingen
● Laden/opslaan van afbeeldingen in diverse bestandsformaten, zoals TIF, PCX, BMP,
TGA, JPG, PCD, WMF, PNG, etc.
● Ondersteuning van het formaat New Flash Pix
Uitvoer van afbeeldingen
● Aanpassingen in de kleuren van de afdruk om het resultaat te kunnen beoordelen
voordat er feitelijk wordt afgedrukt
● OLE 2.0 ondersteuning voor bewerking in de standalone-modus
● Gemakkelijk ontwerp van artwork voor het maken van introductiepagina's en
HTML-toepassingen
Bewerken en verwerken van afbeeldingen
● Meerdere-lagen in document voor complexe plaatsing van objecten
● Slepen en neerzetten van zwevende afbeeldingen tussen documenten (het
verplaatsen van een geselecteerd gebied naar een nieuw doek of naar andere
doeken)
● Nauwkeurig selecteren van kleuren door instellen van kleurkanalen of kiezen van
kleuren uit een palet
● Volledige set met teken- en schildergereedschappen voor het maken van lijnen,
schilderen met verfkwast of verfspuit, kleurgradatie, gum, zoomen, tekst, pipet,
freehand roteren, borstel voor tint/verzadiging, helderheid/donkerte, vervagen/
scherpstellen, image hose enzovoort.
● Definieerbaar gereedschap voor image hose voor het snel plaatsen van
afbeeldingen op het doek
Page 80

18 NE
● Anti-alias functie met alle grafische gereedschappen voor het verfraaien van het
tekeneffect
● Selectiegereedschappen voor het snel en makkelijk maskeren van
onregelmatigheden in objecten
● Met één druk op een knop maken van betoverende 3D-effecten met instelbare
lichtbron voor geselecteerde objecten
● Met één druk op een knop genereren van schaduweffecten voor objecten bij een
vrij te kiezen lichtinvalshoek
● Elegante sjablonen voor het plaatsen van foto's
● Functies voor het fijnafstellen van afbeeldingen, bijvoorbeeld voor het aanpassen
van de helderheid, contrast, tint, verzadiging, toondistributie (egalisatie) enzovoort
● Meerdere filters voor het produceren van speciale effecten zoals effenen,
scherpstellen, rand opsporen, in reliëf en mozaïek
● Effect-browser met voorbeelden op de werkelijke grootte van de afbeelding,
verwerkt met alle fijnafstellingen en filters
● Ondersteuning van 16- en 32-bit Adobe™ plug-in filters
Systeemvereisten
De volgende hardware en software zijn nodig om met het programma te kunnen
werken:
● IBM PC 486, Pentium of compatibele computer
● Een CD-ROM station
● Vaste schijf met minstens 60 MB vrije schijfruimte om het programma te kunnen
opslaan en uitvoeren
● Tenminste 8 MB RAM (bij voorkeur 16 MB)
● MS Windows 95 of Windows NT
Om efficiënt met het programma te kunnen werken worden de volgende hardware en
software ten zeerste aanbevolen:
● 50 MB of meer virtueel geheugen
● Een kleurenprinter die door MS Windows 95 wordt ondersteund
Presto! ImageFolio (vervolg)
Page 81

NE 19
Mr. Photo, PhotoAlbum en ImageFolio installeren
Volg de onderstaande stappen als u Mr. Photo, PhotoAlbum en ImageFolio wilt
installeren.
1. Plaats de programma-CD in het CD-ROM station.
2. Klik op de knop Start en kies Uitvoeren.
3. Typ [station]:\NewSoft\setup.exe en kies OK. Het installatieprogramma detecteert
automatisch welke taal er wordt gebruikt door uw Windows-versie.
4. Volg de instructies op het scherm.
Page 82

20 NE
TECHNISCHE HULP VOOR GEREGISTREERDE GEBRUIKERS
JVC hulp voor:
Zie voor andere landen het JVC WorldWide Service Network op http://www.jvcvictor.co.jp/english/worldmap/index-e.html.
PORTUGAL
ORIELA, SA
Campo de Santa Clara, 160-A, 1100, Lisboa, Portugal
Tel : 01 888 4731 Fax : 01 886 7871
GREECE
≥ªEπ·‹…£∑…Ω≥Á°√∑π≥ Eªª°fl °.E.
◊ƒ∂¤†∂Í› 62, 183 46 Ω∆fiÁ†‡∆, A¥≤v†, ´ªª°©°
Tel : 01-4832855 Fax : 01-4832557
SUOMI
OY HEDENGREN AB
Mänkimiehentie 2 02780 Espoo, Finland
Tel : 9-68281 Fax : 9-810933
SCHWEIZ/SUISSE/SVIZZERA
SPITZER ELECTRONIC AG
Mühlemattsstrasse 13 4104 Oberwil, Suisse
Tel : 061 405 1111 Fax : 061 402 0434
DANMARK
JVC DANMARK A/S
Helgeshøj Alle 30 DK-2630 Taastrup, Danmark
Tel : 43 50 90 00 Fax : 43 50 90 81
ÖSTERREICH
JVC AUSTRIA GMBH
Slamastrasse 43 A-1230, Wien, Austria
Tel : (0222) 610370 Fax : (0222) 6103777
ESPAÑA
JVC ESPAÑA S.A.
Ctra. Gracia Manresa Km. 14' 750 Edificio Can
Castanyer, 08190 Sant Cugat del Vallés, España
Tfno : (93) 565 32 16 Fax : (93) 565 32 18
ITALIA
JVC ITALIA S.p.A.
Via Cassanese 224 Palazzo Tiepolo, 20090
Segrate Milano Oltre, Italia
Tel : (02) 26.99.161 Fax : (02) 26.92.1820
BELGIQUE/LUXEMBOURG
JVC BELGIUM S.A.
Rue de la Petite lle 3 -1070 BRUXELLES, Belgique
Tel : (02) 529 42 11 Fax : (02) 520 83 12
BELGIE/LUXEMBURG
JVC BELGIUM N.V.
Klein Eilandstraat 3 - 1070 BRUSSEL, België
Tel : (02) 529 42 11 Fax : (02) 520 83 12
DEUTSCHLAND
JVC DEUTSCHLAND GMBH
Postfach 10 05 62, Grüner Weg 12, 61169
Friedberg/Hessen. Deutschland
Tel : (06031) 9390 Fax : (06031) 183 83
NEDERLAND
JVC NEDERLAND B.V.
JVC Plein DE Heyderweg 2,
2314 XZ Leiden, Nederland
Tel : (071) 5453333 Fax : (071) 5894674
FRANCE
JVC FRANCE S.A. DIVISION VIDEO
102, boulevard Heloise,
95104 Argenteuil CEDEX, France
Tel : 01.39.96.33.33 Fax : 01.39.47.73.78
JVC (U.K.) Limited
14 Priestley Way, London
NW2 7BA, United Kingdom
Tel : (0181) 450-3282
Fax : (0181) 452-2534
U.K. & IRELAND
JVC IRELAND
(Branch of JVC(U.K.)Limited)
JVC HOUSE Carriglea Industrial Estate
Naas Road, Dublin 12, Republic of Ireland
Tel : (01)-460-2288 Fax : (01) -456-7522
SVERIGE
JVC SVENSKA AB
Veddestavãgen 15, 175 62 Jãrfälla-Stockholm, sweden
Tel : (08) 7950400 Fax : (08) 7950450
NORGE
JVC NORGE A/S
P.O.BOX 2012, Postterminalen 3103 Tonsberg, Norge
Tel : 33 36 52 00 Fax : 33 36 52 99
Page 83

NE 21
Productnaam
Model
Probleem
Foutmelding
Merk
Model Desktop Laptop
CPU
OS (Operating System)
Geheugen MB
Beschikbare ruimte op harde schijf MB
Het gebruik van deze software is onderhevig aan de voorwaarden van de softwarelicentie.
Vul de volgende gegevens in en zorg dat u de juiste informatie klaar heeft alvorens u
een JVC kantoor of agent in uw land raadpleegt omtrent deze software. (Zie JVC
Worldwide Service Network op http://www.jvc-victor.co.jp/english/worldmap/indexe.html).
PC/
Computer
Afhankelijk van uw probleem kan het even duren voordat u een antwoord op uw
vragen kunt krijgen.
JVC kan helaas niet ingaan op vragen betreffende de technische gegevens of de
prestaties van de meegeleverde NewSoft producten, noch op vragen betreffende de
basisbediening van uw PC.
NewSoft hulp voor:
Noord-Amerika (V.S.)
Technische hulp hotline:
E-mail naar: tech@newsoftinc.com. of bel
(510) 445-8616
www.newsoftinc.com
Europa
Groot-Brittannië
The Software Centre, East Way, East Mill
Industrial Estate, Ivybridge, Devon, PL21
9PE, UK
Tel: (44) 1752-201148
Fax: (44) 1752-894833
Frankrijk
Info Trade Centre d’activités de l’Ourcq 45,
rue Delizy 93692 Pantin, France
Tel: (33) 1-4810-7563
Fax: (33) 1-4810-7555
Azië/Oceanië (Taiwan, R.O.C.)
9F, NO68, Sec. 3, Nankig E.Rd., Taipei,
Taiwan, R.O.C.
Tel: (886) 2-2517-0750
Fax: (886) 2-2517-0760
support@newsoft.com.tw
www.newsoft.com.tw
OPMERKING VOOR DE GEBRUIKER
Page 84

2 CA
CONVENIO DE LICENCIA DEL SOFTWARE DE JVC
A NUESTROS CLIENTES:
ASEGURESE DE LEER CUIDADOSAMENTE ESTE AVISO ANTES DE ABRIR LOS
SOBRES PRECINTADOS QUE CONTIENEN EL SOFTWARE
Gracias por haber adquirido nuestro producto. Para poder empezar a utilizar el programa
de software adjunto debe aceptar los términos y las condiciones de este acuerdo, que
figuran a continuación.
Acuerdo de licencia de software
Este es un acuerdo vinculante entre usted (ya sea una persona física o jurídica) y Victor
Company of Japan, Limited (JVC) . El hecho de abrir los sobres precintados que contienen el
software y/o utilizar el Programa indicará su aceptación de los términos de este acuerdo. Si
no está de acuerdo con estos términos y condiciones, devuelva de inmediato los sobres del
software sin abrir y los elementos que acompañan al software al establecimiento en el que
los haya obtenido.
1. CONCESION DE LICENCIA
Este acuerdo de licencia (Acuerdo) le permite utilizar el programa de software (Programa)
que se adjunta en este paquete y/o los materiales impresos que acompañan al mismo (p. ej.
manuales impresos). Si bien se le concede asimismo una licencia para cargar el Programa
en la memoria temporal (es decir, la RAM) o instalar el Programa una sola vez en la memoria
permanente (p. ej., disco duro, CD-R u otro dispositivo de almacenamiento) de un (1) sistema
informático, queda terminantemente prohibido instalar el Programa en un servidoer de red
con el único objetivo de su distribución interna.
2. COPYRIGHT
No obstante lo estipulado en el anterior Artículo 1, todos los derechos de propiedad intelectual
sobre el Programa corresponden exclusivamente a JVC y están protegidos por la legislación
japonesa en materia de copyright, por las leyes de copyright de otros países, de ser aplicables,
y por las disposiciones pertinentes contenidas en los tratados internacionales, incluido el
Convenio de Berna para la Protección de Obras Literarias y Artísticas, junto con sus posibles
enmiendas, y el Convenio Universal de Copyright, así como sus enmiendas. Por consiguiente,
debe tratar el Programa como cualquier otro material protegido por copyright, con la única
salvedad de que podrá (a) realizar una (1) copia del Programa exclusivamente como copia de
seguridad o para fines de archivo, o (b) transferir el Programa a un único disco duro, siempre
que conserve el original únicamente como copia de seguridad o para fines de archivo.
3. LIMITACIONES AL USO DEL PROGRAMA
Queda prohibido someter el Programa a ingeniería inversa, descompilarlo, desensamblarlo,
revisarlo o modificarlo, salvo en la medida en que tal limitación esté prohibida expresamente
por la legislación aplicable. JVC y sus distribuidores y representantes declinan toda
responsabilidad por cualquier reclamación o defecto, etc. que pueda surgir o derivarse de
tates actividades prohibidas indicadas en este Acuerdo.
4. OTRAS RESTRICCIONES
Se prohíbe alquilar, arrendar o ceder el Programa a otras personas, o permitir el uso del
Programa por parte de otras personas.
IMPORTANTE
Page 85

CA 3
5. GARANTIA LIMITADA
JVC garantiza que el soporte en el que se suministra el Programa (p. ej., disquetes, CDROM, etc.) estará exento de defectos materiales y de fabricación durante un período de
treinta (30) días a partir de la fecha de adquisición y que el hardware que pueda acompañar
el Programa estará libre asimismo de defectos en la medida en que se estipula en el Formulario
de Garantía adjunto. La única responsabilidad de JVC y el recurso exclusivo del cliente en
relación con el Programa será, a la discreción de JVC, (a) la devolución del precio pagado o
(b) la sustitución de los discos defectuosos del Programa.
6. RENUNCIA A GARANTIAS
SALVO POR LAS GARANTIAS EXPRESAS INDICADAS EN ESTE ACUERDO Y EN LA
MEDIDA EN QUE ESTE PERMITIDO POR LA LEGISLACION APLICABLE, JVC Y SUS
PROVEEDORES RENUNCIAN A TODAS LAS DEMAS GARANTIAS, YA SEAN TACITAS O
EXPRESAS, INCLUIDAS A TITULO ENUNCIATIVO PERO NO LIMIT A TIVO LAS GARANTIAS
T ACIT A DE COMERCIABILIDAD E IDONEIDAD P ARA UN FIN DETERMINADO EN RELACION
CON EL PROGRAMA Y LOS MA TERIALES IMPRESOS SUMINISTRADOS CON EL MISMO.
7. RESPONSABILIDAD LIMITADA
EN LA MEDIDA EN QUE ESTE PERMITIDO POR LA LEGISLACION APLICABLE, EN
NINGUN CASO SERAN RESPONSABLES JVC Y SUS PROVEEDORES POR DAÑOS
INDIRECTOS, ESPECIALES, FORTUITOS O CONSECUENTES DE NINGUN TIPO,
INDEPENDIENTEMENTE DE SU FORMA, YA SEA BAJO CONTRATO , ACTO DELICTIVO,
ESTRICTA RESPONSABILIDAD DE PRODUCTO O DE OTRA NATURALEZA (INCLUIDOS
A TITULO ENUNCIATIVO PERO NO LIMITATIVO DAÑOS SUFRIDOS POR PERDIDA DE
BENEFICIOS, INTERRUPCION DE ACTIVIDADES EMPRESARIALES, PERDIDA DE
INFORMACION EMPRESARIAL O CUALQUIER OTRA PERDIDA ECONOMICA)
RESUL TANTE DE, O RELACIONADA CON EL USO O LA IMPOSIBILIDAD DE UTILIZAR EL
PROGRAMA, AUNQUE SE HAYA NOTIFICADO A JVC LA POSIBILIDAD DE QUE PUEDAN
PRODUCIRSE TALES DAÑOS.
Victor Company of Japan, Limited
Page 86

4 CA
PRECAUCION:
●Opere este equipo de acuerdo con los procedimientos operativos descritos en este manual.
●Emplee el CD-ROM suministrado exclusivamente. Nunca emplee ningún otro CD-ROM
para ejecutar este software.
●No intente modificar este software.
●Los cambios o modificaciones no autorizados por JVC pueden invalidar la autoridad del
usuario para operar el equipo.
Manipulación del CD-ROM
● Tome precauciones para no ensuciar o arañar la superficie reflejante (opuesta a la
superficie impresa), No escriba nada ni coloque rótulos en ninguna de las caras del disco.
Si el CD-ROM se ensucia, límpielo suavemente con un paño suave moviéndolo en
círculos desde el centro hacia la periferia.
● No emplee limpiadores para discos convencionales ni pulverizudores de limpieza.
● No doble el CD-ROM ni toque la superficie reflejante.
● No almacene su CD-ROM en un lugar polvoriento, caliente o húmedo. Manténgalo lejos
de la luz solar directa.
INDICE
CARACTERISTICAS PRINCIPALES 5 – 6
PREPARATIVOS 7
Accesorios suministrados.........................................................
7
Dispositivos conectables .........................................................
7
Ambiente operativo ...............................................................
7
INSTALACION 8 – 9
JLIP Video Capture................................................................
8
JLIP Video Producer ..............................................................
8
Adobe® Acrobat® Reader 3.0 ...................................................
8
Mr. Photo Gold ....................................................................
9
CONEXIONES 10 – 11
Presto! Mr. Photo Gold 13 – 19
APOYO TECNICO PARA LOS USUARIOS
REGISTRADOS 20 – 21
AVISO A LOS USUARIOS 21
NOTA:
El manual de instrucción de JLIP Video Capture/Producer también está incluido en el CDROM en formato PDF. Para abrirlo, haga doble clic en el archivo en el idioma deseado.
Observe que Adobe
®
Acrobat® Reader debe ser instalado para leer archivos PDF.
● El archivo "Readme.TXT" suministra información adicional para instalación e información
que no está incluída en este manual de instrucción. Lea este archivo antes de instalar el
programa de software suministrado.
● Usted podrá encontrar la información más reciente (en inglés) en el programa de software
suministrado en nuestra dirección de Internet: http://www.jvc-victor.co.jp.
Page 87

CA 5
CARACTERISTICAS PRINCIPALES
Software de captura de video JLIP
(JLIP Video Capture)
Función de captura de video
Las imágenes de video provenientes de
videocámaras pueden ser capturadas como
imágenes fijas, con 16,77 millones de
colores, a través de la conexión en serie (RS232C) de un ordenador con WindowsT.
Función de control JLIP
Empleando una videocámara compatible con
JLIP:
• Es posible ejecutar todas las operaciones
básicas de video a través de la pantalla
del ordenador.
• Con el programa de captura de video
(reproducción de cinta, lectura por
escáner y transferencia al PC), es posible
capturar automáticamente un máximo de
99 imágenes.
Software del reproductor de video JLIP
(JLIP Video Producer)
Función de control JLIP
Empleando una videocámara compatible con
JLIP:
• Es posible ejecutar todas las operaciones
básicas a través de la pantalla del
ordenador.
• Puede ser efectuada la reproducción
programada de video (máximo de 99
programas) o la edición de montaje.
Edición de conjuntos
Es posible editar las escenas seleccionadas
en una cinta grabada en la secuencia
especificada.
Cinta grabada
(en la videocámara)
Cinta grabada
(en el VCR)
Se han suministrado dos programas en software.
Page 88

6 CA
CARACTERISTICAS PRINCIPALES (cont.)
Presentaciones de negocios
Las imágenes de video capturadas pueden
ser incorporadas a sus documentos de
negocios para hacer que sus presentaciones
sean más refinadas.
"Internet Homepage"
Las imágenes de video capturadas pueden
ser incorporadas en su "Internet homepage"
empleando software para edición de
imágenes.
Aplicaciones avanzadas
Creación de índices de títulos para su
colección de video
Las imágenes índice de títulos provenientes
de sus grabaciones favoritas pueden ser
capturadas, empleando el modo de intervalo
de captura. Imprima las imágenes índice
capturadas en la impresora de su PC,
empleando la función de impresión de
pantalla (Print Screen) del ordenador para
grabarlas en sus cassettes.
Diario en video y tarjetas postales
Sirve para crear sus tarjetas postales
originales, invitaciones para fiestas y
similares o llevar un diario en video.
Page 89

CA 7
PREPARATIVOS
Dispositivos conectables
q Cámaras de video digital JVC: GR-DVL20, GR-DVL30, GR-DVL40
Ambiente operativo
q Ordenador personal con Microsoft® Windows® 95/Windows® 98
q CPU: Procesador Intel® Pentium® o superior
q RAM mínima requerida: 32 MB
q Espacio disponible en el Disco Duro de por lo menos 10 MB para el Software JVC
Se recomienda 140 MB para el Software Presto! Mr. Photo Gold
(Usted puede seleccionar qué aplicaciones de Mr. Photo Gold desea instalar).
q Pantalla en color con una resolución de 640 x 480 pixels, 256 colores
Se recomienda 1024 x 768 pixeles, 16,77 millones de colores
q Una conexión de transmisión en serie libre, compatible con 9.600 bps o una
velocidad de transmisión más rápida, conectable al RS-232C con un conector en
serie de 9 clavijas (Recomendamos uno compatible con UART 16550A)
q Ratón (compatible con Windows®)
q Unidad de CD-ROM
NOTA:
Para ordenadores que emplean una conexión de comunicación en serie que no sea
la normal de 9 clavijas es necesario un adaptador de conversión en serie opcional
de 9 clavijas.
* La información de los requisitos del sistema arriba mencionada no es una garantía
de que el software suministrado funcionará en todas las computadoras personales
satisfaciendo todas las necesidades.
* Microsoft® y Windows® son marcas o marcas registradas de Microsoft Corporation
en los Estados Unidos y/o en otros países.
* es una marca registrada de JVC.
JLIP es la abreviatura de Interconexión de Nivel de Protocolo, que es un nuevo
protocolo de comunicaciones que permite a unidades de AV equipadas con
terminal JLIP ser controladas por medio de un ordenador personal.
* Otros nombres de productos y de compañías incluídos en este manual de
instrucción son marcas y/o marcas registradas de sus respectivos propietarios.
CD-ROM incluyendo dos
programas software:
•JLIP Video Capture
•JLIP Video Producer
•Presto! Mr. Photo Gold
•
Mr. Photo
•
PhotoAlbum
•
ImageFolio
Cable de conexión de PC
Accesorios suministrados
Cable de edición
(4 polos – 2 polos)
Page 90

8 CA
INSTALACION
INSTALACION
Por detalles sobre los procedimientos operativos básicos de Windows® 95/98 refiérase
al manual de Windows® 95/98 o al manual de su ordenador.
Instalación de JLIP Video Capture (Captura de Video JLIP)
1. Active Windows®.
• Cierre todas las otras aplicaciones que estén siendo ejecutadas.
Asegúrese de que no haya iconos de otras aplicaciones en la barra de tareas.
2. Inserte el CD-ROM en el drive CD-ROM.
Haga clic en Start (Iniciar) en la barra de tareas — Run (Ejecutar).
3. Haga clic en Browse (Hojear) — icono CD-ROM en Look in (Examinar): columna.
4. Haga un doble clic en la carpeta JVC.
5. Haga un doble clic en la carpeta Jcpt.
6. Haga un doble clic en el icono Setup.exe (Configurar).
7. Haga un clic en OK.
Será cargado el programa “set-up”. Siga las instrucciones en la pantalla.
Instalación de JLIP Video Producer (Productor de Video JLIP)
1. Active Windows®.
• Cierre todas las otras aplicaciones que estén siendo ejecutadas.
Asegúrese de que no haya iconos de otras aplicaciones en la barra de tareas.
2. Inserte el CD-ROM en el drive CD-ROM.
Haga clic en Start (Iniciar) en la barra de tareas — Run (Ejecutar).
3. Haga clic en Browse (Hojear) — icono CD-ROM en Look in (Examinar): columna.
4. Haga un doble clic en la carpeta JVC.
5. Haga un doble clic en la carpeta Vdpro.
6. Haga un doble clic en el icono Setup.exe (Configurar).
7. Haga un clic en OK.
Será cargado el programa “set-up”. Siga las instrucciones en la pantalla.
Instalación de Adobe® Acrobat® Reader 3.0
1. Active Windows®.
• Cierre todas las otras aplicaciones que estén siendo ejecutadas.
Asegúrese de que no haya iconos de otras aplicaciones en la barra de tareas.
2. Inserte el CD ROM en el drive CD-ROM.
Haga clic en Start (Iniciar) en la barra de tareas — Run (Ejecutar).
3. Haga clic en Browse (Hojear) — icono CD-ROM en Look in (Examinar): columna.
4. Haga un doble clic en la carpeta Reader.
5. Haga un doble clic en el icono Setup.exe (Configurar).
6. Haga un clic en OK.
Será cargado el programa “set-up”. Siga las instrucciones en la pantalla.
NOTAS:
• Cierre cualquier otro programa que esté corriendo en el PC.
• Inhabilite programas que estén operando en el fondo, tales como software de
protectores de pantalla, correo electrónico y comunicación, verificadores de virus,
planificadores, etc.
• Desactive la compartición de archivo y de impresora.
Page 91

CA 9
INSTALACION
Por detalles sobre los procedimientos operativos básicos de Windows® 95/98 refiérase
al manual de Windows® 95/98 o al manual de su ordenador.
Instalación de NewSoft Presto! Mr. Photo/PhotoAlbum/ImageFolio
1. Active Windows®.
• Cierre todas las otras aplicaciones que estén siendo ejecutadas.
Asegúrese de que no haya iconos de otras aplicaciones en la barra de tareas.
2. Inserte el CD-ROM en el drive de CD-ROM. Haga clic en Start (iniciar) en la barra
de tareas – Settings (ajustar) – Control Panel (panel de control).
3. Haga doble clic en Add/Remove Programs (agregue/retire programas).
Haga clic en el icono Install (instalar) – Next (siguiente) – Browse (hojear) –
CD-ROM en la columna Look in: (examinar:).
4. Haga doble clic en la carpeta NewSoft.
5. Haga doble clic en Setup.exe (configurar).
6. Haga clic en Finish (fininalizar).
• Una vez cargado el programa de instalación, siga las instrucciones mostradas en
su pantalla.
7. Haga clic en Install en la ventana Language Selection (selección de idioma).
• El programa de instalación detectará automáticamente el idioma utilizado en la
versión de Windows® que está en funcionamiento.
8. Haga clic en Next> (próximo) en la ventana Select Components (selección de
componentes).
• Haga clic en la caja de comprobación para anular cualquier programa de soft-
ware que no desea instalar.
Será cargado el programa “set-up”. Siga las instrucciones en la pantalla.
INICIALICE el software JLIP Video Capture/Producer Y
Presto! Mr. Photo/PhotoAlbum/ImageFolio
1. Active Windows®.
2. Haga clic en el botón Start en la barra de tareas.
• Aparecerá el menú de programa en pantalla.
3. Mueva el puntero del ratón sobre el programa que desee ejecutar y haga clic para
iniciar el programa.
• El software que usted seleccionó en el paso 3 es inicializado.
CIERRE DEL PROGRAMA
Haga un clic en el botón Cerrar o seleccione File (Archivo) — Exit (Salir).
Page 92

10 CA
CONEXIONES
n Para seguridad, asegúrese de que todas las unidades tengan la alimentación desconectada
antes de efectuar alguna conexión.
n Le recomendamos que emplee el adaptador de alimentación de CA/cargador.
n Al conectar un cable con un filtro de núcleo colocado, asegúrese de enchufar el conector
equipado con el filtro de núcleo en la videocámara.
n No realice ninguna conexión al conector DV OUT de la videocámara.
CUANDO CONECTE A UN VCR EQUIPADO CON UN JACK JLIP
Al jack JLIP
NOTA:
El cable JLIP es opcional. Asegúrese de utilizar el siguiente:
•Cable JLIP: PEAC0453
Consulte a su Centro de Servicio JVC más cercano para detalles sobre su disponibilidad (vea la
página 20).
PC
Videocámara
Conéctelo si la unidad
de video tiene un jack de
entrada S-Video.
VCR
(Platina de grabación)
Cuando emplea JLIP Video Producer:
Cuando emplea JLIP Video Capture:
Al jack PC
Al jack S OUT
Cable S-VIDEO
Al jack de entrada
S-VIDEO
Cable JLIP
Al jack JLIP
Cable de conexión PC (suministrado)
A la conexión
COM (RS-232C)
Blanco a
AUDIO
L
Rojo a
AUDIO
R
Amarillo
a VIDEO
Cable AUDIO/VIDEO
Blanco a
AUDIO L
Rojo a
AUDIO R
Amarillo a
VIDEO
NOTA:
El cable JLIP solamente puede
ser empleado con VCRs JVC
equipados con un jack JLIP.
Filtro de núcleo
Coloque el filtro de núcleo
suministrado con su videocámara,
refiérase a su manual de instrucción.
Si su VCR tiene un conector
SCART, emplee el adaptador
de cable.
Page 93

CA 11
TW
CUANDO CONECTE A UN VCR QUE NO ESTE EQUIPADO
CON UN JACK JLIP
Cuando emplee un VCR que no esté equipado con un jack JLIP, ajuste la marca de su VCR
empleando el mando a distancia y efectúe la edición empleando el mando a distancia.
PC
Videocámara
Conéctelo si la unidad
de video tiene un jack de
entrada S-Video.
VCR
(Platina de grabación)
Cuando emplea JLIP Video Producer:
Cuando emplea JLIP Video Capture:
Al jack PC
Al jack S OUT
Cable S-VIDEO
Al jack de entrada
S-VIDEO
Cable de edición
(4 polos – 2 polos)
(suministrado )
Al jack JLIP
Cable de conexión PC (suministrado)
A la conexión
COM (RS-232C)
Blanco a
AUDIO
L
Rojo a
AUDIO
R
Amarillo
a VIDEO
Cable AUDIO/VIDEO
Blanco a
AUDIO L
Rojo a
AUDIO R
Amarillo a
VIDEO
Al jack de
pausa
remota
Al mando a
distancia
Conecte aquí si la
platina de grabación
no posee un jack de
pausa a distancia
Emplee el enchufe que tiene tres anillos
amarillos alrededor de la clavija.
Emplee el
enchufe que
tiene un anillo
negro
alrededor de la
clavija.
Filtro de núcleo
Si su VCR tiene un conector
SCART, emplee el adaptador
de cable.
Page 94

12 CA
ANOTACIONES
Page 95

CA 13
Mr. Photo Gold:
Presto! Mr. Photo
Presto! PhotoAlbum
Presto! ImageFolio
Para Windows
Copyright © 1997-1998, NewSoft Technology Corp., reservados todos los derechos.
* Consulte a su centro de servicio NewSoft más cercano para suporte técnico
(refiérase a la siguiente página).
Page 96

14 CA
Servicio posventa
NewSoft international service center:
U.S.A: 4113 Clipper Court, Fremont, CA 94538, USA
Tel: (1) 510-445-8600 Fax: (1) 510-445-8601
Technical Support Hot Line: (1) 510-445-8616
E-mail: tech@newsoftinc.com
http://www.newsoftinc.com
Taiwan: 9F, No. 68, Sec. 3, Nan-king E. Rd., Taipei, Taiwan, R.O.C.
Tel: (886) 2-2517-0750 Fax: (886) 2-2517-0760
Technical Support Hot Line: (886) 2-2517-0952
E-mail: support@newsoft.com.tw
http://www.newsoft.com.tw
Japan: 6-21-3 Shinbashi Minato-Ku, Tokyo 105-0004 Japan
Tel: (81) 3-5472-7008 Fax: (81) 3-5472-7009
E-mail: support@newsoft.co.jp
http://www.newsoft.co.jp
U.K.: The Software Centre, East Way,
East Mill Industrial Estate, Ivybridge
Devon, PL21 9PE, United Kingdom
Tel: (44) 01752-201148 Fax: (44) 01752-894833
France: Info Trade Centre
d’activités de I’Ourcq 45,
rue Delizy 93692 Pantin France
Tel: (33) 1-4810-7563 Fax: (33) 1-4810-7555
E-mail: infotrad@club-internet.fr
* ( ): Código de país
Page 97

CA 15
Presto! Mr. Photo
Mr. Photo almacena y cataloga todas sus fotografías valiosas. Puede optar por ordenar
sus “rollos” de fotografías y películas por la fecha y el título, o hacer búsquedas por
una palabra clave, la fecha o cualquier otra propiedad de la imagen. Más tarde,
podrá arrastrar sus fotografías y soltarlas en la Barra de aplicaciones para crear
composiciones personales y combinaciones de fotografías, ya sea mediante las
plantillas listas para su empleo o los álbumes de fotografías electrónicos. Haga clic en
el icono Presentación de diapositivas para ver las fotografías seleccionadas en un
“rollo” de película, también puede arrastrar una fotografía y soltarla en el icono
Correo electrónico para hacerla llegar a sus familiares y amigos.
Características
● Permite adquirir fotografías de cámaras digitales, escáneres, discos flexibles, Photo
CD e Internet.
● Cataloga fotografías en “rollos” de película que el usuario puede personalizar y
distribuir a su gusto.
● Facilita la mejora instantánea de fotografías (eliminación del rojo de los ojos,
ajuste del brillo y el contraste, aplicación de difuminados, perfilado de formas,
etc.).
● Arrastre y suelte las fotografías que desee imprimir, enviar por correo electrónico,
utilizar para presentación de diapositivas HTML o enviar por correo a través de
Internet.
● Arrastre y suelte sus fotografías en otras aplicaciones para modificarlas más tarde o
utilizarlas para sus proyectos creativos.
● Guardar fotografías para utilizarlas como protector de pantalla o tapiz para el
fondo del escritorio.
● Imprimir pegatinas, etiquetas y catálogos de fotografías.
Requisitos del sistema
● Una cámara digital más el software de cámara digital.
● Un escáner, si desea explorar las fotografías.
● Un ordenador PC con un microprocesador 486 como mínimo (es aconsejable
utilizar un procesador Pentium) y 16 MB de memoria RAM.
● Se recomienda un mínimo de 30 MB espacio disponible en el disco duro después
de la instalación. Es el espacio necesario para el trabajo de Mr. Photo.
● Una unidad de CDROM para cargar Mr. Photo.
● Una tarjeta de vídeo Super VGA.
NOTA:
El software Mr. Photo Gold solamente puede ser utilizado con videocámaras
digitales JVC conjuntamente con el software JLIP Video Capture.
Page 98

16 CA
Presto! PhotoAlbum
PhotoAlbum permite crear los álbumes de fotografías electrónicos que le ayudarán a
mantener sus recuerdos siempre vivos. Para ello, basta con arrastrar y soltar
fotografías, marcos, recortes, texturas y efectos especiales y añadirles voces y efectos
de sonido. También podrá personalizar sus álbumes con voces y efectos sonoros que
le permitirán crear álbumes de presentaciones de diapositivas para su envío por
Internet o correo electrónico.
Características
● Adquirir fotografías de cámaras digitales y escáneres.
● Crear páginas para álbumes, ya sea a partir de las plantillas listas para su empleo,
o de creación propia.
● Girar, cambiar el tamaño y mejorar las fotografías.
● Aplicar la función arrastrar y soltar para añadir fotografías, marcos, recortes,
texturas y efectos especiales.
● Decorar páginas de álbum con capturas de texto, música de fondo, narraciones y
efectos de sonido.
● Compartir álbumes terminados tanto por correo electrónico como a través de
Internet.
Requisitos del sistema
● IBM con procesador 486 ó Pentium o cualquier otro PC compatible.
● Unidad lectora de CD-ROM.
● Disco duro con al menos 50 Mb de espacio libre para que el programa puede
ejecutarse sin problemas.
● Un mínimo de 16 Mb de memoria RAM (32 Mb recomendados).
● MS Windows 95 o Windows NT 4.0.
Requisitos del sistema recomendados
● Tarjeta de sonido con un micrófono adecuado.
● Impresora a color admitida.
● Un visor de red, como por ejemplo Internet Explorer 3.0 o Netscape Navigator
3.0, o una versión posterior de cualquiera de ellos.
Page 99

CA 17
Presto! ImageFolio
ImageFolio es un completo programa de proceso de imágenes multimedia que
funciona bajo MS Windows 95 o Windows NT. Permite procesar con todo detalle en
la pantalla del PC imágenes digitalizadas, como por ejemplo, fotografías, gráficos y
dibujos, así como imágenes capturadas desde dispositivos de vídeo, como por
ejemplo, un aparato de vídeo, un disco láser, una cámara digital, un cuadro de
captura de vídeo, etc.
Puede crear nuevas imágenes utilizando las potentes herramientas incluidas en el
programa. El sofisticado conjunto de herramientas de edición de imágenes permite
crear rápidamente el boceto del cuadro de imágenes con el fin de crear una imagen
nueva, o bien mejorar una ya existente. Con este programa, ¡su imaginación es su
único límite!
Características
Entrada de la imagen
● Captura imágenes con escáners de mano o de sobremesa, cámaras digitales,
cuadros de captura, etc.
● Unión automática y semiautomática de imágenes para insertar imágenes de gran
tamaño.
● Carga y graba imágenes con los formatos de archivo más populares, como TIF,
PCX, BMP, TGA, JPG, PCD, WMF, PNG, etc.
● Admite del formato New Flash Pix.
Salida de la imagen
● Variaciones en el ajuste de color de impresión para examinar el efecto de
impresión antes de la impresión real.
● Soporte OLE 2.0 para el modo de edición autónomo.
● Fácil diseño de ilustraciones para la producción de páginas principales y
aplicaciones HTML.
Edición y proceso de imágenes
● Documentos individuales de varias capas para organizar objetos complejos.
● Arrastre y colocación de imágenes flotantes entre documentos (desplazamiento del
área seleccionada a otros cuadros o a uno nuevo).
● Selección precisa de colores mediante canales de color o mediante una paleta.
● Conjunto completo de herramientas de dibujo y pintura para trabajar en imágenes,
como por ejemplo, líneas, pincel, aerógrafo, gradación de color, borrador, zoom,
texto, cuentagotas, giro a mano alzada, pincel Tono/Saturación, pincel Brillo/
Oscuridad, pincel Suavizar/Nitidez.
● Herramienta difusora de imágenes configurable para insertar rápidamente
conjuntos de imágenes en el cuadro.
Page 100

18 CA
● Función Anti-alias con todas las herramientas gráficas para mejorar el efecto de
dibujo.
● Herramientas de selección completas para aplicar máscaras fácilmente en objetos
irregulares.
● Creación de efectos mágicos 3D con fuentes de luz definibles para los objetos con
un solo clic.
● Generación de sombras de objetos en direcciones de luz seleccionables con un
solo clic.
● Plantillas elegantes para el uso cotidiano de fotos.
● Funciones de ajuste preciso de imágenes para el brillo, contraste, tono, saturación,
distribución de tonos (ecualización), etc.
● Varios filtros para producir efectos especiales, como por ejemplo, suavidad,
nitidez, detección de bordes, relieves y mosaico.
● Examinador de efectos que proporciona vistas previas en tamaño real de la
imagen, procesada con todas las funciones y filtros de ajuste preciso.
● Admite la interfaz de filtros de conexión Adobe™ de 16 y 32 bits.
Requisitos del sistema
Para poder ejecutar el programa, deberá disponer de los siguientes dispositivos de
hardware y software:
● Un PC IBM 486, Pentium o compatible.
● Una unidad de CD-ROM.
● Una unidad de disco duro con un mínimo de 60 MB de espacio disponible para
contener y ejecutar el programa.
● Un mínimo de 8 MB de RAM (preferiblemente 16 MB).
● MS Windows 95 o Windows NT.
Para utilizar eficientemente el programa, los siguientes elementos de hardware y
software adicionales son altamente recomendables:
● 50 MB o más de memoria virtual.
● Una impresora en color admitida por MS Windows 95.
Presto! ImageFolio (cont.)
 Loading...