

Page 1
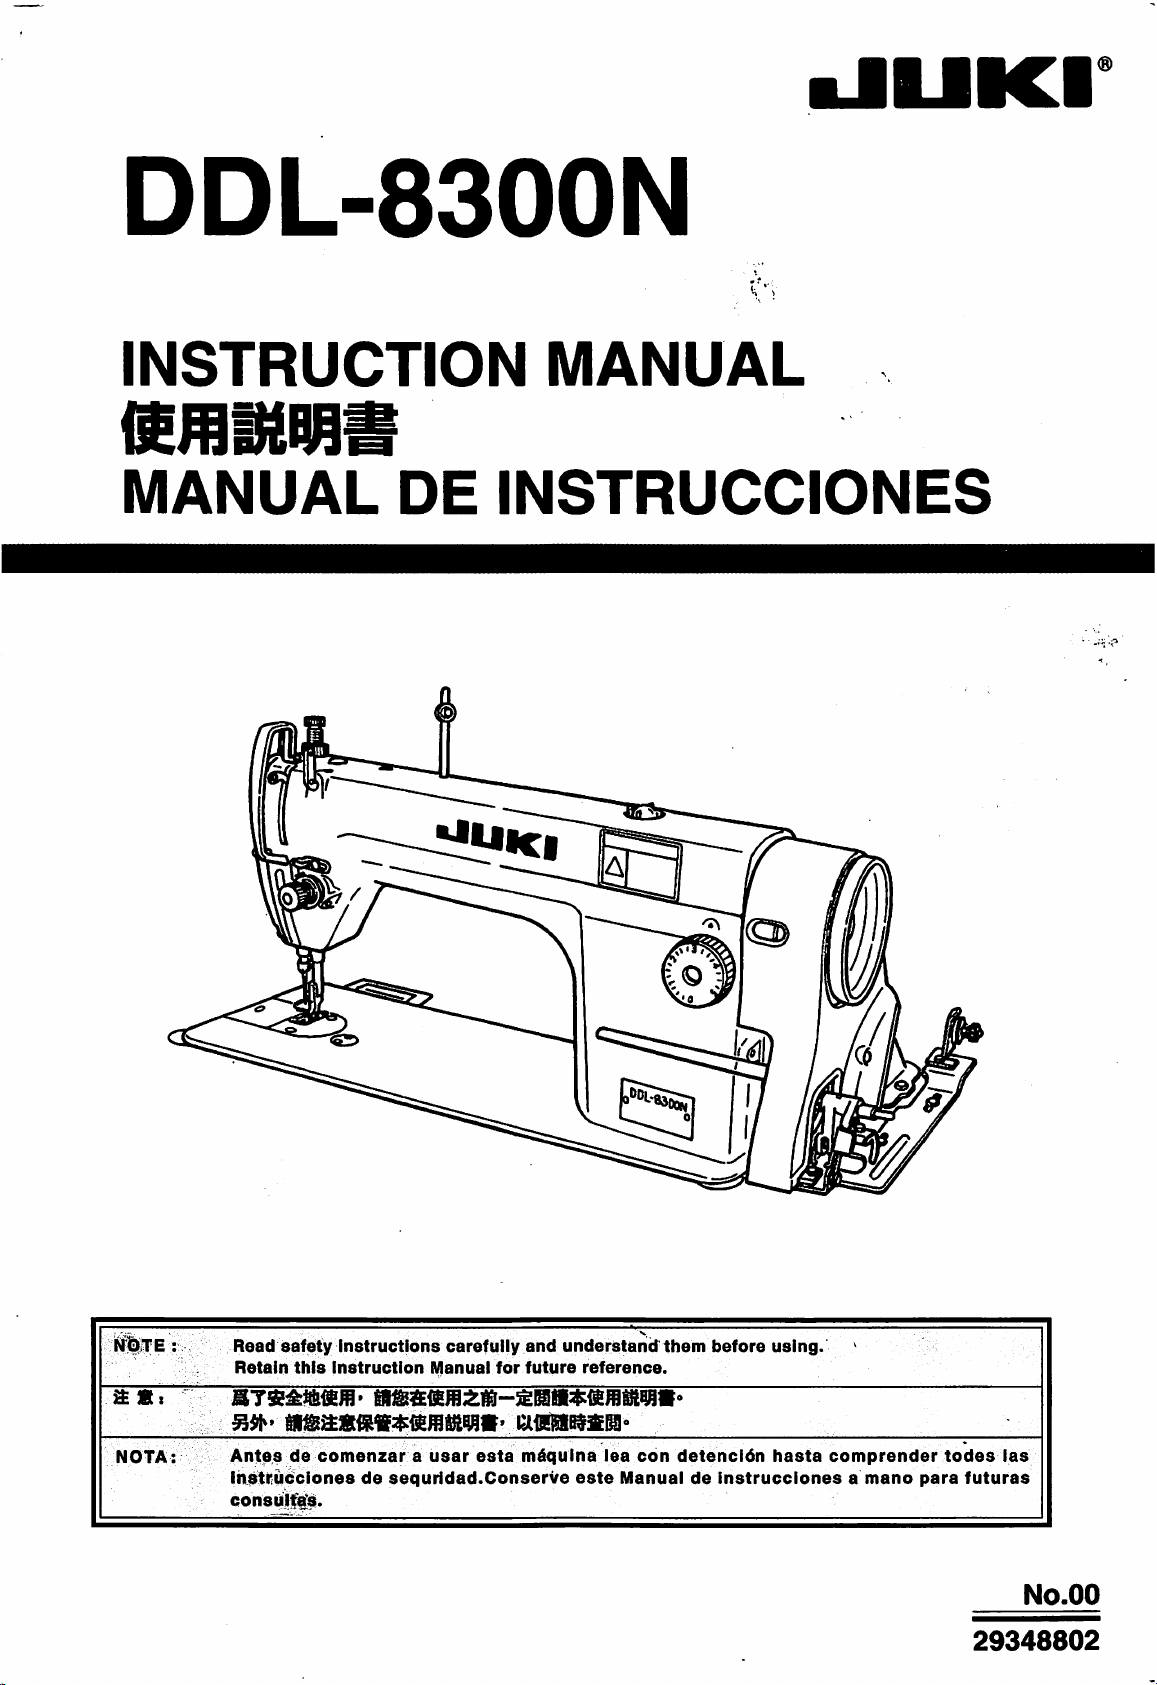
DDL-8300N
•JUKI
INSTRUCTION
MANUAL
DE
MANUAL
INSTRUCCIONES
NOTA:
:
Read
safety
Retain
this
Antes
de
comenzar
InStrudciones
consulfafs.
instructions
instruction
a
de
sequridad.Conserve
carefully
Manual
usar
for
esta
and
understand
future
euEnssB'
mdquina
este
them
before
using.
reference.
lea
con
detencidn
Manualdeinstruccionesamano
hasta
%
comprender
para
todes
futuras
las
No.OO
29348802
Page 2
IMPORTANT
SAFETY
INSTRUCTIONS
Putting sewing
which
these
Technical service for
systems
into operation is prohibited until it
has
sewing machines willbe built into, have conformed with the safety regulations in your country.
those
sewing
systemsisalso
prohibited.
1. Observe the basic safety measures, including, but not limited to
machine.
2. Read all
In addition,
3. Use
country.
4.
All
The operation without
5. This machine shall be
6. For your
7. For
receptacle.
7-1 For threading needle(s), looper,
7-2 For replacing part(s) of needle,
7-3
7-4 When leaving
7-5 When
8. If
skinorswallow
doctor.
the
instructions, including, but not limited to this Instruction Manual before you
keep
the
machine after it
safety devices
personai
the
following,
cloth
guide
For
repair
using
you
should
this
must
protection, we
turn
etc.
work.
the
clutch
allow oil,
anyofsuch
Instruction Manualsothat
has
been
ascertained
be in position when
the
specified
operated
off
the
working
motors
grease,
liquid by mistake, immediateiy
safety
by appropriately-trained
recommend
power
spreader
presser
placeorwhen
without
etc.
used
the
devicesisnot
switchordisconnect
etc.
foot,
the
applying
with
the
you
may
readitat
thatitconforms
machine is ready for work or in operation.
allowed.
operators.
that
you
wear
and
replacing bobbin.
throat
plate, looper,
working
brake,ithastobe
machine
placeisunattended.
and
wash
been ascertained that
the
following
anytime
with
safety
safety
glasses.
the
power
spreader,
waited
devicestocomeincontact
the
contacted
ones,
when
necessary.
rules/standards
plugofthe
feed
dog,
until
the
motor
areas
the
sewing
whenever you
use
the
valid in
machine
needle
guard,folder,
stopped
with
your
and
consuit
systems
use
machine.
your
from
totally.
eyes
a medical
in
the
the
or
9. Tampering with
10. Repair,
specially
11. General
12.
Repair
techniciansorunder
Whenever
13.
Before
cylinder,
cut
expelled.
techniciansorspecially
14. Periodically clean
15.
Grounding
be
16. An appropriate power plug
connectedtoa
17.
The
18. Remodelormodify
safety
machine.
19. Warning
remodeling
maintenance
and
making
off. Existing residual air
operatedinan
machineisonly
measures.
the
live
parts
and
skilled
the
hints
personnel.
and
maintenance
the
you
find a failure of
repair
and
air
compressor
Exceptionstothis
skilled
the
machine
the
machineisaiways
environment
grounded
allowedtot>e
the
machineinaccordance
JUKI
assumes
are
marked
and
devices,
adjustment
Only
inspection
worksofelectrical
audit
maintenance
hastobe
pressure
are
hastobe
receptacle.
with
works
spare
parts
works
and
guidanceofspecially
any
of electrical
worksonthe
detached
after
only
adjustments
personnel.
throughout
necessary
thatisfree
attachedtothe
used
for
no responsibility for
the
two
shown
regardlessofwhether
must
onlybedonebyappropriately
designated
havetobe
components
components,
from
disconnecting
the
period of
for
the
from
strong
the
purpose
with
symbols.
by JUKI
donebyappropriately
skilled
immediately
machine
the
and
normal
machine
the
damage
equipped
machine
the
performance
use.
operationofthe
noise
sources
by electric
intended.
safety
the
machine
canbeused
shall
be
conducted
personnel.
stop
with
pneumatic
and
the
compressed
air
compressor
checks
Other
rules/standards
caused
donebyappropriately
machine.
suchashigh-frequency
technicians.
used
by remodelingormodification of
is powered, is prohibited.
for
repairs.
trained
the
machine.
from
are
not
while
trained
the
technicians
personnel.
by
qualified
parts
air
supply
machine
The
machine
Power
allowed.
taking
all
electric
suchasan
hastobe
hastobe
trained
welder.
plug
hastobe
the
effective
has
or
air
to
the
A
Danger
items
of
injury
requiring
special
to
operator
or
attention
service
staff
A
Page 3
mm•aw^iaii««ii±
-
6. '
7. '
7-2
7-3
mmm'
7-4
If^®m«A7aKISMIf^®Hffif
7-5
{£ffil9ldsa^
8. ^
11.
-i3s»i%if^gsiB^si§i)iispe^An^ii{7<>
13.
(is
^ ^ °
in^ssnsg^iR^'
liiiisssesaiBB^
ffillilBP^tSli^liM
^
sn
>
$t«>ii$t>^8!S
'
14.
°
'
^tRTS^iSSP
^ ^
•>
il:;^^Siie
iSiiii^iSS9ISAiBISlE^iiJlSa±^'
o
iitts
°
o
^ ^
<•
?)i9i£gs^^
§l(»S«fK^ • ffilc
<>
16.
aagaMSfflaBSAHP^aiiiwAasgii»s^ag!^^ggijgsas±
17.
5?p'
19.
2|s:®fflgiB0»±SgfflmT2(l^??SSI»
A
=AjM^^f^AA
°
'JUKI
^
ig(iAea^)gRei
°
<>
A
<•
Page 4
INSTRUCCIONESIMPORTANTES
DE
SEGURIDAO
Est§prohibido poneren operacidnla
losqueeatetipode
mdquinas
se tienenqueIncorporar, estdnen
mdquina
docoser hasta no cerciorarsede que los sistemas de eosidoen
conformidad
conlas requlacionesdeseguridad
vigentes en su pafs. Tambi^nestd prohibidoel servicio t^cnlco para estos alstemas de cosido.
1.Observela medidas b^slcas de seguridad, Incluyendo, pero no llmlt^ndose, a las siguientes, slempre que
uselamdquina.
2. Lea todas las Instrucciones, Incluyendo, pero no llmitdndose a
la mdqulna. Ademds, guarde este
necesarlo.
Manual
de Instrucciones de mode que usted lo pueda leer cuando sea
este
Manualde Instrucciones,
antes
de usar
3. Use la mdquina despu6s de halierse cerciorado de queseconforms a las reglas y normas de seguridad
v^lldasensupals.
4.Todos los dispositlvos de seguridad deben estar en posicldn cuando la m^quina estd lists para entrar en
servicio o ya estd en operacidn. Noestd permltido operar la mdqulna sin los dispositlvos de seguridad
especlficados.
5. Esta mdquina
debe
ser
operada
per
operadores
debldamente entrenados.
6. Para la proteccldn del personal, recomendamos la colocacidn de gafas de seguridad.
7. Paralosigulente,desconecte laalimentacldn o desconecte elcable deallmentacldn de lamdqulnadesde latoma.
7-1 Parael enhebrado de la(s) aguja(s), enlazador, estlradora, etc., y para el reemplazo de la boblna.
7-2 Parael reemplazo
de
transporte, protectordeaguja, plegador, gufadetela,
7-3
Para
los
trabajosdereparo.
7-4 Al dejar el lugar de trabajo o
7-5Cuando usemotores de embraguesin aplicar elfreno,sedebeesperarhastaque el motor pare totalmente.
case
8. En
trague
un
de que el aceite, grasa, etc. queseusa ensumdquina y dispositlvos toque
por
desculdo
m6dlco.
de
las
piezas de la aguja, prensatelas, placadeagujas, enlazador, estiradora,dentado
cualquier
cuando
Ifquido
el lugar de trabajo
semejante,
Idvese
etc.
estd
desatendido.
Inmediatamente
las
sus
partes
afectadasoconsults
ojos o plel, o que
a
9. Est4prohibido
10. Los
11. Los trabajos de mantenlmiento e inspeccidn
12. Los trabajosdereparo y mantenlmientodelos
13.
14. Llmple
15. La
16.
17.
18.
trabajos
entrenadosopor
Para los reparos,sepueden utilizar solamente las piezas de repuesto deslgnadas porJUKI.
entrenado.
eldctricos callflcados o bajo la veriflcacldn y direccidn de personal especlallzado.
Slempre
Antesdellevar a
neumdticas,
tambl^nsedabe
existente
verificaclones de rendimiento
puesta
La
m^qulna
soldadura
Los
t^cnlcos
El
enchufe
S6losepuede
Remodels
medidasdeseguridad
remodelacldn
manipular
de reparo, remodelacldn y
que
descubra
tales
despudsdela desconexidndela m^qulna. Las
perlddicamentelam^qulna
a tierra de la m^qulnaesslempre
deberd
de
alta
el6ctricos
delacorrlente
utilizar
o modlfique la
o modificacidndela mdqulna.
laspiezasydispositivosmdviles mientrasest§ conectada la corrlenteelectricsa lam^uina.
ajustesedeben
personal
cabo
como
cortarelsumlnlstrodeaire comprlmido. Adem^s,sedel>e
frecuencla.
especlallzado.
una
fallaencualquier
los
trabajosdereparoymantenlmientoenla
un clllndrodeaire,sedebe
quesehacen
ser
operada
del)er6n
el4ctrlca
esta
mdqulna
mdqulnadeacuerdoalas
efectivamente.
enunamblente
montarenla
por t6cnlcos debldamente
durante
se
paraelpropdsito
todo
deberd
JUKI no
generalessedeben
componentes
componente
el perfododeuse.
necesarlo
mdquinaunenchufe
conectaraun
asume
hacer
solamente
llevar a
el^ctricossedeben
el6ctrlco,
desmontarelcompresordeaire
excepclones
para la operacidn normal de la misma.
exento
normasyreglasdeseguridad
de
tomaconiente
que
fue fabrlcada. Nosepermiten
ninguna
pare
para
entrenados
ruidos
responsabllldad
fuertes
aproplado
por
cabo
por personal debldamente
Inmediatamente la mdqulna.
mdqulna
expelerlapresidndeaire
eso
son
o por personalespeclallzado.
tales
paralacorrlente
conectadoatierra.
mientras
por
tdcnicos
conduclr
equipada
solamente
comoenlugares
dahos
desde
otros
causados
debfdamente
por
con
la mdqulna, y
los
el^ctrlca.
uses.
toma
t4cnicos
piezas
ajustes
de
todas
las
por
y
la
19.
Los
puntosdeadvertencia
A
Peligro
Itemes
estdn
marcados
de
lesldn
que
requleren
con
los
dos
al
operador
atencldn
o
personal
especial
sfmbolos
de
mostrados.
servicio
A
III
Page 5
FOR
SAFE
OPERATION
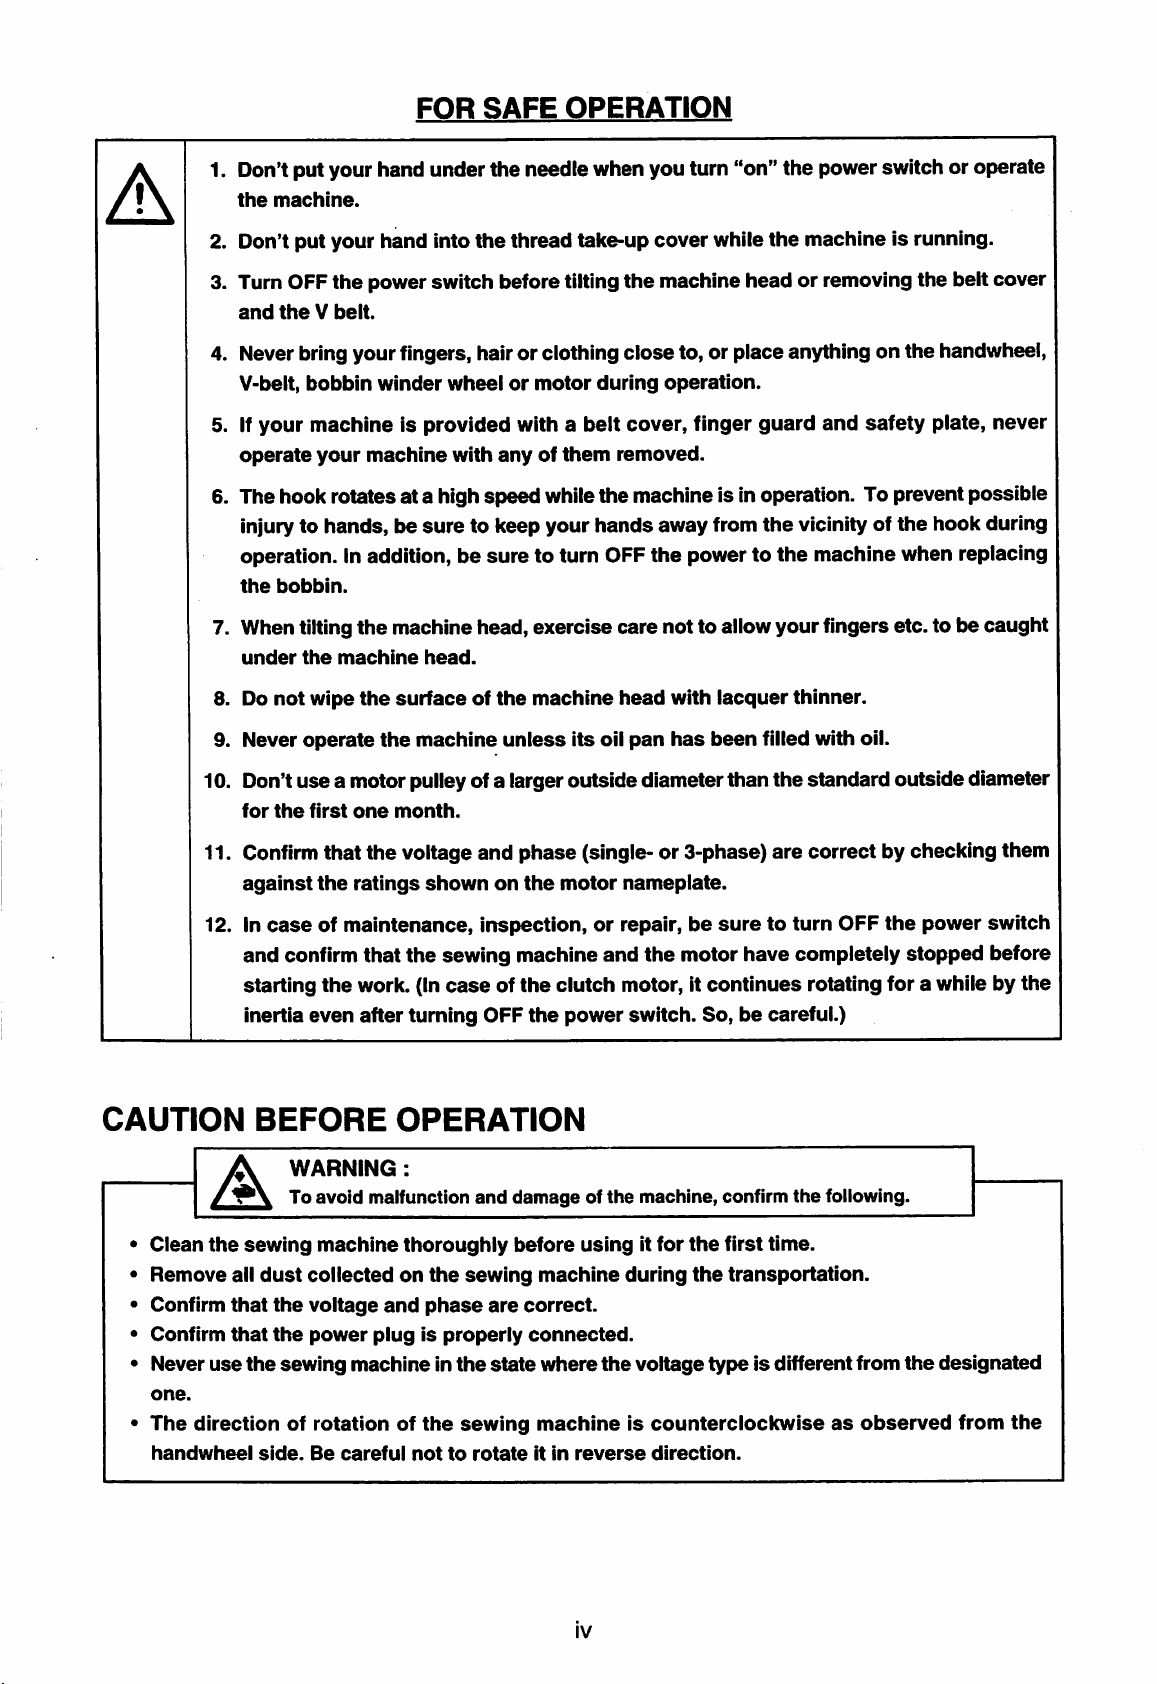
A
1. Don't put your hand under
the
machine.
2. Don't
3. Turn OFF
and
put
your
the
theVbelt.
hand
powerswitch before tilting
into
the
needle when you turn "on"
the
thread
take-up
4. Never bring your fingers, hair or clothing
V-belt,
5. If
operate
6. The hook rotates at a high
injury to
operation. In addition, be
the
7. When tilting
under
8. Do
9.
Never
bobbin
your
machineisprovided
your
winder
machine
hands,besure
bobbin.
the
the
machine
not
wipe
the
operate
the
wheelormotor
with
anyofthem
speed
to keep
sure
machine head,
head.
surfaceofthe
machine
unless
with a
belt
while
your
hands
to turn OFF
exercise
machine
its
during
the
the
power switch or operate
cover
the
close
cover,
removed.
while
the
machine is running.
machine
head
or removing
to, or place anything on
operation.
finger
guard
and
the
safety
the
belt cover
handwheei,
plate,
machine is in operation. To preventpossible
care
head
oil
away from
the
not
with
pan
has
power to
to allow
the
lacquer
been
filled with oil.
vicinity of
the
machine when replacing
your
fingers etc. tobecaught
thinner.
the
hook during
never
10. Don't
11. Confirm
12. In
CAUTION
• Clean
•
Remove
• Confirm
•
Confirm
• Never
one.
•
The
directionofrotationofthe
handwheei
use
a motor pulley ofa larger outside diameterthan
for
the
first
that
against
the
caseofmaintenance,
and
confirm
starting
inertia
the
even
BEFORE
WARNING:
A
the
use
To avoid malfunction
sewing
all
that
that
the
machine
dust
collectedonthe
the
voitage
the
power
sewing
side.
Be
one
month.
the
voltage
ratings
that
shown
the
sewing
work. (In
after
turning
OPERATION
thoroughly
and
phase
piugisproperly
machineinthe
careful
nottorotateitin
and
phase
on
(single-or3-phase)
the
motor
nameplate.
inspection,orrepair,besuretoturn
machine
caseofthe
OFF
the
and
damageofthe
before
sewing
are
correct.
connected.
state
sewing
machine
where
machineiscounterclockwise
clutch
power
using
the
reverse
and
the
motor
motor, it
switch.
machine, confirm
it for
the
during
the
voltage
direction.
have
continues
So,becareful.)
first time.
transportation.
typeisdifferentfrom
the
standardoutside diameter
are
correct
completely
by checking them
OFF
the
power
stopped
rotating for a while by
the
following.
the
designated
as
observed
from
switch
before
the
the
IV
Page 6
mm
4s
i
-< ® ^ ' -<
Mm
h K h ^
At
ho
^ o
h iff K-
m ^
^m
m
•^i^
M
i|
§K
o
M
EE
m>
CN
m^
O
«o
m m
n m E
m
DB
is
•-
B
^ "
fl-
m ^
fm
^ s
i ' ^
i
m
m
m
S "c
^ -
m @
1
gSil
m
IK
1:
m
fr
It
m
K-
£
m
d+i
IK
m
Hh
I
I
Hh
m
m
I i
IS
K- 11
!&8
m
m
m
m
IS
m 4
Si IS
II
h
m
[1
I I
i
89 K
M
i m
Hh
OK
m m
m
g §
m
K-
i!
<S
m
ea
bh IS s
@ 4;:
KD
N %
I
aa ^ o IS ^ ^
^ o
^ o ^
« w ^ " a
K"
li
^
EE
^
m %
o
in
dR
O g
m
If
lel
Page 7
A
1. No
coloquesumano
corrienteocuando
2. No
coloquesumanoenla
PARA
OPERACION
debajodela
aguja
operalam^qulnadecoser.
cublerta
del
SEGURA
cuando
tira-hilos
poslcioneenON el
mientraslamaquina
interrupterdela
esteenoperacion.
3. Noseolvidededesconectarlacorriente
hacia
atrasode
4. Nunca
correaenV,
5. Si la
de
protectores.
6. El
evitar
durantelaoperacion.
electrica
7.
Antes
antemano
8. No
9.
Nunca
10.
Duranteelprimer,nouse
diametro
ponga
maquina
ojosyplaca
gancho
posibles
cuando
de
frotelasuperficie
operelamaquinaano
exterior
cambiar
sus
dedos,
bobinadoraomotor
estd
equipada
de
giraaalta
lesiones
reemplacelabobina.
insertar/extraer
sin
faltaenOFFelinterrupter
estdndar.
la
cublerta
cabellonivestidosniningun
con
seguridad,
velocidad
en
sus
Ademas,
el
conector
del
cabezal
ser
una
delacorreaola
durantelaoperacion.
una
cublertadecorrea,
nunca
cuandolamaquina
manos,
cerciorese
delamdquina
queelcarterdeaceite
poleademotor
antes
de
Inclinarelcabezal
opere
cerciorese
delacorriente
su
de
desconectar
de
alimentacion.
con
cuyo
maquina
de
diametro
correa
objeto
de
diluyentedelaca.
en
V.
cercaoencima
protectordededos,
sin
cualquiera
coser
mantenerlas
electrica
est^
funcionado.
delamaquinalacorriente
debe
est6
llenodeaceite.
exterior
delamaquina
del volante,
protector
de
lejos
del
gancho
posicionar
sea
mayor
estos
Para
que
de
el
11.
Confirme
observando
12. En el
OFF el
motorseban
motordeembrague,
despuds
PRECAUCIONES
PRECAUCION
A
• Limple
•
Quite
•
Conflrma
•
Confirme
•
Nunca
• La direccion
del
Tenga
bienlamdquinadecoser antesdeusaria
blenelpolvo
uselamdqulnadecoserenel
volante.
cuidadoenno
Compruebe
tndquinadecoser.
queelvoltaje
queelenchufe
rotacionaldela
que
tantolatensidn
los
valores
nominates
casodemantenimiento,
interrupterdela
parade
de
haber
ANTES
los
acumulado
y la
esta
corriente
completamente
dste
continua
posicionado
DE
:
siguientes
duranteeltransporte.
fase
son
los
blen
conectado.
estadoenqueeltipodevoltaje
mdquinadecosereshacia
girariaendireccidn
comolafase
que
monofdsicaotrifasica)
van
escritos
inspeccionoreparacion,
electricayde
antes
girando
en
OFFelinterrupter,
LA
OPERACION
ftemes
para
correctos.
evitar mal
per
confirmar
de
comenzareltrabajo.
per
un
funcionamientoodahosdela
primera
la izquierdasise
inverse.
son
enlaetiqueta
del
cercidrese
quelamaquinadecoser
tiempo
Asi
vez.
que
sea
debido
tenga
diferente
observe
las
correctas
motor.
de
posicionar
(Enelcaso
a la
inercia
cuidado.)
del
deslgnado.
desdeellado
en
y el
de
aun
VI
Page 8
1.
SPECIFICATIONS
2.
INSTALLATION
3.
INSTALLING
4.
ADJUSTING
5.
INSTALLING
6.
LUBRICATION
THE
7. ADJUSTING THE
8.
ATTACHING
9.
SETTING
10.
ADJUSTING
11.
PRESSER
12.
HAND
13.
ADJUSTING
14.
THREADING
15.
THREAD
16.
THREAD
17.
ADJUSTING
18.
NEEDLE-TO-HOOK
19.
HEIGHT
20.
TILTOFTHE
21.
ADJUSTING
22.
MOTOR
THE
FOOT
LIFTER
TENSION
TAKE-UP
OF
THE
PULLEYS
THE
THE
THE
THE
THE
THE
THE
THE
BOBBIN
PRESSURE
FEED
FEED
BELT
COVER
HEIGHT
THREAD
AMOUNT
NEEDLE
STITCH
HEIGHT
MACHINE
SPRING
THREAD
DOG
FEED
AND
OF
STAND
OF OIL (OILSPLASHES)INTHE HOOK 5
INTO
LENGTH
OF
TAKE-UP
RELATIONSHIP
DOG
TIMING
BELTS
THE
THE
THE
HEAD
AND
KNEE
BOBBIN
PRESSER
CONTENTS
THE
BOBBIN
LIFTER
CASE
BAR
STROKE
WINDER
1
1
2
3
3
4
7
7
7
8
8
8
9
9
10
10
11
12
13
14
15
m m
1. 1
2. i
3.
4.
5. 3
6.
7.
8. 7
9. 7
10.
mmmmmmm
11. 8
12. 8
13. 8
14. 9
15. 9
16. 10
17.
^HaanisaBa^iasi
18. "
19. 12
20.
21. 14
22. 15
m)
mmyjm
10
13
2
3
4
5
7
VII
Page 9

INDICE
1.
ESPECIFICACIONES
2.
INSTALACION
3.
INSTALACION
YLABOBINADORA
4.
AJUSTE
5.
INSTALACION
6.
LUBRICACION
7.
AJUSTE
DE
DE
DE
LA
ALTURA
DEL
LA
CANTIDAD
LA
CUBIERTA
PEDESTAL
DEL
DE
DE
LA
ELEVADOR
DEL
HILO
ACEITE
CORREA
DE
RODILLA
(MANCHAS DE ACEITE) EN EL GANCHO 5
8.
COLOCACION
9.
MODO
10.
MODO
11.
PRESION
12.
ELEVADOR
13.
AJUSTE
14.
ENHEBRADO
15.
TENSION
16.
RESORTE
17.
AJUSTE
18.
RELACION
19.
ALTURA
20.
INCLINACION
21.
AJUSTE
22.
POLEASYCORREAS
DE
DE
DELAAGUJA
FIJAR
AJUSTAR
DEL
DE
DEL
RECOGEDOR
DEL
DE
DEL
LA
PRENSATELAS
MANUAL
LA
ALTURA
DE
LA
HILO
RECORRIDO
DE
AGUJAAGANCHO
LOS
DIENTES
DE
LOS
SONCRONISMO
BOBINA
LA
LONGITUD
DE
MAQUINA
DEL
DEL
DE
DIENTES
DEL
MOTOR
EN
LA
LA
BARRA
HILO
RECOGEDOR
ARRASTRE
DE
DEL
CAPSULA
DE
PUNTADA
DEL
ARRASTRE
ARRASTRE
DE
CANILLA
PRENSATELAS
DEL
HILO
DE
LAS
TELAS
1
1
2
3
3
4
7
7
7
8
8
8
9
9
10
10
11
12
13
14
15
VIII
Page 10

1.
SPECIFICATIONS
/ /
ESPECIFICACIONES
Application
Sewing
speed
Stitch length
Needle
Presserfoot
lift
(byknee
Lubricating oil
Noise
m m
m tt-
Aplicacidn
Velocidaddecoser
Largodela
Bevacidndel pie prensatelas
(mecfante el elevadorde la
Aceite
puntada
Aguja
lubricante
Ruido
lifter)
rocfiia)
DDL-8300N
For medium-weight materials
Max. 5,500 rpm
Max.5mm
OBx1#9to#18
10 mm (Standard) 13 mm (Max.)
Workplace-related noise at sewing
Noise measurement according to DIN45635-48-A-1.
DDL-8300N
5,5(X)rpm
5
mm
DBxl
#9---#18
10
mm
Para
materiaiesdepeso
Mdx.
Nivelderuido ralacionado
13
mm
DDL-8300N
5.500
p.p.m.
Mdx.5mm
DBx1#9a#18
10 mm (est8ndar)
13mm(mdx.)
medio
n = 4.500 min';Mediddnderuido
DDL-8300NH
For heavy-weight materials
Max.
4,000
rpm
Max.5mm
DB
X 1
#20to#23
10 mm (Standard) 13 mm (Max.)
JUKI
Machine
speed
Oil
7
n = 4,500 min*:
DDL-8300NH
Lpa
^ 83 dB (A)
tpmn•mn
4,000
rpm
5
mm
DBxl
#20~#23
10mm
7 JUKI
JUKI
conelpuestodetrabajo a velocidaddecostura
Lpa
mm
Para
MAX.
DB
10 mm (estdndar)
Machine
Oil
7
83 dB (A)en conformidad con DIN45635-48-A-1.
13mm
DDL-8300NH
materiaies
4.000
Mdx.5mm
X 1
#20a#23
13 mm
(m^.)
pesados
p.p.m.
2.
INSTALLATION
22.5mmJ
/
o o
T\
18.5
INSTALACION
e
o
mm
o
Page 11

(1) Installing
1) The oilpan should rest on the four
2)
Fix
two
O onside®
3)
Fit
hingeOinto
placing
(1)
the
oil
pan
rubber
seatsO onsideO
(hinged
the machinehead on cushions0 on the fourcomers.
side)
the
openinginthe
comers
(operator's
of the machine table groove.
side)
usingarubber-based
machine
bed,
using
adhesive.
and
fit
nails
the
O as
illustrated
Then
place
machine
above.
oil
panO onthe
headtotable
Fix
two
rubber
cushion
fixed
seats
seats.
hingeObefore
ffiOSJffNS•«Sm}ESffifOK(±i
(1)
instaiacion
1)ElCarterdel aceite debe descansar en las 4 esquinas de la abertura de la mesa de la m^quina.
2)
Como
clavosO.Fije
base de goma.
3) Para colocarla m^quina,
luego
almohadillasO puestas en las 4 esquinas.
3.
INSTALLING
INSTALACION
WARNING:
Toavoidpossible personal injurydue to abruptstart ofthe machine,tum offthe powerto the machine
and
A
AVISO:
corrlenteelectricade la maqulnaycompruebe de antemano para mayorsegurldad qua el motorestd
completamente
del
colector
muestra la
alineela
figura,
las
almohadillas
Luego
mdquina
THE
DE
checktobe
Paraevitar posibles leslones pefsonales debldo a un arranque brusco de la m^qulna,desconecte la
sure
parado.
de
coloque
de gomaO en el ladoO
coloqueelcarter delaceite O en las almohadillas.
primero
con las bisagrasde gomade la mesa O antes de apoyarla
BELT
LA
CUBIERTA
that
the
•>
aceite
almohadillas
introduzca la bisagra O en la abertura de la base de la m^quina, y
COVER
motor
de gomaO en el ladoO
has
AND
DE
totally
THE
LA
CORREA
stopped
(lado
de la
operaria)
(lado
de la bisagra) usando unadhesivo con
m^quina
BOBBIN
rotating In prior.
WINDER
Y LA
/
BOBINADORA
usando
en las
0
Page 12

4.
ADJUSTING
THE
HEIGHT
OF
THE
KNEE
LIFTER
/
AJUSTE
WARNING:
Toavoid possible personal Injurydueto abruptstart of the machine, turn offthe powerto the machine
' '
AVISO:
Para evitar poslbles leslones personales debldoa un arranque brusco de la mdqulna, desconecte la
corrlenteel6ctrica de la m^qulna y compruebe
completamente
DE
LA
ALTURA
^
parado.
DEL
i^otor
ELEVADOR
has
mmnmm
DE
RODILLA
totally
stopped
rotating In prior.
> °
de
antemano para mayor seguridad
0
qua
el motor estd
1) The standard height of the
2) Youcan adjust the presserfoot
3) When you have adjusted the presserfoot
inits lowestpositiondoes not hitpresser foot
2)
3)
1) La altura normal
2) Usandoel
rodilla
3) Cuandohaajustado la elevacidn del pie
hasta
lOnrni
tomillo
un
queseeleva
de ajusteO,Ud.puede ajustar laelevacidn del pie prensatelas usando el elevador de
m^imo
de la barrade la aguja
5.
INSTALLING
INSTALACION
THE
DEL
presser
lift
el pie prensatelas
de13mm.
O,
al estar en su posicidn mds baja, no chocacon el pieprensatelas
THREAD
PEDESTAL
foot lifted using the knee lifteris 10 mm.
up to 13 mm using knee
lift
to over 10 mm, be sure that the bottom end ofneedle bar <
O.
usando
prensatelasamdsde10 mm,
STAND
DEL
//
HILO
lifter
adjust screw O •
13 mm -
el elevadorderodillaes10 mm.
asegurese
que
el extreme inferior
0.
Page 13

6.
LUBRICATION
WARNING:
To
avoid
and
possible
checktobe
/
sure
personal
that
LUBRICACION
injury
dueto
abrupt
the
motor
has
totally
startofthe
stopped
machine,
rotating in prior.
turn
off
the
power
tothe
machine
A
(I)
AVISO:
Para
evitar
posibies lesionespersonales debido a unarranque bruscodela
corriente
completamente parado.
1)
S#}E
7 JUKI
2)
ttlfWttH^HLOwsleSJUT©
3)
4)
el^ctrica
dela
m^quinaycompruebedeantemano
(1) information
1)
2)
3) Whenyouoperate the machine after
4) Note that the amount of the splashing oil Is
^
I
'
;SnSJ
Oa
• —1
HIGH
•
para
Fill
oil
panO
markO.
When
the
oil
the
oil
pan
you
will
see
O if
the
lubrication Is
unrelatedtothe
When
after
of disuse, run your machine at 3,000 |
ri
©SBOWffiB
rpm.
purposeofbreak-in.
mayor
on
with
level
with
the
splashing
amountofthe
you
mdquina,
seguiidad
Subrication
JUKI
Machine
lowers
below
specified oil.
oil
through
adequate.
first
operate
desconecte la
queel
motor
Oil
7 upto
LOW
mark
lubrication,
oil
sight
lubricating oil.
your
machln^
setuporafteranextended
for about 10 minutes for the |
•
estd
HIGH
refill
window
period
I
^
(1)
informacidn
1)
Lleneelcolector
2)SIel
3)81elsistemade
4) Observeque lacantldadque salpica elaceite no tiene
rAterTcidn
' i I
'
\^py
nivel
el
aceiteatrav^sdela mirilla del
Cuando
quenola
3.000
0
sc ia
del
acek«ro^a de la
lubrlcaclbn
useiam^uina
haya
iubricaclon
siteOcon
marca
estd
usado
per
por
aceite
JUKI
"LOW"0,relleneelcolectordeaceite
funcionando
aceite
0.
primera
mucho
voz
tiempo,
p.p.m.duranteunos10minutos.
Machine
blen,
1
Maximum
HA
Mdxiomo
Minimum
H'J^
Minimo
•
ffiHr
Oil7hastalamarca
alhacer
despues
haga
funclonarlam^qulna,
relacidn
dosuinstalacidn
funcionariamdquinaauna
(2) Adjusting
to
the
1)
Adjust
the amountof
up
and
needle
2) The
3)
minimum
dotOIsbrought
turning
The
markerdot O Isbroughtto the position just opposite
from the needle bar crank by turning the adjust pin
In direction
the adjust
maximum
10
dfi
3,000
n>n.»SdS$S
"HIGH"
O •
conelaceite
puedeversesalplcar
con lacantldad de aceite
y
preparacidn
the
amount of oil supplied
face
plate
bar
amountof
0.
parts
oil
suppliedtothe thread take-
crank0by
closeto needle bar
pinIndirection
amount
turning
oil
Isreached whenmarker
of oil Is
especlflcado.
lubrlcante.
o
velocidad
adjust
0.
reached
I
despue^|
de.
j
pin
O.
crank
0 by
when
Page 14

(2)
(2)
Ajuste
1) Lacantidad de aceite suministrada a Ios componentes recogedores del hiloy a la biela de la barra de la
2) Lacantidad
3}
delacantidad
aguja e se ajusta girando el vastago de ajuste
minima
posible de la biela de la barra de la aguja
direccibn
0.
de
aceite
suministradaaios
componentes
O.
de aceiteselogracuando el puntomarcadorOsemuevehasta estar lo mas cerca
O.
Para ello,esnecesario girar el vastago de ajuste en la
Lacantidad maximade aceiteseobtiene cuando el punto marcador O
opuestadesde el
ciguenal
de la barrade aguja
girando
elesparragode ajusteen la
delaplaca
Hega
a la posicidnexactamente
direccion
frontal
®.
7. ADJUSTING THE AMOUNT
mnmmmM
AJUSTEDELA
WARNING
Be extremely careful
turning
A
0 Amount of oil(oilsplashes) confirmation paper
}±m
AVISO:
Ponga
se
m)
Papeldeconfirmacidndecantidaddeaceite
(manchasdeaceite)
debe
the
sumo
comprobar
(ii!)
CANTIDADDEACEITE
:
about
hookata
cuidado
70
high
speed.
acerca
girandoelganchoaalta
mm
OF
the
operation of
de la operacldndela maquinadecoser
Oil
splashes
Papeideconfirmacion
OIL (OIL
(MANCHAS
the
machine
velocidad.
d)
Positiontoconfirm
Posicidn
(manchasdeaceite)
1 /
confirmation
manchas
SPLASHES)
DE
ACEITE)
since
the
amount of oil
(Si)
BigtSlS
para
confirmar ia
/)
9
7
V
m
paper
de
de
aceite
IN
THE HOOK
ENEL
has
dado
que
la cantidaddeaceite
the
amount
cantidaddeaceite
Closeiyfit
the
wall
Pegueelpapel
pared
del
GANCHO
to be checked by
of oil (oil
the
surface
depdsitodeaceite.
paper
of
contra
splashes)
against
the
bed.
la
*
When
carrying
your fingers to
1)ifthe
machine
three minutes. (Moderate intermittentoperation)
2) Placethe
3)
Confirm
4)
Confirmation
*
5itfT^0
1)
2)
3)
4)
mm^m
outthe
come
has notbeen
amountofoil
the
height
ofthe
2)
'
mmn
»)
procedure
incontact withthe hook.
(oil
ofthe
amountofoil
3 )
desciitied
sufficiently
splashes)
oil
surfaceinthe
shouldbecompletedinfive
HIGH m LOW
below
warmed
confirmation
oil
reservoiriswithin
in2,
remove
upfor
operation,
paperunderthe
seconds.
6^|g@0;tP9
mmmm)
the
slide
plate
andtake
makethe
hook
while
machine
the
the rangebetween
(Check
°
sewing
"HIGH"
the
periodoftime
extreme
run
idle
machineisin
and
o
caution
notto
for
approximately
operation.
"LOW".
withawatch.)
allow
Page 15

*
Cuando
que
1) Sila
aproximadamente tres minutos(funcbnamlento
2)
Coloque
despu^s
3)
Confirme
4) La
ejecuteelprooedlmiento
BUS
dedos
no toquen el gancho.
m^quina
confiimacidn
nohasido
elpapelde
quesedetenga la m^quina.
quela
confirmacidn
altura
del
de la
cantldad
descritoacontinuacion
oalentadalosuficiente
de lacantldad deaceite(manchasde
nivel
de aceiteenel
de aceitedebeefectuarse endnco segundos
en2,
quite
laplaca
parasu operaddn, hagaquela
Intemnitente
moderado).
aceite)
depdsito
deaceitese encuentre
deslizanteyponga
m^quina
debayo
dentro
marcheenvacfo
delgancho
de lagama
(Chequeeeltiempo
sumo
cuidado
durarrte
inmedlatamente
"HI"y"LOW".
conun
reloj.)
en
Sampleshowing
Ejempio
Splashesofoil
El
aceite
Appropriate
Cantldad
(pequeha)
Splashes
aceite
El
Appropriate
mwmu
Cantldad
(grande)
que
from
salpica
I
1
t
1
amountofoil
apropiada
of oil
from
salpica
amount
(A)
apropiada
muestraiacantidad
desdeelgancho
1
desdeelgancho
y
2
mm
the
appropriate amount of oil /
the
hook
mm
(small)
de
aceite
the
hook
of oil (large)
de
aceite
de
aceite
/ /
(DDL-8300NH: 1
/ /
(DDL-8300NH: 3
mm)
mm)
Bn'
apropiada
1) The
2)
2)
1) La
2) Ajusteia
amountofoil
be
finely
adjustedinaccordance
Be careful not to excessively increase/decrease the
amount of oil in the hook.
small,
the
the
amountof oil Istoo much,
be
stainedwithoil.)
Adjust
theamountof
(oil
splashes)
amountthree times(onthe threesheets ofpaper).
mm
(»)
cantidad
showninthesamplesonthe
(If
hook
willbeseiz^
oilInthehooksothatthe
should
notchange
mjsm3>x
with
sewingprocesses.
the amount of
(the
hook
the
sewing product may
while
left
willbehot).
oil
checking
de aceitequese muestra en losejemplos
de la izquierdasedeberd ajustar a precisibn en
coiTfoimidadconlosprocesosdecosido. Pongacuidado
ennoaumentar/disminuir
de aceite en el gancho. (Si la cantldad de aceite
insuficiente, el ganchoseagarrotarS (el gancho
excesivamentelacantidad
recalentard). Si lacantidadde aceite es excesiva, la
prendadel cosidosemanchardcon aceite.)
cantidad
de aceiteen elganchode modeque
lacantidad de aceite (salpiquede aceite) no deber^
cambiaralcomprobartres veces lacantidadde aceite
(en las tres hojasdepapel).
should
oil
istoo
amount
the
If
oil
es
•Adjusting
AJuste
the
amount of oil (oil spots) in
deiacantidad
de
aceite
(manchas
the
hook/t&WAJi
de
aceite)
eneigancho
1) Tumingthe oilamount adjustment screw attached
on the hook drivingshaft front bushing in the"+"
direction (indirection
(oil
of oil
(indirection
2)
After
adjusted
spots) in the hook, or in
O)
the amountof
with
the
O)
will
increase the amount
thedirection
will
decrease
oil
inthe hookhas been properly
oil
amount
it.
adjustment screw,
makethe sewingmachinerunidleforapproximately
30
2)
1)Algirarel
tomillo
de ajuste de la cantidad de aceite
secondstocheck
1)
1^
(®:^i^)
fijado
al buje frontal del eje impulsordel gancho en
the
mm•mm
mm^mm
amount
im)
m)
of oil In
direccibn"+" (en direccibnO)aumentard la cantidad de aceite (manchas de aceite) en el gancho, yen
la
direccldn(en
direccibn
0),
la disminuird.
2) Despu^s que la cantidad de aceite en el gancho haya sido ajustada apropiadamente con el
ajustede lacantidadde aceite, haga que la
30
segundos
para
chequearlacantidaddeaceiteenei
irWiquina
de coser marcheen vacfoduranteaproximadamente
gancho.
the
*
iri-6^:^
tomillo
hook.
de
Page 16

8.
ATTACHING
WARNING:
To avoid
and
THE
possible
checktobe
NEEDLE
personal
sure
that
injury
the
/ /
duetoabrupt
motor
has
totally
COLOCACION
startofthe
stopped
machine,
rotating in prior.
turn
off
the
DE
LA
powertothe
AGUJA
machine
A
9.
SETTING
MODO
AVISO:
Para
evitar
posibles
corrienteelTOtricadela mdquina y
completamente
THE
DE
FIJAR
iesiones
parado.
BOBBIN
LA
personales
INTO
BOBINA
debido
compruebedeantemano
THE
EN
a un
BOBBIN
LA
CAPSULA
arranque
1) Pass the thread throughthread slitO.and
thread
Byso doing, the thread
spring
2) Check that the bobbin rotates in the direction of
the arrow when thread 0 is pulled.
in
andcome out
bruscodela mdquina,
para
mayor
seguridad
CASE
direction
/ /
DE
CANILLA
from
will
que
pass
under the tension
notch
0.
desconecte
el motor
pull
la
esta
the
10.
ADJUSTING
MODO
DE
AJUSTAR
0
THE
STITCH
LA
1)
2)
1) Rase el
2) Compruebe que la bobina gira en la direccibn de
LENGTH
LONGITUD
ies^iiaasw^ssa©
aisM®
en la direccidn
De
este
• -
hilo
porla rendija O de
0.
modo, el hilo
pasard
tensorysaldra porlamuesca
la flecha
cuandosetira del hilo
/ /
DE
PUNTADA
•
hilo,
ytire del
por debajo del muelle
hilo
0.
®.
Page 17

11.
PRESSER
FOOT
PRESSURE/MPS
/
29-32
12.
PRESION
mm
HAND
DEL
LIFTER
PRENSATELAS
/ /
ELEVADOR
MANUAL
13.
ADJUSTING
AJUSTE
WARNING
^and check to be sure that the motor hastotally stopped rotating in prior.
A
AVISO:
§
THE
DE LA
:
Toavoid possible personal injurydue to abrupt start ofthe machine, turn offthe powerto the machine
Paraevitar posibles lesiones personales debido a un arranque brusco de la maquina, desconecte la
corriente
completamente
el^tricadela
HEIGHT
ALTURA
maquinaycompruebedeantemano
parado.
OF
THE
DE LA
PRESSER
BARRA
1) Loosen setscrew
height or the angle ofthe
2)
After
adjustment,securelytightenthe setscrew
2) ^
1) Para ajustar la altura de la barra del prensatelas, o
el dngulo del prensatelas, aflojeel
o
2) Despu^s del ajuste, apiiete firmementeel
de
fijacidn.
DEL
para
BAR
/ /
PRENSATELAS
mayor
seguridad
0,
and adjust the presser bar
presser
queelmotor
foot.
tomillodefijacidn
tomillo
esta
0.
0
8
Page 18

14.
THREADING
THE
MACHINE
HEAD
/ /
ENHEBRADO
WARNING:
Toavoid possible personal Injurydue to abrupt startof the machine, turn off the power to the machine
^andcheckto be sure that the motorhas totallystopped rotatingIn
A
AVISO:
Para evitar poslbles leslones personales debldo a un arranque brusco de la maqulna,
corrlente electricadela maqulna y
completamente
DE
parado.
LA
MAQUINA
'
mmmmm
compruebedeantemano
* -
prior.
para mayor
DDL-8300N
seguiidad
desconecte
que
el motor
DDL-8300NH
la
esta
15.
THREAD
TENSION
/ /
0
©
TENSION
(1)
1) As
O),
DEL
Adjusting
you
turn
the needle thread tension
HILO
the
thread
needle
tensbn
thread
tension
nutOclockwise
will
be increased.
2) As you turn nut O counterclockwise (indirection
©),
the needle thread tension
(2)
Adjusting
the
bobbin
1) Asyouturntension adjustscrew©
direction
increased.
2) Asyouturnscrew © counterclockwise (indirection
©),
©),
the bobbin thread tension
the bobbin thread tension
will
be decreased.
thread
will
be decreased.
clockwise
(1)
% °
2)
'
(2)
o
2)
»
(in
direction
tension
will
(in
be
Page 19

(1)
Ajuste
1)Amedida
tensidn del hilodela aguja aumentar^.
2) A
(en la direccidn
(2)
Ajuste
1) A
la derecha (en ladireccidn
2) A
(en la direccidn
16.
THREADTAKE-UPSPRING /
delatension
que
medida
que
delatension
medida
medida
que
que
del hilo
Ud.
giralatuerca
Ud.
giralatuercaO en elsentidocontrario aldel
®),
latensidn del
del
Ud.
giraeltomillo
0),
Ud.
girael
tomillo
0).
la tensidn del
delaaguja
del
cabezaldetensidnOhacialaderecha
hilo
de la aguja
hilo
delabobina
de agjuste de la
latensidn del
0 en elsentido
hilo
de la bobina disminuird.
Hmmt
0 O
0
/
(1)
Cambio
recogedor del hiloO
1)
Atlojeeltomillodefijacldn
2) A
medida
laderecha(enla
3) A
medida
la
izquierda
(2) Cambiodelapresidndel resorterecogedor
del hilo O
1)
Aflojeeltomillodefijacidn
tensidn
2)
Aflojeeltomillodefijacidn
3)Amiedida
laderecha(enla
recogedordel
4) Amedidaque
la izquierda (en la direccidn
dismlnulrd.
0.
del
que
que
(enla
que
recorrldo
Ud.
giraelcabezalde
direccidn
Ud.
gira
direccidn
Ud.
direccidn
hib
Ud.
giraelcabezaldetensbn0 hada
0),lapresidn
elcabezalde
0 ysaque elcabezalde
O.
giraelcabezaldetenidn0hada
O), el
aumentara.
del
0.
tensidn
tensidn
0),lapresidn
reconido
0),
el recorrldo
resorte
aumentard.
dismlnulrd.
delresorte
0hacia
0tiacia
movimiento
disminuird.
tensidn
hilo
contrario
O en elsentido del
de la bobinaaumentar^.
aldel
movimiento
/ RESORTE
(1) Changing
springO
1)
Loosen
2)Asyou
the strokeofthe threadtake-upspring
3)Asyou
ttie
setscrew0.
turn
tum
stroke
willbedecreased.
tension
the
(2) Changing
springO
1)
Loosen
0.
2)
Loosen
3)Asyou
the pressure
4) As
0),
(1)
1)
(2)
1)
mmm&tmo
2)
4)
setscrew0,and
setscrew
tum
tension
you
tum
thepost0
thepressure
(deladireccidn
de los punteros la
movimiento
de los
RECCXSEDOR
the
strokeofthread
post0clockwise
kriob
counterclockwise
the
pressure
remove
0.
post0clockwise
willbeincreased.
counterclockwise
will
bedecreased.
• '
O). la
Izuguierda
de los
punteros
punteroslaizuguierda
DEL
HILO
take-up
(in
direction
will
l3e
(In
direction
O),
increased.
0),
of thread take-up
thread
tension
(in
'
(asm.)
direction
(in
direction
0),
17.
ADJUSTING
AJUSTE
A
10
WARNING:
To avoid
and
checktobe
' -
AVISO:
Para
evitar
coriiente
completamente
THE
DEL
possible
poslbies
eldctricadela mdqulna y
THREAD
RECORRIDO
personal
sure
parado.
that
the
lesiones
Injury
TAKE-UP
DEL
duetoabrupt
motor
mmnmrn
personates
compruebedeantemano
RECOGEDOR
startofthe
has
totally
> «
debldo
STROKE
stopped
a un
arranque
/ /
DEL
machine,
rotating
para
turn
In prior.
bruscodela mdqulna,
mayor
off
seguiidad
HILO
the
powertothe
desconecte
queelmotor
machine
la
est^
Page 20

2)
0
1) When sewing heavy-weight materials, movethread
guide
O to the
lengthofthread
left
(In
directionO)to Increase the
pulled
outbythe thread take-up.
2) When sewing light-weight materials, move thread
guide
length
3)
Normally,
marker
1)
O tothe
ofthread
line
right
(In
direction
pulled
out bythe thread take-up.
threadguideO is
0 Isaligned
with
®) todecrease the
positionedIna waythat
thecenter ofthescrew.
1)SIcosetelaspesadas,
largodel
2)Alcosertelas
largo
3)
Normalemente,
alineada
18.
NEEDLE-TO-HOOK
hllo
del
hllo
conelcentro
que tirael recogedor.
livlanas,
tiradoporel recogedor.
RELACION
WARNING:
Toavoid possible personal injury
and
check
A
AVISO:
Para
evitar
corriente
completamente
muevalagufa
muevalagufa
lagufadel
del
tomlllo.
DE
AGUJA
to be
sure
posibles
eltetricadela
lesiones
parado.
del
hlloOhacialaIzqulerda
del
hlloOhacIaladerecha
hllo
O estd poslclonada de manera talque la
RELATIONSHIP
A
GANCHO
due
to abruptstartof
that
the
motor
has
totally
personaies
m^quinaycompruebedeantemano
debido
/ /
the
stopped
a un
(1)
1)
Tum
the
rotating in prior.
arranque
Adjust
and
the
the
towest
(enla
direccidnO)paraaumentar el
(enladirecclbn0)lo
Ifnea
machine, turn off
bruscodela
para
mayor
the
timing
hook
handwheel to bright
pointofits
seguridad
as
follows
stroke,
the
between
que
dismlnuye
demarcadora0 quede
power to the machine
m^quina,
the
and
desconecte
queelmotor
the
:
needle
loosen
bar
setscrew
estd
needle
down to
O.
el
la
0.04-0.1
mm
(Adjusting
2) (For a DBneedle)
bar
bushing0,then tighten setscrew
(Adjusting position of
3) (Fora DB
0 with
the
the
needle)
needle
Align
bottom
Loosen
bar
height)
marker
endofneedle
line
O on needle
O.
the
hook
the
three hook setscrews,
O)
bar
lower
turn the handwheel and align marker line 0 on
ascending needle bar 0
needle bar lowerbushing
o
4) After making
the
adjustments
with
the bottom end of
0.
mentionedinthe
above steps, align hook blade point 0 withthe
centerofneedle
mm to 0.1 mm (DDL-8300NH :
0
(reference value) between
then securely tighten
I
If
pointofhook
than the specified
point of
clearance is
result.
the
O.
Provideaclearanceof0.04
0.06to0.17
the
needle and the hook,
setscrews
clearance
and
Inthe hook.
between
the
needleissmaller
value,
hook
wiilbedamaged.Ifthe
larger,
stitch
the
blade
the
blade
skipping
mm)
will
•
I
j
|
11
Page 21

(1)
1)
witifiitt•^s-ffi^aftTss
2) CDBSt-^)
3)
(OBSf^l
4)
SlItWiiT
0.06-0.17mni)(:^a)
•
- •
>
• -
(^»W0«4''L<
• fflt8«i-«l?«E<SWroMIHSfS^0.04~0.1
mm(DDL-8300NH:
w.
(1)
Ajusteelsincronlsmo
1)
Gire
elvolante para bajarla barrade aguja al
(Modo
de
ajustarlaaltura
2) (Para una aguja
, y luego apriete el tomlllo O •
DB)
(Modo de ajustar la posicion del
3) (Para aguja
la barra de agua © ascendente con el extreme inferior del buje © inferior de la barra de aguja.
4) Despu^s de hacer los ajustes mencionados en los pasos precedentes, alinee la punta© de la hojadel
gancho con el centre de la aguja©.Provea una separacion de 0,04 mma 0,1 mm (DDL-8300NH; 0,06
to 0,17 mm) (valordereferenda)
el
gancho.
DB)
Afloje
entrelaaguja
delabarra
Allnee
la lineaO demarcadoraen la barraO con elextreme
lostres
tornillos
entrelaaguja
y el
gancho
punto
mas bajode su
de
aguja)
gancho
O)
del gancho,gireel volanteyalinee la Itnea© demarcadoraen
y el gancho, y
delamanera
recorrido,yaflojeeltornillo
seguidamente
siguiente:
Inferior
apriete bien los tornillos en
del
O.
buje
I
0
.
Aten
Vtenfcid
19.
A
Si laseparacion entre la punta de la hoja delgancho y la agujaes
especificado,lapunta
producira
HEIGHT
ALTURA
WARNING
To avoid possible personal injury
^and check to be sure that the motor has totallystopped rotating in
AVISO
Para evitar posibles lesiones personales debido a un arranque brusco de la m^quina, desconecte la
corriente el6ctrica de la maquina ycompruebe de antemano para mayor seguridad que el motor estd
completamente
OF
DE
:
saltode
THE
LOS
:
parado.
DDL-8300N
DDL-8300NH
FEED
dela
puntada.
DOG
DIENTES
0.75•0.85
0.95-1.05
|sNsNsNhN<^
hoja
del
gancho
/ /
DE
ARRASTRE
duetoabrupt
mm
startofthe
To adjust
0 Loosen screw © of crank
0
0 Securelytighten screw
^/6a3^Ifthe
I f
fiSk)the
mm
se dahari. Silaseparacion es
machine,turn off
prior.
the
height of
Move
thefeedbarupor
the
clamping
motionofthe
te^me^^vy.
menor
the
powerto
feed dog :
O.
down
tomake
©.
pressureisinsufficient,'^
forked
que el
mayor,
the
machine
adjustment.
portion
valor^
se |
y
|
y
0
12
Page 22

Para
ajustar la aituradelos
0
Aflojeeltomillo
(0 Parahacerel ajuste,
0 Aprietefirmementeel
,
Atenfcid
cidn Si la presion de fijacionesinsuficiente, el movimentodela porcion ahorquillada deviene
pesada.
20.
TILT
OF
THE
dientesdearrastre:
O de la
ciguenal
mueva
tornlllo
FEED
DOG
O.
labarradelarrastre
O.
/ /
hacia
artibao
hacia
abajo.
INCLINACION
WARNING
To avoid
and
checktobe
A
O Front up
O
Oiu±
©iu"F
O
0 Frente abajo 0 Placa de agujas
AVISO:
Para evitar poslbles leslones personales debldo a un arranque bruscode la mdqulna, desconecte la
coriienteeldctrica de la maqulna y compruebedeantemano para mayor segurldad
completamente parado.
Front
down
Parte
delantera
DE
:
possible
sure
0
Standard
0 Throat plate
omm
elevada
LOS
personal
that
0
0
0
0
Est^ndar
DIENTES
Injury
duetoabrupt
the
motor
has
DE
ARRASTRE
startofthe
totally
stopped
1) The standard
when markerdotO on the feed barshaft isaligned
markerdot ® on feed rockerO •
marker dot © inclinesforward the feed rocker shaftby
90®,asstandard).
2) To
puckering,
shaft90° inthe directionofthe arrow,usinga screwdriver.
3) To
machine,
rotatingInprior.
tilt
the feed dog
loosenthe setscrew, and turnthe feed bar
tilt
thefeed dog
uneven materialfeed, turnthe feed bar shaft 90° inthe
opposite
direction
DDL-8300NH.)
Whenever
feed dog height
necessaryto check
turn
tilt
(horizontal)
with
with
from
the
off
the
powertothe
que
el motor
ofthefeed dogisobtained
(DDL-8300NH,
its
front
up inorder to prevent
its
front
downinordertoprevent
the
arrow.
(The
standard
.
f^
dog
tiltisadjusted,
will
be changed. So, it is •
the
height after
machine
esta
with
the
tilt
the
tilt.
for
adjustment
|
'
1)
90Jt
(MJiDDLr8300NH6^^2^(M«»)
1)Lainclinacion
delabarradetransporte
8300NH,elpunto
2)
Para
de la
3)
Para
gire
elejede la
(Lainclinaddn
^ ^
AterJ
cl6n
vjjPLy
(7jc^)
°
estandar
(horizontal)
queda
del
alineado
demarcador©inclina
inclinareldentadodetransporte
tjarradetransporte
90' en la
direccidn
inclinareldentadodetransporte
barradetransporte
est^dar
cada
vez
queseajustalainclinaciondelo
necesari
comprol)^laaitura
para
90°
DDL-8300NH)
dentadodetransporteseobtiene
conelpunto
hacia
adelante
consuparte
de la
consuparte
enla
direcdon
demarcador©enelbalancfn
eleje
del
iDalancfn
frontal
arriba
para
evitar
flecha,
usandoundestomillador.
frontal
bajada
opuesta
para
desdela
dientesdearrastre,
luego
del
ajuste.
cuandoelpunto
demarcadorOeneleje
O de
90°
como
est^dar).
fruncidos,
aflojeeltomillo,ygireeleje
evitaruntransporte
flecha.
variasuaitura.
transporte.
del
material
Forlotanto,
(DDL-
desigual,
es|
13
I
^
Page 23

21.
ADJUSTING
THE
FEED
TIMING
/ /
AJUSTE
A
DEL
WARNING
To avoid
and
AVISO:
Para
corriente
completamente
possible
checktobe
evitar
el^tricadela
SONCRONISMO
:
personal injury
sure
that
the
motor
posibles
Standard
mm
Sincronismo
arrastre
Advanced
Avanceeisincronismo
arrastre
Delayed
iesiones
parado.
feed
personaies
m^quinaycompruebedeantemano
feed timing
est^ndar
feed
timing
timing
DEL
duetoabrupt
has
totally
debido
del
del
ARRASTRE
startofthe
stopped
a un
machine,
rotating
arranque
para
DE
LAS
turn
off
in prior.
bruscodela mdquina,
mayor
seguridad
TELAS
the
powertothe
queelmotor
machine
desconecte
la
estd
1) Loosenscrews O and O infeed eccentriccamO
,
move
the
feed
eccentric
the
arroworopposite
firmly tighten
2)
For
the
surfaceoffeed dog
are
flush with
the
feed
3) To
advance
uneven
In
the
directionofthe
4) To delay
tightness,
opposite
m
the
screws.
standard
dog
material
the
direction from
Be
adjustment,
the
descends
the
feed
feed,
feed timing In
move
careful
eccentric
breakage
and
top
the
cam
may
1) ' e •
camInthe
direction of
the
top
surfaceofthroat
below
timing In
move
the
arrow.
order
feed
eccentric
the
arrow.
not
to
too
the
adjustsothat
end
of needleeyelet
the
throat plate.
ordertoprevent
feed
eccentric
to Increase stitch
move
far,or
else
result.
direction
arrow,
plate
camInthe
the
the
when
cam
feed^
and
top
needle
mwm
of
|
^
1)
Afloje
los
tomlllos
en la
2)
Paraelajuste
extreme
cuando
3) Para
muevalaleva
dlreccl6n
eldentado de transporte desclendepor
evitar
de la
est^ndar,
superior del
el arrastre
exc^ntricaenla
4) Paraaumentar la
Sincronizacidn
atrasada
O yO enla
flecha
hagaelajustedemodo
ojal
disparejo
tensldn
de
arrastre
leva
exc^ntrlcadetransporteO,muevalaleva
o en la
direccidn
opuestade la
de la agujaqueden a ras con la
de lastelas, puedeavanzarla
direccidndela
delas puntadas, puedeatrasarla
la levaexcdntrica en la direccidn opuesta de laflecha.
cuidadoen no moverdemasiado lejosla levaexcdntricade transporte, porque ello
podria resultarenroturadela aguja. •
2)
flecha,
quelasuperflcle
debajo
flecha.
de la placade
slncronlzacldn
yapiiete
superior
superflcle
sincronlzacldn
exc^ntrlcadetransporte
blen
los
tomlllos.
del
dentadodetransporte
superior de la placade agujas
aguja;
delarrastre. Para
del
arrastre. Para
ello,
ello,
mueva
yel
14
Page 24

22.
MOTOR
PULLEYS
AND
BELTS/
/
POLEAS
Y
CORREAS
DEL
1) A clutch motor with400W output (1/2 HP) Is
2) An M-type V belt shouldbeused.
3)
The
Motor
relationship between
tabie:
pulley
O.D.
(mm)
125
120
115
110
105
100
95
90
85
80
75
70
Motor
the
motor puileys, belt lengths
pulley
MTKP0120000
MTKP0115000
MTKP0110000
MTKP0105000
MTKP0100000
MTKP0095000
MTKP0090000
MTKP0085000
MTKP0080000
MTKP0075000
MTKP0070000
MTKP0065000
part
No.
MOTOR
usedasthe standard motor.
and
Sewing
50
5,060
Hz
4,850
4,630
4,440
4,250
4,000
3,820
3,610
3,390
3,160
2,950
2,740
speed
(rpm)
60
5,040
4,780
4,540
4,320
4,000
3,790
3,520
3,260
Hz
sewing
speeds
Belt
1118
1092
1067
1041
is shown in
length
mm (44")
mm (43")
mm (42")
mm
(41")
the
foilowing
Belt
part
MTJVM004400
MTJVM004300
MTJVM004200
MTJVM004100
No.
^ The effective diameter of a motor puiley is equivalent to
The
motor
to
allow
2)
3)
mmmmmm
125
120
115
110
105
100
95
90
85
80
75
70
the
should
motor
m
rotate
counterclockwise
to
rotateinthe
MTKPO120000
MTKPO115000
MTKPO
MTKPO
MTKPO100000
MTKP0095000
MTKP0090000
MTKP0085000
MTKP0080000
MTKP0075000
MTKP0070000
MTKP0065000
reverse
110000
105000
as
observed
direction.
50
Hz
5,060
4,850
4,630
4,440
4,250
4,000
3,820
3,610
3,390
3,160
2,950
2,740
<>
(rpm)
60
5,040
4,780
4,540
4,320
4,000
3,790
3,520
3,260
the
outside diameter minus 5 mm.
from
the
handwheel
side.
mmm
Hz
1118 mm
1092
1067 mm
1041
mm
mm
(44")
(43")
(42")
(41")
Be
careful
MTJVM004400
MTJVM004300
MTJVM004200
MTJVM004100
not
* s
mm
°
15
Page 25

1) Como motor est^ndarseusa
2)Sedebark
usar
una
correa
un motor de embrague con
V tipo-M.
una
potencia de salida de 400W (1/2HP).
3) La relacion entre las poleas y el motor, la longitud de las correas y la velocidad de cosidosemuestran en
la siguiente
D.E.
(Diametro
delapoleademotor
125
120
115
110
105
100
95
90
85
80
75
70
tabia:
Exterior)
No.deplezadela
polea
del
motor
MTKP0120000
MTKP0115000
MTKP0110000
MTKP0105000
MTKP0100000
MTKP0095000
MTKP0090000
MTKP0085000
MTKP0080000
MTKP0075000
MTKP0070000
MTKP0065000
Velocidaddecoser
50
Hz
5.060
4.850
4.630
4.440
4.250
4.000
3.820
3.610
3.390
3.160
2.950
2.740
(p.p.m.)
60
Hz
5.040
4.780
4.540
4.320
4.000
3.790
3.520
3.260
Longituddela
correa
1118
mm
(44")
1092
mm (43")
1067
mm (42")
1041 mm (41")
No.depleza
de
correa
MTJVM004400
MTJVM004300
MTJVM004200
MTJVM004100
* Eldiametro efectivodeuna
poleademotoresequivalente
* El motor debera girar hacia la izquierda siseobserve
en
queelmotornogireenla
direcclon
inversa.
al diametro exterior
desde
el lado del volante. Ponga culdado
menos
5 mm.
16
Page 26

•JUKI
JUKI
INTERNATIONAL
8-2-1,
CKOFU-SHI, TOKYO
PHONE;
FAX:
TELEX
Copyright
•
•
CORPORATION
SALES
KOKURYO-CHO,
(81)3-3430-4001 to
(81)3-3430-4909 *
:J22967
© 2001
All
rights reserved throughout the world.
Reservados
entero.
todos
H.Q.
182-8655,
4914*4984
JUKI
CORPORATION
derechosenel
4005
JAPAN
mundo
Please
do not hesitate to contactour distr&utors or
*
The
descrfptlon
commodity
Sirvase
ponerse
informacidn
e La
descripcidn
razonesdemqjoradela
coveredInthis
wtthout
notice.
en contacto con nuestros distribuidores o
mAs
detallada.
quesedoeneste
mercancfa.
agents
instruction
in your
manualiasubjecttochange
agentes
manualdeinstrucciones
area
estA
for further informationwfren necessary.
for
improvementofthe
en su Area siempre que necesite alguna
sujetaacambio
01•04
sin
previo
Printed
aviso
por
(E)
 Loading...