

Page 1
JENN-AIRGASRANGE
TABLE OF CONTENTS
Important Safety Instructions .....................................1-4
Care & Cleaning ..............................................................5-7
Maintenance .....................................................................8-9
Troubleshooting .........................................................10-11
Surface Cooking .........................................................12-13
Oven Cooking ..............................................................14-20
Options ..........................................................................21-24
Favorites ...............................................................................25
Setup ..............................................................................26-28
Warranty & Service ...........................................................29
Guide d'utilisation et d'entretien .................................30
Guia de uso y cuidado ....................................................60
JENN-AIE
Form No. A/03/06 Part No. 8113P621 60
@2006 Maytag Appliances Sales Co.
Litho USA
Page 2

|MPI RTANT SAFETY
technician. De not attempt to adjust, repair, service
or replace any part of your appliance unless it is
specifically recommended in this guide. All other
servicing should be referred to a qualified servicer.
Always disconnect power to appliance before servicing.
|NSTRI
Warning and Important Safety Instructions appearing in
this guide are not meant to cover all possible conditions
and situations that may occur. Common sense, caution,
and care must be exercised when installing,
maintaining, or operating the appliance.
Always contact the manufacturer about problems or
conditions you do not understand.
Recognize Safety Symbols, Words, Labels
General instructions
Read and follow all instructions before using this
appliance to prevent the potential risk of fire, electric
shock, personal injury or damage to the appliance as a
result of improper usage of the appliance. Use appliance
only for its intended purpose as described in this guide.
To ensure proper and safe operation: Appliance
must be properly installed and grounded by a qualified
To check if device is properly installed, look underneath
range with a flashlight to make sure one of the rear
1
Page 3
levelinglegsisproperlyengagedinthe bracketslot.The
anti-tipdevicesecurestherearlevelinglegtothefloor
whenproperlyengaged.Youshouldcheckthisanytime
therangehasbeenmoved.
To Prevent Fire or Smoke
Damage
Be sure all packing materials are removed from the
appliance before operating it.
Keep area around appliance clear and free from
combustible materials. Flammable materials should not
be stored in an oven.
Many plastics are vulnerable to heat. Keep plastics away
from parts of the appliance that may become warm or
hot. Do not leave plastic items on the cooktop as they
may melt or soften if left too close to the vent or a
lighted surface burner.
Child Safety
NEVER leave children alone or unsupervised near the
appliance when it is in use or is still hot. Children should
never be allowed to sit or stand on any part of the
appliance as they could be injured or burned.
Children must be taught that the appliance and utensils in
it can be hot. Let hot utensils cool in a safe place, out of
reach of small children. Children should be taught that an
appliance is not a toy. Children should not be allowed to
play with controls or other parts of the appliance.
To prevent grease fires, do not let cooking grease or
other flammable materials accumulate in or near the
appliance.
If appliance is installed near a window, proper
precautions should be taken to prevent curtains from
blowing over burners.
NEVER leave any items on the cooktop. The hot air from
the vent may ignite flammable items and may increase
pressure in closed containers which may cause them to
burst.
Many aerosol-type spray cans are EXPLOSIVE when
exposed to heat and may be highly flammable. Avoid
their use or storage near an appliance.
To eliminate the hazard of reaching over hot surface
burners, cabinet storage should not be provided
directly above a unit. If storage is provided, it should be
limited to items which are used infrequently and which
are safely stored in an area subjected to heat from an
appliance. Temperatures may be unsafe for some items,
such as volatile liquids, cleaners or aerosol sprays.
In Case of Fire
Turn off appliance and ventilating hood to avoid
spreading the flame. Extinguish flame, then turn on
hood to remove smoke and odor.
• Cooktop: Smother fire or flame in a pan with a lid or
cookie sheet.
* NEVER pick up or move a flaming pan.
* Oven: Smother fire or flame by closing the oven door.
Do not use water on grease fires. Use baking soda, a
dry chemical or foam-type extinguisher to smother fire
or flame.
About Your Appliance
Avoid touching oven vent area while oven is on and for
several minutes after oven is turned off. Some parts of
the vent and surrounding area become hot enough to
cause burns. After oven is turned off, do not touch the
oven vent or surrounding areas until they have had
sufficient time to cool.
Other potentially hot surfaces include cooktop, areas
facing the cooktop, oven vent, surface near the vent
opening, oven door, area around the oven door and oven
window.
Cont.
Page 4

Donot touch a hot oven light bulb with a damp cloth as
the bulb could break. Should the bulb break, disconnect
power to the appliance before removing bulb to avoid
electrical shock.
To prevent potential hazard to the user and damage to
the appliance, do not use appliance as a space heater to
heat or warm a room. Also, do not use the oven as a
storage area for food or cooking utensils.
NEVER use aluminum foil to cover an oven rack or oven
bottom. Misuse could result in risk of electric shock, fire,
or damage to the appliance. Use foil only as directed in
this guide.
Cooking Safety
Always place a pan on a surface burner before turning it
on. Be sure you know which knob controls which surface
burner. Make sure the correct burner is turned on and
that the burner has ignited. When cooking is completed,
turn burner off before removing pan to prevent exposure
to burner flame.
Always adjust surface burner flame so that it does not
extend beyond the bottom edge of the pan. An excessive
flame is hazardous, wastes energy and may damage the
appliance, pan or cabinets above the appliance.
NEVER leave a surface cooking operation unattended,
especially when using a high heat setting or when deep
fat frying. Boilovers cause smoking and greasy spillovers
may ignite. Clean up greasy spills as soon as possible.
Do not use high heat for extended cooking operations.
NEVER heat an unopened container on the surface
burner or in the oven. Pressure build-up may cause
container to burst resulting in serious personal injury or
damage to the appliance.
Use dry, sturdy potholders. Damp potholders may cause
burns from steam. Dish towels or other substitutes
should never be used as potholders because they can
trail across hot surface burners and ignite or get caught
on appliance parts.
Always let quantities of hot fat used for deep fat frying
cool before attempting to move or handle.
Do not let cooking grease or other flammable materials
accumulate in or near the appliance, hood or vent fan.
Clean hood frequently to prevent grease from
accumulating on hood or filter. When flaming foods
under the hood, turn the fan on.
NEVER wear garments made of flammable material or
loose fitting or long-sleeved apparel while cooking.
Clothing may ignite or catch utensil handles.
Always place oven racks in the desired positions while
oven is cool. Slide oven rack out to add or remove food,
using dry, sturdy potholders. Always avoid reaching into
the oven to add or remove food. If a rack must be
moved while hot, use a dry potholder. Always turn the
oven off at the end of cooking.
Use care when opening the oven door. Let hot air or
steam escape before moving or replacing food.
PREPARED FOOD WARNING: Follow food
manufacturer's instructions. If a plastic frozen food
container and/or its cover distorts, warps, or is otherwise
damaged during cooking, immediately discard the food
and its container. The food could be contaminated.
NEVER use aluminum foil to cover oven racks or oven
bottom. This could result in risk of electric shock, fire or
damage to the appliance. Use foil only as directed in this
guide.
Utensil Safety
Use pans with flat bottoms and handles that are easily
grasped and stay cool. Avoid using unstable, warped,
easily tipped or loose-handled pans. Also avoid using
pans, especially small pans, with heavy handles as they
could be unstable and easily tip. Pans that are heavy to
move when filled with food may also be hazardous.
Be sure utensil is large enough to properly contain food
and avoid boilovers. Pan size is particularly important in
deep fat frying. Be sure pan will accommodate the
volume of food that is to be added as well as the bubble
action of fat.
To minimize burns, ignition of flammable materials and
spillage due to unintentional contact with the utensil, do
not extend handles over adjacent surface burners.
Always turn pan handles toward the side or back of the
appliance, not out into the room where they are easily hit
or reached by small children.
Never let a pan boil dry as this could damage the utensil
and the appliance.
Follow the manufacturer's directions when using oven
cooking bags.
Only certain types of glass, glass/ceramic, ceramic or
glazed utensils are suitable for cooktop or oven usage
without breaking due to the sudden change in
temperature. Follow manufacturer's instructions when
using glass.
This appliance has been tested for safe performance
using conventional cookware. Do not use any devices
or accessories that are not specifically recommended in
this guide. Do not use element covers for the surface
units, stovetop grills or add-on oven convection
systems. The use of devices or accessories that are not
expressly recommended in this guide can create serious
safety hazards, result in performance problems, and
reduce the life of the components of the appliance.
3
Page 5

Deep Fat Fryers
Use extreme caution when moving the grease pan or
disposing of hot grease. Allow grease to cool before
attempting to move pan.
Ventilating Hoods
Clean range hood and filters frequently to prevent
grease or other flammable materials from accumulating
on hood or filter and to avoid grease fires.
When flaming foods under the hood, turn the fan on.
Cleaning Safety
Turn off all controls and wait for appliance parts to cool
before touching or cleaning them. Do not touch the
burner grates or surrounding areas until they have had
sufficient time to cool.
Clean cooktop with caution. Use care to avoid steam
burns if a wet sponge or cloth is used to wipe spills on a
hot surface. Some cleaners can produce noxious fumes
if applied to a hot surface.
Self-Clean Oven
Clean only parts listed in this guide. Do not clean door
gasket. The door gasket is essential for a good seal.
Care should be taken not to rub, damage, or move the
gasket.
Do not use oven cleaners or oven liners of any kind in
or around any part of the self-clean oven.
It is normal for the cooktop of the range to become hot
during a self-clean cycle. Therefore, touching the
cooktop during a clean cycle should be avoided.
important Safety Notice
and Warning
The California Safe Drinking Water and Toxic
Enforcement Act of 1986 (Proposition 65) requires the
Governor of California to publish a list of substances
known to the State of California to cause cancer or
reproductive harm, and requires businesses to warn
customers of potential exposures to such substances.
Users of this appliance are hereby warned that when
the oven is engaged in the self-clean cycle, there may
be some low-level exposure to some of the listed
substances, including carbon monoxide. Exposure to
these substances can be minimized by properly venting
the oven to the outdoors by opening the windows and/
or door in the room where the appliance is located
during the self-clean cycle.
IMPORTANT NOTICE REGARDING PET BIRDS:
NEVER keep pet birds in the kitchen or in rooms where
the fumes from the kitchen could reach. Birds have a
very sensitive respiratory system. Fumes released during
an oven self-cleaning cycle may be harmful or fatal to
birds. Fumes released due to overheated cooking oil, fat,
margarine and overheated non-stick cookware may be
equally harmful.
Save These instructions for Future Reference
4
Page 6
CARE CLEANING
To
Self-Clean Oven
The self-clean cycle uses above-normal cooking temperatures
to automatically clean the oven interior,
The oven should be cleaned regularly by wiping up spillovers
to prevent excessive smoke and flare-ups. Do not allow a
heavy build-up of soil to accumulate in the oven,
During the cleaning process, the kitchen should be well
ventilated to get rid of normal odors associated with cleaning.
Before Self-Cleaning
1. Turn off the oven light before cleaning. The oven light may
burn out during the clean cycle.
2. Remove broiler pan, all pans, and oven racks from the
oven. The oven racks will discolor and may not slide easily
after a self-clean cycle ifthey are
not removed.
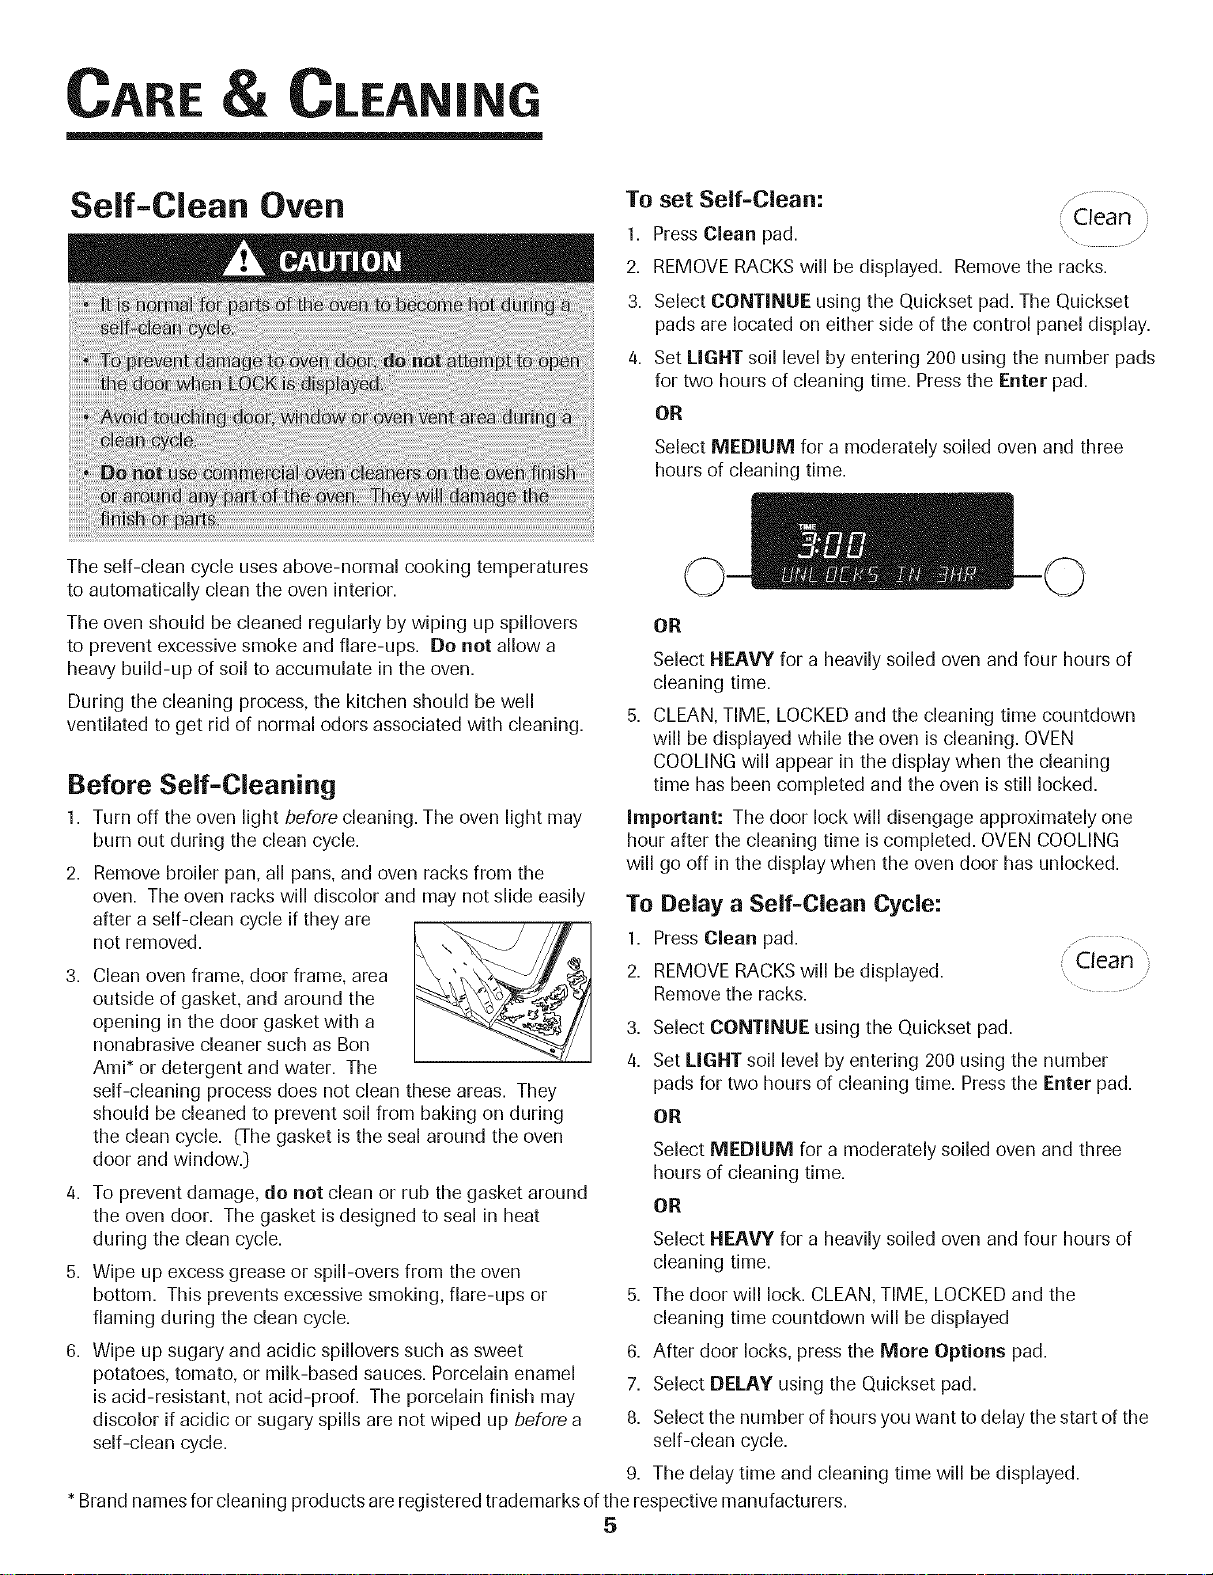
3. Clean oven frame, door frame, area
outside of gasket, and around the
opening in the door gasket with a
nonabrasive cleaner such as Ban
Ami* or detergent and water. The
self-cleaning process does not clean these areas. They
should be cleaned to prevent soil from baking on during
the clean cycle. 0-he gasket is the seal around the oven
door and window.)
4. To prevent damage, do not clean or rub the gasket around
the oven door. The gasket is designed to seal in heat
during the clean cycle.
5. Wipe up excess grease or spill-overs from the oven
bottom. This prevents excessive smoking, flare-ups or
flaming during the clean cycle.
6. Wipe up sugary and acidic spillovers such as sweet
potatoes, tomato, or milk-based sauces. Porcelain enamel
is acid-resistant, not acid-proof. The porcelain finish may
discolor if acidic or sugary spills are not wiped up before a
self-clean cycle.
* Brand namesfor cleaning products are registered trademarks of the respective manufacturers.
\
\
set Self=Clean: / ..............,
1.
Press Clean pad. ,..............
2.
REMOVE RACKSwill be displayed. Removethe racks.
3.
Select CONTINUE using the Quickset pad. The Quickset
pads are located on either side of the control panel display.
Set LIGHT soil level by entering 200 using the number pads
for two hours of cleaning time, Press the Enter pad.
OR
Select MEDIUM for a moderately soiled oven and three
hours of cleaning time,
OR
Select HEAVY for a heavily soiled oven and four hours of
cleaning time.
5. CLEAN, TIME, LOCKEDand the cleaning time countdown
will be displayed while the oven is cleaning. OVEN
COOLING will appear in the display when the cleaning
time has been completed and the oven isstill locked.
Important: The door lock will disengage approximately one
hour after the cleaning time is completed. OVEN COOLING
will go off in the display when the oven door has unlocked.
To Delay a Self=Clean Cycle:
1. Press Clean pad.............
2. REMOVERACKSwill be displayed. (Clean
Removethe racks. .............
3,
Select CONTINUE using the Quickset pad.
4.
Set LIGHT soil level by entering 200 using the number
pads for two hours of cleaning time. Press the Enter pad.
OR
Select MEDIUM for a moderately soiled oven and three
hours of cleaning time,
OR
Select HEAVY for a heavily soiled oven and four hours of
cleaning time.
The door will lock. CLEAN, TIME, LOCKEDand the
cleaning time countdown will be displayed
6. After door locks, press the Mare Options pad.
7. Select DELAY using the Quickset pad.
8. Select the number of hours you want to delay thestart of the
self-clean cycle.
9. The delay time and cleaning time will be displayed.
5
( Clean
Page 7

After Self=Cleaning
About one hour after the end of the clean cycle, the lock
will disengage a/td OVEN COOLING will go off in the
display. At this point, the door can be opened.
Some soil may leavea lightgray, powdery ash which can be
removed with a damp cloth. If soil remains, it indicatesthat
the clean cycle was not long enough. The soil will be removed
during the next clean cycle.
If the oven racks were left in the oven and do not slide
smoothly after a clean cycle, wipe racks and embossed rack
supports with a small amount of vegetable oil to restore ease
of movement.
A white discoloration may appear after cleaning if acidic or
sugary foods were not wiped up before the clean cycle. This is
normal and will NOT affect performance.
Cleaning Procedures
Notes:
• If the oven door is left open, CLOSEDOORwill appear in
the display until the door is closed.
• If more than 30 seconds elapse between pressing the
Clean pad and pressing a number pad, the program will
automatically return to the previous display.
° The oven door will be damaged if it is forced to open
during cleaning or cooling process.
• The first few times the oven is cleaned, some smoke and
odor may be detected. This is normal and will lessen or
disappear with use. If the oven isheavily soiled, or if the
broiler pan was accidently left in the oven, excessive
smoke and odor may occur.
• As the oven heats and cools, you may hear sounds of
metal parts expanding and contracting. This is normal
and will not damage your appliance.
Burner Grates =
Porcelain on
Cast Iron
Burner Caps and
Sealed Gas
Burners
Clock and
Control Pad
Area
Brand names are registered trademarks of the
respective manufacturers.
** To order call 1-800-JENNAIR (1-800-536-6247).
° Allow grates to cool completely before cleaning.
° Wash with warm, soapy water and a nonabrasive, plastic scrubbing pad. For stubborn soils,
clean with a soap-filled, nonabrasive plastic pad or Cooktop Cleaning Creme_ and a sponge. If soil
remains, reapply Cooktop Cleaning Creme, cover with a damp paper towel and soak for 30 minutes.
Scrub again, rinse and dry.
• Do not clean in the dishwasher or self-cleaning oven.
Removable Burner Caps
• Allow burner to cool. Remove burner cap and wash in soapy water with a plastic scouring pad. For
stubborn soils, clean with a soap-filled, nonabrasive pad or Cooktop Cleaning Creme_
(Part #20000001) _*and asponge.
° Do not clean in the dishwasher or self-cleaning oven.
Sealed Gas Burners
° Clean frequently. Allow burner to cool. Clean with soap and plastic scouring pad. For stubborn or
dried-on soils, clean with a soap-filled, nonabrasive pad, stiff brush, toothbrush, the soft rubber tip on
the toothbrush (if equipped) or a straight pin. Do not enlarge or distort holes.
• Be careful not to get excesswater into burner ports.
• Use care when cleaning the ignitor. If the ignitor is wet or damaged the surface burner will not light.
° To activate control lock for cleaning, see Locking the Control,page 15.
• Wash, rinse and dry. Do not use abrasive cleaning agents as they may scratch the finish.
• Glass cleaners may be used if sprayed on a cloth first. DO NOTspray directly on control pad and
display area.
Broiler Pan
and Insert
NEVER cover insert with aluminum foil as this prevents the fat from draining to the pan below.
• Place soapy cloth over insert and pan; let soak to loosen soil.
• Wash in warm, soapy water. Use scouring pad to remove stubborn soil.
• Broiler pan and insertcan be cleaned in dishwasher.
Cont.
6
Page 8
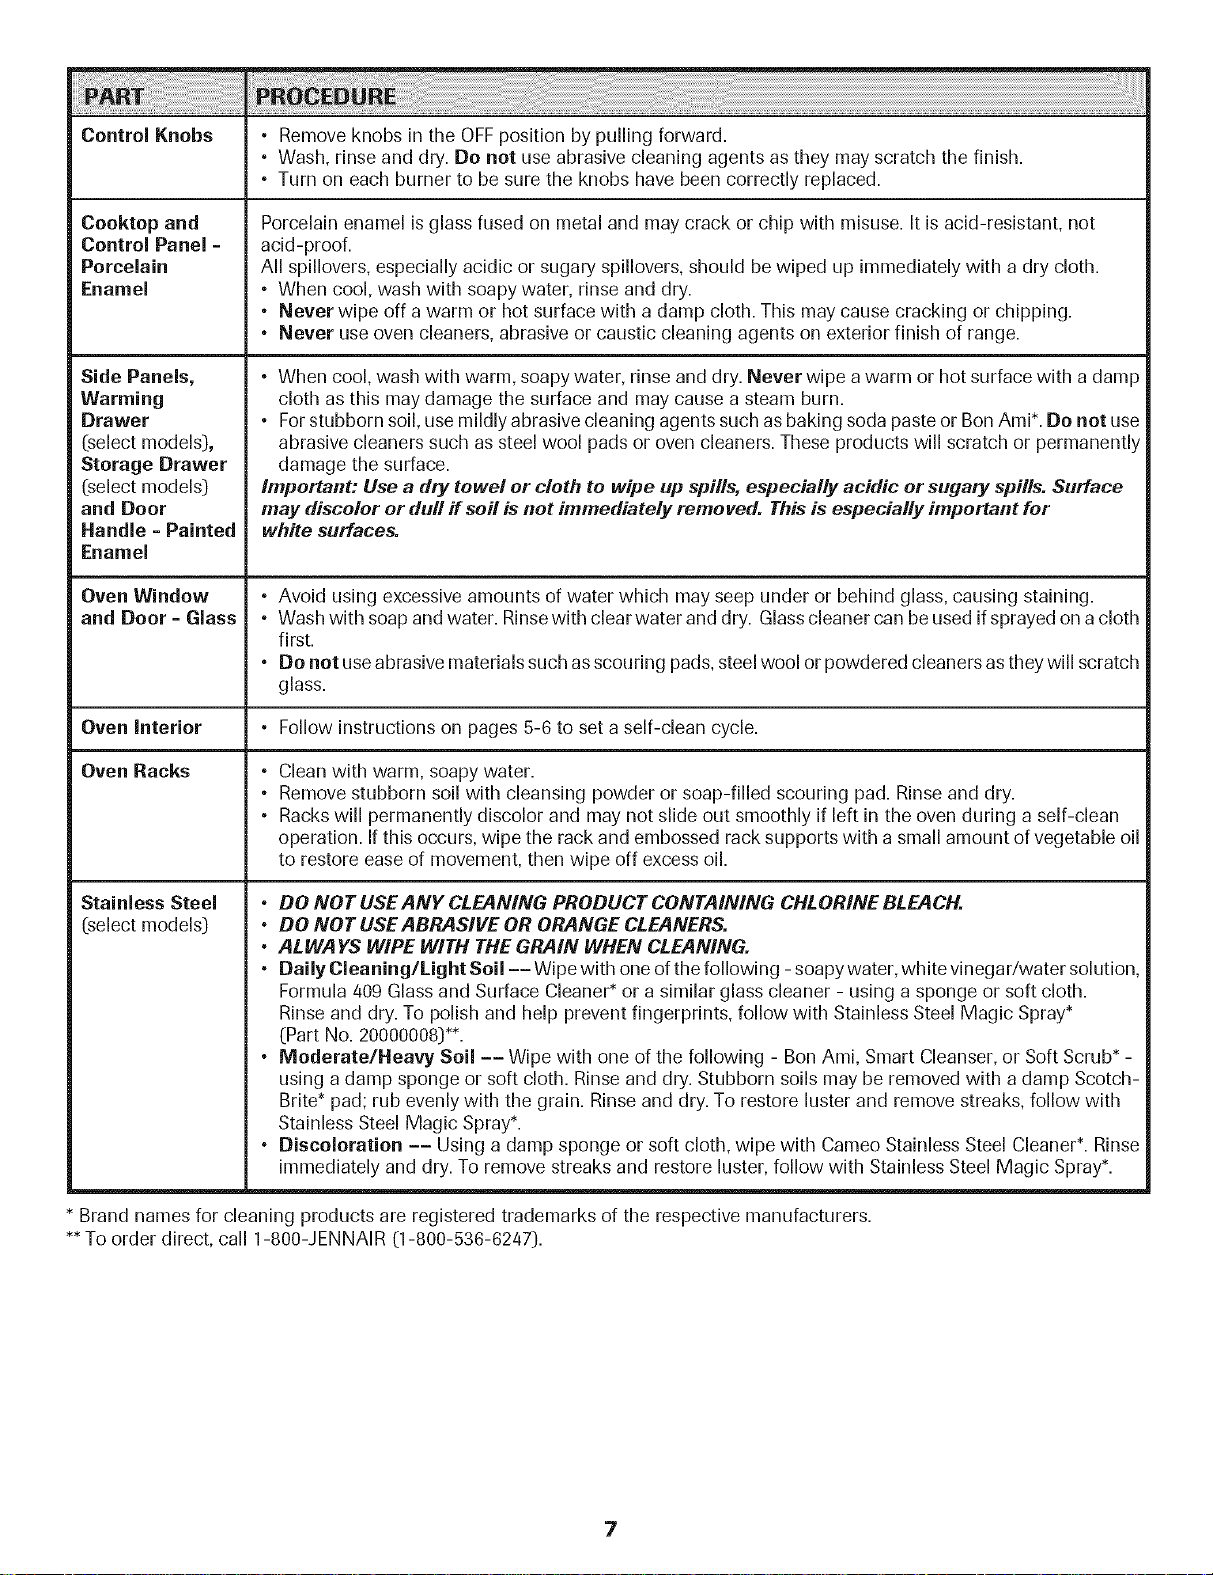
Control Knobs • Remove knobs in the OFFposition by pulling forward.
• Wash, rinse and dry. Do not use abrasive cleaning agents as they may scratch the finish.
• Turn on each burner to be sure the knobs have been correctly replaced.
Cooktop and Porcelain enamel is glass fused on metal and may crack or chip with misuse. It is acid-resistant, not
Control Panel = acid-proof.
Porcelain All spillovers, especially acidic or sugary spillovers, should be wiped up immediately with a dry cloth.
Enamel • When cool, wash with soapy water, rinse and dry.
• Never wipe off a warm or hot surface with a damp cloth. This may cause cracking or chipping.
• Never use oven cleaners, abrasive or caustic cleaning agents on exterior finish of range.
Side Panels, • When cool, wash with warm, soapy water, rinse and dry. Never wipe a warm or hot surface with a damp
Warming cloth as this may damage the surface and may cause a steam burn.
Drawer • Forstubborn soil, use mildly abrasive cleaning agents such as baking soda paste or Bon Ami*. Do not use
(select models), abrasive cleaners such as steel wool pads or oven cleaners. These products will scratch or permanently
Storage Drawer damage the surface.
(select models) important: Use a dry towel or cloth to wipe up spills, especially acidic or sugary spills. Surface
and Door may discolor or dull ffsoil is not immediately removed. This is especially important for
Handle - Painted white surfaces.
Enamel
Oven Window ° Avoid using excessive amounts of water which may seep under or behind glass, causing staining.
and Door = Glass ° Wash with soap and water. Rinsewith clear water and dry. Glass cleaner can be used if sprayed on a cloth
first.
• Do not useabrasive materials such as scouring pads, steel wool or powdered cleaners as they will scratch
glass.
Oven Interior • Follow instructions on pages 5-6 to set a self-clean cycle.
Oven Racks ° Clean with warm, soapy water.
• Remove stubborn soil with cleansing powder or soap-filled scouring pad. Rinse and dry.
° Racks will permanently discolor and may not slide out smoothly if left in the oven during a self-clean
operation. If this occurs, wipe the rack and embossed rack supports with a small amount of vegetable oil
to restore ease of movement, then wipe off excessoil.
Stainless Steel ° DO NOT USEANY CLEANING PRODUCT CONTAINING CHLORINE BLEACH.
(select models) ° DO NOT USEABRASIVE OR ORANGE CLEANERS.
• ALWAYS WIPE WITH THE GRAIN WHEN CLEANING.
• Daily Cleaning/Light Soil -- Wipe with one ofthe following - soapy water, white vinegar/water solution,
Formula 409 Glass and Surface Cleaner* or a similar glass cleaner - using a sponge or soft cloth.
Rinse and dry. To polish and help prevent fingerprints, follow with Stainless Steel Magic Spray*
(Part No. 20000008)**.
• Moderate/Heavy Soil -- Wipe with one of the following -Bon Ami, Smart Cleanser, or Soft Scrub* -
using a damp sponge or soft cloth. Rinse and dry. Stubborn soils may be removed with a damp Scotch-
Brite* pad; rub evenly with the grain. Rinse and dry. To restore luster and remove streaks, follow with
Stainless Steel Magic Spray*.
• Discoloration -- Using a damp sponge or soft cloth, wipe with Cameo Stainless Steel Cleaner*. Rinse
immediately and dry. To remove streaks and restore luster, follow with Stainless Steel Magic Spray*.
• Brand names for cleaning products are registered trademarks of the respective manufacturers.
•* To order direct, call 1-800-JENNAIR (1-800-536-6247).
Page 9

AINTENANCE
Oven Door
• NEVER attempt to open or close door or operate oven until
door is properly replaced.
• NEVER place fingers between hinge and front oven frame.
Hinge arms are spring mounted. If accidentally hit, the
hinge will slam shut against oven frame and could injure
your fingers.
Important: The oven door on a new range may feel "spongy"
when it is closed. This is normal and will decrease with use.
Oven Window
To protect the oven door window:
1. Do not use abrasive cleaning agents such as steel wool
scouring pads or powdered cleansers as they may scratch
the glass.
2. I::]onot hit the glass with pots, pans, furniture, toys, or
other objects.
3. Do not close the oven door until the oven racks are in
place.
Oven Light
To Replace Oven Light Bulb:
1. When oven is cool, hold bulb cover in place, then slide wire
retainer off cover. NOTE:Bulbcover will fall if not held in place
while removing wire retainer.
2. Removebulb coverand light bulb.
3. Replacewith a 40-wattappli-
ance bulb.
4,
Replace bulb cover and se-
cure with wire retainer.
5.
Reconnect power to range. Reset clock.
Storage Drawer (:selectmodels:)
BULB CO VER
RETAINER
Scratching, hitting, jarring or stressing the glass may weaken
its structure causing an increased risk of breakage at a later
date.
Leveling Legs
Be sure the range is leveled when installed. If
the range is not level, turn the leveling legs,
located at each corner of the range, until range
islevel.
BRACKET
The storage drawer can be removed to allow you to clean
under the range.
To remove:
1. Empty drawer and pull out to the first stop position.
2. Lift up the front of the drawer.
3. Pull out to the second stop position.
4. Grasp sides and lift drawer up and out.
To replace:
1. Fit the ends of the drawer glides into the rails in the range.
2. Lift up the front of the drawer and gently push in to the
first stop position.
3. Lift drawer up again and push until drawer is closed.
Page 10
Electrical Connection
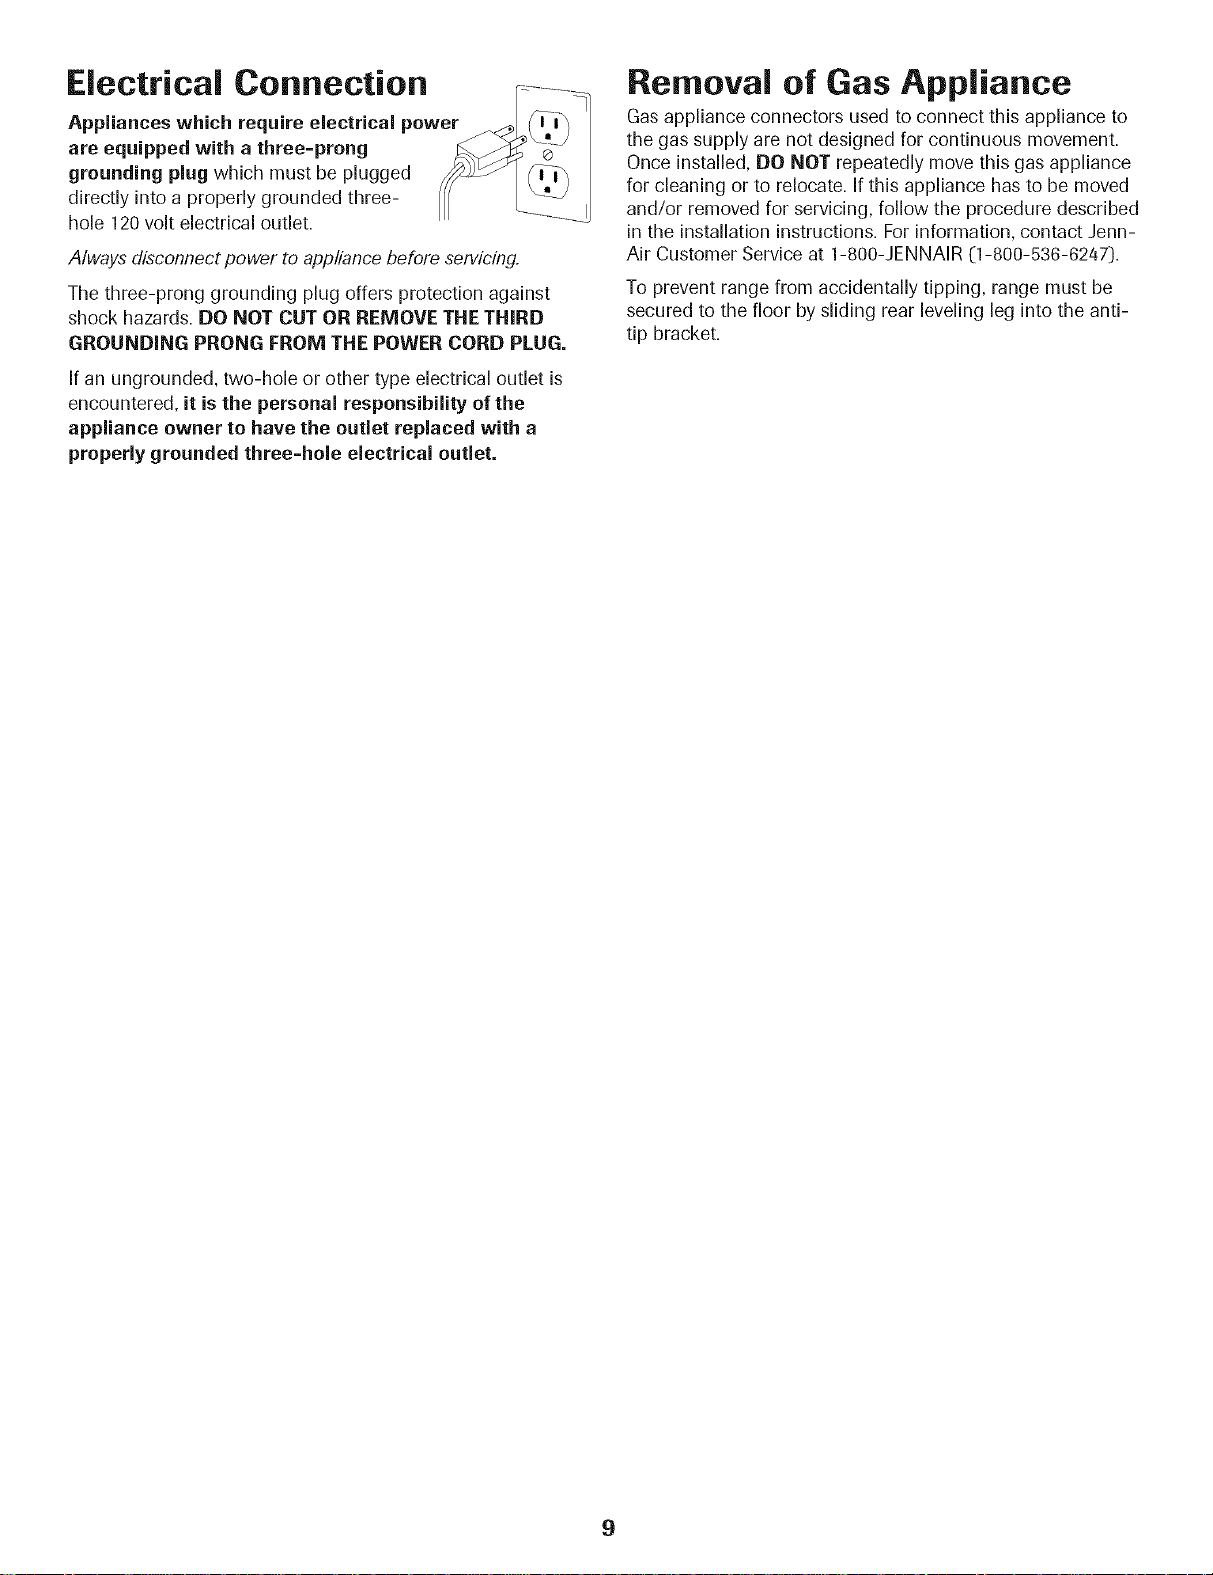
Appliances which require electrical power
are equipped with a three=prong
grounding plug which must be plugged
directly into a properly grounded three-
hole 120 volt electrical outlet.
Always disconnect power to appliance before servicing.
The three-prong grounding plug offers protection against
shock hazards. DO NOT CUT OR REMOVE THE THIRD
GROUNDING PRONG FROM THE POWER CORD PLUG.
If an ungrounded, two-hole or other type electrical outlet is
encountered, it is the personal responsibility of the
appliance owner to have the outlet replaced with a
properly grounded three=hole electrical outlet.
Removal of Gas Appliance
Gas appliance connectors used to connect this appliance to
the gas supply are not designed for continuous movement.
Once installed, DO NOT repeatedly move this gas appliance
for cleaning or to relocate. If this appliance has to be moved
and/or removed for servicing, follow the procedure described
in the installation instructions. For information, contact Jenn-
Air Customer Service at 1-800-JENNAIR 0-800-536-6247).
To prevent range from accidentally tipping, range must be
secured to the floor by sliding rear leveling leg into the anti-
tip bracket.
9
Page 11

T UB NG
For most concerns, try these first.
Part or all of appliance does not
work.
Clock, indicator words, and/or
lights operate but oven does
not heat.
Surface burner fails to light.
The flame is uneven. Burner ports may be clogged. Seepage 6.
Surface burner flame lifts Check to be sure a pan is sitting on the grate above.
off ports.
Check if oven controls have been properly set.
Check to be sure plug is securely inserted into receptacle.
Check or re-set circuit breaker. Check or replace fuse.
Check power supply.
Check if surface and/or oven controls have been properly set. See pgs. 12& 16-19.
Check if oven door is unlocked after self-clean cycle. See pg. 6.
Check if oven is set for a delayed cook or clean program. See pgs. 16 & 5.
Check if control lock is activated. See pg. 15.
Check if control is in Sabbath Mode. See pg. 27.
Oven may be set for a Cook & Hold or delay function.
Control lock may have been set. See pg. 15.
Check to be sure unit is properly connected to power supply.
Check for a blown circuit fuse or a tripped main circuit breaker.
Check to be sure ignitor isdry and clicking. Burner will not light if ignitor is damaged,
soiled or wet. If ignitor doesn't click, turn control knob OFF.
Baking results are not as
expected or differ from
previous oven.
Food is not broiling properly or
smokes excessively.
Check the oven temperature selected. Make sure oven is preheated when recipe
or directions recommend preheat.
Make sure the oven vent has not been blocked. See page 20 for location.
Check to make sure range is level.
Temperatures often vary between anew oven and an old one.As ovens age,the oven
temperature often "drifts" and may become hotter or cooler. Seepage 27for
instructions on adjusting the oven temperature. Important: It is not recommended
to adjust the temperature if only one or two recipes are in question.
Use correct pan. Dark pans produce dark browning. Shiny pans produce light
browning.
Check rack positions and pan placement. Stagger pans when using two racks. Allow
1-2 inches between pans and oven wall.
Check the use of foil in the oven. Never use foil to cover an entire oven rack. Place
a small piece of foil on the rack below the pan to catch spillovers.
Check oven rack positions. Food may be too close to flame.
Aluminum foil was incorrectly used. Never line the broiler insert with foil.
Trim excess fat from meat before broiling.
A soiled broiler pan was used.
Preheat oven for 2-3 minutes before placing food in the oven.
Broil with the oven door closed.
Cont.
10
Page 12
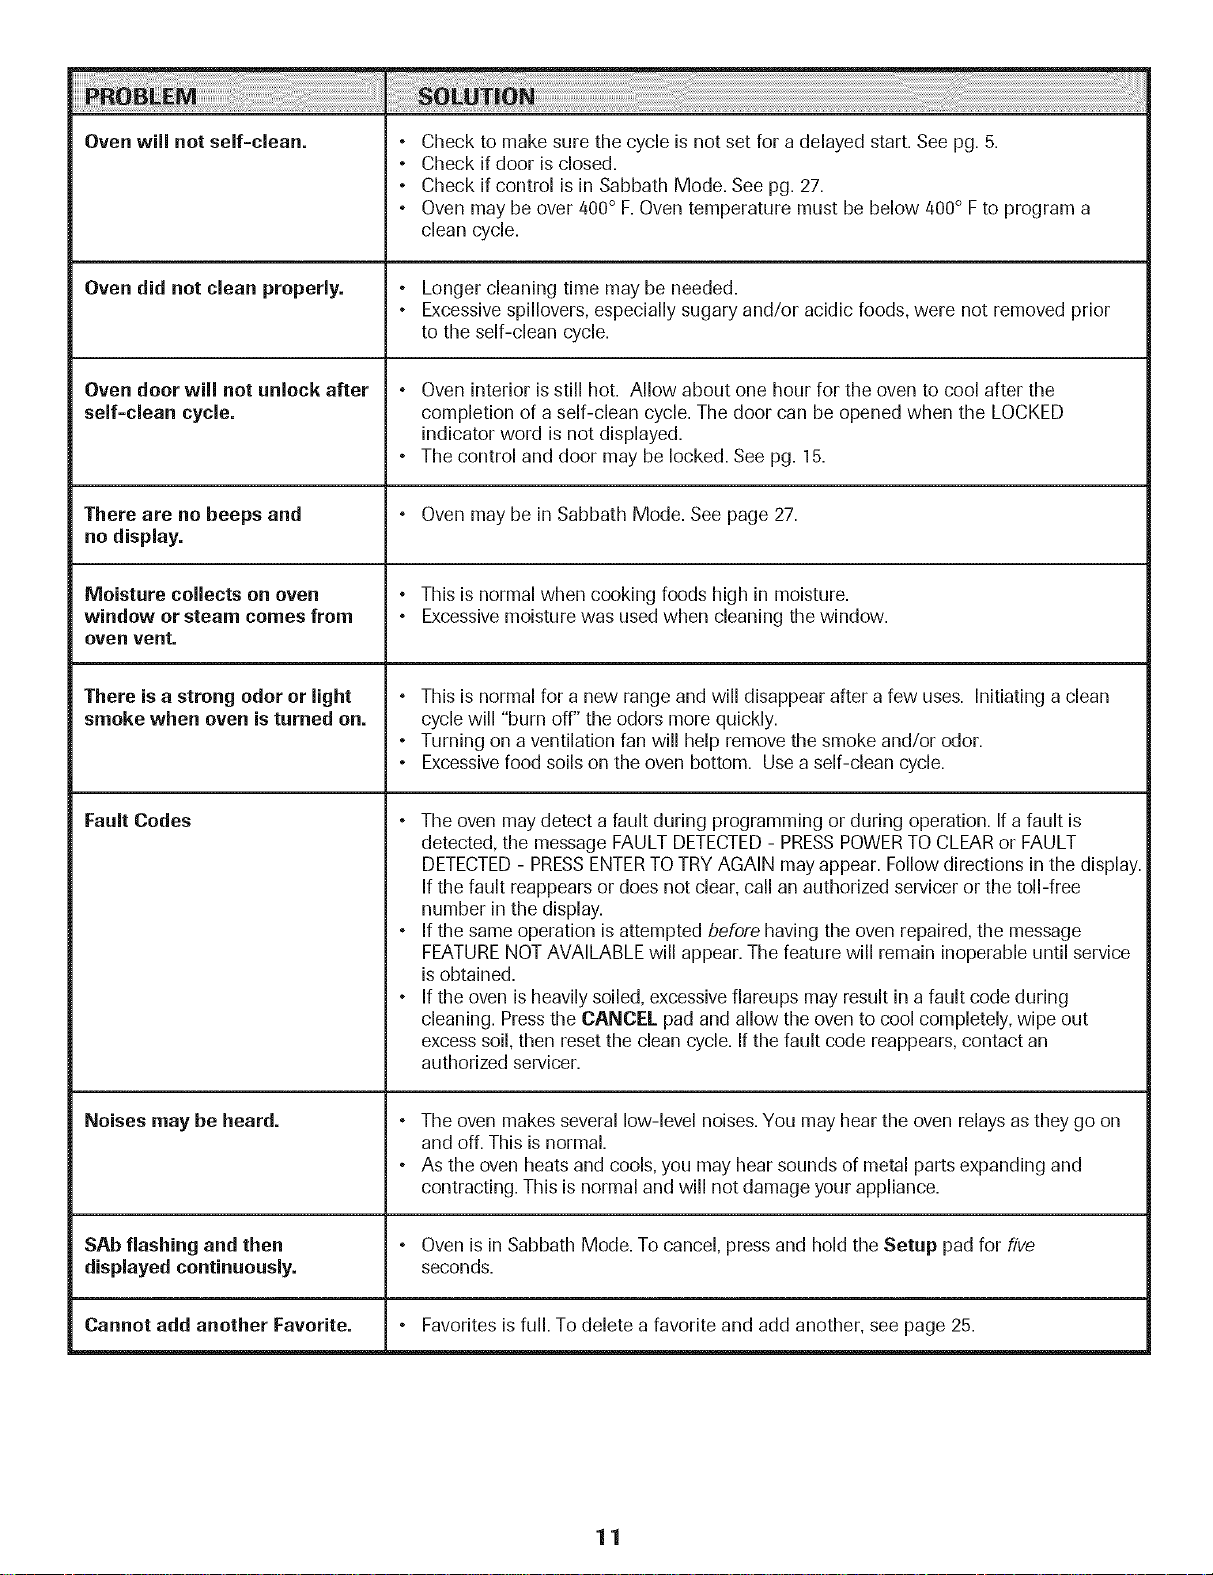
Oven will not self=clean.
• Check to make sure the cycle is not set for a delayed start. See pg. 5.
• Check if door is closed.
• Check if control is in Sabbath Mode. See pg. 27.
° Oven may be over 400° F.Oven temperature must be below 400° Fto program a
clean cycle.
Oven did not clean properly.
Oven door will not unlock after
self=clean cycle.
There are no beeps and
no display.
Moisture collects on oven
window or steam comes from
oven vent=
There is a strong odor or light
smoke when oven is turned on.
Fault Codes
• Longercleaning time may be needed.
• Excessivespillovers, especially sugary and/or acidic foods, were not removed prior
to the self-clean cycle.
° Oven interior isstill hot. Allow about one hour for the oven to cool after the
completion of a self-clean cycle, The door can be opened when the LOCKED
indicator word is not displayed,
• The control and door may be locked, See pg. 15.
° Oven may be in Sabbath Mode. See page 27.
• This isnormal when cooking foods high in moisture.
• Excessivemoisture was used when cleaning the window.
° This is normal for a new range and will disappear after a few uses. Initiating a clean
cycle will "burn off" the odors more quickly.
• Turning on a ventilation fan will help remove the smoke and/or odor.
• Excessivefood soils on the oven bottom. Usea self-clean cycle.
• The oven may detect a fault during programming or during operation. If a fault is
detected, the message FAULTDETECTED- PRESSPOWERTO CLEARor FAULT
DETECTED- PRESSENTERTOTRYAGAIN may appear. Follow directions in the display.
If the fault reappears or does not clear, call an authorized servicer or the toll-free
number in the display.
° If the same operation is attempted before having the oven repaired, the message
FEATURENOT AVAILABLE will appear. The feature will remain inoperable until service
is obtained.
• Ifthe oven is heavily soiled, excessive fiareups may result in a fault code during
cleaning. Press the CANCEL pad and allow the oven to cool completely, wipe out
excess soil, then reset the clean cycle. If the fault code reappears, contact an
authorized servicer.
Noises may be heard.
° The oven makes several low-level noises.You may hear the oven relays as they go on
and off. This is normal.
• As the oven heats and cools, you may hear sounds of metal partsexpanding and
contracting. This is normal and will not damage your appliance.
SAb flashing and then ° Oven is in Sabbath Mode. To cancel, press and hold the Setup pad for five
displayed continuously, seconds.
Cannot add another Favorite. • Favorites isfull. To delete a favorite and add another, see page 25.
11
Page 13
:SURFACECOOKING
Surface Controls
Suggested Heat Settings
The size and type of cookware, type and OFF
amount of food and BTU of the burner
will determine where to set the knob z_¢
for cooking operations. Use the
settings printed around the knobs
as a guide.The following
descriptions will aid in choosing the
type setting that will gived optimum
results:
Hold or Warm: Food maintains a
temperature above 140° Fwithout
continuing to cook. Food is heated on
a higher flame size until it reaches
this temperature and then the flame
size is reduced. Never use a hold or
warm setting to reheat cold food. Be
sure knob is adjusted to produce a
stable flame. (Use the Lo setting or
the simmer burner located at the right
rear to keep food warm.)
Simmer: Food forms bubbles that barely break the surface.
Foods are between 185° Fand 200° F.A simmer setting can
also be used to steam or poach foods or continue cooking
covered foods. (Adjust the knob between Hi and Lo to obtain
the desired simmer action.)
Slow Boil: Food forms bubbles at a moderate pace. A slow
boil setting can also be used for most frying and for
maintaining the cooking of large amounts of liquids. (Adjust
the knob between Hi and Lo to obtain the desired boil action.)
Boil: Liquid forms bubbles at a rapid pace. A fast boil setting
can be used to bring liquid to a boil, brown meat, stir fry,
saute, and heat oil for frying before turning to a lower setting.
The HIGH setting is always used to bring liquids to a boil.
Once the liquid boils, always reduce the flame size to the
lowest setting that will maintain the boil action. L-Turnthe knob
to Hi then adjust the flame size to fit the size of the pan.)
Style of knob
varies by model.
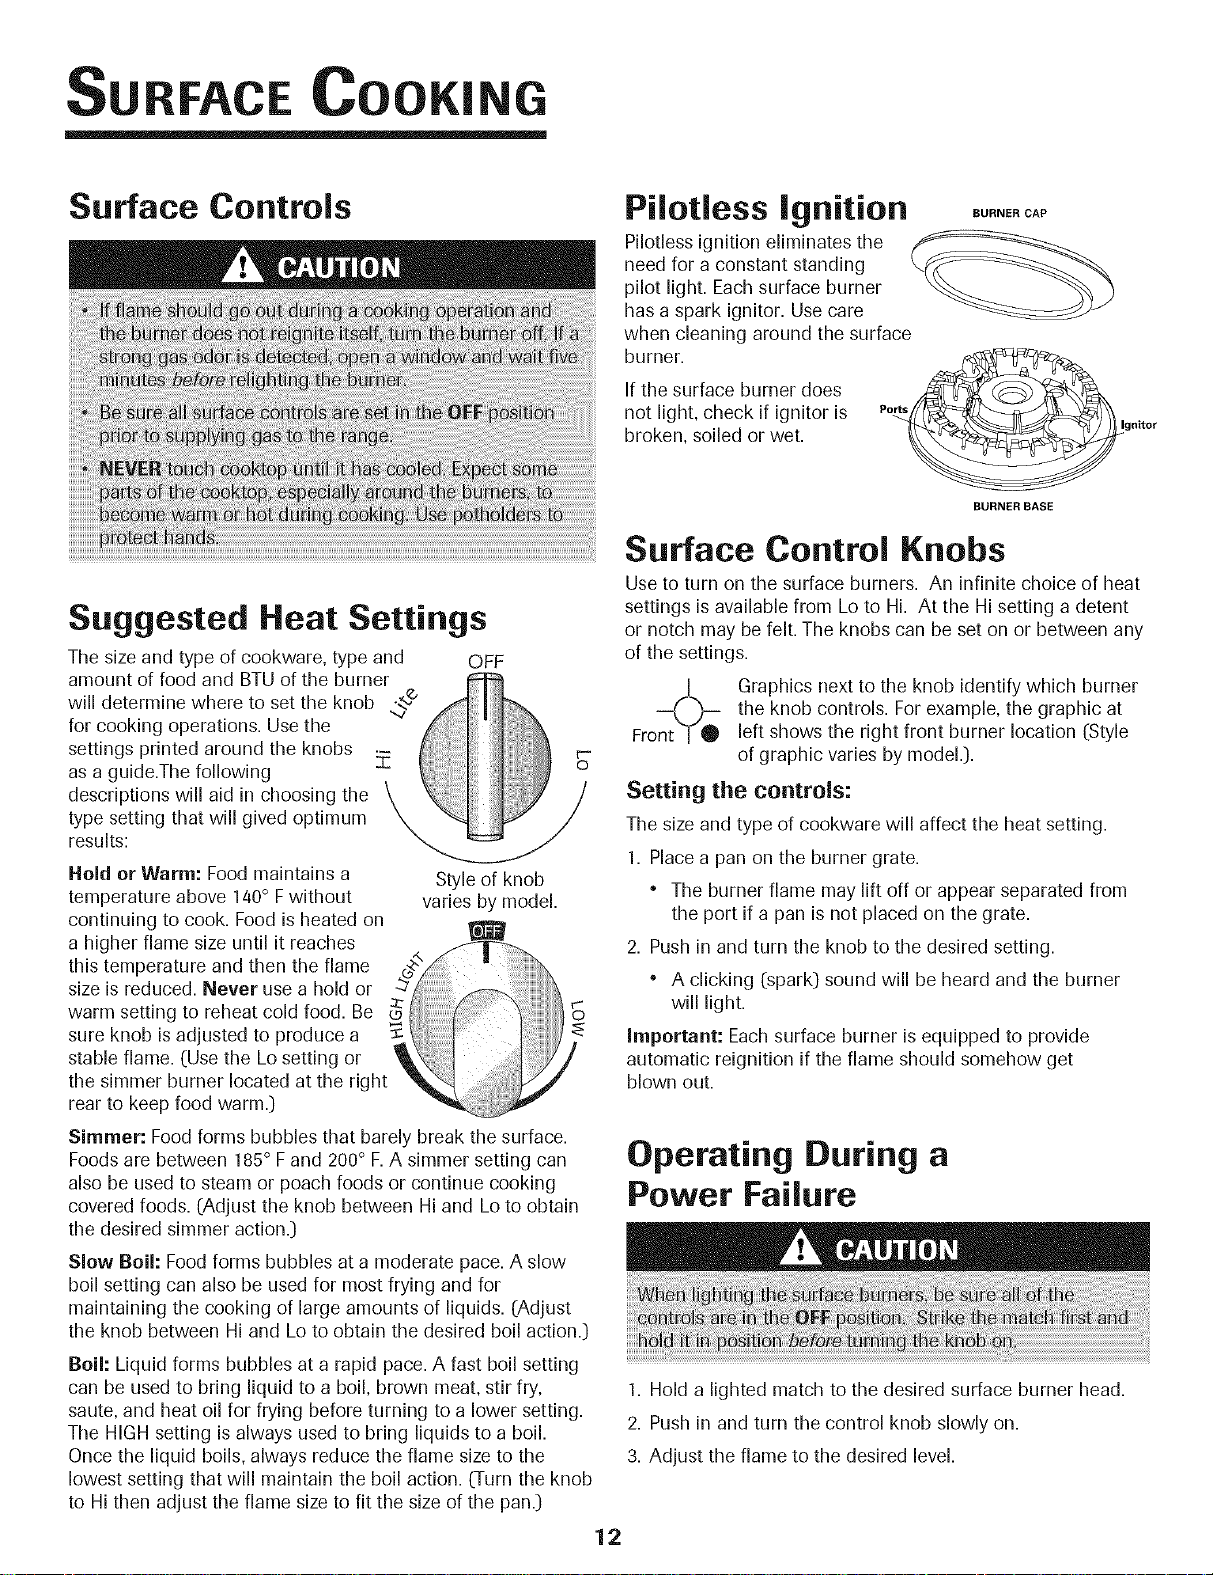
Pilotless Ignition
Pilotless ignition eliminates the
need for a constant standing k,
pilot light. Each surface burner
has a spark ignitor. Use care
when cleaning around the surface
burner.
If the surface burner does
not light, check if ignitor is
broken, soiled or wet.
Po_s
f
BURNER CAP
BURNEBBASE
Surface Control Knobs
Use to turn on the surface burners. An infinite choice of heat
settings is available from Lo to Hi. At the Hi setting a detent
or notch may be felt. The knobs can be set on or between any
of the settings.
f the knob controls. For example, the graphic at
Fro left shows the right front burner location (Style
r
o
Setting the controls:
The sizeand type of cookware will affect the heat setting.
1. Place a pan on the burner grate.
• The burner flame may lift off or appear separated from
the port if a pan is not placed on the grate.
2. Push in and turn the knob to the desired setting.
A clicking (spark) sound will be heard and the burner
will light.
Important: Each surface burner is equipped to provide
automatic reignition if the flame should somehow get
blown out.
Graphics next to the knob identify which burner
of graphic varies by model.).
Operating During a
Power Failure
1. Hold a lighted match to the desired surface burner head.
2. Push in and turn the control knob slowly on.
3. Adjust the flame to the desired level.
12
gnitor
Page 14
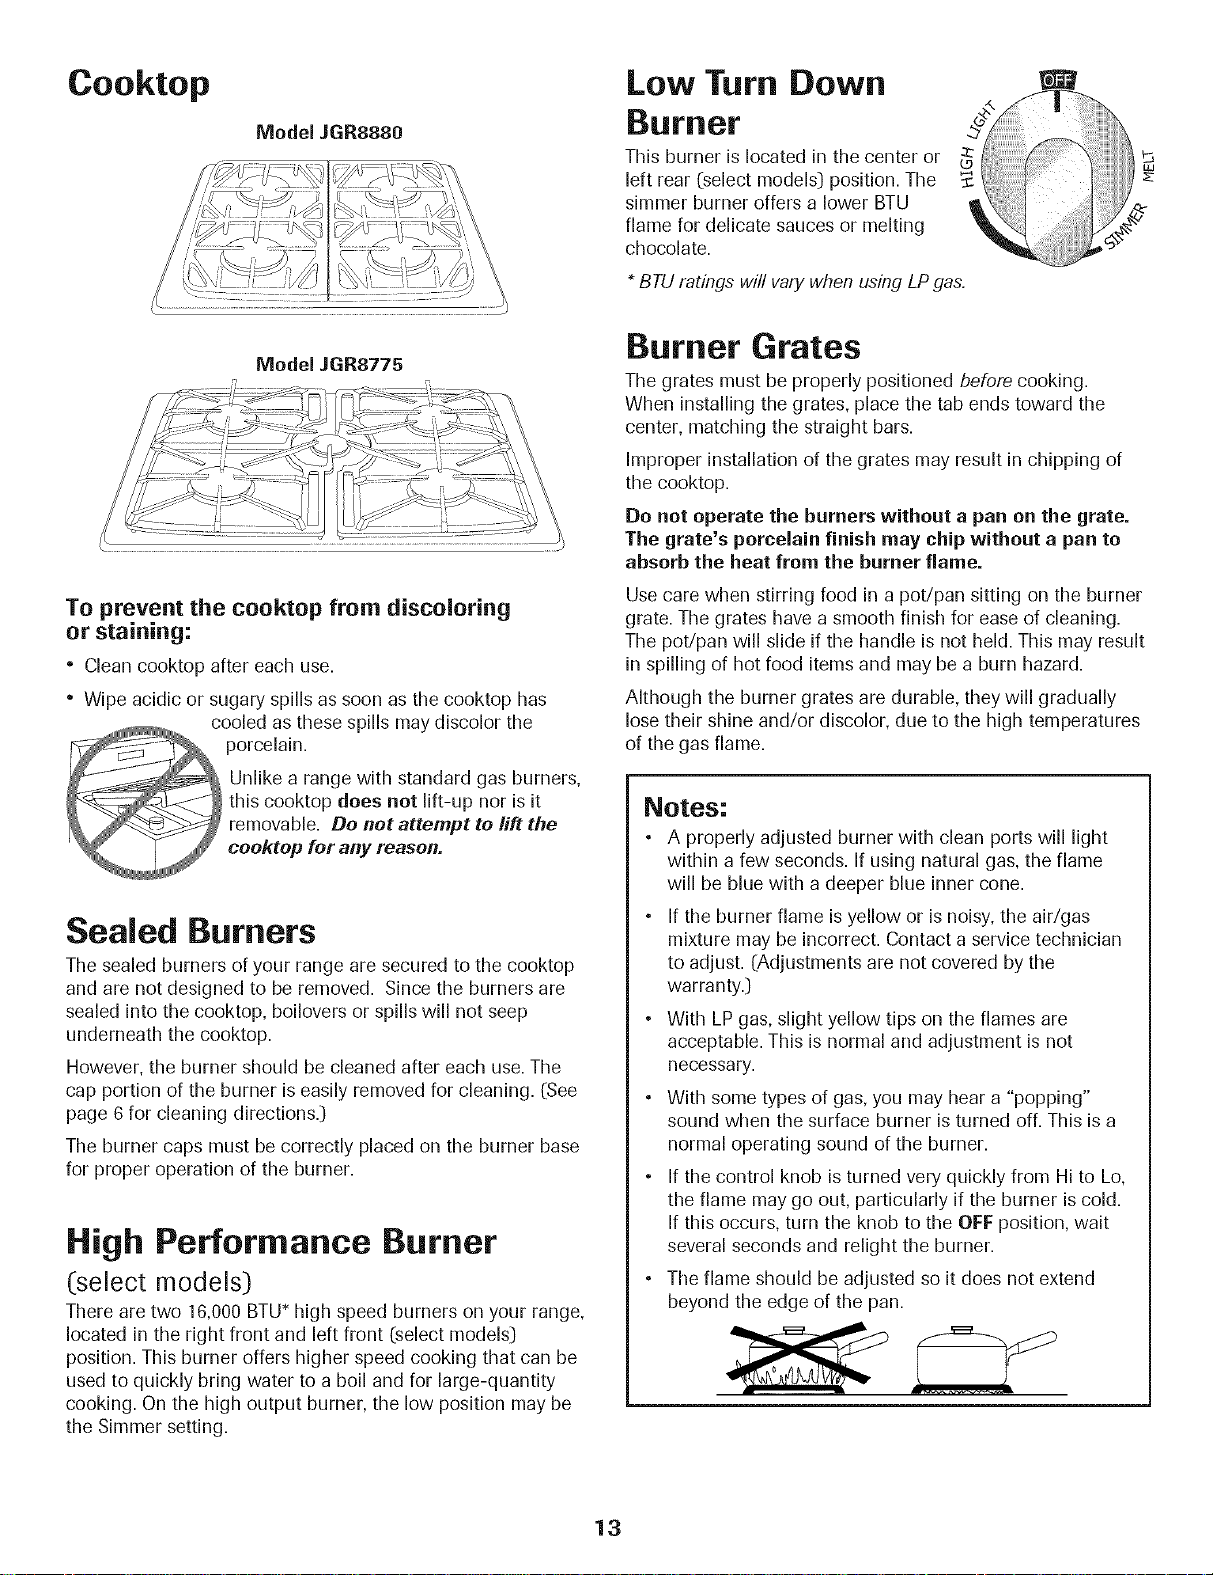
Cooktop
ModeIJGRSO80
Low Turn Down
Burner
This burner is located in tile center or
left rear (select models} position. The
simmer burner offers a lower BTU
flame for delicate sauces or melting
chocolate.
BTU ratings will vary when using LP gas.
P_
LU
ModeIJGR8775
To prevent the cooktop from discoloring
or staining:
" Clean cooktop after each use.
" Wipe acidic or sugary spills as soon as the cooktop has
cooled as these spills may discolor the
porcelain.
__ Unlike a range with standard gas burners,
__J_ this cooktop does not lift-up nor is it
__ removable. Do not attempt to lift the
' _ [ J cooktop for any reason.
Sealed Burners
The sealed burners of your range are secured to the cooktop
and are not designed to be removed. Since the burners are
sealed into the cooktop, boilovers or spills will not seep
underneath the eooktop.
However, the burner should be cleaned after each use. The
cap portion of the burner is easily removed for cleaning. (See
page 6 for cleaning directions.}
The burner caps must be correctly placed on the burner base
for proper operation of the burner.
High Performance Burner
(:select models:)
There are two 16,000 BTU* high speed burners on your range,
located in the right front and left front (select models}
position. This burner offers higher speed cooking that can be
used to quickly bring water to a boil and for large-quantity
cooking. On the high output burner, the low position may be
the Simmer setting.
Burner Grates
The grates must be properly positioned before cooking.
When installingthe grates, place the tab ends toward the
center, matching the straight bars.
Improper installation of the grates may result in chipping of
the cooktop.
Do not operate the burners without a pan on the grate.
The grate's porcelain finish may chip without a pan to
absorb the heat from the burner flame.
Use care when stirring food in a pot/pan sitting on the burner
grate. The grates have a smooth finish for ease of cleaning.
The pot/pan will slide if the handle is not held. This may result
in spilling of hot food items and may be a burn hazard.
Although the burner grates are durable, they will gradually
lose their shine and/or discolor, due to the high temperatures
of the gas flame.
Notes:
• A properly adjusted burner with clean ports will light
within a few seconds. If using natural gas, the flame
will be blue with a deeper blue inner cone.
• If the burner flame is yellow or is noisy, the air/gas
mixture may be incorrect. Contact a service technician
to adjust. (Adjustments are not covered by the
warranty.}
• With LP gas,slight yellow tips on the flames are
acceptable. This is normal and adjustment is not
necessary.
• With some types of gas, you may hear a "popping"
sound when the surface burner is turned off. This is a
normal operating sound of the burner.
• If the control knob is turned very quickly from Hi to Lo,
the flame may go out, particularly if the burner is cold.
If this occurs, turn the knob to the OFF position, wait
several seconds and relight the burner.
• The flame should be adjusted so it does not extend
beyond the edge of the pan.
13
Page 15

OVENCOOK=NG
Control Panel
AB CD
C!!_ "Favorites
Rapid More
-- Preheat i_s_
On/Off
&etup
On/Off
Clean
J KL
E
TIMER 1
On / Off
G
TIMER2
On/Off
0
H
_"""1
2 3
ASC DEF
4 5 6
GHI JKL MNO
7 8 9
POR$ TUV WXYZ
Back 0 Enter
[ Space I
4ack
The control panel isdesigned for ease in programming. The display window shows options for each function and moves from step
to step through the programming process. Control panel features and style varies by model. Ovendisplay above is programmed for
a bake operation.
Rapid Preheat
(select models_
Convect
(select models
Bake
B Broil
TIMER 1
Useto decrease preheating time.
Usefor convection baking and roasting.
Usefor baking and roasting.
Usefor broiling and top browning.
Sets timer.
If you need to back out of a function or option in the display,
press the Back pad. When your programming is complete,
press the Enter pad or wait four seconds and the function will
start automatically.
Up arrows indicate additional screens with additional options.
Press the Quickset pads next to the arrows to scroll through
the display.
Display
Displaysoven functions, options and
window time of day.
TIMER 2
Number Pads
Sets timer.
Useto enter time and temperature,
or to enter Favorites names.
I Favorites
Useto access,program or save
baking cycles.
More Options
Clean
Setup
Useto access additional features.
Useto set self-clean cycle.
Useto view or change factory
default settings.
Oven Light
CANCEL
Useto turn the oven light on or off.
Cancels all operations except TIMER,
Clock, Favorites,Setup and Warm
Drawer (select models].
Quickset pads
Useto select options in display
window (next to display window
on both sides].
Quickset Pads
Quickset pads are located on each side of the display window
and are used to select the desired function or option in the
display window. To select the option or function, press the
Quickset pad next to the word.
Important: Four seconds after entering the function,
option, number or letter, the function will automatically be
entered. If more than 30 seconds elapse between steps in
programming, the function will be canceled and the
display will return to the previous display.
Pilotless Ignition (select models)
Your range isequipped with pilotless ignition.With this type
of ignitionsystem, the gas automatically shuts off and the
oven will not operate during a power failure.
A lighted match will not light the oven burner. No attempt
should be made to operate the oven during a power failure.
Clock
Setting the Clock:
1. Pressthe Setup pad.
2. Select CLOCK using the Quickset pads.
3. Select TIME.
4. Enter the time using the number pads.
5. PressEnter pad.
14
/ ....... %
/Setup
....., On / Off /
- /
Cant.
Page 16

6. Select AM or PNI in 12hour mode• (For 24 hour clock, see
below•)
7. To exit the Setup mode, press Setup pad.
Activating and canceling the clock/day ............
of week display: _J
1 Press Setup pad. On / Off
• ,\ ..................... //
2. Select CLOCK.
3. Pressthe arrow to scroll until DISABLE is displayed•
4. Select DISABLE.
5. Select TIME.
6. Select OFF to turn the clock display off, or select ON to turn
the clock display on.
7. Select OFF to turn the day of the week display off Select
ON to turn the weekday display on.
8. To exit the Setup mode, press Setup pad.
Entering the day of the week: _........................
1 Press Setup pad. _ Setup
• on/off/
2. Select CLOCK• '.............. /
3. Pressthe arrow to scroll until DAY is displayed•
4. Use Quickset arrow to scroll through the days•
5. Select day desired•
6. To exit the Setup mode, press Setup pad.
TO set the clock for a 12 or 24 honr format:
The clock can be set to display time in either a 12hour or 24
hour format•
1. Press the Setup pad.
2. Select CLOCK.
3. Usethe arrow to scroll to the next screen•
4. Select 12/24 HOUR•
5. Select 12 HR or 24 HR.
6. To exit Setup mode, press Setup pad.
/ Setup
\On / Offj'
Changing the amount of time entered
once the Timer starts:
1. Press the TINIER 1 or TINIER 2 pad once.
2. Press the displayed times on the Quickset
....., OnlOff i
pads repeatedly until the desired time is
entered•
OR
3. Pressthe number pads to enter the new desired time.
4. Press Enter pad.
Canceling the Timer:
1. Press the TINIER 1 or TINIER 2 pad twice• /:rIMER 1\'
If both Timers are active: ,On/Off ji
If the desired Timer is already in the foreground, press once
for edit mode and twice to cancel the Timer. If the desired
Timer is not in the foreground, follow the steps below.
1. Press the desired TINIER pad once.The selected Timer will
come to the foreground.
2. Press the TINIER pad a secondtime to access the edit
mode in order to make changes.
3. Pressing the TINIER pad a thirdtime will cancel the Timer•
Changing the Timer beeps:
The signal beeps for TIMER I and TIMER 2 can be changed.
The options available are two beeps every thirty seconds, two
beeps every sixty seconds or one beep only. The default
setting is one beep.......................
/
" Setup'
1. Press the Setup pad. On / Off
2. Select the arrow to scroll until TONES .................
isdisplayed•
3. SelectTONES•
4. Select TIMERS TONES•
5. Select the desired timer beep format (2-30 SEC,2-60 SEC
or 1 BEEF).
6. Press Setup pad to exit Setup mode.
Timers
Setting the Timers (Timer 1 or Timer 2):
1. Press TINIER 1 or TINIER 2 pad.
2. Press one of the displayed times using the
Quickset pads, or press the number pads to
enter the desired time•
Important: Each press of the displayed time choices adds
additional time. For example, pressing "10 MIN" three
times provides 30 minutes on the timer (0:30).
3. PressEnter pad.
/f ......... %
TIMER 1
...._On!Off
Locking the Control and Oven Door
The oven control and oven door can be locked to prevent
accidental programming• If an oven function is currently
being used, the control and door cannot be locked•
To lock the control and door:
Press the Back and Enter pads at the same time, holding for
three seconds or until CONTROL LOCKED appears in the
display•
To unlock the control and door:
Press the Back and Enter pads at the same time, holding for
three seconds. UNLOCKING DOORwill appear in the display
when the control and door are unlocking•
Back 0 Enter
15
Page 17
Baking
To set Bake: Bake
1. Press the Bake pad.
2. Select the oven temperature using the Quickset pads.
OR
Enter the desired temperature using the number pads.
Press Enter pad to set.
• The temperature can be set from 170° Fto 550° F
in 5° increments.
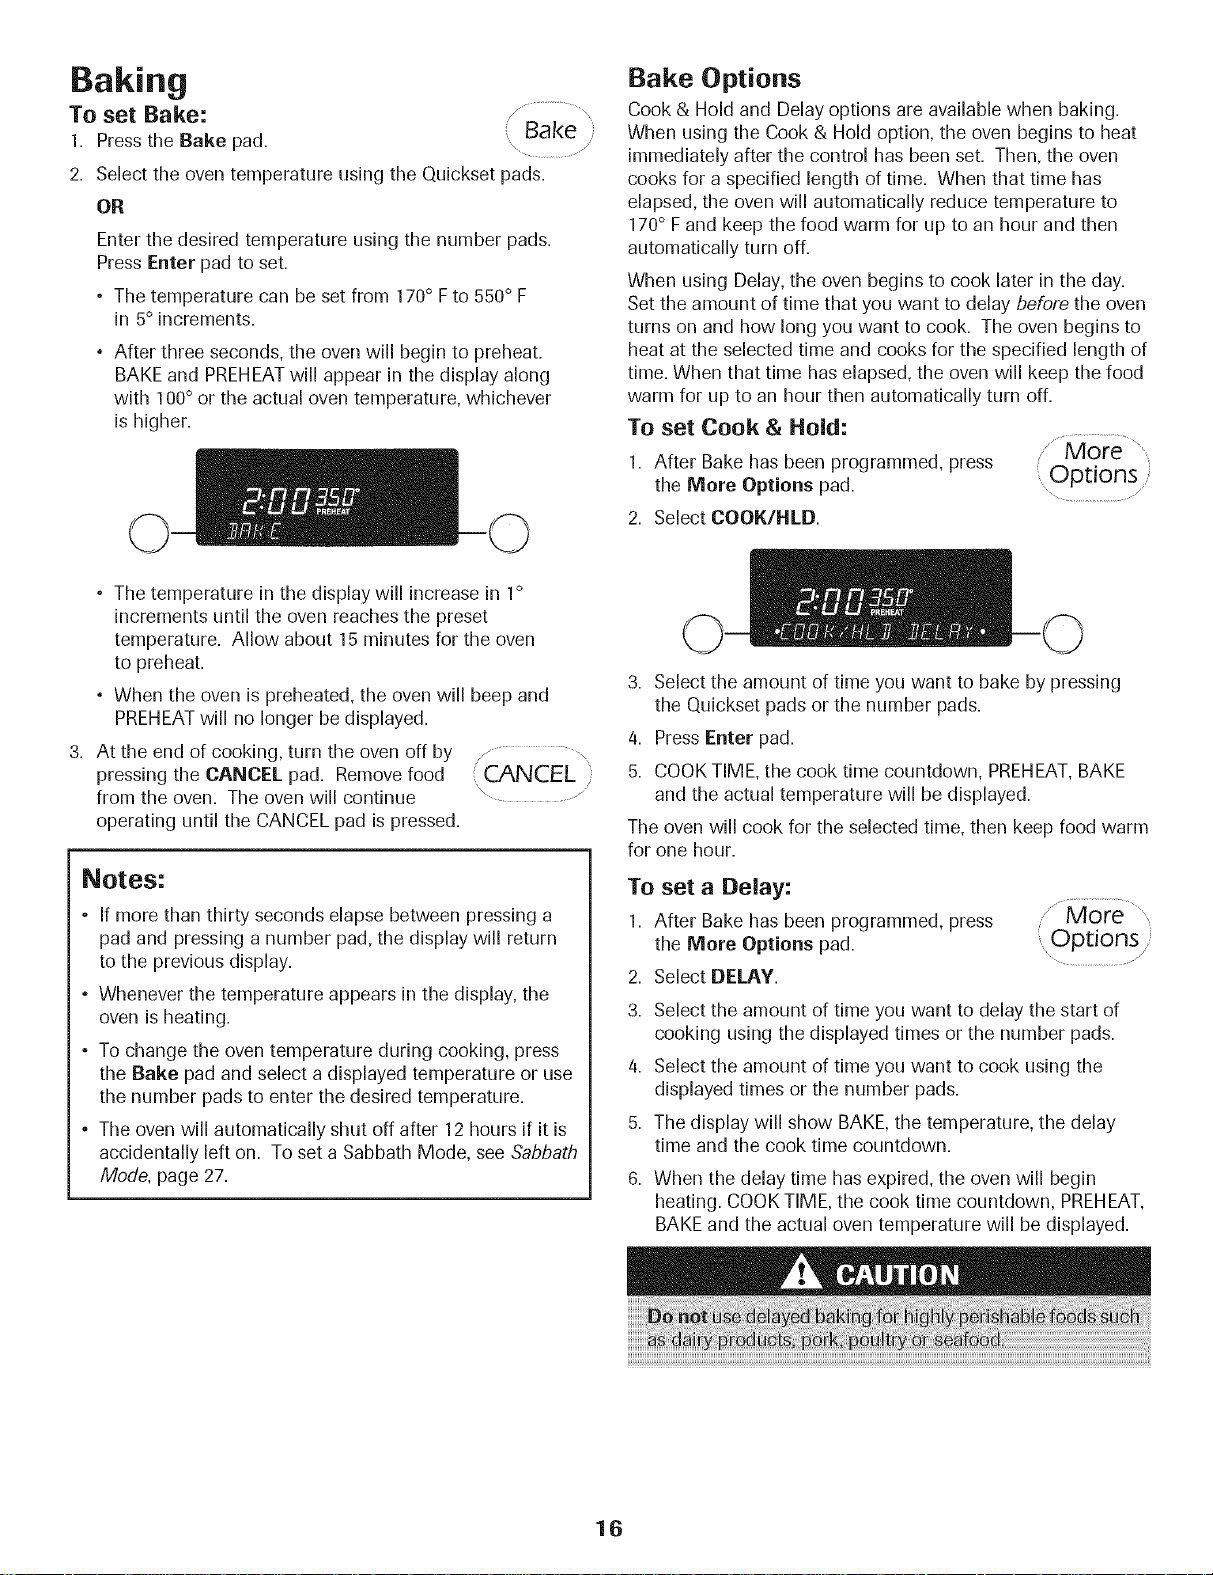
• After three seconds, the oven will begin to preheat.
BAKE and PREHEATwill appear in the display along
with 100° or the actual oven temperature, whichever
is higher.
• The temperature in the display will increase in 1°
increments until the oven reaches the preset
temperature. Allow about 15 minutes for the oven
to preheat.
• When the oven is preheated, the oven will beep and
PREHEATwill no longer be displayed.
3. At the end of cooking, turn the oven off by
pressing the CANCEL pad. Removefood CANCEL
from the oven. The oven will continue ...............
operating until the CANCEL pad is pressed.
Notes:
• If more than thirty seconds elapse between pressing a
pad and pressing a number pad, the display will return
to the previous display.
• Whenever the temperature appears in the display, the
oven is heating.
• To change the oven temperature during cooking, press
the Bake pad and select a displayed temperature or use
the number pads to enter the desired temperature.
• The oven will automatically shut off after 12 hours if it is
accidentally left on. To set a Sabbath Mode, see Sabbath
Mode, page 27.
Bake Options
Cook & Hold and Delay options are available when baking.
When using the Cook & Hold option, the oven begins to heat
immediately after the control has been set. Then, the oven
cooks for a specified length of time. When that time has
elapsed, the oven will automatically reduce temperature to
170° Fand keep the food warm for up to an hour and then
automatically turn off.
When using Delay,the oven begins to cook later in the day.
Set the amount of time that you want to delay before the oven
turns on and how long you want to cook. The oven begins to
heat at the selected time and cooks for the specified length of
time. When that time has elapsed, the oven will keep the food
warm for up to an hour then automatically turn off.
To set Cook & Hold:
1. After Bake has been programmed, press ,Options
the More Options pad. ..............................
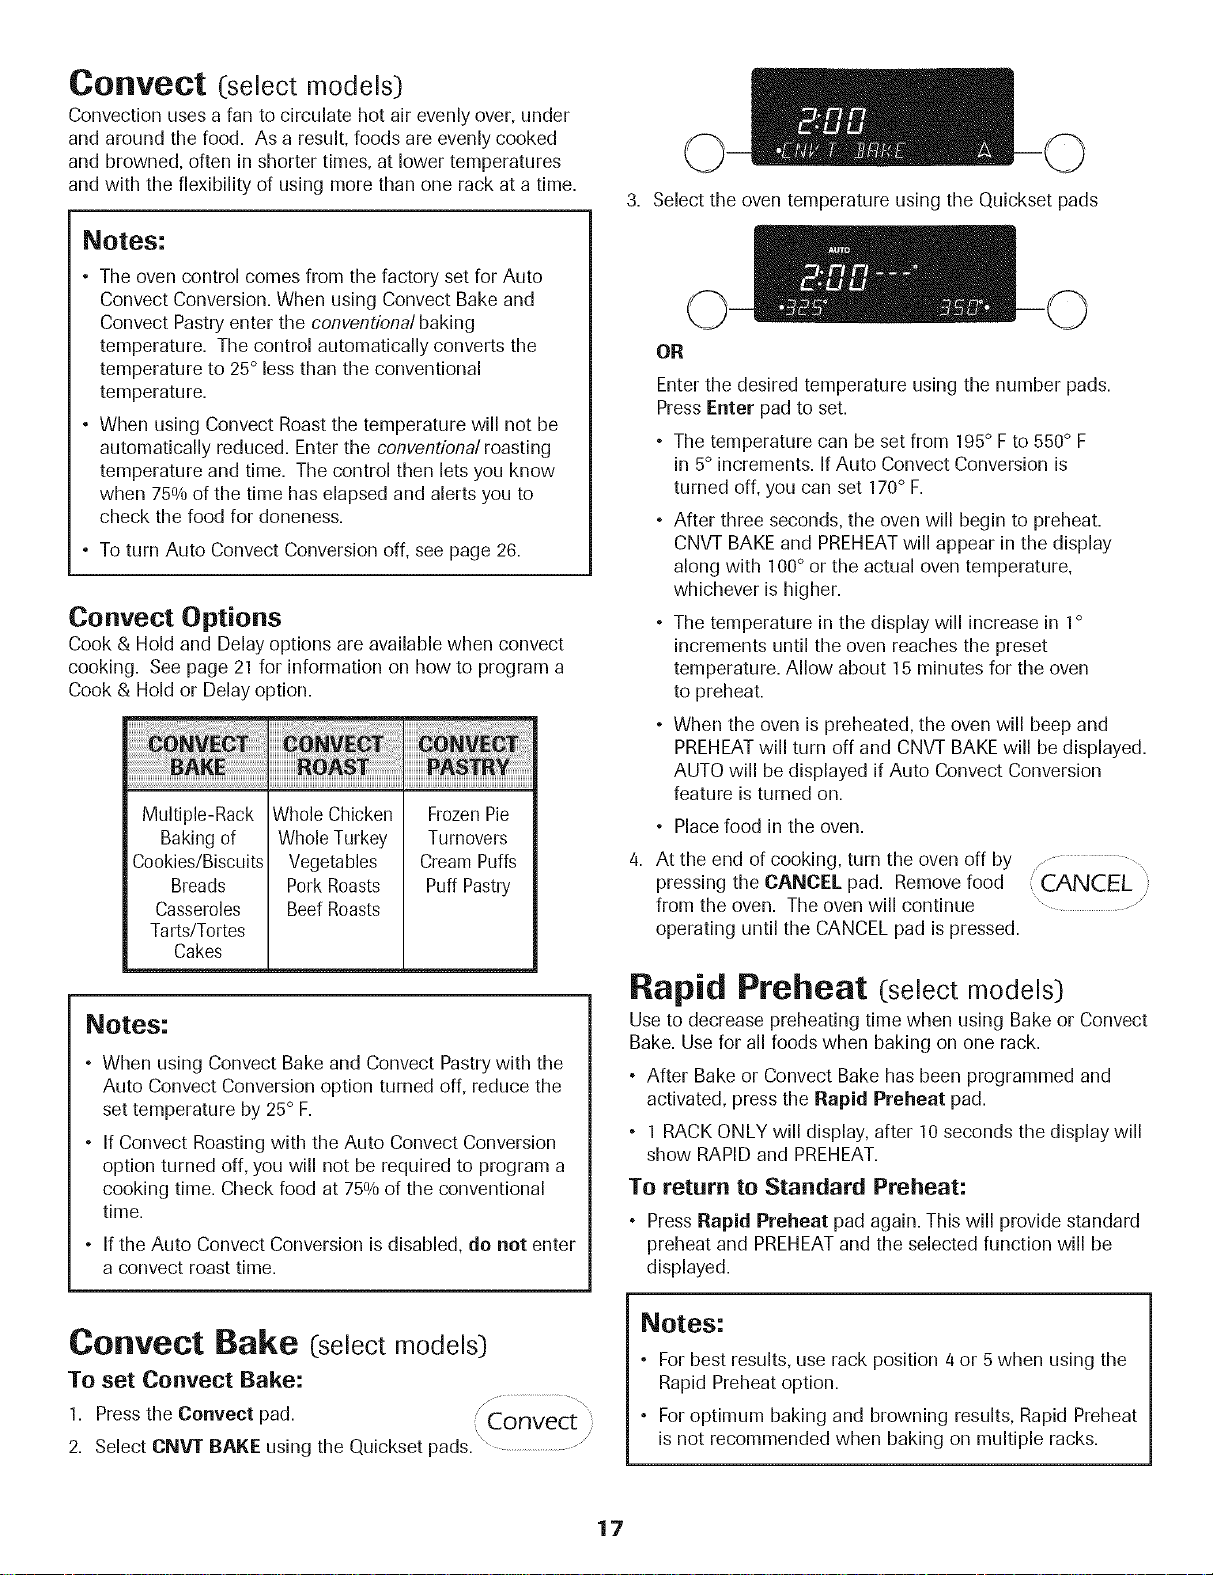
2. Select COOK/HLD.
3. Select the amount of time you want to bake by pressing
the Quickset pads or the number pads.
4. Press Enter pad.
5. COOKTIME, the cook time countdown, PREHEAT,BAKE
and the actual temperature will be displayed.
The oven will cook for the selected time, then keep food warm
for one hour.
To set a Delay:
1. After Bake has been programmed, press
the More Options pad.
2. Select DELAY.
3. Select the amount of time you want to delay the start of
cooking using the displayed times or the number pads.
4. Select the amount of time you want to cook using the
displayed times or the number pads.
5. The display will show BAKE, the temperature, the delay
time and the cook time countdown.
6. When the delay time has expired, the oven will begin
heating. COOK TIME, the cook time countdown, PREHEAT
BAKEand the actual oven temperature will be displayed.
....,Options
, /
16
Page 18
Oorlvect (:select models:)
Convection uses a fan to circulate hot air evenly over, under
and around the food. As a result, foods are evenly cooked
and browned, often in shorter times, at lower temperatures
and with the flexibility of using more than one rack at a time.
Notes:
• The oven control comes from the factory set for Auto
Convect Conversion. When using Convect Bake and
Convect Pastry enter the conventional baking
temperature. The control automatically converts the
temperature to 25° less than the conventional
temperature.
° When using Convect Roast the temperature will not be
automatically reduced. Enter the conventional roasting
temperature and time. The control then lets you know
when 750/0of the time has elapsed and alerts you to
check the food for doneness.
• To turn Auto Convect Conversion off, see page 26.
Convect Options
Cook & Hold and Delay options are available when convect
cooking. See page 21 for information on how to program a
Cook & Hold or Delay option.
Multiple-Rack
Baking of
Cookies/Biscuits
Breads
Casseroles
Tarts/Tortes
Cakes
Whole Chicken
WholeTurkey
Vegetables
Pork Roasts
Beef Roasts
FrozenPie
Turnovers
Cream Puffs
Puff Pastry
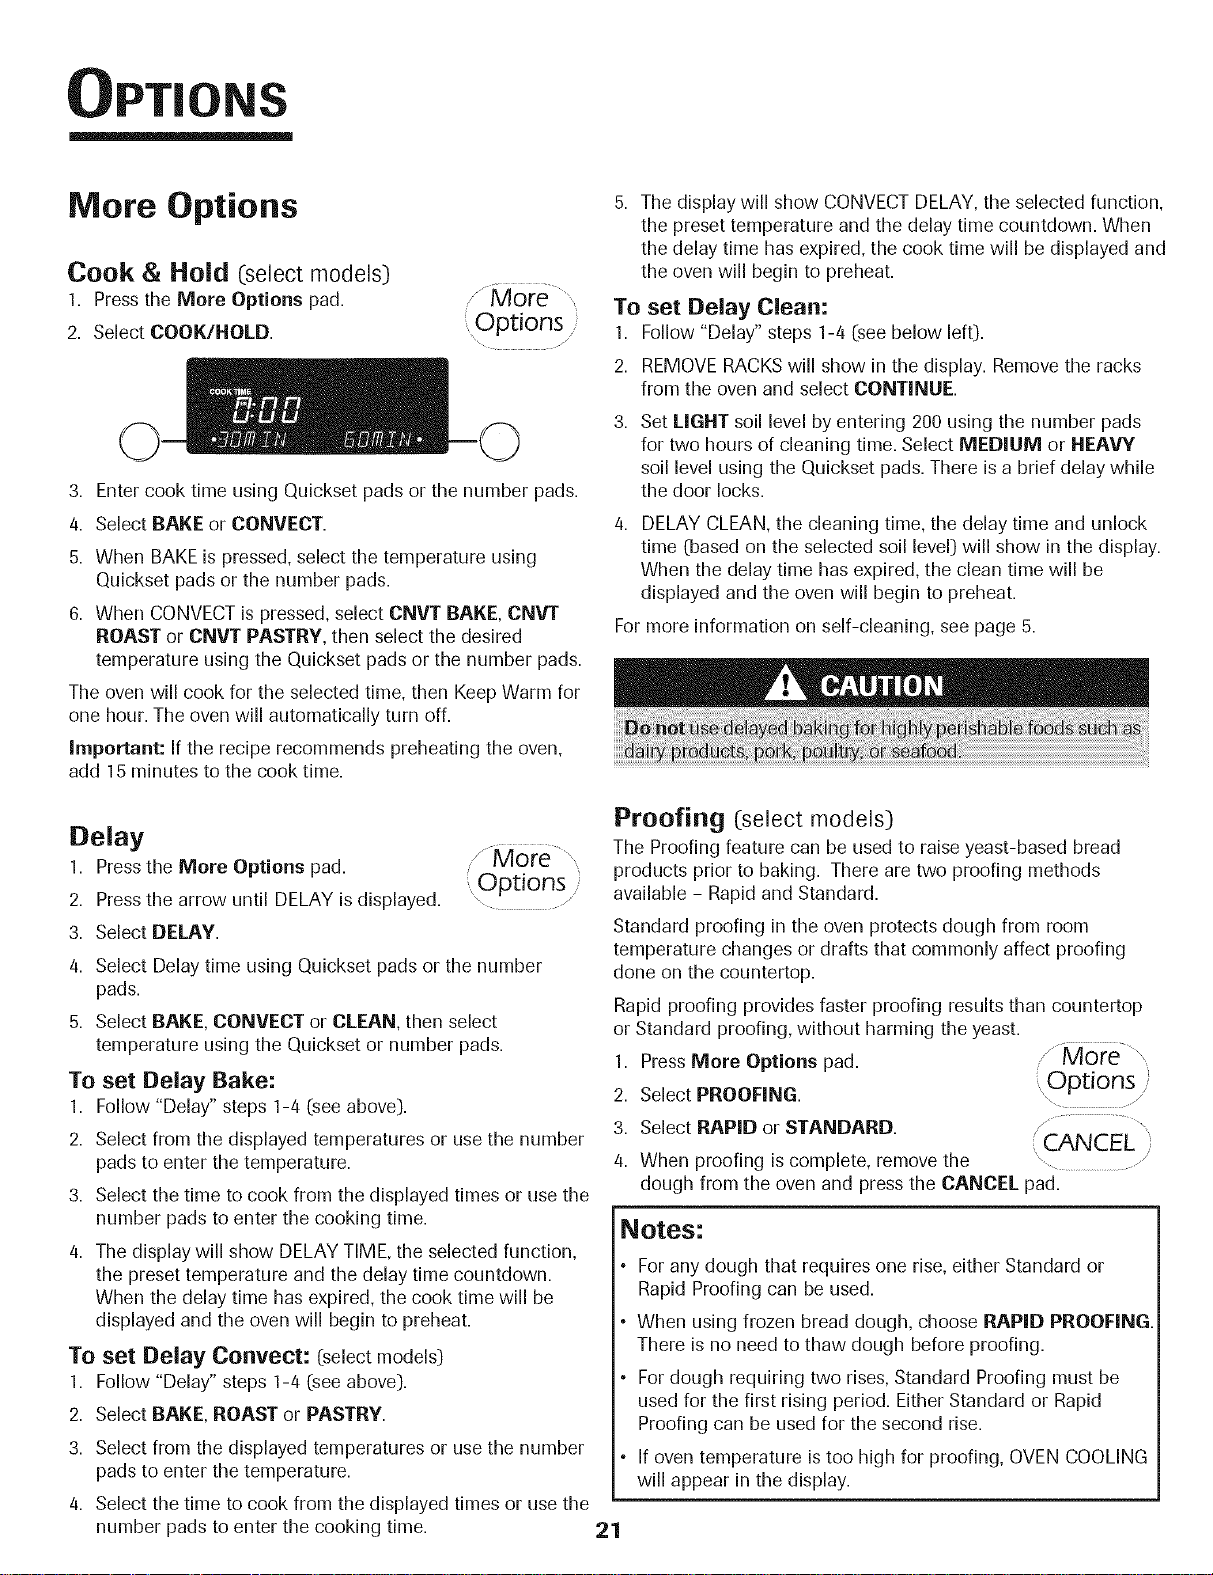
3. Select the oven temperature using the Quickset pads
OR
Enter the desired temperature using the number pads.
Press Enter pad to set.
• The temperature can be set from 195° F to 550° F
in 5° increments. If Auto Convect Conversion is
turned off, you can set 170° F.
° After three seconds, the oven will begin to preheat.
CNVT BAKE and PREHEATwill appear in the display
along with 100° or the actual oven temperature,
whichever is higher.
° The temperature in the display will increase in 1°
increments until the oven reaches the preset
temperature. Allow about 15 minutes for the oven
to preheat.
• When the oven is preheated, the oven will beep and
PREHEATwill turn off and CNVT BAKE will be displayed.
AUTO will be displayed if Auto Convect Conversion
feature is turned on.
• Place food in the oven.
4. At the end of cooking, turn the oven off by
pressing tile CANCEL pad. Remove food
from the oven. The oven will continue
operating until the CANCEL pad is pressed.
(CANCEL)
............ J
Rapid Preheat (selectmodels:)
Notes:
° When using Convect Bake and Convect Pastrywith the
Auto Convect Conversion option turned off, reduce the
set temperature by 25° F.
• If Convect Roasting with the Auto Convect Conversion
option turned off, you will not be required to program a
cooking time. Check food at 750/0of the conventional
time.
• If the Auto Convect Conversion is disabled, do not enter
a convect roast time.
Cor|vect Bake (select models:)
To set Convect Bake:
1. Press the Convect pad. Convect
2. Select CNVT BAKE using the Quickset pads. ...................................
Use to decrease preheating time when using Bake or Convect
Bake. Use for all foods when baking on one rack.
° After Bake or Convect Bake has been programmed and
activated, press the Rapid Preheat pad.
• 1 RACK ONLY will display, after 10 seconds the display will
show RAPID and PREHEAT.
To return to Standard Preheat:
° PressRapid Preheat pad again. This will provide standard
preheat and PREHEATand the selected function will be
displayed.
Notes:
• For best results, use rack position 4 or 5 when using the
° For optimum baking and browning results, Rapid Preheat
17
Rapid Preheat option.
is not recommended when baking on multiple racks.
Page 19

CO_VeCt ROaSt (select models)
To set Convect Roast:
1. Placefood in the oven.
2. Pressthe Convect pad.
3. Select CNVT ROAST using the
Quickset pads.
4. Select the oven temperature using the Quickset pads.
OR
Enter the desired temperature using the number pads.
Press Enter pad to set.
• The temperature can be set from 170° Fto 550° F
in 5° increments.
5. Enter desired cook time. Enter the conventional roasting
time using the number pads.
• After three seconds, the oven will begin to heat. CNVT
ROASTwill appear in the display along with 100° or the
actual oven temperature, whichever is higher.
• The temperature in the display will increase in 1°
increments until the oven reaches the preset
temperature.
° Cook time will begin to count down.
6. At 750/0of the cooking time the oven will beep to let
you know to check food. Check food using a meat
thermometer. If food is done, take food out of oven and
press CANCEL pad to turn oven off.
7. Iffood is not done, continue roasting.
Once the set time has elapsed the oven will CANCEL i
automatically go into Keep Warm mode for ....................
1 hour and then shut off. Iffood is taken from the oven
before the hour has elapsed, press CANCEL pad.
Convect
............. //
Broil
For optimal results, preheat for five minutes with the door
closed and use a pan designed for broiling.
To set Broih
1. Placethe oven rack in the proper rack position (see
Broiling Chart].
2. Pressthe Broil pad.
3. Select HiGH - 550° Ffor high broil.
OR
Select LOW - 450° Ffor low broil.
° The oven has a variable broil feature which means that
a lower broil temperature can be selected (3000-550° El.
To select a lower temperature, press the appropriate
number pads. Press Enter pad to set the lower
ternperatu re.
4. Preheat the oven for five minutes.
5. Placefood in the oven and close the door.
6. Pressthe CANCEL pad when broiling ( CANCEL :
isdone.
Notes:
o
See Broiling Chartfor foods and broiling times.
o
If more than 30 seconds elapse between pressing the
Broil pad, Quickset pads, or number pads, the oven will
not be set and the display will return to the previous
display.
HIGHis used for most broiling. Use a lower broil
temperature when broiling longer-cooking foods. The
lower temperature allows food to cook to the well done
stage without excessive browning.
o
Foodshould be turned halfway through broiling time.
o
Broil times may be longer when lower broiling
temperatures are selected.
" Broil
\
Cont.
NOteS:
• If the recipe suggests preheating the oven, add 15
minutes to cook time.
° If Auto Convect isoff, roast time will not be required.
18
Page 20

Broiling Chart
Preheat oven for 2-3 minutes.
Beef Steaks, 1"thick 5 Medium 15 - 20 min.
5 Well Done 18 - 24 min.
Hamburger patties, 3/4" thick 5 or 6 Well Done 13- 18 rain.
Pork Bacon 5 Well Done 6 - 10 min.
Ham, precooked 1/2" slice 5 Warm 8 - 12 min.
Chops, 1" thick 5 Well Done 22 - 26 min.
Poultry Chicken breasts, bone-in 4 Well Done 30 - 45 min. (Lo Broil)
Seafood Fish filets
Fish steaks, 1" thick
Lobster tails, 3-4 oz. each
For a browned/seared exterior and rare interior, it may be necessary to decrease cook time on side one and decrease the distance
between the meat and heat source.
important: This chart is a suggested guide. The times may vary with the food being cooked.
Oven Fan
A convection fan (select models) is used to circulate hot air in
tile oven when tile convection feature is selected.
Important: The convection fan will automatically stop when
the oven door isopened.
5
5
5
Flaky
Flaky
Done
8 - 12 min.
10 - 15 min.
7 - 10 min.
Oven Light
The oven light automatically comes on when
the door is opened. When the door is closed,
press the Oven Light pad to turn the oven
light on and off. A beep will sound every time
the Oven Light pad is pressed. If the oven light is on when the
door is opened, the light will go off when the door is closed.
/" Oven,
Light
Oven Vent
The oven vent is located along the back edge of the cooking
surface.
When the oven is in use,the area near the oven vent may
become hot enough to cause burns. For best baking results,
do not block the vent opening.
Oven Bottom
Protect oven bottom against spillovers, especially acidic or
sugary spills, as they may discolor the porcelain enamel. Use
the correct pan size to avoid spillovers and boilovers. Do not
place utensils or aluminum foil directly on the oven
bottom.
f
19
Page 21
Oven Racks
The oven has two racks (three if convection). All racks are
designed with a lock-stop edge.
To remove:
1. Pull rack straight out until it
stops at the lock-stop
position.
2. Lift up on the front of the
rack and pull out.
To replace:
1. Place rack on the rack support in the oven.
2. Tilt the front end up slightly. Slide rack back until it clears
the lock-stop position.
3. Lower front and slide back into the oven.
RACK 2: Used for some single rack baking on cookie sheets
and roasting small cuts of meat. Use for multiple rack baking.
RACK 1: Use for roasting large
cuts of meat and poultry.
Oven Bottom: Place oven rack on
raised sides of oven bottom. Use
for additional space when cooking
large oven meals.
MULTIPLE RACK COOKING:
Two rack: Use rack positions 3 and 5, or 2 and 5.
Three rack: (convection only) Use rack positions 2, 4 and 6.
Important: When convect baking (select models) on two or
three racks, check foods at the minimum suggested time toavoid
over-browning or over-cooking.
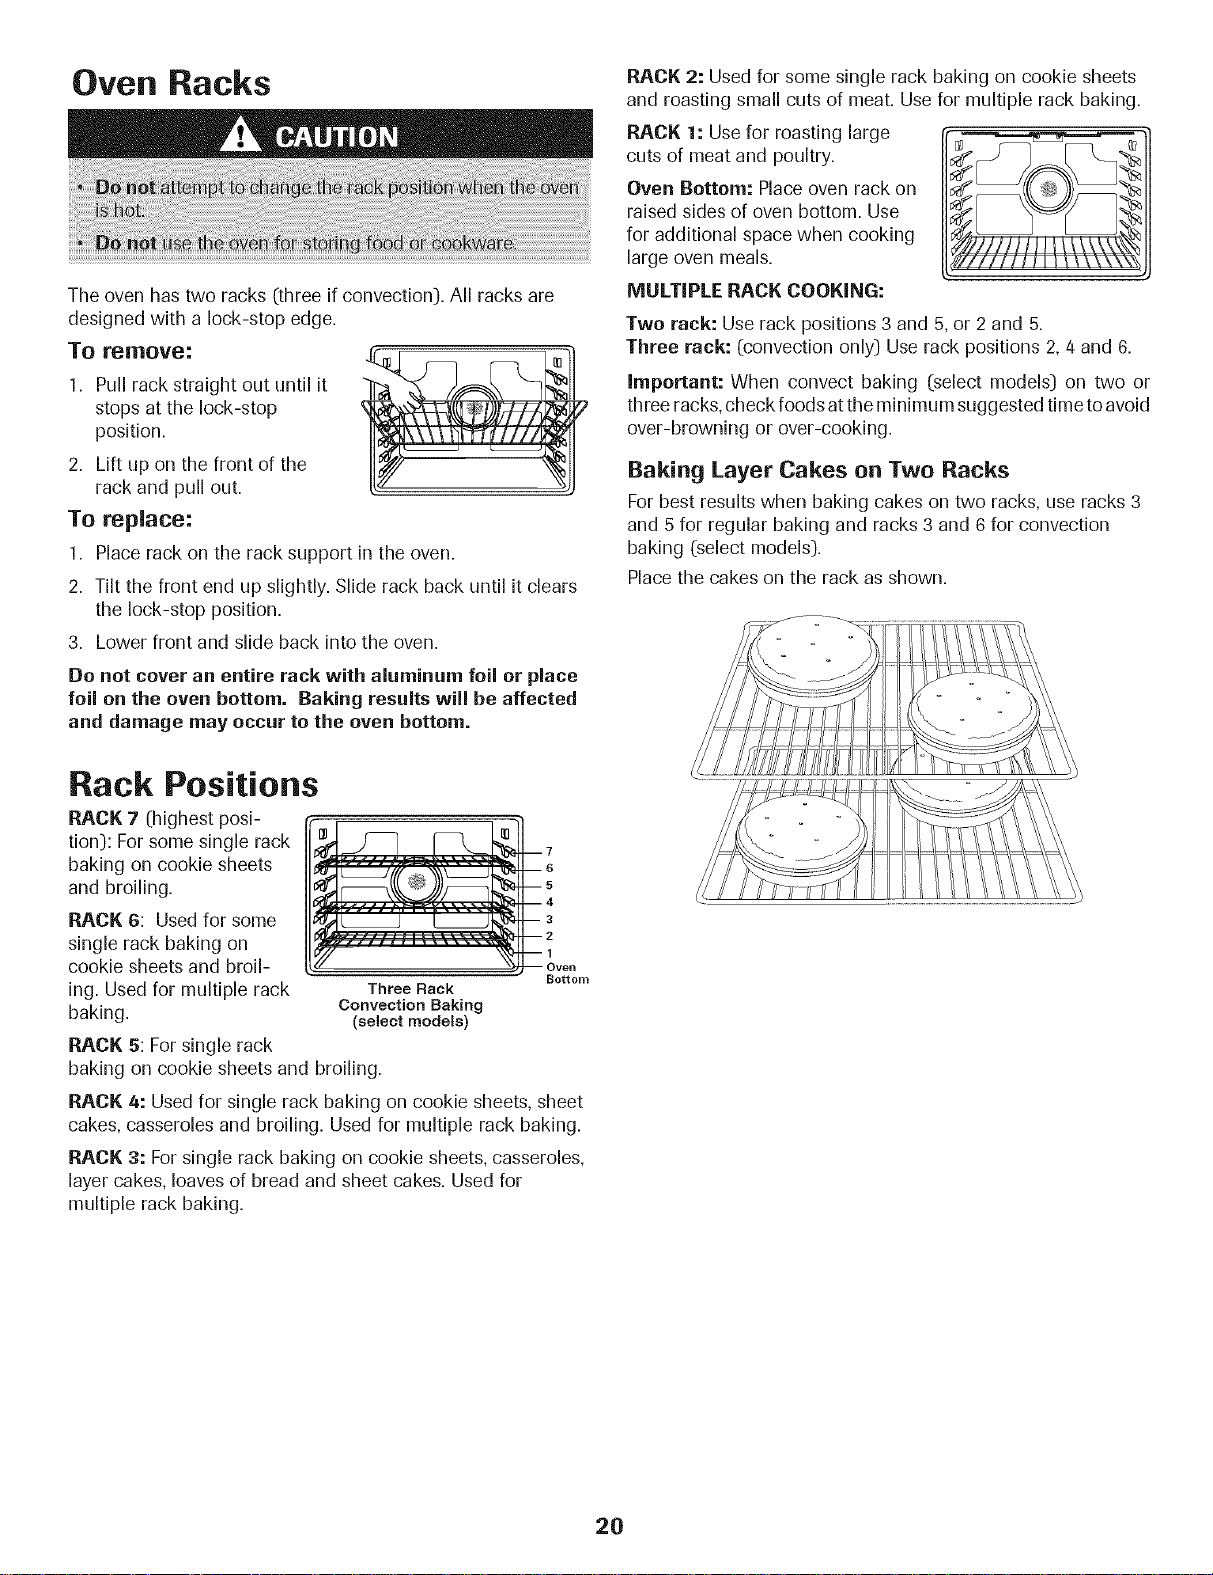
Baking Layer Cakes on Two Racks
Forbest results when baking cakes on two racks, use racks 3
and 5 for regular baking and racks 3 and 6 for convection
baking (select models).
Placethe cakes on the rack as shown.
Do not cover an entire rack with aluminum foil or place
foil on the oven bottom. Baking results will be affected
and damage may occur to the oven bottom.
Rack Positions
RACK 7 (highest posi-
tion): For some single rack
baking on cookie sheets
and broiling.
RACK 6: Used for some
single rack baking on
cookie sheets and broil-
ing. Used for multiple rack
baking.
RACK 5: For single rack
baking on cookie sheets and broiling.
RACK 4: Used for single rack baking on cookie sheets, sheet
cakes, casseroles and broiling. Usedfor multiple rack baking.
RACK 3: Forsingle rack baking on cookie sheets, casseroles,
layer cakes, loaves of bread and sheet cakes. Used for
multiple rack baking.
J..I;
Three Rack
Convection Baking
(select models)
Bottom
2O
Page 22
OPT|
More Options
Cook & Hold ([selectmodels)
1. Press the More Options pad.
2. Select COOK/HOLD.
3. Enter cook time using Quickset pads or the number pads.
4. Select BAKE or CONVECT.
5. When BAKE is pressed, select the temperature using
Quickset pads or the number pads.
6. When CONVECTis pressed, select CNVT BAKE, CNV[
ROAST or CNVT PASTRY, then select the desired
temperature using the Quickset pads or the number pads.
The oven will cook for the selected time, then Keep Warm for
one hour. The oven will automatically turn off.
Important: If the recipe recommends preheating the oven,
add 15 minutes to the cook time.
/MorP',,
Options
5. The display will show CONVECTDELAY, the selected function,
the preset temperature and the delay time countdown. When
the delay time has expired, the cook time will be displayed and
the oven will begin to preheat.
To set Delay Clean:
1. Follow "Delay" steps 1-4 (see below left).
2. REMOVERACKSwill show in the display. Remove the racks
from the oven and select CONTINUE.
Set LIGHT soil level by entering 200 using the number pads
for two hours of cleaning time. Select MEDIUM or HEAVY
soil level using the Quickset pads. There is a brief delay while
the door locks.
4. DELAY CLEAN,the cleaning time, the delay time and unlock
time (based on the selected soil level) will show in the display.
When the delay time has expired, the clean time will be
displayed and the oven will begin to preheat.
For more information on self-cleaning, see page 5.
Delay
1. Press the More Options pad.
2. Pressthe arrow until DELAY isdisplayed.
3. Select DELAY.
4. Select Delay time using Quickset pads or the number
pads.
5. Select BAKE, CONVECT or CLEAN, then select
temperature using the Quickset or number pads.
To set Delay Bake:
1. Follow "Delay" steps 1-4 (see above).
2. Select from the displayed temperatures or use the number
pads to enter the temperature.
3. Select the time to cook from the displayed times or use the
number pads to enter the cooking time.
4. The display will show DELAY TIME, the selected function,
the preset temperature and the delay time countdown.
When the delay time has expired, the cook time will be
displayed and the oven will begin to preheat.
To set Delay Convect: (select models)
1. Follow "Delay" steps 1-4 (see above).
2. Select BAKE, ROAST or PASTRY.
3. Select from the displayed temperatures or use the number
pads to enter the temperature.
4. Select the time to cook from the displayed times or use the
number pads to enter the cooking time.
Options /
Proofing (select models)
The Proofing feature can be used to raise yeast-based bread
products prior to baking. There are two proofing methods
available - Rapid and Standard.
Standard proofing in the oven protects dough from room
temperature changes or drafts that commonly affect proofing
done on the countertop.
Rapid proofing provides faster proofing results than countertop
or Standard proofing, without harming the yeast.
1. Press More Options pad.
2. Select PROOFING.
3. Select RAPID or STANDARD.
_"More ",,
.....Options/
/ ....
CANCEL
4. When proofing is complete, remove the
dough from the oven and press the CANCEL pad.
Notes:
Forany dough that requires one rise, either Standard or
Rapid Proofing can be used.
When using frozen bread dough, choose RAPID PROOFING.
There is no need to thaw dough before proofing.
Fordough requiring two rises, Standard Proofing must be
used for the first rising period. Either Standard or Rapid
Proofing can be used for the second rise.
If oven temperature istoo high for proofing, OVEN COOLING
will appear in the display.
21
Page 23
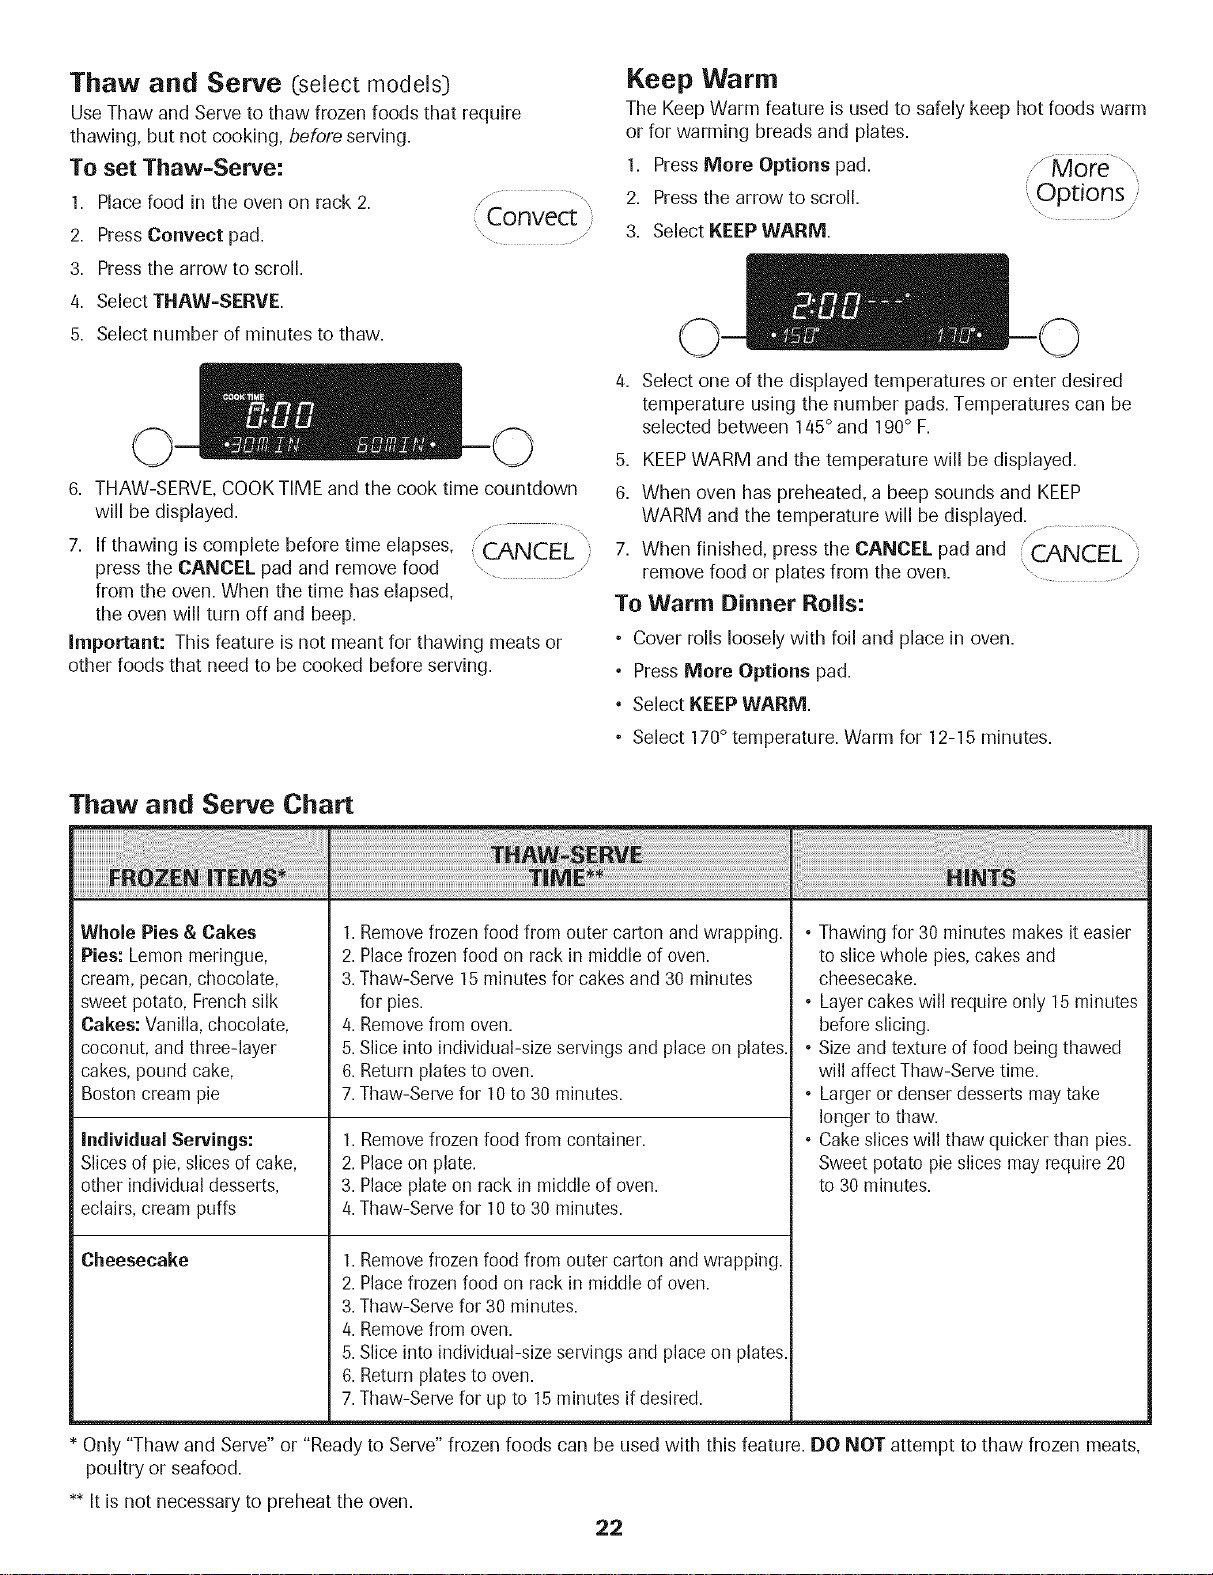
Thaw and Serve (select models)
Use Thaw and Serve to thaw frozen foods that require
thawing, but not cooking, before serving.
To set Thaw=Serve:
1. Placefood in the oven on rack 2.
Convect
2. PressConvect pad.
3. Pressthe arrow to scroll.
4. Select THAW-SERVE.
5. Select number of minutes to thaw.
6. THAW-SERVE,COOKTIME and the cook time countdown
will be displayed.
// ............ \
7. Ifthawing is complete before time elapses, ' CANCEL i:
press the CANCEL pad and remove food ......................................
from the oven. When the time has elapsed,
the oven will turn off and beep.
Important: This feature is not meant for thawing meats or
other foods that need to be cooked before serving.
Keep Warm
The Keep Warm feature is used to safely keep hot foods warm
or for warming breads and plates.
1. PressMore Options pad.
2. Pressthe arrow to scroll. Uptlonsi--"
3. Select KEEPWARM.
4. Select one of the displayed temperatures or enter desired
temperature using the number pads. Temperatures can be
selected between 145° and 190° F.
5. KEEPWARM and the temperature will be displayed.
6. When oven has preheated, a beep sounds and KEEP
WARM and the temperature will be displayed.
/ \
7. When finished, press the CANCEL pad and CANCEL :
remove food or plates from the oven.
To Warm Dinner Rolls:
• Cover rolls loosely with foil and place in oven.
° PressMore Options pad.
° Select KEEPWARM.
Thaw and Sewe Chart
Whole Pies & Cakes
Pies: Lemon meringue,
cream,pecan, chocolate,
sweet potato, French silk
Cakes: Vanilla,chocolate,
coconut, and three-layer
cakes, pound cake,
Bostoncream pie
Individual Servings:
Slicesof pie, slices of cake,
other individual desserts,
eclairs,cream puffs
Cheesecake
• Select 170° temperature. Warm for 12-15 minutes.
1.Removefrozen food from outer carton and wrapping.
2.Placefrozen food on rack in middle of oven.
3.Thaw-Serve 15minutes for cakesand 30 minutes
for pies.
4.Removefrom oven.
5.Sliceinto individual-size servings and place on plates.
6.Return plates to oven.
7.Thaw-Serve for 10 to 30 minutes.
1.Removefrozen food from container.
2.Placeon plate.
3. Placeplate on rack in middle of oven.
4.Thaw-Serve for 10 to 30 minutes.
1.Removefrozen food from outer carton and wrapping.
2.Placefrozen food on rack in middle of oven.
3.Thaw-Serve for 30 minutes.
4.Removefrom oven.
5.Sliceinto individual-size servings and place on plates.
6.Return plates to oven.
7.Thaw-Serve for up to 15minutes if desired.
° Thawing for 30 minutes makesit easier
to slice whole pies, cakesand
cheesecake.
• Layercakes will require only 15 minutes
before slicing.
° Size andtexture of food being thawed
will affect Thaw-Serve time.
• Larger or denser desserts may take
longer to thaw.
° Cake sliceswill thaw quicker than pies.
Sweet potato pie slices may require 20
to 30 minutes.
Only "Thaw and Serve" or "Ready to Serve" frozen foods can be used with this feature. DO NOT attempt to thaw frozen meats,
poultry or seafood.
** It is not necessary to preheat the oven.
22
Page 24

To Warm Plates:
• Place two stacks of up to four plates each in the oven.
• Press More Options pad. / More ",,
° Select KEEPWARM. ,Options j
• Select 170° temperature.
• Warm for five minutes. Turn off the oven by pressing the
CANCEL pad and leave plates in the oven for 15 minutes
more.
° Use only oven-safe plates, check with the manufacturer.
• Do not set warm dishes on a cold surface as rapid
temperature changes could cause crazing or breakage.
Notes:
, Food should be hot when placed inoven.
• For optimal food quality, foods should be kept warm for
no Iongerthan I hour.
• To keep foods from drying, cover loosely with foil or a
glass lid.
\
Drying (select models:)
For best results, use a drying rack. A drying rack allows air to
circulate evenly around the food.
The convection fan will operate during the drying procedure.
To set Drying:
1. Tile oven door needs to be opened slightly to allow
moisture to escape from the oven during the drying
process.
• Open the oven door slightly.
• Place the magnetic door spacer
(Part No. 8010P146-60) over the
plunger switch. The spacer
provides a gap between the oven
frame and the oven door to allow
moisture to escape.
• Gently close the door until the spacer magnet makes
contact with the oven door. The magnet will hold the
spacer in the proper position during the drying process
and allows the door to be opened at any time during
drying without losing proper positioning.
Important: If the spacer is not placed correctly, the
convection fan will not operate.
2. PressConvect pad.
( Convect
3. Pressthe arrow to scroll. ................................
4. Select DRYING.
5. Select a displayed temperature or enter a temperature with
the number pads. Temperatures can be set between
100° Fand 200° F.
6. DRYINGand the temperature will be displayed. PREHEAT
will be displayed until the programmed temperature is
reached.
7. When drying iscomplete, remove food from _..................................,,
oven and press CANCEL pad. (CANCEL i
Follow the Drying Guide on page 24 for drying times.
Check foods at minimum times given. Cool foods to room
temperature before testing for doneness.
Notes:
• To purchase a drying rack, contact your Jenn-Air
dealer for the "DRYINGRACK" Accessory Kit or call
1-800-JENNAIR (1-800-536-6247).
• Most fruits and vegetables dry well and retain their color
when dried at 140° F. Meat and jerky should be dried at
145° - 150° F.For optimal flavor, dry herbs at 100° F,
however, at this lower temperature expect extended
drying times of up to 8 hours.
• The length of drying times vary due to the following:
Water and sugar content of food, size of food
pieces, amount of food being dried, humidity in the
air.
• Check foods at the minimum drying time. Dry longer if
necessary.
• Fruits that turn brown when exposed to air should be
treated with an antioxidant. Try one of the following
methods:
1. Dip fruit in a mixture of two parts bottled lemon juice
to one part cool water.
2. Soak fruit in a solution of 1 tsp. ascorbic acid or
commercial antioxidant to 1 quart of cold water.
• Foods may drip during the drying process. After drying
high acid or sugary foods, clean the oven bottom with
soap and water. The porcelain oven finish may discolor if
acidic or sugary food soils are not wiped up prior to high
heat or a self-cleaning cycle.
• More than one rack of food may be dried at the same
time. However, additional drying time is needed.
• Refer to other resources at your local library or call your
local County Extension service for additional information.
23
Page 25
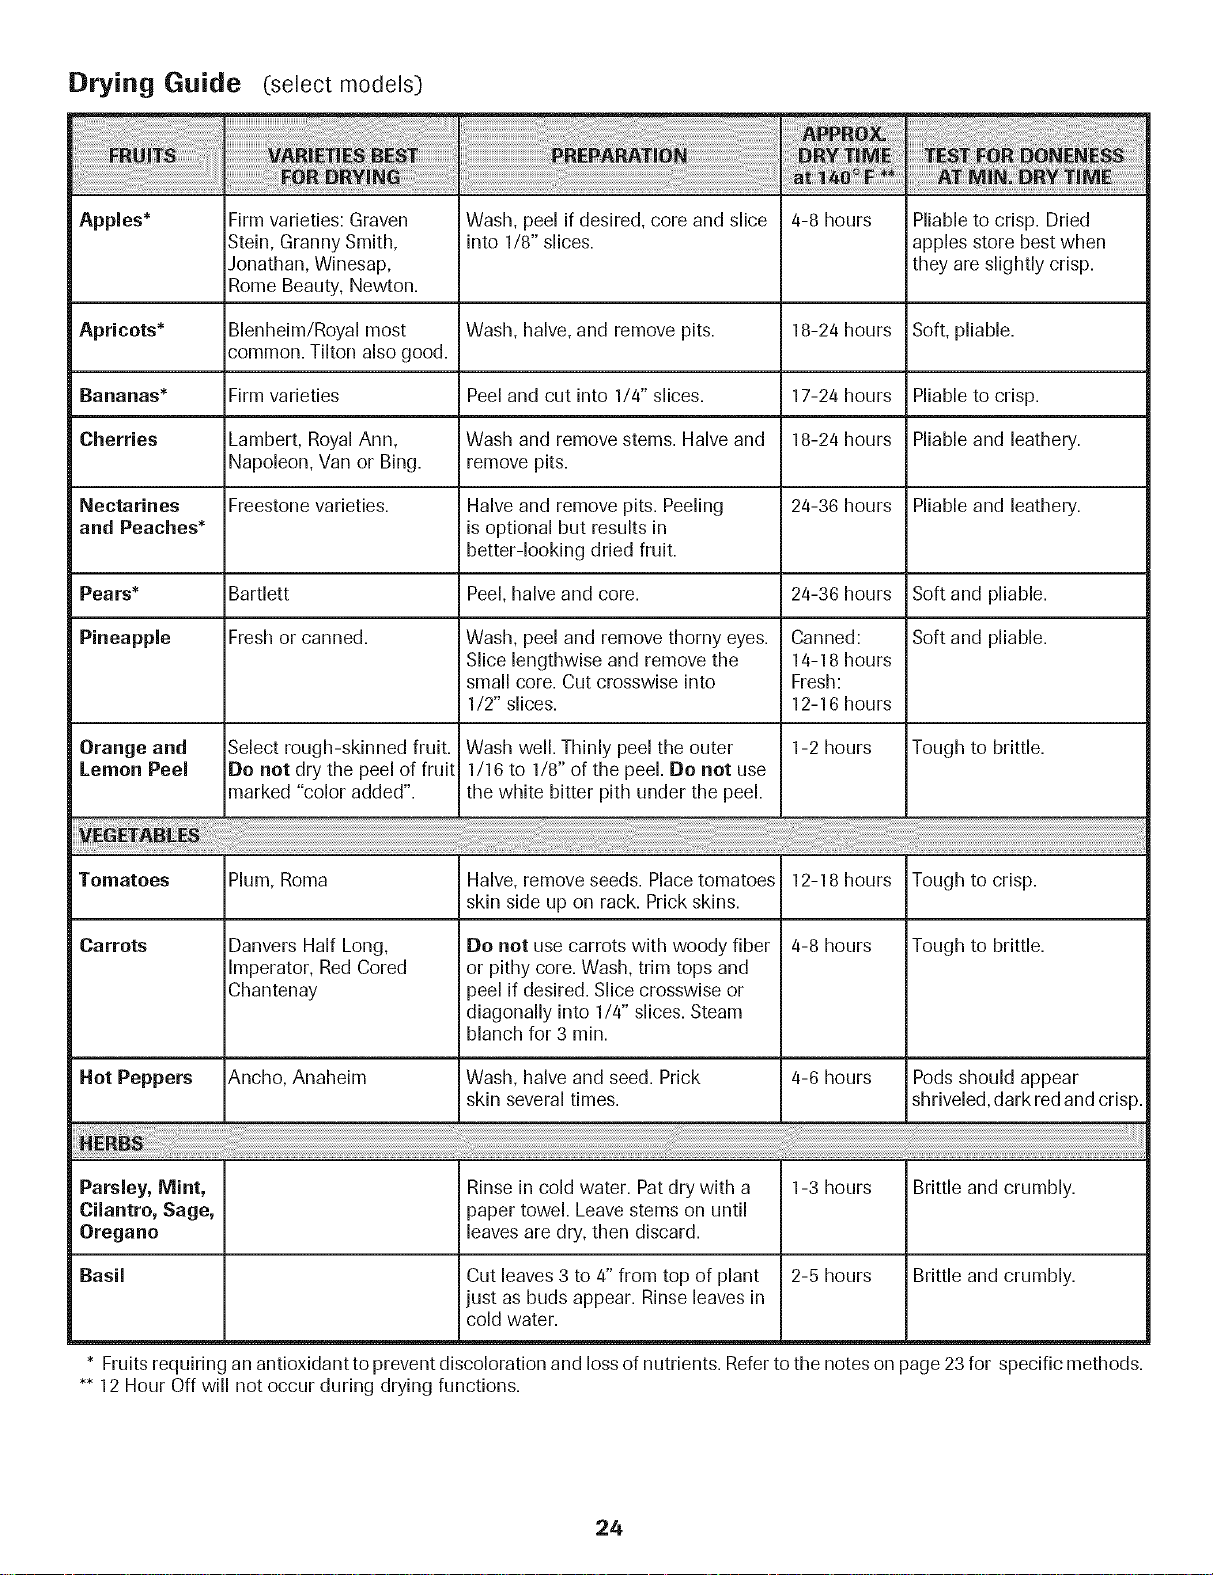
Drying Guide (select models)
Apples*
Apricots*
Bananas*
Cherries
Nectarines
and Peaches*
Pears*
Pineapple
Orange and
Lemon Peel
Firm varieties: Graven
Stein, Granny Smith,
Jonathan, Winesap,
Rome Beauty, Newton.
Blenheim/Royal most
common. Tilton also good.
Firm varieties
Lambert, Royal Ann,
Napoleon, Van or Bing.
Freestone varieties.
Bartlett
Fresh or canned.
Select rough-skinned fruit.
Do not dry the peel of fruit
marked "color added".
Wash, peel if desired, core and slice
into 1/8" slices.
Wash, halve, and remove pits.
Peel and cut into 1/4" slices.
Wash and remove stems. Halve and
remove pits.
Halve and remove pits. Peeling
isoptional but results in
better-looking dried fruit.
Peel, halve and core.
Wash, peel and remove thorny eyes.
Slice lengthwise and remove the
small core. Cut crosswise into
1/2" slices.
Wash well. Thinly peel the outer
1/16 to 1/8" of the peel. Be not use
the white bitter pith under the peel.
4-8 hours
18-24 hours
17-24 hours
18-24 hours
24-36 hours
24-36 hours
Canned:
14-18 hours
Fresh:
12-16 hours
1-2 hours
Pliable to crisp. Dried
apples store best when
they are slightly crisp.
Soft, pliable.
Pliable to crisp.
Pliable and leathery.
Pliable and leathery.
Soft and pliable.
Soft and pliable.
Tough to brittle.
Tomatoes
Plum, Roma
Halve, remove seeds. Place tomatoes
12-18 hours
Tough to crisp.
skin side up on rack. Prick skins.
Carrots
Danvers Half Long,
Imperator, Red Cored
Chantenay
Do not use carrots with woody fiber
or pithy core. Wash, trim tops and
)eel if desired. Slice crosswise or
4-8 hours
Tough to brittle.
diagonally into 1/4" slices. Steam
blanch for 3 min.
Hot Peppers Ancho, Anaheim Wash, halve and seed. Prick 4-6 hours Pods should appear
skin several times, shriveled, dark redand crisp.
Parsley, Mint, 1-3 hours Brittle and crumbly.
Cilantro, Sage,
Oregano
Basil 2-5 hours Brittle and crumbly.
Rinse in cold water. Pat dry with a
paper towel. Leave stems on until
leaves are dry, then discard.
Cut leaves 3 to 4" from top of plant
just as buds appear. Rinse leaves in
cold water.
* Fruits requiring an antioxidant to prevent discoloration and loss of nutrients. Referto the notes on page 23 for specific methods.
** 12 Hour Off will not occur during drying functions.
24
Page 26

FAVORITES
Favorites
Favorites stores the oven mode, cook time and temperature
for up to 10 of your favorite recipes. Convection ovens come
with five preprogrammed recipes.
To select a recipe from the preset Recipe List:
1. Press Favorites pad.
2. Select RECIPE LIST.
3. Select desired recipe on screen or press
arrow key to scroll to the desired recipe.
4. Once the recipe isselected, oven will begin preheating to
the set program.
° You may press the More Options pad to add
COOK/HOLD or DELAY.
5. When finished, press the CANCEL pad and remove food
from the oven.
To Save the Last Recipe Completed:
CBake,Convect Bake, Convect Roast, Convect Pastry,Convect
Broil, Drying, Keep Warm, Proofing]
1. Press Favorites pad.
2. Select SAVE LAST.
3.
Enter the name using the keypads.
• Forexample, to save lasagna, press the <.IKL> pad three
times for "L'; Pressthe <ABC> pad once for "A"; press
the <STU> pad once for "S". Continue until you've
finished the word.
4. After each desired letter appears, wait three seconds or
press Enter pad before moving on the next letter.
° Up to 14 letters including spaces can be used.
5. When the recipe name has been entered, the last settings
will be displayed for a few seconds.
6. RECIPELISTwill then be displayed to scroll through the list.
7. PressFavorites pad to exit the Favorites menu.
To Create a New Favorite Recipe: _............. ,,
1. Press Favorites pad. Favorites
2. Pressarrow key to scroll through selections. ..............
3. Select CREATE NEW with touchpad on left.
4. Enter the name using the keypads.
• Forexample, to save lasagna, press the <JI(L> pad three
times for "L'; Pressthe <ABC> pad once for "A'; press
the <STU> pad once for "S". Continue until you've
finished the word.
/ Favorites
On/Off /
// ............ "N
Favorites
, On/Off /
, /
....\ On / off
• After each desired letter wait three seconds until an
underline appears in the next space or press
Enter pad before moving on the next letter.
• Up to 14 letters includingspaces can be used.
5,
Select ENTER to save name.
6.
Select cooking mode, such as BAKE,CONVECT BAKE,
CONVECT ROAST,etc.
Select the oven temperature using the Quickset pads.
OR
Enter the desired temperature using the number pads.
8. Add Cook/Hold by selecting YES or omit Cook/Hold by
selecting NO.
9. Ifyou selected YES, enter cook time using the Quickset
pads or the number pads.
10.Add Delay by selecting YES or omit Delay by selecting
NO.
11.If you selected YES, enter the delay time by using the
Quickset pads or the number pads.
12.The control will display programmed settings then return
to the Favorites menu.
13. Press Favorites pad to exit the Favorites menu.
To Edit a Saved Recipe:
1. Press Favorites pad.
2. Pressarrow key to scroll.
/ .......
Favorites
.... On / Off
3. Select EDIT RECIPE.
4.
Select desired recipe to edit. You may need to press arrow
key to find desired recipe.
5,
Follow menu to revise recipe settings as desired.
6.
The display will return to the Favorites menu. RECIPELIST
will be displayed.
7,
Press Favorites pad to exit Favorites menu. Favorites
To
Delete a Favorite Recipe:
1.
Press Favorites pad.
2.
Pressarrow keyto scroll.
3.
Select DELETE RECIPE.
4.
Find recipe to be deleted. You may need to press arrow
, on / off
key to find desired recipe.
5. The control will ask again to make sure you want to delete
that recipe. SelectYES or NO.
6. PressFavorites pad to exit Favorites menu.
To exit out of Favorites at any time, press the Favorites pad.
25
Page 27

SetUp " Setup
jr ...........
1. Press the Setup pad. On / Off ,'
2. Use the arrow to scroll through the Setup options.
3. Select the desired option by pressing the Quickset pads.
Note-" To back out of a screen without making any
changes, press the Setup pad. The display will return to
the time of day.
Clock
See pages 14-15 for more details. Use tile Clock option to:
• Set the time of day.
• Set day of week.
° Select AM or PM (12-hour mode only). AM or PM will not
show with the time of day in the display.
• Choose a 12 or 24 hour clock display.
° Disable the clock display.
Notes:
/
° When using Convect Bake and Convect Pastrywith the
Auto Convect Conversion option turned off, reduce the
set temperature by 25° F.
• If Convect Roasting with the Auto Convect Conversion
option turned off, you will not be required to program a
cooking time. Check food at 750/0of the conventional
time.
° If the Auto Convect Conversion is disabled, do not enter
a convect roast time.
To
deactivate Auto Convect Conversion:
1. Press Setup pad.
2. Select AUTO CONVECT.
3. Select OFF.
4. Press Setup pad to exit the Setup menu.
To reactivate Auto Couvect Conversion:
1. Press Setup pad.
2. Select AUTO CONVECT.
3. Select ON.
4. Press Setup pad to exit the Setup menu.
/ ..... N
Setup '
On/Off/
Language
Tile language of tile screens in tile display window carl be
set to English, French or Spanish. To change the display
language from English:
1. Press Setup pad. Setup ',
2. Select LANGUAGE. \On / Off/
3. Usethe arrow to scroll to next screen, if needed.
4. Select the desired language.
5. PressSetup pad to exit the Setup menu.
//
/ Setup
', On / Off/
Auto Convect Conversion
(select models)
The oven comes from the factory set for Auto Convect
Conversion.
Auto Convect Conversion automatically reduces the set
temperature by 25° for Convect Bake and Convect Pastry.
ForConvect Roast the control will alert you at 750/0of the
programmed roasting time to check foods for doneness.
Convect roast temperatures are not reduced.
C/F
Tile displayed temperature scale car/be changed from
Fahrenheit to Celsius.
To change the scale:
1. Press Setup pad.
2. Use the arrow to scroll to the next screen.
3. Select C/F.
4. Select the desired temperature scale.
5. Press Setup pad to exit the Setup menu.
, Setup
' On / Off'
26
Page 28
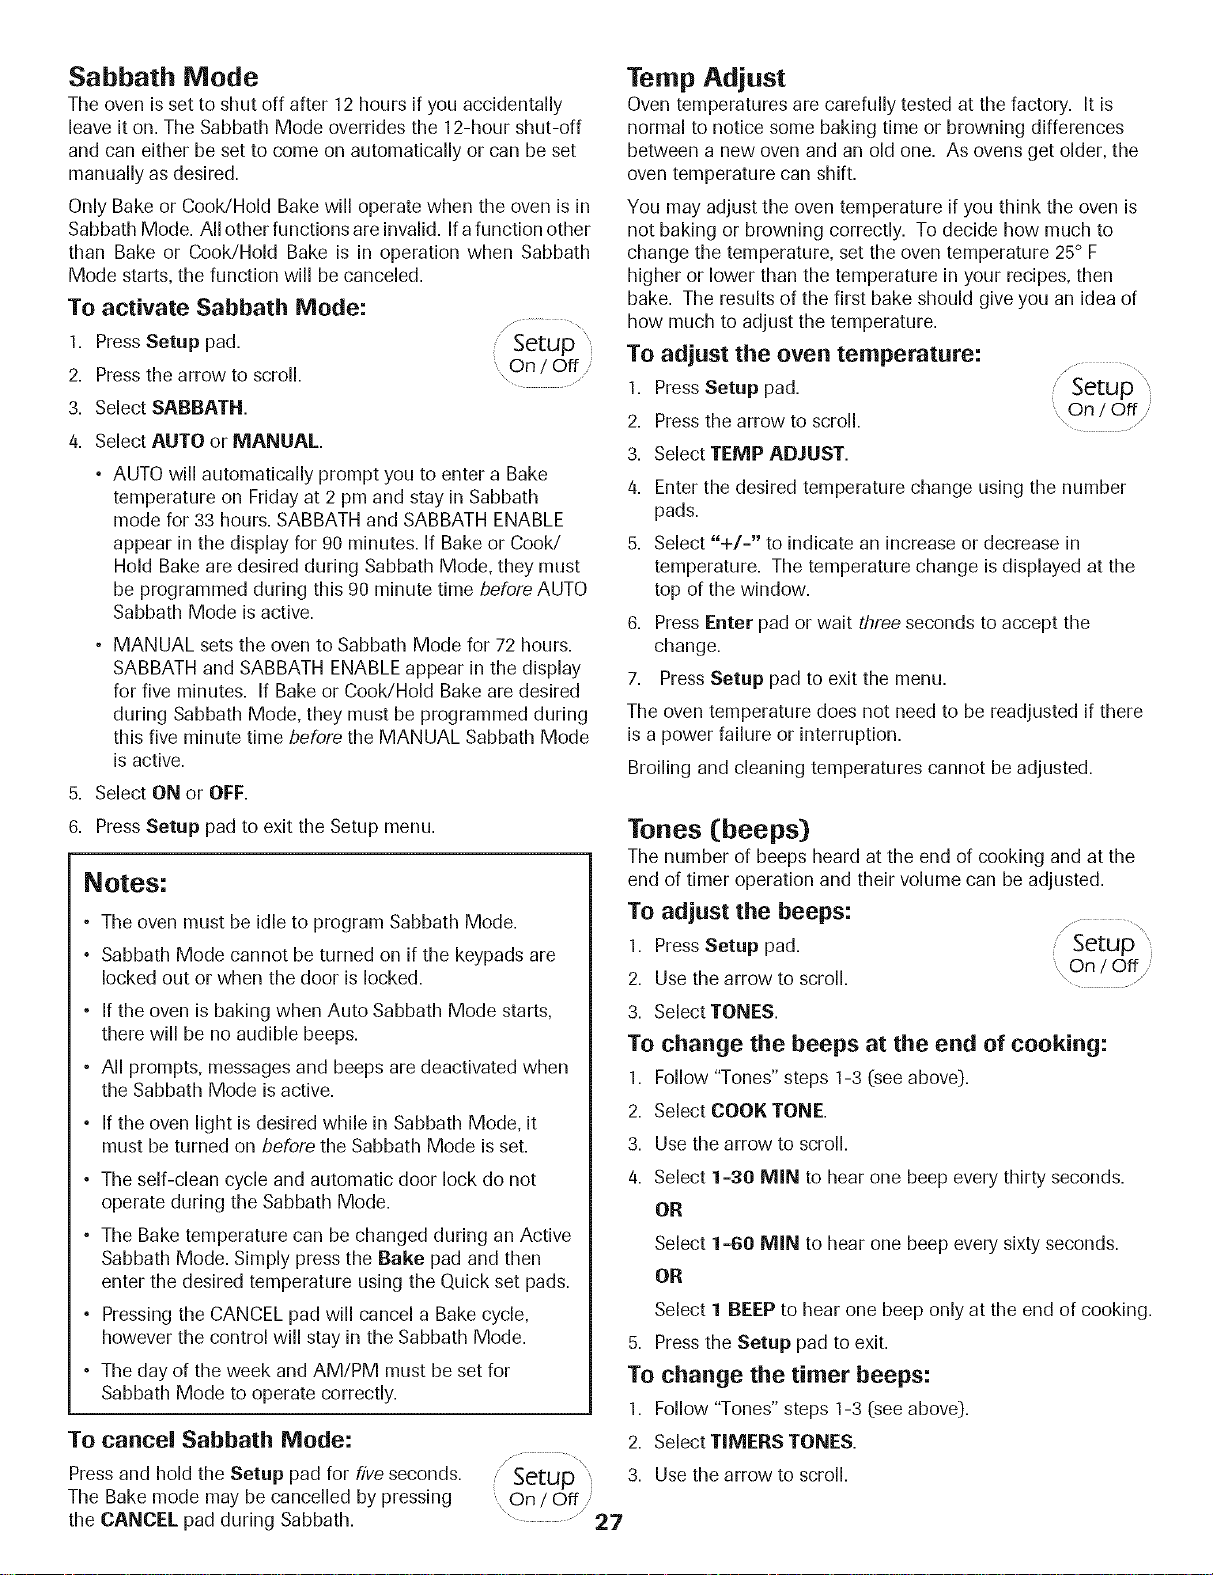
Sabbath Mode
Tile oven is set to shut off after 12 hours if you accidentally
leave it on. The Sabbath Mode overrides the 12-hour shut-off
and can either be set to come on automatically or can be set
manually as desired.
Only Bake or Cook/Hold Bake will operate when the oven is in
Sabbath Mode. All other functions are invalid. Ifa function other
than Bake or Cook/Hold Bake is in operation when Sabbath
Mode starts, the function will be canceled.
To activate Sabbath Mode:
1. Press Setup pad.
2. Pressthe arrow to scroll.
3. Select SABBATH.
4. Select AUTO or MANUAL.
• AUTO will automatically prompt you to enter a Bake
temperature on Friday at 2 pm and stay in Sabbath
mode for 33 hours. SABBATH and SABBATH ENABLE
appear in the display for 90 minutes. If Bake or Cook/
Hold Bake are desired during Sabbath Mode, they must
be programmed during this 90 minute time before AUTO
Sabbath Mode is active.
• MANUAL sets the oven to Sabbath Mode for 72 hours.
SABBATH and SABBATH ENABLEappear in the display
for five minutes. If Bake or Cook/Hold Bake are desired
during Sabbath Mode, they must be programmed during
this five minute time before the MANUAL Sabbath Mode
is active.
5. Select ON or OFF.
Setup "
On / Off
Temp Adjust
Oven temperatures are carefully tested at the factory. It is
normal to notice some baking time or browning differences
between a new oven and an old one. As ovens get older, the
oven temperature can shift.
You may adjust the oven temperature if you think the oven is
not baking or browning correctly. To decide how much to
change the temperature, set the oven temperature 25° F
higher or lower than the temperature in your recipes, then
bake. The results of the first bake should give you an idea of
how much to adjust the temperature.
To adjust the oven temperature:
1. Press Setup pad.
2. Pressthe arrow to scroll.
3. Select TEMP ADJUST.
4. Enter the desired temperature change using the number
pads.
5. Select "+/-" to indicate an increase or decrease in
temperature. The temperature change is displayed at the
top of the window.
6. PressEnter pad or wait three seconds to accept the
change.
7. Press Setup pad to exit the menu.
The oven temperature does not need to be readjusted if there
is a power failure or interruption.
Broiling and cleaning temperatures cannot be adjusted.
/ Setup
, On/Off
......... /
6. PressSetup pad to exit the Setup menu.
Notes:
• The oven must be idle to program Sabbath Mode.
• Sabbath Mode cannot be turned on if the keypads are
locked out or when the door is locked.
• If the oven is baking when Auto Sabbath Mode starts,
there will be no audible beeps.
• All prompts, messages and beeps are deactivated when
the Sabbath Mode is active.
° If the oven light is desired while in Sabbath Mode, it
must be turned on before the Sabbath Mode is set.
• The self-clean cycle and automatic door lock do not
operate during the Sabbath Mode.
• The Bake temperature can be changed during an Active
Sabbath Mode. Simply press the Bake pad and then
enter the desired temperature using the Quick set pads.
• Pressing the CANCEL pad will cancel a Bake cycle,
however the control will stay in the Sabbath Mode.
• The day of the week and AM/PM must be set for
Sabbath Mode to operate correctly.
To cancel Sabbath Mode:
Press and hold the Setup pad for five seconds.
The Bake mode may be cancelled by pressing
the CANCEL pad during Sabbath.
/'Setup
', On / Off/
........... 27
Tones (beeps)
The number of beeps heard at the end of cooking and at the
end of timer operation and their volume can be adjusted.
To adjust the beeps:
1. Press Setup pad.
2. Use the arrow to scroll.
3. Select TONES.
To change the beeps at the end of cooking:
1. Follow "Tones" steps 1-3 (seeabove).
2. Select COOK TONE.
3. Use the arrow to scroll.
4. Select 1-30 MIN to hear one beep every thirty seconds.
OR
Select 1-60 MIN to hear one beep every sixty seconds.
OR
Select 1 BEEP to hear one beep only at the end of cooking.
5. Press the Setup pad to exit.
To change the timer beeps:
1. Follow "Tones" steps 1-3 (seeabove).
2. Select TIMERS TONES.
3. Use the arrow to scroll.
Setup
On/Off
/
Page 29

4. Select2-30SECtoheartwobeepseverythirtyseconds.
OR
Select2-60SEC to hear two beeps every sixty seconds.
OR
Select 1 BEEP to hear one beep only at the end of the
set time.
5. Pressthe Setup pad to exit.
To change the volume of the beeps:
1. Follow "Tones" steps 1-3 (see above).
2. Pressthe arrow to scroll.
3. Select VOLUME.
4. Select HIGH for the highest volume.
OR
Select MEDIUM for medium volume.
OR
Select LOW for the lowest volume.
5. Pressthe Setup pad to exit.
Energy Saver
To save energy, the display can be set to go dark if it is not
being used.
To set the Energy Saver feature: ...........
1. PressSetup pad. /Setup"
2. Usethe arrow to scroll. .........
3. Select ENERGY SAVER.
4. Select ON or OFF using the Quickset pads.
5. Pressthe Setup pad to exit.
Press any pad to "wake up" the display.
Service
This area of the oven control displays the Jenn-Air Customer
Service toll-free phone number.
1. PressSetup pad.
2. Usethe arrow to scroll. On / Off/
3. Select SERVICE.
4. Pressthe Setup pad to exit.
On/Offj
" .................... x
12 HR Shutoff
The oven will automatically turn off at the end of 12 hours if
you accidentally leave it on.
To turn off this feature:
1. Press Setup pad.
2. Usethe arrow to scroll.
3. Select 12HR SHUTOFF.
4. Select ON or OFF using the Quickset pads.
5. Pressthe Setup pad to exit.
Setup
On / Offji
Der[io
When Demo isselected, you will see a short presentation
highlighting the features of your new Jenn-Air range.
/ ......................
1. PressSetup pad. / Setup
2. Usethe arrow to scroll. On / Off/
3. Select DEMO.
4. Select ON or OFF using the Quickset pads.
5. Pressthe Setup pad to exit.
28
Page 30

WARRANTY SERVICE
What is Not Covered By These Warranties
1.Conditionsanddamagesresultingfrom anyof thefollowing:
a. Improperinstallation,delivery,or maintenance.
b.Any repair,modification,alteration,or adjustmentnot authorizedby
the manufactureror an authorizedservicer.
c. Misuse,abuse,accidents,unreasonableuse,oracts of God.
d. Incorrectelectriccurrent, voltage,or supply.
e. Impropersettingof anycontrol.
2.Warrantiesarevoid if the original serial numbershavebeenremoved,altered,
or cannotbereadilydetermined.
3.Light bulbs.
4.Productspurchasedfor commercialor industrialuse.
5.Thecostof serviceorservicecallto:
a.Correctinstallationerrors.
b.Instructthe useronthe proper useof the product.
c. Transportthe appliancetothe servicerand back.
6.Consequentialorincidentaldamagessustainedby any personasa resultof
any breachofthesewarranties. Somestatesdo not allow the exclusionor
limitationofconsequentialor incidentaldamages,sothe aboveexclusionmay
notapply.
CUSTOMER'SSOLEAND EXCLUSIVEREMEDYUNDERTHIS
WARRANTYSHALLBEPRODUCTREPAIRAS PROVIDEDHEREIN.
IMPLIEDWARRANTIES,INCLUDINGWARRANTIESOF
MERCHANTABILITYORFITNESSFORA PARTICULARPURPOSE,ARE
LIMITEDTOONEYEARORTHESHORTESTPERIODALLOWEDBY
LAW. MAYTAGCORPORATIONSHALL NOTBELIABLEFOR
INCIDENTALORCONSEQUENTIALDAMAGES.SOMESTATESAND
PROVINCESDO NOTALLOWTHEEXCLUSIONOR LIMITATIONOF
INCIDENTALORCONSEQUENTIALDAMAGES,ORLIMITATIONSON
THEDURATIONOFIMPLIEDWARRANTIESOFMERCHANTABILITYOR
FITNESS,SOTHESEEXCLUSIONSORLIMITATIONSMAYNOTAPPLY
TOYOU. THISWARRANTYGIVESYOUSPECIFICLEGALRIGHTSAND
YOU MAYALSOHAVEOTHERRIGHTS,WHICHVARYSTATETOSTATE
OR PROVINCETO PROVINCE.
if You Need Service
Firstseetile TroubleshootingsectioninyourUseand CareGuideor call
MaytagServices,LLC,Jenn-Air CustomerAssistanceat 1-800-JENNAIR
(1-800-536-6247)U.S.A.andCanada.
To Obtain Warranty Service
Tolocateanauthorizedservicecompanyin yourarea,contactthedealerfrom
whom yourappliancewaspurchasedor call MaytagServices,LLC,Jenn-Air
CustomerAssistance.Shouldyounot receivesatisfactorywarrantyservice,call
or write:
MaytagServices,LLC
Attn: CAIR4'Center
P.O.Box2370,Cleveland,TN 37320-2370
U.S.and Canada 1=808=JENNAIR(1=800=536=6247)
U.S.customers usingT[Y for deaf, hearing impaired or speech
impaired,call 1=800=688=2080.
NOte: WhencontactingMaytag Services,LLC,Jenn-AirCustomer
Assistanceaboutaserviceproblem,pleaseincludethefollowing:
a.Your name,addressandtelephonenumber;
b.Modelnumberandserialnumberof your appliance;
c. Nameandaddressofyourdealerand dateappliancewaspurchased;
d.A cleardescriptionofthe problemyou are having;
e.Proofof purchase.
UseandCareguides,servicemanualsand partsinformationareavailablefrom
MaytagServices,LLC,Jenn-AirCustomerAssistance.
29
Page 31

CUISINIE.RE A GAZ JENN-AIR
JENN-AIR
TABLE DES MATII_RES
Instructions de s6curite importantes ..................31-34
Entretien et nettoyage ..............................................35-37
Entretien ........................................................................38-39
Depannage ...................................................................40-41
Cuisson sur la surface .............................................42-43
Cuisson au four ..........................................................44-50
Options ..........................................................................51-54
R6glage favori .............................................................55-56
Reglage ..........................................................................56-58
Garantie et service ...........................................................59
Gu[a de uso y cuidado ....................................................60
Page 32

UR|TE
Pour assurer une utilisation appropri_e et en route s_curit_ :
Seul un technicien qualifiedevrait installer I'appareilet lemettre
la terre. Ne tentez pas de regler, reparer ou remplacer un
composant de I'appareil, _ moins que cela ne soit
specifiquement recommande darts ce guide. Toute autre
reparation doit etre effectuee par un technicien qualifie.
Debrancheztoujours I'appareil avantd'en faire I'entretien.
DE
f
|NI
Les instructions de securite importantes et les avertissements
paraissant dans ce guide ne sont pas destines _ couvrir toutes
los situations et conditions eventuelles qui peuvent se presenter.
II faut faire preuve de bon sens, de prudence et de soin Iors de
I'installation, de I'entretien ou du fonctionnement de I'appareil.
Communiquez toujours avec le fabricant si vous ne comprenez
pas un probleme ou une situation.
RTANTE
Reconnaissez los _tiquettes,
paragraphes et symboles sur la s6curit6
instructions g n rales
Lisez routes les instructions avant d'utiliser cot appareil;
observeztoutes les instructionspour eliminer lesrisques
d'incendie, choc electrique, dommages materiels et corporels que
pourrait causer une utilisation incorrecte de I'appareil. Utilisez
I'appareil uniquement pour los fonctions prevues,decrites darts ce
guide. 31
Page 33

UtJlisezune lampe torche pour determiner si la bride
antibasculement est convenablement installee sous la
cuisiniere. L'un des pieds de mise b niveau arriere doit ¢tre
convenablement engage darts la fente de labride. Lorsque la
cuisiniere est convenablement calee, la bride antibasculement
immobilise le pied arriere contre le sol.Assurez-vous que la
cuisiniere est bien ancree au sol apres cbaque deplacement.
Pour viter un incendie ou des
dommages causes par la
fum e
Assurez-vous que tout le materiel d'emballage est retire de
rappareil avantde mettre celui-ci en marche.
Gardez los materiaux combustibles bien eloignes de rappareil.
Ne rangez pas de materiaux inflammables darts un four.
De nombreux articles en plastique peuvent etre deteriores par la
chaleur. Gardez les plastiques eloignes des pieces de rappareil
pouvant devenir chaudes. Ne laissez pas des articles en
plastique sur la table de cuisson; un article en plastique trop
pros de revent du four ou d'un brQleur allume pourrait se
ddormer ou fondre.
Pour empecher un feu de graisse, _vitez toute accumulation de
graisse ou autre matiere inflammablebrinterieur ou pros de
rappareil.
Si rappareil est installeprosd'une fenetre, des precautions
doivent etre prises pour eviter que levent entraine les rideaux
au-dessus des brQleurs.
NE laissezJAMAIS des articles sur la table de cuisson. L'air
chaud de revent peut les enflammer et mettre egalement sous
pression des contenants fermes qui pourraient alors exploser.
De nombreux flacons d'aerosol peuvent EXPLOSERIorsqu'on
los expose b la chaleur, et ils peuvent contenir un produit tres
inflammable. Evitez d'utiliser ou de remiser un flacon d'aerosol
proximite de rappareil.
Pour eliminer le besoin d'atteindre quelque chose par-dessus
los brQleursde surface, il est preferable qu'il n'y ait aucune
armoire de cuisine directement au-dessus de rappareil. S'il y a
une armoire, vous ne devriez y remiser que des articles peu
frequemment utilises et capables de resister b la chaleur emise
par rappareil. La temperature pourrait etre excessive pour
certains articles, comme liquides volatils, produits de nettoyage
ou flacons d'aerosol.
• Four : Fermezla porte du four pour etouffer les flammes.
Ne jetez pas d'eau sur un feu de graisse. Utilisez du
bicarbonate de sodium, un extincteur b mousse ou un produit
chimique sec pour eteindre los flammes.
S curit des enfants
NE laissezJAMAIS des enfants seuls ou sans supervision
Iorsque rappareil est en service ou encore chaud. Ne laissez
jarnais un enfant s'asseoir ou setenir sur une partie
quelconque de rappareil. II pourrait se blesser ou se brQler.
II est importantd'enseigner aux enfants que lacuisiniere et les
ustensiles places dessus ou b rinterieur peuvent etre chauds.
Laissezrefroidir lesustensiles en un lieu sQr,hors d'atteinte des
enfants. Losenfants doivent comprendre que rappareil n'est
pas un jouet. IIs ne doivent pas jouer avec les boutons ou toute
autre piece de rappareil.
Familiarisation avec I'appareil
En cas d'incendie
Debranchez rappareil et la hotte de ventilation, pour minimiser
la propagation des flammes. Eteignez losflammes, puis mettez
la hotte en marche pour evacuer la fumee et losodeurs.
• Table de cuisson : Utilisez un couvercle ou une plaque
biscuits pour etouffer les flammes d'un feu qui sedeclare
darts un ustensile de cuisine.
• NE saisissezou deplacez JAMAIS un ustensile de cuisine
enflamme.
Evitezde toucher la region entourant revent du four Iorsque le
four est utilise et phsieurs minutes apres rarret du four. Certains
composants de revent et la zone voisine peuvent devenir
32
Suite
Page 34

suffisammentchaudspourprovoquerdesbrQlures.Apresrarret
dufour,ne touchez pas revent du four ou la zone voisine avant
que ces composants aient pu se refroidir suffisamment.
Autres surfaces potentiellement chaudes :table de cuisson, zones
faisant face _ la table de cuisson, event du four, zonevoisine de
revent, porte du four et zonevoisine de la porte et du hublot.
Ne touchez pas rampoule chaude du four avec un linge humide
car elle pourrait se casser.Sirampoule se casse,debranchez
rappareil avantde retirer rampoule afin d'eviter un choc
electrique.
Pour eviter d'endommager rappareil ou de mettre en danger
rutilisateur, n'utilisezpas cet appareil comme appareil de
chauffage pour chauffer ou rechauffer une piece. N'utilisez [)as
non plus le four pour ranger des aliments ou des ustensiles de
cuisine.
N'utilisez JAMAIS de feuille d'aluminium pour recouvrir la sole
ou une grille du four. Ceci pourrait endommager rappareil ou
causer un risque de choc electrique oud'incendie. Utilisez le
papier d'aluminium uniquement selon les instructions donnees
dans ce guide.
Cuisson et s curit
Placeztoujours un ustensile sur un brQleurde la table de cuisson
avantde rallumer. Veillez _ bien connaitre la correspondance
entre les boutons de commande et [es brQleurs.Veillez _ alhmer
le bon brQleuret verifiez que le brOleur s'allume effectivement. A
la fin de la periode de cuisson, eteignez le brQleur avantde retirer
rustensile, pour eviter une exposition aux flammes du brQleur.
Veillez _ toujours ajuster correctement la taille des flammes pour
qu'elles ne d@assent pas sur les cotes de rustensile. Des
fiammes de trop grande taille sur un brQleursont dangereuses;
eiles entrainent ungaspillage d'energJeet elles peuvent faire
subir des dommages _ rustensile, _ rappareil ou au placard situe
au-dessus.
NE laissezJAMAIS un brOleurde surface allume sans surveil-
lance, particulierement avec un reglage de puissance eleveeou
Iors d'un type de frJture. Un debordement pourrait provoquer la
formation de fumee et des produits gras pourraient s'enflammer.
Eliminezdes que possible les produits gras renverses. N'utilisez
pas un reglage de puissance eleve pendant une periode
prolongee.
NEfaites JAMAIS chauffer un recipient non ouvert dans le four.
L'accumulation de pression dans le recipient pourrait provoquer
son eclatement et de graves dommages materiels ou corporels.
Utilisez des maniques robustes et seches. Des maniques
humides peuvent provoquer la formation de vapeur brOlante.
N'utilisez jamais un linge_ vaisselle ou autre article textile _ la
place de maniques; un tel article pourrait trainer sur un brQleuret
s'enflammer, ou accrocher un ustensile ou un composant de
rappareil.
Laisseztoujours refroidir un recipient d'huile de friture chaude
avantde tenter de le d@lacer et le manipuler.
Ne laissez pas la graisse de cuisson ou autre materiau inflam-
mable s'accumuler dans ou pres de I'appareil, de la hotte ou du
ventilateur. Nettoyez frequemment la hotte de la cuisiniere pour
empecher la graisse de s'accumuler sur la hotte ou sur le filtre. Si
vous flambez des aliments sous la hotte, mettez le ventilateur en
marche.
NE portez JAMAIS, Iors de rutilisation de rappareil, des
vetements fairs d'un materiau inflammable, amples ou
manches Iongues. De tels vetements peuvent s'enflammer ou
accrocher la poignee d'un ustensile.
Placeztoujours les grilles _ la position appropriee dans le four
Iorsqu'il est froid. Faitescoulisser la grille vers rexterieur avant
d'ajouter ou d'enlever un plat _ raide de maniques robustes et
seches. Evitezd'introduire la main dans le four pour d@oser ou
retirer un plat. S'il est necessaire de d@lacer une grille
Iorsqu'elle est chaude, utilisez une manique seche.Arretez
toujours le four _ la fin d'une periode de cuisson.
Ouvrez toujours la porte du four tres prudemment. Laissezrair
chaud ou la vapeur s'echapper avantde retirer ou d'introduire un
plat.
AVERTISSEMENT - METS PRitPAR¢S : Suivez lesinstructions
du fabricant. Si le contenant ou le couvercle en plastique d'un
mets surgele se ddorme ou est endommage durant la cuisson,
jetez immedJatement le recipient et son contenu. Lesaliments
pourraient etre contamines.
N'UTILISEZJAMAIS la feuille d'aluminium pour recouvrir la sole
ou une grille du four. Ceci pourrait endommager rappareil ou
causer un risque de choc electrique ou d'incendie. Utilisez le
papier d'aluminium uniquement selon les instructions donnees
dans ce guide.
Ustensiles et sOcurit6
Utilisez des ustensiles _ fond plat comportant une ou des
poignees que vous pouvez facilement saisir et qui restent froides.
Evitezd'utiliser un ustensile instableou ddorm& qui pourrait
facilement basculer, ou dont la poignee est mal fixee. Evitez
egalement d'utiliser des ustensiles de petite taille comportant
une ou des poignees Iourdes; ces ustensiles sont generalement
instabieset peuvent facilement basculer. Un ustensile Iourd
Iorsqu'il est rempli peut egalement etre dangereux Iors des
manipulations.
Veillez_ utiliser unustensile de taille suffisante pour que le
contenu ne risque pas de deborder. Ceci est particulierement
importantpour un ustensile rempli d'huile de friture. Verifiez que
la taille de rustensile est suffisante pour qu'il puisse recevoir les
produits alimentaires _ cuire et absorber raugmentation de
volume suscitee par rebullition de la graisse.
Pour minimJserles risques de brQlure,d'infiammation des
matieres combustibles et de renversement par contact non
intentionnel avec un ustensile, n'orientez[)as la poignee d'un
ustensile vers un brQleuradjacent. Orientez toujours la poignee
d'un ustensile vers le cote ou rarriere de rappareil; ne laissezpas
33
Page 35

non plus la poignee d'un ustensile d@asser _ ravant de
rappareil, ou un jeune enfant pourrait facilement la saisir.
Ne laissez jamais le contenu liquide d'un ustensile s'evaporer
completement; rustensile et rappareil pourraient subir des
dommages.
Suivez les instructions du fabricant Iors de remploi d'un sachet
pour cuisson au four.
Seulscertains materiaux de verre, vitroceramique, ceramique ou
certains ustensiles vitrifies/emailles peuvent etre utilises sur la
table de cuisson ou darts le four sans risque de bris sous reffet
du choc thermique. Observezles instructions du fabricant Iors
de rutilisation d'un ustensile en verre.
La securite de fonctionnement de cet appareil a ere testee
raide d'ustensiles de cuisine conventionnels. N'utilisez pus un
ustensile ou accessoire qui n'est passpecifiquement
recommande darts ce guide. Ne mettez pus de couvre-brOleur
ni de gril sur la table de cuisson et n'utilisez pas de systemede
convection additionnel. L'utilisation d'un dispositif ou accessoire
qui n'est pas expressement recommande dans ce guide peut
degrader la securite de I'appareil ou sa performance, ou reduire
la Iongevite des composants.
Friteuses
Exercezune prudence extreme Iorsdu d@lacement du
recipient de graisse ou Iors de relimination de graisse chaude.
Laissezla graisse refroidir avant de d@lacer rustensile.
Hottes d'e×traction
Nettoyez frequemment les fiitres et la hotte de la cuisiniere,
pour empecher la graisse ou d'autres produits inflammables de
s'accumuier sur le fiitre ou la hotte et provoquer des feux de
graisse.
Si vousfiambez des aliments sous la hotte, mettez le ventiiateur
en marche.
Nettoyage et s curit6
Eteignez tous les brQleurset attendez le refroidissement de tous
les composants avantde les toucher ou d'entreprendre le
nettoyage. Ne touchez pus la grille d'un brQleur ou la zone
voisine avant que ces composants aient pu refroidir
suffisamment.
Nettoyez prudemment la table de cuisson. Travaillez
prudemment afin d'eviter les brQlurespar la vapeur sivous
utilisez un chiffon ou une @onge humide pour nettoyer les
renversements sur une surface chaude. Certains produits de
nettoyage peuvent generer desvapeurs nocives Iorsqu'ils sont
appliques sur une surface chaude.
Four autonettoyant
Ne nettoyez pus lejoint de porte. Lejoint est essentiel
retancheite de rappareil. Veiiiez _ ne pus frotter,
endommager ou depiacer lejoint.
N'utiiisez pus de protection pour couvrir la sole ou de nettoyant
pour four _ rinterieur du four autonettoyant ou pres de ses
composants.
IIest normal que la surface de cuisson devienne chaude durant
une operation d'autonettoyage; par consequent, eviter de
toucher la surface de cuisson durant rautonettoyage.
Avertissement et avis
importants
En vertu de la {{California Safe Drinking Water and Toxic
Enforcement Act >>de 1986 (Proposition 65), le gouverneur de la
Californie dolt punier une liste des substances qui, selon retat
de la Californie, causent le cancer ou presentent un risque pour
la reproduction. Enoutre, les entreprises doivent avertir leurs
clients de rexposition potentielle _ de relies substances.
Nous informons lesutilisateurs decet appareil que Iors d'une
operation d'autonettoyage, ils peuvent etre exposes_ une faible
concentration de certaines substances figurant dans la liste
mentionnee ci-dessus, dont le monoxyde de carbone. Pour
minimiser rexposition, veillez _ ce que la piece ouse trouve le
four soit convenablement aeree durant une operation
d'autonettoyage, par rouverture d'une fenetre ou d'une porte.
AVIS IMPORTANT - OISEAUX FAMIUERS : Ne gardez
jaraais un oiseau famiiier darts [acuisine ou darts une piece ou
il pourrait etre expose aux fumees. Lesoiseaux ont un systeme
respiratoire tres sensible. Les vapeurs qui s'echappent du four
pendant ['autonettoyage peuvent [eur etre nocives ou meme
fataies. Lesvapeurs qui s'echappent [ors de [a surchauffe de
rhuiie de cuisson, des corps gras, de [a margarine et des
ustensiies _ revetement antiadhesif peuvent egalement etre
nocives.
Conservez ces instructions pour consultation uit rieure
34
Page 36

ENTRET|EN ET NETTOYAGE
Four autonettoyant
Lecycled'autonettoyageutilisedestemp6raturesde cuisson
sup6rieuresa la normaleafin de nettoyerautomatiquementI'int6rieur
du four.
Lefour dolt _tre nettoy6rc!guli_rement.Lesc!claboussuresdoivent
6tre essuy6espour@iterune productionexcessivedefum6eou
I'apparitionde flammes.Ne laissezpasde r6siduss'accumulerduns
lefour.
Durantleprocessusd'autonettoyage,il convientde biena@erla
cuisine pourc!liminerlesodeursnormalement6misesdurant le
nettoyage.
Avant I'autonettoyage
1. Eteignezla lampedefour avantle nettoyage.Celle-cirisqueraitde
griller durant lecyclede nettoyage.
2. Enlevezla I_chefrite,tousles platset lesgrillesdu four.Sivous
n'enlevezpus lesgrilles,ellesrisquentde se d6coloreret de ne
plusglisseraussifacilementapr_slecycled'autonettoyage.
3. Nettoyezlecadredu four, le cadre de
la porte,lazone_ I'ext6rieurdujoint et \
autourde I'ouverturedujoint de la
portea I'aided'eauetde d6tergentou
d'un nettoyantnonabrasifcommeBon
Ami*. Le processusd'autonettoyage
ne nettoiepusceszones. Ellesdoivent
6trenettoy_espouremp6cherlasalet6de s'incrusterpendantle
cyclede nettoyage. (Lejoint assureI'c!tanchc!itc!autour de la porte
et du hublotdu four.)
4. Pouremp6chertoutdommage,ne nettoyezpas et nefrottez pus
lejoint qui setrouveautourde la porte du four. Cejoint est congu
pour @iter lespertesdechaleurpendantlecycled'autonettoyage.
5. Eliminezlesr6sidusde graisseou de produitsrenvers6ssur la
soleavantlenettoyage. Ceciemp6chelaformationdeflammes
ou de fum6edurantle nettoyage.
6. Essuyezles r6sidussucresetacides,commelespatatesdouces,la
tomateou lessaucesabasedelait. L'_mailvitrifi6poss_deune
rc!sistancelimit6eauxcompos6sacides. IIpeutsede!colorersi les
re!siriusacidesousucrc!snesontpusenlevc!savantle cycle
d'autonettoyage.
Lesnomsde marquedesproduitsde nettoyagesontdes marquesd@os6esdesdiff,!rentsfabricants.
Programrnation de I'autonettoyage :
1. Appuyezsur latouche Clean [Nettoyage).
2. ENLEVERGRILLEseraaffich& Retirezlesgrilles. ".................
3. S61ectionnezCONTINUER ) I'aidede latouche rapide.Les
touches rapidessentsitu_esde chaquec6t6 de I'afficheurdu
tableaudecommande.
4. Choisissezleniveaudesalet6LEGERenentrant 200) I'aidedes
touchesnum6riquesafinde programmerdeuxheuresde
nettoyage. Appuyezsurla touche Enter (Entre0.
OU
Choisissezleniveaudesalet6MOYEN ettrois heuresde
nettoyage,pour un niveaude salet6mod_r6e.
OU
S61ectionnezINTENSEetquatreheuresde nettoyage,pour un
niveaude saletc!important.
5. NETTOYAGE,TIME(Duree),VERROUILLAGEet le compte
reboursde ladurc!ede nettoyageserontaffich6spendantle
nettoyagedu four. REFROIDISSs'afficheraIorsquele nettoyage
seraterrain& lefour _tanttoujoursverrouill&
important: Laporteserad6verrouill_eenvironune heureapr_sla
fin du nettoyage.LamentionREFROIDISSdisparaitrade I'afficheur
Iosquela porte serad@errouill(!e.
Pour differer I'autonettoyage :
1. Appuyezsur latouche Clean. Clean
2. ENLEVERGRILLEseraaffich_. Retirezles grilles.
3. Sc!lectionnezCONTINUER _ I'aidedela touche rapide.Les
touches rapidessont situ_esdechaquec6t6 de I'afficheurdu
tableaudecommande.
Choisissezleniveaudesalet6LEGERenentrant200) I'aidedes
4,
touchesnum@iquesafinde programmerdeuxheuresde
nettoyage.Appuyezsur la toucheEnter,
OU
Choisissezleniveaudesalet6MOYENet trois heuresde
nettoyage,pour un niveaudesaletc!modc!rc!e.
OU
Sc!lectionnezINTENSEet quatreheuresdenettoyage,pour un
niveaude salet6important.
5,
La porte severrouillera.NETTOYAGE,TIME,VERROUILLAGEet le
compte_ reboursde la dur_edenettoyageserontaffichc!s.
6.
Apr_sle verrouillagedela porte,appuyezsurlatouche Mere
Options [Autresoptions).
35
Page 37

7. S61ectionnezDEMARRDIFFEREa I'aidedela touche rapide.
8. Choisissezle hombred'heuresd'attenteavantque necommencele
cycled'autonettoyage.
9. Ladurc!edud61aiet ladur_edu nettoyageserontaffich6es.
Aprbs I'autonettoyage
Environone heure apr_sla fin du cycle de nettoyage, la porte
sera d4verrouil/_eet la mentionREFRO/D/SSdisparaitrade
I'afficheor. A partir de ce moment, la porte peut _tre ouverte.
Lasalet6poutavoirlaiss6au fond du four un r_sidugris poudreuxqui
pout6treenlev6avecun lingo humide.S'il restedelasalet6,cela
indiquequele cyclede nettoyagen'apas€!t6assezlong. Cettesalet6
seraenlevc!eauprochaincycled'autonettoyage.
Si losgrillesdu four ont 6tc!laiss6es_ I'int6rieurpendantlecycle
d'autonettoyageet qu'ellesglissentreal,enduisezcelles-ci,ainsique
leurssupports,d'unefine couched'huilev6g6tale.
Uned6colorationblanchepoutapparaitreapr_sle nettoyagesides
d@6tsacidesou sucr6sn'ont pas6t6essuy_savantI'autonettoyage.
Ceciest normalet N'affectePASlaperformancedeI'appareil.
Techniques de nettoyage
Reilrlarques :
• Sila portedu four resteouverte,FERMERPORTEseraaffichc!
jusqu'_ceque la portesoit ferm6e.
• Siplusde 30secondess'6coulententrele momentoL']vous
appuyezsur latouche Clean(Nettoyage)et celuio{']vous
appuyezsur unetouche num6rique,la programmation
retourneraautomatiquementa I'affichagepr6cc!dent.
. Vousendommagerezla portedu four sivousforcezson
ouverturedurant le nettoyageoule refroidissement.
° II peut yavoirpr6senced'odeuretde fum6edurant les
premiersnettoyagesdu four. Ceciest normalet diminueraou
disparaitraavecletemps.Sile four esttr_ssale ou si la
I_chefritea c!tdlaissdedansle four, il pout y avoirunepresence
excessivedefum6eetd'odeur.
Alors que lefour ser6chauffeet se refroidit,il estpossibleque
vous entendiezdes bruitscaus6spar ladilatationet la
contractiondespi_cesm6talliques.Ceciestnormal et
n'endommagepas I'appareil.
Grillesde
br_leur = En
porcelainesur
fonte
Chapeaux de
brQleur et
br_leurs _ gaz
scell_s
* Losnomsde marquesontdesmarquesd@os6esdes
diff6rentsfabricants.
**Pourcommanderdirectement,composezle1-800-JENNAIR
(1-800-536-6247].
• Laissezlosgrillesrefroidircompl6tement.
. LavezlosgrillesavecdeI'eausavonneusetilde et untampon_r6curerenplastiquenonabrasif.Pourlostachestenaces,
lestachestenaces,nettoyez-lesavecuntamponr_cureurnonabrasifremplidesavon,ou unecr_mede nettoyagepour
tabledecuisson*et une@onge.S'ilrestedessouillures,appliquezdenouveaulacr_mepourtabledecuisson,recouvrez
avecunessuie-touthumide,et laisseztremper pendant30 minutes.Frottezde nouveau,rincezet faitessc!cher.
° N'effectuezpas le nettoyageaulave-vaisselleoudanslefour autonettoyant.
T_tesde brQleuramevibles
. LaissezlebrQleurrefroidir.EnlevezlechapeaudebrQleurpourlelaverdansdeI'eausavonneuseavecuntampon_ rc!curer
en plastique.Pourlestachestenaces,nettoyez-lesavecun tampon rc!cureurnon abrasif,rempli desavonouavecune
cr_medenettoyagepourtable de cuisson* (Pieceno20000001]** et une@onge.
• N'effectuezpas le nettoyageat] lave-vaisselleou danslefour autonettoyant.
Br_leurs_ gaz scell_s
. Nettoyezfrc!quemment.Laissezle br_leur refroidir.Nettoyezavecdu savonet un tampona r_!curerenplastique.
Pourlestachestenacesous_!ch_es,nettoyezavecune @onge nonabrasiverempliedesavon,une brossedure,une
brossea dents (ouson bout en caoutchouc,sielle enest dot,!e] ouune @ingle droite.N'agrandissezpas oune
ddormez pasles trous.
• Veillez_ ne pas introduired'eauexc_!dentairedartslosorificesdu brOleur.
. TravaillezprudemmentIorsdu nettoyagedeI'allumeur.Si I'allumeurestendommag_oumouill_,losbr_]leursdela
tablede cuissonne pourrontpass'allumer.
L_chefrite
et sa grille
Ne couvrezjamais la grille de papier d'aluminium;cola emp_che la graisse decou/er dans la I_chefrite
. Recouvrezla I_chefriteetsagrille d'un Iingesavonneux;laisseztremperpour d_tacherlesr_sidus.
• Lavezavecde I'eausavonneusetiSde.Utilisezuntampona r_!curerpour _liminerlos souillurestenaces.
. Onpout placerlosdeux composantsdela I_chefritedartsunlave-vaisselle.
36 Suite
Page 38

Tableaude . Pourverrouillerloscommandospendantlenettoyage,reportez-vousala sectionVerrouillagedescommandosdelapage45.
commando • Essuyezavecun lingohumide.%chezbien.N'utilisezpasnettoyantsabrasifssurletableau.
et horloge . Losnettoyantspourverrepeuvent6treutilis6ss'ilssontd'abordpulv6ris6ssurunchiffon.NEpulv#rlsezPASle predult
directementsurlostouchesdecommando etI'afficheur.
Boutons de • Placezlosboutons_ lapositionOFF(Arr6t)etretirer-lesentirant.
eommande • Lavez,rincezets6chez.N'utilisezpas unagentde nettoyageabrasifsusceptiblede rayerlefini.
• Faitesfonctionnerb@vementchaque616meritpourv@ifierquelosboutonsont _t6correctementrc!installc!s.
Dosseret et table L'6mailvitrific!estfaitdeverreli6au mc!talparfusion.IIpoutsefissurerous'6caillers'ilestrealutilis6.IIposs_deuner6sistance
decuisson- limit6eauxcompos_sacides.Essuyezimm6diatementtout renversementavecun lingosec,particuliSrements'ils'agitde
Ernailvitrifie compos6sacidesousucr6s.
• Uneloisrefroidi,lavezavecdeI'eausavonneuse,rincezets6chez.
. N'essuyezjamaisunesurfaceti_deouchaudeavecun lingohumide.Ellepourraitsefissurerou s'c!cailler.
• N'utilisezjamais denettoyantspourfour,d'agentsdenettoyagecaustiquesou abrasifssurlefini ext6rieurdela cuisini_re.
Panneaux, • Uneloislospi_cesrefroidies,lavez-lesaI'eausavonneusetilde, rincezets6chez.N'essuyezjamais unesurfacetilde ouchaude
R_cbauffage avecunlingohumide,carcolapourraitabimerlasurfaceetprovoquerdesbr01urespar lavapeur.
Tiroir, (certains • Pourlostachestenaces,utilisezdesagentsdenettoyageIc!g_rementabrasifscommelap_teaubicarbonatede soudeou
mo@les],Tiroir de BonAmi*.N'utilisezpas denettoyantsabrasifscommelostamponsenlained'acierou losnettoyantspourfour.Cos
rangement produitsrayeraientou endommageraientlasurface.
(certainsmodules) Important: Uti/isezunlingoou un torchonsecpouressuyerlosproduits renvets_s,surtout s'ils sent acides ou
et la Poign_e sucr_&Lasurface pourraitsed_colorerouse ternirsi lasalet_ n'_tait pasimm_diatementenlev_e.Ceci
de porte- estparticuli_rementimportant dartslecas desurfaces blanches.
peintesemail
I-lublot et porte • Evitezd'utilisertrop d'eau,carellerisqueraitdes'infiltrersousouder@releverre,causantainsi destachessur lehublot.
du four - • Laveza reauet ausavon.Rinceza reauclaireetsc!chez.Un nettoyantpourverrepeut6treutilis6sivouslepulv@isez
Verre d'abordsur un chiffon.
• N'utilisezpas deproduitsabrasifscommelostampons_ rc!curer,lalained'acieroulos nettoyantsenpoudrequi
peuventrayerleverre.
Int_rieurdu four . Suivezlosinstructionsprc!sent6esauxpages35-36pourrautonettoyagedufour.
Grillesdufour • Nettoyez_ I'eausavonneuse.
. Eliminezlossalet6stenacesavecunepoudrede nettoyageou un tampon_ r_curersavonneux.Rincezet s6chez.
• Losgrillessed6colorentet glissentdifficilementsi oliossontlaiss6esdanslefourpendantle cycled'autonettoyage.
Sicolaseproduit,enduisezlebord desgrilleset leurssupportsavecunpet] d'huilev6g6talepourleur permettrede
glisser_ nouveau,puis essuyezI'exc_s.
Acier inoxydable , N'UTILISEZPASDE PRODUITSDE NETTOYAGECONTENANTUNAGENTDEBLANCHIMENTCNLORE.
(certainsmo@les) ° N'UTILISEZPASDENETTOYANTSABRASIFSOUA BASED'ORANGE.
, ESSUYEZTOUJOURSDANSLESENSDU GRAINPENDANTLENETTOYAGE.
• Nettoyagejournalier/salet_ I_g_re -- Nettoyeza raideunlingodouxoud'une@ongeet undesproduitssuivants: eau
savonneuse,m61angevinaigreblanc/eau,nettoyantpourverreetsurfaceFormula409*ou un produitsemblablepourverre
Rincezets_chezPourpolket aiderapr_!venirlostracesdedoigts,appliquezStainlessSteelMagic Spray*(piecen°
20000008)**.
• Salet_ mod_r_e/importante--Nettoyez _ I'aided'un lingodouxou d'unedpongehumideet I'undesproduitssuivants:
BonAmi,SmartCleanserou SoftScrub*.RincezetsSchez.Lostachesrebellespeuvent_treenlev_esenfrottantdartsle
sonsdu grainavecun tampontout usageScotch-Brite*humide.Rincezet s_!chez.Pourretirer losmarqueset redonnerdu
lustre,terminezle nettoyageavecle produitpouracierinoxydableMagicSpray*.
. D_coloration-- Avecunchiffondouxouune@ongehumide,appliquezlenettoyantpouracierinoxydableCameo*.Rincez
imm_!diatementets_chez.Pourretirerleamarqueset redonnerdu lustre,terminezlenettoyageaveclevaporisateurpouracier
inoxydableMagicSpray*.
Losnomsde marquedes produitsde nettoyagesontdesmarquesd@os_esdesdiff_rentsfabricants.
•* Pourcommanderdirectement,composezle 1-800-JENNAIR[1-800-536-6247).
37
Page 39

ENTRET|EN
Porte du four
• N'essayezJAMAIS d'ouvrir ou de fermerla porteou demettre le
four en marchesi la porten'estpasbien remiseen place.
• Ne placezJAMAIS lesdoigtsentrela charni_reet le cadreavant
du four. Les brasdecharni_resontmunisd'un ressort.S'ilssont
accidentellementheurt6s,ilsserabattentviolemmentcontrele
cadredu four et risquentde vousblesserlesdoigts.
important : Laported'une cuisini_reneuvepeutsembler
{{spongieuse>>Iorsqu'elleestferm6e.Ceciest normalet diminuera
avecletemps.
Hubiot du four
Protection des hublots :
1. N'utilisezpasde produitsnettoyantsabrasifscommelestampons
r6cureren lained'acierou les produitsdenettoyageenpoudre
qui peuventrayerleverre.
2. Ne heurtezpasle verreavecun ustensile,un meuble,un jouet ou
tout autre objet.
Larnpe du four
Pour rempiacer I'ampoule du four :
1. Apr_sle refroidissementdufour,
maintenirlecabochontout en
enlevantla piece m6talliquequi
la maintienten place.
REMARQUE:Lecabochon
tomberasi on ne le maintient
pasenplace.
2. Enleverlecabochonet
I'ampoule.
3. Installerune ampoulede/40wattspourappareilmc!nager.
4. R_installerlecabochonet le fil m6talliquede retenue.
5. R6tablirI'alimentationde la cuisini_re.R6glerde nouveau
I'horloge.
CABOCHON
RESSORTDERETENUE
fill m4tallklue)
3. Ne fermezpas laportedu four avantd'avoirreplacc!lesgrilles.
Touted6gradationdu verre(rayure,choc,tension,etc.)peutaffaiblir
sastructure etaugmenterlerisquedebris_ unedateult6rieure.
Pieds de raise & niveau
Assurez-vousquela cuisini_reest d'aplombunelois
install_e. Dansle cascontraire,tournezles piedsde
raisea niveau,a chacundesanglesde la cuisiniSre,
jusqu'_ce quecelle-cisoit d'aplomb.
__ BRIDE
PIED DE MISE
ANTIBASCULEMENT
NIVEAU
Tiroir de rangernent
Letiroir de rangementpeut6treenlevc!pourvouspermettrede
nettoyersousla cuisini_re.
Pour retirer uue grille :
1. Videzletiroir et tirez-lejusqu'_ la positionde la premierebut6e.
2. SoulevezI'avant.
3. Tirezjusqu'a la positiondela secondebut6e.
4. Saisissezle tiroir par lesc6tc!set soulevez/tirezpour I'extraire.
Pour remettre uue grille en place :
1. Ins_rezlesextrc!mit6sdesglissi_resdutiroir dans les railsde la
cuisini_re.
2. SoulevezI'avantdutiroir etpoussezdoucementjusqu'a la
positiondela premierebutc!e.
3. Soulevezdenouveauletiroir et poussez-lepour lefermer.
38
Page 40

Raccordement 61ectrique
Les appareils n6cessitantunealimentation
61ectrique comportent unefiche de raise _ la
terre _ trois broches quidoit 6trebranchde
directementsur uneprisede 120volts _ trois
cavit6set correctementraisea laterre.
Toujoursd4branchezI'appareilavantd'yfairede
Ibntretien.
Lafiche de miseala terrea trois brochesoffre uneprotectioncontre
le risquedechocc!lectrique.NECOUPEZPASOU N'ENLEVEZ
PASLAP,ROCHEDETERREDU CORDOND'ALIMENTATION.
Si laprisenecomportequedeuxcavit6s,n'estpasmise_laterre ou
n'estpasappropri6e,le propri6tairede I'appareila la
responsabilit6defaire remplacer la prisepar une prise_ trois
cavit6scorrectement raise_ la terre.
D placement d'un appareil
gaz
Lesraccordsdesappareilsa gaz utilisc!ssur cet appareil nesont pas
con_uspourdes d@lacementsfr6quents.Unefois I'appareilinstall6,
NEle d@lacezPASdefagonr@c!t6epour le nettoyerou le changer
de place.Si cet appareildoit6tred_mc!nag6et/ou enlev6pour6tre
r@ar6,suivezlam6thoded6critedanslesinstructionsd'installation.
Pourtouteinformation,prenezcontactavecle servicea la clientele
de Jenn-Air au 1 800JENNAIR(1 800536-6247].
II fautque le piedarri_rede lacuisini_resoit enclench6dartsla
bride antibasculementpourquela cuisini_rene puissebasculer
accidentellement.
39
Page 41

DEPANNAGE
Pourla plupart des problbmes
observbs, essayezd'abordce
quisuit.
Une pattie ou Jatotaiitb de Ja
cuisinibrene fonctionnepas.
L'horloge,I'afficheuret/ou
les lampestonctionnent, mais le
fourne chautte pas.
Un brSieur desurface ne
s'allume pas.
Flammesnonunitormes.
Latlamme du br_leur s'_loigne •
desorifices.
• V6rifiezque lescommandesdu foursont correctementrc!gl6es.
• V6rifiezsi lafiche estbien branch6esur la prise.
• Inspectez/r6armezle disjoncteur. Inspectez/remplacezlefusible.
• V6rifiezla sourced'alimentationc!lectrique.
• V6rifiezsila surfaceet/oulescommandesdufour sontbienr_gl6es.Voyezlespages42et 44-49.
• V6rifiezsi laportedu fourest d6verrouill6eapr_sun autonettoyage.Voyezlapage36.
• V6rifiezsi lefour estrc!glc!pourune cuissondiff6r_eoupour un autonettoyage.Voyezlespages
46et35.
• V6rifiezsi leverrouillagedescommandesestactiv& Voyezla page45.
• V6rifiezsi lacommandeesten modesabbat.Voyezlapage57.
• Lefour peut6treprogramm6pour une fonction diffc!rc!eou de cuissonet maintien.
• Leverrouillagedescommandesestpeut-6tre activ6.Voyezla page45.
V6rifiezqueI'appareilest correctementraccord6a la sourced'61ectricitc!.
D6terminezsi I'alimentation61ectriqueest interrompue(fusiblegrillddisjoncteur ouvert].
o
V_rifiezqueI'allumeurestsec etqu'il c!metdes_tincelles.LebrGleurnepeuts'allumersi
I'allumeurestendommagc!,souill_oumouill6.SiI'allumeurnegc!n_repasd'c!tincelles,
ramenezleboutondecommandeala positionOFF(Arr6t].
LesorificesdubrQleursont peut-6tre obstru6s.07oirla page36.)
Assurez-vousqu'unustensilereposesur la grille.
Les r_sultats de lacuisson
different de ceux du
fourprecedent. •
Lesaliments ne grillent pas
correctementou d_gagent
beaucoup detum_e.
V6rifiezque latempc!ratures_lectionnc!eestcorrecte.Assurez-vousque le four est pr6chauffc!
quandcelaestprc!cis6dansla recette.
D_terminezsi I'_ventdufour est obstru6. Voyezson emplacement_ la page50.
=
Assurez-vousquela cuisiniSreest d'aplomb.
=
Lesr_glagesdetemperaturevarientsouvententreun four neufet lefour qu'il remplace.
Avec I'_gedesfours, la temp6ratureestsouventd6cal_eetdevientpluschaudeou plusfroide.
Voyezla page57 pour obtenirlesinstructionssur le r_!glagede la temp(!raturedufour.
Important : II n'estpasrecommand_!de r6glerlatemp6raturesi un probl_mesemanifeste
avecune ou deux recettesseulement.
o
Utilisezlesbonsustensiles.Lesustensilesfonc_sdonnentunbrunissementdecouleurfonc_!e,
lesustensilesbrillants, unbrunissementplus clair.
o
V_rifiezlapositiondesgrillesetdes ustensiles.Lorsde la r_!partitionsur deuxgrilles,ne
superposezpaslesplats.Veillezalaisserun espacede 2,5a5 cm (l a 2 po) entreles platset
lesparoisdu four.
o
Contr61ezI'utilisationdefeuille d'aluminiumclanslefour.Ne recouvrezjamais compl_tement
unegrilledu four avecdu papierd'aluminium.Placezun petit morceaude feuilled'aluminium
sur la grille sousleplatpour r_!cup_rerlesmati6resrenvers6es.
V_rifiezlapositiondesgrilles.Lesalimentssontpeut-_tretrop prochesdubrQleur.
Lepapierd'aluminium a _!t_!mal utilis_!.Ne garnissezjamais lagrille de la I_chefriteavec
du papierd'aluminium.
e
EnlevezI'exc_sdegraissesurla piecedeviandeavantla cuissonaugril.
e
UneI_chefritesalea _t_ utilis_e.
e
Pr_chauffezlefour pendant2 a3 minutesavantde placerleplat dans lefour.
e
Portedu four ferm6edurant lacuissonau gril.
40 Suite
Page 42

L'autonettoyage ne se fait pas.
• Dc!terminezsi I'appareila 6t6programm6pour un autonettoyagediff@&Voyezlapage35.
• V@ifiezquela porteest ferm6e.
• V6rifiezsi la commandeesten modesabbat.Voyezlapage57.
• Lefourestpeut6tre ) unetemp6raturesup6rieurea 204°C (400°F).Latemp@aturedufour
dolt 6treinf@ieure_204°C [400° F] pour pouvoirprogrammeruncycled'autonettoyage.
Lefour ne se nettoie pas
correetement.
Laportedu fourne
se d_verrouille pasaprbs
lecycle d'autonettoyage.
II n'y a pas de bipset
rafficheur nefonctionne pas.
DeI'humidit_sed_posesur le
hublotou de la vapeur
s'_chappede r_vent.
Odeur forte ou fum_e I_g_re
la raiseen marehe dufour.
Codes d'anomalie
• Untempsde nettoyagepluslongpeut6tre n6cessaire.
• Avant I'op_rationd'autonettoyage,vousn'avezpas61imin6lesaccumulationsexcessivesde
r6sidus,particuli_rementlesrc!sidusd'alimentsacidesousucres.
• L'int6rieurdu four estencorechaud. Laissezlefour refroidir pendantenvironune heureapr_s
un cycle d'autonettoyage.II estpossibled'ouvrir laporte Iorsquele messageLOCK
[Verrouillage]n'estplus affich&
• Lacommandeet la portesont peut-6treverrouillc!es.Voyezla page45.
• Lefour peut6treen modesabbat.Voyezlapage57.
• Ceciestnormalavecdesalimentsateneur_lev6een humidit&
• Lenettoyagedu hublota produittrop d'humidit&
• Ceciestnormalpour unecuisini_reneuveet disparaitapr_squelquesutilisations.Un
autonettoyage61imineralesodeursplus rapidement.
Laraiseen marched'unventilateurd'extractionaide_ enleverfum_eetodeur.
• Salet6importantesur lasole. Ex6cutezune op@ationd'autonettoyage.
• Lefourpeut d6celeruneanomalieIorsdelaprogrammationoudu fonctionnement.Encas
d'anomalie,le messageDEFAUTDETECTE- APPUYEZENTERPOURREESSAYERpeuvent
apparaitre.SuivrelesindicationsdeI'affichage.Si I'anomalier6apparaitounes'effacepas,appeler
un r@arateuragr6c!ou composerlenum6rosansfraisde I'afficheur.
• Si la m6meop@ationestessayeeavantquelefournesoit r@ar6,le messageCARACTERISTIQUE
NONDISPONIBLE- APPUYEZAIDEparaitra.Lacaract6ristiquesera dansI'incapacitc!de
fonctionnertantque la r@arationn'aurapas6t6effectu_e.
• Si lefouresttr_ssale,lesflamm_chespeuventproduireuncoded'anomalieau coursdu cycle
d'autonettoyage.Appuyersur CANOE[ [Annule0 et laisserlefour refroidircompletement,essuyer
lasalet6enex@spuisreprogrammerI'autonettoyage.Si lecoded'anomalierc!apparait,prendre
contactavecunr@arateuragr66.
Desbruits se font entendre.
• Lefourpeut fairediff6rentsbruitslagers.Vouspouvezentendrelesrelaisfonctionnerets'arr6ter.
Ceciestnormal.
• Lachaleurdanslefour,puis lerefroidissement,peuventproduiredesbruitsdecontractionoude
dilatationdum6tal.Ceciestnormaletn'endommagepasI'appareil.
SAb clignotepuis, • Lefouresten modesabbat.Pourannuler,appuyezsur latoucheSetup(R6glage]pendantcinq
s'afficbe continuellement, secondes.
Impossible d'ajouterun
autre favori.
• Lalistedesfavorisestpleine.Poureffacerunfavorietenajouterunnouveau,consultezles
instructions_ lapage55.
41
Page 43

CU N R LA RFACE
Commandes de la
surface de cuisson
r6glageleplusbas,qui maintiendra1'6bullition.0-ournezlebouton
versHI,puis ajustezla taille desflammesafinqu'ellessoientadapt6es
au diam_trede I'ustensile.)
AJlumage sans fiamme
de veille CBAPEABOBBBOLEU0
Ledispositifd'allumagenefait
interveniraucunefiamme deveille.
ChaquebrQleurde latablede cuisson
comporteun allumeurpar 6tincelle.
TravaillezprudemmentIorsdunettoyage
autourdesbrQleursdelatable __
de cuisson. OBtE,C_
Si unbrQleurde latablede . L_X__ ALLUMEUB
cuissonnes'allumepas,d6terminezsi ___,_L"-----_t_
I'allumeurestbris6,sailoumouillc!. __J
R6giages sugg r s de la
puissance de chauffage OFF
Lataille et letype d'ustensile,letype etla qua[_t6 _ h
d'alirnentsetla puissancedubrQieuren " __
BTUpermettrontded_terminera quelle ._ r-
positionil faut r6glerle bouton pour les :z:: o
diff6rentstypesde cuisson. Utilisezles \ _ _ /
inscriptionsimprim(gesautour desboutons _ _"
commeguide. Lesdescriptionssuivantes
vous aiderontachoisir letype de rc!glagequi Style de la
vous donneralesmeilleursr6sultats: r6glage varient
Maintien au chaud: Lesalimentsrestenta selonle module
unetemp6raturesupdrieurea 60°C (1400F)
sanscontinuer_ cuire.Lesalimentssont ,,¢
chauff6ssur desfiammesplus grandes .1_
jusqu'_ce qu'ilsatteignentcettetempc!rature,_: _"
puis,latailledes flammesest r6duite.
N'utilisezjamaisle rc!glagedemaintienau
chaudpour r6chaufferdes alimentsfroids.
Assurez-vousquele boutonest r6gkgpourqueles
flammessoientstables.(Utilisezle r6glageLO (Bas]ou le brQleurde
mijotagesitu6_ I'arri_rea droite pour garderlesalimentschauds.)
Nlijotage : Desbullesse forment _ la surfacedesaliments.Les
alimentssont_ unetemp6raturesitu6eentre85et93°C [185et
2000F].Ce rc!glagepeut aussi6treutilis6 pour cuiredesaliments_ la
vapeur,pourlespocherouencorepour continuerla cuisson
d'alimentsdansun r6cipientcouvert.(Ajustezle boutonentreHI
(Ele%)et Lowpour obtenirle mijotaged6sirc!.)
Ebullitionlente : Desbullesseforment aun rythmemod_r&Ce
r6glagepeutaussiservirpourfairefrire lamajoritc!desalimentset
pour maintenirI'c!bullitiondegrandesquantit6sdeliquide. (Ajustezle
boutonentreHighet Low pour obtenir I'_bullitiond6sirc!e.)
l_bullition : Desbullesseforment dansleliquide a un rythme rapide.
Cer_glagepeut aussi6tre utilis6 pour porterun liquide a 6bullition,
fairebrunir de la viande,la fairesauteret chaufferdeI'huile pourfaire
frireavantdepasser_ un rc!glageinf6rieur.Ler_glageHIesttoujours
utilis_ pourporter les liquidesa _bullition.Unefois que le liquide
bout,r6duiseztoujourslataille desflammesen plagantleboutonau 42 3. Ajuster lesflammes_ la tailled_!sir6e.
Boutons de commande de la
surface de cuisson
Utilisezcesboutonspour commanderI'allumagedesbr_leursde
surface. Vousdisposezd'un choixinfini de r6glagesde puissanceentre
lespositions LOet HI. Vouspouvezpercevoiruned_tente decalage
lapositionHigh.Vouspouvezmettre les boutonssurcesdeuxpositions
ou a tout autreendroit.
nt-_@ Unsch6maprosdechaqueboutonidentifiele brQleurde
Fro _1gaucheidentifiele br_leur avantdroit (Style de la
sch6ma varientselonle module).
surfacecommand_parcebouton.Parexemple,lesch6ma
R_glage des comma_des :
Lapuissance_ employerd_!penddu type etde la taillede
I'ustensileutilis_!.
1. Placezunustensilesurlagrille du br_leur.
• Siaucunustensilen'estplac_!surla grille du brQleur,les
flammespeuventavoirtendancease s_parerdu br_leur.
2. Enfoncezleboutonde commandeettournez-lejusqu'a la position
voulue.
• Vouspouvezpercevoirlecliquetiscorrespondant_ la
productiondes_!tincelleset le brQleurs'allume.
Important : Chaquebr01eurde surfaceestcon_upour serallumer
automatiquementsi laflammes'_!teint.
UtiJisation durant une
panne d' iectricit
1. Approchezune allumetteenflamm_!edu br_leur _ utiliser.
2. Enfoncezleboutonettournez-ledoucement.
BASE DE BRULEUR
Page 44

Surface de caisson
IVJod_leJGR8880
Br leur de faible puissance
CebrQleurestsitu6 du c0t6centreou gauche
arri_re(certainsmodules].IIoffreune plus
faiblepuissancepourla cuissonde sauces
ddlicatesou la fusiondu chocolat.
L9 uJ
IVJod_leJGR8775
Pour 6viter la formation de taches ou un
changement de couleur de la surface de caisson :
• Nettoyezla surfacedecuissonapr_s
chaqueutilisation.
• Enlevezles rdsidusrenversdsde
produits acidesou sucrOsd_sque lasurface
de cuissonarefroidi;ces produitsrenvers_s
peuventfake changer la couleur de 1'Omail.
A la diff@enced'unecuisini_redotdede brOleurs_ gazstandard,la
surfacede cuissondecettecuisini_ren'est pas amovibleou
relevable Ne teotezpas de relever la surface de caisson, quelle
qu'en seit la raison.
Br leurs scell s
LesbrQleursscell_sde lacuisini_resentfixOssur latablede
cuisson;ils nesont pas con_uspour 6tre enlevds.Commeles
brQleurssontscellds,un produitqui d_borded'un ustensilene
s'infiltrera passouslasurfacede cuisson.
VousdevezcependantnettoyerlesbrOleursapr_schaqueutilisation.
Lechapeaudu brOleurs'enl_vefacilementpour6tre nettoyd.07oyez
lesinstructionsde nettoyagea lapage36.]
Pourlebonfonctionnementdu brCfleur,la tote de brOleurdolt 6tre
correctementplacOesur la basedu brOleur.
Br leurs de haute
performance (certains modeles)
Cettecuisini_reestdotOede deux brOleursde 16000BTUL_ haute
vitesse,plac6_I'avantdroit et I'avantgauche(certainsmo@les].Ce
brOleurpermet unecuissona vitesseplus rapide,utilepourfaire
bouillir rapidementdeI'eauoucuire unegrandequantit6d'aliments.
Sur lebrOleurpuissant,la positionverslebaspeut 6tre le r_glagede
mijotage.
Lapuissancethermique(BTU)desbrdeurs
est diff4rentelots deI'alimentationaugazde
p4troleliqu4fi4.
@
Grilles de br leur
Avantune op@ationde cuisson,v@ifiezque lagrille est
correctementplacde. Lorsde I'installationdes grilles,placez
I'extr_mit6avecpattesverslecentre,auniveaudes barresdroites.
Unegrille de brCfleurincorrectementinstall@peutdcaillerlasurface
de cuisson.
Ne faites pusfonctionner an brSlear suns qu'un ustensilesoit
plac_ sar la grille. L'_rnailde la grille peat s'_caJller s'il n'y a
aucan astensile capable d'absorberla chalear _rnise par le
brSleur.
TravaillezprudemmentIorsqu'ilfaut remuerdesalimentsdartsun
ustensileplacdsur la grille de brQleur.Lesgrillescomportentunfini
lissequifacilite le nettoyage.Lesmarmites/casserolesglisserontsi
ellesnesontpas maintenues.Cecipeut entrainerun renversement
de nourritureschaudesetdoric causerdesbrQlures.
MOmesi lesgrillessonttr_s durables,ellesfinissentpar perdreleur
dclatousedOcolorentacausede la tempOrature_levdedes
flammes.
Reilrlarques :
UnbrQleurconvenablementrOgldetdont lesorificessont
propress'allumeenquelquessecondes.Lotsde I'alimentation
augaznaturel,lesflammessontbleues,avecun cOneinterne
bleu intense.
. Silesflammesd'un brOleursontjaunesou sila combustionest
bruyante,leratioaidgaz peut 6tre incorrect.Demandezaun
techniciend'effectuerle rdglage.(Lagarantienecouvrepasce
rOglage.]
• LorsdeI'alimentationau gazde pdtroleliqudfi_,il est
acceptablequeI'extr_mitddesflammessoitjaune.Ceciest
normal;aucun rdglagen'est ndcessaire.
Avec certainstypesde gaz,vous pouvezpercevoirun petit bruit
d'explosionIorsde I'extinctiond'un brQleurde surface.Ceciest
normal.
Sivousfaites passerrapidementlebouton de commandede la
positionHia la positionLo,lesflammespeuvents'dteindre,
particuli_rementsi le brQleurestfroid. Si ceciseproduit, placez
le boutonde commandea la positionOFF(Arr_t] et attendez
quelquessecondesavantd'allumerde nouveaulebrQleur.
Ajustezla puissancedechauffagedetelle mani_requeles
flammesne ddbordentpasa la p@iphdriede I'ustensile.
43
Page 45

OU N AU R
Tableau de commande
AB CD
E
F
G
H
!
2 3
ABC DEE
4 5 6
GH_ JKL MNO
7 8 9
[ Space
rock
/ Setup
On / Off /
\ /
Ra id More
- Pro£0t _i_ 1
TIMER1
On/Off
Oven
Light CANCEL
TtMER2
On/Off
PQRS IUV WXYZ
Back 0 Enter
i t
J KL
Letableaudecommandeestcon_;upourfaciliterlaprogrammation.Laconsoleaffichelesoptionsdechaquefonction etvousguidepasapasdurant
laprogrammation.Lescaract6ristiquesetsyledutableaudecommandevarientselonlemod61e.L'afficheurdufourillustr6ci-dessusestprogramm6
)our effectueruneop6rationde cuisson.
RapidPreheat
iiiiiiB
(Pr@hauffagerapid@
(certainsmodules]
Convect(Convection]
(certainsmodules]
Bake(Cuisson
aufouO
iii@!I
iiD
Broil [Cuissonaugril}
HHHHH
HHHHH
HHHHH
TIMER1 (Minuterie}
Display[Afficheu0
iiiiiiiiii
iiiiiiiiii;
TIMER2 {Minuterie}
Touchesnum_riques
Favorites(Favoris}
More Options
(Autresoptions)
Clean(Nettoyage)
iiiiiiiiii
Setup(R6glage)
iiiiiiiiii
iiiiiiiiii
OvenLight (Lampe
iiiiiiiiii
iiiiiiiiii
iiiiiiiiii
defou0
iiiiiiii_
CANCEL[Annule0
HHHHH_
HHHHH_
HHHHH_
HHHHH_
HHHHH_
QuicksetPads
(Touchesrapides)
Pourdiminuerladur_!edepr@hauffage.
Pourlacuissonaufour et le rOtissage
convection.
Pourla cuissonau fouret ler6tissage.
Pourlacuissonaugriletle brunissage
delapattiesupSrieure.
Programmelaminuterie.
Affiche losfonctionsdufour,los
optionset I'horloge.
Programmelaminuterie.
Pourprogrammerla dur_!eetla
temp6ratureoupourentrerle norades
programmesfavoris.
Pourafficher,programmerou
sauvegarderdescyclesdecuisson.
PouraccederauxcaractSristiques
additionnelles.
Pourprogrammerlecycle
d'autonettoyage.
Pourafficherou modifierlesr_glages
parddaut de rusine.
Pourallumerou_!teindrelalampe
defour.
Annuletouteslosoperationssaufla
minuterie,I'horloge,los r_glagesfavoris,
ettiroir de rechauffage(certains
modules).
Pourchoisirlesoptionsaffich_essur
laconsole(_c6t_!de laconsole
M N
0
Touches rapides
Lostouches rapidessont situ(!esde chaquec6t(1de la consoleet
sont utilis@s pours61ectionnerlafonction d@ir@ ou roption
affich@. Pourchoisir I'optionou la fonction,appuyezsurla touche
rapide pr6sdu mot.
Si vousd@irezretournera r@ranpr@_!dentde lafonction oude
I'option,appuyezsur latoucheBack (Pr_c6dent).Lorsquevous
avezterrain6la programmation,appuyezsur latouche Eater {EntreO
ou attendezquatresecondeset la fonctiond_!butera
automatiquement.
Losfl@hes pointantverslehautindiquentla pr6senced'6crans
additionnelsaffichant plus d'options. Appuyezsur lostouches
rapides pr6s desfl6ches pour faire driller les@rans.
Important : Quatresecondesapr_sI'entr@de lafonction,deI'option,
du nombreou de la lettre,lafonctionseraentr@automatiquement.Si
plusde 30secondess'@oulententre los8tapesdeprogrammation,la
fonctionseraannul@et rafficheur retournaar@ran pr@_!dent.
Allumage sans flamme de veille
(certains modules}
Lacuisini6reestdot6ed'un syst6med'allumagesansflammede
veille.Cesyst6mefermeautomatiquementI'arriv_edegazet
emp#che tout fonctionnementdu four/ors d'une interruption
de I'alimentationdlectrique.
II neserapaspossibled'allumerle brQleurdu four avecune
allumette.Ne pastenterdefairefonctionnerle four Iorsd'une
interruptiondeI'alimentation_!lectrique.
Horloge
R6glage de I'horloge :
1. Appuyezsur latouche Setup.
44
Page 46

2. S61ectionnezHORLOGE_ I'aidedestouchesrapides.
3. S61ectionnezHEURE.
4. EntrezI'heurea I'aidedestouchesnum6riques.
5. Appuyezsur latouche Enter.
6. S61ectionnezAM ouPM en modede 12heures.(PourI'horloge
de 24 heures,voyezci-dessus.)
7. Pourquitter lemodede r6glage,appuyezsur latoucheSetup.
Pour activer et annuler l'affichage de
I'horloge/jour de la semaiue :
1. Appuyezsur latouche Setup (R6glage).
2. %lectionnez HORLOGE.
3. Appuyezsur lafl_che pour afficher le mot DESACTIVER.
4. S61ectionnezDESACTIVER.
5. S61ectionnezHEURE.
6. ChoisissezOFF(Arr6t)pourannulerI'affichagede I'horloge,ou
s_lectionnezON (Marche)pour afficherI'horloge.
7. S61ectionnezOFFpourannulerI'affichagedujour de la sernaine.
S61ectionnezONpour afficherlejour delasemaine.
8. Pourquitter lemodede r6glage,appuyezsur latoucheSetup.
Setup
On / Off
Entree du jour de la semaiue :
1. Appuyezsur latouche Setup.
2. %lectionnez HORLOGE.
3. Appuyezsur lafi_che pour afficher le motJOUR.
4. Utilisezlatoucherapidedela flSchepourfaire driller losjours.
5. S61ectionnezlejour d_sirc!e.
6. Pourquitter lemodede r6glage,appuyezsur latoucheSetup.
Setup
On/Off
\ /
R_glage de I'horloge pour 12 ou 24 heures :
L'horlogepeut6treprogramm6epourafficher 12ou 24 heures.
1. Appuyezsur latouche Setup.
2. %lectionnez HORLOGE.
3. Utilisezlafl_chepour passer_ I'_cransuivant.
4. %lectionnez 12/24 H.
5. %lectionnez 12 HRou 24 HR.
Setup
On / Off
\ ............. /
Pour modifier la dur_e entree uue lois la
minuterie activee : /T|l_/ll_F_1
1. Appuyezunefoissur latoucheTIMER 1 ou On / Off /;
TIMER 2. ..............
2. Appuyezplusieurslois surlosdur6esdestouchesrapides
jusqu'aceque la dur6edc!sirc!esoitr6gl6e.
OU
3. Appuyezsur lestouchesnum6riquespourentrerla nouvelle
durc!evoulue.
4. Appuyezsur latouche Enter.
Pour annulet la miuuterie : / TIMER]
/
Appuyezdeuxfoissurla toucheTIMER 1 ouTIMER 21 On/ off/
Si les deux miuuteries soar actives :
Si laminuterievoulue estdc!jaaffich6e,appuyezuneloissur la
touche pour le moded'6ditionet deuxloispourannulerlaminuterie.
Si laminuterievoulue n'est pus affichc!e,suivezlos_tapes
c!numc!rc!esci-dessous.
1. Appuyezsur latouche TIMER unefois.La minuteriechoisiesera
affich6e.
2. Appuyezsur latouche TIMER une deuxiemelois pouracc6der
au moded'c!ditionafindefaire leschangements.
3. Appuyezsur latouche TIMER une troisiemefoispourannulet la
minuterie.
Modifier los sonueries de la minuterie :
Lesignalsonore desTIMER1et TIMER2pout6tre modifi& Les
optionsdisponiblessontdeuxbips _toutes los30secondes,deux
bips_ toutesles60secondesou unsoul bip. Le r6glagepar dc!faut
est d'un soul hip.................
1. Appuyezsur latouche Setup. _Setup
2. S_lectionnezlafl_che pour afficher ................../
SIGNAUXSONOR.
3. S_lectionnezSIGNAl.IXSONOR.
4. S_lectionnezSIGNALIXMINUTE.
5. S_lectionnezlesignal sonore d_!sir_!(2-30SEC,2-60SECor 1
BEEP(Bip)].
6. Pourquitter le modeder4glage,appuyezsur latoucheSetup.
/Jlvl_l& /
On / Off
6. Pourquitter lemodede r6glage,appuyezsur latoucheSetup.
Minuteries
R_glage des miuuteries (Miuuterie 1 et
Miuuterie 2) :
1. Appuyezsur latouche TIMER 1 (Minuterie 1)ou _TIMER
TIMER 2 (Minuterie 2]. _On / Off
2. Appuyezsur I'unedesdur_esaffichc!esenutilisant lostouches
rapidesou appuyezsur lestouchesnumc!riquespour entrerla
dur6e dc!sirc!e.
Important : Chaquelois quevousappuyezsur loschoixde
dur6e affichc!s,vousen augmentezladur_e. Parexemple,en
appuyantsur_<10MIN >>trois lois,vousafficherez30minutes_ la
minuterie(0:30).
3. Appuyezsur latouche Enter (Entrer].
Verrouillage des commandos et de la
porte du four
Loscommandoset la porte du four peuvent_treverrouill_espour
pr_venirtoute programmationaccidentelle.Si unefonction du four
est encours d'utilisation,les commandoset laporte nepeuventpus
_treverrouilk!es.
Pour verrouiller los commandes et la porte du four :
Appuyezsur lostouchesBack (Pr_!c_dent]et Enter en m_metemps
et maintenez-lesenfonc_espendanttrois secondesoujusqu'_ ce
que la mentionCOMMVERROUILLs'affiche.
45
Page 47

Pour d_verrouiller les commandes et la porte
du four :
Appuyezsur lostouchesBack et Enterenm6metempset
maintenez-lesenfonc6espendanttroissecondes.Lorsquelos
commandeset la porte sont d_verrouill6es,la mention
DEVERROUILLAGEapparait _ I'afficheur.
Back 0 Enter
lock
Cuisson au four
Programmation de ia cuisson an four : , ................
1. Appuyezsur latouche Bake (Cuissonau four). "Bake
2. S61ectionnezlatempc!raturedu four a I'aidedestouchesrapides.
OU
Entrezla temperatured6sir_ea I'aidedestouchesnum6riques.
Appuyezsur latouche Enter (Entrer)pourvaliderlatemp6rature.
, Latemp6raturepout _treprogramm6ede75 a 285° C(170
550° F)parintervallesde3° C(5° F).
• Apr_stroissecondes,lefour semet a prc!chauffer.CUISSON
et PREHEAT(Prechauffage)apparaissent_I'afficheuravecla
mention<_100°_ou la temp6ratureactuelledu four (la plus
_lev_edesdeux).
Options de cuisson au four
LosoptionsdeCuissonet maintienetde Dc!partdiff6rc!sont
disponiblespourla cuissonaufour. Lorsde I'utilisationdeI'option
Cuissonet maintien,lefour se met_ chauffer immc!diatementapr_s
le r6glage. Puis,lefour fonctionne pendantla durc!esp6cifi6e.
Lorsquecette dur6eest 6coulee,lefour r_duit automatiquementla
temperaturea 75° C (170° F)et gardelanourriture auchaud
pendantune heureaumaximum,puiss'_teint automatiquement.
Aveclafonctionde d_partdiff_!r_!,lefour semet en marcheplustard
danslajourn_e. Programmezla dur_!ed'attented_!sir_eavantque le
four nese metteenmarcheet ladurocde cuissond_!sir_!e.Lefour
commencea chauffer a I'heures_!lectionn_!eetcult pour ladur_!e
sp_cifi_e.Lorsquecette duroc s'est_coul_e,lefour maintientla
nourritureau chaudpendantune heureau maximum,puiss'_!teint
automatiquement.
Pour programmer la cuissou et maiutien :
1. Apr_savoirr_!gl8la fonctionde cuissonau four,
appuyezsur latouche More Options (Autres Options
options). , ............
2. S_lectionnezCUI/CHD
3. S_lectionnez la dur_e de cuisson souhait_e _ I'aide des touches
rapides ou des touches num6riques.
4. S6lectionnez sur la touche Enter.
• Latemp6ratureaffich6eaugmenteparintervallesde 1°
jusqu'ace que lefour atteignela temp6raturepr6regk!e.
AIIouezenviron 15minutespourle prc!chauffage.
, Lorsquelefour estprc!chauffc!,unsignalsonore retentitet
lamentionPREHEATs'_teint.
3. A lafin de lacuisson,_teignezlefour en appuyantsur latouche
CANOE[.(Annule0. Retirezlanourrituredu ...............................
four. Le fourcontinue defonctionnerjusqu'_ ce (CANCEL
quevousappuyiezsur la toucheCANCEL. ...............
Remarques :
• Siplus de30 secondess'6coulententre le momentoL']vous
appuyezsurunetoucheet le momento0 vousappuyezsur une
touchenum6rique,I'afficheurretourneraa I'c!cranpr_cc!dent.
, Lefour chauffechaquelois qu'unetempc!ratureapparait
I'afficheur.
Pourmodifierla temp6raturedufourdurant la cuisson,appuyez
surla touche Bake et choisissezune tempc!ratureaffichc!eou
utilisezlos touches num6riquespourentrerlatempc!rature
d6sir_e.
Lefour s'arr6teautomatiquementapr_s12heuress'ila 6t6
accidentellementlaissc!en marche. Pourprogrammerle mode
sabbat,voyezModesabbat_ la page57.
5. COOKTIME(Dur_!ede cuisson),le compte_ reboursde la dur_e
de cuisson,PREHEAT,CUISSONetlatemp_!ratureactuelleseront
affich_s.
Lefour effectuelacuissonpourla dur_echoisie,puisgardeles
alimentsau chaudpendant une heure.
Pour programmer une cuisson diff_r_e :
1. Apr_savoir r_!gl_lafonction decuissonau four, /More
appuyezsur la toucheMore Options..... ,Options,
2. S_lectionnez DM DIF.
3. S_lectionnezladurocsouhait_eavantle d_butde cuisson,en
utilisantlosdur_!esaffich_esou lestouchesnum_!riques.
4. S_lectionnezladurocde cuissond_sir_een utilisant losdur_es
affich_esou lestouches num_!riques.
5. LemotCUISSON,la temp_!rature,led_!laiet lecomptearebours
de la dur_!ede cuissons'affichent.
6. Lorsquele d_lais'est_coul_,le four commencea chauffer.COOK
TIME,le compte_ reboursde la durocde cuisson,PREHEAT,
CUISSONetlatemperatureactuelleseront affich_!s.
, /
46
Page 48

Convection (certains modeles)
Laconvectionutiliseun ventilateurpour faire circuler Fairchaudtout
autourdesaliments. Cettemc!thodecult et brunitlosalimentsde
fwon plus uniforme,souventen moisdetempset _ des
temp(!raturesplusbasses,en plus de permettreI'utilisationde
plusieursgrilles_la lois.
Reilrlarques :
• Ler6gulateurdu four est r%16a I'usinepour laconversion
automatiquepour convection(certainsmodeles).Lorsquevous
utilisezConvectBake (Cuissona convection]et ConvectPastry
(P_tisserie_convection),entrezlatemp6raturedecuisson
conventionnelle.Lerc!gulateurrc!duitautomatiquementla
temp6ratureconventionnellede 25°.
• EnmodeConvectRoast[R6tissagea convection),la
temp6raturene serapasr(!duiteautomatiquement.Entrezla
temp6ratureconventionnelleainsique ladur6ede r6tissage.
Lerc!gulateurvousavertit Iorsque75 %du tempss'est_ooul6
et vousdemandedev6rifier lacuisson.
• Pourd6sactiverla conversionautomatiquepour convection
(certainsmod_les),voyezlapage56.
Options de convection
Lesoptionsde cuissonet maintienetde cuissondiff6r6esent
disponiblesIorsde lacuisson_convection. Voyezla page51pour
plusd(!tailsconcernantlaprogrammationdela cuissonet maintien
et de la cuissondiff6r_e.
Plusieursgrilles
Cuissonde
G_teauxsecs/
Biscuits
Pains
Metsensauce
Tartesfl-ourtieres
G_teaux
Remarques :
• Lorsquevous utilisezla Cuisson_convectionetla P_tisserie
convectionalorsque I'optionde Conversionautomatiquepour
convectionest d_sactiv6e,rc!duisezlatempc!raturede cuisson
de 14°C (25°F).
• Si[option ROtissage_convectionavecConversionautomatique
pour convectionestd6sactiv_e,vous n'aurezpasbesoinde
programmerla dur6ede la cuisson.V_rifiezlosaliments
Iorsque75%de la dur6ehabituelledelacuissonest 6coulc!e.
• Sila conversionautomatiquepourconvectionest d6sactivc!e,
ne programmezpas unedurc!ederOtissageavecconvection.
Pouletentier
Dindeentiere
L6gumes
ROtisdeporc
ROtisdebceuf
Tartesurgelee
Chaussons
Choux_lacr6me
P_tisseriesdep_te
feuillet6e
Cuisson convection
(certains mod les)
Programmation de la cuisson _ convection :
1. Appuyezsur latouche Cenvect (Convection). J"................
Convect :
2. S61ectionnezCUISSONCONVEC_ I'aidedes .........
touchesrapides.
3. S61ectionnezlatempc!ratureaI'aidedestouchesrapides
OU
Entrezlatemp6ratured_sir6e_ I'aidedestouchesnumc!riques.
Validezle r6glageen appuyantsur latoucheEater (Entre0.
• Latempc!raturepout6treprogramm6ede 90_285°C (195
550°F) par intervallesde3° C (5° F).Si la conversion
automatiquepourconvectionestdc!sactiv_e,la temperature
pout_trer_!gl_e_ partirde 170°C (77°F).
• Apr_strois secondes,le fourse met_ pr_chauffer.
CUISSONCONVECet PREHEAT[Prechauffage)apparaissent
I'afficheuravecla mention{{100° _ou la temp_!ratureactuelle
du four [la plus _lev_edesdeux).
• Latemperatureaffich(!eaugmentepar intervallesde 1°
jusqu'_ceque le four atteignelatemp(!raturepr_r_gl_e.
AIIouezenviron 15minutespourle pr_chauffage.
• Lorsquelefourest pr_chauff_,un signalsonoreretentit et
le motPREHEATs'_teintet la mentionCUISSONCONVEC
s'affiche.AUTOs'affichesi la caract_ristiquedeconversion
automatiquepourconvection(certainsmod_les)estactiv_!e.
• Placezlanourrituredanslefour.
4. A la fin de la cuisson,_!teignezle fouren / ............ ,
appuyantsur latouche CANCEL[Annuler). CANCEL )
Retirezlanourrituredu four. Le four continue
defonctionnerjusqu'_ ce quevousappuyiezsur latouche
CANCEL.
Rapid Preheat (Prechauffagerapide)
(certains modeles)
Pourr_duireladur_!edupr_!chauffageIorsquevousutilisezBakeou
ConvectBake.Utilisezpourtous losaliments_cuire au four surune
seulegrille.
, Apr_savoirprogramm_et activ_Bake(Cuissoncourante)ou
ConvectBake,appuyezsur latouche Rapid Preheat.
• La mention 1GRILLESEULs'affichepuis,apr_s10secondes,
I'afficheurindique RAPIDEet PREHEAT.
47
Page 49

Pour retoumer au pr6chauffage standard :
• Appuyezsur latoucheRapidPreheat ( Pr_chauffagerapide)
nouveau.VousaccCdezainsiau prCchauffagestandardet
PREHEATainsique lafonction choisies'affichent.
Remarques :
• Pourde meilleursrCsultats,placezlagrillea laposition/4ou 5
Iorsquevous utilisezI'optionRapidPreheat.
• PourobtenirdesrCsultatsoptimauxdecuissonetde
brunissage,nousvous dCconseillonsI'usagedu prCchauffage
rapide Iorsquevousutilisezplusieursgrilles.
7. Si lacuissonn'estpasterminCe,poursuivezlerCtissage.
Unelois letemps_coul& lefour passeautomatiquementau
modede maintienau chaud pendant1heure,puiss'Cteint. Si les
alimentssont retirc!sdu four avantqueI'heure
nesoit6coulCe,appuyezsur latoucheCANCEL. ( CANCEL
Remarques :
, Sila recettesugg_rede prCchaufferlefour, augmentezladurc!e
de cuisson_ 15minutes.
• Si la caractCristiquedeconversionautomatiquepour convection
est d_sactiv&unedurdeder0tissagen'estpasrequise.
COI]VeCt ROaSt (ROtissage
convection) (certains modeles)
Programmation du r6tissage _ convection :
1. Placezla nourritureclansle four............................... ,
Convect )
2. Appuyezsur latouche Convect (Convection)................ J
3. SClectionnezRO]]SS CONVEC]") I'aidedestouchesrapides.
4. SClectionnezlatempCraturedu four _ I'aidedestouchesrapides.
OU
EntrezlatempCratured_sirCe_ I'aidedestouches
numCriques.ValidezlerCglageenappuyantsur latouche Enter
(Entre0.
• Latempc!raturepeut6treprogrammCede90_ 285° C [170
550°F) par intervallesde3° C [5°F].
5. EntrezladurCedecuissond_sirCe.Entrezla durCederCtissage
conventionnel_I'aidedestouchesnumCriques.
• Apr_strois secondes,le four commence_ chauffer.ROTISS
CONVECTapparaita I'afficheuravecla mention{{100°>>ou la
tempCraturedu four actuelle(Inplus61evCedesdeux].
• Latemp(!ratureaffichCeaugmentepar intervallesde 1°
jusqu'_ce que le four atteignelatempCratureprCrCglCe.
• Led_comptede la durCedela cuissoncommence.
6. Lefour 6metunsignalsonoreIorsque75% dutempss'est
6coul6pour quevous puissiezvc!rifierla cuissondesaliments.
V_!rifiezlacuisson_I'aided'un thermom_treaviande.Si la
cuissonestterminCe,retirezlesalimentsdufouret appuyezsur
CANCEL[Annulet] pour_teindrele four.
Cuisson au gril
PourobtenirdesrCsultatsoptimaux,pr_chauffezlefour pendant5
minutesla portefermCeet utilisezuneI_chefriteconguepour la
cuissonau gril.
Programmation de la cuisson au gril :
1. Placezla grille de four_ la positionappropric!e[voyez
le Tableaudecuissonau[Tril).
2. Appuyersur latouche Broil (Gril).
3.
SClectionnezHAUT - 285°C (550° F] pour lacuissonau gril
tempCrature61evCe.
OU
SClectionnezBAS - 230° C (450° F]pourla cuissonaugril
tempSraturebasse.
• Lefourposs_deunecaract_!ristiquede cuissonaugril variable.
Vouspouvezdonc choisirunetemperaturede cuissonaugril
plus basse(149a 288° Cou 300_550° F].Pourchoisir une
temp(!ratureplusbasse,appuyezsurlestouchesnum_riques
appropri_es.Appuyezsur latouche Enter pour programmerla
tempCraturela plusbasse.
4,
Pr_!chauffezlefour pendantcinq minutes.
5.
Placezlesalimentsdanslefour et poussezlaporte.
6. Appuyezsur latouche CANCELquand la
cuissonau gril termin_e.
/, .......... \
( Broil
'\ .............. /
( CANCEL ,
48
Page 50

Remarques :
° VoyezleTableaudecuissonaugfi/pour connaitrelesdurdes
de cuissonrecommand6es.
• Siplusde 30secondess'6coulententre le momento_vous
appuyezsur latouche Broil[Gril)et ceM ou vousappuyezsur
lostouches rapidesou lostouchesnumdriques,lefour ne sera
pasprogrammdetI'afficheurretournera1'6cranprdc6dent.
• Utilisezle r6glageHAUTpour la plupartdescuissonsau gril.
Utilisezlatempdratureplusbassopour lacuissonau gril de
Tableau de cuisson au gril
Pr6chaufferlefour pendant2-3 minutes.
metsdevantcuireplus Iongtemps. Unetempdraturebasseleur
permetdebiencuiresanstrop brunir.
RetournezlanourritureIorsquela moiti6de ladurde pr6wJepour
la cuissonau gril s'est6coul6e.
Losdur6es decuissonaugril peuvent6treplus Ionguessivous
choisissezdestemp6raturesplusbasses.
Boeuf
Pore
Volaille Blancs,avecos 4 Biencult (Grila tempdraturebasso]
Fruitsde mer
Fourobtenirunesurfaceext6rieuresaisie/brunieetun int6rieursaignant,il pout6tre n6cessaireder6duireletempsdecuissonsurlapremiereface
etde r6duireladistanceentrelaviandeet lasourcedechaleur.
Important :Cetableaun'estqu'unguide desuggestions.Losdur6espeuventvarletsolonI'alimenta cuire.
Bifteck,2,5 cm [1 po) d'dpaisseur
Hamburger,2cm (3/4 po]d'_paisseur
Bacon
Tranchedejambon pr6cuit,
1,3cm [1/2 po) d'dpaisseur
C6telette,2,5cm (1po] d'dpaisseur
Filetdepoisson
Dame depoisson,2,5cm (1 po) d'dpaisseur
Queuedehomard,85_ 115g [3a 4 onces)
Ventilateur du four
Unventilateurdeconvection [certainsmod_les)permetdefaire
circuler I'airchauddartslefour Iorsquelacaract6ristiquede
convectionests61ectionn6e.
Important : Leventilateurde convections'arr6teautomaticuement
Iorsquevousouvrezlaporte.
f
5
5
5ou6
5
5
5 Biencult 22- 26 min.
5
5
5
A point
Bien cult
Bien cult
Biencult
Chaud
Emiettement
Emiettement
Bien cult
15 - 20 min.
18 - 24 min.
13 - 18 min.
6 - 10 min.
8 - 12 min.
30- 45 rain.
8 - 12 min.
10 - 15 min.
7 - 10 min.
Lampe du four
Lalampe du four s'allume automatiquement
I'ouverturedela porte. Lorsquelaporteestferm6e,
appuyezsur latouche Oven Light [Lampedu fou0
pourallumerou6teindre la lampe.Lefour produit
un signalsonorechaquelois quevousappuyezsurOvenLight.Sila
lampedu four estallum6eIorsquela porteestouverte,elles'6teindra
Iorsquela porte serafermde.
"oven ,,
Light /
....... /
Event du four
L'dventdu four estincorporddartslesyst_mede ventilation
6vacuationdescendantede latablede cuisson.
Lorsquelefour fonctionne,lessurfacesprosde 1'6ventpeuvent
devenirassezchaudespourcauserdes brQlures.Pourdemeilleurs
r6sultatsde cuisson,ne bloquez pas rouverturede 1'6vent.
Sole du four
Prot6gezlasoledesproduits renvers6s,enparticulierceuxacidesou
sucr6s,puisqu'ilspeuventd6colorer1'6mailvitrifid. Utilisezdes
ustensilesde la bonnedimensionpour6viter lesrenversementset
lesd6bordementspendantr6bullition. Ne placezpas d'ustensiles
ou de papier d'aluminiumdirectementsurla sole dufour.
49
Page 51

Grilles de four
Deuxoutrois grillesstandardplatessont inclusesavec lefour.
Pourrotifer une grille :
1. Tirezsur la grillejusqu'_la
butc!e.
2. Soulevez-lapar I'avantettirez
versvous.
Pourremettre une grille
en place :
1. Placezla grille sur les supportsduns lefour.
2. SoulevezIc!g_rementI'avant;faitesglisserlagrille versI'arri_re,
au-dela de la positiondecalage.
3. AbaissezI'avantde la grille et faites-laglisserdunslefour.
Ne couvrezpustoute la surface d'une grille ou la sole du four
avec du papier d'aluminium. Vousaffecterez les r_sultatsde
cuissonet vouspourriezendommager la sole du four.
Grille 1 : Pourle rOtissagedegrosses
pi_cesde viande etla volaille.
Sole du four : Placerlagrille sur les
cOtc!srelev6sde la sole.Donneune
placesuppk!mentairepour lacuisson
de grandesquantitc!s.
CUISSONSURPLUSIEURS
GRILLES: Deux grilles :Utiliserlespositions2et 5.
Troisgrilles(convection seulement) : Utiliserlespositions2,4et
6 (voirI'illustration).
Important : Pourla cuissonavecconvection(certainsmodules)sur
deuxoutroisgrilles,vc!rifiezlosaliments_la dur6eminimale
suggc!r6epourc!viterdetrop cuireou detrop brunir.
Caisson de g_teaax _ etages sat deax grilles
Pourde meilleursrc!sultatsIors
de lacuissonde g_teauxsur
deuxgrilles,avecousans
convection[curtainsmodules),
utilisezles positions3et 5.
Placezlesg_teauxsur lagrille,
commeil est indiqu&
Positions des grilles
Grille 7 (Positionla plus haute) :Pourfaire griller du painoupasser
au gril des alimentsminceset
non gras.
Grille 6 : Utilis6epourla
majorit6desop6rationsde
cuissonau gril.
Grille 5 : Pourla cuissonsur
plusieursgrilles.
Grille 4 : Pourla plupartdes
cuissonsde p_tisseriessur
unet61ea biscuitsou un moule _ g_teauroul6,destartesauxfruits
ou metssurgelc!s.Utilis6eaussipour passerau gril desmorceauxde
poulet.
Grille 3 : Pourlosplatsmijotc!s,cuissondemichesdepain,savarins
ou tartesa lacr_me.
Grille 2 : Pourler6tissagede petites coupesde viande,tares
surgel_es,soufflc!sou g_teauxdesangus.Utilisc!eaussipourla
cuissonsur plusieursgrilles.
CLIiSSOR avec ConveotioR
sur trois grflJes (certains
modules)
Sole du
four
5O
Page 52

OPT|
Autres options
Cuisson et maintien (certains modeles)
1. Appuyezsur latouche More Options [Autresoptions).
Programmation de la cuisson _ convection differ6e :
[certainsmod_les)
1. Suivezles_tapes] a/_du{{d_!marragediff_r_!>>(voiragauche).
2. SSlectionnezCUISSCONVECT,ROTISSCONVECT ou PATISS
,JMore...........
Options
2. S61ectionnezCUISS/CHAUD.
3. Entrezladurc!edecuisson_ I'aidedestouchesrapidesoudes
touchesnum6riques.
4. S61ectionnezCUISSouCONVECT.
5. Apr_savoirappuy6surCUISS,s61ectionnezlatemp6raturea I'aide
destouches rapidesoudes touchesnum6riques.
6. Apr6savoirappuyc!surCONVECT,s61ectionnezCUISSON
CONVEC,RGTISSCONVECTouPATISSCGNVECT,puis
s61ectionnezla tempc!rature_ I'aidedestouches rapidesoudes
touchesnum6riques.
Lefour effectuelacuisson pour la duroc choisie,puisgardeles
alimentsau chaudpendant une heure.Lefour s'arr6tera
automatiquement.
important :Si larecette recommandede pr6chaufferlefour,
augmentezladur6e decuisson_ 15minutes.
D6ma rrage diff6r6 Options
1. Appuyezsurla touche More Options. "....................................
2. Appuyezsurla flechepourafficher DEMARRDIFFERE.
3. S61ectionnezDEMARRDIFFERE.
4. Entrezladurc!eded61aisouhait6savantleti!!but de I'opc!ration
I'aidedestouchesrapidesou destouches numc!riques.
5. S61ectionnezCUISSON,CONVECTou NETTOYAGE,puis
s_lectionnezla temp6rature_ I'aidedestouchesrapidesoudes
touchesnum6riques.
Programmation de la cuisson differ_e :
1. Suivezles6tapes] a/4du {{dc!marragediff_rc!>>(voltci-dessus).
2. %lectionnezla temp6ratureparmicellosaffich6esou utilisezlos
touchesnum6riquespour entrerla temp6raturedevotre choix.
3. %lectionnezla durc!ede cuissondc!sir6een utilisantlosdurc!es
affich6esou lostouches num6riques.
4. LamentionDELAY(Diffc!rc!)apparait_I'afficheur,lafonction
choisie,latemp6raturepr_ddinie etle dc!comptede la durc!edu
d_lai.Lorsqueledc!compteestterrain6,ladur6edecuisson
s'afficheetle four commence_ pr6chauffer.
3. S6lectionnezlatemp_!ratureparmicellosaffich_!esou utilisezles
4. S61ectionnezladur_!ede cuissond6sir6eenutilisant lesdur6es
5. La mentionDELAYapparaita I'afficheur,la fonctionchoisie,la
Prograrnrnation de I'autonettoyage diff_r_ :
1. Suivezlos_tapes1 a/_du_d_!marragediff_!r_!_ (voiragauche).
2. ENLEVERGRILLEapparait_I'afficheur.Retirezlosgrillesdufour et
3. Choisissezleniveaudesalet6LEGERenentrant200aI'aidedes
4. DELAYapparait_I'afficheur,ainsique la durocdu nettoyage,led_lai
Pourplus ded6tailsconcernantI'autonettoyage,voyezlapage35.
Fermentation (certains modeles)
La caract_!ristiquede fermentation est utilis_!epour faire lever des
produits deboulangerie_ basede levureavantdeloscuire. IIy a deux
m_!thodesde fermentationdisponible:rapideet standard.
Lafermentationstandardeffectu_!eclanslefour protSgelap_te des
changementsdetemp6ratureou descourantsd'air qui affectent
courammentlesr6sultatsd'unefermentationfaitesur le comptoir.
LamSthodedefermentationrapidepermetd'obtenirune
fermentationplusrapidesansfaire de tort _ la levure.
1. Appuyezsurla touche More Options.
2. S6lectionnezFERMENTATION.
3. S61ectionnezRAPIDEouNORMALE.
4. Lorsquela fermentationest termin_e,retirezla
CONVECT.
touchesnum_!riquespourentrer latemp6raturedevotre choix.
affich6esou lostouches num_!riques.
temp_!raturepr_ddinie et le d6comptedeladurocdu d_!lai.Lorsque
le d_!compteesttermin_,la dur6edecuissons'afficheet le four
commence_ pr6chauffer.
s_!lectionnezCONTINUER.
touchesnum_!riquesafin de programmerdeuxheuresde nettoyage.
Choisissezleniveaudesalet6MOYENouiNTENSEa I'aidedes
touchesrapides.Attendezquelquesinstantspendantque laportese
verrouille.
et le d_!verrouillage(solonleniveaudesalet_choisi).Lorsquele
d6compteesttermin_!,ladur6e du nettoyages'afficheet le four
commence_ pr6chauffer.
Options
/
iCANCEL :
p_tedu four etappuyezsur latouche
CANCEL(Annule0.
51
Page 53

ReilrlaFques :
• PourlapQtequi n_cessiteuneseulelev6e,lesdeuxm6thodes
[normaleou rapide]peuvent6tre utilis6es.
• Sivous utilisezde la pQteapainsurgel6e,choisissezla
FERMENTATIONRAPIDE.II n'est pas n6cessairede
dQcongelerlapQteavantlafermentation.
• PourlapQtequi demandedeuxlev@s,lam6thodestandard
dolt 6treutilis6ependantla premierelevc!e.PourladeuxiSme
lev6e,utilisezI'unedesdeuxmc!thodes.
• Si latemp@aturedu four esttrop _lev_epour lafermentation,
REFROIDISSapparaita I'afficheur.
D congeler et servir (certains modeles)
UtilisezD6congeleret servirpour pr@arerdesalimentssurgel6squi
n6cessitentseulementuned6cong61ationavantd'6treservis.
Progran_mation de la fonction
D_congeler et servir :
1. Placezla nourrituresurla grille a la position2.
2. Appuyezsur latouche Convect [Convection].
3. Appuyezsur la fl_chepourfaire driller 1'6cran.
4. %lectionnez DECONG-SERVIR.
5. %lectionnez le hombrede minutesdedc!cong61ation.
( Convect '
\ /
6. DECONG-SERVIR,COOKTIME(Durc!ede cuisson]et le
d6comptes'affichent.
7. Si lad6congc!lationestcompleteavantlafin du
/ ..................... ,
CANCEL
comptea rebours,appuyezsurla touche ..........................................
CANCEL(Annule0 et retirezla nourrituredu four.Lorsquela
dur6es'est6coul6e,lefour c!metun hip ets'6teint.
Important : Cettecaract6ristiquen'estpas con9uepourdc!congeler
lesviandesou d'autresalimentsqui doivent6trecultsavantd'6tre
servis.
IVlaintien au chaud
Lacaract_ristiquedemaintienau chaudest utilis6epourgarderau
chauddesalimentscultsoupour rc!chaufferpainsetassiettes.
1. Appuyezsur latouche More Options (Autresoptions).
2. Appuyezsur la fl_chepourfaire driller 1'6cran.
3. S61ectionnezMAINTIENCHAUD. Options,
4. ChoisissezI'unedestemp6raturesaffich6esouentrezcellede
votrechoixen utilisantlestouchesnum6riques.Vouspouvez
choisir unetemp@atureentre63et 88° C045 et 190° F].
5. LamentionMAINTIENCHAUDet latemp6ratures'affichent.
6. Lorsquelepr6chauffageesttermin_,un signal sonore retentit,
puis MAINTIENCHAUDet la temp@atures'affichent.
7. Lorsquevousavezterrain6,appuyezsurla _..............
touche CANCEL[Annulet] etretirezla ( CANCEL )
nourritureou lesassiettesdu four. .................
Tableau de la fonction D congeler et servir
Tartes et g_teaux - entiers
Tartes : Meringue au citron,
cr_me, pacane, chocolat, patate
douce, chocolat et cr_me
G_teaux :Vanille, chocolat,
noix de coco, et trois _tages
g_teaux, quatre-quarts,
G_teau Boston
Portionsindividuelles:
Lesmorceauxdetarte,deg_teau,
ladessertsindividuelsvark!s,
c!clairs,chouxalacr_me
G_teau au fromage
1.Retirezlesalimentssurgel_sde leursemballages.
2.Placezralimentsurgek!surunegrilleau milieudu four.
3.D_congelezet servirpendant 15minutespourlesg_teauxet
30minutespour lestartes.
4.Retirezdu four.
5.Coupezen portionsindividuelleset d@osezdartslesassiettes.
6.Remettezlesassiettesau four.
7.D_congelezet sePvirpendant10a 30minutes.
1.RetirezI'aliment surgel_ du contenant.
2. D@osez darts une assiette.
3. Placez rassiette sur une grille au milieu du four.
4. D6congelez et servir pendant 10a 30 minutes.
1.Retirezlesalimentssurgel_sde leursemballages.
2.Placezralimentsurgel_surlagrilleau milieudu four.
3.D_congelezet sePvirpendant30minutes.
4.Retirezlanourrituredufour.
5.Coupezen portionsindividuelleset d@osezdartslesassiettes.
6.Remettezlesassiettesau four.
7.D6congelezet sePvirpendant15minutes,si d_sir_!.
• Uneddcong_lationde30minutes
facilitela coupedestartes,ggteaux
entiersetggteauaufromage.
• Lesg_teauxadtagesne requi_rent
que 15minutesavantdecouper.
• Lataille etlatexturede aliments
d_congeldsaffectentladurdede la
fonctiond_congelezet servir.
• Lesdessertsplusgrosou plus
densespeuventmettreplusde
tempsaddcongeler.
• Lesmorceauxdeg_teau
d_cong_lentplusrapidementque
lestartes.Unetartepatatedeuce
peutndcessiter20_ 30 minutes.
Seulsles alimentssurgeldsportantla mention_{Ddcongeleret servir>>ou_{Pr(_ts_servir>>peuvent_treutilis_saveccettecaract@istique.
NEtentez£AS de d_congelerdesviandes,de la volailleou desfruits de mersurgelds.
**Vousn'avezpasbesoindepr_chaufferle four.
52
Page 54

Pour r_chauffer des petits pains :
• Recouvrezlespetitspainsde papierd'aluminium,sansserrer,puis
placez-lesaufour. ,"More.............
• Appuyezsur More Options (Autresoptions). Options /
• Sc!lectionnezMAINTIEN CHAUD. ...........
• S61ectionnezla temp@ature075°. R6chauffezpendant 12_ 15
minutes.
Pour r_chauffer des assiettes :
• Placezdeuxpilesdequatreassiettesmaximumdanslefour.
• Appuyezsur More Options.
• S61ectionnezMAINTIEN CHAUD.
• S6lectionnezla temp6rature075°.
• R6chauffezpendantcinq minutes. Eteignezlefour en appuyantsur
la toucheCANCELetlaissezlosassiettesdans le four pendant
encore15minutes.
• N'utilisezque des assiettespouvantallot8u four. (V@ifiezavecle
fabricant.]
• Ne posezpas d'assietteschaudessur unesurfacefroide.Los
changementsrapidesdetempc!raturepourraientloscasseroules
fendiller.
Reilrla rql.les :
• Lesalimentsdoivent6trechaudsIorsqu'ilssont plac6sdansle
four.
• Pourconserverlaqualit6optimaledesaliments,ne lesgardez
pasau chaudpendantplus d'uneheure.
• Pouremp6cherlesalimentsdesedess_cher,recouvrez-lessans
sorter depapierd'aluminiumou d'un couvercleenverre.
Deshydration (certains modeles)
Pourdemeilleursr6sultats,utilisezunegrillede deshydration qui
permet_Fairdecirculeruniform(gmentautourde lanourriture.
Leventilateurde convectionfonctionnependantladeshydration.
Programmation de la dessiccation :
1.Laporte du four dolt 6tre16g_rementouvertepourlaisser
c!chapperI'humidit6pendant ladeshydration.
• OuvrezIc!g_rementlaporte dufour.
• PlacezI'entreb_illeurmagn6tique(Pieceno
8010P146-60]par-dessuslecommutateur.
L'entreb_illeurcrc!eun espaceentrele cadre
du four et la portedu four afin de permettre
I'humiditc!de s'_chapper.
• Fermezdoucementlaportejusqu'_ ce que I'entreb_illeur
magn6tiquesoit en contactaveclaporte du four. L'aimant
garderaI'entreb_illeuren positiondurant ladessiccationet
permettraI'ouverturede la porte_ tout momentdurant
I'op@ation,sansque ce dernier ne changedeposition.
Important : SiI'entreb_illeurn'estpascorrectementpositionn6,le
ventilateurdeconvectionnefonctionnera pas.
2.Appuyezsur latoucheConvect (Convection).
3.Appuyezsur lafl_che pourfairedriller I'c!cran.
4.Sc!lectionnezDESHYDRATION.
5.S61ectionnezunetemp6ratureparrnicellosaffich6esouentrezcello
devotrechoixen utilisant lostouchesnum@iques.Vouspouvez
choisirunetemp@atureentre38 et93°C (100et 200° F].
6.La mentionDESHYDRATiONet latemp@atures'affichent.
PREHEAT(Prechauffage)s'affichejusqu'_ceque la temp@ature
programmc!esoit atteinte.
7.Lorsquela dessiccationesttermin6e,retirezles
alimentsdu four et appuyezsur latouche ( CANCEL
CANCEL(Annuler].
Suivezle Guidede deshydrationde la page54pourconnaitreles
durc!esdedessiccation.V6rifiezlesalimentsauxdurc!esminimales
indiquc!es.Refroidissezles aliments_ latemp@atureambianteavant
dev6rifiers'ilssont biend_shydrat6s.
Reilrla rl:! i.les :
• Pouracheterunegrille de deshydration,appelezund_taillant
Jenn-Airafin d'obtenir la_{DRYINGRACK>>(Grillede
deshydration),en accessoireou composezle 1-800-JENNAIR
(1-800-536-6247].
• La majorit6desfruits et I_gumess_chentbien etconserventleur
couleurunelois s(gch6sa 60° C(140° F).Lesviandesfraicheset
s6chc!esdoivent6tredc!shydrat(gesentre63_ 65° C 045 et
150°F].Pourobtenir desr6sultatsoptimaux,dess6chezlos
herbesaromatiques_ 38° C(100°F).Cependant,a cette
temperatureinf@ieure,pr@oyezdesdur_!esdes_chagepouvant
allerjusqu'a8 heures.
. Ladur_e de deshydration varie selonles crit_res suivants :
Lecontenu en eau et en sucre de I'aiiment, la faille des
morceaux,la quantit_ d'aliments_ d_shydrateret
rhumidit_ dansI'air.
• V@ifiezlesalimentsautemps des_chageminimum.S_!chez-les
plus Iongtempsau besoin.
, Losfruitsqui brunissentunefois expos_!s_ Fairdoivent_tre
trait_savecunantioxydant.EssayezI'une desm_!thodes
suivantes:
1. Trempezlefruit dansun m_!langede deuxpartsdejus de
citronembouteill8pour unepart d'eaufraiche.
2. Faitestremperle fruit dartsune solutiond'acideascorbique
oud'antioxydantcommercial(1cuill_re _ th6 pour 1pinto
(1 L)d'eaufroide].
, Losalimentspeuvents'_!goutterlotsdu processusde
deshydration.Apr_sla deshydrationd'alimentsa contenu_!lev_!
en sucreou en acide,lasole du four dolt_tre nettoy_!e_ I'eau
et ausavon.Lefini deporcelainepeutse d_colorersi los
projectionsde sucreou d'acide nesontpas essuy_esavantque
lefour ne soit chauff_!_chaleur _lev6eou avantuncycle
d'autonettoyage.
, II estpossibled'utiliserplus d'une grille ala fois.Cependant,
vousdevrezaugmenterladur6e dedeshydration.
, Consultezd'autressources(commela biblioth_quedela r6gion]
pour obtenir desinformationssuppl_!mentaires.
('Convect )
/
53
Page 55

Guide de deshydration (certains modeles)
Potatoes* Varic!tCsfermes:Graven Lavez,pelezsi dCsir&6videzetcoupez 4 a8 heures Souple_ croustillante.Les
Stein,GrannySmith, destranchesde1/8pc (0,3cm). potatoesdc!shydratCesse
Jonathan,Winesap, conserventmieux
RomeBeauty,Newton. Iorsqu'ellessont Ic!g_rement
Abricots* Blenheim/Royalsont Lavez,coupezen deuxet retirez 18_ 24 heures Souplesetflexibles.
courantes.Tiltonestaussi lesnoyaux.
unebonnevariCtC.
Bananes* Varic!tCsfermes Pelezetcoupezentranches 17_ 24 heures Souple_ croustillante.
de 1/4 pc (0,6cm).
Cerises Lambert,RoyalAnn, Lavezetretirezlesqueues.Coupezen 18_24 heures Soupleset
Napoleon,Vanou Bing. deuxetretirer lesnoyaux, caoutchouteuses.
Nectarines Varic!t_s_ noyaunon Coupezendeuxetretirezles noyaux. 24_ 36heures Soupleset
et p_ches* adhCrent. L'_pluchageestfacultatifmaisdonneune caoutchouteuses.
meilleureapparence.
Pokes* Bartlett Pelez,coupezenmoitiCsetc!videz. 24_36 heures Souplesetflexibles.
Ananas Fraisouen conserve. Lavez,pelezetenlevezlesyeux.Coupez Conserves: Souplesetflexibles.
en tranchesdanslesensde la Iongueuret 14a 18heures
enlevezle centre.Coupeztransversalement Frais:
en tranchesde env.I cm (1/2pc). 12_ 16heures
croustillantes.
Pelured'orange I _2 heures Duresa cassantes.
et de citron
Choisissez les fruits avec
une surface rugueuse.
Ne dCshydratezpas de
fruits portant la mention
_colorant ajout6 ;).
Lavezbien.Enlevez1'Ccorceexternesur
une c!paisseurde I _3 mm(1/16_ 1/8pc).
N'utilisezpas la pelliculeblanchesous
rCcorce.
Tomates Roma Coupezendeux,retirezlesgraines.Placez 12_ 18heures Duresa croustillantes.
lestomatespeauversle hautsur lagrille.
Percezdestrousdanslapeau.
Carottes Typedemi-longDanvers, N'utilisezpaslescarottessi ellessont 4 a8 heures Duresa cassantes.
Imperator,RedCored fibreusesou creuses.Lavez,coupezles
Chantenay faneset6pluchez-lessivousled_sirez.
Trancheztransversalementoudiagonale-
menten tranchesde 0,6cm (1/4pc).
Blanchissez_ lavapeurpendant3minutes.
Piments forts Ancho,Anaheim. Lavez,coupezendeuxetenlevezles 4 _ 6 heures Lesgoussesdoivent
graines.Percezlapeauplusieursfois. apparaitreridc!es,rouge
fonc6 et croustillantes.
Persil, menthe, Rincezareaufroide.Epongezaraided'un I _3 heures Cassants,en miettes.
coriandre,sauge, papieressuie-tout.Laissezlesqueues
origan jusqu'_cequelesfeuillessoients_ches,
puisjetez-les.
Basilic Coupezlesfeuilles_ 8-10cm (3-4 pc) du 2 _ 5 heures Cassants,en miettes.
hautde la plante,juste Iorsqueles
bourgeonsapparaissent.Rincezlesfeuilles
I'eaufroide.
* FruitsnCcessitantun antioxydantpour empCcherla d_colorationetlapertedenutriments.Reportez-vousaux remarquesdela page53 pour
connaitrelesmc!thodesparticuli_res.
** L'arrCtapr_s12heuresneseproduitpasIorsdesfonctionsdedeshydration.
54
Page 56

J GLAGE RI
R glage favori
Lafonction R6glagefavorivouspermetdegarderen me!moirele
mode,durc!ede cuissonet latemp@aturede cuissonde 10de vos
recettesprd6rc!es.Losfours _ convectionsont livrc!savec5 recettes
pr@rogramm6es.
Pour s_lectiouuer uue recette de la liste
pr_tablie : _,.............
1. Appuyezsur latouche Favorites[R6glagefavori]. Favorites
2. S61ectionnezLISTERECETTES. , On/Off _'
3. Choisissezlarecetted6sir6eou appuyezsur
lafl_chepourfaire d6filer1'6cran.
4. Unefois la recettes61ectionn6e,lefour commencele pr6chauffage
solonle programme6tabli.
• Vouspouvezappuyersur la touche More Options (Autres
options]pour ajouterune fonctionde CUI/CHDouDEM DIF.
5. Lorsquevousavezterrain6,appuyezsur latouche CANCEl.
(Annule0 et retirezla nourrituredufour.
Pour sauvegarder la derniere recette compl_t_e :
(Cuissonaufour, Cuissonaconvection,R6tissage_ convection,
P_tisserieaconvection,Gril a convection,Dc!shydratation,Maintien au
chaud,Fermentation)
1. Appuyezsur latouche Favorites. _F_vorites._
2. %lectionnezGARDERDERNiER. ', On/Off
3. Entrezlenoraa I'aidedestouches.
• Parexemple,poursauvegarderunelasagne,appuyezsur la
touche<'JKL> troisfois pourla lettre <_L >>;appuyezsurla touche
<.ABC>une foispourla lettre<<A>>;appuyezsurlatouche
<STU> unefoispour la lettre<_S _>.Continuezjusqu'ace que
vousayezcompl6t6lemot.
4. Chaquefoisque la lettre recherch6eapparait,attendez trois
secondespourque le prochain espacesoitsoulignc!ou appuyez
sur latouche Enter(Entre0avantde passera la prochainelettre.
• Vouspouvezutiliserun maximumde 14lettresincluant les
espaces.
5. Lorsquele noradela recetteestentr6,leaderniersr6glages
s'affichentpendantquelquessecondes.
6. LamentionUSTERECETTESapparait pourfaire ddiler 1'6cran.
7. Appuyezsur latouche Favoritespour quitter lemenudes r#glages
favoris.
Pour crier uue uouvelle recette favorite :
1. Appuyezsurla touche Favorites. "Favorites'
2. Appuyezsurla flSchepourfaire driller leachoix. "_0 n /Off,
3. %lectionnezCREERNOUVEAU_ I'aidedelatouche_ gauche.
4. Entrezlenom aI'aidedestouches.
• Parexemple,poursauvegarderunelasagne,appuyezsur la
touche <JKl.> troislois pourla lettre <_L_;appuyezsurla touche
<ABC> unefoispourla lettre<_A >_;appuyezsur latouche
<STU> une lois pour la lettre<_S_.Continuezjusqu'_ceque vous
ayezcompl#t(gle mot.
• Chaquelois que la lettre recherchc!eapparait,attendeztrois
secondespour que le prochainespacesoit soulign6ouappuyez
sur latoucheEnter avantde passera la prochainelettre.
• Vouspouvezutiliser un maximumde 14lettresincluant les
espaces.
5,
Appuyezsurla touche Enterpoursauvegarderlenora.
6.
Selectionnezlemodedecuisson,par exemple: CUISSON,CUISSON
CONVEC,ROTISSCONVECT,etc.
7,
%lectionnezla temperaturedu four_ I'aide destouchesrapides.
OU
Entrezlatemperatured_sir_e_ I'aidedestouchesnum_riques.
8. Ajoutezlafonctionde Cuissonet maintienenchoisissantOUIou
cuisinezsansCuissonet maintienen choisissantNON.
9. Sivouss_lectionnezOUI,entrezladur_ede cuissonaI'aidedes
touchesrapidesoudestouches num_riques.
10.Ajoutezla fonctionde D@artdiff_r_en choisissantOUI ou cuisinez
sansD@artdiff_r_!en choisissantNON.
11.Sivouss_lectionnezOUI,entrezla dur_edud_!lai_ I'aidedes
touchesrapidesoudestouches num_riques.
12.Le r_gulateuraffichelosr_glagesprogramme!s,puis retourneau
menudesr_glagesfavoris.
13.Appuyezsur la touche Favorites pour quitter
le menudesr_!glagesfavoris.
Pour modifier une recette sauvegardee :
1. Appuyezsurla touche Favorites. Favorites
2. Appuyezsurla fl_chepourfaire driller I'_cran. ', On / Off /
3. %lectionnezMODIF RECETTE.
4. Choisissezlarecette_ modifer.Au besoin,utilisezlesflaches pour
rep@erlarecetted6sir#e.
5. Modiferlos r6glagesde la recetteen suivantlemenu.
6. L'afficheurretourne au menudesr6glagesfavoris.La mention
USTERECETTESs'affiche.
7. Appuyezsurla toucheFavoritespour quitter le menudesr_!glages
favoris.
55
Page 57

Pour supprimer une recette favorite :
1. Appuyezsurla touche Favorites(R6glagefavori).
/ .... \
2. Appuyez sur la fl_che pour faire ddiler 1'6cran. "Favodtes'
3. S61ectionnezEFFACRECETTE. On-/Off /
4. Trouvezlarecette_ supprimer.Au besoin,utilisez losfl_ches
pour rep_rerla recetted_sir6e.
RE.GLAGE
5. Ler6gulateurvous demandera_ nouveausi vousd6sirez
supprimercetterecette.S61ectionnezOU[ ou NON.
6. Appuyezsurla toucheFavoritespour quitter le menudes
recettesfavorites.
Entout temps,vouspouvezquitter le menu des rc!glagesfavorisen
appuyantsurlatouche Favorites.
// ...............
R6glage Setup ,,
1. Appuyezsur latouche Setup (R6glage). ,On / Off,
2. Utilisezlafl_che pourfairedriller lesoptionsde1'6crander6glage.
3. ChoisissezI'optiond_sir_een appuyantsur lestouchesrapides.
Remarque : Pourquitter 1'6cransansfaire de changements,
lappuyez sur a toucheSetup. L heuredu/our apparaita afficheur.
Horioge
Pourinstructionsd6taill6,voyezInspages44-45.UtilisezI'option
Clock (Horloge)pour:
• R6glerI'heure.
• R(!glerle/our de la semaine.
, S_lectionnerAM ou PM (modede12heuresseulement).L'heurene
serapusaffich6eavecI'indicationAM ou PM.
• ChoisirI'affichage_ 12ou 24heures.
• D6sactiverI'affichagede I'horloge.
Langue
Los6cransde laconsolepeuvent6treaffich6s en anglais,fran£)aisou
espagnol. Pourchoisir uneautre langueque I'anglais•
1. Appuyezsurla toucheSetup. " Setup
2. S61ectionnezLANGUES.
3. Aubesoin,utilisezlaflSchepour passera I'_cransuivant.
4. Choisissezlalangued6sir6e.
5. Appuyezsurla toucheSetuppour quitter le menu de rc!glage.
/ ........
, On/Off
Laconversionautomatiquepour convectionr6duitautomatiquement
latempdraturer6gl6ede25°pourloscaract6ristiquesdeCuisson
convectionetdeP_tisserieaconvection.
PourleR6tissage_convection,le r6gulateurvousavertitIorsque
75 %du tempsde r6tissages'estdcouldet vousdemandede v6rifier
lacuisson.Lestemp6raturesnesontpusrdduitespour le r6tissage
convection.
Reilrlarques :
• Lorsquevousutilisezla Cuisson_ convectionet la P_tisserie
convectionalorsque I'optiondeConversionautomatiquepour
convectionest d_sactiv_e,rc!duisezlatempc!raturede cuisson de
]4° C (25° F).
• Si I'optionR0tissage_convectionavecConversionautomatique
pour convectionest d6sactiv6e,vousn'aurezpasbesoinde
programmerla dur6ede la cuisson.Vc!rifiezlosalimentsIorsque75
% deladurc!ehabituellede la cuissonestc!coul(!e.
• Si laconversionautomatiquepourconvectionestd6sacti%e,ne
programmezpusuneduroc de r6tissageavecconvection.
Pour desactiver la conversion automatique pour
convection :
1. Appuyezsur latouche Setup. / Setup
2. S61ectionnezCONVECTAUTO. ',....
3. S61ectionnezARRET.
4. Appuyezsur latouche Setuppour quitter le menude rc!glage.
On/Off,
Pour reactiver la conversion automatique pour
convection :
1. Appuyezsur latouche Setup. / ............................
2. S_lectionnezCONVECTAUTO. Setup '
3. ChoisissezMARCHE. "................
4. Appuyezsur latouche Setuppour quitter le menude r_!glage.
' On/Off/
Conversion automatique pour
convection (curtains modules)
Lefour estr6g16a I'usinepourla conversionautomatiquepour
convection.
C/F
L'_chellede temperaturepeut _treindiqu_!eenFahrenheitou en Celsius.
/ ...................
Pour modifier I'echelle de temperature : Setup '
1. Appuyezsur latouche Setup. On / Off
56 Suite
Page 58

2. Utilisezlafl_chepour passer_ 1'6cransuivant.
3. %lectionnezC/F.
4. ChoisissezI'c!chellede tempc!ratured6sir6e.
5. Appuyezsur latouche Setup (R_glage]pour quitter le menude
r_glage.
Ajustement de la temp6rature
Lapr6cisiondesrc!glagesdetemp6raturea 6t6soigneusement
v_rifi6e_ I'usine. IIest normalde remarquerquelquesdiffc!rences
dunsladur_edecuissonentreun four neuf etun four plusancien.
Latemp6raturedesfourspout 6ventuellementse d6caler.
Vouspouvezajusterlatempe!futuredu foursi vouspensezqu'il ne
cuit pusoune dore puscorrectement.Pourd6ciderde I'ajustement
apporter,r6glezlefour _ unetemp6raturede 14° C(25° F)plus
c!lev6eou plus bassoque latemp6ratureindiqu6edunsla recette,
puisfaitescuirela prc!paration.Losr6sultatsdu premieressaide
cuissondoiventdonneruneidc!edu nombrededegr6spar lequella
temp6raturedoit 6treajust6e.
Pour ajuster la temperature du four :
1. Appuyezsur latouche Setup.
2. Appuyezsur lafl_che pour faire driller I'c!cran.
3. %lectionnez REGI.ERTEMP.
4. Entrezlamodificationde temp6raturedc!sir6ea I'aidedes
touchesnum6riques.
5. %lectionnez{{+/- _ pour indiqueruneaugmentationouune
r6ductiondetemp6rature. Lamodificationdetemp6ratureest
affich6een hautde 1'6cran.
6. Appuyezsur latouche Enter(Entrer)ouattendezpendant trois
secondespourvaliderle changement.
7. Appuyezsur la toucheSetup pour quitterle menu.
II n'estpusn6cessaireder_ajusterlatempc!raturedufour en casde
panneoud'interruptionde courant.
Lostemp6raturesde cuissonaugril et de nettoyagenepeuventpus
6treajust6es.
" Setup
On/Off/
Mode sabbat
Lefour eatprogramm6pours'c!teindreapr_s 12heuress'ilest
accidentellementlaissc!en marche.LemodesabbatannuleI'arr6t
automatiqueapr6s12heureset pout6tre r6g16pours'activer
automatiquementoumanuellement,auchoix.
Le modesabbatpermetlefonctionnementdela cuissonaufour et de
la cuissonet maintien seulement. Toutes lesautres fonctions sont
d6sactivc!es.Siunefonctionautrequelacuissonaufouroulacuisson
etmaintienestutilisc!equandlemodesabbatcommence,cettefonction
seraannul6e.
Pour activer le mode sabbat :
1. Appuyezsur latouche Setup.
2. Appuyezsur lafl_che pour faire driller I'c!cran.
3. SelectionnezSABBAT.
4. %lectionnezAUTOou MANUEl..
• LafonctionAUTOvousdemandeautomatiquernentd'entrer
unetemperaturedecuissonpourvendredi_14het demeure
en modesabbatpendant33 heures.La mentionMODESABBA
Setup
On / Off
\ ........... /"
ACTapparaka I'afficheurpendant90 minutes.Sivous
d6sirezutiliser la fonction de cuissonaufourou de cuissonet
maintien,durant le modesabbat,vousdevezlosprogrammer
pendantlos90minutes,avantque le modesabbat
automatiquene soitactiv&
• La fonctionMANUALr_gle lefour pour le modesabbatde 72
heures.LosmentionsMODESABBAACTapparaissent
I'afficheurpendant cinq minutes. Si vous d6sirez utiliser
la fonction de cuisson au four ou de cuisson et maintien
durant le mode sabbat, celle-ci doit 6tre programm6e
pendantleacinq minutes,avant que le mode sabbat
MANUEL ne soit active.
5. S_lectionnez IVIARCHE ou ARRET.
6. Appuyez sur la touche Setup pour quitter le menu de
r_glage.
Pour annulet le mode sabbat : / Setup
AppuyezsurlatoucheSetup et maintenez-laenfonc_!e,On / Off /
pendantcinq secondes.Vouspouvezannuler lemode
de cuissonenappuyantsur la toucheCANCEL (Annulet)
durantle modesabbat.
Remarques :
• Lefour doit_tre inactifpour programmerle modesabbat.
• Lemodesabbat nepout pus_tre misen marchesi lostouches
ou la portesontverrouilk!es.
• Si la cuissonau fourest en coursIorsquelemodesabbatse
metenmarche,il n'yaurapusdesignalsonore.
• Touslosmessageset losbipssont d_!sactivesIorsquele mode
sabbatesten marche.
• Sivousvoulezquela lampedu four soit allumSependantle
modesabbat,allumez-laavantder6glerle mode.
• L'autonettoyageet leverrouillageautomatiquedesportesne
fonctionnent puspendantle modesabbat.
• Latemp_!raturedecuissonpout 8trechang_ependantquele
modesabbatestactif.Appuyezsimplementsur la touche
Bake (Cuissonaufou0 et entrezensuitela temperature
dSsirSea [aide destouchesrapides.
• Appuyezsur latouche CANCELpour annulet lacuissonau
four. Le r6gulateurdemeureraen modesabbat.
• Lejour de la semaineetAM/PM (matin/sol0 doivent_tre
r6gl_spourque le modeSabbatfonctionnecorrectement.
Signaux sonores (hips)
Vouspouvezajusterle volumeet lenombredebips entendusa la fin
de la cuissonetdu d6comptedela minuterie.
Pour ajuster los hips : _...................
1. Appuyezsur latouche Setup. " Setup
2. Appuyezsur la fl_chepourfaire d_!filerI'_cran. ..................
3. SelectionnezSIGNAUX SONOR.
Pour modifier los hips euteudus _ la fin
de la cuisson :
1. Suivezlos_!tapes1a3 de la section<_Signauxsonores_ci-dessus.
2. S_lectionnezSIGNAUX CUISS.
57
On/Off
Page 59

3. Appuyezsur lafl_che pour faire driller rc!cran.
4. S61ectionnez1-30 MIN pour entendreun hip_toutes les30
secondes.
OU
S(!lectionnez1-60 MIN pour entendreun hip_ toutes les60
secondes.
OU
%lectionnez 1 BIP pour entendreunseulbip a lafin de la
cuissoil.
5. Appuyezsur latouche Setup (R_glage)pour quitter le menu.
Pour modifier les sonueries de la miuuterie :
1. Suivezlesc!tapes1_ 3 de la section_Signauxsonores_ci-
dessus.
2. SelectionnezSIGNAUX MINUTE.
3. Appuyezsur lafl_che pour faire driller rc!cran.
4. S61ectionnez2-30 MIN pour entendredeux bips_toutes les30
secondes.
OU
S(!lectionnez2-60 MIN pour entendredeux bips _toutes les60
secondes.
OU
S_lectionnez1BEEP[Bip)pour entendreunseul bip a la fin de
la dur6er6gl6e.
5. Appuyezsur latouche Setup pourquitter le menu.
Pour modifier le volume des hips :
1. Suivezlesc!tapes1_ 3 de la section_Signauxsonores_ci-
dessus.
2. Appuyezsur lafl_che pour faire driller rc!cran.
3. Sc!lectionnezVOLUME.
4. S(!lectionnezHAUTpour levolume leplus_levc!.
OU
Economie d'_nergie
Pourc!conomiser1'6nergie,I'afficheurpeut6tre r6g16pours'_teindre
Iorsqu'iln'estpusen fonction.
Pour r_gler la caract_ristique
d'economie d'euergie :
1. Appuyezsurla touche Setup.
2. Appuyezsurla fl6chepourfaire ti!!filer 1'6cran.
3. S6lectionnezECONOMENERGIE.
4. S61ectionnezMARCHEouARRET a I'aidedestouchesrapides.
5. Appuyezsurla toucheSetup pour quitter le menu.
Appuyersurn'importequelletouche pour r6activerI'afficheur.
Setup
On/Off
.......... /
Service & la clientele
Cettezonedur_gulateurdefour affiche le num6rosansfrais du
servicea la clienteleJenn-Air.
1. Appuyezsurla touche Setup. On / Off
2. Appuyezsurla fl_chepourfaire dc!filerI'_cran. ..................."
3. S61ectionnezENTRETIEN.
4. Appuyezsurla toucheSetuppour quitter le menu.
; Setup ',
D_monstration
Si vouss(_lectionnezlad(!monstration,vousverrezunecourte
pr_!sentationdescaract_!ristiquesprincipalesde votre nouvelle
cuisini_reJenn-Air.
/ .... \
1. Appuyezsurla touche Setup. Setup '
2. Appuyezsurla fl_chepourfaire d_!filerI'_cran. _On / Off
3. S_lectionnezDEMO.
4. S_lectionnezIVlARCHEouARRET a I'aidedestouchesrapides.
5. Appuyezsurla toucheSetup pour quitter le menu.
Sc!lectionnezIVIOYENpourunvolumemoyen.
OU
Sc!lectionnezBAS pour levolumele plus bus.
5. Appuyezsur latouche Setup pourquitter le menu.
Arr_t automatique 12 heures
Lefour s'arr_teautomatiquementapr_s12heuress'ilest
accidentellementlaiss_!en marche.
Pour desactiver cette caract_ristique : , ...............,
1. Appuyezsur latouche Setup. ; Setup
2. Appuyezsur lafl_che pour faire d_!filerr_!cran. .................
3. S_!lectionnezARRETAUT12 H.
4. S_!lectionnezNIARCHEouARRETa I'aidedestouchesrapides.
5. Appuyezsur latouche Setup pourquitter le menu.
On/Off
58
Page 60

ARANT|E ET ERV|CE
Ce qui n'est pus couvert par ces garanties :
1.Lesprobl_meset dommagesrc!sultantdessituationssuivantes:
2.Lesgarantiessontannul6essi les num6rosdes6rie d'origineont tit6
3.Lesampoules.
4.Lesproduits achet6sa des fins commercialesou industrielles.
5.Lesfrais de d@annageoudevisitepour :
6.Lesdommagesindirectsou accessoiressubispartoute personnea lasuite
a.Installation,livraisonou entretieneffectudsincorrectement.
b.Touter@aration,modification,alt6rationoutout r6glagenonautoris_s
par lefabricant ou parun techniciende serviceautoris_.
c. Utilisationinad6quate,abusiveounon raisonnable,ou catastrophe
naturelle.
d.Courant61ectrique,tension,alimentation61ectriqueincorrectes.
e.R6glageinappropriddetoute commande.
enlev_s,modifi6sou ne sont pasfacilementlisibles.
a.Correctiond'erreursd'installation.
b.Initiationde I'utilisateur_ I'utilisationappropridede I'appareil.
c.Transportde I'appareilauxIocauxdu techniciendeservice.
d'unequelconqueviolationdesgaranties. CertainsEtatsou certaines
provincesinterdisentI'exclusionoula limitationdes dommagesindirects
ou accessoires.II estdoncpossibleque I'exclusionci-dessusnes'applique
pus_vous.
LESEULETUNIQUERECOURSDUCLIENTENVERTUDECETTEGARANTIEESTLA
RI_PARATIONDUPRODUITCOMMEDI_CRITPRECEDEMMENT.LESGARANTIES
IMPLICITES,Y COMPRISLESGARANTIESDEQUALITEMARCHANDEOU
D'ADAPTATIONA UNUSAGEPARTICULIER,SONTLIMITEESAUNANOUA LA
PERIODELAPLUSCOURTEPERMISEPARLALOI.MAYTAGCORPORATIONNEPEUT
ETRETENUERESPONSABLEDESDOMMAGESACCESSOIRESOUINDIRECTS.
CERTAINSETATSETCERTAINESPROVINCESINTERDISENTL'EXCLUSIONOULA
LIMITATIONDESDOMMAGESACCESSOIRESOUINDIRECT&OULESLIMITATIONS
SURLADUREEDESGARANTIESIMPLICITESDEQUALITEMARCHANDEOU
D'ADAPTATIONA UNUSAGEPARTICULIER,ILESTDONCPOSSIBLEQUECES
EXCLUSIONSOULIMITATIONSNES'APPLIQUENTPASAVOUS.CETrEGARANTIE
VOUSCONFEREDESDROITSJURIDIQUESSPECIFIQUES.VOUSPOUVEZEGALEMENT
BI_NEFICIERD'AUTRESDROITS,QUIVARIENTD'UNETATA L'AUTREOUD'UNE
PROVINCEAL'AUTRE
Si vous avez besoin d'aide
Consultezd'abord lasectionsurle d@annageduguide d'utilisation et
d'entretienou appelezMaytagServices,SARL,Servicea la clientelede
Jenn-Airau I 800JENNAIR[1 800536-6247)aux Etats-Uniset au Canada.
Pour obtenir un service en vertu de la garantie
PourIocaliserune entreprisede r_parationautoris6edunsvotrer6gion,
prenezcontactavecledc!taillantaupr_sduquelvousavezachet_I'appareil
ou appelezMaytagServices,SARL,Service_ laclienteledeJenn-Air.Sile
serviceobtenuenvertu de la garantienevoussatisfait pus,veuillezc!crireou
t_lc!phoner_:
MaytagServices,SARL
A I'attentionduCAIR4'Center
P.O.Box2370,Cleveland,TN37320-2370ETATS-UNIS
Etats=Uniset Canada : I 800 JENNAIR(1 800 536=6247)
Reraarque : Lotsde toutcontact aupr6sdeMaytagServices,SARL,
Servicea laclienteledeJenn-Air concernantunprobl_me,veuillezfournir
I'informationsuivante•
a.Vos nom,adresseetnum6ro det6l@hone.
b.Lesnum_rosde moduleet des6riedeI'appareil.
c. Lenoraet I'adressedu d6taillantetla dated'achatde I'appareil.
d.Unedescriptiond_taillc!edu problSmeobserve.
e.Unepreuved'achat.
Lesguides d'utilisation etd'entretien,lesmanuelsde serviceetles
renseignementssur lespi_cessont disponiblesaupr_sdeMaytagServices,
SARL,Service_ la clientSledeJenn-Air.
59
Page 61

ESTUFAA GASJENN-AIR _
JENN-AIR
TABLA DE CONTENIDO
Instrucciones importantes sobre seguridad ....61-65
Cuidado y limpieza ....................................................66-68
Mantenimiento ...........................................................69-70
Localizaci0n y soluci6n de averias ......................71-72
Cocci0n en la cubierta .............................................73-7/4
Cocci6n en el homo .................................................75-81
Opciones .......................................................................82-85
Favoritos ........................................................................86-87
Ajuste .............................................................................87-89
Garantia y servicio ....................................01tima p_gina
Page 62

STRU
Lea y siga todas las instrucciones antes de usar este
electrodom_stico para evitar el riesgo potencial de incendio,
choque electrico, lesiones personales o da_o al
electrodomestico como resultado de su uso inapropiado.
Utilice este electrodomestico solamente para el propOsito para
el cual hasido destinado seg0n se describe en esta gu[a.
Para asegurar el funcionamiento correcto y seguro del
electrodom_stico: El electrodom_stico debe ser instalado
debidamente y puesto a tierra por un tecnico calificado. No
instente ajustar, reparar, realizar servicio o reemplazar
cualquier pieza de su electrodomestico a menos que se
recomiende espedficamente en esta gu[a.Todas las demos
reparaciones deben set hechas por un tScnico calificado.
$iempre desenchufe el electrodomestico antes de realizar
reparaciones.
|NIPORTANTES BRE
URIDAD
Lasadvertencias e instrucciones importantes sobre seguridad
que aparecen en esta guia no est_indestinadas acubrir todas
las posibles circunstancias y situaciones que puedan ocurrir.
Se debe ejercer sentido com0n, precauci6n y cuidado cuando
se instale, se realice mantenimiento o se haga funcionar el
electrodomestico.
Siempre pdngase en contacto con el fabricante si surgen
problemas o condiciones que no entienda.
Reconozca los simbolos, advertencias y
etiquetas de seguridad
61
Page 63

Instrucciones general
Para verificar si el dispositivo est_ debidamente instalado, mire
debajo de la estufa con una linterna pare asegurarse de que
uno de los tornillos niveladores traseros est6 debidamente
enganchado en la ranura del soporte. B dispositivo antivuelco
asegura el tornillo nivelador trasero al piso cuando est_
debidamente enganchado. Verifique este dispositivo cada vez
que la estufa sea movida.
Para evitar da os a causa de
un incendio o humo
AsegQresede que se hayan retirado todos losmaterialesde
empaque del electrodom6stico antes de su use.
Muchos envases de tipo aerosol son EXPLOSIVOScuando son
expuesto al calory pueden set altamente inflamables. Evitesu
use o su almacenamiento cerca de un electrodom6stico.
Para eliminar el riesgo de pasar sobre los quemadores
superiores calientes, no se deben guardar artfculos en los
armarios que est_n directamente sobre la estufa. Si existen
armarios sobre la cubierta, los mismos sdlo deben contener
artfculos que no se usen frecuentemente y que est6n seguros
en un _ireaen la que estar_n expuestos al calor de un
electrodom6stico. Las altas temperaturas pueden ser
peligrosas para algunos artfculos tales come los Ifquidos
vol_tiles, los limpiadores o los aerosoles.
[n caso de incendio
Apague el electrodom6stico y la campana de ventilaciOn para
evitar esparcir las llamas. Apague las llamas y luego encienda
la campana para expulsar el humo y el olor.
• En la cubierta: Apague el fuego o la llama en una sart6n
con una tapa o una bandeja de hornear.
NUNOA levante o mueva una sart6n en llamas.
• En el borne: Apague el fuego o la llama del homo cerrando
la puerta del horno.
No use agua en los incendios de grasa. Use bicarbonate de
sodio, un producto qufmico seco o un extinguidor de espuma
para apagar un incendio o llama.
Seguridad para los ni os
Mantenga el _rea que rodea el electrodom6stico libre de
materiales combustibles. Losmateriales combustibles no
deben ser almacenados en el interior de un horno.
Muchos pkisticos son afectados per el calor. Mantenga los
pkisticos alejados de las piezas de[ electrodom6stico que se
puedan entibiar o calentar. No deje artfculos de pkistico sobre
la cubierta de la estufa pues se pueden derretir o ablandar si
est_n demasiado cerca del respiradero o de un quemador
superior encendido.
Paraevitar incendios de grasa, no deje que seacumu[e grasa
de cocinar ni otros materiales i@amables en la estufa o cerca
de ella.
Si el electrodom6stico es instalado cerca de una ventana,
tome las precauciones necesarias para evitar que las cortinas
vuelen sobre los quemadores.
NUNCA deje articulos sobre la cubierta de la estufa. El aire
caliente del respiradero puede encender los artfculos
inflamables y aumentar la presi6n en los envases cerrados
hasta hacerlos reventar.
NUNCA deje a los ni_os solos o sin supervisidn cerca del
electrodom6stico cuando est6 en uso o est6 caliente. Nunca
permita que los ni_os se sienten o se paren en ninguna parte
del electrodom6stico pues se pueden lesionar o quemar.
Se le debe ense_ar a los ni_os que el electrodom6stico y los
utensilios que est_n en 61pueden estar calientes. Deje enfriar
los utensilios calientes en un lugar seguro, fuera del alcance
de los ni_os pequ@os. Sele debe ense_ar a los ni_os que un
electrodom6stico no es un juguete. No se debe permitir que
los ni_os jueguen con los controles u otras piezas del
electrodom6stico.
Cont.
62
Page 64

Informaci6n sobre su
electrodom stico
Evite tocar el _rea del respiradero mientras el homo est6
encendido y durante varios minutos despu6s de haberlo
apagado. Algunas partes del respiradero y del _rea que Io
rodea se calientan Io suficiente como para causar quemaduras.
Despu6s de apagar el homo, no toque el respiradero o el _rea
que Io rodea hasta que haya tenido suficiente tiempo para
enfriarse.
Otras superficies que pueden estar calientes inchyen la
cubierta, las _reas orientadas hacia la cubierta, el respiradero
del homo, la superficie cercana a la abertura del respiradero, la
puerta del homo y el _rea que la rode& y la ventanilla del
horno.
No toque una bombilla de homo caliente con un paso hQmedo
ya que se puede romper. Si la bombilla se rompe, desconecte el
suministro el6ctrico al electrodom6stico antesde retirar la
bombilla para evitar un choque el6ctrico.
Para evitar exporter al usuario a un potencial riesgo y para
evitar da_os al electrodom6stico, no use este electrodom6stico
como calefactor de _rea o para calentar una habitaci6n.
Tarapoee utilice el homo como _rea de almacenamiento para
alimentos o utensilios de cocina.
NUNCA use papel de aluminio para cubrir una parrilla o la
parte inferior del horno. El mal uso puede crear riesgos de
choque el6ctrico, incendio o da_os al electrodom6stico. Use el
papel de aluminio solamente como se indica en esta gu{a.
Inforrnaci6n de seguridad
sobre la cocci6n
Siempre coloque el utensilio sobre el quemador superior antes
de encenderlo. AsegOrese de saber cu_l perilla corresponde al
quemador superior que va a utilizar. Aseg_rese de haber
activado el quemador correcto y de que el mismo se haya
encendido. Una vez que haya terminado la cocci6n, apague el
quemador antes de retirar el utensilio para evitar exponerse a la
llama.
Siempre ajuste la llama del quemador superior para que la
misma no se extienda m_s all_ del borde inferiordel utensilio.
Una llama excesiva es peligrosa, malgasta energfa y puede
daffar el electrodom6stico, el utensilio o los armarios que se
encuentran sobre la cubierta.
NUNCA deje alimentos cocin_ndose sin supervisi6n,
especialmente cuando utilice ajustes de temperatura altos o
cuando frfa en aceite. Losderrames pueden causar humo,y los
derrames de grasa se pueden encender. Limpie los derrames
de grasa tan pronto como sea posible. No use un ajuste de
calor alto para cocinar durante tiempos prolongados.
NUNCA caliente un envase cerrado en un quemador superior o
en el horno. La acumulaci6n de presi6n puede hacer que el
envase explote y causar lesiones personales graves o da_os al
electrodom6stico.
Use tomaollas secos y gruesos. Los tomaollas ht_medospueden
causar quemaduras por vapor. Nunca use pa_os para secar
platos u otros artfculos similares como tomaollas ya que
pueden arrastrarse sobre la superficie caliente de los
quemadores y se pueden encender o enredar en las piezas del
electrodom6stico.
Siempre permita que el aceite utilizado para frefr se enfr{e antes
de mover o manipular el utensilio.
No permita que el aceite para cocinar u otros materiales
inflamablesse acumulen en el electrodom6stico, en la campana
de ventilaci6n, en el respiradero o en las _reas cercanas a
estos. Limpie la campana deventilaci($n con frecuencia para
evitar que la grasa se acumule en la campana o en el filtro.
Cuando flamee alimentos debajo de la campana, encienda el
ventiWor.
NUNCA use ropa fabricada con materiales inflamaNes o ropa
holgada o de mangas largas para cocinar. La ropa se puede
encender o se puede enganchar en las manijas de los
utensilios.
Siempre coloque las parrillas del horno en las posiciones
deseadas cuando el homo est6 frfo. Deslice la parrilla hacia
afuera para colocar o retirar alimentos usando tomaollas secos
y gruesos. Siempre evite introducir sus manos en el homo para
colocar o retirar alimentos. Si se debe mover una parrilla
mientras est_ caliente, use un tomaollas seco. Siempre apague
el homo al terminar lacocci6n.
63
Page 65

Tenga cuidado cuando abra la puerta del horno. Permita que
el aire o vapor caliente escape antes de mover o colocar el
alimento.
ADVERTENCIA SOBRE AUMENTOS PREPARADOS: Siga
las instruccionesdel fabricante. Si un envase de pl_stico con
alimento congelado y/o su tapa se deforman, se comban ose
dafian de alguna manera durante la cocci6n, elimine el
alimento y el envase. El alimento puede estar contaminado.
NUNCA use papel de aluminio para cubrir las parrfllas o la
parte inferior del horno. Esto puede crear riesgos de choque
electrico, incendio o da_os al electrodomestico. Use el papel
de aluminio solamente como se indica en esta guia.
Inforrnaci6n de seguridad
sobre los utensilios
Use utensilios con fondos pianos y manijas que sean f_ciles
de sostener y que se mantengan frfas. Evite usar utensilios
inestabies, deformados, que se puedan volcar f_cilmente o
con manijas sueltas. Tambien evite usar utensilios,
especialmente utensilios pequeffos, que tengan manijas
pesadas,ya que los mismos pueden perder su estabilidad y
volcarse f_cilmente. Los utensilios que son pesados cuando
contienen alimentos tambien pueden set peiigrosos a[
moverlos.
Aseg0rese de que el utensilio sea Io suficientemente grande
para el alimento y para evitar derrames. El tamafio del
utensilio es especialmente importante cuando fria en aceite.
Asegdrese de que el utensilio sea del tamafio adecuado para
la cantidad de alimento que va a cocinar y para el burbujeo
del aceite.
Para minimizar las quemaduras, el encendido de materiales
infiamables y los derrames pot el contacto accidental con el
utensilio, no extienda las manijas sobre los quemadores
superiores adyacentes. Siempre gire las manijas hacia un lado
o hacia la parte trasera del electrodomestico, y no hacia la
habitacidn donde puedan set f_cilmente alcanzadas o
golpeadas pot ni_os pequefios.
No use cubiertas para los elementos superiores, parrillas para
cubiertas o sistemas adicionales de convecci(3n para hornos.
Eluso de dispositivos o accesorios que no sean expresamente
recomendados en esta guia puede crear peligros graves de
seguridad, afectar el rendimiento y reducir la vida dtil de los
componentes de este electrodomestico.
Ollas freidoras
Sea extremadamente cuidadoso cuando mueva laolla con
aceite o descarte la grasa caliente. Deje que la grasa se enfrie
antes de intentar mover la olla.
Campanas de ventilaci6n
Limpie la campana de ventilaci6n de la estufa y losfiltros con
frecuencia para evitar que se acumule grasa u otros
materiales infiamables en la campana o en el filtro y tambien
para evitar incendios de grasa.
Cuando fiamee alimentos debajo de la campana, encienda el
ventilador.
Informaci6n de seguridad
sobre la limpieza
Apague todos loscontroles y espere hasta que las piezas del
electrodomestico se enfrien antes de tocarlas o limpiarlas. No
toque las rejillas de los quemadores o las _reas que las rodean
hasta que hayan tenido suficiente tiempo para enfriarse.
Limpie la cubierta con cuidado. Tenga cuidado si utfliza un
patio o esponja mojada para limpiar derrames en una
superficie caliente para evitar quemaduras por vapor. Algunos
limpiadores pueden producir vapores nocivos si se aplican a
una superficie caliente.
Homo autolimpiante
Nunea deje que un utensilio hierva hasta quedar seco pues
esto puede dafiar la cubierta y el utensilio.
Siga las instrucciones del fabricante cuando utflice bolsas
para hornear.
Solamente ciertos tipos de utensilios de vidrio, vidrio/cer_mico,
cer_mica o porcelanizados son convenientes para cocinar en la
cubierta o en el homo sin que se quiebren debido al repentino
cambio de temperatura. Siga las instrucciones del fabricante
del utensilio cuando use vidrio.
El rendimiento y funcionamiento seguro de este
electrodomestico se ban comprobado usando utensilios de
cocina convencionales. No use ningQn dispositivo o accesorio
que no haya sido especfficamente recomendado en esta gufa.
Limpie t_nicamente las piezas que se indican en esta guia. No
limpie la junta de la puerta. Lajunta de la puerta es esencial
para obtener un sellado hermetico. Tenga cuidado de no frotar,
dafiar o mover la junta.
No use limpiadores o forros para hornos de ningt_ntipo dentro
o cerca de ninguna pieza del homo autolimpiante.
Esnormal que la cubierta de la estufa se caliente durante un
ciclo de autolimpieza. Por Iotanto, evite tocar la cubierta
durante un ciclo de autolimpieza.
64
Page 66

Aviso y adverntencia
irnportantes de seguridad
La propuesta 65 de la Leysobre Seguridad y Contaminaci6n
del Agua Potable del estado de California de 1986 (California
Safe Drinking Water and Toxic Enforcement Act of 1986)exige
que el gobernador de California publique una lista de las
sustancias que segt_nel Estado de California causan c_ncer o
da_os al sistema reproductor, y exige que los negocios
adviertan a sus clientes de la exposici6n potencial a tales
sustancias.
Los usuarios de este electrodomestico quedan advertidos de
que cuando el homo est8 en el ciclo de autolimpieza, puede
resultar en una exposici6n de bajo nivel a algunas de las
sustancias publicadas, incluyendoel mon6xido de carbono. La
Conserve estas instrucciones para referencia futura
exposici6n a estas sustancias puede set minimizada
ventilando el homo adecuadamente al exterior durante el ciclo
de autolimpieza abriendo las ventanas y/o la puerta de la
habitaci6n donde se encuentra el electrodomestico.
AVlSO IMPORTANTE RESPECTO A LOS PAJAROS
DOMItSTICOS: Nunca mantenga a losp_jaros dom_sticos
en la cocina oen habitaciones hasta donde puedan Ilegar los
humos de la cocina. Los p_jaros tienen un sistema respiratorio
muy sensible. Los vapores producidos durante el ciclo de
autolimpieza del homo pueden ser perjudiciales o mortales
para los p_jaros. Los vapores que despiden el aceite de
cocina, la grasa y la margarina sobrecalentados y la vajilla
antiadherente sobrecalentada pueden tambien set
perjudiciales.
65
Page 67

CU| Y L|MP|EZA
Homo autolimpiante
Elciclode autolimpiezausatemperaturassuperioresalas
temperaturasnormalesdecocci6nparalimpiar autom_ticamenteel
interiordel homo.
Limpieel homocon frecuenciaremoviendolosderramespara evitar
humoexcesivoy Ilamaradas.No permitaqueseacumuledemasiado
sucio enel homo.
Duranteelprocesodeautolimpieza,ventile bienla cocinapara
deshacersedelosolores normalesasociadosconlalimpieza.
Antes de la autolimpieza
1. Apague la luzdel hornoantesde la autolimpieza.Laluzdel horno
se puedefundir durante el ciclo de autolimpieza.
2. Retirelaasadera,todoslosutensiliosy lasparrillasdel homo.Si
nose retirandel homo,lasparrillassedecolorar_ny se deslizardn
condificultaddespudsdel ciclo de autolimpieza.
3. Limpieel marcodelhomo, el marcodela puertay el dreapot
fuerade lajuntay alrededorde la
aberturade la mismacon un limpiador \
noabrasivotal comoel"Bon Ami"*o
detergenteyagua.El procesode
autolimpiezanolimpiaestasareas.Las
mismasdebenserlimpiadasparaevitar
queelsuciosefije durante el ciclo de
autolimpieza.(Lajuntaesel selloalrededorde la puertay de la
ventanadelhomo.}
4. Paraevitardafios,no limpieo frote lajunta alrededorde la puerta
del homo.Lajunta est4disefiadaparasellarelcalor dentro del
homoduranteel ciclo deautolimpieza.
5. Limpieel excesodegrasao losderramesdel fondodel homo.
Estoevitaelhumoexcesivo,lasllamasy lasIlamaradasduranteel
ciclodeautolimpieza.
6. Limpielosderramesazucaradosy _cidostalescomolosderrames
de batatas,tomatoosalsasa base de leche.La porcelanaes
resistenteal 4cido,noa pruebadel mismo.Elacabadode
porcelanasepuededecolorarsi losderrames_cidoso
azucaradosnose limpian antesde un ciclo de autolimpieza. 7. SeleccioneDIFERIRusandolatecla r_pida.
* Los nombres de los productos son mamas registradas de sus respectivos fabricantes.
Para programar la autolimpieza: Clean
1. Oprimalatecla"Clean" (Limpieza).
2. RETPARRILLASsedesplegar&Retirelasparrillas.
3. SeleccioneCONTINUARusando latecla r_pida.Lasteclas
rdpidasest_nubicadasa cadaladodela pantalladelpanelde
control.
Seleccioneel niveldesuciedadLEVEintroduciendoel n0mero 200
con lasteclasnumdricasparaprogramardoshorasdelimpieza.
OprimalateclaEnter (Acepta0.
O
SeleccioneME[} ytres horasde tiempode limpiezasi el homo
est4 moderada.
O
SeleccioneINTENSOy cuatro horasdetiempode limpiezasi el
homoest_muysucio.
5. LIMPIEZA,"TIME"0-iempo),BLOQUEOyel conteo regresivodela
autolimpiezasedesplegaranen pantallamientraselhomose
limpia.Cuandotermineel tiempo de limpiezay lapuertatodavia
est6 bloqueada,ENFRIAMIENTOaparecer4en pantalla.
Importante: El bloqueode la puerta se desenganchar_
aproximadamenteuna horadespudsde que se hayaterminadola
limpieza.ENFRIAMIENTOdesaparecerdde la pantallacuando la
puertadel homosehayadesbloqueado.
Para diferir un ciclo de autolimpieza: _..................,
1. Oprimalatecla"Clean". i Clean
2. RETPARRILLASsedesplegar&Retirelasparrillas.
3. SeleccioneCONTINU/_J:_usando latecla rdpida.
4. Seleccioneel niveldesuciedadLEVEintroduciendoeln0mero200
con lasteclasnumdricasparaprogramardoshorasdelimpieza.
OprimalateclaEnter.
O
SeleccioneMED y tres horasdetiempode limpiezasi el homo
est,1moderada.
O
SeleccioneINTENSOy cuatro horasdetiempode limpiezasi el
homoest_muysucio.
5,
Lapuertasebloquear&LIMPIEZA,"TIME",BLOQUEOy el conteo
regresivode la autolimpiezasedesplegar_nen pantalla
6.
Despu6sdeque la puertasebloquee,optimala tecla "Nlore
Options" (M_sopciones).
66
\ ............
Page 68

8. Seleccionela cantidadde horasque deseadiferirelinicio del
ciclo deautolimpieza.
9. Eltiempodiferido y eltiempode limpiezaaparecer_nenla
pantalla.
Despu6s de la autolimpieza
Apreximadamente una hera despu_s del fin del title de
limpieza, el blequee se desenganchar_ y ENFRIAMIENTO
desaparecer_ de la pantalla. En este memento se pedtd
abrir la puerta.
Algunasmanchaspuedendejaruna ligeracenizagrisquepuedeser
removidaconun pa_oht3medo.Si lasuciedadpermanecedespuc!s
de limpiar lascenizas,el ciclo de autolimpiezanorue Io
suficientementelargo.La suciedadser_iremovidaduranteel
siguienteciclodeautolimpieza.
Sisedejaronlasparrillasenel homoy lasmismasnosedeslizan
confacilidad despu6sde un ciclode autolimpieza,limpielasparrillas
y lossoportescon unapeque_acantidadde aceitevegetalpara
facilitarsu movimiento.
Puedeapareceruna decoloraciOnblancadespudsde laautolimpieza
si nose limpiaronlosderramesdcidoso azucaradosantesde iniciar
el ciclode autolimpieza.Estoes normaly NOafectar_el
rendimiento.
Notas:
• Sisedeja la puertaabierta,CIERREPUERTAse desplegar_en
la pantallahastaque se cierrela puerta
, Sipasanrodsde 30segundosentre la activaciOndelatecla
"Clean"(Limpieza)y la activaciOndeuna tecla num6rica,el
programaregresar_autom_ticamenteal despliegueanterior.
• La puertadelhomose da_ardsi intentaabrirlaa lafuerza
durantela limpiezao enfriamiento.
° Lasprimerasvecesqueseusela autolimpieza,esnormalver
humoy sentir un olor. Estoesnormaly sereducir_o
desaparecer_icon el use.Siel homoest_ muysucioosi la
asaderasedej0accidentalmenteen el homo,puedensalir
humoy olor excesivos.
° A medidaqueel homo secalientayse enfrfa,esposible
escucharelsonidode laspiezasde metalamedidaquese
expandeny contraen.Estoes normaly no da_ardel
electrodom6stico.
Procedimientos de limpieza
Rejillasde los
quemadores=
Poreelanasebre
hierrofundido
Tapas de los
quemadoresy
quemadores
selladosa gas
• Espereaqueseenfrfeper completelosrejillas.
• Laveconaguacalienteyjabonosaycon unaesponjapl_sticade restregarno abrasiva.Paralasmanchasdificiles,
limpieconuna esponjajabonosano abrasivao con la cremade limpiezaparacubiertas"CooktopCleaningCreme"*
y una esponja. Siquedaalgunasuciedad,wJelvaa aplicar la crema,cubracon unatoallade papel hOmeday remoje
durante30 minutes.Vuelvaarestregar,enjuaguey seque.
° No limpie en el lavavajillaso enel homoautolimpiante.
Cabezasremoviblesde losquemadores
• Espereaqueseenfrfeel quemador.Retirelatapa del quemadory I_ivelaen agujajabonosacon unaesponjapl_stica
de restregar.Paralasmanchasdificiles,limpiecon unaesponjajabonosa no abrasivaocon lacremadelimpiezapara
cubiertas"CooktopCleaningCreme"*(PiezaN°20000001_**y unaesponja.
° No limpie en el lavavajillaso enel homoautolimpiante.
Quernadores SeHadosa Gas
• Limpiecon frecuencia.Espereaque seenfrfeel quemador.Limpieconjab6ny unaesponjade pl_isticopara
restregar.Paramanchasdificileso secas,limpiecon unaesponjajabonosanoabrasiva,uncepilloduro,un cepillode
dientes,lapunta degomasuavedel cepillode dientes[siviene equipado)o un alfiler recto.No aumenteo
distorsionelos agujeros.
• Tongacuidadodeno permitir queentreaguaexcesoen los orificiosde losquemadores.
• Tongacuidadocuandolimpieel encendedor.Siel mismose mojao se da_a,elquemadorsuperiorno seencender&
* Losnombresde losproductosson marcasregistradasde
sus respectivosfabricantes.
** Parahacerun pedido Ilameal 1-800-JENNAIR
[1-800-536-6247).
Asadera
e Inserto
Nuncacubrael inserte conpapel dealum#deya que el mismoevita que /a grasa se dronehastala asadera.
• Coloqueun pa_ojabonososobreel insertoy la asaderaydeje remojarparasuavizarlasuciedad.
• Laveenaguatibia con jabSn.Useunaesponjaderestregarparaquitarlasmanchasdificiles.
° Laasaderay el insertopuedenlavarseen el lavavajillas.
67
Page 69

Paneldecontrol
• Paraactivarelbloqueode controlesparalalimpieza,vealasecciOnBloqueodelcontrolen lap_gina76.
, Limpieconun pasomojado.Sequebien.
• Sepuedenusarlimpiadoresdevidrio siserociaenun pasoprimero.NOrecie el limpiader directamentesoflre el
brea deInsteclasde control y de la pantalla.
Perillasde
controJ
° Retirelasperillastirandodeeliashaciaafueracuandoest6nen laposici0n"OFF"[Apagado).
• Limpie,enjuaguey seque.No useagentesdelimpiezaabrasivosyaquelosmismospuedenrayarelacabado.
• EnciendacadaelementoparaasegurarsedequeInsperillasfueron reinstaladascorrectamente.
Protector trasero
y Cubierta-
porcelana
esrnaltada
porcelana
esmaltada
Paneles
Laterales,caj6n
calentador,
0nodelosselectos)
caj6n de
almacenarniento
(modelosselectos)
manijasde la
La porcelanaesvidriofundido sobre el metaly puedeagrietarseo picarsesi no seusacorrectamente.Laporcelanaes
resistenteal dcido,no a pruebadel mismo.Todoslosderrames,en especiallosderrames_cidoso azucarados,deben
limpiarseinmediatamentecon un paso seco.
• Cuandolasuperficieest6fria,limpieconaguajabonosa,enjuagueyseque.
• Nunca limpieunasuperficietibiao calientecon un pasoh0medo.La porcelanasepuedeagrietaro picar.
° Nunca uselimpiadoresparahornoso agentesdelimpiezaabrasivoso c_usticosen el acabadoexteriordeunaestufa.
• Cuandolasuperficieestc!fria,limpiecon aguajabonosatibia, enjuaguey seque.Nunca limpieunasuperficietibia
o calientecon un paso h0medoyaque puededa_ar lasuperficiey causarquemaduraspot vapor.
° Paramanchasdificiles,useun agentede limpiezaabrasivosuavetal comocretande bicarbonatode sodioo "Bon
AmP. No uselimpiadoresabrasivostalescomoesponjasde lanade acero olimpiadoresparahornos.Estos
productosrayar_noda_ar_inpermanentementelasuperficie.
Importante:Useuna toallao pa#o h#medo para limpiar derrames,especialmente si losmismossonficidos e
azucarades.La superficiepuede y manijasdecolorarseu epacarse si no se limpianinmediatamente.Este
es especialmente importantepara Inssuperficiesblancas.
puerta=Esrnalte
pintado
Ventanillay , Eviteusarcantidadesexcesivasdeagua,ya quepuedeescurrirsedebajoodetr_sdel vidrioy mancharlo.
puertadel , LaveconaguayjabOn.Enjuagueconagualimpiayseque.Sepuedenusarlimpiadoresdevidrio siseroc[aen un
homo= Vidrio pasoprimero.
, No use materialesabrasivostalescomoesponjasde restregar,lanadeaceroolimpiadoresenpolvoyaquelosmismos
rayar_nelvidrio.
interiordel ° Signlasinstruccionesen Insp_iginas66 y67 paraprogramarunciclodeautolimpieza.
homo
Parrillasdel • Laveconaguajabonosa.
homo ° LimpieInsmanchasdificilesconun limpiadorenpolvooconunaesponjaderestregarjabonosa.Enjuagueyseque.
° Lasparrillassedecolorar_npermanentementey puedeque nosedeslicenbiensisedejanenel homoduranteunciclo
de autolimpieza.Si estosucede,limpieel bordedelaparrillayelsoportecon unapeque_acantidadde aceitevegetal
pararestaurarlafacilidaddemovimiento.Limpieel excesodeaceite.
AceroIno×idable ° NO USENING(IN PRODUCTODE LIMPIEZA QUECONTENGABLANQUEADOBA BASEDECLORO.
(modelosselectos) ° NO USELIMPIADOBESABRASIVOSODENARANJA.
. SIEMPRELIMPIELASSUPERFICIESDEACEROA FAVORDELGRANO.
• Limpiezadiaria/suciedad love - Limpieconunode lossiguientes- aguaconjab6n, unasoluci6ndeaguayvinagre
blanco,limpiadorparasuperficiesy vidrio"Formula409"*oun limpiadorparavidriosimilar- usandounaesponjaoun
pasosuave.Enjuagueyseque.Parapuliry evitarmarcasde los dodos,useelproducto"StainlessSteelMagicSpray"*
(PiezaNO20000008)**.
• Suciedad moderada/rnanchasrebeldes- Limpieconunode lossiguientes- "BonAmi","SmartCleanser"o"Soft
Scrub"*-usandounaesponjahOmedao un pasosuave.Enjuagueyseque.Lasmanchasdiffcilespuedenset quitadas
conunaesponja"Scotch-Brite"*multiusoht3medafrotandoa favordelgrano.Enjuaguey seque.Pararestaurarel lustrey
sacarInsmarcas,vetas,aplique"StainlessSteelMagic Spray"*.
, Decoloraci6n-- Usandounaesponjamojadaoun pasosuave,limpieconellimpiadorparaaceroinoxidable"Cameo
StainlessSteelCleaner"*.Enjuagueinmediatamentey seque.ParasacarInsvetasy restaurarellustre,utilice"Stainless
SteelMagicSpray"*.
Loshombresde los _roductossonmarcasregistradasde susrespectivosfabricantes.
•* Parahacerpedidosdirectamente,Ilameal 1-800-JENNAIR(1-800-536-6247).
68
Page 70

ANTEN|M|
Puerta del homo
• NUNCA intenteabrir o cerrarlapuertao hacerfuncionarel homo
hastaquese hayareinstaladocorrectamentela puerta.
• NUNOAcoloquelosdedosentrela bisagray la partedelanteradel
marcodelhomo.Losbrazosde lasbisagrasest_ninstaladosa
resorte.Sise golpeaaccidentalmente,labisagrasecerrar_contra
el marcodelhomoy podr[alesionarsusdedos.
Irnportante:Lapuertadel homo de unaestufanuevapuedesentirse
"esponjosa"cuandosecierra.Estoesnormalyse reducir_con eluso.
Ventanilla del homo
Para proteger la ventana de la puerta
del homo:
1. No use agentesde limpiezaabrasivostalescomolasesponjasde
restregarde lana deaceroo limpiadoresen polvoya que los
mismospuedenrayarelvidrio.
2. No golpeeel vidrio con utensilios,sartenes,muebles,juguetes u
otrosobjetos.
3. No cierrela puertadel homo hastaque lasparrillasestc!nen
su lugar.
Si seraya,segolpea,se sacudeo se presiona,el vidrio puede
debilitarsey aumentarel riesgode que serompa m_isadelante.
Luz del Homo
Para reemplazar el foco del homo:
1. Cuandoelhomoest6fr[o,sujetelatapade labombillaensulugar,
luego desliceel ret6nde alambrefuerade lacubierta.NOTA: La
cubiertadelabombillase caer_sino essujetaensu lugar cuando
est,1sacandoelret6n de alambre.
2. Saquela cubiertadel foooyel foco. CUBIERTADEL
3. Coloqueun focode 40watts para
electrodom6sticos.
3. Vuelvaacolocarlacubiertade
la bombillay asegOrelacon el
ret6nde alambre.
5. Vuelva a enchufar la estufa.
Vuelva a colocar la hora
correct&
FOCO
RETENDE ALAMBRE
Caj6n de almacenamiento
(modelos selectos)
Tornillos niveladores
Asegt_resede que la estufaest_niveladacuando
est6instalada. Silaestufanoest_ nivelada,gire los
tornillos niveladoresqueseencuentranencada
esquinade la estufahastaque la mismaest6
nivelada. &_ SOPORTE
TORNILL O NIVELADOR
ANTIVUEL CO
ElcajOnde almacenamientopuedeser retiradoparapermitirle
limpiardebajodela estufa.
Para retirar:
1. Vacfeel caj6ny_ibralohastael primertope.
2. Levantelapartedelanteradel caj6n.
3. S_quelohastael segundotope.
4. Sostengaloscostadosy levanteel cajOnparasacarlo.
69
Page 71

Para volver a instalar:
1. Coloquelosextremosdelasgufasdel cajOnenlos rielesde la
estufa.
2. Levantelapartedelanteradel cajOny empuje suavementehasta
el primertope.
3. Levantenuevamenteel cajOnyempOjelohastaque quede
cerrado.
Elenchufede tresclavijascon puestaatierraofreceprotecciOn
contra los riesgosde choqueelOctrico.NOCORTEORENIUEVA[A
TERCERACLAVUADELENCHUFEDELCORDONELECTRICO,
Sis01osecuentacon un tomacorrientededosalvOolosode otto tipo
sinconexiOnatierra,es responsabilidaddel propietariodel
electrodomOsticoreemplazarle per un tomacorriente de tres
alvOolos debidamente puestoa tierra.
ConexiOn el ctrica
LoselectrodemOsticos que requierenenergia
elOctricavienen equipadoscon un enchufede
ires clavijas con puestaa tierra, el cualdebe
serconectadodirectamentea un
tomacorrientedetresalvOolosde 120V
debidamentepuestoatierra.
Siempredesenchufeel electrodom#sticoantesderealizar
reparaciones.
DesinstalaciOn de un
electrodom stico a gas
Losconectoresque seusan paraconectarloselectrodomOsticosa
gasalsuministrodegasno est_indise_adosparaser movidos
constantemente.Unavezque estc!instalado,NO muevaeste
electrodom_sticoa gasparaabrir espacioo para reubicarlo.Sieste
electrodomc!sticodebeset reubicadoo desinstaladoparahacer
reparaciones,sigael procedimientodescritoen lasinstruccionesde
instalaci0n.ParamayorinformaciOn,p0ngaseencontactocon el
Servicioal ClientedeJenn-Airal 1-800-JENNAIR(1-800-536-6247_.
Paraevitarquela estufase vuelqueaccidentalmente,debe
asegurarlaalpisohaciendodeslizareltornillo niveladortrasero
hastacalzarloenel soporteantivuelco.
7O
Page 72

f
LOCAL|
iiiiiii_!_i!_i!_i_!_!!_!!_!!_i_!!_!i_!!_!_i_i_i_i_ii_ii_!i_i!_!i_i!_!i_i!_ii_iiiiiiiiiiiiiiiiiiiiiiiiiiiiiiiiiiiiiiliiiiiiiiiiiiiiiiiiiiiilliiiiiiiiiiiiiiiiiiiiiiiiiiiiiiiiiiiiiiiiiiiiiiiiiiiiiiiiiiiiiiiiiiiiiiiiiiiiiiiiiiii!i!i!i!i!i!i!i!i!iiiilili_i_iiiiiiiii!i!iii_i!_!ii_!i_!ii_iii!ii!_i!_il !ii!ii!ii!ii!ii!ii!ii!il!ii!ii!ii!iiiii!iiiiiiiliiiiii!i_!i!!i_!i_!i_!i_!i_!i_!i_!i_!i_!i_!i_!i_!i_!i_!i_!i_!i_!i_!i_!i_!i_!i_!i_!i_!i_!i_!i_!i_!i_!i_!i_!i__i_ii_i__i_i__i_i_iiii_iiiiiiiiiiiiiiiiiiiiiiiiiiiiiiiiiiiiiiiiiiiiiiiiiiiiiiiiiiiiiiiiiiiiiiiiiiiiiiiiiiiiiiiiiiiiiiiiiiiiiiiiiiiiiiiiiiiiiiiiiiiiiiiiiiiiiiiiii!i!i!i!i!i!i!i!iiiiiiiiiiiiiiiiiiiiiiiiiiiiiiiiiiiii!i!i!!!i!i!!!i!_i!!i!!i!!i!!i!!i!!i!!i!!i!!i!!i!!i!!i!!i!!i!!i!!i!!i!!i!!i!_i_!i!iii!i!iii!_!_i_!_!_i_!_!_i_i_i_ii_ii_iiiiiiiiiiiiiiiiiiiiiiiiiiiiiiiiiiiiiiiiiiiiiiiiiiiiiiiiiiiiiiiiii!i!i!i!_!i!_!_!i!_i__i__i__i__i__i__i__i__i__i__i__i__i__i__i__i__i__i__i__i__i__i__i__i__i_iii_i_iii_i__i_____i_i_i_ii_ii_iiiiiiiiiiiiiiiilililililili_i!i!i!i!i!i!i!i!i!iiiiiiiiiiiiiiiiiiiiiiiiiiiiiiiiiiiiiiiiiiiiiiiiiiiiiiiiiiiiiiiiiiiiii_iiiiiiiiiiiiiiiiiiiiiiiiiiiiiiiiiiiiiiiiiiiiiiiiiiiiiiiiiiiiiiiiiiiiiiiiiiiiiiiiiiiiiiiiiiiiiiiiiiiiiiiiiiiiiiiiiiiiiiiiiiiiiiiiiiiiiiiiiiiiiiiiiiiiiiiiiiiiiiiiiiiiiiiiiiiiiiiiiiiiiiiiiiiiiiiiiiiiiiiiiiiiiiiiiiiiiiiiiiiiiiiiiiiiiiiiiiiiiiiiiiiiiiiiiiiiiiiiiiiiiiiiiiiiiiiiiiiiiiiiiiiiiiiiiiiiiiiiiiiiiiiiiiiiiilililililililili!i!i!i!i!_!_!_!!iii
Parala mayoria de las . Verifiquesi loscontrolesdelhomo fueron programadoscorrectamente.
situaciones, siga las siguientes • Verifique queel enchufeestc!bien conectadoen eltomacorriente.
soluciones. . Verifique o restablezcaeldisyuntor. Verifiqueo reemplaceelfusible.
• Verifiqueel suministroelc!ctrico.
Y LU
DE AVER|A
Una parle o la totalidad del
electrodom_stico no funciona.
Eireloj, las palabras indicadoras
y/o las luces funcionan pore el
homo no calienta.
Losquemadoressuperiores
nose encienden.
Lallama es dispareja. . Losorificiosdelquemadorpuedenestartapados.G/eala p%ina 673
Lallama del quemador superior • Aseg0resedeque hayaun utensiliosobrela rejilla.
se elevade los orificios,
Losresultadosdel horneado
no son los esperados o dilieren
de losobtenidosconun
homo usado.
• Verifiquesi loscontrolessuperioresy/olosdel homo fueron programadoscorrectamente.
Vealasp_iginas73y 77-80.
. Verifiquesi la puertadel homosedesbloque6despu6sdelciclo de autolimpieza.Vealap%ina 66.
. Verifiquesi el homorue programadoparaun ciclo de cocci6no deautolimpiezadiferido.Vealas
p%inas 66y 77.
. Verifiquesi el bloqueodeloscontrolesest_activado.Veala p%ina 76.
° Verifiquequeel homo no est6enmodosab_tico.Veala p%ina 88.
. Elhomopuedeestarprogramadoparauna funciOnde Cocinary mantenercalientediferida.
. Elbloqueode loscontrolespuedeestaractivado.Veala p%ina 76.
. Aseg0resedeque el electrodom6sticoest_debidamenteconectadoal suministrode energ[a.
° Verifiquesihay unfusibledel circuitofundido o sise hadisparadoeldisyuntorprincipal.
. Aseg0resedeque el encendedorest6secoy emitiendochispas.Elquemadornoseencender_si
encendedorest,1dafiado,sucio o mojado.Si el encendedornoemitechispas,gire la perillaa la
posici6n"OFF" [Apagado).
. Verifique latemperaturaprogramadadel homo.AsegOresede precalentarel homo cuandola receta
o lasinstruccionesIorecomienden.
. Aseg0resedeque el respiraderodelhomo no hayasido bloqueado.Vealaubicaci6nen lap_igina81
° Aseg0resedequela estufaest6nivelada.
. Frecuentemente,lastemperaturasvarianentreunhomo nuevoy uno usado.A medidaqueseusan
loshomos,la temperaturatiendea cambiary puedehacersem_scalienteo m_sfr[a.Veaenla
p_gina88las instruccionesparaajustarlatemperaturadel homo. Importante: Nose recomienda
ajustar latemperaturasielproblemaIo presentans61ounao dos recetas.
. Useel utensiliocorrecto.Los utensiliososcurosproducenundorado m_soscuro.Losutensilios
brillantesproducenun doradom_isclaro.
° Verifiquela posici6nde lasparrillasylacolocaci6ndelosutensilios.Alterne losutensilioscuando
usedos parrillas.Deje2,54cm (1") a 5,08cm [2") de espacioentrelos utensiliosy la pareddelhomo.
° Reviseel usode papeldealuminio enel homo.Nunca usepapelde aluminioparacubrir una
parrillacompleta.Coloqueun pedazopequefiodepapeldealuminio debajodelutensiliopara
recogerlos derrames.
Elalimento no hierve
adecaadamente o genera
demasiadohumo.
• Verifiquelasposicionesdelas parrillasdelhomo. Elalimento puedeestar demasiadocerca
de la llama.
. Elpapelde aluminionoseus6 apropiadamente.Nunca cubra el insertode laasaderaconpapel
de aluminio.
° Recorteel excesodegrasade la came antesde asarla.
. Seus6una asaderasucia.
. Precalienteel homodurante2 o 3 minutosantesde colocarelalimentoen el homo.
. Ase con la puertadel homo cerrada.
71
Page 73

Eihomo no se autolimpia.
• Aseg0resede que no hayaprogramadoun ciclo de autolimpiezadiferido.Veala p%ina 66.
. Verifiqueque lapuertaest6cerrada.
. Verifiqueque el homo no est_en modosab_itico.Veala p%ina 88.
. Elhomo puedeestarsobrelos204°C (400° F).Latemperaturadebesermenorde 204°C
(400°F) parapoderprogramarun ciclo de autolimpieza.
Eihomo no se lirnpi6
adecuadamente.
Lapuertadel homo no se
desbloqueadespu_sdel ciclode
autolimpieza.
_O $e escuchan sella_es SOnOra$
y la pantallaest_ apagada.
Lahumedadse acurnulaen
laventanadel homo osalevapor
del respiraderodel homo.
Se percibeun fuerte oior o humo
levecuandose enciendeel homo.
C6digosdefallas
• Esposibleque serequieraun ciclodeautolimpiezam_slargo.
• Losderramesexcesivos,en especiallosderramesazucaradosy/o _cidos,no se limpiaronantes
delciclode autolimpieza.
. Elinteriordelhomotodav[aest,1caliente. Espereaproximadamenteuna hora paraqueel homo
seenfr[edespu6sde que el ciclo doautolimpiezahayafinalizado.Lapuertapuedeabrirseuna
vezquela luzindicadoraBLOQUEOno est6enla pantalla.
. Elcontroly laspuertaspuedenestar bloqueados.Vea la pdgina76.
• Elhomo puedeestaren modosab_tico.Veala p%ina 88.
• Estoesnormalcuandose cocinanalimentoscon altocontenidode humedad.
• Seus6humedadexcesivacuandoselimpi6laventana.
• Estoesnormalen unaestufanuevay desaparecer_despu6sde variosusos. Un ciclo de
autolimpiezanuevo"quemard'losoloresm4sr4pidamente.
° Sienciendeun ventiladorayudar_a eliminarel humoy/uolor.
. Haysuciedaddealimentosexcesivaenla parteinferior delhomo. Useun ciclodeautolimpieza.
• ElhomopuededetectarunafalladurantelaprogramaciOnoduranteelfuncionamiento.Sise
detectaunafalla,puedeaparecerelmensajeFALLADETECTADA- PILSEENTERY TRATEDE
NUEVO.Sigalasinstruccionesenla pantalla.Silafallavuelvea aparecerono desaparece,Ilame
aunt6cnicodeservicioautorizadoo al n0merogratisqueapareceenlapantalla.
. Sise intentausarlamismafunci6nantesde queel homo muralsea reparado,sedesplegar4el
mensajeCARACTERiSTICANO DISPONIBLEPULSEAYUDA. Lacaracter[sticapermanecer4
inactivahastaqueseareparada.
• Siel homoest_demasiadosucio,puedenocurrirdemasiadasIlamaradasIocualresultar4en un
c6digodeerror durantela limpieza.Oprimalatecla"CANCEU' (Cancela0y dejequeel homose
enfr[ecompletamente,limpieelexcesode suciedady luegovuelvaa programarelciclodelimpieza.
Sielc6digodeerror reaparece,Ilameaun t6cnicoautorizado.
Seescuchanruidos,
. Elhomohacevariosruidosdebajonivel.Esposiblequepuedaescucharlosrelc!sdelhomo
cuandoseenciendeny se apagan.Estoesnormal.
• A medidaque el homosecalientaysoenfr[a,esposibleescucharel sonidode laspiezasdemetal
a medidaqueseexpandeny contraen.Estoesnormaly no da_ar4el electrodom6stico.
"SAb" destellay luego • Elhomoest_enmodosab_tico.ParaanularestafunciOn,oprimay mantengaoprimidalatecla
se despliegacontinuamente. "Setup" (Ajuste)durantecincosegundos.
No sepuedea_adir otra
recetafavorita.
• Lalista do recetas favoritas est4 Ilena. Para borrar una recetafavorita y a_adir una nueva,vea las
instrucciones en la pdgina 86.
72
Page 74

COCC|6N EN LA B|ERTA
Controles superiores
Ajustes de calor sugeridos
OFF
Eltamafioytipo de utensilio,eltipo y cantidadde _
alimentoqueest6calentandoyla potenciadel.__" _ I
elementodetermmaranlaposicmn,deal de _
aper apara acoccOn Ut ce osajustes _: :_ r-
marcadosalrededordelaperillaamodode\ i
gufa.Lassiguientesdescripcionesle
ayudar_naelegir el ajusteque ledar_ilos _ -___r //
resultados6ptimos.
"Hold" (Mantenercaliente)o "Warm" El estilo de la
(Calentar}:Losalimentosmantienenuna
temperaturasobre los 140°F(60°C)sin que seg8nel modelo
sigancocindndose.Losalimentossecalientan__
conuna llamamdsalta hastaquealcanzan _
estatemperaturaluegosereducela llama• J,
alimentosfr[os.AsegOresedeque laperilla
est6ajustadademaneraquesegenereuna
llamaestable.(Useel ajuste"Low",o bajo,oel
quemadordecocci6na fuego lento ubicadoenla
partetraseraderechapara mantenerlos alimentoscalientes).
"Simmer" (Cocci6nafuegolento): Losalimentosformanburbujas
queapenasIlegana lasuperficie.Losalimentostienenuna
temperaturaentre 185°F[85°0)y200°F(93°0).ElajustedecocciOna
fuegolentotambi6npuedeserusadopara herviro escalfar
alimentoso seguircocinandoalimentoscubiertos.(Ajustela perilla
entrelasposiciones"High"[alto),y"Low"(bajo),paraobtenerla
cocci6na fuego lento deseada).
"Slow Boil" (Hervorlento):Losalimentosformanburbujas
moderadamente.Elajustede hervor lentotambi6n puedeserusado
parala mayoriade lasfriturasy paramantenerlacocci6nde
grandescantidadesde liquido. (Ajuste laperilla entrelasposiciones
"High"y"Low",paraobtenerel hervordeseado).
"Boil" (Hervi0:Losalimentosformanburbujasagranvelocidad.
Esteajustetambi6npuedeserusadoparahacerhervirliquidos,
dorarcame,paraprepararalimentossalteadosy paracalentaraceite
parafreff antesdereducirlatemperatura.Elajuste"High"siempre
seusaparahacerhervirlos liquidos.Unavezqueelliquido est6
• O
control varfan
paraNuncauseestosajustes recalentar i_
hirviendo,siemprereduzcalallamaalajustem_isbajoquemantenga
el hervor.(Girelaperillaala posici6n"High",y luegoajustela llama
segl_neltamafiodel utensilio).
Encendido sin piloto
Elencendidosinpilotoelimina la
necesidadde tenet una luz piloto
encendidaconstantemente.Cada
quemadorsuperiorcuentacon un
encendedordechispa.Tengacuidado
cuandolimpie el _reaalrededor
delquemadorsuperior. _(_)_-_x'_k-_
Si elquemadorsuperiorno se °R'F'o'_.L_ #/_#NOENDEDoR
enciende,verifiquesi el _.X__
encendedorest_rote,sucio o mojado.
BASE [}EL QUEMADOR
Perillas de control de los
elementos superiores
Useestoscontroles paraencenderlosquemadoressuperiores. Una
selecciOninfinitade ajustesdecalorest_disponibleentre "Lo" y
"Hi". Sentir_un topeo ranuraenla posiciOn"HI".Lasperillas
puedencolocarseen cualquieradeestosajustesoentre ellos.
Losgr_ficos queseencuentranjunto a cadaperillaidentificanel
nt_l._@ quemadorquedichaperillacontrola.Potejemplo,el
Fro derecho(Elestilo del gr_ificovat[ansegOnel modelo).
Ajuste de los controles:
Eltamafioy tipo deutensilioafectaelajustede calor.
1. Coloqueunutensiliosobrela rejilladelquemador.
* La llamadel quemadorpuedeelevarseo parecerquese
2. Oprimaygire laperilladecontrol al ajustede temperatura
deseado.
Importante: Carlaquemadorfuedisefiado paraproporcionar
reencendidoautom_iticosi la llamaIlegaraa apagarse.
Funcionamiento durante
una falla el ctrica
1. Sostengaunacerillasobreelquemadorquedeseeutilizar.
2. Optimala perilla decontrolygffela lentamente.
3. Ajustelallamaal niveldeseado.
73
gr_ificoa la izquierdamuestraelquemadordelantero
encuentraseparadadel orificiosi el utensilionose coloca
sobrela rejilla.
Escuchar_elsonido de una chispay el quemadorse
encender_.
Page 75

Cubierta
IVlodbleJGR8880
Quemador de nivel bajo
centro o traseraizquierda(modelosselectos).
Estequemadorseencuentraen la posiciOn
Elquemadorde cocci6na fuegolento
paracocinarsalsasdelicadaso para derretir
chocolate. _
proporcionaunallamade menorpotencia _:
*Lapotenciavarfacuandose usagas LP.
Modble JGR8775
Para evitar que la cubierta se decolore o manche:
•Limpielacubierta despu6sdecadauso.
• Limpielosderrames_cidoso azucaradostan
prontocomosehayaenfriadola cubierta,ya
queestosderramespuedendecolorarla
porcelana.
A diferenciadelas estufascon quemadores
normalesde gas,estacubiertano se levantani sepuederemover.
No intentelevantarla cubiertaper ningunarazSn.
Quemadores sellados
Losquemadoresselladosde suestufaest_nfijadosa la cubiertay
no est_ndiseffadosparaserremovidos.Debidoa que los
quemadoresest_nselladosa la cubierta,losderramesnose
escurrir_ndebajodela cubierta.
Sinembargo,elquemadordebelimpiarsedespu6sdecadauso.El
conjuntodela tapadel quemadorse puederetirarfdcilmenteparala
limpieza.Nea la pdgina67para las instruccionesde limpieza.)
Lascabezasde los quemadoresdeben estarcolocadasde manera
apropiadaen la basedelquemadorparaque el mismofuncione
correctamente.
Quemador de alto rendimiento
(modelos selectos)
Suestufacuentacondosquemadoresde altavelocidadde 16.000
BTU*y seencuentraen las posici6nesdelanteraderechay izquierda
(modelosselectos)de la cubierta.Estequemadorproporcionauna
mayorvelocidaddecocci6nquesepuedeusarparaIlevarelagua
r_pidamenteal hen/ory paracocinargrandescantidadesde
alimentos.Parael quemadordealta potencia,el ajustemdsbajo
puedesetparacocci6na fuegolento.
Rejillas de los quemadores
Lasrejillas debenestaren la posici6ncorrectaantesde la cocci6n.
Cuandoinstalelasrejillas,coloquelosextremoscon lengQetashacia
el centrode maneraqueconcuerdenconlasbarrasrectas.
Lainstalaci6ninadecuadadelasrejillas puedecausarpicadurasen
lacubierta.
No hagafuncionarlosquemaderes sinun utensiliosebre la
rejilla. B acabade de porcelanade la rejilla puede picarsesin
un atensilioque absorbael calor de la llama del quemador.
Tengacuidado cuandoagitealimentosen un utensilioquese
encuentresobrela rejilla.Lasrejillastienenun acabadoliso para
facilitar sulimpieza.Elutensiliose deslizar_si nosesostienesu
manija.Estopuedeprovocarderramesde alimentoscalientesy
riesgosdesufrir quemaduras.
A pesarde que lasrejillassonduraderas,lasmismasperderdnel
brilloy/o se decolorar_npot las altastemperaturasde lasllamasdel
gas.
Notas:
• Unquemadorajustadode maneracorrectay conorificios
limpiosseencenderdal cabode pocossegundos.Si estd
usandogas natural,la llama ser_azulconun cono interno
azul oscuro.
Si lallamadelquemadoresamarillay ruidosa,la mezcla
aire/gaspuedeser incorrecta.P6ngaseencontactocon un
tdcnicode servicioparaajustar la llama.(Los ajustesde la
llamano est_ncubiertospor lagarantia.)
Conel gasLPesaceptableque laspuntasde las llamassean
ligeramenteamarillas.Estoesnormaly no esnecesario
realizarajustes.
Conalgunostiposde gas,esposibleque escucheun
golpeteocuandoseapagueelquemadorsuperior.Estees un
sonidonormalde funcionamientodel quemador.
Si laperillasegira r_pidamentede "Hi" a"Lo", es posible
que la llamaseapague,especialmentesi elquemadorest_
fifo. Siestoocurre,gire la perillaala posici6n"OFF"
[Apagado),esperevariossegundosy wJelvaa encenderel
quemador.
Lallamadebeserajustadademaneraquenose extienda
rodsallddel borde inferior delutensilio.
74
Page 76

Panel de Control
EEl EL H
AB CD
Bake
I -Favorites
onv ct Clean
Rapid
-- Preheat
0II/Off
On/Off
TIMER 1 TtMER2
On/Of_ On/Off
F G
Over1
Ught CANCEL
H
I
1 2 3
ABC DEF
4 5 6
GHf JKL MNO
7 8 9
PQRS TUV WXYZ
Back O Enter
I Space 1
lock
i t
J KL M N 0
Elpanelde control estddise_adoparaunaprogramaci6nsencilla. Lapantalla muestralasopcionesparacadafunci6nyvaindicandolos pasos
del procesodeprogramaci6n.Lascaracteristicasy estilodelpaneldecontrolvarfansegkinel modelo.Lapantalladelhomoest_programadapara
horneado.
"RapidPreheat"
(Precalentamiento
Useestafunci6nparareducireltiempo
de precalentamiento.
r@ido}(modelos
selectos)
"Convect"(Convecci6n}
Useparahorneary asarperconvecci6n.
(modelosselectos}
"Bake"(Horneado}
"Broil"(Asado}
"TIMER"1
Useparahomearyasara laparrilla.
Useparaasara laparrillay paradorar.
Pmgramaeltemporizador.
(Temporizado0
Pantalla
Muestralasfunciones,opcionesy hera
deldfadel homo.
"TIMER"2
Programaeltemporizador.
(Temporizador}
Teclasnum6ricas
Useparaprogramareltiempoy la
temperaturao paraprogramarnombres
deconfiguracionesfavoritas.
"Favorites"(Favorites)
Useparaacceder,programaro guardar
losciclosdecocci@.
"MoreOptions"
(IVI4sopciones)
"Clean"__impieza}
Useestaopci6nparaaccedera
caracter[sticasadicionales.
Useparaprogramarel ciclode
autolimpieza.
"Setup"(Ajuste}
UseestafunciOnparavet ocambiarlos
ajustesdef_brica.
"OvenLight"
(Luzdelhomo)
"CANCEL"[Anular}
Useparaencendero apagarlaluzdel
homo.
AnulatodaslasflJncionesexceptoel
temporizador,el relojlasrecetasfavoritas,
losajustesy lagavetacalentadora.
Teclasr@idas
Seusanparaseleccionaropcionesen la
pantalla0untoa lapantallaen ambos
lades}.
Teclas r pidas
Lasteclasrdpidasestdnubicadasacarla ladede lapantallay se
utilizanparaseleccionarlafunci6nu opci6ndeseadaen la pantalla.
Paraseleccionarlaopci6no funciOn,oprimalatecla r_ipidaque
est6junto a lapalabra.
Siustednecesitavolveratr_scuandoest_en una funciOnu opci6n
en el indicador,optima la tecla"Back". Cuandotermine la
programaciOn,optima latecla"Eater" o esperecuatrosegundosyla
funci6n comenzardautomdticamente.
Lasflechas haciaarribaindican pantallasadicionalescon opciones
adicionales.Optimalasteclas r_pidas queest_njunto alas flechas
paradesplegarlasopcionescontenidasenla pantalla.
Impertante: Cuatrosegundosdespudsdehaberseleccionadola
funci6n,opci6n,nt3meroo letra,lafunci6n ser_ autom_ticamente
programada.Sitranscurren m_sde30 segundosentre los pasos
de laprogramaci6n,la funci6n serdcanceladay la pantallavolverd
al despliegueanterior.
Encendido Sin Pileto (modelosselectos}
Suestufaestdequipadacon un encendidosin piloto. Conestetipo
de sistemade encendido,el gasseapagaautomdticamentey el
berneno eperar_ duranteuna interrupci6n dela cerriente
ei_ctrica.
Un f6sforo encendido no encenderd el quemador del homo. No se
debe intentar encender el homo durante la interrupciOn de la
corriente el6ctrica.
Relej
Programaci(_n del reloj:
1. Oprimalatecla"Setup".
2. SeleccioneRELOJusandolasteclasr@idas.
3. Seleccionela NORA.
4. Programeeltiempo usandolasteclasnum6ricas.
75
/" ...... • "x
/ Setup "
On / Off
Page 77

5. Optimalatecla"Enter"(Aceptar).
6. SeleccioneAMoPM enel modede 12horas.[paracambiarel
reloj a24 horas,yea la p_gina76.)
7. Parasalir del modede ajuste,optimalatecla "Setup" (Ajuste).
Activaci6n y anulaci6n del despliegue del reloj/
dim de la semana:
1. Oprimalatecla"Setup". Setup
2. SeleccioneRELOJ. ........................
3. Optimalaflecha paranavegarentre Insopcioneshastaquese
muestreel DESACTIVAR.
/4. SeleccioneDESACTIVAR.
5. SeleccioneHORA.
6. Seleccione"OFF" (Apagar)para desactivareldesplieguedel relojo
seleccione"ON" (Encende0paraactivareldesplieguedelreloj.
7. Seleccione"OFF" paraeliminareldesplieguedel dfadela semana.
Seleccione"ON" paramostrarel dfadela semanaenpantalla.
8. Parasalirdel modede ajuste,oprima latecla "Setup".
Pregramaci6n del dim de la semana:
1. Oprimalatecla"Setup". On / Off
2. SeleccioneRELOJ. "................
3. Oprimalaflechaparanavegarentre Insopcioneshastaquese
muestreel DIA.
4. Uselatecla r_pidaflechadaparanavegarentreInsopcionesde
d[as.
5. Seleccioneel d[adeseado.
6. Parasalirdel modede ajuste,optima latecla"Setup".
Para pregramar el reloj en formate de
12 o 24 horns:
Elrelojpuedeserajustadoparadesplegarla herayaseaen formate
de 12horuso 24 horus.
1. Oprima la tecla "Setup".
2. Seleccione RELOJ.
3. Use la flecha para pasar a la pantalla siguiente.
4. Seleccione 12/24 HR.
5. Seleccione12HRo24HR.
6. Parasalirdel modede ajuste,optima latecla"Setup".
"Timers" (Temporizadores)
Programaci6n de los temporizadores ("TINIER
1" o "TIMER 2"): _.................
1. Oprimalatecla"TIMER 1" o "TIMER 2". TIMER 1 "
2. Oprimauno de lostiemposmostradosusando
Insteclasr_pidaso presioneunade Insteclasnum6ricaspara
programarel tiernpodeseado.
Importante: Cadavezqueoprimeuna de Insopcionesde tiempo
mostradas,seagregatiempoadicional. Perejemplo,si oprime"10
MIN." tresveces,agrega30 minutesenel temporizador(0:30).
3. Optimalatecla "Enter".
On / Off,
Setup
,,On t Off/
,,O n / Off_
76
Para cambiar el tiempo programado ann vez que
el temporizador comienza: . ,
1. Oprimala tecla "TIMER 1" o "TIMER 2" unavez, i Off,_
2. Seleccioneuno de lostiemposdesplegados
usandorepetidamenteInsteclasr_pidashastaqueeltiempo
deseadoquedeprogramado.
3. Optimalasteclasnumc!ricaspara programareltiempo nuevo
deseado.
4. Optimalatecla "Enter".
Anulaci6n del temporizador:
Oprimalatecla "TIMER 1" o "TIMER 2" dosveces.
Si ambos temporizadores est_n activos:
Si eltemporizadordeseadoyaseencuentraen lapantalla,oprimala
tecla una vezparaentraren lafunci6nde edici6ny dos vecespara
anular eltemporizador.Siel temporizadordeseadono est,1en pantalla,
signestospasos:
1. Optimalatecla "TIMER" deseadaunavez Eltemporizador
seleccionadoaparecer_en pantalla.
2. Optimalatecla "TIMER" una segundavezparaactivar lafunci6n de
edici6nparahacerloscambios.
3. Sioprimelatecla "TIMER" una terceravez,anular_el temporizador.
Cambio de Ins so,ales sonoras del temporizador:
Lasse_alessonorasparael TEMPORIZADOR1y parael
TEMPORIZADOR2puedensercambiadas.Lasopcionesdisponibles
sondosseffalescadatreintasegundos,dosseffalescadasesenta
segundosounasehalsolamente. Elajustepredeterminadoesunasola
serial.
1. Optimalatecla "Setup". " Setup "
2. Seleccionela flechay opr[malahastaque "...............
SONIDOSaparezcaen pantalla.
3. SeleccioneSOMDOS.
4. SeleccioneSONIDOSTEMPER.
5. Seleccioneel formatedeseadodela sehalsonoradeltemporizador
(2-30SEC,2-60SECo 1 BIP).
6. Parasalirdel modedeajuste,optima latecla "Setup".
/ ...................
' On/Off
Bloqueo del control y de 0
la puerta dei homo Bad<| sp_ Ent_rl
LOScontrolesdelhornoy de lapuerta [ J
del homo puedenserbloqueadospara
evitarprogramaci6naccidental.Si seest_usandounafunci6n del
homo,elcontrol y la puertanopuedenserbloqueados.
Para bloquear los controles y la puerta:
OprimaInsteclas"Back" (Arras)y "Enter" almismotiempo,
manteni6ndolasoprimidasdurantetres segundoso hastaque las
palabrasCONTROLBLOQaparezcanen la pantalla.
Para desbloquear los centreles y la puerta
del homo:
OptimaInsteclas "Back" y "Enter" al mismotiempo,mantenk!ndolas
oprimidasdurantetressegundos. DESBLOQUEOaparecer_ien la
pantallacuando el controly la puertase estc!ndesbloqueando.
loci(
Page 78

Horneado
Para homear: / .......... ....
1. Oprimalatecla "Bake" (Horneado). : Bake
2. Seleccionelatemperaturadel homo usandolasteclasr_ipidas.
O
Programelatemperaturadeseadausando lasteclasnumc!ricas.
Oprimalatecla "Enter" (Aceptar)paraguardarelajuste.
• Latemperaturapuedeprogramarseentre 77° C[170° F)
y 288° C (550°F)enincrementosde5°.
• Despu6sdetressegundos,elhomocomenzar_ia precalentarse.
HORNEARy "PREHEAT"[Precalentamiento)aparecer_nen la
pantallajunto con "100°" o la temperaturaactualdel homo [la
opci6nm_isalta).
° Latemperaturaen elindicadoraumentar_enincrementosde
1°hastaqueel homo Ileguea la temperaturaprogramada.
Espereaproximadamente15minutosparaqueel homose
precaliente.
° Cuandoel homoseha precalentado,seescuchar_iuna
serialsonoray "PREHEAT"se apagar_en la pantalla.
AI final de lacocciOn,apagueel homo z..................
oprimiendola tecla "CANCEL" (Anula0. Retire CANCEL
el alimentodelhomo. Elhomocontinuar_i ...........
funcionando hastaque se oprima latecla"CANCEL".
Notas:
• Sitranscurrenm_sde treinta segundosaloprimir unatecla y
unateclanum6rica,lapantallavolverdal despliegueanterior.
• Siemprequela temperaturaapareceen la pantalla,el homo
estdcalentando.
Paracambiarlatemperaturadelhomoduranteel procesode
cocciOn,oprimalatecla "Bake" y seleccioneunade las
temperaturasdesplegadaso uselas teclasnum6ricaspara
programarla temperaturadeseada.
Elhomo seapagar_iautom_ticamentedespu_sde12horassi
sedejaaccidentalmenteencendido. Paraprogramarun modo
sab_tico,yeala secci6nModo sabdtico,en la p%ina 88.
Opciones de horneado
Lasopciones"Cook& Hold" (Cocinary mantenercaliente)y "Delay"
(Diferido)est_ndisponiblescuandosehornea. Cuandousela
opci6n"Cook& Hold",el homo comienzaa calentarinmediatamente
despuc!sde que elcontrol hasidoprogramado. A continuaciOn,el
........... /
homococinaporun perfodoespedfico detiempo. Cuandoese
tiemposeacabe,elhomoreducir_latemperaturaautom_iticamente
a 77° C 070° F},mantendr_el alimentocalienteduranteunahoray
luegoseapagar_autom_ticamente.
Cuandose usa la funciOn"Delay",elhomocomienzaacocinarm_s
tardeen el dfa. Programela cantidadde tiempoqueusteddesea
esperarantesde encenderelhomoy eltiempo de cocciOn.Elhomo
comenzar_acalentarseala temperaturaseleccionaday cocinar_
duranteel tiempoprogramado.Cuandoese tiempoacaba,el homo
mantendr_iel alimentocalientehastapot una horay luegose
apagar_autom_ticamente.
Para programar la funci6n "Cook & Hold"
(Cocinar y mantener caliente):
1. Despu6sdeprogramarel horneado,oprima .............More
latecla"More Options" IMPsopciones). { Options,
2. SeleccioneCOCC/CALEN. _ ......... "
3. Selecionela cantidaddetiempo quevaa hornearusandolas
teclasr_pidaso lasteclasnum6ricas.
4. Oprimala tecla"Enter".
5. "COOKTIME"0-iempode cocci6n),el conteoregresivodel
tiempodecocci6n,"PREHEAT",HORNEARyla temperatura
actualsedesplegar_nen pantalla.
Elhomococinar_duranteel tiempo seleccionadoy luego mantendr_
el alimentocalientedurante una hora.
Para programar la funci6n "Delay" [Diferido):
I. Despu6sdeprogramarelhomeado,optima ,,,_,_
latecla"More Options". ODtiOIqS
2. Seleccionela funci6n DIF. \-'-.............................
3. Seleccionela cantidaddetiempo que usteddeseadiferir el
comienzodela cocci6nusandolos tiemposdesplegadoso las
teclasnum6ricas.
4. Seleccionela cantidaddetiempo que usteddeseacocinar
usandolos tiemposdesplegadoso lasteclasnum6ricas.
5. Elindicadormostrar_HORNEAR,latemperatura,eltiempo
diferidoyel conteo regresivodel tiempodecocci6n.
6. Cuandoeltiempo diferidoseha acabado,el homo comenzar_a
calentar."COOKTIME",elconteoregresivodeltiempode
cocci6n,"PREHEAT",HORNEARy la temperaturaactualdel
homosedesplegar_nenpantalla.
77
Page 79

"CO[IVeOt" (ConvecciOn)
(modelos selectos)
LacocciOnpor convecci0nusaun ventiladorpardcirculardire
calienteuniformementesobre,debajoy alrededordel alimento.
Comoresultado,los alimentossecocinany doranuniformemente,a
menudoen tiemposm_scortos,atemperaturasm_sbajasy con la
flexibilidaddeusarm_isdeuna parrillaal mismotiempo.
Notas:
, Elcontroldel homovieneprogramadodesdelaf_bricapara
"Auto ConvectConversion"(ConversiOnautom_ticaa
convecci0n](modelosselectos).Cuandose usa "ConvectBake"
(HorneadoporconvecciOn)y "ConvectPastry"(Pasteler[apor
convecci0n]programelatemperaturadehorneado
convencional.Elcontrolautom_ticamenteconviertela
temperaturaa 15° C (25° F) menosque la temperatura
tradicionaldelhomo.
"Oonveot Bake" (Horneado por
convecciOn) (modelos selectos)
Para hornear pot convecci6n: _........... ,
i Convect
1. Optima latecla "Cenvect" (ConvecciOn). , ........... _,;
2. SeleccioneHORNEADOCONVusando Insteclas r@idas.
3. Seleccionela opci0n deseadausandoInsteclas r_pidas
\
, Cuandouseel asadoporconvecciOn,latemperaturano se
reducir_iautom_iticamente.Programeel tiempo y latemperatura
de asadoconvencional.Elcontrolluego le hacesaber cuando
ha acabadoun75o/0del tiempoy le advierteque verifiqueel
gradodecocciOndelalimento.
• Parddesactivarla conversionautom_iticadeconvecci0n
(modelosselectos],veala p_gina87.
Opciones de convecci6n (modelos selectos)
Lasopciones"Cook & Hold" (Cocinary mantenercaliente)y "Delay"
(Diferido]estandisponiblescuandosecocina por convecciOn.Vea
la p_gina82pardobtenerinformaciOnsobrecOmoprogramarla
funci0n "Cook & Hold"o "Delay".
Parrillasm01tiples
Horneadode
3alletas/Bizcochos
Panes
Cacerolas
Tartasfrortas
Tortas
Polioentero
Pavoentero
Verduras
Asadosdecerdo
Asadosderes
Pasteles
Congelados
Pastelitos
PonquOsdecrema
Pastelerfa
de crema
ProgramelatemperaturadeseadausandoInsteclasnumericas.
Oprimala tecla "Enter" (Acepta0paraguardarelajuste.
• Latemperaturadel homo puedeprogramarseentre 91° C
(195°F) y 288°C (550°F)enincrementosde 1° C (5° F].Si la
convecciOnautom_ticaest_apagada,puedeprogramarla
temperaturadesdelos170° F.
• Despuc!sde tres segundos,el homocomenzar_aprecalentarse.
HORNEADOCONVy "PREHEAT"(Precalentamiento)aparecer_n
en la pantallajunto con"100°'' o latemperaturaactualdel homo
(la opciOnm_salta).
• Latemperaturaen el indicadoraumentar_en incrementosde 1°
hastaqueel homoIleguea latemperaturaprogramada.Espere
aproximadamente15minutospara queel homo se precaliente.
• Cuandoelhomoseha precalentado,seescuchar_unaserial
sonoray "PREHEAT"se apagar_y se desplegar_HORNEADO
CONV."AUTO"(Autom_tico]aparecer_en lapantalla sila
funciOnde conversionautom_iticadeconvecciOn(modelos
selectos)est_activada.
• Coloqueelalimentoenel homo.
AIfinal de la cocci0n,apagueelhomo
oprimiendola tecla "CANOE[." (Anular].Retire ( CANCEL
el alimentodelhomo. Elhomocontinuar_ ................
funcionandohastaqueseoptima la tecla"CANCEL".
Notas:
• Cuandouse"ConvectBake"(Horneadopor convecci0n]y
"ConvectPastry"(Pasteler[aporconvecciOn]con la opci0n
"Auto ConvectConversion"(ConversiOnautom_ticade
convecciOn)apagada,reduzcalatemperaturaprogramadaen
25°F(15°C].
• Si usael asadopor convecci0ncon la opci0n de conversion
automSticadeconvecciOnapagada,noser5 necesario
programaruntiempo de cocci0n.Verifiqueelalimentocuando
hayatranscurridoel75O/odeltiempotradicional.
• Si la funci0n deconvecciOnautom_ticaest,1desactivada,no
programeuntiempo de asadoporconvecciOn.
"Rapid Preheat" (Precalentamiento
r pido) (modelos selectos)
Usepardreducir eltiempode precalentamientocuando use Ins
funcionesde horneadoo de horneadopor convecci0n.Useparatodos
losalimentoscuandohorneeenunasod parrilla.
• DespuOsde haberprogramaticy activadoel horneadoo el horneado
por convecci0n,oprimalatecla "Rapid Preheat".
• SOLOI REJILLAse desplegar_en lapantalla;despuOsde 10
segundoslapantallamostrar_RAPIDOy"PREHEAT".
Para regresar al precalentamiento normal:
• Optimala tecla"Rapid Preheat" nuevamente.Estoproporcionar_
precalentamientoest_ndary"PREHEAT"y la funci0nseleccionada
se mostrar_nenpantalla.
78
Page 80

Notas:
Notas:
• Paraobtener los mejores resultados, coloque la parrilla en la
posici6n 4 o 5 con la opci6n de precalentamiento r_pido.
• Paraobtener los mejores resultados de horneado y dorado, no
se recomienda el uso de precalentamiento rdpido cuando se
usen mQItiples parrillas.
"Convect Roast" (Asado por
convecciOn) (modelos selectos)
Para asar por conveccien:
1. Coloqueel alimentoen el homo.
2. Oprimalatecla"Convect" [ConvecciOn).
3. SeleccioneASAR PORCONVusandolas
teclasrdpidas.
4. Seleccionelatemperaturadel homo usandolasteclasr_pidas.
( Convect )
x ......... /
• Si la recetasugiereprecalentarel horno,afiada15minutosa la
duraciOndela cocci6n.
• Si "Auto" (Autom_tico)estdapagado,noser_necesario
programareltiempo de asado.
"Broil" (Asar)
Paraobtenerlosmejoresresultados,precalienteel homodurante
cinco minutoscon la puertacerraday useuna bandejadisefiada
paraasar.
Para asar a la parrilla:
1. Coloquela parrilladel hornoen la posici6napropiada.Nea la
Tablade asar ).
2. Optima la tecla "Broil".
3. Seleccione el nivel ALTO - 288° C [550° F).
O
Seleccione el nivel BAJO - 232° C [450°F).
( Broil
................... /
Programelatemperaturadeseadausando lasteclasnum6ricas.
Optimalatecla "Enter" (Aceptar)paraguardarel ajuste.
• Latemperaturadel homopuedeprogramarseentre77° C
(170°F)y 288° C [550° F)enincrementosde 1° C(5° F).
Programeeltiempo de cocci6ndeseado.Programeel tiempo de
asadoconvencionalusandolasteclas num6ricas.
• Despu6sdetressegundos,elhomocomenzarda calentar.
ASARPORCONVaparecerdnenla pantallajunto con"100°''
o latemperaturaactual del homo(la opciOnm_salta).
• Latemperaturaenel indicadoraumentardenincrementosde
1° hastaque el homo Ilegueala temperaturaprogramada.
• Elconteoregresivodeltiempode cocciOncomenzard.
AI completarse75%deltiempo de cocciOn,el homo emitir_una
serialsonoraparaadvertirleque reviseel alimento. Verifiquela
cocci6ndel alimentousandoun termOmetrode came. Siel
alimentoest_cocinado,retffelodel homo y optima latecla
"CANCEL" [Anular)paraapagarelhomo.
Si elalimentono estdlisto,continQeasando.
Unavezque eltiempoprogramadohaacabado,el homo
autom_ticamentepasardalmodo"KeepWarm"[Mantener
caliente) por unahora. Sielalimentoesretirado
del homoantesde que la horahayaacabado,
oprima latecla "CANCEL". i CANCEL )
, Elhomotieneuna caracter[sticavariablede asara laparrillaIo
que significa quesepuedeseleccionarunatemperaturam_s
bajaparaasara laparrilla [149°Ca288°Co300°Fa550°F).
Paraseleccionarunatemperaturamdsbaja,optimalas teclas
num6ricascorrespondientes.Oprimalatecla "Enter"
[Acepta0 paraguardarelajustedetemperaturam_sbajo.
4. Precalienteel homoduratecincominutos.
5. Coloqueel alimentoen el homo y cierrela puerta.........................
6. Oprimalatecla"CANCEL" (Anular)cuando CANCEL
terminedeasar. ...........
Notas:
• Veala Tabladeasarparaobtenerinformaci6nsobre los
alimentosy tiemposdeasado.
• Si pasanmdsde30 segundosentrela activaciOnde la tecla
"Broil"y la activaciOndelas teclasr_pidaso numdricas,el
homo no quedar_programadoy la pantalla mostrardel
despliegueanterior.
• Useel ajusteALTOparaasarla mayoriade los alimentos. Use
la temperaturade asado m_sbajacuandoase alimentosque
requieranmayortiempodecocci6n. Latemperaturam_sbaja
permitequeel alimentoquedebiencocidosinque se dore
demasiado.
o
Elalimentodebevoltearsea la mitaddeltiempode asado.
o
Lostiempos de asarala parrilla puedenser m_slargos
cuandose hanseleccionadotemperaturasmdsbajasdeasar a
la parrilla.
79
Page 81

Tabla de asar a la parrilla
Precalienteel hornodurante2-3 minutes.
Ca[Re lie ires
Came de cerdo
Came de ave
IVlariscos
Paraun exteriorm_isdoradoy m_sasadoy un interiora mediococer,puedesernecesariodisminuirel tiempodecocciOnenel primerladey
acercarm_slacame a la fuentede calor.
Impertante: Estatablaess61ouna gu[a. Lostiempospuedenvariarconel tipo de alimentoqueseest_cocinando.
Biftec,2,5cm (1")
Hamburguesas,1,9cm (3/4") de grosor
Tocino
Jam6n,precocido,rebanadade
1,3cm (1/2")
Chuletas,2,5cm(1")
Pechugasde Polio,con hueso
Filetesdepescado
Tajadasdepescado,
2,5cm (1")de grosor
Colasde langosta,85-115g
(3-4onzas)cadauna
Ventilador del homo
Elventiladorde convecci6n(modelosselectos)se usaparahacer
circularairecalienteenel homo cuando seseleccionalafunci0nde
convecciOn.
Impertante: Elventiladordeconvecci6nsedetendr_
autom_ticamentecuandoseabrala puertadel homo.
5
5
5o8
5
5
5
Luz del homo
Laluzdel hornoseenciendeautom_iticamente
cuandose abre la puertadelhomo. Cuandola
puertaest6cerrada,oprimalatecla"Oven [.ight"
(Luzdel homo)paraencendero apagarlaluz del
homo.Cadavezqueoprimalatecla "OvenLight" escuchar_iuna
sepalsonora.Si la hz del homoest_encendidacuandoseabrela
puerta,laluzseapagar_cuandosecierrela puerta.
A medioasar
Bienasado
Bienasado
Bienasado
Tibio
Bienasado
Bienasado
Hojaldrado
Hojaldrado
Biencocidas
15 - 20 minutes
18 - 24 minutes
13 - 18 minutes
6 - 10 minutes
8- 12 minutes
22 - 26 minutes
'Lo Broil' (lade de la piel
hacia abajo primero)
30 - 45 minutes
8- 12 minutes
10 - 15 minutes
7- 10 minutes
Respiradero del homo
Elrespiraderodel homoest_incorporadoal sistemade ventilaci6n
descendenteenlasuperficiedecocci6n.
Cuandoel homoest_en use,el_ireacercanaal respiraderodel
homo puedecalentarseIosuficientecomeparacausarquemaduras.
Paraobtenerlosmejoresresultados,no bloqueeel respiradero.
Parte inferior del homo
Protejala parteinferior de los homescontra derrames,
especialmentelosderrames_icidoso azucarados,ya quepueden
decolorarla porcelana.Useutensiliosdetamale adecuadopara
evitarderrames.No coloqueutensilioso papel de aluminio
directamentesebre el rondo del home.
8O
Page 82

Parrillas del homo
Elhomo incluyetres parrillasplanasnormales.
Pararetirar la puerta del homo:
1. Tirede la parrilla hastaeltope.
2. Levantelaparte delanteradela
parrillaytire de ella para
sacarla.
Para volver a instalar:
1. Coloquela parrillaen el soporte
correspondienteenel homo.
2. Inclinelevementeel extremodelantero;deslicelaparrilla hacia
atr_shastaque paseeltope.
3. Bajeelextremodelanteroy deslicela parrillaenel homo.
No cubra una parrilla completa con papel de aluminimo ni
coloquepapelde aluminio en el rondo del horno. Estoafeetar_
losresultadosdelacocei6nypuedeocasionardafiosalrondo del
homo.
PARRILLA2: Seusaparaasartrozospeque_osdecame,pays
congelados,sufl6sde postreo pastelesesponjososy horneadocon
dosparrillas.Tambi6nseusaparahorneadocon parrillasm01tiples.
PARRiLLA1: Seusaparaasartrozosgrandesdecame ycame de
ave.
Panel Inferior del Homo: Coloquela
parrilladelhomo en lossoportesen
relievedel panelinferiordel homo.
Useparadisponerdeespacio
adicionalcuando cocinecomidas
grandesen el homo.
COOCi0N CONVARIASPARRILLAS:
Dos parrillas:Uselas parrillasenlas posiciones3 y5 o 2y 5.
]'res parrillas (convecciOnsolamente)(modelosselectos):Uselas
posiciones2,/4y 6 (yeala ilustraci6n).
Importante: Cuandosehorneaporconvecci6n(modelosselectos)
condoso tres parrillas,reviselosalimentosen el tiempo mfnimo
sugeridoparaevitar quequedendemasiadodoradosodemasiado
cocinados.
Horneado de pasteles de capas
en dos parriilas
Paraobtenermejoresresultadoscuando horneapastelesendos
parrillas,usela posici6n3y 5 para horneadoregulary la posici6n3 y
6 parahorneadopor convecci6n(modelosselectos).
Coloquelos pastelesen lasparrillascomose muestra.
Posiciones de las parrillas
PARRILLA7 (la posici6nm_s
alta): Paratostar pan o asara
la parrillaalimentosdelgados,
no grasosos.
PARRILLA6: Seusapara la
mayoriade los asadosa la
parrilla.
PARR&[.A5: Parahorneado
con parrillasmOltiples.
PARRILLA4: Seusapara
hornearlamayoriade losalimentosenuna bandejade hornear
galletasoun moldepararollode mermelada,paysde frutaso
alimentoscongeladosde preparaci6nr_pida.Tambic!nse puedeusar
paraasarpresasdepolioa la parrilla.
PARRILLA3: Paracacerolas,horneadode pan,tortasenmoldesde
tubo o paysdenatilla.
[_
Coccidn por conveccidn
con tres parriHas
(modelos selectos)
inferior
81
Page 83

(}PC|ONES
IVies opciones
Para programar an horneado per convecci6n
diferido: (modelosselectos)
"Cook & Hold" (Cocinar y mantener caliente)
1. SigalospasosI a 4 de la funciOn"Delay"(yeaabajoala izquierda}.
2. Seleccionela funciOnHORNEADO,ASAR o PASTELES.
(modelos selectos) ,
1. Optimalatecla"More Options" [M_sopciones).{,Options
2. SeleccioneCOCCION/CALENT. .................
3. Programeeltiempo de cocci6nusando lasteclasr_pidaso las
teclasnum6ricas.
/4. Seleccionelafunci6n HORNoCONVEC.
5. CuandooptimaHORNEAR,seleccionelatemperaturausando las
teclasr_pidaso lasteclas numdricas.
6. Cuandooprimalatecla CONVEC,seleccioneHORNEADO
CONV,ASARPeR CONV o PASTELESCONVy programela
tempera-turadeseadausandolasteclasr@idaso lasteclas
num6ricas.
El homococinar_idurante el tiemposeleccionadoy luegomantendr_
el alimentocalienteduranteunahera.Elhomoseapagar_i
autom_ticamente.
Importante:Si larecetarecomiendaprecalentarel homo,afiada 15
minutesa laduraciOnde la cocci6n.
3. Elijaunade lastemperaturasdesplegadasouselasteclas
num6ricasparaprogramarlatemperatura.
4. Elijaeltiempo de cocciOnde lostiemposdesplegadosouse las
teclasnum6ricasparaprogramareltiempodecocciOn.
5. Lapantallamostrar_"DELAY",lafunciOnseleccionada,la
temperaturaprogramaday el conteoregresivodeltiempodiferido.
Cuandoeltiempo diferidotermina,se muestrael tiempode cocci6n
y el homo comienzaa precalentar.
Para programar la autolimpieza diferida:
1. Sigalospasos1a/4 de la funci6n "Delay"[yeaabajoa la izquierda).
2. RETPARRILLASsedesplegar_ien la pantalla.Retirelasparrillas
del homo yseleccione CONTINUAR.
3. Seleccioneel niveldesuciedadLEVEintroduciendoel nt3mero
200conlasteclasnum6ricasparaprogramardos horasde limpieza.
Seleccioneel niveldesuciedadMED o INTENSe usandolas
teclasr_pidas.Hayunaesperabrevemientrasla puertase bloquea.
/4. Lapantallamostrar_"DELAY",eltiempo delimpiezay eltiempo de
desbloqueodela puerta[on basealniveldesuciedad
seleccionado}.Cuandoeltiempo diferidotermine,se mostrar_el
tiempo de limpiezay el homocomenzar_aprecalentar.
Paramayorinformaci6nsobreautolimpieza,yea la p%ina 66.
"Delay" (Diferir)
1. Oprimalatecla "More Options".
2. Oprimalafiecha paranavegarentrelasopciones
hastaque se muestreDIFERIRen pantalla.
3. Seleccionelafunci6n DIFERIR.
4. Programeeltiempo a diferir usandolasteclasr_pidaso las teclas
num6ricas.
5. SeleccioneHORNEADO,CONVECoLIMPIEZA y programela
temperaturausando lasteclasr_ipidasolasteclas numc!ricas.
/More ...........
Options,
Para programar an horneado diferido:
1. Siga los pasos1a 4de lafunci6n "Delay" (yeaarriba).
2. Elijaunade lastemperaturasdesplegadasouse las teclas
numc!ricaspara programarlatemperatura.
3. Elijaeltiempo decocci6nde lostiemposdesplegadoso use las
teclasnum6ricasparaprogramareltiempodecocci6n.
4. Lapantallamostrar_i"DELAY",lafunciOnseleccionada,la
temperaturaprogramaday el conteoregresivodeltiempo
diferido.Cuandoel tiempo diferidotermina,semuestraeltiempo
decocciOny el homocomienzaaprecalentar.
"Proofing" (Espajamiento} (modelos selectos}
Estacaracteristicaseutilizaparaquelosproductosdepan de
levadurase elevenyfermentenantesdel horneado.Haydos
m6todosde espajamientodisponibles- RAPIDOy NORMAL.
Elfermentadoest_ndaren el homo protegelamasacontralos
cambiosdetemperaturay lascorrientesquecomt3nmenteafectan
losresultadosdelespajamientoefectuadofueradel homo.
Elfermentador_pido proporcionaresultadosm_isr_pidossin dafiar
la levaduraquesi seusaelfermentadoest_indaro sedejala masa
reposarfuera del homo.
1. Optimalatecla"More Options".
2. SeleccioneESPAJAMIENTO.
3. SeleccioneRAPIDOo NORMAL.
/4.
Cuandose hayacompletadoel eapajamiento,retire..............
la masadelhomo y optima latecla"CANCEL" [AnulaO.
Options
......... /
,/
CANCEL i:
Cent.
82
Page 84

Notas:
, Paracualquiermasaque requieralevantarseuna vez,sepuede
usarel espajamientonormalo r@ido.
, Cuandousemasade pancongelada,elija laopci0nde ESPONJ
RAPIDA.No esnecesariodescongelarla masaantesde
fermentarla.
• Parala masaque requieralevantarsedosveces,sedebeusarel
espajamientonormalparael primer ciclo de espajamiento.Se
puedeusarcualquierade losdos ciclosde espajamientoparael
segundolevantamiento.
, Si latemperaturadelhomoes demasiadoaltaparael
espajamiento,ENFRIAMIENTOaparecer_en pantalla.
6. DESCONG-SERVlR,eltiempode cocci0ny el conteo regresivo
del tiempode cocci0naparecer_nenpantalla.
7. Si ladescongelaci0nterminaantesdeque eltiempohaya
transcurrido,oprimala tecla"CANCEL" (Anular)yretireel
alimentodelhomo. Cuandoeltiempo de ....................................
cocci0nhayaterminado,elhomo se apagar_y ( CANCEL
emitir_ unasepalsonora. ..............................
Importante: Estacaracter[sticanodebe usarseparadescongelar
carnesuotrosalimentosque debensercocinadosantesdeservir.
"Thaw and Serve" (Descongelar y serviO
(modelos selectos)
UseestafunciOnparaalimentoscongeladosquenecesitanser
descongeladosperonococinadosantesde servir.
Para programar la funci6n descongelar y servir:
1. Coloqueelalimentoenel horno en laparrilla2.
2. Oprimalatecla "Convect" (ConvecciOn). ( Convect i:
3. Oprimalaflecha paranavegarentrelasopciones. .............. "
4. SeleccioneDESCONG=SERVIR.
5. Seleccioneel nOmerode minutosdedescongelaci0n.
Tabla para descongelar y servir
Pastelesy tortas completas
Pasteles:de limOn,con crema,
de pacana,dechocolate,
batatas,pasteldeseda
Tortas:Vainilla,chocolate,
cocoytortasde tres
capas,tortade ponqud,
3asteldecrema
Porcionesindividuales:
Rebanadasde pastel,rebanadas
torta,otros postresindividuales,
3astelitosrellenos,pastelitos
de crema
ToAadequeso
1.Remuevael alimentocongeladodela cajay envoltorio.
2.Coloqueel alimentocongeladoen la parrillacentraldel homo.
3.Uselafunci0n dedescongelar-servirdurante 15
minutosparatortasy30 minutosparapasteles.
4.Retireelalimentodel homo.
5,
Corteenporcionesindividualesy coloqueenplatos.
6.
Vuelvaa colocarlosplatosenel homo.
7.
Uselafunci0n de descongelar-servirde 10a30minutos.
1.Retireel alimentocongeladodel envase.
2.Coloquela porci0n en el plato.
3.Coloqueel plato en la parrilla centraldelhomo
4.Uselafunci0n de descongelar-servirde 10a30minutos.
1.Remuevael alimentocongeladodela cajay envoltorio.
2.Coloqueel alimentocongeladoen la parrillacentraldel homo.
3.Uselafunci0n de descongelar-servirdurante30minutos.
4.Retireelalimentodel homo.
5.Corteenporcionesindividualesy coloqueen platos.
6.Vuelvaa colocarlosplatosen el homo.
7.Uselafunci0n de descongelar-servirhastapor 15
minutossi Io desea.
"Keep Warm" (Mantener caliente)
Lacaracteristica"KeepWarm"seusaparamantenercalientes
alimentosqueest_incalientesoparacalentarpanesy platos.
1. Oprimalatecla"More Options" (M_s opciones).
2. Oprimalaflechaparanavegarentre lasopciones.,up(Ions"-" /
3. SeleccioneMANTCALIENTE.
4. Seleccioneuna de lastemperaturasdesplegadasoprogramela
temperaturadeseadausandolas teclas numOricas.Puede
seleccionartemperaturasentre63° C(145° F)y 88°C (190° F).
° Sidescongeladurante30 minutos,
sefacilita cortar pastelesy tortas
completasy torta de queso.
° Lastortasde capasrequieren
solamente15minutosantes
decortar.
• Eltama_oy la texturadelalimento
a descongelarafectar_nel tiempo
de lafunci0n descongelar-servir.
• Lospostresm_isgrandesodensos
puedentomar m_stiempo
paradescongelarse.
° Lasrebanadasdetorta se
descongelanm_sr_pidamente
que lasrebanadasde pastel.
Lasrebanadasde pastel.
de batatapuedentomarentre
20y30minutes.
*Estacaracteristicas01opuedeserusadaconalimentoscongelados"ThawandServe"(Descongelary servir)o "ReadytoServe"(Listoparaservir).
NO intentedescongelarcarnescongeladas,camede aveo mariscos.
** Noesnecesarioprecalentarel homo. 83
Page 85

5. MANTENCALIENTylatemperaturaaparecer_nenpantalla.
6. Cuandoelhomosehayaprecalentado,escuchar_unasepal
sonorayMANTENCALIENTylatemperaturasedesplegar_inen
lapantalla. /............. ,,,
7. Cuandotermine,oprimala tecla "CANCEL" (CANCEL ;
(Anular)y retireelalimentoo losplatosdel homo. .............
Para calentar panecillos:
• Cubralospanecilloslevementeconpapelde aluminioy
col0quelosen el horno.
• Oprimalatecla "More Options" (Masopciones). { Options ,- ,,
• SeleccioneMANT CAUENTE. ..........
• Elijaunatemperaturade 77°C (170°F).Calientedurante
12a 15minutos.
Para calentar pintos:
• Coloquedosfilasdehastacuatroplatoscadauna enel homo.
• Oprimalatecla "More Options".
• SeleccioneMANT CAUENTE.
• Elijaunatemperaturade 77°C 070° F).
• Calientedurantecinco minutos. Apagueel homo oprimiendola
tecla"CANCEL" y dejelospintosenel homo durante 15minutos
m_is.
Usesolamenteplatos resistentesal homo;verifiqueconel
fabricante.
• No coloquelospintoscalientessobresuperficiesfr[aspuesel
cambior_ipidode temperaturapuedehacerque serompano
causarfisuras.
Notas:
• Losalimentosdebenestarcalientescuandosecolocanenel
homo.
, Paraobtenerla mejorcalidadde losalimentos,los mismos
debenmantenersecalientesduranteno robsde 1horn.
° Paraevitarquelosalimentossesequen,ct3bralosligeramente
conpapeldealuminio o con una tapa devidrio.
"Drying" (Secado) (modelos selectos)
Paraobtenerlosmejoresresultados,utilice unarejillade secado.
Estasrejillaspermitenque el airecircule uniformementealrededordel
alimento.
Elventiladorde convecci0nfuncionarddurante el secado.
Para programar el secado:
1. Lapuertadel homodebeset abierta
levementeparapermitirquela humedad
escapedel homoduranteelsecado.
° Abrala puertadel homolevemente.
• ColoqueelespaciadormagnOticoparalapuerta(piezaNo.
8010P146-60)sobreel interruptor. Elespaciadorproporciona
una aberturaentreel marcoy la puertadel homo parapermitir
que la humedadescape.
° Cierrela puertacon cuidadohastaque el espaciadormagnOtico
entreen contactocon la puertadelhomo. Elim_nsostendr_el
/
espaciadoren laposici0ncorrectaduranteel procesode secado
ypermitequela puertaseaabiertaencualquiermomento
duranteelsecadosinquepierdasuposici0ncorrecta.
Importante:Si el espaciadornosecolocacorrectamente,el
ventiladorde convecciOnno funcionard.
2,
Oprimala tecla"Oonvect" (ConvecciOn). Convect )
3.
Oprimala flecha paranavegarentre Insopciones.
SeleccioneSEOADO.
4.
.............. \
\ /
5. Seleccioneunade lastemperaturasdesplegadasoprogramela
temperaturausando Insteclas numOricas.Puedeprogramar
temperaturasentre38° C (100°F)y93° C[200°F).
6. Enel indicadoraparecer_iSECADOy la temperatura. "PREHEAT"
(Precalentamiento)aparecer_en pantallahastaque el homo
alcancelatemperaturaprogramada.
del homo y oprima la tecla "CANCEL".
//_ L "7. Cuando el secado haya terminado, retire el alimento ( _ANCE
................. /
SigalaGufadesecadoenla pdgina85paraconocerlostiemposde
secado.Verifiquelosalimentosal habertranscurridoeltiempo m[nimo
indicado.Enfr[elosalimentoshastatemperaturaambienteparaprobar
el nivelde secado.
Notas:
. Paraadquiriruna rejilladesecado,pOngaseencontactocon su
distribuidorJenn-Airy pidaelkit de accesorio"DRYINGRACK"
(Rejilladesecado)o Ilameal 1-800-JENNAIR(1-800-536-6247).
° Lamayor[ade Insfrutasy verdurassesecanbienymantienensu
colorcuandosesecana60°C (140° F).Lacamey la cecinadeben
secarseaentre63°C (145° F)y66° C (150° F).Paraun sabor
0ptimo,sequeInshierbasa38° C(100°F).Sinembargo,debidoa
estabajatemperatura,el tiempodesecadopuedealargarsehasta8
horns.
• Eltiernpo de secadovaria de acuerdo con Io siguiente:
Contenidode agua y azticar del alimento, tama_o delas
piezas,cantidadde alimento que seest_ secandoyla
humedaddelaire.
• Verifiquelosalimentosal habertranscurridoelminimotiempode
secado.Sequelosalimentosduranteun mayortiemposies
necesario.
• Lasfrutasquesetornan marronescuandoseexponenal aire
debensettratadascon unantioxidante.Pruebeuric delos
siguientesmOtodos:
1. Moje lafrutaen unamezcladedosterciosdejugo de limOn
embotelladoy untercio deaguatemplada.
2. Remojelafruta enunasoluciOnde1cucharaditade _cido
asc0rbicooun antioxidantecomercialenun litro deaguafr[a.
° Losalimentospuedengotearduranteel procesode secado.
Despu_sdesecaralimentosconalto contenido_cido o azucarado,
limpiela parteinferiordel homo conaguayjabOn.Elacabadode
porcelanadelhomosepuededecolorarsiInsmanchasdcidaso
azucaradasnoselimpianantesde un ciclode altatemperaturao
de autolimpieza.
° Sepuedesecarm_sdeunaparrilladealimentoa lavez.Sin
embargo,serequerir_un mayortiempodesecado.
• Consulteotrasfuentesde informaci0nen subibliotecalocalo Ilame
a suserviciodeextensiondel condadoparaobtenermayor
informaci0n.
84
)
Page 86

Guia de secado (modelos selectos)
Nlanzanas* Variedadesfirmes:"Graven" Lave,pelesi desea,elimineel coraz0ny 4 a8 horas Flexiblesa crujientes.Las
"Stein","GrannySmith", corteen rebanadasde32mm(1/8"). manzanassecasse
"Jonathan","Winesap", )reservanmejorcuando
"RomeBeauty","Newton". est_nunpococrujientes.
Duraznos* "Blenheim/Royal"m_is Lave,corteperla mitad,eliminelas 18a 24horas Suaves,flexibles.
comunes.Los"Tilton" semillas.
tambiOnsonbuenos.
Cambures* Variedadesfirmes Peleycorteen rebanadasde64 mm 0/4"). 17a 24horas Flexiblesa crujientes.
Cerezas "Lambert","RoyalAnn", Lavey eliminelostallos.Corteper la mitad 18a 24horas Flexiblesy gomosos.
"NapoleOn","Van"o"Bing". yeliminelassemillas.
Nectarinas y Variedades"Freestone". Cortepor la mitadyeliminelassemillas. 24a36horas Flexiblesy gomosos.
melocotones* Puedepelarlos,peroresultaen
frutasecade mejoraspecto.
Peras* "Bartlett" Pele,corteporla mitadyelimineelcorazOn. 24a36horas Suavey flexible.
Pifia Frescao enlatada. Lave,peley eliminelosojuelosespinosos. Enlatada: Suaveyflexible.
Cortea Io largoyelimineel corazOn 14a 18horas
peque_o.CorteaIoanchoenrebanadas Fresca:
de 1,27cm [1/2"). 12a 16horas
Concha de Elijafrutasdeconcha_spera. Lavebien.Peledelgadamentela 16mm 1a2 horas Durasafr_igiles.
Lim6no No sequelaconchade las 0/16") a 32mm(1/8")de laconcha.No
Naranja frutascon "colora_adido", use lamOdulablancaamargadebajodela
concha.
Tomates
"Plum","Roma"
Cortepor la mitad,eliminelassemillas.
12a 18horas
Durosa crujientes.
Coloquelostomatescon elpellejodel
tomateen laparrilla.Pincheel pellejo.
Zanahorias
"Danvers"de mediotama_o,
"Imperator",de centrorojo
"Chantenay"
No usezanahoriasdefibradurao con
corazOnmeduloso.Lave,cortelostopesy
pelesiIodesea.Cortea Ioanchoo
/4a8 horas
Durasafr4giles.
diagonalmenteen rebanadasde 64mm
(1/4").Cocinealvaporpor3 minutes.
Aji picante
"Ancho","Anaheim"
Lave,corte porlamitadyeliminelas
semillas.Pincheelpellejovariasveces.
4 a6 horas
Lasvainas deben verse
arrugadas, de color rojo
oscuro y crujientes.
Perejil,Menta, Enjuagueenaguafria.Sequeconuna 1a3 horas Fr4gilesy desmenuzables.
Cilantre,Salvia, toalladepapel.Dejelostalloshastaque
Oregano lashojasestOnsecas,y luegodesc!chelos.
AIbahaca Cortelashojas7,62cm (3") a 10,16cm [4") 2a5 horas Fr_gilesy desmenuzables.
desdeeltopede laplantajusto donde
comienzanabrotar.Enjuaguelashojasen
aguafr[a.
*Frutasque requierenun antioxidanteparaevitarladecoloraciOny lapc!rdidade losnutrientes.ConsultelosmOtodosespecificosenlasnotasde
la p_gina84.
** Lafunci0nde apagadoautom_ticodespuc!sde 12horasnofuncionar_duranteelsecado.
85
Page 87

AVOR|TOS
"Favorites" (Favoritos)
Laopci6n "Favorites"guarda lafunci6n del homo,tiempodeeocci6n
y la temperaturahastapara 10de sus recetasfavoritas. Loshomos
de convecci6nvienenconcinco recetaspreprogramadas.
Para seleccionar una receta de la lista
de recetas preprogramadas:
1. Oprimalatecla"Favorites".
2. Seleccionelaopci6nUSTA RECETAS.
3,
Seleccionela recetadeseadaen la pantallau opnmalafiecha
paradesplazarseala recetadeseada.
4.
Unavezque la recetaesseleccionada,el homo comenzar_a
precalentarde acuerdoconel programaseleccionado.
• Puedeoprimir latecla"More Options"[M_sopciones}para
a_adir lasfuncionesCOCC/CALENo DIF.
5. Cuandotermine,optimalatecla"CANCEL" [Anula0y retire el
alimentodelhomo.
Para guardar la _ltima receta terminada:
(Hornear,Horneadopot convecci6n,Asado por convecci6n,
Pasteler[aporconvecciOn,Asadoa la parrillaperconvecciOn,Secado,
Mantenercaliente,Fermentado}
1. Optimalatecla "Favorites". Favorites,
2. Seleccionela opci6nGLIARDARLILTIMA. ,, ............On / Off
3. Introduzcaelhombre usandolasteclas.
• Porejemplo,paraguardar"lasagna",optima latecla <JKL>
tresvecesparalaletra "L"; optima la tecla<.ABe> una vez
para la letra "A"; optimala tecla<STU> unavezparalaletra
"S".Contintieasihastaque hayaterminadola palabra.
4. Despu@deprogramarcadaletra,esperetressegundoshasta
que aparezcaunalineaen el siguienteespaciou optimala tecla
"Enter" (Aceptar}antesde pasara la siguienteletra.
• Sepuedenusarhasta14letrasincluyendolosespacios.
5. Cuandoel hombrede larecetahayasidoprogramado,los01timos
ajustesse desplegar_indurantevariossegundos.
6. LISTARECETASse desplegar_ien la pantalla paranavegarpor las
opciones.
7. Optimalatecla "Favorites" parasalirdel men0
de recetasfavoritas.
// .......... ......
: Favorites
',, On/Off /
/, .......
Para treat una nueva receta favorita:
1. Oprimala tecla"Favorites". Favorites
, On/Off
2. Oprimala flechaparanavegarpot lasopciones. ....................................
3. SeleccioneCREARNUEVAconla teclaa la izquierda.
4. Introduzcaelnombreusandolasteclas.
, Potejemplo,paraguardar"lasagna",optima la tecla<JKL> tres
vecespara la letra"L";oprimala tecla<.ABC> unavezparala
letra"A"; optima latecla<STU> unavezparalaletra"S".
Contin0easihastaquehayaterminadola palabra.
• Despu_sdeprogramarcadaletra,esperetressegundoshasta
que aparezcaunalinea enelsiguienteespaciouoptima latecla
"Enter" antesde pasarala siguienteletra.
• Sepuedenusar hasta14letrasincluyendolosespacios.
5,
Seleccionetecla "Enter" paraguardarelnombre.
6.
Seleccioneel tipo decocciOn,comopot ejemplo HORNEAR,
HORNEADOCONV,ASARA LAPARR,etc.
7,
Seleccionela temperaturadelhomo usandolasteclasr@idas.
O
Programelatemperaturadeseadausandolasteclasnum6ricas.
8. Mada lafunciOn"Cook/Hold"(Cocinar/mantenercalient@
seleccionandolaopciOnSI o sakeestafunci6nseleccionandoNO.
9. SieligeSI,programeeltiempodecocci@ usandolasteclas
r@idaso lasteclasnumc!ricas.
10.Mada la funciOn"Delay"[Diferido}seleccionandola opciOn$1o
sakeestafunci6nseleccionandoNO.
11.SieligeSI,programeel tiempodiferido usandolasteclasr@idaso
lasteclas num6ricas.
12. La pantalla mostrar_ las opciones progrmadas y luego regresar_ al
men0 de recetas favoritas.
13.Optimala tecla"Favorites"para salirdel menti
de recetasfavoritas.
Para editar una receta guardada:
1. Oprimalatecla"Favorites".
/H ....................... \
/ Favorites
....._ On/Off _/
2. Oprimalaflechaparanavegarentre lasopciones.
3. Seleccionela opci6nEDITARRECETA.
4.
Elijalarecetaque deseaeditar. Esposiblequedebaoprimir las
teclasflechadasparaencontrar la receta.
SigaelmenOparacambiarlas opcionesde la recetasegOn18
desee.
6. Lapantallamostrar_el ment3derecetasfavoritasnuevamente.
LISTARECETASaparecer_ien pantalla.
7. Oprimalatecla"Favorites" parasalirdel menOderecetas
favoritas.
86
Page 88

Para borrar una receta favorita: /Favorites
1. Oprimalatecla"Favorites" (Favoritos). On / Off
2. Optima laflechaparanavegarentrelas opciones.
3. SeleccionelaopciOnBORRARRECETA.
4. Busquela recetaque deseaborrar.Esposibleque debaoprimir
lasteclasflechadaspara encontrarlareceta.
5. Elcontrolle preguntar_isi est,1segurodeque deseaborraresa
receta.SeleccioneSIo NO.
6. Oprimalatecla"Favorites" parasalirdel ment_de recetas
favoritas.
Parasalirdel men0de recetasfavoritasen cualquiermomento,
optima latecla "Favorites".
"Setup" (Ajuste) /_SetuP"
1. Optimalatecla"Setup". \On / Off
2. Uselaflecha paradesplazarsepot lasopcionesde "Setup".
3. Seleccionela opciOndeseadausandolasteclasr@idas.
NOra= = Parasalirde unapantallasinhacerning0n cambio,oprima
la tecla"Setup". La pantallavolver_adesplegarla horadel dfa. J
"Clock" (Reloj)
Param_sinformaciOnver lasp_ginas75-76.UselaopciOn"Clock"para:
• Programarlahoradel dfa.
• Programareldfa dela semana.
• Seleccionar"AM" o "PM" (modode 12 horassolamente)."AM" o
"PM" no aparecer_nen lapantallacon la horadeldfa.
• Seleccionarunformatode 12o 24 horaspara el reloj.
• Apagarel reloj.
"Auto Convect" (ConvecciOn autom_tica)
(modelos selectos)
Elhomovieneprogramaticdesde laf_brica paralaconversion
autom_ticade convecciOn.
"Auto ConvectConversion"reduceautom_ticamentela temperatura
programadaen 15° C[25° F)paralasfunciones"ConvectBake"
(Horneadopot convecciOn)y "ConvectPastry"[Pasteleriapor
convecciOn).
Parala funciOn"ConvectRoast"(AsadoporconvecciOn)el controlle
advertir_cuandohayatranscurridoel75%del tiempodeasado
programadoparaqueverifiqueelgrado de cocciOnde losalimentos.
Lastemperaturasde asadopot convecciOnno se reducirdn.
Notas:
Cuandouse "ConvectBake"y "ConvectPastry"con la opciOn
"Auto ConvectConversion"apagada,reduzcalatemperatura
programadaen 25° F(15°0).
Si usael asadopor convecciOncon la opciOndeconversion
automdticade convecciOnapagada,noserdnecesarioprogramar
un tiempo de cocciOn.Verifiqueel alimentocuandohaya
transcurridoel 750/odel tiempotradicional.
Si lafunciOndeconvecciOnautomdticaest_desactivada,no
programeuntiempode asadoporconvecciOn.
|dioma
Elidiomadelas pantallaspuedeserprogramaticen inglOs,francOso
espaM. Paracambiarelidiomade inglOsa otroidioma:
1. Optima latecla "Setup".
2. Elija[DIOMA.
3. Uselaflecha parapasara la pantallasiguientede sernecesario.
4. Seleccioneel idiomadeseado.
5. Optima latecla"Setup" parasalir del ment]deconfiguraciOn.
Para desactivar la conversion autom_tica
de convecciOn:
1. Oprimalatecla "Setup".
2. Seleccionela opciOnOONVEOCAUTOM.
3. SeleccioneDESACTIV.
4. Oprimalatecla "Setup" parasalirdelmenOdeconfiguraciOn.
/ Setup
Para reactivar la conversion autom_tica
de convecciOn:
],
Oprimalatecla "Setup".
2.
Seleccionela opciOnCONVECCAUTOM. On / Off /
3.
SeleccioneACTIV.
4. Optimalatecla "Setup" parasalirdelmenL_de configuraciOn.
87
// ........... •x
On/Off
.......... /
Page 89

C/F
Laescaladetemperaturadesplegadapuedesercambiadade
Fahrenheita Celsius.
Para cambiar la escala:
1. Oprimalatecla"Setup" (Ajuste].
2. Usela flecha parapasarala pantallasiguiente.
3. SeleccioneC/F.
4. Seleccionelaescaladetemperaturadeseada.
5. Optimalatecla "Setup" parasalirdel men0de configuraciOn.
Mode sab tico
El hornoest_programadoparaapagarsedespu_sde 12horassi
usted Io dejaaccidentalmenteencendido.Elmodesab_ticotiene
prioridadsobreestecierreautom_ticode 12horasy puedeset
programaticparaquese activeautom_ticamenteo puedeser
programaticmanualmentecomese desee.
SOlopuedeusarla fuciOn"Bake"(Hornea0o "Cook/HoldBake"
(Horneadoconcocinary mantenercaliente)cuandoel homo est,1en
el modesab_itico.Todaslasdemosfuncionessondesactivadas.Si
cualquierfunciOnque no sea"Bake"o "Cook/HoldBake"cuando
comienzael modesab_itico,dichafunciOnser_anulada.
Para activar el mode sab_tico:
1. Optimalatecla "Setup".
2. Optimalaflecha paranavegarentre lasopciones.
3. Seleccionela opciOnS/\BATICO.
4. SeleccioneAUTOo MANUAL.
• "Auto" (Autom_tico]lepedir_que programela temperaturade
horneadoel viernesalas 2:00 p.m.y permanecer4enmode
sab_ticoper 33horas.MODOSABATACTsedespliegaenla
pantallaper 90 minutes.Sideseausar"Bake"o "Cook/Hold
Bake"duranteel modesab_tico,debenserprogramados
duranteesteperiodode90 minutespreviosala activaciOndel
modesab_ticoautom_tico.
• "Manual" colocaal homo en mode sab_iticoinstant_ineamente
durante72horas.SABATICOy MODOSABATACT
aparecer_nenla pantalladurante cinco minutes. Si
deseausar"Bake"o "Cook/HoldBake"duranteel mode
sab_tico,debenserprogramados
duranteesteperiododecinco minutespreviosala activaciOn
delmodesab_iticoautom_tico.
5. SeleccioneACTIVo BESACTIV.
6. Optimalatecla "Setup" parasalirdel men0deconfiguraciOn.
Para anular el mode sab_tico:
Optimay mantengaoprimidalatecla"Setup" durantecinco
segundos.Elmodede horneadopuedeseranuladooprimiendola
tecla "CANCEl," (Anula0durante el mode sab_itico.
// ........ ....
" Setup
, On! Off /
.......... /
/, ...... ,\
/ Setup
\, On / Off /
Notas:
Elhomonodebeestarenuse parapoder programarel mode
sab_tico.
Elmodesab_ticono puedeactivarsesiel tecladoo la puerta
est_inbloqueados.
Siel homo est,1funcionandocuandoel modesab4tico
comienza,noescuchar_seffalessonoras.
Todoslosavisos,mensajesy se_alessonorasestar_n
desactivadoscuandoel mode sab_ticoest6activado.
Sideseautilizarlaluzdel homoen modesab_tico,la misma
debeestarencendidaantesdeactivarestafunciOn.
Elciclo deautolimpiezay el bloqueoautom_iticode laspuertas
nofuncionandurante el mode sab_tico.
Latemperaturade horneadopuedeset cambiadaduranteel
modesab_ticoactive.Simplementeoprima latecla "Bake" y
luegointroduzcalatemperaturadeseadausandolasteclas de
programaciOnr_pida.
Sioprime latecla"CANCEL"se detendr_iel ciclo de horneado,
pore el control permanecer4en modesab_itico.
Eld[ade la semanay "AM/PM" debenserprogramadospara
que el mode sab_ticofuncione correctamente.
"Temp Adjust" (Ajuste de la temperatura)
Lastemperaturasdel homoson cuidadosamenteprobadasen la
f4brica. Esnormalnotaruna diferenciaentre latemperaturade
horneadoo en el doradoentreun homo nuevoyun homousado.
A medidaque se usan loshornos,la temperaturade losmismos
puedecambiar.
Ustedpuedeajustarlatemperaturadel homo siconsideraque el
mismono est,1horneandoo dorandocorrectamente.Paradecidir
cuanto debecambiarlatemperatura,programelatemperaturadel
homoa 15° C(25° F] m_saltao m_s bajaque la temperatura
indicadaen surecetay luegohornee. Los resultadosdel primer
horneadole dar_nuna mejorideade cu_intodebeajustarla
temperatura.
Para ajustar la temperatura del homo:
1. Oprimala tecla "Setup".
2. Oprimala fiechaparanavegarentrelasopciones.
3. Seleccione/\JUST/\RTEMP.
4,
Programe la temperatura deseada usando las teclas numOricas.
5.
Seleccione"+/=" para indicarun aumentoo reducciOndela
temperatura. Elcambiodetemperaturasedespliegaenla parte
superiorde la ventana.
Oprimala tecla "Enter" (Acepta0oesperetres " Setup
segundosparaaceptarlos cambios. On / Off
Oprimalatecla "Setup" parasalirdel men0.
Latemperaturadel homono necesitaser reajustadasi hayunafalla
o interrupciOnde laenerg[aek!ctrica.
Lastemperaturasdeasadoy deautolimpiezanose puedenajustar.
Setup '
On / Off
" .......... /
/ ....................
88
Page 90

Tones (Bips)
Sepuedeajustarel nL_meroy el volumendeInsse_alessonoras
emitidasal fin de lacocciOny al fin de la funciOndeltemporizador.
Para ajustar las se_ales sonoras:
1. Oprimala tecla "Setup" (Ajuste).
2. Optimalaflecha paranavegarentre Insopciones.
3. Seleccionela opciOnS(}NID(}S.
Para cambiar las se_ales sonoras al fin
de la cocci6n:
1.
Signlospasos1a 3 de la funci6nTonos(yeaarriba).
2.
SeleccioneS(}NID(}S C(}CC.
3.
Optimalaflecha paranavegarentre Insopciones.
4.
Seleccione1=30 MIN paraoirunaserialsonoracadatreinta
segundos.
(}
Seleccione1=60 MIN paraoiruna serialsonoracadasesenta
segundos.
(}
Seleccione1 BIP paradr sOlounasepalsonoraal finalde la
cocciOn.
5,
Optimalatecla "Setup" parasalir.
Para cambiar las se_ales sonoras del temporizador:
1. Signlospasos1a 3 de la funciOnTonos(veaarriba).
2. SeleccioneS(}NID(}STEMP(}R.
3. Optimalaflecha paranavegarentre Insopciones.
4. Seleccione2=30 SECparaoir dossefialessonorascadatreinta
segundos.
(}
Seleccione2=60 SECparaoir dossefialessonorascadasesenta
segundos.
(}
Seleccione1 BIP paraoir sOlounasepalsonoraal finaldel tiempo
prograrnado.
5. Optimalatecla "Setup" parasalir.
Para cambiar el volumen de las se_ales sonoras:
1. Signlospasos1a 3 de la funciOnTonos(veaarriba).
2. Optimalaflecha paranavegarentre Insopciones.
3. SeleccioneV(}LUMEN.
4. SeleccioneALTOparael volumenm_salto.
(}
" Setup ',
, On / Off
"12 I-it Shutoff" (Apagado despues de 12 horas)
Elhorno se apagar_autom4ticamentedespuOsde12horasde
funcionamientosi Iodejaencendidoaccidentalmente.
Para desactivar esta caracteristica:
1. Oprimala tecla"Setup".
2. Oprimala flechaparanavegarentrelasopciones.
3. SeleccioneAPAGAD(} DE 12H.
/4. SeleccioneACTIV o DESACTIVusandoInsteclas r@idas.
5. Optimalatecla"Setup" parasalir.
/ Setup
On/Off/
"Energy Saver" (Ahorro de energia)
Paraahorrarenergfa,la pantalla puedeser configuradaparaapagarse
si noest_ enuse.
Para programar la caracteristica de ahorro de energia:
1. Oprimala tecla"Setup".
2. Oprimala flechaparanavegarentreInsopciones. On / Off
3. SeleccioneAH(}RR(}ENERGiA.
4. SeleccioneACTIV o DESACTIVusandoInsteclasr@idas.
5. Optimalatecla"Setup" parasalir.
Optimacualquierteclaparaactivarel indicador.
\ .......... /
"Service" (Servicio)
Estaareadel controldel homodespliegaelmimero gratisdeatenci6n
al clientedeJenn-Air. ,,..................................
1. Oprimala tecla"Setup". On / Off
2. Oprimala flechaparanavegarentreInsopciones.
3. Seleccionela opciOnSERVICI(}.
/4. Optimala tecla"Setup"para salir.
"Demo" (Demostraci6n)
Cuandose seleccionala funciOn"Demo"ustedver_una peque_a
presentaciOndescribiendoInscaracteristicasdesu nuevaestufa
Jenn-Air. ,............,,
1. Oprimala tecla"Setup". Setup
2. Oprimala flechaparanavegarentreInsopciones. "..............
3. Seleccionela opci0nDEM(}.
/4. SeleccioneAOTIVo DESAOTIVusandoInsteclas r@idas.
5. Optimalatecla"Setup" parasalir.
" Setup
x ........ /
On/Off/
SeleccioneMEDIAN(} paraunniveldevolumenintermedio.
(}
SeleccionesBAJ(}parael volumenm_isbajo.
5. Optimalatecla "Setup" parasalir.
89
Page 91

90
Page 92

f
ARANT|A Y SERV|C|
Lo que no cubren estas garantias:
1.Situacionesydafios resultantesdecualquierade lassiguientessituaciones:
a.Instalaci0n,entregao rnantenimientoinapropiados.
b.CualquierreparaciOn,modificaci0n,alteraci0no ajusteno autorizadosporel
fabricanteo centro de servicioautorizado.
c. Mal uso,abuso,accidentes,usonorazonableo hechosfortuitos.
d.Corriente,voltajeo surninistroelOctricoincorrectos.
e.Ajuste inadecuadodecualquer control.
2. Lasgarant[asquedanhulassi los n_merosdeserieoriginalesbansido
retirados,alteradoso no sonf_cilmentelegibles.
3. Bombillas.
4. Losproductoscompradosparausocomercialoindustrial.
5. Elcostodel serviciooIlamadade serviciopara:
a. Corregirerroresde instalaciOn.
b. Instruir al usuariosobreel uso correctodel producto.
c. Transportedel electrodomOsticoal establecimientodeservicio.
6. Losdafiosconsecuenteso incidentalessufridospot cualquier personacomo
resultadodel incumplimientodeesta garantfa. Enalgunosestadosnose
permitelaexclusionolimitaciOnde dafiosconsecuenteso incidentales,porIo
tanto la limitaciOno exclusionanteriorpuedenoaplicarseen sucaso.
LAUNICAYEXCLUSIVASOLUCIONPARAELCLIENTEBAJOESTAGARANTfAES
LAREPARACIONDELPRODUCTOSEGONSEINDICAAQU[.LASGARANT[AS
IMPLfCITAS,INCLUYENDOLASGARANTfASDECOMERCIALIZACION0 DE
APTITUDPARAUNPROPOSITOENPARTICULARESTA,N LIMITADASAUNANO0
ALPER[ODODETIEMPOM[NIMOPERMITIDOPORLALEY.MAYTAGCORPORA-
TIONNOSERA,RESPONSABLEDEDANOSINCIDENTALES0 CONSECUENTES.
ALGUNOSESTADOSY PROVINCIASNOPERMITENLAEXCLUSION0 LIMITACION
DEDANOSINCIDENTALES0 CONSECUENTES0 LALIMITACIONDELA
DURACIONDELASGARANT[ASIMPLiCITASDECOMERCIALIZACION0 APTITUD,
PORLOQUEESTASEXCLUSIONES0LIMITACIONESPUEDENNOAPLICARSEEN
SUCASO.ESTAGARANT[ALEOTORGADERECHOSLEGALESESPEC[FICOS.USTED
TAMBIENPUEDETENEROTROSDERECHOSQUEVAR[ANDEUNESTADOAOTRO
0 DEUNAPROVINCIAA OTRA.
Form No. A/03/06 Part No. 6113P621 60
Si necesita servicio
Primeroleala secciOndeIocalizaciOnysoluciOnde aver[asen sugu[ade usoy
cuidadoo Ilamealdepartamentodeatenci0nal clientedeMaytagServices,LLC,
Jenn-Airal 1-800-JENNAIR[1-800-538-6247)en los EstadosUnidosy Canad&
Para obtener servicio bajo la garantia
Paraubicarunacornpafifadeservicioautorizadoerrsu Iocalidad,pOngaseerr
contacto con el distribuidordonde adquiri6suelectrodomOsticoo Ilameal
departamentodeatenci0nalcliente de MaytagServices,LLC,Jenn-Air.Sino
recibeserviciosatisfactoriobajola garant[a,porfavorIlameoescribaa:
MaytagServices,LLC
Attn: CAIR_'Center
P.O.Box2370,Cleveland,TN37320-2370
1-SO0-JENNAIR(1=808=536=6247) en EE.UUyen Canad&
Nora: Cuandosepongaencontactocon el departamentode atenci0nal
cliente de MaytagServices,LLC,Jenn-Airacercade un problema,pot favor
incluya lasiguienteinformaciOn:
a.Sunombre,direcciOny nQmerode telc!fono;
b. NOmerosde modeloy seriedelelectrodomdstico;
c. NombreydirecciOndel distribuidory fechadecompradelproducto;
d. UnadescripciOnclara del problema;
e.Comprobantedecompra.
Lasgufasde usoy cuidado,losmanualesde servicioy la informaciOnsobrelas
piezaspuedensersolicitadasal departamentodeatenciOnal clientede Maytag
Services,LLC,Jenn-Air.
@2006 Maytag Appliances Sales Co. Litho USA
 Loading...