

Page 1
UltraMax Plus
Desktop Hard Drive
USB / FireWire 400 / FireWire 800 / eSATA
Quick Start Guide
Guide de démarrage rapide
Schnellstart-Handbuch
Guida di installazione rapida
Guía de instrucciones rápidas
Guia de uso rápido
Snel aan de slag
Snabbstartguide
Introduktion
Hurtigreferanse
Pikaopas
Gyors útmutató
Stručná příručka
Wprowadzenie
Οδηγός γρήγορης εκκίνησης
Page 2
Quick Install–USB or FireWire
SA
T
A
S
A
T
A
FireWire/1394/i.LinkUSB eSATA
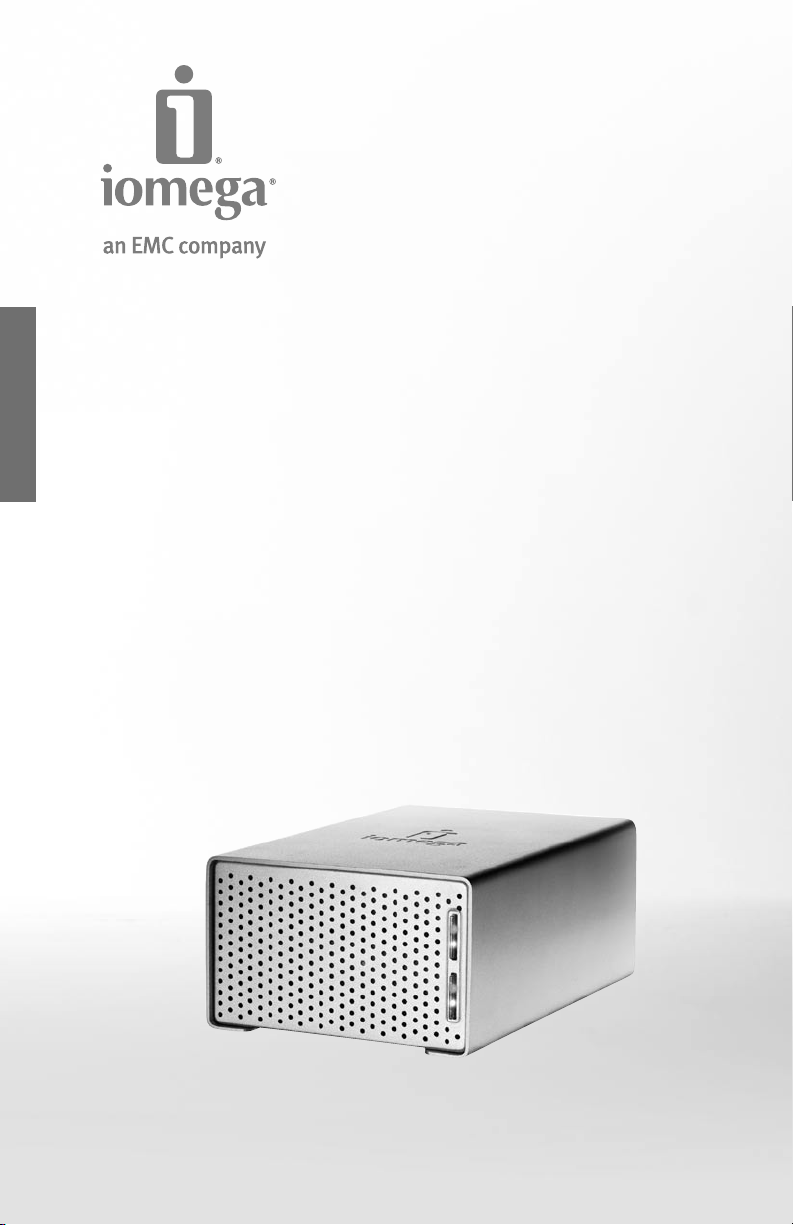
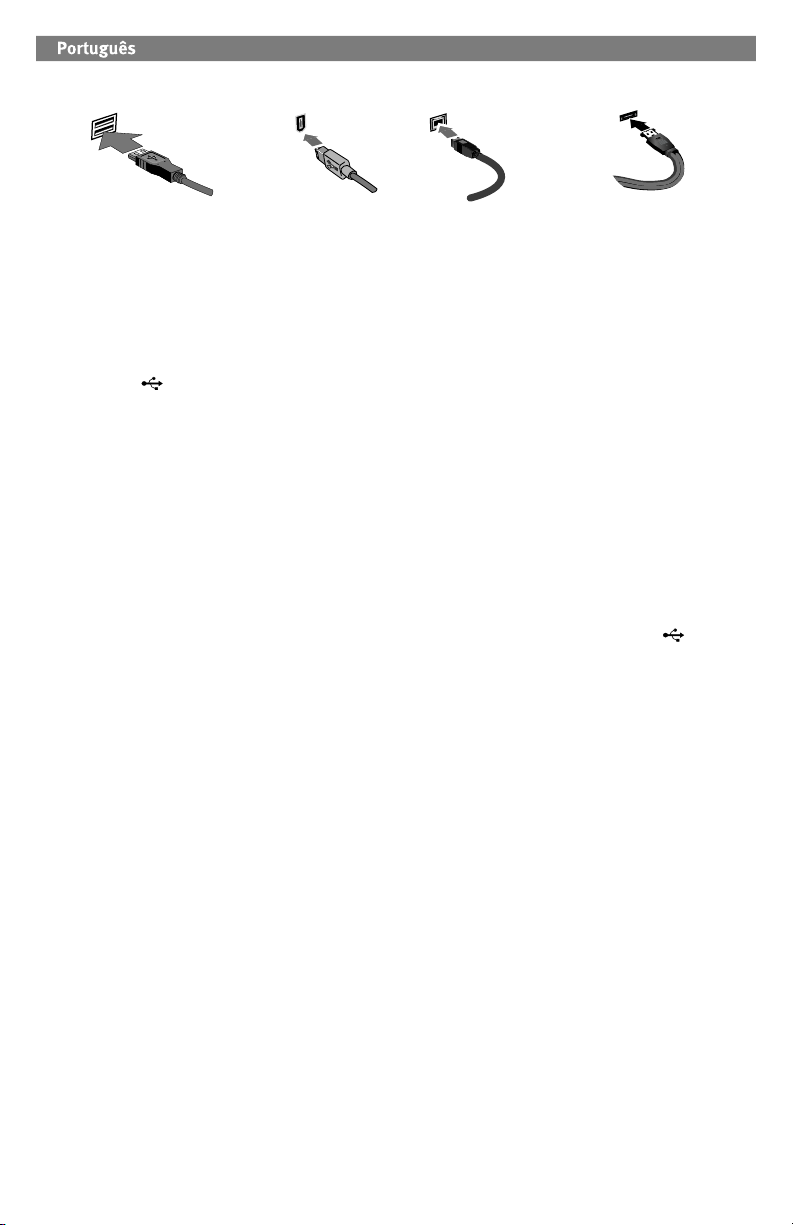
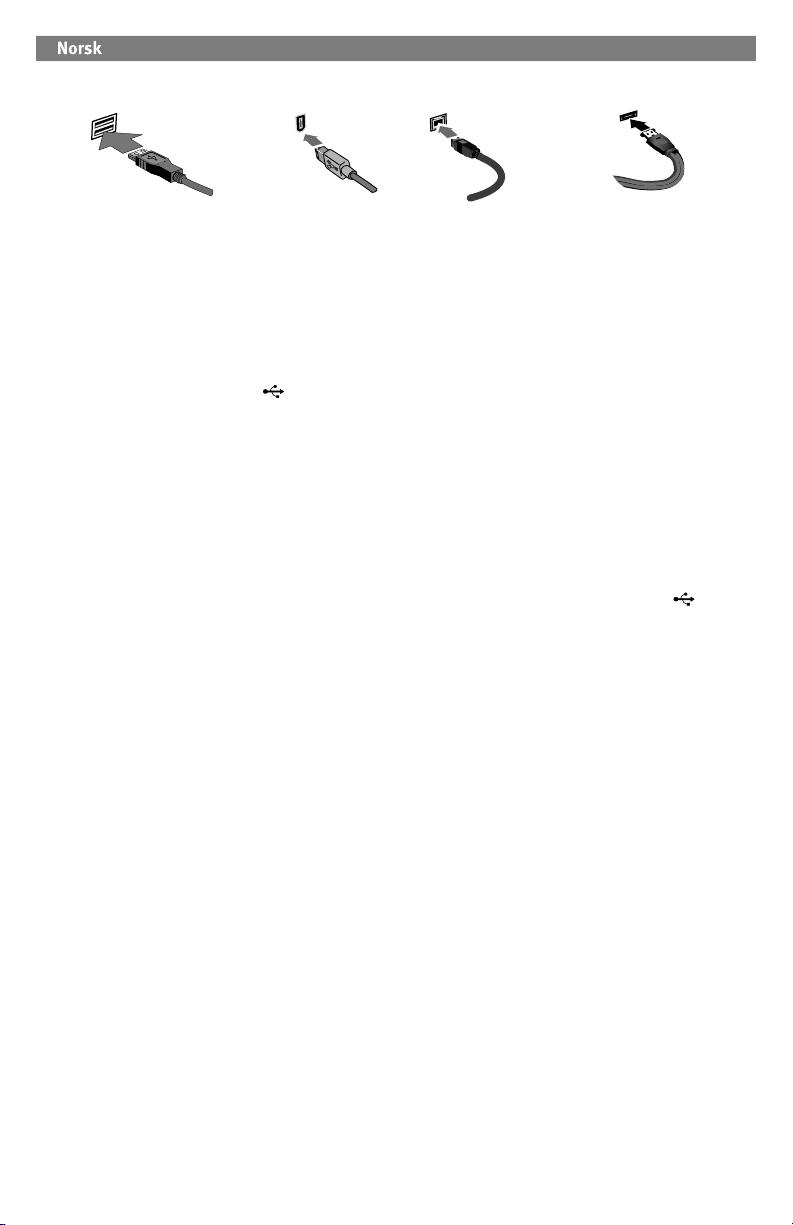
1. Connect the included power supply to the back of the
drive and to a power outlet
.
CAUTION! Do not move the drive while it is powered up
to avoid drive damage or data loss.
2. Identify the appropriate cable and connect it to the
back of the drive. For a USB connection, connect the
USB cable to the DuoLink port (marked with both
the USB symbol
and ‘eSATA’). For a FireWire
connection, you can use any FireWire port.
NOTE:
Never connect the drive to the computer with
more than one cable.
3. Connect the other end of the cable to the port on your
computer. Turn the drive on.
Mac Users
Mac Desktop
: The drive should mount and appear on the
.
PC Users: Your computer will not recognize the drive
until it is reformatted. See instructions below.
Formatting the Drive for Windows
CAUTION! Reformatting the drive will erase all existing data!
1. Open Windows Disk Management (right click on
My Computer, select Manage, and click on Disk
Management).
2. If the Disk Wizard opens, click Next. Select the disk,
click Next, then Finish.
If the Wizard does not open, locate the drive in the
lower list. Look for a disk that does not show a drive
letter or file system. Right click on the drive name and
select Initialize Disk (Windows XP) or Write Signature
(Windows 2000), then OK
3. The drive will now appear as Unallocated and the
bar will be black. Right click on the black bar and
select New Partition (Windows XP) or Create Partition
(Windows 2000)
4. When the Partition Wizard opens, click Next at each
screen to select the default options and format the
drive NTFS.
NOTE: If you want to use the drive with other operating
systems, use the Iomega FAT32 Formatter located on the
CD to change the format to FAT32. If you need detailed
instructions, check the
.
.
support area on www.iomega.com.
Quick Install–eSATA
1. If you are connecting to an eSATA PCI card, make sure
the drivers for the card have been installed and the
card is properly recognized by your operating system.
NOTE: You do not need to install special drivers for the
Iomega UltraMax drive. It is supported by the drivers
included with the eSATA PCI card. If you are using a
built-in eSATA connection, the drive is supported by
native drivers in the operating system.
2. Shut down the computer.
NOTE: The eSATA interface is NOT plug-and-play.
Always shut down the computer before connecting or
disconnecting the drive.
3. Connect the included power supply to the back of the
drive and to a power outlet
CAUTION! Do not move the drive while it is powered up
to avoid drive damage or data loss.
4. Identify the eSATA cable and connect it to the DuoLink
port (marked with both the USB symbol
‘eSATA’).
NOTE: Never connect the drive to the computer with
more than one cable.
5. Connect the other end of the cable to your eSATA PCI
card or built-in eSATA connection.
6. Turn on the power switch on the back of the drive and
restart your computer.
Mac Users
Mac Desktop
PC Users: Your computer will not recognize the drive
until it is reformatted. See instructions to the left on
: The drive should mount and appear on the
.
Formatting the Drive for Windows
.
and
.
2
Page 3
Installation rapide – USB ou FireWire
SA
T
A
S
A
T
A
FireWire/1394/i.LinkUSB eSATA
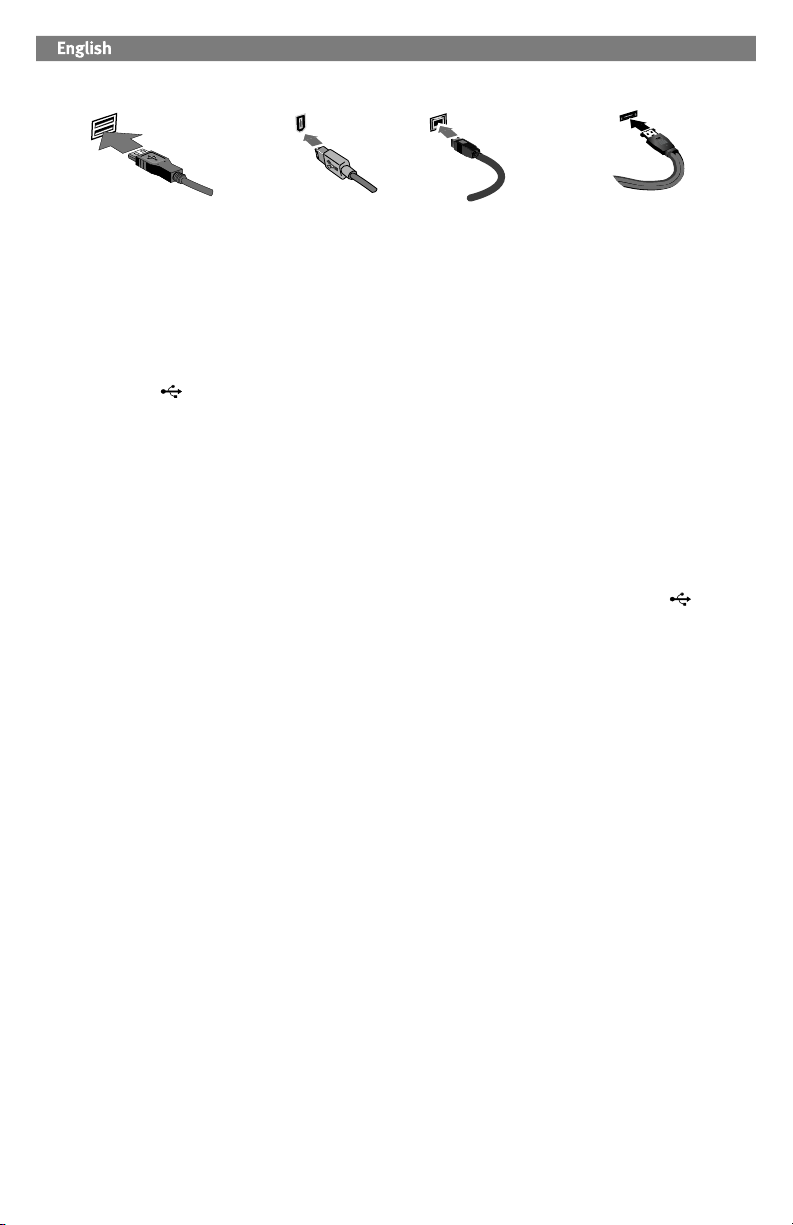
1. Connectez l’alimentation fournie à l’arrière du disque,
puis connectez-la à une prise secteur.
ATTENTION ! Ne déplacez pas le disque lorsqu’il est sous
tension pour éviter tout dommage ou perte de données.
2. Identifiez le câble approprié et connectez-le à l’arrière
du disque. Dans le cas d’une connexion USB, connectez
le câble USB à un port DuoLink (signalé par le symbole
USB
et eSATA). Pour une connexion FireWire, vous
pouvez utiliser n’importe quel port FireWire.
REMARQUE : ne connectez jamais le disque à
l’ordinateur à l’aide de plusieurs câbles.
3. Connectez l’autre extrémité du câble au port de votre
ordinateur. Mettez le lecteur sous tension.
Utilisateurs de Mac : Le lecteur doit être monté et
apparaître sur le bureau du Mac.
Utilisateurs de PC : votre ordinateur ne reconnaîtra pas le
disque tant que celui-ci ne sera pas reformaté. Reportezvous aux instructions ci-dessous.
Formatage du disque pour
ATTENTION ! Le reformatage du lecteur efface toutes les
données existantes !
1. Ouvrez l’utilitaire de gestion des disques de Windows
(cliquez avec le bouton droit de la souris sur Poste de
travail, Gérer, puis Gestion des disques).
2. Si l’Assistant lecteur s’ouvre, cliquez sur Suivant.
Sélectionnez le lecteur, cliquez sur Suivant puis sur
Terminer.
Si l’Assistant ne s’ouvre pas, recherchez le lecteur dans
la liste inférieure. Recherchez un disque ne présentant
ni lettre de lecteur ni système de fichiers. Cliquez avec
le bouton droit de la souris sur le nom du lecteur et
sélectionnez Initialiser le lecteur (Windows XP) ou Ecrire
une signature (Windows 2000) puis OK
3. Le disque apparaît comme Non attribué et la barre doit
être noire. Cliquez avec le bouton droit sur la barre noire
et sélectionnez Nouvelle partition (Windows 2000) ou
Créer une partition (Windows XP).
4. Lorsque l’Assistant Création de partition s’ouvre, cliquez
sur Suivant sur chaque écran pour sélectionner les
options par défaut et formater le disque au format NTFS.
REMARQUE : Si vous souhaitez utiliser le disque avec d’autres
systèmes d’exploitation, utilisez le Iomega Fat32 Formatter
situé sur le CD pour formater le disque au format FAT32
(requis pour la compatibilité multiplate-forme). Pour obtenir
des instructions détaillées, consultez la section Support du
site www.iomega.com
.
Windows
.
Installation rapide – eSATA
1. En cas de connexion à une carte PCI eSATA, assurezvous que les pilotes pour la carte ont été installés
et que la carte est correctement reconnue par votre
système d’exploitation.
REMARQUE : il n’est pas nécessaire d’installer
des pilotes particuliers pour le disque dur Iomega
UltraMax. Il est pris en charge par les pilotes inclus
avec la carte eSATA PCI. Si votre ordinateur dispose
d’une connexion eSATA intégrée, le lecteur est pris en
charge par les pilotes natifs du système d’exploitation.
2. Eteignez l’ordinateur.
REMARQUE : l’interface eSATA ne dispose PAS de la
fonction plug-and-play. Eteignez toujours l’ordinateur
avant de connecter ou de déconnecter le disque.
3. Connectez l’alimentation fournie à l’arrière du disque,
puis connectez-la à une prise secteur.
ATTENTION ! Ne déplacez pas le disque lorsqu’il est
sous tension pour éviter tout dommage ou perte de
données.
4. Identifiez le câble eSATA et connectez-le à un port
DuoLink (signalé par le symbole USB
REMARQUE : ne connectez jamais le disque à
l’ordinateur à l’aide de plusieurs câbles.
5. Connectez l’autre extrémité du câble à votre carte PCI
eSATA ou à la connexion eSATA intégrée.
6. Redémarrez votre ordinateur à l’aide de l’interrupteur
d’alimentation situé à l’arrière du disque.
Utilisateurs de Mac : Le lecteur doit être monté et
apparaître sur le bureau du Mac.
Utilisateurs de PC : votre ordinateur ne reconnaîtra pas le
disque tant que celui-ci ne sera pas reformaté
les instructions à gauche pour le Formatage du disque
pour Windows
.
et eSATA).
. Consultez
3
Page 4
Schnellstart – USB oder FireWire
SA
T
A
S
A
T
A
FireWire/1394/i.LinkUSB eSATA
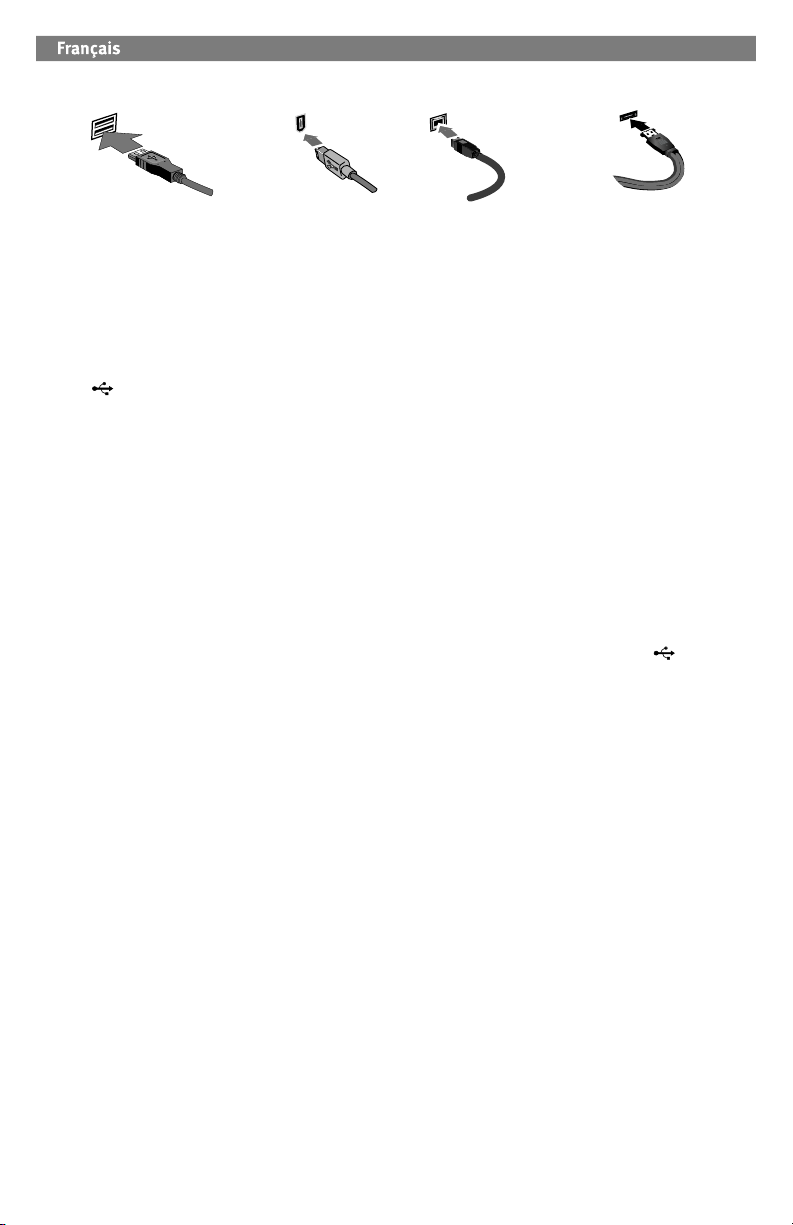
1. Schließen Sie das mitgelieferte Netzteil an der Rückseite
des Laufwerks und an eine Steckdose an.
ACHTUNG! Bewegen Sie das Laufwerk während des
Einschaltvorgangs nicht, um Laufwerkbeschädigungen
oder Datenverluste zu vermeiden.
2. Wählen Sie das richtige Kabel aus und schließen Sie
es an der Laufwerksrückseite an. Schließen Sie für
eine USB-Verbindung das USB-Kabel an den DuoLinkAnschluss an (mit dem USB-Symbol
und „eSATA“
gekennzeichnet). Für eine FireWire-Verbindung können
Sie einen beliebigen FireWire-Anschluss verwenden.
HINWEIS:
Schließen Sie das Laufwerk
niemals
mit mehr
als einem Kabel am Computer an.
3. Verbinden Sie das andere Ende des Kabels mit dem
Anschluss des Computers. Schalten Sie das Laufwerk ein.
Mac-Benutzer: Nun wird normalerweise das Laufwerk
gemountet und auf dem Mac-Schreibtisch angezeigt.
PC-Benutzer: Ihr Computer erkennt das Laufwerk erst,
wenn es neu formatiert wird. Anweisungen hierzu finden
Sie weiter unten.
Formatieren des Laufwerks für Windows
ACHTUNG! Bei einer Neuformatierung des Laufwerks werden
sämtliche vorhandenen Daten gelöscht!
1. Öffnen Sie die Windows Datenträgerverwaltung (mit
rechter Maustaste auf Arbeitsplatz klicken, Verwalten
wählen und dann auf Datenträgerverwaltung klicken).
2. Falls der Assistent für die Datenträgerinitialisierung
gestartet wird, klicken Sie auf Weiter. Wählen Sie den
Datenträger aus. Klicken Sie auf Weiter und dann auf
Fertig stellen.
Falls der Assistent für die Datenträgerinitialisierung
nicht gestartet wird, suchen Sie das Laufwerk in der
unteren Liste. Suchen Sie nach einem Datenträger,
bei dem kein Laufwerksbuchstabe oder Dateisystem
angezeigt wird. Klicken Sie mit der rechten Maustaste auf
den Laufwerksnamen und wählen Sie dann Datenträger
initialisieren (Windows XP) oder Signatur schreiben
(Windows 2000). Klicken Sie anschließend auf OK
3. Das Laufwerk wird dann als Nicht zugeordnet angezeigt
und der Balken schwarz dargestellt. Klicken Sie mit der
rechten Maustaste Right auf den schwarzen Balken und
wählen Sie Neue Partition (Windows XP) oder Partition
erstellen (Windows 2000).
4. Sobald der Assistent zum Erstellen neuer Partitionen
geöffnet wird, klicken Sie in jedem Fenster auf Weiter,
um die Standardoptionen auszuwählen und das NTFSLaufwerk zu formatieren.
HINWEIS: Falls Sie das Laufwerk mit anderen
Betriebssystemen verwenden möchten, können Sie das Format
mit dem Iomega FAT32-Formatter auf der CD in FAT32 ändern.
4
.
Schnellstart – eSATA
1. Wenn Sie eine eSATA-PCI-Karte anschließen, stellen Sie
sicher, dass die Treiber für die Karte installiert sind und
die Karte von Ihrem Betriebssystem ordnungsgemäß
erkannt wurde.
HINWEIS: Für die Iomega UltraMax-Festplatte müssen Sie
spezielle Treiber installieren. Sie wird von den Treibern
unterstützt, die bei der eSATA-PCI-Karte enthalten sind.
Wenn Ihr Computer über einen integrierten eSATAAnschluss verfügt, wird das Laufwerk von den nativen
Treibern des Betriebssystems ünterstützt.
2. Fahren Sie den Computer herunter.
HINWEIS: Die eSATA-Schnittstelle verfügt NICHT über
Plug-and-Play. Fahren Sie den Computer immer herunter,
bevor Sie das Laufwerk verbinden oder die Verbindung
trennen.
3. Schließen Sie das mitgelieferte Netzteil an der Rückseite
des Laufwerks und an eine Steckdose an.
ACHTUNG! Bewegen Sie das Laufwerk während des
Einschaltvorgangs nicht, um Laufwerkbeschädigungen
oder Datenverluste zu vermeiden.
4. Wählen Sie das eSATA-Kabel aus und schließen Sie es an
den DuoLink-Anschluss an (mit dem USB-Symbol
„eSATA“ gekennzeichnet).
HINWEIS: Schließen Sie das Laufwerk niemals mit mehr
als einem Kabel am Computer an.
5. Verbinden Sie das andere Ende des Kabels mit der eSATAPCI-Karte oder dem integrierten eSATA-Anschluss.
6. Schalten die den Hauptschalter auf der
Laufwerksrückseite an, und starten Sie Ihren Computer
neu.
Mac-Benutzer: Nun wird normalerweise das Laufwerk
gemountet und auf dem Mac-Schreibtisch angezeigt.
PC-Benutzer: Ihr Computer erkennt das Laufwerk erst,
wenn es neu formatiert wird. Anweisungen hierzu finden
Sie links unter Formatieren des Laufwerks für Windows
und
.
Page 5

Installazione rapida – USB o FireWire
SA
T
A
S
A
T
A
FireWire/1394/i.LinkUSB eSATA
1. Collegare l’alimentatore in dotazione al retro dell’unità
e inserirlo in una presa di corrente.
ATTENZIONE! Non spostare l’unità mentre è accesa per
evitare danni o perdite di dati.
2. Individuare il cavo appropriato e collegarlo al retro
dell’unità. In caso di connessione USB, collegare il
cavo USB alla porta DuoLink (contrassegnata sia con il
simbolo USB
che ‘eSATA’). In caso di connessione
FireWire è possibile utilizzare una qualsiasi porta
FireWire.
NOTA:
evitare di collegare l’unità al computer
utilizzando più di un cavo.
3. Collegare l’altra estremità del cavo alla porta del
computer
. Accendere l’unità.
Utenti Mac: una volta installata, l’unità viene
visualizzata sulla Scrivania Mac.
Utenti PC: il computer non riconosce l’unità finché non è
formattata. Vedere le istruzioni riportate qui di seguito.
Formattazione dell’unità per Windows
ATTENZIONE! La riformattazione dell’unità provoca
l’eliminazione dei dati esistenti!
1. Aprire Gestione disco di Windows (fare clic con il
pulsante destro del mouse su Risorse del computer,
selezionare Gestisci, quindi fare clic su Gestione disco).
2. Quando si avvia l’Installazione guidata disco, scegliere
Avanti. Selezionare il disco, fare clic su Avanti, quindi su
Fine.
Se la procedura guidata non si avvia, cercare l’unità
nella parte inferiore dell’elenco. Cercare un disco senza
lettera di unità o file system. Fare clic con il pulsante
destro del mouse sul nome dell’unità e selezionare
Inizializza disco (Windows XP) o Riporta la firma
(Windows 2000), quindi scegliere OK
.
3. A questo punto l’unità apparirà come Non allocata e
la barra diventerà nera. Fare clic con il pulsante destro
del mouse sulla barra nera, quindi selezionare Nuova
partizione (Windows XP) o Crea partizione (Windows
2000).
4. Quando si apre la Creazione guidata partizione, fare clic
su Avanti su ogni schermata per selezionare le opzioni
predefinite e formattare l’unità come NTFS.
NOTA
: se si desidera utilizzare l’unità con altri sistemi
operativi, utilizzare il programma Iomega FAT32 Formatter
contenuto nel CD per modificare la formattazione in FAT32
(richiesta per compatibilità tra diverse piattaforme). Per
ulteriori informazioni, visitare la sezione Assistenz
www.iomega.com
.
a sul sito
Installazione rapida – eSATA
1. Se si effettua la connessione a una scheda PCI eSATA,
assicurarsi che i driver relativi siano stati installati e
che la scheda venga riconosciuta correttamente dal
sistema operativo.
NOTA: non è necessario installare dei driver speciali
per l’unità disco rigido Iomega UltraMax supportata
dai driver forniti con la scheda PCI eSATA. Se il
computer è dotato di connessione integrata eSATA,
l’unità è supportata dai driver nativi del sistema
operativo.
2. Spegnere il computer.
NOTA: l’interfaccia eSATA NON è plug-and-play.
Spegnere sempre il computer prima di connettere o
disconnettere l’unità.
3. Collegare l’alimentatore in dotazione al retro dell’unità
e inserirlo in una presa di corrente.
ATTENZIONE! Non spostare l’unità mentre è accesa per
evitare danni o perdite di dati.
4. Individuare il cavo eSATA e collegarlo alla porta
DuoLink (contrassegnata sia con il simbolo USB
che ‘eSATA’).
NOTA:
evitare di collegare l’unità al computer
utilizzando più di un cavo.
5. Collegare l’altra estremità del cavo alla scheda PCI
eSATA o alla connessione integrata eSATA.
6. Accendere l’interruttore di alimentazione situato sulla
parte posteriore dell’unità e riavviare il computer.
Utenti Mac: una volta installata, l’unità viene
visualizzata sulla Scrivania Mac.
Utenti PC: il computer non riconosce l’unità finché
non è formattata. Vedere le istruzioni relative alla
Formattazione dell’unità per Windows che compaiono
a sinistra.
5
Page 6

Instalación rápida de USB o FireWire
SA
T
A
S
A
T
A
FireWire/1394/i.LinkUSB eSATA
1. Conecte la fuente de alimentación suministrada
a la parte posterior de la unidad y a la toma de
alimentación.
PRECAUCIÓN: No mueva la unidad mientras esté
encendida para evitar posibles daños en la unidad o la
pérdida de datos.
2. Identifique el cable adecuado y conéctelo a la parte
posterior de la unidad. Para conseguir una conexión
USB, conecte el cable USB al puerto DuoLink (marcado
con el símbolo USB
y “eSATA”). Para conseguir
una conexión FireWire, puede utilizar cualquier puerto
FireWire.
NOTA:
Nunca conecte la unidad al equipo con más de
un cable.
3. Conecte el otro extremo del cable al puerto del
ordenador. Encienda la unidad.
Usuarios de Mac: La unidad debe estar montada y
aparecer en el Escritorio de Mac.
Usuarios de PC: El ordenador no reconocerá la
unidad hasta que la vuelva a formatear. Consulte las
instrucciones que aparecen a continuación.
Formateo de la unidad para Windows
PRECAUCION: Al volver a formatear la unidad, se borrarán todos
los datos existentes.
1. Abra Administración de discos de Windows (haga clic con el
botón derecho del ratón en Mi PC, seleccione Administrar
y, a continuación, haga clic en Administración de discos).
2. Si se abre el asistente para discos, haga clic en
Siguiente. Seleccione el disco, haga clic en Siguiente y, a
continuación, en Finalizar.
Si el asistente no se abre, localice la unidad en la lista
de abajo. Busque un disco que no tenga letra de unidad
asignada o sistema de archivos. Haga clic con el botón
derecho del ratón en el nombre de la unidad y seleccione
Inicializar disco (Windows XP) o Escribir firma (Windows
2000). A continuación, haga clic en Aceptar
3. A continuación, la unidad aparecerá como No asignado y
la barra se mostrará negra. Haga clic con el botón derecho
del ratón en la barra negra y seleccione Nueva partición
(Windows XP) o Crear partición (Windows 2000).
4. Cuando se abra el asistente para particiones, haga clic en
Siguiente en cada pantalla para seleccionar las opciones
predeterminadas y formatear la unidad NTFS.
NOTA
: Si desea utilizar la unidad con otros sistemas operativos,
utilice el software Iomega FAT32 Formatter que se incluye en el
CD para cambiar el formato a FAT32 (necesario para plataformas
cruzadas). Si desea obtener instrucciones detalladas, visite el
área de Soporte en www.iomega.com
.
6
.
Instalación rápida de eSATA
1. Si la conecta a una tarjeta PCI eSATA, asegúrese de
que se han instalado los controladores de la tarjeta y
de que el sistema operativo reconoce correctamente la
tarjeta.
NOTA: No necesita instalar controladores especiales
para la unidad de disco duro Iomega UltraMax.
Se incluyen en los controladores de la tarjeta PCI
eSATA. Si su equipo dispone de una conexión eSATA
incorporada, los controladores nativos del sistema
operativo detectan la unidad.
2. Apague el equipo.
NOTA: La interfaz eSATA NO es un sistema Plug-and-
Play. Apague siempre el equipo antes de conectar o
desconectar la unidad.
3. Conecte la fuente de alimentación suministrada
a la parte posterior de la unidad y a la toma de
alimentación.
PRECAUCIÓN: No mueva la unidad mientras esté
encendida para evitar posibles daños en la unidad o la
pérdida de datos.
4. Identifique el cable eSATA y conéctelo al puerto
DuoLink (marcado con el símbolo USB
NOTA:
un cable.
5. Conecte el otro extremo del cable a su tarjeta PCI
eSATA o conexión eSATA incorporada.
6. Pulse el interruptor de encendido de la parte posterior
de la unidad y reinicie el equipo.
Usuarios de Mac: La unidad debe estar montada y
aparecer en el Escritorio de Mac.
Usuarios de PC: El ordenador no reconocerá la
unidad hasta que la vuelva a formatear. Consulte
las instrucciones que aparecen a la izquierda sobre
Formateo de la unidad para Windows
Nunca conecte la unidad al equipo con más de
.
y “eSATA”).
Page 7
Instalação rápida – USB ou FireWire
SA
T
A
S
A
T
A
FireWire/1394/i.LinkUSB eSATA
1. Conecte a fonte de alimentação fornecida à parte
traseira da unidade e depois a uma tomada elétrica.
CUIDADO! Não mova a unidade enquanto ela estiver
ligada para evitar danos à mesma ou perda de dados.
2. Identifique o cabo apropriado e conecte-o à parte
traseira da unidade. Para uma conexão USB, conecte
o cabo USB à porta DuoLink (identificada tanto com o
símbolo USB
quanto com o ‘eSATA’). Para uma
conexão FireWire, você pode usar qualquer porta
FireWire.
OBS:
nunca conecte a unidade ao computador através
de mais de um cabo.
3. Conecte a outra extremidade do cabo à porta do seu
computador.
Ligue a unidade.
Usuários de Mac: A unidade deve ser montada e
exibida na mesa do Mac.
Usuários de PC: seu computador não irá reconhecer
a unidade até que ela seja reformatada. Consulte as
instruções abaixo.
Formatação da unidade para Windows
CUIDADO! A reformatação da unidade apagará todos os
dados existentes!
1. Abra o Gerenciamento de Disco do Windows (clique
com o botão direito do mouse em Meu Computador,
selecione Gerenciar e, em seguida, clique em
Gerenciamento de Disco).
2. Se o Assistente de Disco abrir, clique em Avançar.
Selecione o disco, clique em Avançar e Concluir.
Se o assistente não abrir, localize a unidade na
lista inferior. Procure um disco que não tenha uma
letra de unidade ou um sistema de arquivos. Clique
com o botão direito do mouse no nome da unidade,
selecione Inicializar Disco (Windows XP) ou Gravação
de Assinaturas (Windows 2000) e OK
3. A unidade aparecerá como Não Alocada e a barra
estará preta. Clique com o botão direito do mouse na
barra preta e selecione Nova Partição (Windows XP) ou
Criar Partição (Windows 2000).
4. Quando o Assistente de partição é aberto, clique
em Avançar em cada tela para selecionar as opções
padrão e formatar a unidade NTFS.
NOTA: Para usar a unidade com outros sistemas
operacionais, use o Iomega FAT32 Formatter, incluído no
CD, para alterar o formato para FAT32 (necessário para
manter compatibilidade entre plataformas). Se precisar
de instruções detalhadas, visite a área de Suporte do site
www.iomega.com
.
.
Instalação rápida – eSATA
1. Caso esteja conectando a uma placa eSATA PCI,
certifique-se de que os drivers para a placa tenham
sido instalados e de que a placa seja reconhecida
corretamente pelo sistema operacional.
OBS: não é preciso instalar drivers especiais para a
unidade Iomega UltraMax Hard Drive. Ela é suportada
pelos drivers incluídos na placa eSATA PCI. Se o seu
computador possuir uma conexão eSATA embutida, a
unidade é suportada por drivers nativos do sistema
operacional.
2. Desligue o computador.
OBS: a interface eSATA NÃO é plug-and-play.
Sempre desligue o computador antes de conectar ou
desconectar a unidade.
Conecte a fonte de alimentação fornecida à parte
3.
traseira da unidade e depois a uma tomada elétrica.
CUIDADO! Não mova a unidade enquanto ela estiver
ligada para evitar danos à mesma ou perda de dados.
4. Identifique o cabo eSATA e conecte-o à porta DuoLink
(identificada tanto com o símbolo USB
com o ‘eSATA’).
OBS:
nunca conecte a unidade ao computador através
de mais de um cabo.
5. Conecte a outra extremidade do cabo à placa eSATA
PCI ou à conexão eSATA embutida.
6. Ligue o botão de alimentação na parte traseira da
unidade e reinicie o computador.
Usuários de Mac: A unidade deve ser montada e
exibida na mesa do Mac.
Usuários de PC: seu computador não irá reconhecer
a unidade até que ela seja reformatada. Consulte as
instruções à esquerda em Formatação da unidade para
Windows
.
quanto
7
Page 8
Snelle installatie – USB- of FireWire
SA
T
A
S
A
T
A
FireWire/1394/i.LinkUSB eSATA
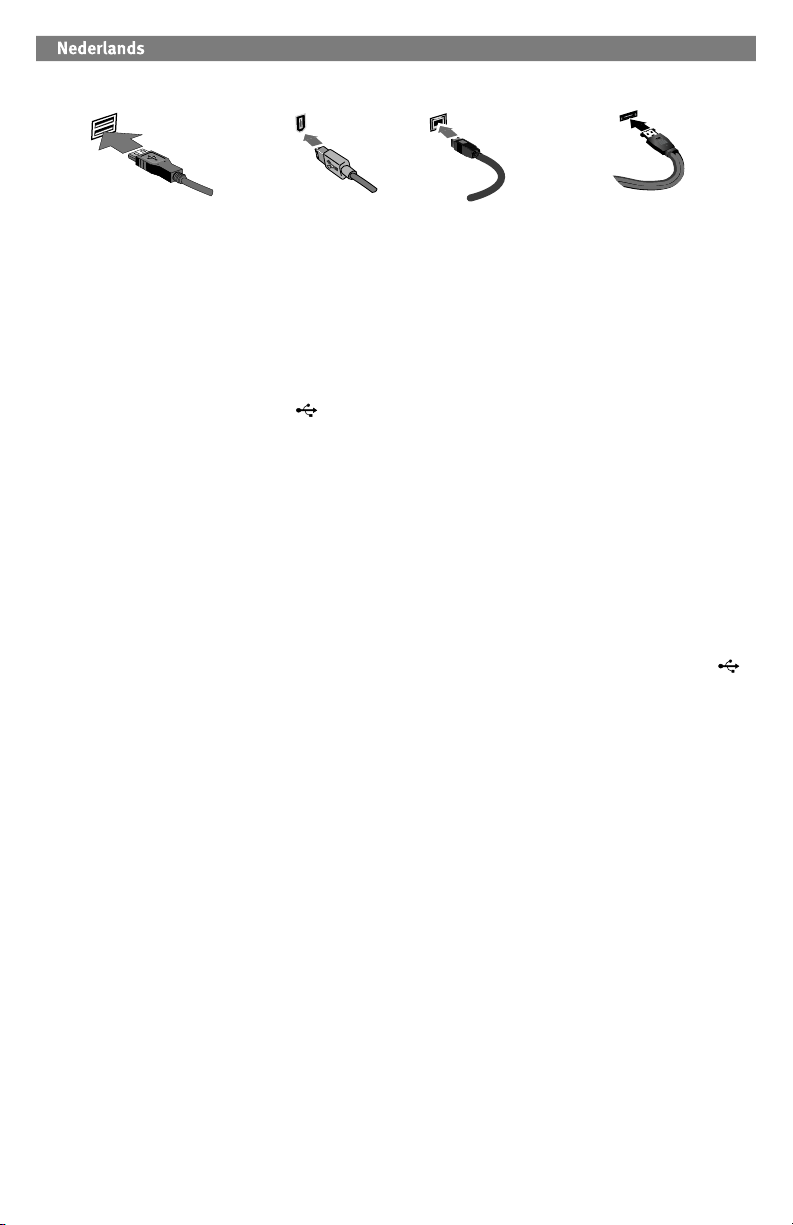
1. Sluit het ene uiteinde van de meegeleverde voeding
aan op de achterkant van de drive en het andere op een
stopcontact.
WAARSCHUWING! Verplaats de drive niet wanneer
deze van stroom is voorzien, om beschadigingen of
gegevensverlies te voorkomen.
2. Neem de geschikte kabel en sluit die aan op de
achterkant van de drive. Wanneer u de USB-aansluiting
gebruikt, sluit u de USB-kabel aan op de DuoLink-poort
(aangegeven met zowel het USB-symbool
als
‘eSATA’). Wanneer u de FireWire-aansluiting gebruikt,
kunt u een willekeurige FireWire-poort gebruiken.
OPMERKING: sluit de drive nooit met meer dan één kabel
aan op de computer.
3. Sluit het andere uiteinde van de kabel aan op de poort
van de computer
. Schakel de drive in.
Mac-gebruikers: de drive wordt normaal geladen en
verschijnt op het Mac-bureaublad.
PC-gebruikers: uw computer zal de drive pas herkennen
nadat deze opnieuw is geformatteerd. Lees de instructies
hieronder.
De drive formatteren voor Windows
WAARSCHUWING! Door de drive opnieuw te formatteren,
zullen alle gegevens op de drive worden gewist!
1. Open Windows Schijfbeheer (klik met de
rechtermuisknop op Deze computer, selecteer Beheren
en klik daarna op Schijfbeheer).
2. Als de wizard Schijf wordt geopend, klikt u op
Volgende. Selecteer de schijf en klik achtereenvolgens
op Volgende en Voltooien
Als de wizard niet verschijnt, zoekt u de drive in
de lijst onderaan. Zoek naar een schijf zonder een
stationsaanduiding of bestandssysteem. Klik met de
rechtermuisknop op de naam van de drive, selecteer
Schijf initialiseren (Windows XP) of Handtekening
schrijven (Windows 2000) en klik op OK
3. De drive zal nu verschijnen als Niet-toegewezen en de
balk zal zwart zijn. Klik met de rechtermuisknop op de
zwarte balk en selecteer Nieuwe partitie (Windows XP)
of Partitie maken (Windows 2000).
4. Wanneer de Wizard Partitie verschijnt, klikt u in
elk scherm op Volgende om de standaardopties te
selecteren en de drive NTFS te formatteren.
OPMERKING: als u de drive in andere besturingssystemen
wilt gebruiken, gebruikt u de Iomega FAT32 Formatter,
die zich op de cd bevindt, om het formaat in te stellen op
FAT32 (wat vereist is voor compatibiliteit tussen platforms).
Voor gedetailleerde instructies raadpleegt u de sectie voor
Support op www.iomega.com
8
.
.
.
Snelle installatie – eSATA
1. Als u op een eSATA PCI-kaart aansluit, moeten de
stuurprogramma’s voor de kaart geïnstalleerd zijn
en moet de kaart correct door uw besturingssysteem
worden herkend.
OPMERKING: u hoeft geen speciale stuurprogramma’s
te installeren voor de Iomega UltraMax Hard Drive.
Deze wordt ondersteund door de stuurprogramma’s
die bij de eSATA PCI-kaart worden meegeleverd. Als uw
computer over een geïntegreerde eSATA-aansluiting
beschikt, wordt de drive ondersteund door de standaa
rdstuurprogramma’s van het besturingssysteem.
2. Schakel de computer uit.
OPMERKING: de eSATA-interface is NIET van het type
plug-and-play. Schakel de computer daarom altijd uit
voordat u de drive aansluit of loskoppelt.
3. Sluit het ene uiteinde van de meegeleverde voeding
aan op de achterkant van de drive en het andere op
een stopcontact.
WAARSCHUWING! Verplaats de drive niet wanneer
deze van stroom is voorzien, om beschadigingen of
gegevensverlies te voorkomen.
4. Neem de eSATA-kabel en sluit die aan op de DuoLinkpoort (aangegeven met zowel het USB-symbool
als ‘eSATA’).
OPMERKING: sluit de drive nooit met meer dan één
kabel aan op de computer.
5. Sluit het andere uiteinde van de kabel aan op uw
eSATA PCI-kaart of geïntegreerde eSATA-aansluiting.
6. Schakel de drive in met de aan/uit-knop op de
achterzijde van de drive en start uw computer opnieuw
op.
Mac-gebruikers: de drive wordt normaal geladen en
verschijnt op het Mac-bureaublad.
PC-gebruikers: uw computer zal de drive pas
herkennen nadat deze opnieuw is geformatteerd.
Lees de instructies links op De drive formatteren voor
Windows
.
Page 9
Snabbinstallation–USB eller Firewire
SA
T
A
S
A
T
A
FireWire/1394/i.LinkUSB eSATA
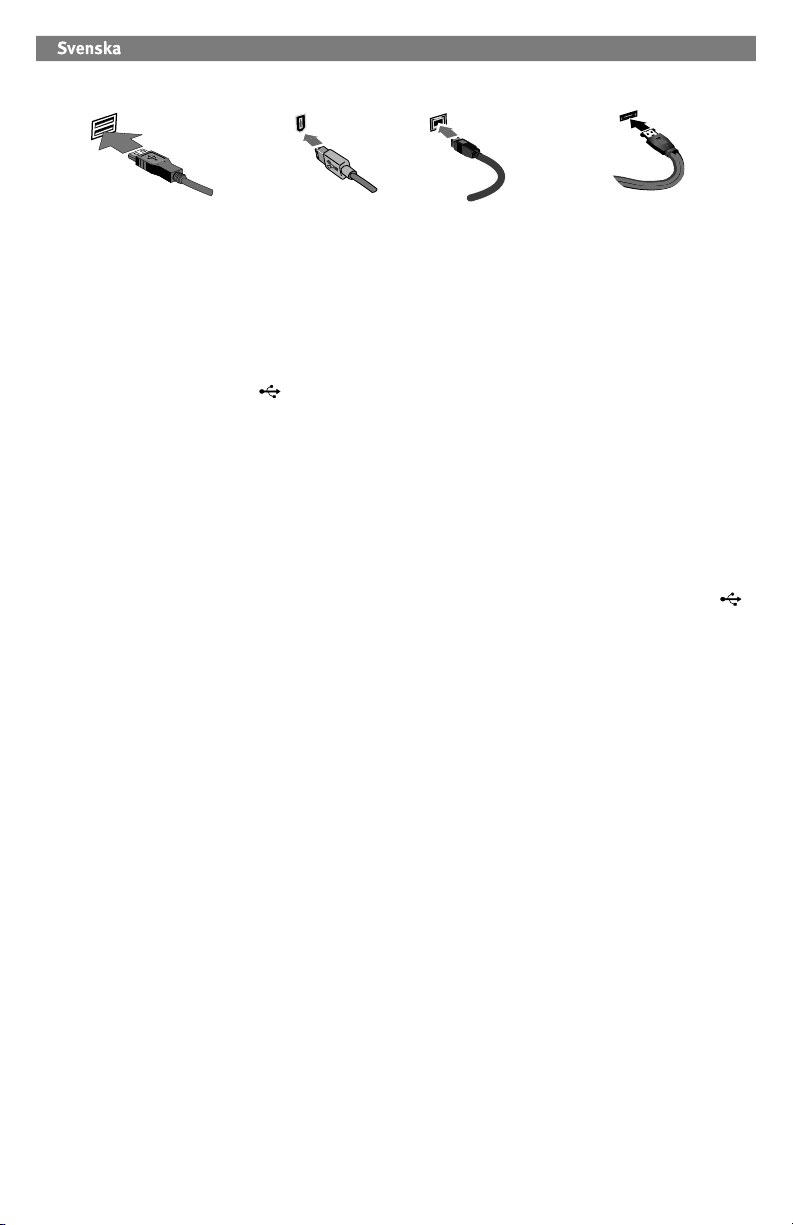
1. Anslut den medföljande strömkabeln till enhetens
baksida och koppla den därefter till ett strömuttag.
VARNING! Flytta inte enheten när den har startats för
att undvika att den skadas eller att data går förlorade.
2. Lokalisera rätt kabel och anslut den till uttaget på
baksidan av enheten. När du gör en USB-anslutning
ansluter du USB-kabeln i DuoLink-porten (som är
markerad med både USB-symbol
och ‘eSATA’).
När du gör en Firewire-anslutning kan du använda
valfri Firewire-port.
OBS! Anslut aldrig enheten till datorn med mer än en
kabel.
3. Anslut den andra änden av kabeln till porten på
datorn. Sätt på hårddisken.
Mac-användare: Hårddisken skall gå igång och
kommer att visas på skrivbordet.
PC-användare: Datorn kommer inte att känna av
enheten om den inte formateras om. Se instruktioner
nedan.
Formatering av enheten för Windows
VARNING! Omformatering av hårddisken innebär att all
befintlig information kommer att raderas!
1. Öppna Windows Diskhantering (högerklicka på Den
här datorn, välj Hantera, och klicka på Diskhantering).
2. Om Guiden disk öppnas, klicka på Nästa. Markera
hårddisken, klicka på Nästa och därefter på Avsluta.
Om Guiden ej öppnas, sök upp hårddisken i den undre
listan. Sök efter en hårddisk som ej har en bokstav
eller ett filsystem. Högerklicka på hårddiskens namn
och välj Initiera disk (Windows XP) eller Skriv signatur
(Windows 2000) och därefter OK
3. Hårddisken kommer nu att visas som Tillgänglig och
listen kommer att vara svart. Högerklicka på den
svarta listen och välj Ny partition (Windows XP) eller
Skapa partition (Windows 2000).
4. När partitionsguiden öppnas klickar du på Nästa i alla
fönster för att välja standardalternativen och formatera
enheten NTFS.
OBS! Om du vill använda hårddisken med andra
operativsystem, använd dig av Iomega FAT32 Formatter,
som finns på CD-skivan, för att ändra format till
FAT32 (krävs för att den skall vara kompatibel över
plattformsgränserna).
.
Snabbinstallation–eSATA
1. Om du ansluter till ett eSATA PCI-kort bör du
kontrollera att drivrutinerna för kortet har installerats
och att operativsystemet känner av kortet.
OBS! Du behöver inte installera några särskilda
drivrutiner för hårddisken Iomega UltraMax. Den stöds
av drivrutinerna som medföljer eSATA PCI-kortet. Om
din dator har en inbyggd eSATA-anslutning stöds
enheten av standarddrivrutinerna i operativsystemet.
2. Stäng av datorn.
OBS! eSATA-gränssnittet är INTE plug-and-play. Stäng
alltid av datorn innan du ansluter eller kopplar bort
enheten.
3. Anslut den medföljande strömkabeln till enhetens
baksida och koppla den därefter till ett strömuttag.
VARNING! Flytta inte enheten medan den startar. Den
kan skadas och du kan förlora data.
4. Lokalisera eSATA-kabeln och anslut den i DuoLinkporten (som är markerad med både USB-symbol
och ‘eSATA’).
OBS! Anslut aldrig enheten till datorn med mer än en
kabel.
5. Anslut den andra änden av kabeln till eSATA PCI-kortet
eller den inbyggda eSATA-anslutningen.
6. Slå på strömbrytaren på enhetens baksida och starta
om datorn.
Mac-användare: Hårddisken skall gå igång och
kommer att visas på skrivbordet.
PC-användare: Datorn kommer inte att känna av
enheten om den inte formateras om. Se instruktioner
till vänster om Formatering av enheten för Windows
.
9
Page 10
Hurtig installation – USB eller FireWire
SA
T
A
S
A
T
A
FireWire/1394/i.LinkUSB eSATA
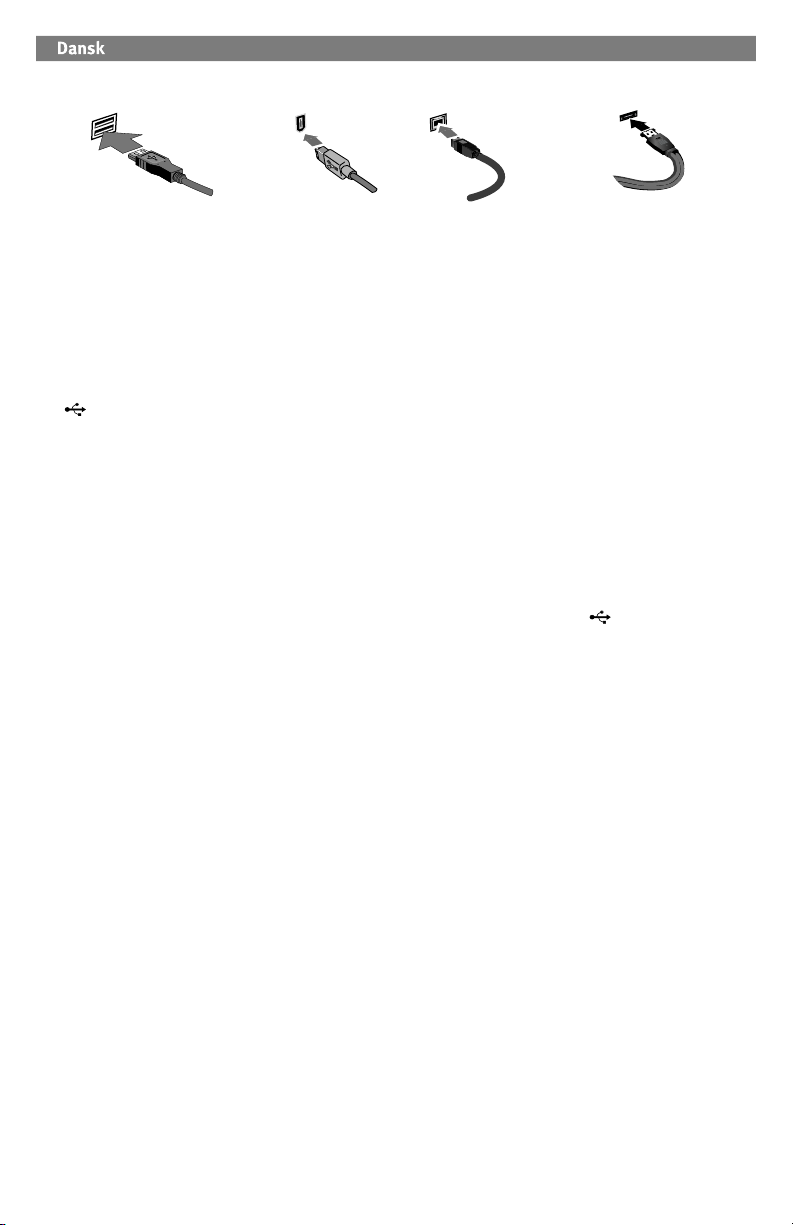
1. Sæt stikket fra den medfølgende strømforsyning i på
bagsiden af drevet, og sæt derefter den anden ende i
en stikkontakt.
Forsigtig! Hvis du vil undgå at beskadige drevet eller
miste data, må du ikke flytte drevet, mens det startes.
2. Find det korrekte kabel, og sæt det i på bagsiden af
drevet. Ved en USB-tilslutning skal du tilslutte USBkablet til DuoLink-porten (markeret med både USB-
og ‘eSATA’-symbolet). Ved en FireWire-tilslutning
kan du anvende en vilkårlig FireWire-port.
Bemærk! Slut aldrig drevet til computeren med mere
end ét kabel.
3. Slut den anden ende af kablet til porten på
computeren. Tænd for drevet.
Mac-brugere: Drevet skal installeres og vises på Mac-
skrivebordet.
PC-brugere: Din computer genkender ikke drevet før
det er blevet omformateret. Se instruktioner herunder.
Formatering af drevet til Windows
FORSIGTIG! Formatering af drevet sletter alle eksisterende
data!
1. Åbn Windows Diskhåndtering (højreklik på
Dette computer, vælg Administrer, og klik på
Diskh
åndtering).
2. Hvis guiden Disk åbnes, skal du klikke på
Marker disken, og klik på
Næste og derefter Udfør.
Hvis guiden ikke åbnes, skal du finde drevet på
den nederste liste. Søg efter en disk, der ikke
viser et drevbogstav eller filsystem. Højreklik på
drevnavnet, og vælg Initialiser disk (Windows XP) eller
Signaturskrivning (Windows 2000), og klik derefter på
OK.
3. Drevet vises nu som Ikke-allokeret, og bjælken bliver
sort. Højreklik på den sorte linje, og vælg Ny partition
(Windows XP) eller Opret partition (Windows 2000).
4. Når guiden Partition åbnes, skal du klikke
på Næste på hvert skærmbillede for at vælge
standardindstillingerne og formatere drev-NTFS.
Bemærk! Hvis du ønsker at bruge drevet med andre
operativsystemer, skal du bruge det Iomega FAT32
Formatter-program, der findes på cd’en, til at ændre
formatet til FAT32 (hvilket er nødvendigt for kompabilitet på
tværs af platforme).
10
Næste.
Hurtig installation – eSATA-stik
1. Hvis du opretter tilslutning til et eSATA PCI-kort, skal
du sørge for at driverne til kortet er installeret, og at
kortet genkendes af operativsystemet.
Bemærk! Du behøver ikke installere specielle drivere
til harddisken Iomega UltraMax. Den understøttes af
de drivere, der leveres med eSATA PCI-kortet. Hvis
computeren har et indbygget eSATA-stik, understøttes
drevet af de drivere, der findes i operativsystemet.
2. Luk computeren ned.
Bemærk! eSATA-grænsefladen er IKKE plug-and-
play. Luk altid computeren ned, før du tilslutter eller
frakobler drevet.
3. Sæt stikket fra den medfølgende strømforsyning i på
bagsiden af drevet, og sæt derefter den anden ende i
en stikkontakt.
Forsigtig! Hvis du vil undgå at beskadige drevet eller
miste data, må du ikke flytte drevet, mens det startes.
4. Find eSATA-kablet, og tilslut det til DuoLink-porten
(markeret med både USB-
og ‘eSATA’-symbolet).
Bemærk! Slut aldrig drevet til computeren med mere
end ét kabel.
5. Slut den anden ende af kablet til eSATA-kortet eller det
indbyggede eSATA-stik.
6. Tænd for afbryderen bag på drevet, og genstart
computeren.
Mac-brugere: Drevet skal installeres og vises på Mac-
skrivebordet.
PC-brugere: Din computer genkender ikke drevet før
det er blevet omformateret. Se instruktioner til venstre
på Formatering af drevet til Windows
.
Page 11
Rask installering – USB eller FireWire
SA
T
A
S
A
T
A
FireWire/1394/i.LinkUSB eSATA
1. Koble til den medfølgende strømforsyningen på
baksiden av stasjonen, og deretter til en stikkontakt.
FORSIKTIG! For å unngå skade på stasjonen eller tap
av data må ikke stasjonen flyttes mens den er slått på.
2. Finn frem den riktige kabelen og koble den til
på baksiden av stasjonen. Når det gjelder USBforbindelser, kobler du USB-kabelen til DuoLink-porten
(merket med både USB-symbolet
og ‘eSATA’). Til
FireWire-forbindelser kan du bruke en hvilken som
helst FireWire-port.
MERK: Koble aldri stasjonen til datamaskinen med mer
enn én kabel.
3. Koble den andre enden av kabelen til porten på
datamaskinen. Slå stasjonen på.
Mac-brukere: Stasjonen skal nå aktiveres og vises på
Mac-skrivebordet.
PC-brukere: Datamaskinen vil ikke finne stasjonen før
den er formatert på nytt. Se veiledningen nedenfor.
Formatere stasjonen for Windows
FORSIKTIG! Alle eksisterende data blir slettet ved
omformatering av stasjonen!
1. Åpne Windows Diskbehandling (høyreklikk på
Min datamaskin, velg Behandle og klikk på
Diskbehandling).
2. Hvis diskveiviseren åpnes, klikker du på Neste. Velg
disken, klikk på Neste og deretter på Fullfør.
Hvis veiviseren ikke åpnes, finner du frem stasjonen
på den nedre listen. Se etter en disk som ikke har
noen stasjonsbokstav eller filsystem. Høyreklikk på
stasjonsnavnet og velg Initialiser disk (Windows XP)
eller Signer (Windows 2000), og klikk på OK.
3. Nå vil stasjonen fremstå som Utildelt, og linjen vil
være svart. Høyreklikk på den svarte linjen og velg
Ny partisjon (Windows XP) eller Opprett partisjon
(Windows 2000).
4. Når partisjonsveiviseren åpnes, klikker du på Neste på
hvert skjermbilde for å velge standardalternativene og
formatere stasjonen med NTFS.
MERK: Hvis du vil formatere stasjonen med andre
operativsystemer, bruker du Iomega FAT32 Formatter, som
finnes på CDen, til å endre formatet til FAT32 (som kreves
for kompatibilitet med andre plattformer).
Rask installering – eSATA
1. Hvis du kobler til et eSATA PCI-kort, må du kontrollere
at driverne for kortet er installert, og at kortet
gjenkjennes riktig av operativsystemet.
MERK: Det er ikke nødvendig å installere egne drivere
for Iomega UltraMax. Den støttes av driverne som
følger med eSATA PCI-kortet. Hvis datamaskinen har
en innebygd eSATA-tilkobling, støttes stasjonen av
driverne som er innebygd i operativsystemet.
2. Avslutt datamaskinen.
MERK: eSATA-grensesnittet er IKKE plug-and-play.
Avslutt alltid datamaskinen før du kobler stasjonen til
eller fra.
3. Koble til den medfølgende strømforsyningen på
baksiden av stasjonen, og deretter til en stikkontakt.
FORSIKTIG! For å unngå skade på stasjonen eller tap
av data må ikke stasjonen flyttes mens den er slått på.
4. Finn frem eSATA-kabelen og koble den til DuoLinkporten (merket med både USB-symbolet
‘eSATA’).
MERK: Koble aldri stasjonen til datamaskinen med mer
enn én kabel.
5. Koble den andre enden av kabelen til eSATA PCI-kortet
eller den innebygde eSATA-tilkoblingen.
6. Slå på strømbryteren på baksiden av stasjonen, og
start datamaskinen.
Mac-brukere: Stasjonen skal nå aktiveres og vises på
Mac-skrivebordet.
PC-brukere: Datamaskinen vil ikke finne stasjonen før
den er formatert på nytt. Se veiledningen til venstre
angående Formatere stasjonen for Windows
og
.
11
Page 12

Pika-asennus–USB tai FireWire
SA
T
A
S
A
T
A
FireWire/1394/i.LinkUSB eSATA
1. Kytke laitteen mukana toimitettu virtalähde aseman
takaosaan ja pistorasiaan.
VAROITUS: Älä irrota asemaa, kun sen virta on
kytkettynä. Näin vältät aseman vaurioitumisen ja
tietojen katoamisen.
2. Etsi oikea kaapeli ja kytke se aseman takaosaan.
USB-kytkennässä kytke USB-kaapeli DuoLink-porttiin
(merkitty USB-symbolilla
ja ‘eSATA’-merkinnällä).
FireWire-kytkennässä voit käyttää kaikkia FireWireportteja.
HUOMAUTUS: Kytke kiintolevy tietokoneeseen vain
yhdellä kaapelilla.
3. Kytke kaapelin toinen pää tietokoneen porttiin.
Käynnistä asema.
Macintosh-käyttäjät: Aseman pitäisi asentua ja näkyä
Mac-työpöydällä.
PC-käyttäjät: Tietokone ei tunnista asemaa ennen kuin
se on alustettu uudelleen. Katso seuraavat ohjeet.
Levyn alustaminen Windows
VAROITUS! Aseman uudelleenalustus poistaa kaikki sillä
olevat tiedot!
1. Avaa Windowsin levynhallinta (napsauta Oma
tietokone –kuvakkeen päällä hiiren oikeaa painiketta,
valitse Hallitse ja napsauta valintaa Levynhallinta
2. Jos ohjattutoiminto avautuu, napsauta Seuraava.
Valitse asema, napsauta valintaa Seuraava ja sen
jälkeen Valmis.
Jos ohjattutoiminto ei avaudu, etsi asema alemmasta
luettelosta. Asemalla ei vielä ole tunnusta tai
tiedostojärjestelmää. Napsauta aseman nimeä oikealla
hiiren painikkeella, valitse Alusta ja sen jälkee OK
3. Asema näkyy nyt varaamattomana tilana ja palkki
on musta. Napsauta mustaa palkkia hiiren oikealla
painikkeella, valitse Uusi osio (Windows XP) tai Luo
osio (Windows 2000).
4. Kun Ohjattu osion luominen aukeaa, valitse
oletusasetukset ja alusta NTFS-asema napsauttamalla
Seuraava kussakin ruudussa.
HUOMAUTUS: Jos haluat käyttää asemaa muissa
käyttöjärjestelmissä, muuta tiedostojärjestelmä CD-levyllä
olevan Iomega FAT32 Formatter -ohjelman avulla muotoon
FAT32 (käyttöjärjestelmäriippumaton).
12
Pika-asennus–eSATA
1. Jos kytket laitteen eSATA PCI -korttiin, varmista, että
kortin ohjaimet on asennettu ja että käyttöjärjestelmä
on tunnistanut kortin oikein.
HUOMAUTUS: Iomega UltraMax -kiintolevyä varten ei
tarvitse asentaa erityisiä ohjaimia. eSATA PCI -kortin
mukana toimitettavat ohjaimet tukevat kiintolevyä.
Jos tietokoneessa on sisäänrakennettu eSATAliitäntä, käyttöjärjestelmän asema ohjaimet tukevat
kiintolevyä.
2. Katkaise tietokoneesta virta.
HUOMAUTUS: eSata-liitäntä ei ole plug-and-play-
yhteensopiva. Katkaise tietokoneen virta aina, kun
kytket tai irrotat kiintolevyn.
3. Kytke laitteen mukana toimitettu virtalähde aseman
takaosaan ja pistorasiaan.
VAROITUS: Älä siirrä kiintolevyä, kun siihen on virta
kytkettynä. Levy voi vahingoittua, tai tietoja voi hävitä.
4. Etsi eSATA-kaapeli ja kytke se DuoLink-porttiin
(merkitty USB-symbolilla
HUOMAUTUS: Kytke kiintolevy tietokoneeseen vain
yhdellä kaapelilla.
5. Kytke kaapelin toinen pää eSATA PCI -korttiin tai
sisäänrakennettuun eSATA-liitäntään.
6. Kytke laitteeseen virta kiintolevyn takana olevasta
.
virtakytkimestä ja käynnistä tietokone uudelleen.
Macintosh-käyttäjät: Aseman pitäisi asentua ja näkyä
Mac-työpöydällä.
PC-käyttäjät: Tietokone ei tunnista asemaa ennen
kuin se on alustettu uudelleen. Katso ohjeet Levyn
alustaminen Windows-käyttöjärjestelmää varten -
.
toimintoa varten vasemmalta.
ja ‘eSATA’-merkinnällä).
Page 13
Gyorstelepítés - USB vagy FireWire
SA
T
A
S
A
T
A
FireWire/1394/i.LinkUSB eSATA
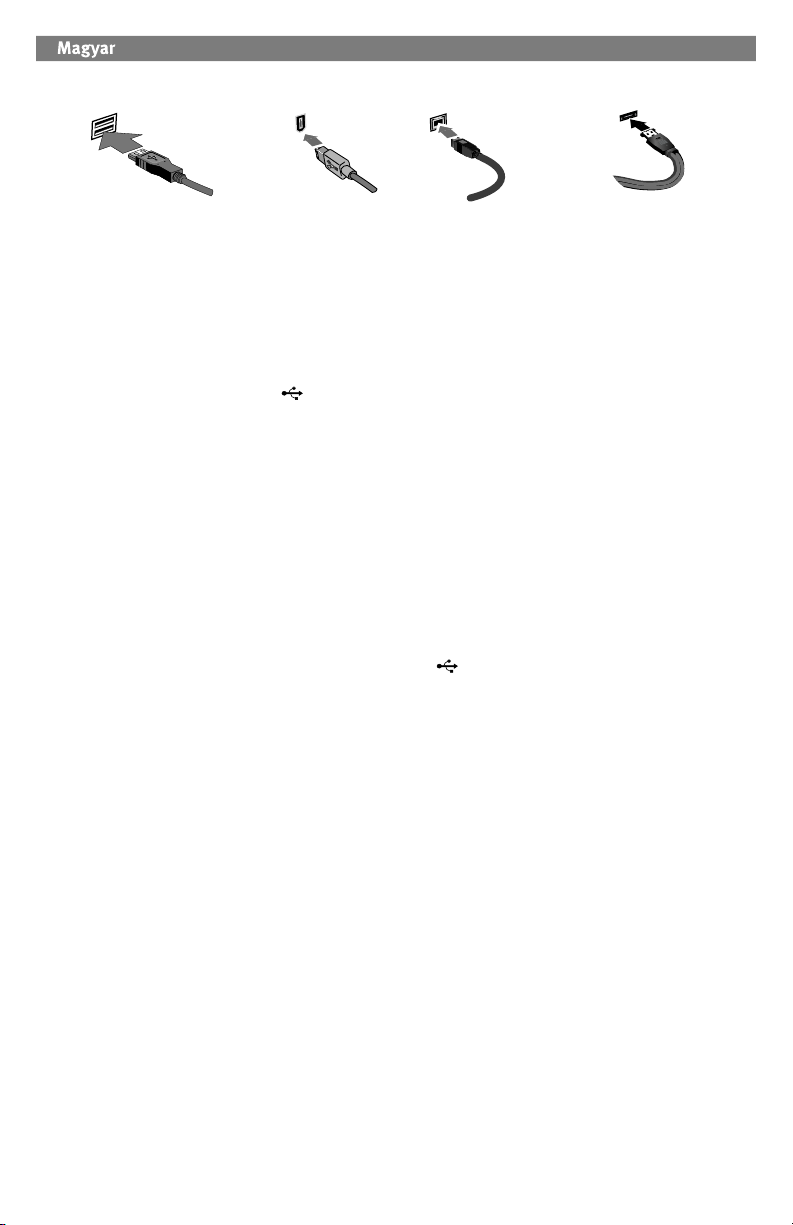
1. Csatlakoztassa a mellékelt tápegységet a meghajtó
hátuljához és a konnektorhoz.
VIGYÁZAT! Bekapcsolás közben ne mozgassa a
meghajtót, így elkerülheti az esetleges sérüléseket és
adatvesztéseket.
2. Keresse meg a megfelelő kábelt, majd csatlakoztassa
a meghajtó hátuljához. USB használata esetén
csatlakoztassa az USB kábelt a DuoLink porthoz
(melynél szerepel az USB szimbólum
és az ’eSATA’
felirat is). FireWire használata esetén bármely FireWire
porthoz csatlakozhat.
MEGJEGYZÉS:
kábellel a meghajtót a számítógéphez.
Soha ne csatlakoztassa egynél több
3. A kábel másik végét csatlakoztassa a számítógép egyik
portjához. Kapcsolja be a meghajtót.
Mac felhasználók: A meghajtót csatlakoztatni kell és
megjelenik a Mac asztalán.
PC felhasználók: A számítógép csak újraformázást
követően ismeri fel a meghajtót. Lásd a lenti
utasításokat.
Meghajtó formázásához Windows
FIGYELEM! A meghajtó újraformázása töröl minden meglévő
adatot!
1. Nyissa meg a Windows Lemezkezelés menütételt (jobb
oldali gombbal kattintson a Sajátgép menüre, jelölje
ki a Kezelés menüt és kattintson a Lemezkezelés
menütételre).
2. Ha megnyílik a Lemez varázsló, kattintson a Tovább
gombra. Jelölje ki a lemezt és kattintson a Tovább, majd
a Befejezés gombra.
Ha nem nyílik meg a Varázsló, az alsó listán keresse meg
a meghajtót. Keressen olyan lemezt, mely nem jeleníti
meg egy meghajtó betűjelét vagy fájlrendszert. Jobb
oldali gombbal kattintson a meghajtó nevére és jelölje
ki a Lemez inicializálása (Windows XP) vagy Aláírás
írása (Windows 2000) menütételt, majd kattintson az OK
gombra.
3. Nem lefoglalt jelzéssel jelenik meg a meghajtó, és fekete
színűre változik a sor. Jobb oldali gombbal kattintson a
fekete sorra és jelölje ki az Új partíció (Windows XP) vagy
Partíció létrehozása (Windows 2000) beállítást.
4. A Partíció varázsló megjelenésekor kattintson a
Tovább
gombra minden képernyőn az alapértelmezett
beállítások kijelöléséhez és a meghajtó NTFS
fájlrendszerrel való formázásához.
MEGJEGYZÉS: Ha más operációs rendszerekkel akarja
használni a meghajtót, a formátum FAT32 formátumra
változtatásához használja a CD-n lévő Iomega FAT32
Formatter programot.
Gyorstelepítés - eSATA
1. eSATA PCI-kártyához való csatlakoztatáskor győződjön
meg arról, hogy a kártyához tartozó meghajtó telepítve
lett, és a kártyát az operációs rendszer felismeri.
MEGJEGYZÉS: Az Iomega UltraMax merevlemez-
meghajtóhoz nem szükséges speciális
meghajtóprogramokat telepíteni. A meghajtót
támogatják az eSATA PCI-kártyához mellékelt
meghajtóprogramok. Amennyiben számítógépéhez
beépített eSATA-csatlakozó tartozik, a meghajtót az
operációs rendszer saját meghajtói is támogatják.
2. Zárja le a számítógépet.
MEGJEGYZÉS: Az eSATA felület NEM „plug-and-play“
jellegű, vagyis nem használható azonnal. A meghajtó
csatlakoztatásakor, illetve leválasztásakor mindig
kapcsolja ki a számítógépet.
3. Csatlakoztassa a mellékelt tápegységet a meghajtó
hátuljához és a konnektorhoz.
VIGYÁZAT! Bekapcsolás közben ne mozgassa a
meghajtót, így elkerülheti az esetleges sérüléseket és
adatvesztéseket.
4. Keresse meg az eSATA kábelt, és csatlakoztassa a
DuoLink porthoz (melynél szerepel az USB szimbólum
és az ’eSATA’ felirat is).
MEGJEGYZÉS:
Soha ne csatlakoztassa egynél több
kábellel a meghajtót a számítógéphez.
5. Csatlakoztassa a kábel másik végét az eSATA PCIkártyához vagy a beépített eSATA-csatlakozóhoz.
6. Kapcsolja be a meghajtó hátoldalán található
főkapcsolót, és indítja újra a számítógépet.
Mac felhasználók: A meghajtót csatlakoztatni kell és
megjelenik a Mac asztalán.
PC felhasználók: A számítógép csak újraformázást
követően ismeri fel a meghajtót. Lásd a bal oldalon
lévő utasításokat a Meghajtó formázásához Windows
rendszerben
.
13
Page 14

Rychlá instalace – FireWire nebo USB
SA
T
A
S
A
T
A
FireWire/1394/i.LinkUSB eSATA
1. Pomocí přiloženého adaptéru připojte diskové pole k
elektrické síti.
UPOZORNĚNÍ! Nepřemísťujte zapnuté diskové pole.
Hrozí poškození disků a ztráta dat.
2. Najděte příslušný kabel a připojte jej do zadní části
jednotky. U připojení pomocí rozhraní USB připojte
kabel USB k portu DuoLink (je označen jak symbolem
rozhraní USB
, tak textem „eSATA“). Pro připojení
pomocí rozhraní FireWire můžete použít jakýkoli port
rozhraní FireWire.
POZNÁMKA:
Nikdy nepřipojujte jednotku k počítači
více než jedním kabelem.
3. Připojte druhý konec kabelu k portu v počítači.
Zapněte jednotku.
Systém Mac: Jednotka by se měla nainstalovat a
zobrazit na ploše systému Mac.
Uživatelé PC:
Váš počítač jednotku nerozpozná dříve,
než bude znovu naformátována. Viz pokyny níže.
Formátování pro systém Windows
UPOZORNĚNÍ! Změna formátu jednotky smaže veškerá
stávající data!
1. Otevřete nástroj Správce disků systému Windows
(klepněte pravým tlačítkem myši na položku Tento
počítač, klepněte na příkaz Spravovat a vyberte
položku Správa disků).
2. Pokud se otevře Průvodce diskem, klepněte na tlačítko
Další. Vyberte disk, klepněte na tlačítko Další a potom
na tlačítko Dokončit.
Pokud se Průvodce neotevře, vyhledejte jednotku
v seznamu uvedeném dole. Vyhledejte disk, který
neuvádí písmeno jednotky nebo systém souborů.
Klepněte pravým tlačítkem myši na název jednotky a
klepněte na příkaz Inicializace disku (systém Windows
XP) nebo Podepsat (Windows 2000). Potom klepněte
na tlačítko OK.
3. Jednotka se nyní bude zobrazovat jako nerozdělená
a panel se bude zobrazovat černě. Klepněte pravým
tlačítkem myši na černý panel a vyberte příkaz Nový
oddíl (systém Windows XP) nebo Vytvořit oddíl
(systém Windows 2000).
4. Jakmile se otevře Průvodce oddílem, na každé
obrazovce stiskněte tlačítko Další, abyste vybrali
výchozí možnosti a zformátovali jednotku NTFS.
POZNÁMKA: Chcete-li jednotku používat v jiných operačních
systémech, změňte pomocí nástroje Iomega FAT32
Formatter umístěném na disku CD formát na FAT32 (nutný
pro kompatibilitu mezi platformami).
14
Rychlá instalace – eSATA
1. Připojujete-li jednotku ke kartě PCI eSATA, ujistěte se,
že jsou pro kartu nainstalovány všechny ovladače a
karta je správně rozpoznána operačním systémem.
POZNÁMKA: Pro pevný disk Iomega UltraMax není
nutné instalovat zvláštní ovladače. Disk je podporován
ovladači ke kartě PCI eSATA. Je-li v počítači k dispozici
vestavěné připojení eSATA, je jednotka podporována
nativními ovladači v operačním systému.
2. Vypněte počítač.
POZNÁMKA: eSATA NENÍ rozhraní typu plug-and-play.
Před připojováním či odpojováním jednotky počítač
vždy vypněte.
3. Pomocí přiloženého adaptéru připojte diskové pole k
elektrické síti.
UPOZORNĚNÍ! Nepřemísťujte diskovou jednotku, když
je napájena. Hrozí poškození disků a ztráta dat.
4. Najděte kabel eSATA a připojte ho k portu DuoLink (je
označen jak symbolem rozhraní USB
„eSATA“).
POZNÁMKA:
pomocí více než jednoho kabelu.
5. Připojte opačný konec kabelu ke kartě PCI eSATA nebo
vestavěnému připojení eSATA.
6. Zapněte síťový vypínač na zadní straně jednotky a
restartujte počítač.
Systém Mac: Jednotka by se měla nainstalovat a
zobrazit na ploše systému Mac.
Uživatelé PC:
dříve, než bude znovu naformátována. Informace o
Formátování jednotky pro systém Windows naleznete
v pokynech vlevo.
Nikdy nepřipojujte jednotku k počítači
Váš počítač jednotku nerozpozná
, tak textem
Page 15

Szybka instalacja — FireWire lub USB
SA
T
A
S
A
T
A
FireWire/1394/i.LinkUSB eSATA
1. Podłącz dostarczony zasilacz do gniazda z tyłu dysku
oraz do gniazda zasilania.
UWAGA! Aby uniknąć uszkodzenia dysku lub utraty
danych, nie wolno przenosić włączonego napędu.
2. Znajdź odpowiedni przewód i podłącz go z tyłu
napędu. W przypadku podłączania za pomocą
złącza USB, podłącz kabel USB do portu DuoLink
(oznaczonego symbolem USB
i eSATA). Celem
użycia połączenia FireWire można skorzystać z
dowolnego portu FireWire.
UWAGA:
Nie wolno podłączać dysku do komputera za
pomocą więcej niż jednego przewodu.
3. Podłącz drugi koniec przewodu do portu w
komputerze. Włącz dysk.
Użytkownicy komputerów Macintosh: Dysk powinien
być zainstalowany i widoczny na pulpicie komputera
Macintosh.
Użytkownicy komputerów PC:
Twój komputer nie
rozpozna napędu do momentu jego ponownego
sformatowania. Patrz: poniższe instrukcje.
Formatowanie w systemie Windows
OSTROŻNIE! Ponowne formatowanie dysku powoduje
usunięcie wszystkich istniejących danych!
1. Otwórz okno Zarządzanie dyskami w systemie
Windows (kliknij prawym przyciskiem myszy ikonę Mój
komputer, wybierz polecenie Zarządzaj, a następnie
kliknij ikonę Zarządzanie dyskami).
2. Jeśli zostanie uruchomiony Kreator dysku, kliknij
przycisk Dalej. Wybierz dysk, a następnie kliknij
kolejno przyciski Dalej i Zakończ.
Jeśli kreator nie zostanie uruchomiony, znajdź dysk
na liście wyświetlanej niżej. Dyskowi temu nie jest
przypisana litera i nie jest on sformatowany za pomocą
żadnego systemu plików. Kliknij prawym przyciskiem
myszy nazwę dysku i wybierz polecenie Zainicjuj dysk
(Windows XP) lub Zapisywanie podpisu (Windows
2000), a następnie kliknij przycisk OK
3. Dysl będzie teraz wyświetlany jako Nieprzydzielony,
a pasek będzie czarny. Kliknij prawym przyciskiem
myszy czarny pasek i wybierz polecenie Nowa partycja
(Windows XP) lub Utwórz partycję (Windows 2000).
4. Po otwarciu kreatora partycji Partition Wizard, kliknij
przycisk Dalej na każdym ekranie, żeby wybrać opcje
domyślne i sformatować napęd w systemie NTFS.
UWAGA: Aby korzystać z dysku w innych systemach
operacyjnych, należy użyć narzędzia Iomega FAT32
Formatter znajdującego się na płycie CD. Za jego pomocą
można zmienić format na FAT32 (niezbędny do zapewnienia
zgodności między między różnymi platformami).
.
Szybka instalacja — eSATA
1. W przypadku podłączania dysku do karty PCI eSATA
pamiętaj o zainstalowaniu sterowników karty oraz
sprawdź, czy karta jest poprawnie rozpoznawana
przez system operacyjny.
UWAGA: Dysk twardy Iomega UltraMax nie wymaga
instalowania specjalnych sterowników. Jest on
obsługiwany przez sterowniki karty PCI eSATA. Jeśli w
komputerze jest wbudowane złącze eSATA, dysk jest
obsługiwany przez sterowniki systemu operacyjnego.
2. Wyłącz komputer.
UWAGA: Interfejs eSATA NIE jest interfejsem plug-and-
play. Przed podłączeniem i odłączeniem dysku należy
zawsze wyłączyć komputer.
3. Podłącz dostarczony zasilacz do gniazda z tyłu dysku
oraz do gniazda zasilania.
UWAGA! Aby uniknąć uszkodzenia dysku lub utraty
danych, nie wolno przenosić włączonego dysku.
4. Zidentyfikuj przewód eSATA i podłącz go do portu
DuoLink (oznaczonego symbolem USB
UWAGA:
Nie wolno podłączać dysku do komputera za
pomocą więcej niż jednego przewodu.
5. Podłącz drugi koniec przewodu do karty PCI eSATA lub
wbudowanego złącza eSATA.
6. Włącz dysk za pomocą przełącznika z tyłu obudowy i
uruchom ponownie komputer.
Użytkownicy komputerów Macintosh: Dysk powinien
być zainstalowany i widoczny na pulpicie komputera
Macintosh.
Użytkownicy komputerów PC:
rozpozna napędu do momentu jego ponownego
sformatowania. Patrz: instrukcje z lewej strony
poświęcone Formatowaniu napędu w systemie
Windows
.
Twój komputer nie
i eSATA).
15
Page 16

Γρήγορη εγκατάσταση – USB ή FireWire
SA
T
A
S
A
T
A
FireWire/1394/i.LinkUSB eSATA
1. Συνδέστε το τροφοδοτικό που συνοδεύει το δίσκο στο
πίσω µέρος του και σε µια πρίζα ηλεκτρικού.
ΠΡΟΣΟΧΗ! Μην µετακινείτε το δίσκο όταν ξεκινά
η τροφοδοσία του, για να µην προκληθεί ζηµιά ή
απώλεια δεδοµένων.
2. Εντοπίστε το κατάλληλο καλώδιο και συνδέστε το στο
πίσω µέρος του δίσκου. Για σύνδεση USB, συνδέστε
το καλώδιο USB στην υποδοχή DuoLink (η οποία είναι
επισηµασµένη και µε το σύµβολο USB
και µε την
ένδειξη ‘eSATA’). Για σύνδεση FireWire, µπορείτε να
χρησιµοποιήσετε οποιαδήποτε υποδοχή FireWire.
ΣΗΜΕΙ
ΩΣΗ: Ποτέ µην συνδέετε τη µονάδα δίσκου µε
τον υπολογιστή µε περισσότερα του ενός καλώδια.
3. Συνδέστε το άλλο άκρο του καλωδίου σε µια υποδοχή
στον υπολογιστή σας.
Ενεργοποιήστε το δίσκο.
Χρήστες Mac: Ο δίσκος πρέπει να µονταριστεί και να
εµφανιστεί στο γραφείο του Mac.
Χρήστες PC: Ο υπολογιστής σας δεν θα αναγνωρίσει
τον δίσκο έως ότου διαµορφωθεί εκ νέου. ∆είτε τις
οδηγίες που ακολουθούν.
∆ιαµόρφωση του δίσκου για Windows
ΠΡΟΣΟΧΗ! Με την επανάληψη διαµόρφωσης του δίσκου θα
χαθούν όλα τα υπάρχοντα δεδοµένα!
1. Ανοίξτε τη ∆ιαχείριση ∆ίσκων των Windows (κάντε
δεξιό κλικ στην επιλογή Ο Υπολογιστής µου, επιλέξτε
∆ιαχείριση και κάντε κλικ στην επιλογή ∆ιαχείριση
∆ίσκων).
2. Εάν ανοίξει ο Οδηγός δίσκων, κάντε κλικ στο κουµπί
Επόµενο. Επιλέξτε το δίσκο, κάντε κλικ στο κουµπί
Επόµενο και, στη συνέχεια, στο κουµπί Τέλος.
Εάν δεν ανοίξει ο οδηγός, εντοπίστε το δίσκο στην
κάτω λίστα. Αναζητήστε ένα δίσκο για τον οποίο δεν
εµφανίζεται γράµµα µονάδας δίσκου ή σύστηµα
αρχείων. Κάντε δεξιό κλικ στο όνοµα της µονάδας
δίσκου και επιλέξτε Προετοιµασία δίσκου (Windows
XP) ή Εγγραφή υπογραφής (Windows 2000) και, στη
συνέχεια, OK.
3. Η µονάδα δίσκου θα εµφανιστεί τώρα µε την ένδειξη
∆εν έχει εκχωρηθεί και η γραµµή θα είναι µαύρη.
Κάντε δεξιό κλικ επάνω στη µαύρη γραµµή και
επιλέξτε Νέο διαµέρισµα (Windows XP) ή ∆ηµιουργία
διαµερίσµατος (Windows 2000).
4. Όταν ανοίξει ο οδηγός διαµερισµάτων (Partition
Wizard) κάντε κλικ στο κουµπί Επόµενο σε κάθε
οθόνη, για να επιλέξετε τις προεπιλογές και να γίνει
διαµόρφωση NTFS του δίσκου.
ΣΗΜΕΙΩΣΗ: Εάν θέλετε να χρησιµοποιήσετε το δίσκο
µε άλλα λειτουργικά συστήµατα, χρησιµοποιήστε το
πρόγραµµα Iomega FAT32 Formatter που βρίσκεται στο CD,
για να αλλάξετε τη διαµόρφωση σε FAT32.
16
Γρήγορη εγκατάσταση –
eSATA
1. Εάν κάνετε σύνδεση σε µια κάρτα eSATA PCI,
βεβαιωθείτε ότι έχουν εγκατασταθεί τα προγράµµατα
οδήγησης της κάρτας και ότι η κάρτα αναγνωρίζεται
κανονικά από το λειτουργικό σας σύστηµα.
ΣΗΜΕΙ
ΩΣΗ: ∆εν χρειάζεται να εγκαταστήσετε ειδικά
προγράµµατα οδήγησης για το σκληρό δίσκο Iomega
UltraMax. Υποστηρίζεται από τα προγράµµατα
οδήγησης που περιλαµβάνονται στην κάρτα eSATA
PCI. Εάν ο υπολογιστής σας διαθέτει ενσωµατωµένη
σύνδεση eSATA, ο δίσκος υποστηρίζεται από τα
προγράµµατα οδήγησης που περιλαµβάνονται ήδη στο
λειτουργικό σύστηµα.
2. Σβήστε τον υπολογιστή.
ΣΗΜΕΙ
ΩΣΗ: Η διασύνδεση eSATA ∆ΕΝ είναι plug-and-
play. Πρέπει πάντα να τερµατίζετε τη λειτουργία του
υπολογιστή πριν συνδέσετε ή αποσυνδέσετε το δίσκο.
3. Συνδέστε το τροφοδοτικό που συνοδεύει το δίσκο στο
πίσω µέρος του και σε µια πρίζα ηλεκτρικού.
ΠΡΟΣΟΧΗ! Μην µετακινείτε το δίσκο όταν ξεκινά
η τροφοδοσία του, για να µην προκληθεί ζηµιά ή
απώλεια δεδοµένων.
4. Εντοπίστε το καλώδιο eSATA και συνδέστε το στην
υποδοχή DuoLink (η οποία είναι επισηµασµένη και µε
το σύµβολο USB
ΣΗΜΕΙ
και µε την ένδειξη ‘eSATA’).
ΩΣΗ: Ποτέ µην συνδέετε το δίσκο µε τον
υπολογιστή µε περισσότερα του ενός καλώδια.
5. Συνδέστε το άλλο άκρο του καλωδίου στην κάρτα
eSATA PCI ή στην ενσωµατωµένη υποδοχή eSATA.
6. Ανάψτε το διακόπτη τροφοδοσίας στο πίσω µέρος του
δίσκου και κάντε επανεκκίνηση του υπολογιστή.
Χρήστες Mac: Ο δίσκος πρέπει να µονταριστεί και να
εµφανιστεί στο γραφείο του Mac.
Χρήστες PC: Ο υπολογιστής σας δεν θα αναγνωρίσει
τον δίσκο έως ότου διαµορφωθεί εκ νέου. Ανατρέξτε
στις οδηγίες αριστερά, στην ενότητα ∆ιαµόρφωση του
δίσκου για Windows
.
Page 17

Using Your Drive
Disconnecting the Drive
To prevent data loss, do not disconnect the drive during data transfer (activity light flashing).
CAUTION!
USB/FireWire Users:
eSATA Users: Always turn off power to the drive and computer before disconnecting.
Using the USB Hub
The Iomega UltraMax drive includes a 3-port USB 2.0 hub. When the drive is connected via USB, you can use the hub to
connect other USB devices to your system.
NOTE: The USB hub works only when the UltraMax Hard Drive is connected to a USB port on the computer. Do NOT connect
the drive to more than one interface at the same time.
Using FireWire Pass-through
The Iomega UltraMax drive includes two FireWire 400 ports and one FireWire 800 port. When the drive is connected via
FireWire, the other ports can be used for connecting other FireWire devices to your system.
NOTE: FireWire pass-through works only when the UltraMax drive is connected to a FireWire port on the computer. Do NOT
connect the drive to more than one interface at the same time.
Backing Up with Your Drive
Iomega recommends periodic system backups and more frequent data backups to ensure that your critical data is always
protected. The frequency of your backup should depend on the importance of your data. To protect your data, you can
simply drag and drop copies of your critical files onto the drive, or you can use backup software to schedule regular
backups.
CAUTION! Any data storage device can fail. Always keep at least two copies on different disks for all critical data files.
Time Machine Compatibility
The Iomega UltraMax drive ships formatted HFS+ and is compatible with Time Machine (available in Mac OS X 10.5).
Always use the safe removal procedure for your operating system when disconnecting the drive.
Volume Configuration
The Iomega UltraMax drive ships configured RAID 0 (striped volume), which appears as a single drive letter or disk on the
computer system. If desired, you can change the configuration to another RAID type, including RAID 1 (mirrored volume),
JBOD (spanned volume), or non-RAID (simple volumes–two drive letters). Refer to the instructions below. For additional
details, visit the support area on www.iomega.com
NOTE: The non-RAID configuration is not supported when the drive is connected to eSATA.
CAUTION! Changing the volume configuration will erase all existing data! If you have files on the drive you want to save,
move them to another drive before changing the configuration. Do NOT change the configuration switches while the drive is
powered up.
1. Power down the drive.
2. Change the switch settings on the back of the drive for the desired volume type. See table below for setting options.
.
Volume Type Switch Settings
Simple (non-RAID)*
Spanned (JBOD)
Striped (RAID 0)
Mirrored (RAID 1)
*NOTE: The configuration for simple volumes is not supported when the drive is connected to eSATA.
17
Page 18

3. Turn the drive on.
4. Repartition and format your hard drive to complete the volume configuration. See the complete user’s manual
available on www.iomega.com if you need detailed instructions.
Troubleshooting
Drive does not appear in My Computer or Windows Explorer or on the Mac Desktop
• Try rebooting your computer.
• Check all connections.
• Make sure the drive is receiving power (check if the status light is on). Make sure the power switch is on.
• Make sure you are using the cable that came with your drive.
• Make sure the drive is connected to only one interface.
PC Users:
• Make sure the drive is formatted for use with Windows. Refer to the instructions on page 2.
• If you are connecting to a PCI card, make sure the correct drivers for the card are installed and recognized by your
operating system.
• If you are connecting to USB, check your BIOS to ensure USB is enabled. Please refer to your computer’s user’s guide
or manual for instructions
If the drive is still not assigned a drive letter, please visit the support area on www.iomega.com
PC will not start up
If your PC will not start up when the drive is connected, the BIOS on the computer probably has a conflict with large capacity
removable drives. To work around this problem, power off the drive when starting the computer. Power on the drive after
the computer finishes starting up.
.
.
Complete User's Manual
A complete user’s manual in HTML format is available on the support area on www.iomega.com.
Utilisation du lecteur
Déconnexion du lecteur
ATTENTION ! Pour éviter toute perte de données, ne déconnectez pas le lecteur pendant un transfert de données (voyant
d’activité clignotant).
Utilisateurs de USB/FireWire :
déconnexion du lecteur.
Utilisateurs de eSATA : mettez toujours le lecteur et l’ordinateur hors tension avant la déconnexion.
Utilisation du concentrateur USB
Le disque Iomega UltraMax comporte un concentrateur USB 2.0 à trois ports. Lorsque le disque est connecté via USB, vous
pouvez utiliser le concentrateur pour connecter d’autres périphériques USB à votre système.
REMARQUE : le concentrateur USB fonctionne uniquement lorsque le disque dur UltraMax est connecté à un port USB de
l’ordinateur. Ne connectez PAS le disque dur à plusieurs interfaces en même temps.
Utilisation du transfert FireWire
Le disque Iomega UltraMax comporte deux ports FireWire 400 et un port FireWire 800. Lorsque le disque dur est connecté
via FireWire, vous pouvez utiliser les autres ports pour connecter d’autres périphériques FireWire à votre système.
REMARQUE : le transfert FireWire fonctionne uniquement quand le disque UltraMax est connecté à un port FireWire de
l’ordinateur. Ne connectez PAS le disque dur à plusieurs interfaces en même temps.
Sauvegarder avec votre disque dur
Iomega recommande d’effectuer des sauvegardes régulières du système et des sauvegardes fréquentes de données
pour assurer la protection permanente de vos données les plus importantes. La périodicité des sauvegardes dépend
directement de l’importance des données à sauvegarder. Pour protéger vos données, copiez vos fichiers les plus importants
sur le disque par simple glisser-déplacer ou utilisez le logiciel de sauvegarde pour programmer des sauvegardes régulières.
18
Utilisez toujours la procédure de retrait sécurisée de votre système d’exploitation lors de la
Page 19

Configuration du volume
Le disque Iomega UltraMax possède la configuration RAID 0 (volume réparti) qui s’affiche comme lettre de lecteur ou disque unique sur
le système. Si vous le souhaitez, vous pouvez modifier la configuration vers un autre type RAID, y compris RAID 1 (volume en miroir),
JBOD (volume étendu) ou non-RAID (volumes simples avec deux lettres de lecteur). Référez-vous aux instructions ci-dessous. Pour de
plus amples informations, consultez le service d’assistance technique sur le site
REMARQUE : une configuration autre que RAID n’est pas prise en charge lorsque le disque est connecté à eSATA.
ATTENTION ! La modification de la configuration du volume efface toutes les données existantes ! Si le disque contient des
fichiers que vous voulez sauvegarder, déplacez-les sur un autre disque avant de modifier la configuration. Ne modifiez PAS
la configuration lorsque le disque est alimenté.
1. Mettez le disque hors tension.
2. Modifiez les paramètres du commutateur situé à l’arrière du disque pour obtenir le type de volume souhaité. Consultez
les options des paramètres dans le tableau ci-dessous.
Type de volume Réglages de l’interrupteur
Simple (non-RAID)*
Etendu (JBOD)
Réparti (RAID 0)
En miroir (RAID 1)
REMARQUE : la configuration des volumes simples n’est pas prise en charge lorsque le disque est connecté à eSATA.
3. Mettez le disque sous tension.
4. Partitionnez et formatez le disque dur pour terminer la configuration du volume. Pour obtenir des instructions
détaillées, reportez-vous au guide complet de l’utilisateur disponible sur le site www.iomega.com.
www.iomega.com
.
Dépannage
Le lecteur n’apparaît pas dans le Poste de travail, l’Explorateur Windows ou sur le bureau du Mac.
• Redémarrez votre ordinateur.
• Vérifiez toutes les connexions.
• Assurez-vous que le lecteur est connecté à l’alimentation (vérifiez que le voyant d’état est allumé). Vérifiez que
l’interrupteur d’alimentation à l’arrière du lecteur est sur ON.
• Assurez-vous que vous utilisez le câble fourni avec le disque
• Assurez-vous que le disque est connecté à une seule interface.
Utilisateurs de PC :
• Assurez-vous que le disque dur est formaté sous Windows. Consultez les instructions à la page 3.
• En cas de connexion à une carte PCI, assurez-vous que les pilotes corrects pour la carte sont installés et reconnus par
votre système d’exploitation.
• En cas de connexion USB, vérifiez votre BIOS pour vous assurer que la connexion USB est activée. Reportez-vous aux
instructions de la documentation de votre ordinateur.
Si aucune lettre n’a encore été attribuée au lecteur, consultez la section Support à l’adresse
www.iomega.com
L’ordinateur ne démarre pas
Si votre PC ne démarre pas lorsque le disque est connecté, il est possible que le BIOS de votre ordinateur rencontre des
problèmes avec les disques amovibles de grande capacité. Afin de résoudre ce problème, éteignez le disque lorsque vous
démarrez l’ordinateur. Allumez-le une fois l’ordinateur démarré.
.
.
Guide complet de l’utilisateur
Un guide de l’utilisateur complet est disponible au format HTML dans la section Support du site www.iomega.com.
19
Page 20

Verwenden des Laufwerks
Trennen des Laufwerks vom System
ACHTUNG! Um Datenverluste zu vermeiden, trennen Sie das Laufwerk während der Datenübertragung (wenn
Aktivitätsanzeige blinkt) nicht vom Computer.
USB/FireWire-Benutzer:
eSATA-Benutzer: Müssen Sie das Laufwerk und den Computer immer vor dem Trennen der Verbindung abschalten.
Verwenden des USB-Hub
Das Iomega UltraMax-Laufwerk verfügt über einen USB 2.0-Hub mit drei Anschlüssen. Wenn das Laufwerk per USB
angeschlossen wird, kann der Hub für die Verbindung anderer USB-Geräte mit Ihrem System verwendet werden.
HINWEIS: Der USB-Hub funktioniert nur, wenn die UltraMax-Festplatte über einen USB-Anschluss des Computers
angeschlossen ist. Schließen Sie die Festplatte NIEMALS gleichzeitig an mehr als eine Schnittstelle an.
Verwendung von FireWire-Pass-Through
Das Iomega UltraMax-Laufwerk ist mit zwei FireWire 400-Anschlüssen und einem FireWire 800-Anschluss ausgestattet.
Wenn das Laufwerk per FireWire verbunden ist, können die übrigen Anschlüsse für die Verbindung anderer FireWire-Geräte
mit Ihrem System verwendet werden.
HINWEIS: FireWire-Pass-Through funktioniert nur, wenn das UltraMax-Laufwerk über einen FireWire-Anschluss des
Computers angeschlossen ist. Schließen Sie die Festplatte NIEMALS gleichzeitig an mehr als eine Schnittstelle an.
Mit dem Iomega Laufwerk auf Nummer Sicher
Es empfiehlt sich, das System regelmäßig und die Daten noch häufiger zu sichern, um den ständigen Schutz Ihrer wichtigen
Daten zu gewährleisten. Wie oft Sie eine Sicherung vornehmen, hängt jeweils von der Wichtigkeit Ihrer Daten ab. Sie
können die Daten auf einfache Weise sichern, indem Sie Kopien derselben durch Ziehen und Ablegen auf das Laufwerk
kopieren. Alternativ dazu bietet die Sicherungssoftware die Möglichkeit, eine regelmäßige Sicherung zu planen.
Zum Abklemmen des Laufwerks sollten Sie immer die Option zum sicheren Entfernen der Hardware wählen.
Volume-Konfiguration
Das Iomega UltraMax-Laufwerk ist werksseitig als RAID 0 (Striping-Volume) konfiguriert und wird daher auf dem Computer
als einzelner Laufwerksbuchstabe oder Datenträger angezeigt. Nach Wunsch können Sie die Konfiguration auf einen
anderen RAID-Typ ändern, z. B. RAID 1 (gespiegeltes Volume), JBOD (übergreifendes Volume) oder Non-RAID (einfache
Volumes – zwei Laufwerksbuchstaben). Anweisungen hierzu finden Sie weiter unten. Zusätzliche Informationen finden Sie
im Support-Bereich auf www.iomega.com
HINWEIS: Die Non-RAID-Konfiguration wird nicht unterstützt, wenn das Laufwerk per eSATA angeschlossen ist.
ACHTUNG! Bei einer Änderung der Volume-Konfiguration werden sämtliche vorhandenen Daten gelöscht! Sollten sich
Dateien auf dem Laufwerk befinden, die Sie speichern möchten, verschieben Sie diese auf ein anderes Laufwerk, bevor Sie
die Konfiguration ändern. Ändern Sie NICHT die Konfigurationsswitches, während das Laufwerk hochgefahren ist.
1. Fahren Sie das Laufwerk herunter.
2. Ändern Sie die Schaltereinstellungen auf der Rückseite des Laufwerks für den gewünschten Volume-Typ. In folgender
Tabelle finden Sie die Einstellungsoptionen.
.
Volume-Typ Schaltereinstellungen
Einfach (Non-RAID)*
Übergreifend (JBOD)
Striping (RAID 0)
Gespiegelt (RAID 1)
*HINWEIS: Die Konfiguration für einfache Volumes wird nicht unterstützt, wenn das Laufwerk per eSATA angeschlossen ist.
20
Page 21

3. Schalten Sie das Laufwerk ein.
4. Partitionieren und formatieren Sie die Festplatte neu, um die Volume-Konfiguration abzuschließen. Sollten Sie
ausführliche Anweisungen benötigen, ist das vollständige Benutzerhandbuch für Sie auf www.iomega.com verfügbar.
Fehlerbehebung
Laufwerk wird nicht im Arbeitsplatz, dem Windows Explorer oder auf dem Mac-Desktop angezeigt
• Führen Sie probeweise einen Neustart des Rechners durch.
• Überprüfen Sie alle Verbindungen.
• Kontrollieren Sie anhand der Aktivitätslampe vorne auf dem Laufwerk, ob das Laufwerk mit Strom versorgt wird.
Vérifiez que l’interrupteur d’alimentation à l’arrière du lecteur est sur ON.
• Achten Sie darauf, dass Sie das mit dem Laufwerk gelieferte Kabel verwenden.
• Vergewissern Sie sich, dass das Laufwerk nur an eine Schnittstelle angeschlossen ist.
PC-Benutzer:
• Vergewissern Sie sich, dass das Laufwerk für den Gebrauch mit Windows formatiert ist. Lesen Sie hierzu die
• Wenn Sie eine Verbindung zu einer PCI-Karte herstellen, stellen Sie sicher, dass die korrekten Treiber für die Karten
• Wenn Sie eine Verbindung zum USB-Port herstellen, überprüfen Sie das BIOS, um sicher zu gehen, dass der USB-Port
Wenn dem Laufwerk immer noch kein Laufwerkbuchstabe zugewiesen wird, rufen Sie den Bereich “Support” von www.
iomega.com auf.
Der PC lässt sich nicht starten
Wenn sich Ihr PC mit dem angeschlossenen Laufwerk nicht starten lässt, besteht möglicherweise ein BIOS-Konflikt mit
Wechseldatenträgern mit hoher Speicherkapazität. Sie können dieses Problem umgehen, indem Sie das Laufwerk beim
Starten des Computers ausschalten. Nach dem Starten des Computers schalten Sie das Laufwerk ein.
Anweisungen auf Seite 4.
installiert und von Ihrem Betriebssystem erkannt wurden.
aktiviert ist. Weitere Anweisungen finden Sie im Benutzerhandbuch Ihres Rechners.
Benutzerhandbuch (vollständig)
Im Bereich “Support” unter www.iomega.com steht Ihnen ein vollständiges Benutzerhandbuch im HTML-Format zur Verfügung.
Uso dell’unità
Scollegamento dell’unità
ATTENZIONE! Per evitare che si verifichino perdite di dati, non scollegare l’unità durante il trasferimento di informazioni (la
spia verde di attività lampeggia).
Utenti USB/FireWire: Quando si scollega l’unità, usare sempre la procedura di rimozione sicura specifica per il sistema
operativo usato.
Utenti eSATA: Prima di scollegarla, ricordarsi sempre di spegnere sia l’unità che il computer.
Utilizzo dell’hub USB
L’unità Iomega UltraMax è dotata di un hub USB 2.0 a 3 porte. Se l’unità è collegata tramite USB, è possibile utilizzare l’hub
per collegare altre periferiche USB al sistema.
NOTA: l’hub USB funziona solo quando l’unità UltraMax Hard Drive è collegata a una porta USB sul computer. NON collegare
l’unità a più di un’interfaccia contemporaneamente.
Utilizzo di Pass-through FireWire
L’unità Iomega UltraMax include due porte FireWire 400 e una porta FireWire 800. Quando l’unità è connessa tramite
FireWire le altre porte possono essere utilizzate per collegare altri dispositivi FireWire al sistema.
NOTA: FireWire pass-through funziona solo quando l’unità UltraMax è collegata a una porta FireWire sul computer. NON
collegare l’unità a più di un’interfaccia contemporaneamente.
21
Page 22

Backup con le unità Iomega
Iomega consiglia di eseguire backup di sistema periodici e backup di dati più frequenti per garantire che i dati essenziali
siano sempre protetti. La frequenza dei backup varia in base all’importanza dei dati da memorizzare. Per proteggere i
dati, è sufficiente selezionare e trascinare copie dei dati più importanti sull’unità, oppure utilizzare il software incluso per
pianificare l’esecuzione di backup a intervalli regolari.
Configurazione del volume
L’unità Iomega UltraMax viene fornita configurata come RAID 0 (volume striped), per cui viene visualizzata sul computer
come disco singolo o come lettera di unità singola. Se lo si desidera, è possibile modificare la configurazione impostando
l’unità su un altro tipo di RAID, ad esempio RAID 1 (volume con mirroring), JBOD (volume con spanning) o non RAID (volumi
semplici - due lettere di unità). Fare riferimento alle istruzioni sotto riportate. Per ulteriori informazioni, visitare l’area
dedicata al supporto tecnico nel sito www.iomega.com
NOTA: la configurazione non RAID non è supportata quando l’unità e collegata a eSATA.
ATTENZIONE! La modifica della configurazione del volume provoca l’eliminazione dei dati esistenti! Se i file che si intende
salvare risiedono sull’unità, spostarli su un’altra unità prima di modificare la configurazione. NON modificare i selettori di
configurazione quando l’unità è accesa.
1. Spegnere l’unità.
2. Modificare le impostazioni dell’interruttore nella parte posteriore dell’unità per il tipo di volume desiderato. Per
informazioni sulle opzioni di impostazione fare riferimento alla tabella sottostante
Tipo di volume Impostazioni dei selettori
Semplice (non-RAID)*
Suddiviso (JBOD)
Con striping (RAID 0)
.
Con mirroring (RAID 1)
*NOTA: la configurazione per i volumi semplici non è supportata quando l’unità è collegata a eSATA.
3. Accendere l’unità.
4. Per completare la configurazione del volume, ripartizionare e formattare il disco rigido. Per istruzioni più dettagliate
fare riferimento al manuale per l’utente completo disponibile sul sito www.iomega.com.
Risoluzione dei problemi
L’unità non compare in Risorse del computer, in Gestione risorse o sulla Scrivania Mac.
• Provare a riavviare il computer.
• Controllare i collegamenti.
• Assicurarsi che l’unità sia opportunamente alimentata (controllare che la spia di stato sia accesa). Assicurarsi che
l’interruttore di accensione situato sul retro dell’unità sia su ON.
• Assicurarsi di utilizzare il cavo fornito in dotazione con l’unità.
• Accertarsi che l’unità sia collegata a una sola interfaccia.
Utenti PC:
• Assicurarsi che l’unità sia formattata per l’utilizzo con Windows. Fare riferimento alle istruzioni a pagina 5.
• Se si effettua la connessione a una scheda PCI, assicurarsi che i driver relativi della scheda siano stati installati e
riconosciuti dal sistema operativo.
• Se si sta effettuando la connessione all’USB, controllare il BIOS per verificare che la connessione USB sia attivata. Per
istruzioni, consultare la guida o il manuale del computer.
Se all’unità continua a non essere assegnata alcuna lettera, visitare l’area Assistenza nel sito Web www.iomega.com
22
.
Page 23

Il computer non si avvia
Se il PC non si avvia quando l’unità è collegata, è possibile che esista un conflitto tra il BIOS del computer e i dischi
rimovibili a elevata capacità. Per risolvere il problema, spegnere l’unità quando si accende il computer. Accendere l’unità
dopo l’avvio del computer.
Manuale completo dell’utente
Il manuale completo dell’utente è disponibile nell’area Assistenza all’indirizzo www.iomega.com.
Uso de la unidad
Desconexión de la unidad
PRECAUCIÓN: Para impedir la pérdida de datos, no desconecte la unidad durante el proceso de transferencia de datos (la
luz de actividad parpadea).
Usuarios de USB/FireWire:
unidad.
Usuarios de eSATA: Apague siempre la unidad y el ordenador antes de desconectarla.
Uso del concentrador USB
La unidad de disco duro Iomega UltraMax incluye un concentrador USB 2.0 de tres puertos. Cuando la unidad se ha
conectado a través de USB, puede utilizar el concentrador para conectar al sistema otros dispositivos USB.
NOTA: El concentrador USB funciona sólo cuando la unidad de disco duro UltraMax está conectada a un puerto USB del
equipo. NO conecte la unidad a más de una interfaz al mismo tiempo.
Uso de la conexión de transferencia FireWire
La unidad de disco duro Iomega UltraMax incluye dos puertos FireWire 400 y un puerto FireWire 800. Cuando se conecta la
unidad a través de FireWire, los demás puertos pueden utilizarse para conectar otros dispositivos FireWire a su sistema.
NOTA: La conexión de transferencia FireWire sólo funciona cuando la unidad UltraMax está conectada a un puerto FireWire
en el ordenador. NO conecte la unidad a más de una interfaz al mismo tiempo.
Realización de copias de seguridad con la unidad
Iomega recomienda realizar con periodicidad copias de seguridad del sistema y copias de seguridad más frecuentes de
los datos para garantizar que los datos importantes estén siempre protegidos. La frecuencia de las copias de seguridad
dependerá de la importancia de los datos. Para proteger los datos, no tiene más que arrastrar y soltar copias de los
archivos importantes en la unidad o utilizar el software de copia de seguridad para programar copias de seguridad
regulares.
Utilice siempre un procedimiento de desconexión seguro para su sistema operativo al desconectar la
Configuración de volumen
La unidad Iomega UltraMax viene configurada como RAID 0 (volumen agrupado), que aparece como una única letra de
unidad o disco en el sistema del ordenador. Si lo desea, puede cambiar la configuración a otro tipo RAID, incluido RAID 1
(volumen duplicado), JBOD (volumen distribuido) o no RAID (volúmenes simples: dos letras de unidad). Consulte las
instrucciones que aparecen a continuación. Para obtener más información, visite el área de asistencia de la página
www.iomega.com
NOTA: No se admite la configuración no RAID cuando la unidad está conectada a e-SATA.
PRECAUCIÓN: Si cambia la configuración de volumen se borrarán todos los datos existentes. Si tiene archivos en la
unidad que desee conservar, muévalos a otra unidad antes de cambiar la configuración. NO cambie los interruptores de
configuración con la unidad encendida.
1. Apague el dispositivo.
2. Cambie la configuración del interruptor de la parte posterior de la unidad al tipo de volumen deseado. Consulte la
siguiente tabla para ver las opciones de configuración.
.
23
Page 24

Tipo de volumen Configuración del interruptor
Simple (no RAID)*
Distribuido (JBOD)
Agrupado (RAID 0)
Duplicado (RAID 1)
*NOTA: No se admite la configuración para volúmenes simples cuando la unidad está conectada a e-SATA.
3. Encienda la unidad.
4. Vuelva a crear particiones y formatee el disco duro para completar la configuración de volumen. Consulte el manual del
usuario completo disponible en www.iomega.com si necesita instrucciones detalladas.
Solución de problemas
La unidad no aparece en Mi PC, el Explorador de Windows o en el escritorio de Mac.
• Pruebe a reiniciar el ordenador.
• Compruebe todas las conexiones
• Asegúrese de que la unidad recibe alimentación (compruebe si la luz de estado está encendida).
interruptor de encendido de la parte posterior de la unidad está en ON.
• Asegúrese de que está utilizando el cable que se incluye con la unidad
• Asegúrese de que la unidad está conectada a una sola interfaz.
Usuarios de PC:
• Compruebe que la unidad está formateada para su uso en Windows. Consulte las instrucciones de la página 6.
• Si la conecta a una tarjeta PCI, asegúrese de que se han instalado los controladores de la tarjeta y de que el sistema
operativo reconoce correctamente la tarjeta.
• Compruebe la BIOS para asegurarse de que la conexión USB está activada. Consulte las instrucciones del manual o la
guía del usuario del equipo.
Si aún no se le ha asignado una letra a la unidad, visite el área de soporte del sitio www.iomega.com
El PC no arranca
Si su PC no se inicia cuando la unidad está conectada, puede que la BIOS de su ordenador tenga un conflicto con las
unidades extraíbles de gran capacidad. Para solucionar este problema, apague la unidad cuando arranque el equipo.
Encienda la unidad después de que el equipo haya terminado de arrancar.
.
Asegúrese de que el
.
.
Completo manual del usuario
El manual de usuario completo en formato HTML está disponible en el área de asistencia del sitio www.iomega.com.
Utilização da unidade
Desconexão da unidade
CUIDADO! A fim de evitar a perda de dados, não desconecte a unidade durante a transferência de dados (luz de atividade
da unidade piscando).
Usuários de USB/FireWire:
unidade.
Usuários de eSATA: Sempre desligue a unidade e o computador antes de desconectá-la.
24
Sempre utilize o procedimento de remoção segura do sistema operacional ao desconectar a
Page 25

Utilização do hub USB
A unidade Iomega UltraMax inclui um hub USB 2.0 de 3 portas. Quando a unidade é conectada via USB, você pode usar o
hub para conectar outros dispositivos USB ao sistema.
OBS: o hub USB funciona somente quando a unidade UltraMax Hard Drive é conectada a uma porta USB no computador.
NÃO conecte a unidade a mais de uma interface ao mesmo tempo.
Utilização de FireWire de passagem
A unidade Iomega UltraMax inclui duas portas FireWire 400 e uma porta FireWire 800. Quando a unidade está conectada
via FireWire, as outras portas podem ser usadas para conectar outros dispositivos FireWire ao sistema.
OBS: O FireWire de passagem funciona somente quando a unidade UltraMax está conectada a uma porta FireWire no
computador. NÃO conecte a unidade a mais de uma interface ao mesmo tempo.
Execução de backup com a sua unidade
A Iomega recomenda que sejam feitos backups periódicos do sistema e backups mais freqüentes de dados para garantir
que seus dados mais importantes estejam sempre protegidos. A freqüência da execução de backups deve basear-se na
importância de seus dados. Para proteger seus dados, você pode simplesmente arrastar e soltar cópias de seus arquivos
importantes na unidade ou pode usar um software de backup para programar backups regulares.
Configuração de volume
A unidade Iomega UltraMax é enviada com a configuração RAID 0 (volume dividido), que aparece como uma única letra
de unidade ou disco no sistema do computador. Se desejar, você pode alterar a configuração para outro tipo de RAID,
incluindo RAID 1 (volume espelhado), JBOD (volume distribuído), ou não-RAID (volumes simples – duas letras de unidade).
Consulte as instruções abaixo. Para obter mais detalhes, visite a área de suporte em www.iomega.com
OBS: a configuração não-RAID não é suportada quando a unidade está conectada a eSATA.
CUIDADO! A alteração da configuração do volume apagará todos os dados existentes! Caso você possua arquivos
na unidade que deseje salvar, mova-os para outra unidade antes de mudar a configuração. NÃO altere as chaves de
configuração enquanto a unidade estiver ligada.
1. Desligue a unidade.
2. Altere as configurações de chave na parte traseira da unidade para o tipo de volume desejado. Consulte a tabela
abaixo para ver as opções de configuração.
.
Tipo de volume Configurações de chave
Simples (não-RAID)*
Distribuído (JBOD)
Dividido (RAID 0)
Espelhado (RAID 1)
*OBS: A configuração para volumes simples não é suportada quando a unidade está conectada a eSATA.
3. Ligue a unidade.
4. Reparticione e formate sua unidade para concluir a configuração do volume. Consulte o manual do usuário completo
disponível em www.iomega.com se precisar de instuções detalhadas.
Solução de problemas
A unidade não aparece em Meu computador, no Windows Explorer ou na mesa do Mac.
• Tente reiniciar seu computador.
• Verifique todas as conexões.
• Certifique-se de que a unidade esteja recebendo energia (verifique se a luz de status está ligada).
a chave de alimentação na parte traseira da unidade esteja LIGADA.
Certifique-se de que
25
Page 26

• Certifique-se de que esteja utilizando o cabo enviado com a unidade.
• Certifique-se de que a unidade esteja conectada a apenas uma interface.
Usuários de PC:
• Certifique-se de que a unidade esteja formatada para uso com o Windows. Consulte as instruções na página 7.
• Caso esteja conectado a uma placa PCI, certifique-se de que os drivers adequados para a placa estejam instalados e
sejam reconhecidos pelo sistema operacional.
• Caso esteja conectando a USB, verifique sua BIOS para verificar se o USB está ativado. Consulte o guia ou manual do
usuário do computador para obter instruções.
Se ainda não houver uma letra atribuída à unidade, visite a área de Suporte no site www.iomega.com
O computador não inicia
Se o computador não está iniciando quando a unidade está conectada, provavelmente existe um conflito com o
computador. Para resolver esse problema, desligue a unidade ao iniciar o computador. Ligue a unidade quando o
computador terminar de iniciar.
.
Manual completo do usuário
Está disponível na área de Suporte no site www.iomega.com a versão completa do manual do usuário em formato HTML.
De drive gebruiken
De drive loskoppelen
WAARSCHUWING! Koppel de drive nooit los tijdens een gegevensoverdracht (wanneer het statuslampje van de drive-activiteit
knippert).
USB- of FireWire-gebruikers:
loskoppelt.
eSATA-gebruikers:
De USB-hub gebruiken
Bij de Iomega UltraMax-drive wordt een USB 2.0-hub met 3 poorten geleverd. Wanneer de drive is aangesloten via USB,
kunt u de hub gebruiken om andere USB-apparaten op uw systeem aan te sluiten.
OPMERKING: de USB-hub werkt alleen wanneer de UltraMax Hard Drive is aangesloten op een USB-poort op de computer.
Sluit de drive NIET op meerdere interfaces tegelijkertijd aan.
FireWire-passthrough gebruiken
Bij de Iomega UltraMax-drive worden twee FireWire 400-poorten en één FireWire 800-poort geleverd. Wanneer de drive is
aangesloten via FireWire, kunt u de andere poorten gebruiken om andere FireWire-apparaten op uw systeem aan te sluiten.
OPMERKING: FireWire-passthrough werkt alleen wanneer de UltraMax-drive is aangesloten op een FireWire-poort op de
computer. Sluit de drive NIET op meerdere interfaces tegelijkertijd aan.
Back-ups maken met uw drive
Iomega raadt u aan regelmatig een back-up te maken van uw systeem en nog regelmatiger een back-up van uw gegevens,
zodat u er altijd op kunt vertrouwen dat uw kritieke gegevens zijn veiliggesteld. De regelmaat waarmee u back-ups maakt,
stemt u het beste af op het belang van uw gegevens. U kunt uw gegevens eenvoudig beschermen door kopieën van uw
bestanden naar de drive te verslepen of door gebruik te maken van back-upsoftware om regelmatig back-ups te plannen.
Gebruik voor uw besturingssysteem altijd de procedure voor veilig verwijderen wanneer u de drive
U moet de drive en computer dus altijd uitschakelen voordat u de drive loskoppelt.
Volumeconfiguratie
De Iomega UltraMax-drive is bij levering geconfigureerd voor RAID 0 (striped volume). Dit wordt op de computer
weergegeven als een enkele stationsletter of schijf. Indien gewenst kunt u de configuratie wijzigen in een ander RAID-type,
zoals RAID 1 (mirrored volume), JBOD (spanned volume) of niet-RAID (simple volumes - twee stationsletters). Bekijk de
onderstaande instructies. Voor meer informatie gaat u naar het gedeelte voor ondersteuning op www.iomega.com
OPMERKING: de niet-RAID-configuratie wordt niet ondersteund wanneer de drive is aangesloten op eSATA.
WAARSCHUWING! Wanneer u de volumeconfiguratie wijzigt, worden alle gegevens van de drive gewist! Als u bestanden
op de drive wilt bewaren, verplaatst u deze naar een andere drive voordat u de configuratie wijzigt. Wijzig de
configuratieschakelaars NIET wanneer de drive is ingeschakeld.
26
.
Page 27

1. Schakel de drive uit.
2. Gebruik de schakelaarinstellingen op de achterkant van de drive om het gewenste volumetype in te stellen. Zie de
onderstaande tabel voor instellingsopties.
Type volume Schakelaarinstellingen
Simple (niet-RAID)*
Spanned (JBOD)
Striped (RAID 0)
Mirrored (RAID 1)
*OPMERKING: de configuratie voor simple volumes wordt niet ondersteund wanneer de drive is aangesloten op eSATA.
3. Schakel de drive in.
4. Herpartitioneer en formatteer uw vaste schijf om de volumeconfiguratie te voltooien. Raadpleeg de volledige
gebruikershandleiding op www.iomega.com voor meer informatie.
Problemen oplossen
De drive verschijnt niet in Deze computer, Windows Verkenner of op het Mac-bureaublad.
• Start de computer opnieuw op.
• Controleer alle aansluitingen.
• Zorg dat de drive op de elektriciteit is aangesloten (controleer of het statuslampje brandt).
aan de achterzijde van de drive is INgeschakeld.
• Controleer of u wel de kabel gebruikt die bij de drive is meegeleverd.
• Controleer of de drive slechts op één interface is aangesloten.
Pc-gebruikers:
• Zorg dat de drive geformatteerd is voor gebruik met Windows. Raadpleeg de instructies op pagina 8.
• Als u aansluit op een PCI-kaart, moeten de juiste stuurprogramma’s voor de kaart geïnstalleerd zijn en door uw
• Als u aansluit op een USB-poort, controleert u in het BIOS of USB is ingeschakeld. Raadpleeg de gebruikershandleiding
Als er nog steeds geen stationsaanduiding is toegewezen aan de drive, gaat u naar het gedeelte Support op www.iomega.
com
Pc start niet op
Als u de computer niet kunt opstarten wanneer de drive is aangesloten, is er wellicht een conflict opgetreden tussen de
BIOS van de computer en de verwisselbare drive met grote capaciteit. U kunt dit probleem oplossen door de drive uit te
schakelen wanneer u de computer opstart. Schakel de drive weer in wanneer de computer volledig is opgestart.
besturingssysteem worden herkend.
of het handboek bij de computer voor instructies.
.
Zorg dat de aan/uit-knop
Gebruikershandleiding
Een volledige gebruikershandleiding in HTML-indeling is beschikbaar via het gedeelte Support op www.iomega.com.
27
Page 28

Limited Warranty • Garantie Limitée
Eingeschränkte Garantie • Garanzia limitata
Garantía limitada • Garantia limitada • Beperkte garantie
Iomega warrants this hardware product to be free from defects in materials and workmanship for the warranty period. This non-transferable,
limited warranty is only to you, the first end-user purchaser. The warranty begins on the date of purchase and lasts for a period of one (1) year
for product purchased in the Americas, the Asia-Pacific region, or non-European Union nations in Europe, the Middle East, or Africa; ninety (90)
days for Iomega reconditioned products purchased in these regions; or, two (2) years for product purchased by an end-user in member nations
of the European Union.
This warranty does not apply to: (a) Iomega software products; (b) expendable components such as fuses or bulbs; or (c) third party products,
hardware or software, supplied with the warranted product. Iomega makes no warranty of any kind on such products which, if included, are
provided “AS IS.” This warranty also excludes damage caused by accident, misuse, abuse, use of non-Iomega approved media, exposure of
media to excessive magnetic fields, or external environmental causes.
Your sole and exclusive remedy for a covered defect is repair or replacement of the defective product, at Iomega’s sole option and expense
(shipping may be charged), and Iomega may use new or refurbished parts or products to do so. The replaced part/product will be warranted for
the remainder of the original warranty or three (3) months from the date of shipment of such parts/products, whichever is longer. If Iomega is
unable to repair or replace a defective product, your alternate exclusive remedy shall be a refund of the original purchase price.
The above is Iomega’s entire obligation to you under this warranty. IN NO EVENT SHALL IOMEGA BE LIABLE FOR INDIRECT, INCIDENTAL,
CONSEQUENTIAL OR SPECIAL DAMAGES OR LOSSES, INCLUDING LOSS OF DATA, USE, OR PROFITS EVEN IF IOMEGA HAS BEEN ADVISED OF THE
POSSIBILITY OF SUCH DAMAGES. In no event shall Iomega’s liability exceed the original purchase price of the drive or the media disk. Some
jurisdictions do not allow the exclusion or limitation of incidental or consequential damages, so the above limitation or exclusion may not apply
to you.
Obtaining Warranty Service
You must notify Iomega within the warranty period to receive warranty service. Just as technology and market conditions vary, Iomega’s specific
customer support policies (including fees for services) and procedures change over time. To obtain information about Iomega’s current policies
or warranty service, please visit our website at www.iomega.com/supportpolicy.html or write to: Iomega Customer Service, 4059 South 1900
West, Roy, UT 84067. Contact Information for Iomega Customer Service in Europe can be obtained on our Support website at www.iomega.
com/europe/support. If your product is eligible for warranty service, you will be required to return it to Iomega, along with proper identification,
a return authorization number obtained from the Iomega website or provided by the Iomega representative, and proof of purchase. Iomega will
not protect, recover, or return data during warranty service so you should duplicate your data before shipment.
Limitations
THE ABOVE WARRANTY IS EXCLUSIVE AND IN LIEU OF ALL OTHER WARRANTIES, EXPRESS OR IMPLIED. To the extent permitted by applicable
law, IOMEGA SPECIFICALLY DISCLAIMS ANY IMPLIED WARRANTIES, INCLUDING ANY IMPLIED WARRANTY OF MERCHANTABILITY OR FITNESS FOR
A PARTICULAR PURPOSE. Any implied warranty required by applicable law shall be limited in duration to the express warranty term. Some
jurisdictions do not allow disclaimers of implied warranties or limitations on how long an implied warranty lasts, so the above limitation may not
apply to you. This warranty gives you specific legal rights and you may also have other rights that vary from jurisdiction to jurisdiction. Any suit
for breach of any warranty on your Product must be filed within one (1) year of the first date the suit could have been brought.
Iomega garantit que ce produit est exempt de tout vice de fabrication ou de malfaçon pendant toute la période de garantie. Cette garantie
limitée n’est pas transférable et ne s’applique qu’à l’utilisateur final. La garantie est effective à partir de la date d’achat et reste ensuite
valable pendant une période de un (1) an à compter de cette même date sur le continent américain, dans la région Asie-Pacifique, dans les
pays d’Europe non membres de l’Union Européenne, au Moyen-Orient ou en Afrique, quatre-vingt dix (90) jours pour les produits remis en
état achetés dans les pays ou régions précédemment cités ou deux (2) ans dans le cadre d’un achat effectué par un utilisateur final au sein de
l’Union Européenne.
Cette garantie ne s’applique pas : (a) aux produits logiciels Iomega, (b) aux composants consommables comme les fusibles ou les ampoules
ou (c) aux produits tiers, matériel ou logiciel, fournis avec le produit sous garantie. Iomega ne garantit en aucun cas ces produits qui, si inclus,
sont fournis “EN L’ETAT”. Sont exclus les dommages causés par un accident, une mauvaise utilisation, un usage abusif, l’utilisation de supports
non fournis ou non approuvés par Iomega, une exposition excessive des supports à un champ magnétique ou tout autre cause externe d’origine
naturelle.
Votre seul et unique recours en cas de défaut reconnu est la réparation ou le remplacement du produit défectueux, aux frais et à la discrétion
de Iomega (l’expédition pourra vous être facturée). Iomega se réserve le droit d’utiliser des pièces ou produits neufs ou remis en état pour
procéder à la réparation. L’élément/produit remplacé sera garanti pendant le reste de la garantie d’origine ou, au maximum, trois (3) mois à
dater de l’expédition desdits éléments/produits. S’il s’avère que Iomega est dans l’impossibilité de réparer ou remplacer un produit défectueux,
votre seul recours sera le remboursement du prix d’achat initial. L’obligation de garantie de Iomega envers vous se limite aux éléments cités
précédemment. EN AUCUN CAS IOMEGA NE POURRA ETRE TENUE POUR RESPONSABLE DES DOMMAGES OU PERTES INDIRECTS, ACCESSOIRES
OU SPECIAUX, Y COMPRIS LA PERTE DE DONNEES, DE L’IMPOSSIBILITE D’UTILISATION OU DE PROFIT ET CE MEME SI IOMEGA A ETE AVERTIE DE
L’EVENTUALITE DE TELS DOMMAGES. En aucun cas la responsabilité de Iomega ne pourra s’étendre au-delà du prix d’achat initial de l’appareil
ou du support. Certaines juridictions ne reconnaissent pas l’exclusion ou la limitation des dommages accessoires ou indirects. De ce fait, les
limitations ou les exclusions énoncées ci-dessus peuvent ne pas être applicables dans votre cas.
28
Page 29

Obtention d’un service de garantie
Pour bénéficier des services sous garantie, vous devez en avertir Iomega pendant la période de garantie. A l’image des technologies et des
conditions du marché, les procédures et les politiques d’Iomega en matière d’assistance clientèle (notamment la tarification des services)
sont susceptibles de varier dans le temps. Afin d’obtenir des informations pertinentes sur les politiques actuelles ou sur le service de garantie
d’Iomega, veuillez visiter notre site Web www.iomega.com/supportpolicy.html ou nous écrire à l’adresse suivante : Iomega Customer
Service, 4059 South 1900 West, Roy, UT 84067. Les coordonnées des services d’assistance clientèle d’Iomega en Europe se trouvent sur
notre site Web d’assistance, www.iomega.com/europe/support. Si votre produit peut bénéficier du service sous garantie, vous devrez
le retourner à Iomega, avec son identification détaillée, un numéro d’autorisation de retour obtenu à partir de notre site Web ou fourni par
votre représentant Iomega et une preuve d’achat. Iomega ne protège, ne récupère ni ne retourne des données pendant le service de garantie ;
assurez-vous donc de copier vos données avant d’expédier le matériel.
Limites
LA PRESENTE GARANTIE EST EXCLUSIVE ET TIENT LIEU DE TOUTE AUTRE GARANTIE, EXPRESSE OU IMPLICITE. Dans les limites de la législation
en vigueur, IOMEGA DECLINE TOUTE GARANTIE IMPLICITE, Y COMPRIS TOUTE GARANTIE IMPLICITE DE COMMERCIALISATION OU D’ADAPTATION
A UN USAGE PARTICULIER. Toute garantie implicite requise par la législation en vigueur sera limitée dans le temps à la durée de la garantie
expresse. Certaines juridictions ne reconnaissent pas la déclaration de non-responsabilité des dommages accessoires ou indirects. De ce fait,
les limitations ou les exclusions énoncées ci-dessus peuvent ne pas être applicables dans votre cas. Cette garantie vous donne certains droits
spécifiques, mais vous pouvez également bénéficier de droits supplémentaires en fonction de la législation de votre état. Toute poursuite pour
défaut de garantie sur votre produit devra être déposée dans un délai d’un an à compter du premier jour à partir duquel la poursuite peut être
engagée.
Iomega garantiert, dass dieses Hardwareprodukt während des Garantiezeitraums keine Material- oder Herstellungsfehler aufweist. Diese nicht
übertragbare, eingeschränkte Garantie gilt ausschließlich für Sie als ersten Käufer sowie Endnutzer dieses Produkts. Der Garantiezeitraum
beginnt mit dem Erwerbsdatum und hat für folgenden Zeitraum Gültigkeit: ein (1) Jahr für Produkte, die in Nord-/Süd-/Mittelamerika, im
asiatisch-pazifischen Raum oder nicht-EU-Ländern innerhalb Europas, dem Nahen Osten oder Afrika erworben wurden; neunzig (90) Tage für
alle bei Iomega überholten Produkte, die in diesen Regionen erworben wurden; zwei (2) Jahre für Produkte, die von Endverbrauchern in EUMitgliedsstaaten erworben wurden.
Von dieser Garantie sind ausgenommen: (a) Iomega-Softwareprodukte; (b) Verschleißteile wie Sicherungen oder Glühbirnen; bzw. (c)
Drittanbieterprodukte, -Hardware oder -Software, die im Lieferumfang des Produkts enthalten waren, auf das sich die Garantie bezieht. Iomega
übernimmt hinsichtlich dieser Art von Produkten keinerlei Garantie. Falls diese im Lieferumfang enthalten sind, werden sie mit Abbedingen der
Haftung für einen bestimmten Zweck zur Verfügung gestellt. Ausgenommen sind Schäden, die durch Unfall, Zweckentfremdung, unsachgemäße
Verwendung, Verwendung von Medien, die nicht von Iomega zur Verfügung gestellt oder anerkannt wurden, Kontakt der Medien mit übermäßig
starken Magnetfeldern oder Umwelteinflüssen verursacht wurden.
Ihr einziges und ausschließliches Rechtsmittel im Falle eines abgedeckten Defekts ist die Reparatur bzw. der Ersatz des defekten Produkts; die
diesbezügliche Entscheidung sowie die anfallenden Kosten liegen ausschließlich bei Iomega (abgesehen von evtl. anfallenden Frachtkosten).
Iomega kann hierzu neue oder gebrauchte Teile oder Produkte verwenden. Für das ersetzte Teil/Produkt wird für den Rest der ursprünglichen
Garantiefrist oder für drei (3) Monate ab Versanddatum solcher Teile/Produkte Garantie geleistet, je nachdem, welcher Zeitraum länger ist. Falls
die Reparatur bzw. der Ersatz eines defekten Produkts durch Iomega nicht möglich ist, ist Ihr einziges alternatives Rechtsmittel die Erstattung
des ursprünglichen Kaufpreises. Die obigen Angaben stellen sämtliche Verpflichtungen dar, die Iomega Ihnen gegenüber im Rahmen dieser
Garantie hat. IOMEGA IST UNTER KEINEN UMSTÄNDEN HAFTBAR FÜR MITTELBARE SCHÄDEN, SCHADENSERSATZ FÜR AUFWENDUNGEN BEI
VERTRAGSERFÜLLUNG, FOLGESCHÄDEN ODER SPEZIELLE SCHÄDEN BZW. VERLUSTE, EINSCHLIESSLICH DATENVERLUST, NUTZUNGSAUSFALL
SOWIE BETRIEBSUNTERBRECHUNG, SELBST WENN IOMEGA AUF DIE MÖGLICHKEIT SOLCHER SCHÄDEN HINGEWIESEN WURDE. Die Haftung von
Iomega übersteigt keinesfalls den ursprünglichen Kaufpreis des jeweiligen Laufwerks oder Datenträgers. Gemäß einiger Rechtsprechungen ist
der Ausschluss bzw. die Einschränkung von Schadensersatz für Aufwendungen bei Vertragserfüllung bzw. Folgeschäden nicht zulässig, sodass
die oben genannten Ausschluss- bzw. Einschränkungsklauseln für Sie möglicherweise nicht relevant sind.
Inanspruchnahme des Garantieservice
Um den Garantieservice in Anspruch nehmen zu können, müssen Sie Iomega innerhalb der Garantiefrist benachrichtigen. Die spezifischen
Kundendienstrichtlinien von Iomega (einschließlich der Servicegebühren) sowie die entsprechenden Vorgehensweisen können sich aufgrund
der veränderlichen Technologie und Marktbedingungen ändern. Wenn Sie gerne mehr über die aktuellen Kundendienstangebote oder
Garantieleistungen von Iomega erfahren möchten, besuchen Sie unsere Website unter www.iomega.com/supportpolicy.html. Sie können
sich auch unter folgender Adresse schriftlich mit Iomega in Verbindung setzen: Iomega Customer Service, 4059 South 1900 West, Roy, UT
84067. Informationen zur Kontaktaufnahme mit dem Kundendienst von Iomega finden Sie auf unserer Kundendienst-Website unter
www.iomega.com/europe/support. Wenn für Ihr Produkt Garantieanspruch besteht, müssen Sie es mit ordnungsgemäßer Identifikation,
der über die Iomega Website oder vom Vertreter zur Verfügung gestellten Nummer der Rückgabeberechtigung sowie dem Kaufnachweis an
Iomega zurück senden. Im Rahmen des Garantieservice werden Daten von Iomega weder geschützt noch wiederhergestellt oder zurückgegeben,
weshalb es sich empfiehlt, Ihre Daten vor dem Versand zu duplizieren.
Einschränkungen
BEI DER OBIGEN GARANTIE HANDELT ES SICH UM EINE AUSSCHLIESSLICHE GARANTIE, DIE ANSTELLE ALLER WEITEREN GARANTIEN,
AUSDRÜCKLICHER ODER STILLSCHWEIGENDER NATUR, GÜLTIGKEIT HAT. Innerhalb des gesetzlich zulässigen Rahmens SCHLIESST IOMEGA
AUSDRÜCKLICH JEGLICHE STILLSCHWEIGENDEN GARANTIEN AUS, EINSCHLIESSLICH JEGLICHER STILLSCHWEIGENDER GARANTIE HINSICHTLICH
DER MARKTGÄNGIGKEIT BZW. DER EIGNUNG FÜR EINEN BESTIMMTEN ZWECK. Sämtliche stillschweigenden Garantien, die laut geltendem
Recht gewährt werden müssen, sind auf die Laufzeit der ausdrücklichen Garantie beschränkt. Gemäß einiger Rechtsprechungen ist der
Haftungsausschluss stillschweigender Garantien oder die Einschränkung bezüglich der Laufzeit stillschweigender Garantien nicht zulässig,
sodass die obigen Einschränkungsklauseln für Sie möglicherweise nicht relevant sind. Durch diese Garantie werden Ihnen gewisse
subjektive Rechte verliehen, und Sie verfügen u. U. über weitere Rechte, die je nach Rechtsprechung variieren. Sämtliche Klagen hinsichtlich
Garantieverletzungen in Bezug auf Ihr Produkt müssen innerhalb 1 Jahres erhoben werden. Ausschlaggebend hierfür ist das Datum, zu dem die
Klageerhebung erstmalig möglich war.
29
Page 30

Iomega garantisce che questo prodotto hardware è privo di difetti di fabbricazione e dei materiali durante l’intero periodo di validità della
garanzia. La presente garanzia limitata, non trasferibile, è da considerarsi valida per il solo utente finale e non può quindi essere ceduta a terze
parti. La garanzia decorre a partire dalla data di acquisto del prodotto e ha validità di un (1) anno per i prodotti acquistati nelle Americhe, nella
regione Estremo Oriente e Oceania o nei paesi non membri dell’Unione Europea, in Medio Oriente o in Africa; la garanzia ha una validità di
novanta (90) giorni per i prodotti Iomega ricondizionati acquistati in tali regioni; oppure di due (2) anni per i prodotti acquistati dall’utente finale
in uno dei paesi membri dell’Unione Europea.
La presente garanzia non è da ritenersi valida per: (a) i prodotti software Iomega; (b) i materiali di consumo, come ad esempio i fusibili o le
lampadine; o (c) i prodotti di terze parti, hardware o software, forniti in dotazione con il prodotto coperto da garanzia. Iomega non fornisce
alcun tipo di garanzia su tali prodotti che, se inclusi, vengono forniti “COSÌ COME SONO”. Si considera escluso da garanzia il danno causato da
incidente, l’uso improprio, l’abuso, l’utilizzo di supporti non approvati da Iomega, l’esposizione dei supporti a campi magnetici particolarmente
intensi o a cause ambientali esterne.
L’unico ed esclusivo diritto risarcitorio esercitabile in caso di difetto di un prodotto coperto da garanzia è la riparazione o la sostituzione
del prodotto difettoso, a sola discrezione e interamente a carico di Iomega; Iomega ha inoltre la facoltà di utilizzare componenti o prodotti
nuovi o rimessi a nuovo. È prevista la copertura del componente/prodotto sostituito per tutto il periodo di validità della garanzia stipulata
originariamente o per i tre (3) mesi successivi alla data di spedizione di tale componente/prodotto, quale che sia la situazione temporale
che risulti più conveniente per garantire l’estendibilità della garanzia. Nell’eventualità in cui Iomega non sia in grado di riparare o sostituire
il prodotto difettoso, l’unico diritto risarcitorio alternativo esercitabile dall’acquirente consiste nella restituzione del prezzo di acquisto del
prodotto originale. Quanto sopra enunciato costituisce l’obbligo contrattuale cui attenersi ai sensi della presente garanzia. IN NESSUN CASO
IOMEGA DOVRÀ ESSERE RITENUTA RESPONSABILE DI EVENTUALI DANNI INDIRETTI, INCIDENTALI, CONSEGUENZIALI O SPECIALI O DI ALTRI DANNI
TRA CUI LE PERDITE DI DATI, UTILIZZO O DI PROFITTO, INDIPENDENTEMENTE DAL FATTO CHE IOMEGA FOSSE AL CORRENTE DELLA POSSIBILITÀ
CHE SI POTESSERO VERIFICARE TALI DANNI. In nessun caso la responsabilità di Iomega potrà superare il prezzo di acquisto originale dell’unità
o del supporto. Poiché alcune giurisdizioni non prevedono l’esclusione o la limitazione di danni incidentali o conseguenziali, la limitazione o
l’esclusione di cui sopra potrebbe non avere alcuna validità giuridica.
Come ottenere servizi di assistenza durante il periodo di validità della garanzia
Per ricevere assistenza durante il periodo di validità della garanzia, è necessario inviare opportuna notifica a Iomega entro detto periodo.
Le politiche di assistenza clienti Iomega (compresi i servizi a pagamento) e le relative procedure variano in base alle esigenze di mercato e
alle tecnologie emergenti. Per ottenere informazioni sulle procedure Iomega in vigore, visitare il sito Web all’indirizzo www.iomega.com/
supportpolicy.html
clienti di Iomega in Europe sono disponibili sul sito Web del Suppor to tecnico all’indirizzo www.iomega.com/europe/support. Nel caso in
cui il prodotto sia idoneo a ricevere gli interventi manutentivi previsti dalla garanzia, sarà necessario restituire il prodotto a Iomega unitamente
al relativo codice, al numero di autorizzazione per la restituzione disponibile sul sito Web di Iomega o fornito dal rivenditore Iomega e la prova di
acquisto. Poiché Iomega non prevede la protezione, il ripristino o la restituzione dei dati durante l’esecuzione degli interventi di manutenzione,
si consiglia sempre di duplicarli prima di procedere alla spedizione del prodotto.
o scrivere a Iomega Customer Service, 4059 South 1900 West, Roy, UT 84067. Le informazioni sui contatti dell’Assistenza
Limitazioni
LA PRESENTE GARANZIA HA NATURA ESCLUSIVA, PERTANTO SOSTITUISCE QUALUNQUE ALTRA GARANZIA ESPLICITA O IMPLICITA. Nella misura in
cui sia consentito dalle leggi in vigore, IOMEGA DISCONOSCE ESPRESSAMENTE EVENTUALI GARANZIE IMPLICITE, COMPRESE QUELLE IMPLICITE
DI COMMERCIABILITÀ O DI IDONEITÀ A FINI SPECIFICI. Eventuali garanzie implicite previste dalla legislazione vigente devono essere limitate nel
tempo in base a quanto sancito dai termini della garanzia esplicita. Poiché alcune giurisdizioni non prevedono il ricorso a formule di diniego
di garanzie implicite o limitazioni sulla durata di validità di tale garanzia, è possibile che la limitazione di cui sopra non abbia alcuna validità
nel caso specifico. La presente garanzia concede particolari diritti legali, nonché eventuali altri diritti suscettibili di variazione in base alla
giurisdizione specifica. Eventuali risarcimenti per violazione dei termini contenuti nella garanzia devono essere richiesti entro 1 anno dalla data
in cui è possibile intraprendere un’azione legale.
Iomega garantiza que este producto de hardware está libre de defectos de materiales y mano de obra durante el período de garantía. Esta
garantía limitada e intransferible es sólo para usted, el primer comprador usuario final. El período de garantía comienza en la fecha de
compra y tiene una duración de un (1) año para productos adquiridos en el continente americano, la región Asia-Pacífico, países europeos no
pertenecientes a la UE, Oriente Medio o África; noventa (90) días para productos reacondicionados de Iomega adquiridos en estas regiones; o
dos (2) años para productos adquiridos por un usuario final en a algún país miembro de la Unión Europea.
Esta garantía no se aplica a: (a) productos de software de Iomega, (b) consumibles como fusibles o lámparas, o (c) productos, hardware o
software, de terceros incluidos con el producto en garantía. Iomega no ofrece ningún tipo de garantía para dichos productos que, si están
incluidos, se proporcionan “TAL CUAL”. Se excluyen de esta garantía los daños provocados por accidente, uso incorrecto, abuso, uso de discos
no suministrados o no autorizados por Iomega, exposición excesiva de los discos a campos magnéticos o por causas ambientales externas al
producto.
Su única y exclusiva compensación por un defecto cubierto es la reparación o sustitución del producto defectuoso, a elección y cargo de Iomega (el
porte puede ser cobrado); Iomega puede utilizar piezas o productos nuevos o reparados para tal fin. La garantía de la pieza o producto repuesto
tendrá la validez del resto de la garantía original o tres (3) meses desde la fecha de envío de dichas piezas o productos, sea cual sea su duración. Si
Iomega no puede reparar o sustituir un producto defectuoso, su única compensación alternativa será un reembolso del precio de compra original. Lo
expuesto anteriormente es la única obligación de Iomega con respecto a usted según esta garantía. EN NINGÚN CASO IOMEGA SERÁ RESPONSABLE
DE CUALQUIER DAÑO INDIRECTO, INCIDENTAL O RESULTANTE NI DE PÉRDIDAS, INCLUIDA LA PÉRDIDA DE DATOS, USO O BENEFICIOS INCLUSO SI SE HA
ADVERTIDO A IOMEGA DE LA POSIBILIDAD DE TALES DAÑOS. En ningún caso la responsabilidad de Iomega superará el precio de compra original de la
unidad o el disco. Algunas jurisdicciones no permiten la exclusión o limitación de los daños incidentales o resultantes, por lo que es posible que la
limitación o exclusión anterior no se aplique a
usted.
30
Page 31

Obtención de servicio de garantía
Para recibir el servicio de garantía deberá notificar su caso al Iomega durante el período de garantía. La política y procedimientos de asistencia
al cliente de Iomega (incluidas las tarifas de los servicios) cambian al ritmo que lo hacen la tecnología y las condiciones del mercado. Para
obtener información acerca de las políticas actuales de Iomega o del servicio de garantía, visite nuestra página Web en www.iomega.com/
supportpolicy.html
servicio de atención al cliente de Iomega en Europa, visite nuestra página Web de asistencia: www.iomega.com/europe/support. Si tiene
derecho a que su producto reciba servicio de garantía, se le pedirá que lo devuelva a Iomega, junto con la identificación adecuada, un número
de autorización de devolución obtenido del sitio Web de Iomega o proporcionado por el representante, y una prueba de compra. Iomega no
protegerá, recuperará o devolverá datos durante el servicio de garantía, por lo que debe duplicarlos antes del envío.
o escriba a: Iomega Customer Service, 4059 South 1900 West, Roy, UT 84067, EE.UU. Para obtener información sobre el
Limitaciones
LA GARANTÍA ANTERIOR ES EXCLUSIVA Y SUSTITUYE LAS DEMÁS GARANTÍAS, EXPRESAS O IMPLÍCITAS. En la medida permitida por la ley
aplicable, IOMEGA RENUNCIA ESPECÍFICAMENTE A CUALQUIER TIPO DE GARANTÍA, INCLUIDAS LA GARANTÍA IMPLÍCITA DE COMERCIABILIDAD
O IDONEIDAD PARA UN FIN DETERMINADO. Cualquier garantía implícita requerida por la ley aplicable estará limitada a la duración del plazo
de la garantía expresa. Algunas jurisdicciones no permiten la renuncia de las garantías implícitas ni limitación en la duración de una garantía
limitada, con lo que es posible que la limitación anterior no se aplique a usted. Esta garantía le otorga derechos legales específicos y es posible
que también tenga otros derechos que varían de una jurisdicción a otra. Cualquier demanda por violación de la garantía del producto será
presentada en un plazo de 1 año desde la primera fecha en la que la demanda pudiera haber sido interpuesta.
A Iomega garante que este produto de hardware encontra-se isento de defeitos de material e de mão-de-obra durante todo o período de
garantia. Esta garantia limitada e intransferível destina-se unicamente ao consumidor, o primeiro comprador usuário final. A garantia começa na
data da compra e dura por um período de um (1) ano por produto adquirido nas Américas, na região da Ásia-Pacífico, ou em países da Europa
não pertencentes à União Européia, no Oriente Médio ou na África; noventa (90) dias por produtos recondicionados Iomega adquiridos nestas
regiões; ou, dois (2) anos por produto adquirido por um usuário final em países membros da União Européia.
Esta garantia não se aplica a: (a) produtos de software da Iomega; (b) componentes perecíveis, como fusíveis ou lâmpadas, ou (c) produtos de
terceiros, hardware ou software, fornecidos com o produto garantido. A Iomega não oferece garantias de qualquer espécie sobre tais produtos
que, quando incluídos, são fornecidos “NO ESTADO”. Estão excluídos os dados causados por acidente, uso impróprio, abuso, uso de mídia não
fornecida ou aprovada pela Iomega, exposição da mídia a campos magnéticos excessivos ou causas ambientais externas.
O único e exclusivo recurso do usuário com referência a defeitos cobertos pela garantia é o reparo ou substituição do produto defeituoso,
segundo escolha e determinação da Iomega (a remessa pode ser cobrada). Para tanto, a Iomega poderá utilizar peças ou produtos novos
ou recondicionados. A peça ou o produto substituído será coberto pelo tempo restante da garantia original ou por 3 (três) meses a serem
contados a partir da data de envio do mesmo, prevalecendo o tempo mais longo. Se a Iomega não puder reparar ou substituir um produto
defeituoso, o único recurso alternativo exclusivo será a restituição da importância paga originalmente pela aquisição do produto. O exposto
acima representa todas as obrigações da Iomega para com o usuário sob esta garantia. EM NENHUMA EVENTUALIDADE A IOMEGA PODERÁ
SER RESPONSABILIZADA POR PERDAS OU DANOS INDIRETOS, INCIDENTAIS, EMERGENTES OU ESPECIAIS, INCLUINDO PERDA DE DADOS,
USO OU LUCROS, MESMO QUE A IOMEGA TENHA SIDO ADVERTIDA QUANTO À POSSIBILIDADE DE TAIS DANOS. Em nenhuma eventualidade
a responsabilidade da Iomega excederá o preço original de aquisição da unidade ou disco de mídia. Algumas jurisdições não permitem a
exclusão ou limitação de danos incidentais ou emergentes, portanto a limitação ou exclusão acima poderá não se aplicar ao usuário.
Obtenção de serviço de garantia
É preciso notificar a Iomega dentro do período de garantia para receber o serviço de garantia. Os procedimentos da Iomega, assim como suas
políticas específicas de suporte ao cliente (incluindo taxas de serviços), mudam conforme as condições tecnológicas e de mercado. Para obter
informações sobre as políticas atuais da Iomega ou sobre o serviço de garantia, visite nosso website em www.iomega.com/supportpolicy.
html
ou escreva para: Iomega Customer Service, 4059 South 1900 West, Roy, UT 84067. Informações de contato para o atendimento ao cliente
da Iomega na Europa podem ser obtidas em nosso website de Suporte em www.iomega.com/europe/support. Caso o produto tenha
direito ao serviço de garantia, será necessário devolvê-lo à Iomega, acompanhado da identificação apropriada: o número da autorização de
retorno obtido no website da Iomega ou fornecido pelo representante da Iomega e uma comprovação de aquisição. A Iomega não protege,
recupera ou retorna dados durante o serviço de garantia, portanto o usuário deve fazer cópia dos documentos antes da remessa.
Limitações
A GARANTIA ACIMA É EXCLUSIVA E SUBSTITUI TODAS AS OUTRAS GARANTIAS, EXPRESSAS OU IMPLÍCITAS. Na extensão permitida pelas leis
aplicáveis, A IOMEGA DESOBRIGA-SE ESPECIFICAMENTE DE QUAISQUER GARANTIAS IMPLÍCITAS, INCLUINDO QUALQUER GARANTIA IMPLÍCITA DE
COMERCIALIZAÇÃO OU ADEQUAÇÃO A UM DETERMINADO PROPÓSITO. Quaisquer garantias implícitas exigidas pelas leis aplicáveis deverão ser
limitadas, em duração, ao prazo da garantia expressa. Algumas jurisdições não permitem a desobrigação de garantias implícitas ou limitações
sobre a duração de uma garantia implícita, portanto a limitação acima pode não se aplicar ao usuário. Esta garantia outorga direitos legais
específicos ao usuário, mas o usuário também poderá ter direitos que variam conforme sua jurisdição. Qualquer processo judicial por violação
de qualquer garantia sobre o Produto deverá ser aberto no prazo de 1 ano, a contar da primeira data na qual a ação poderia ter sido movida.
Iomega garandeert voor de garantieperiode dat dit hardwareproduct vrij is van materiaal- en productiefouten. Deze niet-overdraagbare beperkte
garantie geldt alleen voor u, de eerste eindgebruiker die het product heeft aangeschaft. De garantie gaat in op de dag van aankoop en loopt af
na één (1) jaar voor producten die gekocht zijn op het Amerikaanse continent, in Azië en het Stille-Oceaangebied of in Europese landen die geen
lid zijn van de Europese Unie, in het Midden-Oosten of in Afrika; negentig (90) dagen voor vervangende Iomega-producten die in deze regio’s
zijn gekocht; of, twee (2) jaar voor producten die door een eindgebruiker in een lidstaat van de Europese Unie zijn gekocht.
Deze garantie geldt niet voor: (a) softwareproducten van Iomega; (b) verbruiksartikelen zoals zekeringen of lampjes; of (c) producten, hard- of
software, van derden die zijn meegeleverd met het product waarvoor de garantie geldt. Iomega biedt geen enkele garantie voor dergelijke
31
Page 32

producten: indien meegeleverd, worden deze als zodanig meegeleverd. Uitgesloten wordt schade veroorzaakt door een ongeluk, verkeerd
gebruik, misbruik, gebruik van niet door Iomega geleverde of goedgekeurde media, blootstelling van media aan extreme magnetische velden of
externe oorzaken die met de omgeving samenhangen.
Uw enige en exclusieve verhaalsrecht voor een gedekt defect is reparatie of vervanging van het defecte product, uitsluitend door Iomega te
bepalen en te betalen, en Iomega kan daarvoor nieuwe of gereviseerde onderdelen of producten gebruiken. Het vervangen onderdeel/product
wordt gegarandeerd voor de rest van de oorspronkelijke garantie of drie (3) maanden vanaf de datum van verzending van deze onderdelen/
producten, als dit langer is. Als Iomega een defect product niet kan repareren of vervangen, is uw alternatieve exclusieve verhaalsrecht beperkt
tot restitutie van de oorspronkelijke aanschafprijs. Het hierboven beschrevene is de volledige verplichting van Iomega aan u op grond van deze
garantie. IOMEGA IS IN GEEN GEVAL AANSPRAKELIJK VOOR INDIRECTE SCHADE, INCIDENTELE SCHADE, GEVOLGSCHADE OF SPECIALE SCHADE OF
VERLIEZEN, INCLUSIEF VERLIES VAN GEGEVENS, GEBRUIK OF WINST, OOK ALS IOMEGA OP DE HOOGTE IS GESTELD VAN DE MOGELIJKHEID VAN
DERGELIJKE SCHADE. In ieder geval is de financiële aansprakelijkheid van Iomega beperkt tot de oorspronkelijke aanschafprijs van de drive of
de mediadisk. In sommige rechtsgebieden is de uitsluiting of beperking van incidentele schade of gevolgschade niet toegestaan, waardoor het
bovenstaande mogelijk niet voor u van toepassing is.
Service onder de garantie krijgen
U moet Iomega binnen de garantieperiode laten weten dat u een beroep wilt doen op de garantieservice. Iomega’s specifieke beleid voor
klantenondersteuning (evenals vergoedingen voor services) en procedures worden regelmatig aangepast aan de veranderende technologie
en marktsituatie. Bezoek Iomega op www.iomega.com/supportpolicy.html voor meer informatie over het huidige beleid van Iomega of
schrijf naar: Iomega Customer Service, 4059 South 1900 West, Roy, UT 84067, VS. U vindt de contactinformatie voor de klantenservice van
Iomega in Europa via onze website voor ondersteuning: www.iomega.com/europe/support. Als uw product in aanmerking komt voor de
garantieservice, moet u het artikel retourneren aan Iomega met de juiste identificatie, een retourbonnummer dat u via de Iomega-website of
een Iomega-vertegenwoordiger hebt gekregen en een bewijs van aankoop. Iomega kan tijdens de garantieservice geen gegevens beveiligen,
herstellen of terugsturen. U moet bijgevolg zelf uw gegevens kopiëren voordat u het product verzendt.
Beperkingen
BOVENSTAANDE GARANTIE IS EXCLUSIEF EN VERVANGT ALLE ANDERE GARANTIES, EXPLICIET OF IMPLICIET. Voorzover toegestaan door
de toepasselijke wetgeving, WIJST IOMEGA SPECIFIEK ALLE IMPLICIETE GARANTIES AF, INCLUSIEF ALLE IMPLICIETE GARANTIES VAN
VERKOOPBAARHEID OF GESCHIKTHEID VOOR EEN BEPAALD DOEL. Elke impliciete garantie die de geldende wetgeving vereist, wordt in duur
beperkt tot de expliciete garantietermijn. In sommige rechtsgebieden is afwijzing van impliciete garanties of beperkingen ten aanzien van de
duur van impliciete garanties niet toegestaan. Mogelijk geldt de bovenstaande beperking dan ook niet voor u. Deze garantie geeft u specifieke
wettelijke rechten en mogelijk hebt u ook andere rechten, die per rechtsgebied kunnen verschillen. Elk verzoek wegens schending van enige
garantie op uw product moet binnen één jaar na de eerste datum waarop het verzoek kon zijn ingebracht, worden ingediend.
32
Page 33

Regulatory Information • Informations relatives à la réglementation
Gesetzliche Bestimmungen • Informazioni sulle regolamentazioni
Información reglamentaria • Informações regulamentares
Regulatieve informatie
Manufacturer/Responsible Party
Iomega Corporation
4059 South 1900 West
Roy, UT 84067 USA
CE (European Community)
This Iomega product conforms to the following European Directive(s)and Standard(s): Application of Council Directives: 73/23/EEC, 89/336/EEC.
Standards to which Conformity is declared: EN60950, EN55022, EN55024, EN61000-3-2, EN61000-3-3. Importer’s Name: Iomega International,
S.A. Type of Equipment: Information Technology Equipment.
Waste Electrical and Electronic Equipment (WEEE)
In accordance with European Directive 2002/96/EC on Waste Electrical and Electronic Equipment (WEEE), the presence of the above symbol on
the product or on its packaging indicates that this item must not be disposed of in the normal unsorted municipal waste stream. Instead, it is
the user’s responsibility to dispose of this product by returning it to a collection point designated for the recycling of electrical and electronic
equipment waste. Separate collection of this waste helps to optimize the recovery and recycling of any reclaimable materials and also reduces
the impact on human health and the environment.
For more information concerning the correct disposal of this product, please contact your local authority or the retailer where this product was
purchased.
FCC
This equipment complies with Part 15 of the FCC Rules. Operation is subject to the
following conditions: (1) This device may not cause harmful interference, and (2) this
device must accept any interference received, including interference that may cause
undesired operation.
NOTE: This equipment has been tested and found to comply with the limits for a Class B digital device, pursuant to part 15 of the FCC Rules.
These limits are designed to provide reasonable protection against harmful interference in a residential installation. This equipment generates,
uses and can radiate radio frequency energy and, if not installed and used in accordance with the instructions, may cause harmful interference
to radio communications. However, there is no guarantee that interference will not occur in a particular installation. If this equipment does cause
harmful interference to radio or television reception, which can be determined by turning the equipment off and on, the user is encouraged to try
to correct the interference by one of more or the following measures:
• Reorient or relocate the receiving antenna.
• Increase the separation between the equipment and receiver.
• Connect the equipment into an outlet on a circuit different from that to which the receiver is connected.
• Consult the dealer or an experienced radio/TV technician for help.
Canadian Verification
This Class B digital apparatus meets all requirements of the Canadian Interference-Causing Equipment Regulations (ICES-003, Class B).
CE (Union européenne)
Ce produit Iomega est certifié conforme aux normes et directives européennes suivantes : Applications des directives du Conseil : 73/23/
EEC, 89/336/EEC. Conformité déclarée pour les normes suivantes : EN60950, EN55022, EN55024, EN61000-3-2, EN61000-3-3. Nom de
l’importateur : Iomega International, S.A. Type d’équipement : matériel informatique.
Déchets d’équipements électriques et électroniques (WEEE)
Conformément à la Directive européenne 2002/96/EC relative aux déchets d’équipements électriques et électroniques (WEEE), la présence
du symbole ci-dessus sur un produit ou sur son emballage indique que cet article ne doit pas être mis au rebut avec les déchets municipaux
normaux non-triés. La responsabilité incombe à l’utilisateur de ramener ce produit à un endroit dédié au recyclage des déchets d’équipements
électriques et électroniques. La collecte indépendante de ces déchets permet d’optimiser la récupération et le recyclage des matériaux
récupérables et de minimiser l’impact sur la santé des personnes et l’environnement.
33
Page 34

Pour de plus amples informations concernant la mise au rebut appropriée de ce produit, contactez les autorités locales ou le revendeur auprès
duquel le produit a été acheté.
Vérification pour le Canada
Cet appareil numérique de classe B est conforme aux normes définies dans les réglementations canadiennes sur les appareils générant des
interférences radio (Canadian Interference-Causing Equipment Regulations, ICES-003, Class B).
CE (Europäische Union)
Dieses Iomega-Produkt hält die Bestimmungen der folgenden EU-Richtlinie(n) und Norm(en) ein: Umsetzung der Richtlinien des Rats: 73/23/
EEC, 89/336/EEC. Normen, deren Einhaltung festgestellt wurde: EN60950, EN55022, EN55024, EN61000-3-2, EN61000-3-3. Name des
Importeurs: Iomega International, S.A. Gerätetyp: Einrichtungen der Informationstechnik.
WEEE-Abfallverordnung (Waste Electrical and Electronic Equipment)
In Übereinstimmung mit der europaweiten Vorschrift 2002/96/EC zu Elektrik- und Elektronikabfällen (WEEE) weist das Vorhandensein des
obigen Symbols auf dem Produkt oder der Verpackung desselben darauf hin, dass dieser Artikel nicht mit dem gewöhnlichen Hausmüll
entsorgt werden darf. Es liegt vielmehr in der Verantwortung des Verbrauchers, das Produkt an einer für die Wiederverwertung von Elektrikund Elektronikabfällen vorgesehenen Sammelstelle zu entsorgen. Die getrennte Entsorgung dieser Abfälle trägt zur Optimierung der
Wiederaufbereitung jeglichen recyclingfähigen Materials sowie zur Verringerung von Gesundheits- und Umweltschäden bei.
Weitere Informationen zur korrekten Entsorgung dieses Produkt erhalten Sie beim Händler oder der Behörde, bei dem oder bei der es erworben
wurde.
CE (Unione Europea)
Questo prodotto Iomega è conforme alle direttive e agli standard europei: Applicazione delle direttive comunitarie: 73/23/EEC, 89/336/EEC.
Dichiarazione di conformità agli standard: EN60950, EN55022, EN55024, EN61000-3-2, EN61000-3-3. Nome importatore: Iomega International,
S.A. Tipo di apparecchiatura: dispositivo informatico.
Waste Electrical and Electronic Equipment (WEEE)
In conformità a quanto sancito dalla Direttiva europea 2002/96/EC, nota anche come WEEE (Waste Electrical and Electronic Equipment), la
presenza di questo simbolo sul prodotto o sulla confezione indica che il prodotto non deve in alcun modo essere smaltito nei normali cassonetti
di raccolta. Al contrario, è responsabilità dell’utente provvedere al corretto smaltimento del prodotto in appositi punti di raccolta destinati al
riciclaggio delle apparecchiature elettriche ed elettroniche inutilizzate. La raccolta differenziata di tali rifiuti consente di ottimizzare il recupero e
il riciclaggio di materiali riutilizzabili, riducendo nel contempo i rischi legati alla salute dell’uomo e l’impatto ambientale.
Per maggiori informazioni sul corretto smaltimento del prodotto, contattare l’autorità locale o il rivenditore presso cui è stato acquistato il
prodotto.
CE (Comunidad Europea)
Este producto Iomega se ajusta a las siguientes directivas y estándares europeos: Aplicación de Directivas del Consejo: 73/23/EEC, 89/336/
EEC. Estándares con los que se declara Conformidad: EN60950, EN55022, EN55024, EN61000-3-2, EN61000-3-3. Nombre del importador:
Iomega International, S.A. Tipo de equipo: Equipo de tecnología de la información.
Residuos de aparatos eléctricos y electrónicos (WEEE)
Conforme a la Directiva europea 2002/96/EC sobre Residuos de aparatos eléctricos y electrónicos (RAEE), la presencia del símbolo anterior
sobre el producto o en el embalaje indica que este artículo no debe arrojarse al flujo de residuos no clasificados municipal. Es responsabilidad
del usuario desechar este producto llevándolo a un punto de recogida designado para el reciclaje de residuos de aparatos eléctricos y
electrónicos. La recogida por separado de este residuo ayuda a optimizar la recuperación y reciclaje de cualquier material reciclable y también
reduce el impacto en la salud y el entorno.
Para obtener más información acerca del desecho correcto de este producto póngase en contacto con la autoridad local o el distribuidor donde
adquirió este producto.
CE (Comunidade Européia)
Este produto da Iomega está em conformidade com as Seguintes diretivas e padrões europeus: Diretivas ainda não aprovadas por conselho:
73/23/EEC, 89/336/EEC. Padrões em relação aos quais a conformidade foi declarada: EN60950, EN55022, EN55024, EN61000-3-2, EN610003-3. Nome do importador: Iomega International, S.A. Tipo de equipamento: Equipamento de tecnologia da informação.
34
Page 35

CE (Europese Gemeenschap)
Dit Iomega-product voldoet aan de volgende Europese Richtlijn(en) en Norm(en): Toepassing van Richtlijnen: 73/23/EEC en 89/336/EEC van
de Europese Commissie. Normen waarmee de conformiteit wordt verklaard: EN60950, EN55022, EN55024, EN61000-3-2, EN61000-3-3 en
EN60825-1. Naam van importeur: Iomega International, S.A. Type apparatuur: Informatietechnologie-apparatuur.
Afgedankte elektrische en elektronische apparatuur (WEEE)
In overeenstemming met de Europese richtlijn 2002/96/EG betreffende afgedankte elektrische en elektronische apparatuur (AEEA) geeft
de vermelding van het hierboven vermelde symbool op het product of de verpakking aan dat dit artikel niet in de normale, niet-gesorteerde
stedelijke afvalstroom mag worden verwerkt. In plaats daarvan ligt de verantwoordelijkheid van de afvoer van dit product bij de gebruiker,
die het dient aan te bieden bij een inzamelpunt voor de recyclage van afgedankte elektrische en elektronische apparatuur. De gescheiden
inzameling van dit afval helpt de eventuele te recupereren materialen terug te winnen of te recycleren en vermindert de impact ervan op het
milieu en de gezondheid van de mens.
Voor meer informatie betreffende de juiste afvoermethode voor dit product, neemt u contact op met de plaatselijke overheid of de winkelier bij
wie dit product is gekocht.
Models may vary.
*
Les modèles peuvent varier.
Abweichungen je nach Modell möglich.
I modelli possono variare.
Los modelos pueden variar.
Modellen kunnen verschillen.
����������
�
Os modelos podem variar.
35
Page 36

Customer Support • Assistance clientèle • Kundenunterstützung
Assistenza clienti • Asistencia al cliente • Suporte ao cliente
English
If you have a problem, we can help. Please do NOT return this product to the store!
Your answer is on the web. Visit our award-winning web support site www.iomega.com.
Select your region, then select Support.
Français
Si vous avez un problème, nous pouvons vous aider. NE RENVOYEZ PAS ce produit au magasin !
Votre réponse est sur le Web. Site Web d’assistance primé www.iomega.com.
Sélectionnez votre région puis Support
.
Deutsch
Wenn Sie ein Problem haben, können wir Ihnen helfen.
Bringen Sie dieses Produkt NICHT zu Ihrem Händler zurück!
Ihre Antwort steht im Netz. Preisgekrönte Support-Website www.iomega.com.
Wählen Sie Ihr Gebiet aus und klicken Sie auf Support
.
Italiano
In caso di problemi, noi possiamo fornire assistenza. NON restituire questo prodotto al rivenditore!
La risposta è sul Web. Sito di supporto sul Web premiato www.iomega.com.
Selezionare la propria regione, quindi scegliere Assistenza
.
Español
Si tiene algún problema, podemos ayudar. ¡Por favor, NO devuelva este producto a la tienda!
Su respuesta está en la web. Destacado sitio Web de atención al cliente www.iomega.com.
Elija su región y luego seleccione Soporte
.
Português
Se você tiver um problema, nós podemos ajudar. NÃO devolva esse produto à loja!
A resposta para você está na web. Site da web vencedor de prêmios www.iomega.com.
Copyright © 2008 Iomega Corporation. All rights reserved. Iomega and the stylized “i” logo are either registered trademarks or trademarks
of Iomega Corporation in the United States and/or other countries. Microsoft and Windows are either registered trademarks or trademarks of
Microsoft Corporation in the United States and/or other countries. Apple
Apple Inc. in the United States and/or other countries. Certain other product names, brand names, and company names may be trademarks or
designations of their respective owners.
Selecione a sua região e Suporte
, Mac, and FireWire are either registered trademarks or trademarks of
.
31792800 7/17/08 a
 Loading...