

Page 1
Document: CCS-G003-UM-001 Revision: Feb 2017
Intel® Euclid™ Development Kit
User Guide
Intel Corporation
2200 Mission College Blvd
Santa Clara, CA USA 95054
www.intel.com
Page 2
Document: CCS-G003-UM-001 Revision: Feb 2017
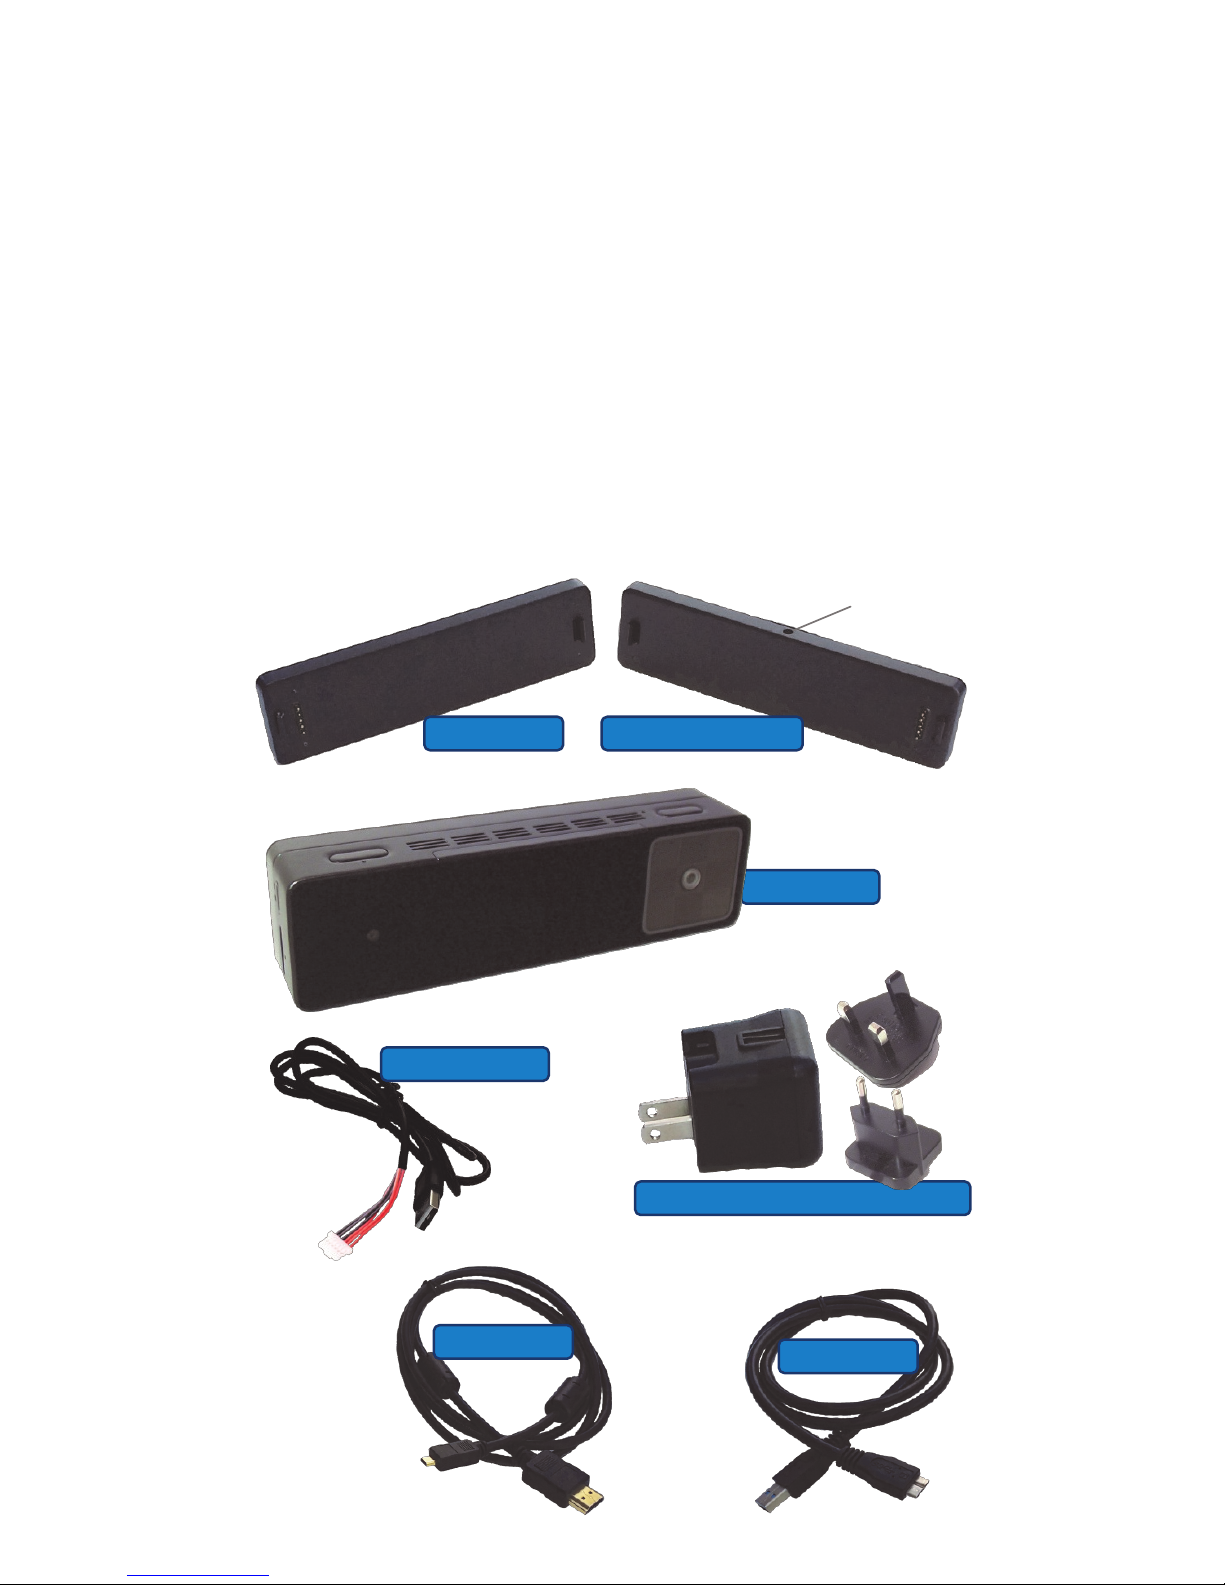
Box Contents
The Intel® Euclid™ Development Kit (also known as Intel®
Euclid™ Developer Kit) contains everything that you need
to begin using the device right out of the box:
Intel™ Euclid® Development Kit main unit (Main Unit)
Lithium Polymer battery
Power Adapter Plate
USB 3.0 Cable (Type A to Micro B Super Speed)
USB Power Cable (Type A to mini plug)
AC Power Adapter (USB output with converters)
HDMI Cable (Type D to Type A)
Battery Power Adapter Plate
Note: The Power Adapter Plate
is identified by the mini plug
port on the top.
Main Unit
HDMI Cable
USB 3.0 Cable
USB Power Cable
AC Power Adapter with connectors
Page 3

Document: CCS-G003-UM-001 Revision: Feb 2017
Description
The Intel® Euclid™ Development Kit features the integration of Intel® RealSense™ depth camera technology, a
motion camera, and an Intel® Atom™ x7-Z8700 Quad
core CPU to produce a compact and sleek all-in-one
computer and depth camera . The Intel® Euclid™ Devel-
opment Kit is designed to be operable out of the box
with pre-installed software including an Ubuntu® operating system.
Features
Intel® Atom™ x7-Z8700 Quad-Core processor
4GB memory and 32GB storage
Intel® RealSense™ ZR300 camera functionality (depth
camera with a motion module)
Wi-Fi® and Bluetooth® wireless communications
USB® 3.0, Micro HDMI®, and USB® OTG/Charging
ports
Environmental sensors including inertial measure-
ment unit, barometric pressure sensor, GPS, and
proximity sensor
2200mAH, 8.36W lithium polymer battery pack
Mobile and stationary power solutions
Accessories for out-of-the-box usage
Pre-installed Ubuntu® 16.04 operating system
Pre-installed Robotics Operating System (ROS) with
support for Intel® RealSense™ Technology and mid-
dleware
Easy to use Web interface for remote device control
Introduction
The Intel® Euclid™ Development Kit User Guide will help
users to start operating the device right out of the box.
For more complete documentation, please see the following links:
http://click.intel.com
http://www.intel.com/realsense
Page 4

Document: CCS-G003-UM-001 Revision: Feb 2017
Product Introduction
Attaching the Battery To attach
the battery, align the pins on the
battery to the contacts on the
Main Unit. Slide the retaining
hook into the slot next to the
contacts, then gently push the
battery onto the Main Unit until
the retaining latch engages.
ON/OFF button
POWER
Configurable buttons
CUSTOM
VGA @ 60fps1
FISHEYE CAMERA
USB OTG
USB
1080p @30fps
RGB Camera
IR projector
Laser Projector
Stereo depth capture
IR Cameras
Tripod hole
Mount
Micro HDMI port
HDMI
Micro SD card
SD CARD Slot
UART
Type A
USB 3.0
Charging
LED’s
System ON
Battery pins
Contacts
Intel Use Only
Test Port
1. Driver supports 30fps
Page 5
Document: CCS-G003-UM-001 Revision: Feb 2017
Powering ON the Device
The Intel® Euclid™ Development Kit contains three meth-
ods of powering on the Main Unit.
1. Battery power. To use the device in it’s mobile mode,
attach the battery as shown. Follow the quick start
instructions.
2. Battery charging. To charge the battery, the device
can be either ON or OFF (if the device is in the OFF
state, then the Charging LED will not illuminate).
Attach the battery to the Main Unit. Plug the AC
Power Adapter into an available outlet. Connect the
USB 3.0 cable into the AC Power Adapter with the
other end into the OTG port on the Main Unit. Follow the quick start instructions.
3. No battery. To use the device without the battery
connected, plug the AC Power Adapter into an available outlet. Attach the Power Adapter Plate to the
back of the Main Unit (same procedure as attaching
the battery). Connect the USB Power Cable to the
AC Power Adapter and the Power Adapter Plate.
The device is ready to power on.
WARNING: DO NOT attempt to supply power to the USB 3.0 Type A
port. Only use the supplied Power Adapter and cable.
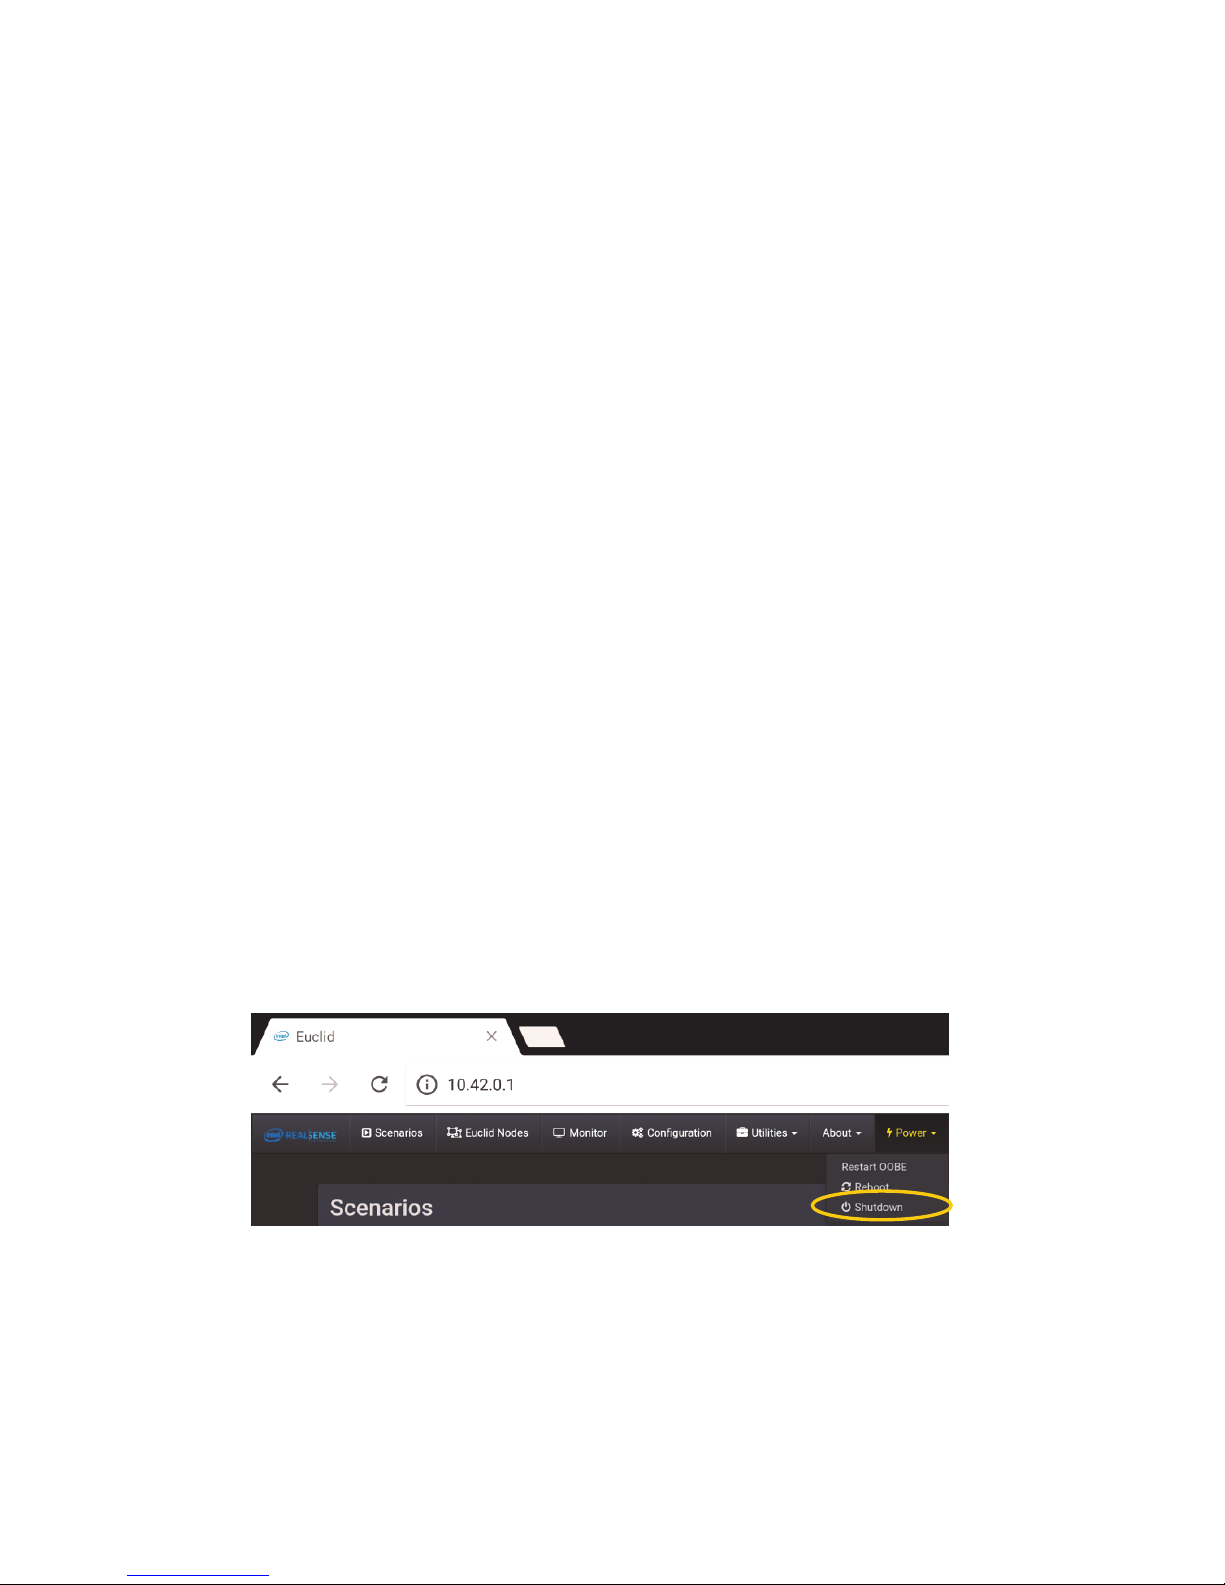
Powering OFF the device
To power off the device, there are three methods:
1. Web interface. From the web interface, click on
POWER, then choose SHUTDOWN.
2. Shutdown. Press and hold the ON/OFF button for
~8-10 seconds and release. The device will shut
down.
3. Forced Shutdown. Press and hold the ON/OFF button for ~15 seconds. The device will force shutdown.
Page 6

Document: CCS-G003-UM-001 Revision: Feb 2017
Quick Start Instructions
Intel® Euclid™ Development Kit provides a “zeroinstallation” usage as all of the software needed to oper-
ate the device is pre-installed. For first time usage,
please follow these instructions:
1. Attach the battery to the Main Unit. It is advised to
connect the battery charger until the battery status is
known.
2. Power-on the device by pressing the POWER ON/OFF
BUTTON for 3 seconds. The SYSTEM ON LED will
illuminate green. The CHARGING LED will illuminate
red if the battery is being charged.
3. Wait for approximately 30 seconds until you hear the
chime tone indicating that the device is ready to use.
4. Power-on your personal device—either a laptop, tab-
let, smart phone or other Wi-Fi enabled device.
Please be sure that your personal device is within 3
meters of the Intel® Euclid™ Development Kit.
5. Access the settings of your personal device and use
the wireless setup facility to connect your personal
device to the Intel® Euclid™ Development Kit. Find
the SSID “EUCLID_XXXX” and connect to it (where
XXXX is an alphanumeric code that is unique to your
individual device). The password that you will need is
“12345678”.
6. Open the browser on your personal device and enter
the following IP address: “http://10.42.0.1/” and hit
ENTER. This will open the main portal for the Intel®
Euclid™ Development Kit.
7. By using the device, you are accepting the software
license. A complete version of the license can be
viewed at: http://click.intel.com. After reading the
license terms, please click to accept the software license.
8. For more detailed instructions, please navigate to the
following link: http://click.intel.com. Search for the
Intel® Euclid™ Development Kit device page and the
Documentation tab for additional support material.
9. To use the cameras, choose the Cameras Scenario on
the web page. Then click on Monitor at the top of
the web page to turn on the individual cameras.
Page 7

Document: CCS-G003-UM-001 Revision: Feb 2017
Safety and Regulatory Information
Device complies with U.S. FDA performance standards for laser products except for deviations pursuant to Laser Notice No. 50, dated June 24, 2007. This device also complies with
International Standards IEC 60825-1, Edition 2 (2007) and IEC 60825-1 , Edition 3 (2014)
for a Class 1 laser product.
Caution—AC Power Adapter: Risk of electric shock, fire, or burn if using an AC adapter
other than the one provided with this device. Indoor use only and in dry locations. Do
not open enclosure. The adapter is rated for use between 100V-240V at 0.5A and 50 or
60Hz. Connect only to properly wired and grounded outlet.
Caution—Risk of explosion if the battery pack is replaced with other than the one
provided with this device. Batteries should be recycled where possible. Disposal of
used batteries must be in accordance with local environmental regulations.
Caution—Failure to use the included ECOGUY, Model KSA29A05003005 Power
Adapter shall violate regulatory compliance requirements and may expose the user to
safety hazards.
Caution—Temperature: This device is intended for use in ambient temperature
between 0°C and 35°C . Avoid using or storing next to heat sources, in direct sunlight,
or outside the intended temperature ranges.
Caution—Modify: Modification of the wireless solution, thermal solution, device
components or enclosure shall violate regulatory compliance requirements and may
induce safety hazards.
Caution—use of controls, adjustments, performance, or procedures other than those specified
herein may result in hazardous radiation exposure. Invisible laser radiation when opened,
interlocked failed or defeated. Avoid direct exposure to the beam.
WARNING: This product contains a chemical known to the State of California to cause birth
defects or other reproductive harm.
Notice for Europe: The use of the WEEE symbol indicates that this product may not be
treated as household waste. By ensuring this product is disposed of correctly, you
will help protect the environment. For more detailed information about the recycling
of this product, please contact your local authority, your household waste disposal
service provider or the ship where you purchased this product.
Informations concernant la sécurité et la réglementation
L'appareil est conforme aux normes de performance définies par l'Agence américaine des
produits alimentaires et médicamenteux (FDA) concernant les produits laser, à l'exception
des dérogations stipulées dans la « Laser Notice No. 50 » du 24 juin 2007. L'appareil est
également conforme aux normes internationales IEC 60825-1, 2e édition (2007), et IEC
60825-1, 3e édition (2014) pour un produit laser de classe 1.
Attention - Bloc d'alimentation secteur : Toute utilisation d'un bloc d'alimentation
secteur autre que celui qui est fourni avec l'appareil risque de provoquer des décharges électriques, incendies ou brûlures. Utiliser uniquement à l'intérieur et dans des endroits
secs. Ne pas ouvrir le boîtier. L'adaptateur est prévu pour fonctionner entre 100 et 240 V à
0,5 A et 50 ou 60 Hz. Branchez-le uniquement à une prise correctement câblée et mise à la
terre.
Attention - Risque d'explosion en cas de remplacement de la batterie par une autre
que celle fournie avec cet appareil. Les batteries doivent être recyclées dans la mesure
du possible. La mise au rebut des batteries usagées doit être réalisée conformément aux
réglementations environnementales.
Attention - Tout manquement à l'utilisation de l'adaptateur secteur modèle
KSA29A05003005 de ECOGUY fourni constituera une violation des exigences de
conformité à la réglementation et peut mettre en danger l'utilisateur.
Attention - Température : Cet appareil est prévu pour être utilisé à une température
ambiante comprise entre 0 °C et 35 °C. Évitez de l'utiliser ou de le stocker près de
sources de chaleur, à la lumière directe du soleil, ou au-delà des plages de température
indiquées.
Attention - Modification : Toute modification de la solution sans fil, de la solution
thermique, des composants de l'appareil ou du boîtier constitue une violation des
exigences de conformité à la réglementation et peut présenter des risques d'accident.
Attention : l'utilisation de contrôles, d'ajustements ou de procédures autres que ceux
spécifiés ici peut entraîner une exposition dangereuse aux radiations. L'appareil émet
des radiations laser invisibles lorsqu'il est ouvert ou que le verrouillage est mal enclenché
ou défectueux. Évitez toute exposition directe au rayon.
Page 8

Document: CCS-G003-UM-001 Revision: Feb 2017
Avis pour l'Europe : L'utilisation du symbole WEEE indique que ce produit ne peut pas
être traité comme un déchet domestique. En veillant à ce que le produit soit éliminé
selon la réglementation en vigueur, vous contribuez à la protection de l'environnement. Pour plus d'informations sur le recyclage de ce produit, veuillez contacter les
autorités locales, votre centre de traitement des déchets ménagers ou le magasin
dans lequel vous avez acheté ce produit.
Sicherheits- und Zulassungsinformationen
Das Gerät entspricht den Vorschriften der amerikanischen FDA für Laserprodukte.
Ausgenommen sind Abweichungen gemäß Laser Notice No. 50 vom 24. Juni 2007. Dieses
Gerät entspricht auch den internationalen Normen IEC 60825-1, Edition 2 (2007) und IEC
60825-1, Edition 3 (2014) für Laserprodukte der Klasse 1.
Vorsicht – Netzteil: Es besteht die Gefahr von Stromschlag, Feuer und Verbrennungen,
wenn ein anderes als das im Lieferumfang des Geräts enthaltene Netzteil verwendet
wird. Nur zur Verwendung in Gebäuden und in trockenen Umgebungen. Gehäuse nicht
öffnen. Das Netzteil kann bei einer Netzspannung zwischen 100 V und 240 V Wechselstrom
bei 0,5 A und einer Netzfrequenz von 50 Hz/60 Hz benutzt werden. Nur an eine
ordnungsgemäß verkabelte und geerdete Steckdose anschließen.
Vorsicht – Es besteht die Gefahr einer Explosion, wenn der im Lieferumfang des Geräts
enthaltene Akku durch einen anderen ersetzt wird. Akkus sollten wenn möglich dem
Recycling zugeführt werden. Verbrauchte Akkus müssen gemäß den örtlichen
Umweltvorschriften entsorgt werden.
Vorsicht – Die Nichtnutzung des im Lieferumfang enthaltenen Netzteils ECOGUY,
Modell KSA29A05003005 stellt einen Verstoß gegen gesetzliche Anforderungen dar
und der Nutzer ist möglicherweise Sicherheitsrisiken ausgesetzt.
Vorsicht – Temperatur: Dieses Gerät ist für den Einsatz bei Umgebungstemperaturen
zwischen 0°C und 35°C vorgesehen. Vermeiden Sie die Benutzung und Lagerung
neben Wärmequellen, in direktem Sonnenlicht oder außerhalb des angegebenen
Temperaturbereichs.
Vorsicht – Veränderungen: Veränderungen an der Wireless-Lösung, der
Kühlungslösung, den Gerätekomponenten oder dem Gehäuse verstoßen gegen
gesetzliche Anforderungen und können zu Sicherheitsrisiken führen.
Vorsicht – Durch die Verwendung anderer als der hier beschriebenen Bedienungen,
Einstellungen oder Verfahren kann gefährliche Strahlung freigesetzt werden.
Unsichtbare Laserstrahlung, wenn das Gerät geöffnet wird, die Verriegelung versagt oder
diese umgangen wird. Blicken Sie nicht direkt in den Laserstrahl.
Hinweis für EU-Länder: Die Verwendung des WEEE-Symbols weist darauf hin, dass dieses
Produkt nicht über den Hausmüll entsorgt werden darf. Durch die ordnungsgemäße
Entsorgung dieses Produkts helfen Sie, die Umwelt zu schützen. Nähere
Informationen zum Recycling dieses Produkts erhalten Sie bei den zuständigen
örtlichen Behörden, Ihrem Müllentsorgungsunternehmen oder dem Händler, bei
dem Sie das Produkt erworben haben.
Información sobre seguridad y normativa
El dispositivo cumple con las normas de rendimiento de la Administración de Alimentos y
Medicamentos de EE.UU. (FDA) para productos láser, excepto las desviaciones indicadas en
el Aviso de láser N. º 50 del 24 de junio de 2007. Este dispositivo también cumple con las
Normas Internacionales de la Comisión Electrotécnica Internacional (CEI) 60825-1, Edición
2 (2007) y 60825-1, Edición 3 (2014) para los productos láser de Clase 1.
Precaución—Adaptador de CA: Riesgo de descarga eléctrica, incendio o quemaduras si
se utiliza un adaptador de CA distinto al suministrado con este dispositivo. Solo uso en
interiores y en lugares secos. No abra la carcasa. El adaptador se ha concebido para su uso
con voltajes de entre 100 V-240 V a 0,5 A y 50 o 60 Hz. Conectar solo a una toma debidamente cableada y conectada a tierra.
Precaución—Riesgo de explosión si se sustituye la batería por otra distinta de la
suministrada con este dispositivo. Las baterías deben reciclarse cuando sea posible.
Debe desechar las baterías usadas según las regulaciones locales para proteger el medio
ambiente.
Precaución—La no utilización del adaptador ECOGUY, modelo KSA29A05003005
puede constituir una violación de los requisitos de cumplimiento de la normativa y
exponer al usuario a riesgos de seguridad.
Page 9
Document: CCS-G003-UM-001 Revision: Feb 2017
Precaución—Temperatura: Este dispositivo se ha concebido para su uso a una tempe-
ratura ambiente de entre 0 °C y 35 °C. No lo utilice ni lo guarde junto a fuentes de
calor, luz solar directa, o fuera de los rangos de temperatura previstos.
Precaución—Modificación: La modificación de la solución inalámbrica, la solución
térmica, los componentes del dispositivo o la carcasa puede constituir una violación de
los requisitos de cumplimiento de la normativa y puede conllevar peligros para la seguridad.
Precaución—Un uso de los controles, los ajustes, el rendimiento o los procedimientos
distinto del aquí especificado puede provocar una exposición peligrosa a la radiación.
Radiación láser invisible en caso de apertura o con interbloqueo averiado o defectuoso.
Evitar la exposición directa al haz.
Aviso para Europa: El uso del símbolo RAEE indica que este producto no puede ser
tratado como residuo doméstico. Asegúrese de desechar correctamente este
producto para contribuir a la protección del medio ambiente. Para obtener información más detallada sobre el reciclaje de este producto, póngase en contacto con las
autoridades locales, su proveedor de servicio de recogida de residuos domésticos o
el comercio donde adquirió este producto.
安全和法规信息
设备符合美国食品和药品管理局(FDA)规定的激光产品性能标准,适用2007年6月24日的第
50号激光公告部分除外。 该设备也符合如下国际标准:IEC 60825-1, 版本 2 (2007) 、 IEC
60825-1和适用于1级激光产品的版本 3 (2014) 。
警告 - 交流电电源配适器: 使用非随本设备提供的交流电源适配器会有触电、火灾或灼
伤的风险。 仅适用于室内和干燥的环境。 不要打开外壳。 适配器额定在100V-240V,
0.5A,50或60Hz条件下使用。 仅连接到正确连线和接地的电源插座。
警告 - 如用其他电池组替换设备原配的电池组,则可能有爆炸危险。 应尽可能回收使用
电池。 废弃的电池必须按照本地的环境法规处理。
警告 - 不使用随附的ECOGUY牌(型号为KSA29A05003005)的电源适配器将违反合规
要求,并会导致用户面临安全隐患。
警告 - 温度: 设备适宜温度为 0°C - 35°C。避免在热源附近、阳光直射处或不适宜温度
下使用或存放。
警告 - 修改: 对无线解决方案、散热方案、设备组件或外壳进行将修改违反合规要求,
并可能导致安全隐患。
警告 - 使用未在本文指定的控制、调节或执行步骤可能会导致有害的辐射曝露。 不可见
光激光在投影仪被打开以及安全互锁失灵或切断时会曝露辐射。 避免光照
安全性と規定に関する注意事項
このデバイスは、2007年6月24日付け Laser Notice No. 50に準ずることによる逸脱を除き、米国
のレーザー製品のFDA性能基準に準拠しています。 このデバイスは、国際規格 IEC 60825-1,
Edition 2 (2007) およびクラス1 レーザー製品の IEC 60825-1, Edition 3 (2014) にも準拠してい
ます。
注意—AC 電源アダプター: 同梱品以外のAC アダプターを使用すると、感電、火災、やけどの
危険があります。 室内での使用のみに限り、また湿気のない場所で使用してください。 エンク
ロージャーを開けないでください。 アダプターの使用範囲は 0.5A および 50 Hzまたは 60Hz の場
合に 100V-240V です。 適切に配線・接地されたコンセントのみに接続してください。
注意—同梱品以外のバッテリーパックと交換した場合、爆発の危険があります。 リサイクルが
可能な地域であれば、電池をリサイクルしてください。 使用済み電池の廃棄は、地域の環境規
制に従ってください。
注意—同梱品の ECOGUY モデル KSA29A05003005電源アダプターを使用しないと、規制上
の準拠要件に違反し、ユーザーに安全上の危険が及ぶことがあります。
注意—温度: このデバイスは 0°C ~ 35°C の周囲温度で使用されることを意図しています。熱
源の近く、直射日光下、または意図された温度範囲外での使用または保存は避けてください。
注意—改造: ワイヤレス・ソリューション、サーマル・ソリューション、デバイス・コンポーネントま
たはエンクロージャーの改造は、規制上の準拠要件に違反し、安全上の危険を生じる可能性
があります。
注意—本書で指定した以外の方法のコントロール、調整、またはパフォーマンスを使用すると、
有害な放射線にさらされる可能性があります。 開くと、不可視レーザー光が放射されます。イ
ンターロックなどの安全機構は損なわれないままの状態にし、いじらないようにしてくだい。 直接
レーザービームを浴びないようにしてください。
Page 10

Document: CCS-G003-UM-001 Revision: Feb 2017
안전 및 규정 정보
이 장치는 레이저 제품에 관한 미국 FDA 성능 표준을 준수합니다(2007년 6월 24일자 Laser
Notice No. 50에 의거한 편차는 제외). 또한 1등급 레이저 제품에 대한 국제 표준 IEC 60825-1,
에디션 2(2007) 및 IEC 60825-1, 에디션 3(2014)을 준수합니다.
주의—AC 어댑터: 이 장치와 함께 제공된 AC 어댑터 이외의 제품을 사용할 경우, 감전, 화
재 또는 화상의 위험이 있습니다. 실내 전용이며, 건조한 장소에서 사용하십시오. 엔클로
저를 열지 마십시오. 이 어댑터의 사용 정격은 100V-240V, 0.5A, 50~60Hz입니다. 올바로 배선
되고 접지된 콘센트에만 연결하십시오.
주의—이 장치와 함께 제공된 배터리팩 이외의 제품을 사용할 경우, 폭발 위험이 있습니
다. 가능한 한 배터리는 재활용하십시오. 배터리 폐기 시 현지 환경 규정을 준수해야 합니
다.
주의—동봉된 ECOGUY, 모델 KSA29A05003005 전원 어댑터를 사용하지 않을 경우, 규정
준수 요건을 위반하게 되며 사용자가 안전 위험에 노출될 수 있습니다.
주의—온도: 이 장치는 0˚C ~ 35˚C 온도에서 사용하도록 설계되었습니다. 발열기기, 직사
광선 또는 허용 온도 이외에서 사용하거나 보관하지 마십시오.
주의—개조: 무선 솔루션, 열 솔루션, 장치 구성부품 또는 엔클로저를 개조하는 경우, 규정
준수 요건을 위반하게 되며 안전 위험을 유발할 수 있습니다.
주의—본 설명서에 명시되지 않은 제어, 조정, 작업, 절차를 실행할 경우, 유해 방사선이 유
출될 수 있습니다. 개방 또는 안전장치 파손 시 적외선이 유출됩니다. 광선에 직접 노출되
지 않도록 하십시오.
Informacje o bezpieczeństwie i przepisach
Urządzenie jest zgodne ze standardami wydajności dla produktów laserowych
wyznaczonymi przez organizację U.S. FDA, z wyjątkiem odstępstw zgodnie z dokumentem
Laser Notice nr 50 z dnia 24 czerwca 2007. Urządzenie to jest również zgodne z
międzynarodowymi normami IEC 60825-1, wydanie 2 (2007), oraz IEC 60825-1, wydanie 3
(2014) dla produktów laserowych klasy 1.
Ostrzeżenie — Zasilacz AC: Ryzyko porażenia prądem elektrycznym, pożaru lub
poparzenia, w przypadku stosowania zasilacza innego niż dostarczony z urządzeniem.
Do użytku wyłącznie wewnątrz pomieszczeń i w suchych miejscach. Nie otwierać obudowy.
Parametry zasilacza: 100-240 V, 0,5 A i 50/60 Hz. Podłączać wyłącznie do gniazda z
odpowiednim okablowaniem i uziemieniem.
Ostrzeżenie — Istnieje ryzyko wybuchu, jeśli akumulator jest zastąpiony innym niż
dostarczony z tym urządzeniem. W miarę możliwości baterie należy oddawać do
recyklingu. Zużytych baterii należy pozbywać się zgodnie z lokalnymi przepisami o ochronie
środowiska.
Ostrzeżenie — Nieprzestrzeganie użycia dołączonego zasilacza ECOGUY, model
KSA29A05003005 stanowi naruszenie ustawowych wymogów co do zgodności i może
zagrozić bezpieczeństwu użytkownika.
Ostrzeżenie — Temperatura: Urządzenie to przeznaczone jest do stosowania w
temperaturze od 0°C do 35°C. Należy unikać używania lub przechowywania obok
źródeł ciepła, w miejscu nasłonecznionym lub w temperaturze innej niż dozwolona.
Ostrzeżenie — Modyfikacja: Modyfikacja rozwiązania bezprzewodowego, rozwiązania
termicznego, elementów urządzenia lub obudowy naruszy wymogi dotyczące
zgodności z przepisami i może spowodować zagrożenie bezpieczeństwa.
Ostrzeżenie — Użycie elementów sterujących, ustawień wydajności lub procedur
innych niż określone w niniejszym dokumencie, może spowodować narażenie na
niebezpieczne promieniowanie. Niewidzialne promieniowanie laserowe po otwarciu lub
awarii mechanizmu blokującego. Należy unikać bezpośredniego kontaktu z promieniem.
Uwaga dla Europy:
Użycie symbolu WEEE wskazuje na to, że produkt nie może być traktowany jako
odpad komunalny. Zapewnienie prawidłowego złomowania pomaga chronić
środowisko. Aby uzyskania bardziej szczegółowe informacje na temat recyklingu
tego produktu, należy skontaktować się z przedstawicielem władz lokalnych,
dostawcą usług utylizacji odpadów z gospodarstw domowych lub sklepem, w
którym został zakupiony ten produkt.
Page 11

Document: CCS-G003-UM-001 Revision: Feb 2017
Bezpečnostné a regulačné informácie
Zariadenie je v súlade s americkými prevádzkovými normami FDA pre laserové produkty s
výnimkou odchýlok v súlade s vyhláškou Laser Notice č. 50 z 24. júna 2007. Toto zariadenie
je tiež v súlade s medzinárodnými štandardmi IEC 60825-1, 2. vydanie (2007) a IEC 60825-
1, 3. vydanie (2014), pre laserový produkt 1. triedy.
Varovanie - AC sieťový adaptér: Ak budete s týmto zariadením používať iný než
dodaný adaptér striedavého prúdu, hrozí riziko zasiahnutia elektrickým prúdom,
požiaru alebo popálenia. Používajte len v interiéri a v suchom prostredí. Kryt neotvárajte.
Adaptér je dimenzovaný pre použitie medzi 100V-240V pri 0,5 A a 50 alebo 60 Hz.
Pripájajte len k správne nainštalovanej a uzemnenej zásuvke.
Varovanie - Nebezpečenstvo výbuchu, ak je batéria nahradená iným typom ako typ
dodávaný s týmto zariadením. Batérie by mali byť recyklované, pokiaľ je to možné.
Použité batérie je nutné likvidovať v súlade s miestnymi predpismi na ochranu životného
prostredia.
Varovanie - Nepoužitie priloženého napájacieho adaptéra ECOGUY, model
KSA29A05003005 predstavuje porušenie požiadaviek na dodržiavanie právnych
predpisov a vystavuje užívateľa bezpečnostným rizikám.
Varovanie - Teplota: Tento prístroj je určený pre použitie pri teplote okolia medzi 0 a
35 °C. Nepoužívajte ani neodkladajte pri zdrojoch tepla, na priamom slnečnom svetle
alebo mimo určeného teplotného rozsahu.
Varovanie - Úpravy: Úpravy bezdrôtového riešenia, tepelného riešenia, súčastí
zariadenia alebo krytu porušujú zákonné požiadavky v oblasti regulácie a môžu vyvolať
bezpečnostné riziká.
Varovanie - používanie iných ovládacích prvkov, nastavení, výkonu alebo postupov,
ako je uvedené v tomto dokumente, môže viesť k nebezpečenstvu ožiarenia.
Neviditeľné laserové žiarenie pri otvorení, je zaistený zlyhania alebo zničenie. Vyhnite sa
priamemu vystaveniu lúču.
Upozornenie pre Európu: Použitie symbolu WEEE značí, že s výrobkom nemôže byť
zaobchádzané ako s komunálnym odpadom. Zabezpečením ekologickej likvidácie
tohto výrobku pomôžete chrániť životné prostredie. Pre podrobnejšie informácie o
recyklácii tohto výrobku sa obráťte na obecný úrad, poskytovateľa služby likvidácie
komunálneho odpadu alebo obchod, kde ste tento výrobok zakúpili.
Informace o bezpečnosti a předpisech
Zařízení splňuje standardy U.S. FDA pro laserová zařízení s výjimkou odchylek podle
vyhlášky Laser Notice č. 50 z 24. června 2007. Toto zařízení splňuje také mezinárodní
standardy IEC 60825-1, edice 2 (2007), a IEC 60825-1, edice 3 (2014) pro laserová zařízení
třídy 1.
Upozornění – síťový adaptér: Při používání jiného síťového adaptéru než toho, který byl
dodán s tímto zařízením, hrozí nebezpečí úrazu elektrickým proudem, požáru nebo
popálenin. Používejte pouze v interiéru a v suchém prostředí. Neotvírejte kryt. Adaptér je
určen pro napětí 100–240 V při 0,5 A a 50 nebo 60 Hz. Připojujte pouze k řádně zapojené a
uzemněné zásuvce.
Upozornění – v případě nahrazení baterie jinou než tou, která je součástí zařízení, hrozí
nebezpečí výbuchu. Baterie by měly být recyklovány, je-li to možné. Použité baterie je
nutné likvidovat v souladu s místními předpisy na ochranu životního prostředí.
Upozornění – nepoužití přiloženého napájecího adaptéru ECOGUY model
KSA29A05003005 představuje porušení požadavků na dodržování právních předpisů
a může uživatele vystavit bezpečnostním rizikům.
Upozornění – provozní teplota: Toto zařízení je určeno pro provoz při okolní teplotě
mezi 0 °C a 35 °C. Nepoužívejte ani neskladujte v blízkosti zdrojů tepla, na přímém
slunečním světle nebo při teplotách mimo určené rozmezí.
Upozornění – úpravy: Úpravy bezdrátového řešení, chlazení, součástí zařízení nebo
krytu zařízení jsou porušením požadavků na dodržování právních předpisů a mohou
vyvolat bezpečnostní rizika.
Upozornění – používání ovládacích prvků, nastavení nebo provádění jiných než v tomto
dokumentu uvedených postupů může vést k vystavení se nebezpečné radiaci. V
případě otevření krytu a porušení nebo překonání bezpečnostního zámku se vystavujete
riziku působení neviditelného laserového záření. Vyhněte se přímému kontaktu s laserovým
paprskem.
Page 12

Document: CCS-G003-UM-001 Revision: Feb 2017
Upozornění pro Evropu: Symbol WEEE označuje dle směrnice OEEZ zařízení, které nesmí
být likvidováno jako netříděný komunální odpad. Správnou likvidací odpadu
přispíváte k ochraně životního prostředí. Pro podrobnější informace o recyklaci
tohoto zařízení kontaktujte příslušné místní úřady, společnost odpovídající za svoz
odpadu, nebo obchodníka, u něhož jste zařízení koupili.
Sicurezza e informazioni normative
Il dispositivo è conforme agli standard prestazionali della FDA statunitense per i prodotti
laser ad esclusione delle deviazioni ai sensi dell'Avviso sui Laser N° 50, del 24 giugno 2007.
Questo dispositivo è anche conforme agli Standard Internazionali IEC 60825-1, Seconda
edizione (2007) e IEC 60825-1, Terza edizione (2014) per i prodotti laser di Classe 1.
Attenzione, adattatore di alimentazione CA: se si usa un adattatore CA diverso da
quello fornito in dotazione con il dispositivo, si corre il rischio di causare scosse
elettriche, incendi o ustioni. Utilizzare esclusivamente in ambienti interni e asciutti. Non
aprire l'involucro esterno. L'adattatore è progettato per i seguenti parametri: 100V-240V a
0,5A e 50 o 60Hz. Collegarlo solo a una presa che sia correttamente cablata e dotata di
messa a terra.
Attenzione: la sostituzione della batteria con un ricambio non originale potrebbe
causare l'esplosione del dispositivo. Le batterie devono essere riciclate, se possibile. Lo
smaltimento delle batterie usate deve essere effettuato conformemente alla normativa
ambientale locale.
Attenzione: il mancato utilizzo dell'alimentatore ECOGUY, fornito in dotazione, Modello
KSA29A05003005, causa la violazione dei requisiti di conformità alle normative e
potrebbe esporre l'utente a pericoli per la sicurezza.
Attenzione, temperature: il dispositivo è stato progettato per essere usato a
temperatura ambiente, tra 0°C e 35°C. Evitare di posizionarlo vicino a fonti di calore, di
esporlo alla luce solare diretta o di utilizzarlo a temperature diverse da quelle indicate dal
costruttore.
Attenzione, modifiche: la modifica della soluzione wireless, della soluzione termica, dei
componenti o dell'involucro del dispositivo causa la violazione dei requisiti di
conformità alle normative e potrebbe comportare rischi per la sicurezza degli utilizzatori.
Attenzione: l'alterazione di comandi, regolazioni, prestazioni o procedure rispetto alle
specifiche del costruttore potrebbe causare l'esposizione a radiazioni pericolose.
Pericolo di emissioni di radiazioni laser invisibili in caso di apertura del dispositivo o di
mancato funzionamento o manomissione del meccanismo di protezione. Evitare
l'esposizione diretta al raggio.
Avviso per il mercato europeo: l'utilizzo del simbolo WEEE indica che il prodotto dovrà
essere smaltito in base alle normative sui i rifiuti speciali. Smaltendo questo
prodotto in modo corretto, si contribuirà alla tutela dell'ambiente. Per avere
informazioni più dettagliate sul riciclaggio di questo prodotto, contattare le autorità
locali, l'azienda che si occupa dello smaltimento dei rifiuti domestici oppure il
negozio in cui si è acquistato il prodotto.
Veiligheidsrichtlijnen en kennisgevingen
Apparaat voldoet aan de Amerikaanse FDA-prestatienormen voor laserproducten met
uitzondering van afwijkingen krachtens Laser Notice No. 50, gedateerd 24 juni 2007. Dit
apparaat voldoet daarnaast aan de internationale normen IEC 60825-1, Editie 2 (2007) en
IEC 60825-1, Edition 3 (2014) voor een Klasse-1 laserproducten.
Voorzichtig-AC-netvoedingsadapter: Er bestaat een risico op een elektrische schok,
brand of brandwonden als een andere AC-adapter wordt gebruikt dan de adapter die is
geleverd bij dit apparaat. Adapter is alleen bedoeld voor gebruik binnenshuis en op droge
locaties. Open de behuizing niet. De adapter is geschikt voor gebruik tussen 100V-240V bij
0.5A en 50 of 60Hz. Sluit de adapter aan op een correct bekabeld en geaard stopcontact.
Voorzichtig-Explosiegevaar als de batterij wordt vervangen door een andere dan die bij
dit apparaat is geleverd. Recycle de batterijen indien mogelijk. Het wegwerpen van
gebruikte batterijen moet gebeuren in overeenstemming met lokale milieuwetgeving.
Voorzichtig-het niet gebruiken van de meegeleverde ECOGUY, Model
KSA29A05003005-netvoedingsadapter schendt de conformiteitseisen en kan de
gebruiker blootstellen aan veiligheidsrisico's.
Voorzichtig-Temperatuur: Dit apparaat is bedoeld voor gebruik bij
omgevingstemperatuur tussen 0 °C en 35 °C. Vermijd gebruik of opslag naast
warmtebronnen, in direct zonlicht, of buiten het aangegeven temperatuurbereik.
Voorzichtig-Aanpassingen: Aanpassingen aan de draadloze oplossing, componenten
van het apparaat of de behuizing kunnen leiden tot schending van de wettelijke
conformiteitseisen en kunnen gevaar veroorzaken.
Page 13

Document: CCS-G003-UM-001 Revision: Feb 2017
Voorzichtig-het doen van aanpassingen of het gebruik van andere procedures dan
hierin beschreven, kan leiden tot blootstelling aan gevaarlijke straling. Onzichtbare
laserstraling wanneer geopend, niet vergrendeld of defect. Vermijd directe blootstelling aan
de laserstraal.
Opmerking voor Europa: Het gebruik van het WEEE-symbool geeft aan dat dit product
niet mag worden behandeld als huishoudelijk afval. Door ervoor te zorgen dat dit
product op correcte wijze wordt afgevoerd, helpt u het milieu te beschermen. Voor
meer informatie over het recyclen van dit product kunt u contact opnemen met uw
gemeente, het afvalbedrijf of de winkel waar u het product hebt gekocht.
Informações de Segurança e de Regulamentação
O dispositivo está em conformidade com os padrões de desempenho da U.S. FDA para
produtos a laser, exceto para variações nos termos do Aviso Laser N.º 50, de 24 de junho
de 2007. Este dispositivo também está em conformidade com as Normas Internacionais IEC
60825-1, Edição 2 (2007) e IEC 60825-1, Edição 3 (2014) para um produto laser de Classe
1.
Cuidado—Transformador CA: Risco de choque elétrico, incêndio ou queimadura se
utilizar um transformador CA diferente do que é fornecido juntamente com este
dispositivo. Utilizar apenas em ambientes fechados e em locais secos. Não abrir o
compartimento. O adaptador está classificado para ser utilizado entre 100V-240V em 0,5A
e 50 ou 60Hz. Ligar apenas a uma tomada adequadamente instalada e com ligação terra.
Cuidado—Risco de explosão se a bateria for substituída por outra que não a fornecida
com este dispositivo. Deve reciclar as baterias quando possível. A eliminação das
baterias utilizadas deve ocorrer de acordo com os regulamentos ambientais locais.
Cuidado—A não utilização do transformador incluído da ECOGUY, Modelo
KSA29A05003005, é uma violação às normas de utilização e pode expor o utilizador a
perigos de segurança.
Cuidado—Temperatura: Este dispositivo destina-se a ser utilizado à temperatura
ambiente entre 0 °C e 35 °C. Evite utilizar ou armazenar junto a fontes de calor, expor à
luz solar direta ou fora do intervalo de temperatura recomendado.
Cuidado—Modificações: A modificação de uma solução sem fios, solução térmica,
componentes ou compartimento do dispositivo viola as normas de utilização e poderá
representar um perigo para a segurança.
Cuidado—A utilização de controlos, ajustes ou procedimentos diferentes dos aqui
especificados pode causar exposição a radiação perigosa. Exposição a radiação
invisível quando a unidade é aberta e o dispositivo de bloqueio danificado ou modificado.
Evite a exposição direta ao feixe.
Aviso para a Europa: O uso do símbolo WEEE indica que este produto não pode ser
tratado como lixo doméstico. Ao garantir que este produto é reciclado
corretamente, estará a ajudar e a proteger o meio ambiente. Para obter informações
mais detalhadas sobre a reciclagem deste produto, contacte as autoridades locais, o
seu fornecedor de serviços de eliminação de resíduos domésticos ou a loja onde
adquiriu este produto.
Sikkerheds- og regulativoplysninger
Enheden overholder kravene i U.S. FDA performance standards for laser products med
undtagelse af ændringer i henhold til Laser Notice No. 50, dateret 24. juni 2007. Denne
enhed overholder også kravene i International Standards IEC 60825-1, Edition 2 (2007) og
IEC 60825-1, Edition 3 (2014) for et klasse 1-laserprodukt.
Pas på – AC-adapter: Risiko for elektrisk stød, ild eller brand, hvis en anden AC-adapter
end den leverede bruges med enheden. Kun indendørs brug og på tørre steder. Åbn
ikke dækslet. Adapteren er godkendt til brug mellem 100 V-240 V og 0,5 A og 50 eller 60
Hz. Tilslut kun til en korrekt kabelført og jordet stikkontakt.
Pas på - Eksplosionsfare, hvis batteripakken udskiftes med en anden end den, der blev
leveret med enheden. Batterierne bør genbruges, hvor det er muligt. Bortskaffelse af
brugte batterier skal være i overensstemmelse med lokale miljøregulativer.
Pas på - Manglende brug af den medfølgende ECOGUY, Model KSA29A05003005
Power Adapter er en overtrædelse af de regulatoriske krav for compliance, og kan
udsætte brugeren for fare.
Pas på - Temperatur: Denne enhed er beregnet til brug ved omgivende temperaturer
mellem 0 °C og 35 °C. Undgå brug og opbevaring i nærheden af varmekilder, i direkte
sollys eller uden for det angivne temperaturspænd.
Pas på - Ændringer: Ændring af den trådløse løsning, enhedens komponenter eller
dæksel kan være en overtrædelse af overholdelsesregler og kan medføre fare for
sikkerheden.
Page 14

Document: CCS-G003-UM-001 Revision: Feb 2017
Pas på - Brug af andre kontrolmekanismer, indstillinger, ydeevne eller opgaver end de,
der er specificeret heri, kan udsætte dig for farlig stråling. Usynlig laserstråling hvis
åbnet, sammenlukning er mislykket eller omgået. Undgå at blive direkte udsat for strålen.
Bemærkning for Europa: Brugen af WEEE-symbolet indikerer, at dette produkt ikke må
behandles som husholdningsaffald. Ved at sikre, at dette produkt bliver bortskaffet
korrekt, vil du være med til at beskytte miljøet. For mere detaljeret information om
genanvendelse af dette produkt kan du kontakte din lokale myndighed, din
renovatør eller forretningen, hvor du købte produktet.
Sikkerhet og juridisk informasjon
Enheten tilfredsstiller kravene som stilles til laserprodukters ytelse i U.S. FDA, sett bort fra
avvikene som ble påpekt i Laser Notice nr. 50, datert 24. juni 2007. Denne enheten
oppfyller også kravene til de internasjonale standarene IEC 60825-1, Edition 2 (2007) and
IEC 60825-1, Edition 3 (2014) for laserprodukter i klasse 1.
Advarsel—AC strømadapter: Fare for elektrisk støt, brann eller brannskader hvis du
bruker en annen strømadapter enn den som fulgte med denne enheten. Kun til bruk
innendørs og på tørre steder. Ikke åpne kabinettet. Adapteren er beregnet for bruk mellom
100 V-240 V ved 0,5 A og 50 eller 60 Hz. Koble den bare til et forskriftsmessig kablet og
jordet uttak.
Advarsel—Eksplosjonsfare i tilfelle batteripakken blir erstattet med en annen en den
som følger med enheten. Lever batteriene til gjenvinning der det er mulig. Avhending
av brukte batterier må gjøres i henhold til lokale miljøforskrifter.
Advarsel—Unnlatelse av å bruke den medfølgende strømdapteren ECOGUY Model
KSA29A05003005 er brudd på gjeldende forskrifter, og kan utsette brukeren for
sikkerhetsrisiko.
Advarsel—temperatur: Denne enheten er beregnet til bruk i lufttemperaturen mellom
0°C og 35°C. Unngå bruk eller oppbevaring i nærheten av varmekilder, i direkte sollys
eller i temperaturer utenfor denne skalaen.
Advarsel—modifisering: Endringer på den trådløse løsningen, termiske løsningen,
enhetskomponenter eller kabinettet er brudd på gjeldende forskrifter og kan føre til
fare.
Advarsel—bruk av andre kontroller, justeringer, oppgaver og prosedyrer enn det som
står spesifisert her kan føre til farlig radioaktiv eksponering. Usynlig laserstråling når
den er åpnet, eller hvis sikkerhetsmekanismene er ødelagt. Unngå direkte eksponering for
strålen.
Merknad for Europa: Bruk av WEEE-symbolet indikerer at produktet ikke kan kastes som
husholdningsavfall. Når du sørger for å kvitte deg med produktet på riktig måte,
bidrar du til å ta vare på miljøet. For mer detaljert informasjon om hvordan dette
produktet kan gjenvinnes, ber vi deg ta kontakt med lokale myndigheter,
renovasjonsselskapet eller butikken hvor du kjøpte produktet.
Saugos ir reglamentavimo informacija
Šis įrenginys atitinka JAV Maisto ir vaistų administracijos (FDA) nustatytus lazerinių
produktų techninių savybių standartus, išskyrus nuokrypius, nurodytus Pranešime dėl
lazerių Nr. 50 (2007 m. birželio 24 d.). Šis įrenginys taip pat atitinka tarptautinių standartų
IEC 60825-1 (2 laida, 2007 m.) ir IEC 60825-1 (3 laida, 2014 m.) nuostatas dėl 1 klasės
lazerinių produktų.
Perspėjimas dėl kintamosios srovės maitinimo adapterio. Jeigu naudojate ne prie šio
įrenginio pridėtą kintamosios srovės adapterį, gali kilti elektros smūgio, gaisro ar
nudegimo pavojus. Naudokite tik patalpose, sausose vietose. Nebandykite atidarinėti
korpuso. Šis adapteris maitinamas 100–240 V įtampos, 0,5 A stiprio ir 50 arba 60 Hz dažnio
elektros srove. Junkite tik prie tinkamai įrengto ir įžeminto kištukinio lizdo.
Perspėjimas: jei baterijos blokas pakeičiamas kitu, nei buvo pateiktas su šiuo įrenginiu,
gali kilti sprogimo pavojus. Jei tik įmanoma, reikia pasirūpinti baterijų grąžinamuoju
perdirbimu. Panaudotos baterijos turi būti šalinamos laikantis vietinių aplinkos apsaugos
reikalavimų.
Perspėjimas: jei naudojamas ne pridėtas ECOGUY maitinimo adapteris (modelis
KSA29A05003005), tai laikoma privalomųjų atitikties reikalavimų pažeidimu ir dėl to
gali kilti pavojus naudotojo saugai.
Perspėjimas dėl temperatūros. Šis įrenginys skirtas naudoti aplinkoje, kurios
temperatūra yra nuo 0 °C iki 35 °C. Nenaudokite ir nelaikykite jo šalia šilumos šaltinių,
saulės atokaitoje arba aplinkoje, kurios temperatūra peržengia pirmiau nurodytas ribas.
Perspėjimas dėl modifikavimo. Jei belaidžio ryšio ar temperatūros sistema, įrenginio
komponentai arba korpusas modifikuojami, tai laikoma privalomųjų atitikties
reikalavimų pažeidimu ir dėl to gali kilti pavojus saugai.
Page 15

Document: CCS-G003-UM-001 Revision: Feb 2017
Perspėjimas: jei valdoma, reguliuojama, eksploatuojama arba imamasi veiksmų ne
pagal čia pateiktus nurodymus, gali būti paskleista pavojinga spinduliuotė. Atidarius,
įveikus arba sugadinus apsaugos priemones, gali būti skleidžiama nematoma lazerio
spinduliuotė. Saugokitės tiesioginio spindulio poveikio.
Perspėjimas Europoje. EEĮ atliekų simbolio naudojimas reiškia, kad su šiuo produktu
negalima elgtis kaip su buitinėmis atliekomis. Rūpindamiesi tinkamu šio produkto
pašalinimu padedate apsaugoti aplinką. Jei pageidaujate išsamesnės informacijos
apie šio produkto grąžinamąjį perdirbimą, kreipkitės į atitinkamą savo vietovės
instituciją, buitinių atliekų surinkimo tarnybą arba parduotuvę, kurioje šį produktą
įsigijote.
Tietoja turvallisuudesta ja säädöksistä
Laite täyttää Yhdysvaltain FDA-viraston suorituskykyvaatimukset lasertuotteille, 24.6.2007
julkaistussa Laser Notice No. 50 -asiakirjassa määritellyin poikkeuksin. Laite täyttää myös
luokan 1 lasertuotteille asetetut kansainväliset IEC-standardit 60825-1, Edition 2 (2007) ja
IEC 60825-1, Edition 3 (2014).
Varoitus – verkkolaite: Muun kuin tämän laitteen mukana toimitetun verkkolaitteen
käyttäminen voi aiheuttaa sähköiskun, tulipalon tai palovammojen vaaran. Tarkoitettu
käyttöön ainoastaan sisätiloissa ja kuivassa ympäristössä. Älä avaa laitteen koteloa.
Verkkolaitteen hyväksytyt käyttöolosuhteet: 100–240 V, 0,5 A ja 50 tai 60 Hz. Kytke
ainoastaan maadoitettuun pistorasiaan.
Varoitus – Räjähdysvaara, jos laitteessa käytetään muuta kuin sen mukana toimitettua
akkua. Akut tulisi aina toimittaa niille tarkoitettuun keräyspisteeseen. Käytettyjen
akkujen hävittämisessä on noudatettava paikallisia jätehuoltomääräyksiä.
Varoitus – Muiden kuin toimitukseen sisältyvän ECOGUY KSA29A05003005 -
verkkolaitteen käyttäminen loukkaa määräysten mukaisia yhteensopivuusvaatimuksia
ja voi vaarantaa käyttäjän turvallisuuden.
Varoitus – Lämpötila: Laite on tarkoitettu käytettäväksi 0–35° C:n lämpötilassa. Vältä
käyttöä ja varastointia lämmönlähteiden läheisyydessä, suorassa auringonvalossa tai
ohjeistuksesta poikkeavissa lämpötiloissa.
Varoitus – Muutostyöt: Langattoman ratkaisun, lämpöteknisen ratkaisun, laitteen osien
tai sen kotelon muuttaminen voi loukata yhteensopivuusmääräyksiä ja aiheuttaa
turvallisuusvaaroja.
Varoitus – Muiden kuin tässä asiakirjassa mainittujen säätöjen tekeminen tai
toimenpiteiden suorittaminen voi aiheuttaa vaarallisen altistumisen säteilylle.
Näkymätöntä lasersäteilyä, kun laite on avattu tai turvallisuuslukitus on rikki tai ohitettu.
Vältä suoraa altistusta säteelle.
Huomautus Euroopan markkinoille: WEEE-symboli merkitsee, ettei tuotetta voida
käsitellä kotitalousjätteenä. Varmistamalla tuotteen asianmukaisen hävittämisen
autat huolehtimaan ympäristöstä. Tarkempaa tietoa tämän tuotteen
kierrättämisestä saat paikallisilta viranomaisilta, jätehuollostasi vastaavalta
palveluntarjoajalta tai tuotteen myyneestä liikkeestä.
Güvenlikle ve Yönetmeliklerle İlgili Bilgiler
Aygıt, 24 Haziran 2007 tarihli ve 50 sayılı Lazer Bildirimi uyarınca, sapmalar hariç olmak
üzere, ABD FDA'nın lazer ürünleriyle ilgili performans standartlarına uygundur. Bu aygıt
ayrıca 1. Sınıf lazer ürünleri için geçerli olan Uluslararası Standartlar: IEC 60825-1, Edition 2
(2007) ve IEC 60825-1, Edition 3 (2014) ile uyumludur.
Dikkat—AC Güç Adaptörü: Aygıtla birlikte verilen AC adaptörünün dışında bir adaptörle
kullanıldığında elektrik çarpması, yangın veya yanık riski vardır. Yalnızca kapalı
mekanlarda ve kuru yerlerde kullanın. Kasayı açmayın. Adaptör, 0.5A ve 50 veya 60Hz'de
100V-240V arasında kullanım için uygundur. Yalnızca elektrik bağlantısı düzgün bir şekilde
yapılmış ve topraklanmış bir prize takın.
Dikkat—Bu aygıtla birlikte verilen pil paketi dışında bir pil paketi ile değişim
yapıldığında patlama riski vardır. Piller mümkünse geri dönüşüme dahil edilmelidir.
Kullanılan piller yerel çevre düzenlemelerine uygun şekilde atılmalıdır.
Dikkat—Ambalaja dahil olan ECOGUY, Model KSA29A05003005 Güç Adaptörünün
kullanılmaması, düzenleyici uyumluluk gereklerini ihlal eder ve kullanıcının güvenlik
tehlikelerine maruz kalmasına yol açar.
Dikkat—Sıcaklık: Bu aygıt 0°C ile 35°C arasındaki ortam sıcaklıklarında kullanılmak
üzere tasarlanmıştır. Isı kaynaklarının yanında, doğrudan güneş ışığında veya istenen
sıcaklık aralıklarının dışında kullanmayın ve saklamayın.
Page 16

Document: CCS-G003-UM-001 Revision: Feb 2017
Dikkat—Değişiklik: Değişiklik: Kablosuz iletişim çözümünde, termal çözümde, aygıtın
bileşenlerinde veya kasasında yapılan değişiklikler, yasalara uygunluk gerekliliklerini
ihlal edebilir ve güvenlik risklerine yol açabilir.
Dikkat—Burada belirtilenlerin haricindeki kontroller, ayarlamalar, performans veya
prosedürlerin kullanılması, tehlikeli radyasyona maruz kalınmasına neden olabilir.
Açıldığında, güvenlik kilidi arızalıysa veya bozulmuşsa görünmez lazer radyasyonu yayılır.
Işınıma doğrudan maruz kalmaktan kaçının.
Avrupa bildirimi: WEEE simgesinin kullanılması, bu ürünün evsel atık olarak
değerlendirilmemesi gerektiğini ifade eder. Bu ürünün doğru bir şekilde atılmasını
sağlayarak çevreyi korumaya yardımcı olabilirsiniz. Bu ürünün geri dönüşümü
hakkında detaylı bilgi almak için lütfen belediye yetkilileri, çöp toplama servisi veya
bu ürünü satın aldığınız mağazaya danışın.
Page 17

Document: CCS-G003-UM-001 Revision: Feb 2017
Regulatory Compliance Information
Notice for United States of America
Federal Communication Commission (FCC) Interference Statement
This equipment has been tested and found to comply with the limits for a Class B digital
device, pursuant to part 15 of the FCC Rules. These limits are designed to provide reasonable protection against harmful interference in a residential installation. This equipment
generates, uses and can radiate radio frequency energy and, if not installed and used in
accordance with the instructions, may cause harmful interference to radio communications.
However, there is no guarantee that interference will not occur in a particular installation. If
this equipment does cause harmful interference to radio or television reception, which can
be determined by turning the equipment off and on, the user is encouraged to try to correct
the interference by one or more of the following measures:
—Reorient or relocate the receiving antenna.
—Increase the separation between the equipment and receiver.
—Connect the equipment into an outlet on a circuit different from that to which the
receiver is connected.
—Consult the dealer or an experienced radio/ TV technician for help.
This device complies with Part 15 of the FCC Rules. Operation is subject to the following
two conditions: (1) this device may not cause harmful interference, and (2) this device must
accept any interference received, including interference that may cause undesired operation.
This equipment complies with FCC radiation exposure limits set forth for an uncontrolled
environment. This equipment should be installed and operated with minimum distance 20
cm between the radiator and your body.
Wireless certification granted under FCC ID: 2AK6WEUCLID1
CAUTION: To comply with the limits of the Class B digital device, pursuant to Part 15 of the
FCC Rules, this device must be installed with computer equipment certified to comply with
Class B limits. All cables used to connect to the computer and peripherals must be shielded
and grounded. Operation with non-certified computers or non-shielded cables may result
in interference to radio or television reception.
MODIFICATION: Any changes or modifications not expressly approved by the grantee of
this device could void the user's authority to operate the device.
Notice for Japan
VCCI Statement
Page 18

Document: CCS-G003-UM-001 Revision: Feb 2017
Notice for Europe
CAUTION: This product is intended for use with CE certified computer equipment. Please
check the equipment operation/installation manual and/or with the equipment manufacturer to verify/confirm if your equipment is suitable prior to the installation or use of the
product.
This product complies with all applicable European directives.
CAUTION: To comply with the European CE requirement, the device must be installed with
CE certified computer equipment which meet with Class B limits. All cables used to connect
this device must be shielded, grounded with no longer than 3m length. Operation with non
-certified computers or incorrect cables may result in interference to other devices or
undesired effect to the product.
MODIFICATION: Any changes or modifications not expressly approved by Intel Corporation
could void the user’s warranty and guarantee rights.
Notice for Canada
This digital apparatus does not exceed the Class B limits for radio noise emissions from
digital apparatus set out in the Radio Interference Regulations of the Canadian Department
of Communications. This device complies with Industry Canada license-exempt RSS
standard(s). Operation is subject to the following two conditions: (1) this device may not
cause interference, and (2) this device must accept an interference, including interference
that may cause undesired operation of the device.
This equipment complies with IC radiation exposure limits set forth for an uncontrolled
environment. This equipment should be installed and operated with minimum distance 20
cm between the radiator and your body.
Wireless certification granted under IC ID: 22461-EUCLID1
EMC certification under Class B: CAN ICES-3 (B)/NMB-3(B)
Avis pour le Canada
Cet appareil numérique ne dépasse pas les limites de classe B pour les émissions de bruit
radioélectrique par les appareils numériques définies dans la réglementation sur les
interférences radio du Ministère des Communications du Canada. Cet appareil est conforme
aux normes d'exemption de licence RSS d'Industrie Canada. Son fonctionnement est
soumis aux deux conditions suivantes : (1) cet appareil ne peut causer d'interférence, et (2)
cet appareil doit accepter toutes les interférences, y compris celles qui pourraient entraîner
un fonctionnement non désiré.
Cet équipement est conforme aux limites d'Industrie Canada relatives à l'exposition aux
rayonnements établies pour un environnement non contrôlé. Cet équipement doit être
installé et utilisé en respectant une distance minimale de 20 cm entre l'antenne et votre
corps.
Certification sans fil accordée avec l'identifiant d'Industrie Canada : 22461-EUCLID1
Certification CEM en vertu de la Classe B : CAN ICES-3 (B)/NMB-3(B)
Page 19
Document: CCS-G003-UM-001 Revision: Feb 2017
Notice for Korea
Wireless certification granted under MSIP-CMM-CPU-EUCLID1
B 급 기 기
(가 정 용 방 송 통 신 기 자 재 )
Class B Equipment
(For Home Use Broadcasting & Communication Equipment)
이 기기는 가정용(B 급) 전자파적합기기로서 주
로 가정에서 사용하는 것을 목적으로 하며, 모든
지역에서 사용할 수 있습니다.
해당 무선설비는 전파혼신 가능성이 있으므로 인명안전과 관련된 서비스는 할
수 없음
This equipment is suitable for home use (Class B) and can be used in all
areas. The radio equipment may not be able to provide services related to
personal safety due to possible radio interference.
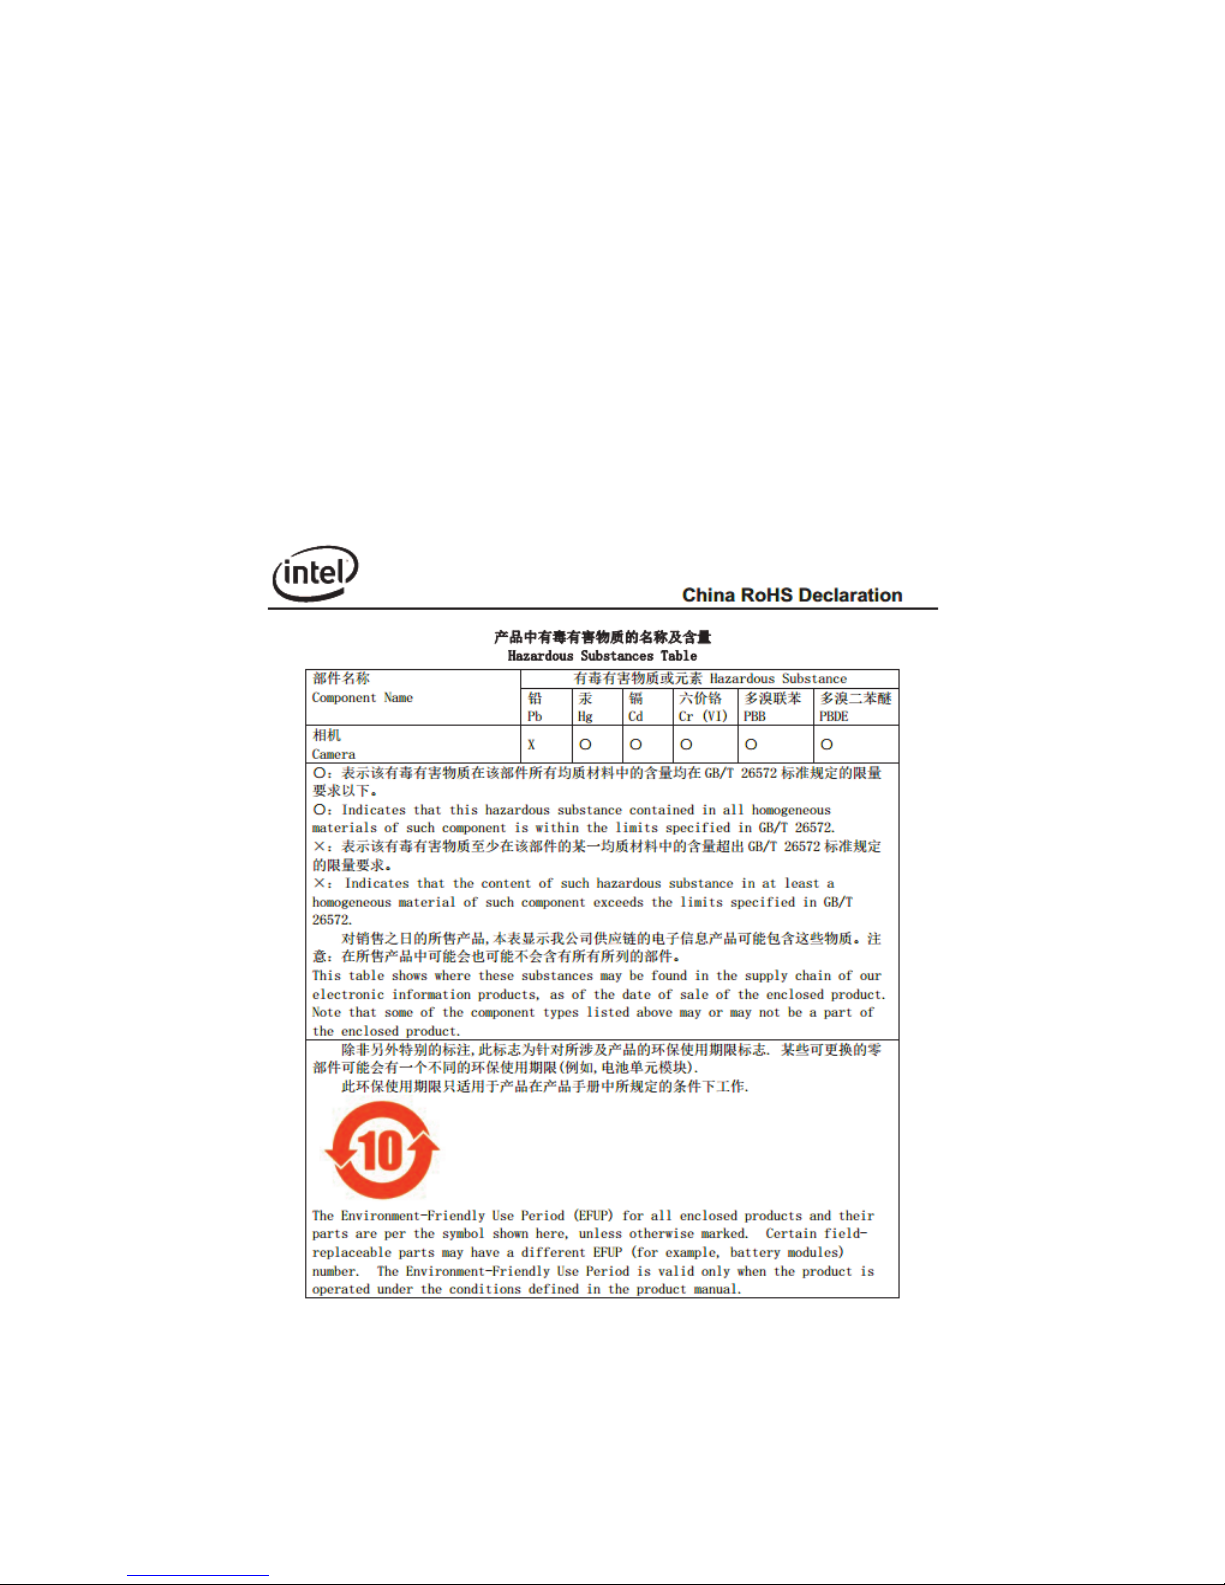
Notice for China
Page 20

Document: CCS-G003-UM-001 Revision: Feb 2017
Manufacturer Information
Manufactured by Intel Corporation
2200 Mission College Blvd., Santa Clara, CA 95054 USA
Intel® Euclid™ Development Kit, Model CCS-G003, mm# 956912
Ubuntu® is a registered trademark of Canonical Ltd.
Wi-Fi® is a registered trademark of the Wi-Fi Alliance.
Bluetooth® is a registered trademark of Bluetooth SIG, Inc.
HDMI®is a registered trademark of HDMI Licensing Administrator, Inc.
USB® is registered trademark of USB Implementers Forum, Inc.
Note:
中文版用户手册请见:
Mode d'emploi disponible en français :
Auf Deutsch verfügbares Benutzerhandbuch:
日本語のユーザーマニュアルは以下から入手できます:
한국어 설명서:
Manual de usuario disponible en español:
http://click.intel.com
Intel® Euclid™ Development Kit
featuring:
Note:
For additional support, please see:
https://communities.intel.com/community/tech/realsense
 Loading...