

Page 1
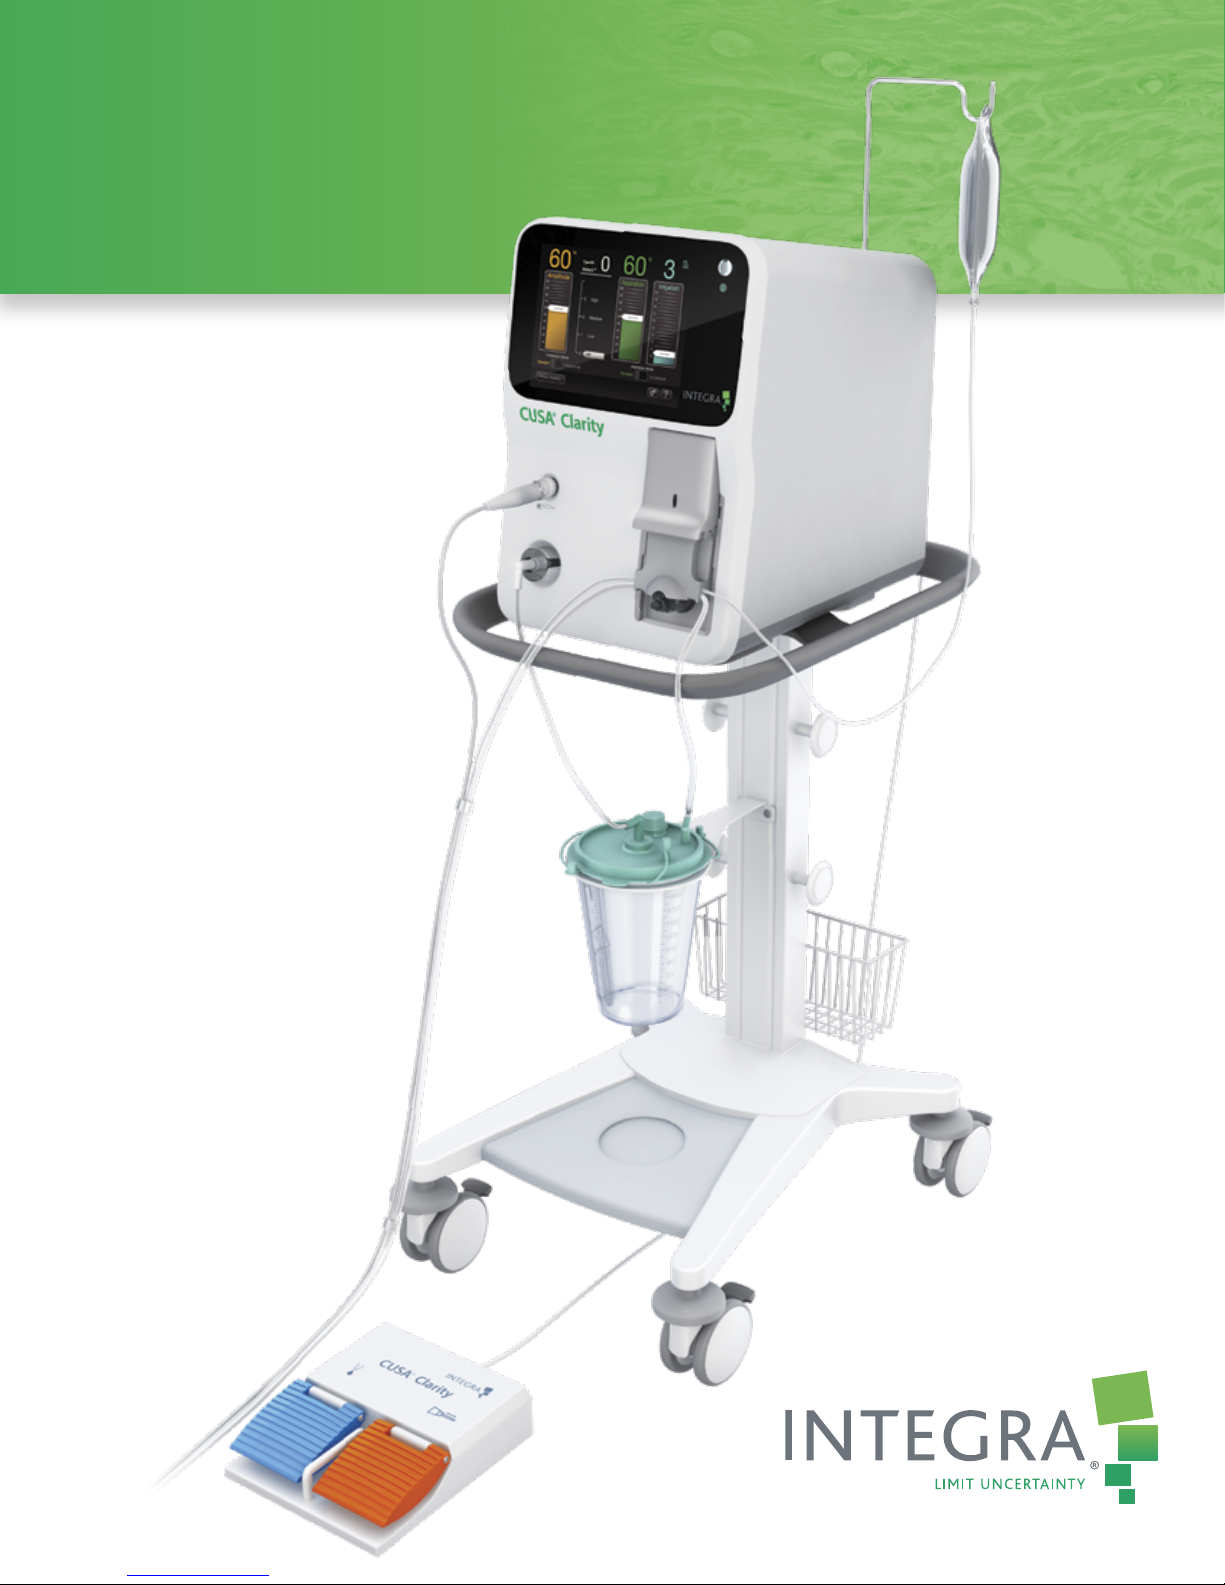
Integra® CUSA® Clarity
Ultrasonic Surgical Aspirator System
Cleaning Instruction Guide
Page 2

Integra® CUSA® Clarity – Ultrasonic Surgical Aspirator System
Disassembling, Cleaning, and Sterilizing the System
PREFACE
Intended Audience
This cleaning instruction guide and the equipment it describes are for use only by qualified medical professionals trained in the particular technique and surgical procedure to be performed. It is intended as a guide for cleaning the CUSA® Clarity Ultrasonic Surgical
Aspirator System only.
CAUTION
Federal (USA) law restricts this device to
sale by or on the order of a physician.
Overview
This section describes how to disassemble the system and clean the console, handpiece, and components.
Page 3
Disassembling the System
CUSA® Clarity Items to Keep and Discard Aer a Surgical Procedure
Keep Discard
Handpiece Nosecone
Contamination Guard Flue
EUTs (with less than 5 uses) EUTs (aer 5 uses)
Torque Base Tip Stylet
Footswitch Torque Wrench
Power Cord
Sterilization Tray Aspiration Canister
CUSA Quick Connect™
Cartridge and Tubing Set
Irrigation Supply
Specimen Trap (if used)
Single Use Tip
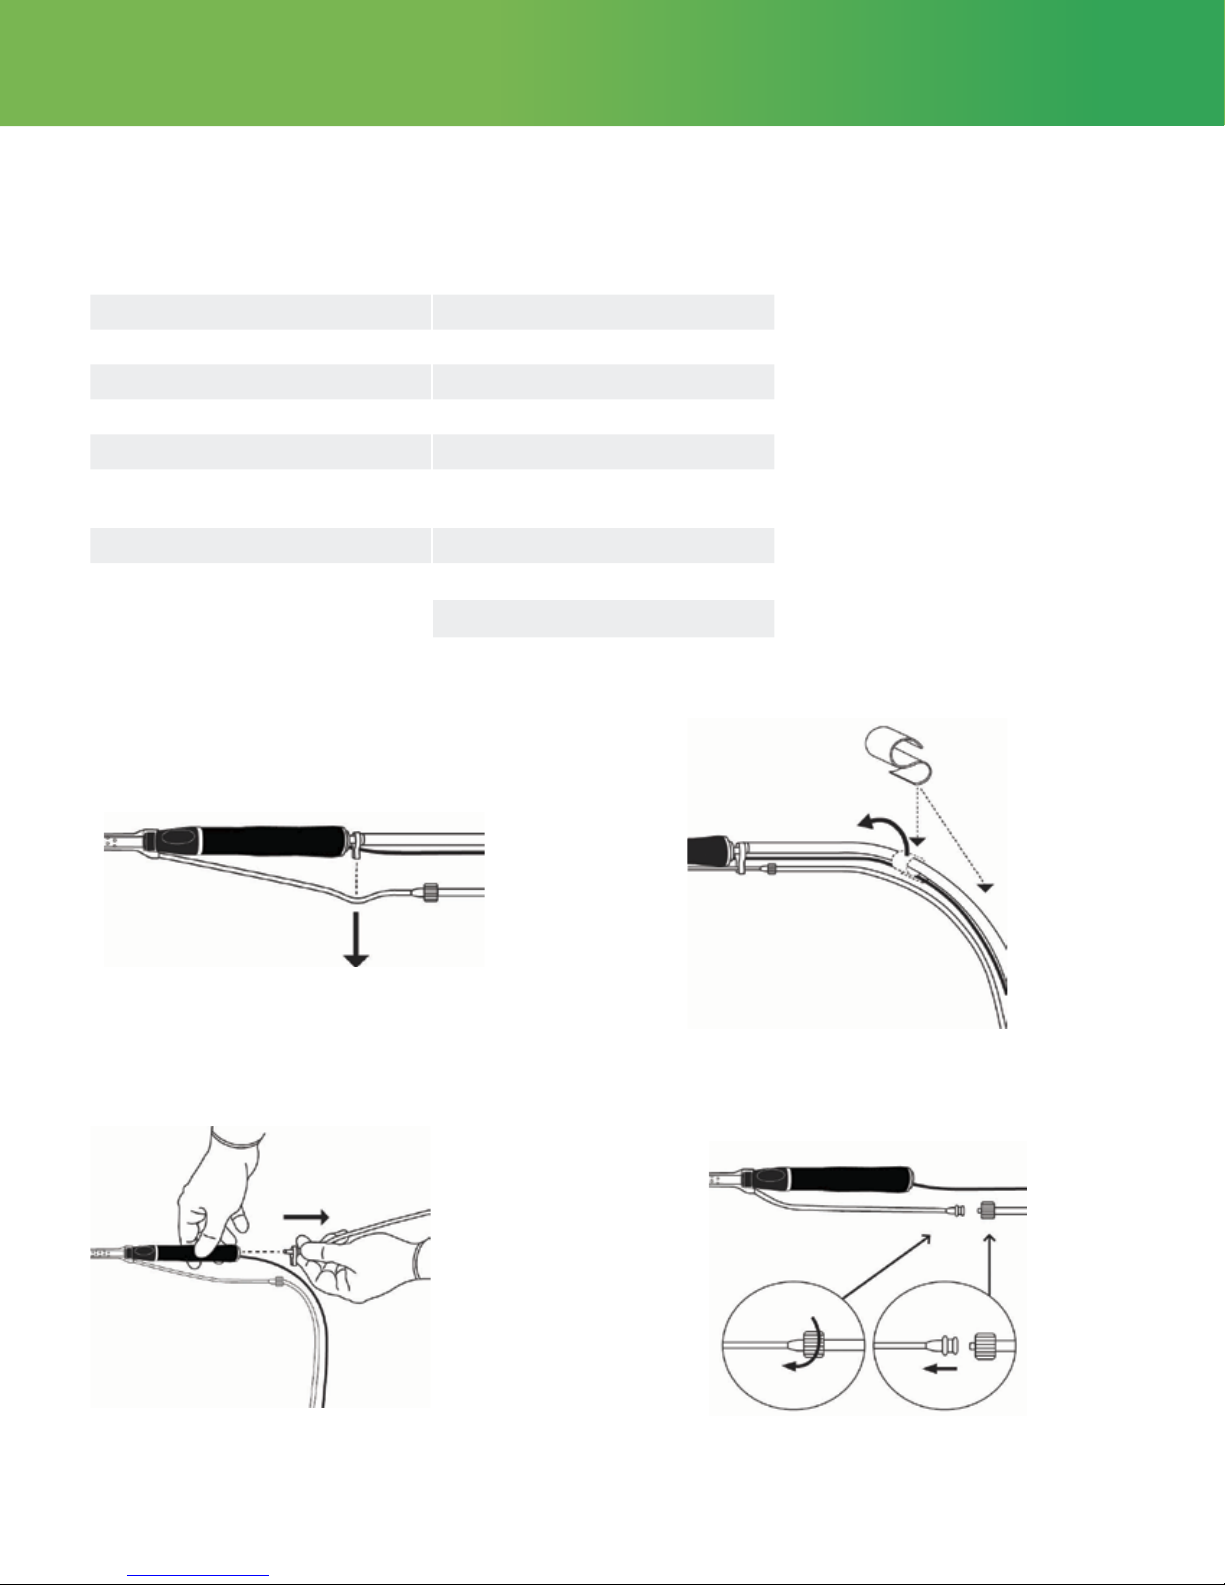
Disassembling the Handpiece
1. Remove the irrigation tubing from the clip at the
base of the handpiece.
2. Remove the handpiece cable from the aspiration
tubing clips.
3. Remove the aspiration tubing from the aspiration
port at the base of the handpiece.
4. Remove the irrigation tubing from the Luer fiing
on the handpiece flue.
2
Page 4

Integra® CUSA® Clarity – Ultrasonic Surgical Aspirator System
Disassembling, Cleaning, and Sterilizing the System
5. Slide the flue off of the nosecone base along the tip. 6. Twist off the nosecone counter-clockwise until it unlocks.
7. Slide the nosecone off the tip.
9. Hold the handpiece in the base and place the torque
wrench (color side towards handpiece) over the tip.
To avoid product damage, always use the torque base
CAUTION
to hold the handpiece while using the torque wrench to
tighten or loosen the tip. Avoid over torqueing the tip.
8. Place the handpiece on the torque base as shown and make
sure that the 2 flat metal sides fit snugly in the metal slot at
the end of the base.
10. Rotate the torque wrench counter-clockwise.
11. Unthread the tip from the handpiece connecting
body by turning the tip counter-clockwise by hand.
12. Discard the items (listed in the table in “CUSA® Clarity Items to Keep and Discard Aer a Surgical Procedure” on page 2)
in compliance with hospital policy for contaminated waste.
3
Page 5

Disassembling the Console
1. Detach the aspiration tubing from the patient port on the
canister.
The contamination guard should not be removed
NOTE
3. Open cartridge door, if necessary press the pinch valve
buon, and remove the cartridge from the console by
sliding it up.
from the console unless it is time to replace it
(every six months or when the color changes).
2. Disconnect the contamination guard tubing
from the vacuum port of the canister.
4. Detach the handpiece cable from the console by
gently pulling on the handpiece cable connector in
the handpiece port on the front of the console.
5. Unplug the power cord from the wall receptacle
and the console.
7. Discard the used/contaminated items in compliance with hospital policy for contaminated waste.
Please reference the table “CUSA® Clarity Items to Keep and Discard Aer a Surgical Procedure” on page 2.
6. Disconnect the footswitch cable connector from
the back of the console.
4
Page 6

Integra® CUSA® Clarity – Ultrasonic Surgical Aspirator System
Disassembling, Cleaning, and Sterilizing the System
Detaching the Contamination Guard
NOTE
1. Detach the handpiece cable from the console by gently pulling on
the handpiece cable connector in the handpiece port on the front
of the console.
2. Discard the contamination guard in compliance with hospital policy
for contaminated waste.
The contamination guard should not be removed from the console unless
it is time to replace it (every six months or when the color changes).
Powering Down the System
Press the Power buon on the front of the console. The touchscreen will go dark. Do not unplug power cord until system has powered down.
Cleaning the System
WARNING
Electric Shock Hazard - Always unplug
the CUSA Clarity System before cleaning it.
CAUTION
Product damage may result if you do not follow the
instructions described in the cleaning section.
Cleaning the Touchscreen
Make sure the console is unplugged before cleaning it. Clean the touch screen with a lint-free wipe and a cleaner, such as window/
glass cleaner, eyeglass cleaner, or a quaternary ammonia disinfectant.
NOTE
Do not wipe the touch screen with a sponge
because it may scratch the surface.
NOTE
Never apply cleaner directly to the touch screen.
Cleaning the Console and Cart
1. Unplug the power cord from the wall receptacle and the console.
2. Clean the surface with a lint-free wipe soaked with one of the following:
• 70% IPA
• Super Sani-Cloth®
• Sani-Cloth® Bleach
3. Make sure the surfaces remain visibly wet for a minimum of two (2) minutes, then air dry.
4. Clean the wheels at the base of the system cart to ensure that the four anti-static wheels function correctly.
WARNING
Do not allow fluids to enter the console.
NOTE
Make sure that the surface of the wheels is free
from dirt and dust. Make sure that the surface is
completely dry before using the system again.
5
Page 7

Cleaning the Handpiece, EUT, and Torque Base
The handpiece, extended use tips, and torque base may be cleaned by either the manual cleaning or autowash cycle process prior to
sterilization. For Sterlization Parameter, see “Sterilizing the System” on page 8 .
Manual Cleaning
1. Use the provided cleaning brush to clean out the internal channels of both the handpiece and tip. Continue to pass the brush
through the tip and handpiece until it comes out clean.
NOTE
2. Clean the exterior of the handpiece and tip with a lint free cloth soaked with warm water and a non-alkaline detergent.
3. Use the cloth to manually clean the junction where the tip aaches.
4. Rinse the entire handpiece and tip thoroughly with water and dry with a so cloth.
Make sure to keep the handpiece cable connector dry.
Autowash Cycle:
Before auto washing, use the provided cleaning brush to thoroughly clean the internal channels of the handpiece and tip. Continue
to pass the brush through the tip and handpiece until it comes out clean.
In a Steelco DS50 DRS or equivalent washer/disinfector, perform a prewash cycle of 5 minutes, then clean using a 1% solution of
alkaline detergent (neodisher® MediClean forte or equivalent, final pH between 10.0-11.5) for 10 minutes at 60°C (140°F), disinfect for
10 minutes at 93°C (199.4°F), and dry for 20 minutes.
Cleaning the Footswitch
1. Disconnect the footswitch from the console.
2. Wipe it clean.
3. If the footswitch is contaminated with blood or fluid:
a. Immerse the footswitch in warm water containing
detergent or disinfectant.
b. Rinse the footswitch with clean water.
NOTE
4. Allow the footswitch to drain aer rinsing.
Make sure to keep the connector dry.
Sterilization Tray Cleaning
Use a neutral detergent to clean the tray.
NOTE
Do not clean the sterilizer tray with
abrasives. Product damage will result.
6
Page 8

Integra® CUSA® Clarity – Ultrasonic Surgical Aspirator System
Disassembling, Cleaning, and Sterilizing the System
Sterilizing the System
Packaging the Handpiece and Components for Sterilization
The handpiece and components need to be packaged for sterilization.
Integra provides a sterilization tray for steam sterilization of the CUSA Clarity handpiece. This tray protects the handpiece during sterilization and during transfer to the sterile field. The handpiece and components must be cleaned prior to sterilization, see “Cleaning
the Handpiece, EUT, and Torque Base” on page 6.
Sterilization Tray Layout
➁
➂ ➃
➄➅
➆
➀
1 Handpiece
2 Handpiece Cable Posts
3 Handpiece Connector
4 Nosecone
5 Flue and Stylet
6 Torque Base
7 EUT Slots (3)
8 Lid (Not shown)
Most Common Sterilization Tray Configuration EUT Sterilization Tray Configuration
1. Place the handpiece in the appropriate slot ➀ and align it with the outline on the boom of the tray.
2. Wrap the handpiece cable around the posts ➁.
3. Place the handpiece connector in the appropriate slot ➂ and align it with the outline on the boom of the tray.
4. Optional. Place the nosecone in the appropriate slot ➃ and align it with the outline on the boom of the tray.
5. Optional. Place the flue ➄ anywhere on the boom of the tray.
6. Place the torque base in the appropriate slot ➅ and align it with the outline on the boom of the tray.
7. Optional. Place the Extended Use Tips (up to 3) in the appropriate slots ➆ and align them with the outline on the boom of the tray.
8. Put on the lid ➇ on the sterilizer tray.
9. Close and latch the lid.
7
Page 9

Sterilization Parameters
The CUSA Clarity handpiece and components must be sterilized with steam.
Sterilization Tray Packaging
The handpiece and components can be packaged in the sterilization tray either:
• Wrapped—Sterilization tray double wrapped in hospital CSR material
• Flash (Unwrapped)—Sterilization tray unwrapped
The cycles below are acceptable for sterilizing the CUSA Clarity handpiece and components:
Packaging Temperature Type Time Dry Cycle
132˚C (269.6˚F) Prevac 4 min 30 min
Wrapped
Flash (Unwrapped) Prevac 4 min None
134˚C (273.2˚F) Prevac 3 min 30 min
134˚C (273.2˚F) Prevac 18 min 30 min
Sterilizing the Handpiece and Components with Steam
Sterilizing the handpiece with steam depends on the following factors:
• Temperature
• Exposure time
• Population and resistance of resident bioburden
• Method of air removal from the autoclave
Use the validated steam sterilization cycle parameters in these instructions. If you deviate from this recommended method of sterilizing, it is your Health Care Facility’s responsibility to validate the deviation. For sterilizing the handpiece with steam, do not exceed
134°C (273.2°F).
CAUTION
Do not use sterilization methods involving temperatures in
excess of 134ºC (273.2°F) as this may damage the handpiece.
8
Page 10

Integra® CUSA® Clarity – Ultrasonic Surgical Aspirator System
Disassembling, Cleaning, and Sterilizing the System
Sterilization of Handpieces and Accessories
You must sterilize the CUSA Clarity handpiece with steam before use. Some of the CUSA Clarity system accessories are sterile,
single-use items. Other accessories are reusable. You must sterilize all reusable accessories with steam before use.
The table below describes the sterilization requirements for the handpiece and accessories. For information on the sterilization
parameters and sterilization procedure for the handpieces and accessories, see “Assembling the System Prior to Use” on page 6-1.
Item Initially Sterile
Handpiece No Yes 200 Steam
Torque Base No Yes 200 Steam
Torque Wrench Yes No Single Use Not Applicable
CUSA Quick Connect
artridge and Tubing Set
Single Use Tip Pack (all items) Yes No
EUT Tip Pack (all items) No
Yes No Single Use Not Applicable
Reusable/Requires
Sterilization by the User
Tip: Yes
All other items:
No (not reusable; but
require sterilization
prior to use)
Validated Number
of Sterilizations Cycle
Single Use -
One time prior to use
5 (EUT tip only)
Flue, stylet and
nosecone one time prior to use
Sterilization Method
Steam
Steam
WARNING
9
Single-use devices are for single patient use only. Do not reprocess or re-use.
Page 11

10
Page 12

Integra® CUSA® Clarity – Ultrasonic Surgical Aspirator System
Disassembling, Cleaning, and Sterilizing the System
Availability of these products might vary from a given country or region to another, as a result of specific local regulatory approval or clearance requirements for sale in such country or region.
n
Non contractual document. The manufacturer reserves the right, without prior notice, to modify the products in order to improve their quality.
n
Warning: Applicable laws restrict these products to sale by or on the order of a physician.
n
Consult product labels and inserts for any indication, contraindications, hazards, warnings, precautions, and instructions for use.
For more information or to place an order, please contact:
United States, Canada, Asia, Pacific, Latin America
USA 800-654-2873
International +1 609-936-5400
integralife.com/contact
Integra, the Integra logo, and CUSA are regist ered trademark s of Integra Life Sciences Corporation or its subsidiar ies in the United St ates and/or other countries. CUSA Quick Connect
is a trademark of Integra LifeSciences Corporation or its subsidiaries. Sani-Cloth is a re gistered trademark of Professional Disposables International, Inc. neodisher is a trademark
of Chemische Fabrik Dr. Weigert GmbH & Co. KG. All other trademarks and trade names are the property of their re spective owners. ©2018 Integra LifeScience s Corporation.
All right s reserved. Printe d in USA. 0M 0932889-1-EN
n
888-980-7742 fax
n +1 609-750-4259 fax
Manufacturer:
Integra LifeSciences (Ireland) Limited
IDA Business &Technology Park
Sragh
Tullamore
County Offaly
Ireland
 Loading...