

Page 1
Final Trim Size: 5.512 x 8.268 in. (140 x 210 mm)
V2
FINAL
FOR PRINT
NS-RC50SS9_NS-RC50SS9-C_18-0469_MAN_V2_EN.fm Page 1 Tuesday, July 31, 2018 2:41 PM
USER GUIDE
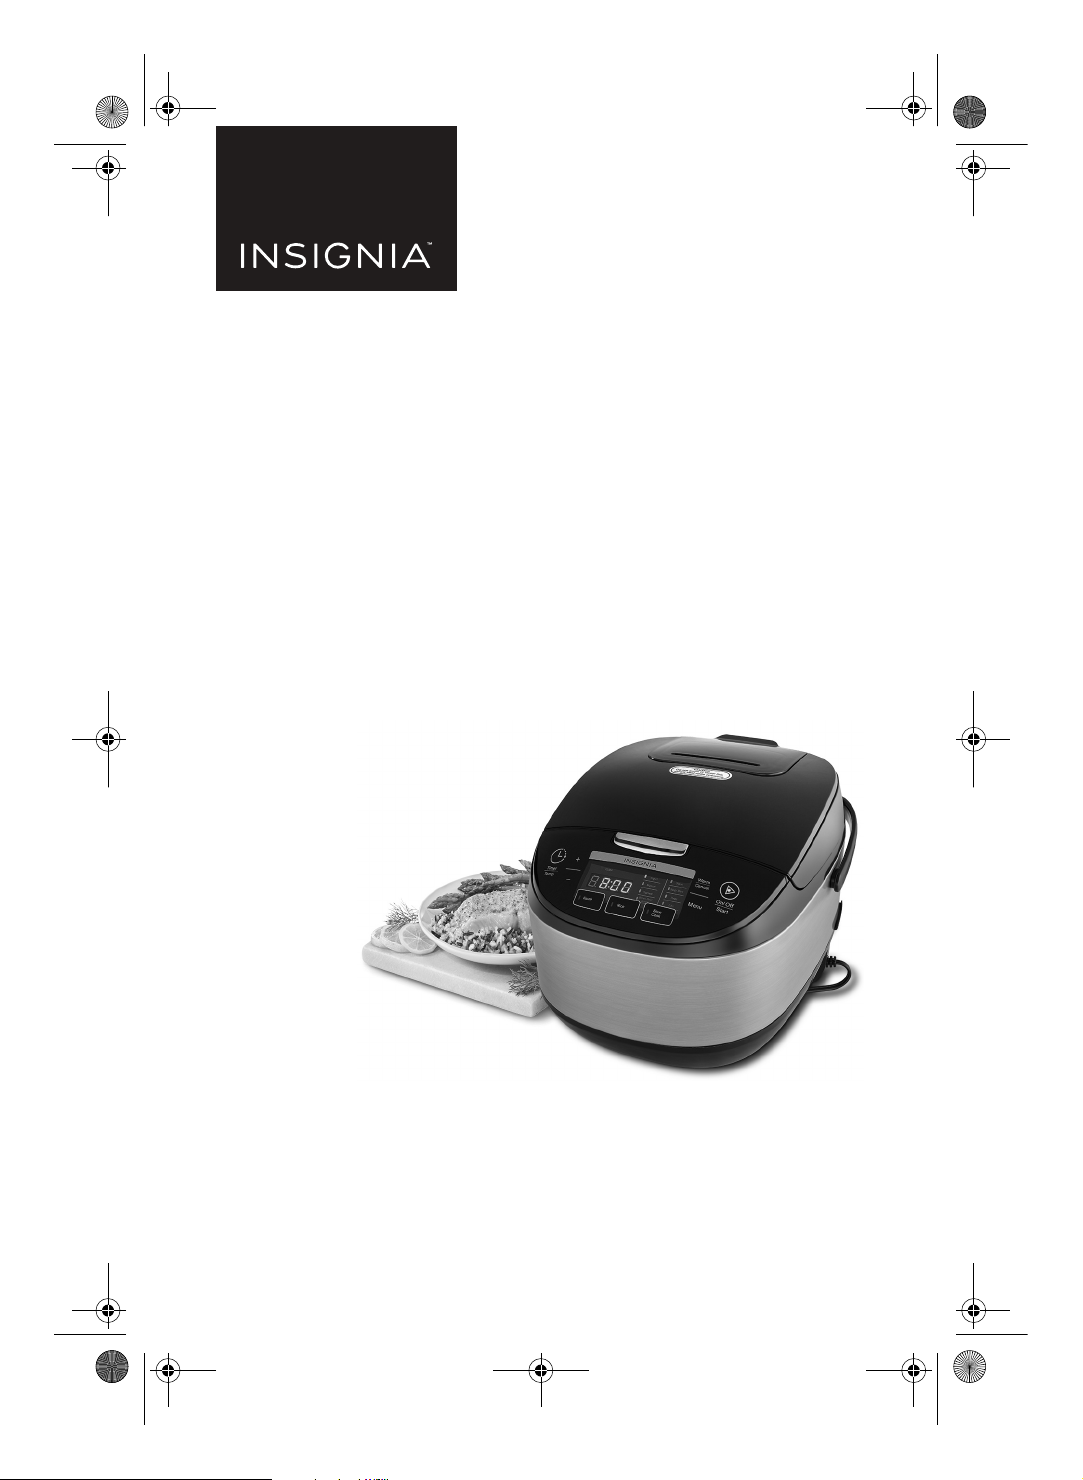
5.2 Qt Multi-Function Digital
Rice Cooker
NS-RC50SS9/NS-RC50SS9-C
Before using your new product, please read these instructions to prevent any damage.
Page 2

NS-RC50SS9_NS-RC50SS9-C_18-0469_MAN_V2_EN.fm Page 2 Tuesday, July 31, 2018 2:41 PM
Contents
Introduction . . . . . . . . . . . . . . . . . . . . . . . . . . . . . . . . . . . . . . . . . . . . . . . . . . . . . . . . . . . .2
IMPORTANT SAFEGUARDS . . . . . . . . . . . . . . . . . . . . . . . . . . . . . . . . . . . . . . . . . . . . . . .3
Short cord instructions . . . . . . . . . . . . . . . . . . . . . . . . . . . . . . . . . . . . . . . . . . . . . . 4
About the power cord. . . . . . . . . . . . . . . . . . . . . . . . . . . . . . . . . . . . . . . . . . . . . . . 4
Features . . . . . . . . . . . . . . . . . . . . . . . . . . . . . . . . . . . . . . . . . . . . . . . . . . . . . . . . . . . . . . . .4
Package contents . . . . . . . . . . . . . . . . . . . . . . . . . . . . . . . . . . . . . . . . . . . . . . . . . . . 4
Components. . . . . . . . . . . . . . . . . . . . . . . . . . . . . . . . . . . . . . . . . . . . . . . . . . . . . . . . 5
Control panel . . . . . . . . . . . . . . . . . . . . . . . . . . . . . . . . . . . . . . . . . . . . . . . . . . . . . . . 6
Accessories . . . . . . . . . . . . . . . . . . . . . . . . . . . . . . . . . . . . . . . . . . . . . . . . . . . . . . . . . 7
Using your cooker . . . . . . . . . . . . . . . . . . . . . . . . . . . . . . . . . . . . . . . . . . . . . . . . . . . . . . .7
Preparing to cook . . . . . . . . . . . . . . . . . . . . . . . . . . . . . . . . . . . . . . . . . . . . . . . . . . .7
Using the cooking pot. . . . . . . . . . . . . . . . . . . . . . . . . . . . . . . . . . . . . . . . . . . . . . . 7
Cooking rice . . . . . . . . . . . . . . . . . . . . . . . . . . . . . . . . . . . . . . . . . . . . . . . . . . . . . . . . 8
Cooking brown rice and quinoa . . . . . . . . . . . . . . . . . . . . . . . . . . . . . . . . . . . . . 9
Steaming food . . . . . . . . . . . . . . . . . . . . . . . . . . . . . . . . . . . . . . . . . . . . . . . . . . . . . .9
Cooking pasta . . . . . . . . . . . . . . . . . . . . . . . . . . . . . . . . . . . . . . . . . . . . . . . . . . . . .10
Cooking soups and stews . . . . . . . . . . . . . . . . . . . . . . . . . . . . . . . . . . . . . . . . . .11
Cooking oatmeal. . . . . . . . . . . . . . . . . . . . . . . . . . . . . . . . . . . . . . . . . . . . . . . . . . .11
Making cakes . . . . . . . . . . . . . . . . . . . . . . . . . . . . . . . . . . . . . . . . . . . . . . . . . . . . . .12
Sautéing. . . . . . . . . . . . . . . . . . . . . . . . . . . . . . . . . . . . . . . . . . . . . . . . . . . . . . . . . . .12
Making yogurt . . . . . . . . . . . . . . . . . . . . . . . . . . . . . . . . . . . . . . . . . . . . . . . . . . . . .13
Slow cooking . . . . . . . . . . . . . . . . . . . . . . . . . . . . . . . . . . . . . . . . . . . . . . . . . . . . . .13
Using the manual cooking mode . . . . . . . . . . . . . . . . . . . . . . . . . . . . . . . . . . .14
Setting a delayed completion time . . . . . . . . . . . . . . . . . . . . . . . . . . . . . . . . .14
Using the temperature preservation mode. . . . . . . . . . . . . . . . . . . . . . . . . .15
Maintaining your cooker. . . . . . . . . . . . . . . . . . . . . . . . . . . . . . . . . . . . . . . . . . . . . . . .15
Cleaning the cooking pot and outer body. . . . . . . . . . . . . . . . . . . . . . . . . . .15
Cleaning the cooker’s interior . . . . . . . . . . . . . . . . . . . . . . . . . . . . . . . . . . . . . .16
Cleaning the cover plate . . . . . . . . . . . . . . . . . . . . . . . . . . . . . . . . . . . . . . . . . . .17
Cleaning the steam valve. . . . . . . . . . . . . . . . . . . . . . . . . . . . . . . . . . . . . . . . . . .18
Troubleshooting . . . . . . . . . . . . . . . . . . . . . . . . . . . . . . . . . . . . . . . . . . . . . . . . . . . . . . .20
Specifications . . . . . . . . . . . . . . . . . . . . . . . . . . . . . . . . . . . . . . . . . . . . . . . . . . . . . . . . . .21
ONE-YEAR LIMITED WARRANTY . . . . . . . . . . . . . . . . . . . . . . . . . . . . . . . . . . . . . . . . .22
Introduction
Congratulations on your purchase of a high-quality Insignia product. Your
NS-RC50SS9 or NS-RC50SS9-C represents the state of the art in rice cooker and
steamer design and is designed for reliable and trouble-free performance.
2
www.insigniaproducts.com
Page 3

NS-RC50SS9_NS-RC50SS9-C_18-0469_MAN_V2_EN.fm Page 3 Tuesday, July 31, 2018 2:41 PM
5.2 Qt Multi-Function Digital Rice Cooker
IMPORTANT SAFEGUARDS
When using your cooker, always follow basic precautions, including the following:
READ ALL INSTRUCTIONS BEFORE
USING
1 Do not touch hot surfaces. Use the handles or knobs.
2 Use only on a level, dry, and heat-resistant surface.
3 To protect against fire, electric shock, and injury to persons, do not immerse
the cord, plug, or your cooker in water or any other liquid. See instructions for
cleaning.
4 Close supervision is necessary when you use your cooker by or near children.
5 Unplug your cooker from the outlet when not in use and before cleaning. Let
your cooker cool before removing or replacing parts and before cleaning.
6 Do not operate your cooker with a damaged cord or plug or after your cooker
malfunctions or has been damaged in any manner. Contact customer service
for examination, repair, or adjustment.
7 The use of accessory attachments not recommended by the manufacturer
may result in fire, electrical shock, or injury.
8 Do not use outdoors.
9 Household use only.
10 Do not immerse in water.
11 Do not let the cord touch hot surfaces or hang over the edge of a counter or
table.
12 Do not place on or near a hot gas or electric burner or in a heated oven.
13 Your cooker is intended for household use on a countertop.
14 Do not use your cooker for anything other than its intended purpose.
15 Use extreme caution when moving your cooker containing rice or liquids.
16 Do not touch, cover, or obstruct the steam vent on the top of your cooker as it
is extremely hot and may cause scalding.
17 Use only with a 120V AC power outlet. Never use an outlet below the counter.
18 Always unplug by gripping the electrical plug. Never pull on the cord.
19 Your cooker should be operated on a separate electrical circuit from other
operating cookers. If the electrical circuit is overloaded with other appliances,
your cooker may not operate properly.
20 Always make sure that the outside of the inner cooking pot is dry prior to use.
If the inner pot is returned to your cooker when wet, it may damage or cause
your cooker to malfunction.
21 Use extreme caution when opening the lid during or after cooking. Hot steam
can escape and cause scalding.
22 Rice should not be left in the inner cooking pot with the temperature
preservation mode on for more than 12 hours.
www.insigniaproducts.com
3
Page 4

NS-RC50SS9_NS-RC50SS9-C_18-0469_MAN_V2_EN.fm Page 4 Tuesday, July 31, 2018 2:41 PM
NS-RC50SS9/NS-RC50SS9-C
23 To prevent damage or deformation, do not use the inner cooking pot on a
stovetop or burner.
24 Intended for countertop use only.
25 WARNING: Spilled food can cause serious burns. Keep your cooker and cord
away from children. Never drape cord over edge of counter, never use outlet
below counter, and never use with an extension cord.
26 To disconnect, turn off any control, then remove the plug from the wall outlet.
27 CAUTION: To reduce the risk of electrical shock, cook only in the removable
cooking pot provided.
28 CAUTION: Your cooker is not intended for deep frying foods.
29 WARNING: Do not use the handle to move the cooker when any food is in it.
Short cord instructions
A short power cord is provided to reduce the risks of entanglement or tripping.
Never use an extension cord.
SAVE THESE INSTRUCTIONS
About the power cord
Your cooker has a polarized plug (one blade is wider than the other). To reduce the
risk of electric shock, this plug is intended to fit into a polarized outlet only one
way. If the plug does not fit fully into the outlet, reverse the plug. If it still does not
fit, contact a qualified electrician. Do not attempt to modify the plug in any way.
Features
• 12 preset functions including Sauté, Rice, Slow Cook, Yogurt, Manual, Oatmeal,
Brown Rice/Quinoa, Steam, Soup/Stew, Pasta, Cake, and Keep Warm.
• Delay timer ensures that your food will be ready on time
• Keep warm setting maintains your food at an ideal serving temperature
• 5.2-quart capacity holds up to 20 cups of cooked rice measured with the
included measuring cup
• Dishwasher-safe, nonstick pot makes cleanup easy
• Steamer basket lets you cook multiple foods at the same time
Package contents
• 5.2 Qt Multi-Function Digital Rice Cooker
• Cooking pot
• Serving spatula
• Soup ladle
• Measuring cup (3/4 C capacity)
• Steamer basket
• User Guide
4
www.insigniaproducts.com
Page 5

NS-RC50SS9_NS-RC50SS9-C_18-0469_MAN_V2_EN.fm Page 5 Tuesday, July 31, 2018 2:41 PM
5.2 Qt Multi-Function Digital Rice Cooker
Components
Upper housing
Lid release
Control panel
Handle
Outer body
Power cord
www.insigniaproducts.com
5
Page 6

NS-RC50SS9_NS-RC50SS9-C_18-0469_MAN_V2_EN.fm Page 6 Tuesday, July 31, 2018 2:41 PM
NS-RC50SS9/NS-RC50SS9-C
Control panel
# ITEM FUNCTION
Timer/Temp button Adjusts the cooking time for a preset cooking mode.
1
+ and – buttons Increases or decreases the cooking time or
2
Display Displays the cook time, delay time, temperature
3
Sauté Selects the sauté mode. See
4
5 Rice
6 Slow Cook
7 Menu options list
8 Menu button Accesses the menu options list.
9 Warm/Cancel button
10 On/Off/Start button
Adjusts the temperature for manual cooking mode.
temperature.
preservation time, and other messages.
Sautéing on page 12.
Selects the rice mode. See
Selects the slow cook mode. See
page 13.
Selects a cooking mode. You can select:
• Yogurt (see
• Manual (see Using the manual cooking mode on
page 14)
• Oatmeal (see Cooking oatmeal on page 11)
• Brown Rice/Quinoa (see Cooking brown rice and
quinoa on page 9)
• Steam (see Steaming food on page 9)
• Soup/Stew (see Cooking soups and stews on
page 11)
• Pasta (see Cooking pasta on page 10)
• Cake (see Making cakes on page 12)
Turns the temperature preservation mode on or off.
See
Using the temperature preservation mode on
page 15.
Turns your cooker on (Standby mode) and off (ECO
mode). When a cooking mode is selected, starts
cooking.
Making yogurt on page 13)
Cooking rice on page 8.
Slow cooking on
6
www.insigniaproducts.com
Page 7

NS-RC50SS9_NS-RC50SS9-C_18-0469_MAN_V2_EN.fm Page 7 Tuesday, July 31, 2018 2:41 PM
5.2 Qt Multi-Function Digital Rice Cooker
Accessories
Serving spatula Measuring cupSoup ladle Steamer basket
Using your cooker
Preparing to cook
• Read all instructions and important safeguards.
• Remove all packaging materials and make sure that all items are in good
condition.
• Tear up all plastic bags because they can pose a risk to children.
• Remove the inner cooking pot from your cooker, then wash it and the
accessories with warm, soapy water. Rinse and dry thoroughly.
CAUTION: Do not use abrasive cleaners or scouring pads. They can damage
your cooker.
• Wipe the body clean with a damp cloth.
• Do not immerse the cooker base, cord, or plug in water at any time.
• Plug the power cord into a power outlet.
Using the cooking pot
• Make sure that the outside of the cooking pot is clean and dry. If the outside of
the pot is wet, your cooker can be damaged or can malfunction.
Dry and clean Rotate to make good contact
• Place the cooking pot into your cooker, then slightly rotate the pot two or
three times to make sure that the pot bottom and the heating element in the
bottom of your cooker make good contact.
• Do not use the cooking pot on stoves. High temperatures can damage the pot.
• Do not use other containers in your cooker. Using other containers can
damage your cooker.
www.insigniaproducts.com
7
Page 8

NS-RC50SS9_NS-RC50SS9-C_18-0469_MAN_V2_EN.fm Page 8 Tuesday, July 31, 2018 2:41 PM
NS-RC50SS9/NS-RC50SS9-C
Cooking rice
1 Rinse the rice to remove the excess starch, then drain.
2 Make sure that the outside of the cooking pot is dry and free of debris, then
place it into your cooker.
3 Add the rice and water. Using the measuring cup that came with your cooker,
you can add between 2 and 10 cups of uncooked rice.
For information about the rice to water ratio, see
table on page 8.
4 Press the lid down until it clicks into place.
5 Turn on your cooker, then press the Rice button. The Rice light turns on.
6 Press the On/Off/Start button. The On/Off/Start and Rice lights stay on and a
running circle appears on the display. After cooking is complete, your cooker
enters the temperature preservation mode and 0 to 12 hours appear on the
display. When 12 appears on the display, your cooker goes into Standby mode.
7 Press the lid release to open your cooker.
8 Stir the rice with the serving spatula to distribute any remaining moisture.
9 Unplug your cooker when it is not in use.
Tips:
• If you misplace the measuring cup, use a 3/4 measuring cup.
• To add more flavor to the rice, try substituting a favorite meat or vegetable
broth or stock. The ratio of broth or stock to rice is the same as water to rice.
• For suggested rice to water ratios, see
Rice and water measurement table on
page 8.
Rice and water measurement
Rice and water measurement table
The cooking pot has scale marks inside to help you measure the amount of water
you need to add.
UNCOOKED RICE WATER/SCALE MARK COOKED RICE YIELD
2 measuring cups* Mark 2 4 cooker cups
3 measuring cups* Mark between 2 and 4 6 cooker cups
4 measuring cups* Mark 4 8 cooker cups
5 measuring cups* Mark between 4 and 6 10 cooker cups
6 measuring cups* Mark 6 12 cooker cups
7 measuring cups* Mark between 6 and 8 14 cooker cups
8 measuring cups* Mark 8 16 cooker cups
9 measuring cups* Mark between 8 and 10 18 cooker cups
10 measuring cups* Mark 10 20 cooker cups
*Use the provided measuring cup, which equals 3/4 the capacity of a standard
1-cup measuring cup.
8
www.insigniaproducts.com
Page 9

NS-RC50SS9_NS-RC50SS9-C_18-0469_MAN_V2_EN.fm Page 9 Tuesday, July 31, 2018 2:41 PM
5.2 Qt Multi-Function Digital Rice Cooker
Cooking brown rice and quinoa
1 Make sure that the outside of the cooking pot is dry and free of debris, then
place it into your cooker.
2 Add rice or quinoa and water to the cooking pot. For information about the
rice to water ratio, see Rice and water measurement table on page 8.
3 Press the lid down until it clicks into place.
4 Turn on your cooker, then press the Menu button repeatedly to select the
Brown Rice/Quinoa mode.
5 Press the On/Off/Start button. The On/Off/Start and Brown Rice/Quinoa
lights stay on and a running circle appears on the display. When the water is
almost absorbed, the countdown time appears on the display.
After cooking is complete, your cooker enters the temperature preservation
mode and 0 to 12 hours appear on the display. When 12 appears on the
display, your cooker goes into Standby mode.
6 Press the lid release to open your cooker.
7 Stir the rice with the serving spatula to distribute any remaining moisture.
8 Unplug your cooker when it is not in use.
Steaming food
1 Make sure that the outside of the cooking pot is dry and free of debris, then
place it into your cooker.
2 Add water up to the number 2 scale mark inside the pot.
3 Place the steamer basket in the pot, then place the food you want to steam in
steamer basket.
4 Press the lid down until it clicks into place.
5 Turn on your cooker, then press the Menu button repeatedly to select the
Steam mode.
6 If you want to change the cooking time, press the + or – button. The default
time is 5 minutes. You can select from 5 to 30 minutes. Each button press
changes the time by 1 minute.
7 Press the On/Off/Start button. The On/Off/Start and Steam lights stay on and
a running circle appears on the display.
When the water begins to boil, the countdown timer appears on the display.
After cooking is complete, your cooker enters the temperature preservation
mode and 0 to 12 hours appear on the display. When 12 appears on the
display, your cooker goes into Standby mode.
8 Press the lid release to open your cooker.
9 Unplug your cooker when it is not in use.
Tips:
• Keep the lid closed during the entire steaming process. Opening the lid
causes a loss of heat and steam, resulting in a slower cooking time. If you
need to open the lid, add a small amount of water to help restore the
cooking time.
• Altitude, humidity, and outside temperature affect cooking times.
• Frozen vegetables take longer to cook.
• Since most vegetables only absorb a small amount of water, there is no
need to increase the amount of water with a larger serving of vegetables.
www.insigniaproducts.com
9
Page 10

NS-RC50SS9_NS-RC50SS9-C_18-0469_MAN_V2_EN.fm Page 10 Tuesday, July 31, 2018 2:41 PM
NS-RC50SS9/NS-RC50SS9-C
Vegetable steaming guide
The cooking pot has scale marks inside to help you measure the amount of water
you need to add.
VEGETABLE WATER/SCALE MARK COOKING TIME
Asparagus Mark 2 7 minutes
Broccoli Mark 2 5 minutes
Cabbage, Carrots,
Cauliflower, or Corn
Mark 2
15 minutes
Eggplant Mark 2 15 minutes
Green Beans Mark 2 15 minutes
Peas, Spinach, Squash,
or Zucchini
Mark 2
7 minutes
Meat steaming guide
The cooking pot has scale marks inside to help you measure the amount of water
you need to add.
MEAT WATER/SCALE MARK COOKING TIME
SAFE
TEMPERATURE
Fish Mark 2 15 minutes 140°
Chicken Mark 2 20 minutes 165°
Pork Mark 2 20 minutes 160°
Beef Mark 2 Medium - 15 minutes 160°
Medium-Well - 20 minutes
Well - 23 minutes
Cooking pasta
1 Add water and salt to the pot. For information about the pasta to water ratio,
see Pasta and water measurement table on page 11.
2 Make sure that the outside of the cooking pot is dry and free of debris, then
place it into your cooker.
3 Turn on your cooker, then press the Menu button repeatedly to select the
Pasta mode
4 If you want to change the cooking time, press the + or – button. The default
time is 10 minutes. You can select from 10 to 35 minutes. Each button press
changes the time by 1 minute.
5 Press the lid down until it clicks into place.
6 Press the On/Off/Start button. The On/Off/Start and Rice lights stay on and a
running circle appears on the display.
When the water begins to boil, the countdown timer appears on the display.
10
www.insigniaproducts.com
Page 11

NS-RC50SS9_NS-RC50SS9-C_18-0469_MAN_V2_EN.fm Page 11 Tuesday, July 31, 2018 2:41 PM
5.2 Qt Multi-Function Digital Rice Cooker
7 Press the lid release to open your cooker.
8 Add the pasta, stir for one to two minutes, then close the lid.
After cooking is complete, your cooker enters the temperature preservation
mode and 0 to 12 hours appear on the display. When 12 appears on the
display, your cooker goes into Standby mode.
9 Press the lid release to open your cooker.
10 Unplug your cooker when it is not in use.
Pasta and water measurement table
WATER PASTA
2 cups 3.5 oz. (100g)
4 cups 7 oz. (200g)
6 cups 10.5 oz. (300g)
8 cups 14 oz. (400g)
Cooking soups and stews
1 Make sure that the outside of the cooking pot is dry and free of debris, then
place it into your cooker.
2 Place the soup or stew ingredients in the pot.
3 Press the lid down until it clicks into place.
4 Turn on your cooker, then press the Soup/Stew button. The Soup/Stew light
turns on.
5 If you want to change the cooking time, press the + or – button. The default
time is 2 hours. You can select from 2 to 4 hours. Each button press changes
the time by 30 minutes.
6 Press the On/Off/Start button. The On/Off/Start and Soup/Stew lights stay on
and the countdown timer appears on the display.
After cooking is complete, your cooker enters the temperature preservation
mode and 0 to 12 hours appear on the display. When 12 appears on the
display, your cooker goes into Standby mode.
7 Press the lid release to open your cooker.
8 Unplug your cooker when it is not in use.
Cooking oatmeal
1 Make sure that the outside of the cooking pot is dry and free of debris, then
place it into your cooker.
2 Place the oatmeal and water in the pot, according to your recipe.
3 Press the lid down until it clicks into place.
4 Turn on your cooker, then press the Menu button repeatedly to select the
Oatmeal mode. The Oatmeal light turns on.
www.insigniaproducts.com
11
Page 12

NS-RC50SS9_NS-RC50SS9-C_18-0469_MAN_V2_EN.fm Page 12 Tuesday, July 31, 2018 2:41 PM
NS-RC50SS9/NS-RC50SS9-C
5 Press the On/Off/Start button. The On/Off/Start and Oatmeal lights stay on
and the countdown timer appears on the display.
After cooking is complete, your cooker enters the temperature preservation
mode and 0 to 12 hours appear on the display. When 12 appears on the
display, your cooker goes into Standby mode.
6 Press the lid release to open your cooker.
7 Unplug your cooker when it is not in use.
Making cakes
1 Mix the cake ingredients ahead of time, stirring the cake into a paste. See
Example of baking ingredients and amounts on page 12.
2 Make sure that the outside of the cooking pot is dry and free of debris, then
place it into your cooker.
3 Lightly coat the inside of the pot with vegetable oil, then pour the cake
mixture in the pot.
4 Press the lid down until it clicks into place.
5 Turn on your cooker, then press the Menu button repeatedly to select the
Cake mode. The Cake light turns on.
6 Press the On/Off/Start button. The On/Off/Start light stay on, the Cake
flashes, and a running circle appears on the display.
After cooking is complete, your cooker enters the temperature preservation
mode and 0 to 12 hours appear on the display. When 12 appears on the
display, your cooker goes into Standby mode.
7 Press the lid release to open your cooker.
8 Unplug your cooker when it is not in use.
Example of baking ingredients and amounts
INGREDIENT AMOUNT
Egg 3
Milk 7 tbsp. (100 ml)
Vegetable oil 5 tbsp. (70 g)
Package of brownies About 13 oz. (380g)
Sautéing
The following example details how to use the sautéing feature.
1 Prepare the ingredients you want to sauté.
2 Make sure that the outside of the cooking pot is dry and free of debris, then
place it into your cooker.
3 Leave the lid open.
4 Press the Sauté button. The Sauté light turns on.
5 Press the On/Off/Start button. The On/Off/Start light turns on, the Sauté light
flashes, and a running circle appears on the display.
6 Pour the oil in the pot, and let it heat with the lid open for about five minutes.
12
www.insigniaproducts.com
Page 13

NS-RC50SS9_NS-RC50SS9-C_18-0469_MAN_V2_EN.fm Page 13 Tuesday, July 31, 2018 2:41 PM
5.2 Qt Multi-Function Digital Rice Cooker
7 When the oil is heated, add the prepared sauté ingredients and stir with the lid
open until they reach the desired color and consistency.
8 Optionally, you can continue to cook your ingredients in the sauté mode with
the lid closed.
9 Press the lid down until it clicks into place. Your cooker detects that the lid is
closed, and the Sauté light stays on and the countdown timer appears in the
display.
After cooking is complete, your cooker enters Standby mode.
10 Press the lid release to open your cooker.
11 Unplug your cooker when it is not in use.
Making yogurt
1 Heat milk to 180°F (82°C) in a sauce pan on a stovetop, stirring constantly to
prevent scalding.
2 Let the milk cool to 115°F (46°C) for approximately one to two hours.
3 Add the yogurt culture and stir mixture thoroughly.
4 Make sure that the outside of the cooking pot is dry and free of debris, then
place it into your cooker.
5 Pour the milk mixture into the cooking pot.
6 Press the lid down until it clicks into place.
7 Turn on your cooker, then press the Menu button repeatedly to select the
Yogurt mode. The Yogurt light turns on.
8 If you want to change the cooking time, press the + or – button. The default
time is 8 hours. You can select from 6 to 12 hours. Each button press changes
the time by 1 hour.
9 Press the On/Off/Start button. The On/Off/Start and Yogurt lights stay on and
the countdown timer appears on the display. When cooking is complete, your
cooker returns to Standby mode.
10 Press the lid release to open your cooker.
11 After incubation is complete, store the yogurt in an air tight container in the
refrigerator. Do not leave it in your cooker.
12 Unplug your cooker when it is not in use.
Slow cooking
1 Make sure that the outside of the cooking pot is dry and free of debris, then
place it into your cooker.
2 Place the food you want to cook in the pot.
3 Press the lid down until it clicks into place.
4 Turn on your cooker, then press the Slow Cook button.
5 If you want to change the cooking time, press the + or – button. The default
time is 2 hours. You can select from 2 to 10 hours. Each button press changes
the time by 1 hour.
www.insigniaproducts.com
13
Page 14

NS-RC50SS9_NS-RC50SS9-C_18-0469_MAN_V2_EN.fm Page 14 Tuesday, July 31, 2018 2:41 PM
NS-RC50SS9/NS-RC50SS9-C
6 Press the On/Off/Start button. The On/Off/Start and Slow Cook lights stay on
and the countdown timer appears on the display.
After cooking is complete, your cooker enters the temperature preservation
mode and 0 to 12 hours appear on the display. When 12 appears on the
display, your cooker goes into Standby mode.
7 Press the lid release to open your cooker.
8 Unplug your cooker when it is not in use.
Using the manual cooking mode
The manual cooking mode lets you set the cooking time and temperature.
1 Make sure that the outside of the cooking pot is dry and free of debris, then
place it into your cooker.
2 Place the food you want to cook in the pot.
3 Press the lid down until it clicks into place.
4 Turn on your cooker, then press the Menu button repeatedly to select the
Manual mode.
5 If you want to change the cooking time, press the + or – button. The default
time is 1 minute. You can select from 1 minute to 4 hours. Each button press
changes the time by 10 minutes.
6 Press the Timer/Temp button, then press the + or – button to select a
temperature. You can select 95°F (35°C), 105°F (40°C), 120°F (49°C), 140°F
(60°C), 160°F (71°C), 175°F (79°C), 195°F (90°C), 210°F (99°C), 230°F (110°C),
250°F (121°C), or 275°F (135°C). The default temperature is 95°F (35°C). The
temperature you selected appears on the display.
Note: When the cooking time is more than 2 hours, 250°F (121°C) and
275°F (135°C) are not available.
7 Press the On/Off/Start button. The On/Off/Start and Manual lights stay on
and a running circle appears on the display.
When your cooker reaches the temperature you selected, the countdown
timer appears on the display.
8 To view the remaining time, press the Timer/Temp button. The time appears
on the display for about three seconds, then the temperature appears.
After cooking is complete, your cooker enters the temperature preservation
mode and 0 to 12 hours appear on the display. When 12 appears on the
display, your cooker goes into Standby mode.
9 Press the lid release to open your cooker.
10 Unplug your cooker when it is not in use.
Setting a delayed completion time
You can prepare food for cooking, then set a delayed completion time of up to 24
hours.
1 Follow the instructions for the preparing food based on the cooking mode
you selected.
2 Before you press the On/Off/Start button, press the Timer/Temp button,
then press the + or – button to select a completion time. Each time you press a
button, the time changes by 1 hour. The maximum time you can select is
24 hours.
14
www.insigniaproducts.com
Page 15

NS-RC50SS9_NS-RC50SS9-C_18-0469_MAN_V2_EN.fm Page 15 Tuesday, July 31, 2018 2:41 PM
5.2 Qt Multi-Function Digital Rice Cooker
3 Press the On/Off/Start button. The delayed completion time appears in the
display, then the countdown time appears.
Note: We recommend that the delayed completion timer is no more than
12 hours to avoid food deterioration.
Using the temperature preservation mode
The temperature preservation mode keeps food warm for up to 12 hours after the
cooking cycle is complete. In most cooking modes, the temperature preservation
mode automatically starts when the cooking is complete.
Notes:
• We recommend that you consume food within five hours after cooking so
that flavor and taste do not deteriorate.
• Sauté and Yogurt modes do not have the temperature preservation feature.
To manually start or stop the temperature preservation mode:
• Press the Warm/Cancel button. 0 to 12 hours appear on the display. After 12
hours, -- -- appears on the display and your cooker returns to Standby mode.
• Press the Warm/Cancel button again to turn off the temperature preservation
mode.
Maintaining your cooker
Cleaning the cooking pot and outer body
1 Lift the cooking pot out of your cooker.
2 Wash the pot with warm, soapy water and rinse throughly. You can also wash
the pot in a dishwasher.
3 Make sure that the outside of the cooking pot is dry and free of debris before
you place it into your cooker.
4 Wipe the outer body with a damp cloth. Do not immerse in water.
www.insigniaproducts.com
15
Page 16

NS-RC50SS9_NS-RC50SS9-C_18-0469_MAN_V2_EN.fm Page 16 Tuesday, July 31, 2018 2:41 PM
NS-RC50SS9/NS-RC50SS9-C
Cleaning the cooker’s interior
1 Lift the cooking pot out of your cooker.
2 Wipe the heat preservation cover with a wet cloth. Do not wash with water.
3 Wipe dry any water in the condensation collector with a dry cloth.
4 Wipe the rim and interior of your cooker with a damp cloth. Do not immerse in
water.
16
www.insigniaproducts.com
Page 17

NS-RC50SS9_NS-RC50SS9-C_18-0469_MAN_V2_EN.fm Page 17 Tuesday, July 31, 2018 2:41 PM
5.2 Qt Multi-Function Digital Rice Cooker
5 Clean any water on the heating plate with a cloth. Remove any burnt food on
the plate with a steel scrubber or sand paper.
Cleaning the cover plate
CAUTION: Do not put the cover plate in a dishwasher. Hand wash only.
1 Open the lid, then pull up the latch that secures the cover plate and remove
the plate.
2 Wash the plate with soapy water, rinse throughly, then dry the plate.
www.insigniaproducts.com
17
Page 18

NS-RC50SS9_NS-RC50SS9-C_18-0469_MAN_V2_EN.fm Page 18 Tuesday, July 31, 2018 2:41 PM
NS-RC50SS9/NS-RC50SS9-C
3 Position the plate back into the inside of the lid, align the plate with the latch,
then push in the plate until the latch clicks into place. The plate only fits one
way.
Cleaning the steam valve
You should clean the steam valve frequently so that the valve vents correctly.
1 Grasp the handle of the steam valve and lift up.
18
www.insigniaproducts.com
Page 19

NS-RC50SS9_NS-RC50SS9-C_18-0469_MAN_V2_EN.fm Page 19 Tuesday, July 31, 2018 2:41 PM
5.2 Qt Multi-Function Digital Rice Cooker
2 Push in the latch to open the valve cover.
3 Remove the valve seat.
4 Wash with the valve seat cover and the valve seat in warm, soapy, water. You
can also wash the cover and valve in a dishwasher. Make sure that both the
cover and valve seat are dry.
IMPORTANT: If the seal slips out, make sure that you put it back in place.
5 Replace the valve seat.
6 Align the valve cover with the slot in the valve seat, then close the cover. When
the cover is secure, you hear a click.
www.insigniaproducts.com
19
Page 20

NS-RC50SS9_NS-RC50SS9-C_18-0469_MAN_V2_EN.fm Page 20 Tuesday, July 31, 2018 2:41 PM
NS-RC50SS9/NS-RC50SS9-C
7 Align the valve assembly on the lid, then press down until the latch locks into
place. When the latch is secure, you hear a click.
Troubleshooting
PROBLEM SOLUTION
My cooker does not turn on. Make sure that the power cord is plugged in and
My cooker does not stay on. If you cannot press a button down to turn it on,
My cooker continues to
cook after I remove the
cooking pot.
20
the wall outlet works. If not, check the circuit
breaker and reset if necessary.
There may be a problem with the internal
circuitry and connections. Take your rice cooker
to a Best Buy authorized service center for repair.
Make sure that the power cord is not damaged. If
it is, take your cooker to a Best Buy authorized
service center for repair.
or if a button is missing or broken, take your
cooker to a Best Buy authorized service center for
repair.
If the rice cooker continues to heat up after you
take out the cooking pot, take your cooker to a
Best Buy authorized service center for repair.
www.insigniaproducts.com
Page 21

NS-RC50SS9_NS-RC50SS9-C_18-0469_MAN_V2_EN.fm Page 21 Tuesday, July 31, 2018 2:41 PM
5.2 Qt Multi-Function Digital Rice Cooker
PROBLEM SOLUTION
The indicator light does not
turn on.
The rice is too dry or hard
after cooking.
Rice is too moist or soggy
after cooking.
If your cooker is heating correctly, but the light
does not indicate whether the rice is cooked or
being kept warm, the light bulbs are probably
burnt out and need to be replaced. Take your
cooker to a Best Buy authorized service center for
repair.
The light could be incorrectly connected to the
circuitry. Take your rice cooker to a Best Buy
authorized service center for repair.
Additional water and cooking time will soften the
rice. Add 1/2 to 1 cup of water (depending on
how dry it is) and stir throughly. Close the lid and
press the On/Off/Start button. When your
cooker switches to temperature preservation
mode, check the consistency and repeat as
necessary.
You probably added too much water. Stir the rice
to redistribute the bottom part of the rice, as well
as release excess moisture. Close the lid and let
your cooker remain in temperature preservation
mode for 10 to 30 minutes as needed, stirring
occasionally.
Any other servicing should be performed by an authorized service representative.
Specifications
Volume 5.2 qts. (20 cups of cooked rice)
Dimensions (H x W x D) 10 x 11.3 x 15.5 in (25.6 x 28.7 x 39.3 cm)
Weight 9.3 lbs (4.2 kg)
Power 120V ~ 60 Hz
Power consumption 890W
Power cord length 3 ft. (90 cm)
www.insigniaproducts.com
21
Page 22

NS-RC50SS9_NS-RC50SS9-C_18-0469_MAN_V2_EN.fm Page 22 Tuesday, July 31, 2018 2:41 PM
NS-RC50SS9/NS-RC50SS9-C
ONE-YEAR LIMITED WARRANTY
Definitions:
The Distributor* of Insignia branded products warrants to you, the original purchaser of this
new Insignia-branded product (“Product”), that the Product shall be free of defects in the
original manufacturer of the material or workmanship for a period of one (1) year from the
date of your purchase of the Product (“Warranty Period”).
For this warranty to apply, your Product must be purchased in the United States or Canada
from a Best Buy branded retail store or online at
is packaged with this warranty statement.
How long does the coverage last?
The Warranty Period lasts for 1 year (365 days) from the date you purchased the Product.
Your purchase date is printed on the receipt you received with the Product.
What does this warranty cover?
During the Warranty Period, if the original manufacture of the material or workmanship of
the Product is determined to be defective by an authorized Insignia repair center or store
personnel, Insignia will (at its sole option): (1) repair the Product with new or rebuilt parts; or
(2) replace the Product at no charge with new or rebuilt comparable products or parts.
Products and parts replaced under this warranty become the property of Insignia and are
not returned to you. If service of Products or parts are required after the Warranty Period
expires, you must pay all labor and parts charges. This warranty lasts as long as you own your
Insignia Product during the Warranty Period. Warranty coverage terminates if you sell or
otherwise transfer the Product.
www.bestbuy.com or www.bestbuy.ca and
How to obtain warranty service?
If you purchased the Product at a Best Buy retail store location or from a Best Buy online
website (www.bestbuy.com or www.bestbuy.ca), please take your original receipt and the
Product to any Best Buy store. Make sure that you place the Product in its original packaging
or packaging that provides the same amount of protection as the original packaging.
To obtain warranty service, in the United States call 1-888-BESTBUY or in Canada call
1-866-BESTBUY. Call agents may diagnose and correct the issue over the phone.
Where is the warranty valid?
This warranty is valid only in the United States and Canada at Best Buy branded retail stores
or websites to the original purchaser of the product in the county where the original
purchase was made.
What does the warranty not cover?
This warranty does not cover:
• Customer instruction/education
• Installation
• Set up adjustments
• Cosmetic damage
• Damage due to weather, lightning, and other acts of God, such as power surges
• Accidental damage
• Misuse
• Abuse
• Negligence
• Commercial purposes/use, including but not limited to use in a place of business or in
communal areas of a multiple dwelling condominium or apartment complex, or
otherwise used in a place of other than a private home.
• Modification of any part of the Product, including the antenna
• Display panel damaged by static (non-moving) images applied for lengthy periods
(burn-in).
• Damage due to incorrect operation or maintenance
22
www.insigniaproducts.com
Page 23

NS-RC50SS9_NS-RC50SS9-C_18-0469_MAN_V2_EN.fm Page 23 Tuesday, July 31, 2018 2:41 PM
5.2 Qt Multi-Function Digital Rice Cooker
• Connection to an incorrect voltage or power supply
• Attempted repair by any person not authorized by Insignia to service the Product
• Products sold “as is” or “with all faults”
• Consumables, including but not limited to batteries (i.e. AA, AAA, C, etc.)
• Products where the factory applied serial number has been altered or removed
• Loss or Theft of this product or any part of the product
• Display panels containing up to three (3) pixel failures (dots that are dark or incorrectly
illuminated) grouped in an area smaller than one tenth (1/10) of the display size or up to
five (5) pixel failures throughout the display. (Pixel based displays may contain a limited
number of pixels that may not function normally.)
• Failures or Damage caused by any contact including but not limited to liquids, gels or
pastes.
REPAIR REPLACEMENT AS PROVIDED UNDER THIS WARRANTY IS YOUR EXCLUSIVE REMEDY
FOR BREACH OF WARRANTY. INSIGNIA SHALL NOT BE LIABLE FOR ANY INCIDENTAL OR
CONSEQUENTIAL DAMAGES FOR THE BREACH OF ANY EXPRESS OR IMPLIED WARRANTY ON
THIS PRODUCT, INCLUDING, BUT NOT LIMITED TO, LOST DATA, LOSS OF USE OF YOUR
PRODUCT, LOST BUSINESS OR LOST PROFITS. INSIGNIA PRODUCTS MAKES NO OTHER
EXPRESS WARRANTIES WITH RESPECT TO THE PRODUCT, ALL EXPRESS AND IMPLIED
WARRANTIES FOR THE PRODUCT, INCLUDING BUT NOT LIMITED TO ANY IMPLIED
WARRANTIES OF AND CONDITIONS OF MERCHANTABILITY AND FITNESS FOR A PARTICULAR
PURPOSE, ARE LIMITED IN DURATION TO THE WARRANTY PERIOD SET FORTH ABOVE AND
NO WARRANTIES, WHETHER EXPRESS OR IMPLIED, WILL APPLY AFTER THE WARRANTY
PERIOD. SOME STATES, PROVINCES AND JURISDICTIONS DO NOT ALLOW LIMITATIONS ON
HOW LONG AN IMPLIED WARRANTY LASTS, SO THE ABOVE LIMITATION MAY NOT APPLY TO
YOU. THIS WARRANTY GIVES YOU SPECIFIC LEGAL RIGHTS, AND YOU MAY ALSO HAVE OTHER
RIGHTS, WHICH VARY FROM STATE TO STATE OR PROVINCE TO PROVINCE.
Contact Insignia:
1-877-467-4289
www.insigniaproducts.com
INSIGNIA is a trademark of Best Buy and its affiliated companies.
*Distributed by Best Buy Purchasing, LLC
7601 Penn Ave South, Richfield, MN 55423 U.S.A.
©2018 Best Buy. All rights reserved.
Made in China
www.insigniaproducts.com
23
Page 24

NS-RC50SS9_NS-RC50SS9-C_18-0469_MAN_V2_EN.fm Page 24 Tuesday, July 31, 2018 2:41 PM
www.insigniaproducts.com
1-877-467-4289 (U.S. and Canada) or 01-800-926-3000 (Mexico)
INSIGNIA is a trademark of Best Buy and its affiliated companies.
Distributed by Best Buy Purchasing, LLC
7601 Penn Ave South, Richfield, MN 55423 U.S.A.
©2018 Best Buy. All rights reserved.
Made in China
V2 ENGLISH
18-0469
 Loading...