

Innovate Motorsports MTX-L Quick Start Guide
MTX-L Accessories:
4 pin to 2.5mm daisy chain cable: #3812
4 pin to 4 pin daisy-chain cable: #3846
Exhaust Clamp: #3728
Stainless Steel Bung w/ Steel Plug” #3838
HBX-1: Heat-sinking Bung Extender: #3729
18ft sensor cable: #3828
Replacement Parts:
Bung/Plug set: #3764
Sensor (Bosch LSU4.2): #3737
4 pin Serial Programming Cable: #3840
8ft sensor cable: #3810
3ft sensor cable: #3843
Order parts, get support, find FAQ answers, and read case
studies at www.tuneyourengine.com
Warning!
1) The Oxygen Sensor used with this device gets very hot in
operation. Do not touch the hot sensor. Do not let a hot sensor
touch a combustible surface. Do not use the sensor with or near
flammable liquids or gases. Failure to heed these warnings may
result in severe burns, explosions or fires. 2) When installed in the
exhaust, the oxygen sensor MUST be connected and operating with
the MTX-L whenever the car is running. An un-powered oxygen
sensor will be quickly damaged when exposed to hot exhaust gases.
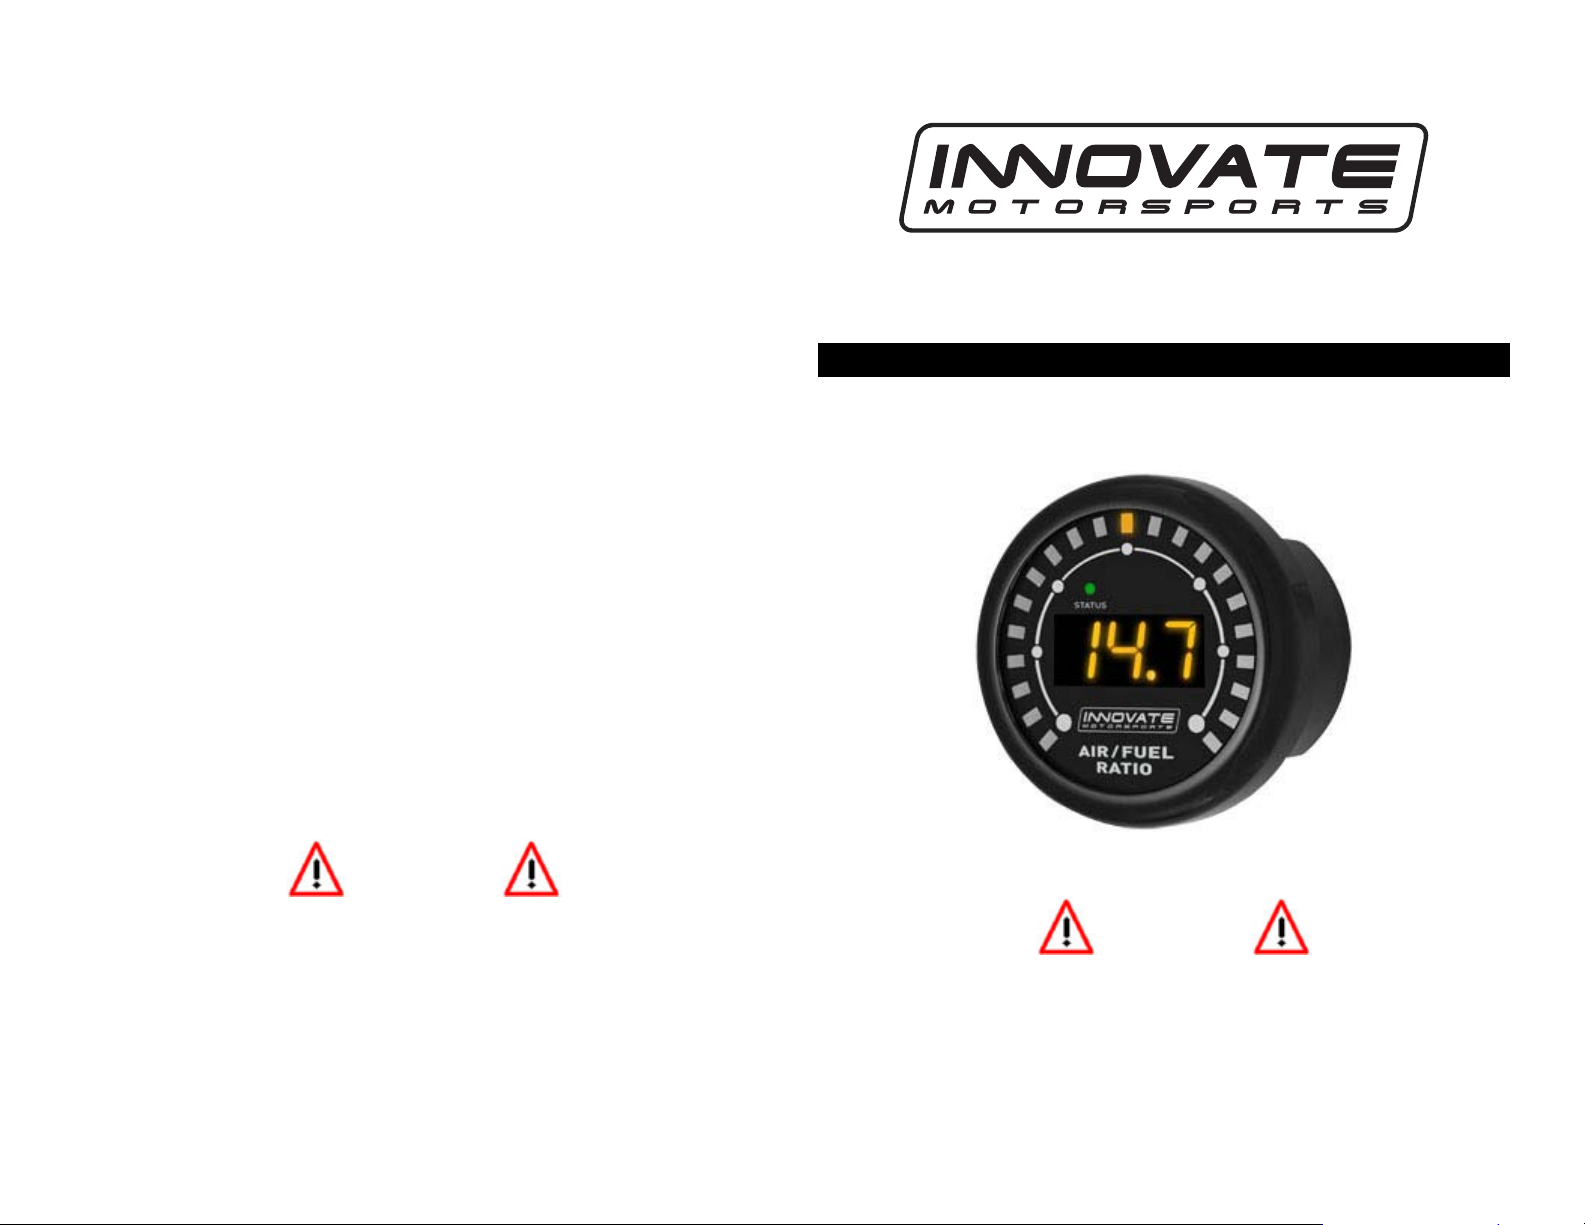
MTX-L (Digital Air/Fuel Ratio Gauge)
QUICK START GUIDE
The complete instruction manual is on the CD
Warning!
1) The Oxygen Sensor used with this device gets very hot in operation. Do not touch
the hot sensor or let a hot sensor touch a combustible surface. 2) When installed in
the exhaust, the oxygen sensor MUST be connected and operating with the MTX-L
whenever the car is running. An un-powered oxygen sensor will be quickly damaged.
11-0129

The complete instruction manual is on the CD
MTX-L
QUICK START GUIDE
To gain access to the complete MTX-L manual please
install the software provided on the CD which was
included as part of your kit.
Wiring
1. Connect the RED wire to a switched 12V source. A switched
12V source goes on as soon as the ignition on the car is on.
Make sure the connection is fused with a minimum fuse size
of 3A.
2. Connect the BLACK wire to a ground source. Avoid noisy
ground sources, such as grounds used for radio and or
ignition sources.
3. Connect the WHITE wire to a headlight power wire (a wire
that supplies current to the headlights). This enables the
display to dim for better nighttime viewing. DO NOT
CONNECT THIS WIRE TO THE HEADLIGHT DIMMING
WIRE. Connection to this rheostat type of switch will cause
the gauge to malfunction. If you chose not to utilize the
dimming feature, connect the WHITE wire to ground.
4. Optionally, the YELLOW (Analog out 1) and/or BROWN
(Analog out 2) can be connected to the analog inputs of other
devices such as data loggers or ECUs. If either one or both of
these wires are not being used isolate and tape the wire(s) out
of the way. The default analog outputs are as follows: Analog
output one (yellow) is 0V = 7.35 AFR and 5V = 22.39 AFR.
Analog output two (brown) is 1.1V = 14 AFR and .1V = 15
AFR. This is a simulated narrowband signal.
Sensor Calibration
1. The calibration procedure requires that the oxygen sensor be
in free air, not in the exhaust.
2. With the sensor disconnected from the MTX-L, apply
power to the MTX-L. When power is applied, all three digits
will light up and the needle bar will sweep once through all
LEDs. Then the status light will turn red and the numeric
display will read “E2”. This is an error code, indicating that
no sensor is detected. Leave unit powered on for minimum
30 seconds.
3. Power down the MTX-L and attach the oxygen sensor using
the cable provided. Again, make sure that the sensor is in
free air (not in the exhaust).
4. Power up the MTX-L.
Again, the display should ‘sweep’, but instead of an error, the
display will display “Htr”. This indicates that the sensor is
being heated up to operating temperature. After 30-60
seconds, the display will switch from “Htr” to “CAL”,
indicating that the sensor is being calibrated. A few seconds
later, your MTX-L will begin displaying AFR. Since the
sensor is in free air, the gauge will default to the upper limit
of 22.4.
The calibration procedure has completed and the system is
now ready for use.
Important: You can disconnect and reconnect the sensor and
sensor cable for installation without losing your calibration.
However, if you power up the MTX-L without a sensor
connected, your calibration will be reset (see step #1
above).
11-0129
 Loading...