

Innovate Motorsports MTX-D User Manual

MTX-D, Water Temperature/Volt Gauge

1 Mounting and Sensor Installation............................................................................................. 3
1.1 Mounting the Gauge.......................................................................................................... 3
1.2 Water Temp Sensor.......................................................................................................... 3
2 Wiring .......................................................................................................................................3
2.1 Main Gauge Wiring ........................................................................................................... 3
2.2 Water Temp Sensor Wiring............................................................................................... 4
2.3 Voltage Input..................................................................................................................... 4
3 Programming the Gauge (LM Programmer)............................................................................4
3.1 Installing the LM Programmer Software ........................................................................... 4
3.2 Hooking up the MTX Water Temp/ Volt gauge to the computer....................................... 5
3.3 Programming the Gauge................................................................................................... 5
3.4 Temp Tab.......................................................................................................................... 5
3.5 Volts Tab........................................................................................................................... 6
3.6 Updating the Firmware...................................................................................................... 6
4 LogWorks ................................................................................................................................. 7
4.1 Connecting the MTX Water Temp/ Volt gauge to other MTS products............................ 7
4.2 Logging data ..................................................................................................................... 7
5 Changing the MTX gauge face and/or bezel ........................................................................... 8
Appendix A: Limited Warranty........................................................................................................ 9
Revision History............................................................................................................................. 10
- 2 -
1 Mounting and Sensor Installation
1.1 Mounting the Gauge
The MTX Water Temp/ Volt gauge fits in a standard 2-1/16” (52mm) hole. The gauge can be
mounted into a commercially available 2-1/16” (52mm) gauge pod or by drilling a 2-1/16” (52mm)
diameter hole to your desired mounting location. Check behind he mounting location for any
wiring or components before drilling. Allow at least 2-1/4” (57mm) of depth for the gauge body
and associated wiring. Mounting of the gauge should be done in such a manner that the cables
are not being forcefully pulled from the gauge body itself.
The MTX Water Temp/ Volt gauge is splash resistant (not water proof) and can be mounted so
that it is exposed to the elements. The MTX gauge should not be submerged and special
consideration should be taken to protect the gauge from direct water spray (water coming from a
pressurized source.) When replacing the bezel and/or gauge face verify that the o-ring is properly
seated.
Make sure the mounting location does not impair visibility or interfere with driving.
1.2 Water Temp Sensor
The water temp sensor provided in the kit has 1/8 PT external threads.
Mount the sensor using Teflon tape over the threads to avoid water leaks.
Be sure the sensor wire is not twisted. Having the wire twisted will damage the sensor.
Avoid bending the sensor wire near the sensor body.
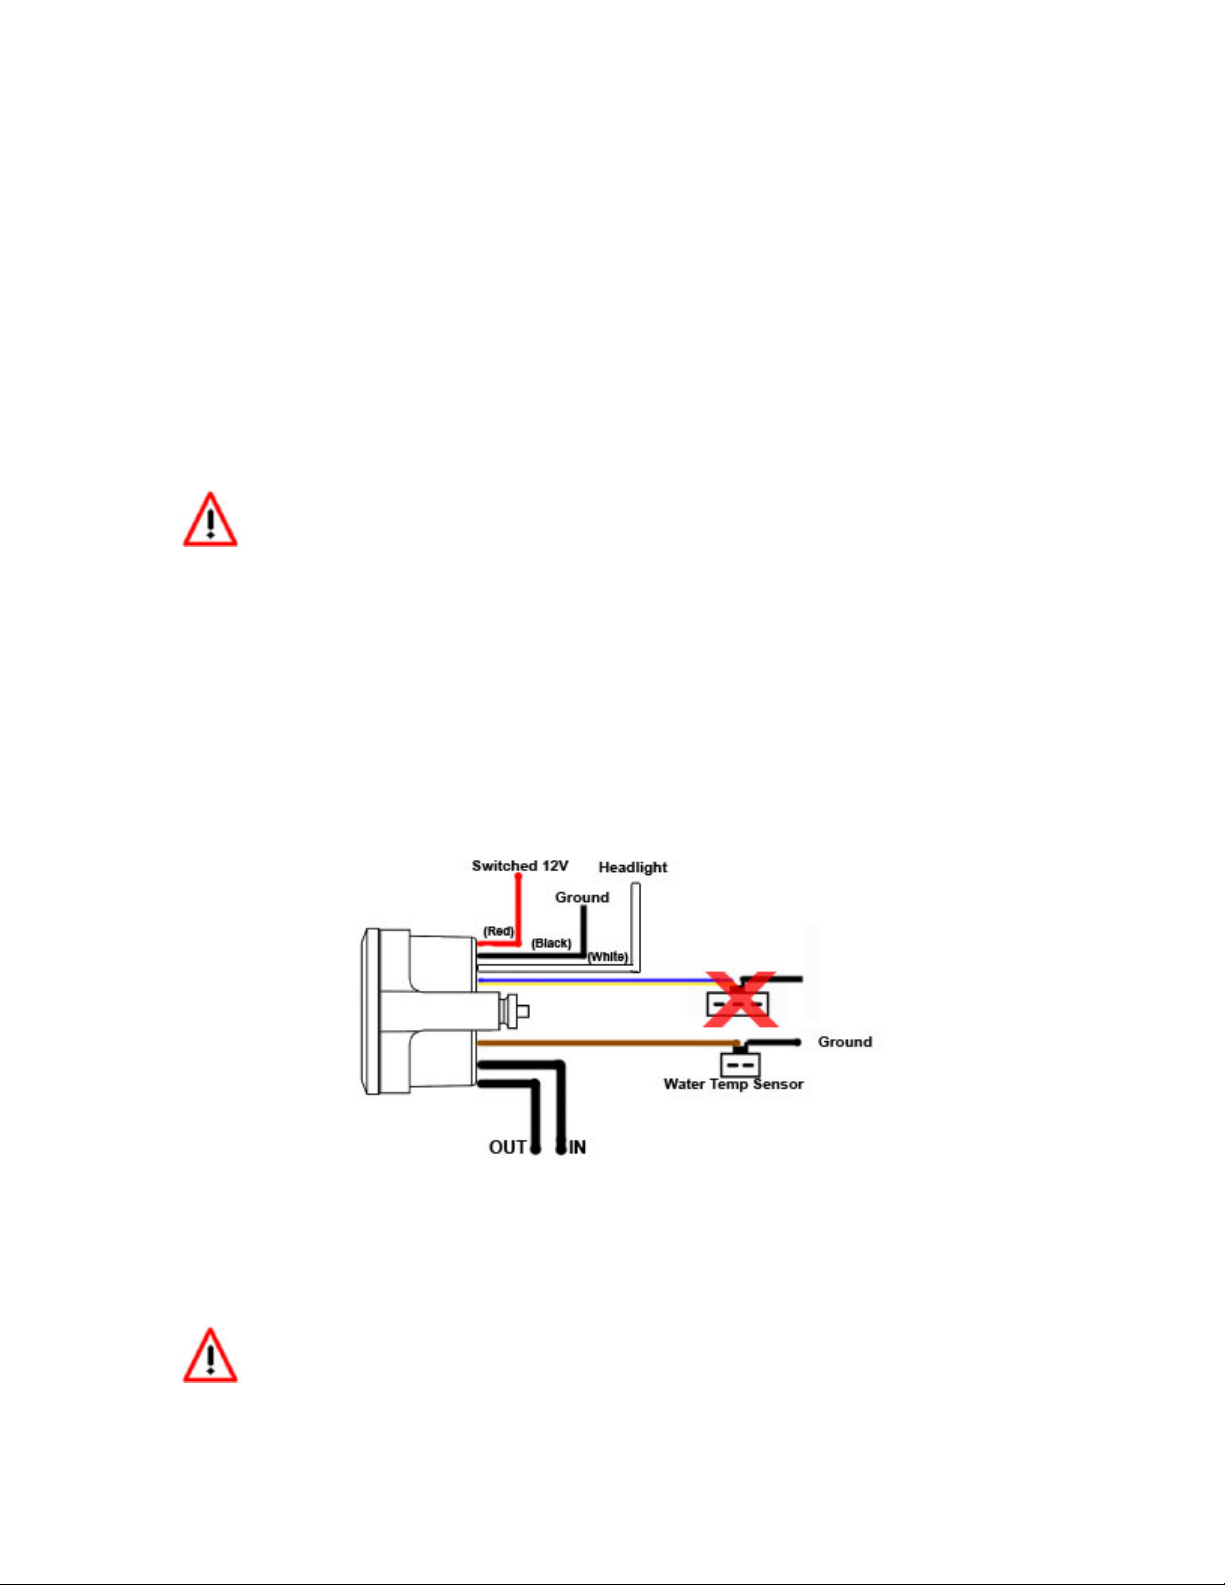
2 Wiring
2.1 Main Gauge Wiring
1. Connect the RED wire to a switched 12V source. A switched 12V source comes ON as soon
as the ignition on the car is keyed on. Make sure the connection is fused with a minimum
fuse size of 2A.
Circuits that share power with the vehicle’s stereo, ignition system, and fuel pump
are not recommended.
- 3 -
 Loading...