

Innovate Motorsports LM-2 Quick Start Guide

LM-2 Accessories:
LM-2 to MTS patch cable, 4 pin micro fit to 2.5mm male stereo
P/N: 3812
XD-16 (Air/Fuel Digital Gauge) P/N3780
Exhaust Clamp: #3728
Stainless Steel Bung w/ Steel Plug #3736
HBX-1: Heat-sinking Bung Extender: #3729
Double Length Bung: P/N 3764
LM-2 Window Mount: P/N 3814
Replacement Parts:
Power Cable: P/N 3808
OBD-II Cable: P/N 3809
Bung/Plug set: P/N 3735
Sensor (Bosch LSU4.2): P/N 3737
8ft Sensor Cable: P/N 3810
Analog Cable: P/N 3811
USB Cable: P/N 3813
Order parts, get support, find FAQ answers, and read case
studies at www.tuneyourengine.com
< (10-2303.B)
LM-2
QUICK START GUIDE
The complete instruction manual is on the CD
Warning!
1) The Oxygen Sensor used with this device gets very hot in
operation. Do not touch the hot sensor. Do not let a hot sensor
touch a combustible surface. Do not use the sensor with or near
flammable liquids or gases. Failure to heed these warnings may
result in severe burns, explosions or fires. 2) When installed in
the exhaust, the oxygen sensor MUST be connected and
operating with the LM-2 whenever the car is running. An unpowered oxygen sensor will be quickly damaged when exposed
to hot exhaust gases.
Warning!
1) The Oxygen Sensor used with this device gets very hot in operation. Do not touch
the hot sensor or let a hot sensor touch a combustible surface. 2) When installed in
the exhaust, the oxygen sensor MUST be connected and operating with the LM-2
whenever the car is running. An un-powered oxygen sensor will be quickly damaged.
The complete instruction manual is on the CD
LM-2
QUICK START GUIDE
Software Installation
It is important to install the provided software on the computer
prior to connecting the LM-2. Failure to do so may lead to
connection complications.
1. Place the CD that came with your LM-2 in your personal computer.
2. The software installer will automatically start, follow the prompts to
finish the installation.
3. Once the software is installed connect one end of the USB cable to
the LM-2 and the other end to your computer.
4. Confirm the LM-2 is powered up.
5. Windows will now recognize the device and prompt the “New
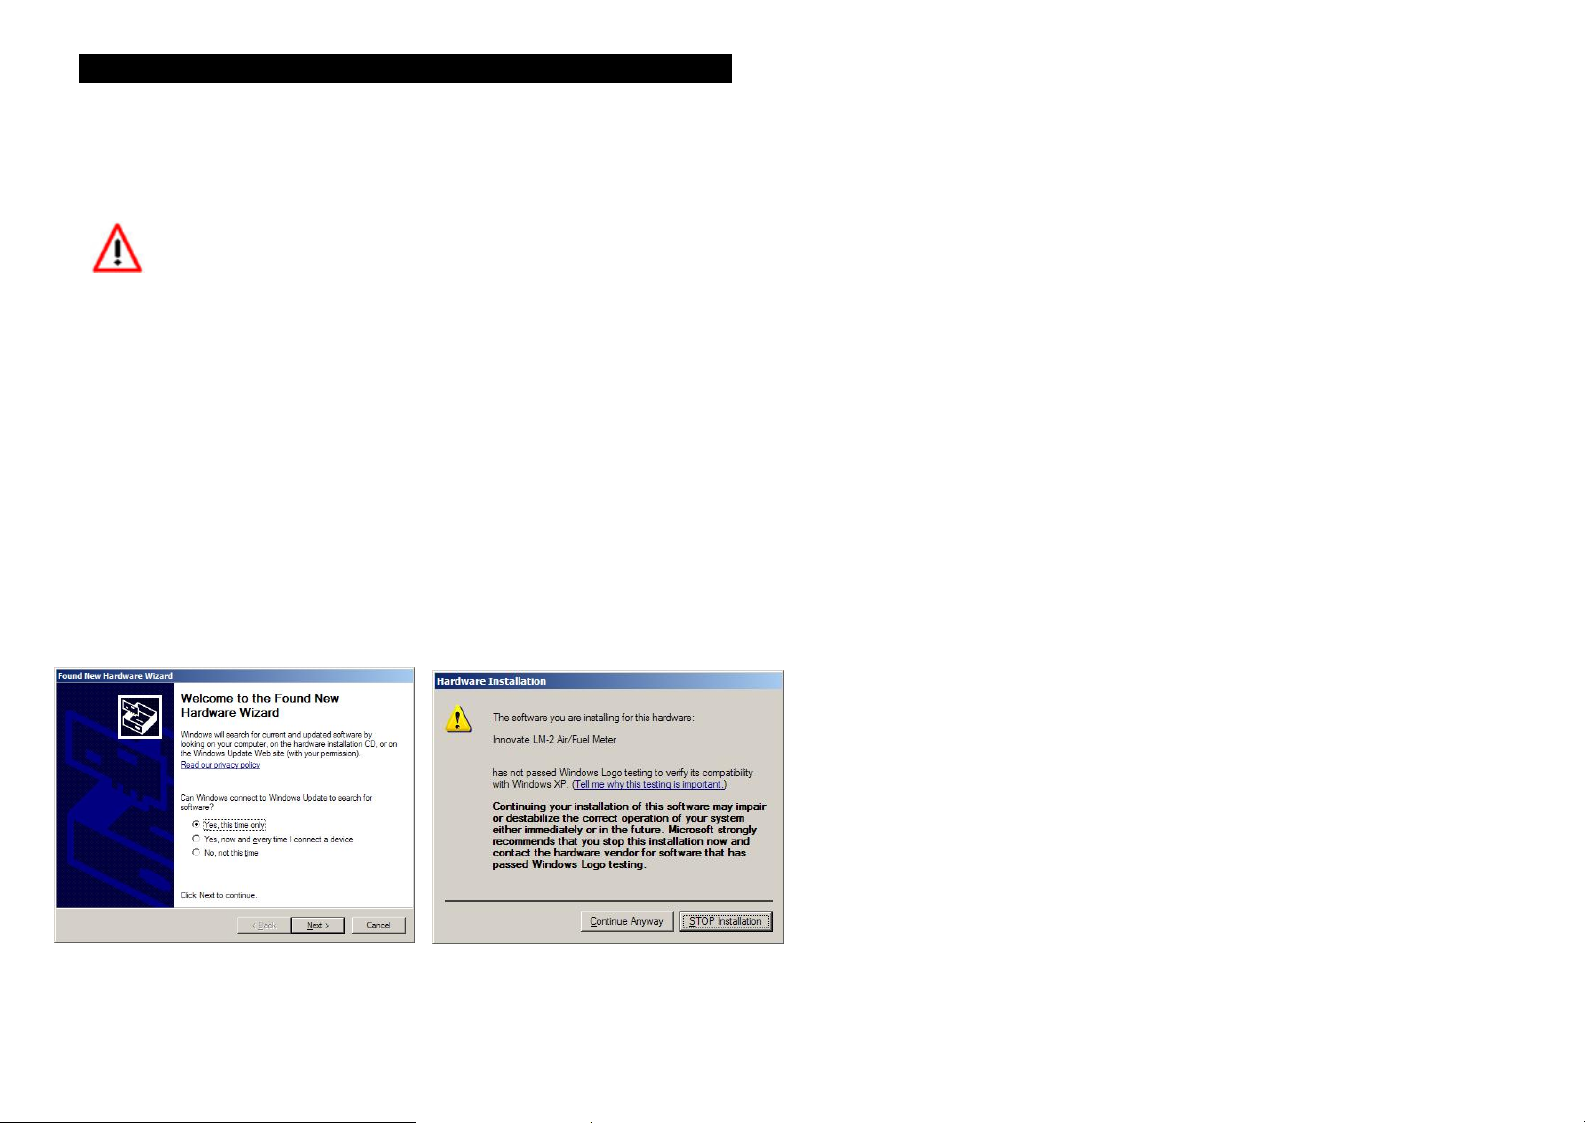
Hardware Wizard.” Click Next. (Fig 1)
6. Select “Install the Device Automatically” and click Next.
7. A progress screen will appear. During this installation process the
screen below will pop up. Click “Continue Anyway.” (Fig 2)
8. The last screen will inform you that the unit has been successfully
installed. Click “Finish.” The unit is installed and ready to use.
Fig 2 Fig 1
Sensor Calibration
1. Connect the oxygen sensor to the provided sensor cable and then
to the appropriate port on the LM-2. Note: The dual channel LM-2
model allows you to connect both oxygen sensors to the unit at the
same time to do the calibration simultaneously.
2. Connect the LM-2 to a 12V power source with the provided
cigarette power adapter.
3. The sensor(s) will start warming up. The LM-2 will display WXX,
where XX is the percentage of temperature reached. Wait for the
sensor to finish warming up.
4. Next is the calibration procedure. Press and hold the Mode button
until the Configuration Menu appears. Select ‘Calibrate Sensors’
and press the Enter button.
5. Confirm by selecting ‘Start Sensor Calibration’ and press the Enter
button.
6. The display will momentarily display ‘Cal’ and then it will switch to
reading a percentage of oxygen. If the oxygen content now differs
from 20.9% by more than 0.4%, repeat the calibration.
7. The LM-2 is now ready to read A/F.
Instruction Manual
Once the software is installed the manual can be found by clicking on
Start->Programs->LogWorks3->Manuals->LM-2 Man ual.
 Loading...