


展开尺寸:216X140MM
PR Pro:
PERCUSSION MASSAGE DEVICE
Thank you for choosing the Infinity PR PRO PERCUSSION MASSAGE
DEVICE. Please read the User Manual carefully before using the
massager. Keep this booklet in a safe place for future reference.
Please do not use the device, or any vibration device
without first obtaining approval from your doctor if any
of the following apply:
Pregnancy, diabetes with complications such as neuropathy or retinal
damage, wear of pace-makers, recent surgery, epilepsy or migraines,
herniated disks, spondylolisthesis, spondylolysis, or spondylosis, recent
joint replacements or IUD’s, metal pins or plates or any concerns about
your physical health. Frail individuals and children should be accompanied by an adult when using any vibration device. If any of these listed
conditions apply to you, this does not mean that you are not able to
use a vibration or exercise device, but we advise you consult a doctor
first.
Ongoing research is being done to the effects of vibration exercise for
specific medical disorders. This will be likely to result in the shortening
of the list of contra indications as shown above. Practical experience
has shown that integration of vibration exercise into a treatment plan is
advisory in a number of cases. This must be done on the advice of and
in accompaniment with a doctor, specialist or physiotherapist.
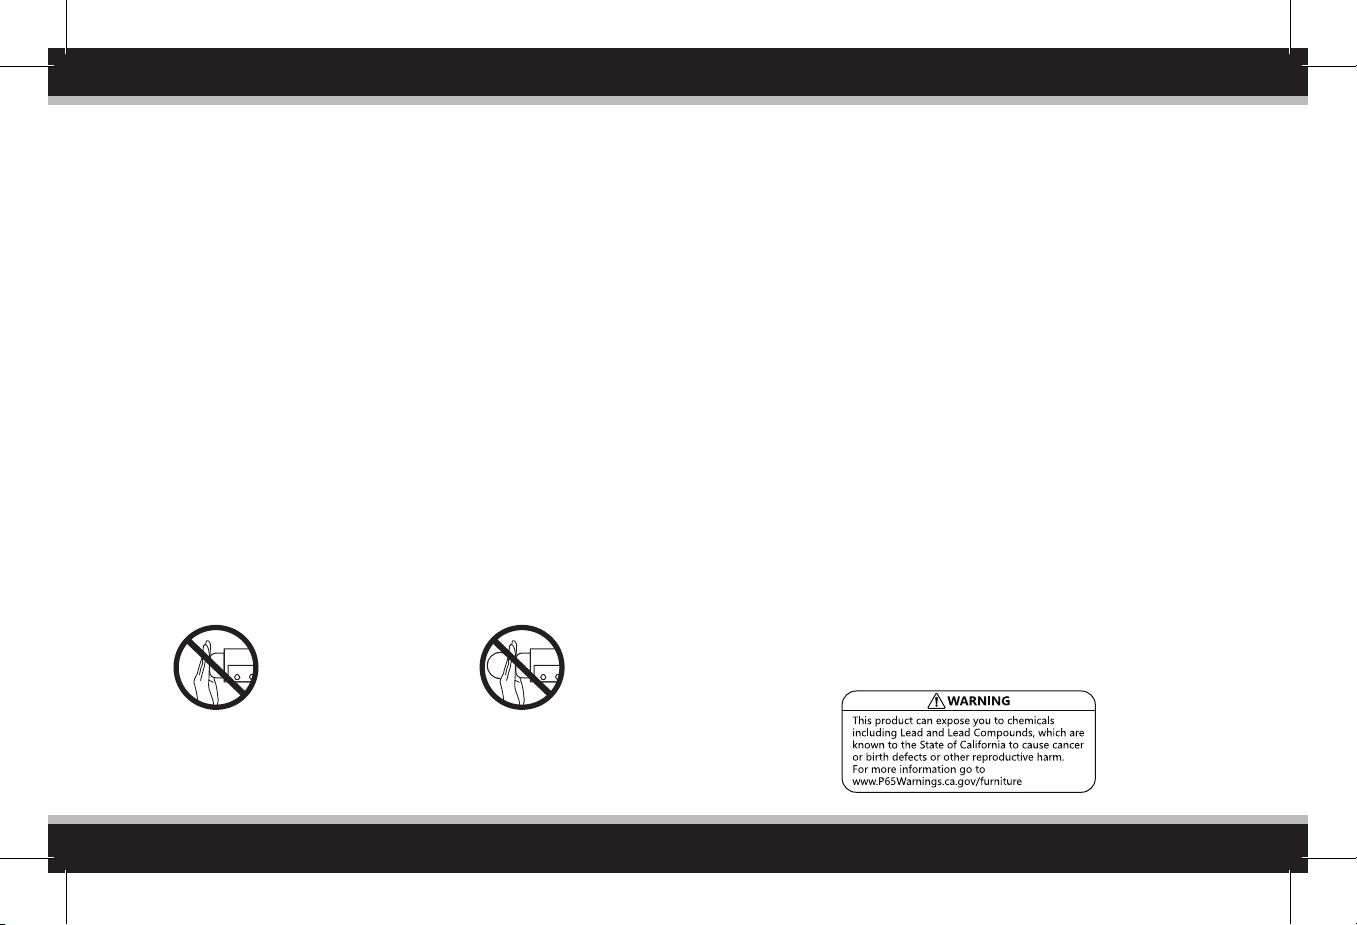
IMPORTANT SAFETY WARNINGS:
- For adult only. Do not use if injured. Muscle injuries can beused for recovery.
Please consult your doctor before using this device.
- Use only on dry and clean surface of the body over clothing by lightly pressing
and moving across the body for approximately 60 seconds per region.
- Use this device only on the body’s soft tissue as desired without producing pain
or discomfort. Do not use on head or any hard or bony area of the body.
- Do not use in areas where there is bruising, pain or any uncomfort.
- Do not place any objects into the ventilation holes.
- Do not immerse in water or allow water to enter the ventilation holes.
- Do not drop or misuse the device.
- Only recharge with supplied 24VDC charger.
- Do not tamper or alter the fascia massage gun.
- Keep finger, hair or any other body part away from the shaft and backside of
the applicator as pinching may occur.
- Keep away from heat sources. Keep ventilation ports free from dust and debris.
- Unplug the charger from device battery after charging.
- Use only the applicators that provide the best desired effect.
- Use this product in accordance with the instructions.
- Check the device carefully before each use.
LI-ION BATTERY WARNINGS
This device contains a Lithium-ion battery. The battery must be recycled or
disposed of properly. Contact your local waste management office for
information on battery recycling or disposal.
ENVIRONMENT PROTECTION
At the end of the service life of this product, please do not throw away. Take
the device to a designated recycling station, or dispose of it in an
environmentally sound way.
Do not touch this area when
starting the machine without
massage head assembled.
1
Do not touch this area when
starting the machine with any
massage head assembled
2
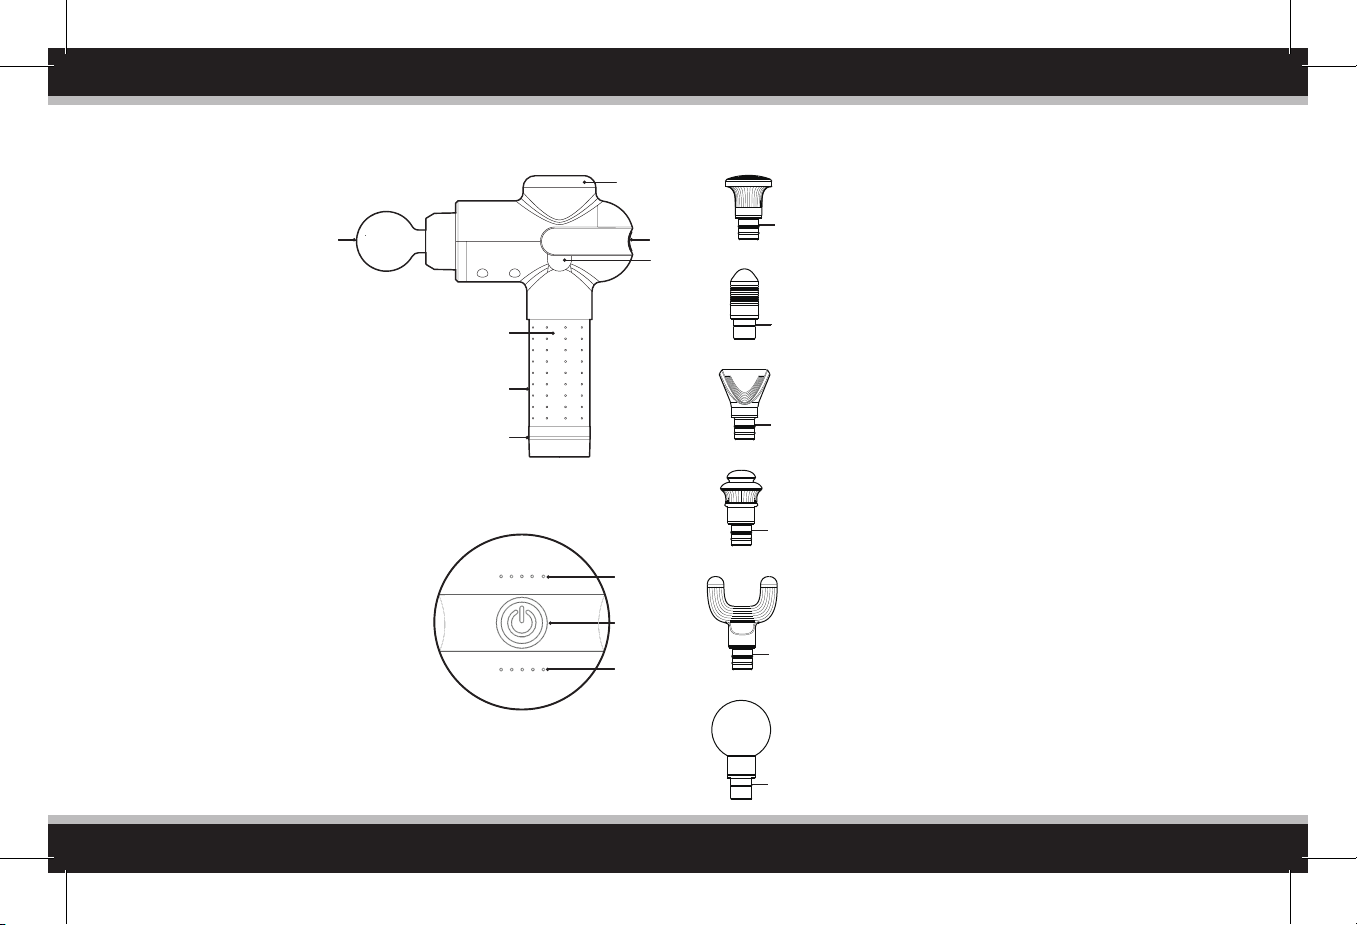
PRODUCT DESCRIPTION
SIX REPLACEABLE MASSAGE HEADS
1. 45W brushless high-torque motor.
2. Massage head connection point.
3. Control Panel.
4. Battery pack release button.
5. Silica gel covered handle.
6. Rechargeable Lithium-ion battery.
7. Battery Pack LED Ring: When flashing
Red, the battery is below 20%; when
flashing Orange, the battery is at
20-40%; when flashing Yellow, the
battery is at 40-60%; when flashing
Green, the battery is at 60-80%; when
solid Green, the battery is at 80-100%.
8. Speed indicator light: from left to right
is level 1-5, White LED.
9. Power Button: push button to switch
on device. Once device is on, push
the button to toggle through 5 speed
levels. To turn device off, long press
the power button, or cycle through all
speed levels until the device stops.
10. Power indicator light: after switching
on, 5 lights indicate 80-100% power;
4 lights indicate 60%-80% power; 3
lights indicate 40%-60% power; 2
lights indicate 20-40% power; 1 light
indicate 5-20% power; 1 flashing light
indicates low power and the device
must be charged.
2
5
6
7
Control panel
1
3
4
8
9
10
11
12
13
14
15
Installation method: Rotate the massage head gently while
pulling/loading
11. Flat Head - Features a large, flat contact point. Great for
large muscle groups, such as the calves and hamstrings
allowing you to cover more surface area in less time.
12. Bullet Head - Features a more concentrated contact
point which re-inacts a thumb. Best for pipointing
specific areas of the feet or around joints.
13. Wedge Head - Features a long, wide contact point.
Great for scraping along the upper arms, chest,
shoulders, and biceps.
14. Dampener Head - Features a cushioning effect for users
who are new to percussive therapy. Great for larger
muscle regions such as the glutes, adductors, or lower
back, and also more sensitive areas such as the knee.
15. Fork Head - Featuring a two-pronged shape, the fork
head is great for getting into smaller, slimmer muscle
regions such as the achilles, IT-band, forearms, or along
the spine.
16. Ball Head - The large round head is used for large
muscle groups such as the quads, hamstrings, traps, and
upper back.
3
16
4
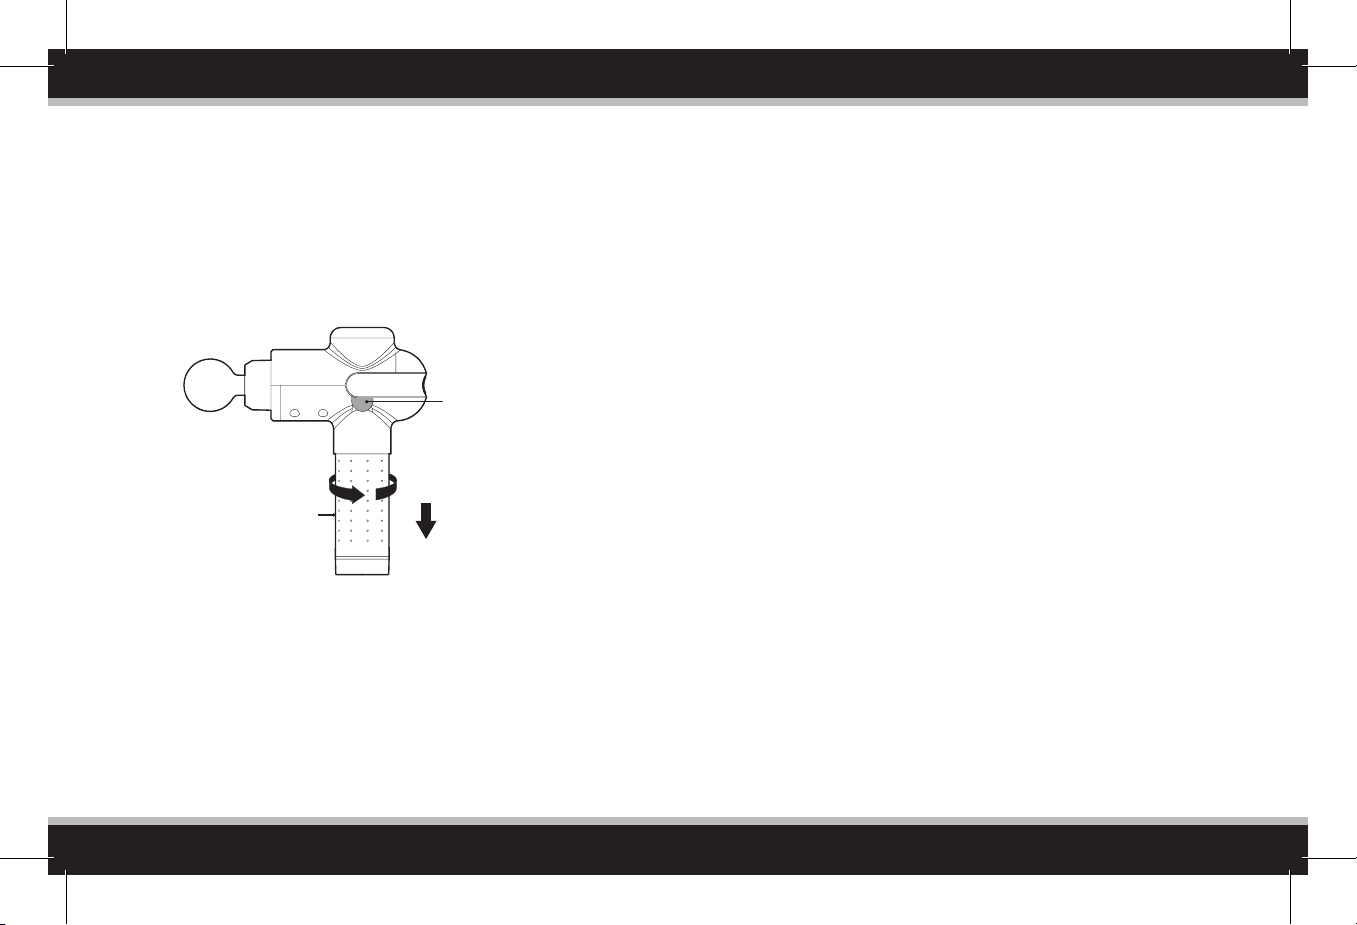
REMOVING BATTERY PACK
1. To remove the battery pack from the device, press in the battery pack
release button located on the side of the device and twist back and
forth while firmly pulling down on the battery pack until it comes out.
2. To re-attach the battery pack, align the groove key on the side of the
battery pack with the groove on the inside of the battery pack slot.
Push the battery up firmly into the device until you hear a click sound.
3. In Standby mode, the LED lights on the device control panel flash
regularly, indicating the battery level and that it is charging. The ring
on the bottom of the battery pack also flashes and changes color to
indicate battery charge. If the battery switch on the bottom of the
battery pack is Off, only the battery pack ring will flash from yellow to
green, when battery is fully charged, battery ring will stop flashing
and stays on green.
4. Battery may be recharged at any time and at any battery level. Do
not use this device while charging.
5. One flashing light indicates low power and the battery needs to be
recharged.
Battery pack button
Twist back and forth
while pulling down.
Battery Pack
CHARGING
1. Fully charge battery for up to 2.5 hours before first use either
attached or detached from the device.
2. To charge, connect DC end of the supplied 24V adapter to the
battery’s charging port and plug AC side cable into wall outlet.
5
OPERATION
1. Make sure battery switch on the bottom of the battery pack is turned
on and the battery pack ring is lit indicating that the device is in
standby mode. If the ring is not lit, switch off and then on again.
2. Press the power button on the control panel to turn device on.
3. Device will start at speed level 1. To cycle through the 5 different
speed levels press the power button. When the device is at speed
level 5, press the power button once more to enter standby mode
(speed level 0). To restart, wait 3 seconds and then press the power
button to enter speed level 1 again.
4. At any time after turning on the device, long press the power button
to enter standby mode.
5. To completely turn off, slide the battery switch to off.
6. If the device is left idle in standby mode for 60 minutes it will
automatically turn off.
6

MAINTENANCE
A. Storage
- When not using the device, place back into provided carry case.
- For storage or travel, remove battery and store in the supplied box.
- Keep out of direct sunlight and high temperatures. Store in a cool
dry place
B. Cleaning
- Unplug power cord before cleaning.
- Use a dry cloth only to spot clean the surface of the product. Avoid
direct contact with water.
- Do not use corrosive cleaners such as benzene or bleach products.
SPECIFICATIONS
Model
Dimension of Main Body (in)
Weight (lbs)
Amplitude
Power
Adapter Input
Output
Battery Type
Battery Life
Battery Charge Time
6.85” x 2.67” x 9.3” (L x W x H)
PR Pro
2.2
12mm
45W brushless motor
100-240V~50/60Hz
DC 24V 1A
Li-ion 2400mAh 11.1V
Approx. 240 minutes ea
Approx. 2.5 hours
TROUBLESHOOTING
Symptoms Possible SolutionPossible Causes
Will not turn on.
Massage node will
not pull off.
Percussion has
slowed.
Battery does
not fit.
not remove.
Battery switch set to Off or
timed out while set to On.
Battery pack not making
connection.
It is stuck through
prolonged use.
Needs battery charge.
Note the battery pack
is keyed. It only will
fit one way.
Safety lock is engaged.Battery will
Swith either to On or Off then ON.
Press Power button.
Remove battery and re-insert until you
hear a click.
Twist as you pull the node off. It may
take significant pulling effort.
Swap battery and charge.
Line up slot before sliding into the
device. Insert firmly until it locks with
a click.
Find and press the battery release
button, then at the same time pull the
battery down. It does not unscrew.
INFINITY TECHNICAL SUPPORT
If you have any questions about maintenance or are experience
technical difficulties with your massager, please contact Infinity's
technical support team at 603-910-5000 for assistance.
.
7
8
 Loading...