

Page 1

User Manual
PRELUDE
Page 2
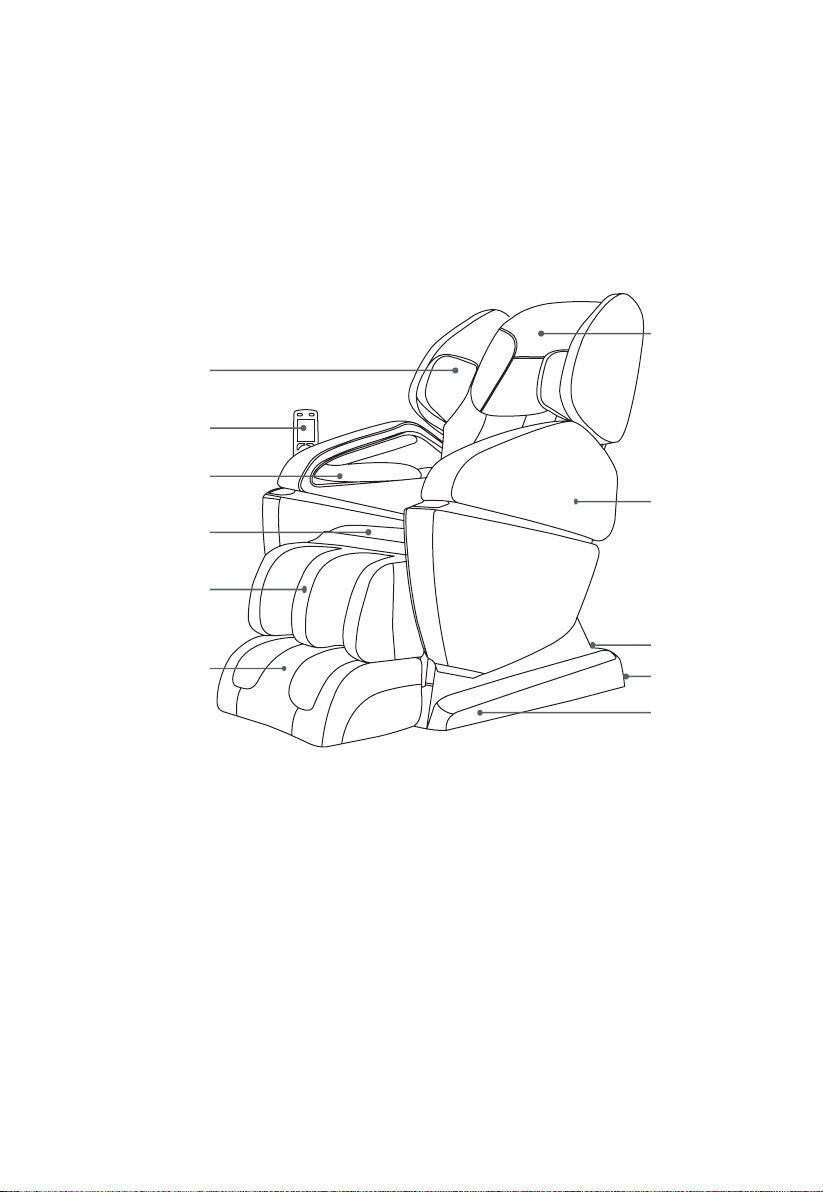
Your Chair
External Structure
Shoulder Airbag
Remote Control
Arm Airbags
Seat Cushion
Legrest
Footrest
Pillow
Arm Panel
Power Box
Caster
Pedestal
Page 3

Welcome to
THE ULTIMATE MASSAGE EXPERIENCE
Thank you and congratulations on purchasing an Infinity Massage Chair - you’ve
made a great choice.
With over a decade of experience designing, building and servicing massage
chairs, Infinity takes pride in every chair sold, including yours. We are here for you.
The US-based Customer Care team can be reached at (603) 910-5000 or visit us
online at www.infinitymassagechairs.com and find valuable self service resources
under the SUPPORT tab, including electronic copies of all documents and video
tutorials.
Inside this manual, you will find everything you need to setup and safely enjoy
your chair. Please review the entire manual before assembling or using your chair.
If you are assembling the chair yourself, please see the Assembly Guide next and
reference the online assembly video.
For convenience, we’ve also created a Quick Start Guide. We suggest you keep it
in the remote pocket as a tool to get to know all the features of your new chair.
Get ready to sit back, Relax and enjoy the Ultimate Massage Experience.
Register your product at www.infinitymassagechairs.com/
warranty to ensure it is in our system. This will simplify the
warranty process should you ever need it.
Alternatively, scan the QR code to go directly to the URL above.
@infinitymassagechairs@infinitymassagechairs
We know you can’t wait to sit in your new Infinity Massage chair!
Take a picture of you enjoying the ultimate massage experience
and make sure to tag us on social media with the hashtag
#lovemyinfinitychair
@infinity_chairs@infinity_chairs
@infinitymassagechairs@infinitymassagechairs
SCAN CODE
Page 4
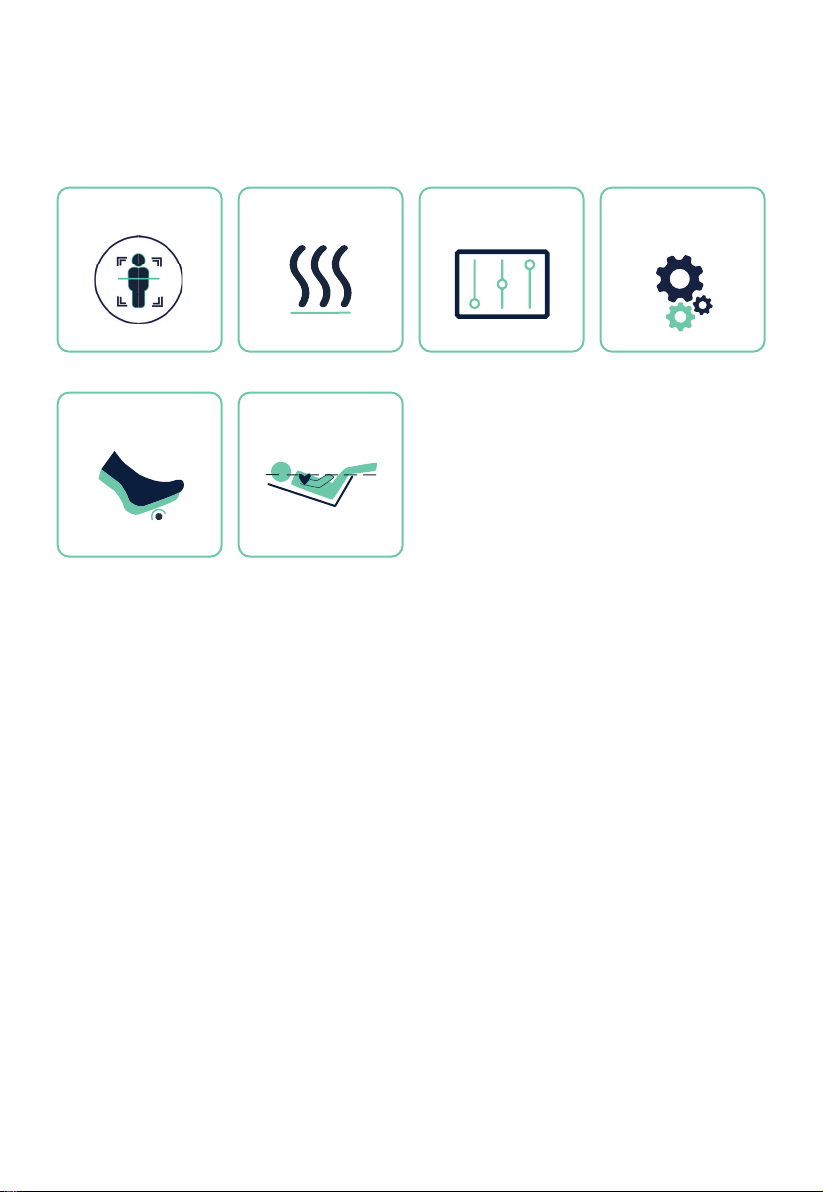
Chair Features
Body Scanning
Foot Rollers
Lumbar heat
See page 12
Zero Gravity
See page 17See page 13 & 17
Airbag Control Manual Massage
Customization
See page 12
See page 16See page 9
Page 5

Table of Contents
Before Getting Started
Installation Site
Clearance Space for the Chair
Floor Protection
Move Methods
Connect to Power
Chair Setup
Getting Comfortable
Main Power Switch
Adjust Pillow
Body Scanning
Reduce the Intensity of Your Massage
Getting Out Of The Chair
Taking Control
Auto Programs
Airbag Massage
Airbag Region
Airbag Intensity
Back Heat
Foot Rollers
Adjusting the Backrest
Adjusting the Footrest
Pause Massage
Set Your Environment
Time
Surroundings
Settings
Remote Control Sleep Mode
Build Your Own
Manual Programs
Back Massage Technique Mode
Massage Part (Back Region)
Back Node Width
Massage Speed
Foot Rollers
Zero Gravity
Move Rollers Up/Down
Staying Safe
Fixing Issues
Trouble Shooting
Frequently Asked Questions
Specifications
Product Waranty
6
6
6
7
7
8
8
8
9
9
9
10
12
12
12
12
13
13
13
13
14
14
15
16
16
16
16
17
17
17
17
18
20
21
22
23
Page 6
Before Getting Started
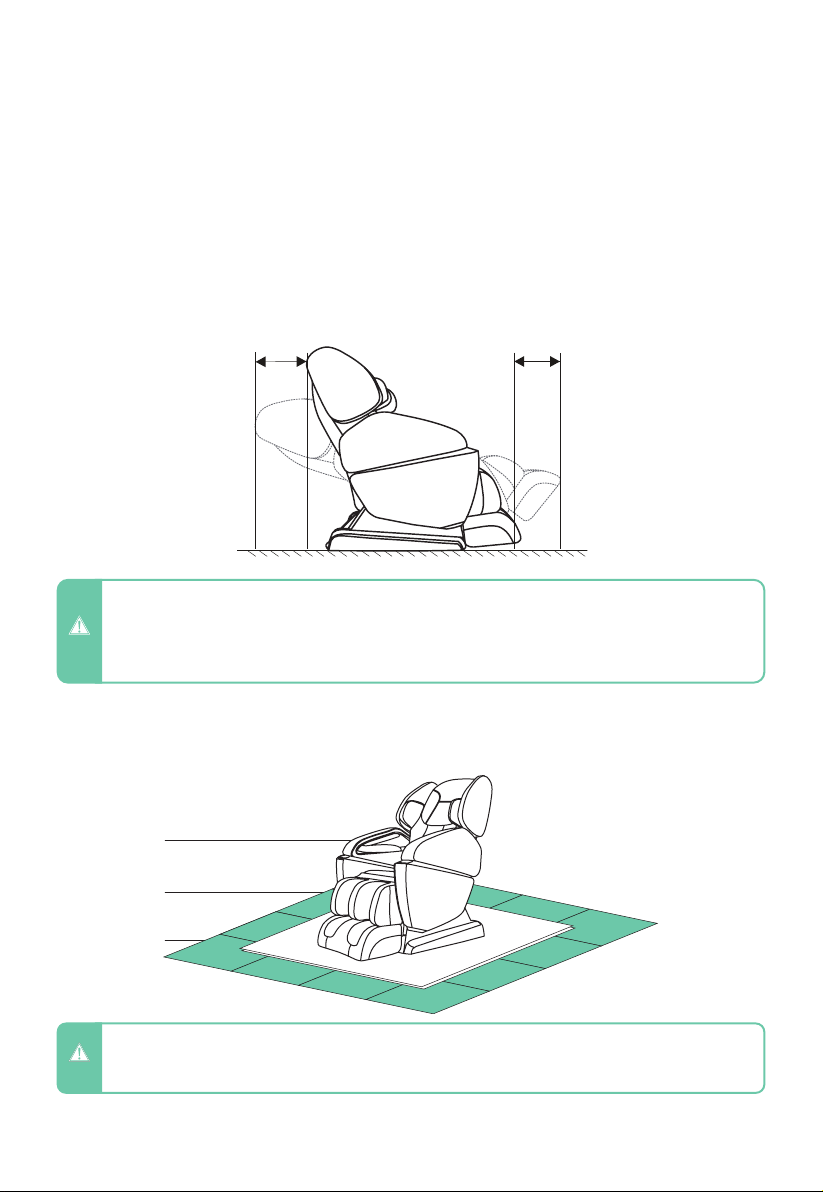
Installation Site
Clearance Space for the Chair
- 15” clearance for the recline of the backrest; 20” clearance for the extension of footrest
and sliding forward of the chair.
- Keep it 3 feet away from the TV, radio or other audio & video appliance to avoid signal
interference.
15” 20”
- Keep the distance between the power socket and power switch within 60” to avoid damage of power cord
while massage chair sliding forward.
- Straighten the power cord while in use to avoid tangle or damage.
CAUTION
- When the massage chair sliding forwards or back, please check to make sure there is no children, pets or
other obstacles around to avoid accident.
Floor Protection
We recommend to place a piece of thin carpet or soft mat underneath it to avoid damaging
the floor.
Massage chair
Floor
Carpet
- Do not use the massage chair in high moisture environment such as near swimming pool or bathroom to
prevent electric shock accident.
WARNING
- Please keep the massage chair away from heated surfaces to prevent fire hazard or damage to the product.
6
Page 7
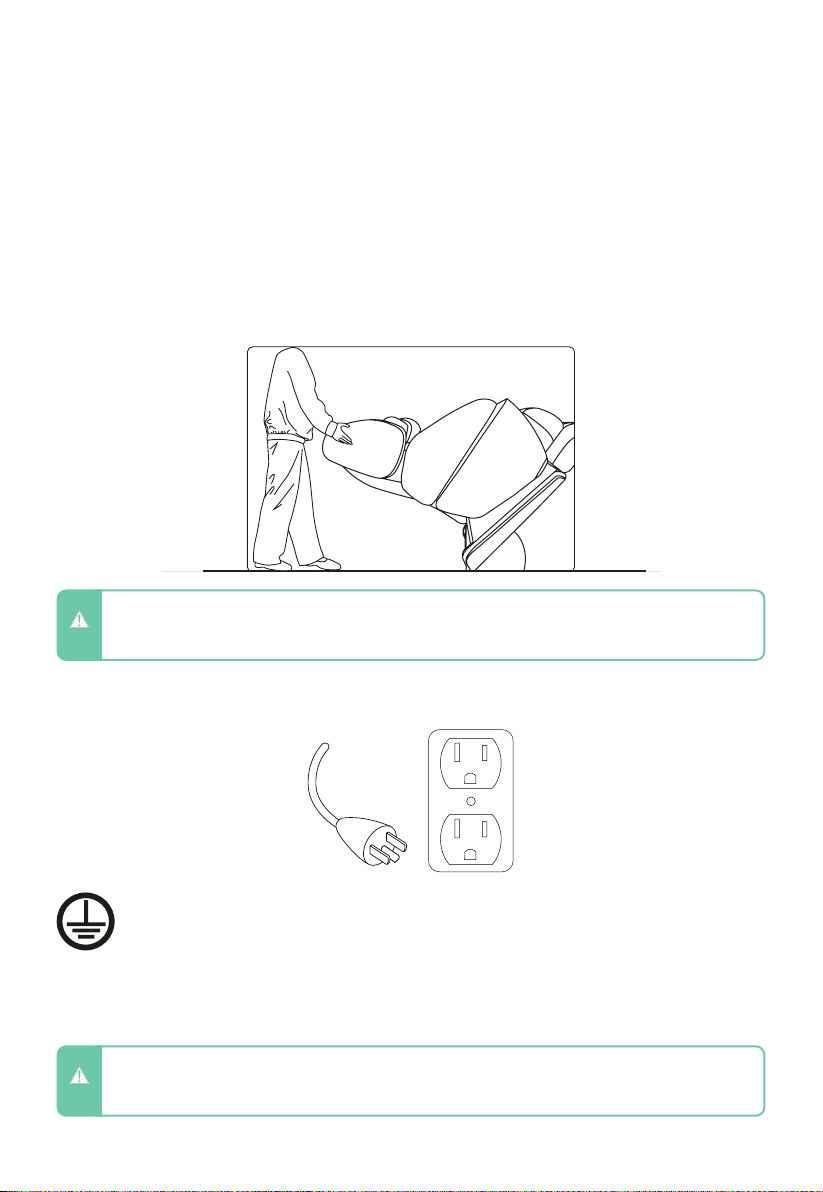
Move Methods
45°„
- Apply pressure to the back of the massage chair from behind to pivot on the Castors.
Have a second person up front to guide the Footrest until in the correct position. Maintain
clearances as mentioned above. Gently lower into place. Do not pull on the side arms.
- Do not move the chair when there is user inside.
- To carry this product, do not lift by the footrest or armrest, hold the chassis and steady the backrest (have 4
CAUTION
or more people to carry the product).
Connect to Power
Plug into a 110V grounded outlet.
This product must be grounded. If it should malfunction or breakdown, grounding
provides a path of least resistance for electric current to reduce the risk of electric
shock. This product is equipped with a cord having an equipment-grounding
conductor and a grounding plug. The plug must be plugged into an appropriate
outlet that is properly installed and grounded in accordance with all local codes
and ordinances.
- Ensure there is no damage to the supply cord before switching on the massage chair.
- Ensure that the main power switch is turned off before connecting to power
CAUTION
7
Page 8
Chair Setup
Getting Comfortable
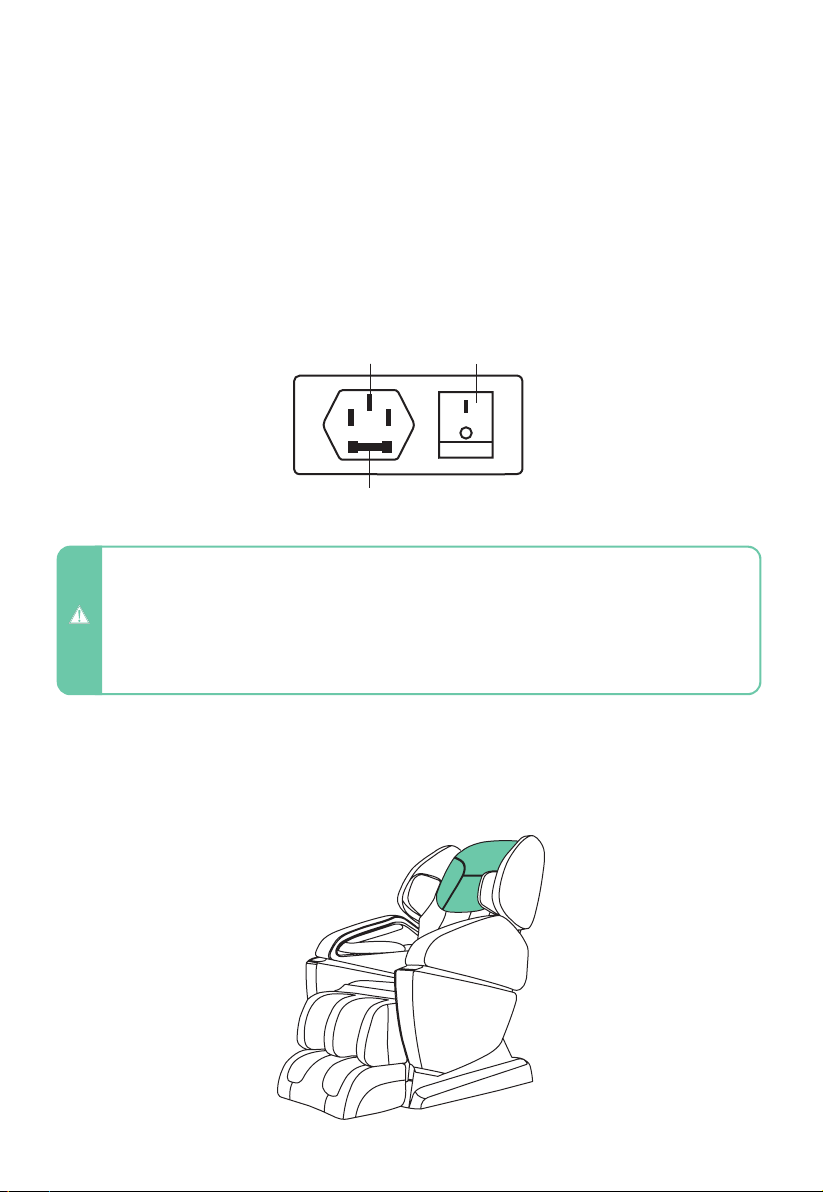
Main Power Switch
To power up the chair, flip the main power switch located on the back of the base of the
chair to ON.
Power
Cord Input
Fuse Location
- Children should be supervised to ensure that they do not play with the chair or touch the power box.
- Always unplug the massage chair from the electrical outlet immediately after use.
- Unplug from outlet during thunder or lightening storms, and before putting on or taking off parts.
- Turn off the power switch and unplug the massage chair from the electrical outlet while not in use to avoid
CAUTION
children power on the massage chair accidentally.
- When not in use for a long period of time,we recommend that the chair be covered, the power cord be coiled
and that the unit be placed in an environment free of dust and moisture.
Main
Power Switch
Adjust Pillow
Take a seat in the chair and take note of where the neck pillow rests on your neck. Adjust
the pillow so that it rests comfortably in the arch of your neck. Do this by removing it from
the velcro, aligning it, and then reattaching to the velcro once it is in the desired position.
8
Page 9
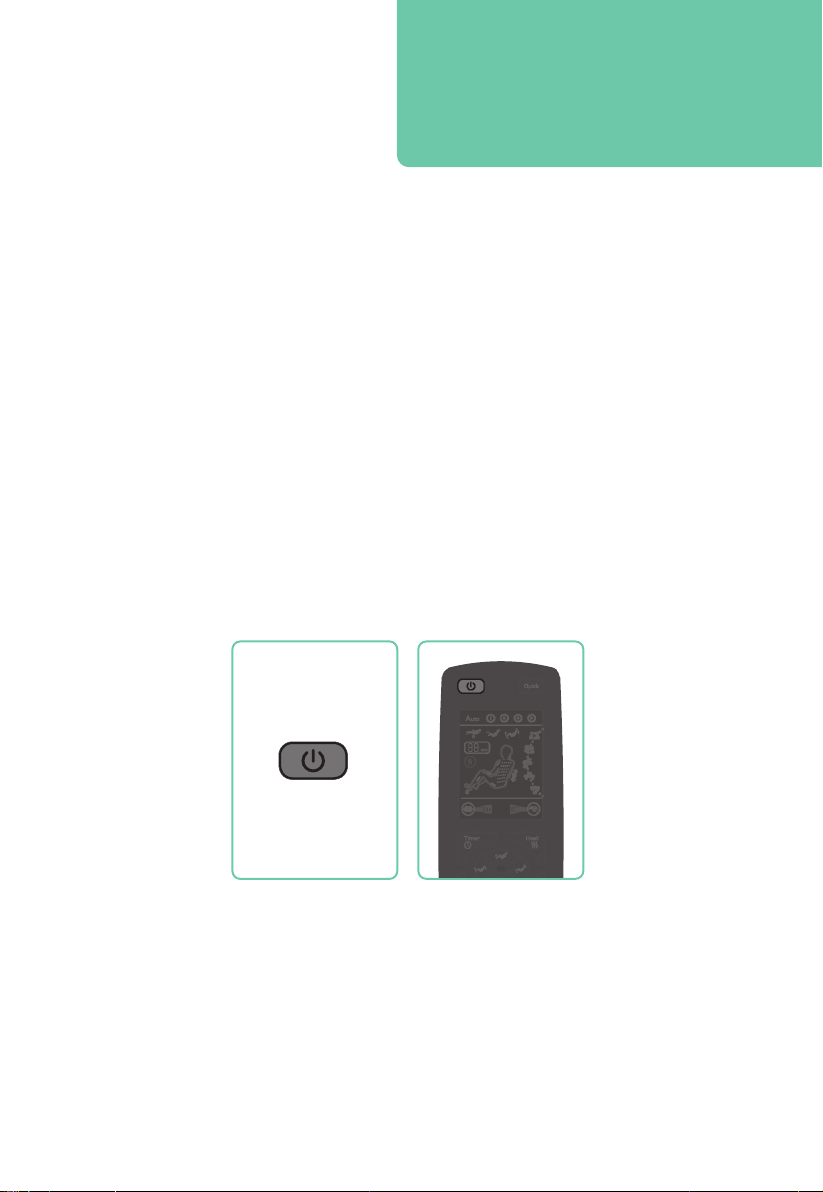
Smart tip: To increase intensity in the neck
and shoulder region, flip the pillow or the
pillow and pillow pad up so you lay directly
on the seat backpad.
Body Scanning
Select any auto program. The chair will automatically begin scanning your body, mapping
your back, shoulders, and neck. During this process its is importing to remain seated back
into the chair without lifting your head.
The scan can be viewed on the remote control screen. If fine tuning is needed just after
your body scan, wait for a series of beeps to start, then immediately use the Roller Position
buttons on the bottom of the remote control to move the massage rollers up or down for
the perfect shoulder kneading position.
Reduce the Intensity of your Massage - Manually
To make the massage less intense you can fold down the neck rest to provide more
cushioning between you and the massage mechanism in the seat back.
10min
10min
Getting out of the Chair
To easily exit the chair at any time, press the ON/OFF power button on the remote control
to restore the chair to the upright position.
9
Page 10
Taking Control
Auto Programs
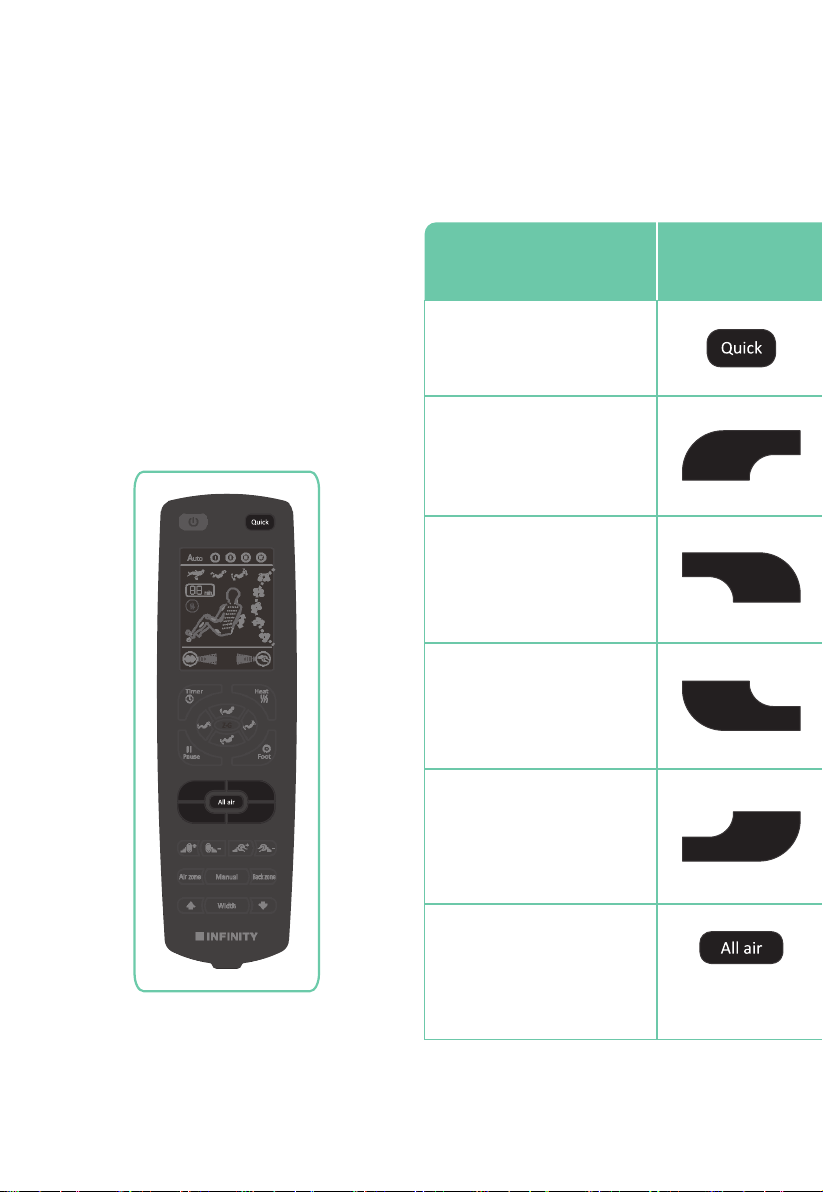
Press any of the highlighted AUTO
PROGRAM buttons to jump to the
corresponding Auto Program. Select among
6 Auto Programs. The display screen will
show the In-Use screen.
While running any Auto Program, you can
select a different Auto Program or go into
Manual mode at any time. You do not need
for that program to end.
Program Button
Quick
Full Body
I - Full Body
Recover
II - Recover
Focus
I-Full Body II-Recover
IV-RelaxIII-Focus
III - Focus
Relax
IV - Relax
All Air
10
Page 11

What for? Description
To gain a quick understanding of
what each auto program has to
offer.
This program is the best choice to
relax tired muscles and increase
physical vigor.
Soothe muscles after sports
activities and exercise.
Helps with muscle recovery and
benefits of stretching.
Try this program as you prepare
your body to rest for the night.
Rapid demonstration of all massage techniques and
chair motions.
Comprehensive massage session using deep
tissue kneading, and tapping combines with air cell
compression.
Massage session focused on back and leg/foot
region muscle recovery.
Performs a series of grab, hold, and stretch
sequences while the back and legrest move up and
down. This is combined with traditional massage
techniques.
Massage session built for winding down with slower
paced massage techniques.
For compression only massage
without any kneading and tapping.
Many find this program beneficial
to relax and ease stress when
winding down.
This massage uses only airbags for a full-body
compression massage, alternating between the feet,
calves, seat, arms, hands, and shoulders.
11
Page 12
Taking Control
Airbag Massage
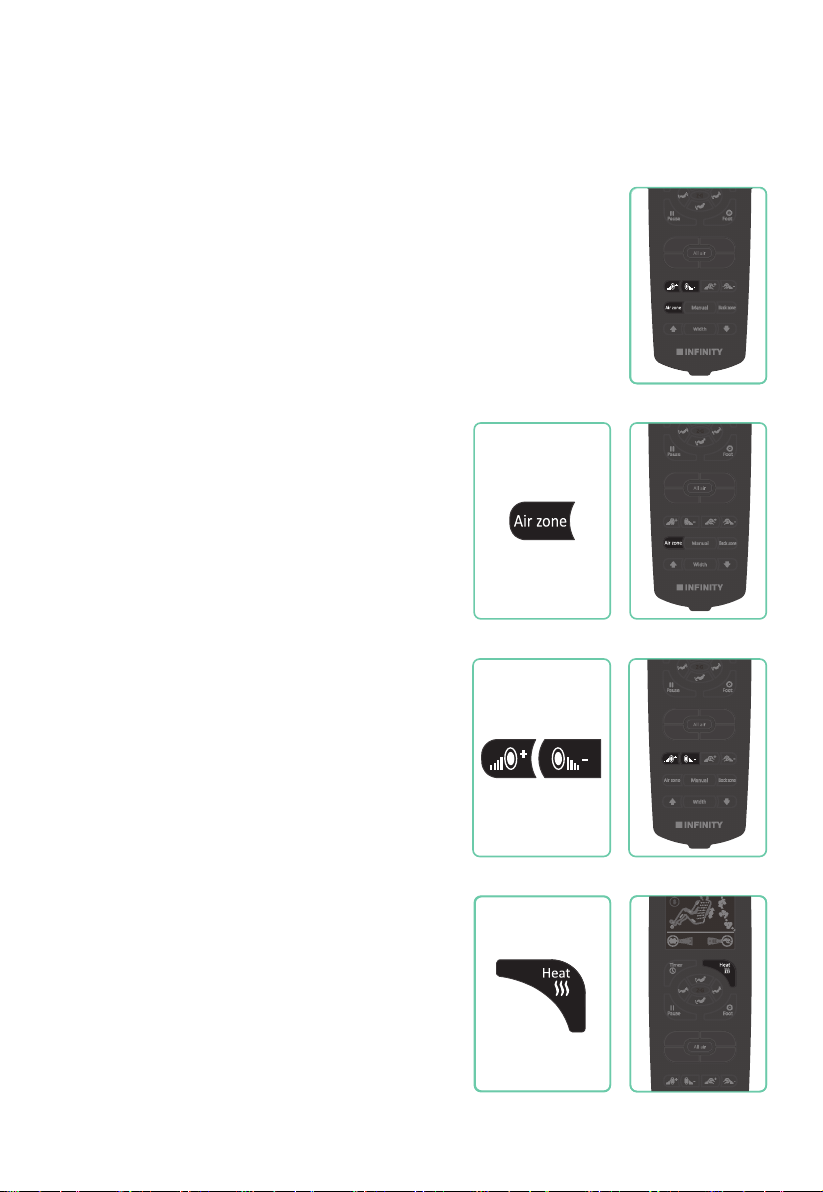
To control the airbag functions of your chair, use the AIR ZONE button,
and the AIR PRESSURE INTENSITY button found on your remote
control.
The Air Pressure Intensity button adjusts the strength of the airbag
compression, and the Air massage Zone toggles between the airbag
regions of the chair.
Airbag Region
Press the AIR ZONE button on your remote control
to select your desired airbag massage zone.
Press once for foot air massage.
Press twice for leg air massage.
Press three times for leg and foot air massage.
Press four times for arm air massage.
Press five times for shoulder air massage.
Press six times to turn off.
Airbag Intensity
Press the AIR PRESSURE INTENSITY button
on your remote control to select your desired
intensity: Soft, Medium, or Strong.
I-Full Body II-Recover
IV-RelaxIII-Focus
I-Full Body II-Recover
IV-RelaxIII-Focus
I-Full Body II-Recover
IV-RelaxIII-Focus
Back Heat
Press the HEAT button on your remote control
to turn on lumbar heat. Press button again to
turn off lumbar heat.
12
I-Full Body II-Recover
IV-RelaxIII-Focus
Page 13
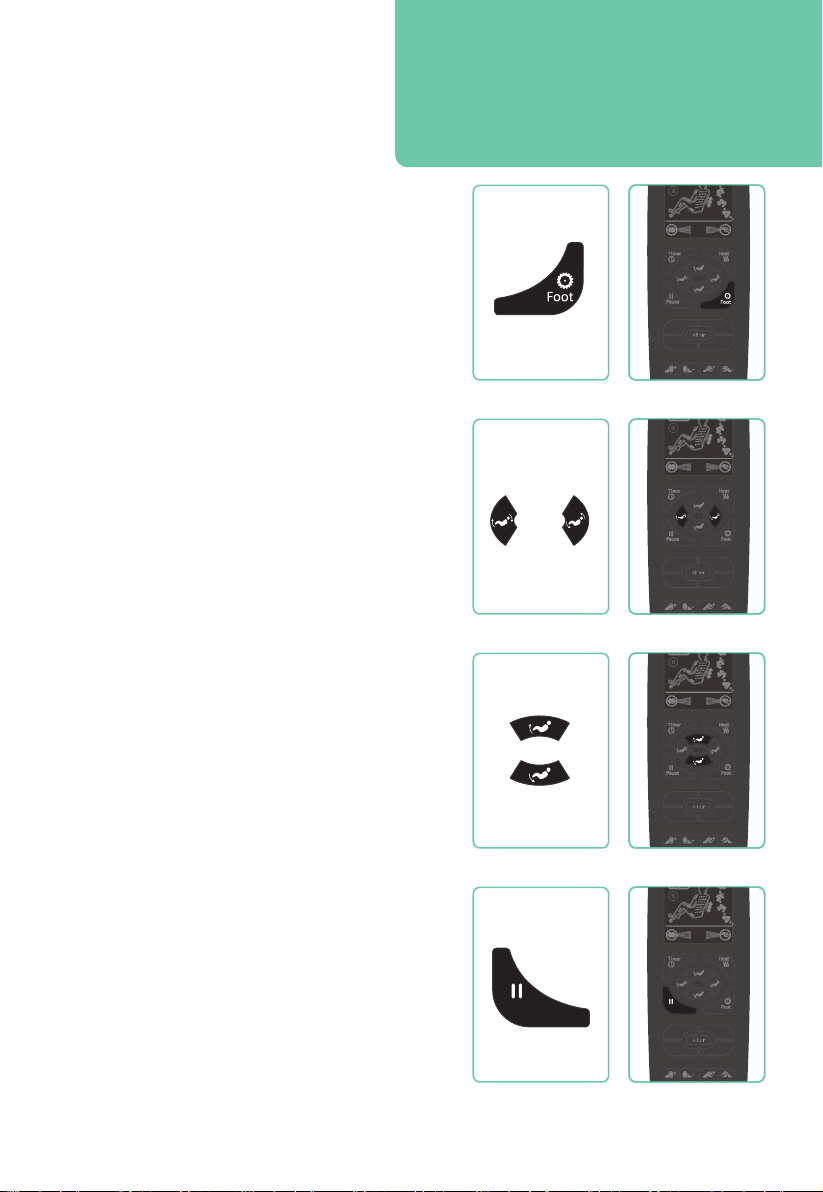
Foot Rollers
Press the FOOT button on your remote control
to turn on foot roller massage. Press button
again to turn off foot roller massage.
Adjusting the Backrest
Press the BACKREST ADJUST buttons on your
remote control to raise or lower the backrest of
the chair.
Smart tip: Adjust the backrest and legrest
angle prior to selecting a massage
function. Setting the position before
selecting a massage program allows for the
chair to deliver a more accurate massage.
I-Full Body II-Recover
IV-RelaxIII-Focus
I-Full Body II-Recover
IV-RelaxIII-Focus
Adjusting the Footrest
Press the FOOTREST ADJUST buttons on your
remote control to raise or lower the backrest of
the chair.
Pause Massage
Press the PAUSE button on your remote control
to force stop the chair during a program and
stop all functions immediately. Press button
again to resume functions.
13
Pause
I-Full Body II-Recover
IV-RelaxIII-Focus
Pause
I-Full Body II-Recover
IV-RelaxIII-Focus
Page 14
Set your Environment
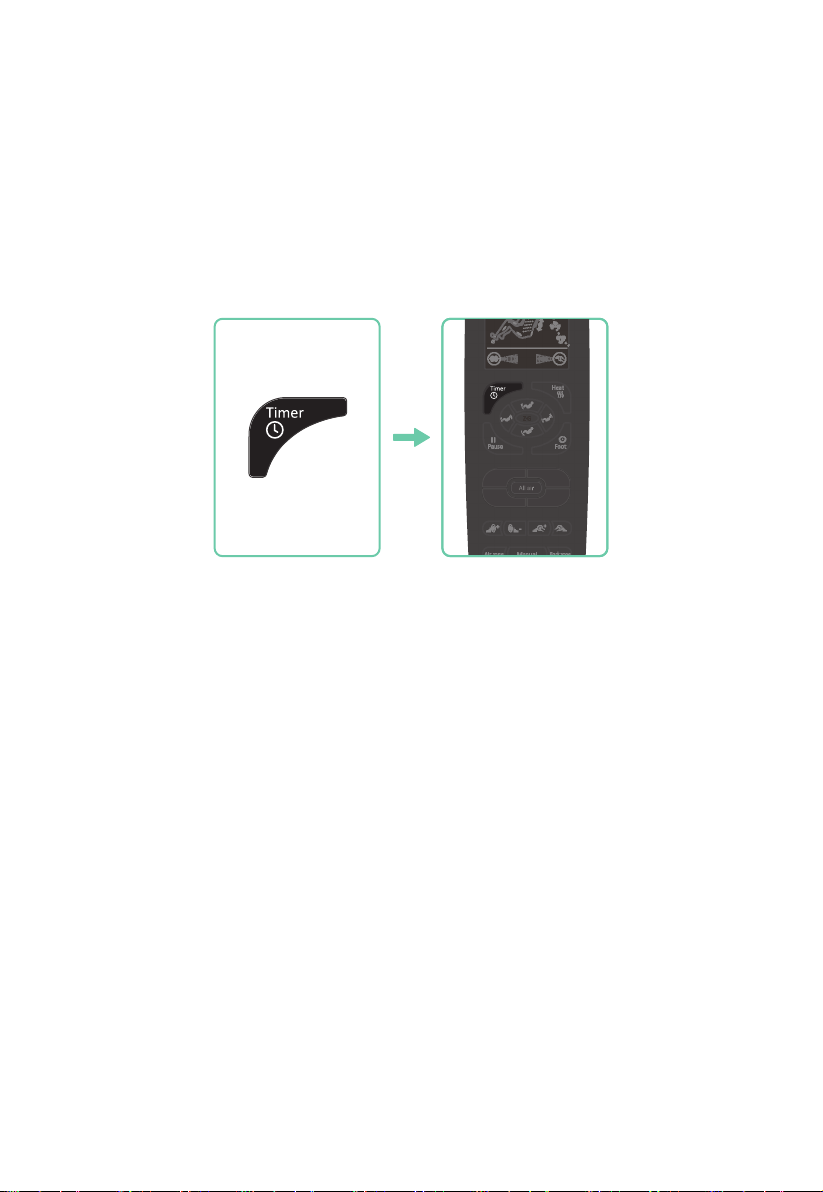
Time
Press the TIMER button on your remote control to select your desired massage time. The
massage time can be adjusted in 5-minute increments, with a max massage time of 30
minutes.
I-Full Body II-Recover
IV-RelaxIII-Focus
Surroundings
Your massage experience is enhanced further by the mood of your surroundings. Set a
soothing environment for total relaxation by blocking any unwanted sounds and light.
14
Page 15

Settings
Remote Control Sleep Mode
After 15 minutes of being idle with nothing selected, your remote control and chair will
automatically turn off. To wake up, press any button then the next button press command
will be acted on. Note: sleep mode does not occur when the chair is in an auto or manual
program.
15
10min
Page 16
Build your own
Manual Programs
In Manual mode you can operate components of your massage chair
individually or combine them to create unique massage scenarios.
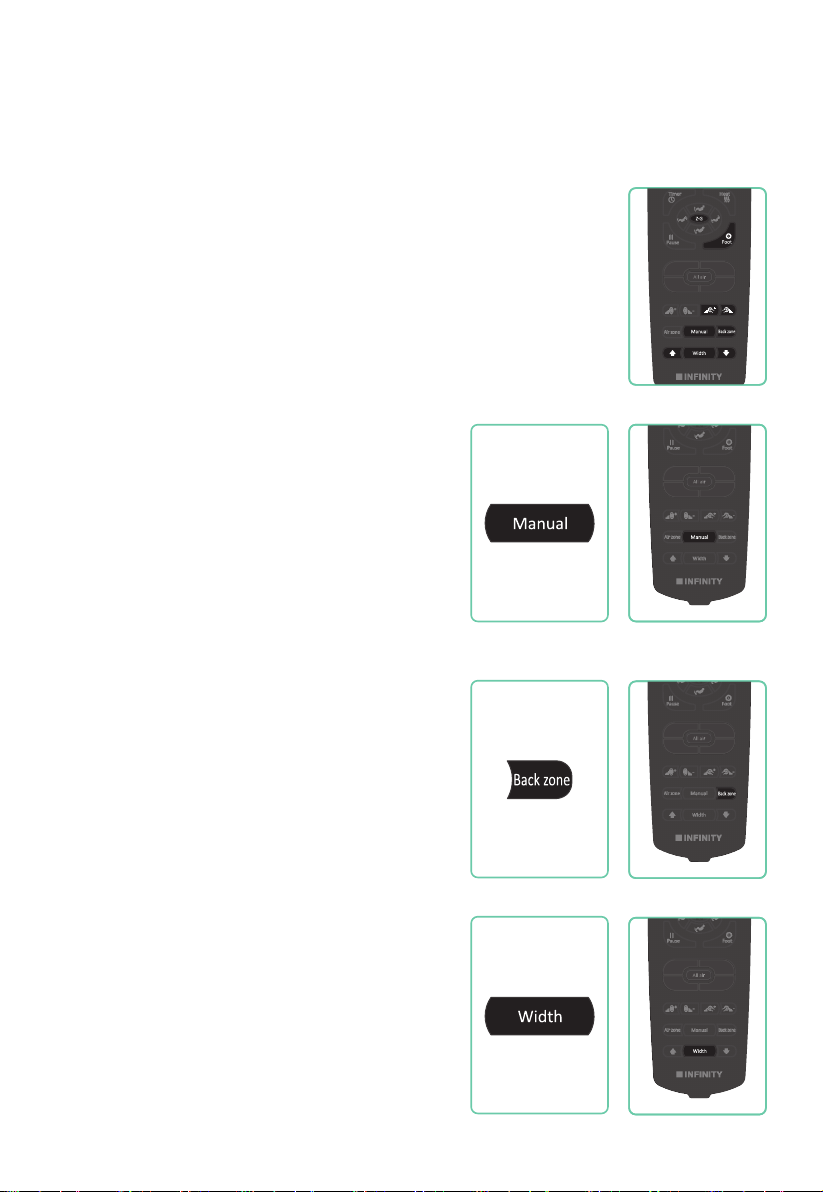
Press the MANUAL button on your remote control to toggle
between massage techniques: KNEADING, KNOCKING, KNEADING &
KNOCKING, TAPPING, and SHIATSU.
Back Massage Technique Mode
Press the MANUAL button on your remote control
to select your desired massage technique:
Press button once for Kneading.
Press button twice for Knocking.
Press button three times for Kneading & Knocking.
Press button four times for Tapping.
Press button five times for Shiatsu.
Massage Part (Back Region)
Press the BACK ZONE button on your remote
control to select your desired region: Point,
Partial, and Whole massage.
I-Full Body II-Recover
IV-RelaxIII-Focus
I-Full Body II-Recover
IV-RelaxIII-Focus
I-Full Body II-Recover
IV-RelaxIII-Focus
Point stops on the track for targeted relief.
Partial travels a short distance and reverses
direction for focused relief. Whole travels the
entire length of the track.
Back Node Width
Press the WIDTH button on your remote
control to select your desired width: Narrow,
Medium, or Wide. Width feature works on
Knocking, Tapping and Shiatsu techniques.
I-Full Body II-Recover
IV-RelaxIII-Focus
16
Page 17
Massage Speed
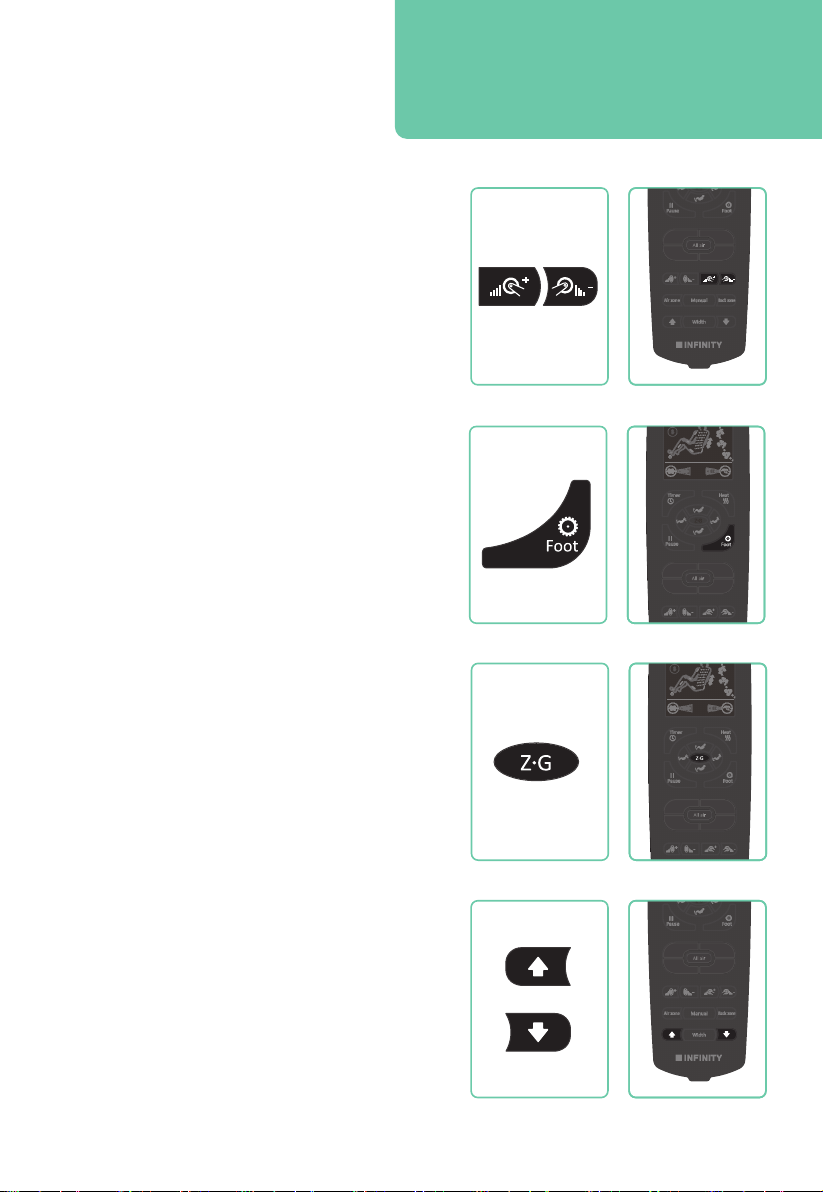
Press the SPEED ADJUSTMENT button on your
remote control to select your desired speed:
Slow, Medium, or Fast.
Foot Rollers
Press the FOOT button on your remote control
to turn on foot roller massage. Press button
again to turn off foot roller massdage.
Smart tip: Massage Width can’t be
adjusted when in Kneading, or Sync mode
techniques. Massage Speed can’t be
adjusted when in Shiatsu.
I-Full Body II-Recover
IV-RelaxIII-Focus
I-Full Body II-Recover
IV-RelaxIII-Focus
Zero Gravity
Zero Gravity mode will recline the back and
elevate the feet to reduce the gravitational
force on your spine. Press the ZG button on
your remote control once for recline, press
twice for Zero Gravity, and press a third time to
turn off.
Move Rollers Up/Down
Press the ROLLER POSITION buttons on your
remote control to set your shoulder height
during body scanning and back zone Point
mode.
17
I-Full Body II-Recover
IV-RelaxIII-Focus
I-Full Body II-Recover
IV-RelaxIII-Focus
Page 18
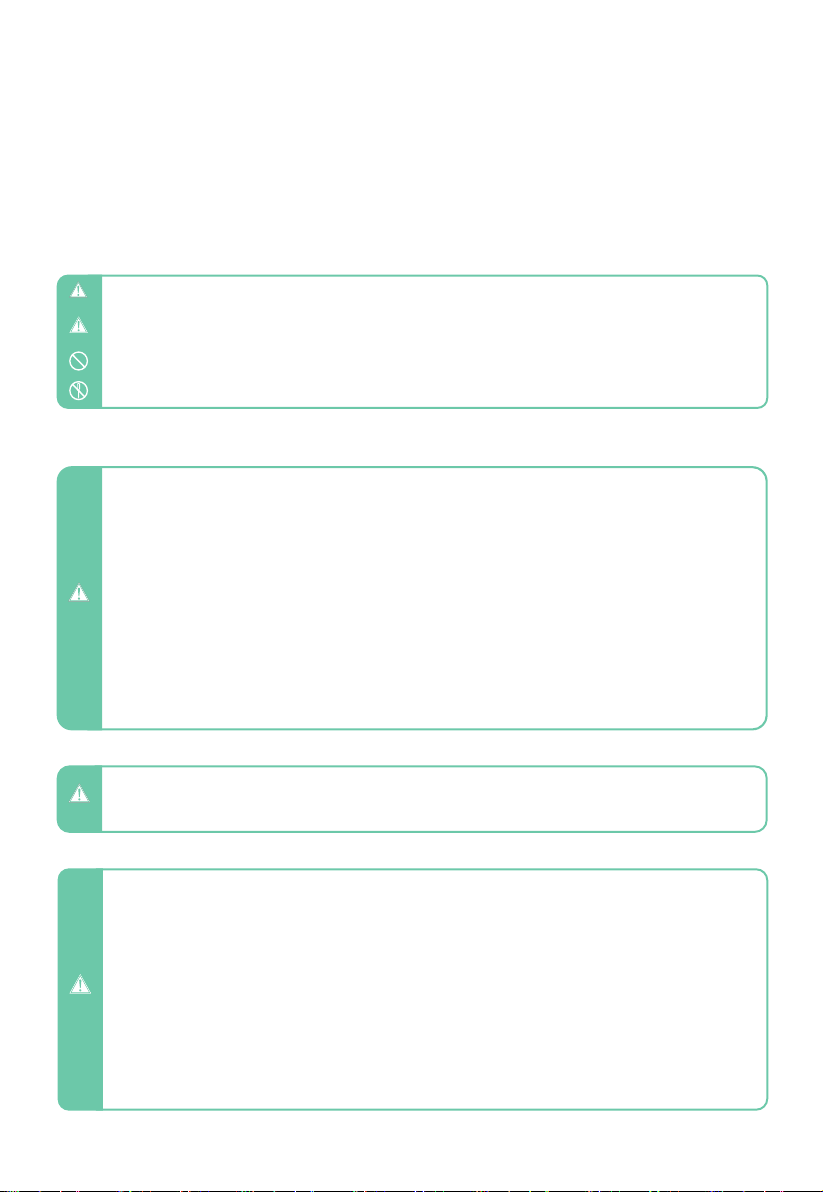
Staying Safe
Safety Precautions
Precautions listed below will help to ensure proper use of this appliance.
Read all instructions before using this appliance.
- Improper operation may cause severe personal injury or substantial property damage.
WARNING
- Improper operation may cause personal injury or product damage.
CAUTION
- Prohibited.
- No Disassemble.
Not Suitable For Below Persons
We recommend those with any of the following conditions consult your physician before using.
- Those who are using electronic medical instruments embedded in the body, such as a cardiac pacemaker.
- Those undergoing treatment, especially those who are not feeling well.
- Those with malignant tumors or malignant abscesses. (Need to be supervised)
- Women who are pregnant.
- Those with osteoporosis or a fractured spine.
- Those with skin diseases or those wwith skin injuries.
- Those with a high fever.
- Close supervision is necessary when this product is used by, on, or near children, invalids, or disabled persons.
WARNING
- The appliance has a heated surface. Persons insensitive to heat must be careful when using the appliance.
- This appliance can be used by children aged 8 years and above and persons with reduced physical, sensory, or
mental capabilities, or lack of experience and knowledge, if they have been given supervision or instruction
concerning the use of the appliance in a safe way and understand the hazards involved.
- Children shall not play with the appliance.
- Cleaning and user maintenance shall not be made by children without supervision.
Control Buttons Precautions
- Do not operate the control buttons with wet hands.
- Do not spill water or other liquids onto the control buttons to avoid fault.
WARNING
- Do not lay heavy objects on the controller.
Best Circumstances
- Do not operate under blanket or pillow. Excessive heating can occur and cause fire, electric shock,
or injury to persons.
- Do not use this appliance when ambient temperature is over 40 C.
- Women who are pregnant should not use this chair.
- Do not use this appliance in humid or dusty environment, or when any part of the body is in contact
with plumbing or any similar ground.
- Never operate the appliance with the air openings blocked. Keep the air openings free of lint, hair,
CAUTION
and the like.
- Do not use outdoors.
- Do not operate where aerosol (spray) products are being used or where oxygen is being administered.
- Please place the product on a flat level floor.
- Do not store near heat or open flame.
- Connect this unit to a properly grounded outlet only. See Grounding Instructions.
18
Page 19
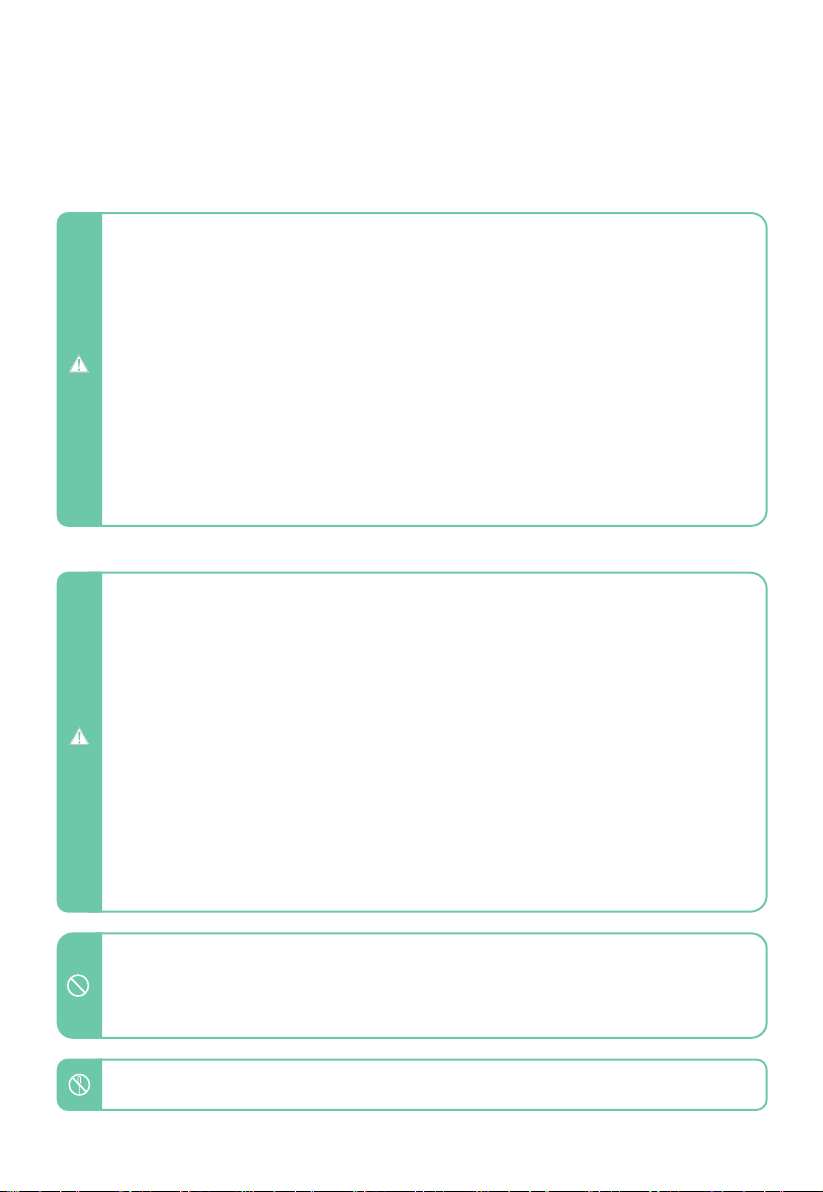
Cautions Regarding the Adapters and Cord
- Always unplug this appliance from the electrical outlet immediately after using and before cleaning.
- An appliance should never be left unattended when plugged in. Unplug from outlet when not in use.
- Unplug from outlet during thunder or lightening storms, and before putting on or taking off parts.
- Check that the power voltage stated on the rating label corresponds to your local electricity supply.
- Do not use a damp hand to unplug the cord to avoid electric shock
- Do not drag the cord, reach to the front plastic end to unplug it.
- Do not squeeze, over bend, pull hard, or twist the cord.
- Keep the cord away from heated surfaces.
- Do not carry this appliance by supply cord or use cord as a handle.
CAUTION
- Never operate this appliance if it has a damaged cord or plug, if it is not working properly, if it has been dropped
or damaged, or dropped into water. Return the appliance to a service center for examination and repair.
- To disconnect, turn all controls to the off position, then remove plug from outlet
- The appliance is only to be used with the power supply unit provided with the appliance.
- It must only be supplied at safety extra low voltage corresponding to the marking on the appliance.
- If the supply cord is damaged, it must be replaced by the manufacturer or its service agent or a similarly qualified
person in order to avoid a hazard.
Best Practices for Safe Use
- Only for users who weigh below 300 lbs.
- Use this product only for its intended use as described in this manual. Do not use attachments not
recommended by the manufacturer.
- Appliance should only be used by one person, do not use by two or more persons at the same
time to avoid damage to the product.
- Do not use the product right after a meal, it may cause discomfort.
- Remove personal accessories from arms and empty pockets while using the massage services.
- Check the upholstery under the cushions and other spots, if any damages are present, do not
use it and refer to a qualified service professional for servicing.
- If you feel any abnormal discomfort during the operation of this product, turn off the power
CAUTION
immediately and do not use the product.
- Use of the appliance for 20 minutes each time is highly recommended.
- Make sure there are no obstacles behind the chair and there is enough clearance before adjusting
the backrest or legrest angle.
- Make sure there is no other excessive load pressed on the backrest or legrest besides the user.
- Make sure there are no children, pets or other objects under the backrest or legrest.
- Please be seated properly while using the product.
- Do not drag or push the chair or roll on its caster on wood floor or carpet to avoid damage
- Do not stand on or stack heavy objects on the footrest.
- Do not fall asleep while the product is operating.
- Avoid using the product under the influence of alcohol.
- Never drop or insert any object into any openings.
- If there is any smoke or unusual smell while using, stop using immediately, and unplug the power cord.
- Do not disassemble this product yourself to avoid failure.
- Do not dismantle, fix or modify the product yourself. Please contact authorized dealer or service agent.
19
Page 20

Fixing Issues
Trouble Shooting
No. Symptoms Possible SolutionPossible Causes
1
Noise is heard while in
use
2
Massage Chair does not
start
These noises are normal and
arise from friction between the
massage rollers and the faux
leather cover
- The power cord is not
secured into the socket
- Not switched ON
- The fuse is blown
No need to take any
measures
- Insert the power plug properly
into the power socket
- Turn on the switch found on
chair side. Then push power
button on remote
- Replace only with a fuse of
same type and rating
3
Backrest or footrest can
not raise or recline
Airbag malfunction
4
If problem remains, please contact Infinity for maintenance.
Tip: Do not attempt to repair this product yourself, our company shall not be liable for the injury or damage caused by any
servicing without authorizations. Thank you for you cooperation
Excessive load has been pressed
on the backrest or legrest
The air hose is blocked
Reduce the load and try again
Straight the air hose and
clearout the blockage
.
20
Page 21

Frequently Asked Questions
Q: I find the chair is too intense to be comfortable. What can I do?
A: Your body needs to become acclimated to therapeutic massage. To be effective, the
massage techniques must compress the tissue in your body. We recommend the following
steps to help get started. Then over time as your body acclimates you can increase the
intensity by reducing the layers between you and the chair.
1. Use the body pillow and pillow pad to reduce upper body intensity
2. If a specific airbag is too intense, turn off Full and turn only the airbags you want
3. Press the foot roller button to turn the foot rollers off
4. Adjust the recline on the remote. More upright will be less intense. Zero Gravity will be
more intense
Q: I’m not a foot massage person, what should I do?
A: To turn off foot rollers, press the Foot Roller button on your remote control. You may
also want to reduce the air intensity to level 1.
Q: My chair is not performing as expected. What should I do?
A: Your Infinity massage chair is an amazing combination of programming and robotics.
On occasion the chair just may need to be rebooted. To do this power down the chair and
unplug from the wall for 5 minutes then plug back in and power back up to see if it selfhealed. If you are still having an issue, give Infinity a call at 603-910-5000.
Q: I can never seem to get in my Infinity Massage chair, someone is
always in it.
A: We know. It happens. Tell your friends to get their own Infinity Chair.
For more information and access to further questions, and resources, visit our website at
www.infinitymassagechairs.com
21
Page 22

Fixing Issues
Specifications
Model
Dimension of Main Body (in)
Necessary Clearance to Wall (in)
Net Weight (lbs)
Shipping Weight (lbs)
Max. User Weight (lbs)
Voltage
Fuse
Power Consumption
Safety Standards
Prelude
52 x 32 x 48 (L x W x H)
”
15
154
180
264
120V 60Hz
3.15 AMP
W
100
Type 1
22
Page 23

Product Warranty
For the most current Warranty information please visit:
www.infinitymassagechairs.com/warranty
Alternatively, scan the QR code to go directly to the URL above.
SCAN CODE
Page 24

72 Stard Road, Seabrook, NH
03874
(603) 910-5000
www.infinitymassagechairs.com
Version 2.2
 Loading...