

Page 1

Luftreiniger
Air Purifi ers
Purifi cateur
AP 40
DE Betriebsanleitung
EN Operating Instructions
FR Mode d´emploi
DE Bitte lesen Sie vor Inbetriebnahme des Gerätes unbedingt diese
Betriebsanleitung und beachten Sie die Sicherheitshinweise.
EN Please read and follow all safety rules and instructions in this manual
before operating.
FR Nous vous prions de lire attentivement le mode d’emploi avant d’utiliser la
machine, et attirons votre attention sur les consignes de sécurité.
Page 2

- 2 -
AP 40
DE Betriebsanleitung (1 - 29)
EN
Operating Instructions
(30 – 57)
FR Mode d´emploi (58 – 85)
DE Produkteigenschaften
Aufstellen 5
Inbetriebnahme 7
Reinigung 10
Übersicht und Benennung der Teile
Vorne 11
Oben 12
Bedienfeld 12
Aufstellung / Bedienung
1. Aufstellungsort 13
2. Filter einsetzen 14
Bedienung des Luftreinigers
1. Inbetriebnahme 16
2. Automatischer Betrieb 17
3. Schlaf-Modus 17
4. Manueller Modus 18
5. Zeitschaltuhr 18
6. PasmaWave
®
18
7. Kindersicherung 19
8. Luftqualitätsindikator 19
Wartung und Pfl ege
1. Filterwechsel 20
2. Reinigen des
CleanCel® Fein Filters 23
3. Reinigen des Staubsensors 24
4. Reinigung (Außen und Innen) 25
Mögliche Störungen 26
Technische Daten 28
Page 3

- 3 -
Pre-filter
Carbon deodorization filter (CD )Anti-microbial HEPA filter
PlasmaWave
Washable
filters
Stage : Pre-filter
Filters large household particles such as dust, pet hair,
pollen, and lint.
Replaceable
filters
Stage : Carbon deodorization filter (CD)
Safely removes various odors and harmful gases like
acetic acid, ammonia, and acetaldehyde.
Stage : Anti-microbial HEPA filter
Captures 99.97% of ultrafine particulate matter
(PM2.5) and impurities as small as 0.3 microns.
Non-
removable
element
Stage : PlasmaWave®
Cleans the air by breaking down and removing a
range of undesirable airborne contaminants and
disease-causing agents like bacteria and fungi.
Waschbarer
Filter
Austauschbare
Filter
Element nicht
austauschbar
CleanCel® Fein Filter
CD Aktivkohle Filter
Antimikrobieller True HEPA Filter
PlasmaWave
®
Filtert allgemein bekannte Partikel wie Staub,
Tierhaare, Pollen und Fusseln.
Entfernt verschiedene Gerüche und
schädliche Gase, wie Essigsäure, Ammoniak
und Acetaldehyd.
Erfasst zu 99,97% ultrafeinen Staub (PM2,5)
und Verunreinigungen mit einer Größe von 0,3
Mikron.
Reinigt die Luft durch den Abbau von einer
Reihe unerwünschten Verunreinigungen und
entfernt Krankheitserregern, wie Bakterien und
Pilze.
CleanCel® Fein Filter
CD Aktivkohle Filter
Antimikrobieller True HEPA Filter
PlasmaWave
®
Page 4

- 4 -
AP 40
Smart Sensors
Comprehensive detection/analysis of
indoor air quality and environment
through built-in sensors for dust,
odors, and light, enabling automatic
operation. (Able to sense a range of
impurities such as ultrafine
particulate matter, household dust,
acetic acid, and ammonia.)
Air Quality Indicator
Color-coded LED indicates three
levels of air quality. Also serves as
low-level nighttime illumination
during sleep.
Various modes
Automatic/Manual/Sleep modes can
be selected according to different
conditions.
Filter Replacement Reminder Sensor
When it is time to change one of the
filters, an indicator light will
automatically display an alert. To
assure clean indoor air, be sure to
change the filters at the specified
intervals.
Child Lock
This feature ‘locks’ the control panel to
prevent malfunctions from accidental
misuse by small children.
Timer
Automatic turn-off after specified
period of use (choice of 1, 4, or 8
hours).
FEATURES
PACKAGE CONTENTS
Product
Pre-filter/Carbon deodorization filter (CD)/
Anti-microbial HEPA filter
(Included with the product.)
Power cord with
plug
Use and Care
Guide
or
Intelligenter Sensor
Die Innenraum- und Umweltluft
wird mit Hilfe eines automatischen
Staub-, Geruch- und Lichtsensors
umfassend erkannt und analysiert.
(Der Sensor ist in der Lage eine
Vielzahl von Verunreinigungen, wie
zum Beispiel ultrafeiner Feinstaub,
Hausstaub, Essigsäure oder
Ammoniak zu erkennen.)
Luftqualitätsindikator
Farbcodierte LEDs zeigen die
momentane Luftqualität an. Im
Nachtmodus werden die LEDs
gedimmt. Der Luftqualitätsindikator
ist im Nachtmodus deaktiviert.
Verschiedene Funktionen
Automatik- / Manueller- /
Schlaf-Modus
Kindersicherung
Diese Funktion sperrt die
Systemsteuerung und verhindert
somit versehentliche Störungen oder
Manipulation durch Kinder.
Zeitschaltuhr
Abschaltautomatik nach einer von
Ihnen festgelegten Nutzungsdauer
(zur Auswahl stehen 1, 4 oder 8
Stunden)
Filterwechsel-Sensor
Falls es Zeit wird den Filter zu
wechseln, wird Ihnen das der
Filterwechsel-Sensor automatisch
auf dem Display anzeigen. Um
sicherstellen, dass Sie eine reine
und saubere Luft erhalten, wechseln
Sie bitte den Filter nach spätestens
12 Monaten.
Produkteigenschaften
Inhalt
Produkt CleanCel® Fein Filter
CD Aktivkohle Filter
Antimikrobieller True HEPA Filter
Netzkabel Betriebs-
anleitung
Luftreiniger
#KT2WTKſGTU
2WTKſECVGWT
AP 40
&'$GVTKGDUCPNGKVWPI
'01RGTCVKPI+PUVTWEVKQPU
(4/QFGFyGORNQK
DE Bitte lesen Sie vor Inbetriebnahme des Gerätes unbedingt diese
Betriebsanleitung und beachten Sie die Sicherheitshinweise.
EN Please read and follow all safety rules and instructions in this manual
before operating.
FR Nous vous prions de lire attentivement le mode d’emploi avant d’utiliser la
machine, et attirons votre attention sur les consignes de sécurité.
Page 5

- 5 -
Installation
Do not place near flammable
materials (aerosol sprays, fuel oil,
gases, etc.).
This may cause an explosion or fire.
Do not install below an electrical
outlet.
This may cause fire.
fuel oil
Sprays
gases
Do not place near any gas- or heat-
producing appliances, such as gas
appliances, heaters, and fireplaces.
This may cause the unit to become
deformed, discolored, or to catch fire.
Do not install where large quantities
of noxious gases are present,
including carbon monoxide and
gases emitted by animals.
This may cause the unit to break down.
Product Specifications
Before operating this equipment, carefully read and follow these safety cautions and
instructions to avoid damage and ensure safe use.
WARNING
Follow these instructions to reduce the risk of serious
injury or death.
NOTICE
Failure to follow these safety instructions may lead to
personal injury or property damage.
Sicherheitshinweise
Bitte lesen Sie vor Inbetriebnahme des Gerätes unbedingt diese
Betriebsanleitung und beachten Sie die Sicherheitshinweise.
Warnung
Bitte folgen Sie der Anweisungen um das Risiko
einer Verletzung zu vermeiden.
Bei Nichtbeachtung dieser Sicherheitshinweise
kann es zu Verletzungen oder Sachschäden
kommen.
Hinweis
Aufstellen
Bitte stellen Sie das Gerät nicht in
die Nähe von brennbaren
Materialien (Spraydosen, Heizöl,
Gase, etc.) auf. Dies könnte zu einem
Feuer oder einer Explosion führen.
Bitte installieren Sie das Gerät nicht
unter einer Steckdose.
Dies könnte zu einem Feuer führen.
Bitte platzieren Sie das Gerät nicht
in die Nähe von Haushaltsgeräten
die Wärme produzieren, wie z.B.
Gasherden, Heizungen oder
Kaminen. Dies kann dazu führen, dass
sich das Gerät verformt, verfärbt oder
sogar anfängt zu brennen.
Bitte installieren Sie das Gerät nicht
dort, wo größere Mengen
schädlicher Gase, wie z.B. Kohlenmonoxid oder von Tieren
ausgestoßene Gase vorhanden sind.
Dies kann zu einem Defekt des Geräts
führen.
Page 6

- 6 -
AP 40
Installation
Do not install near electronics such
as TVs, radios, or air conditioners.
Electromagnetic interference may cause the
unit to malfunction.
Do not place the unit facing into
wind or drafts.
This may cause the sensors to fail.
Do not install under direct sunlight,
lighting fixtures with inverters, or
lighting fixtures with automatic
detection sensors.
This may cause the unit’s sensors to
malfunction.
Do not use around mist or fumes
from industrial oil or around large
quantities of metallic dust.
This may result in fire or may cause product
failure.
Do not install in confined spaces or
on slanted or uneven surfaces.
This may cause product failure or
deformation.
Do not install in any sort of transport
(motor vehicles, boats, ships, etc.).
Aufstellen
Installieren Sie das Gerät nicht
in der Nähe von elektronischen
Geräten, wie TVs, Radios oder
Klimaanlagen. Elektromagnetische
Störungen können Fehlfunktionen im
Gerät verursachen.
Platzieren Sie das Gerät nicht in
direkter Sonneneinstrahlung oder
unter Leuchten mit automatischer
Leuchtkraftanpassung. Dies könnte
zu einem Defekt des Lichtsensors
führen.
Platzieren Sie das Gerät weder in
engen Räumen noch auf schrägen
oder unebenen Oberfl ächen. Dies
könnte zu
Betriebsstörungen oder
Verformungen führen.
Betreiben Sie das Gerät nicht in
einem Transportmittel, wie z.B. Kfz,
Boot, Schiff, etc.
Setzen Sie das Gerät keinem
Wasserdampf / Nebel oder
Nebel aus Industrie Öl oder großen
Mengen Metallstaub aus. Dies kann
zu einem Brand oder dem Ausfall des
Gerätes führen.
Platzieren Sie das Gerät nicht in
einem Zugluftbereich. Dies kann
dazu führen, dass die Sensoren gestört
werden.
Page 7

- 7 -
Operation
Do not use in places that are very
humid or moist or where the unit
may get wet, such as bathrooms.
This may result in fire or electric shock.
Unplug the power cord when not in
use for long periods.
Leaving it plugged in could cause the
insulation to deteriorate, posing a risk of
short circuit and fire.
Do not plug other appliances into
the same outlet. Provide an
exclusive outlet for this unit.
Also, do not arbitrarily extend the power
cord. Risk of electric shock or fire may result
from plugging several appliances into one
outlet, modifying the power cord, or using
an extension cord.
Do not pull on the power cord when
unplugging the unit.
This may cause electric shock or fire.
Do not touch the plug with wet
hands.
This may result in electric shock.
Do not damage the power cord by
forcefully bending, pulling, twisting,
bundling, or pinching it, or by
placing heavy objects on it.
Damaging the power cord could lead to a
short circuit, resulting in electric shock or fire.
Inbetriebnahme
Benutzen Sie das Gerät nicht in
sehr feuchten oder nassen
Raumen, in denen das Gerät feucht
werden könnte, wie z.B. im
Badezimmer. Dies kann zu einem
elektrischen Schlag oder Brand
führen.
Stecken Sie das Gerät aus, falls das Gerät
für einen längeren Zeitraum nicht benutzt
wird. Das Eingesteckt-lassen kann die
Isolierung verschlechtern - daraus entsteht
ein Risiko für Kurzschluss und Feuer.
Benutzen Sie keine Mehrfachsteckdose,
das Gerät sollte in einer Einzelsteckdose eingesteckt werden. Benutzen Sie
auch kein Verlängerungskabel.
Das benutzen einer Mehrfachsteckdose,
modifi ziertem Netzkabel oder einem
Verlängerungskabel kann zu einem
elektrischen Schlag oder Brand führen.
Stecken Sie das Gerät nicht aus, indem
Sie am Kabel ziehen. Dies kann zu einem
elektrischen Schlag
oder Brand führen.
Berühren Sie den Netzstecker
nicht mit nassen Händen.
Dies kann zu einem elektrischen Schlag
führen.
Beschädigen Sie das Netzkabel nicht
durch Drücken, Biegen, Ziehen,
Drehen oder Einklemmen. Stellen Sie
auch keine schweren Gegenstände darauf
ab. Dies kann zu einem
elektrischen Schlag oder Brand führen.
Page 8

- 8 -
AP 40
Operation
Do not unplug or move the unit
while it is running.
This may cause product failure or fire.
Make sure the filters have been
inserted before running the unit.
Running it without filters shortens the
product’s service life and may cause electric
shock or injury.
Do not touch the interior of the unit
with wet hands.
The high voltage may cause electric shock.
Do not insert foreign objects into the
vents, such as pins, rods, and coins.
Make especially sure that children follow
safety rules around the unit. Unsafe behavior
may result in product failure or injury from
burns or electric shocks.
If the unit becomes submerged in
water, unplug it and contact the
service center.
If you attempt to dry and operate the unit after it
has been submerged, this could result in product
failure, electric shock, fire, or injury.
When cooking foods with strong
odors, reduce use of the unit as
much as possible.
The filters may become permeated with the
cooking odors, possibly affecting the filters’
performance and service life.
Ziehen oder bewegen Sie das Gerät
nicht, während dessen es noch
in Betrieb ist. Dies kann zu einer
Betriebsstörung oder einem Brand
führen.
Achten Sie darauf, dass die Filter vor der
Inbetriebnahme eingesetzt wurden. Der Be-
trieb ohne Filter kann die Produktlebensdauer
verkürzen und kann einen elektrischen Schlag
oder Verletzungen verursachen.
Fassen Sie niemals mit nassen
Händen in das Geräteinnere. Die
Hochspannung kann einen
Stromschlag führen.
Stecken Sie keine Fremdkörper, wie z.B. Stifte,
Stangen oder Münzen, in den Lufteinlass oder
Luftauslass. Achten Sie besonders darauf, dass
Kinder die Sicherheitsregeln befolgen.
Unvorsichtiges Verhalten kann zu Betriebsstörungen
oder Verletzungen, wie z.B. Verbrennungen oder
Elektroschocks, führen.
Sollte das Gerät im Wasser stehen, ziehen Sie
sofort das Netzkabel und rufen dem IDEAL
Kundendienst oder Ihrem Fachhändler an.
Falls Sie versuchen sollten das getrocknete Gerät
in Betrieb zu nehmen, nachdem es im Wasser
gestanden hat, kann das zu Produktausfall,
Stromschlag, Brand oder Verletzung führen.
Wenn Sie Gerichte mit starken
Gerüchen zubereiten, reduzieren Sie
bitte den Einsatz des Geräts soweit
wie möglich. Starke Kochgerüche
können möglicherweise die zukünftige
Filterleistung und somit die Lebensdauer
des Filters beeinfl ussen.
Inbetriebnahme
Page 9

- 9 -
Operation
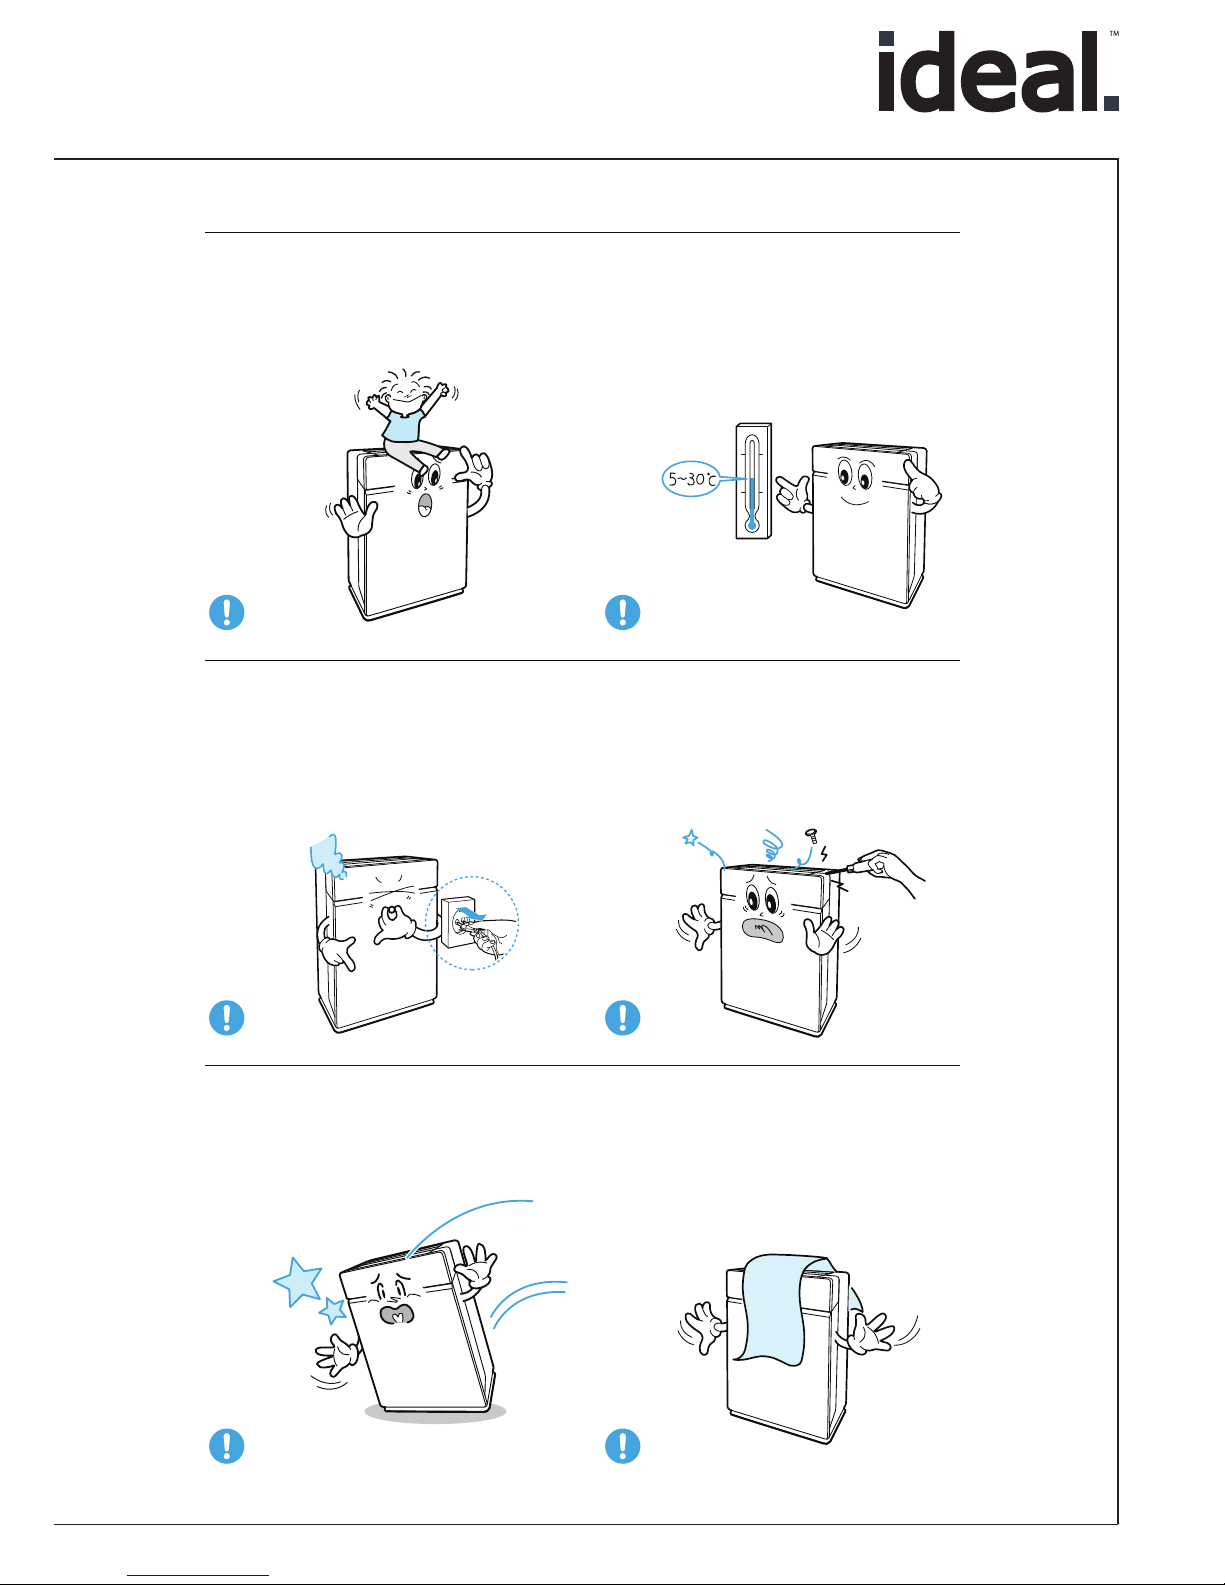
Do not step on or place heavy
objects on top of the unit.
This could result in personal injury, or may
cause product failure or deformation.
Do not use in places with extremely
high or low temperatures.
This product is for indoor use (5-30˚C). Using
it outside this temperature range may cause
deformation, discoloration, or shortened
filter life.
If the product emits unusual noises,
smells, or smoke, unplug the power
cord immediately and contact the
service center ( 1544-5081).
Such occurrences may lead to electric shock
or fire.
Never disassemble, repair or modify
this product yourself.
This may cause product failure, electric
shock, or fire. If repairs are needed, contact
the service center.
Do not subject the product to strong
blows or physical shocks.
This may lead to product failure.
Do not allow intake or outlet vents
to become blocked, for instance by
furniture, laundry, curtains, or other
objects.
Such blockage may lead to increased internal
temperatures, causing product deformation.
Inbetriebnahme
Steigen Sie nicht auf das Gerät und
stellen Sie keine schweren Objekte
auf das Gerät. Dies kann zu
Verletzungen, Produktausfall oder
Deformationen führen.
Betreiben Sie das Gerät nicht in Räumen, in
denen extrem hohe oder niedrige Temperaturen
herrschen. Das Gerät ist für den Innenbereich
(5° bis 30°C) ausgelegt. Verwendet man das Gerät
außerhalb dieses Temperaturbereichs kann es zu
Verformungen, Verfärbungen oder einer verkürzen
Lebensdauer der Filters führen.
Sollten Sie vom Gerät ausgehend
ungewöhnliche Geräusche, Gerüche
oder Rauch entdecken, ziehen Sie bitte
sofort das Netzkabel ab und wenden Sie
sich an den IDEAL Kundendienst oder
Ihren Fachhändler.Solche Ereignisse
können zu einem elektrischen Schlag oder
Brand führen.
Versuchen Sie nicht selbst das Gerät zu
reparieren, zu modifi zieren oder zu zerlegen.
Dies kann zu Betriebsstörungen, elektrischem
Schlag oder Brand führen. Falls eine Reparatur
notwendig sein sollte, kontaktieren Sie bitte den
IDEAL Kundendienst oder Ihren Fachhändler.
Lassen Sie das Gerät nicht fallen.
Stoßen Sie das Gerät nicht. Setzen
Sie das Gerät keinen Vibrationen
oder Erschütterungen aus.
Dies kann zu einem Produktausfall führen.
Die Lufteinlässe und Luftauslässe müssen frei
sein, d.h. diese Öffnungen dürften nicht durch
Möbel, Wäsche, Vorhänge oder anderen
Objekten versperrt werden. Eine solche Blockade
kann zu einer erhöhten Innentemperatur führen,
was zu Produktverformungen und einem
Produktausfall führen kann.
Page 10

- 10 -
AP 40
Operation
Do not tie up or bundle the power
cord when operating the unit.
This may cause electric shock or fire.
Do not use for specialized purposes
or sites, such as places devoted to
animals and plants, precision
instruments, or art conservation.
Cleaning
Do not use flammable sprays or
liquid detergents.
This may cause product failure, electric shock
or fire.
Do not use flammable sprays or
liquid detergents.
This may cause product failure, electric shock
or fire.
Do not allow children to clean or
maintain the unit by themselves.
Adult supervision is absolutely necessary.
Before cleaning or performing
maintenance, unplug the power cord
and be sure the fan has stopped.
Not doing so could result in electric shock or
injury.
Inbetriebnahme
Das Netzkabel darf nicht gebündelt
oder zu einem Knoten zusammen
gefasst sein, wenn das Gerät im
Betrieb ist. Dies kann zu einem
elektrischen Schlag oder Brand führen.
Betreiben Sie das Gerät nicht zu spezialisierten
Zwecken, wie in Umgebungen die für Tiere oder
Pfl anzen, Präzisionsinstrumente, oder
Kunstkonservierung oder ähnlichem
vorgesehen sind.
Verwenden Sie keine brennbaren
Sprays oder fl üssige Reinigungsmittel.
Dies kann zu Betriebsstörungen,
elektrischem Schlag oder Brand führen.
Lassen Sie kein Wasser auf das Gerät laufen.
Dies kann zu Betriebsstörungen, elektrischem Schlag
oder Brand führen.
Lassen Sie das Gerät nicht von Kindern
reinigen oder reparieren.
Nur unter Ausicht von
Erziehungsberechtigten.
Versichern Sie sich unbedingt, dass der
Gerätenetzstecker gezogen ist und der Lüfter
gestoppt hat, bevor Sie das Gerät reinigen oder
eine Wartung durchführen. Nichtbeachtung kann
zu einem elektrischen Schlag oder Verletzung
führen.
Reinigung
Page 11

- 11 -
PlasmaWave®
Control Panel / Display Panel
Air Quality LED Indicator
Main unit
Anti-microbial HEPA filter
Carbon deodorization
filter (CD )
Pre-filter
Front panel
Power cord with plug
(This product is suitable for
220V only.)
Übersicht und Benennung der Teile
Vorne:
Netzkabel
Bedienfeld / Display
PlasmaWave
®
Luftqualitätsindikator
Haupteinheit
Antimikrobieller
True HEPA Filter
CD Aktivkohle Filter
CleanCel®
Fein Filter
vordere Abdeckung
(nur 120V)
Page 12

- 12 -
AP 40
| Top |
| Control Panel and Display Panel |
Vent
Light Sensor
Detects whether the environment
is light or dark and automatically
adjusts operation accordingly.
Timer Indicator
Indicates how long the unit
is currently programmed to
run, if timer has been set.
PlasmaWave® Indicator
Indicates whether the
PlasmaWave® air cleaning
function is running.
Smart Sensors
Automatically detect
indoor air quality.
Child Lock Indicator
When the Child Lock
feature is engaged, this is
illuminated to signal that
the control panel is locked
and settings cannot be
changed.
Child Lock Button
Press for at least 3 seconds to engage
or disengage the Child Lock feature.
Mode / Fan Speed Button
Selects each mode in turn:
Automatic l Sleep l Low l
Medium l High l Tur bo.
Power Button
Starts or stops
operation.
Timer / Air Quality
Indicator Button
Press momentarily to set desired
length of operation (1hr l 4hr
l 8hr l[NO TIMER]). Pressing
this button for at least 3 seconds
turns the Air Quality Indicator
light on or off.
PlasmaWave® Button
Turns PlasmaWave® function on or off.
Filter Replacement
Reminder
When it is time to change
one of the filters, an LED light
is illuminated as a reminder.
Reset Button
After replacing a filter, press
the RESET button for at least
5 seconds.
Oben:
Lüftungsöffnung
Bedienfeld
Lichtsensor
Rückstellungsknopf
Intelligenter
Sensor
PlasmaWave®
Anzeige
ZeitschaltuhrAnzeige
Stellt fest ob die Umgebung hell
oder dunkel ist, passt den Betrieb
automatisch entsprechend an.
(Nachtmodus)
Leuchtet auf, wenn es an
der Zeit ist den Filter zu
wechseln.
Nach einem Filtertausch drücken
Sie bitte für mindestens 5 Sekunden
die RESET-Taste.
Erkennt automatisch
die vorherrschende
Raumluftqualität.
Gibt Rückmeldung, ob die
PlasmaWave® Luftreinigung
aktiv ist oder nicht.
Zeigt Ihnen an wielange das
Gerät läuft, falls die
Zeitschaltuhr eingestellt wurde.
Kindersicherung Ein-/Ausschalter Zeitschaltuhr-
Knopf
Zeigt Ihnen an ob die Kindersicherung aktiviert ist.
Bei aktiver Kindersicherung
ist das Bedienfeld komplett
gesperrt, d.h. Einstellungen
können nicht geändert
werden.
Schaltet das Gerät ein
und aus.
Wählen Sie die gewünschte Betriebsdauer: 1 Std. (1hr), 4 Std. (4hr),
8 Std. (8hr) oder inaktiv. Drücken
Sie den Knopf für mindestens 3
Sekunden um die Luftqualitätsanzeige (Lichtstreifen) an- oder
auszuschalten.
Modus- / Lüftergeschwindigkeits-Taste
Wählen Sie den gewünschten Modus der Reihe nach
aus:
Auto – Sleep – Low – Med – High - Turbo
Kindersicherungstaste
PlasmaWave® Taste
Drücken Sie diese Taste mindestens 3 Sekunden um
die Kindersicherung ein- oder auszuschalten.
Schaltet die PlasmaWave® Funktion ein oder aus.
FilterwechselAnzeige
Page 13

- 13 -
Installation and set-up
1.
Choosing a location
Place it in an indoor location
away from direct sun.
Direct sun may cause product
malfunction or failure.
Choose a location an
adequate distance from TVs, radios,
and other electronic products.
Electromagnetic interference from certain
electronics may cause product
malfunction.
Place at least 10cm
from any wall.
Allow at least
30-45cm of space
around the unit.
Place on a hard, flat surface
Placement on flimsy or slanted
surfaces may result in abnormal noise
and vibrations.
Aufstellung / Bedienung
1. Aufstellungsort
Wählen Sie einen Ort aus,
der einen ausreichenden Abstand
zu anderen elektronischen Produkten,
wie z.B. TVs, Radios, aufweist.
Eine Nichteinhaltung kann zu
elektromagnetische Störungen des
Produktes führen.
Platzieren Sie das Gerät in einem
geschlossenen Raum und schützen
Sie es vor direkter Sonneneinstrah-
lung. Direkte Sonneneinstrahlung
kann zu Störungen oder Ausfall des
Geräts führen.
Halten Sie mindestens 12-18 inch
Abstand zu anderen Objekten.
Halten Sie mindestens 4 inch
Abstand zu einer Wand.
Platzieren Sie das Gerät auf einer
fl achen und harten Oberfl äche.
Eine schräge oder ungerade
Oberfl äche kann zu ungewöhnlichen
Geräuschen oder Vibrationen führen.
12~18 inch
4 inch
Page 14

- 14 -
AP 40
2.
Installing filters
This product comes with all of the required filters. The protective plastic wrap must be
removed from the filters before use.
Ú Operating the unit without removing the plastic wrap may result in product failure.
Unplug and make sure the unit is turned off before installing filters.
①
Remove the front panel by grasping
its upper edge and gently pulling
forward.
xTo remove the front panel, the latch
at the lower edge of the panel must
be released from its position.
Latch
2. Filter einsetzen
Dieses Produkt erhalten Sie mit allen erforderlichen Filtern. Bevor Sie diese
benutzen, entfernen Sie bitte die jeweilige Plastikfolie.
Sollten Sie die Plastikfolien nicht entfernen, könnte es zu Betriebsstörungen
kommen. Stellen Sie sicher, dass das Gerät ausgeschaltet ist, bevor Sie die
Filter einsetzen.
Sie öffnen die Frontblende, indem
Sie den oberen Rand ergreifen
und leicht herausziehen.
Um die Frontplatte zu entfernen,
muss der Riegel am unteren Rand
muss entfernt werden.
Riegel
②
Press the tabs on the top edge to
remove the Pre-filter.
Tabs
Um den CleanCel® Fein Filter
zu entnehmen, drücken Sie die
beiden obenstehenden Klips.
②
Pull out the new filters covered in
plastic wrap.
③
Remove the plastic wrap from the
new filters.
xOperating the unit without removing
the plastic wrap from the lters may
cause abnormal noise, deformation, or
re from overheating.
Entnehmen Sie die abgepackten
Filter aus dem Gerät.
Entfernen Sie die Plastikfolie des
neuen Filters.
Sollten Sie das Gerät mit dem
eingepackten Filter betreiben, kann
es zu abnormalen Geräuschen,
Verformungen oder Feuer führen.
Klips
A
B
C
D
Page 15

- 15 -
ⶺ
Refer to pages 21-22 for more detailed information on how to
change filters.
Zubehör Verkauf: www.ideal-health.de
Weitere Informationen zum Filterwechsel erhalten Sie auf den
Seiten 21 – 22.
Hinweis
④
In the following order, install the
filters until they are snugly in place
all the way into the interior: Anti-
microbial HEPA filter l Carbon
deodorization filter l Pre-filter
x.When installing the pre-lter, rst insert
it into the grooves on either side of
the lower part of the unit, then lock it
into place by inserting the tabs at the
top and then pushing until both sides of
the middle section audibly click into
place.
Anti-microbial
HEPA filter
Carbon
deodorization
filter
Pre-filter
Folgendermaßen setzen Sie die
drei verschiedenen Filter in das
Gerät korrekt ein:
Antimikrobieller True HEPA-Filter
CD Aktivkohle Filter
CleanCel® Fein Filter
Achten Sie darauf, dass Sie bei der
Installation des CleanCel® Fein Filters
zuerst die beiden untenstehenden
Führungen in die dafür
vorgesehenen Aussparungen am
Geräteboden einsetzten, danach
verriegeln Sie den CleanCel
®
Fein
Filter auf der Oberseite bis Sie ein
klicken hören.
Antimikrobieller
True HEPA-Filter
CD Aktivkohle
Filter
CleanCel®
Fein Filter
⑤
Replace the front panel by first
inserting the latch at the bottom
edge and then snapping the upper
part shut.
⑥
Intervals for cleaning and replacing
the filters
Filter Indicator Light
Interval for
cleaning/
maintenance
Interval
between
filter changes
Pre-filter
-
Twice per
month
Semi-
permanent
Carbon deodorization
filter
Steady
light
-
Every 12
months
Anti-microbial HEPA
filter
Ú Intervals between filter changes may vary depending on the environment.
Der Intervall des Filterwechsels kann je nach Umgebung und Gebrauch variieren.
Setzen Sie die Frontblende auf
der Unterseite ein und
verriegeln Sie sie mit Hilfe der
Magnete auf der Oberseite.
Intervalle für Reinigung und
Austausch der Filter
Filter Kontrollleuchte
Intervall für
Reinigung/
Instandhaltung
Intervall
Filterwechsel
Antimikrobieller
True HEPA-Filter
CD Aktivkohle
Filter
CleanCel®
Fein Filter
Dauerlicht
Alle
12 Monate
2 X im
Monat
Semipermanent
E
F
G
Page 16

- 16 -
AP 40
Operating the air cleaner
1.
Initial Operation
①
Insert the power cord into the socket (❶) at the rear of the unit, and
then plug into an electrical outlet (❷).
xThe Display Panel lights will turn on and then o.
②
Press the [Power] button.
ⶺ
For the first 4 minutes, the Air Quality
Indicator will flash as the Smart Sensors
measure the air quality around the unit,
after which normal operation will begin.
③
When the unit first begins running, it will be set to Automatic mode
with the PlasmaWave® feature turned on, by default.
x
The fan speed will be automatically adjusted according to the indoor air quality.
x
PlasmaWave® works to remove harmful airborne contaminants.
ⶺ
As the indoor air becomes clean, the fan speed will automatically
be reduced to Low.
ⶺ
When the unit is running, you may hear an electrical sound
during the normal operation of PlasmaWave®. This does not
signify product failure.
Socket
Bedienung des Luftreinigers
1. Inbetriebnahme
Stecken Sie das Netzkabel in die Steckdose.
Das Display leuchtet kurz auf und erlischt dann wieder.
Buchse
Drücken Sie die "POWER" - Taste
Bevor der Normalbetrieb beginnt,
misst der Smart Sensor die ersten 4
Minuten die Umgebungsluftqualität
und kalibriert sich selbstständig, dabei
blinkt er.
Bei erstmaliger Inbetriebnahme läuft das Gerät im
Automatik-Modus + PlasmaWave
®
.
Die Lüftergeschwindigkeit wird sich automatisch an die Raumluftqualität anpassen.
Um schädliche Verunreinigungen aus der Luft zu entfernen wird das
PlasmaWave
®
aktiviert.
Nachdem die Umgebungsluft gereinigt wurde, reduziert sich
die Lüftergeschwindigkeit automatisch.
Während das Gerät läuft, kann es sein, dass Sie einen leisen
elektrischen Ton vernehmen, dieser Ton wird von
PlasmaWave® erzeugt. Es liegt kein Produktausfall vor.
Hinweis
Hinweis
Page 17

- 17 -
2.
Automatic Mode
Enables automatic operation based on the product’s capacity to sense indoor air
quality.
①
Press the Mode button to select Automatic mode.
xThe illuminated indicator light will show when ‘Automatic’ mode has been
selected, and operation will begin.
xEach time the Mode button is pressed, the modes will each be selected in
turn (Automatic l Sleep l Low l Medium l High l Turbo).
Ü
ⶺ
Fan speed is automatically adjusted according to the indoor air
quality. When the air has become clean, the unit will automatically
run at the Low setting.
3.
Sleep Mode
①
Press the Mode button to select Sleep
mode.
xThe illuminated indicator will show when
‘Sleep’ mode has been selected, and
operation in that mode will begin.
ⶺ
Each time the Mode button is pressed,
the modes will each be selected in turn
(Automatic l Sleep l Low l Medium
l High l Turbo).
ⶺ
When Sleep mode is selected, the fan
speed is automatically set to Low. Fan
speed can be changed by pressing the
Fan Speed (Mode) Button.
ⶺ
When Sleep Mode is activated, the Air
Quality Indicator light is turned off.
2. Automatischer Betrieb
Ermögliche den automatischen Betrieb des Geräts um die Raumluft
zu reinigen.
Drücken Sie die Taste "MODE" um den Automatik-Modus auszuwählen.
Die Kontroll-Leuchte leuchtet auf und das Gerät beginnt zu
reinigen.
Durch jedem Tastendruck wird ein einer Modus ausgewählt
(Auto – Sleep – Low – Med – High – Turbo)
Die Lüftergeschwindigkeit passt sich automatisch an
die vorherrschende Raumluftqualität an.
Nach Reinigung der Raumluft schaltet das Gerät
selbstständig auf den "Low" - Modus.
3. Schlaf-Modus
Drücken Sie die "MODE"-Taste um zu
dem Schlaf-Modus zu gelangen.
Die Leuchtanzeige leuchtet auf, wenn
der Schlaf-Modus ausgewählt worden
ist.
Durch jedem Tastendruck wird ein
einer Modus ausgewählt
(Auto – Sleep – Low – Med – High
– Turbo)
Falls der Schlaf-Modus ausgewählt
wurde, reduziert sich die
Lüftergeschwindigkeit und die
Luftqualitätsanzeige erlischt.
Hinweis
Hinweis
Page 18

- 18 -
AP 40
4.
Manual Mode (Regulate fan speed)
Users can opt to set the fan speed to Low, Medium, High, or Turbo according to the
indoor environment.
Press the Mode button to select the
desired fan speed.
xEach time the Mode button is pressed,
the modes will each be selected in turn
(Automatic l Sleep l Low l Medium l
High l Turbo).
ⶺ
When Manual Mode (Regulate fan speed) is selected, Automatic
and Sleep modes are automatically disabled.
5.
Timer
The timer can be set when you want the unit to run only for a specified period of
time.
Select the desired period of use by
pressing the Timer / Air Quality Indicator
Button.
xWhen the Timer indicator is illuminated,
it will begin operating for the requested
period.
xEach time the Timer button is pressed, the
timer options will each be selected in turn
(1hr l 4hr l 8hr l [NO TIMER]).
6.
PlasmaWave®
This air purification function is always running when the unit is turned on .
Press the Plasma button when the
power is on.
xTo turn o this function, press the Plasma
button.
xTo turn it back on, press the Plasma
button again.
©
4. Manueller Modus (Lüfter-Geschwindigkeit regulieren)
Sie können je nach Raumklima entscheiden, welche Lüftergeschwindigkeit die richtige ist. (Low – Med – High – Turbo)
Drücken Sie die "MODE"-Taste, um die
gewünschte Lüfter-Geschwindigkeit zu
erreichen.
Durch jeden Tastendruck wird ein Modus
ausgewählt (Auto – Sleep – Low – Med – High
– Turbo)
Wenn der manuelle Modus ausgewählt wird, ist automatisch
der Schlafmodus sowie der automatische Betrieb deaktiviert.
5. Zeitschaltuhr
Die Zeitschaltuhr (Timer) kann genutzt werden, wenn das Gerät nur
für eine gewisse Dauer reinigen soll.
Wählen Sie die gewünschte Nutzungszeit
aus, indem Sie die "TIMER"-Taste mehrfach
drücken.
Oberhalb der "Timer"-Anzeige leuchtet die
gewünschte Nutzungsdauer auf.
Mit jedem Druck der "Timer"-Taste leuchtet
eine andere Nutzungsdauer auf.
(1 Std. (1hr) – 4 Std. (4hr) – 8 Std. (8hr) –
keine Nutzungsdauer)
6. PlasmaWave
®
Diese Luftreinigungsfunktion wird immer dann ausgeführt, wenn das
Gerät eingeschaltet wird.
Drücken Sie die "PLASMA"-Taste, wenn
das Gerät eingeschaltet ist.
Um diese Funktion zu deaktivieren, drücken
Sie noch einmal die "Plasma"-Taste.
Um diese Funktion wieder zu aktivieren,
drücken Sie die "Plasma"-Taste erneut.
Hinweis
Page 19

- 19 -
7.
Child Lock
This feature prevents malfunctions from small children tampering with the control
panel.
Press the Child Lock Button for at least 3
seconds to engage or disengage the
feature.
xWhen the Child Lock indicator is lit, the
feature is engaged.
xWhen Child Lock is engaged, the control
panel is locked and the settings cannot
be changed.
xTo disengage, press the Child Lock Button
again for at least 3 seconds.
3 seconds
8.
Air Quality Indicator
The color-coded Air Quality Indicator light may be turned on or off.
To turn it on or off, press the Timer
button for at least 3 seconds.
xWhen on, it indicates the current indoor
air quality according to four levels:
BLUE(good) l AMBER l RED(poor)
xPress the Timer button again for at least
3 seconds to disable the Air Quality
Indicator.
3 seconds
Ü
Air Quality Indicator
ⶺ
When Automatic Mode is activated, the Air Quality Indicator may be
illuminated or dark, depending on whether the room is bright or dim.
ⶺ
When Sleep Mode is activated, the Air Quality Indicator light is
turned off.
7. Kindersicherung
Diese Funktion verhindert das ungewünschte Bedienen des Geräts
durch Kinder.
Drücken Sie die "CHILD LOCK"-Taste
mindestens 3 Sekunden um den
entsprechenden Modus ein- bzw.
auszuschalten.
Die Kindersicherung wird bei Aktivierung
oberhalb der "CHILD LOCK"-Taste angezeigt.
Bei aktiver Kindersicherung ist das komplette
Bedienfeld gesperrt, d.h. die Einstellungen
können nicht geändert werden.
Zum Deaktivieren halten Sie die "CHILD
LOCK"Taste erneut 3 Sekunden gedrückt.
8. Luftqualitätsindikator
Der Lichtstreifen, der die Luftqualität symbolisiert, kann ein- und
ausgeschaltet werden.
Um den Lichtstreifen ein- oder auszuschalten halten Sie die
"Timer"-Taste mindestens 3 Sekunden gedrückt.
Der Lichtstreifen symbolisiert die Luftqualität in
den folgenden vier Stufen:
Blau (sehr gut) – Gelb – Rot (sehr schlecht)
Drücken Sie die "Timer"-Taste erneut für
mindestens 3 Sekunden um den Lichtstreifen
zu deaktivieren.
Luftqualitätsindikator
Bei dem "Automatik"-Modus dimmt das Gerät den Lichtstreifen
selbstständig je nach Helligkeit des Raumes, indem sich das
Gerät befi ndet.
Bei dem aktivem "Schlaf"-Modus ist der Lichtstreifen
automatisch ausgeschaltet.
Hinweis
Page 20

- 20 -
AP 40
Care and Maintenance
1.
Changing Filters
①
When the Filter Replacement Reminder light is illuminated or blinking,
it is a signal to replace one of the filters. Refer to the intervals below.
Filter Indicator Light
Interval for
cleaning/
maintenance
Interval
between filter
changes
Pre-filter
-
Twice per
month
Semi-
permanent
Carbon
deodorization filter
Steady
light
-
Every 12
months
Anti-microbial
HEPA filter
Ú Intervals between filter changes may vary depending on the environment.
Ú The service life of the Anti-microbial HEPA filter may be extended if it is vacuumed
about
once a month.
②
After replacing a filter, press the RESET
button for at least 5 seconds.
5 seconds
Wartung und Pfl ege
1. Filterwechsel
Falls die Erinnerungsleuchte "Filterwechsel" erscheint oder blinkt, sollten die
Filter ausgetauscht werden. Folgende Intervalle sollten berücksichtigt werden:
Filter Indicator Light
Interval for
cleaning/
maintenance
Interval
between
filter changes
Pre-filter
-
Twice per
month
Semi-
permanent
Carbon deodorization
filter
Steady
light
-
Every 12
months
Anti-microbial HEPA
filter
Ú Intervals between filter changes may vary depending on the environment.
Ú The service life of the Anti-microbial HEPA filter may be extended if it is vacuumed
about once a month.
Filter Kontrollleuchte
Intervall für
Reinigung/
Instandhaltung
Intervall
Filterwechsel
Antimikrobieller
True HEPA Filter
CD Aktivkohle
Filter
CleanCel®
Fein Filter
Dauerlicht
Alle
12 Monate
2 X im
Monat
Semipermanent
Der Intervall des Filterwechsels kann je nach Umgebung und Gebrauch variieren.
Halten Sie die "Reset"-Taste für mindestens
5 Sekunden gedrückt, nachdem Sie die
Filter ausgetauscht haben.
Page 21

- 21 -
Removing Filters
Be sure to turn off and unplug the unit before removing filters.
①
Remove the front panel by grasping its
upper edge and gently pulling forward.
xTo remove the front panel, the latch at the
lower edge of the panel must be released
from its position.
Latch
②
Press the tabs on the top edge to
remove the Pre-filter.
Tabs
③
The Carbon deodorization filter and
the Anti-microbial HEPA filter must be
removed in that order by pulling on the
numbered tags at the top.
x Remove the Carbon deodorization lter
before removing the Anti-microbial HEPA
lter.
Filter ausbauen
Vergewissern Sie sich, dass Sie das Gerät ausgeschalten und vom
Strom getrennt haben, bevor Sie die Filter austauschen.
Um die Frontplatte zu entfernen, greifen Sie
diese oben (rechts und links) und ziehen sie
leicht nach vorne.
Um die Frontplatte komplett zu
entfernen, müssen Sie die beiden
untenstehenden Riegel aus den dafür
vorgesehenen Aussparungen anheben.
Riegel
Um den CleanCel® Fein Filter
zu entnehmen, drücken Sie die
beiden obenstehenden Klips.
Klips
Um den
CD Aktivkohle Filter und den
Antimikrobiellen True HEPA Filter korrekt
zu entnehmen, ziehen Sie bitte an den
nummerierten Streifen.
Entfernen Sie zuerst den CD Aktivkohle
Filter und danach den Antimikrobiellen
True HEPA Filter.
Page 22

- 22 -
AP 40
Filter Assembly
Filters should be re-assembled in the reverse order of their removal.
①
Insert the Anti-microbial HEPA filter
and Carbon deodorization filter, in
that order.
xBe sure to remove the plastic wrap from new
lters.
Operating the unit without removing the
plastic wrap from the lters may cause
abnormal noise, deformation, or re from
overheating.
Anti-microbial
HEPA filter
Carbon
deodorization
filter
②
Insert the Pre-filter.
xFit this pair of lters into the grooves on
either side of the lower part of the unit, and
then insert the tabs at the top and gently
push until both sides of the middle section
audibly click into place.
③
Replace the front panel by first inserting
the latch at the bottom edge and then
snapping the upper part shut.
X
Only genuine Winix filters should be used with this unit.
Filter einbauen
Der Filtereinbau erfolgt in umgekehrter Reihenfolge.
Setzen Sie zuerst den
Antimikrobiellen
True HEPA Filter und danach den
CD
Aktivkohle Filter ein.
Stellen Sie sicher, dass Sie die Plastikfolie
des neuen Filters vor dem Einsetzen entfernt
haben. Das Einsetzen eines Filters mit
Plastikfolie kann zu ungewöhnlichen
Geräuschen, Verformungen oder sogar
Feuer führen.
Antimikrobieller
True HEPA-Filter
CD Aktivkohle
Filter
Einlegen des
CleanCel
®
Fein Filters.
Um die Montage abzuschließen, setzen Sie
den CleanCel® Fein Filter in die untenstehenden dafür vorgesehenen Aussparungen
ein und drücken Sie dann den oberen Teil
in Pfeilrichtung nach innen, bis er hörbar
einrastet.
Setzen Sie die Frontplatte ein, indem
Sie die beiden untenstehenden Riegel in
die dafür vorgesehenen Aussparungen
einsetzen und das Oberteil ans Gehäuse
andrücken. (Magnet)
Es dürfen nur originale IDEAL Health Filter
verwendet werden.
Hinweis
Page 23

- 23 -
2.
Cleaning the Pre-filter
Intervals between filter cleanings may vary depending on the air quality.
Use a vacuum cleaner or soft brush to clean the Pre-filter. If it is heavily
soiled, wash it with a solution of water and mild detergent.
xTo clean the sensor area, use only water. Do not use volatile substances such
as alcohol or acetone.
xIf washed about twice a month, the Pre-lter can be used indenitely.
X
When cleaning the unit, always unplug the power cord first and
then wait until the unit has cooled off.
X
Do not use benzene, alcohol, or other volatile fluids, which may
cause damage or discoloration.
X
The Pre-filter is reusable after cleaning.
X
Do not use hot water over 40°C or volatile fluids such as paint
thinner.
X
If the filter is too soiled to clean, then replace the filter.
X
After washing the filter, allow it to dry completely in a well-
ventilated area. Otherwise, it may develop a bad odor.
2. Reinigen des CleanCel® Fein Filters.
Benutzen Sie kein Benzin, Alkohol oder andere aggressive Flüssigkeiten, die eventuell zu Schäden oder Verfärbungen führen könnten.
Der CleanCel® Fein Filter ist nach der Reinigung wiederverwendbar.
Verwenden Sie kein Wasser heißer als 40°C oder aggressive
Flüssigkeiten, wie z.B. Farbverdünner.
Sollte der CleanCel
®
Fein Filter auch nach dem Reinigen stark
verschmutzt sein, sollten Sie ihn ersetzen
Nach der Reinigung lassen Sie bitte den Filter vollständig trocknen,
anderenfalls könnte es zu einem unangenehmen Geruch führen.
Hinweis
Die Wechselintervalle der Filter können je nach Luftqualität und
Gebrauch des Gerätes variieren.
Um den CleanCel® Fein Filter zu reinigen, verwenden Sie bitte einen Staubsauger oder eine weiche Bürste. Bei starken Verschmutzungen benutzen Sie
bitte eine Lösung aus Wasser und einem milden Reinigungsmittel.
Den Sensorbereich reinigen Sie bitte mit Wasser ohne aggressive
Substanzen, wie z.B. Alkohol oder Aceton.
Der CleanCel® Fein Filter kann auf unbestimmte Zeit verwendet werden,
falls dieser zweimal im Monat gewaschen wird.
Bevor Sie das Gerät reinigen, ziehen Sie bitte zuerst unbedingt
das Netzkabel ab und warten bis das Gerät abgekühlt ist.
Page 24

- 24 -
AP 40
3.
Cleaning the Dust Sensor
For optimal performance of the Dust Sensor, which detects airborne dust and
ultrafine particles, clean it every two months. Clean it more frequently when the unit
is running in a place with high dust levels.
①
Open the Dust Sensor cover.
②
Use a damp cotton swab to wipe the
lens and intake area of the Dust Sensor.
xTo clean the sensor area, use only water. Do
not use volatile substances such as alcohol
or acetone.
Lens
Cotton
swab
③
Wipe away any remaining moisture with
a dry cotton swab.
④
Close the Dust Sensor cover.
xThe Dust Sensor cover may be cleaned using
a vacuum cleaner.
3. Reinigen des Staubsensors
Um eine optimale Leistung des Staubsensors, der den Staub und ultrafeine
Partikel in der Luft erfasst, zu gewährleisten, reinigen Sie bitte diesen zweimal
im Monat. Eine häufi gere Reinigung des Sensors ist von Vorteil, falls das Gerät
an einem Ort mit einer hohen Staubbelastung platziert ist.
Öffnen Sie die Abdeckung
des Staubsensors.
Verwenden Sie ein feuchtes
Wattestäbchen um die Linse und den
inneren Ansaugbereich des Sensors
zu reinigen.
Wattestäbchen
Linse
Bitte verwenden Sie für die Reinigung des
Sensors nur Wasser und keine
aggressiven Flüssigkeiten, wie z.B.
Alkohol oder Aceton.
Wischen Sie gegebenenfalls
verbliebene Feuchtigkeit mit einem
trockenen Wattestäbchen auf.
Schließen Sie wieder die Abdeckung
des Staubsensors.
Die Abdeckung des Staubsensors kann mit
Hilfe eines Staubsaugers gereinigt werden.
Page 25

- 25 -
4.
Cleaning the exterior / Cleaning the interior
Cleaning the exterior
Wipe with a soft damp cloth using a
solution of water and mild detergent.
Afterwards, wipe it down with a clean dry
cloth.
xUse a vacuum cleaner or duster to clean the
front panel 1-2 times a month.
Cleaning the interior
Open the front panel and clean the
interior with a vacuum cleaner.
xUse a vacuum cleaner or duster to clean the
interior 1-2 times a month.
Verwenden Sie einen Staubsauger
oder ein Staubtuch um das
Geräteinnere 1-2 Mal im Monat zu
reinigen.
Innenreinigung
Öffnen Sie die Frontblende, entnehmen Sie
die Filter und reinigen Sie das Innere mit
einem Staubsauger.
Verwenden Sie einen Staubsauger
oder ein Staubtuch um das
Geräteinnere 1-2 Mal im Monat zu
reinigen.
4. Reinigung (Außen und Innen)
Außenreinigung
Reinigen Sie das Gerät mit einer
Lösung aus Wasser und einem milden
Reinigungsmittel, aufgetragen auf
einem weichen, feuchten Tuch. Danach
trocknen Sie das Gerät ab.
Page 26

- 26 -
AP 40
Troubleshooting
Problem Check / Actions to take
It does not turn on
at all
ⶺ
Is the power cord securely attached to the socket
on the back of the unit?
Check both ends of the power cord to make sure
it is plugged in and the power connections are
secure.
ⶺ
Is there a power outage?
Check to see if other lights and electrical
equipment are working and try again.
It doesn’t work in
Automatic mode.
ⶺ
Is the power cord securely attached to the socket
on the back of the unit?
Try turning it on again after detaching and
reattaching the power cord.
ⶺ
Has Automatic mode been selected?
Press the Mode button until Automatic mode is
selected.
ⶺ
Is the sensor blocked or clogged?
Clear the sensor using a vacuum cleaner.
It vibrates and makes a
lot of noise.
ⶺ
Is it running on a slanted surface?
Move the unit to a hard, flat area of the floor.
Mögliche Störungen
Problem Prüfen / Was tun
Das Gerät lässt sich
überhaupt nicht
einschalten.
Der Automatik-Modus
funktioniert nicht.
Das Gerät vibriert und
ist sehr laut.
Ist das Netzkabel an der Rückseite des
Geräts sicher angeschlossen?
Überprüfen Sie die beiden Enden des
Netzkabels. Stellen Sie sicher, dass diese
eingesteckt sind und eine Stromverbindung
sichergestellt ist.
Liegt ein Stromausfall vor?
Überprüfen Sie andere elektrische Geräte,
ob diese funktionieren.
Ist das Netzkabel an der Rückseite des
Geräts sicher angeschlossen?
Versuchen Sie erneut das Gerät einzuschalten,
nachdem Sie das Netzkabel aus- und wieder
eingesteckt haben.
Haben Sie den Automatik-Modus ausgewählt?
Drücken Sie so oft die "MODE"-Taste, bis
der Automatik-Modus ausgewählt ist.
Ist der Sensor blockiert oder verstopft?
Reinigen Sie den Sensor mit einem Staubsauger.
Wurde das Gerät auf einer ebenen
Oberfl äche platziert?
Stellen Sie das Gerät auf eine harte, ebene Oberfl äche.
Page 27

- 27 -
Problem Check / Actions to take
The power plug and
outlet feel hot.
ⶺ
Is the plug securely plugged in?
Make sure the plug is properly plugged into the
outlet.
There is a strange
smell.
ⶺ
Is it being used in a place with a lot of smoke,
dust, or odors?
xClean the air intakes on either side and clean the
pre-lter.
xWhen cooking foods with strong odors, reduce use
of the unit as much as possible.
The lters may become permeated with cooking odors,
possibly aecting their performance and service life.
xContact the customer service center to conrm the
exact cause.
xReplace the carbon deodorization lter (CD) and
Anti-microbial HEPA lter.
The fan speed is weak.
The product is not
purifying the air.
ⶺ
Is the Filter Replacement Reminder indicator light
on?
Change the filters as required.
The display panel is
dim.
ⶺ
Is it in Sleep mode?
Sleep mode is activated through automatic detection of
a room’s brightness or darkness. During Sleep mode, the
display panel’s level of illumination is reduced by half.
ⶺ
Is the detection window of the Light Sensor
blocked by debris?
Remove any debris from the Light Sensor
detection window.
Problem Prüfen / Was tun
Der Netzstecker und
die Steckdose fühlen
sich sehr heiß an.
Das Gerät hat einen
seltsamen Geruch.
Die Lüfterdrehzahl ist
zu schwach. Das Gerät
reinigt nicht die Luft.
Das Bedienfeld ist
dunkel.
Ist der Netzstecker richtig angeschlossen?
Stellen Sie sicher, dass der Netzstecker richtig in
die Steckdose eingesteckt ist.
Haben Sie das Gerät an einem Ort mit viel
Rauch, Staub oder Gerüchen aufgestellt?
Reinigen Sie die beiden Luftöffnungen (links und rechts)
und auch den CleanCel
®
Fein Filter.
Reduzieren Sie den Gebrauch des Geräts soweit
wie möglich, falls Sie Speisen mit starken Gerüchen
zubereiten. Filter die permanent starken Kochgerüchen
ausgesetzt werden, müssen möglicherweise schneller
ausgetauscht werden, da dies Auswirkungen auf die
Leistung und Lebensdauer des Filters haben kann.
Kontaktieren Sie den Service:
www.ideal-health.de
Ersetzen Sie den CD Aktivkohle Filter und den
Antimikrobiellen True HEPA Filter.
Leuchtet im Bedienfeld "Filterwechsel" auf?
Wechseln Sie die Filter, wie beschrieben.
Ist der "Schlaf"-Modus aktiviert?
Bei Dunkelheit schaltet sich das Gerät selbstständig in
den "Schlaf"-Modus und dimmt somit automatisch das
Beleuchtungsniveau des Displays auf die Hälfte herunter.
Ist eventuell das Erkennungsfenster des
Lichtsensors verschmutzt?
Entfernen Sie den Fremdkörper von dem
Erkennungsfenster des Lichtsensors.
Page 28

- 28 -
AP 40
Product Specifications
Model Name HR950
Power Voltage
AC 220V~240V, 50/60Hz
Power Rate
83W
Room, Capacity in Sq. Ft.
380
Weight
8.5kg
Dimensions
415mm(W) x 245mm(D) x 600mm(H)
Bevollmächtigter für technische Dokumentation
MBM Corporation
3134 Industry Drive
North Charleston, SC 29418
800-223-2508
www.mbmcorp.com
01.04.2016
Datum
Modell
Netzspannung
Leistungsaufnahme
Geeignet für
Raumgrössen bis zu
Gewicht
Abmessungen
Technische Daten
AP 40
120 V / 60 Hz
90 W
400 sq. ft.
18,7 lb
16,3 inch (B) X 9,6 inch (T) X 23,6 inch (H)
Technische Änderungen vorbehalten
Made in South Korea
Sicherheitshinweise
- Wenn das Netzkabel beschädigt ist, muss es durch ein original Netzkabel vom Hersteller
oder dessen Kundendienst ausgetauscht werden.
- Personen, die mit der Betriebsanleitung nicht vertraut sind, sowie Kinder und Personen mit
eingeschränkten physischen, sensorischen oder geistigen Fähigkeiten oder mangelnder
Erfahrung und Wissen, dürfen das Gerät nicht oder nur unter Aufsicht bedienen.
- Kinder können die Gefahren beim Umgang mit Elektrogeräten nicht erkennen. Deshalb
Kinder immer beaufsichtigen, wenn sie sich in der Umgebung des Luftreinigers aufhalten.
- Um das Risiko eines elektrischen Schocks zu minimieren, hat dieses Gerät einen
polarisierten Stecker (Ein Kontaktstift ist breiter als der andere). Dieser Stecker passt nur auf
eine Art in eine polarisierte Steckdose. Wenn der Stecker nicht ganz in die Steckdose passt,
drehen Sie den Stecker um. Falls der Stecker immer noch nicht passt, kontaktieren Sie eine
qualifi zierte Person um eine ordentliche Steckdose zu installieren. Manipulieren Sie den
Stecker in keiner Weise.
- "RISIKO EINES ELEKTRISCHEN SCHOCKS" – Diese Service Anleitung ist nur für
qualifi ziertes Personal gedacht. Um das Risiko eines elektrischen Schocks zu minimieren,
führen Sie keinesfalls andere Pfl ege- und Wartungsarbeiten am Gerät durch, als in dieser
Anleitung beschrieben, außer Sie sind ausdrücklich dazu befugt und qualifi ziert.
Page 29

- 29 -
Entsorgen
Übergeben Sie den ausgedienten Luftreiniger Ihrem Händler
zur fachgerechten Entsorgung. Weitere
Entsorgungsmöglichkeiten erfahren Sie von Ihrer
Gemeinde- oder Stadtverwaltung.
Ersatzteile und Zubehör
Ersatzteile können Sie über Ihren Fachhändler
beziehen. Es dürfen nur Originalteile des Herstellers
verwendet werden.
Reparatur
Alle weiteren Reparaturen dürfen nur Fachkräfte oder der
Kundendienst durchführen. Dies gilt auch für ein defektes
Netzkabel. Durch unsachgemässe Reparaturen können
erhebliche Gefahren für den Benutzer entstehen und der
Garantieanspruch erlischt.
Garantiebestimmungen
Vielen Dank, dass Sie sich für ein Gerät aus dem Hause IDEAL
entschieden haben.
IDEAL übernimmt für dieses Gerät eine Garantie ab Verkaufs datum. Die Garantiebestimmungen sind von unserer
Landesvertretung festgelegt.
• Falls innerhalb des Garantiezeitraums ein Material oder
Konstruktionsfehler auftritt, wird IDEAL nach eigenem
Ermessen das Gerät reparieren, ersetzen oder den
Einkaufspreis des Gerätes erstatten.
• Die Garantieleistung kann nur erfolgen wenn ausreichende
Nachweise wie z.B. eine Kaufquittung vorgelegt werden und
der Garantieanspruch innerhalb des Garantiezeitraums
geltend gemacht wird.
• Die Garantie erstreckt sich nicht auf Verschleißteile und nicht
auf die regelmäßig zu erneuernde Teile, wie z.B. Filter.
• Die Garantie verfällt wenn das Gerät nicht sachgemäß
(entsprechend der Betriebsanleitung) aufgestellt, eingesetzt
und gewartet wird.
• Die Garantie verfällt, wenn das Gerät nicht regelmäßig
(entsprechend der Empfehlung in der Bedienungsanleitung
und/oder der Anzeige auf dem Gerät) mit neuen Original
IDEAL Filter ausgestattet wird.
• Die Garantie verfällt, wenn das Gerät an eine nicht dem
Typenschild entsprechende Stromversorgung
angeschlossen wird.
Page 30

- 30 -
AP 40
EN Product Specifi cations
Installation 33
Operation 35
Cleaning 38
Names of parts
Front 39
Top 40
Control Panel and Display Panel 40
Installation and set-up
1. Choosing a location 41
2. Installing fi lters 42
Operating the air cleaner
1. Initial Operation 44
2. Automatic Mode 45
3. Sleep Mode 45
4. Manual Mode 46
5. Timer 46
6. PlasmaWave
®
46
7. Child Lock 47
8. Air Quality Indicator 47
Care and Maintenance
1. Changing Filters 48
2. Cleaning the Pre-fi lter 51
3. Cleaning the Dust Sensor 52
4. Cleaning the exterior / Cleaning the interior 53
Troubleshooting 54
Product Specifi cations 56
Page 31

- 31 -
Pre-filter
Carbon deodorization filter (CD )Anti-microbial HEPA filter
PlasmaWave
Washable
filters
Stage : Pre-filter
Filters large household particles such as dust, pet hair,
pollen, and lint.
Replaceable
filters
Stage : Carbon deodorization filter (CD)
Safely removes various odors and harmful gases like
acetic acid, ammonia, and acetaldehyde.
Stage : Anti-microbial HEPA filter
Captures 99.97% of ultrafine particulate matter
(PM2.5) and impurities as small as 0.3 microns.
Nonremovable
element
Stage : PlasmaWave®
Cleans the air by breaking down and removing a
range of undesirable airborne contaminants and
disease-causing agents like bacteria and fungi.
CleanCel® Pre-fi lter
Carbon deodorization fi lter (CD)
Anti-microbial True HEPA Filter
PlasmaWave
®
Anti-microbial True HEPA Filter
CleanCel® Pre-fi lter
Page 32

- 32 -
AP 40
Smart Sensors
Comprehensive detection/analysis of
indoor air quality and environment
through built-in sensors for dust,
odors, and light, enabling automatic
operation. (Able to sense a range of
impurities such as ultrafine
particulate matter, household dust,
acetic acid, and ammonia.)
Air Quality Indicator
Color-coded LED indicates three
levels of air quality. Also serves as
low-level nighttime illumination
during sleep.
Various modes
Automatic/Manual/Sleep modes can
be selected according to different
conditions.
Filter Replacement Reminder Sensor
When it is time to change one of the
filters, an indicator light will
automatically display an alert. To
assure clean indoor air, be sure to
change the filters at the specified
intervals.
Child Lock
This feature ‘locks’ the control panel to
prevent malfunctions from accidental
misuse by small children.
Timer
Automatic turn-off after specified
period of use (choice of 1, 4, or 8
hours).
FEATURES
PACKAGE CONTENTS
Product
Pre-filter/Carbon deodorization filter (CD)/
Anti-microbial HEPA filter
(Included with the product.)
Power cord with
plug
Use and Care
Guide
or
CleanCel® Pre-fi lter,
Carbon deodorization fi lter (CD),
Anti-microbial True HEPA Filter
(Included with the product)
Color-coded LED indicates three
levels of air quality.
Air Quality Indicator is disabled
during sleep mode.
Luftreiniger
#KT2WTKſGTU
2WTKſECVGWT
AP 40
&'$GVTKGDUCPNGKVWPI
'01RGTCVKPI+PUVTWEVKQPU
(4/QFGFyGORNQK
DE Bitte lesen Sie vor Inbetriebnahme des Gerätes unbedingt diese
Betriebsanleitung und beachten Sie die Sicherheitshinweise.
EN Please read and follow all safety rules and instructions in this manual
before operating.
FR Nous vous prions de lire attentivement le mode d’emploi avant d’utiliser la
machine, et attirons votre attention sur les consignes de sécurité.
Page 33

- 33 -
Installation
Do not place near flammable
materials (aerosol sprays, fuel oil,
gases, etc.).
This may cause an explosion or fire.
Do not install below an electrical
outlet.
This may cause fire.
fuel oil
Sprays
gases
Do not place near any gas- or heatproducing appliances, such as gas
appliances, heaters, and fireplaces.
This may cause the unit to become
deformed, discolored, or to catch fire.
Do not install where large quantities
of noxious gases are present,
including carbon monoxide and
gases emitted by animals.
This may cause the unit to break down.
Product Specifications
Before operating this equipment, carefully read and follow these safety cautions and
instructions to avoid damage and ensure safe use.
WARNING
Follow these instructions to reduce the risk of serious
injury or death.
NOTICE
Failure to follow these safety instructions may lead to
personal injury or property damage.
Page 34

- 34 -
AP 40
Installation
Do not install near electronics such
as TVs, radios, or air conditioners.
Electromagnetic interference may cause the
unit to malfunction.
Do not place the unit facing into
wind or drafts.
This may cause the sensors to fail.
Do not install under direct sunlight,
lighting fixtures with inverters, or
lighting fixtures with automatic
detection sensors.
This may cause the unit’s sensors to
malfunction.
Do not use around mist or fumes
from industrial oil or around large
quantities of metallic dust.
This may result in fire or may cause product
failure.
Do not install in confined spaces or
on slanted or uneven surfaces.
This may cause product failure or
deformation.
Do not install in any sort of transport
(motor vehicles, boats, ships, etc.).
Page 35

- 35 -
Operation
Do not use in places that are very
humid or moist or where the unit
may get wet, such as bathrooms.
This may result in fire or electric shock.
Unplug the power cord when not in
use for long periods.
Leaving it plugged in could cause the
insulation to deteriorate, posing a risk of
short circuit and fire.
Do not plug other appliances into
the same outlet. Provide an
exclusive outlet for this unit.
Also, do not arbitrarily extend the power
cord. Risk of electric shock or fire may result
from plugging several appliances into one
outlet, modifying the power cord, or using
an extension cord.
Do not pull on the power cord when
unplugging the unit.
This may cause electric shock or fire.
Do not touch the plug with wet
hands.
This may result in electric shock.
Do not damage the power cord by
forcefully bending, pulling, twisting,
bundling, or pinching it, or by
placing heavy objects on it.
Damaging the power cord could lead to a
short circuit, resulting in electric shock or fire.
Page 36

- 36 -
AP 40
Operation
Do not unplug or move the unit
while it is running.
This may cause product failure or fire.
Make sure the filters have been
inserted before running the unit.
Running it without filters shortens the
product’s service life and may cause electric
shock or injury.
Do not touch the interior of the unit
with wet hands.
The high voltage may cause electric shock.
Do not insert foreign objects into the
vents, such as pins, rods, and coins.
Make especially sure that children follow
safety rules around the unit. Unsafe behavior
may result in product failure or injury from
burns or electric shocks.
If the unit becomes submerged in
water, unplug it and contact the
service center.
If you attempt to dry and operate the unit after it
has been submerged, this could result in product
failure, electric shock, fire, or injury.
When cooking foods with strong
odors, reduce use of the unit as
much as possible.
The filters may become permeated with the
cooking odors, possibly affecting the filters’
performance and service life.
Page 37
- 37 -
Operation
Do not step on or place heavy
objects on top of the unit.
This could result in personal injury, or may
cause product failure or deformation.
Do not use in places with extremely
high or low temperatures.
This product is for indoor use (5-30˚C). Using
it outside this temperature range may cause
deformation, discoloration, or shortened
filter life.
If the product emits unusual noises,
smells, or smoke, unplug the power
cord immediately and contact the
service center ( 1544-5081).
Such occurrences may lead to electric shock
or fire.
Never disassemble, repair or modify
this product yourself.
This may cause product failure, electric
shock, or fire. If repairs are needed, contact
the service center.
Do not subject the product to strong
blows or physical shocks.
This may lead to product failure.
Do not allow intake or outlet vents
to become blocked, for instance by
furniture, laundry, curtains, or other
objects.
Such blockage may lead to increased internal
temperatures, causing product deformation.
If the product emits unusual noises,
smells, or smoke, unplug the power
cord immediately and contact the
IDEAL service center.
Such occurrences may lead to
electric shock or fi re.
Page 38

- 38 -
AP 40
Operation
Do not tie up or bundle the power
cord when operating the unit.
This may cause electric shock or fire.
Do not use for specialized purposes
or sites, such as places devoted to
animals and plants, precision
instruments, or art conservation.
Cleaning
Do not use flammable sprays or
liquid detergents.
This may cause product failure, electric shock
or fire.
Do not use flammable sprays or
liquid detergents.
This may cause product failure, electric shock
or fire.
Do not allow children to clean or
maintain the unit by themselves.
Adult supervision is absolutely necessary.
Before cleaning or performing
maintenance, unplug the power cord
and be sure the fan has stopped.
Not doing so could result in electric shock or
injury.
Do not let water run over the unit.
This may lead to product failure, electric
shock or fi re.
Page 39

- 39 -
Names of parts
| Front |
PlasmaWave®
Control Panel / Display Panel
Air Quality LED Indicator
Main unit
Anti-microbial HEPA filter
Carbon deodorization
filter (CD )
Pre-filter
Front panel
Power cord with plug
(This product is suitable for
220V only.)
Anti-microbial True HEPA Filter
CleanCel
®
Pre-fi lter
(120V only)
Page 40

- 40 -
AP 40
| Top |
| Control Panel and Display Panel |
Vent
Light Sensor
Detects whether the environment
is light or dark and automatically
adjusts operation accordingly.
Timer Indicator
Indicates how long the unit
is currently programmed to
run, if timer has been set.
PlasmaWave® Indicator
Indicates whether the
PlasmaWave® air cleaning
function is running.
Smart Sensors
Automatically detect
indoor air quality.
Child Lock Indicator
When the Child Lock
feature is engaged, this is
illuminated to signal that
the control panel is locked
and settings cannot be
changed.
Child Lock Button
Press for at least 3 seconds to engage
or disengage the Child Lock feature.
Mode / Fan Speed Button
Selects each mode in turn:
Automatic l Sleep l Low l
Medium l High l Tur bo.
Power Button
Starts or stops
operation.
Timer / Air Quality
Indicator Button
Press momentarily to set desired
length of operation (1hr l 4hr
l 8hr l[NO TIMER]). Pressing
this button for at least 3 seconds
turns the Air Quality Indicator
light on or off.
PlasmaWave® Button
Turns PlasmaWave® function on or off.
Filter Replacement
Reminder
When it is time to change
one of the filters, an LED light
is illuminated as a reminder.
Reset Button
After replacing a filter, press
the RESET button for at least
5 seconds.
Page 41

- 41 -
Installation and set-up
1.
Choosing a location
Place it in an indoor location
away from direct sun.
Direct sun may cause product
malfunction or failure.
Choose a location an
adequate distance from TVs, radios,
and other electronic products.
Electromagnetic interference from certain
electronics may cause product
malfunction.
Place at least 10cm
from any wall.
Allow at least
30-45cm of space
around the unit.
Place on a hard, flat surface
Placement on flimsy or slanted
surfaces may result in abnormal noise
and vibrations.
12-18inch
4inch
12~18 inch
4 inch
Page 42

- 42 -
AP 40
from its position.
Latch
②
Press the tabs on the top edge to
remove the Pre-filter.
Tabs
③
The Carbon deodorization filter and
the Anti-microbial HEPA filter must be
removed in that order by pulling on the
numbered tags at the top.
x Remove the Carbon deodorization lter
before removing the Anti-microbial HEPA
lter.
Press the tabs on the top edge to
remove the
CleanCel® Pre-fi lter
The
Carbon deodorization fi lter and
the
Anti-microbial True HEPA fi lter
must be removed in that order by pulling
on the numbered tags at the top.
Remove the
Carbon deodorization
fi lter before removing the
Anti-microbial True HEPA fi lter.
①
Remove the front panel by grasping
its upper edge and gently pulling
forward.
xTo remove the front panel, the latch
at the lower edge of the panel must
be released from its position.
Latch
②
Pull out the new filters covered in
plastic wrap.
③
Remove the plastic wrap from the
new filters.
xOperating the unit without removing
the plastic wrap from the lters may
cause abnormal noise, deformation, or
re from overheating.
2.
Installing filters
This product comes with all of the required filters. The protective plastic wrap must be
removed from the filters before use.
Ú Operating the unit without removing the plastic wrap may result in product failure.
Unplug and make sure the unit is turned off before installing filters.
A
B
C
D
Page 43

- 43 -
⑤
Replace the front panel by first
inserting the latch at the bottom
edge and then snapping the upper
part shut.
For inquiries on purchasing fi lters:
www.ideal-health.de
④
In the following order, install the
filters until they are snugly in place
all the way into the interior: Anti-
microbial HEPA filter l Carbon
deodorization filter l Pre-filter
x.When installing the pre-lter, rst insert
it into the grooves on either side of
the lower part of the unit, then lock it
into place by inserting the tabs at the
top and then pushing until both sides of
the middle section audibly click into
place.
Anti-microbial
HEPA filter
Carbon
deodorization
filter
Pre-filter
In the following order, install the
fi lters until they are snughy in place
all the way into the interior:
Anti-microbial True HEPA
Filter
Carbon deodorization
fi lter (CD)
CleanCel® Pre-fi lter
CleanCel
®
Pre-fi lter
Anti-microbial
True HEPA
Filter
Carbon
deodorization
fi lter (CD)
⑥
Intervals for cleaning and replacing
the filters
Filter Indicator Light
Interval for
cleaning/
maintenance
Interval
between
filter changes
Pre-filter
-
Twice per
month
Semi-
permanent
Carbon deodorization
filter
Steady
light
-
Every 12
months
Anti-microbial HEPA
filter
Ú Intervals between filter changes may vary depending on the environment.
ⶺ
Refer to pages 21-22 for more detailed information on how to
change filters.
Refer to pages 49 - 50 for more detailed information on how to
change fi lters.
CleanCel
®
Pre-fi lter
Anti-microbial True HEPA
Filter
Carbon
deodorization fi lter (CD)
E
F
G
Page 44

- 44 -
AP 40
Operating the air cleaner
1.
Initial Operation
①
Insert the power cord into the socket (❶) at the rear of the unit, and
then plug into an electrical outlet (❷).
xThe Display Panel lights will turn on and then o.
②
Press the [Power] button.
ⶺ
For the first 4 minutes, the Air Quality
Indicator will flash as the Smart Sensors
measure the air quality around the unit,
after which normal operation will begin.
③
When the unit first begins running, it will be set to Automatic mode
with the PlasmaWave® feature turned on, by default.
x
The fan speed will be automatically adjusted according to the indoor air quality.
x
PlasmaWave® works to remove harmful airborne contaminants.
ⶺ
As the indoor air becomes clean, the fan speed will automatically
be reduced to Low.
ⶺ
When the unit is running, you may hear an electrical sound
during the normal operation of PlasmaWave®. This does not
signify product failure.
Socket
Insert the unit plug into an electrical outlet.
The Control Panel lights will turn on and o .
Page 45

- 45 -
2.
Automatic Mode
Enables automatic operation based on the product’s capacity to sense indoor air
quality.
①
Press the Mode button to select Automatic mode.
xThe illuminated indicator light will show when ‘Automatic’ mode has been
selected, and operation will begin.
xEach time the Mode button is pressed, the modes will each be selected in
turn (Automatic l Sleep l Low l Medium l High l Turbo).
Ü
ⶺ
Fan speed is automatically adjusted according to the indoor air
quality. When the air has become clean, the unit will automatically
run at the Low setting.
3.
Sleep Mode
①
Press the Mode button to select Sleep
mode.
xThe illuminated indicator will show when
‘Sleep’ mode has been selected, and
operation in that mode will begin.
ⶺ
Each time the Mode button is pressed,
the modes will each be selected in turn
(Automatic l Sleep l Low l Medium
l High l Turbo).
ⶺ
When Sleep mode is selected, the fan
speed is automatically set to Low. Fan
speed can be changed by pressing the
Fan Speed (Mode) Button.
ⶺ
When Sleep Mode is activated, the Air
Quality Indicator light is turned off.
Page 46

- 46 -
AP 40
4.
Manual Mode (Regulate fan speed)
Users can opt to set the fan speed to Low, Medium, High, or Turbo according to the
indoor environment.
Press the Mode button to select the
desired fan speed.
xEach time the Mode button is pressed,
the modes will each be selected in turn
(Automatic l Sleep l Low l Medium l
High l Turbo).
ⶺ
When Manual Mode (Regulate fan speed) is selected, Automatic
and Sleep modes are automatically disabled.
5.
Timer
The timer can be set when you want the unit to run only for a specified period of
time.
Select the desired period of use by
pressing the Timer / Air Quality Indicator
Button.
xWhen the Timer indicator is illuminated,
it will begin operating for the requested
period.
xEach time the Timer button is pressed, the
timer options will each be selected in turn
(1hr l 4hr l 8hr l [NO TIMER]).
6.
PlasmaWave®
This air purification function is always running when the unit is turned on .
Press the Plasma button when the
power is on.
xTo turn o this function, press the Plasma
button.
xTo turn it back on, press the Plasma
button again.
©
Page 47

- 47 -
7.
Child Lock
This feature prevents malfunctions from small children tampering with the control
panel.
Press the Child Lock Button for at least 3
seconds to engage or disengage the
feature.
xWhen the Child Lock indicator is lit, the
feature is engaged.
xWhen Child Lock is engaged, the control
panel is locked and the settings cannot
be changed.
xTo disengage, press the Child Lock Button
again for at least 3 seconds.
3 seconds
8.
Air Quality Indicator
The color-coded Air Quality Indicator light may be turned on or off.
To turn it on or off, press the Timer
button for at least 3 seconds.
xWhen on, it indicates the current indoor
air quality according to four levels:
BLUE(good) l AMBER l RED(poor)
xPress the Timer button again for at least
3 seconds to disable the Air Quality
Indicator.
3 seconds
Ü
Air Quality Indicator
ⶺ
When Automatic Mode is activated, the Air Quality Indicator may be
illuminated or dark, depending on whether the room is bright or dim.
ⶺ
When Sleep Mode is activated, the Air Quality Indicator light is
turned off.
Page 48

- 48 -
AP 40
Care and Maintenance
1.
Changing Filters
①
When the Filter Replacement Reminder light is illuminated or blinking,
it is a signal to replace one of the filters. Refer to the intervals below.
Filter Indicator Light
Interval for
cleaning/
maintenance
Interval
between filter
changes
Pre-filter
-
Twice per
month
Semi-
permanent
Carbon
deodorization filter
Steady
light
-
Every 12
months
Anti-microbial
HEPA filter
Ú Intervals between filter changes may vary depending on the environment.
Ú The service life of the Anti-microbial HEPA filter may be extended if it is vacuumed
about
once a month.
②
After replacing a filter, press the RESET
button for at least 5 seconds.
5 seconds
CleanCel
®
Pre-fi lter
Anti-microbial True HEPA
Filter
Carbon
deodorization fi lter (CD)
Page 49

- 49 -
Removing Filters
Be sure to turn off and unplug the unit before removing filters.
①
Remove the front panel by grasping its
upper edge and gently pulling forward.
xTo remove the front panel, the latch at the
lower edge of the panel must be released
from its position.
Latch
②
Press the tabs on the top edge to
remove the Pre-filter.
Tabs
③
The Carbon deodorization filter and
the Anti-microbial HEPA filter must be
removed in that order by pulling on the
numbered tags at the top.
x Remove the Carbon deodorization lter
before removing the Anti-microbial HEPA
lter.
Press the tabs on the top edge to
remove the
CleanCel® Pre-fi lter
The
Carbon deodorization fi lter and
the
Anti-microbial True HEPA fi lter
must be removed in that order by pulling
on the numbered tags at the top.
Remove the
Carbon deodorization
fi lter before removing the
Anti-microbial True HEPA fi lter.
Page 50

- 50 -
AP 40
Filter Assembly
Filters should be re-assembled in the reverse order of their removal.
①
Insert the Anti-microbial HEPA filter
and Carbon deodorization filter, in
that order.
xBe sure to remove the plastic wrap from new
lters.
Operating the unit without removing the
plastic wrap from the lters may cause
abnormal noise, deformation, or re from
overheating.
Anti-microbial
HEPA filter
Carbon
deodorization
filter
②
Insert the Pre-filter.
xFit this pair of lters into the grooves on
either side of the lower part of the unit, and
then insert the tabs at the top and gently
push until both sides of the middle section
audibly click into place.
③
Replace the front panel by first inserting
the latch at the bottom edge and then
snapping the upper part shut.
X
Only genuine Winix filters should be used with this unit.
Insert the CleanCel® Pre-fi lter
Insert the Anti-microbial True HEPA
fi lter and
Carbon deodorization fi lter,
in that order.
Only genuine IDEAL lters should be used with this unit.
Page 51

- 51 -
2.
Cleaning the Pre-filter
Intervals between filter cleanings may vary depending on the air quality.
Use a vacuum cleaner or soft brush to clean the Pre-filter. If it is heavily
soiled, wash it with a solution of water and mild detergent.
xTo clean the sensor area, use only water. Do not use volatile substances such
as alcohol or acetone.
xIf washed about twice a month, the Pre-lter can be used indenitely.
X
When cleaning the unit, always unplug the power cord first and
then wait until the unit has cooled off.
X
Do not use benzene, alcohol, or other volatile fluids, which may
cause damage or discoloration.
X
The Pre-filter is reusable after cleaning.
X
Do not use hot water over 40°C or volatile fluids such as paint
thinner.
X
If the filter is too soiled to clean, then replace the filter.
X
After washing the filter, allow it to dry completely in a wellventilated area. Otherwise, it may develop a bad odor.
Page 52

- 52 -
AP 40
3.
Cleaning the Dust Sensor
For optimal performance of the Dust Sensor, which detects airborne dust and
ultrafine particles, clean it every two months. Clean it more frequently when the unit
is running in a place with high dust levels.
①
Open the Dust Sensor cover.
②
Use a damp cotton swab to wipe the
lens and intake area of the Dust Sensor.
xTo clean the sensor area, use only water. Do
not use volatile substances such as alcohol
or acetone.
Lens
Cotton
swab
③
Wipe away any remaining moisture with
a dry cotton swab.
④
Close the Dust Sensor cover.
xThe Dust Sensor cover may be cleaned using
a vacuum cleaner.
Page 53

- 53 -
4.
Cleaning the exterior / Cleaning the interior
Cleaning the exterior
Wipe with a soft damp cloth using a
solution of water and mild detergent.
Afterwards, wipe it down with a clean dry
cloth.
xUse a vacuum cleaner or duster to clean the
front panel 1-2 times a month.
Cleaning the interior
Open the front panel and clean the
interior with a vacuum cleaner.
xUse a vacuum cleaner or duster to clean the
interior 1-2 times a month.
Page 54

- 54 -
AP 40
Troubleshooting
Problem Check / Actions to take
It does not turn on
at all
ⶺ
Is the power cord securely attached to the socket
on the back of the unit?
Check both ends of the power cord to make sure
it is plugged in and the power connections are
secure.
ⶺ
Is there a power outage?
Check to see if other lights and electrical
equipment are working and try again.
It doesn’t work in
Automatic mode.
ⶺ
Is the power cord securely attached to the socket
on the back of the unit?
Try turning it on again after detaching and
reattaching the power cord.
ⶺ
Has Automatic mode been selected?
Press the Mode button until Automatic mode is
selected.
ⶺ
Is the sensor blocked or clogged?
Clear the sensor using a vacuum cleaner.
It vibrates and makes a
lot of noise.
ⶺ
Is it running on a slanted surface?
Move the unit to a hard, flat area of the floor.
Page 55

- 55 -
Problem Check / Actions to take
The power plug and
outlet feel hot.
ⶺ
Is the plug securely plugged in?
Make sure the plug is properly plugged into the
outlet.
There is a strange
smell.
ⶺ
Is it being used in a place with a lot of smoke,
dust, or odors?
xClean the air intakes on either side and clean the
pre-lter.
xWhen cooking foods with strong odors, reduce use
of the unit as much as possible.
The lters may become permeated with cooking odors,
possibly aecting their performance and service life.
xContact the customer service center to conrm the
exact cause.
xReplace the carbon deodorization lter (CD) and
Anti-microbial HEPA lter.
The fan speed is weak.
The product is not
purifying the air.
ⶺ
Is the Filter Replacement Reminder indicator light
on?
Change the filters as required.
The display panel is
dim.
ⶺ
Is it in Sleep mode?
Sleep mode is activated through automatic detection of
a room’s brightness or darkness. During Sleep mode, the
display panel’s level of illumination is reduced by half.
ⶺ
Is the detection window of the Light Sensor
blocked by debris?
Remove any debris from the Light Sensor
detection window.
Clean the air intakes on either side and clean the
pre-filter.
When cooking foods with strong odors, reduce use
of the unit as much as possible.
The filters may become permeated with cooking odors,
possibly affecting their performance and service life.
Contact the customer service center to confirm the
exact cause.
Replace the carbon deodorization filter (CD) and
Anti-microbial True HEPA filter.
Change the filters as required.
Sleep mode is activated through automatic detection of
a room´s brightness or darkness. During Sleep mode, the
display panel´s level of illumination is reduced by half.
Remove any debris from the Light Sensor
detection window.
Make sure the plug is properly plugged into the
outlet.
Page 56

- 56 -
AP 40
Product Specifications
Model Name HR950
Power Voltage
AC 220V~240V, 50/60Hz
Power Rate
83W
Room, Capacity in Sq. Ft.
380
Weight
8.5kg
Dimensions
415mm(W) x 245mm(D) x 600mm(H)
AP 40
120 V / 60 Hz
90 W
400 sq. ft.
18,7 lb
16,3 inch (W) X 9,6 inch (D) X 23,6 inch (H)
Model Name
Power Voltage
Power Consumption
Siutable for room
sizes up to
Weight
Dimensions
Authorized representative for technical documentation
MBM Corporation
3134 Industry Drive
North Charleston, SC 29418
800-223-2508
www.mbmcorp.com
01.04.2016
Date
Subject to technical modifi cations
Made in South Korea
Safety instructions
- If the supply cord is damaged, it must be replaced by a special cord or assembly available
from the manufacturer or its service agent.
- This appliance is not intended for use by person (including children) with reduced physical
sensory or mental capabilities, or lack of experience and knowledge, unless they have been
given supervision or instruction concerning use of the appliance by a person responsible for
their safety.
- Children should be supervised to ensure that they do not play with the appliance.
- To reduce the risk of electric shock, this equipment has a polarized plug (one blade is wider
than the other). This plug will fi t in a polarized outlet only one way. If the plug does not fi t
fully in the outlet, reverse the plug. If it still does not fi t, contact qualifi ed personnel to install
the proper outlet. Do not alter the plug in any way.
- RISK OF ELECTRIC SHOCK – These servicing instructions are for use by qualifi ed
personnel only. To reduce the risk of electric shock, do not perform any servicing other than
that contained in the operating instructions unless you are qualifi ed to do so.
Page 57

- 57 -
Disposal
Pass the outdated Air Purifi er onto your specialized retailer for
professional disposal. You can fi nd out about further disposal
possibilities from your municipality.
Spare parts and accessories
You can purchase spare parts from specialized
retailers. Only original parts from the
manufacturer can be used.
Repairs
All further repairs may only be carried out from professionals
or the service department. This also applies to a faulty
power cord. Through improper repairs, considerable danger
for the operator can result and warranty claims lapse.
Guarantee agreements
Thank you for choosing an IDEAL device.
IDEAL grants a guarantee on its products. Warranty
stipulations are determined by our national representation.
• If defects due to faulty materials and workmanship occur
within this guarantee period, IDEAL will repair or replace
the device at its expense.
• IDEAL will only repair or replace the device, if convincing
proof is provided, for example by a receipt and if the claim
is made within the guarantee period.
• The guarantee is not given on wearing parts or service
parts like fi lter.
• The guarantee is not valid if the device was not set up, run
and serviced right (as according to the devices manual)
• The guarantee is not valid if fi lters haven’t been replaced
regularly with original IDEAL fi lters according to the
description in the manual and/or the indication on the
device itself.
• The guarantee is not valid if the device was connected to a
power supply not matching the rating label on the machine.
Page 58

- 58 -
AP 40
FR Caractéristiques
Installation 61
Utilisation 63
Nettoyage 66
Nom de chaque pièce
Avant 67
Dessus 68
Panneau de commande 68
Mise en place
1. Choix du lieu 69
2. Montage des fi ltres 70
Utilisation du purifi cateur d’air
1. Mise en fonctionnement 72
2. Mode Auto 73
3. Mode Veille 73
4. Mode Manuel 74
5. Minuterie 74
6. Ionisation PasmaWave
®
74
7. Sécuritéenfants 75
8. Indicateur de la qualitéde l’air 75
Nettoyage et maintenance
1. Remplacement des fi ltres 76
2. Nettoyage du pré-fi ltre 79
3. Nettoyage du capteur de poussière 80
4. Nettoyage de l’extérieur / l’intérieur 81
Dépannage 82
Caractéristiques techniques 84
Page 59

- 59 -
Pre-filter
Carbon deodorization filter (CD )Anti-microbial HEPA filter
PlasmaWave
Washable
filters
Stage : Pre-filter
Filters large household particles such as dust, pet hair,
pollen, and lint.
Replaceable
filters
Stage : Carbon deodorization filter (CD)
Safely removes various odors and harmful gases like
acetic acid, ammonia, and acetaldehyde.
Stage : Anti-microbial HEPA filter
Captures 99.97% of ultrafine particulate matter
(PM2.5) and impurities as small as 0.3 microns.
Non-
removable
element
Stage : PlasmaWave®
Cleans the air by breaking down and removing a
range of undesirable airborne contaminants and
disease-causing agents like bacteria and fungi.
Pré-fi ltre à mailles
fi ne CleanCel
®
fi ltre au charbon
actif (CD)
Filtre True HEPA
antimicrobien
PlasmaWave
®
Étape
Étape
Étape
Étape
Pré-fi ltre à mailles fi ne CleanCel
®
Filtre au charbon actif /CD)
Ionisation PlasmaWave
®
Filtre les grosses particules comme la
poussière, les poils er squames d’animaux.
Élimine les odeurs et les gaz nocifs comme
l’acide acétique l’ammoniac et l’acétaldéhyde.
Décompose et supprime les nombreux
contaminants volatiles responsables de
maladies comme les bactéries et les
moisissures.
Filtre
lavable
Filtres
remplaçables
Élement non
remplaçables
Filtre True HEPA antimicrobien
Capture jusqu’à 99,97% de toutes les particules
et microparticules jusqu’à 0,3 microns.
Page 60

- 60 -
AP 40
Smart Sensors
Comprehensive detection/analysis of
indoor air quality and environment
through built-in sensors for dust,
odors, and light, enabling automatic
operation. (Able to sense a range of
impurities such as ultrafine
particulate matter, household dust,
acetic acid, and ammonia.)
Air Quality Indicator
Color-coded LED indicates three
levels of air quality. Also serves as
low-level nighttime illumination
during sleep.
Various modes
Automatic/Manual/Sleep modes can
be selected according to different
conditions.
Filter Replacement Reminder Sensor
When it is time to change one of the
filters, an indicator light will
automatically display an alert. To
assure clean indoor air, be sure to
change the filters at the specified
intervals.
Child Lock
This feature ‘locks’ the control panel to
prevent malfunctions from accidental
misuse by small children.
Timer
Automatic turn-off after specified
period of use (choice of 1, 4, or 8
hours).
FEATURES
PACKAGE CONTENTS
Product
Pre-filter/Carbon deodorization filter (CD)/
Anti-microbial HEPA filter
(Included with the product.)
Power cord with
plug
Use and Care
Guide
or
Capteurs intelligents
Détection et analyse de la qualitéde
l’air intérieur au moyen de capteurs
intégrés pour la poussière, les
odeurs et la luminositépour un
fonctionnement automatique
(détection des impuretés comme
les microparticules, les poussières,
l’acide acétique et l’ammoniac).
Indicateur de la qualité de l’air
Les témoins LED indiquent trois
niveaux de qualitépour l’air intérieur.
Le Indicateur de la qualité de l’air est
désactivé en mode nuit.
Modes divers
Vous pouvez sélectionner le mode
automatique, manuel ou veille selon
l’utilisation souhaitée.
Sécurité enfants
Cette fonction verrouille le panneau
de commande afi n d’éviter les
dysfonctionnements liés àune
utilisation inappropriée par des
enfants.
Minuterie
Vous pouvez sélectionner un cycle
de fonctionnement de l’appareil
de 1, 4 ou 8 heures. L’appareil se
mettra en veille automatiquement àla
fi n du cycle.
Capteur de remplacement des fi ltres
Lorsqu’il est nécessaire de remplacer un
fi ltre, un témoin LED s’allume
automatiquement pour vous alerter.
Pour garantir un air intérieur
parfaitement propre, changez les fi ltres
aux intervalles précisés.
Propriétés du produit
Contenue de la livraison
Purifi cateur
d’air
Pré-fi ltre à mailles fi ne CleanCel®,
fi ltre au charbon actif CD, fi ltre
True HEPA antimicrobien (inclus
dans le purifi cateur d’air)
Mode
d’emploi
Prise et cordon
d’alimentation
électrique
Luftreiniger
#KT2WTKſGTU
2WTKſECVGWT
AP 40
&'$GVTKGDUCPNGKVWPI
'01RGTCVKPI+PUVTWEVKQPU
(4/QFGFyGORNQK
DE Bitte lesen Sie vor Inbetriebnahme des Gerätes unbedingt diese
Betriebsanleitung und beachten Sie die Sicherheitshinweise.
EN Please read and follow all safety rules and instructions in this manual
before operating.
FR Nous vous prions de lire attentivement le mode d’emploi avant d’utiliser la
machine, et attirons votre attention sur les consignes de sécurité.
Page 61

- 61 -
Installation
Do not place near flammable
materials (aerosol sprays, fuel oil,
gases, etc.).
This may cause an explosion or fire.
Do not install below an electrical
outlet.
This may cause fire.
fuel oil
Sprays
gases
Do not place near any gas- or heat-
producing appliances, such as gas
appliances, heaters, and fireplaces.
This may cause the unit to become
deformed, discolored, or to catch fire.
Do not install where large quantities
of noxious gases are present,
including carbon monoxide and
gases emitted by animals.
This may cause the unit to break down.
Product Specifications
Before operating this equipment, carefully read and follow these safety cautions and
instructions to avoid damage and ensure safe use.
WARNING
Follow these instructions to reduce the risk of serious
injury or death.
NOTICE
Failure to follow these safety instructions may lead to
personal injury or property damage.
Caractéristiques du produit
Nous vous prions de lire attentivement le mode d’emploi avant d’utiliser
la machine, et attirons votre attention sur les consignes de sécurité.
Avertissement
Attention
Installation
N´utilisez pas l´appareil en présence
de vapeurs infammables (aérosols,
essence, gaz, etc...).
Vous risqueriez de provoquer une
explosion ou un incendie.
Ne placez pas l´appareil sous une
prise électrique.
Vous risqueriez de provoquer un
incendie.
Ne placez pas l´appareil à proximité
de sources de chaleur (chauffage,
cheminée, etc...). La chaleur risque de
décolorer et de déformer l´appareil ou
de provoquer un incendie.
N´installez pas l´appareil dans
les endroits dont l´air contient
beaucoup de gaz nocifs comme le
monoxyde carbone ou des gaz émis
par les animaux. Vous risqueriez de
provoquer un dysfonctionnement.
Une utilisation non conforme peut être dangereuse
pour la santé et entraîner de graves blessures.
Suivez ces consignes de sécurité pour éviter
tout risque d’incendie et d’électrocution.
Page 62

- 62 -
AP 40
Installation
Do not install near electronics such
as TVs, radios, or air conditioners.
Electromagnetic interference may cause the
unit to malfunction.
Do not place the unit facing into
wind or drafts.
This may cause the sensors to fail.
Do not install under direct sunlight,
lighting fixtures with inverters, or
lighting fixtures with automatic
detection sensors.
This may cause the unit’s sensors to
malfunction.
Do not use around mist or fumes
from industrial oil or around large
quantities of metallic dust.
This may result in fire or may cause product
failure.
Do not install in confined spaces or
on slanted or uneven surfaces.
This may cause product failure or
deformation.
Do not install in any sort of transport
(motor vehicles, boats, ships, etc.).
Installation
N’installez pas l’appareil
àproximitéd’un téléviseur, d’une
radio, ou d’un climatiseur. Les
interférences électromagnétiques
pourraient provoquer un
dysfonctionnement.
Evitez d’installer l’appareil exposéàla
lumière directe du soleil, sous un
luminaire avec un inverseur ou sous
un luminaire avec des capteurs de
détection automatique. Cela pourrait
provoquer un dysfonctionnement des
capteurs.
Ne placez pas l’appareil sur une
surface instable.
Vous risqueriez de provoquer un panne
ou un déformation.
N’utilisez pas l’appareil dans un
moyen de transport (véhicules
motorisés, bateaux, navires, etc…).
N’utilisez pas l’appareil dans les
locaux dont l’air contient des
vapeurs industrielles ou des
poussières de métal. Vous risqueriez
de provoquer un incendie ou un panne.
Evitez d’installer l’appareil
directement dans un courant d’air
(vent). Vous risqueriez de provoquer
un dysfonctionnement des capteurs.
Page 63

- 63 -
Operation
Do not use in places that are very
humid or moist or where the unit
may get wet, such as bathrooms.
This may result in fire or electric shock.
Unplug the power cord when not in
use for long periods.
Leaving it plugged in could cause the
insulation to deteriorate, posing a risk of
short circuit and fire.
Do not plug other appliances into
the same outlet. Provide an
exclusive outlet for this unit.
Also, do not arbitrarily extend the power
cord. Risk of electric shock or fire may result
from plugging several appliances into one
outlet, modifying the power cord, or using
an extension cord.
Do not pull on the power cord when
unplugging the unit.
This may cause electric shock or fire.
Do not touch the plug with wet
hands.
This may result in electric shock.
Do not damage the power cord by
forcefully bending, pulling, twisting,
bundling, or pinching it, or by
placing heavy objects on it.
Damaging the power cord could lead to a
short circuit, resulting in electric shock or fire.
Utilisation
N’utilisez pas l’appareil dans des
pièces très humides comme des
salles de bain. Vous risqueriez de
provoquer un court-circuit ou un
incendie.
Si vous prévoyez ne pas utiliser l’appareil
pendant une période prolongée,
débranchez-le de la prise murale. Laisser
la prise branchée pourrait provoquer une
détérioration de l’appareil, un court-circuit ou
un incendie.
Ne branchez pas l’appareil sur une
multiprises ou sur une rallonge.
Réservez toujours un prise exclusive
àl’appareil.
Vous risqueriez de provoquer un
court-circuit ou un incendie.
Ne tirez pas sur le cordon d’alimentation
pour débrancher la prise. Vous risqueriez
de provoquer un court-circuit ou un incendie.
Ne touchez pas la prise avec les
mains mouillées.
Vous pourriez vous électrocuter.
Ne pas endommager, modifi er, ou plier de
manière excessive le cordon
d’alimentation. Ne posez pas d’objets
lourds sur le cordon d’alimentation.
Un cordon d’alimentation
endommagépourrait provoquer un
court-circuit ou un incendie.
Page 64

- 64 -
AP 40
Operation
Do not unplug or move the unit
while it is running.
This may cause product failure or fire.
Make sure the filters have been
inserted before running the unit.
Running it without filters shortens the
product’s service life and may cause electric
shock or injury.
Do not touch the interior of the unit
with wet hands.
The high voltage may cause electric shock.
Do not insert foreign objects into the
vents, such as pins, rods, and coins.
Make especially sure that children follow
safety rules around the unit. Unsafe behavior
may result in product failure or injury from
burns or electric shocks.
If the unit becomes submerged in
water, unplug it and contact the
service center.
If you attempt to dry and operate the unit after it
has been submerged, this could result in product
failure, electric shock, fire, or injury.
When cooking foods with strong
odors, reduce use of the unit as
much as possible.
The filters may become permeated with the
cooking odors, possibly affecting the filters’
performance and service life.
Ne déplacez pas et ne débranchez
pas l’appareil lorsqu’il est en
fonctionnement.
Vous risqueriez de provoquer une
panne ou un incendie.
Assurez-vous que l’appareil est bien équipé
d’un fi ltre.
Une utilisation sans fi ltre diminue la durée de
vie de l’appareil et pourrait provoquer des
dommages ou un court-circuit.
Ne touchez par l’intérieur
de l’appareil avec les mains
mouillées.
Vous pourriez vous électrocuter.
N’insérez pas d’objets étrangers au niveau de la
sortie d’air.
Il faut toujours surveiller les enfants lorsqu’ils sont
à proximité de l’appareil. Une mauvaise utilisation
de l’appareil pourrait provoquer une panne ou des
dommages corporels.
Si l’appareil a été immergé dans l’eau,
débranchez-le et contactez le service client.
Si vous tentez de sécher et d’utiliser l’appareil par
la suite, vous pourriez provoquer un
dysfonctionnement, un incendie ou des dommages
corporels.
Utilisation
Lorsque vous cuisinez, si il y a de
fortes odeurs, réduisez l’utilisation de
l’appareil autant que possible.
Des conditions défavorables pourraient
réduire la durée de vie des fi ltres et
endommager l’appareil.
Page 65

- 65 -
Operation
Do not step on or place heavy
objects on top of the unit.
This could result in personal injury, or may
cause product failure or deformation.
Do not use in places with extremely
high or low temperatures.
This product is for indoor use (5-30˚C). Using
it outside this temperature range may cause
deformation, discoloration, or shortened
filter life.
If the product emits unusual noises,
smells, or smoke, unplug the power
cord immediately and contact the
service center ( 1544-5081).
Such occurrences may lead to electric shock
or fire.
Never disassemble, repair or modify
this product yourself.
This may cause product failure, electric
shock, or fire. If repairs are needed, contact
the service center.
Do not subject the product to strong
blows or physical shocks.
This may lead to product failure.
Do not allow intake or outlet vents
to become blocked, for instance by
furniture, laundry, curtains, or other
objects.
Such blockage may lead to increased internal
temperatures, causing product deformation.
Utilisation
Ne posez pas d’objets lourds sur
l’appareil. Vous risqueriez des dommages
corporels et de provoquer une déformation
ou un dysfonctionnement de l’appareil.
N’utilisez pas l’appareil dans un endroit exposés
à des températures trop élevées ou trop basses.
Le produit est conçu pour une utilisation entre 5°C
et 30°C. Toute utilisation dans des endroits
inadéquats risque de provoquer un
dysfonctionnement électrique ou de déformer
l’appareil.
Si l’appareil émet des bruits inhabituels,
des odeurs ou de la fumée,
débranchez-le immédiatement et
contactez le service client.
Toutes anomalies de fonctionnement
pourraient provoquer un court-circuit ou un
incendie.
N’effectuez aucune modifi cation ni réparation sur
l’appareil.
Vous risqueriez de provoquer un court-circuit, un
incendie ou des dommages corporels. Contactez le
service client.
N’exposez pas l’appareil à des vents
forts ou à des chocs physiques.
Vous risqueriez de provoquer un
dysfonctionnement.
N’obstruez pas les orifi ces d’entrée d’air et de
sortie d’air avec des vêtements, des chiffons,
des rideaux, etc…
Des peluches collées risquent d’obstruer le passage
de l’air et de provoquer une surchauffe et un
incendie.
Page 66

- 66 -
AP 40
Operation
Do not tie up or bundle the power
cord when operating the unit.
This may cause electric shock or fire.
Do not use for specialized purposes
or sites, such as places devoted to
animals and plants, precision
instruments, or art conservation.
Cleaning
Do not use flammable sprays or
liquid detergents.
This may cause product failure, electric shock
or fire.
Do not use flammable sprays or
liquid detergents.
This may cause product failure, electric shock
or fire.
Do not allow children to clean or
maintain the unit by themselves.
Adult supervision is absolutely necessary.
Before cleaning or performing
maintenance, unplug the power cord
and be sure the fan has stopped.
Not doing so could result in electric shock or
injury.
Utilisation
Ne pas attacher ou faire des nœuds
avec le cordon d’alimentation.
Vous risqueriez de provoquer un
court-circuit ou un incendie.
N’utilisez par l’appareil dans des lieux
spécifi quement dédiés aux animaux, aux
plantes, aux instruments de mesures de
précision et à la conservation d’objets d’art.
N’utilisez pas de d’aérosols
infl ammables ni de détergents.
Ces substances risquent de provoquer
un dysfonctionnement, un court-circuit ou
incendie.
Ne vaporisez pas de liquides directement dans
le purifi cateur d’air. Ces substances risquent de
provoquer un dysfonctionnement, un court-circuit ou
incendie.
Interdisez aux enfants d’utiliser ou de
nettoyer l’appareil sans surveillance.
La supervision d’un adulte est absolument
nécessaire.
Avant de changer les fi ltres, de nettoyer
l’appareil ou de le déplacer, débranchez
toujours la prise murale.
Vous pourriez vous électrocuter ou provoquer des
dommages corporels.
Nettoyage
Page 67

- 67 -
PlasmaWave®
Control Panel / Display Panel
Air Quality LED Indicator
Main unit
Anti-microbial HEPA filter
Carbon deodorization
filter (CD )
Pre-filter
Front panel
Power cord with plug
(This product is suitable for
220V only.)
Nom de chaque pièce
Avant:
Prise et cordon
d’alimentation
Panneau de commande
PlasmaWave
®
Indicateur de la qualité de l’air par LED
Unité principale
Filtre True HEPA
antimicrobien
Filtre au charbon actif CD
Pré-fi ltre à mailles
fi ne CleanCel
®
Couvercle frontal
(seulement 120V)
Page 68

- 68 -
AP 40
| Top |
| Control Panel and Display Panel |
Vent
Light Sensor
Detects whether the environment
is light or dark and automatically
adjusts operation accordingly.
Timer Indicator
Indicates how long the unit
is currently programmed to
run, if timer has been set.
PlasmaWave® Indicator
Indicates whether the
PlasmaWave® air cleaning
function is running.
Smart Sensors
Automatically detect
indoor air quality.
Child Lock Indicator
When the Child Lock
feature is engaged, this is
illuminated to signal that
the control panel is locked
and settings cannot be
changed.
Child Lock Button
Press for at least 3 seconds to engage
or disengage the Child Lock feature.
Mode / Fan Speed Button
Selects each mode in turn:
Automatic l Sleep l Low l
Medium l High l Tur bo.
Power Button
Starts or stops
operation.
Timer / Air Quality
Indicator Button
Press momentarily to set desired
length of operation (1hr l 4hr
l 8hr l[NO TIMER]). Pressing
this button for at least 3 seconds
turns the Air Quality Indicator
light on or off.
PlasmaWave® Button
Turns PlasmaWave® function on or off.
Filter Replacement
Reminder
When it is time to change
one of the filters, an LED light
is illuminated as a reminder.
Reset Button
After replacing a filter, press
the RESET button for at least
5 seconds.
Dessus:
Ventilateur
Panneau de commande
Capteur de la
luminosité
Touche de
réinitialisation
Détecte la luminosité pour adapter
automatiquement le
fonctionnement de l’appareil.
Un témoin LED s’allume pour
vous indiquer lorsqu’un fi ltre
doit être remplacé.
Après avoir remplacé un fi ltre,
appuyez sur la touche de
réinitialisation pendant 5 environ
secondes.
Indicateur de
remplacement
des fi ltres
Capteurs
intelligents
Indicateur
PlasmaWave
®
Indicateur de
minuterie
Détecte
automatiquement la
qualité de l’air intérieur.
Indique lorsque l’ionisateur
PlasmaWave est activé.
Indique le temps de
fonctionnement restant selon le
cycle choisi.
Indicateur de
verrouillage
Bouton
d’alimentation
Minuterie / Bouton d’indicateur
de la qualité de l’air
Lorsque le verrouillage est
activé, l’indicateur s’allume et
aucun réglage ne peut être
effectué depuis le panneau
de commande.
Allume et éteint
l’appareil.
Appuyez sur le bouton pour
sélectionner la durée de
fonctionnement (1h- 4h- 8hAnnuler). Appuyez sur le bouton
pendant environ 3 secondes pour
activer ou désactiver les témoins LED
de l’indicateur de la qualité de l’air.
Mode / Vitesse du ventilation
Sélectionnez la vitesse de ventilation :
Auto/ veille/ bas/ moyen/ haut/ turbo
Bouton de verrouillage
Bouton de PlasmaWave
®
Appuyez le bouton pendant environ 3 secondes pour
activer ou désactiver le verrouillage de sécurité enfants.
Appuyez le bouton pour activer ou désactiver
l’ionisation PlasmaWave®.
Page 69

- 69 -
Installation and set-up
1.
Choosing a location
Place it in an indoor location
away from direct sun.
Direct sun may cause product
malfunction or failure.
Choose a location an
adequate distance from TVs, radios,
and other electronic products.
Electromagnetic interference from certain
electronics may cause product
malfunction.
Place at least 10cm
from any wall.
Allow at least
30-45cm of space
around the unit.
Place on a hard, flat surface
Placement on flimsy or slanted
surfaces may result in abnormal noise
and vibrations.
Mise en place
1. Choix du lieu
Choisissez un endroit à
distance adéquate d’un téléviseur,
d’une radio, ou d’autres appareils
électroniques.
Les interférences électromagnétiques
pourraient provoquer un
dysfonctionnement.
Choisissez un endroit non exposé à
la lumière directe du soleil.
La lumière directe du soleil pourrait
causer un dysfonctionnement ou
une panne.
Assurez- vous de laisser une
distance de 12 – 18 inch autour de
l’appareil.
Placez l’appareil à au moins 4 inch
du mur.
Placez l’appareil sur une surface
stable. Placé sur une surface
instable l’appareil pourrait
provoquer des bruits anormaux et
des vibrations.
12~18 inch
4 inch
Page 70

- 70 -
AP 40
2.
Installing filters
This product comes with all of the required filters. The protective plastic wrap must be
removed from the filters before use.
Ú Operating the unit without removing the plastic wrap may result in product failure.
Unplug and make sure the unit is turned off before installing filters.
①
Remove the front panel by grasping
its upper edge and gently pulling
forward.
xTo remove the front panel, the latch
at the lower edge of the panel must
be released from its position.
Latch
2. Installation des fi ltres
Le purifi cateur d’air est livré avec tous les fi ltres requis.
Retirez les emballages de protection des fi ltres avant usage.
Si vous utilisez l’appareil alors que les fi ltres ne sont pas installés, vous
risquez de provoquer un dysfonctionnement.
Éteignez et débranchez l’appareil avant d’installer les fi ltres.
Retirez le couvercle frontal en
saisissant son bord supérieur et
en tirant doucement vers l‘avant,
puis soulever le couvercle pour
libérer le crochet de verrouillage
du bord inférieur.
le crochet
②
Press the tabs on the top edge to
remove the Pre-filter.
Tabs
Pressez vers le bas les onglets du
bord supérieur du pré-fi ltre pour
le retirer.
attache
②
Pull out the new filters covered in
plastic wrap.
③
Remove the plastic wrap from the
new filters.
xOperating the unit without removing
the plastic wrap from the lters may
cause abnormal noise, deformation, or
re from overheating.
Retirez les fi ltres avec leurs
emballages de protection de
l’appareil.
Retirez l’emballage de
protection et les bandes
adhésives de chaque fi ltre.
Si vous installez les fi ltres sans
retirer l’emballage, vous risquez de
provoquer des bruits anormaux,
une déformation ou un incendie.
A
B
C
D
Page 71

- 71 -
⑤
Replace the front panel by first
inserting the latch at the bottom
edge and then snapping the upper
part shut.
Pour remonter le couvercle
frontal, enclenchez d’abord le
crochet de verrouillage du bord
inférieur puis pousser le
couvercle en saisissant son
bord supérieur.
Accessoires en option
Commandez les fi ltres de rechange chez un
revendeur spécialisé IDEAL ou dans notre
boutique en ligne: www.ideal-health.de
④
In the following order, install the
filters until they are snugly in place
all the way into the interior: Anti-
microbial HEPA filter l Carbon
deodorization filter l Pre-filter
x.When installing the pre-lter, rst insert
it into the grooves on either side of
the lower part of the unit, then lock it
into place by inserting the tabs at the
top and then pushing until both sides of
the middle section audibly click into
place.
Anti-microbial
HEPA filter
Carbon
deodorization
filter
Pre-filter
Filtre au
charbon actif CD
Pré-fi ltre
à mailles fi ne
CleanCel
®
Dans l’ordre suivant, installez
les fi ltres jusqu’à ce qu’ils soient
bien en place.
Filtre True HEPA
antimicrobien
Filtre au charbon actif CD
Pré-fi ltre à mailles
fi ne CleanCel
®
Filtre True HEPA
antimicrobien
ⶺ
Refer to pages 21-22 for more detailed information on how to
change filters.
Pour plus de détails sur le remplacement des fi ltres,
voir page 77 - 78.
Note
⑥
Intervals for cleaning and replacing
the filters
Filter Indicator Light
Interval for
cleaning/
maintenance
Interval
between
filter changes
Pre-filter
-
Twice per
month
Semi-
permanent
Carbon deodorization
filter
Steady
light
-
Every 12
months
Anti-microbial HEPA
filter
Ú Intervals between filter changes may vary depending on the environment.
L’intervalle peut varier en fonction de la pollution de l’air.
Intervalles d’entretien et de
remplacement des fi ltres
Filtre Voyant
Intervalle
d’entretien /
maintenance
Intervalle de
replacement
Filtre True HEPA
antimicrobien
Filtre au charbon
actif CD
Pré-fi ltre à mailles
fi ne CleanCel
®
Lumière
constante
Tous les 12
mois
2 fois par
mois
Semipermanent
E
F
G
Page 72

- 72 -
AP 40
Operating the air cleaner
1.
Initial Operation
①
Insert the power cord into the socket (❶) at the rear of the unit, and
then plug into an electrical outlet (❷).
xThe Display Panel lights will turn on and then o.
②
Press the [Power] button.
ⶺ
For the first 4 minutes, the Air Quality
Indicator will flash as the Smart Sensors
measure the air quality around the unit,
after which normal operation will begin.
③
When the unit first begins running, it will be set to Automatic mode
with the PlasmaWave® feature turned on, by default.
x
The fan speed will be automatically adjusted according to the indoor air quality.
x
PlasmaWave® works to remove harmful airborne contaminants.
ⶺ
As the indoor air becomes clean, the fan speed will automatically
be reduced to Low.
ⶺ
When the unit is running, you may hear an electrical sound
during the normal operation of PlasmaWave®. This does not
signify product failure.
Socket
Utilisation du purifi cateur d’air
1. Mise en fonctionnement
Connectez le cordon d’alimentation à l’appareil.
Le panneau de commande s’allume brièvement puis s’éteint.
douille
Appuyez sur la touche POWER.
Lors de la première mise en marche,
une procédure d’étalonnage des
capteurs d’air démarre. Pendant les 4
minutes de l’étalonnage, le voyant Air
Quality clignote.
Lors du démarrage, l’appareil s’active à chaque fois en mode
Auto et l’ionisation PlasmaWave
®
est à chaque fois activée.
La vitesse du ventilateur est réglée automatiquement en fonction du
niveau de qualité de l’air.
L’ionisation PlasmaWave® permet le captage des particules fi nes.
La vitesse du ventilateur s’adapte automatiquement à la
qualité de l’air.
Lors de l’utilisation de l’ionisation PlasmaWave®, vous
pouvez entendre une léger bruit électrique. Ce n’est pas un
dysfonctionnement.
Note
Note
Page 73

- 73 -
2.
Automatic Mode
Enables automatic operation based on the product’s capacity to sense indoor air
quality.
①
Press the Mode button to select Automatic mode.
xThe illuminated indicator light will show when ‘Automatic’ mode has been
selected, and operation will begin.
xEach time the Mode button is pressed, the modes will each be selected in
turn (Automatic l Sleep l Low l Medium l High l Turbo).
Ü
ⶺ
Fan speed is automatically adjusted according to the indoor air
quality. When the air has become clean, the unit will automatically
run at the Low setting.
3.
Sleep Mode
①
Press the Mode button to select Sleep
mode.
xThe illuminated indicator will show when
‘Sleep’ mode has been selected, and
operation in that mode will begin.
ⶺ
Each time the Mode button is pressed,
the modes will each be selected in turn
(Automatic l Sleep l Low l Medium
l High l Turbo).
ⶺ
When Sleep mode is selected, the fan
speed is automatically set to Low. Fan
speed can be changed by pressing the
Fan Speed (Mode) Button.
ⶺ
When Sleep Mode is activated, the Air
Quality Indicator light is turned off.
2. Mode Auto
En mode automatique, la vitesse de purifi cation est automatiquement
adapté à la qualité de l’air mesurée.
Appuyez sur le bouton MODE pour sélectionner Auto
Le témoin lumineux indique si le mode Auto est activé.
Chaque fois que vous appuyez sur le bouton, le débit d’air
change (Auto/ Veille/ Bas/ Moyen/ Haut/ Turbo).
La vitesse du ventilateur est ajusté automatiquement
selon le niveau de qualité de l’air. Une fois l’air purifi é,
l’appareil fonctionnera automatiquement en mode Bas.
3. Mode Veille
Note
Appuyez sur le bouton MODE pour
sélectionner Veille
Le témoin lumineux indique si le mode
de Veille est activé.
Chaque fois que vous appuyez sur le
bouton, le débit d’air change (Auto/
Veille/ Bas/ Moyen/ Haut/ Turbo).
Si le mode de veille est activé, la vitesse
du ventilateur correspond à un débit
d’air très lent. La vitesse du ventilateur
peut être sélectionnée manuellement
avec la touche Speed.
Note
Lors du mode veille, l’indicateur de la
qualité de l’air est désactivé.
Page 74

- 74 -
AP 40
4.
Manual Mode (Regulate fan speed)
Users can opt to set the fan speed to Low, Medium, High, or Turbo according to the
indoor environment.
Press the Mode button to select the
desired fan speed.
xEach time the Mode button is pressed,
the modes will each be selected in turn
(Automatic l Sleep l Low l Medium l
High l Turbo).
ⶺ
When Manual Mode (Regulate fan speed) is selected, Automatic
and Sleep modes are automatically disabled.
5.
Timer
The timer can be set when you want the unit to run only for a specified period of
time.
Select the desired period of use by
pressing the Timer / Air Quality Indicator
Button.
xWhen the Timer indicator is illuminated,
it will begin operating for the requested
period.
xEach time the Timer button is pressed, the
timer options will each be selected in turn
(1hr l 4hr l 8hr l [NO TIMER]).
6.
PlasmaWave®
This air purification function is always running when the unit is turned on .
Press the Plasma button when the
power is on.
xTo turn o this function, press the Plasma
button.
xTo turn it back on, press the Plasma
button again.
©
4. Mode Manuel (réglage de la vitesse du ventilateur)
La vitesse du ventilateur peut être sélectionnée en fonction du niveau
de pollution de l’air.
Appuyez sur le bouton MODE pour
sélectionner la vitesse du ventilateur
désirée.
Chaque fois que vous appuyez sur le bouton,
le débit d’air change (Auto/ Veille/ Bas/ Moyen/
Haut/ Turbo).
lorsque le mode Manuel est activé, les modes Auto et de Veille
sont désactivés.
5. Minuterie
Vous pouvez sélectionner un cycle de fonctionnement à l’issue
duquel l’appareil cessera de fonctionner.
Appuyez sur le bouton MINUTERIE pour
sélectionner la durée du cycle de
fonctionnement.
Lorsque le témoin lumineux est allumé, le
cycle de fonctionnement commence.
Chaque fois que vous appuyez sur le
bouton MINUTERIE le cycle de
fonctionnement est réglée comme suit:
1h- 4h- 8h- annuler.
6. Ionisation PlasmaWave
®
Cette fonction est automatiquement activée à chaque
démarrage de l’appareil.
Pour désactiver cette fonction, appuyez sur
le bouton PLASMA.
Pour réactiver cette fonction, appuyez à
nouveau sur le bouton PLASMA.
Note
Page 75

- 75 -
7.
Child Lock
This feature prevents malfunctions from small children tampering with the control
panel.
Press the Child Lock Button for at least 3
seconds to engage or disengage the
feature.
xWhen the Child Lock indicator is lit, the
feature is engaged.
xWhen Child Lock is engaged, the control
panel is locked and the settings cannot
be changed.
xTo disengage, press the Child Lock Button
again for at least 3 seconds.
3 seconds
8.
Air Quality Indicator
The color-coded Air Quality Indicator light may be turned on or off.
To turn it on or off, press the Timer
button for at least 3 seconds.
xWhen on, it indicates the current indoor
air quality according to four levels:
BLUE(good) l AMBER l RED(poor)
xPress the Timer button again for at least
3 seconds to disable the Air Quality
Indicator.
3 seconds
Ü
Air Quality Indicator
ⶺ
When Automatic Mode is activated, the Air Quality Indicator may be
illuminated or dark, depending on whether the room is bright or dim.
ⶺ
When Sleep Mode is activated, the Air Quality Indicator light is
turned off.
7. Sécurité enfants
Cette fonction vous permet d’éviter que les enfants n’utilisent
abusivement l’unité.
Appuyez sur le bouton pendant environ 3
secondes pour activer ou désactiver le
verrouillage du panneau de commande.
Lorsque le témoin lumineux est allumé, le
verrouillage est activé.
Lorsque le verrouillage est activé, aucun
réglage ne peut être effectué depuis le
panneau de commande.
Pour désactiver le verrouillage, appuyez sur
le bouton pendant environ 3 secondes.
8. Indicateur de la qualité de l’air
Les témoins LED à trois couleurs peut être activés ou désactivés.
Appuyez sur le bouton MINUTERIE pendant environ
3 secondes pour activer ou désactiver les témoins LED.
Lorsqu’ils sont activés, les témoins indiquent
le niveau de qualité de l’air. Bleu(bon)/ ambre/
rouge(pauvre)
Appuyez sur le bouton MINUTERUE à
nouveau pour désactiver les témoins LED.
Lors du fonctionnement de l’appareil en mode Auto l’intensité
lumineuse des témoins LED peut être ajustée en brillant ou
sombre.
Lors du fonctionnement de l’appareil en mode Veille, les
témoins LED sont désactivés.
Note
Indicateur de la
qualitéde l’air
Page 76

- 76 -
AP 40
Care and Maintenance
1.
Changing Filters
①
When the Filter Replacement Reminder light is illuminated or blinking,
it is a signal to replace one of the filters. Refer to the intervals below.
Filter Indicator Light
Interval for
cleaning/
maintenance
Interval
between filter
changes
Pre-filter
-
Twice per
month
Semi-
permanent
Carbon
deodorization filter
Steady
light
-
Every 12
months
Anti-microbial
HEPA filter
Ú Intervals between filter changes may vary depending on the environment.
Ú The service life of the Anti-microbial HEPA filter may be extended if it is vacuumed
about
once a month.
②
After replacing a filter, press the RESET
button for at least 5 seconds.
5 seconds
Maintenance et entretien
1. Remplacement des fi ltres
Lorsqu’il est temps de remplacer les fi ltres, ce témoin s’allume.
Filtre Voyant
Intervalle
d’entretien /
maintenance
Intervalle de
replacement
Filtre au charbon
actif CD
Lumière
constante
Tous les 12
mois
2 fois par
mois
Semipermanent
L’intervalle peut varier en fonction de la pollution de l’air.
Après le remplacement d’un fi ltre, appuyez
sur la touche de réinitialisation pendant
environ 5 secondes.
Filtre True HEPA
antimicrobien
Pré-fi ltre à mailles
fi ne CleanCel
®
Page 77

- 77 -
Removing Filters
Be sure to turn off and unplug the unit before removing filters.
①
Remove the front panel by grasping its
upper edge and gently pulling forward.
xTo remove the front panel, the latch at the
lower edge of the panel must be released
from its position.
Latch
②
Press the tabs on the top edge to
remove the Pre-filter.
Tabs
③
The Carbon deodorization filter and
the Anti-microbial HEPA filter must be
removed in that order by pulling on the
numbered tags at the top.
x Remove the Carbon deodorization lter
before removing the Anti-microbial HEPA
lter.
Remplacement des fi ltres
Assurez-vous que l’appareil soit éteint et que la prise murale soir
débranchée avant de remplacer les fi ltres.
Retirez le couvercle frontal en
saisissant son bord supérieur et en
tirant doucement vers l‘avant, puis
soulever le couvercle pour libérer le
crochet de verrouillage du bord
inférieur.
Pressez vers le bas les onglets du
bord supérieur du pré-fi ltre pour
le retirer.
Le fi ltre au charbon actif CD
et le
fi ltre True HEPA antimicrobien
doivent
être retirés dans cet ordre en tirant sur la
languette présente sur le bord supérieur.
Retirez le fi ltre au charbon actif CD
avant
de retirer le fi ltre True HEPA antimicrobien
.
douille
attache
Page 78

- 78 -
AP 40
Filter Assembly
Filters should be re-assembled in the reverse order of their removal.
①
Insert the Anti-microbial HEPA filter
and Carbon deodorization filter, in
that order.
xBe sure to remove the plastic wrap from new
lters.
Operating the unit without removing the
plastic wrap from the lters may cause
abnormal noise, deformation, or re from
overheating.
Anti-microbial
HEPA filter
Carbon
deodorization
filter
②
Insert the Pre-filter.
xFit this pair of lters into the grooves on
either side of the lower part of the unit, and
then insert the tabs at the top and gently
push until both sides of the middle section
audibly click into place.
③
Replace the front panel by first inserting
the latch at the bottom edge and then
snapping the upper part shut.
X
Only genuine Winix filters should be used with this unit.
Remplacement des fi ltres
Placez les nouveaux fi ltres dans l’ordre inverse.
Insérez en premier le fi ltre True HEPA
antimicrobien et après le fi ltre au charbon
actif.
Retirez l’emballage en plastique des
nouveaux fi ltres. Si vous installez les fi ltres
sans retirer l’emballage, vous risquez de
provoquer des bruits anormaux, une
déformation ou un incendie.
Insérez le pré-fi ltre.
Lors de l’installation du pré-fi ltre, d’abord
l’insérer dans la rainure de chaque côté de la
partie inférieur, après accrochez-le en haut
et appuyez dessus simultanément en bas,
à droite et à gauche pour l’enfoncer sur le
purifi cateur d’air.
Montez le couvercle frontal sur l’appareil
Accrochez-le en bas et appuyez dessus
simultanément en haut, à droite et à
gauche pour l’enfoncer sur le purifi cateur
d’air.
Utilisez uniquement des fi ltres préconisés par le
fabricant.
Note
Filtre au
charbon actif CD
Filtre True HEPA
antimicrobien
Page 79

- 79 -
2.
Cleaning the Pre-filter
Intervals between filter cleanings may vary depending on the air quality.
Use a vacuum cleaner or soft brush to clean the Pre-filter. If it is heavily
soiled, wash it with a solution of water and mild detergent.
xTo clean the sensor area, use only water. Do not use volatile substances such
as alcohol or acetone.
xIf washed about twice a month, the Pre-lter can be used indenitely.
X
When cleaning the unit, always unplug the power cord first and
then wait until the unit has cooled off.
X
Do not use benzene, alcohol, or other volatile fluids, which may
cause damage or discoloration.
X
The Pre-filter is reusable after cleaning.
X
Do not use hot water over 40°C or volatile fluids such as paint
thinner.
X
If the filter is too soiled to clean, then replace the filter.
X
After washing the filter, allow it to dry completely in a well-
ventilated area. Otherwise, it may develop a bad odor.
2. Nettoyage du pré-fi ltre
Ne jamais utiliser d’alcool, de benzène, d’acétone ou d’autres fl uides
volatiles pour nettoyer l’appareil et ses composants.
Le pré-fi ltre est réutilisable après le nettoyage.
Ne pas utiliser d’eau chaude dépassant 40°C.
En cas de saleté résistante, remplacez le fi ltre.
Après nettoyage du pré-fi ltre, veillez à bien le sécher
complètement dans un endroit bien ventilé. Sans cela, il peut
dégager une mauvaise odeur.
Note
L’intervalle peut varier en fonction de la pollution de l’air.
Utilisez un aspirateur pour extraire la poussière du pré-fi ltre et lavez-le avec
de l’eau. En cas de saleté incrustée, lavez le pré-fi ltre avec de l’eau et un
détergent doux.
Utiliser toujours de l’eau pour nettoyer le pré-fi ltre ; n’utilisez jamais d’alcool
ou d’acétone.
Nettoyé régulièrement toutes les deux semaines, le pré-fi ltre peut être
utilisée indéfi niment.
Avant d’effectuer l’entretien, éteignez toujours l’appareil et
débranchez la prise du cordon d’alimentation.
Page 80

- 80 -
AP 40
3.
Cleaning the Dust Sensor
For optimal performance of the Dust Sensor, which detects airborne dust and
ultrafine particles, clean it every two months. Clean it more frequently when the unit
is running in a place with high dust levels.
①
Open the Dust Sensor cover.
②
Use a damp cotton swab to wipe the
lens and intake area of the Dust Sensor.
xTo clean the sensor area, use only water. Do
not use volatile substances such as alcohol
or acetone.
Lens
Cotton
swab
③
Wipe away any remaining moisture with
a dry cotton swab.
④
Close the Dust Sensor cover.
xThe Dust Sensor cover may be cleaned using
a vacuum cleaner.
3. Nettoyage du capteur de poussière
Pour une performance optimale nettoyez le capteur de poussière tous les deux
mois. L’air est aspiré par là et le capteur de poussière détecte l’état de pollution
de l’air. Dans les zones très polluées, la fréquence de nettoyage augmentera.
Démontez le couvercle du
capteur de poussière
Utilisez un coton-tige pour nettoyer la
saleté sur la lentille du capteur.
Utilisez uniquement de l’eau pour nettoyer
la lentille du capteur. N’utilisez jamais
d’alcool ou d’acétone.
Essuyez toute l’humidité restante
avec coton-tige sec.
Fermez le couvercle du capteur de poussière.
Le couvercle du capteur de poussière peut
être nettoyé avec un aspirateur.
coton-tige
lentille
Page 81

- 81 -
4.
Cleaning the exterior / Cleaning the interior
Cleaning the exterior
Wipe with a soft damp cloth using a
solution of water and mild detergent.
Afterwards, wipe it down with a clean dry
cloth.
xUse a vacuum cleaner or duster to clean the
front panel 1-2 times a month.
Cleaning the interior
Open the front panel and clean the
interior with a vacuum cleaner.
xUse a vacuum cleaner or duster to clean the
interior 1-2 times a month.
Nettoyez-le avec un aspirateur 1 à 2
fois par mois.
Nettoyage de l’intérieur
Démontez le couvercle frontal, retirez les
fi ltres, et nettoyez l’intérieur avec un
aspirateur.
Nettoyez-le avec un aspirateur 1 à 2
fois par mois.
4. Nettoyage de l’extérieur et de l’intérieur
Nettoyage de l’extérieur
Nettoyer avec un linge humide et avec
un détergent doux puis essuyez avec
un linge sec.
Page 82

- 82 -
AP 40
Troubleshooting
Problem Check / Actions to take
It does not turn on
at all
ⶺ
Is the power cord securely attached to the socket
on the back of the unit?
Check both ends of the power cord to make sure
it is plugged in and the power connections are
secure.
ⶺ
Is there a power outage?
Check to see if other lights and electrical
equipment are working and try again.
It doesn’t work in
Automatic mode.
ⶺ
Is the power cord securely attached to the socket
on the back of the unit?
Try turning it on again after detaching and
reattaching the power cord.
ⶺ
Has Automatic mode been selected?
Press the Mode button until Automatic mode is
selected.
ⶺ
Is the sensor blocked or clogged?
Clear the sensor using a vacuum cleaner.
It vibrates and makes a
lot of noise.
ⶺ
Is it running on a slanted surface?
Move the unit to a hard, flat area of the floor.
Dépannage
Problème Que faire
L’appareil ne fonctionne
pas.
Le mode Auto ne
fonctionne pas.
L’appareil vibre et fait
beaucoup de bruit.
La prise d’alimentation est-elle bien
branchée?
Vérifi ez le cordon d’alimentation pour
vous assurer qu’il est bien branché sur
le prise murale et à l’arrière de l’appareil.
Assurez-vous également que vos prises
électriques sont sécurisées.
Il y a une panne de courant?
Vérifi ez si d’autres lumières et les appareils
électriques fonctionnent et réessayez.
Le cordon d’alimentation est-il solidement
fi xé à la prise à l’arrière de l’appareil ?
Débranchez et rebranchez la fi che du cordon
d’alimentation et mettre l’appareil en marche.
Le mode Auto est-il activé?
Appuyez le bouton Mode jusqu’à le mode
Auto soit sélectionné.
Le capteur est-il bloqué ou obstrué?
Nettoyez le capteur avec l’aspirateur.
L’appareil est-il placé sur une surface
instable?
Placez l’appareil sur une surface stable.
Page 83
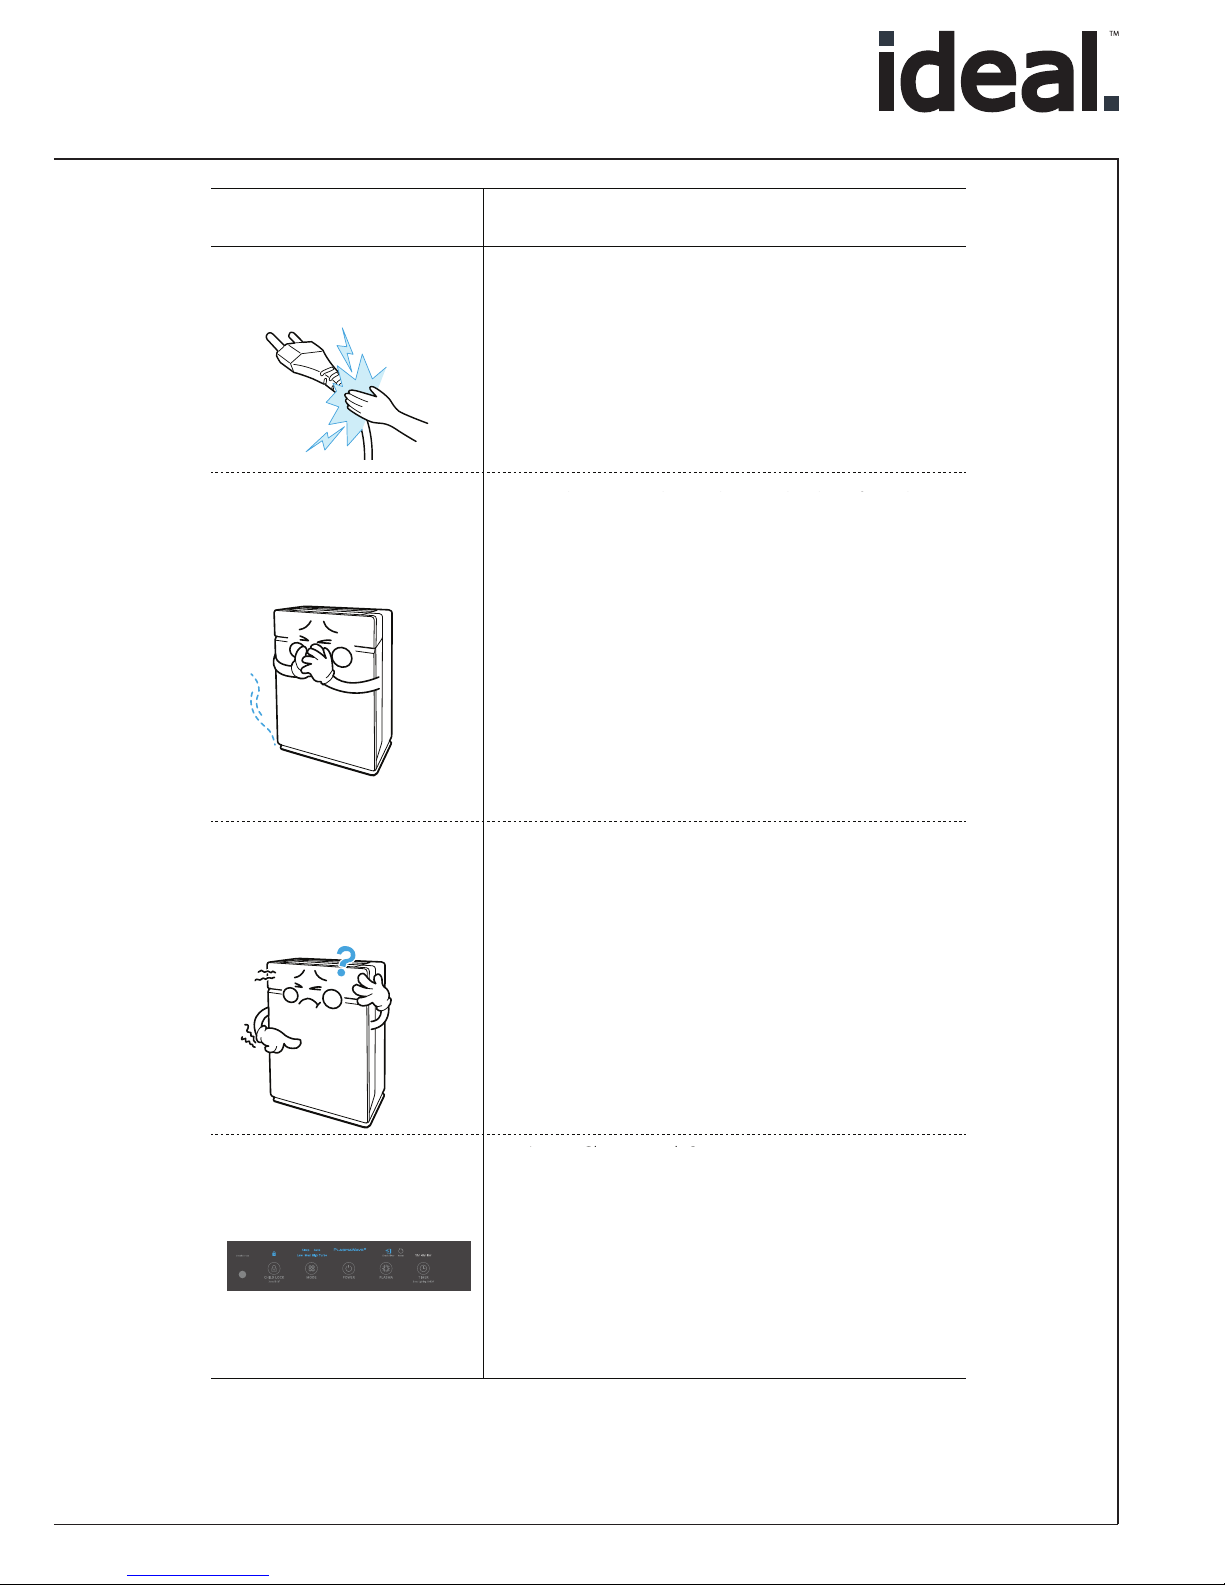
- 83 -
Problem Check / Actions to take
The power plug and
outlet feel hot.
ⶺ
Is the plug securely plugged in?
Make sure the plug is properly plugged into the
outlet.
There is a strange
smell.
ⶺ
Is it being used in a place with a lot of smoke,
dust, or odors?
xClean the air intakes on either side and clean the
pre-lter.
xWhen cooking foods with strong odors, reduce use
of the unit as much as possible.
The lters may become permeated with cooking odors,
possibly aecting their performance and service life.
xContact the customer service center to conrm the
exact cause.
xReplace the carbon deodorization lter (CD) and
Anti-microbial HEPA lter.
The fan speed is weak.
The product is not
purifying the air.
ⶺ
Is the Filter Replacement Reminder indicator light
on?
Change the filters as required.
The display panel is
dim.
ⶺ
Is it in Sleep mode?
Sleep mode is activated through automatic detection of
a room’s brightness or darkness. During Sleep mode, the
display panel’s level of illumination is reduced by half.
ⶺ
Is the detection window of the Light Sensor
blocked by debris?
Remove any debris from the Light Sensor
detection window.
Problème Que faire
La fi che du cordon
d’alimentation est
chaude.
Une odeur se dégage
de l’appareil.
La vitesse du ventilateur
est faible.
L’effet purifi cateur n’est
pas obtenu.
Le panneau de
commande est sombre.
La fi che est-elle bien branché?
Vérifi ez si la fi che du cordon d’alimentation est
bien branchée.
L’appareil a-t-il été utilisé dans un endroit avec
beaucoup de fumée, de poussière ou d’odeur ?
Nettoyez la surface de l’appareil et le pré-fi ltre.
Lord de la cuisson des aliments avec des odeurs fortes,
réduire l’utilisation de l’appareil autant que possible.
Les fi ltres peuvent s’imprégner d’odeurs de cuisson, et
cela peut affecter leurs performances et leur durées de
vie.
Contactez le service client pour vérifi er la raison:
www.ideal-health.de
Remplacez le fi ltre au charbon actif CD et le fi ltre True
HEPA antimicrobien.
L’indicateur du remplacement des fi ltres
est-il allumé?
Remplacez les fi ltres comme recommandé.
Le mode Veille est-il activé?
Le mode Veille s’active automatiquement en fonction de
la luminosité ou l’obscurité d’une pièce. En mode Veille,
la luminosité du panneau de commande est réduite de
moitié.
Le capteur de luminosité est-il obstrué?
Retirez tout ce qui pourrait obstruer le capteur.
Page 84

- 84 -
AP 40
Product Specifications
Model Name HR950
Power Voltage
AC 220V~240V, 50/60Hz
Power Rate
83W
Room, Capacity in Sq. Ft.
380
Weight
8.5kg
Dimensions
415mm(W) x 245mm(D) x 600mm(H)
Modèle
Alimentation
Puissance
Surface traitée
Poids
Dimensions
Caractéristiques techniques
AP 40
120 V / 60 Hz
90 W
400 sq. ft.
18,7 lb
16,3 inch (L) X 9,6 inch (P) X 23,6 inch (H)
Représentant autorisé pour la documentation technique.
MBM Corporation
3134 Industry Drive
North Charleston, SC 29418
800-223-2508
www.mbmcorp.com
01.04.2016
date
Sous réserves de modifi cations techniques
Made in South Korea
Consignes de sécurité
- Si le cordon d’alimentation est endommagé, il doit être remplacé par un cordon spécial,
ou un assemblage disponible du fabricant ou l’agent de service.
- Cet appareil ne doit pas être utilisé par personne (y compris les enfants) dont les capacités
physiques, mentales ou sensorielles sont réduites, ou manquent d’expérience et de
connaissance, sauf que la personne a été encadrée pour l’utilisation de l’appareil donnée par
une personne responsable de leur sécurité.
- Les enfants doivent être surveillés pour s’assurer qu’ils ne jouent pas avec l’appareil.
- Pour réduire le risque de choc électrique, cet appareil est équipé d’une fi che polarisée
(une lame est plus large que l’autre). Cette fi che ne peut être branchée dans la prise que
d’une seule façon. Si la fi che ne peut pas être insérée entièrement dans la prise, tournez la
fi che. Si la fi che ne peut toujours pas entrer dans la prise, contactez un électricien qualifi é
pour installer une prise murale appropriée. Ne modifi ez la fi che en aucun cas.
- POUR PRÉVENIR LES CHOCS ÉLECTRIQUES – Ces instructions d’entretien sont destinées
à un personnel qualifi é. Pour réduire le risque de choc électrique, ne pas effectuer tout autre
service que celui contenues dans les instructions, sauf si vous êtes qualifi é pour le faire.
Page 85

- 85 -
Elimination
Remettez le purifi cateur d’air arrivé en fi n de vie à votre
revendeur pour une élimination dans les règles de l’art.
Votre administration communale ou régionale vous informera
des possibilités d’élimination supplémentaires.
Pièces de rechange et accessoires
Vous pouvez obtenir des pièces de rechange auprès
de votre revendeur spécialisé et les remplacer
vous-même sur le purifi cateur d’air.
Réparation
Toutes les autres réparations peuvent uniquement être
réalisées par un spécialiste ou le service après-vente.
Ceci vaut également pour un cordon d’alimentation
défectueux. Les travaux de réparation
Dispositions de garantie
Nous vous remercions d’avoir choisi un produit de la
société IDEAL.
IDEAL accorde une garantie sur cet appareil à partir de la date
d’achat. Les conditions de garantie sont fi xées par notre
représentation nationale.
• Si un vice de matériau ou de construction venait à survenir
pendant la période de garantie, IDEAL s’engage, à son
unique discrétion, à réparer l’appareil, le remplacer ou à en
rembourser le prix d’achat.
• Le droit à la garantie ne peut être exercé que si des
justifi catifs suffi sants, comme une facture, peuvent être
présentés et que le recours à la garantie a lieu pendant la
période de garantie.
• La garantie ne couvre pas les pièces d’usure ni les pièces à
remplacer régulièrement, comme les fi ltrantes.
• La garantie ne s’applique plus si l’appareil n’est pas installé,
utilisé et entretenu correctement (conformément au mode
d’emploi).
• La garantie ne s’applique plus si le fi ltre de
l’appareil n’est pas remplacée régulièrement par des
cassettes fi ltrantes IDEAL d’origine (conformément aux
recommandations du mode d’emploi et/ou aux indications
sur l’appareil).
• La garantie ne s’applique plus si l’appareil n’est pas raccordé
sur un circuit électrique correspondant aux indications de la
plaque signalétique.
Page 86

- 86 -
AP 40
Notizen:
Remarks:
Notes :
Page 87

- 87 -
Notizen:
Remarks:
Notes :
Page 88

IDEAL Health
IDEAL • 04-2016 / 23.08.2016 zm
Immer frische Luft.
Für Gesundheit, Vitalität
und mehr Lebensqualität.
Spürbar. Bei jedem Atemzug.
For fresh air.
For more health, vitality and
quality of life. Perceptible.
With every breathe you take.
De l’air toujours frais.
Pour une meilleure santé,
vitalité et qualité de vie.
Perceptible. À chaque
inspiration.
•
MBM Corporation • North Charleston • South Carolina • www.mbmcorp.com
•
 Loading...