


LC 141VLi, LC 141Li, LC 141C
EN Operator's manual
BG Ръководство за експлоатация
CS Návod k použití
DA Brugsanvisning
DE Bedienungsanweisung
EL Οδηγίες χρήσης
ES Manual de usuario
ET Kasutusjuhend
FI Käyttöohje
FR Manuel d'utilisation
HR Priručnik za korištenje
HU Használati utasítás
IT Manuale dell'operatore
JA 取扱説明書
LT Operatoriaus vadovas
LV Lietošanas pamācība
NL Gebruiksaanwijzing
NO Bruksanvisning
PL Instrukcja obsługi
RO Instrucţiuni de utilizare
RU Руководство по эксплуатации
SK Návod na obsluhu
SL Navodila za uporabo
SR Priručnik za rukovaoca
SV Bruksanvisning
TR Kullanım kılavuzu
UK Посібник користувача
10-28
29-50
51-69
70-88
89-110
111-132
133-153
154-172
173-191
192-212
213-231
232-251
252-272
273-291
292-311
312-331
332-352
353-371
372-393
394-413
414-437
438-457
458-476
477-496
497-515
516-534
535-556

4
3
6
7
8
9
1311 12
10
2
5
1
18
17
16
14
15
15
20
23
22
21
19
24
25
26
1

3
4
6
13
11
7
2
5
12
10
8
9
1
7
2
3 4 5 6 7 8
9 10 11 12 13 14
15 16 17 18
19 20
21 22 23 24
25

26 27 28
29 30
31 32
33 34

35 36
BA
37 38
39 40
41
42

43 44
3
4
5
6
7
8
9
45
46
47 48
49 50

A
B
51 52
A
B
A
B
53 54
55
57
56
58

59 60
61 62
63 64
65 66

67 68
69 70
71 72
73

Contents
Introduction................................................................... 10
Safety............................................................................13
Assembly...................................................................... 19
Operation...................................................................... 20
Maintenance................................................................. 22
Introduction
Troubleshooting............................................................ 24
Transportation, storage and disposal........................... 25
Technical data.............................................................. 25
EC Declaration of Conformity....................................... 28
Product description
The product is a pedestrian-controlled rotary lawn
mower. The grass is collected in a grass catcher.
Remove the grass catcher to get rear discharge of the
grass. Attach a mulch kit (accessory) to cut the grass
into fertilizer.
Product overview LC 141VLi/LC 141Li
(Fig. 1 )
1. Motor brake handle
2. Start inhibitor
3. Drive bail (LC 141VLi)
4. Handle / handlebar
5. Control panel
6. ON/OFF button
7. SavE button
8. Battery indicator button
9. Battery charge indicator
10. Warning indicator (ERROR LED)
11. Decrease speed button (LC 141VLi)
12. Speed level indicator (LC 141VLi)
13. Increase speed button (LC 141VLi)
Product overview LC 141C
(Fig. 2 )
1. Motor brake handle
2. Start inhibitor
3. Power cord socket
4. Power cord holder
5. Handle / handlebar
6. Rear cover
7. Symbols
8. Cutting cover
9. Rating plate
10. Cutting height lever
11. Mulch plug (Accessory)
12. Grass catcher
13. Operator's manual
Intended use
Use the product to cut grass in private gardens. Do not
use the product for other tasks.
14. Rear cover
15. Symbols
16. Battery lid
17. Safety key
18. Cutting cover
19. Cutting height lever
20. Rating plate
21. Grass catcher
22. Mulch plug for LC 141VLi (Accessory)
23. Mulch plug for LC 141Li (Accessory)
24. Battery charger (Accessory)
25. Battery (Accessory)
26. Operator's manual
Symbols on the product
Injury or death can occur
to the operator or
bystanders if the product
is not used carefully and
(Fig. 3 )
correctly.
Read the operator's
manual and make sure
(Fig. 4 )
that you understand the
10 71 - 005 - 18.05.2018

(Fig. 5 )
(Fig. 6 )
(Fig. 7 )
(Fig. 8 )
(Fig. 9 )
(Fig. 10 )
(Fig. 11 )
instructions before you
use this product.
Keep persons and
animals at a safe distance
from the work area.
Look out for thrown
objects and ricochets.
Warning: Keep hands and
feet away from the
rotating blade.
Warning: Keep hands and
feet away from rotating
parts.
Remove the safety key
before you do
maintenance on the
product. (model
LC 141VLi/LC 141Li)
Disconnect the product
from electrical outlet
before you do
maintenance on the
product. (model LC 141C)
IPX1 - The product has
protection against
dripping water (model
LC 141VLi/LC 141Li)
(Fig. 14 )
(Fig. 15 )
(Fig. 16 )
(Fig. 17 )
(Fig. 18 )
(Fig.
19 )
Warning: Do not operate
the product across the
power cord as this can
result in electrical shock
or damage to the product.
(model LC 141C)
This product is in
accordance with
applicable EC directives.
Noise emission to the
environment according to
the European
Community’s Directive.
The product’s emission is
specified in the Technical
data chapter and on the
label.
Direct current. 36V
Double insulation.
Recycle this
product at a recycling location
for electrical
and electronic
equipment.
(Applies to Europe only)
IPX4 - The product has
protection against
splashing water (model
(Fig. 12 )
LC 141C)
Do not let rain fall on the
product (model
(Fig. 13 )
71 - 005 - 18.05.2018 11
LC 141VLi/LC 141Li)

(Fig.
20 )
(Fig. 21 )
(Fig. 22 )
Start procedure
for model
LC 141VLi/
LC 141Li: push
ON/OFF button, loosen
start inhibitor,
push motor
brake handle
down.
Start procedure for model
LC 141C: loosen start
inhibitor, push motor
brake handle down.
Release motor brake
handle to stop.
(Fig. 26 )
Fail-safe transformer.
Use and keep the battery
(Fig. 27 )
(Fig. 28 )
Product liability
As referred to in the product liability laws, we are not
liable for damages that our product causes if:
• the product is incorrectly repaired.
• the product is repaired with parts that are not from
• the product has an accessory that is not from the
• the product is not repaired at an approved service
charger indoors only.
Double insulation.
the manufacturer or not approved by the
manufacturer.
manufacturer or not approved by the manufacturer.
center or by an approved authority.
(Fig. 23 )
(Fig. 24 )
Note: Other symbols/decals on the product refer to
certification requirements for some markets.
Slow
Fast
Symbols on the battery and/or on the battery charger
(Fig.
25 )
Recycle this
product at a recycling station
for electrical
and electronic
equipment.
(Applies to Europe only)
12 71 - 005 - 18.05.2018

Safety
Safety definitions
Warnings, cautions and notes are used to point out
specially important parts of the manual.
WARNING: Used if there is a risk of injury or
death for the operator or bystanders if the
instructions in the manual are not obeyed.
CAUTION: Used if there is a risk of damage
to the product, other materials or the
adjacent area if the instructions in the
manual are not obeyed.
Note: Used to give more information that is necessary in
a given situation.
General safety instructions
WARNING: Read the warning instructions
that follow before you use the product.
•
This product is dangerous if
used incorrectly or if you are
not careful. Injury or death can
occur if you do not obey the
safety instructions.
•
This product produces an
electromagnetic field during
operation. This field may
under some circumstances
interfere with active or passive
medical implants. To reduce
the risk of serious or fatal
injury we recommend persons
with medical implants to
consult their physician and the
medical implant manufacturer
before operating this product.
•
Always be careful and use
your common sense. If you
are not sure how to operate
the product in a special
situation, stop and speak to
your Husqvarna dealer before
you continue.
•
Keep in mind that the operator
will be held responsible for
accidents that involve other
persons or their property.
•
Keep the product clean. Make
sure that you can clearly read
signs and decals.
•
Do not let a person use the
product unless you make sure
that they read and understand
the contents of the operator's
manual.
•
Do not let a child operate the
product.
•
Do not let a person, without
knowledge of the instructions,
operate the product.
•
Always monitor a person, with
decreased physical capacity or
mental capacity, that uses the
product. A responsible adult
must be there at all times.
•
Do not use the product if you
are tired, ill, or under the
influence of alcohol, drugs or
medicine. This has a negative
effect on your vision,
alertness, coordination and
judgment.
71 - 005 - 18.05.2018
13

•
Do not use the product if it is
defective.
•
Do not change this product or
use it if it is possible that it has
been changed by others.
Work area safety
WARNING: Read the warning instructions
that follow before you use the product.
•
Remove objects such as
branches, twigs and stones
from the work area before you
use the product.
•
Objects that hit against the
cutting equipment can eject
and cause damage to persons
and objects. Keep bystanders
and animals at a safe distance
from the product.
•
Never use the product in bad
weather such as fog, rain,
strong winds, intense cold and
risk of lightning. To use the
product in bad weather or in
moist or wet locations is tiring.
Bad weather can cause
dangerous conditions, such as
slippery surfaces.
•
Look out for persons, objects
and situations that can prevent
safe operation of the product.
•
Look out for obstacles, such
as roots, stones, twigs, pits
and ditches. Long grass can
hide obstacles.
•
To cut grass on slopes can be
dangerous. Do not use the
product on ground that slopes
more than 15°.
•
Operate the product across
the face of slopes. Do not
move up and down.
•
Be careful when you go near
hidden corners and objects
that prevent a clear view.
Work safety
WARNING: Read the warning instructions
that follow before you use the product.
•
Use this product to cut grass
lawns only. It is not permitted
to use it for other tasks.
•
Use personal protective
equipment. See
Personal
protective equipment on page
15
.
•
Do not operate the product in
rain or wet conditions. The risk
of electrical shock increases if
water enters the product.
•
Do not operate the product
unless the blade and all
covers are attached correctly.
An incorrectly attached blade
can come loose and cause
personal injury.
•
Make sure that the blade does
not hit objects such as stones
and roots. This can do
damage to the blade and bend
the motor shaft. A bent axle
14
71 - 005 - 18.05.2018

causes heavy vibration and a
very high risk that the blade
becomes loose.
•
If the blade hits an object or if
vibrations occur, stop the
product immediately. Stop the
motor, turn the safety key to 0
and remove the battery (model
LC 141VLi and LC 141Li) or
disconnect the power cord
(model LC 141C). Examine
the product for damages.
Repair damages or let an
authorised service agent do
the repair.
•
Never attach the motor brake
handle permanently to the
handle when the motor is
started.
•
Put the product on a stable,
flat surface and start it. Make
sure that the blade does not
hit the ground or other objects.
•
Always stay behind the
product when you operate it.
•
Let all the wheels stay on the
ground and keep 2 hands on
the handle when you operate
the product. Keep your hands
and feet away from the
rotating blades.
•
Do not tilt the product when
the motor is started.
•
Be careful when you pull the
product rearward.
•
Never lift up the product when
the motor is started. If you
must lift the product, first stop
the motor, turn the safety key
to 0 and remove the battery
(model LC 141VLi and
LC 141Li) or disconnect the
power cord (model LC 141C).
•
Do not walk rearward when
you operate the product.
•
Stop the motor when you
move across areas without
grass, for example paths
made of gravel, stone and
asphalt.
•
Do not run with the product
when the motor is started.
Always walk when you operate
the product.
•
Stop the motor before you
change the cutting height.
Never make adjustments with
the motor started.
•
Never let the product stay out
of view with the motor started.
Stop the motor and make sure
that the cutting equipment
does not rotate.
Safety instructions for operation
Personal protective equipment
WARNING: Read the warning instructions
that follow before you use the product.
•
Personal protective equipment
cannot fully prevent injury but
it decreases the degree of
71 - 005 - 18.05.2018
15

injury if an accident does
occur. Let your dealer help
you select the right equipment.
•
Use heavy-duty slip-resistant
boots or shoes. Do not use
open shoes or go with bare
feet.
•
Use heavy, long pants.
•
Use protective gloves when
necessary, for example when
you attach, examine or clean
the cutting equipment.
Safety devices on the product
WARNING: Read the warning instructions
that follow before you use the product.
• Do not use a product with defective safety devices.
• Do a check of the safety devices regularly. If the
safety devices are defective, speak to your
Husqvarna service agent.
Cutting cover
• Examine the cutting cover to make sure that there
are no damages such as cracks.
Motor brake handle
The motor brake handle stops the motor. When the
motor brake handle is released, the motor stops.
To do a check of the motor brake, start the motor and
then release the motor brake handle. If the motor does
not stop in 3 seconds, let an approved Husqvarna
service agent adjust the motor brake.
(Fig. 29 )
Safety key (models LC 141VLi and LC 141Li)
The safety key is below the battery lid. The safety key
connects the battery that supplies the motor with power.
• Start and stop the motor to do a check of the safety
key.
• If the safety key functions correctly, the motor only
starts when the key is in position 1.
(Fig. 30 )
To examine the start inhibitor
Do a check of the start inhibitor to make sure that it
prevents operation of the motor.
1. Pull the motor brake handle in the direction of the
handlebar. The start inhibitor stops the movement.
2. Push the start inhibitor out.(Fig. 31 )
3. Release the start inhibitor and make sure that it goes
back to its initial position.
To use the power cord holder (model LC 141C)
The power cord holder decreases the strain on the
power socket and the power cord. The power cord
holder also decreases the risk that you fall.
1. Bend the power cord to a small loop.
2. Put the loop in to the hole in the power cord holder.
3. Put the loop around the hook.
4. Pull the power cord to tighten the loop around the
hook.(Fig. 32 )
Battery safety
WARNING: Read the warning instructions
that follow before you use the product.
•
Use Husqvarna rechargeable
batteries as a power supply for
related Husqvarna products
only. To prevent injury, do not
use the battery as a power
supply for other devices.
•
Do not use non-rechargeable
batteries.
•
Risk of electrical shock. Do not
connect the battery terminals
to keys, coins, screws or other
metal. This can cause a short
circuit of the battery.
•
Do not put objects into the air
slots of the battery.
•
Keep the battery away from
sunlight, heat or open flame.
The battery can explode and
16
71 - 005 - 18.05.2018

cause burns and/or chemical
burns.
•
Keep the battery away from
rain and wet conditions.
•
Keep the battery away from
microwaves and high
pressure.
•
Do not try to disassemble or
break the battery.
•
If the battery leaks, do not let
the liquid touch your body or
eyes. If you have touched the
liquid, clean the area with a
large quantity of water and get
medical aid.
•
Use the battery in
temperatures between -10°C
and 40°C.
•
Do not clean the battery or the
battery charger with water.
See
To clean the battery and
the battery charger on page
23
.
•
Do not use a defective or
damaged battery.
•
Keep batteries in storage
away from metal objects such
as nails, coins, jewellery.
Battery charger safety
WARNING: Read the warning instructions
that follow before you use the product.
•
Use the QC battery chargers
to charge Husqvarna
replacement batteries only.
•
Risk of electrical shock or
short circuit. Do not put
objects into the air slots of the
charger. Do not try to
disassemble the battery
charger. Do not connect the
charger terminals to metal
objects. Use an approved
mains socket.
•
This product produces an
electromagnetic field during
operation. This field may
under some circumstances
interfere with active or passive
medical implants. To reduce
the risk of serious or fatal
injury, we recommend persons
with medical implants to
consult their physician and the
medical implant manufacturer
before operating this product.
•
Regularly make sure that the
power cord of the battery
charger is not damaged and
that there are no cracks in it.
•
Do not lift the battery charger
by the power cord. To
disconnect the battery charger
from a mains socket, pull out
the plug. Do not pull the power
cord.
•
Keep the power cord and
extension cables away from
water, oil and sharp edges.
Make sure that the cable is not
pinched in doors, fences or
71 - 005 - 18.05.2018
17

equivalent. It can cause the
charger to become energized.
•
Do not clean the battery
charger with water.
•
The battery charger can be
used by children aged from 8
years and above and persons
with reduced physical,
sensory, or mental capabilities
or lack of experience and
knowledge if they have been
given supervision or
instruction concerning use of
the battery charger in a safe
way and understand the
hazards involved. Children
shall not play with the battery
charger. Cleaning and user
maintenance shall not be
made by children without
supervision.
•
Do not charge nonrechargeable batteries in the
battery charger.
•
Do not use the battery charger
near flammable materials or
materials that can cause
corrosion. Do not cover the
battery charger. Pull out the
plug to the battery charger if
there is smoke or fire.
•
Do not use a defective or
damaged battery charger.
•
Only charge the battery
indoors in a room with good
airflow and away from
sunlight. Do not charge the
battery in wet conditions.
Power cord safety
For model LC 141C.
•
The use of a Residual Current
Device (R.C.D.) with a tripping
current of not more than 30mA
is recommended. Even with an
R.D.C. installed, 100% safety
cannot be guaranteed and
safe work procedures must be
obeyed at all times. Do a
check of your R.C.D. each
time you use it.
•
Immediately disconnect from
the mains if the power cord is
cut or the insulation is
damaged.
•
Do not touch a cut or
damaged power cord until the
electrical supply is
disconnected.
•
Do not repair a cut or
damaged power cord. Replace
it with a new one.
Safety instructions for maintenance
WARNING: Read the warning instructions
that follow before you use the product.
•
For models LC 141VLi and
LC 141Li: To prevent
accidental start during
maintenance, turn the safety
key to 0 and remove the
battery. Wait at minimum 5
18
71 - 005 - 18.05.2018

seconds before you start the
maintenance.
•
For model LC 141C: To
prevent accidental start during
maintenance, disconnect the
power cord.
•
Do the maintenance work
correctly to increase the
lifetime of the product and
decrease the risk of accidents.
Let an approved service agent
do the professional repairs.
Speak to your nearest service
agent for more information.
•
Only do the maintenance work
written in this operator's
manual. More extensive work
must be done by an approved
service agent.
•
Put on heavy duty gloves
when you use the cutting
equipment. The blade is very
sharp and cuts can easily
occur.
•
Keep the cutting edges sharp
and clean for the best and
safest performance.
•
Let your service agent
regularly examine the product
and make necessary
adjustments and repairs.
•
Replace damaged, worn or
broken parts.
•
Obey the instructions for how
to change accessories. Only
use accessories from the
manufacturer.
•
When not in operation, keep
the product, battery and
battery charger apart in a dry,
indoor and locked area. Make
sure that children and persons
that are not approved cannot
get access to the product,
battery or battery charger.
Assembly
Introduction
WARNING: Before you assemble the
product, read the safety chapter.
WARNING: For models LC 141VLi and
LC 141Li: To prevent accidental start during
assembly, turn the safety key to 0, remove
the battery and wait at minimum 5 seconds.
For model LC 141C: To prevent accidental
start during assembly, disconnect the power
cord.
71 - 005 - 18.05.2018 19
To assemble the handle
1. Align the holes in the handlebar with the holes in the
lower handle and attach the screws, washers and
knobs. Tighten the knobs fully.(Fig. 33 )
2. Attach the cables to the handle with the cable
holders.(Fig. 34 )
Note: Make sure that the tension in the cables is not
too high. A too high tension can cause damage to
the cable if the handle is folded to transport position.
3. Put the cables around the hook at the bottom of the
handle.(Fig. 35 )
To adjust the handle height
1. Loosen the lower knobs.(Fig. 36 )

2. Remove the knob, washer, and screw on the left and
the right side.
3. The handle can be set to 2 different heights. Put the
screw in one of the 2 holes on the left and the right
side.(Fig. 37 )
4. Attach the screws, washers and knobs.
5. Move the knobs up in the direction of the handle until
they stop and you hear a click. Tighten the knobs
fully.(Fig. 38 )
To assemble the grass catcher
1. Push the 2 transportation covers out and down.(Fig.
39 )
2. Put the top part of the grass catcher onto the lower
part of the grass catcher. Attach the grass catcher
frame with the clips.(Fig. 40 )
Operation
3. Lift the rear cover.
4. Attach the hooks on the grass catcher to the top
edge of the chassis.(Fig. 41 )
To assemble the mulching-kit
1. Lift up the rear cover and remove the grass catcher.
2. Put the mulch plug into the grass discharge channel.
The mulch plug of type A is for LC 141Li and
LC 141C. Type B is for LC 141VLi.(Fig. 42 )
3. Close the rear cover.
4. Replace the blade with the Combi blade, see
remove and replace the blade on page 23
To
.
Introduction
WARNING: Before you operate the product,
you must read and understand the safety
chapter.
To set the product in operation position
If the handle is put in transport and storage position (see
To set the product in transport position on page 25
the procedure that follows to put the handle in operation
position.
1. Lift the handle until the lower handle locks into
operation position.(Fig. 43 )
2. Move the lower knobs up in the direction of the
handle until they stop and you hear a click.(Fig. 44 )
3. Tighten the knobs.
4. Lift the upper handle and tighten the knobs.(Fig. 45 )
), do
To set the cutting height
1. Move the cutting height lever rearward to increase
the cutting height.
2. Move the cutting height lever forward to decrease
the cutting height.(Fig. 46 )
CAUTION: Do not set the cutting height too
low. The blades can hit the ground if the
surface of the lawn is not level.
Battery
WARNING:
must read and understand the safety
chapter. You must also read and understand
the operator's manual for the battery and the
battery charger.
Before you use the battery, you
Battery status
The display shows the remaining battery capacity and if
there are problems with the battery. The battery capacity
is shown for 5 seconds after the product is switched off
or the battery indicator button is pressed. The warning
symbol on the battery is on when an error has occurred.
See
Battery on page 24
(Fig. 47 )
LED lights Battery status
All LEDs are lit Fully charged (75-100%)
LED 1, LED 2, LED 3 are
lit
LED 1, LED 2 are lit The battery is 25%-50%
LED 1 is lit The battery is 0%-25%
LED 1 flashes The battery is empty.
.
The battery is 50%-75%
charged
charged
charged.
Charge the battery.
To charge the battery
Charge the battery before the first use. The battery is
only 30% charged when supplied to the customer.
Note: The battery charger must be connected to the
voltage and frequency specified on the rating plate.
The battery does not charge if the battery temperature is
above 50°C. The battery charger decreases the
temperature of the battery before it starts to charge.
1. Connect one end of the power cord for the battery
charger into the socket of the battery charger.
20
71 - 005 - 18.05.2018

2. Connect the other end of the power cord for the
battery charger in an grounded mains socket. The
LED on the battery charger flashes green one time.
(Fig. 48 )
3. Put the battery in the battery charger. The green light
on the charger comes on when the battery is
correctly connected to the battery charger.(Fig. 49 )
4. When all LEDs on the battery have come on the
battery is fully charged. Charge the battery for
maximum 24 hours.
5. To disconnect the battery charger from the mains
socket, pull the plug, not the power cord.
6. Remove the battery from the battery charger.
Battery charging status
A Husqvarna Li-ion battery can be charged or used at all
charging levels. The battery is not damaged. A fully
charged battery will not decrease its charge when the
battery is left in the charger.
LED display
LED 1 flashes 0%-25%
LED 1 is lit, LED 2 flashes 25%-50%
LED 1, LED 2 are lit, LED
3 flashes
LED 1, LED 2, LED 3 are
lit, LED 4 flashes
LED 1, LED 2, LED 3,
LED 4 are lit
Charging status
50%-75%
75%-100%
Fully charged
To operate LC 141VLi and LC 141Li
To start the product
1. Put a charged battery in the battery compartment.
2. Turn the safety key to 1.(Fig. 50 )
3. Stay behind the product.
4. Press the ON/OFF button (A) on the control panel
and the green LED (B) comes on.(Fig. 51 )
5. Loosen the start inhibitor.(Fig. 52 )
6. Push the motor brake handle in the direction of the
handlebar.(Fig. 53 )
To use the drive on the wheels
• Model LC 141VLi. Pull the drive bail in the direction
of the handlebar to start the drive.(Fig. 54 )
• Press + and - on the control panel to set the drive
speed in 4 steps.(Fig. 55 )
• Release the drive bail to disengage the drive, for
example when you go near an obstacle.
To use the SavE function
The product has a battery saving function (SavE) that
gives longer operation time.
1. Press the SavE button (A) to start the function. The
green LED comes on.(Fig. 56 )
2. Press the SavE button again to stop the function.
The green LED (B) goes out.
The SavE function stops automatically if the ground
conditions make it necessary to have a higher output.
The SavE function starts automatically when the ground
conditions lets it.
High load function
When the product cuts long or wet grass, the motor
automatically increases rpm. The motor goes back to
standard mode when high load is not necessary.
To stop the product
The product stops automatically if you do not operate it
for 10 minutes. Always turn the safety key to 0 before
you let the product out of view.
1. Release the motor brake handle to stop the motor.
(Fig. 57 )
2. Press the ON/OFF button (A) on the control panel
and the green LED (B) goes out.(Fig. 58 )
3. Open the battery lid and turn the safety key to 0.(Fig.
59 )
4. To remove the battery, press the 2 release buttons
and pull out the battery.(Fig. 60 )
5. Charge the battery if it is weak. For more
information, see
To charge the battery on page 20
.
To operate LC 141C)
To select an approved cable (LC 141C)
For the UK market, use only the 16M extension
Note:
cable that comes with the product. For all other markets,
refer to the information below.
If extension cables are used, these must comply with the
minimum cross-sections in the table below:
Voltage
220-240V/ 50Hz Up to 20 m 1.5 mm
220-240V/ 50Hz 20–50 m 2.5 mm
• Mains cables and extension cables are available
from your local approved service agent for
Husqvarna outdoor products.
• Only use extension cables specifically designed for
outdoor use and which conform to one of the
following specifications: Ordinary rubber (60245 IEC
53), Ordinary PVC (60227 IEC 53) or Ordinary PCP
(60245 IEC 57)
• If the cable is damaged, it must be replaced by the
manufacturer, its service agent or similarly qualified
persons in order to avoid a hazard.
Cable length Cross section
2
2
71 - 005 - 18.05.2018
21

To start the product
1. Connect a power cord to the socket below the
handle.(Fig. 61 )
2. Put the power cord in the power cord holder. Refer
to
To use the power cord holder (model LC 141C) on
page 16
.(Fig. 62 )
3. Stay behind the product.
4. Loosen the start inhibitor.(Fig. 63 )
5. Push the motor brake handle in the direction of the
handlebar.(Fig. 64 )
To stop the product
1. Release the motor brake handle to stop the motor.
(Fig. 65 )
2. Disconnect the power cord from the mains and then
from the product.(Fig. 66 )
Maintenance
CAUTION: Pull the plug straight out. Do
not pull the power cord.
To get a good result
• Always use a sharp blade. A blunt blade gives an
irregular result and the cut surface of the grass
becomes yellow. A sharp blade also uses less
energy than a blunt blade.
• Do not cut more than ⅓ of the length of the grass.
Cut first with the cutting height set high. Examine the
result and lower the cutting height to an applicable
level. If the grass is very long, drive slowly and cut 2
times if necessary.
• Cut in different directions each time to prevent
stripes in the lawn.
Introduction
WARNING: Before you do maintenance, you
must read and understand the safety
chapter.
For all servicing and repair work on the product, special
training is necessary. We guarantee the availability of
professional repairs and servicing. If your dealer is not a
service agent, speak to them for information about the
nearest service agent.
LC 141VLi, LC 141Li and LC 141C Daily Weekly Monthly
Do a general inspection. X
Clean the product. X
Do a check of the start inhibitor *. X
Make sure that the safety devices on the product are not defective *. X
Examine the cutting equipment. X
Examine the cutting cover *. X
Do a check of the motor brake handle *. X
LC 141VLi and LC 141Li only Daily Weekly Monthly
Make sure that the ON/OFF button operates correctly and is not defective. X
Examine the battery for damage. X
Do a check of the battery charge. X
Make sure that the release buttons on the battery operates correctly and that the
battery locks into the product.
Maintenance schedule
The maintenance intervals are calculated from daily use
of the product. The intervals change if the product is not
used daily.
For maintenance identified with *, refer to
on the product on page 16
.
X
Safety devices
22 71 - 005 - 18.05.2018

LC 141VLi and LC 141Li only Daily Weekly Monthly
Examine the battery charger for damage and make sure that it operates correctly.
Examine the connections between the battery and the product. Also examine the
connection between the battery and the battery charger.
X
X
To do a general inspection
• Make sure that the nuts and screws on the product
are tightened.
• Make sure that the cables on the product are not in a
position where they can get damaged.
To clean the product
• Clean plastic parts with a clean and dry cloth.
• Do not use water to clean the product. Water can
enter the battery or the motor and cause short circuit
or damage to the product.
• Do not use a high pressure washer to clean the
product.
• Do not flush water directly on the motor.
• Use a brush to remove leaves, grass and dirt.
To clean the battery and the battery charger
CAUTION: Do not clean the battery or the
battery charger with water.
• Make sure that the battery and the battery charger
are clean and dry before you put the battery into the
battery charger.
• Clean the battery terminals with compressed air or
use a soft and dry cloth.
• Clean the surfaces of the battery and the battery
charger with a soft and dry cloth.
To examine the cutting equipment
WARNING: For models LC 141VLi and
LC 141Li: To prevent accidental start , turn
the safety key to 0, remove the battery and
wait at minimum 5 seconds.
For model LC 141C: To prevent accidental
start, disconnect the power cord.
WARNING: Use protective gloves when you
do maintenance on the cutting equipment.
The blade is very sharp and cuts can easily
occur.
1. Examine the cutting equipment for damage or
cracks. Always replace a damaged cutting
equipment.
2. Look at the blade to see if it is damaged or blunt.
Note: It is necessary to balance the blade after it is
sharpened. Let a service center sharpen, replace and
balance the blade. If you hit an obstacle that causes the
product to stop, replace the damaged blade. Let the
service center estimate if the blade can be sharpened or
must be replaced.
To remove and replace the blade
1. Lock the blade with a block of wood.(Fig. 67 )
2. Remove the blade bolt.
3. Remove the blade.
4. Examine the blade support and blade bolt to see if
there are damages.
5. Examine the motor shaft to make sure that it is not
bent.
6. When you attach the new blade, point the angled
ends of the blade in the direction of the cutting cover.
(Fig. 68 )
7. Make sure that the blade is aligned with the center of
the motor shaft.
8. Lock the blade with a block of wood. Attach the
spring washer and tighten the bolt and washer with a
torque of 20 Nm.(Fig. 69 )
9. Pull the blade around by hand and make sure that it
turns freely.
WARNING:
blade is very sharp and cuts can easily
occur.
10. Start the product to do a test of the blade. If the
blade is not correctly attached, there is vibration in
the product or the cutting result is unsatisfactory.
Use heavy duty gloves. The
71 - 005 - 18.05.2018
23

Troubleshooting
Battery
LED on the battery Possible faults Possible procedure
The green LED is flashing
The error LED flashes The battery is weak Charge the battery. See
The error LED is on Cell difference too much (1V) Speak to an approved service agent.
Battery charger
LED on the battery
charger
The error LED flash-esThe temperature in the work en-
The error LED is on Speak to an approved service agent
Control panel
For problems, other than those in this section, speak to
your service agent.
Keypad Possible faults Possible action
Error LED flashes The motor is overloaded Increase the cutting height. See
The product stops The battery is weak Charge the battery. See
The battery voltage is low Charge the battery. See
page 20
.
To charge the battery on
To charge the battery on
page 20
.
The temperature in the work environment is too high or too low
Overvoltage Check that the mains voltage is the same as on
Possible faults Possible procedure
vironment is too high or too low
The motor speed drops too much,
and the motor stops
The motor control is too hot Stop the motor and wait until it has become cool
The blade is blocked To prevent accidental start turn the safety key to
Battery error or no signal from battery Put the battery in the product correctly and exam-
Use the battery in temperatures between -10°C
and 40°C.
the rating plate on the product.
Remove the battery from the battery charger. Wait
5 seconds and try again to charge the battery. If
the problem continues, speak to an authorised
service agent.
Use the battery charger in temperatures between 5°C
and 40°C.
height on page 20
0, remove the battery and wait a minimum 5 seconds. Make sure that the blade can rotate freely. If
the problem continues, speak to an authorised
service agent
ine the battery connector. If the error LED on the
battery flashes, see
.
Battery on page 24
To charge the battery on
page 20
.
Battery connector failure Examine the battery connector
To set the cutting
.
24 71 - 005 - 18.05.2018

Transportation, storage and disposal
To set the product in transport position
1. Remove the grass catcher (if installed).
2. Loosen the knobs on the upper handle and fold the
handle down.(Fig. 70 )
3. Loosen the lower knobs.
4. Move the knobs to the lower end of the grooves on
the left and the right side of the product.(Fig. 71 )
5. Fold the handle forward.(Fig. 72 )
Transportation
• The Dangerous Goods Legislation requirements
apply to the contained Li-ion batteries.
• For commercial transports special requirements on
package and labels must be obeyed.
• Make sure that you obey the regulations for
dangerous material when you prepare the product
for transport. Local regulations can apply.
• Always remove the battery for transport.
• Put tape on the battery connectors and make sure
that the battery cannot move around during
transport.
• Attach the product during transport.
Storage
• Always remove the battery for storage.
• To prevent accidents, make sure that the battery is
not connected to the product during storage.
• Keep the battery charger in a closed and dry space.
• Keep the battery and the battery charger in a dry
space where there is no moisture or frost.
• Disconnect the battery from the battery charger
during storage.
• Do not keep the battery where static electricity can
occur. Do not keep the battery in a metal box.
• Keep the battery where the temperature is between
5°C and 25°C and out of sunlight.
• Keep the battery charger where the temperature is
between 5°C and 45°C and out of sunlight.
• Make sure that the battery is charged to 30% - 50%
before you put it in storage for long periods.
• Keep the product, battery and battery charger in a
locked area out of reach for children and not
approved persons.
• Clean the product and do a complete servicing
before you put the product in storage for a long time.
Disposal
Symbols on the product or the packaging of the product
indicate that this product cannot be handled as domestic
waste. It must be submitted to an appropriate recycling
station for the recovery of electrical and electronic
equipment.
By ensuring that this product is taken care of correctly,
you can help to counteract the potential negative impact
on the environment and people that can otherwise result
through the incorrect waste management of this product.
For more detailed information about recycling this
product, contact your municipality, your domestic waste
service or the shop from where you purchased the
product.
(Fig. 73 )
Technical data
Technical data LC 141VLi, LC 141Li
LC 141VLi LC 141Li
Cutting motor
Motor type BLDC (brushless) 36V BLDC (brushless) 36V
Motor speed – SavE, rpm 2700 2700
Motor speed – Nominal, rpm 3100 3100
Motor speed – High load, rpm 3700 3700
Motor output – max. kW 0.8 0.8
Motor output – Nominal, kW 0.55 0.55
Drive motor
Motor output – Nominal, kW 0.25 NA
Self walk speed, km/h 3.0–4.5 NA
71 - 005 - 18.05.2018 25

LC 141VLi LC 141Li
Speed adjustment levels 4 NA
Weight
Weight without battery, kg 23.2 20
1
Battery
Type of battery Husqvarna Battery Series Husqvarna Battery Series
Battery runtime
Battery runtime, min, (free run) with SavE activated, with
50 50
Husqvarna 5.0 Ah battery.
Battery runtime, min, (free run) with standard mode acti-
40 40
vated, with Husqvarna 5.0 Ah battery.
Noise emissions
2
Sound power level, measured dB (A) 92 92
Sound power level, guaranteed LWA dB (A) 94 94
Sound levels
3
Sound pressure level at the operators ear, dB (A) 83 83
Vibration levels
Handle, m/s
4
2
2.0 2.0
Cutting
Cutting height, mm 25–70 25–70
Cutting width, cm 41 41
Blade Collect Collect
Article number 5011716-10 5011716-10
Bagger capacity, litre 50 50
Technical data LC 141C
LC 141C
Motor
Motor type Series AC Motor
Motor speed – Nominal, rpm 3200
Power 1800 W
Power source Corded electric
Power cable (included for the UK market only)
Cable type 16M extension cord
1
For best results and performance the Husqvarna battery BLi200 is recommended.
2
Noise emissions in the environment measured as sound power (LWA) in conformity with EC directive
2000/14/EC.
3
Reported data for noise pressure level has a typical statistical dispersion (standard deviation) of 1.2 dB (A).
4
Reported data for vibration level has a typical statistical dispersion (standard deviation) of 0.2 m/s2.
26 71 - 005 - 18.05.2018

LC 141C
Weight, kg 1.6
Weight
Weight, kg 22
Noise emissions
5
Sound power level, measured dB (A) 94
Sound power level, guaranteed LWA dB (A) 96
Sound levels
6
Sound pressure level at the operators ear, dB (A) 83
Vibration levels
Handle, m/s
7
2
2.0
Cutting
Cutting height, mm 25–70
Cutting width, cm 41
Blade Collect
Article number 5011716-10
Bagger capacity, litre 50
5
Noise emissions in the environment measured as sound power (LWA) in conformity with EC directive
2000/14/EC.
6
Reported data for noise pressure level has a typical statistical dispersion (standard deviation) of 1.2 dB (A).
7
Reported data for vibration level has a typical statistical dispersion (standard deviation) of 0.2 m/s2.
71 - 005 - 18.05.2018 27

EC Declaration of Conformity
EC Declaration of Conformity
Husqvarna AB, SE-561 82 Huskvarna, Sweden, tel:
+46-36-146500, declares that the lawn mowers
Husqvarna LC 141VLi and LC 141Li from serial number
15XXXXXXX and onwards, comply with the
requirements of the COUNCIL’S DIRECTIVE:
• of June 8, 2011 on the ”restriction of use of certain
hazardous substances” 2011/65/EU
• of May 17, 2006 ”relating to machinery” 2006/42/EC
• of February 26, 2014 ”relating to electromagnetic
compatibility” 2014/30/EU
• of May 8, 2000 ”relating to the noise emissions in the
environment” 2000/14/EC
For information relating to noise emissions, see the
Technical data chapter.
The following standards have been applied:
EN 60335-1:2012+A11:2014, EN 60335-2-77:2010, EN
62233:2008, EN 55014-1:2006/+A1:2009/+A2:2011, EN
55014-2:2015, EN 61000-3-2:2014, EN 61000-3-3:2013
Notified body: 0359, Intertek Testing & Certification Ltd.,
58 Jinfeng Road, Yuyao, Zhejiang 315403, P.R. China
has performed conformity assessment according to
Annex VI of Directive 2000/14/EC and issued a
certificate with the number: 71225
Huskvarna, 2016-10-31
EN 60335-1:2012+A11:2014, EN 60335-2-77:2010, EN
62233:2008, EN 55014-1:2006/+A1:2009/+A2:2011, EN
55014-2:2015, EN 61000-3-2:2014, EN
61000-3-11:2000
Notified body: 0499, The Société Nationale de
Certification et d'Homologation s.à r.l. (SNCH)
Luxemburg certifies in accordance with SNCH
procedures that the Manufacturer fulfils the provisions of
the Directive 2000/14/EC Annex VI and issued a
certificate with the number:
SNCH*2000/14*2005/88*2945*00
Huskvarna, 2016-10-31
Claes Losdal, Development Manager/Garden Products
(Authorized representative for Husqvarna AB and
responsible for technical documentation.)
Claes Losdal, Development Manager/Garden Products
(Authorized representative for Husqvarna AB and
responsible for technical documentation.)
EC Declaration of Conformity
Husqvarna AB, SE-561 82 Huskvarna, Sweden, tel:
+46-36-146500, declares that the lawn mower
Husqvarna LC 141C from the serial number
15XXXXXXX and onwards, complies with the
requirements of the COUNCIL’S DIRECTIVE:
• of June 8, 2011 on the ”restriction of use of certain
hazardous substances” 2011/65/EU
• of May 17, 2006 ”relating to machinery” 2006/42/EC
• of February 26, 2014 ”relating to electromagnetic
compatibility” 2014/30/EU
• of May 8, 2000 ”relating to the noise emissions in the
environment” 2000/14/EC
For information relating to noise emissions, see the
Technical data chapter.
The following standards have been applied:
28 71 - 005 - 18.05.2018

Содержание
Въведение................................................................... 29
Безопасност.................................................................32
Монтаж.........................................................................40
Експлоатация.............................................................. 41
Поддръжка...................................................................43
Въведение
Отстраняване на проблеми........................................45
Транспортиране, съхранение и изхвърляне.............46
Технически характеристики....................................... 47
Декларация за съответствие на ЕО.......................... 50
Описание на продукта
Продуктът е пешеходна ротационна косачка.
Тревата се събира в кош за трева. Свалете коша за
трева, за да се получи задно разтоварване на
тревата. Поставете комплект за мулчиране
(допълнителна принадлежност), за да нарежете
тревата в тора.
Предназначение
Използвайте продукта, за да косите трева в частни
градини. Не използвайте продукта за други задачи.
Общ преглед на продукта LC 141VLi/LC 141Li
(Фиг. 1 )
1. Ръкохватка за спирачката на двигателя
2. Инхибитор за стартиране
3. Дръжка за задвижване (LC 141VLi)
4. Дръжка/управление
5. Пулт за управление
6. Бутон за ВКЛ./ИЗКЛ.
7. Бутон SavE
8. Бутон за индикатора на батерията
9. Индикатор за състояние на акумулатора
10. Индикатор за предупреждение (СВЕТОДИОД ЗА
ГРЕШКА)
11. Бутон за намаляване на скоростта (LC 141VLi)
12. Индикатор за изравняване на скоростта
(LC 141VLi)
13. Бутон за увеличаване на скоростта (LC 141VLi)
14. Заден капак
15. Символи
16. Капак на акумулатора
17. Ключ за безопасност
18. Капак срещу порязване
19. Лост за височината на рязане
20. Табелка за модела
21. Кош за трева
22. Щифт за мулчиране за LC 141VLi
(Принадлежност)
23. Щифт за мулчиране за LC 141Li (Принадлежност)
24. Зарядно устройство за акумулатор
(Принадлежност)
25. Акумулатор (Принадлежност)
26. Инструкция за експлоатация
Общ преглед на продукта LC 141C
(Фиг. 2 )
1. Ръкохватка за спирачката на двигателя
2. Инхибитор за стартиране
3. Гнездо на захранващия кабел
4. Държач на захранващия кабел
5. Дръжка/управление
6. Заден капак
7. Символи
8. Капак срещу порязване
9. Табелка за модела
10. Лост за височината на рязане
11. Щифт за мулчиране (Принадлежност)
12. Кош за трева
13. Инструкция за експлоатация
Символи върху продукта
(Фиг. 3 )
Невнимателното или
погрешното използване
на продукта може да
доведе до нараняване
71 - 005 - 18.05.2018 29

или смърт на оператора
или наблюдатели.
контакт. (модел
LC 141C)
(Фиг. 4 )
(Фиг. 5 )
(Фиг. 6 )
(Фиг. 7 )
(Фиг. 8 )
(Фиг. 9 )
(Фиг. 10 )
Прочетете
ръководството за
оператора и се уверете,
че разбирате
инструкциите, преди да
използвате този
продукт.
Дръжте хората и
животните на безопасно
разстояние от
работната зона.
Пазете се от отскачащи
предмети и рикошети.
Предупреждение:
Дръжте ръцете и
краката си далеч от
въртящия се нож.
Предупреждение:
Дръжте ръцете и
краката си далеч от
въртящи се части.
Извадете ключа за
безопасност преди
извършване на
техническа поддръжка
на продукта. (модел
LC 141VLi/LC 141Li)
Преди да извършите
техническата
поддръжка, изключете
уреда от електрическия
(Фиг. 11 )
(Фиг. 12 )
(Фиг. 13 )
(Фиг. 14 )
(Фиг. 15 )
(Фиг. 16 )
IPX1 – продуктът е със
защита от капеща вода
(модел LC 141VLi/
LC 141Li)
IPX4 – продуктът е със
защита от напръскване
с вода (модел LC 141C)
Продуктът не трябва да
бъде изложен на дъжд
(модел LC 141VLi/
LC 141Li)
Предупреждение: При
работа с продукта не
преминавайте върху
захранващия шнур, тъй
като това може да
доведе до електрически
удар или повреда на
продукта. (модел
LC 141C)
Този продукт отговаря
на изискванията на
приложимите директиви
на EO.
Шумови емисии в
околната среда в
съответствие с
Директивата на
Европейската общност.
Емисиите на продукта
са посочени в раздела
за технически
30 71 - 005 - 18.05.2018

(Фиг. 17 )
(Фиг. 18 )
(Фиг
.
19 )
(Фиг
.
20 )
(Фиг. 21 )
характеристики и на
табелката.
Прав ток. 36V
Двойна изолация.
Рециклирайте
този продукт
на място за
рециклиране –
за
електрическо
и електронно
оборудване.
(Валидно
само в
рамките на
Европа)
Процедура по
стартиране за
модел
LC 141VLi/
LC 141Li:
натиснете
бутона за
ВКЛ./ИЗКЛ.,
разхлабете
инхибитора за
стартиране,
натиснете
ръкохватката
на спирачката
на двигателя
надолу.
Процедура по
стартиране за модел
LC 141C: разхлабете
инхибитора за
стартиране, натиснете
ръкохватката на
спирачката на
двигателя надолу.
Освободете
ръкохватката на
спирачката на
(Фиг. 22 )
(Фиг. 23 )
(Фиг. 24 )
Забележка: Останалите символи/стикери на
продукта се отнасят до изисквания по отношение на
сертификати за определени пазари.
Символи върху акумулатора и/или зарядното устройство
(Фиг
.
25 )
двигателя за спиране.
Бавно
Бързо
Рециклирайте
този продукт в
пункт за
рециклиране
за
електрическо
и електронно
оборудване.
(Валидно
само за
Европа)
Устойчив на
неизправности
(Фиг. 26 )
трансформатор.
Използвайте и дръжте
(Фиг. 27 )
зарядното устройство
71 - 005 - 18.05.2018 31

на акумулатора
единствено на закрито.
(Фиг. 28 )
Отговорност за вреди, причинени от стоки
Както е посочено в законите за отговорност за
вреди, причинени от стоки, ние не носим отговорност
за щети, причинени от нашия продукт, ако:
Двойна изолация.
Безопасност
• продуктът е неправилно ремонтиран.
• продуктът е ремонтиран с части, които не са от
производителя или не са одобрени от
производителя.
• продуктът има принадлежност, която не е от
производителя или не е одобрена от
производителя.
• продуктът не е ремонтиран в одобрен сервизен
център или от одобрен орган.
Дефиниции за безопасност
Предупреждения, знаци за внимание и бележки се
използват за указване на особено важни части на
инструкцията.
ПРЕДУПРЕЖДЕНИЕ: Използва се, ако
има опасност от нараняване или смърт за
оператора или за околните, ако не се
спазват инструкциите в ръководството.
ВНИМАНИЕ: Използва се, ако има
опасност от повреждане на машината,
други материали или съседната зона, ако
не се спазват инструкциите в
ръководството.
Забележка: Използва се за предоставяне на повече
информация, която е необходима в дадена ситуация.
Общи инструкции за безопасност
ПРЕДУПРЕЖДЕНИЕ: Прочетете
следващите предупредителни указания,
преди да използвате машината.
•
Този продукт е опасен, ако
се използва неправилно или
ако не сте внимателни.
Неспазването на
инструкциите за безопасност
може да доведе до
нараняване или смърт.
•
Тази машина създава
електромагнитно поле по
време на работа. При някои
условия това поле може да
интерферира с активни или
пасивни медицински
имплантанти. За да
намалите риска от тежко или
смъртоносно нараняване,
ние препоръчваме лицата с
медицински импланти да
говорят с лекаря си и
производителя на
медицинския имплант, преди
да започнат да работят с
тази машина.
•
Винаги бъдете внимателни и
подхождайте разумно. Ако
не сте сигурни как да
работите с продукта при
специална ситуация, спрете
и се обърнете към Вашия
дилър на Husqvarna,преди
да продължите.
•
Имайте предвид, че
операторът носи
отговорност за нещастни
случаи, включващи други
хора или тяхното
имущество.
32
71 - 005 - 18.05.2018

•
Поддържайте продукта чист.
Уверете се, че разчитате
ясно знаците и стикерите.
•
Не позволявайте на когото и
да е да работи с продукта,
докато не се уверите, че е
прочел и разбрал
съдържанието на
инструкцията за
експлоатация.
•
Не позволявайте на деца да
работят с продукта.
•
Не позволявайте на лица,
които не са запознати с
инструкциите, да работят с
продукта.
•
Винаги наблюдавайте лица с
намален физически или
умствен капацитет, които
използват продукта. През
цялото време трябва да
присъства отговорен
възрастен.
•
Не използвайте продукта,
ако сте уморени, болни или
под въздействието на
алкохол, наркотици или
лекарства. Това състояние
оказва отрицателно
въздействие върху Вашето
зрение, бдителност,
координация и преценка.
•
Не използвайте продукта,
ако е неизправен.
•
Не променяйте този продукт
или не го използвайте, ако
има вероятност той да е бил
променен от друг.
Безопасност на работната област
ПРЕДУПРЕЖДЕНИЕ: Прочетете
следващите предупредителни указания,
преди да използвате машината.
•
Отстранете препятствия
като клони, пръчки и камъни
от работната зона, преди да
използвате продукта.
•
Обектите, които се удрят в
режещото оборудване,
могат да бъдат изхвърлени и
да причинят нараняване на
лицата и щети на
предметите. Дръжте
страничните наблюдатели и
животните на безопасно
разстояние от продукта.
•
Никога не използвайте
продукта в лошо време –
например при мъгла, дъжд,
силни ветрове, много силен
студ и риск от мълнии.
Използването на продукта в
лошо време или върху
влажни или мокри терени е
изморително. Лошото време
може да създаде опасни
условия, като например
хлъзгави повърхности.
•
Внимавайте за лица,
предмети и ситуации, които
могат да са причина за
намаляване на безопасната
работа на продукта.
71 - 005 - 18.05.2018
33

•
Внимавайте за препятствия
като корени, камъни, клони,
ями и канавки. Дългата
трева може да крие
препятствия.
•
Косенето на трева на склон
може да бъде опасно. Не
работете с продукта, когато
наклонът на повърхността е
повече от 15°.
•
Използвайте продукта
напречно на склона. Не се
движете нагоре и надолу.
•
Внимавайте, когато
преминавате покрай
закриват ъгли и предмети,
които скриват зрителното Ви
поле.
Безопасност при работа
ПРЕДУПРЕЖДЕНИЕ:
следващите предупредителни указания,
преди да използвате машината.
•
Използвайте този продукт
Прочетете
само за косене на морави.
Не се допуска използването
му за други цели.
•
Използвайте лични
предпазни средства. Вижте
Лични предпазни средства
на страница 35
•
Не използвайте продукта
.
при дъжд или влага.
Опасността от токов удар се
повишава при навлизане на
вода в продукта.
•
Не работете с продукта,
докато ножът и всички
капаци не се монтират
правилно. Неправилно
монтираният нож може да се
разхлаби и да причини
телесна повреда.
•
Уверете се, че ножът няма
да се удря в обекти, като
например камъни и корени.
Това може да доведе до
повреда на ножа и до
огъване на двусекционния
вал на двигателя. Огънатата
ос предизвиква силни
вибрации и има много
голяма опасност ножът да се
разхлаби.
•
Ако ножът се удари в
някакъв обект или се
получат вибрации, спрете
веднага продукта. Спрете
двигателя, завъртете ключа
за безопасност на 0 и
отстранете акумулатора
(модел LC 141VLi и LC 141Li)
или разкачете захранващия
шнур (модел LC 141C).
Проверете продукта за
повреди. Ремонтирайте
повредите или потърсете
оторизиран сервиз за това.
•
Никога не прикрепяйте
ръкохватката за спирачката
на двигателя за постоянно
върху дръжката, когато
двигателят е стартиран.
34
71 - 005 - 18.05.2018
•
Поставете продукта върху
стабилна, равна повърхност
и го стартирайте. Уверете
се, че ножът не се допира в
земята или в други
предмети.
•
Винаги стойте зад продукта,
когато го използвате.
•
Всички колела трябва да
бъдат на земята и да
държите дръжката с 2 ръце,
когато работите с продукта.
Дръжте ръцете и краката си
далеч от въртящите се
остриета.
•
Не накланяйте продукта при
стартиран двигател.
•
Бъдете внимателни, когато
дърпате продукта назад.
•
Никога не повдигайте
продукта при стартиран
двигател. Ако се налага да
повдигнете продукта, първо
спрете двигателя, завъртете
ключа за безопасност на 0 и
отстранете акумулатора
(модел LC 141VLi и LC 141Li)
или разкачете захранващия
шнур (модел LC 141C).
•
Не се движете назад при
работа с продукта.
•
Спрете двигателя, когато
преминавате през области
без трева, като например
пътеки от чакъл, камък и
асфалт.
•
Не тичайте с продукта,
докато двигателят работи.
Винаги ходете, когато
работите с продукта.
•
Спрете двигателя, преди да
промените височината на
рязане. Никога не
регулирайте при стартиран
двигател.
•
Никога не оставяйте
продукта без надзор, когато
двигателят работи. Спрете
двигателя и се уверете, че
режещото оборудване не се
върти.
Инструкции за безопасност за работа
Лични предпазни средства
ПРЕДУПРЕЖДЕНИЕ: Прочетете
следващите предупредителни указания,
преди да използвате машината.
•
Личните предпазни средства
не изключват изцяло риска
от нараняване, но
намаляват степента на
нараняването при
злополука. Нека вашият
дилър Ви помогне да
изберете подходящото
оборудване.
•
Носете ботуши или обувки,
устойчиви на хлъзгане. Не
носете отворени обувки и не
ходете боси.
•
Използвайте дълги
панталони от здрав плат.
71 - 005 - 18.05.2018
35
•
Когато е необходимо, носете
защитни ръкавици,
например, когато
закрепвате, проверявате или
почиствате режещото
оборудване.
Приспособления за безопасност на машината
ПРЕДУПРЕЖДЕНИЕ: Прочетете
следващите предупредителни указания,
преди да използвате машината.
• Не използвайте машина с неизправни
приспособления за безопасност.
• Проверявайте редовно приспособленията за
безопасност. Ако приспособленията за
безопасност са дефектни, говорете с Вашия
сервиз Husqvarna.
Капак срещу порязване
• Проверете капака срещу порязване, за да се
уверите, че няма повреди, като например
пукнатини.
Ръкохватка за спирачката на двигателя
Ръкохватка за спирачката на двигателя спира
двигателя. Когато ръкохватката за спирачката на
двигателя бъде пусната, двигателят спира.
За да извършите проверка на спирачката на
двигателя, стартирайте двигателя и след това
отпуснете ръкохватката за спирачката на двигателя.
Ако двигателят не спре след 3 секунди, позволете на
одобрен сервиз на Husqvarna да регулира
спирачката на двигателя.
(Фиг. 29 )
Ключ за безопасност (модели LC 141VLi и LC 141Li)
Ключът за безопасност е под капака на акумулатора.
Ключът за безопасност свързва акумулатора, който
захранва двигателя с енергия.
• Стартирайте и спрете двигателя, за да
извършите проверка на ключа за безопасност.
• Ако ключът за безопасност функционира
правилно, двигателят стартира само когато
ключът е в положение 1.
(Фиг. 30 )
За да проверите блокировката на пускането
Направете проверка на блокировката на пускане, за
да се уверите, че тя не допуска работата на
двигателя.
1. Дръпнете ръкохватката за спирачката на
двигателя по посока на управлението.
Блокировката на пускането спира движението.
2. Натиснете блокировката на пускането навън.
(Фиг. 31 )
3. Освободете блокировката на пускането и се
уверете, че тя се е върнала в първоначалното си
положение.
За използване на държача на захранващия шнур (модел LC 141C)
Държачът на захранващия шнур намалява
натоварването върху електрическия контакт и
захранващия шнур. Държачът на захранващия шнур
намалява също и риска да паднете.
1. Сгънете захранващия шнур, за да оформите
малка примка.
2. Поставете примката в отвора на държача на
захранващия шнур.
3. Поставете примката около куката.
4. Дръпнете захранващия шнур, за да затегнете
примката около куката.(Фиг. 32 )
Инструкции за безопасност за батерията
ПРЕДУПРЕЖДЕНИЕ: Прочетете
следващите предупредителни указания,
преди да използвате машината.
•
Използвайте акумулаторни
батерии Husqvarna като
източник на захранване
само на продукти Husqvarna.
За да предотвратите
нараняване, не използвайте
акумулатора като източник
на захранване за други
устройства.
•
Не използвайте батерии,
които не се презареждат.
•
Опасност от електрически
удар. Не свързвайте
клемите на акумулатора с
ключове, монети, винтове
или други метални
предмети. Това може да
36
71 - 005 - 18.05.2018

доведе до късо съединение
на акумулатора.
•
Не поставяйте предмети във
въздушните отвори на
акумулатора.
•
Съхранявайте акумулатора
далеч от слънчева светлина,
топлина или открит огън.
Акумулаторът може да се
взриви и да причини
изгаряния и/или химически
изгаряния.
•
Съхранявайте акумулатора
далеч от дъжд или влага.
•
Съхранявайте акумулатора
далеч от микровълни и
високо налягане.
•
Не се опитвайте да
разглобите или счупите
акумулатора.
•
Ако има в акумулатора има
теч, не оставяйте течността
да влиза в контакт с тялото и
очите. Ако докоснете
течността, измийте мястото
с обилно количество вода и
потърсете медицинска
помощ.
•
Използвайте акумулатора
при температури между
-10°C и 40°C.
•
Не почиствайте батерията
или зарядното устройство с
вода. Вижте
За почистване
на акумулатора и зарядното
устройство на страница 44
•
Не използвайте дефектен
или повреден акумулатор.
•
Съхранявайте
акумулаторите далеч от
метални предмети като
пирони, монети, бижута.
Инструкции за безопасност за зарядното устройство на акумулатор
ПРЕДУПРЕЖДЕНИЕ: Прочетете
следващите предупредителни указания,
преди да използвате машината.
•
Използвайте зарядните
устройства QC за зареждане
само на резервни
акумулатори Husqvarna.
•
Опасност от токов удар или
късо съединение. Не
поставяйте предмети във
въздушните отвори на
зарядното устройство. Не
опитвайте да демонтирате
зарядното устройство. Не
свързвайте клемите на
зарядното устройство към
метални предмети.
Използвайте одобрен
електрически контакт.
•
Тази машина създава
електромагнитно поле по
време на работа. При някои
условия това поле може да
интерферира с активни или
пасивни медицински
имплантанти. За да
намалите риска от сериозно
или смъртоносно
.
нараняване, ние
71 - 005 - 18.05.2018
37

препоръчваме лицата с
медицински импланти да
говорят с лекаря си и
производителя на
медицинския имплант, преди
да започнат да работят с
този продукт.
•
Редовно проверявайте дали
кабелът на зарядното
устройство на акумулатора
не е повреден и напукан.
•
Не вдигайте зарядното
устройство, като го държите
за кабела. За да изключите
зарядното устройство от
стенния контакт, дръпнете
щепсела. Не дърпайте
захранващия шнур.
•
Дръжте захранващия кабел
и удължаващите шнурове
далеч от вода, масло или
остри ръбове. Уверете се, че
кабелът не е защипан от
врати, огради и подобни.
Това може да доведе до
напрежение в зарядното
устройство.
•
Не почиствайте зарядното
устройство с вода.
•
Това зарядно устройство
може да се използва от деца
на възраст от 8 години
нагоре и лица с физически,
сетивни или умствени
способности или без знания
и опит, ако са под надзор
или са получили инструкции
за безопасното използване
на зарядното устройство и
разбират свързаните с това
рискове. Децата не трябва
да си играят със зарядното
устройство. Почистването и
потребителската поддръжка
не трябва да се извършват
от деца без надзор.
•
Не зареждайте акумулатори
без възможност за
зареждане в зарядното
устройство.
•
Не използвайте зарядното
устройство близо до
запалими материали или
материали, които
причиняват корозия. Не
покривайте зарядното
устройство. Ако има дим или
огън, извадете щепсела на
зарядното устройство.
•
Не използвайте дефектно
или повредено зарядно
устройство.
•
Зареждайте акумулатора
само на закрито, в
помещение с добра
вентилация и далеч от
слънчева светлина. Не
зареждайте акумулатора във
влажна условия.
Безопасност на захранващия кабел
За модел LC 141C.
38
71 - 005 - 18.05.2018
•
Препоръчва се използването
на устройство за остатъчен
ток (R.C.D.) с ток на
изключване не повече от 30
mA. Дори с инсталирано
R.C.D. не може да се
гарантира 100% безопасност
и процедурите за безопасна
работа трябва да се следват
по всяко време.
Проверявайте R.C.D. при
всяко използване.
•
Ако по захранващия шнур
има срязвания или ако
изолацията е повредена,
незабавно го извадете от
контакта.
•
Не докосвайте срязан или
повреден захранващ шнур,
преди да изключите
електрозахранването.
•
Не поправяйте срязан или
повреден захранващ кабел.
Подменете го с нов.
Инструкции за безопасност при техническо обслужване
ПРЕДУПРЕЖДЕНИЕ:
следващите предупредителни указания,
преди да използвате машината.
•
За моделите LC 141VLi и
Прочетете
LC 141Li: За да
предотвратите случайно
стартиране по време на
техническо обслужване,
завъртете ключа за
безопасност на 0 и извадете
акумулатора. Изчакайте наймалко 5 секунди преди да
започнете техническото
обслужване.
•
За модел LC 141C: За да
предотвратите случайно
стартиране по време на
техническо обслужване,
извадете захранващия шнур.
•
Извършете правилно
техническото обслужване, за
да увеличите срока на
експлоатация на продукта и
да намалите опасността от
инциденти. Възложете
извършването на
професионалните ремонтни
дейности на упълномощен
сервиз. За повече
информация говорете с найблизкия до Вас сервиз.
•
Изпълнявайте стъпките от
техническото обслужване,
посочени в тази инструкция
за експлоатация. Позначителни ремонтни
дейности трябва да се
изпълняват от одобрен
сервиз.
•
Сложете ръкавици за тежки
условия, когато използвате
режещото оборудване.
Ножът е много остър и
можете лесно да се
порежете.
71 - 005 - 18.05.2018
39

•
Поддържайте режещите
краища остри и чисти за найдобра и безопасна
производителност.
•
Редовно проверявайте
продукта при Вашия сервиз
и извършвайте
необходимите корекции и
ремонтни дейности.
•
Заменете повредени,
износени или счупени части.
•
Следвайте инструкциите за
смяна на аксесоарите.
•
Монтаж
Използвайте само аксесоари
от производителя.
Когато не ги използвате,
съхранявайте продукта,
акумулатора и зарядното
устройство отделно на
закрито сухо и заключено
място. Уверете се, че деца и
лица, които не са одобрени,
не могат да получат достъп
до продукта, акумулатора
или зарядното устройство.
Въведение
ПРЕДУПРЕЖДЕНИЕ: Преди да сглобите
машината, прочетете главата за
безопасност.
ПРЕДУПРЕЖДЕНИЕ: За моделите
LC 141VLi и LC 141Li: За да
предотвратите случайно стартиране по
време на монтаж, завъртете ключа за
безопасност на 0, отстранете
акумулатора и изчакайте най-малко 5
секунди.
За модел LC 141C: За да предотвратите
случайно стартиране по време на
монтаж, извадете захранващия шнур.
За да монтирате ръкохватката
1. Подравнете отворите в ръкохватката с отворите
в долната част на дръжката и прикрепете
винтовете, шайбите и фиксаторите. Затегнете
напълно фиксаторите.(Фиг. 33 )
2. Закрепете кабелите към ръкохватката с помощта
на кабелни превръзки.(Фиг. 34 )
Забележка: Уверете се, че напрежението в
кабелите не е твърде високо. Твърде високото
напрежение може да повреди кабела, ако
ръкохватката бъде сгъната в положение при
транспортиране.
3. Поставете кабелите около куката в долната част
на ръкохватката.(Фиг. 35 )
За регулиране на височината на ръкохватката
1. Разхлабете долните копчета.(Фиг. 36 )
2. Отстранете фиксатора, шайбата и винта от
лявата и дясната страна.
3. Ръкохватката може да бъде зададена на 2
различни височини. Поставете винта в единия от
2-та отвора от лявата и дясната страна.(Фиг. 37 )
4. Прикрепете винтовете, шайбите и фиксаторите.
5. Преместете фиксаторите по посока на дръжката,
докато спрат и се чуе щракване. Затегнете
напълно фиксаторите.(Фиг. 38 )
За сглобяване на коша за трева
1. Бутнете 2-та транспортни капака навън и надолу.
(Фиг. 39 )
2. Поставете горната част на коша за трева върху
долната му част. Прикрепете рамката на коша за
трева с фиксаторите.(Фиг. 40 )
3. Вдигнете задния капак.
4. Прикрепете куките върху коша за трева към
горния край на шасито.(Фиг. 41 )
За сглобяване на комплекта за мулчиране
1. Повдигнете задния капак и извадете коша за
трева.
2. Поставете щифта за мулчиране в канала за
разтоварване на тревата. Щифтът за мулчиране
40
71 - 005 - 18.05.2018

тип А е за LC 141Li и LC 141C. Тип B е за
LC 141VLi.(Фиг. 42 )
3. Затворете задния капак.
Експлоатация
Въведение
ПРЕДУПРЕЖДЕНИЕ: Преди работа с
продукта трябва да прочетете и
разберете главата за безопасност.
Задаване на продукта в положение за работа
Ако ръкохватката е в положение за транспортиране
и съхранение (вижте
положение за транспортиране на страница 46
изпълнете следната процедура, за да поставите
ръкохватката в работно положение.
1. Повдигнете ръкохватката, докато долната й част
се фиксира в положение за работа.(Фиг. 43 )
2. Преместете долните фиксатори по посока на
дръжката, докато спрат и се чуе щракване.(Фиг.
44 )
3. Затегнете фиксаторите.
4. Повдигнете горната част на ръкохватката и
затегнете фиксаторите.(Фиг. 45 )
За регулиране на височината на рязане
1. Преместете назад лоста за височина на рязане,
за да увеличите височината на рязане.
2. Преместете напред лоста за височина на рязане,
за да намалите височината на рязане.(Фиг. 46 )
ВНИМАНИЕ: Не настройвайте твърде
ниска височина на рязане. Ножовете
могат да се ударят в земята, ако
повърхността на моравата не е равна.
Акумулатор
ПРЕДУПРЕЖДЕНИЕ:
използвате акумулатора, трябва да
прочетете и разберете главата за
безопасност. Вие трябва също да
прочетете и разберете ръководството на
оператора за акумулатора и зарядното
устройство.
Статус на батерията
Дисплеят показва оставащия капацитет на
акумулатора и дали има проблеми с него.
Капацитетът на акумулатора се показва за 5
секунди, след като продуктът бъде изключен или
За задаване на продукта в
),
Преди да
4. Сменете ножа с комбинирания нож, вижте
извадите и смените ножа на страница 44
бутонът за индикатора на акумулатора бъде
натиснат. Символът за предупреждение върху
акумулатора се включва, когато има грешка. Вижте
Акумулатор на страница 45
(Фиг. 47 )
Светодиодни лампи Статус на батерията
Всички светодиоди
светят
Светодиоди 1, 2, 3
светят
Светодиоди 1 и 2 светят Акумулаторът е зареден
Светодиод 1 свети Акумулаторът е зареден
Светодиод 1 мига Батерията е изтощена.
.
Напълно зареден (75 –
100%)
Акумулаторът е зареден
на 50% – 75%
на 25% – 50%
на 0% – 25%.
Заредете батерията.
За да
.
За зареждане на акумулатора
Заредете акумулатора преди използване за първи
път. Акумулаторът е зареден само на 30%, когато се
доставя на клиента.
Забележка: Зарядното устройство на акумулатора
трябва да бъде свързано към напрежението и
честотата, посочени на типовата табелка.
Акумулаторът не се зарежда, ако температурата на
акумулатора е над 50°C. Зарядното устройство
намалява температурата на акумулатора, преди да
започне да зарежда.
1. Свържете единия край на захранващия шнур на
зарядното устройство в гнездото на зарядното
устройство.
2. Свържете другия край на захранващия шнур за
зарядното устройство в заземен контакт.
Светодиодът на зарядното устройство примигва
един път в зелено.(Фиг. 48 )
3. Поставете батерията в зарядното устройство.
Когато акумулаторът е правилно свързан към
зарядното устройство, на зарядното устройство
светва зелена светлина.(Фиг. 49 )
4. Когато всички светодиоди на акумулатора
светнат, акумулаторът е напълно зареден.
Зареждайте акумулатора за най-много 24 часа.
5. За да разкачите зарядното устройство на
акумулатора от контакта, издърпайте щепсела, а
не кабела.
71 - 005 - 18.05.2018
41

6. Извадете батерията от зарядното устройство.
Състояние на зареждане на акумулатора
Литиево-йонният акумулатор Husqvarna може да
бъде зареждан или използван във всички нива на
заряда. Батерията не се поврежда. Напълно
зареденият акумулатор няма да намали заряда си,
дори когато е оставен в зарядното устройство.
Светодиоден дисплей Състояние на
Светодиод 1 мига 0% – 25%
Светодиод 1 свети,
светодиод 2 мига
Светодиоди 1 и 2
светят, светодиод 3
мига
Светодиоди 1, 2 и 3
светят, светодиод 4
мига
Светодиоди 1, 2, 3 и 4
светят
зареждането
25%-50%
50%-75%
75%-100%
Напълно зареден
За работа с LC 141VLi и LC 141Li
За стартиране на продукта
1. Поставете зареден акумулатор в отделението за
акумулатора.
2. Завъртете ключа за безопасност на 1.(Фиг. 50 )
3. Останете зад продукта.
4. Натиснете бутона ON/OFF (ВКЛ./ИЗКЛ.) (A) на
разпределителното табло и зеленият светодиод
(B) ще светне.(Фиг. 51 )
5. Разхлабете инхибитора за стартиране.(Фиг. 52 )
6. Натиснете ръкохватката за спирачката на
двигателя по посока на управлението.(Фиг. 53 )
За използването на задвижването на колелата
• Модел LC 141VLi. Дръпнете дръжката за
задвижване по посока на управлението, за да
стартирате задвижването.(Фиг. 54 )
• Натиснете + и - на разпределителното табло, за
да зададете скоростта на задвижване в 4 стъпки.
(Фиг. 55 )
• Освободете дръжката за задвижване, за да
изключите задвижването, например, когато
приближите препятствие.
За да използвате функцията SavE
Продуктът разполага с функция за пестене на
акумулатора (SavE), която осигурява по-дълго време
на работа.
1. Натиснете бутона SavE (A), за да стартирате
функцията. Зеленият светодиод светва.(Фиг. 56 )
2. Натиснете отново бутона SavE, за да спрете
функцията. Зеленият светодиод (B) изгасва.
Функцията SavE спира автоматично, ако условията
на терена изискват по-висока мощност. Функцията
SavE стартира автоматично, когато условията на
терена го позволяват.
Функция на високо натоварване
Когато продуктът реже дълга или влажна трева,
двигателят автоматично повишава оборотите.
Двигателят се връща към стандартен режим, когато
не е необходимо голямо натоварване.
Спиране на продукта
Продуктът спира автоматично, ако не работите с
него в продължение на 10 минути. Винаги
завъртайте ключа за безопасност на 0, преди да
оставите продукта без надзор.
1. Освободете ръкохватката за спирачката на
двигателя, за да спрете двигателя.(Фиг. 57 )
2. Натиснете бутона ON/OFF (ВКЛ./ИЗКЛ.) (A) на
разпределителното табло и зеленият светодиод
(B) ще изгасне.(Фиг. 58 )
3. Отворете капака на акумулатора и завъртете
ключа за безопасност в положение 0.(Фиг. 59 )
4. За да извадите акумулатора, натиснете 2-та
бутона за освобождаване и извадете
акумулатора.(Фиг. 60 )
5. Заредете акумулатора, ако е изтощен. За повече
информация вижте
на страница 41
За зареждане на акумулатора
.
За работа с LC 141C)
За избиране на одобрен кабел (LC 141C)
Забележка:
само удължителния кабел 16 м, който се доставя с
изделието. За всички други държави вижте
информацията по-долу.
Ако използвате удължителни кабели, те трябва да са
в съответствие с минималните сечения в таблицата
по-долу:
Напрежение
220 – 240 V/50HzДо 20 м 1,5 мм
220 – 240 V/50Hz20 – 50 m 2,5 мм
• Захранващите и удължителните кабели са
За Обединеното кралство използвайте
Дължина на
кабела
налични от Вашия местен одобрен сервиз на
Husqvarna за продукти на открито.
Напречно
сечение
2
2
42
71 - 005 - 18.05.2018

• Използвайте само удължителни кабели,
предназначени за използване на открито и които
отговарят на една от следните спецификации:
Обикновен каучук (60245 IEC 53), обикновено
PVC (60227 IEC 53) или обикновено PCP (60245
IEC 57)
• Ако кабелът е повреден, той трябва да бъде
заменен от производителя, неговия сервиз или
подобен квалифициран персонал, за да се
избегне опасност.
За стартиране на продукта
1. Свържете захранващ кабел към контакта под
ръкохватката.(Фиг. 61 )
2. Поставете захранващия шнур в държача на
захранващия шнур. Вижте
За използване на
държача на захранващия шнур (модел LC 141C)
на страница 36
3. Останете зад продукта.
4. Разхлабете инхибитора за стартиране.(Фиг. 63 )
5. Натиснете ръкохватката за спирачката на
двигателя по посока на управлението.(Фиг. 64 )
.(Фиг. 62 )
Спиране на продукта
1. Освободете ръкохватката за спирачката на
двигателя, за да спрете двигателя.(Фиг. 65 )
Поддръжка
2. Разкачете захранващия шнур от контакта и след
това от продукта.(Фиг. 66 )
ВНИМАНИЕ: Издърпайте щепсела
докрай навън. Не дърпайте
захранващия шнур.
За получаване на добър резултат
• Винаги използвайте остър нож. Косенето със
затъпен нож е неравномерно и окосената
повърхност пожълтява. При работа с остър нож
също така се използва по-малко енергия
отколкото при работа със затъпен нож.
• Не отрязвайте повече от ⅓ от дължината на
тревата. Първо, косете със зададена висока
височина на рязане. Вижте какъв е резултатът и
намалете височината на рязане до подходящо
ниво. Ако тревата е много висока, карайте бавно
и – ако е необходимо – окосете два пъти.
• Режете всеки път в различни посоки, за да
избегнете образуването на линии в моравата.
Въведение
ПРЕДУПРЕЖДЕНИЕ: Преди да
извършите техническо обслужване,
трябва да прочетете и разберете раздела
за безопасност.
За всички работи по поддръжката и поправката на
продукта е необходимо специално обучение.
Осигуряваме предлагане на професионални
ремонти и обслужване. Ако Вашият дилър не
предлага сервизно обслужване, говорете с него, за
да Ви даде информация за най-близкия сервиз.
LC 141VLi, LC 141Li и LC 141C ЕжедневноВсяка
Извършете обща проверка. X
Почистете продукта. X
Проверете инхибитора за стартиране *. X
Уверете се, че приспособленията за безопасност на продукта не са
дефектни *.
Прегледайте режещото оборудване. X
Извършете преглед на капака на режещите части *. X
Проверете ръкохватката на спирачката на двигателя *. X
71 - 005 - 18.05.2018 43
График за техническо обслужване
Интервалите за техническо обслужване са
изчислени в зависимост от ежедневната употреба на
продукта. Интервалите се променят, ако продуктът
не се използва ежедневно.
За техническо обслужване, маркирано със *,
направете справка с
на машината на страница 36
Приспособления за безопасност
.
седмица
X
Всеки
месец

само за LC 141VLi и LC 141Li ЕжедневноВсяка
Уверете се, че бутонът ВКЛ./ИЗКЛ. функционира правилно и не е
дефектен.
Проверете акумулатора за повреди. X
Проверете заряда на акумулатора. X
Уверете се, че бутоните за освобождаване на акумулатора работят
изправно и че акумулаторът се фиксира на място в продукта.
Проверете зарядното устройство за повреда и се уверете, че функционира
изправно.
Проверете връзките между акумулатора и продукта. Освен това проверете
връзката между акумулатора и зарядното устройство.
седмица
X
X
X
Всеки
месец
X
За извършване на обща проверка
• Уверете се, че всички гайки и винтове на
продукта са затегнати.
• Уверете се, че кабелите на продукта не са в
положение, в което могат да бъдат повредени.
За почистване на машината
• Почиствайте пластмасовите части със суха
кърпа.
• Не използвайте вода за почистване на продукта.
Водата може да навлезе в акумулатора или в
двигателя и да причини късо съединение или
повреда на продукта.
• Не мийте продукта с устройство за миене под
високо налягане.
• Не пръскайте вода директно върху двигателя.
• За отстраняване на листа, трева и прах
използвайте четка.
За почистване на акумулатора и зарядното устройство
ВНИМАНИЕ: Не почиствайте батерията
или зарядното устройство с вода.
• Преди да поставите батерията в зарядното
устройство се уверете, че батерията и зарядното
устройство са чисти и сухи.
• Почистете клемите на акумулатора с въздух под
налягане или използвайте чиста и суха кърпа.
• Почистете повърхностите на акумулатора и
зарядното устройство с чиста и суха кърпа.
За проверка на режещото оборудване
ПРЕДУПРЕЖДЕНИЕ: За моделите
LC 141VLi и LC 141Li: За да
предотвратите случайно стартиране,
завъртете ключа за безопасност на 0,
отстранете акумулатора и изчакайте поне
5 секунди.
За модел LC 141C: За да предотвратите
случайно стартиране, разкачете
захранващия шнур.
ПРЕДУПРЕЖДЕНИЕ: Носете защитни
ръкавици, когато ще изпълнявате
дейности, свързани с техническото
обслужване на режещото оборудване.
Ножът е много остър и можете лесно да
се порежете.
1. Проверете режещото оборудване за повреди или
пукнатини. Винаги заменяйте повреденото
режещо оборудване.
2. Погледнете ножа, за да разберете дали не е
повреден или затъпен.
Забележка: Необходимо е да балансирате ножа след
заточване. Ножът се заточва, сменя и балансира от
сервизен център. Ако ударите препятствие и
вследствие на това продуктът спре, сменете
повредения нож. Оставете специалистите в сервиза
да преценят дали ножът ще трябва да се заточи, или
да се смени.
За да извадите и смените ножа
1. Застопорете ножа с дървен блок.(Фиг. 67 )
2. Свалете придържащия болт на ножовете.
3. Свалете ножа.
44
71 - 005 - 18.05.2018

4. Проверете носача на ножа и придържащия болт
на ножовете, за да видите дали има повреди.
5. Проверете двусекционния вал на двигателя, за
да се уверите, че не е огънат.
6. Когато поставяте новия нож, насочете извитите
краища на ножа по посока към капака на
режещите части.(Фиг. 68 )
7. Уверете се, че ножът е подравнен с центъра на
двусекционния вал на двигателя.
8. Застопорете ножа с дървен блок. Поставете
пружинната шайба и затегнете болта и шайбата
до въртящ момент от 20 Nm.(Фиг. 69 )
Отстраняване на проблеми
Акумулатор
Светодиод на
акумулатора
Зеленият светодиод
мига
Светодиодът за
грешка мига
Светодиодът за
грешка свети
Възможни неизправности Възможна процедура
Зарядът на акумулатора е нисък Заредете батерията. Вижте
Акумулаторът е изтощен Заредете батерията. Вижте
Температурата в работната среда
е прекалено висока или прекалено
ниска
Свръхнапрежение Проверете дали захранващото напрежение е
Разликата в клетките е твърде
голяма (1 V)
9. Раздвижете ножа на ръка и се уверете, че той се
върти свободно.
ПРЕДУПРЕЖДЕНИЕ: Използвайте
ръкавици с висока здравина. Ножът е
много остър и можете лесно да се
порежете.
10. Стартирайте продукта, за да тествате ножа. Ако
ножът не е поставен правилно, продуктът
вибрира или резултатът от косенето е
незадоволителен.
За зареждане на
акумулатора на страница 41
.
За зареждане на
акумулатора на страница 41
Използвайте акумулатора при температури
между -10°C и 40°C.
същото като на типовата табелка на продукта.
Извадете батерията от зарядното устройство.
Изчакайте 5 секунди и опитайте отново да
заредите акумулатора. Ако проблемът
продължи, обърнете се към упълномощен
сервиз.
Обърнете се към одобрен сервиз.
.
Зарядно устройство за батерията
Светодиод на
зарядното
устройство
Светодиодът за
грешка мига
Светодиодът за
грешка свети
Възможни неизправности Възможна процедура
Температурата в работната
среда е прекалено висока или
прекалено ниска
Използвайте зарядното устройство на акумулатора
при температури между 5°C и 40°C.
Обърнете се към одобрен сервиз
Пулт за управление
За проблеми, различни от тези в този раздел,
свържете се с Вашия сервиз.
71 - 005 - 18.05.2018 45

Клавиатура Възможни неизправности Възможно действие
Светодиодът за
грешка мига
Продуктът спира Акумулаторът е изтощен Заредете батерията. Вижте
Двигателят е претоварен Увеличете височината на рязане. Вижте
Оборотите на двигателя спадат
прекалено много и двигателят
спира
Управлението на двигателя е
прекалено горещо
Ножът е блокиран За да предотвратите случайно стартиране,
Грешка на акумулатора или липса
на сигнал от него
регулиране на височината на рязане на
страница 41
Спрете двигателя и изчакайте докато изстине
завъртете ключа за безопасност на 0,
отстранете акумулатора и изчакайте най-малко
5 секунди. Уверете се, че ножът се върти
свободно. Ако проблемът продължи, обърнете
се към упълномощен сервиз
Поставете правилно акумулатора в продукта и
проверете конектора на акумулатора. Ако
светодиодът за грешка на акумулатора мига,
вижте
.
Акумулатор на страница 45
акумулатора на страница 41
Грешка в конектора на
акумулатора
Проверете конектора на акумулатора
Транспортиране, съхранение и изхвърляне
За задаване на продукта в положение за транспортиране
1. Отстранете коша за трева (ако е инсталиран).
2. Разхлабете фиксаторите в горната част на
ръкохватката и я сгънете надолу.(Фиг. 70 )
3. Разхлабете долните копчета.
4. Преместете фиксаторите към долния край на
каналите от лявата и дясната страна на продукта.
(Фиг. 71 )
5. Сгънете ръкохватката напред.(Фиг. 72 )
Транспортиране
• В сила са изискванията на Законодателството за
опасни продукти, отнасящи се до литиево-йонни
акумулатори.
• За търговско транспортиране трябва да се
спазват специалните изисквания върху
опаковката и етикетите.
• Уверете се, че спазвате разпоредбите за опасни
материали, когато подготвяте продукта за
транспорт. Може да са в сила местни
разпоредби.
• Винаги изваждайте акумулатора при
транспортиране.
• Поставете тиксо върху конекторите на
акумулатора и се уверете, че акумулаторът не
може да се движи по време на транспортиране.
• Закрепете продукта по време на транспортиране.
Съхранение
• Винаги изваждайте акумулатора за съхранение.
• За да се избегнат инциденти, се уверете, че
акумулаторът не е свързан към продукта по
време на съхранение.
• Съхранявайте зарядното устройство в затворено
и сухо помещение.
• Съхранявайте акумулатора и зарядното
устройство на сухо място, където няма влага или
скреж.
• При съхранение разкачете акумулатора от
зарядното устройство.
• Не съхранявайте акумулатора, където може да
се натрупа статично електричество. Не
съхранявайте акумулатора в метална кутия.
• Съхранявайте акумулатора при температура
между 5°C и 25°C и далече от слънчева
светлина.
• Съхранявайте зарядното устройство при
температура между 5°C и 45°C и далече от
слънчева светлина.
За
.
За зареждане на
.
46 71 - 005 - 18.05.2018

• Уверете се, че акумулаторът е зареден до 30% –
50% преди съхранение за продължителен
период.
• Съхранявайте продукта, акумулатора и
зарядното устройство в заключено помещение
без достъп за деца или неупълномощени лица.
• Почистете продукта и извършете пълно
обслужване, преди да го съхранявате
продължително време.
Изхвърляне
Символите на продукта или на неговата опаковка
показват, че този продукт не може да бъде третиран
като битов отпадък. Той трябва да бъде подаден в
съответната рециклираща станция за използване на
електрическо и електронно оборудване.
Подавайки този продукт на правилното място, вие
спомагате за предотвратяване на потенциалното
негативно отражение върху околната среда и
хората, което би могло да настъпи иначе в резултат
на неправилно изхвърляне на този продукт. За
повече подробна информация относно
рециклирането на този продукт се свържете с
местната администрация, услугите за битови
отпадъци или магазина, откъдето сте закупили
продукта.
(Фиг. 73 )
Технически характеристики
Технически характеристики LC 141VLi, LC 141Li
LC 141VLi LC 141Li
Двигател за рязане
Тип двигател BLDC (безчетков) 36 V BLDC (безчетков) 36 V
Обороти на двигателя – SavE, об./мин. 2700 2700
Обороти на двигателя – номинални, об./мин. 3100 3100
Обороти на двигателя – високо натоварване, об./мин. 3700 3700
Изходна мощност на двигателя – макс. kW 0,8 0,8
Изходна мощност на двигателя – номинална, kW 0,55 0,55
Двигател за задвижване
Изходна мощност на двигателя – номинална, kW 0,25 Няма
Обороти за самостоятелно задвижване, km/h 3,0 – 4,5 Няма
Нива за регулиране на оборотите 4 Няма
Тегло
Тегло без акумулатор, kg 23,2 20
8
Батерия
Тип батерия Серия акумулатори Husq-
Време на работа на батерията
Време за работа на акумулатора, мин., (свободна
работа) при активирана функция SavE с акумулатор
Husqvarna 5,0 Ah.
Време за работа на акумулатора, мин., (свободна
работа) при активиран стандартен режим с
акумулатор Husqvarna 5,0 Ah.
varna
50 50
40 40
Серия акумулатори Husqvarna
8
За най-добри резултати и производителност се препоръчва акумулаторът Husqvarna BLi200.
71 - 005 - 18.05.2018 47

LC 141VLi LC 141Li
<elf "Bold" 1>Шумови емисии
9
Ниво на звуковата мощност, измерена dB(A) 92 92
Ниво на звуковата мощност, гарантирана [LWA dB(A)] 94 94
Нива на звука
10
Ниво на шума при ухото на работещия, dB (A) 83 83
Нива на вибрациите
Ръкохватка, m/s
11
2
2,0 2,0
Косене
Височина на рязане, mm 25-70 25-70
Ширина на рязане, cm 41 41
Нож Събиране Събиране
Артикул номер 5011716-10 5011716-10
Капацитет на приставката за чували, литри 50 50
Технически характеристики LC 141C
LC 141C
Двигател
Тип двигател Серия AC двигател
Обороти на двигателя – номинални, об./мин. 3200
Мощност 1800 W
Източник на захранване Електрически с кабел
Захранващ кабел (включен само за Обединеното кралство)
Вид на кабела Удължителен кабел 16 м
Тегло, кг 1,6
Тегло
Тегло, кг 22
<elf "Bold" 1>Шумови емисии
Ниво на звуковата мощност, измерена dB(A) 94
Ниво на звуковата мощност, гарантирана [LWA dB(A)] 96
12
9
Шумови емисии в околната среда, измерени като звукова мощност (LWA) в съответствие с директива на
ЕО 2000/14/ЕО.
10
Отчетените данни за нивото на звуковото налягане имат типична статистическа дисперсия (стандартно
отклонение) от 1,2 dB (A).
11
Отчетените данни за равнището на вибрации имат типична статистическа дисперсия (стандартно
отклонение) от 0,2 m/s2.
12
Шумови емисии в околната среда, измерени като звукова мощност (LWA) в съответствие с директива на
ЕО 2000/14/ЕО.
48 71 - 005 - 18.05.2018

LC 141C
Нива на звука
13
Ниво на шума при ухото на работещия, dB (A) 83
Нива на вибрациите
Ръкохватка, m/s
14
2
2,0
Косене
Височина на рязане, mm 25-70
Ширина на рязане, cm 41
Нож Събиране
Артикул номер 5011716-10
Капацитет на приставката за чували, литри 50
13
Отчетените данни за нивото на звуковото налягане имат типична статистическа дисперсия (стандартно
отклонение) от 1,2 dB (A).
14
Отчетените данни за равнището на вибрации имат типична статистическа дисперсия (стандартно
отклонение) от 0,2 m/s2.
71 - 005 - 18.05.2018 49

Декларация за съответствие на ЕО
Декларация за съответствие на ЕО
Husqvarna AB, SE-561 82 Хускварна, Швеция, тел.:
+46-36-146500 декларира, че косачките Husqvarna
LC 141VLi и LC 141Li със сериен номер от
15XXXXXXX нататък са в съответствие с
изискванията на ДИРЕКТИВАТА НА СЪВЕТА:
• от 8 юни 2011 г. относно "ограничения за
използване на определени опасни вещества"
2011/65/ЕС
• от 17 май 2006 г., "свързани с машини"
2006/42/ЕО
• от 26 февруари 2014 г., "свързани с
електромагнетичната съвместимост" 2014/30/ЕС
• от 8 май 2000 г., "свързани с шумовите емисии в
околната среда" 2000/14/ЕО
За информация относно шумовите емисии вижте
главата "Технически характеристики".
Приложени са следните стандарти:
EN 60335-1:2012+A11:2014, EN 60335-2-77:2010, EN
62233:2008, EN 55014-1:2006/+A1:2009/+A2:2011, EN
55014-2:2015, EN 61000-3-2:2014, EN 61000-3-3:2013
Нотифициран орган: 0359, Intertek Testing &
Certification Ltd., 58 Jinfeng Road, Yuyao, Zhejiang
315403, P.R. China извърши оценка на
съответствието съгласно приложение VI на
Директива 2000/14/ЕО и издаде сертификат с номер:
71225
Huskvarna, 2016-10-31
• от 8 май 2000 г., "свързани с шумовите емисии в
околната среда" 2000/14/ЕО
За информация относно шумовите емисии вижте
главата "Технически характеристики".
Приложени са следните стандарти:
EN 60335-1:2012+A11:2014, EN 60335-2-77:2010, EN
62233:2008, EN 55014-1:2006/+A1:2009/+A2:2011, EN
55014-2:2015, EN 61000-3-2:2014, EN
61000-3-11:2000
Нотифициран орган: 0499, The Société Nationale de
Certification et d'Homologation s.à r.l. (SNCH)
Luxemburg удостоверява в съответствие с
процедурите SNCH, че Производителят отговаря на
разпоредбите на приложение VI на Директива
2000/14/ЕО и издава сертификат с номер:
SNCH*2000/14*2005/88*2945*00
Huskvarna, 2016-10-31
Claes Losdal, Мениджър "Разработки и
Развитие"/"Градински продукти" (Упълномощен
представител за Husqvarna AB и отговорно лице за
техническата документация).
Claes Losdal, Мениджър "Разработки и
Развитие"/"Градински продукти" (Упълномощен
представител за Husqvarna AB и отговорно лице за
техническата документация).
Декларация за съответствие на ЕО
Husqvarna AB, SE-561 82 Хускварна, Швеция, тел.:
+46-36-146500 декларира, че косачката Husqvarna
LC 141C със сериен номер от 15XXXXXXX нататък е
в съответствие с изискванията на ДИРЕКТИВАТА НА
СЪВЕТА:
• от 8 юни 2011 г. относно "ограничения за
използване на определени опасни вещества"
2011/65/ЕС
• от 17 май 2006 г., "свързани с машини"
2006/42/ЕО
• от 26 февруари 2014 г., "свързани с
електромагнетичната съвместимост" 2014/30/ЕС
50 71 - 005 - 18.05.2018

Obsah
Úvod............................................................................. 51
Bezpečnost................................................................... 54
Montáž.......................................................................... 61
Provoz...........................................................................61
Údržba.......................................................................... 63
Odstraňování problémů................................................ 65
Přeprava, skladování a likvidace.................................. 66
Technické údaje............................................................67
ES Prohlášení o shodě................................................. 69
Úvod
Popis výrobku
Výrobek je rotační sekačka na trávu s pěší obsluhou.
Koš na trávu slouží ke sběru posečené trávy. Chcete-li
otevřít zadní výhoz trávy, sejměte koš na trávu.
Připevněte mulčovací sadu (příslušenství), chcete-li
používat posečenou trávu jako hnojivo.
Popis výrobku LC 141VLi/LC 141Li
(Obr. 1 )
1. Rukojeť brzdy motoru
2. Inhibitor spuštění
3. Páka pojezdu (LC 141VLi)
4. Řídicí rukojeť
5. Ovládací panel
6. Tlačítko ON/OFF
7. Tlačítko SavE (Úspora energie)
8. Tlačítko ukazatele stavu baterie
9. Kontrolka stavu nabití baterie
10. Varovná kontrolka (Chybová kontrolka LED)
11. Tlačítko snížení rychlosti (LC 141VLi)
12. Ukazatel rychlosti (LC 141VLi)
13. Tlačítko zvýšení rychlosti (LC 141VLi)
14. Zadní kryt
Popis výrobku LC 141C
(Obr. 2 )
1. Rukojeť brzdy motoru
2. Inhibitor spuštění
3. Zásuvka napájecího kabelu
4. Držák napájecího kabelu
5. Řídicí rukojeť
6. Zadní kryt
7. Symboly
8. Kryt žacího ústrojí
9. Typový štítek
10. Páka pro nastavení výšky sečení
11. Mulčovací vložka (příslušenství)
12. Sběrací koš
13. Návod k používání
Doporučené použití
Výrobek používejte k sečení trávy na soukromých
zahradách. K jiným činnostem výrobek nepoužívejte.
15. Symboly
16. Víko baterie
17. Bezpečnostní klíček
18. Kryt žacího ústrojí
19. Páka pro nastavení výšky sečení
20. Typový štítek
21. Sběrací koš
22. Mulčovací vložka pro model LC 141VLi
(příslušenství)
23. Mulčovací vložka pro model LC 141Li (příslušenství)
24. Nabíječka baterie (příslušenství)
25. Baterie (příslušenství)
26. Návod k používání
Symboly na výrobku
Pokud není výrobek
používán obezřetně
a řádně, může dojít
k zranění nebo usmrcení
(Obr. 3 )
obsluhy či osob v okolí.
Přečtěte si návod
(Obr. 4 )
k používání
71 - 005 - 18.05.2018 51

(Obr. 5 )
(Obr. 6 )
(Obr. 7 )
(Obr. 8 )
(Obr. 9 )
(Obr. 10 )
(Obr. 11 )
a nepoužívejte stroj,
pokud mu zcela
nerozumíte.
Zajistěte, aby se
v pracovní oblasti a jejím
okolí nezdržovaly
nepovolané osoby či
zvířata.
Pozor na odvržené a
odražené předměty.
Varování: Ruce a nohy
udržujte mimo dosah
rotujícího nože.
Varování: Ruce a nohy
udržujte mimo dosah
rotujících částí.
Před prováděním údržby
výrobku vyjměte
bezpečnostní klíček.
(model LC 141VLi/
LC 141Li)
Před prováděním údržby
výrobku jej odpojte od
elektrické sítě. (model
LC 141C)
IPX1 – Výrobek má
ochranu proti kapající
vodě (model LC 141VLi/
LC 141Li)
(Obr. 13 )
(Obr. 14 )
(Obr. 15 )
(Obr. 16 )
(Obr. 17 )
(Obr. 18 )
(Obr
.
19 )
Na výrobek nesmí pršet
(model LC 141VLi/
LC 141Li)
Varování: Dávejte pozor,
abyste nepřejeli přes
kabel napájení
a nepřesekli jej. Může to
způsobit úraz elektrickým
proudem nebo poškození
výrobku. (model
LC 141C)
Tento výrobek vyhovuje
platným směrnicím EU.
Emise hluku do okolí dle
direktivy Evropského
společenství. Emise
produktu jsou uvedeny
v kapitole Technické
údaje a na štítku.
Stejnosměrný proud. 36V
Dvojitá izolace.
Odevzdejte
výrobek na
sběrném místě
elektrických
a elektronických zařízení.
(Platí pouze
pro Evropu)
IPX4 – Výrobek má
ochranu proti stříkající
(Obr. 12 )
52 71 - 005 - 18.05.2018
vodě (model LC 141C)

(Obr
.
20 )
(Obr. 21 )
(Obr. 22 )
Startovací
proces pro
model
LC 141VLi/
LC 141Li: stiskněte tlačítko
ON/OFF, povolte inhibitor
spuštění, zatlačte rukojeť
brzdy motoru
směrem dolů.
Startovací proces pro
model LC 141C: povolte
inhibitor spuštění, zatlačte
rukojeť brzdy motoru
směrem dolů.
Uvolněním rukojeti brzdy
motoru zastavíte.
Transformátor se
zabezpečením proti
(Obr. 26 )
selhání.
Nabíječku baterií
používejte a skladujte
pouze ve vnitřních
(Obr. 27 )
(Obr. 28 )
Odpovědnost za výrobek
Jak uvádí zákon o odpovědnosti za výrobek, neneseme
odpovědnost za žádnou škodu způsobenou našim
výrobkem, pokud:
• byl produkt nesprávně opraven,
• byl produkt opraven pomocí součástí od jiného
• má produkt příslušenství od jiného výrobce nebo
• produkt nebyl opraven ve schváleném servisním
prostorech.
Dvojitá izolace.
výrobce nebo součástí, které nejsou výrobcem
schváleny,
příslušenství, které není výrobcem schváleno,
středisku nebo schváleným odborníkem.
(Obr. 23 )
(Obr. 24 )
Povšimněte si: Další symboly/štítky na produktu se
týkají certifikačních požadavků pro určité obchodní trhy.
Pomalu
Rychle
Symboly na baterii nebo na nabíječce baterií
(Obr
.
25 )
Odevzdejte
výrobek ve stanici pro recyklaci elektrických a elektronických zařízení. (Platí pouze
pro Evropu)
71 - 005 - 18.05.2018 53
Bezpečnost
Definice týkající se bezpečnosti
Varování, upozornění a poznámky slouží jako
upozornění na specifické důležité části návodu.
VÝSTRAHA: Používá se v případě
nebezpečí úrazu nebo usmrcení obsluhy
nebo okolních osob, pokud nejsou dodrženy
pokyny uvedené v této příručce.
VAROVÁNÍ: Používá se v případě
nebezpečí poškození výrobku, dalších
materiálů či škod na majetku v blízkém okolí,
pokud nejsou dodrženy pokyny uvedené
v této příručce.
Povšimněte si: Používá se k poskytnutí dalších
informací, které jsou nezbytné v dané situaci.
Obecné bezpečnostní pokyny
VÝSTRAHA: Před použitím výrobku si
přečtěte následující varování.
•
Tento výrobek je nebezpečný,
nepoužívá-li se správně nebo
není-li věnována provozu
řádná pozornost. Nedodržení
bezpečnostních pokynů může
vést ke zranění nebo
usmrcení.
•
Tento výrobek vytváří během
provozu elektromagnetické
pole. Toto pole může za
určitých okolností narušovat
funkci aktivních či pasivních
implantovaných lékařských
přístrojů. Za účelem snížení
rizika možného zranění nebo
smrtelného úrazu
doporučujeme osobám
s implantovanými lékařskými
přístroji poradit se před
použitím výrobku s lékařem
a s výrobcem implantovaného
lékařského přístroje.
•
Buďte stále opatrní
a používejte zdravý rozum.
Nejste-li si jisti, jak ovládat
výrobek ve zvláštních
situacích, vypněte jej
a promluvte si s prodejcem
Husqvarna, než budete
pokračovat v práci.
•
Mějte na paměti, že obsluha je
odpovědná za nehody a škody
vzniklé jiným osobám nebo na
jejich majetku.
•
Udržujte výrobek čistý. Ujistěte
se, že jsou značky a štítky
dobře čitelné.
•
Nedovolte osobám používat
výrobek, nejste-li si jisti, že si
přečetly návod k používání
a porozuměly jeho obsahu.
•
Zamezte používání výrobku
dětmi.
•
Zamezte používání výrobku
osobami, které naznají
pokyny.
•
Vždy sledujte osoby
s fyzickým nebo mentálním
postižením při práci
s výrobkem. Vždy musí být
přítomna zodpovědná dospělá
osoba.
54
71 - 005 - 18.05.2018

•
Nepoužívejte výrobek, jste-li
unavení, nemocní nebo pod
vlivem alkoholu, drog nebo
léků. To by mohlo ovlivnit váš
zrak, ostražitost, koordinaci
a úsudek.
•
Nepoužívejte výrobek, pokud
je vadný.
•
Nikdy neupravujte výrobek
a nepoužívejte jej, pokud je
možné, že jej upravil někdo
jiný.
Bezpečnost pracovního prostoru
VÝSTRAHA: Před použitím výrobku si
přečtěte následující varování.
•
Před použitím výrobku,
odkliďte z pracovní oblasti
předměty, jako jsou větve,
větvičky a kameny.
•
Předměty, které mohou být
zachyceny žacím ústrojím
mohou být odmrštěny
a způsobit zranění osob
a poškození předmětů.
Udržujte osoby v okolí
a zvířata v bezpečné
vzdálenosti od výrobku.
•
Nikdy nepoužívejte výrobek za
špatného počasí, jako je mlha,
déšť, silný vítr, intenzívní
chlad a nebezpečí blesku.
Použití výrobku za špatného
počasí nebo ve vlhkých či
mokrých podmínkách je
namáhavé. Nepříznivé počasí
může vytvořit nebezpečné
podmínky, např. kluzký
povrch.
•
Dávejte pozor na osoby,
předměty a situace, které
mohou bránit bezpečnému
provozu výrobku.
•
Dávejte pozor na překážky,
jako jsou kořeny, kameny,
větve, díry a příkopy. Vysoká
tráva může překážky skrýt.
•
Sečení trávy na svazích může
být nebezpečné. Nepoužívejte
výrobek na svahu se sklonem
větším než 15°.
•
S výrobkem jezděte po
vrstevnicích. Nepohybujte se
na svahu nahoru a dolů.
•
Postupujte opatrně v blízkosti
skrytých rohů a objektů, které
mohou bránit ve výhledu.
Bezpečnost práce
VÝSTRAHA: Před použitím výrobku si
přečtěte následující varování.
•
Tento výrobek používejte
výhradně k sečení trávy. Není
dovoleno používat výrobek
k jiným činnostem.
•
Používejte osobní ochranné
prostředky. Viz
Osobní
ochranné prostředky na strani
57
.
•
Neprovozujte výrobek v dešti
a vlhku. Nebezpečí úrazu
elektrickým proudem se
71 - 005 - 18.05.2018
55

zvyšuje, přijde-li výrobek do
styku s vodou.
•
Neprovozujte výrobek, pokud
není správně namontovaný
nůž a všechny kryty.
V opačném případě by se
mohl nůž uvolnit a způsobit
zranění osob.
•
Zajistěte, aby nůž nenarazil do
předmětů, jako jsou kameny
a kořeny. Mohlo by dojít
k poškození nože a ohnutí
hřídele motoru. Ohnutý hřídel
způsobuje velké vibrace
a hrozí velmi vysoké riziko
uvolnění nože.
•
Pokud nůž narazí do nějakého
předmětu nebo se objeví
vibrace, okamžitě zastavte
výrobek. Zastavte motor,
otočte bezpečnostní klíček do
polohy 0 a vyjměte baterii
(model LC 141VLi a LC 141Li)
nebo odpojte napájecí kabel
(model LC 141C). Zkontrolujte,
zda není výrobek poškozený.
Opravte poškozené díly nebo
svěřte opravu schválenému
servisnímu pracovníkovi.
•
Po nastartování motoru nikdy
nepřipevňujte rukojeť brzdy
motoru trvale k rukojeti
sekačky.
•
Umístěte výrobek na stabilní,
rovný povrch a nastartujte jej.
Zkontrolujte, zda nůž nemůže
přijít do kontaktu se zemí nebo
cizími objekty.
•
Při provozu vždy stůjte za
výrobkem.
•
Při provozu nechte všechna
kola spočívat na zemi a držte
rukojeť oběma rukama. Ruce
a nohy udržujte mimo dosah
rotujících nožů.
•
Nenaklánějte výrobek, když je
spuštěný motor.
•
Dávejte pozor při tažení
výrobku dozadu.
•
Nikdy výrobek nezvedejte,
když je spuštěný motor. Pokud
musíte výrobek zvednout,
nejprve vypněte motor, otočte
bezpečnostní klíček do
polohy 0 a vyjměte baterii
(model LC 141VLi a LC 141Li)
nebo odpojte napájecí kabel
(model LC 141C).
•
Při provozování výrobku
nechoďte směrem dozadu.
•
Před přejezdem ploch bez
trávy, jako jsou cesty
vytvořené ze štěrku, kamenů
nebo asfaltu, vypněte motor.
•
Neběhejte s výrobkem, když je
spuštěný motor. Při provozu
výrobku vždy pouze choďte.
•
Před změnou výšky sečení
vypněte motor. Nikdy
neupravujte nastavení při
spuštěném motoru.
56
71 - 005 - 18.05.2018
•
Nikdy nenechte výrobek se
spuštěným motorem bez
dozoru. Vypněte motor
a ujistěte se, že se žací ústrojí
neotáčí.
Bezpečnostní pokyny pro provoz
Osobní ochranné prostředky
VÝSTRAHA: Před použitím výrobku si
přečtěte následující varování.
•
Osobní ochranné prostředky
nemohou zcela eliminovat
nebezpečí úrazu, ale
v případě nehody pomáhají
snížit míru poranění.
Požádejte prodejce, aby vám
pomohl vybrat správné
vybavení.
•
Používejte odolnou obuv
s protiskluzovou podrážkou.
Nepoužívejte otevřenou obuv
ani nepracujte naboso.
•
Používejte silné, dlouhé
kalhoty.
•
Při určitých činnostech
používejte ochranné rukavice,
například při nasazování,
prohlídce nebo čištění žacího
ústrojí.
Bezpečnostní zařízení na produktu
VÝSTRAHA: Před použitím výrobku si
přečtěte následující varování.
• Nepoužívejte výrobek, jehož bezpečnostní zařízení
jsou vadná!
• Pravidelně kontrolujte bezpečnostní zařízení. Pokud
je zařízení vadné, obraťte se na servis Husqvarna.
Kryt žacího ústrojí
• Zkontrolujte kryt žacího ústrojí, aby bylo zajištěno, že
nevykazuje známky poškození, např. praskliny.
Rukojeť brzdy motoru
Rukojeť brzdy motoru slouží k zastavení motoru. Když
uvolníte rukojeť brzdy motoru, motor se zastaví.
Chcete-li zkontrolovat funkci brzdy motoru, nastartujte
motor a uvolněte rukojeť brzdy motoru. Pokud se motor
nevypne během 3 sekund, požádejte schváleného
servisního pracovníka Husqvarna o seřízení brzdy
motoru.
(Obr. 29 )
Bezpečnostní klíček (modely LC 141VLi a LC 141Li)
Bezpečnostní klíček se nachází pod víkem baterie.
Bezpečnostní klíček připojuje baterii, která slouží jako
napájecí zdroj motoru.
• Kontrolu funkce bezpečnostního klíčku provedete
spuštěním a vypnutím motoru.
• V případě správné funkce bezpečnostního klíčku se
motor spustí, pouze když je klíček otočený do
polohy 1.
(Obr. 30 )
Kontrola inhibitoru spuštění
Proveďte kontrolu inhibitoru spuštění a ujistěte se, že
brání provozu motoru.
1. Přitáhněte rukojeť brzdy motoru směrem k řídítkům.
Inhibitor spuštění přeruší pohyb.
2. Zatlačte inhibitor spuštění směrem ven.(Obr. 31 )
3. Uvolněte inhibitor spuštění a ujistěte se, že se vrátí
do své výchozí polohy.
Použití držáku napájecího kabelu (model LC 141C)
Držák napájecího kabelu snižuje tlak na zásuvku
a napájecí kabel. Držák napájecího kabelu rovněž
snižuje riziko, že upadnete.
1. Ohněte napájecí kabel do malé smyčky.
2. Vložte smyčku do otvoru v držáku napájecího
kabelu.
3. Položte smyčku na hák.
4. Zatáhnutím za napájecí kabel smyčku kolem háku
utáhněte.(Obr. 32 )
Bezpečnostní pokyny týkající se baterií
VÝSTRAHA: Před použitím výrobku si
přečtěte následující varování.
71 - 005 - 18.05.2018 57

•
Dobíjecí baterie Husqvarna
používejte jako zdroj napájení
pouze pro související produkty
Husqvarna. Abyste zabránili
zranění, nepoužívejte baterii
jako zdroj napájení pro jiná
zařízení.
•
Nepoužívejte baterie, které
nejsou určené k dobíjení.
•
Nebezpečí úrazu elektrickým
proudem. Vývody baterie
nepřipojujte ke klíčům,
mincím, šroubkům nebo jiným
kovům. Může to způsobit zkrat
baterie.
•
Nevkládejte do větracích
otvorů baterie žádné
předměty.
•
Chraňte baterii před sluncem,
teplem nebo otevřeným
ohněm. Baterie může
explodovat a způsobit
popáleniny a/nebo chemické
popáleniny.
•
Chraňte baterii před deštěm
a vlhkým prostředím.
•
Chraňte baterii před
mikrovlnami a vysokým
tlakem.
•
Baterii nikdy nerozebírejte
nebo nerozbíjejte.
•
Pokud baterie netěsní,
kapalina nesmí přijít do styku
s kůží a očima. Po styku
s kapalinou omyjte zasaženou
oblast velkým množstvím vody
a získejte lékařskou pomoc.
•
Baterii používejte při teplotě
-10 °C až 40 °C.
•
Baterii ani nabíječku baterií
nečistěte vodou. Viz
Čištění
baterie nebo nabíječky baterií
na strani 64
•
Nepoužívejte vadnou nebo
.
poškozenou baterii.
•
Baterie uchovávejte mimo
dosah kovových předmětů,
jako jsou např. hřebíky, mince
nebo šperky.
Bezpečnostní pokyny pro nabíječku baterií
VÝSTRAHA: Před použitím výrobku si
přečtěte následující varování.
•
Nabíječku baterií QC
používejte pouze pro nabíjení
náhradních baterií Husqvarna.
•
Hrozí nebezpečí zkratu
a úrazu elektrickým proudem.
Nevkládejte do větracích
otvorů nabíječky žádné
předměty. Nabíječku baterií
nerozebírejte. Nepřipojujte
nabíjecí vývody ke kovovým
předmětům. Používejte
schválenou elektrickou
zásuvku.
•
Tento výrobek vytváří během
provozu elektromagnetické
pole. Toto pole může za
určitých okolností narušovat
funkci aktivních či pasivních
58
71 - 005 - 18.05.2018

implantovaných lékařských
přístrojů. Za účelem snížení
rizika možného zranění nebo
smrtelného úrazu
doporučujeme osobám
s implantovanými lékařskými
přístroji poradit se před
použitím výrobku s lékařem a
s výrobcem implantovaného
lékařského přístroje.
•
Pravidelně kontrolujte, zda
není napájecí kabel
poškozený a nejsou na něm
praskliny.
•
Nabíječku nezvedejte pomocí
napájecího kabelu. Když
nabíječku baterií odpojujete
z elektrické zásuvky, tahejte
za zástrčku. Netahejte za
napájecí kabel.
•
Uchovávejte napájecí kabel
a prodlužovací šňůry mimo
dosah vody, oleje a ostrých
okrajů. Dejte pozor, aby nebyl
kabel přivřen ve dveřích,
nezachytil se za plot
a podobně. Mohlo by dojít
k probíjení nabíječky.
•
Nabíječku baterií nečistěte
vodou.
•
Nabíječku baterií smí používat
děti od 8 let a osoby se
sníženými fyzickými,
smyslovými nebo duševními
schopnostmi nebo
nedostatečnými zkušenostmi
či znalostmi pod dozorem
odpovědné osoby, nebo pokud
jim takováto osoba poskytne
pokyny, které zajistí, že budou
nabíječku používat
bezpečným způsobem. Děti si
s nabíječkou nesmí hrát.
Čištění a údržbu nesmí
provádět děti bez dozoru.
•
V nabíječce nenabíjejte
baterie, které nejsou určeny
k opětovnému dobíjení.
•
Nabíječku nepoužívejte
v blízkosti hořlavých nebo
korozivních materiálů.
Nabíječku baterií nezakrývejte.
V případě, že zaznamenáte
kouř nebo požár, vytáhněte
zástrčku kabelu nabíječky
baterií ze zásuvky.
•
Nepoužívejte vadnou nebo
poškozenou nabíječku baterií.
•
Baterii nabíjejte pouze uvnitř,
a to v dobře odvětrané
místnosti a mimo dosah
slunečních paprsků.
Nenabíjejte baterii ve vlhkém
prostředí.
Bezpečnost napájecího kabelu
Pro model LC 141C.
•
Doporučuje se použít
proudový chránič (RCD) se
spouštěcím proudem do
hodnoty 30 mA. Ani
s proudovým chráničem nelze
100% zaručit bezpečnost a je
71 - 005 - 18.05.2018
59

nutné vždy dodržovat
bezpečné pracovní postupy.
Při každém použití zkontrolujte
proudový chránič.
•
Pokud dojde k přerušení
napájecího kabelu nebo
poškození izolace, okamžitě
odpojte stroj od elektrické sítě.
•
Nedotýkejte se přerušeného
nebo poškozeného napájecího
kabelu, dokud nebude
přerušeno elektrické napájení.
•
Přerušený nebo poškozený
napájecí kabel se
nepokoušejte opravit.
Vyměňte ho za nový.
Bezpečnostní pokyny pro údržbu
VÝSTRAHA: Před použitím výrobku si
přečtěte následující varování.
•
Pro modely LC 141VLi
a LC 141Li: Neúmyslnému
spuštění během údržby
můžete zabránit tím, že otočíte
bezpečnostní klíček do
polohy 0 a vyjmete baterii.
Před započetím údržby
vyčkejte minimálně 5 sekund.
•
Pro model LC 141C:
Neúmyslnému spuštění
během údržby můžete
zabránit tím, že odpojíte
napájecí kabel.
•
Správným provedením údržby
zvýšíte životnost výrobku
a snížíte nebezpečí nehod.
Odborné opravy by měl
provést schválený servisní
pracovník. Pro další informace
se obraťte na nejbližšího
servisního pracovníka.
•
Provádějte pouze údržbu
uvedenou v tomto návodu
k používání. Rozsáhlejší
zásahy musí provést
schválený servisní pracovník.
•
Při manipulaci s žacím
ústrojím používejte silné
rukavice. Nůž je velmi ostrý
a může snadno dojít
k pořezání.
•
Pro dosažení nejlepšího
výsledku a bezpečnosti
zajistěte, aby byla ostří nože
čistá a ostrá.
•
Zajistěte pravidelné kontroly
a provádění potřebného
seřízení a oprav výrobku
u servisního pracovníka.
•
Poškozené, opotřebené či
prasklé součásti vyměňte.
•
Dodržujte pokyny pro výměnu
příslušenství. Používejte
výhradně příslušenství od
výrobce.
•
Pokud není výrobek, baterie
a nabíječka baterií právě
v provozu, uchovávejte je
samostatně v suchém,
vnitřním a uzamčeném
prostoru. Zajistěte, aby
k výrobku, baterii či nabíječce
60
71 - 005 - 18.05.2018

baterií neměly přístup děti ani
nepovolané osoby.
Montáž
Úvod
VÝSTRAHA: Před montáží produktu si
pročtěte kapitolu bezpečnosti.
VÝSTRAHA: Pro modely LC 141VLi
a LC 141Li: Neúmyslnému spuštění během
montáže můžete zabránit tím, že otočíte
bezpečnostní klíček do polohy 0, vyjmete
baterii a počkáte alespoň 5 sekund.
Pro model LC 141C: Neúmyslnému spuštění
během montáže můžete zabránit tím, že
odpojíte napájecí kabel.
Montáž rukojeti
1. Díry v rukojeti i v její dolní části zarovnejte
a připevněte šrouby, podložky a knoflíky. Knoflíky
řádně utáhněte.(Obr. 33 )
2. Připojte kabely k řídítkům pomocí držáků kabelů.
(Obr. 34 )
Povšimněte si: Zkontrolujte, zda není napnutí lanek
příliš velké. Pokud je kabel příliš napnutý, může při
složení řídítek do přepravní polohy dojít k jeho
poškození.
3. Zahákněte kabely za háček v dolní části řídítek.(Obr.
35 )
Nastavení výšky rukojeti
1. Povolte spodní matice.(Obr. 36 )
2. Odmontujte knoflík, podložku a šroub na pravé
a levé straně.
3. Rukojeť lze nastavit do dvou různých výšek. Vložte
šroub do jednoho ze dvou otvorů na pravé a levé
straně.(Obr. 37 )
4. Připevněte šrouby, podložky a knoflíky.
5. Posuňte knoflíky směrem k rukojeti, dokud se
nezastaví a neuslyšíte cvaknutí. Knoflíky řádně
utáhněte.(Obr. 38 )
Montáž koše na trávu
1. Zatlačte dva přepravní kryty směrem ven a dolů.
(Obr. 39 )
2. Vložte horní část koše na trávu do dolní části koše
na trávu. Připevněte koš na trávu pomocí svorek.
(Obr. 40 )
3. Zvedněte zadní kryt.
4. Upevněte háčky na koši na trávu k hornímu okraji
podvozku.(Obr. 41 )
Montáž mulčovací sady
1. Zvedněte zadní kryt a vyjměte koš na trávu.
2. Vložte mulčovací vložku do kanálu výhozu trávy.
Mulčovací vložka typu A je pro modely LC 141Li
a LC 141C. Typ B pro model LC 141VLi.(Obr. 42 )
3. Zavřete zadní kryt.
4. Nahraďte nůž nožem Combi, viz
a výměna nože na strani 65
Odmontování
.
Provoz
Úvod
VÝSTRAHA: Před používáním produktu je
třeba, abyste si přečetli a porozuměli
kapitole o bezpečnosti.
Nastavení výrobku do provozní polohy
Jsou-li řídítka v poloze pro přepravu a uložení (viz část
Nastavení produktu do přepravní polohy na strani 66
následujícím způsobem je umístěte do provozní polohy.
1. Zvedejte řídítka, dokud spodní rukojeť nezapadne do
provozní polohy.(Obr. 43 )
2. Posunujte spodní knoflíky směrem k rukojeti, dokud
se nezastaví a neuslyšíte cvaknutí.(Obr. 44 )
71 - 005 - 18.05.2018 61
3. Knoflíky dotáhněte.
4. Zvedněte horní rukojeť a utáhněte knoflíky.(Obr. 45 )
Nastavení výšky sečení
1. Chcete-li zvýšit výšku sečení, posuňte páku pro
nastavení výšky sečení dozadu.
2. Posunem páky pro nastavení výšky sečení dopředu
výšku sečení snížíte.(Obr. 46 )
),
VAROVÁNÍ: Nenastavujte výšku sečení
příliš nízko. V případě, že není povrch
trávníku rovný, mohou nože přijít do styku se
zemí.

Baterie
VÝSTRAHA: Před použitím baterie je třeba,
abyste si přečetli a porozuměli kapitole
o bezpečnosti. Rovněž je nezbytné, abyste
si přečetli a pochopili návod k používání
baterie a nabíječky baterií.
Stav baterie
Displej ukazuje zbývající kapacitu baterie a zda došlo
k problémům s baterií. Kapacita baterie se zobrazuje
5 sekund po vypnutí produktu nebo po stisku tlačítka
ukazatele stavu baterie Pokud dojde k chybě, rozsvítí se
na baterii výstražný symbol. Viz
(Obr. 47 )
Kontrolky LED
Všechny kontrolky LED
svítí
Svítí kontrolky LED 1,
LED 2, LED 3.
Svítí kontrolky LED 1,
LED 2.
Svítí kontrolka LED 1. Baterie je nabitá na 0–
Bliká kontrolka LED 1. Baterie je vybitá. Nabijte
Nabití baterie
Před prvním použitím baterii nabijte. Baterie je při
dodání zákazníkovi nabitá pouze na 30 %.
Povšimněte si: Nabíječka baterií musí být připojena ke
zdroji o napětí a frekvenci uvedené na typovém štítku.
Pokud teplota baterie přesahuje 50 °C, baterie se
nenabíjí. Před zahájením nabíjení zajistí nabíječka
baterií snížení teploty baterie.
1. Připojte jeden konec napájecího kabelu nabíječky
baterií do zásuvky na nabíječce baterií.
2. Připojte druhý konec napájecího kabelu nabíječky
baterií do uzemněné elektrické zásuvky. Kontrolka
LED na nabíječce baterií jednou zeleně blikne.(Obr.
48 )
3. Vložte baterii do nabíječky baterií. Když je baterie
správně připojená k nabíječce baterií, rozsvítí se na
nabíječce zelené světlo.(Obr. 49 )
4. Když svítí všechny kontrolky LED baterie, baterie je
plně nabitá. Baterii nabíjejte maximálně po dobu
24 hodin.
5. Když nabíječku baterií odpojujete z elektrické
zásuvky, tahejte za zástrčku, nikoliv za kabel.
6. Vyjměte baterii z nabíječky.
Baterie na strani 65
Stav baterie
Plné nabití (75–100 %).
Nabití baterie je 50–75 %.
Nabití baterie je 25–50 %.
20 %.
baterii.
.
Stav nabíjení baterie
Lithium-iontové baterie Husqvarna lze nabíjet i používat
bez ohledu na jejich úroveň nabití. Baterie není
poškozená. I když plně nabitou baterii ponecháte
v nabíječce, nedojde k poklesu jejího nabití.
LED displej Stav nabíjení
Bliká kontrolka LED 1. 0–25 %
Svítí kontrolka LED 1, bliká kontrolka LED 2.
Svítí kontrolky LED 1,
LED 2, bliká kontrolka
LED 3.
Svítí kontrolky LED 1,
LED 2, LED 3, bliká kontrolka LED 4.
Svítí kontrolky LED 1,
LED 2, LED 3, LED 4.
25–50 %
50–75 %
75–100 %
Plně nabitá
Provoz modelu LC 141VLi a LC 141Li
Spuštění výrobku
1. Vložte nabitou baterii do přihrádky na baterii.
2. Otočte bezpečnostní klíček do polohy 1.(Obr. 50 )
3. Postavte se za výrobek.
4. Na ovládacím panelu stiskněte tlačítko ON/OFF
(ZAP/VYP) (A). Rozsvítí se zelená kontrolka LED
(B).(Obr. 51 )
5. Povolte inhibitor spouštění.(Obr. 52 )
6. Zatlačte rukojeť brzdy motoru směrem k řídítkům.
(Obr. 53 )
Použití pohonu kol
• Model LC 141VLi. Pojezd spustíte přitáhnutím páky
pojezdu směrem k řídítkům.(Obr. 54 )
• Stiskem tlačítek + a - na ovládacím panelu lze
nastavit 4 úrovně rychlosti pojezdu.(Obr. 55 )
• V blízkosti překážek uvolněte páku pojezdu, aby se
deaktivoval pohon.
Použití funkce SavE
Výrobek má funkci úspory energie v bateriích (SavE),
která prodlužuje dobu provozu.
1. Funkci zapnete stisknutím tlačítka SavE (A). Rozsvítí
se zelená kontrolka LED.(Obr. 56 )
2. Opětovným stiskem tlačítka SavE funkci vypnete.
Zelená kontrolka LED (B) zhasne.
Funkce SavE se vypne automaticky, pokud terénní
podmínky vyžadují vyšší výkon. Jakmile to terénní
podmínky dovolí, funkce SavE se automaticky zapne.
62
71 - 005 - 18.05.2018

Funkce vysokého zatížení
Když výrobek seká dlouhou či mokrou trávu, motor
automaticky zvýší své otáčky. Když není režim
vysokého zatížení potřeba, motor se vrátí do
standardního režimu.
Zastavení výrobku
Výrobek se automaticky vypne po 10 minutách, kdy
s ním nepracujete. Před tím, než ponecháte výrobek bez
dozoru, otočte vždy bezpečnostní klíček do polohy 0.
1. Zastavte motor uvolněním rukojeti brzdy motoru.
(Obr. 57 )
2. Na ovládacím panelu stiskněte tlačítko ON/OFF
(ZAP/VYP) (A). Zelená kontrolka LED (B) zhasne.
(Obr. 58 )
3. Otevřete víko baterie a otočte bezpečnostní klíček
do polohy 0.(Obr. 59 )
4. Chcete-li baterii vyjmout, stiskněte dvě tlačítka pro
uvolnění baterie a baterii vytáhněte.(Obr. 60 )
5. Pokud je baterie slabá, nabijte ji. Další informace viz
Nabití baterie na strani 62
.
Provoz modelu LC 141C
Výběr schváleného kabelu (LC 141C)
Povšimněte si: V případě trhu Velké Británie použijte
pouze 16m prodlužovací kabel, který je součástí
výrobku. V případě ostatních trhů postupujte podle
informací níže.
Při použití prodlužovacích kabelů musí mít kabely
minimální průřezy uvedené v tabulce níže:
Napětí
220–240 V /
50 Hz
220–240 V /
50 Hz
• Přívodní a prodlužovací kabely jsou k dostání od
místního schváleného servisního pracovníka pro
venkovní produkty Husqvarna.
Délka kabelu Průřez
Až 20 m 1,5 mm
20–50 m 2,5 mm
2
2
• Používejte prodlužovací kabely navržené pro
venkovní použití splňující jednu z následujících
specifikací: Běžná pryž (60245 IEC 53), běžné PVC
(60227 IEC 53) nebo běžné PCP(60245 IEC 57)
• Pokud je kabel poškozený, musí ji vyměnit výrobce,
servisní pracovník nebo kvalifikované osoby, aby se
eliminovalo nebezpečí.
Spuštění výrobku
1. Připojte napájecí kabel do zásuvky pod rukojetí.(Obr.
61 )
2. Vložte napájecí kabel do držáku napájecího kabelu.
Další informace naleznete v části
napájecího kabelu (model LC 141C) na strani 57
(Obr. 62 )
3. Postavte se za výrobek.
4. Povolte inhibitor spouštění.(Obr. 63 )
5. Zatlačte rukojeť brzdy motoru směrem k řídítkům.
(Obr. 64 )
Použití držáku
.
Zastavení výrobku
1. Zastavte motor uvolněním rukojeti brzdy motoru.
(Obr. 65 )
2. Odpojte napájecí kabel z elektrické sítě a poté
z výrobku.(Obr. 66 )
VAROVÁNÍ: Zástrčku vytahujte rovně.
Netahejte za napájecí kabel.
Jak docílit dobrých výsledků
• Používejte vždy ostrý nůž. Při použití tupého nože je
střih nepravidelný a posečený povrch trávy žloutne.
Ostrý nůž také vyžaduje méně energie než tupý nůž.
• Nesekejte více než ⅓ výšky trávy. Nejprve sekejte
se žacím ústrojím nastaveným vysoko. Zkontrolujte
výsledek a případně snižte výšku sečení na
požadovanou úroveň. Pokud je tráva velmi vysoká,
jezděte pomalu a v případě potřeby sekejte 2krát.
• Sekejte vždy v jiném směru, aby na trávníku
nevznikly pruhy.
Údržba
Úvod
VÝSTRAHA: Před prováděním údržby je
třeba, abyste si přečetli a porozuměli
kapitole o bezpečnosti.
Pro servis a opravy výrobku je nezbytné speciální
školení. Garantujeme dostupnost profesionálních oprav
a servisu. Pokud neposkytuje prodejce servisní služby,
požádejte jej o informace o nejbližším servisu.
71 - 005 - 18.05.2018 63
Plán údržby
Intervaly údržby se vypočítávají na základě
každodenního používání výrobku. Intervaly se mění,
není-li výrobek používán denně.
Pro údržbu označenou symbolem * najdete pokyny
v části
Bezpečnostní zařízení na produktu na strani 57
.

Modely LC 141VLi, LC 141Li a LC 141C Denně Týdně Měsíčně
Proveďte běžnou kontrolu. X
Vyčistěte výrobek. X
Zkontrolujte inhibitor spuštění.* X
Zkontrolujte, zda nejsou vadná bezpečnostní zařízení výrobku.* X
Zkontrolujte žací ústrojí. X
Zkontrolujte kryt žacího ústrojí.* X
Zkontrolujte rukojeť brzdy motoru.* X
Pouze modely LC 141VLi a LC 141Li Denně Týdně Měsíčně
Zkontrolujte, že tlačítko ON/OFF (ZAP/VYP) funguje správně a není vadné. X
Zkontrolujte, zda není baterie poškozena. X
Zkontrolujte úroveň nabití baterie. X
Zkontrolujte, zda na baterii fungují tlačítka pro uvolnění baterie a zda baterii drží
v produktu.
Zkontrolujte, zda není nabíječka baterií poškozena a ujistěte se, že funguje
správně.
Zkontrolujte připojení mezi baterií a výrobkem. Rovněž zkontrolujte připojení mezi baterií a nabíječkou baterií.
X
X
X
Provedení běžné kontroly
• Zajistěte, aby byly matice a šrouby na výrobku
správně dotažené.
• Zkontrolujte, že kabely výrobku nejsou na místě, kde
by mohlo dojít k jejich poškození.
Čištění výrobku
• Plastové části čistěte čistou a suchou utěrkou.
• Nečistěte výrobek vodou. Voda může proniknout do
baterie nebo motoru a způsobit zkrat nebo
poškození výrobku.
• K čištění výrobku nepoužívejte vodu pod vysokým
tlakem.
• Motor nesmí být přímo oplachován vodou.
• Pomocí kartáče odstraňte listí, trávu a nečistoty.
• Očistěte povrch baterie a nabíječku baterie měkkou
a suchou utěrkou.
Kontrola žacího ústrojí
VÝSTRAHA: Pro modely LC 141VLi
a LC 141Li: Neúmyslnému spuštění můžete
zabránit tak, že otočíte bezpečnostní klíček
do polohy 0, vyjmete baterii a počkáte
alespoň 5 sekund.
Pro model LC 141C: Neúmyslnému spuštění
můžete zabránit tím, že odpojíte napájecí
kabel.
VÝSTRAHA: Při provádění údržby žacího
ústrojí používejte ochranné rukavice. Nůž je
velmi ostrý a může snadno dojít k pořezání.
Čištění baterie nebo nabíječky baterií
1. Zkontrolujte žací ústrojí ohledně poškození
VAROVÁNÍ: Baterii ani nabíječku baterií
nečistěte vodou.
• Než vložíte baterii do nabíječky, zkontrolujte, zda
jsou baterie a nabíječka baterie čisté a suché.
• Očistěte kontakty baterie stlačeným vzduchem nebo
použijte měkkou a suchou utěrku.
64 71 - 005 - 18.05.2018
a prasklin. Poškozené žací ústrojí vždy vyměňte.
2. Prohlédněte nůž a zkontrolujte, zda není poškozený
nebo tupý.
Povšimněte si: Po ostření je nezbytné nůž vyvážit.
Výměnu, ostření a vyvážení nože svěřte servisnímu
středisku. Dojde-li k nárazu do překážky, po kterém
dochází k vypínání výrobku, vyměňte poškozený nůž.
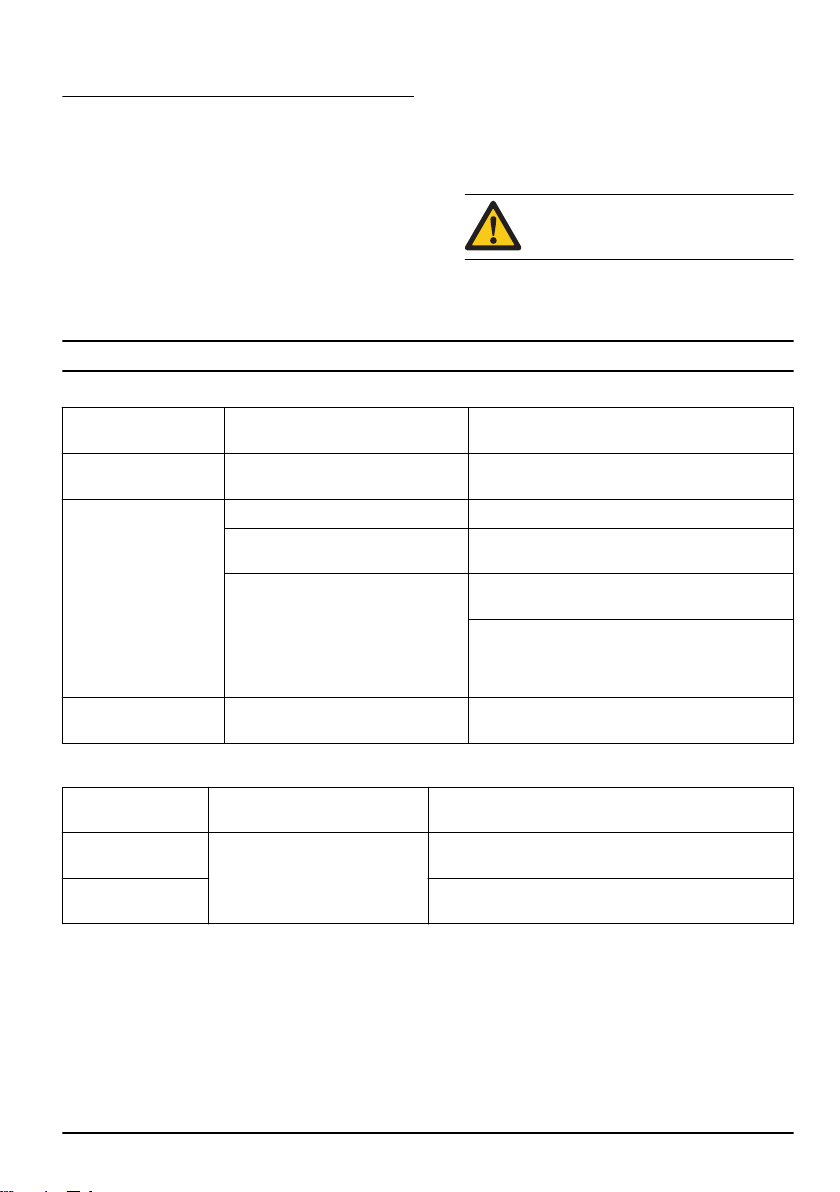
O tom, zda je možné nůž nabrousit či zda je nutné ho
vyměnit, rozhodne servisní středisko.
Odmontování a výměna nože
1. Zajistěte nůž pomocí dřevěného špalíku.(Obr. 67 )
2. Demontujte šroub nože.
3. Odmontujte nůž.
4. Prohlédněte držák nože a šroub nože a zkontrolujte,
zda nejsou poškozené.
5. Prohlédněte hřídel motoru a ujistěte se, že není
ohnutý.
6. Při montáží nového nože nasměrujte zahnuté konce
nože ve směru krytu žacího ústrojí.(Obr. 68 )
Odstraňování problémů
Baterie
Kontrolka LED na baterii
Zelená kontrolka LED
bliká
Chybová kontrolka LED
bliká
Chybová kontrolka LED
svítí
Možné závady Možné řešení
Napětí baterie je nízké Nabijte baterii. Viz
Baterie je slabá Nabijte baterii. Viz
Teplota v pracovním prostředí je
příliš vysoká nebo nízká
Přepětí Zkontrolujte, zda napětí elektrické sítě odpovídá
Příliš velký rozdíl napětí článků (1 V) Obraťte se na schváleného servisního pracovníka.
7. Zkontrolujte, zda je nůž zarovnaný se středem
hřídele motoru.
8. Zajistěte nůž pomocí dřevěného špalíku. Nasaďte
pružnou podložku a utáhněte šroub a podložku
utahovacím momentem 20 Nm.(Obr. 69 )
9. Otočte nožem rukou a zkontrolujte, zda se volně
otáčí.
VÝSTRAHA: Používejte odolné rukavice.
Nůž je velmi ostrý a může snadno dojít
k pořezání.
10. Nastartujte výrobek a proveďte test nože. Pokud
není nůž správně připevněn, výrobek vibruje
a výsledky sečení nejsou uspokojivé.
Nabití baterie na strani 62
Nabití baterie na strani 62
Baterii používejte při teplotě -10 °C až 40 °C.
napětí uvedenému na typovém štítku produktu.
Vyjměte baterii z nabíječky. Počkejte 5 sekund
a zkuste baterii znovu nabít. Pokud potíže přetrvávají, obraťte se na autorizovaného servisního pracovníka.
.
.
Nabíječka baterií
Kontrolka LED na
nabíječce baterií
Chybová kontrolka
LED bliká
Chybová kontrolka
LED svítí
Možné závady Možné řešení
Teplota v pracovním prostředí je
příliš vysoká nebo nízká
Nabíječku baterií používejte při teplotě 5 °C až 40 °C.
Obraťte se na schváleného servisního pracovníka.
Ovládací panel
V případě potíží, které nejsou v této části uvedeny, se
obraťte na servisního pracovníka.
71 - 005 - 18.05.2018 65

Klávesnice Možné závady Možná akce
Bliká chybová kontrolka
LED
Výrobek se vypíná Baterie je slabá Nabijte baterii. Viz
Motor je přehřátý Zvyšte výšku sečení. Viz
Otáčky motoru klesnou příliš nízko
a motor se zastaví
Došlo k přehřátí ovládání motoru Zastavte motor a počkejte, než vychladne.
Nůž je zablokovaný Neúmyslnému spuštění můžete zabránit tím, že
Chyba baterie nebo žádný signál
z baterie
Selhání konektoru baterie Zkontrolujte konektor baterie.
na strani 61
otočíte bezpečnostní klíček do polohy 0, vyjmete
baterii a počkáte alespoň 5 sekund. Zkontrolujte,
zda se nůž může volně otáčet. Pokud potíže přetrvávají, obraťte se na autorizovaného servisního
pracovníka.
Vložte správně baterii do výrobku a zkontroluje konektor baterie. Pokud kontrolka LED na baterii bliká, přečtěte si část
.
Přeprava, skladování a likvidace
Nastavení produktu do přepravní polohy
1. Sundejte koš na trávu (je-li nainstalovaný).
2. Povolte knoflíky na horní rukojeti a sklopte řídítka
dolů.(Obr. 70 )
3. Povolte spodní matice.
4. Posuňte knoflíky na spodní konec drážek na pravé
i na levé straně výrobku.(Obr. 71 )
5. Sklopte rukojeť dopředu.(Obr. 72 )
Přeprava
• Na dodané Li-ion baterie se vztahují požadavky
legislativy o nebezpečném zboží.
• Při komerční přepravě musí být dodrženy speciální
požadavky na balení a označení.
• Při přípravě výrobku k přepravě nezapomeňte dbát
předpisů pro nebezpečné materiály. Mohou platit
místní předpisy.
• Při přepravě vždy vyjměte baterii.
• Přelepte konektory baterie páskou a zajistěte, aby se
baterie při přepravě nemohla pohybovat.
• Během přepravy výrobek zajistěte.
Skladování
• Při skladování baterii vždy vyjímejte.
• Abyste zabránili nehodám, zajistěte, aby při
skladování nebyla baterie připojená k výrobku.
• Nabíječku baterií uchovávejte na uzavřeném
a suchém místě.
• Baterii a nabíječku baterií uchovávejte na suchém
místě, kde nehrozí vlhkost či mráz.
• Při skladování baterii odpojte od nabíječky baterií.
• Neskladujte baterii v místech, kde může docházet
k výbojům statické elektřiny. Neskladujte baterii
v kovovém obalu.
• Baterii uchovávejte na místě s teplotou mezi 5 °C
a 25 °C a mimo dosah slunečních paprsků.
• Nabíječku baterií uchovávejte na místě s teplotou
mezi 5 °C a 45 °C a mimo dosah slunečních
paprsků.
• Ujistěte se, že je baterie před dlouhodobým
uskladněním nabitá na 30 % až 50 %.
• Produkt, baterii a nabíječku baterií skladujte
v uzamčeném prostoru mimo dosah dětí
a nepovolaných osob.
• Před dlouhodobým skladováním výrobku jej
vyčistěte a proveďte kompletní údržbu.
Likvidace
Symboly na produktu nebo jeho obalu označují, že tento
výrobek nesmí být likvidován jako domácí odpad. Musí
být odevzdán do příslušné recyklační stanice pro
recyklaci elektrických a elektronických zařízení.
Zajištěním odpovídající likvidace tohoto výrobku
pomůžete zabránit potenciálnímu negativnímu dopadu
na životní prostředí a zdraví lidí, který by jinak mohl být
důsledkem nesprávné likvidace tohoto výrobku.
Podrobnější informace o recyklaci tohoto výrobku
získáte na městském úřadě, u služby zajišťující
zpracování domácího odpadu nebo v prodejně, kde jste
výrobek zakoupili.
Nastavení výšky sečení
Baterie na strani 65
.
Nabití baterie na strani 62
.
66
71 - 005 - 18.05.2018

(Obr. 73 )
Technické údaje
Technické údaje LC 141VLi, LC 141Li
LC 141VLi LC 141Li
Motor žacího systému
Typ motoru BLDC (bezkontaktní) 36V BLDC (bezkontaktní) 36V
Otáčky motoru – SavE, ot/min 2700 2700
Otáčky motoru – jmenovité, ot/min 3100 3100
Otáčky motoru – vysoké zatížení, ot/min 3 700 3 700
Výkon motoru – max. kW 0,8 0,8
Výkon motoru – jmenovitý, kW 0,55 0,55
Hnací motor
Výkon motoru – jmenovitý, kW 0,25 Není k dispozici
Rychlost vlastního pojezdu, km/h 3,0–4,5 Není k dispozici
Úrovně rychlosti 4 Není k dispozici
Hmotnost
Hmotnost bez baterie, kg 23,2 20
15
Baterie
Typ baterie Řada baterií Husqvarna Řada baterií Husqvarna
Doba provozu baterie
Provozní doba baterie, min, (volný chod) s aktivovanou
funkcí SavE, s baterií Husqvarna 5,0 Ah.
Provozní doba baterie, min, (volný chod) s aktivovaným
standardním režimem, s baterií Husqvarna 5,0 Ah.
Emise hluku
16
Hladina akustického výkonu, změřená dB (A) 92 92
Hladina akustického výkonu, zaručená LWA dB (A) 94 94
Hladina hluku
17
Hladina akustického tlaku na sluch obsluhy, dB (A) 83 83
Úrovně vibrací
Rukojeť, m/s
18
2
Řezání
Výška sečení, mm 25–70 25–70
50 50
40 40
2,0 2,0
15
Pro dosažení nejlepších výsledků a výkonu se doporučuje použít baterii Husqvarna BLi200.
16
Emise hluku v životním prostředí měřené jako akustický výkon (LWA) v souladu se směrnicí 2000/14/ES.
17
Uváděná data pro hladinu akustického tlaku mají typickou statistickou odchylku (standardní odchylku) 1,2 dB
(A).
18
Uváděná data o úrovni vibrací mají typickou statistickou odchylku (standardní odchylku) 0,2 m/s2.
71 - 005 - 18.05.2018 67

LC 141VLi LC 141Li
Šířka střihu, cm 41 41
Kotouč Collect Collect
Objednací číslo 5011716-10 5011716-10
Objem sběracího koše, l 50 50
Technické údaje LC 141C
LC 141C
Motor
Typ motoru Sériový motor na střídavý proud
Otáčky motoru – jmenovité, ot/min 3200
Výkon 1800 W
Zdroj napájení Elektrický, kabelový
Napájecí kabel (pouze v případě trhu Velké Británie)
Typ kabelu 16m prodlužovací kabel
Hmotnost, kg 1,6
Hmotnost
Hmotnost, kg 22
Emise hluku
Hladina akustického výkonu, změřená dB (A) 94
Hladina akustického výkonu, zaručená LWA dB (A) 96
Hladina hluku
Hladina akustického tlaku na sluch obsluhy, dB (A) 83
Úrovně vibrací
Rukojeť, m/s
Řezání
Výška sečení, mm 25–70
Šířka střihu, cm 41
Kotouč Collect
Objednací číslo 5011716-10
Objem sběracího koše, l 50
19
20
21
2
2,0
19
Emise hluku v životním prostředí měřené jako akustický výkon (LWA) v souladu se směrnicí 2000/14/ES.
20
Uváděná data pro hladinu tlaku zvuku mají typickou statistickou odchylku (standardní odchylku) 1,2 dB (A).
21
Uváděná data o úrovni vibrací mají typickou statistickou odchylku (standardní odchylku) 0,2 m/s2.
68 71 - 005 - 18.05.2018

ES Prohlášení o shodě
ES Prohlášení o shodě
Husqvarna AB, SE–561 82 Huskvarna, Švédsko, tel:
+46-36-146500, prohlašuje, že sekačky na trávu
Husqvarna LC 141VLi a LC 141Li s výrobním číslem
15XXXXXXX a vyšším, splňují požadavky SMĚRNICE
RADY:
• z 8. června 2011 o „omezení používání některých
nebezpečných látek“ 2011/65/EU
• ze 17. května 2006 „týkající se strojních zařízení”
2006/42/EC
• z 26. února 2014 „týkající se elektromagnetické
kompatibility“ 2014/30/EU,
• z 8. května 2000 „týkající se emisí hluku v okolním
prostředí“ 2000/14/ES.
Informace o emisích hluku najdete v kapitole „Technické
údaje“.
Byly uplatněny následující standardní normy:
EN 60335-1:2012+A11:2014, EN 60335-2-77:2010, EN
62233:2008, EN 55014-1:2006/+A1:2009/+A2:2011, EN
55014-2:2015, EN 61000-3-2:2014, EN 61000-3-3:2013
Oznámený subjekt: 0359, Intertek Testing & Certification
Ltd., 58 Jinfeng Road, Yuyao, Zhejiang 315403, P.R.
China provedl vyhodnocení shody podle dodatku VI ke
Směrnici 2000/14/ES a vydal certifikát s číslem: 71225
Huskvarna, 2016-10-31
Byly uplatněny následující standardní normy:
EN 60335-1:2012+A11:2014, EN 60335-2-77:2010, EN
62233:2008, EN 55014-1:2006/+A1:2009/+A2:2011, EN
55014-2:2015, EN 61000-3-2:2014, EN
61000-3-11:2000
Oznámený subjekt: 0499, The Société Nationale de
Certification et d'Homologation s.à r.l. (SNCH)
Luxemburg potvrzuje v souladu s procedurami SNCH,
že výrobce splňuje normy Směrnice 2000/14/ES
přílohy VI, a vydal certifikát s číslem:
SNCH*2000/14*2005/88*2945*00
Huskvarna, 2016-10-31
Claes Losdal, Development Manager/Garden Products
(ředitel vývoje zahradního sortimentu) (Autorizovaný
zástupce společnosti Husqvarna AB a osoba odpovědná
za technickou dokumentaci.)
Claes Losdal, Development Manager/Garden Products
(ředitel vývoje zahradního sortimentu) (Autorizovaný
zástupce společnosti Husqvarna AB a osoba odpovědná
za technickou dokumentaci.)
ES Prohlášení o shodě
Husqvarna AB, SE–561 82 Huskvarna, Švédsko, tel:
+46-36-146500, prohlašuje, že sekačka na trávu
Husqvarna a LC 141C s výrobním číslem 15XXXXXXX
a vyšším splňuje požadavky SMĚRNICE RADY:
• z 8. června 2011 o „omezení používání některých
nebezpečných látek“ 2011/65/EU
• ze 17. května 2006 „týkající se strojních zařízení”
2006/42/EC
• z 26. února 2014 „týkající se elektromagnetické
kompatibility“ 2014/30/EU,
• z 8. května 2000 „týkající se emisí hluku v okolním
prostředí“ 2000/14/ES.
Informace o emisích hluku najdete v kapitole „Technické
údaje“.
71 - 005 - 18.05.2018 69

Indhold
Indledning..................................................................... 70
Sikkerhed......................................................................72
Montering......................................................................79
Drift............................................................................... 80
Vedligeholdelse............................................................ 82
Indledning
Fejlfinding..................................................................... 84
Transport, opbevaring og bortskaffelse........................ 85
Tekniske data............................................................... 86
EU-overensstemmelseserklæring.................................88
Produktbeskrivelse
Produktet er en roterende plæneklipper med gående
fører. Græsset opsamles i en græsopsamler. Fjern
græsopsamleren for at få bagudkast af græsset. Monter
et bioklipsæt (ekstraudstyr), og klip græsset til gødning.
Produktoversigt LC 141VLi/LC 141Li
(Fig. 1 )
1. Motorbremsehåndtag
2. Startspærre
3. Bøjle til fremtræk (LC 141VLi)
4. Håndtag / styrestang
5. Betjeningspanel
6. ON/OFF-knap
7. SavE-knap
8. Batteriindikatorknap
9. Batteriopladningsindikator
10. Advarselsindikator (FEJL-LED)
11. Hastighedsreduktions-knap (LC 141VLi)
12. Hastighedsniveauindikator (LC 141VLi)
13. Hastighedsforøgelsesknap (LC 141VLi)
Produktoversigt LC 141C
(Fig. 2 )
1. Motorbremsehåndtag
2. Startspærre
3. Netledningsstik
4. Netledningsholder
5. Håndtag / styrestang
6. Bageste dæksel
7. Symboler
8. Klippeskjold
9. Typeskilt
10. Klippehøjdehåndtag
11. Findelerblænde (tilbehør)
12. Græsopsamler
13. Brugervejledning
Anvendelsesformål
Brug produktet til græsklipning i private haver. Brug ikke
produktet til andre opgaver.
14. Bageste dæksel
15. Symboler
16. Batterilåg
17. Sikkerhedsnøgle
18. Klippeskjold
19. Klippehøjdehåndtag
20. Typeskilt
21. Græsopsamler
22. Findelerblænde til LC 141VLi (tilbehør)
23. Findelerblænde til LC 141Li (tilbehør)
24. Batterioplader (tilbehør)
25. Batteri (tilbehør)
26. Brugervejledning
Symboler på produktet
Personskade eller død
kan forekomme hos
brugeren eller personer i
nærheden, hvis produktet
ikke anvendes forsigtigt
(Fig. 3 )
og korrekt.
Læs brugsanvisningen,
(Fig. 4 )
og sørg for at have
70 71 - 005 - 18.05.2018

(Fig. 5 )
(Fig. 6 )
(Fig. 7 )
(Fig. 8 )
(Fig. 9 )
(Fig. 10 )
(Fig. 11 )
forstået indholdet, inden
du bruger dette produkt.
Hold uvedkommende
personer og dyr på sikker
afstand af arbejdsstedet.
Pas på udslyngede
genstande og
rikochettering.
Advarsel: Hold hænder
og fødder på sikker
afstand af den roterende
klinge.
Advarsel: Hold hænder
og fødder på sikker
afstand af bevægelige
dele.
Tag sikkerhedsnøglen ud,
før der foretages
vedligeholdelse af
produktet. (model
LC 141VLi/LC 141Li)
Afbryd produktet fra
stikkontakten, før du
udfører vedligeholdelse
på produktet. (model
LC 141C)
IPX1 - Produktet er
beskyttet mod dryppende
vand (model LC 141VLi/
LC 141Li)
(Fig. 13 )
(Fig. 14 )
(Fig. 15 )
(Fig. 16 )
(Fig. 17 )
(Fig. 18 )
(Fig.
19 )
Lad ikke regn falde på
produktet (model
LC 141VLi/LC 141Li)
Advarsel: Kør ikke
produktet hen over
strømkablet, da dette kan
medføre elektrisk stød
eller beskadigelse af
produktet. (model
LC 141C)
Dette produkt er i
overensstemmelse med
gældende CE-direktiv.
Støjemissioner til
omgivelserne i henhold til
EF-direktiv. Produktets
emission fremgår af
kapitlet Tekniske data og
af mærkaten.
Jævnstrøm. 36 V
Dobbelt isolering.
Aflever produktet på en genbrugsstation for
elektrisk og
elektronisk udstyr. (Gælder
kun Europa)
IPX4 - Produktet er
beskyttet mod vandstænk
(Fig. 12 )
71 - 005 - 18.05.2018 71
(model LC 141C)

(Fig.
20 )
Startprocedure
for model
LC 141VLi/
LC 141Li: Tryk
på ON/OFFknappen, løsn
startspærren,
tryk motorbremsehåndtaget ned.
Startprocedure for model
LC 141C: Løsn
startspærren, tryk
motorbremsehåndtaget
(Fig. 21 )
ned.
Slip
motorbremsehåndtaget
(Fig. 22 )
(Fig. 23 )
(Fig. 24 )
Bemærk: Andre symboler/mærkater på produktet
henviser til certificeringskrav på visse markeder.
for at stoppe.
Langsomt
Hurtigt
Symboler på batteriet og/eller på batteriopladeren
(Fig.
25 )
Aflever produktet på en genbrugsstation for
elektrisk og
elektronisk udstyr. (Gælder
kun Europa)
(Fig. 26 )
Fejlsikker transformer.
Brug og opbevar kun
batteriopladeren
(Fig. 27 )
(Fig. 28 )
Produktansvar
Som nævnt i produktansvarsbestemmelserne hæfter vi
ikke for skader forårsaget af vores produkt, hvis:
• produktet er forkert repareret
• produktet er repareret med dele, der ikke er fra
• produktet har tilbehør, der ikke er fra producenten
• produktet ikke er repareret på et godkendt
indendørs.
Dobbelt isolering.
producenten eller ikke er godkendt af producenten
eller ikke er godkendt af producenten.
servicecenter eller af en godkendt myndighed.
Sikkerhed
Sikkerhedsdefinitioner
Advarsler, forholdsregler og bemærkninger bruges til at
pege på særligt vigtige dele af brugsanvisningen.
ADVARSEL: Bruges, hvis føreren udsætter
sig selv eller omkringstående personer for
risiko for personskade eller dødsfald ved
tilsidesættelse af instruktionerne i
brugsanvisningen.
BEMÆRK: Bruges, hvis der er risiko for
skader på produktet, andre materialer eller
det omgivende område ved tilsidesættelse
af instruktionerne i brugsanvisningen.
Bemærk: Bruges til at give yderligere oplysninger, der er
nødvendige i en given situation.
Generelle sikkerhedsinstruktioner
ADVARSEL: Læs følgende
advarselsinstruktioner, inden du bruger
produktet.
•
Dette produkt er farligt, hvis
det bruges forkert, eller hvis
du ikke er forsigtig.
Personskade eller dødsfald
72 71 - 005 - 18.05.2018
kan forekomme, hvis du ikke
overholder
sikkerhedsinstruktionerne.
•
Dette produkt danner et
elektromagnetisk felt under
drift. Dette felt kan i nogle
tilfælde påvirke aktive eller
passive medicinske
implantater. For at reducere
risikoen for alvorlige eller
dødbringende kvæstelser
anbefaler vi, at personer med
medicinske implantater
kontakter deres læge og
producenten af det medicinske
implantat, før de tager
produktet i brug.
•
Vær altid forsigtig, og brug din
sunde fornuft. Hvis du ikke er
sikker på, hvordan produktet
betjenes en særlig situation:
Stop, og kontakt Husqvarna
forhandleren, inden du
fortsætter.
•
Vær opmærksom på, at
føreren er ansvarlig for
ulykker, der involverer andre
personer eller disses ejendom.
•
Hold produktet rent. Sørg for,
at skilte og mærkater er
tydeligt læsbare.
•
Lad ikke en person bruge
produktet, medmindre du er
sikker på, at vedkommende
har læst og forstået indholdet i
denne brugsanvisning.
•
Lad ikke børn betjene
produktet.
•
Lad ikke en person uden
kendskab til vejledningen
betjene produktet.
•
Hold altid øje med personer
med nedsat fysisk eller mental
kapacitet, der bruger
produktet. En voksen skal
være til stede hele tiden.
•
Brug ikke produktet, hvis du er
træt, syg eller påvirket af
alkohol, narkotika eller
medicin. Det har en negativ
virkning på synet, overblikket,
koordinationsevnen og
dømmekraften.
•
Brug ikke produktet, hvis det
er fejlbehæftet.
•
Foretag ikke ændringer på
produktet, og undlad af bruge
det, hvis der er risiko for, at
det er blevet ændret af andre.
Sikkerhed i arbejdsområdet
ADVARSEL:
advarselsinstruktioner, inden du bruger
produktet.
•
Fjern genstande såsom grene,
Læs følgende
kviste og sten fra
arbejdsområdet, inden du
bruger produktet.
•
Genstande, som rammer
skæreudstyret, kan udslynges
og forårsage person- og
tingskade. Hold
omkringstående personer og
71 - 005 - 18.05.2018
73

dyr på sikker afstand af
produktet.
•
Undlad at bruge produktet i
dårligt vejr, som f.eks. tåge,
regn, hård vind, kraftig kulde
og ved risiko for lynnedslag.
Det kan være trættende at
bruge produktet i dårligt vejr
eller i fugtige eller våde
områder. Dårligt vejr kan
medføre farlige forhold, f.eks.
glatte underlag.
•
Pas på personer, genstande
og situationer, som kan
forhindre sikker brug af
produktet.
•
Pas på forhindringer som
f.eks. rødder, sten, kviste,
huller og grøfter. Langt græs
kan skjule hindringer.
•
Det kan være farligt at klippe
græs på skråninger. Brug ikke
produktet på skråninger, der
hælder mere end 15°.
•
Lad produktet køre på tværs af
skråninger. Kør ikke op og
ned.
•
Vær forsigtig, når du nærmer
dig uoverskuelige hjørner og
genstande, som blokerer for
udsynet.
Arbejdssikkerhed
ADVARSEL:
advarselsinstruktioner, inden du bruger
produktet.
Læs følgende
•
Brug kun produktet til
græsslåning. Det er ikke tilladt
at bruge det til andre opgaver.
•
Bær personligt
beskyttelsesudstyr. Se
Personligt beskyttelsesudstyr
på side 75
•
Betjen ikke produktet i regn
.
eller våde omgivelser.
Risikoen for elektriske stød
øges, hvis der trænger vand
ind i produktet.
•
Betjen ikke produktet,
medmindre klingen og alle
afskærmninger er monteret
korrekt. En forkert monteret
klinge kan løsne sig og
forårsage personskade.
•
Sørg for, at klingen ikke
rammer genstande som f.eks.
sten og rødder. Det kan
beskadige klingen og bøje
motorakslen. En bøjet aksel
giver kraftige vibrationer og
stor risiko for, at kniven løsner
sig.
•
Hvis kniven rammer en
genstand, eller der opstår
vibrationer, skal du straks
standse produktet. Stands
motoren, drej
sikkerhedsnøglen til 0, og fjern
batteriet (model LC 141VLi og
LC 141Li), eller frakobl
strømkablet (model LC 141C).
Undersøg, om produktet er
74
71 - 005 - 18.05.2018

blevet beskadiget. Reparer
skader, eller lad et autoriseret
serviceværksted udføre
reparationen.
•
Fastgør aldrig
motorbremsehåndtaget
permanent på styret, når
motoren er startet.
•
Anbring produktet på et stabilt,
fladt underlag, og start det.
Sørg for, at kniven ikke
rammer jorden eller andre
genstande.
•
Hold dig altid bag produktet,
mens du betjener det.
•
Lad alle hjulene blive på
jorden, og hold 2 hænder på
styret, når du betjener
produktet. Hold hænder og
fødder på sikker afstand af de
roterende klinger.
•
Tip ikke produktet, når
motoren er startet.
•
Vær forsigtig, når du trækker
produktet baglæns.
•
Løft aldrig produktet, når
motoren er startet. Hvis du
skal løfte produktet, skal du
først stoppe motoren, dreje
sikkerhedsnøglen til 0 og
fjerne batteriet (model
LC 141VLi og LC 141Li) eller
frakoble strømkablet (model
LC 141C).
•
Gå ikke baglæns, når du
bruger produktet.
•
Stands motoren, når du
bevæger dig hen over
områder uden græs, f.eks.
stier med grus, sten og asfalt.
•
Undlad at køre med produktet,
når motoren er startet. Gå altid
fremad, når du bruger
produktet.
•
Stands motoren, inden du
ændrer klippehøjden. Foretag
aldrig justeringer, når motoren
er startet.
•
Efterlad aldrig produktet uden
opsyn, når motoren er startet.
Stands motoren, og sørg for,
at skæreudstyret ikke roterer.
Sikkerhedsinstruktioner for drift
Personligt beskyttelsesudstyr
ADVARSEL: Læs følgende
advarselsinstruktioner, inden du bruger
produktet.
•
Personligt beskyttelsesudstyr
udelukker ikke fuldstændigt
risikoen for personskader,
men det mindsker graden af
skaderne i tilfælde af, at der
skulle ske en ulykke. Lad
forhandleren hjælpe dig med
at vælge det rigtige udstyr.
•
Brug kraftige, skridsikre
støvler eller sko. Brug ikke
åbne sko, og gå heller ikke på
bare fødder.
•
Brug kraftige, lange bukser.
•
Brug om nødvendigt
beskyttelseshandsker, f.eks.
71 - 005 - 18.05.2018
75

ved montering, eftersyn eller
rengøring af skæreudstyret.
Sikkerhedsanordninger på produktet
ADVARSEL: Læs følgende
advarselsinstruktioner, inden du bruger
produktet.
3. Sæt løkken rundt om krogen.
4. Træk i netledningen for at stramme løkken rundt om
krogen.(Fig. 32 )
Batterisikkerhed
ADVARSEL: Læs følgende
advarselsinstruktioner, inden du bruger
produktet.
• Brug ikke et produkt med defekte
sikkerhedsanordninger.
• Kontrollér sikkerhedsanordningerne regelmæssigt.
Hvis sikkerhedsanordningerne er defekte, skal du
henvende dig til dit Husqvarna-serviceværksted.
Klippeskjold
• Undersøg klippeskjoldet for at sikre, at der ikke er
skader såsom revner.
Motorbremsehåndtag
Motorbremsehåndtaget standser motoren. Når
motorbremsehåndtaget slippes, standser motoren.
Ved kontrol af motorbremsen startes motoren, hvorefter
motorbremsehåndtaget slippes. Hvis motoren ikke
standser inden for 3 sekunder, skal et godkendt
Husqvarna-serviceværksted justere motorbremsen.
(Fig. 29 )
Sikkerhedsnøgle (model LC 141VLi og LC 141Li)
Sikkerhedsnøglen er under batterilåget.
Sikkerhedsnøglen forbinder det batteri, der forsyner
motoren med strøm.
• Start og stop motoren for at kontrollere
sikkerhedsnøglen.
• Hvis sikkerhedsnøglen fungerer korrekt, starter
motoren kun, når nøglen er i position 1.
(Fig. 30 )
Sådan efterses startspærren
Efterse startspærren for at sikre, at den forhindrer drift af
motoren.
1. Træk motorbremsehåndtaget i retning mod styret.
Startspærren standser bevægelsen.
2. Skub startspærren ud.(Fig. 31 )
3. Slip startspærren, og sørg for, at den returnerer til
udgangspositionen.
Sådan bruges netledningsholderen (model LC 141C)
Netledningsholderen reducerer belastningen på
strømstikket og strømkablet. Netledningsholderen
mindsker også risikoen for, at du falder.
1. Bøj strømkablet, så det danner en smal løkke.
2. Sæt løkken ind i hullet i netledningsholderen.
•
Brug kun genopladelige
Husqvarna-batterier som
strømforsyning til relaterede
Husqvarna-produkter. For at
undgå personskade, må
batteriet ikke anvendes som
strømforsyning til andre
produkter.
•
Undgå at bruge ikkegenopladelige batterier.
•
Risiko for elektrisk stød. Tilslut
ikke batteripolerne til nøgler,
mønter, skruer eller andre
metalgenstande. Dette kan
medføre en kortslutning af
batteriet.
•
Sæt ikke genstande ind i
batteriets luftspalte.
•
Hold batteriet væk fra sollys,
varme og åben ild. Batteriet
kan eksplodere og medføre
forbrændinger og/eller
kemiske forbrændinger.
•
Hold batteriet væk fra regn og
våde omgivelser.
•
Hold batteriet væk fra
mikrobølger og højt tryk.
•
Forsøg ikke at skille batteriet
ad eller ødelægge det.
76
71 - 005 - 18.05.2018

•
Hvis batteriet lækker, skal du
sørge for, at væsken ikke
kommer i kontakt med hud
eller øjne. Ved berøring af
væsken skal området skylles
med en stor mængde vand, og
opsøg derefter lægehjælp.
•
Brug batteriet i temperaturer
mellem -10 °C og 40 °C.
•
Batteriet eller batteriopladeren
må aldrig rengøres med vand.
Se
Sådan rengøres batteriet
og batteriopladeren på side
83
.
•
Brug ikke et defekt eller
beskadiget batteri.
•
Opbevar batterierne væk fra
metalgenstande som f.eks.
søm, mønter og smykker.
Batteriopladersikkerhed
ADVARSEL:
advarselsinstruktioner, inden du bruger
produktet.
•
Brug udelukkende QC-
Læs følgende
batteriopladerne til at oplade
udskiftelige Husqvarnabatterier.
•
Minimér risikoen for elektrisk
stød eller kortslutning. Sæt
ikke genstande ind i
opladerens luftspalte. Forsøg
aldrig at adskille
batteriopladeren. Forbind ikke
batteriopladerens poler med
metalgenstande. Brug en
godkendt stikkontakt.
•
Dette produkt danner et
elektromagnetisk felt under
drift. Dette felt kan i nogle
tilfælde påvirke aktive eller
passive medicinske
implantater. For at reducere
risikoen for alvorlige eller
dødbringende kvæstelser
anbefaler vi, at personer med
medicinske implantater
kontakter deres læge og
producenten af det medicinske
implantat, før de tager
produktet i brug.
•
Undersøg regelmæssigt, at
ledningen til batteriopladeren
er intakt, og at der ikke er
revner i den.
•
Løft aldrig batteriopladeren
ved hjælp af ledningen. Træk
stikket ud for at afbryde
batteriopladeren fra
stikkontakten. Træk ikke i
ledningen.
•
Hold strømledningen og
forlængerledninger væk fra
vand, olie og skarpe kanter.
Sørg for, at ledningen ikke
bliver klemt i døre, hegn eller
lignende. Det kan medføre, at
opladeren bliver strømførende.
•
Batteriopladeren må aldrig
rengøres med vand.
•
Batteriopladeren kan bruges af
børn fra 8 år og opad samt af
personer med nedsatte
71 - 005 - 18.05.2018
77

fysiske, følelsesmæssige eller
mentale evner eller manglede
erfaring og viden, hvis de er
under opsyn eller har
modtaget træning i brugen af
batteriopladeren på en sikker
måde og forstår farerne, der er
forbundet med brugen. Børn
må ikke lege med
batteriopladeren. Rengøring
og vedligeholdelse må ikke
udføres af børn uden
overvågning.
•
Ikke-genopladelige batterier
må ikke oplades i
batteriopladeren.
•
Brug ikke batteriopladeren i
nærheden af brandfarlige
materialer eller materialer, der
kan medføre korrosion.
Batteriopladeren må ikke
tildækkes. I tilfælde af
røgafgivelse eller brand skal
batteriopladeren afbrydes fra
stikkontakten.
•
Brug ikke defekte eller
beskadigede batteriopladere.
•
Oplad kun batteriet indendørs i
et rum med god ventilation og
beskyttet mod direkte sollys.
Oplad ikke batteriet under
våde forhold.
Sikkerhed for netledning
Til model LC 141C.
•
Det anbefales at bruge en
fejlstrømsafbryder (Residual
Current Device, RCD), der
udløses ved en modstand på
ikke over 30 mA. Selv om der
er installeret en
fejlstrømsafbryder, er
sikkerheden ikke garanteret
100 %, og der skal altid
anvendes sikre
arbejdsprocedurer. Udfør en
kontrol af fejlstrømsafbryderen
hver gang den bruges.
•
Hvis netledningen overskæres
eller isoleringen bliver
beskadiget, skal apparatet
kobles fra med det samme.
•
Rør ikke en overskåret eller
beskadiget netledning, før
strømmen er koblet fra.
•
Reparer aldrig en overskåret
eller beskadiget netledning.
Udskift den med en ny.
Sikkerhedsinstruktioner for vedligeholdelse
ADVARSEL:
advarselsinstruktioner, inden du bruger
produktet.
•
For modeller LC 141VLi og
Læs følgende
LC 141Li: For at undgå
utilsigtet start i forbindelse
med vedligeholdelse, skal du
dreje sikkerhedsnøglen til 0 og
fjerne batteriet. Vent i mindst 5
sekunder, før du påbegynder
vedligeholdelse.
•
For model LC 141C: For at
forhindre utilsigtet start under
78
71 - 005 - 18.05.2018

vedligeholdelse skal
strømkablet frakobles.
•
Udfør vedligeholdelsesarbejde
korrekt for at øge levetiden for
produktet og mindske risikoen
for ulykker. Lad et godkendt
serviceværksted udføre
professionelle reparationer.
Kontakt dit nærmeste
serviceværksted for at få flere
oplysninger.
•
Foretag kun den form for
vedligeholdelsesarbejde, der
er angivet i denne
brugsanvisning. Mere
omfattende arbejde skal
udføres af et godkendt
serviceværksted.
•
Ifør dig kraftige handsker, når
du anvender skæreudstyret.
Klingen er meget skarp, og du
kan nemt komme til at skære
dig.
•
Hold klingerne skarpe og rene
for at sikre den bedst mulige
ydeevne.
•
Lad jævnligt
serviceværkstedet efterse
produktet og foretage de
nødvendige justeringer og
reparationer.
•
Udskift beskadigede, slidte
eller defekte dele.
•
Følg vejledningen for, hvordan
du udskifter tilbehør. Brug kun
tilbehør fra producenten.
•
Når de ikke er i drift, skal du
holde produktet, batteriet og
batteriopladeren adskilt et tørt,
indendørs og aflåst sted. Sørg
for, at børn og personer, som
ikke er godkendt, ikke kan få
adgang til produktet, batteriet
eller batteriopladeren.
Montering
Indledning
ADVARSEL: Før du samler produktet, skal
du læse sikkerhedskapitlet.
ADVARSEL: For modeller LC 141VLi og
LC 141Li: For at undgå utilsigtet start under
monteringen, skal du dreje
sikkerhedsnøglen til 0, fjerne batteriet og
vente i mindst 5 sekunder.
For model LC 141C: For at forhindre
utilsigtet start under monteringen, skal du
frakoble strømkablet.
71 - 005 - 18.05.2018 79
Sådan samles styret
1. Juster hullerne på styret med hullerne i det nederste
håndtag, og monter skruerne, skiver og knopper.
Spænd skruehåndtagene hårdt.(Fig. 33 )
2. Fastgør kablerne til styret med kabelholderne.(Fig.
34 )
Bemærk: Sørg for, at opspændingen af kablerne
ikke er for høj. For høj en spænding kan beskadige
kablet, hvis håndtaget er foldet op i transportposition.
3. Anbring kablerne omkring krogen i bunden af styret.
(Fig. 35 )
Sådan justeres håndtagets højde
1. Løsn de nederste skruehåndtag.(Fig. 36 )
2. Fjern grebet, skiven og skruen på venstre og højre
side.
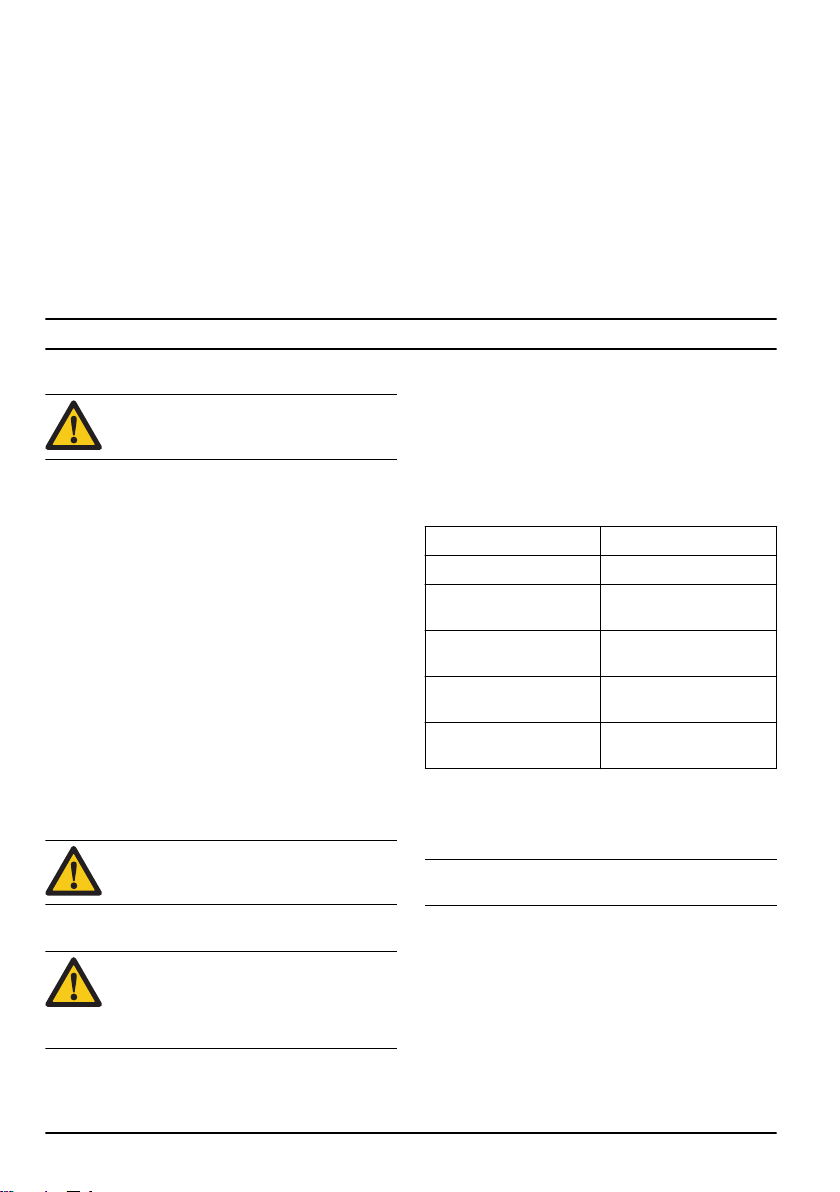
3. Styret kan indstilles til 2 forskellige højder. Sæt
skruen i et af de 2 huller i venstre og højre side.(Fig.
37 )
4. Fastgør skruer, skiver og skruehåndtag.
5. Flyt grebene op i retning af håndtaget, indtil de
stopper, og der høres et klik. Spænd
skruehåndtagene hårdt.(Fig. 38 )
Sådan samles græsopsamleren
1. Tryk de 2 transportdæksler udad og nedad.(Fig. 39 )
2. Fastgør græsopsamlerens øverste del til
græsopsamlerens nederste del. Fastgør
græsopsamlerens ramme med clipsene.(Fig. 40 )
3. Løft det bageste dæksel.
4. Sæt græsopsamlerens kroge på chassisets øverste
kant.(Fig. 41 )
Sådan samles findelersættet
1. Løft det bageste dæksel, og fjern græsopsamleren.
2. Sæt findelerblænden i græsudkastkanalen.
Findelerblænden for type A er til LC 141Li og
LC 141C. Type B er til LC 141VLi.(Fig. 42 )
3. Luk bagafdækningen.
4. Udskift kniven med combi-kniven, se
og udskiftes klingen på side 83
.
Drift
Sådan fjernes
Indledning
ADVARSEL: Før du bruger produktet, skal
du læse og forstå kapitlet om sikkerhed.
Sådan sættes produktet i driftsstilling
Hvis håndtaget er i transport- og opbevaringsposition
(se
Sådan sættes produktet i transportposition på side
85
), skal nedenstående fremgangsmåde følges for at
sætte håndtaget i driftsposition.
1. Løft håndtaget, indtil det nederste håndtag låses fast
i driftsposition.(Fig. 43 )
2. Flyt de nedre greb op i retning af håndtaget, indtil de
stopper, og der høres et klik.(Fig. 44 )
3. Spænd grebene.
4. Løft det øverste håndtag, og spænd grebene.(Fig.
45 )
Sådan indstilles klippehøjden
1. Flyt klippehøjdehåndtaget bagud for at øge
klippehøjden.
2. Flyt klippehøjdehåndtaget fremad for at mindske
klippehøjden.(Fig. 46 )
BEMÆRK: Indstil ikke klippehøjden for lavt.
Knivene kan ramme jorden, hvis
græsplænens overflade ikke er jævn.
Batteri
ADVARSEL:
læse og sætte dig ind i kapitlet om
sikkerhed. Du skal også læse og sætte dig
ind i brugsanvisningen for batteriet og
batteriopladeren.
Inden brug af produktet skal du
Batteristatus
Displayet viser batteriets resterende batterikapacitet, og
om der er problemer med batteriet. Batterikapaciteten
vises i 5 sekunder, efter at produktet er slukket, eller
batteriindikatorknappen er trykket ned.
Advarselssymbolet på batteriet er tændt, når der er sket
en fejl. Se
(Fig. 47 )
LED-lys Batteristatus
Alle LED'er er tændt Fuldt opladet (75-100 %)
LED 1, LED 2 og LED 3 er
tændt
LED 1 og LED 2 er tændt Batteriet er opladet 25-50
LED 1 er tændt Batteriet er opladet 0-25
LED 1 blinker Batteriet er afladet. Oplad
Batteri på side 84
.
Batteriet er opladet 50-75
%
%
%.
batteriet.
Sådan oplades batteriet
Oplad batteriet, inden første ibrugtagning. Batteriet er
kun 30 % opladet, når det leveres til kunden.
Bemærk: Batteriopladeren skal tilsluttes til den
spænding og frekvens, der fremgår af typeskiltet.
Batteriet oplades ikke, hvis batteriets temperatur er over
50 °C. Batteriopladeren sænker batteriets temperatur,
før det begynder at oplade.
1. Forbind den ene ende af ledningen til
batteriopladeren til stikket på batteriopladeren.
2. Forbind den anden ende af ledningen til
batteriopladeren til en jordet stikkontakt. LED'en på
batteriopladeren blinker grønt én gang.(Fig. 48 )
80
71 - 005 - 18.05.2018

3. Isæt batteriet i batteriopladeren. Den grønne lampe
på opladeren lyser, når batteriet er korrekt forbundet
med batteriopladeren.(Fig. 49 )
4. Når alle LED'erne på batteriet er tændt, er batteriet
fuldt opladet. Oplad batteriet i maks. 24 timer.
5. For at afbryde batteriopladeren fra stikkontakten,
skal du trække i stikket, ikke i ledningen.
6. Fjern batteriet fra batteriopladeren.
Batteriets ladestatus
Et Husqvarna-li-ion-batteri kan oplades eller bruges på
alle opladningsniveauer. Batteriet er ikke beskadiget. Et
fuldt opladet batteri vil ikke aflades, når batteriet
efterlades i opladeren.
LED-display Ladestatus
LED 1 blinker 0 %-25 %
LED 1 er tændt, LED 2
blinker
LED 1, LED 2 er tændt,
LED 3 blinker
LED 1, LED 2, LED 3 er
tændt, LED 4 blinker
LED 1, LED 2, LED 3,
LED 4 er tændt
25 %-50 %
50 %-75 %
75 %-100 %
Fuldt opladet
Sådan betjenes LC 141VLi og LC 141Li
Sådan startes produktet
1. Isæt et opladet batteri i batterirummet.
2. Drej sikkerhedsnøglen til 1.(Fig. 50 )
3. Stil dig bag produktet.
4. Tryk på ON/OFF-knappen (A) på betjeningspanelet,
og den grønne LED (B) tænder.(Fig. 51 )
5. Løsn startspærren.(Fig. 52 )
6. Skub bøjlen til fremtrækket i retning mod styret.(Fig.
53 )
Sådan bruges hjulenes fremtræk
• Model LC 141VLi. Træk bøjlen til fremtrækket i
retning af styret for at starte drevet.(Fig. 54 )
• Tryk på + og - på betjeningspanelet for at indstille
kørehastigheden i 4 trin.(Fig. 55 )
• Slip bøjlen til fremtrækket for at frakoble det, f.eks.
når du nærmer dig en forhindring.
Sådan bruges SavE-funktionen
Produktet har en batterisparefunktion (SavE), der giver
længere driftstid.
1. Tryk på SavE-knappen (A) for at starte funktionen.
Den grønne LED tænder.(Fig. 56 )
2. Tryk på SavE-knappen igen for at standse
funktionen. Den grønne LED (B) slukker.
SavE-funktionen standser automatisk, hvis
terrænforholdene gør det nødvendigt at have en højere
effekt. SavE-funktionen starter automatisk, når
terrænforholdene gør det muligt.
Høj belastningsfunktion
Når produktet klipper langt eller vådt græs, øger
motoren automatisk o/min. Motoren skifter tilbage til
standardtilstand, når høj belastning ikke er nødvendigt.
Sådan standses produktet
Produktet standser automatisk, hvis du ikke betjener det
i 10 minutter. Drej altid sikkerhedsnøglen til 0, før du
efterlader produktet uden opsyn.
1. Slip motorbremsehåndtaget for at standse motoren.
(Fig. 57 )
2. Tryk på ON/OFF-knappen (A) på betjeningspanelet,
og den grønne LED (B) slukkes.(Fig. 58 )
3. Åbn batterilåget, og drej sikkerhedsnøglen til 0.(Fig.
59 )
4. Fjern batteriet ved at trykke på de 2 udløserknapper
og trække batteriet ud.(Fig. 60 )
5. Oplad batteriet, hvis det er svagt. Se
batteriet på side 80
for yderligere information.
Sådan oplades
Sådan betjenes LC 141C)
Sådan vælges et godkendt kabel (LC 141C)
Bemærk:
det medfølgende 16M-forlængerkabel. Se
nedenstående information for alle andre markeder.
Hvis der anvendes forlængerledninger, skal disse
opfylde minimumskravene til tværsnit i tabellen
nedenfor:
• Netledninger og forlængerledninger fås hos det
• Brug kun forlængerledninger, der er specifikt
• Hvis ledningen er beskadiget, skal den udskiftes af
Til det britiske marked må der kun anvendes
Spænding
220-240 V / 50HzOp til 20 m 1,5 mm
220-240 V / 50Hz20–50 m 2,5 mm
lokale godkendte serviceværksted for Husqvarna
udendørs produkter.
beregnet til udendørsbrug, og som opfylder en af
følgende specifikationer: Almindeligt gummi (60245
IEC 53), almindeligt PVC (60227 IEC 53) eller
almindeligt PCP (60245 IEC 57)
producenten, dennes serviceværksted eller
tilsvarende kvalificerede fagfolk for at undgå enhver
risiko.
Kabellængde Tværsnit
2
2
71 - 005 - 18.05.2018
81
Sådan startes produktet
1. Tilslut en netledning til stikket under håndtaget.(Fig.
61 )
2. Anbring netledningen i netledningsholderen. Se
Sådan bruges netledningsholderen (model LC 141C)
på side 76
3. Stil dig bag produktet.
4. Løsn startspærren.(Fig. 63 )
5. Skub bøjlen til fremtrækket i retning mod styret.(Fig.
64 )
.(Fig. 62 )
Sådan standses produktet
1. Slip motorbremsehåndtaget for at standse motoren.
(Fig. 65 )
2. Frakobl strømkablet fra stikkontakten, og derefter fra
produktet.(Fig. 66 )
Vedligeholdelse
BEMÆRK: Træk stikket lige ud. Træk
ikke i ledningen.
Sådan opnår du et godt resultat
• Sørg altid for, at klingen er skarp. En sløv klinge
giver et uregelmæssigt resultat, og græssets
snitflade bliver gul. En skarp klinge bruger desuden
mindre energi end en sløv klinge.
• Klip aldrig mere end ⅓ af græssets længde. Klip
først med klippehøjden indstillet højt. Efterse
resultatet, og sænk derefter klippehøjden til det
ønskede niveau. Hvis græsset er meget højt, skal du
køre langsomt og om nødvendigt klippe 2 gange.
• Klip i forskellige retninger hver gang for at undgå
striber i græsplænen.
Indledning
ADVARSEL: Inden der foretages
vedligeholdelse, skal du læse og forstå
kapitlet om sikkerhed.
Alt service- og reparationsarbejde på produktet kræver
specialuddannelse. Vi garanterer faglig korrekt
reparation og service. Hvis forhandleren ikke er et
serviceværksted, kan vedkommende oplyse om
nærmeste serviceværksted.
LC 141VLi, LC 141Li og LC 141C
Foretag et generelt eftersyn. X
Rengør produktet. X
Kontrollér startspærren*. X
Sørg for, at sikkerhedsanordningerne på produktet ikke er defekte*. X
Efterse skæreudstyret. X
Efterse klippeskjoldet*. X
Kontrollér motorbremsehåndtaget*. X
Kun LC 141VLi og LC 141Li
Sørg for, at ON/OFF-knappen fungerer korrekt og ikke er defekt. X
Efterse batteriet for skader. X
Kontrollér batteriopladeren. X
Vedligeholdelsesskema
Vedligeholdelsesintervallerne er fastlagt baseret på
daglig brug af produktet. Intervallerne ændres, hvis
produktet ikke bruges dagligt.
For vedligeholdelse identificeret med * henvises til
Sikkerhedsanordninger på produktet på side 76
Hver dag Ugentligt
Hver dag Ugentligt
.
Måned-
ligt
Måned-
ligt
82 71 - 005 - 18.05.2018
Kun LC 141VLi og LC 141Li
Sørg for, at udløserknapperne på batteriet fungerer korrekt, og at batteriet låses
på plads i produktet.
Efterse batteriopladeren for skader, og sørg for, at den fungerer korrekt. X
Efterse forbindelserne mellem batteriet og produktet. Efterse også forbindelsen
mellem batteriet og batteriopladeren.
Hver dag Ugentligt
X
Måned-
ligt
X
Sådan udføres et generelt eftersyn
• Sørg for, at møtrikker og skruer på produktet er
spændt.
• Sørg for, at ledningerne på produktet ikke er placeret
på en måde, så de kan blive beskadiget.
Sådan rengøres produktet
• Rengør plasticdele med en ren og tør klud.
• Brug ikke vand til rengøring af produktet. Vand kan
trænge ind i batteriet eller motoren og forårsage
kortslutning eller beskadigelse af produktet.
• Brug ikke en højtryksrenser til at rengøre produktet.
• Sprøjt aldrig vand direkte på motoren.
• Brug en børste til at fjerne blade, græs og snavs.
Sådan rengøres batteriet og batteriopladeren
BEMÆRK: Batteriet eller batteriopladeren
må aldrig rengøres med vand.
• Sørg for, at batteriet og opladeren er rene og tørre,
før du sætter batteriet i batteriopladeren.
• Rengør batteriets poler med trykluft eller med en
blød og tør klud.
• Rens overfladerne på batteriet og batteriladeren med
en blød og tør klud.
Sådan efterses skæreudstyret
ADVARSEL: For modeller LC 141VLi og
LC 141Li: For at undgå utilsigtet start, skal
du dreje sikkerhedsnøglen til 0, fjerne
batteriet og vente i mindst 5 sekunder.
For model LC 141C: For at forhindre
utilsigtet start, skal du frakoble strømkabel.
ADVARSEL: Brug handsker, når du udfører
vedligeholdelse på skæreudstyret. Klingen
er meget skarp, og du kan nemt komme til at
skære dig.
1. Efterse skæreudstyret for skader eller revner. Udskift
altid skæreudstyret, hvis det er beskadiget.
2. Kig på klingen for at se, om den er beskadiget eller
sløv.
Bemærk: Kniven skal afbalanceres, efter den er blevet
slebet. Lad et servicecenter skærpe, udskift og
afbalancere klingen. Hvis du rammer en forhindring, der
får produktet til at standse, udskiftes den beskadigede
klinge. Lad servicecenteret vurdere, om klingen kan
files, eller om den skal udskiftes.
Sådan fjernes og udskiftes klingen
1. Lås klingen med en træklods.(Fig. 67 )
2. Fjern klingebolten.
3. Afmonter klingen.
4. Efterse klingeophæng og klingebolt for at se, om der
er skader.
5. Efterse motorakslen for at sikre, at den ikke er bøjet.
6. Når du sætter den nye klinge på, skal klingens ender
pege i retning af klippeskjoldet.(Fig. 68 )
7. Sørg for, at klingen flugter med motorakslens
centrum.
8. Lås klingen med en træklods. Montér fjederskiven,
og spænd bolten og skiven med et
tilspændingsmoment på 20 Nm.(Fig. 69 )
9. Træk klingen rundt pr. håndkraft, og kontrollér, at
den drejer frit.
ADVARSEL:
Klingen er meget skarp, og du kan nemt
komme til at skære dig.
10. Start produktet for at afprøve klingen. Hvis skiven
ikke er korrekt fastgjort, forekommer der vibrationer i
produkt, eller klipperesultatet bliver utilfredsstillende.
Brug sikkerhedshandsker.
71 - 005 - 18.05.2018
83
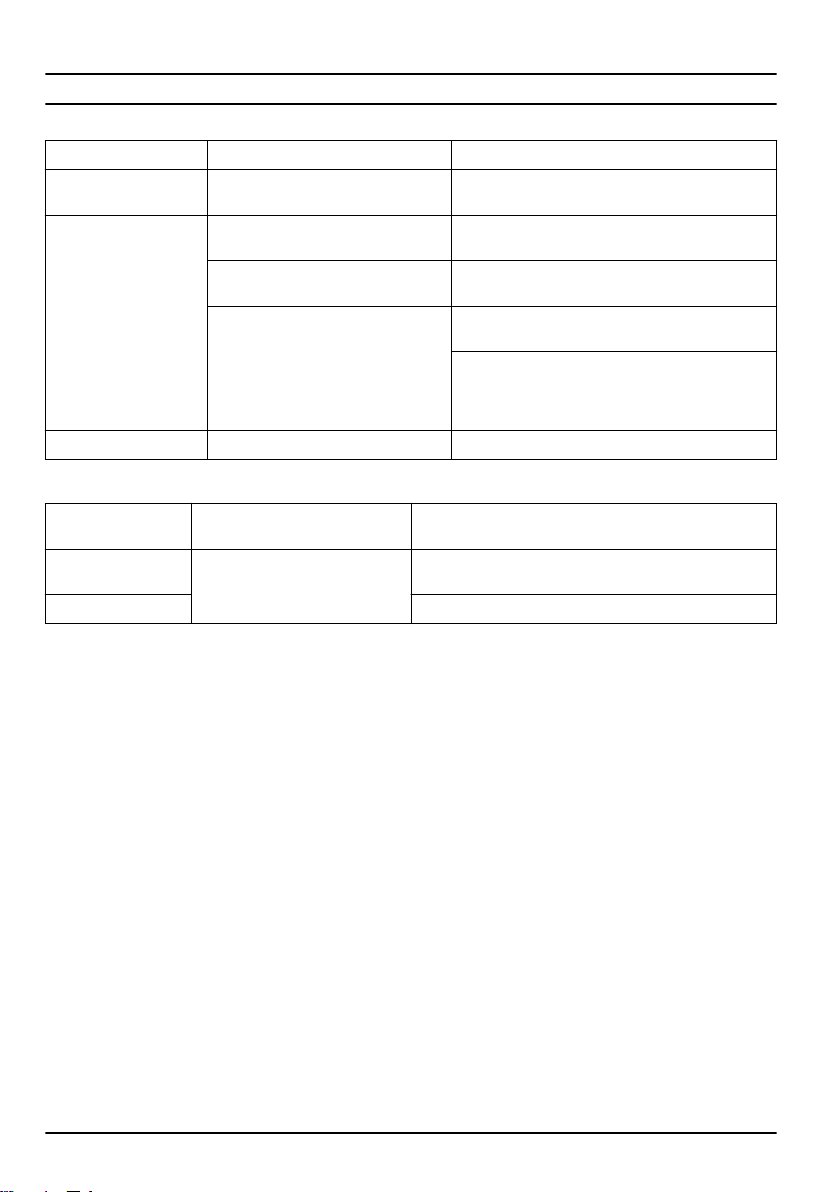
Fejlfinding
Batteri
LED på batteriet Mulige fejl Mulig procedure
Den grønne LED blinker Batterispændingen er lav Oplad batteriet. Se
Fejl-LED'en blinker Batteriet er svagt Oplad batteriet. Se
Temperaturen i arbejdsmiljøet er for
høj eller for lav
Overspænding Kontrollér, at netspændingen er den samme som
Fejl-LED'en er tændt Celleforskel for stor (1 V) Kontakt et godkendt serviceværksted.
side 80
.
side 80
.
Brug batteriet i temperaturer mellem -10 °C og 40
°C.
på typeskiltet på produktet.
Fjern batteriet fra batteriopladeren. Vent 5 sekunder, og prøv igen for at oplade batteriet. Hvis problemet fortsætter, skal du kontakte et autoriseret
serviceværksted.
Batterioplader
LED på batteriopladeren.
Fejl-LED'en blinker Temperaturen i arbejdsmiljøet er
Fejl-LED'en er tændt Kontakt et godkendt serviceværksted
Mulige fejl Mulig procedure
for høj eller for lav
Brug batteriopladeren i temperaturer mellem 5 °C og 40
°C.
Betjeningspanel
Kontakt dit serviceværksted ved problemer, der ikke er
omfattet af dette afsnit.
Sådan oplades batteriet på
Sådan oplades batteriet på
84 71 - 005 - 18.05.2018

Tastatur Mulige fejl Mulig løsning
Fejl-LED blinker Motoren er overbelastet Øg klippehøjden. Se
Motoromdrejningstallet falder for meget, og motoren standser
Kontrolenheden til motoren er for
varm
Klingen er blokeret For at undgå utilsigtet start, skal du dreje sikker-
Batterifejl eller intet signal fra batteri Isæt batteriet korrekt i produktet, og efterse batter-
Produktet standser Batteriet er svagt Oplad batteriet. Se
Fejl ved batteristik Efterse batteristikket
på side 80
Stands motoren, og vent, indtil den er blevet kold
hedsnøglen til 0, fjerne batteriet og vente i mindst
5 sekunder. Kontrollér, at klingen kan rotere frit.
Hvis problemet fortsætter, skal du kontakte et autoriseret serviceværksted
istikket. Se
batteriet blinker.
side 80
.
Batteri på side 84
.
Transport, opbevaring og bortskaffelse
Sådan sættes produktet i transportposition
1. Fjern græsopsamleren (hvis monteret).
2. Løsn skruehåndtagene på den øverste del af
håndtaget, og fold håndtaget nedad.(Fig. 70 )
3. Løsn de nederste skruehåndtag.
4. Flyt grebene til den nederste ende af rillerne på
venstre og højre side af produktet.(Fig. 71 )
5. Fold håndtaget fremad.(Fig. 72 )
Transport
• Lovkravene om farligt gods gælder for de indeholdte
li-ion-batterier.
• Ved kommerciel transport skal særlige krav
vedrørende emballering og mærkning overholdes.
• Sørg for at overholde bestemmelserne for farligt
materiale, når du klargør produktet til transport.
Lokale bestemmelser kan være gældende.
• Fjern altid batteriet ved transport.
• Sæt tape på batteristikkene, og sørg for, at batteriet
ikke kan rykke sig under transporten.
• Fastspænd produktet under transport.
Opbevaring
• Fjern altid batteriet ved opbevaring.
• For at forhindre ulykker, skal du sørge for, at
batteriet ikke er tilsluttet produktet under opbevaring.
• Opbevar batteriopladeren et lukket og tørt sted.
• Opbevar batteriet og batteriopladeren et tørt sted,
hvor der ikke er fugt eller frost.
• Afbryd forbindelsen mellem batteriet og
batteriopladeren under opbevaring.
• Batteriet må ikke opbevares, hvor der kan
forekomme statisk elektricitet. Opbevar ikke batteriet
i en metalkasse.
• Opbevar batteriet ved temperaturer mellem 5 °C og
25 °C og væk fra sollys.
• Opbevar batteriopladerne ved temperaturer mellem
5 °C og 45°C og væk fra sollys.
• Sørg for, at batteriet er ladet op til 30 % - 50 %, før
du sætter det til opbevaring i længere tid.
• Opbevar produktet, batteriet og batteriopladeren et
låst sted, der er utilgængeligt for børn og ikkegodkendte personer.
• Rengør produktet, og udfør fuld service, før du
sætter produktet til opbevaring i længere tid.
Bortskaffelse
Symbolerne på produktet eller emballagen angiver, at
produktet ikke må behandles som almindeligt
husholdningsaffald. Det skal afleveres til en passende
genbrugsstation med henblik på genvinding af elektrisk
og elektronisk udstyr.
Hvis du sørger for, at dette produkt håndteres korrekt,
kan du være med til at modvirke potentielle negative
indvirkninger på mennesker og miljø, som ellers kan
være et resultat af fejlagtig affaldshåndtering i
forbindelse med dette produkt. Nærmere oplysninger om
genanvendelse af dette produkt fås hos kommunen, det
Sådan indstilles klippehøjden
, hvis fejl-LED'en på
Sådan oplades batteriet på
71 - 005 - 18.05.2018
85

lokale renovationsselskab eller forretningen, hvor
(Fig. 73 )
produktet er købt.
Tekniske data
Tekniske data LC 141VLi, LC 141Li
LC 141VLi LC 141Li
Klippemotor
Motortype BLDC (børsteløs) 36 V BLDC (børsteløs) 36 V
Motoromdrejningstal - SavE, o/min. 2700 2700
Motoromdrejningstal - nominelt, o/min. 3100 3100
Motoromdrejningstal - høj belastning, o/min. 3700 3700
Motoreffekt - maks. kW 0,8 0,8
Motoreffekt - nominel, kW 0,55 0,55
Køremotor
Motoreffekt - nominel, kW 0,25 NA
Selvkørende hastighed, km/t 3,0-4,5 NA
Justering af hastighedsniveauer 4 NA
Vægt
Vægt uden batteri, kg 23,2 20
22
Batteri
Batteritype Husqvarna Batteriserie Husqvarna Batteriserie
Batteriets driftstid
Batteriets driftstid, min., (friløb) med SavE aktiveret, med
Husqvarna 5,0 Ah batteri.
Batteriets driftstid, min., (friløb) med standard-tilstand aktiveret, med Husqvarna 5,0 Ah batteri.
Støjemissioner
23
Lydeffektniveau, målt dB (A) 92 92
Lydeffektniveau, garanteret LWA dB (A) 94 94
Lydniveauer
24
Lydtryksniveau ved brugerens øre, dB (A) 83 83
Vibrationsniveauer
Håndtag, m/s
25
2
Plæneklipning
Klippehøjde, mm 25-70 25-70
50 50
40 40
2,0 2,0
22
For de bedste resultater og ydelse anbefales Husqvarna batteriet BLi200.
23
Emission af støj til omgivelserne målt som lydeffekt (LWA) i henhold til EF-direktiv 2000/14/EF.
24
Rapporterede data for støjtryksniveau har en typisk statistisk spredning (standardafvigelse) på 1,2 dB (A).
25
Rapporterede data for vibrationsniveau har en typisk statistisk spredning (standardafvigelse) på 0,2 m/s2.
86 71 - 005 - 18.05.2018

LC 141VLi LC 141Li
Klippebredde, cm 41 41
Kniv Opsamling Opsamling
Artikelnummer 5011716-10 5011716-10
Opsamlerkapacitet, liter 50 50
Tekniske data LC 141C
LC 141C
Motor
Motortype Serie-AC-motor
Motoromdrejningstal - nominelt, o/min. 3200
Effekt 1800 W
Strømkilde Kablet elektrisk
Netledning (medfølger kun til det britiske marked)
Kabeltype 16M-forlængerledning
Vægt, kg 1,6
Vægt
Vægt, kg 22
Støjemissioner
Lydeffektniveau, målt dB (A) 94
Lydeffektniveau, garanteret LWA dB (A) 96
Lydniveauer
Lydtryksniveau ved brugerens øre, dB (A) 83
Vibrationsniveauer
Håndtag, m/s
Plæneklipning
Klippehøjde, mm 25-70
Klippebredde, cm 41
Kniv Opsamling
Artikelnummer 5011716-10
Opsamlerkapacitet, liter 50
26
27
28
2
2,0
26
Emission af støj til omgivelserne målt som lydeffekt (LWA) i henhold til EF-direktiv 2000/14/EF.
27
Rapporterede data for støjtryksniveau har en typisk statistisk spredning (standardafvigelse) på 1,2 dB (A).
28
Rapporterede data for vibrationsniveau har en typisk statistisk spredning (standardafvigelse) på 0,2 m/s2.
71 - 005 - 18.05.2018 87

EU-overensstemmelseserklæring
EU-overensstemmelseserklæring
Husqvarna AB, SE-561 82 Huskvarna, Sverige, tlf.:
+46-36-146500 erklærer, at plæneklippere Husqvarna
LC 141VLi og LC 141Lie fra serienummer 15XXXXXXX
og fremad overholder forskrifterne i RÅDETS DIREKTIV:
• af 8. juni 2011 angående "begrænsning af
anvendelsen af visse farlige stoffer" 2011/65/EU
• af den 17. maj 2006 "angående maskiner"
2006/42/EF
• af den 26. februar 2014 "angående elektromagnetisk
kompatibilitet" 2014/30/EU
• af den 8. maj 2000 "angående emission af støj til
omgivelserne" 2000/14/EF
Vedr. oplysninger om støjafgivelse: Se afsnittet om
tekniske specifikationer.
Følgende standarder har fundet anvendelse:
EN 60335-1:2012+A11:2014, EN 60335-2-77:2010, EN
62233:2008, EN 55014-1:2006/+A1:2009/+A2:2011, EN
55014-2:2015, EN 61000-3-2:2014, EN 61000-3-3:2013
Udpeget organ: 0359, Intertek Testing & Certification
Ltd., 58 Jinfeng Road, Yuyao, Zhejiang 315403, P.R.
China har gennemført overensstemmelsesvurdering i
bilag VI til direktiv 2000/14/EF og udstedt en attest med
nummer:71225
Huskvarna, 2016-10-31
EN 60335-1:2012+A11:2014, EN 60335-2-77:2010, EN
62233:2008, EN 55014-1:2006/+A1:2009/+A2:2011, EN
55014-2:2015, EN 61000-3-2:2014, EN
61000-3-11:2000
Udpeget organ: 0499, The Société Nationale de
Certification et d'Homologation s.à r.l. (SNCH)
Luxemburg bekræfter i overensstemmelse med SNCHprocedurer, at fabrikanten opfylder bestemmelserne i
direktiv 2000/14/EF bilag VI og udstedte et certifikat med
nummer: SNCH*2000/14*2005/88*2945*00
Huskvarna, 2016-10-31
Claes Losdal, udviklingschef/haveprodukter (autoriseret
repræsentant for Husqvarna AB og ansvarlig for teknisk
dokumentation)
Claes Losdal, udviklingschef/haveprodukter (autoriseret
repræsentant for Husqvarna AB og ansvarlig for teknisk
dokumentation)
EU-overensstemmelseserklæring
Husqvarna AB, SE-561 82 Huskvarna, Sverige, tlf.:
+46-36-146500 erklærer, at plæneklipperen Husqvarna
LC 141C fra serienummer og fremefter overholder
forskrifterne i RÅDETS DIREKTIV:
• af 8. juni 2011 angående "begrænsning af
anvendelsen af visse farlige stoffer" 2011/65/EU
• af den 17. maj 2006 "angående maskiner"
2006/42/EF
• af den 26. februar 2014 "angående elektromagnetisk
kompatibilitet" 2014/30/EU
• af den 8. maj 2000 "angående emission af støj til
omgivelserne" 2000/14/EF
Vedr. oplysninger om støjafgivelse: Se afsnittet om
tekniske specifikationer.
Følgende standarder har fundet anvendelse:
88 71 - 005 - 18.05.2018

Einleitung...................................................................... 89
Sicherheit......................................................................92
Montage......................................................................100
Betrieb........................................................................ 101
Wartung...................................................................... 103
Einleitung
Inhalt
Fehlerbehebung..........................................................105
Transport, Lagerung und Entsorgung.........................106
Technische Angaben.................................................. 107
EG-Konformitätserklärung.......................................... 110
Produktbeschreibung
Das Produkt ist ein handgeführter Rasenmäher. Das
Gras wird in einem Grasfänger gesammelt. Entfernen
Sie den Grasfänger, um an den Heckauswurf des
Grases zu gelangen. Befestigen Sie ein Mulch-Kit
(Zubehör), um das Gras in Dünger zu schneiden.
Produktübersicht LC 141VLi/LC 141Li
(Abb. 1 )
1. Motorbremsengriff
2. Startsperre
3. Antriebsgriff (LC 141VLi)
4. Griff/Lenker
5. Bedienfeld
6. EIN-/AUS-Schalter
7. SavE-Taste (Energiespartaste)
8. Akkuanzeigetaste
9. Akkuladestandsanzeige
10. Warnanzeige (FEHLER-LED)
11. Taste Drehzahl verringern (LC 141VLi)
12. Geschwindigkeitsanzeige (LC 141VLi)
13. Taste Drehzahl erhöhen (LC 141VLi)
Produktübersicht LC 141C
(Abb. 2 )
1. Motorbremsengriff
2. Wegfahrsperre
3. Netzkabelsteckdose
4. Netzkabelhalterung
5. Griff/Lenker
6. Heckklappe
7. Symbole
8. Schneidschutz
9. Typenschild
10. Schnitthöhenhebel
11. Mulcheinsatz (Zubehör)
12. Grasfänger
13. Bedienungsanleitung
Verwendungszweck
Verwenden Sie das Produkt, um Gras in privaten Gärten
zu schneiden. Verwenden Sie das Gerät nicht für
andere Aufgaben.
14. Heckklappe
15. Symbole
16. Akkudeckel
17. Sicherheitsschlüssel
18. Schneidschutz
19. Schnitthöhenhebel
20. Typenschild
21. Grasfänger
22. Mulcheinsatz für LC 141VLi (Zubehör)
23. Mulcheinsatz für LC 141Li (Zubehör)
24. Ladegerät (Zubehör)
25. Akku (Zubehör)
26. Bedienungsanleitung
Symbole auf dem Produkt
Wenn das Produkt nicht
sorgfältig und korrekt
verwendet wird, kann es
zu Verletzungen oder
zum Tod des Bedieners
oder anderer Personen
(Abb. 3 )
kommen.
71 - 005 - 18.05.2018 89

(Abb. 4 )
(Abb. 5 )
(Abb. 6 )
(Abb. 7 )
(Abb. 8 )
(Abb. 9 )
(Abb. 10 )
Lesen Sie die
Bedienungsanleitung und
machen Sie sich mit den
Anweisungen vertraut,
bevor Sie das Gerät
verwenden.
Andere Personen oder
Tiere müssen sich in
sicherem Abstand vom
Arbeitsbereich befinden.
Achten Sie auf
hochgeschleuderte und
abprallende
Gegenstände.
Warnung: Halten Sie
Hände und Füße von der
rotierenden
Rasenmäherklinge fern.
Warnung: Halten Sie
Hände und Füße von
rotierenden Teilen fern.
Entfernen Sie den
Sicherheitsschlüssel,
bevor Sie
Wartungsarbeiten am
Gerät durchführen.
(Modell LC 141VLi/
LC 141Li)
Trennen Sie vor
Wartungsarbeiten das
Gerät vom Stromnetz.
(Modell LC 141C)
(Abb. 12 )
(Abb. 13 )
(Abb. 14 )
(Abb. 15 )
(Abb. 16 )
(Abb. 17 )
(Abb. 18 )
geschützt (Modell
LC 141VLi/LC 141Li)
IPX4 – Das Gerät ist
gegen Spritzwasser
geschützt (Modell
LC 141C)
Schützen Sie das Gerät
vor Regen (Modell
LC 141VLi/LC 141Li)
Warnung: Mähen Sie
nicht über das Netzkabel.
Dies kann zu einem
elektrischen Schlag und
Schäden am Gerät
führen. (Modell LC 141C)
Dieses Produkt stimmt
mit den geltenden CERichtlinien überein.
Umweltbelastende
Geräuschemissionen
gemäß der Richtlinie der
Europäischen
Gemeinschaft. Die
Emission des Gerätes ist
im Abschnitt „Technische
Daten“ und auf dem
Geräteschild angegeben.
Gleichstrom 36 V
Doppelt isoliert
IPX1 – Das Gerät ist
(Abb. 11 )
90 71 - 005 - 18.05.2018
gegen Tropfwasser

(Abb
.
19 )
(Abb
.
20 )
(Abb. 21 )
(Abb. 22 )
(Abb. 23 )
Recyceln Sie
dieses Gerät
an einer Recyclingstation für
elektrische und
elektronische
Geräte. (nur für
Europa)
Startvorgang
Modell
LC 141VLi/
LC 141Li:
drücken Sie
den EIN-/AUSSchalter, lösen
Sie die Wegfahrsperre,
drücken Sie
den Motorbremsgriff nach
unten.
Startvorgang Modell:
lösen Sie die Startsperre,
drücken Sie den
Motorbremsengriff nach
unten.LC 141C
Lassen Sie den
Motorbremsengriff bis
zum Stopp los.
Langsam
Hinweis: Sonstige Symbole/Aufkleber am Gerät
beziehen sich auf Zertifizierungsanforderungen, die in
bestimmten Ländern gelten.
Symbole auf dem Akku und/oder auf dem Ladegerät
(Abb
.
25 )
Recyceln Sie
dieses Gerät
an einer Recyclingstation für
elektrische und
elektronische
Geräte. (nur für
Europa)
Störungsfreier
(Abb. 26 )
Transformator.
Das Akkuladegerät darf
nur in geschlossenen
Räumen benutzt und
(Abb. 27 )
(Abb. 28 )
Produkthaftung
Im Sinne der Produkthaftungsgesetze übernehmen wir
keine Haftung für Schäden, die unser Gerät verursacht,
wenn...
• das Gerät nicht ordnungsgemäß repariert wurde.
• das Gerät mit Teilen repariert wurde, die nicht vom
• ein Zubehörteil mit dem Gerät verwendet wird, das
• das Gerät nicht bei einem autorisierten Service
aufbewahrt werden.
Doppelt isoliert
Hersteller stammen oder vom Hersteller zugelassen
sind.
nicht vom Hersteller stammt oder vom Hersteller
zugelassen ist.
Center oder von einem zugelassenen Fachmann
repariert wurde.
(Abb. 24 )
71 - 005 - 18.05.2018
Schnell
91

Sicherheit
Sicherheitsdefinitionen
Warnungen, Vorsichtsmaßnahmen und Hinweise
werden verwendet, um auf besonders wichtige Teile der
Bedienungsanleitung hinzuweisen.
WARNUNG: Wird verwendet, wenn bei
Nichtbeachtung der Anweisungen in diesem
Handbuch die Gefahr von Verletzung oder
Tod des Bedieners oder anderer Personen
besteht.
ACHTUNG: Wird verwendet, wenn bei
Nichtbeachtung der Anweisungen in diesem
Handbuch die Gefahr von Schäden am
Gerät, an anderen Materialien oder in der
Umgebung besteht.
Hinweis: Für weitere Informationen, die in bestimmten
Situationen nötig sind.
Allgemeine Sicherheitshinweise
WARNUNG: Lesen Sie die folgenden
Warnhinweise, bevor Sie das Gerät
benutzen.
•
Dieses Produkt ist gefährlich,
wenn es falsch verwendet wird
oder wenn Sie nicht vorsichtig
sind. Wenn die
Sicherheitshinweise nicht
befolgt werden, kann es zu
Verletzungen oder zum Tod
führen.
•
Dieses Gerät erzeugt beim
Betrieb ein
elektromagnetisches Feld.
Dieses Feld kann sich unter
bestimmten Bedingungen auf
die Funktionsweise aktiver
oder passiver medizinischer
Implantate auswirken. Um die
Gefahr von Situationen, die zu
schweren oder tödlichen
Verletzungen führen können,
zu reduzieren, sollten
Personen mit einem
medizinischen Implantat vor
der Nutzung dieses Geräts
ihren Arzt und den Hersteller
des Implantats konsultieren.
•
Lassen Sie immer Vorsicht
walten und arbeiten Sie mit
gesundem Menschenverstand.
Wenn Sie nicht sicher sind,
wie Sie das Produkt in einer
besonderen Situation
betreiben müssen, hören Sie
auf und sprechen Sie mit
Ihrem Husqvarna Händler,
bevor Sie fortfahren.
•
Denken Sie daran, dass der
Bediener für Unfälle mit
anderen Personen oder deren
Eigentum verantwortlich ist.
•
Halten Sie das Produkt
sauber. Stellen Sie sicher,
dass Sie die Zeichen und
Abziehbilder deutlich lesen
können.
•
Lassen Sie keine Person das
Produkt verwenden, es sei
denn, Sie haben vorher
sichergestellt, dass die Person
den Inhalt der
Bedienungsanleitung gelesen
und verstanden hat.
92
71 - 005 - 18.05.2018

•
Lassen Sie nicht zu, dass
Kinder das Gerät verwenden.
•
Erlauben Sie nicht, dass
Personen ohne Kenntnis der
Anweisungen das Gerät
bedienen.
•
Stellen Sie sicher, dass
Personen mit verminderter
physischer oder psychischer
Leistungsfähigkeit dieses
Gerät nicht unbeobachtet
verwenden. Es muss immer
ein verantwortlicher
Erwachsener anwesend sein.
•
Benutzen Sie das Produkt
nicht, wenn Sie müde oder
krank sind oder unter Einfluss
von Alkohol, Drogen oder
Medikamenten stehen. Dies
wirkt sich negativ auf Ihre
Sehkraft, Ihre Wachsamkeit
sowie Ihr Koordinations- und
Urteilsvermögen aus.
•
Verwenden Sie das Produkt
nicht, wenn es defekt ist.
•
Verändern oder verwenden
Sie dieses Produkt nicht, wenn
es möglich ist, dass andere es
verändert haben.
Sicherheit im Arbeitsbereich
WARNUNG:
Warnhinweise, bevor Sie das Gerät
benutzen.
•
Entfernen Sie Gegenstände
Lesen Sie die folgenden
wie Äste, Zweige und Steine
aus dem Arbeitsbereich, bevor
Sie das Produkt verwenden.
•
Gegenstände, die auf die
Schneidausrüstung treffen,
können herausgeschleudert
werden und Personen und
Gegenständen Schaden
zufügen. Halten Sie andere
Personen und Tiere in einem
sicheren Abstand zum
Produkt.
•
Benutzen Sie das Produkt
niemals bei schlechtem Wetter
wie Nebel, Regen, starkem
Wind, intensiver Kälte und bei
der Gefahr eines
Blitzeinschlags. Die
Verwendung des Produkts bei
schlechtem Wetter oder an
feuchten oder nassen Stellen
ist anstrengend. Schlechtes
Wetter kann gefährliche
Zustände wie rutschige
Oberflächen verursachen.
•
Achten Sie auf Personen,
Gegenstände und Situationen,
die einen sicheren Betrieb des
Produkts verhindern könnten.
•
Achten Sie auf Hindernisse
wie Wurzeln, Steine, Zweige,
Löcher und Gräben. Langes
Gras kann Hindernisse
verdecken.
•
Das Mähen von Gras an
Steigungen kann gefährlich
sein. Verwenden Sie das
71 - 005 - 18.05.2018
93

Produkt nicht in einem
Gelände mit einer Neigung
von mehr als 15°.
•
Betreiben Sie das Produkt
quer zum Hang. Bewegen Sie
sich nicht nach oben und nach
unten.
•
Seien Sie vorsichtig, wenn Sie
um versteckte Ecken oder
Objekte herum fahren, die Ihre
freie Sicht verhindern.
Arbeitssicherheit
WARNUNG: Lesen Sie die folgenden
Warnhinweise, bevor Sie das Gerät
benutzen.
•
Verwenden Sie dieses Produkt
nur zum Mähen von
Rasenflächen. Es ist nicht
erlaubt, das Produkt für
andere Aufgaben zu
verwenden.
•
Benutzen Sie eine persönliche
Schutzausrüstung. Siehe
Persönliche Schutzausrüstung
auf Seite 95
•
Verwenden Sie das Produkt
.
nicht im Regen oder in
feuchter Umgebung. Das
Risiko eines elektrischen
Schlags wird erhöht, wenn
Wasser in das Gerät eindringt.
•
Starten Sie das Produkt nicht,
bevor die Klinge und alle
Abdeckungen korrekt befestigt
sind. Eine falsch befestigte
Klinge kann sich lösen und
Personenschaden
verursachen.
•
Stellen Sie sicher, dass die
Klinge nicht auf Gegenstände
wie Steine und Wurzeln trifft.
Dies kann die Klinge
beschädigen und die
Motorwelle verbiegen. Eine
verbogene Achse führt zu
starken Vibrationen und birgt
ein hohes Risiko, dass die
Klinge sich löst.
•
Wenn die Klinge auf ein
Objektiv trifft oder Vibrationen
auftreten, müssen Sie das
Produkt sofort abstellen.
Halten Sie den Motor an,
drehen Sie den
Sicherheitsschlüssel auf
„0“ und entfernen Sie den
Akku (Modell LC 141VLi und
LC 141Li) bzw. ziehen Sie das
Netzkabel ab (Modell
LC 141C). Untersuchen Sie
das Produkt auf beschädigte
Teile. Reparieren Sie Schäden
oder lassen Sie einen
autorisierten Kundendienst die
Reparatur durchführen.
•
Befestigen Sie den
Motorbremsbügel niemals fest
am Griff, wenn der Motor läuft.
•
Stellen Sie das Produkt auf
eine stabile, flache Oberfläche
und starten Sie es. Stellen Sie
sicher, dass die Klinge nicht
94
71 - 005 - 18.05.2018

den Boden oder ein anderes
Objekt berührt.
•
Bleiben Sie immer hinter dem
Produkt, wenn Sie es
betreiben.
•
Lassen Sie alle Räder auf dem
Boden bleiben und halten Sie
den Griff mit 2 Händen, wenn
Sie das Produkt betreiben.
Halten Sie Hände und Füße
von den rotierenden
Rasenmäherklingen fern.
•
Kippen Sie das Produkt nicht,
wenn der Motor läuft.
•
Seien Sie vorsichtig, wenn Sie
das Produkt nach hinten
ziehen.
•
Heben Sie das Produkt nicht
hoch, wenn der Motor läuft.
Wenn Sie das Gerät anheben
müssen, schalten Sie zuerst
den Motor aus, drehen Sie
den Sicherheitsschlüssel auf
„0“ und entfernen Sie den
Akku (Modell LC 141VLi und
LC 141Li) bzw. ziehen Sie das
Netzkabel ab (Modell
LC 141C).
•
Gehen Sie nicht rückwärts,
wenn Sie das Produkt
betreiben.
•
Stellen Sie den Motor ab,
wenn Sie sich über Bereiche
ohne Gras bewegen, zum
Beispiel Wege aus Kies, Stein
und Asphalt.
•
Rennen Sie nicht mit dem
Produkt, wenn der Motor läuft.
Gehen Sie immer, wenn Sie
das Produkt benutzen.
•
Stellen Sie den Motor ab,
bevor Sie die Schnitthöhe
verändern. Verändern Sie die
Einstellungen niemals, wenn
der Motor läuft.
•
Lassen Sie das Produkt
niemals aus den Augen, wenn
der Motor läuft. Stellen Sie
den Motor ab und stellen Sie
sicher, dass sich die
Schneidausrüstung nicht
dreht.
Sicherheitshinweise für den Betrieb
Persönliche Schutzausrüstung
WARNUNG: Lesen Sie die folgenden
Warnhinweise, bevor Sie das Gerät
benutzen.
•
Die persönliche
Schutzausrüstung kann
Verletzungen nicht vollständig
vermeiden, vermindert aber
den Umfang der Verletzungen
und Schäden bei einem Unfall.
Lassen Sie sich von Ihrem
Händler bei der Auswahl der
richtigen Ausrüstung
unterstützen.
•
Tragen Sie rutschfeste
Sicherheitsstiefel oder schuhe. Verwenden Sie keine
offenen Schuhe, und gehen
Sie nicht barfuß.
71 - 005 - 18.05.2018
95
•
Tragen Sie schwere, lange
Hosen.
•
Tragen Sie bei Bedarf
Schutzhandschuhe,
beispielsweise bei der
Montage, der Untersuchung
oder der Reinigung der
Schneidausrüstung.
Sicherheitsvorrichtungen am Gerät
WARNUNG: Lesen Sie die folgenden
Warnhinweise, bevor Sie das Gerät
benutzen.
• Benutzen Sie kein Gerät mit defekten
Sicherheitsvorrichtungen.
• Führen Sie regelmäßig eine Überprüfung der
Sicherheitsvorrichtungen durch. Wenn die
Sicherheitsvorrichtungen defekt sind, wenden Sie
sich an Ihre Husqvarna-Servicewerkstatt.
Schneidschutz
• Untersuchen Sie die Schneidewerkabdeckung, um
sicherzustellen, dass es keine Beschädigungen wie
zum Beispiel Risse gibt.
Motorbremsbügel
Der Motorbremsbügel stoppt den Motor. Wenn der
Motorbremsbügel losgelassen wird, stoppt der Motor.
Um eine Prüfung der Motorbremse durchzuführen,
starten Sie den Motor und lassen dann den
Motorbremsbügel los. Wenn der Motor nicht innerhalb
von 3 Sekunden stoppt, lassen Sie die Motorbremse von
einer autorisierten Husqvarna Servicewerkstatt
einstellen.
(Abb. 29 )
Sicherheitsschlüssel (Modelle LC 141VLi und LC 141Li)
Der Sicherheitsschlüssel befindet sich unter der
Akkuabdeckung. Mit dem Sicherheitsschlüssel wird der
Akku angeschlossen, der den Motor mit Strom versorgt.
• Starten und stoppen Sie den Motor, um den
Sicherheitsschlüssel zu kontrollieren.
• Wenn der Sicherheitsschlüssel ordnungsgemäß
funktioniert, startet der Motor nur, wenn der
Schlüssel auf Position „1“ steht.
(Abb. 30 )
So überprüfen Sie die Startsperre
Führen Sie eine Prüfung der Startsperre durch, um
sicherzustellen, dass diese den Betrieb des Motors
verhindert.
1. Ziehen Sie den Motorbremsbügel in die Richtung
des Lenkers. Die Startsperre stoppt die Bewegung.
2. Drücken Sie die Startverzögerung heraus.(Abb. 31 )
3. Lösen Sie die Startsperre und stellen Sie sicher,
dass sie sich zurück in die Ausgangsstellung
bewegt.
Verwendung des Netzkabelhalters (Modell LC 141C)
Der Netzkabelhalter reduziert die Belastung für
Steckdose und Netzkabel. Der Netzkabelhalter
verringert auch das Risiko eines Sturzes.
1. Biegen Sie das Netzkabel in eine kleine Schleife.
2. Legen Sie die Schleife in die Öffnung im
Netzkabelhalter.
3. Legen Sie die Schleife um den Haken.
4. Ziehen Sie am Netzkabel, um die Schleife am Haken
enger zu ziehen.(Abb. 32 )
Sicherer Umgang mit Akkus
WARNUNG: Lesen Sie die folgenden
Warnhinweise, bevor Sie das Gerät
benutzen.
•
Verwenden Sie die
wiederaufladbaren Akkus von
Husqvarna nur als
Stromversorgung für
zugehörige Husqvarna
Produkte. Um Verletzungen zu
vermeiden, verwenden Sie
den Akku nicht zur
Energieversorgung anderer
Geräte.
•
Verwenden Sie keine nicht
aufladbaren Akkus.
•
Es besteht die Gefahr von
elektrischen Schlägen.
Verbinden Sie die
Batterieklemmen nicht mit
Schlüsseln, Münzen,
Schrauben oder anderen
96
71 - 005 - 18.05.2018

metallischen Gegenständen.
Dadurch kann es zu einem
Kurzschluss des Akkus
kommen.
•
Legen Sie keine Gegenstände
in die Luftschlitze des Akkus.
•
Halten Sie den Akku von
direkter Sonneneinstrahlung,
Hitze oder offenem Feuer fern.
Der Akku kann explodieren
und Verbrennungen und/oder
chemische Verbrennungen
verursachen.
•
Halten Sie den Akku von
Regen und Feuchtigkeit fern.
•
Halten Sie den Akku von
Mikrowellen und hohem Druck
fern.
•
Versuchen Sie nicht, den Akku
zu zerlegen oder
aufzubrechen.
•
Wenn aus dem Akku
Flüssigkeit austritt, vermeiden
Sie Haut- oder Augenkontakt
mit dieser. Sollten Sie
dennoch mit der Flüssigkeit in
Berührung gekommen sein,
reinigen Sie den Bereich mit
ausreichend Wasser und
suchen Sie medizinische Hilfe
auf.
•
Der Akku darf nur bei
Temperaturen zwischen ‐
10 und 40 °C verwendet
werden.
•
Reinigen Sie weder den Akku
noch das Ladegerät mit
Wasser. Siehe
So reinigen Sie
den Akku und das Ladegerät
auf Seite 104
•
Verwenden Sie keine
.
fehlerhaften oder
beschädigten Akkus.
•
Lagern Sie Akkus getrennt von
Metallgegenständen wie
Nägeln, Münzen und
Schmuck.
Sicherer Umgang mit dem Ladegerät
WARNUNG: Lesen Sie die folgenden
Warnhinweise, bevor Sie das Gerät
benutzen.
•
Verwenden Sie die QC
Ladegeräte nur zum Laden
von Husqvarna Akkus.
•
Stromschlag- oder
Kurzschlussgefahr. Legen Sie
keine Gegenstände in die
Luftschlitze des Ladegeräts.
Das Ladegerät nicht zerlegen.
Verbinden Sie die Anschlüsse
des Ladegeräts nicht mit
Metallgegenständen.
Verwenden Sie eine geprüfte
Netzsteckdose.
•
Dieses Gerät erzeugt beim
Betrieb ein
elektromagnetisches Feld.
Dieses Feld kann sich unter
bestimmten Bedingungen auf
die Funktionsweise aktiver
oder passiver medizinischer
71 - 005 - 18.05.2018
97

Implantate auswirken. Um die
Gefahr von Situationen, die zu
schweren oder tödlichen
Verletzungen führen können,
auszuschließen, sollten
Personen mit einem
medizinischen Implantat vor
der Nutzung dieses Gerätes
ihren Arzt und den Hersteller
des Implantats konsultieren.
•
Prüfen Sie regelmäßig, dass
das Netzkabel des
Akkuladegeräts nicht
beschädigt ist und dass keine
Risse vorhanden sind.
•
Heben Sie das Ladegerät
nicht am Netzkabel an. Um
das Ladegerät von der
Steckdose zu trennen, ziehen
Sie am Netzstecker. Ziehen
Sie nicht am Netzkabel.
•
Achten Sie darauf, dass
Netzkabel und
Verlängerungskabel nicht mit
Wasser, Öl oder scharfen
Kanten in Berührung kommen.
Achten Sie darauf, dass die
Kabel nicht in Türen, Zäunen
o. ä. eingeklemmt werden. Es
besteht sonst die Gefahr, dass
das Ladegerät unter Strom
gestellt wird.
•
Reinigen Sie das Ladegerät
nicht mit Wasser.
•
Das Akkuladegerät kann von
Kindern ab 8 Jahren sowie
von Personen mit
eingeschränkten physischen,
sensorischen oder
psychischen Fähigkeiten bzw.
Personen ohne jegliche
Erfahrung oder Kenntnisse
verwendet werden, wenn sie
beaufsichtigt werden oder
ihnen die sichere Verwendung
des Ladegeräts ausführlich
erklärt wurde und sie sich der
Gefahren bewusst sind. Kinder
dürfen nicht mit dem
Ladegerät spielen. Die
Reinigung und Wartung durch
den Anwender darf nicht von
Kindern ohne Aufsicht
durchgeführt werden.
•
Setzen Sie keine nicht
wiederaufladbaren Akkus in
das Ladegerät ein.
•
Das Ladegerät darf nicht in
der Nähe von entflammbaren
Materialien oder Materialien,
die Korrosion verursachen
können, verwendet werden.
Das Ladegerät darf nicht
abgedeckt werden. Bei
Rauchentwicklung oder Feuer
muss der Stecker des
Ladegeräts sofort aus der
Steckdose gezogen werden.
•
Verwenden Sie keine
fehlerhaften oder
beschädigten Ladegeräte.
•
Laden Sie den Akku nur in
geschlossenen Räumen an
98
71 - 005 - 18.05.2018

einem Ort mit guter
Luftzirkulation und ohne
direkte Sonneneinstrahlung.
Auf keinen Fall Akkus in
feuchter Umgebung laden.
Netzkabelsicherung
Für Modell LC 141C.
•
Die Verwendung einer
Fehlerstromschutzvorrichtung
(FI) mit einem Auslösestrom
von höchstens 30 mA wird
empfohlen. Auch bei
installiertem FI-Schutzschalter
kann eine 100 %-ige
Sicherheit nicht garantiert
werden, weshalb immer
sichere Arbeitsmethoden
befolgt werden müssen.
Überprüfen Sie den FISchutzschalter bei jeder
Verwendung.
•
Trennen Sie das Kabel sofort
von der Stromversorgung,
wenn das Netzkabel
eingeschnitten oder die
Isolierung beschädigt ist.
•
Berühren Sie das
eingeschnittene oder
beschädigte Elektrokabel erst,
wenn es von der
Stromversorgung getrennt
wurde.
•
Reparieren Sie kein
eingeschnittenes oder
beschädigtes Netzkabel.
Ersetzen Sie es durch ein
neues.
Sicherheitshinweise für die Wartung
WARNUNG: Lesen Sie die folgenden
Warnhinweise, bevor Sie das Gerät
benutzen.
•
Für Modelle LC 141VLi und
LC 141Li: Um ein
unbeabsichtigtes Starten
während der Wartung zu
vermeiden, drehen Sie den
Sicherheitsschlüssel auf 0 und
nehmen Sie den Akku heraus.
Warten Sie mindestens 5
Sekunden, bevor Sie mit der
Wartung beginnen.
•
Für Modell LC 141C: Ziehen
Sie das Netzkabel ab, um ein
versehentliches Starten
während der
Wartungsarbeiten zu
verhindern.
•
Führen Sie die
Wartungsarbeiten zur
Erhöhung der Lebensdauer
des Produkts und
Verringerung der Unfallgefahr
ordnungsgemäß aus. Lassen
Sie professionelle
Reparaturarbeiten von einer
zugelassenen
Servicewerkstatt durchführen.
Weitere Informationen
erhalten Sie von Ihrer
Servicewerkstatt.
71 - 005 - 18.05.2018
99
•
Führen Sie die Wartung nur
gemäß dieser
Betriebsanleitung durch.
Größere Eingriffe sind von
einer zugelassenen
Servicewerkstatt auszuführen.
•
Tragen Sie beim Umgang mit
der Schneidausrüstung
schwere Arbeitshandschuhe.
Die Klinge ist sehr scharf und
man schneidet sich sehr leicht.
•
Halten Sie die Schnittkanten
sauber und scharf für die
beste und sicherste Leistung.
•
Ihre Servicewerkstatt sollte
das Gerät regelmäßig
überprüfen und notwendige
Einstellungen und
Reparaturen vornehmen.
Montage
Einleitung
WARNUNG: Lesen Sie das Kapitel über
Sicherheit vor der Montage des Produkts.
WARNUNG: Für Modelle LC 141VLi und
LC 141Li: Um ein unbeabsichtigtes Starten
bei der Montage zu verhindern, drehen Sie
den Sicherheitsschlüssel auf 0, entfernen
Sie den Akku und warten Sie mindestens 5
Sekunden.
Für Modell LC 141C: Ziehen Sie das
Netzkabel ab, um ein versehentliches
Starten während der Montage zu
verhindern.
Für die Montage des Griffs
1. Richten Sie die Schraublöcher im Handgriff an den
Löchern am unteren Griff aus, und befestigen Sie die
Schrauben, Unterlegscheiben und Knöpfe. Ziehen
Sie die Knöpfe vollständig fest.(Abb. 33 )
•
Ersetzen Sie beschädigte,
abgenutzte oder defekte Teile.
•
Befolgen Sie die Anweisungen
für das Auswechseln von
Zubehörteilen. Verwenden Sie
nur Zubehör vom
Gerätehersteller.
•
Wenn es nicht in Betrieb ist,
bewahren Sie Produkt, Akku
und Ladegerät getrennt an
einem trockenen und
abgeschlossenen Ort auf.
Achten Sie darauf, dass
Kinder und unbefugte
Personen keinen Zugriff auf
das Produkt, den Akku oder
das Ladegerät haben.
2. Befestigen Sie die Kabel über die Kabelhalter am
Griff.(Abb. 34 )
Hinweis: Stellen Sie sicher, dass die Spannung in
den Kabeln nicht zu hoch ist. Eine zu hohe
Spannung kann zu Schäden am Kabel führen, wenn
sich der Griff in der Transportposition befindet.
3. Legen Sie das Kabel um den Haken an der
Unterseite des Griffs.(Abb. 35 )
So stellen Sie die Handgriffhöhe ein
1. Lösen Sie die unteren Drehknöpfe.(Abb. 36 )
2. Entfernen Sie links und rechts den Knopf, die
Unterlegscheibe und die Schraube.
3. Der Griff kann auf 2 verschiedene Höhen eingestellt
werden. Setzen Sie die Schraube in eine der beiden
Bohrungen auf der linken und der rechten Seite.
(Abb. 37 )
4. Befestigen Sie die Schrauben, Unterlegscheiben und
die Knöpfe.
5. Bewegen Sie die Flügelmuttern nach oben in
Richtung Griff, bis Sie den Anschlag erreichen und
ein Klicken hören. Ziehen Sie die Knöpfe vollständig
fest.(Abb. 38 )
100 71 - 005 - 18.05.2018
 Loading...