


540
Husqvarna 540, 400, 460, 500, 546 Instruction Manual
...
people well away from the danger area!
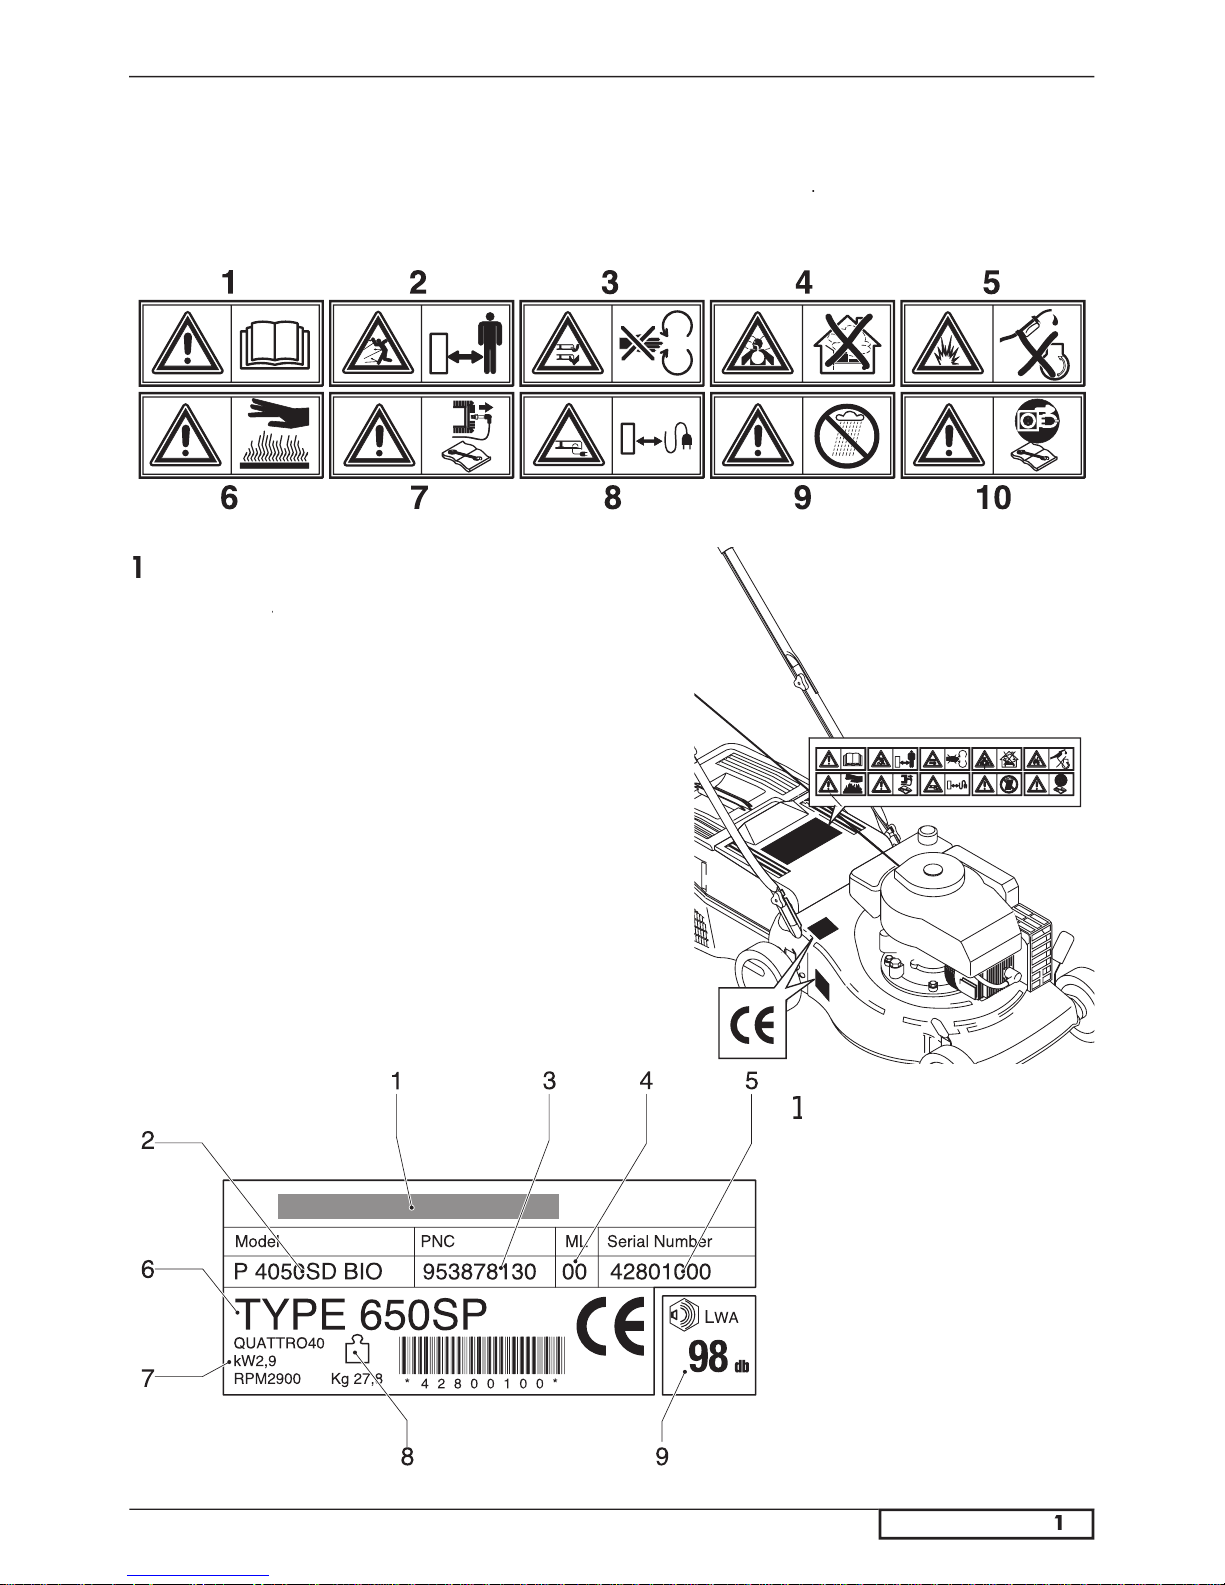
Risk of hand and feet injury.
plug before undertaking any maintenance work.
Shelter from rain and humidity.
4
Maintenance lever
Type
Weight

putat ng hands and feet and throwing objects.Failure to
Read the instructions carefully. Be familiar with the
Never allow children or people un familiar with the
Never mow while people, especially children, or pets
Keep in mind that the operator or user is responsible
for accidents or hazards occurring to other people or
their property.
While mowing, always wear substantial footwear and
Thoroughly inspect the area where the equipment is to
WARNING - Petrol is highly flammable.
- Store fuel in containers specifically de signed for this
- Refuel outdoors only and do not smoke while refue-
- Add fuel before starting the engine. Never remove
the cap of the fuel tank or add petrol while the engine is
- If petrol is spilled, do not attempt to start the engine but
- Replace all fuel tanks and container caps securely.
Replace faulty silencers.
Before using, always visually inspect to see that the
On multibladed machines, take care as rotating one
Do not operate the engine in a confined space where
Mow only in daylight or in good artificial light.
Avoid operating the equipment in wet grass, where
feasible.
Always be sure of your footing on slopes.
Walk, never run.
For wheeled rotary machines, mow across the face of
Exercise extreme caution when changing direction
Do not mow excessively steep slopes.
Use extreme caution when reversing or pulling the
Stop the blade if the lawnmower has to be tilted for
transportation when cross ing surfaces other than grass,
Never operate the lawnmower with defective guards, or
without safety de vic es, for example defl ectors and/or
Do not change the engine governor settings or over-
Disengage all blade and drive clutches before starting
the engine.
Start the engine or switch on the motor carefully
the blade.
Do not tilt the lawnmower when starting the engine or
Do not start the engine when standing in front of the
Do not put hands or feet near or under rotating parts.
Never pick up or carry lawnmower while the engine
Stop the engine and disconnect the spark plug wire:
- before cleaning blockages or un clog ging chute;
- before checking, cleaning or work ing on the lawn-
- after striking a foreign object. Inspect the lawnmower
for damage and make repairs before re starting and
- if the lawnmower starts to vibrate abnormally (check
Stop the engine:
- whenever you leave the lawnmower;
- before refuelling.
Reduce the throttle setting during en gine shut down
the fuel off at the conclusion of mowing.
Go slow when using a trailing seat.
Keep all nuts, bolts and screws tight to be sure the
Never store the equipment with petrol in the tank inside
Allow the engine to cool before storing in any enclo-
To reduce the fire hazard, keep the engine, silencer,
Check the grass catcher frequently for wear or dete-
Replace worn or damaged parts for safety.
If the fuel tank has to be drained, this should be done
SAFETY RULES

Always operate with the deflector or grasscatcher in the correct position.
Always stop the engine before removing the grasscatcher or adjusting the height of cut.
Never place your hands or feet underneath the deck or into the grass discharge chute while
the engine is running.
which may be thrown by the machine. While mowing,
the rear discharge chute while the engine is running.
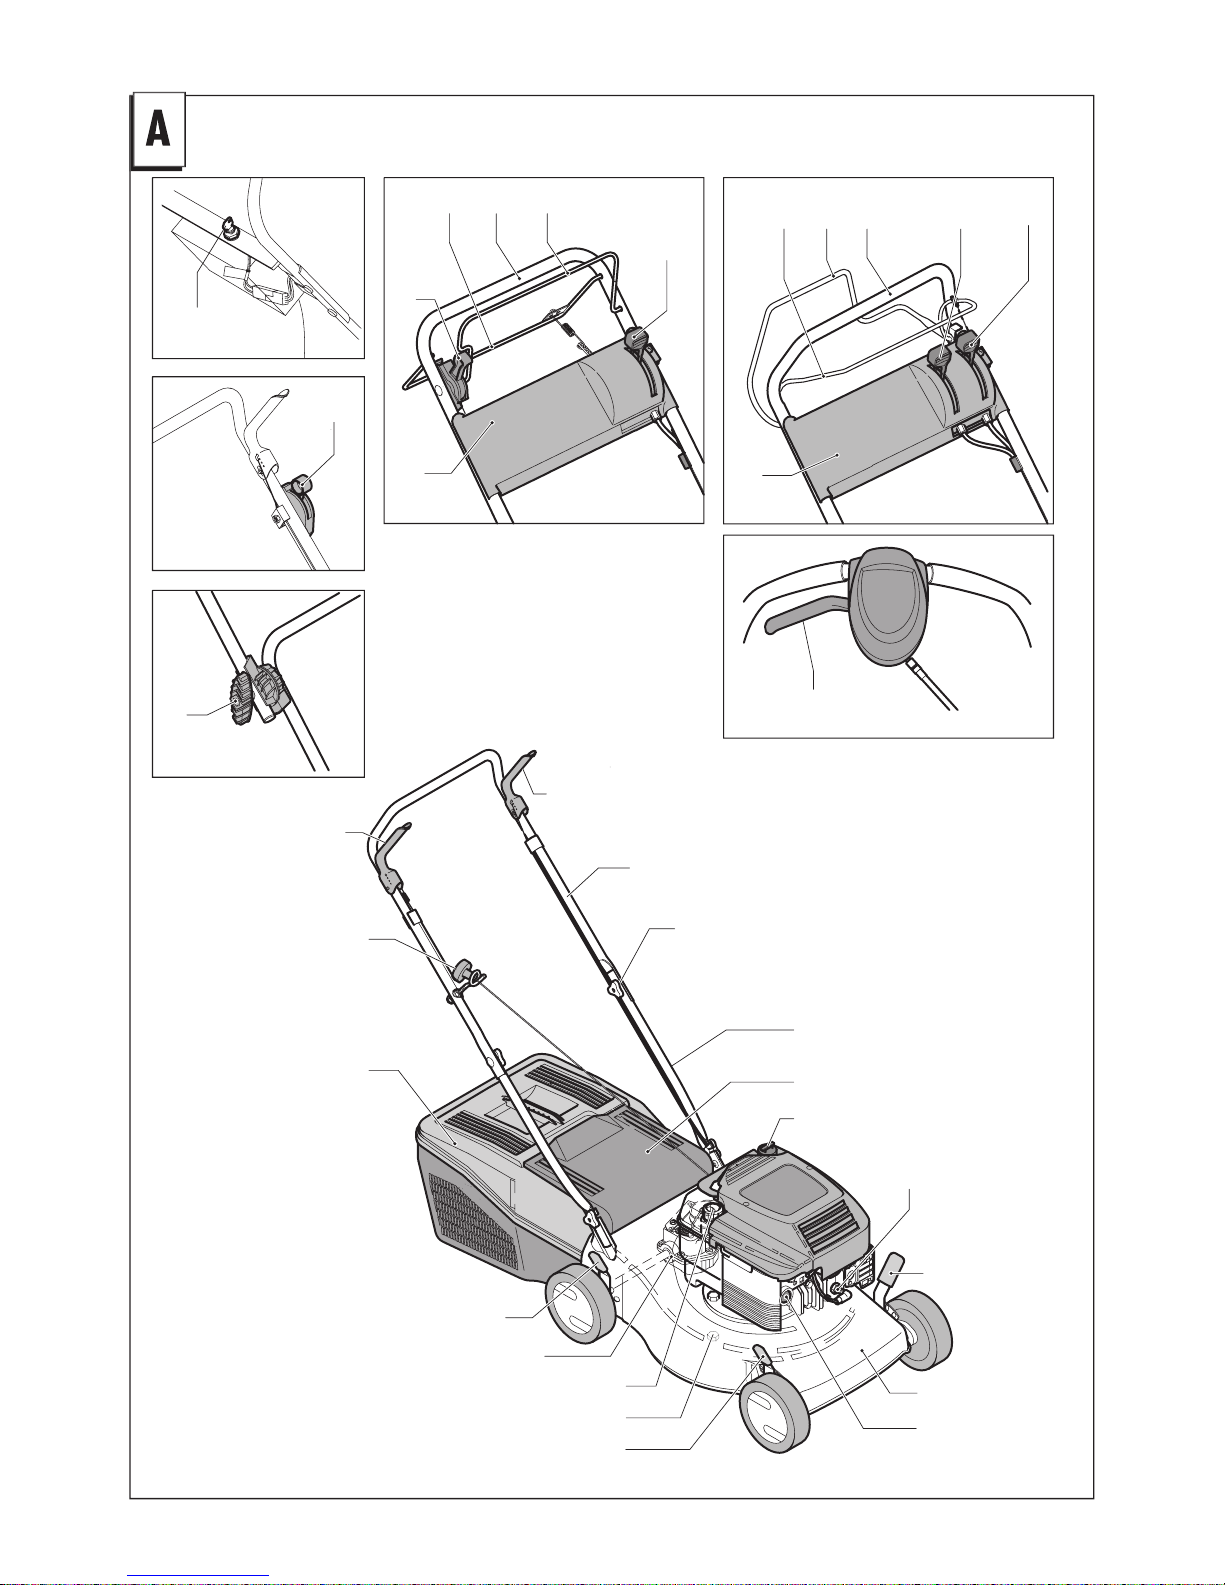
ASSEMBLY OF GRASS CATCHER
ASSEMBLY
MULCHING CAP INSERTION
To cut the grass with the mulching system (no grass collection), lift the rear deflector panel and insert the cap
ADJUSTMENT OF CUTTING HEIGHT
ASSEMBLY
ASSEMBLY
Assembly deflector ,only for the models with this equipment (Fig.C
ADJUSTMENT OF HANDLES
ASSEMBLY
WHEEL

CAUTION:
engine before use
when the engine is cold, position the accelerator lever
- pos.13) on START
while starting and using the machine (it operates the
Press the fuel-enrichment pump (23) located on the
the user instruction manual of the engine.
MANUAL STARTING: (While holding the engine stop
Hold the engine start-grip (11) and pull the starter rope
firmly towards you to its full extent.
ELECTRICAL STARTING: (While holding the engine
Insert the plug (G) in the socket (H) on the engine.
Turn the ignition key (17) or push the button (25) ,only
for the models with this equipment
as the engine is started.
When leaving the machine for any period of time always
To cut the grass, push the lawn mower manually or insert
the automatic advance gear.
the models where it is included only).
There are 3 speed settings.
1°~ 0,6 m/s
2°~ 0,9 m/s
3°~ 1,2m/s
engine is running.
Release the clutch han-
With engine running, pull the handle (14) towards the bar
WARNING!
the blade stops while the motor continues
running.
To cut the grass, push the lawn mower manually or insert
the automatic advance gear.
the models where it is included only).
1°~ 0,6 m/s
2°~ 0,9 m/s
3°~ 1,2m/s
Lift up the clutch
engine is running.
Release the clutch han-
ADJUSTMENT OF CLUTCH CABLE
AUTOMATIC ADVANCEMENT
the pinion (24) and the gear (25) must be kept
To carry out this check, you must remove the wheel (26)
MAINTENANCE
For a four stroke engine, check the oil level and change
the oil when dirty. For further explanation, see ENGINE
Frequently check the mower and ensure that all grass
Never clean the mower by pouring water over it: this may
Take care, the exhaust muffler may be very hot.
Frequently remove the wheel screws clean whith pe-
troleum and oil before replacing. Ball bearings must be
Frequently check the blade for damage.
The lawn mower must be checked by a SERVICE
Cleaning under the bodywork
With machine at a standstill and off.
- Attach fitting (28) on the deck to the water supply tap.
Turn on the tap.
- start up the motor (blade in rotation), allowing it to
warm up for a few minutes.
- at the end of cleaning switch off the motor, turn off the
tap, detach the tube from the deck connection..
To remove the blade (29) unscrew the screw
Check the conditions of the blade-support (31), the
washer (32), the key (33) and the washer (34) and
When reassembling, make sure that the key (33) is cor-
To remove the blade (35) unscrew the two screws
Check the condition of the blade and replace any parts
that are damaged, re-assemble using two screws (36)
which must be torqued to 5,34 Kgm (52,4Nm).
Before starting the motor for the first time, you
to 3 hours.
for 24 hours.
When starting, don’t keep trying to start for more than
IMPORTANT
for 24-36 hours.
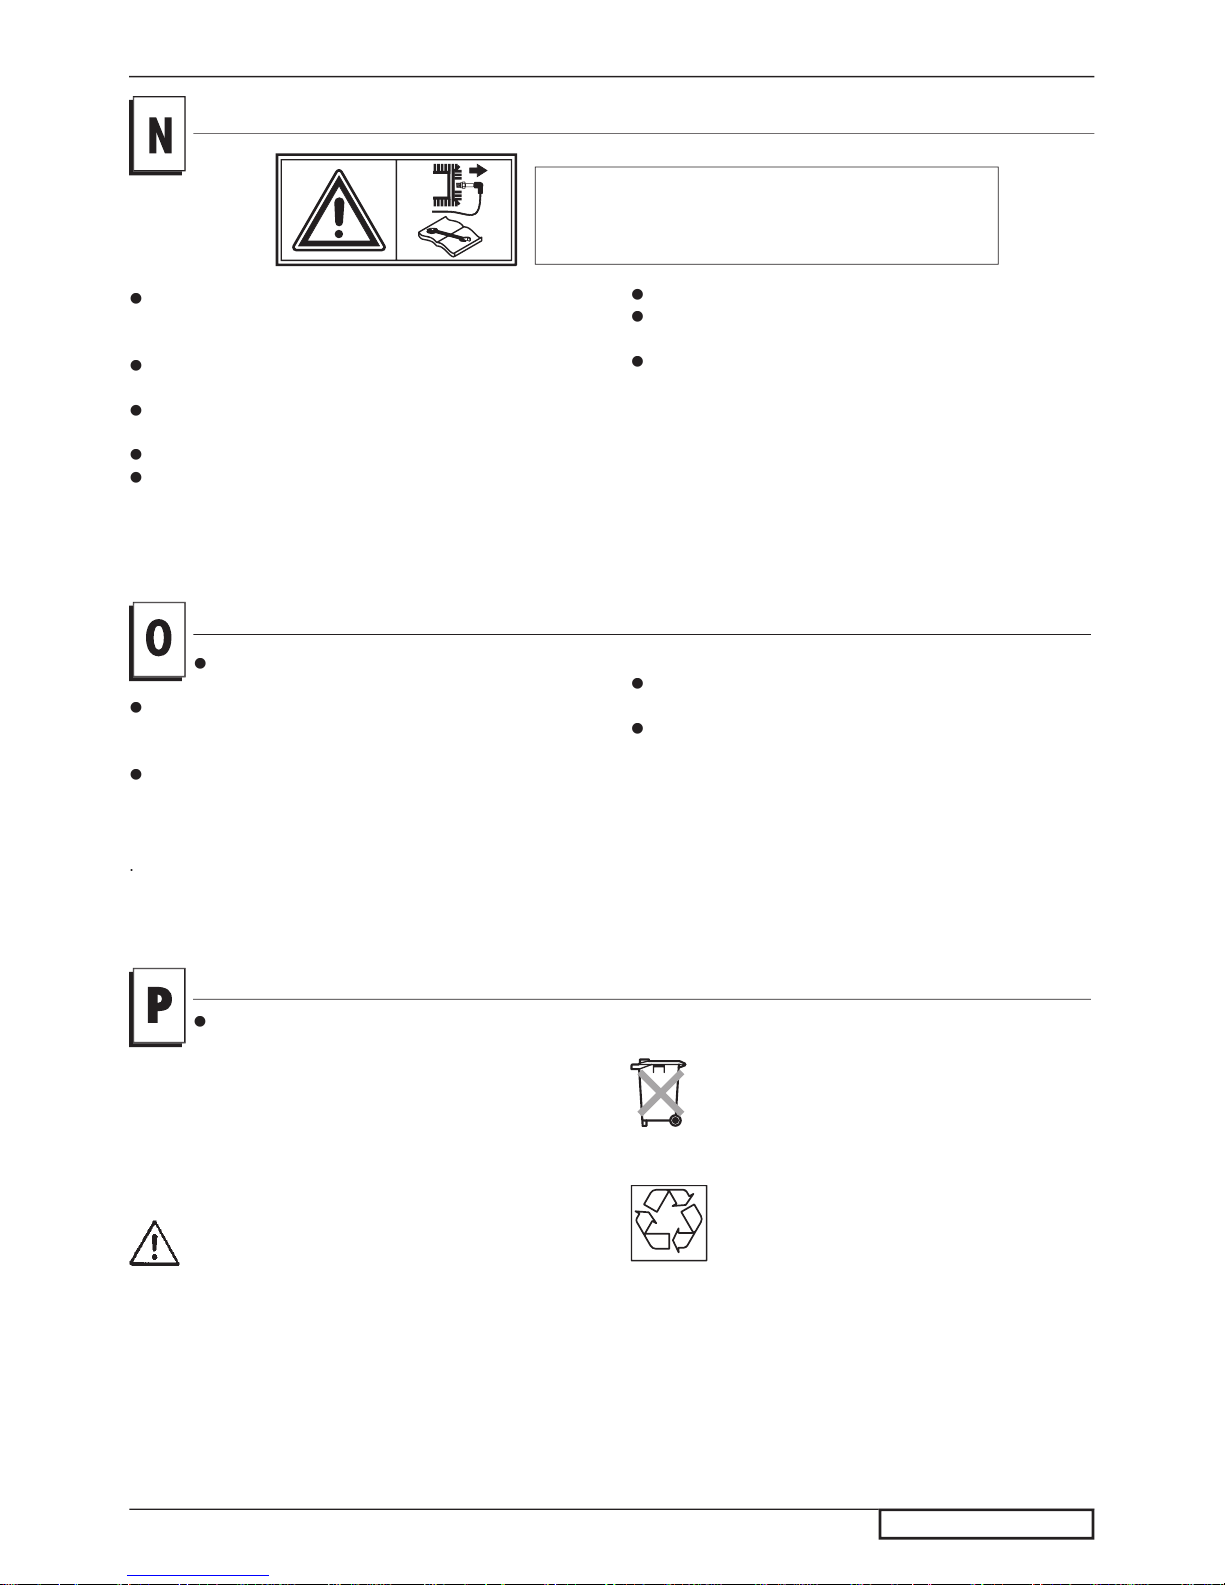
Those batteries marked with a “crossed out
waste disposal bin” and bearing the chemical
The user is legally obliged to take the used
them to the retailer.
Pb
Pb

.................................................................
.......................................................................
Type
....................................................................
Width of cut
............................................................
...............................
Type of Cutting Device
............................................
Gaustadalleen 30 - PO Box 73 Blindern
0314 OSLO - Norway
Technical Manager
within the guarantee period,
Outdoor Products,
through its Authorised Service Repairers will effect the
tear.
Outdoor Products.
f) The machine has not been used for hire.
This guarantee is additional to, and in no way diminishes
the customers statutory rights.
this Operator’s Manual and understand how to operate
with the instructions and recommendations contained in
this Operator’s Manual.
ts and their life is dependent on regular maintenance and
Outdoor Products does not accept liability
Outdoor Products, or by the
17
BATTERY
16
13
1
14
18
19
13
2
3
10
12
4
11
14
18
1
5
6
8
15
7
9
8
8
3
21
1
13
14
16
18
20
20
 Loading...