

Page 1

EN Operator's manual 2-16
ES-MX Manual del usuario 17-33
FR-CA Manuel d’utilisation 34-50
128CD, 128LD
LT28CCHV, LT28CSHV
Page 2

Contents
1
2
3
5
6
7
9
10
8
17
16
11
13
12
14
15
19
4
18
5
1
4
4
Introduction..................................................................... 2
Safety..............................................................................3
Assembly........................................................................ 7
Operation........................................................................ 9
Introduction
Operator's manual
The initial language of this operator's manual is English.
Operator's manuals in other languages are translations
from English.
Overview
Maintenance................................................................. 13
Transportation and storage...........................................15
Technical data.............................................................. 15
Accessories.................................................................. 16
1. Trimmer head
2. Grease filler cap
3. Bevel gear
4. Cutting attachment guard
5. Shaft
6. Shaft coupling
7. Loop handle
8. Throttle trigger
9. Stop switch
10. Throttle trigger lockout
11. Spark plug cap, spark plug
12. Starter housing
13. Starter rope handle
14. Fuel tank
15. Air purge bulb
16. Choke control
17. Air filter cover
18. Drive disc
19. Operator’s manual
2 215 - 004 - 22.05.2020
Page 3
California Proposition 65
WARNING!
The engine exhaust from this
product contains chemicals known
to the State of California to cause
cancer, birth defects or other
reproductive harm.
5
0
F
T
15
m
50F
T
1
5 m
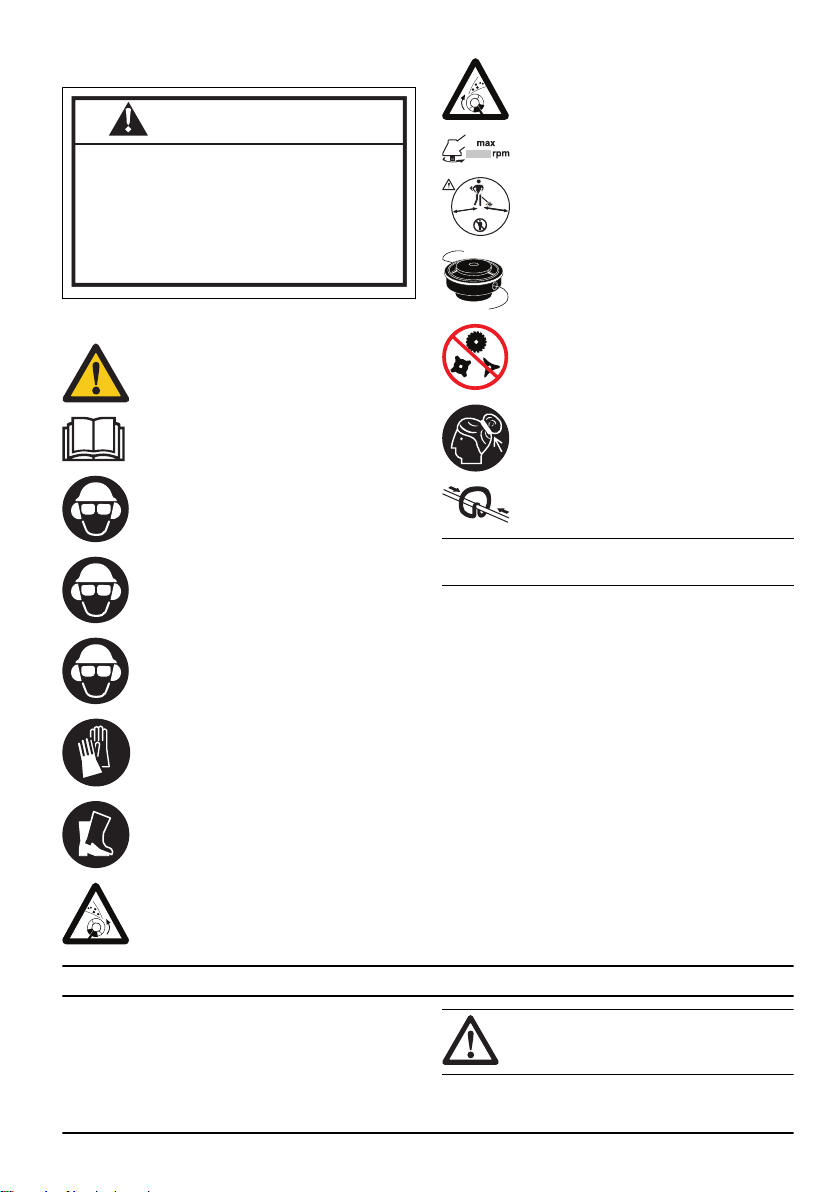
Symbols on the product
Warning
The product can cause objects to eject,
which can cause damage to the eyes.
Max. speed of the output shaft.
Safe distance
Only use an approved trimmer line. Do not
use a blade.
Do not use a cutting attachment made of
metal.
Read this manual.
Use approved head protection.
Use approved hearing protection.
Use approved eye protection.
Use approved protective gloves.
Use protective shoes/boots.
The product can cause objects to eject,
which can cause damage to the eyes.
Note: Other symbols/decals on the product refer to
certification requirements for other commercial areas.
Product liability
As referred to in the product liability laws, we are not
liable for damages that our product causes if:
• the product is incorrectly repaired.
• the product is repaired with parts that are not from
• the product has an accessory that is not from the
• the product is not repaired at an approved service
Make sure that long hair is put up above
your shoulders.
The arrows show the limits for the position of
the handle.
the manufacturer or not approved by the
manufacturer.
manufacturer or not approved by the manufacturer.
center or by an approved authority.
Safety
Safety definitions
The definitions below give the level of severity for each
signal word.
WARNING: Injury to persons.
215 - 004 - 22.05.2020 3
Page 4

CAUTION: Damage to the product.
Note: This information makes the product easier to use.
General safety instructions
WARNING: Read the warning instructions
that follow before you use the product.
• Use the product correctly. Injury or death is a
possible result of incorrect use. Only use the product
for the tasks found in this manual. Do not use the
product for other tasks.
• Obey the instructions in this manual. Obey the safety
symbols and the safety instructions. If the operator
does not obey the instructions and the symbols,
injury, damage or death is a possible result.
• Do not discard this manual. Use the instructions to
assemble, to operate and to keep your product in
good condition. Use the instructions for correct
installation of attachments and accessories. Only
use approved attachments and accessories.
• Do not use a damaged product. Obey the
maintenance schedule. Only do the maintenance
work that you find an instruction about in this
manual. An approved service center must do all
other maintenance work.
• This manual cannot include all situations that can
occur when you use the product. Be careful and use
your common sense. Do not operate the product or
do maintenance on the product if you are not sure
about of the situation. Speak to a product expert,
your dealer, service agent or approved service
center for information.
• Disconnect the spark plug cable before you
assemble the product, put the product into storage or
do maintenance.
• Do not use the product if it is changed from its initial
specification. Do not change a part of the product
without approval from the manufacturer. Only use
parts approved by the manufacturer. Injury or death
is a possible result of incorrect maintenance.
• Do not breathe in the fumes from the engine. Longterm inhalation of the engine's exhaust fumes is a
health risk.
• Do not start the product indoors or near flammable
material. The exhaust fumes are hot and can contain
a spark which can start a fire. Not sufficient airflow
can cause injury or death because of asphyxiation or
carbon monoxide.
• When you use this product the engine makes an
electromagnetic field. The electromagnetic field can
cause damage to medical implants. Speak to your
physician and medical implant manufacturer before
you operate the product.
• Do not let a child operate the product. Do not let a
person without knowledge of the instructions operate
the product.
• Make sure that you always monitor a person, with
decreased physical capacity or mental capacity, that
uses the product. A responsible adult must be there
at all times.
• Lock the product in an area that children and
unapproved persons cannot access.
• The product can eject objects and cause injuries.
Obey the safety instructions to decrease the risk of
injury or death.
• Do not go away from the product when the engine is
on.
• The operator of the product is responsible if an
accident occurs.
• Make sure that parts are not damaged before you
use the product.
• Make sure that you are at minimum 15 m (50 ft)
away from other persons or animals before you use
the product. Make sure that persons in the adjacent
area know that you will use the product.
• Refer to national or local laws. They can prevent or
decrease the operation of the product in some
conditions.
• Do not use the product if you are fatigued or
influenced by alcohol, drugs or medicine. They can
have effects on your vision, alertness, coordination
or judgment.
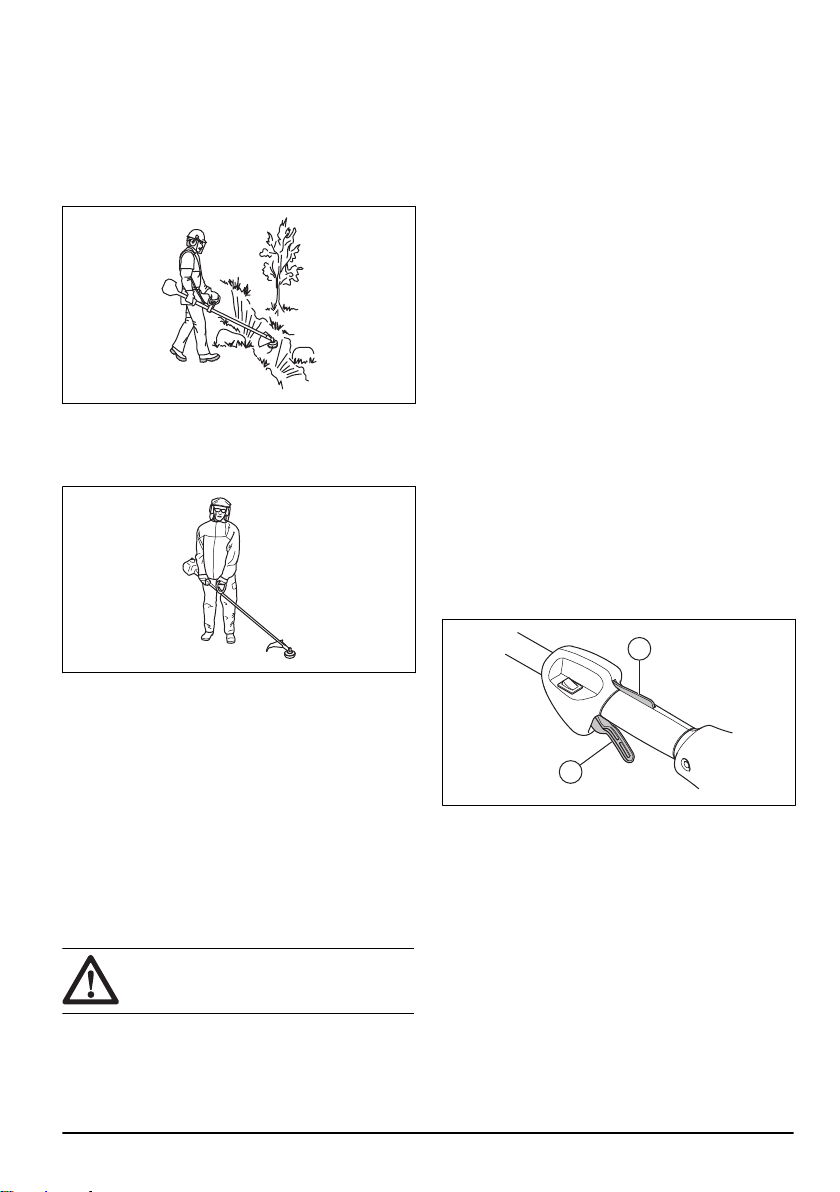
Safety instructions for operation
• Make sure the product is fully assembled before you
use it.
• Before a start, move the product 3 m (10 ft) away
from the position where you filled the fuel tank. Put
the product on a flat surface. Make sure that the
cutting attachment does not touch the ground or
other objects.
• The product can cause objects to eject, which can
cause damage to the eyes. Always use an approved
eye protection when you operate the product.
• Be careful, a child can come near the product
without your knowledge during operation.
• Do not operate the product if there are persons in
the work area. Stop the product if a person goes into
the work area.
• Make sure that you are always in control of the
product.
• Do not use the product if you cannot receive aid if an
accident occurs. Always make sure others know you
will operate the product before you start to operate
the product.
• Do not turn with the product before you make sure
that no persons or animals are in the safety area.
• Remove all unwanted materials from the work area
before you start. If the cutting attachment hits an
object, the object can eject and cause injury or
4
215 - 004 - 22.05.2020
Page 5
damage. Unwanted material can wind around the
A
B
cutting attachment and cause damage.
• Do not use the product in bad weather (fog, rain,
strong winds, risk of lightning or other weather
conditions.). Dangerous conditions (such as slippery
surfaces) can occur because of bad weather.
• Make sure that you can move freely and work in a
stable position.
• Make sure that you cannot fall when you use the
product. Do not tilt when you operate the product.
• Always hold the product with your two hands. Hold
the product on the right side of your body.
injury. The personal protective equipment decreases
the grade of injury if an accident occurs.
• Always use an approved eye protection while you
operate the product.
• Do not operate the product with bare feet or with
open shoes. Always use heavy-duty slip-resistant
boots.
• Use heavy, long pants.
• If it is necessary, use approved protective gloves.
• Use a helmet if it is possible that objects fall on your
head.
• Always use approved ear protection while you
operate the product. Noise for a long period can
cause noise-induced hearing loss.
• Make sure that you have a first aid kit near.
Protective devices on the product
• Make sure that you regularly do the maintenance to
the product.
• The life of the product increases.
• The risk of accidents decreases.
Let an approved dealer or an approved service
center regularly examine the product to do
adjustments or repairs.
• Do not use a product with damaged protective
equipment. If the product is damaged, speak to an
approved service center.
Throttle trigger lockout
The throttle trigger lockout locks the throttle trigger.
• Operate the product with the cutting attachment
below your waist.
• If the choke control is in the choke position when the
engine starts, the cutting attachment starts to turn.
• Do not touch the bevel gear after the engine stops.
The bevel gear is hot after the engine stops. Hot
areas can cause injury.
• Stop the engine before you move the product.
• Do not put down the product with the engine on.
• Before you remove the unwanted materials from the
product, stop the engine and wait until the cutting
attachment stops. Let the cutting attachment stop
before you or an aid remove the cut material.
Personal protective equipment
WARNING:
that follow before you use the product.
• Always use correct personal protective equipment
when you operate the product. The personal
protective equipment does not erase the risk of
215 - 004 - 22.05.2020
Read the warning instructions
Push the throttle trigger lockout (A) to release the
throttle trigger (B). When you release the handle, the
throttle trigger lockout and the throttle trigger go back to
their initial positions.
1. Make sure that the throttle trigger (B) is locked at idle
when you release the throttle trigger lockout (A).
2. Push the throttle trigger lockout (A) and make sure
that it goes back to its initial position when you
release it.
3. Push the throttle trigger (B) and make sure that it
goes back to its initial position when you release it.
Start the engine, and then apply full throttle. Release the
throttle trigger and examine if the cutting attachment
stops. If the cutting attachment turns with the throttle in
the idle position, examine the idle adjustment screw of
the carburetor.
5
Page 6

Stop switch
Start the engine. Make sure that the engine stops when
you move the stop switch to the stop position.
Cutting attachment guard
The cutting attachment guard prevents a loose object to
eject in the direction of the operator.
Examine the cutting attachment guard for damage and
replace if it is damaged. Only use the approved guard
for the cutting attachment.
Muffler
• Do not use an engine with a damaged muffler. A
damaged muffler increases the noise level and the
risk of fire. Keep a fire extinguisher near.
• Examine regularly that the muffler is attached to the
product.
• Do not touch the engine or the muffler when then
engine is on. Do not touch the engine or the muffler
for a while after the engine stops. Hot surfaces can
cause injuries.
• A hot muffler can cause a fire. Be careful, if you use
the product near flammable liquids or fumes.
• Do not touch the parts in the muffler, if the muffler is
damaged. The parts can contain some carcinogenic
chemicals.
Cutting attachment
WARNING:
that follow before you use the product.
Read the warning instructions
• Do the regular maintenance. Let an approved
service center regularly examine the cutting
attachment to do adjustments or repairs.
• The performance of the cutting attachment
increases.
• The life of the cutting attachment increases.
• The risk of accidents decreases.
• Only use an approved cutting attachment guard.
Refer to
• Do not use a damaged cutting attachment.
Accessories on page 16
.
Grass trimmer head
• Make sure that you wind the grass trimmer line
tightly and equally around the drum to decrease the
vibration.
• Use only the approved grass trimmer heads and
grass trimmer lines. Refer to
16
.
• Use a correct length of the grass trimmer line. A long
grass trimmer line uses more engine power than a
short grass trimmer line.
• Make sure that the cutter on the cutting attachment
guard is not damaged.
• Soak the grass trimmer line in water for 2 days
before you attach the grass trimmer line to the
product. This increases the life of the grass trimmer
line.
• Refer to the instructions for the cutting attachment to
use the correct procedure to load the cord and the
correct cord diameter.
Accessories on page
Fuel safety
• Do not start the product if there is fuel or engine oil
on the product. Remove the unwanted fuel/oil and let
the product dry. Remove unwanted fuel from the
product.
• If you spill fuel on your clothing, change clothing
immediately.
• Do not get fuel on your body, it can cause injury. If
you get fuel on your body, use a soap and water to
remove the fuel.
• Do not start the engine if you spill oil or fuel on the
product or on your body.
• Do not start the product if the engine has a leak.
Examine the engine for leaks regularly.
• Be careful with fuel. Fuel is flammable and the fumes
are explosive and can cause injuries or death.
• Do not breathe in the fuel fumes, it can cause injury.
Make sure that there is a sufficient airflow.
• Do not smoke near the fuel or the engine.
• Do not put warm objects near the fuel or the engine.
• Do not add the fuel when the engine is on.
• Make sure that the engine is cool before you refuel.
• Before you refuel, open the fuel tank cap slowly and
release the pressure carefully.
6
215 - 004 - 22.05.2020
Page 7

• Do not add fuel to the engine in an indoor area. Not
sufficient airflow can cause injury or death because
of asphyxiation or carbon monoxide.
• Tighten the fuel tank cap carefully or a fire can
occur.
• Move the product at a minimum of 3 m (10 ft) from
the position where you filled the tank before a start.
• Do not put too much fuel in the fuel tank.
• Make sure that a leak cannot occur when you move
the product or fuel container.
• Do not put the product or a fuel container where
there is an open flame, spark or pilot light. Make
sure that the storage area does not contain an open
flame.
Assembly
WARNING: Read the safety chapter before
you assemble the product.
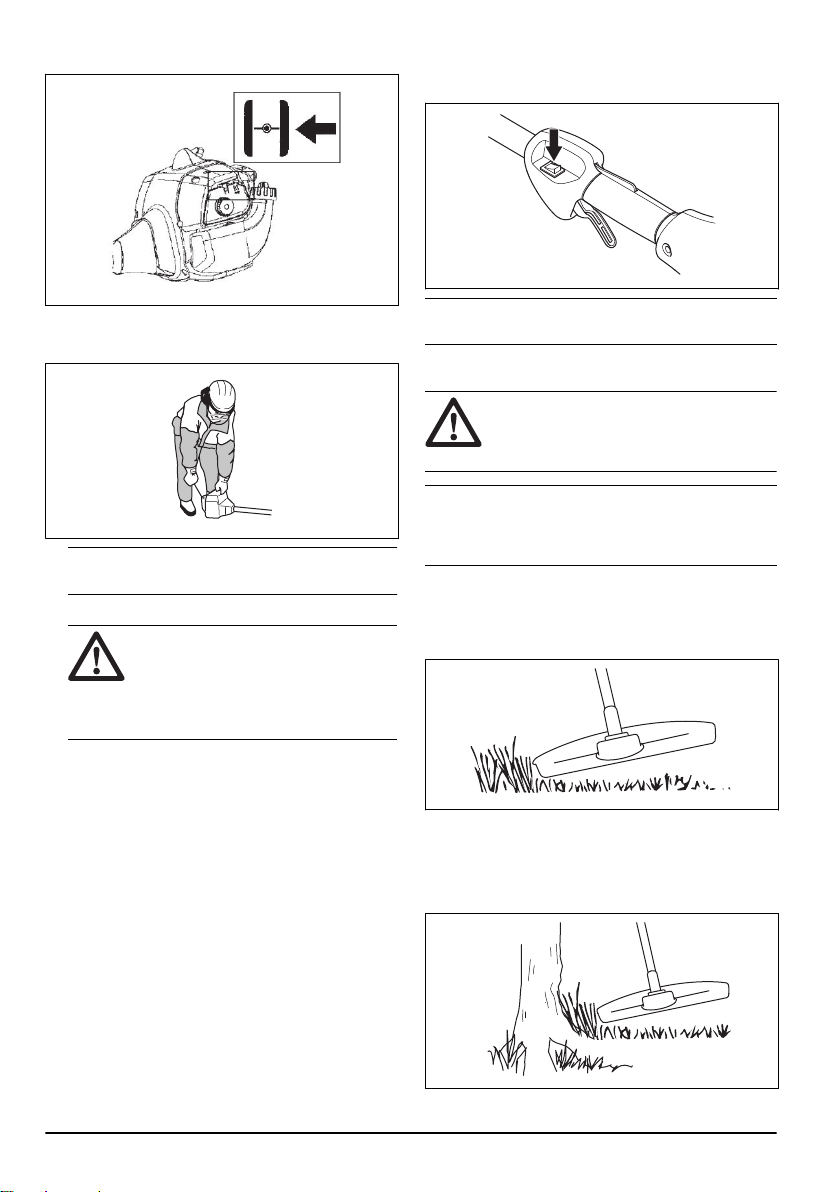
To attach the loop handle
1. Attach the loop handle to the shaft in compliance
with the illustration and tighten.
• Only use approved containers when you move the
fuel or put the fuel into storage.
• Empty the fuel tank before long-term storage. Obey
the local law on where to dispose fuel.
• Clean the product before long-term storage.
• Remove the spark plug cable before you put the
product into storage to make sure that the engine
does not start accidentally.
Safety instructions for maintenance
• If you cannot adjust the idle speed to make the
cutting attachment stop, speak to your service
center. Do not use the product until the product is
correctly adjusted or repaired.
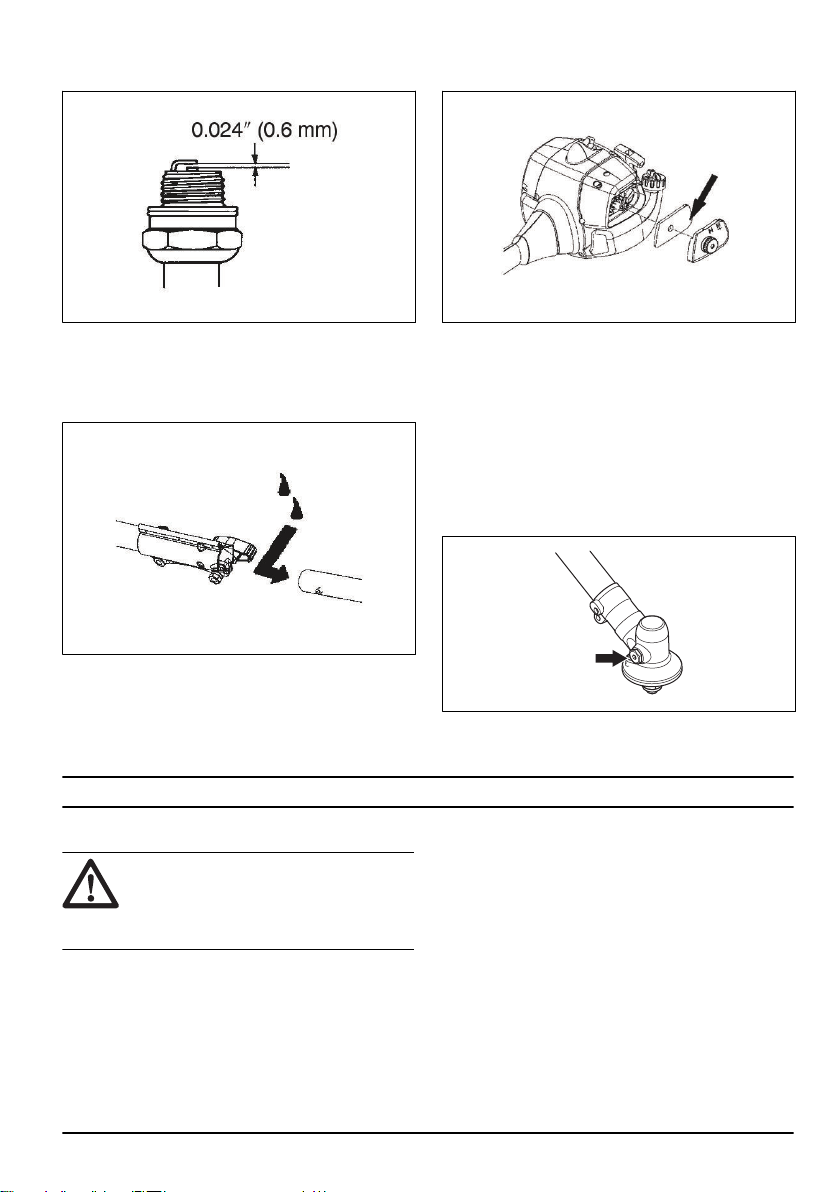
2. Move the locking/release button (A) into the guide
recess. Push the attachment into the coupler until
the locking/release button sets into the primary hole
(B).
3. Insert the shaft into the shaft coupling. The button
2. Make sure that the loop handle attaches between
the arrows on the shaft.
To assemble the two-piece shaft
1. Turn the knob to loosen the shaft coupling.
215 - 004 - 22.05.2020 7
must go through the hole.
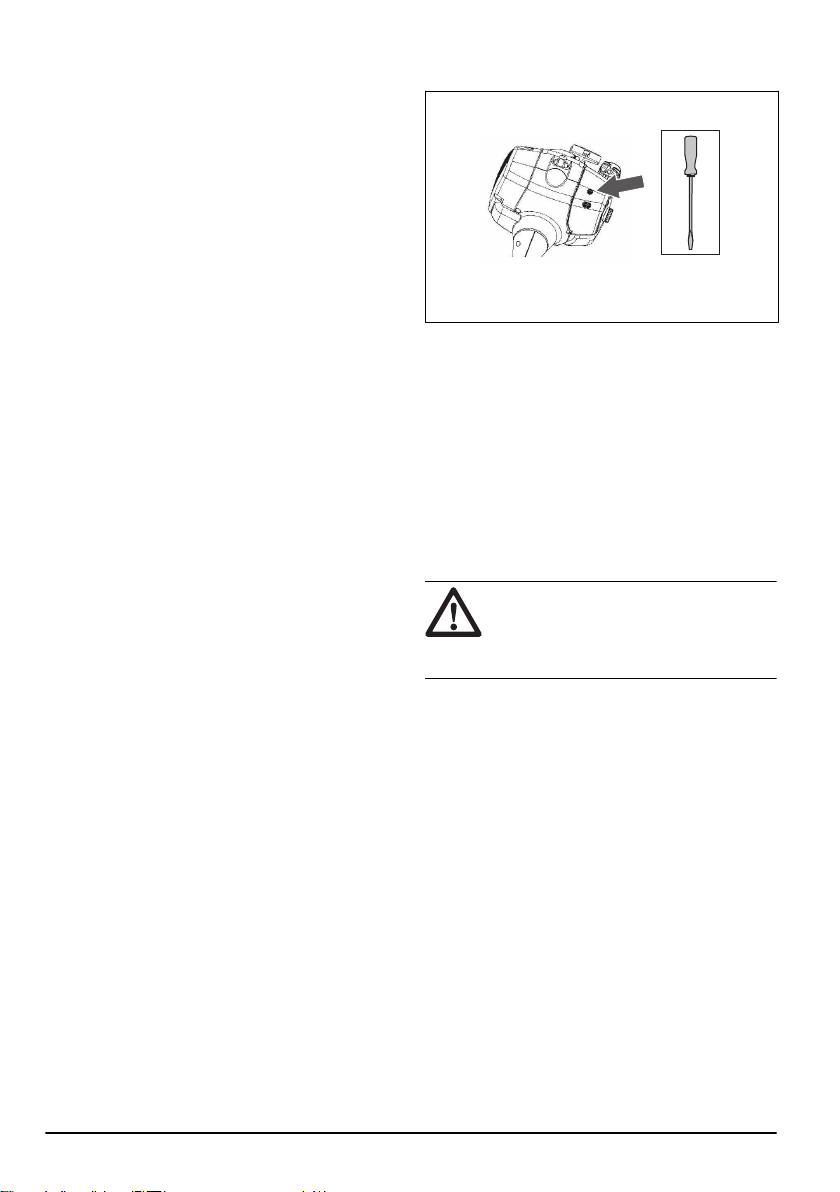
Note: If the attachment does not go fully into the
upper shaft, use a small screwdriver to push the
internal drive shaft deeper into the tube. It can be
necessary to turn the screwdriver while you push.
4. Make sure that you fully tighten the knob before you
operate the product.
Page 8
To disassemble the two-piece shaft
L
A
C
A
B
L
A
C
A
B
H
1. Turn the knob to loosen the shaft coupling.
4. Put a small screwdriver (C) in the hole to lock the
shaft.
2. Push and hold the locking/release button (B). Pull
the shafts apart.
To assemble the cutting attachment
To attach the cutting attachment guard and the trimmer head (straight shaft)
1. Attach the cutting attachment guard (A) to the shaft
with the bolt (L). Make sure to use the correct cutting
attachment guard and the correct trimmer head.
5. Turn the trimmer head (H) counterclockwise to
tighten the trimmer head to the gearbox. (Left hand
threads.)
To attach the cutting attachment guard and trimmer head (curved shaft)
1. Attach the guard. Tighten the nut.
2. Attach the dust cup on the shaft.
2. Attach the drive disc (B) to the output shaft.
3. Turn the output shaft until the hole in the drive disc
aligns with the hole in the gear housing.
8
3. Hold the dust cup with an adjustable wrench to make
sure the shaft does not turn.
4. Attach the trimmer head to the shaft. Turn the
trimmer head clockwise.
215 - 004 - 22.05.2020
Page 9
Operation
WARNING: Read and understand the safety
chapter before you operate the product.
Fuel
To use fuel
CAUTION: This product has a two-cycle
engine. Use a mixture of gasoline and twocycle engine oil. Make sure to use the
correct quantity of oil in the mixture.
Incorrect ratio of gasoline and oil can cause
damage to the engine.
Gasoline
CAUTION: Do not use gasoline with an
octane number less than 90 RON (87 AKI).
This can cause damage to the product.
CAUTION: Do not use gasoline with more
than 10% ethanol concentration (E10). This
can cause damage to the product.
CAUTION: Do not use leaded gasoline. This
can cause damage to the product.
• Always use new unleaded gasoline with a minimum
octane number of 90 RON (87 AKI) and with less
than 10% ethanol concentration (E10).
• Use gasoline with a higher octane number if you
frequently use the product at continuously high
engine speed.
• Always use a good quality unleaded gasoline/oil
mixture.
Two-cycle engine oil
• Use only high quality two-cycle engine oil. Use only
an air cooled engine oil.
• Do not use other types of oil.
• Mixture ratio 50:1 (2%)
Gasoline
1 U.S. Gal. 77 ml (2,6 oz)
1 UK Gal. 95 ml (3,2 oz)
5 l 100 ml (3,4 oz)
Oil
To make the fuel mixture
Note: Always use a clean fuel container when you mix
the fuel.
Note: Do not make more than 30 days quantity of fuel
mixture.
1. Add half of the gasoline quantity.
2. Add the full quantity of oil.
3. Shake the fuel mixture to mix the contents.
4. Add the remaining gasoline quantity.
5. Shake the fuel mixture to mix the contents.
6. Fill the fuel tank.
To add fuel
• Always use a fuel container with an antispill valve.
• If there is some fuel on the container, remove the
unwanted fuel and let the container dry.
• Make sure that the area near the fuel tank cap is
clean.
• Shake the fuel container before you add the fuel
mixture to the fuel tank.
To start and stop
To examine before an engine start
• Examine the product for missing, damaged, loose or
worn parts.
• Examine the nuts, screws and bolts.
• Examine the air filter.
• Examine the throttle trigger lockout and the throttle
control for correct operation.
• Examine the stop switch for correct operation.
• Examine for fuel leaks.
To start a cold engine
1. Push the air purge bulb 10 times.
215 - 004 - 22.05.2020
9
Page 10
2. Move choke control to the full choke position.
To stop the product
• Push the stop switch to stop the engine.
3. Hold the body of the product on the ground with your
left hand. Do not step on the product. Pull the starter
rope handle slowly until you feel some resistance.
Note: Do not pull the throttle trigger while you start
the engine.
4. Pull the starter rope handle 3 times with force.
CAUTION:
until it stops. Do not let go of the starter
rope when it is fully extended. Release
the starter rope slowly. Failure to obey
these instructions can cause damage to
the engine.
5. Move the choke control to the half choke position.
6. Pull the starter rope handle until the engine starts.
7. Let the engine run for 10 seconds.
8. Move the choke control to the no choke position.
Do not pull the starter rope
To start a warm engine
1. Slowly push the air purge bulb 10 times.
2. Move the choke lever to the HALF CHOKE position.
3. Pull the starter rope handle quickly until the engine
runs.
4. Move the choke lever to the NO CHOKE position.
Note: The stop switch automatically goes back to its
initial position.
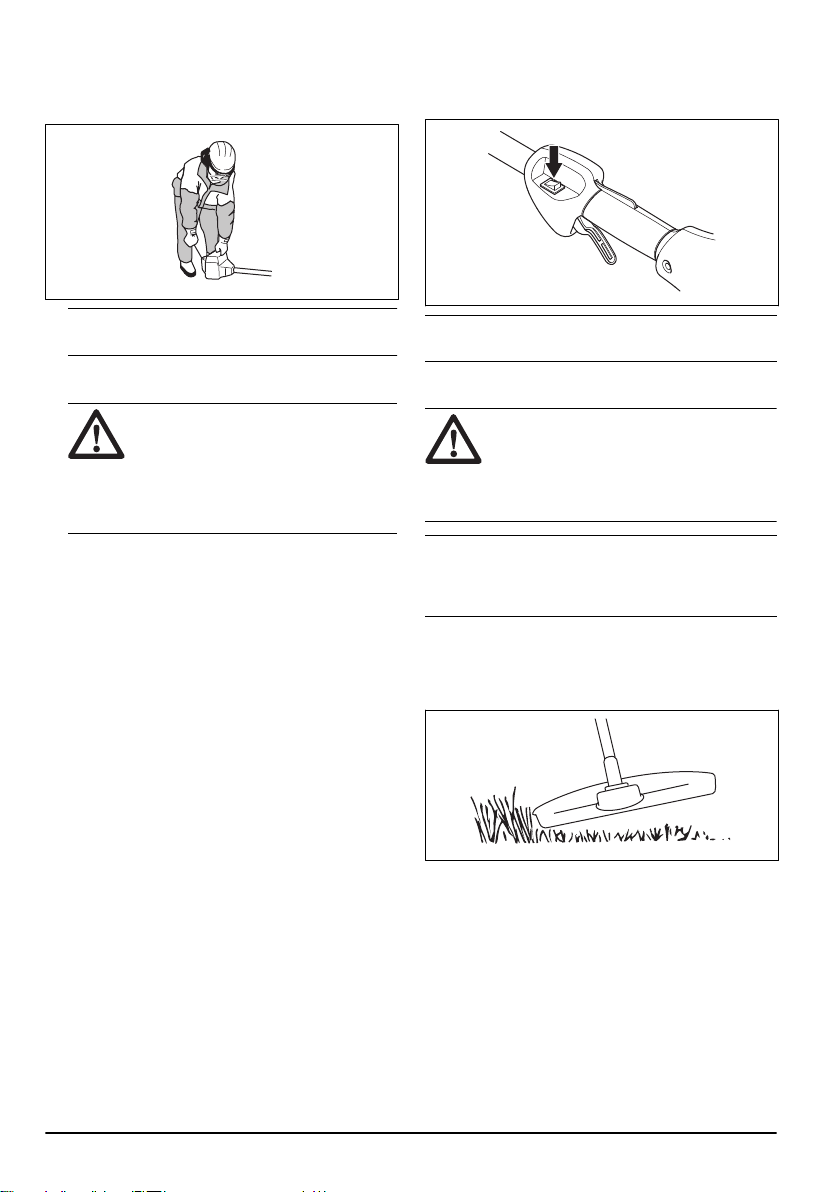
To operate the grass trimmer
CAUTION: Make sure that you slow the
engine to idle speed after each operation. A
long period at full throttle without a load on
the engine can cause damage to the engine.
Note: Clean the cover of the trimmer head when you
attach a new trimmer line to prevent vibrations. Examine
other parts of the trimmer head and clean if it is
necessary.
To trim the grass
1. Hold the trimmer head immediately above the
ground at an angle. Do not push the trimmer line into
the grass.
2. Decrease the length of the trimmer line by 10-12
cm / 4-4.75 in.
3. Decrease the engine speed to decrease the risk of
damage to plants.
4. Use 80 % throttle when you cut grass near objects.
10
215 - 004 - 22.05.2020
Page 11
To cut the grass
6,0 m
18'
3,05 m
9'
2,0-2,4 mm
.079-.095"
10 cm
4"
1. Make sure that the trimmer line is parallel to the
ground when you cut the grass.
2. Do not push the trimmer head to the ground. This
can cause damage to the product.
3. Move the product from side to side when you cut
grass. Use full speed.
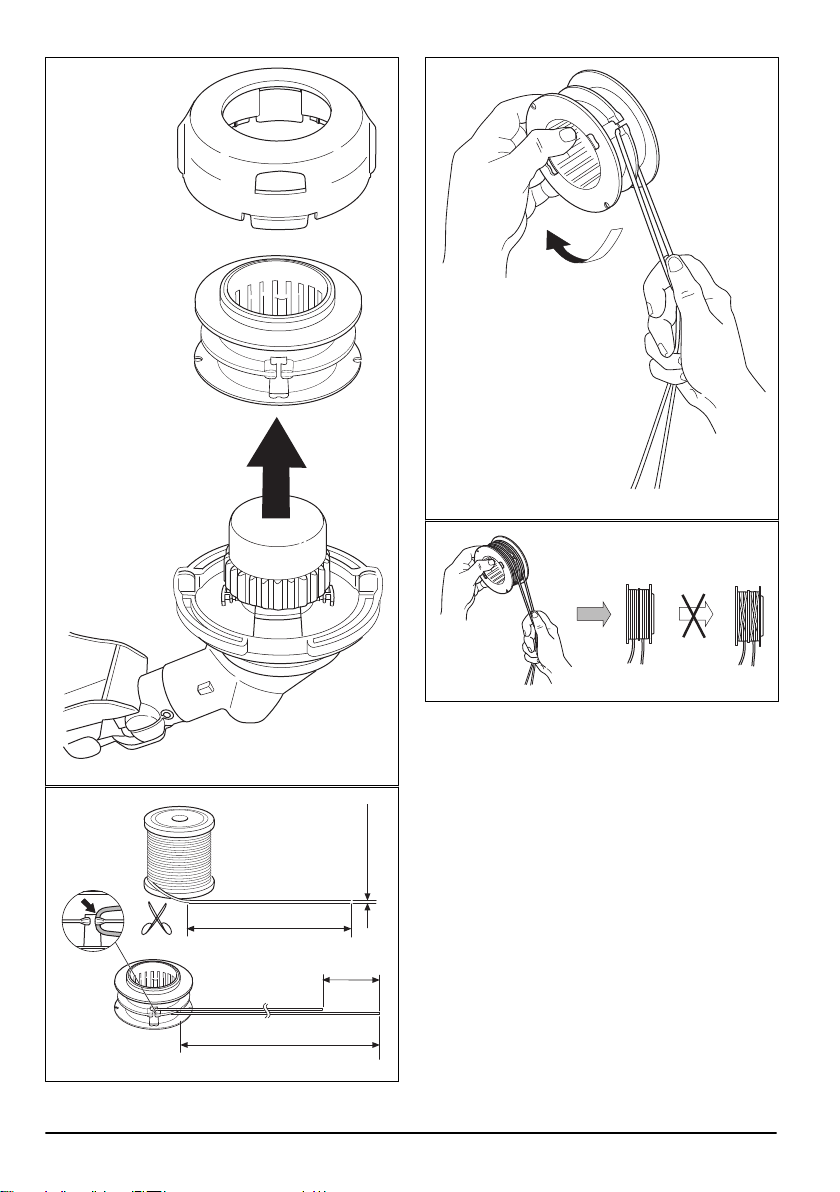
To replace the trimmer line
215 - 004 - 22.05.2020
11
Page 12
6"
15 cm
12 215 - 004 - 22.05.2020
Page 13

"Click"
Maintenance
WARNING: Read and understand the safety
chapter before you clean, repair or do
maintenance on the product.
Maintenance schedule
Make sure that you obey the maintenance schedule.
The intervals are calculated from daily use of the
product. The intervals are different if you do not use the
product each day. Only do the maintenance work that is
found in this manual. Speak to an approved service
center about other maintenance work not found in this
manual.
Weekly maintenance
• Clean the external surfaces.
• Examine the idle speed.
• Examine the bevel gear grease (straight shaft).
Monthly maintenance
• Examine the starter rope handle and the starter
rope.
Yearly maintenance
• Examine the spark plug.
• Apply grease to the end of the drive shaft (two-piece
shaft).
• Clean the external surfaces of the carburetor and its
adjacent areas.
• Clean the cooling system.
• Examine the spark arrester screen.
• Examine the fuel filter.
• Examine the fuel hose for damage.
• Examine all cables and connections.
50 hours maintenance
• Have an approved service center repair or replace
the muffler.
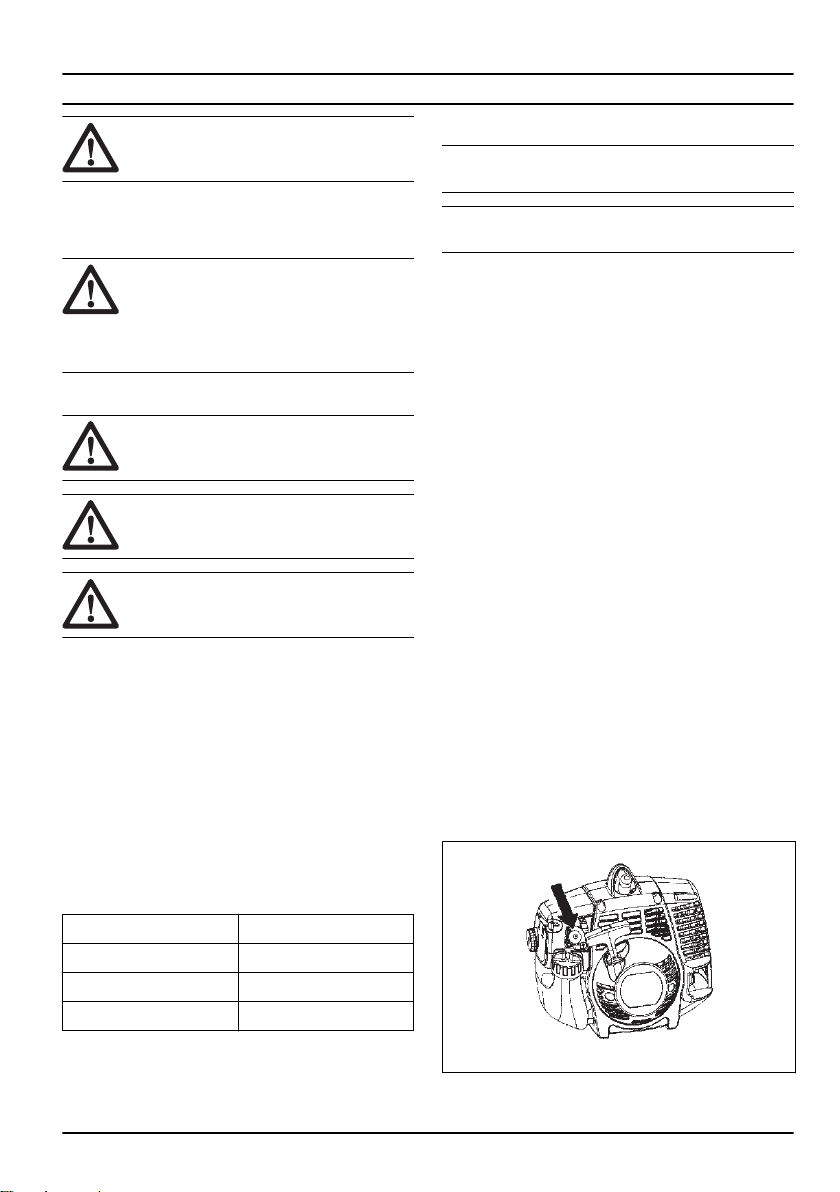
To adjust the idle speed
• Make sure that the air filter is clean and the air filter
cover is attached before you adjust the idle speed.
• Adjust the idle speed with the idle adjustment screw
T which is identified with "T" mark.
• The idle speed is correct when the engine operates
smoothly in all positions. The idle speed must be
below the speed when the cutting attachment starts
to turn.
215 - 004 - 22.05.2020 13
Page 14
1. Turn the idle adjustment screw clockwise until the
cutting attachment starts to turn.
3. Clean the spark plug if it is dirty. Examine that the
electrode gap is correct.
2. Turn the idle adjustment screw counterclockwise
until the cutting attachment stops.
To clean the cooling system
Clean the parts of the cooling system with a brush.
To do maintenance on the spark arrester screen
Use a wire brush to clean the spark arrester screen.
To examine the spark plug
CAUTION: Use the recommended spark
plug. Make sure that the replacement is the
same as the manufacturer supplied part. An
incorrect spark plug can cause damage to
the product.
1. Examine the spark plug when:
a) the engine is low on power.
b) the engine is not easy to start.
c) the engine does not operate correctly at idle
speed.
2. If, the engine is not easy to start or operate, examine
the spark plug for unwanted materials. To decrease
the risk of unwanted material on the spark plug
electrodes:
a) make sure that the idle speed is correctly
adjusted.
b) make sure that the fuel mixture is correct.
c) make sure that the air filter is clean.
4. Replace the spark plug when it is necessary.
To apply grease to the two-piece shaft
• Apply grease to the end of the drive shaft after each
30 hours of operation.
To do the maintenance to the air filter
To clean the air filter
1. Remove the air filter cover and remove the air filter.
2. Clean the air filter with warm soap water. Make sure
that the air filter is dry before you install it.
3. Replace the air filter if it is too dirty to fully clean it.
Always replace a damaged air filter.
14
215 - 004 - 22.05.2020
Page 15
To add grease to the bevel gear
• Make sure that the bevel gear is filled ¾ full with
bevel gear grease.
Transportation and storage
Transportation and storage
WARNING: To prevent the risk of fire, make
sure that there are no leaks or fumes during
transportation or storage. Make sure that
there is no risk of sparks or fire.
• Empty the fuel tank before transportation or longterm storage. Push the air purge bulb to make sure
that all fuel is removed. Discard the fuel at an
applicable disposal location.
Technical data
• Make sure that the product is clean and that a full
servicing is done before long-term storage.
• Remove the spark plug and put approximately 15 ml
of two-stroke oil into the cylinder. Turn the product 3
times and install the spark plug again.
• Attach the product safely to the vehicle during
transportation.
• Keep the product in a dry, cool and clean space with
good airflow. Keep the product away from children.
128CD
LT28CCHV
Engine Specifications
Cylinder displacement, cm
Electrode gap, mm 0.6 0.6
Fuel tank volume, cm
Idling speed, min
Maximum power speed, min
Power output, kW 0.7 0.7
Spark plug Champion QCJ-8Y Champion QCJ-8Y
Maximum output shaft rotation, min
Emissions durability period, h 125 125
Product Dimensions
Weight (excluding cutting equipment), kg 5.0 5.0
215 - 004 - 22.05.2020 15
3
3
-1
-1
-1
28 28
400 400
2300-3200 2300-3200
8000 8000
8000 8000
128LD
LT28CSHV
Page 16

Note 1: Reported data for equivalent vibration level has a typical statistical dispersion (standard deviation) of 1 m/s2.
Note 2: Noise emissions in the environment measured as sound power (LWA) in conformity with EC directive
2000/14/ EC. Reported sound power level for the machine has been measured with the original cutting attachment
that gives the highest level. The difference between guaranteed and measured sound power is that the guaranteed
sound power also includes dispersion in the measurement result and the variations between different machines of
the same model according to Directive 2000/14/EC.
Note 3: Reported data for equivalent sound pressure level for the machine has a typical statistical dispersion (standard deviation) of 1 dB (A).
Accessories
128CD
Approved accessories Type Cutting attachment guard
Thread shaft (3/8 RH)
Trimmer head T25 545 03 11-01
128LD
Approved accessories Type Cutting attachment guard
Threaded shaft (M10L)
Trimmer head T25 545 03 09-01
Plastic blades Tricut 300 mm 545 03 09-01
16 215 - 004 - 22.05.2020
Page 17

Contenido
1
2
3
5
6
7
9
10
8
17
16
11
13
12
14
15
19
4
18
5
1
4
4
Introducción.................................................................. 17
Seguridad..................................................................... 18
Montaje......................................................................... 22
Funcionamiento............................................................ 24
Introducción
Manual del usuario
El idioma original de este manual de usuario es el
inglés. Los manuales de usuario en otros idiomas son
traducciones del inglés.
Descripción general
Mantenimiento.............................................................. 29
Transporte y almacenamiento...................................... 31
Datos técnicos.............................................................. 32
Accesorios.................................................................... 32
1. Cabezal de corte
2. Tapón de llenado de grasa
3. Engranaje angulado
4. Protección del equipo de corte
5. Eje
6. Acoplamiento de eje
7. Mango cerrado
8. Gatillo del acelerador
9. Interruptor de detención
10. Bloqueo del acelerador
11. Sombrerete de bujía y bujía
12. Cuerpo del mecanismo de arranque
13. Empuñadura de la cuerda de arranque
14. Depósito de combustible
15. Bulbo de la purga de aire
16. Estrangulador
17. Cubierta del filtro de aire
18. Disco de arrastre
19. Manual del usuario
215 - 004 - 22.05.2020 17
Page 18
Propuesta 65 de California
¡ADVERTENCIA!
Los gases de escape del motor de este
producto contienen sustancias químicas
conocidas en el Estado de California
como causantes de cáncer, defectos
congénitos y otros daños reproductivos.
5
0
F
T
15
m
50F
T
1
5 m
Símbolos en el producto
El producto puede provocar que los objetos
salgan expulsados, lo que puede causar
daños a los ojos.
Velocidad máxima del eje de salida.
Distancia de seguridad
Utilice solo hilos autorizados para la
recortadora. No utilice una cuchilla.
Advertencia
Lea este manual.
Use protección para la cabeza aprobada.
Use protección auricular aprobada.
Use protección ocular aprobada.
Use guantes protectores aprobados.
Use zapatos/botas de protección.
El producto puede provocar que los objetos
salgan expulsados, lo que puede causar
daños a los ojos.
No utilice un equipo de corte de metal.
Si tiene el cabello largo, asegúrese de
amarrarlo sobre sus hombros.
Las flechas muestran los límites de la
posición de la palanca.
Tenga en cuenta: Otros símbolos o etiquetas del
producto hacen referencia a requisitos de certificación
para otras zonas comerciales.
Responsabilidad del fabricante
Como se menciona en las leyes de responsabilidad del
fabricante, no nos hacemos responsables de los daños
que cause nuestro producto si:
• el producto se repara incorrectamente
• el producto se repara con piezas que no son del
fabricante o que este no autoriza
• el producto tiene un accesorio que no es del
fabricante o que este no autoriza
• el producto no se repara en un centro de servicio
autorizado o por una autoridad aprobada.
Seguridad
Definiciones de seguridad
Las siguientes definiciones proporcionan el nivel de
gravedad de cada palabra clave.
18 215 - 004 - 22.05.2020
ADVERTENCIA: Lesiones a personas.
Page 19

AVISO: Daños en el producto.
Tenga en cuenta: Esta información hace que el
producto sea más fácil de usar.
Instrucciones generales de seguridad
ADVERTENCIA: Lea atentamente las
instrucciones de advertencia siguientes
antes de usar el producto.
• Utilice el producto correctamente. Las lesiones
graves o fatales son un posible resultado de un uso
incorrecto. Solo utilice el producto para las tareas
que aparecen en este manual. No utilice el producto
para otras tareas.
• Obedezca las instrucciones contenidas en este
manual. Obedezca los símbolos y las instrucciones
de seguridad. Si el usuario no obedece las
instrucciones y los símbolos, es posible que se
produzcan daños y lesiones tanto graves como
fatales.
• No deseche este manual. Utilice las instrucciones
para montar, operar y mantener el producto en buen
estado. Utilice las instrucciones para la correcta
instalación de piezas y accesorios. Utilice solamente
piezas y accesorios homologados.
• No use un producto dañado. Cumpla con el
programa de mantenimiento. Realice solamente las
tareas de mantenimiento en las que se detallan
instrucciones en este manual. Un centro de servicio
autorizado debe realizar todos los demás trabajos
de mantenimiento.
• En este manual no se pueden abarcar todas las
situaciones que pueden ocurrir cuando se utiliza el
producto. Tenga cuidado y use el sentido común. No
haga funcionar el producto ni le realice
mantenimiento si no está seguro de la situación.
Hable con un experto en el producto, su distribuidor,
el agente de servicio o un centro de servicio
autorizado para obtener más información.
• Desconecte el cable de la bujía antes de montar o
almacenar el producto, o realizar tareas de
mantenimiento.
• No utilice el producto si cambia su especificación
inicial. No cambie una parte del producto sin la
aprobación del fabricante. Utilice solo piezas
aprobadas por el fabricante. Las lesiones graves o
fatales son un posible resultado de un
mantenimiento incorrecto.
• No respire los humos del motor. La inhalación
prolongada de los gases de escape es un riesgo
para la salud.
• No encienda el producto en interiores o cerca de
materiales inflamables. Los gases de escape están
muy calientes y pueden crear incendios debido a la
creación de chispas. Un flujo de aire insuficiente
puede causar lesiones graves o fatales por asfixia o
debido al monóxido de carbono.
• Cuando utilice este producto, el motor crea un
campo electromagnético. El campo
electromagnético puede causar daños a implantes
médicos. Hable con su médico y fabricante del
implante antes de utilizar el producto.
• No deje que un niño utilice el producto. No permita
que una persona que no conozca las instrucciones
utilice el producto.
• Asegúrese de supervisar siempre a una persona con
capacidades físicas o mentales limitadas que utilice
el producto. Debe haber un adulto responsable en
todo momento.
• Mantenga el producto en un área a la cual los niños
y las personas no autorizadas no puedan acceder.
• El producto puede expulsar objetos y causar
lesiones. Siga las instrucciones de seguridad para
reducir el riesgo de lesiones graves o fatales.
• No se aleje del producto cuando el motor esté en
marcha.
• El operador del producto es responsable en caso de
un accidente.
• Asegúrese de que las piezas no estén dañadas
antes de utilizar el producto.
• Asegúrese de estar al menos a 15 m (50 pies) de
distancia de otras personas o animales antes de
utilizar el producto. Asegúrese de que las personas
en el área adyacente sepan que utilizará el
producto.
• Consulte las leyes locales o nacionales. Estas
pueden evitar o disminuir el funcionamiento del
producto en algunas condiciones.
• No utilice el producto si está cansado o bajo la
influencia de alcohol, drogas o medicamentos.
Pueden tener efectos sobre su visión, estado de
alerta, coordinación o criterio.
Instrucciones de seguridad para el funcionamiento
• Asegúrese de que el producto esté completamente
montado antes de usarlo.
• Antes de comenzar, mueva el producto 3 m
(10 pies) de distancia desde la posición donde llenó
el depósito de combustible. Coloque el producto
sobre una superficie plana. Asegúrese de que el
equipo de corte no toque el suelo u otros objetos.
• El producto puede provocar que los objetos salgan
expulsados, lo que puede causar daños a los ojos.
Use siempre protección ocular autorizada cuando
utilice el producto.
• Tenga cuidado, un niño puede acercarse al producto
sin que lo note mientras se encuentra en
funcionamiento.
• No utilice el producto si hay personas en el área de
trabajo. Detenga el producto si una persona entra al
área de trabajo.
• Asegúrese de estar siempre en control del producto.
215 - 004 - 22.05.2020
19
Page 20

• No utilice el producto si no puede recibir ayuda en
caso de un accidente. Asegúrese siempre de que
los demás sepan que va a utilizar el producto antes
de comenzar a utilizarlo.
• No gire con el producto sin asegurarse de que no
haya personas ni animales en la zona de seguridad.
• Retire todos los materiales no deseados del área de
trabajo antes de empezar. Si el equipo de corte
choca contra un objeto, el objeto se puede expulsar
y causar lesiones o daños. El material no deseado
puede enredarse en el equipo de corte y causar
daños.
• No utilice el producto en malas condiciones
climáticas (niebla, lluvia, vientos fuertes, riesgo de
rayos u otros tipos de condiciones climáticas). Las
condiciones peligrosas (como superficies
resbaladizas) se pueden producir debido al mal
clima.
• Asegúrese de poder moverse libremente y trabajar
en una posición estable.
• Asegúrese de no correr riesgos de caídas cuando
utilice el producto. No se incline cuando utilice el
producto.
• Siempre sostenga el producto con las dos manos.
Mantenga el producto al lado derecho de su cuerpo.
• Utilice el producto con el equipo de corte por debajo
de la cintura.
• Si el estrangulador está en la posición de
estrangulamiento cuando el motor arranca, el equipo
de corte comienza a girar.
• No toque el engranaje angulado después de que se
detenga el motor. El engranaje angulado está
caliente después de que el motor se detiene. Las
áreas calientes pueden causar lesiones.
• Detenga el motor antes de mover el producto.
• No deje el producto en el suelo con el motor
encendido.
• Antes de eliminar el material no deseado del
producto, detenga el motor y espere hasta que el
equipo de corte se detenga. Deje que el equipo de
corte se detenga antes de que usted o un ayudante
quiten el material de corte.
Equipo de protección personal
ADVERTENCIA: Lea atentamente las
instrucciones de advertencia siguientes
antes de usar el producto.
• Utilice siempre el equipo de protección personal
adecuado cuando utilice el producto. El equipo de
protección personal no elimina el riesgo de lesiones.
El equipo de protección personal disminuye el grado
de la lesión en caso de un accidente.
• Use siempre protección ocular autorizada cuando
utilice el producto.
• No utilice el producto con los pies descalzos o con
zapatos abiertos. Use siempre botas antideslizantes
de servicio pesado.
• Utilice pantalones largos y gruesos.
• Si es necesario, utilice guantes de protección
aprobados.
• Use un casco si existe la posibilidad de que caigan
objetos sobre su cabeza.
• Use siempre protectores auriculares autorizados
cuando utilice el producto. Escuchar ruidos durante
un largo período puede provocar pérdida de
audición inducida por el ruido.
• Asegúrese de tener un botiquín de primeros auxilios.
Dispositivos de protección en el producto
• Asegúrese de realizar el mantenimiento del producto
frecuentemente.
• Esto aumenta la vida útil del producto.
• Disminuye el riesgo de accidentes.
Permita que un concesionario autorizado o un centro
de servicio autorizado examinen frecuentemente el
producto para realizar ajustes o reparaciones.
• No use un producto con equipo de protección
dañado. Si el producto está dañado, comuníquese
con un centro de servicio autorizado.
Bloqueo del acelerador
El bloqueo del acelerador bloquea el acelerador.
20
215 - 004 - 22.05.2020
Page 21

A
B
Presione el bloqueo del acelerador (A) para liberar el
acelerador (B). Cuando suelta la manija, tanto el
bloqueo del acelerador como el acelerador vuelven a
sus posiciones iniciales.
1. Asegúrese de que el acelerador (B) se encuentre
bloqueado al ralentí cuando suelte el bloqueo del
acelerador (A).
2. Presione el bloqueo del acelerador (A) y asegúrese
de que vuelva a su posición inicial cuando lo suelte.
3. Presione el acelerador (B) y asegúrese de que
vuelva a su posición inicial cuando lo suelte.
Encienda el motor y aplique la aceleración máxima.
Suelte el acelerador y examine si el equipo de corte se
detiene. Si el equipo de corte gira con el acelerador en
la posición de ralentí, examine el tornillo de ajuste de
ralentí del carburador.
Interruptor de detención
Arranque el motor. Asegúrese de que el motor se
detenga cuando mueva el interruptor de detención a la
posición de detención.
Protección del equipo de corte
La protección del equipo de corte evita que un objeto
suelto salga expulsado en dirección al usuario.
Examine la protección del equipo de corte en busca de
daños y reemplácela si está dañada. Utilice solamente
la protección aprobada para el equipo de corte.
Silenciador
• No utilice un motor con un silenciador dañado. Un
silenciador dañado aumenta el nivel de ruido y el
riesgo de incendio. Mantenga un extintor de
incendios cerca.
• Examine frecuentemente que el silenciador esté
unido al producto.
• No toque el motor o el silenciador cuando el motor
esté en marcha. No toque el motor o el silenciador
por un tiempo después de que el motor se detenga.
Las superficies calientes pueden causar lesiones.
• Un silenciador caliente puede provocar un incendio.
Tenga cuidado si utiliza el producto cerca de
líquidos inflamables o gases.
• No toque las piezas del silenciador si el silenciador
está dañado. Las piezas pueden contener algunos
productos químicos cancerígenos.
Equipo de corte
ADVERTENCIA: Lea atentamente las
instrucciones de advertencia siguientes
antes de usar el producto.
• Realice el mantenimiento periódico. Permita que un
centro de servicio autorizado examine
frecuentemente el equipo de corte para realizar
ajustes o reparaciones.
• El rendimiento del equipo de corte aumenta.
• La vida útil del equipo de corte aumenta.
• Disminuye el riesgo de accidentes.
• Solamente utilice una protección aprobada para el
equipo de corte. Consulte
32
.
• No utilice un equipo de corte dañado.
Cabezal de corte para hierba
• Asegúrese de enrollar el hilo de la recortadora de
césped firme y equitativamente alrededor del tambor
para disminuir la vibración.
• Utilice solamente cabezales e hilos de corte para
hierba aprobados. Consulte
32
.
• Utilice una longitud correcta de hilo para la
recortadora. Un hilo largo para la recortadora utiliza
más potencia del motor que un hilo corto.
• Asegúrese de que la cortadora en la protección del
equipo de corte no está dañada.
• Empape el hilo de la recortadora de césped en agua
durante 2 días antes de conectarlo al producto. Esto
aumenta la vida útil del hilo de la recortadora de
césped.
Accesorios en la página
Accesorios en la página
215 - 004 - 22.05.2020
21
Page 22

• Consulte las instrucciones del equipo de corte para
usar el procedimiento adecuado para cargar el hilo
de la recortadora y su diámetro adecuado.
Seguridad de combustible
• No arranque el producto si hay combustible o aceite
de motor en el producto. Quite el combustible o
aceite no deseado y deje secar el producto. Quite el
combustible no deseado del producto.
• Si derrama combustible en su ropa, cámbiese la
ropa inmediatamente.
• No permita que le caiga combustible en el cuerpo,
ya que puede causar lesiones. Si le cae combustible
en el cuerpo, utilice jabón y agua para quitarlo.
• No arranque el motor si derrama aceite o
combustible en el producto o en su cuerpo.
• No arranque el producto si el motor tiene una fuga.
Examine frecuentemente el motor en busca de
fugas.
• Tenga cuidado con el combustible. El combustible
es inflamable y los gases son explosivos y pueden
causar lesiones graves o fatales.
• No respire los gases del combustible, ya que
pueden causar lesiones. Asegúrese de que haya
suficiente flujo de aire.
• No fume cerca del combustible o del motor.
• No coloque objetos calientes cerca del combustible
o del motor.
• No agregue combustible cuando el motor esté en
marcha.
• Asegúrese de que el motor se enfríe antes de llenar
el depósito de combustible.
• Antes de llenar el depósito de combustible, abra
lentamente la tapa del depósito de combustible y
libere la presión con cuidado.
• No agregue combustible al motor en un área interior.
Un flujo de aire insuficiente puede causar lesiones
graves o fatales por asfixia o debido al monóxido de
carbono.
• Apriete la tapa del depósito de combustible con
cuidado para evitar incendios.
• Mueva el producto a un mínimo de 3 m (10 pies) de
la posición en la que se llenó el depósito antes de
empezar.
• No ponga demasiado combustible en el depósito de
combustible.
• Asegúrese de que no se puedan provocar fugas
cuando mueva el producto o el recipiente de
combustible.
• No coloque el producto ni un recipiente de
combustible donde haya una llama expuesta, una
chispa o una fuente de calor. Asegúrese de que no
haya una llama expuesta en el área de
almacenamiento.
• Utilice solamente contenedores aprobados cuando
mueva el combustible o coloque el combustible en el
almacenamiento.
• Vacíe el depósito de combustible antes de un
almacenamiento a largo plazo. Cumpla con las leyes
locales en cuanto al lugar en dónde se puede
deshacer del combustible.
• Limpie el producto antes de un almacenamiento a
largo plazo.
• Retire el cable de la bujía antes de almacenar el
producto, para asegurarse de que el motor no
arranque accidentalmente.
Instrucciones de seguridad para el mantenimiento
• Si no puede ajustar el régimen de ralentí para
detener el equipo de corte, comuníquese con su
centro de servicio. No utilice el producto hasta que
esté correctamente ajustado o reparado.
Montaje
ADVERTENCIA: Lea el capítulo de
seguridad antes de montar el producto.
22 215 - 004 - 22.05.2020
Para conectar el mango cerrado
1. Conecte el mango cerrado al eje como se muestra
en la ilustración y apriete.
2. Asegúrese de conectar el mango cerrado entre las
flechas del eje.
Page 23

Para montar el eje de dos piezas
L
A
C
A
B
1. Gire la perilla para aflojar el acoplamiento del eje.
Para desmontar el eje de dos piezas
1. Gire la perilla para aflojar el acoplamiento del eje.
2. Mueva el botón de bloqueo/liberación (A) a la
posición de receso de la guía. Empuje el accesorio
en el acoplador hasta que el botón de bloqueo/
liberación se fije en el orificio primario (B).
3. Inserte el eje en su acoplamiento. El botón debe
pasar a través del orificio.
Tenga en cuenta:
completamente en el eje superior, utilice un
destornillador pequeño para empujar el eje propulsor
interno más hacia el interior del tubo. Puede ser
necesario girar el destornillador mientras empuja.
4. Asegúrese de apretar completamente la perilla antes
de operar el producto.
Si el accesorio no se inserta
2. Mantenga presionado el botón de bloqueo/liberación
(B). Aparte los ejes.
Para montar el equipo de corte
Para conectar la protección del equipo de corte y el cabezal de corte (eje recto)
1. Conecte la protección del equipo de corte (A) al eje
con el perno (L). Asegúrese de utilizar la protección
correcta para el equipo de corte y el cabezal de
corte correcto.
215 - 004 - 22.05.2020
2. Conecte el disco de arrastre (B) al eje de salida.
3. Gire el eje de salida hasta que el orificio en el disco
de arrastre se alinee con el orificio en la caja de
engranajes.
23
Page 24

4. Coloque un destornillador pequeño (C) en el orificio
L
A
C
A
B
H
para bloquear el eje.
5. Gire el cabezal de corte (H) hacia la izquierda para
apretar el cabezal de corte a la caja de cambios.
(roscas izquierdas).
Para conectar la protección del equipo de corte y el cabezal de corte (eje curvado)
1. Fije la protección. Apriete la tuerca.
2. Fije el cubo guardapolvo en el eje.
3. Fije el cubo guardapolvo con una llave ajustable
para asegurarse de que el eje no gire.
4. Conecte el cabezal de corte al eje. Gire el cabezal
de corte hacia la derecha.
Funcionamiento
ADVERTENCIA: Asegúrese de leer y
comprender el capítulo de seguridad antes
de utilizar el producto.
Gasolina
Combustible
Para utilizar combustible
AVISO: Este producto tiene un motor de dos
ciclos. Utilice una mezcla de gasolina y de
aceite del motor de dos ciclos. Asegúrese
de utilizar la cantidad correcta de aceite en
la mezcla. Una relación incorrecta de
24 215 - 004 - 22.05.2020
gasolina y aceite puede provocar daños al
motor.
AVISO: No utilice gasolina con un octanaje
inferior a 90 RON (87 AKI). Esto puede
provocar daños al producto.
AVISO: No utilice gasolina con más de un
10 % de etanol concentrado (E10). Esto
puede provocar daños al producto.
Page 25

AVISO: No utilice gasolina con plomo. Esto
puede provocar daños al producto.
• Siempre utilice gasolina sin plomo nueva con un
octanaje mínimo de 90 RON (87 AKI) y con menos
de un 10 % de etanol concentrado (E10).
• Use gasolina con un octanaje superior si con
frecuencia utiliza el producto a velocidades de motor
continuamente altas.
• Utilice siempre una mezcla de aceite/gasolina sin
plomo de buena calidad.
Aceite para motor de dos ciclos
• Use solamente aceite de motor de dos ciclos de alta
calidad. Utilice solamente aceite de motor enfriado
por aire.
• No utilice otros tipos de aceite.
• Proporción de mezcla 50:1 (2 %)
Gasolina
1 gal EE. UU. 77 ml (2,6 oz)
1 gal británico 95 ml (3,2 oz)
5 l 100 ml (3,4 oz)
Aceite
Para hacer la mezcla de combustible
Tenga en cuenta: Use siempre un recipiente de
combustible limpio cuando mezcle el combustible.
Tenga en cuenta: No realice una cantidad de mezcla de
combustible para más de 30 días.
Para arrancar y detener
Para examinar antes de arrancar el motor
• Examine el producto para ver si hay piezas
dañadas, sueltas, desgastadas o faltantes.
• Examine las tuercas, los tornillos y los pernos.
• Examine el filtro de aire.
• Examine el bloqueo del acelerador y el control del
acelerador para un funcionamiento correcto.
• Examine el interruptor de detención para su correcto
funcionamiento.
• Revise si hay fugas de combustible.
Para arrancar un motor frío
1. Presione el bulbo de la bomba de combustible de
aire 10 veces.
2. Mueva el estrangulador a la posición de
estrangulamiento totalmente abierta.
1. Agregue la mitad de la cantidad de gasolina.
2. Agregue la cantidad total de aceite.
3. Agite la mezcla de combustible para mezclar el
contenido.
4. Agregue la cantidad restante de gasolina.
5. Agite la mezcla de combustible para mezclar el
contenido.
6. Llene el depósito de combustible.
Para agregar combustible
• Utilice siempre un recipiente de combustible con una
válvula antiderrames.
• Si hay combustible en el recipiente, retire el
combustible no deseado y deje que el contenedor se
seque.
• Asegúrese de que el área cerca de la tapa del
depósito de combustible está limpia.
• Agite el recipiente de combustible antes de agregar
la mezcla de combustible al tanque de combustible.
215 - 004 - 22.05.2020
25
Page 26
3. Mantenga el cuerpo del producto en el suelo con la
mano izquierda. No se pare sobre el producto. Tire
de la empuñadura de la cuerda de arranque
lentamente hasta que sienta resistencia.
Para detener el producto
• Presione el interruptor de detención para detener el
motor.
Tenga en cuenta: No tire del acelerador cuando
arranque el motor.
4. Tire de la empuñadura de la cuerda de arranque tres
veces con fuerza.
AVISO: No tire de la cuerda de arranque
hasta que se detenga. No suelte la
cuerda de arranque cuando esté
totalmente extendida. Suelte la cuerda
de arranque lentamente. Si no se siguen
estas instrucciones, se pueden producir
daños en el motor.
5. Mueva el estrangulador a la posición de
estrangulamiento media.
6. Tire de la empuñadura de la cuerda de arranque
hasta que el motor arranque.
7. Deje que el motor se caliente durante 10 segundos.
8. Mueva el estrangulador a la posición de
estrangulamiento apagada.
Para arrancar un motor caliente
1. Presione lentamente el bulbo de la purga de aire 10
veces.
2. Mueva la palanca del estrangulador a la posición
HALF CHOKE (Estrangulador en posición media).
3. Tire de la empuñadura de la cuerda de arranque
rápidamente hasta que arranque el motor.
4. Mueva la palanca del estrangulador a la posición NO
CHOKE (Estrangulador apagado).
Tenga en cuenta: El interruptor de detención regresa
automáticamente a su posición inicial.
Para utilizar la recortadora de césped
AVISO: Asegúrese de disminuir la velocidad
del motor hasta un régimen de ralentí
después de cada operación. Un largo
período con el acelerador al máximo y sin
carga en el motor puede causar daños a
este último.
Tenga en cuenta: Limpie la cubierta del cabezal de
corte cuando coloque un nuevo hilo para la recortadora
a fin de evitar las vibraciones. Examine otras piezas del
cabezal de corte y límpielas si es necesario.
Para recortar el césped
1. Sostenga el cabezal de corte inmediatamente sobre
el nivel del suelo en un ángulo. No presione el hilo
de la recortadora de césped contra este último.
2. Disminuya la longitud del hilo de la recortadora entre
10 y 12 cm/4 y 4,75”.
3. Disminuya el régimen del motor para reducir el
riesgo de dañar las plantas.
26
215 - 004 - 22.05.2020
Page 27

4. Use una aceleración de un 80 % cuando corte el
césped cerca de objetos.
Para cortar el césped
1. Asegúrese de que el hilo de la recortadora de
césped esté paralelo al suelo cuando corte.
2. No presione el cabezal de corte contra el suelo. Esto
puede provocar daños al producto.
3. Mueva el producto de un lado a otro cuando corte.
Utilice la máxima velocidad.
Para sustituir el hilo de la recortadora
215 - 004 - 22.05.2020 27
Page 28
6,0 m
18'
3,05 m
9'
2,0-2,4 mm
.079-.095"
10 cm
4"
28 215 - 004 - 22.05.2020
Page 29

6"
15 cm
"Click"
Mantenimiento
de limpiar, reparar o realizar el
ADVERTENCIA: Asegúrese de leer y
comprender el capítulo de seguridad antes
215 - 004 - 22.05.2020 29
mantenimiento del producto.
Page 30
Programa de mantenimiento
Asegúrese de cumplir con el programa de
mantenimiento. Los intervalos se calculan a partir del
uso diario del producto. Los intervalos son diferentes si
no utiliza el producto todos los días. Realice solamente
las tareas de mantenimiento que se encuentran en este
manual. Hable con un centro de servicio aprobado
acerca de los trabajos de mantenimiento que no
aparezcan en este manual.
Mantenimiento semanal
• Limpie las superficies externas.
• Examine el régimen de ralentí.
• Examine la grasa del engranaje angulado (eje
recto).
Mantenimiento mensual
• Examine la empuñadura de la cuerda de arranque y
la cuerda de arranque.
Mantenimiento anual
• Examine la bujía.
• Aplique grasa en el extremo del eje propulsor (eje de
dos piezas).
• Limpie las superficies externas del carburador y sus
zonas adyacentes.
• Limpie el sistema de refrigeración.
• Examine la rejilla apagachispas.
• Examine el filtro de combustible.
• Examine la manguera de combustible en busca de
daños.
• Examine todos los cables y conexiones.
Mantenimiento de 50 horas
• Recurra a un centro de servicio autorizado para que
reparen o reemplacen el silenciador.
Para ajustar el régimen de ralentí
• Asegúrese de que el filtro de aire esté limpio y que
la cubierta del filtro de aire esté instalada antes de
ajustar el régimen de ralentí.
• Ajuste el régimen de ralentí con el tornillo de ajuste
de ralentí T, el cual se identifica con la marca "T".
• El régimen de ralentí es el correcto cuando el motor
funciona correctamente en todas las posiciones. El
régimen de ralentí debe ser inferior a la velocidad
cuando el equipo de corte empieza a girar.
1. Gire el tornillo de ajuste de ralentí hacia la derecha
hasta que el equipo de corte comience a girar.
2. Gire el tornillo de ajuste de ralentí hacia la izquierda
hasta que el equipo de corte se detenga.
Para limpiar el sistema de refrigeración
Limpie las piezas del sistema de refrigeración con un
cepillo.
Para realizar tareas de mantenimiento en la rejilla apagachispas
Use un cepillo de alambre para limpiar la rejilla
apagachispas.
Para examinar la bujía
AVISO: Utilice la bujía recomendada.
Asegúrese de que la pieza de reemplazo
sea la misma que la que proporcione el
fabricante. Una bujía incorrecta puede
causar daños al producto.
1. Examine la bujía cuando:
a) el motor tenga poca potencia.
b) el motor no arranque fácilmente.
c) el motor no funcione correctamente a régimen de
ralentí.
2. Si el motor no arranca o funciona fácilmente,
examine la bujía en busca de materiales no
deseados. Para disminuir el riesgo de material no
deseado en los electrodos de la bujía:
a) asegúrese de que el régimen de ralentí esté
ajustado correctamente.
b) asegúrese de que la mezcla de combustible es
la correcta.
c) asegúrese de que el filtro de aire esté limpio.
30
215 - 004 - 22.05.2020
Page 31
3. Limpie la bujía si está sucia. Revise que la
separación entre los electrodos sea la correcta.
1. Quite la cubierta del filtro de aire y retire el filtro de
aire.
4. Reemplace la bujía cuando sea necesario.
Aplique grasa al eje de dos piezas
• Aplique grasa al extremo del eje propulsor cada
30 horas de funcionamiento.
Para realizar el mantenimiento del filtro de aire
Para limpiar el filtro de aire
Transporte y almacenamiento
Transporte y almacenamiento
ADVERTENCIA: Para evitar el riesgo de
incendio, asegúrese de que no haya fugas
ni liberación de gases durante el transporte
o el almacenamiento. Asegúrese de que no
haya riesgo de chispas o incendio.
• Vacíe el depósito de combustible antes del
transporte o de un almacenamiento prolongado.
Empuje el bulbo de purga de aire para asegurarse
de que se haya quitado todo el combustible.
Deseche el combustible en un lugar adecuado para
tal propósito.
2. Limpie el filtro de aire con agua jabonosa caliente.
Asegúrese de que el filtro de aire esté seco antes de
instalarlo.
3. Reemplace el filtro de aire si está demasiado sucio
para limpiarlo completamente. Siempre reemplace
un filtro de aire dañado.
Para agregar grasa al engranaje angulado
• Asegúrese de que la grasa del engranaje angulado
llene 3/4 del engranaje angulado.
• Asegúrese de que el producto esté limpio y de que
se le realice un mantenimiento completo antes de un
almacenamiento prolongado.
• Extraiga la bujía y ponga aproximadamente 15 ml de
aceite para motores de dos tiempos en el cilindro.
Gire el producto 3 veces e instale nuevamente la
bujía.
• Fije el producto de manera segura al vehículo
durante el transporte.
• Mantenga el producto en un lugar seco, fresco y
limpio con un flujo de aire adecuado. Mantenga el
producto alejado de los niños.
215 - 004 - 22.05.2020 31
Page 32

Datos técnicos
128CD
LT28CCHV
Especificaciones del motor
Cilindrada, cm
Distancia entre los electrodos, mm 0,6 0,6
Volumen del depósito de combustible, cm
Régimen de ralentí, mín.
Velocidad de potencia máxima, mín.
Salida de potencia, kW 0,7 0,7
Bujía Champion QCJ-8Y Champion QCJ-8Y
Rotación máxima del eje de salida, mín.
Período de durabilidad de las emisiones, h 125 125
Dimensiones del producto
Peso (sin incluir el equipo de corte), kg 5,0 5,0
Nota 1: Los datos informados para nivel de vibración equivalente tienen una dispersión estadística típica (desviación estándar) de 1 m/s2.
Nota 2: Las emisiones sonoras en el medioambiente medidas como potencia acústica (LWA) en conformidad con la
directiva CE 2000/14/CE. El nivel de potencia acústica registrado para la máquina se midió con el equipo de corte
original que proporciona el más alto nivel. La diferencia entre la potencia acústica garantizada y medida es que la
potencia acústica garantizada también incluye la dispersión en el resultado de la medición y las variaciones entre
las distintas máquinas del mismo modelo según la directiva 2000/14/CE.
Nota 3: Los datos registrados para el nivel de presión acústica equivalente para la máquina tienen una dispersión
estadística típica (desviación estándar) de 1 dB (A).
3
3
-1
-1
-1
28 28
400 400
2300-3200 2300-3200
8000 8000
8000 8000
128LD
LT28CSHV
Accesorios
128CD
Accesorios aprobados Tipo Protección del equipo de corte
Eje de roscado (3/8 R)
Cabezal de corte T25 545 03 11-01
128LD
Accesorios aprobados Tipo Protección del equipo de corte
Eje roscado (M10L)
Cabezal de corte T25 545 03 09-01
32 215 - 004 - 22.05.2020
Page 33

Hojas de plástico Tricut de 300 mm 545 03 09-01
215 - 004 - 22.05.2020 33
Page 34

Table des matières
1
2
3
5
6
7
9
10
8
17
16
11
13
12
14
15
19
4
18
5
1
4
4
Introduction................................................................... 34
Sécurité.........................................................................35
Montage........................................................................39
Fonctionnement............................................................ 42
Introduction
Manuel d’utilisation
La langue initiale de ce manuel de l’opérateur est
l’anglais. Les manuels de l’utilisateur fournis dans
d’autres langues sont des traductions de l’anglais.
Vue d’ensemble
Entretien....................................................................... 46
Transport et entreposage............................................. 48
Caractéristiques techniques......................................... 49
Accessoires.................................................................. 49
1. Tête de coupe
2. Bouchon de remplissage de graisse
3. Pignon conique
4. Protection de l’outil de coupe
5. Arbre
6. Raccord de l’arbre
7. Poignée de boucle
8. Commande des gaz
9. Interrupteur d’arrêt
10. Dispositif de verrouillage de la gâchette de
l’accélérateur
11. Capuchon de bougie, bougie d’allumage
12. Boîtier du lanceur
13. Corde du lanceur
14. Réservoir de carburant
15. Pompe de purge d’air
16. Commande de l’étrangleur
17. Couvercle du filtre à air
18. Disque d’entraînement
19. Manuel d’utilisation
34 215 - 004 - 22.05.2020
Page 35

Proposition 65 de la Californie
ATTENTION!
Les émissions du moteur de cet outil
contiennent des produits chimiques
qui, d’après l’État de Californie, peuvent
causer le cancer, des malformations
congénitales ou autre danger pour
la reproduction
5
0
F
T
15
m
50F
T
1
5 m
Symboles figurant sur le produit
Avertissement
L'outil peut provoquer des projections
d’objets, ce qui peut causer des dommages
aux yeux.
Vitesse de rotation maximale de l’arbre de
sortie
Distance de sécurité
Utiliser seulement un fil de coupe-herbe
homologué. Ne pas utiliser de lame
Ne pas utiliser un équipement de coupe en
métal.
Lire attentivement ce manuel.
Utiliser un dispositif de protection
homologué pour la tête.
Utiliser un dispositif de protection
homologué pour les oreilles.
Remarque : Les autres symboles/autocollants présents
sur l'outil renvoient aux exigences en matière de
certification pour d’autres zones commerciales.
Prendre soin de retenir les cheveux longs au
dessus des épaules.
Les flèches indiquent les limites de position
du guidon.
Responsabilité concernant le produit
Utiliser un dispositif de protection
homologué pour les yeux.
Utiliser des gants de protection homologués.
Utiliser des chaussures/bottes de protection.
L'outil peut provoquer des projections
d’objets, ce qui peut causer des dommages
aux yeux.
Comme indiqué dans les lois en vigueur sur la
responsabilité concernant les produits, nous ne serons
pas tenus responsables des dommages que notre
produit causerait dans les situations suivantes :
• Le produit n’est pas réparé de façon adéquate.
• Le produit est réparé avec des pièces qui ne sont
pas fournies ou homologuées par le fabricant.
• Le produit comprend un accessoire qui n’est pas
fourni ou homologué par le fabricant.
• Le produit n’est pas réparé par un centre de service
après-vente agréé ou par une autorité homologuée.
Sécurité
Définitions relatives à la sécurité
Les définitions ci-dessous indiquent le niveau de gravité
pour chaque mot signal.
215 - 004 - 22.05.2020 35
AVERTISSEMENT: Blessures aux
personnes.
Page 36

MISE EN GARDE : Dommages causés à
l'outil.
Remarque : Cette information facilite l’utilisation de
l'outil.
Consignes générales de sécurité
AVERTISSEMENT: Lire les messages
d’avertissement qui suivent avant d’utiliser
l’outil.
• Utiliser l’outil correctement. Des blessures graves ou
mortelles peuvent résulter d’une utilisation non
adéquate. Utiliser l’outil seulement pour les tâches
décrites dans le présent manuel. Ne pas utiliser cet
outil pour d’autres tâches.
• Suivre les instructions de ce manuel. Respecter les
symboles et les instructions de sécurité. Si
l’opérateur ne respecte pas les instructions et les
symboles, il pourrait en résulter des blessures, des
dommages ou la mort.
• Ne pas jeter ce manuel. Utiliser les instructions pour
assembler l’outil, le faire fonctionner et le conserver
en bon état. Suivre les instructions pour l’installation
correcte des équipements et accessoires. Utiliser
uniquement des pièces et accessoires homologués.
• Ne pas utiliser l’outil s’il est endommagé. Respecter
le calendrier d’entretien. N’effectuer que les travaux
d’entretien prescrits dans ce manuel. Un centre
agréé doit effectuer tous les autres travaux
d’entretien.
• Ce manuel ne décrit pas toutes les situations qui
peuvent se produire lorsqu’on utilise l’outil. Rester
prudent et faire preuve de bon sens. Ne pas faire
fonctionner l’outil ni effectuer un entretien sur l’outil
si vous n’êtes pas sûr de la situation. Pour obtenir
plus d’information, s’adresser à un spécialiste de
l’outil, à votre revendeur, à un atelier de réparation
ou à un centre de service après-vente agréé.
• Débrancher le câble d’allumage avant d’installer, de
stocker ou de procéder à l’entretien de l’outil.
• Ne pas utiliser l’outil si des modifications contraires à
ses caractéristiques initiales y ont été apportées. Ne
pas modifier une partie de l’outil sans l’approbation
du fabricant. Utiliser seulement des pièces
approuvées par le fabricant. Des blessures graves
ou mortelles peuvent résulter d’un entretien non
adéquat.
• Ne pas respirer les vapeurs du moteur. L’inhalation à
long terme des produits d’échappement du moteur
représente un danger pour la santé.
• Ne pas démarrer l’outil dans un local clos ou à
proximité de matériaux inflammables. Les gaz
d’échappement sont très chauds et peuvent contenir
des étincelles qui peuvent causer un incendie. Un
débit d’air insuffisant peut entraîner des blessures ou
la mort en raison d’une asphyxie ou du monoxyde de
carbone.
• Lors de l’utilisation de ce produit, le moteur génère
un champ électromagnétique. Le champ
électromagnétique peut endommager les implants
médicaux. Parler à votre médecin et au fabricant de
l’implant avant d’utiliser l’outil.
• Ne pas laisser un enfant utiliser l’outil. Ne laisser
personne utiliser la machine sans connaître les
instructions.
• S’assurer de toujours surveiller les personnes avec
des capacités physiques ou mentales réduites qui
utilisent le produit. Un adulte responsable doit être
présent à tout moment.
• Enfermer le produit dans un endroit verrouillé auquel
les enfants et les personnes non autorisées ne
peuvent pas accéder.
• Le produit peut projeter des objets et causer des
blessures. Respecter les consignes de sécurité afin
de réduire le risque de blessures graves ou
mortelles.
• Ne pas s’éloigner de l’outil lorsque le moteur est
sous tension.
• Tout accident avec cet outil engage la responsabilité
de l’opérateur.
• Avant d’utiliser l’outil, vérifier que les pièces ne sont
pas endommagées.
• S’assurer d’être à au moins 15 m (50 pi) d’autres
personnes ou d’animaux avant d’utiliser le produit.
S’assurer que toutes les personnes dans les
environs immédiats sont informés que vous allez
utiliser le produit.
• Consulter les lois nationales ou locales. Elles
peuvent interdire ou limiter l’utilisation de l’outil dans
certaines conditions.
• Ne pas utiliser le produit en cas de fatigue ou sous
l’emprise de l’alcool, de drogues ou de
médicaments. Ils peuvent avoir des effets
indésirables sur votre vision, votre attention, votre
coordination des gestes ou votre jugement.
Consignes de sécurité pour l’utilisation
• Vérifier que le produit est livré assemblé avant de
l’utiliser.
• Avant de commencer, déplacer le produit à 3 m
(10 pi) de l’endroit où l’appoint de carburant a été
effectué. Placer le produit sur une surface plane.
Vérifier que l’outil de coupe ne touche pas le sol ou
tout autre objet.
• Le produit peut causer des projections d’objets, ce
qui peut causer des dommages aux yeux. Toujours
utiliser un dispositif de protection homologué pour
les yeux lorsqu’on utilise le produit.
• Si un enfant se trouve à proximité, faire preuve de
prudence lors de l’utilisation du produit.
• Ne pas faire fonctionner l’outil s’il y a des personnes
dans la zone de travail. Arrêter l’outil si une
personne passe dans la zone de travail.
• Vérifier qu’on garde toujours le contrôle du produit.
36
215 - 004 - 22.05.2020
Page 37

• Ne pas utiliser ce produit si on ne peut pas recevoir
de l’aide en cas d’accident. Toujours vérifier que
d’autres personnes savent qu’on va utiliser le produit
avant de commencer à le faire.
• Ne pas tourner avec le produit sans s’assurer
qu’aucune personne ni aucun animal ne se trouvent
dans la zone de sécurité.
• Retirer tous les matériaux indésirables de la zone de
travail avant de commencer. Si l’outil de coupe
heurte un objet, celui-ci peut être projeté et
engendrer des blessures ou des dommages. Des
matériaux indésirables peuvent s’enrouler autour de
l’outil de coupe et causer des dommages.
• Ne pas utiliser ce produit par mauvais temps
(brouillard, pluie, vent violent, risque d’éclair ou
autres conditions climatiques défavorables). Les
conditions de travail peuvent devenir dangereuses
(tels que les surfaces glissantes) à cause des
intempéries.
• S’assurer qu’on peut se déplacer librement et
travailler dans une position stable.
• Vérifier qu’il n’y a pas de risque de chute lors de
l’utilisation l’outil. Ne pas incliner l’outil lors de son
utilisation.
• Toujours tenir l’outil des deux mains. Tenir l’outil sur
le côté droit du corps.
• Utiliser le produit en plaçant l’outil de coupe sous la
taille.
• Si la commande d’étrangleur se trouve à la position
de démarrage quand le moteur démarre, l’outil de
coupe commence à tourner.
• Ne pas toucher le pignon conique après l’arrêt du
moteur. Le pignon conique est chaud après l’arrêt du
moteur. Les points chauds peuvent causer des
blessures.
• Arrêter le moteur avant de déplacer le produit.
• Ne pas déposer le produit alors que le moteur est en
marche.
• Avant de retirer les matériaux indésirables du
produit, arrêter le moteur et attendre jusqu’à l’arrêt
de l’outil de coupe. Laisser l’outil de coupe s’arrêter
avant de retirer ou de faire retirer le matériau
végétal.
Équipement de protection personnelle
AVERTISSEMENT: Lire les messages
d’avertissement qui suivent avant d’utiliser
l’appareil.
• Toujours utiliser un équipement de protection
personnelle lors de l’utilisation du produit.
L’équipement de protection personnelle ne supprime
pas le risque de blessures. L’équipement de
protection personnelle réduit la gravité des blessures
en cas d’accident.
• Toujours utiliser un dispositif de protection
homologué pour les yeux lorsqu’on utilise le produit.
• Ne pas utiliser le produit avec les pieds nus ou des
chaussures ouvertes. Utiliser toujours des bottes
antidérapantes robustes.
• Porter un pantalon long et robuste.
• Au besoin, utiliser des gants de protection
homologués.
• Utiliser un casque s’il est possible que des objets
tombent sur la tête.
• Toujours utiliser un dispositif de protection
homologué pour les oreilles lorsqu’on utilise le
produit. Le fait d’entendre du bruit pendant une
longue période peut engendrer une perte auditive.
• Vérifier qu’on dispose d’une trousse de premiers
soins à proximité.
Dispositifs de protection sur le produit
• Faire régulièrement l’entretien sur le produit.
• Cette précaution augmente la durée de vie utile
du produit.
• Cette précaution réduit le risque d’accident.
Communiquer régulièrement avec un
concessionnaire agréé ou à un centre de service
après-vente agréé d’examiner le produit pour
effectuer les réglages et les réparations.
• Ne pas utiliser un produit avec un équipement de
protection endommagé. Si le produit est
endommagé, communiquer avec un centre de
service après-vente agréé.
Dispositif de verrouillage de la gâchette de l’accélérateur
Le dispositif de verrouillage de la gâchette de
l’accélérateur verrouille la gâchette de l’accélérateur.
215 - 004 - 22.05.2020
37
Page 38

A
B
Appuyer sur le dispositif de verrouillage de la gâchette
de l’accélérateur (A) pour relâcher la gâchette de
l’accélérateur (B). Une fois la poignée relâchée, le
dispositif de verrouillage de la commande des gaz et la
commande des gaz retournent à leurs positions initiales.
1. Vérifier que la gâchette de l’accélérateur (B) est
verrouillée à la position de ralenti lorsqu’on relâche
le dispositif de verrouillage de la gâchette de
l’accélérateur (A).
2. Appuyer sur le dispositif de verrouillage de la
gâchette de l’accélérateur (A) et s’assurer qu’il
retourne à sa position initiale lorsqu’on le relâche.
3. Appuyer sur la gâchette d’accélération (B) et
s’assurer qu’elle retourne à sa position initiale
lorsqu’on le relâche.
Démarrer le moteur et le faire tourner à plein régime.
Relâcher la gâchette de l’accélérateur et examiner si
l’outil de coupe s’arrête. Si l’outil de coupe tourne
pendant que l’accélérateur se trouve à la position de
ralenti, examiner la vis de réglage de ralenti du
carburateur.
Interrupteur d’arrêt
Démarrer le moteur. Vérifier que le moteur s’arrête
lorsque l’interrupteur est réglé à la position d’arrêt.
Protection de l’outil de coupe
La protection de l’accessoire de coupe empêche qu’un
objet détaché soit projeté vers l’opérateur.
Vérifier le dispositif de protection de l’outil de coupe pour
détecter d’éventuels dommages; le remplacer s’il est
endommagé. Utiliser seulement une protection
homologuée pour l’outil de coupe.
Silencieux
• Ne pas utiliser un moteur dont le silencieux est
endommagé. Un silencieux endommagé augmente
le niveau sonore et le risque d’incendie. Garder un
extincteur à proximité.
• S’assurer régulièrement que le silencieux est fixé sur
le produit.
• Ne pas toucher le moteur ou le silencieux alors que
le moteur est sous tension. Ne pas toucher le moteur
ou le silencieux pendant un moment après l’arrêt du
moteur. Les surfaces chaudes peuvent causer des
blessures.
• Un silencieux chaud peut causer un incendie. Rester
prudent lorsqu’on utilise le produit à proximité de
liquides ou de vapeurs inflammables.
• Ne pas toucher les pièces du silencieux si celui-ci
est endommagé. Les pièces peuvent contenir des
produits chimiques cancérigènes.
Outil de coupe
AVERTISSEMENT: Lire les messages
d’avertissement qui suivent avant d’utiliser
l’appareil.
• Effectuer l’entretien de routine. Communiquer avec
un centre agréé pour examiner régulièrement l’outil
de coupe et effectuer les réglages et les réparations.
• Cette précaution augmente les performances de
l’outil de coupe.
• Cette précaution augmente la durée de vie de
l’outil de coupe.
• Cette précaution réduit le risque d’accident.
• Utiliser seulement un dispositif de protection d’outil
de coupe homologué. Se reporter à la section
Accessoires à la page 49
• Ne pas utiliser un équipement de coupe
endommagé.
.
38
215 - 004 - 22.05.2020
Page 39

Tête de coupe d’herbe
• Vérifier que le fil coupe-herbe est fermement et
uniformément enroulé autour du tambour; cette
précaution réduit les vibrations.
• Utiliser seulement des têtes de coupe-herbe et des
fils coupe-herbe homologués. Se reporter à la
section
• Utiliser un fil coupe-herbe de longueur adéquate. Un
Accessoires à la page 49
fil coupe-herbe plus long utilise plus de puissance de
moteur qu’un fil coupe-herbe court.
• Vérifier que le couteau monté sur le dispositif de
protection de l’outil de coupe n’est pas endommagé.
• Tremper le fil coupe-herbe dans de l’eau pendant
deux jours avant de monter le fil coupe-herbe sur le
produit. Cette précaution permet d’augmenter la
durée de vie du fil coupe-herbe.
• Se reporter aux instructions relatives à l’équipement
de coupe pour connaître la bonne façon de charger
le fil et le diamètre de fil approprié.
.
Sécurité – carburant
• Ne pas démarrer l'outil s’il y a du carburant ou de
l’huile moteur sur l'outil. Nettoyer le carburant ou
l’huile et laisser sécher l'outil. Nettoyer tout carburant
qui souille l'outil.
• Si du carburant se déverse sur les vêtements,
changer immédiatement de vêtement.
• Ne pas déverser du carburant sur le corps; cela
pourrait causer des blessures. Si du carburant se
déverse sur le corps, se nettoyer au savon doux et à
l’eau.
• Ne pas démarrer le moteur si de l’huile ou du
carburant se renverse sur l'outil ou sur le corps.
• Ne pas démarrer l'outil si le moteur présente une
fuite. Vérifier régulièrement le moteur à la recherche
de fuites.
• Faire preuve de prudence lors de la manipulation du
carburant. Celui-ci est inflammable et ses vapeurs
sont explosives et peuvent causer des blessures ou
la mort.
• Ne pas respirer les vapeurs de carburant, car elles
peuvent causer des blessures. Vérifier que la
ventilation est suffisante.
• Ne pas fumer à proximité du carburant ou du
moteur.
• Ne pas placer des objets chauds à proximité du
carburant ou du moteur.
• Ne pas faire le plein de carburant lorsque le moteur
tourne.
• Vérifier que le moteur est froid avant de faire le plein.
• Avant de faire le plein, ouvrir lentement le couvercle
du réservoir de carburant et relâcher la pression
avec précaution.
• Ne pas faire le plein dans une pièce fermée. Un
débit d’air insuffisant peut entraîner des blessures ou
la mort en raison d’une asphyxie ou du monoxyde de
carbone.
• Serrer le couvercle du réservoir de carburant avec
précaution, car un feu pourrait se déclencher.
• Avant de démarrer l'outil, le déplacer à au moins 3 m
(10 pi) de la position où le plein de carburant a été
fait.
• Ne pas mettre trop de carburant dans le réservoir de
carburant.
• Vérifier qu’une fuite ne peut se produire lorsqu’on
déplace l'outil ou le bidon d’essence.
• Ne pas placer l'outil ou un bidon d’essence dans un
espace où il y a une flamme nue, des étincelles ou
une veilleuse. Vérifier que la zone de stockage ne
contient pas de flamme nue.
• Utiliser seulement des conteneurs agréés pour
transporter ou stocker le carburant.
• Vider le réservoir de carburant avant de le remiser
pour une période prolongée. Toujours respecter la
législation locale sur la façon de mettre le carburant
au rebut.
• Nettoyer l'outil avant de le remiser pour une période
prolongée.
• Débrancher le câble d’allumage avant de remiser
l'outil, afin de s’assurer que le moteur ne démarre
pas par inadvertance.
Consignes de sécurité pour la maintenance
• S’il n’est pas possible de régler le régime de ralenti
qui arrête l’outil de coupe, communiquer avec le
centre d’entretien. Ne pas utiliser ce produit jusqu’à
ce qu’il soit correctement réglé ou réparé.
Montage
AVERTISSEMENT: Lire le chapitre sur la
sécurité avant d’installer le produit.
215 - 004 - 22.05.2020 39
Page 40

Montage du guidon en boucle
1. Fixer le guidon en boucle sur l’arbre selon
l’illustration et serrer.
2. Vérifier que le guidon en boucle se fixe entre les
flèches dessinées sur l’arbre.
Assemblage de l’arbre démontable
1. Tourner le bouton pour desserrer le raccord du tube.
plus avant dans le tube. Il peut être nécessaire de
faire tourner le tournevis pendant que vous poussez.
4. S’assurer que le bouton est bien serré, avant
d’utiliser le produit.
Pour démonter l’arbre en deux pièces
1. Tourner le bouton pour desserrer le raccord du tube.
2. Déplacer le bouton de verrouillage/déverrouillage (A)
dans la rainure de guidage. Pousser l’accessoire
dans le raccord jusqu’à ce que le bouton de
verrouillage/déverrouillage se loge dans le trou
principal (B).
3. Insérer l'arbre dans le raccord d’arbre. Le bouton
doit passer à travers le trou.
Remarque :
complètement dans l’arbre supérieur, utiliser un petit
tournevis pour pousser l’arbre d'entraînement interne
40
Si l’accessoire ne s'insère pas
2. Pousser et maintenir le bouton de verrouillage/
deverrouillage (B). Tirer sur les arbres pour les
séparer.
215 - 004 - 22.05.2020
Page 41

Montage de l’outil de coupe
L
A
C
A
B
L
A
C
A
B
H
Montage du dispositif de protection de l’outil de coupe et de la tête de coupe (arbre droit)
1. Fixer le dispositif de protection de l’outil de coupe (A)
sur l’arbre au moyen de la vis (L). Prendre soin
d’utiliser la bonne protection de l’outil de coupe et la
bonne tête de coupe.
2. Fixer le disque d’entraînement (B) sur l’arbre de
sortie.
3. Tourner l’arbre de sortie jusqu’à ce que le trou dans
le disque d’entraînement s’aligne avec le trou situé
dans le carter d’engrenage.
4. Placer un petit tournevis (C) dans le trou pour
verrouiller l’arbre.
Montage du dispositif de protection de l’outil de coupe et de la tête de coupe (arbre courbé)
1. Fixer la protection. Serrer l’écrou.
2. Fixer le pare-poussière sur l’arbre.
3. Maintenir le pare-poussière en place au moyen
d’une clé réglable pour s’assurer que l’arbre ne
tourne pas.
4. Fixer la tête de coupe sur l’arbre. Tourner la tête de
coupe dans le sens des aiguilles d’une montre.
5. Tourner la tête du coupe-herbe (H) dans le sens
antihoraire pour serrer la tête de coupe à la boîte de
vitesses. (Filetage à gauche.)
215 - 004 - 22.05.2020
41
Page 42
Fonctionnement
AVERTISSEMENT: Lire et comprendre le
chapitre sur la sécurité avant d’utiliser l'outil.
Carburant
Utilisation du carburant
MISE EN GARDE : Cet outil est équipé d’un
moteur deux-temps. Utiliser un mélange
d’essence et d’huile à moteur deux-temps.
Prendre soin de verser la bonne quantité
d’huile dans le mélange. Un mauvais rapport
essence/huile peut endommager le moteur.
Essence
MISE EN GARDE : Ne pas utiliser
d’essence avec un indice d’octane inférieur
à 90 RON (87 AKI). Cela pourrait
endommager le produit.
MISE EN GARDE : Ne pas utiliser
d’essence avec une concentration d’éthanol
supérieure à 10 % (E10). Cela pourrait
endommager l’outil.
MISE EN GARDE : Ne pas utiliser
d’essence au plomb. Cela pourrait
endommager l’outil.
• Toujours utiliser de l’essence neuve sans plomb
d’indice d’octane minimal de 90 RON (87 AKI) et
avec une concentration en éthanol inférieure à 10 %
(E10).
• Utiliser de l’essence avec un taux d’octane supérieur
pour utiliser fréquemment le produit à régime moteur
élevé en permanence.
• Toujours utiliser un mélange essence sans plombhuile de bonne qualité.
Huile pour moteur deux-temps
• Utiliser seulement une huile pour moteur deux-temps
de qualité très élevée. N’utiliser qu’une huile moteur
refroidie à l’air.
• Ne pas utiliser d’autres types d’huile.
• Taux du mélange 50:1 (2 %)
Essence
1 gal US 77 ml (2,6 oz)
1 gal UK 95 ml (3,2 oz)
5 l 100 ml (3,4 oz)
Huile
Mélange de carburant
Remarque : Utiliser toujours un récipient de carburant
propre pour mélanger le carburant.
Remarque : Ne pas effectuer une quantité de mélange
de carburant pour plus de 30 jours.
1. Ajouter la moitié de la quantité d’essence.
2. Ajouter la quantité totale d’huile.
3. Agiter le mélange de carburant pour mélanger le
contenu.
4. Ajouter l’essence restante.
5. Agiter le mélange de carburant pour mélanger le
contenu.
6. Remplir le réservoir de carburant.
Ajout de carburant
• Toujours utiliser un bidon d’essence comportant un
robinet antidéversement.
• S’il y a un peu de carburant sur ou dans le récipient,
nettoyer le carburant et laisser le récipient au sec.
• Vérifier que le couvercle du réservoir de carburant
est propre.
• Agiter le récipient à carburant avant d’ajouter le
mélange de carburant dans le réservoir de
carburant.
Démarrage et arrêt
À vérifier avant le démarrage du moteur
• Vérifier le produit pour détecter les pièces
manquantes, endommagées, desserrées ou usées.
• Vérifier les écrous, les vis et les boulons.
• Vérifier le filtre à air.
• Vérifier le dispositif de verrouillage de la gâchette de
l’accélérateur et la commande d’accélération pour un
fonctionnement correct.
• Vérifier l’interrupteur d’arrêt pour un fonctionnement
correct.
• Vérifier pour détecter toute fuite éventuelle de
carburant.
42
215 - 004 - 22.05.2020
Page 43
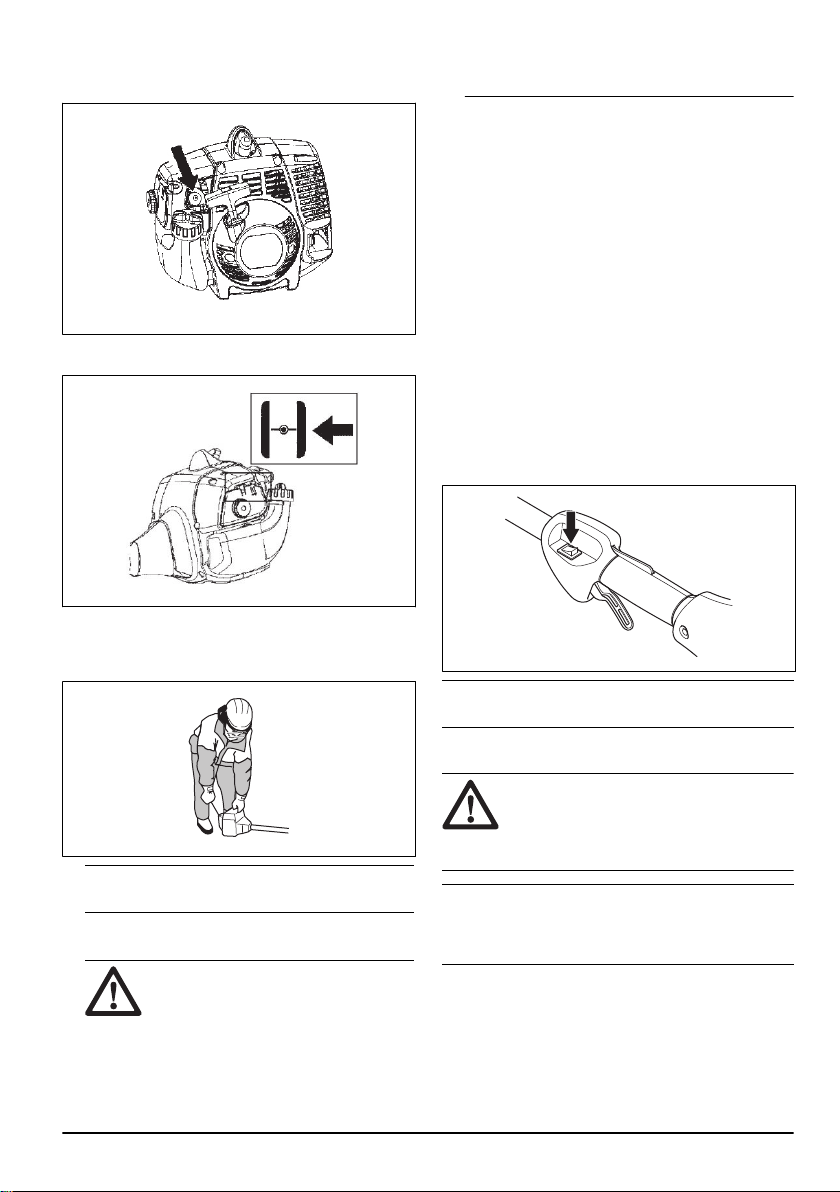
Démarrage d’un moteur froid
1. Appuyer 10 fois sur la pompe à carburant.
2. Déplacer le levier d’étrangleur en position fermée
(position de démarrage).
3. Maintenir l’outil sur le sol à l’aide de la main gauche.
Ne pas marcher sur l’outil. Tirer lentement sur la
poignée de la corde du lanceur jusqu’à ce que vous
sentiez une résistance.
instructions peut causer des dommages
au moteur.
5. Déplacer le levier d’étrangleur en position Étrangleur
à mi-course.
6. Tirer sur la poignée du câble du lanceur jusqu’à ce
que le moteur démarre.
7. Laisser le moteur tourner pendant 10 secondes.
8. Déplacer le levier d’étrangleur en position Étrangleur
ouvert (position de marche).
Démarrage d’un moteur chaud
1. Appuyer lentement 10 fois sur l’ampoule de purge
d’air.
2. Déplacer le levier d’étrangleur en position
ÉTRANGLEUR À MI-COURSE.
3. Tirer vivement sur la corde du lanceur jusqu’à ce
que le moteur démarre.
4. Déplacer le levier d’étrangleur en position
ÉTRANGLEUR OUVERT.
Arrêt de la machine
• Appuyer sur l’interrupteur pour arrêter le moteur.
Remarque : L’interrupteur revient automatiquement à sa
position initiale.
Utilisation du coupe-herbe
MISE EN GARDE :
le moteur au régime de ralenti après chaque
opération. Une longue période à plein
régime sans charge sur le moteur peut
endommager le moteur.
Remarque :
lors du démarrage du moteur.
4. Tirer la poignée du câble du lanceur à 3 reprises
avec force.
215 - 004 - 22.05.2020 43
Ne pas tirer la gâchette de l’accélérateur
MISE EN GARDE :
corde du démarreur tant qu’il ne s’est
pas arrêté. Ne pas lâcher la corde du
démarreur lorsqu’elle est complètement
déployée. Relâcher lentement la corde
du démarreur. Le non-respect de ces
Ne pas tirer sur la
Remarque : Pour éviter les vibrations, nettoyer le
couvercle de la tête de coupe lorsqu’on fixe un nouveau
fil coupe-herbe. Vérifier les autres parties de la tête de
coupe et les nettoyer selon le besoin.
Prendre soin de ralentir
Page 44

Tonte du gazon
1. Tenir la tête de coupe tout juste au-dessus du sol,
en l’inclinant. Ne pas appuyer le fil de coupe dans
l’herbe.
2. Diminuer la longueur du fil de coupe de 10-12 cm
(4-4,75 po).
3. Réduire le régime du moteur pour réduire le risque
d’endommager les plantes.
4. Utiliser 80 % de l’accélération lorsqu’on doit couper
l’herbe à proximité d’objets.
Pour couper l’herbe
1. Pour effectuer une coupe, vérifier que le fil de coupe
est parallèle au sol.
3. Déplacer le produit d'un côté à l'autre pendant la
coupe. Faire tourner le moteur à plein régime.
Remplacement du fil coupe-herbe
2. Ne pas appuyer la tête de coupe sur le sol. Cela
pourrait endommager le produit.
44 215 - 004 - 22.05.2020
Page 45

6,0 m
18'
3,05 m
9'
2,0-2,4 mm
.079-.095"
10 cm
4"
215 - 004 - 22.05.2020 45
Page 46
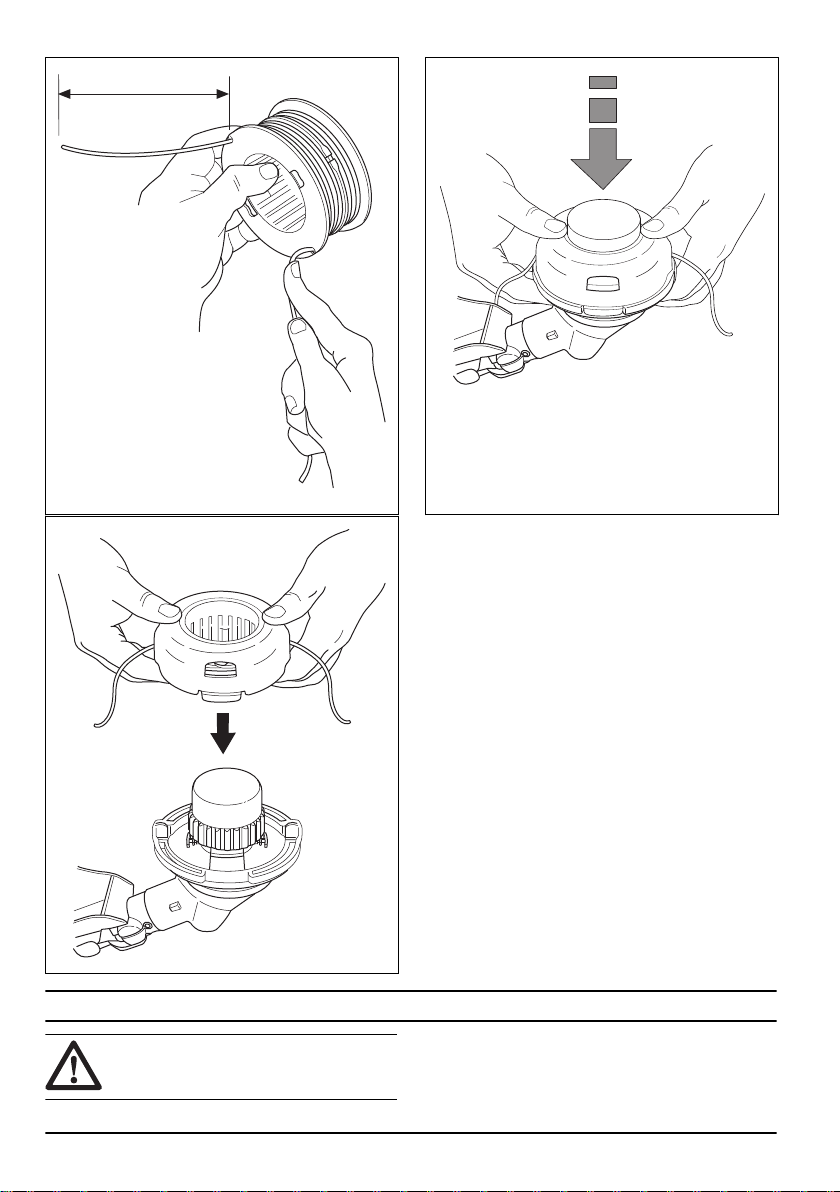
6"
15 cm
"Click"
Entretien
AVERTISSEMENT: Lire et comprendre le
chapitre sur la sécurité avant de le nettoyer
l’outil, le réparer ou en effectuer l’entretien.
46 215 - 004 - 22.05.2020
Calendrier d’entretien
S’assurer de respecter le calendrier d’entretien. La
fréquence est calculée sur la base d’une utilisation
Page 47
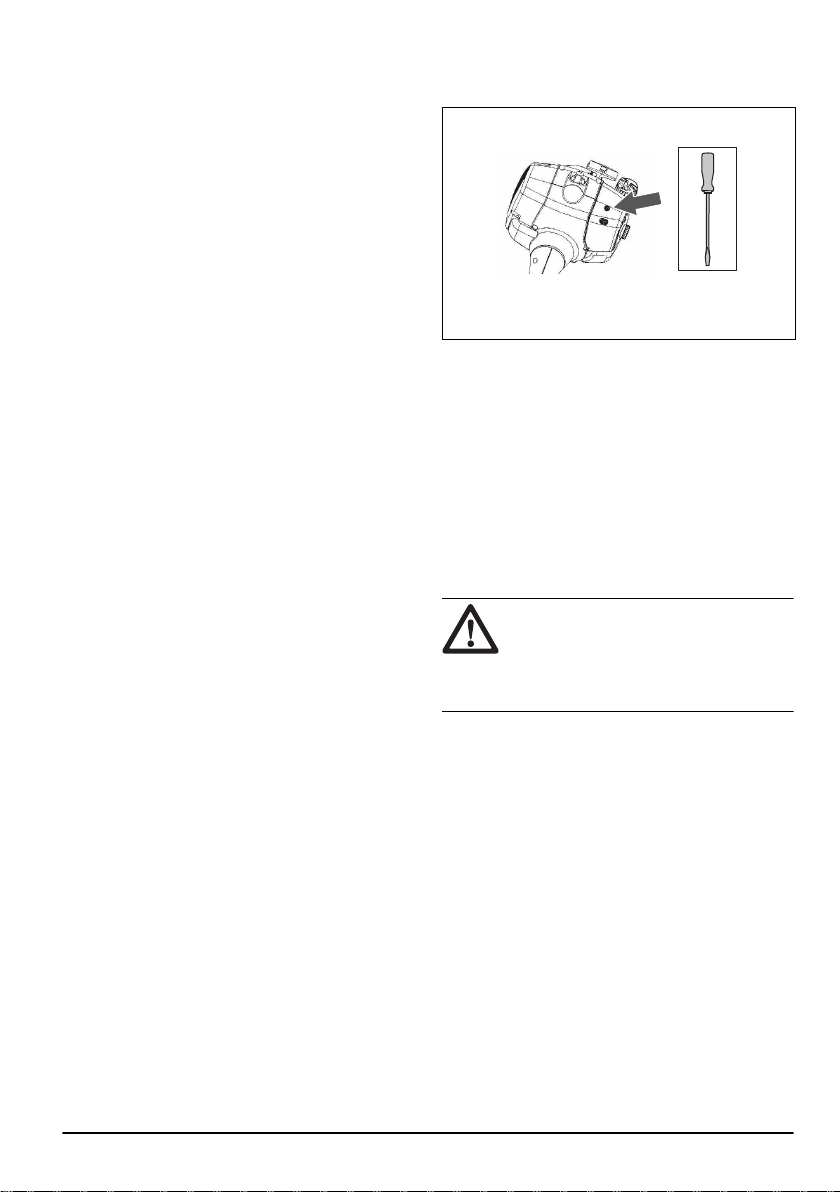
quotidienne du produit. Les périodicités sont différentes
si on n’utilise pas ce produit chaque jour. N’effectuer
que les travaux d’entretien décrits dans ce manuel.
Communiquer avec un centre de service après-vente
agréé pour effectuer les travaux d’entretien qui ne
figurent pas dans ce manuel.
Entretien hebdomadaire
• Nettoyer les surfaces externes.
• Vérifier le régime de ralenti.
• Vérifier la graisse du pignon conique (arbre droit).
Entretien mensuel
• Vérifier la poignée du câble du lanceur et le câble du
lanceur.
Maintenance annuelle
• Vérifier la bougie d’allumage.
• Appliquer de la graisse sur l’extrémité de l’arbre
d’entraînement (arbre démontable).
• Nettoyer les surfaces externes du carburateur et les
zones adjacentes.
• Nettoyer le système de refroidissement.
• Vérifier l’écran pare-étincelles.
• Vérifier le filtre à carburant.
• Vérifier le tuyau de carburant pour détecter
d’éventuels dommages.
• Vérifier tous les câbles et toutes les connexions.
Entretien à 50 heures d’utilisation
• Communiquer avec un centre de service aprèsvente agréé pour réparer ou remplacer le silencieux.
Réglage du régime de ralenti
• Vérifier que le filtre à air est propre et que le
couvercle du filtre à air est fixé avant de régler le
régime de ralenti.
• Régler le régime de ralenti à l’aide de la vis de
réglage de ralenti en T, identifiée par le repère « T ».
• Le régime de ralenti est adéquat lorsque le moteur
fonctionne sans à-coups dans toutes les positions.
Le régime de ralenti doit être inférieur à la vitesse
lorsque l’outil de coupe commence à tourner.
1. Tourner la vis de réglage de ralenti dans le sens
horaire jusqu’à ce que l’outil de coupe commence à
tourner.
2. Tourner la vis de réglage de ralenti dans le sens
antihoraire jusqu’à ce que l’outil de coupe s’arrête.
Nettoyage du système de refroidissement
Nettoyer les pièces du circuit de refroidissement au
moyen d’une brosse.
Entretien de l’écran pare-étincelles
Utiliser une brosse métallique pour nettoyer l’écran
pare-étincelles.
Vérification de la bougie d’allumage
MISE EN GARDE :
recommandée. Vérifier que les pièces de
rechange sont les mêmes que celles
fournies par le fabricant. Une bougie
inadéquate peut causer des dommages au
produit.
1. Vérifier la bougie d’allumage dans les cas suivants :
a) Le moteur manque de puissance.
b) Le moteur ne démarre pas facilement.
c) Le moteur ne fonctionne pas correctement au
régime de ralenti.
2. Si le moteur n’est pas facile à démarrer ou faire
fonctionner, examiner la bougie pour les matériaux
indésirables. Afin de réduire le risque de matériau
indésirable sur les électrodes de la bougie :
a) Vérifier que le régime de ralenti est réglé de
façon adéquate.
b) Vérifier que le mélange de carburant est correct.
c) Vérifier que le filtre à air est propre.
Utiliser la bougie
215 - 004 - 22.05.2020
47
Page 48

3. Nettoyer la bougie si elle est sale. S'assurer que
l'écartement des électrodes est correct.
4. Remplacer la bougie d’allumage selon le besoin.
Application de graisse sur l’arbre démontable
• Appliquer de la graisse sur l’extrémité de l’arbre
d’entraînement après chaque 30 heures de
fonctionnement.
Nettoyage du filtre à air
1. Retirer le couvercle du filtre à air et retirer le filtre à
air.
2. Nettoyer le filtre à air à l’eau savonneuse chaude.
Vérifier que le filtre à air est sec avant de l’installer.
3. Remplacer le filtre à air s’il est trop sale pour être
nettoyé entièrement. Toujours remplacer les filtres à
air endommagés.
Ajouter de la graisse au pignon conique
• Vérifier que le renvoi d'angle est rempli de graisse
pour renvoi au 3/4.
Entretien du filtre à air
Transport et entreposage
Transport et entreposage
AVERTISSEMENT: Pour éviter tout risque
d’incendie, s’assurer qu’il n’y a pas de fuites
ou de fumées pendant le transport ou
l’entreposage. S’assurer qu’il n’y a pas de
risque de production d’étincelles ou
d’incendie.
• Vider le réservoir de carburant avant tout transport
ou remisage pendant une période prolongée.
Appuyez sur la poire d’amorçage d’air pour s’assurer
que tout le carburant est retiré. Mettre au rebut le
carburant à un emplacement adéquat.
48 215 - 004 - 22.05.2020
• Avant d’entreposer le produit à long terme, s’assurer
qu’il est bien nettoyé et en effectuer l’entretien
complet.
• Retirer la bougie d’allumage et verser environ 15 ml
d’huile deux-temps dans le cylindre. Faire tourner
3 fois le moteur à vide et remettre la bougie en
place.
• Fixer le produit au véhicule de façon sécuritaire
pendant le transport.
• Garder le produit dans un endroit sec et frais et
propre avec une bonne circulation d’air. Garder la
machine à l’écart des enfants.
Page 49

Caractéristiques techniques
128CD
LT28CCHV
Spécifications du moteur
Cylindrée, cm
Écartement des électrodes, mm 0,6 0,6
Volume du réservoir de carburant, cm
Régime de ralenti, min
Régime maximum, min
Puissance de sortie, kW 0,7 0,7
Bougie d’allumage Champion QCJ-8Y Champion QCJ-8Y
Rotation de l’arbre sortant, min
Durabilité des émissions, h 125 125
Dimensions du produit
Poids (sans équipement de coupe), kg 5,0 5,0
Remarque 1 : Les données signalées pour le niveau de vibration équivalent présentent une dispersion statistique
type (écart standard) de 1 m/s2.
Remarque 2 : Émission du bruit dans l’environnement mesurée en tant que puissance acoustique (LWA) conforme à
la directive européenne 2000/14/CE. La puissance sonore reportée pour la machine a été mesurée avec l’outil de
coupe d’origine qui fournit le niveau le plus élevé. La puissance sonore garantie diffère du niveau mesuré en cela
qu’elle prend également en compte la dispersion et les variations entre plusieurs machines du même modèle, conformément à la directive 2000/14/CE.
Remarque 3 : Les données se rapportant à la pression sonore équivalente de la machine présentent une dispersion
statistique type (écart standard) de 1 dB (A).
3
3
-1
-1
-1
28 28
400 400
2 300 – 3 200 2 300 – 3 200
8000 8000
8000 8000
128LD
LT28CSHV
Accessoires
128CD
Accessoires homologués Type Protection de l’outil de coupe
Arbre fileté (3/8 R)
Tête de coupe T25 545 03 11-01
128LD
Accessoires homologués Type Protection de l’outil de coupe
Arbre fileté (M10L)
Tête de coupe T25 545 03 09-01
215 - 004 - 22.05.2020 49
Page 50

Couteaux en plastique Tricut, 300 mm 545 03 09-01
50 215 - 004 - 22.05.2020
Page 51

215 - 004 - 22.05.2020 51
Page 52

www.husqvarna.com
Original instructions
Instrucciones originales
Instructions d’origine
1158859-49
2020-08-05
 Loading...