

Page 1

User Guide
HUAWEI Ascend Y
Welcome to HUAWEI
Model: HUAWEI H866C
TracFone part number: 02230MGR
Page 2

HUAWEI H866C
Manufactured under license from DTS Licensing
Limited. DTS, the Symbol, & DTS and the Symbol
together are registered trademarks & DTS Envelo |
Headphone is a trademark of DTS, Inc. Product
includes software. © 2012 DTS, Inc. All Rights
Reserved.
V100R001_01 31010KFD
Page 3

Content
1 Reading Before Proceeding...................................................1
1.1 Safety Precautions............................................................. .......... 1
1.2 Personal Information and Data Security ...................................... 2
1.3 Legal Notice .................................................. ............................... 3
2 Getting Started.......................................................................6
2.1 Appearance ................................................................................. 6
2.2 Setting Up Your Mobile Phone .................................................... 7
2.3 Power On or Off Your Mobile Phone ........................................... 9
2.4 Using the Touchscreen .............................................................. 10
2.5 Locking and Unlocking the Screen ............................................ 10
2.6 Home Screen ..................................................... ........................ 11
2.7 Application Screen ................................................ ..................... 15
2.8 Using a microSD™ Card ........................................... ................ 16
3 Calling..................................................................................17
3.1 Making a Call ............................................................................. 17
3.2 Answering or Rejecting a Call............................................ ........ 18
3.3 Other Operations During a Call .................... ............................. 19
3.4 Using the Call log.... ................................................................... 20
3.5 Using Airplane Mode .............. ................................................... 20
3.6 TTY Operation .......................................................................... 20
4 Contacts...............................................................................21
4.1 Opening the Contacts Application .................................. ........... 21
4.2 Adding a Contact ....................................................................... 22
4.3 Adding a Contact to Your Favorites ................ ........................... 22
4.4 Indexing Contacts...................................................................... 22
4.5 Searching for a Contact .................................................. ........... 22
4.6 Editing a Contact ....................................................................... 23
4.7 Communicating with Your Contac ts........................................... 23
i
Page 4

4.8 Deleting a Contact .......................... ........................................... 23
4.9 Managing Groups ...................................................................... 24
4.10 Joining and Separating Contacts............................. ................ 24
4.11 Sending Contacts .............. ...................................................... 25
5 Using the Onscreen Keyboard.............................................26
5.1 Displaying the Keyboard .................................................... ........ 26
5.2 Customizing Keyboard Settings.................... ............................. 27
6 Messaging ...........................................................................27
6.1 SMS and MMS........................................ ................................... 27
6.2 Email............................................................. ............................. 30
7 Getting Connected...............................................................32
7.1 Mobile Networks ........................................... ............................. 32
®..............................................................................................................
7.2 Wi-Fi
7.3 WPS..................... ...................................................................... 34
7.4 Browser.............................................. ........................................ 34
7.5 Bluetooth
® .....................................................................................................
8 Entertainment ......................................................................37
8.1 Taking Photos and Recording Videos ....................................... 38
8.2 Using the Gallery ....................................................................... 39
8.3 DTS Envelo™ ................................................. ........................... 41
8.4 Enjoying Music...................................... ..................................... 41
9 Google Services ..................................................................42
9.1 Creating a Google™ Account .................................................... 42
9.2 Gmail™........ .............................. ................................................ 43
9.3 Talk .................... ............................. ........................................... 44
9.4 Maps ............................................... ........................................... 46
9.5 YouTube™............................................ ..................................... 47
10 Synchronizing Information.................................................47
33
36
ii
Page 5

10.1 Managing Your Accounts...... ................................................... 48
10.2 Customizing Your Account Synchronization............................ 49
11 Using Other Applications...................................................50
11.1 All Backup................................... ............................................. 50
11.2 Calendar .................................................................. ................ 51
11.3 File Manager ......................... .............................. ..................... 53
11.4 Clock........................................................... ............................. 55
11.5 Calculator................................................................. ................ 56
11.6 Notepad ................................................................................... 56
12 Managing Your Mobile Phone ...........................................56
12.1 Setting the Date and Time....................................................... 57
12.2 Setting the Display ........................................................ ........... 57
12.3 Setting Ringers ........................................................................ 58
12.4 Setting Phone Services ........................................................... 59
12.5 Configuring Text-to-Speech..................................................... 59
12.6 Protecting Your Mobile Phone ................. ........................... ..... 60
12.7 Managing Applications..................................... ........................ 61
12.8 Resetting Your Mobile Phone ....................................... ........... 62
12.9 Setting Power saving mode ..................................................... 62
12.10 Online Update ..................................................... ................... 63
13 Appendix............................................................................63
13.1 FAQ ............................................................ ............................. 63
iii
Page 6

Page 7
1 Reading Before Proceeding
1.1 Safety Precautions
Please read the safety precautions carefully to ensure the correct use of your mobile
phone.
Do not crash, throw, or puncture your mobile phone. Avoid the
falling, squeezing, and bending of your mobile phone.
Do not use your mobile phone in a moist environment, such as the
bathroom. Prevent your mobile p hone from being soaked or washed
in liquid.
Do not switch on your mobile phone when it is prohibited to use
phones or when the phone may cause interference or danger.
Do not use your mobile phone while driving.
Follow any rules or regulations in hospitals and health care facilities.
Switch off your mobile phone near medical apparatus.
Switch off your mobile phone in aircraft. The phone may cause
interference to control equipment of the aircraft.
Switch off your mobile phone near high-precision electronic devices.
The phone may affect the performance of these devices.
Do not attempt to disassemble your mobile phone or its accessories.
Only qualified personnel are allowed to service or repair the phone.
1
Page 8
Do not place your mobile phone or its accessories in containers with
a strong electromagnetic field.
Do not place magnetic storage media near your mobile phone.
Radiation from the phone may erase the information stored on them.
Do not put your mobile phone in a high-temperature place or use it in
a place with flammable gas such as a gas station.
Keep your mobile phone and its accessories away from children. Do
not allow children to use your mobile phone without guidance.
Use only approved batteries and chargers to avoid the risk of
explosions.
Observe any laws or regulations on the use of wireless devices.
Respect others’ privacy and legal rights when using your wireless
device.
Strictly follow the relevant instructions of this manual while using the
USB cable. Otherwise your mobile phone or PC may be damaged.
1.2 Personal Information and Data Security
The use of some functions or third-party applications on your device could result in
your personal information and data being lost or becoming accessible to others.
Several measures are recommended to help you protect personal and confidential
information.
• Place your device in a safe area to prevent it from unauthorized use.
• Set your device screen to lock and create a password or unlock pattern to open it.
2
Page 9

• Periodically back up personal information kept on your memory card, or stored in
your device memory. If you change to a different device, be sure to move or delete
any personal information on your old device.
• If you are worried about viruses when you receive messages or emails from a
stranger, you can delete them without opening them.
• If you use your device to browse the Internet, avoid websites that might pose a
security risk to avoid theft of your personal information.
• If you use services such as Wi-Fi or Bluetooth, set passwords for these services to
prevent unauthorized access. When these services are not in use, turn them off.
• Install or upgrade device security software and regularly scan for viruses.
• Be sure to obtain third-party applications from a legitimate source. Downloaded
third-party applications should be scanned for viruses.
• Install security software or patches released by Huawei or third-party application
providers.
• Some applications require and transmit location information. As a result, a thirdparty may be able to share your location information.
• Your device may provide detection and diagnostic information to third-party
application providers. Third party vendors use this information to improve their
products and services.
• If you have concerns about the security of your personal information and data,
please contact mobile@huawei.com.
1.3 Legal Notice
Copyright © Huawei Technologies Co., Ltd. 2012. All rights reserved.
No part of this document may be reproduced or transmitted in any form or by any
means without prior written consent of Huawei Technologies Co., Ltd.
The product described in this manual may include copyrighted software of Huawei
Technologies Co., Ltd. and possible licensors. Customers shall not in any manner
reproduce, distribute, modify, decompile, disassemble, decrypt, extract, reverse
engineer, lease, assign, or sublicense the said software, unless such restrictions are
prohibited by applicable laws or such actions are approved by respective copyright
holders.
3
Page 10

Trademarks and Permissions
, , and are trademarks or registered trademarks of Huawei
Technologies Co., Ltd.
Android is a trademark of Google Inc.
Other trademarks, product, service and company names mentioned are the property
of their respective owners.
Notice
Some features of the product and its accessories described herein rely on the
software installed, capacities and settings of local network, and therefore may not be
activated or may be limited by local network operators or network service providers.
Thus the descriptions herein may not match exactly the product or its accessories you
purchase.
Huawei Technologies Co., Ltd. reserves the right to change or modify any information
or specifications contained in this manual without prior notice and without any liability.
Third-Party Software Statement
Huawei Technologies Co., Ltd. does not own the intellectual property of the third-party
software and applications that are delivered with this product. Therefore, Huawei
Technologies Co., Ltd. will not provide any warranty of any kind for these third-party
software and applications. Neither will Huawei Technologies Co., Ltd. provide support
to customers who use these third-party software and applications, nor be responsible
or liable for the functions of these third-party software and applications.
Third-party software and applications services may be interrupted or terminated at
any time. Huawei Technologies Co., Ltd. does not guarantee that any content or
service would be maintained for any period during its availability. Third-party service
providers provide content and services through network or transmission tools outside
of the control of Huawei Technologies Co., Ltd. To the greatest extent permitted by
applicable law, it is explicitly stated that Huawei Technologies Co., Ltd. shall not
compensate or be liable for services provided by third-party service providers, or the
interruption or termination of third-party contents or services.
Huawei Technologies Co., Ltd. shall not be responsible for the legality , quality, or any
other aspects of any software installed on this product, or for any uploaded or
downloaded third-party works, such as texts, images, videos, or software. Customers
shall bear the risk for any and all effects, including incompatibility between the
software and this product, which result from installing software or uploading or
downloading the third-party works.
4
Page 11

This product uses the open-source Android™ platform. Huawei Technologies Co.,
Ltd. has made necessary changes to the platform. Therefore, this product may not
support all the functions that are supported by the standard Android platform or may
be incompatible with third-party software. Huawei Technologies Co., Ltd. shall not be
liable for any of such situation.
DISCLAIMER OF WARRANTIES
THE CONTENTS OF THIS MANUAL ARE PROVIDED “AS IS”. EXCEPT AS
REQUIRED BY APPLICABLE LAWS, NO WARRANTIES OF ANY KIND , EITHER
EXPRESS OR IMPLIED, INCLUDING BUT NOT LI MITED TO, THE IMPLIED
WARRANTIES OF MERCHANTABILITY AND FITNESS FOR A PARTICULAR
PURPOSE, ARE MADE IN RELATION TO THE ACCURACY, RELIABILITY OR
CONTENTS OF THIS MANUAL.
LIMITATIONS OF LIABILITY
TO THE MAXIMUM EXTENT PERMITTED BY APPLICABLE LAW, IN NO EVENT
SHALL HUAWEI TECHNOLOGIES CO., LTD. BE LIABLE FOR ANY SPECIAL,
INCIDENTAL, INDIRECT, OR CONSEQUENTIAL DAMAGES, OR LOST
PROFITS, BUSINESS, REVENUE, DATA, GOODWILL OR ANTICIPATED
SAVINGS.
THE MAXIMUM LIABILITY (THIS LIMITATION SHALL NOT APPLY TO LIABILI TY
FOR PERSONAL INJURY TO THE EXTENT APPLICABLE L AW PROHIBITS
SUCH A LIMITATION) OF HUAWEI TECHNOLOGIES CO., LTD. ARISING FROM
THE USE OF THE PRODUCT DESCRIBED IN THIS DOCU MENT SHALL BE
LIMITED TO THE AMOUNT PAID BY CUSTOMERS FOR THE PURCHASE OF
THIS PRODUCT.
Import and Export Regulations
Customers shall comply with all applicable export or import laws and regulations and
be responsible to obtain all necessary governmental permits and licenses in order to
export, re-export or import the product mentioned in this manual including the
software and technical data therein.
5
Page 12
2 Getting Started
All the pictures in this guide are for your reference only. Your phone’s actual
display features may be different to those described here, depending on its
software version.
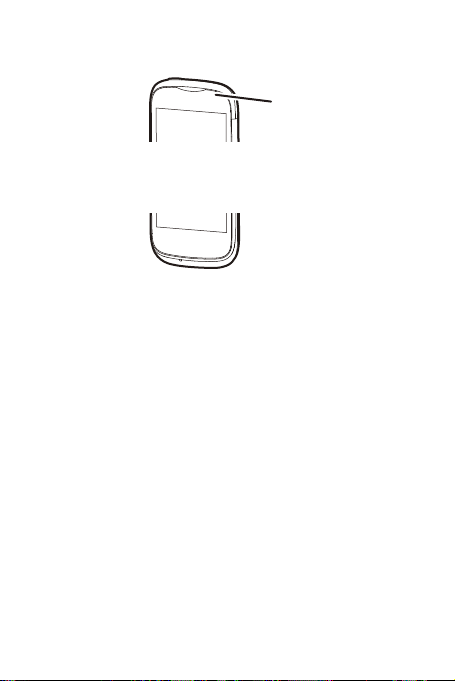
2.1 Appearance
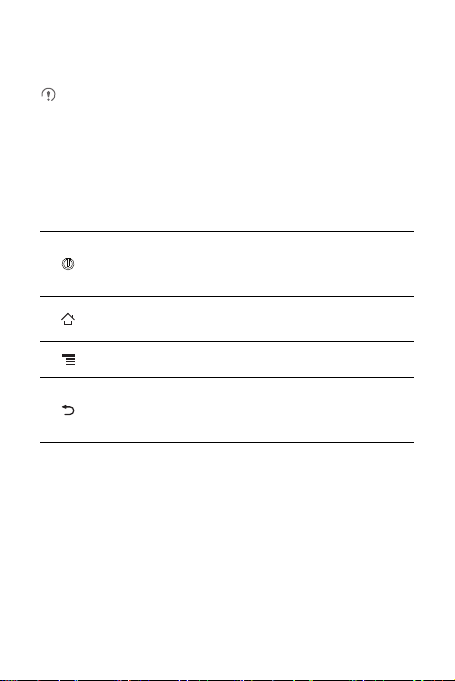
2.1.1 Key Functions at Your Fingertips
• Press and hold to power on your mobile phone.
• Press and hold to open the
• Press to lock the screen when your mobile phone is active.
• Touch to return to the Home screen.
• Touch and hold to open
Touch to open the menu on an active screen.
• Touch to return to the previous screen.
• Touch to exit any application you are running.
• Touch to hide the keyboard.
Phone options
Recent
.
menu.
6
Page 13
2.2 Setting Up Your Mobile Phone
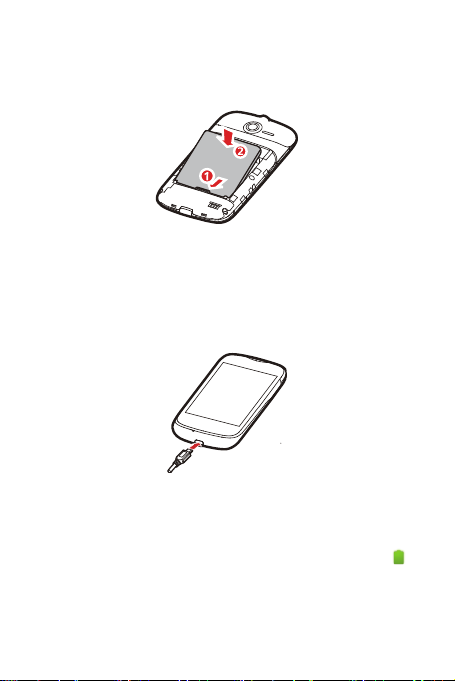
2.2.1 Installing the Battery
1. Angle the edge labeled 1 (with the contacts) into the bottom end of the battery
compartment.
2. Push the edge labeled 2 into the compartment until the battery clicks firmly into
place.
2.2.2 Charging the Battery
Before charging the battery, ensure that it has been properly installed on your phone.
1. Connect the USB cable that came with your mobile phone to the charger.
2. Connect the other end of the USB cable to your mobile phone. Then, to start
charging, plug the charger into an electrical outlet.
If you charge your mobile phone while it is powered on, the battery icon on the
notification bar indicates the charging status. When the battery icon changes to ,
your mobile phone is fully charged.
7
Page 14
Status Indicator
The color of the status indicator tells you the status of your mobile phone’s battery.
Status Indicator
Green: Fully charged (when connected to charger).
Orange: Charging in progress (when connected to charger).
Red: Battery low.
2.2.3 Important Information About the Battery
• If the battery has not been used for a long time, you may not be able to power on
your mobile phone immediately after you begin charging the battery. Allow the
battery to charge for a few minutes with the phone powered off before attempting
to power the phone on.
• As it ages, the battery’s performance will degrade, in particular it will not hold charge
as it did when it was new. When the battery life becomes noticeably shorter than
usual after being charged properly, replace the battery with a new one of the same
type.
• Using data services increases the power consumption of the phone and will
therefore reduce the length of time that the phone can be used between battery
charges.
• The time required to fully charge the battery depends on the ambient temperature
and the age of the battery.
• When the battery power is low, the phone will alert you and display a message.
When the battery power is almost exhausted, your phone will power off
automatically.
8
Page 15

2.2.4 Power Saving Tips
The longevity of battery power depends on the network to which you connect, and
how you use your mobile phone.
Try the following to conserve battery power:
• When your mobile phone is not in use, turn off the screen backlight.
• Reduce the time it takes for your screen backlight to turn off when your phone is
idle.
• Lower the screen brightness.
• Turn off Bluetooth when you are not using it. Only make your phone visible to other
Bluetooth devices when you need to establish a Bluetooth connection.
• Turn off Wi-Fi when you are not using it.
• Turn off your phone’s GPS receiver when you are not using it.
• Lower the volume.
• Close power-draining programs, when you do not need them.
• Turn off the data service.
2.3 Power On or Off Your Mobile Phone
2.3.1 Powering On Your Mobile Phone
Press . The first time you power on your phone, you will be asked to sign in to
your account and set up your mobile phone.
2.3.2 Setting Up Your Mobile Phone
The first time you power on your mobile phone, the phone displays a setup wizard to
help you set up the phone.
The setup wizard helps you:
• Create or sign in to your account
• Make some initial decisions about how you want to use your mobile phone
2.3.3 Turning On Fast boot
1. Touch >
2. Select the
Settings
>
Quick PowerOn
Applications
check box.
.
9
Page 16

Do not turn on
Quick PowerOn
while on an airplane.
2.3.4 Powering Off Your Mobile Phone
1. Press and hold to open the
2. Touch
Power off
If
Quick PowerOn
.
Quick PowerOn
Phone options
is enabled, the phone will enter the deep sleep mode. If
is disabled, touch OK to shut down the phone.
menu.
2.4 Using the Touchscreen
2.4.1 Touchscreen Actions
•
Touch
: Tap the screen with your finger to select an item, confirm a selection, or
start an application.
•
Touch and hold
mobile phone responds. For example, to open the options menu for the active
screen, touch and hold the screen until the menu appears.
•
Flick
•
Drag
item to any part of the screen. You can drag an icon to move or delete it.
: Touch an item with your finger and do not release it until the
: Move your finger either vertically or horizontally across the screen.
: Touch and hold the desired item with your finger. To move an item, drag the
2.4.2 Rotating Your Mobile Phone Screen
The orientation of most screens will change to landscape or portrait view when you
rotate your phone sideways.
On the Home screen, touch >
to disable this function.
Settings
>
Display
>
Auto-rotate screen
2.5 Locking and Unlocking the Screen
2.5.1 Locking the Screen
• When your phone is on, press to lock the screen. When the screen is locked,
you can still receive messages and calls.
• If your phone is idle for a while, the screen will lock automatically.
10
Page 17
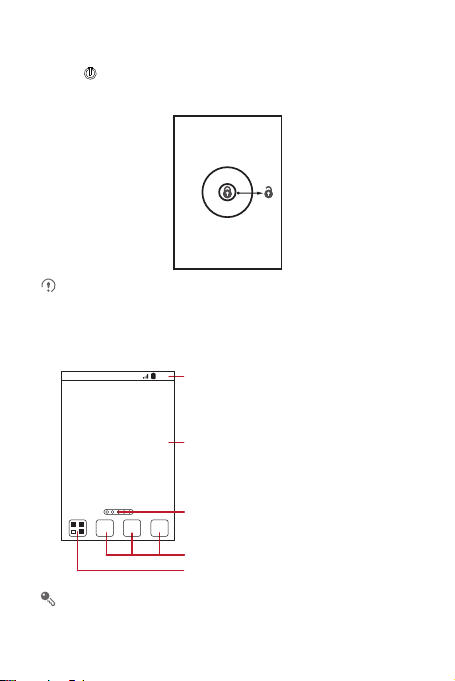
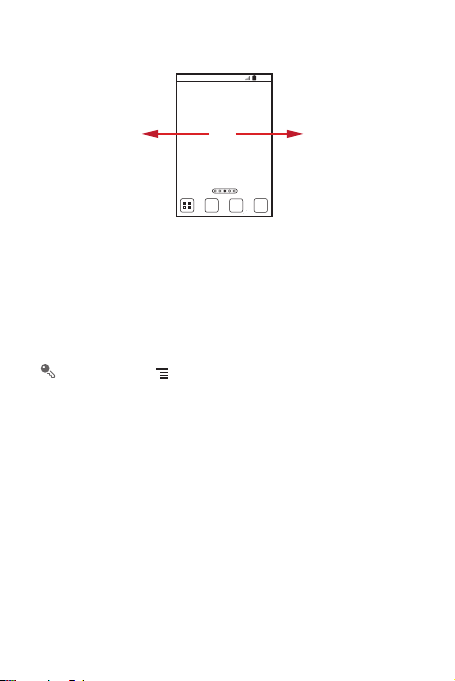
2.5.2 Unlocking the Screen
10:23
Touch to view all your applications.
Shortcuts
Notifications bar:
Displays the reminders and status icons of
your phone. Flick down to open the
notifications panel.
Display area:
Shows the operation and display areas of
your phone.
Indicates the current screen.
1. Press to wake up the screen.
2. Drag the lock icon from left to right to unlock the screen.
If you have set up a screen unlock pattern, you will be prompted to draw the
pattern on the screen to unlock it.
2.6 Home Screen
Touch and hold a shortcut until the mobile phone vibrates, you can then drag it
to your desired location or move it to the trash. You can also drag an icon from
another area of the screen to the shortcut position.
11
Page 18
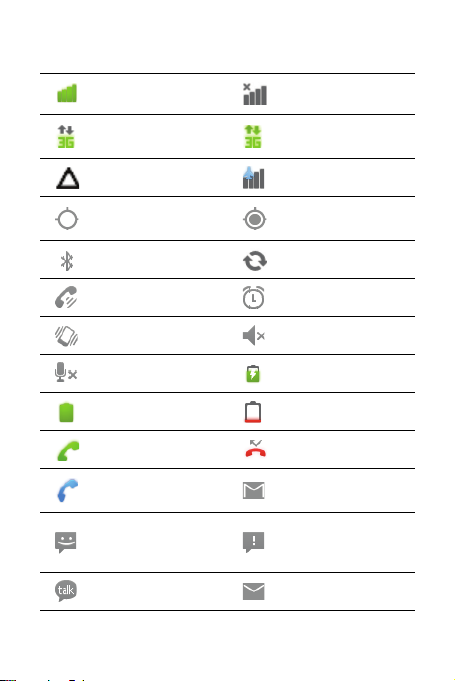
2.6.1 Notification and Status Icons
Signal strength No signal
Connected to 3G mobile
network
Roaming Airplane mode
GPS on
Bluetooth on Synchronizing data
Speakerphone on Alarm enabled
Vibration mode Ringer silenced
Call muted Charging battery
Battery full Battery exetremely low
Call in progress Missed call
Call in progress with a
Bluetooth headset used
New text or multimedia
message
New chat message New email
3G in use
Receiving location data
from GPS
New mail from Gmail
Problem with text or
multimedia message
delivery
12
Page 19
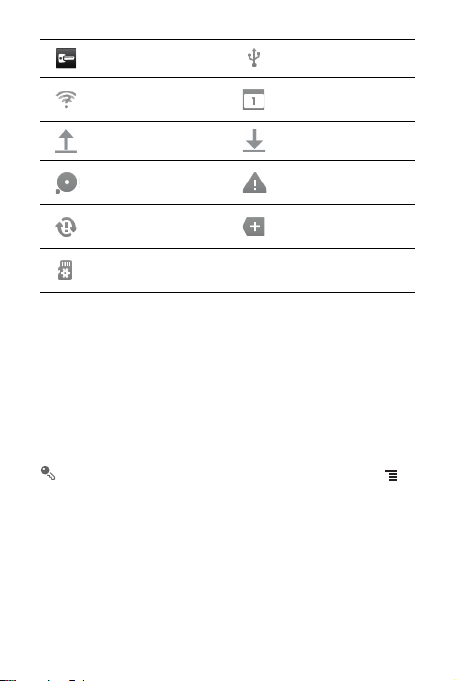
Connected to a VPN Connected to a PC
Open Wi-Fi network
available
Upcoming event
Uploading Downloading
Memory full
Synchronization failed
Preparing the mircoSD
card
Sign-in or synchronization
problem
More undisplayed
notifications
2.6.2 Notification Panel
Your mobile phone will notify you when you receive a new message or there is an
upcoming event. The notification panel also informs you of alarms and settings. Open
the notification panel to see your network operator or to view a message, reminder, or
event notification.
Opening the Notification Panel
1. When a new notification icon appears on the notification bar, place your finger on
the notification bar and flick down to open the notification panel.
You can also open the notification panel from the Home screen: Touch >
Notifications
2. On the panel, you can:
• Touch a notification to open the related application.
• Touch
Closing the Notification Panel
Touch and hold the bottom of the panel. Then flick up to close it.
to open the panel.
Clear
to clear all notifications.
13
Page 20
2.6.3 Viewing Other Parts of the Home Screen
10:23
Flick your finger left or right across
the Home screen.
2.6.4 Customizing the Home Screen
Adding a New Home Screen Item
1. Touch and hold a blank area on the Home screen until the
displayed.
You can also touch >
action
menu.
Add
on the Home screen to display the
2. Select an item to add it to the Home screen.
Moving a Home Screen Item
1. Touch and hold an item on the Home screen until the item expands in size and the
mobile phone vibrates.
2. Without lifting your finger, drag the item to the desired position on the screen, and
then release it.
Removing a Home Screen Item
1. Touch and hold an item on the Home screen until the item expands and the mobile
phone vibrates.
2. Without lifting your finger, drag the item to the trash can. When the item and the
trash can turn red, the item is ready to be removed.
3. Release the item to remove it from the Home screen.
14
Select action
menu is
Select
Page 21
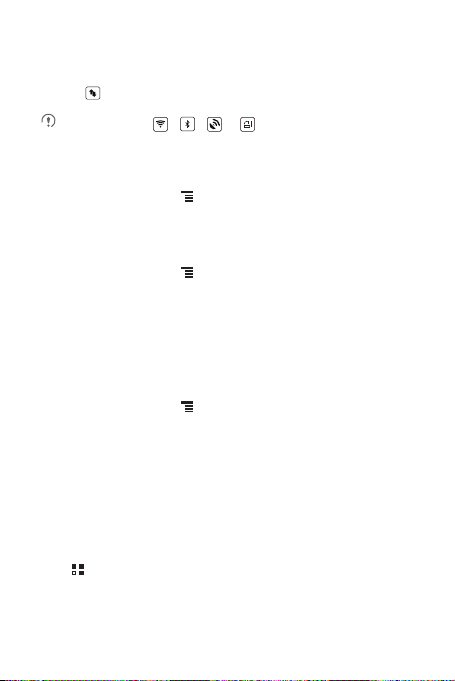
2.6.5 Service Shortcuts
1. Open the notification bar.
2. Touch at the top of the screen to switch data services on or off.
You can also touch , , or turn the corresponding services on
or off.
2.6.6 Setting a Home Screen Animation
1. On the Home screen, touch >
2. Select an animation, and then touch
Home settings
Save
.
>
Animation
.
2.6.7 Changing the Wallpaper
1. On the Home screen, touch >
2. Touch the following menu items to select a picture and set it as the wallpaper:
•
Gallery
•
Live wallpapers
•
Wallpapers
Wallpaper
.
2.6.8 Changing the Theme
1. On the Home screen, touch >
2. Do any of the following:
• Touch
Theme
• Touch
3. Touch
to select a theme.
Application icons
Save
.
Home settings
to select a series of application icons.
.
2.7 Application Screen
The Application screen holds icons for all of the applications on your phone. You can
touch on the Home screen to open the application screen.
15
Page 22

2.7.1 Moving Icons on the Application Screen
1. On the application screen, touch .
2. Touch and hold the icon you want to move on the application screen.
3. Without lifting your finger, drag the icon to the desired location, and then release it.
To move more icons, repeat steps 2 and 3.
4. Touch or to save.
2.8 Using a microSD™ Card
2.8.1 (Optional) Installing the microSD Card
If you want to expand your phone memory, you can also insert a microSD card.
1. Remove the battery cover.
2. Insert the microSD card into the card slot as shown in the diagram.
2.8.2 Using the microSD ™ Card as a USB Mass Storage
To transfer all your favorite music and pictures from your PC to your mobile phone’s
microSD card, set the microSD card as a USB mass storage.
1. Connect your mobile phone to your PC with the USB cable provided. Your PC will
detect the microSD card as a removable storage device.
2. Open the notification bar, and then touch
3. Touch
Turn on USB storage
to transfer files.
You can now transfer files from your PC to your mobile phone’s microSD card.
When your microSD card acts as a USB mass storage, your mobile phone will
USB connected
in the dialog box that opens to confirm that you want
.
16
Page 23

not use this memory space. Ensure that you follow the correct procedures to
disconnect the USB mass storage device (your mobile phone) from the PC
when you have finished transferring files.
2.8.3 Removing the microSD ™ Card
1. On the Home screen, touch >
2. Scroll down the screen, and then touch
3. Carefully remove the microSD card.
Settings
Storage
.
>
Unmount SD card
.
3 Calling
To make a phone call, you can dial a number using the keypad or touch a number
saved in your contact list, on a webpage, or in a document. When you are in a call,
you can answer other incoming calls or redirect them to your voicemail. You can also
set up conference calls with several participants.
3.1 Making a Call
To make a call, you can use the
or
Call log
.
When you are in a call, you can touch to use other functions. To return to the call
screen, flick the notification bar down and touch
Be careful not to block the microphone at the bottom of your phone if you want
your voice heard by the other parties in a call.
3.1.1 Making a Call with the Dialer Application
1. On the Home screen, touch >
If you are already working with
2. Touch the appropriate number keys to enter the phone number.
Your mobile phone supports the SmartDial function, that is, when you touch
numbers on the dialer, the phone automatically searches among your contacts
and lists the matching results ordered according to the accuracy of the match. If
no contacts match the information entered, the phone will not display any result.
Dialer
application, or select a number from
Current call
Dialer
to display the dialer.
Contacts
or
Call log
, touch the
Contacts
.
Dialer
tab.
17
Page 24

3. Touch to initiate the call.
During a call, touch
Dialpad
to enter other numbers on the dialpad.
3.1.2 Making a Call from Contacts
1. On the Home screen, touch >
If you are already working with
2. In the list, touch the contact you want to call.
3. Touch to dial the phone number.
Contacts
Dialer
or
Call log
to display the contact list.
, touch the
Contacts
3.1.3 Making a Call from Call log
1. If you are already working with
2. Touch to the right of the log entry to dial.
If you touch and hold a log entry, the options menu will open.
Contacts
or
Dialer
, touch the
Call log
tab.
3.2 Answering or Rejecting a Call
3.2.1 Answering an Incoming Call
When you receive a phone call, the incoming call screen opens. If you have
previously saved the caller’s number in
displayed. If the caller’s number is not saved in
displayed.
Drag to the right to answer the call.
Contacts
, the caller's name and number are
Contacts
the caller’s number is
tab.
18
Page 25

3.2.2 Ending a Call
During a call, touch
End
to hang up.
3.2.3 Rejecting an Incoming Call
Drag to the left to reject the call.
3.3 Other Operations During a Call
3.3.1 Making a Conference Call
If you receive a new call while you are already on a call, you can connect the second
call to the call you are on. This feature is known as conference calling. You can also
set up a conference call with multiple callers.
Contact your network operator to learn if conference calls are supported and, if
yes, how many can participate.
1. To initiate a conference call, dial the number of the first participant. After you have
connected to the first participant, keep the connection open, touch
2. Enter the phone number of the next person you want to join the conversation and
touch , or select someone from your
is automatically placed on hold while you do this.
3. Once you have connected to the second person, to begin the conference call.
4. To end the conference call and disconnect everyone, touch
Call log
or
Contacts
Add call
. The first participant
End
.
.
19
Page 26

3.3.2 Switching Between Calls
If you receive a new call while you are already in a call, you can switch between the
two calls.
1. While you are in the first call and the second call comes in, answer the incoming
call, and then touch
2. The current call is placed on hold and you are connected to the first call.
Manage calls
.
3.4 Using the Call log
The
Call log
contains a list of calls that you have dialed, received, and missed. You
can use the call log to find a recently called number quickly or add a number from the
call log to your contact list.
3.4.1 Adding an Entry to Contacts
1. If you are already working with
2. Touch and hold the entry you want to add to your
3. Touch
Add to contacts
4. Touch
Create contact
contact name.
Dialer
or
Contacts
, touch the
Call log
in the options menu.
Contacts
or scroll through the contact list and touch an existing
tab.
.
3.5 Using Airplane Mode
Some locations may require you to turn off your phone’s wireless connections. Rather
than powering off your phone, you can place it in
1. Press and hold .
2. Touch
Airplane mode
in the options menu.
Airplane mode
.
3.6 TTY Operation
3.6.1 Using the TTY Device
The Teletypewriter (TTY) is a typewriting device. By connecting the phone to the TTY
device, you can use the TTY functions to send/receive messages. When you use the
TTY function, do as follows:
20
Page 27

1. Connect the TTY device to the headset jack of the phone and set the phone to the
TTY mode.
2. Make or answer calls as normal.
3. When the call is put through, use the TTY device to send or receive the letters.
4. Press the
End
to end the call.
3.6.2 Setting the TTY Mode
1. Touch >
2. Select one TTY mode.
Settings
>
Call settings
>
TTY mode
•
TTY Off
: The standard voice speaking mode and the listening mode.
•
TTY Full
: Transmit and receive the TTY characters.
•
TTY HCO
: Transmit TTY characters but receive by listening to the earpiece.
•
TTY VCO
: Receive TTY characters but transmit by speaking into the
microphone.
.
4 Contacts
The
Contacts
phone numbers and addresses of your contacts. After you save contact information
on your mobile phone, you have easy access to the people with whom you want to
communicate.
4.1 Opening the Contacts Application
If you have not yet added any contacts to your mobile phone,
message with hints on how to start adding contacts information. On the Home screen,
touch
On the Home screen, touch >
All of your contacts are displayed alphabetically in a list that you can scroll through.
application enables you to save and manage information such as
Contacts
to open the
Contacts
application.
Contacts
to open the
Contacts
Contacts
displays a
application.
21
Page 28

4.2 Adding a Contact
1. In the contact list, touch >
2. If you have more than one account with contacts, touch the account to which you
want to add the contact.
3. Enter the contact's name, and then add detailed information such as phone
number and address.
4. When you are finished, touch
Create contact
Save
.
to save the contact information.
4.3 Adding a Contact to Your Favorites
• Touch and hold the contact you want to add to
Favorites
.
• Touch a contact, and then touch the star to the right of the contact’s name. The star
turns gold.
Favorites
. Then touch
Add to
4.4 Indexing Contacts
You can index your
1. On the Home screen, touch >
2. Touch or move any letter in the alphabet to list all contacts starting with the letter.
Contacts
to quickly find your desired contact.
Contacts
.
4.5 Searching for a Contact
1. In the contact list, touch >
2. Enter the name of the contact you wish to search for. As you type, contacts with
matching names appear below the search box.
On the contact list screen, you can touch a letter on the right to display contacts
starting with the touched letter.
Search
.
22
Page 29

4.6 Editing a Contact
You can make changes to the information you have stored for a contact at any time.
1. In the contacts list, touch and hold the contact whose details you want to edit, and
then touch
Edit contact
2. Touch the category of contact information you wish to change: name, phone
number, email address, or any other information you recorded earlier.
3. Make the desired changes to the contact information, and then touch
cancel all of your changes, touch
in the options menu.
Cancel
.
Save
. To
4.7 Communicating with Your Contacts
From the
Contacts
or
Favorites
multimedia (MMS) message to a contact’s default phone number. You can also open
details to view a list of all the ways you can communicate with that contact. This
section describes how to communicate with a contact when you view your contacts
list.
tab, you can quickly call or send a text (SMS) or
4.7.1 Using Quick Contact for Android
1. Touch the contact's picture or picture frame (if you have not assigned a picture to
the contact) to open Quick Contact for Android.
2. Touch the icon for the way you want to communicate with the contact.
The icons available depend on the information you have entered for the contact,
the applications installed on your phone, and the accounts you have.
4.7.2 Communicating with a Contact
1. In the contacts list, touch the contact that you want to communicate with.
2. On the contact’s details screen, touch the icon to the right of the number to call or
send messages.
4.8 Deleting a Contact
1. In the contacts list, touch and hold the contact that you want to delete, and then
touch
Delete contact
2. Touch OK to confirm that you want to delete the contact.
in the options menu.
23
Page 30

4.9 Managing Groups
4.9.1 Creating a Group
1. On the Home screen, touch >
touch
Groups
.
2. In the groups list, touch , and then touch
3. Enter the name and picture you want to assign to the group, and then set a ringtone
for it.
4. Touch >
5. Select the contacts to be added to the group, and then touch OK.
6. When you are finished, touch
Add Members
Contacts
. Then flick the tab bar to the left and
Create group
to add members to the group.
Save
to save the group information.
.
4.9.2 Editing a Group
You can always make changes to the information you have saved for a group.
1. In the groups list, touch and hold the group whose details you want to edit, and then
touch
Edit group
2. Make the desired changes to the group information, and then touch
cancel all changes you made to the group information, touch
in the options menu.
Cancel
Save
.
. To
4.9.3 Adding a Contact to Your Groups
To add a contact to your groups, you can do any of the following:
• Touch and hold the contact you want to add to
groups
.
• When editing a group, touch , and then touch
contacts you want to add to group.
Groups
Add Members
. Then touch
Add to
to select the
4.10 Joining and Separating Contacts
You may have duplicate contacts if you import contacts by:
• Adding an account, such as a Gmail account.
• Using the social networking services such as Facebook or Twitter. (If your phone
has the Streams function, you can use it to access Facebook or Twitter.)
24
Page 31

• Using other methods, such as exchanging emails.
To avoid duplication, join two or more contacts together to form a single contact.
Availability of Facebook or Twitter may vary depending on your country or
carrier. Please use them according to local laws and regulations.
4.10.1 Joining Contacts
1. On the Home screen, touch >
2. Touch a duplicated contact.
3. Touch
Joined Contacts
4. Select the contact to be joined to combine two duplicate contacts.
Two contacts will be joined together and displayed as one contact. Touch the contact
to view the joined information. You can see that the contact is joined together by two
contacts. You can also combine more than two contacts.
Contacts
, and then touch
.
Add contact
.
4.10.2 Separating Contacts
If contact information from different sources was joined together in error, you can
separate the contacts.
1. On the Home screen, touch >
2. Touch the joint contact to be separated.
3. Touch the option for separating a contact.
4. Select the contact to be separated from the joint contact.
The joint contact is then separated into two contacts displayed separately in
Contacts
.
Contacts
.
4.11 Sending Contacts
You can send contacts as a .vcf file via Bluetooth or Email.
1. In the contacts list, touch .
2. Select contacts that you want to send.
3. Touch
Send
4. Select the way you prefer to send the contacts you have selected, for example
.
Bluetooth or Email.
25
Page 32

q w e r t y u i o p
a s d f g h j k
z x c v b n m
.
?123
l
Touch once to capitalize the next letter you type.
Touch twice to capitalize all letters to be entered.
Touch to change from the text mode to the symbol/number mode.
Touch to enter text by voice.
Touch to insert a space.
Touch to delete a character
to the left of the cursor.
Touch and hold to delete all
characters to the left of the
cursor.
......
Touch to select or set input method.
:-)
...
You can send one contact by another way. Touch and hold a contact, touch
Send contact
, and then select the way you prefer to send.
5 Using the Onscreen Keyboard
5.1 Displaying the Keyboard
To enter text, use the onscreen keyboard. Some applications open the keyboard
automatically. In others, touch a text field to open the keyboard.
Touch to hide the keyboard.
Touch and hold a text field to open the
5.1.1 Choosing an Input Method
1. Touch and hold a text field until the
2. Touch
Select input method
3. Select the input method.
The keyboard panel will be displayed automatically.
5.1.2 Using the Android Keyboard
26
Edit text
menu.
Edit text
menu is displayed.
.
Page 33

On the Home screen, touch >
Android keyboard
>
Voice input
Settings
>
Language & keyboard
to turn on or turn off voice input.
>
5.1.3 Using the Landscape Keyboard
If you find the keyboard inconvenient or difficult to use, turn your mobile phone
sideways. The screen will display the keyboard in landscape orientation, providing
you with a wider keyboard layout.
5.2 Customizing Keyboard Settings
1. On the Home screen, touch >
2. In
Keyboard settings
Settings
>
, select an input met hod to customize the keyboard set tings.
Language & keyboard
.
6 Messaging
The
Messaging
multimedia messages (MMS) with anyone using an SMS-or-MMS-capable phone.
With the
6.1 SMS and MMS
6.1.1 Opening Messaging
Touch >
6.1.2 Creating and Sending a Text Message
1. Touch >
application allows you to exchange text messages (SMS) and
Email
application you can read and send emails.
Messaging
.
Messaging
>
New message
.
27
Page 34

2. Enter a phone number or a contact's name in the To field, or touch to select a
contact from
Contacts
or
Groups
.
As you enter the phone number or the contact's name, the phone displays
possible matches from your contacts. Select a contact from the list of possible
matches or continue entering.
After you select a contact or finish entering a number, add a comma and you can
enter another recipient. You can also touch a previously entered contact again
to edit or delete it.
3. Touch the composition text box to start entering your message.
While writing a message, you can touch >
Add
>
Contact
to insert contact
information.
4. When you are ready to send the message, touch
Send
.
Sent and received messages will be displayed in a message thread, grouping
together the messages in a conversation.
6.1.3 Creating and Sending a Multimedia Message
1. Touch >
2. Enter a phone number in the To field, or touch to select a contact from
Contacts
3. Touch the composition text box to start entering your message.
4. Touch to display the options panel.Touch
subject. Your mobile phone is now in multimedia message mode.
5. When the message is ready to be sent, touch
Messaging
>
New message
or
Groups
.
On the message editing screen, you can also touch , and then select your
desired files to add.
You can direct select a multimedia file (audios, videos, or pictures) and send it
via MMS: Touch
and then select
File Manager
Share
>
Messaging
.
Add subject
to add the message
Send MMS
.
, touch and hold the multimedia file to be sent,
.
28
Page 35

Adding a Slideshow
If you want to attach more than one file to your message, use the
1. On the message editing screen, touch to display the options panel.
2. Touch
Add
>
Slideshow
, and then select a slide to start editing it.
3. Touch and then touch
4. Touch
Done
to finish composing your message and return to the multimedia
message screen.
5. To alter your multimedia message, touch the slideshow on the multimedia
message screen. When the message is ready to be sent, touch
More
>
Add slide
to add more slides.
Slideshow
Send
.
6.1.4 Opening and Viewing a Multimedia Message
1. In the message list, touch the message thread you wish to view.
2. Touch the multimedia message to view the message.
6.1.5 Replying to a Message
1. In the message list, touch a text or multimedia message thread to open it.
2. Touch the text box to compose your message. Once finished, touch
You can also do the following to reply to a message: Touch >
select one or more message threads, and touch
Reply
Send
Multiselect
.
6.1.6 Copying a Text Message to Notepad or Calendar
1. In the message list, touch a text message thread to open it.
2. Touch and hold one of the messages, and then touch
3. Touch
Notepad
or
Calendar
For information about how to use
this guide.
to save it as a no te or an event.
Notepad
or
Copy message to
Calendar
, see the relevant sections of
6.1.7 Customizing Message Settings
In the message list, touch , and then touch
settings.
Settings
to customize the message
option.
.
,
.
29
Page 36

6.2 Email
Your mobile phone also puts email at your fingertips. With your phone’s
application, you can use your email account with Yahoo!, AOL, or other popular email
services on your phone.
6.2.1 Adding an Email Account
When using the
account. The Email setup wizard helps you to configure your account. A number of
popular email systems are supported. You can work with the same email service that
you use on your PC or you can select another email service.
1. On the Home screen, touch >
2. To customize your email settings, follow the onscreen instructions, and then touch
Next
3. Enter the account name and the name you want other people to see when they
receive an email from you.
4. Touch
Adding Other Email Accounts
1. After creating your initial email account, touch on the
touch
2. Touch on the accounts screen, and then touch
another email account.
Email
application for the first time, you must configure an email
Email
.
.
Done
.
More
>
Accounts
to access the account s screen.
Add account
When adding an additional email account, you have the option to use the new
account to send all outgoing messages.
6.2.2 Viewing an Email Message
1. On the accounts screen, touch the email account you want to use.
2. Access a folder, and then touch the message that you want to view.
Inbox
screen, and then
Email
to create
30
Page 37

6.2.3 Saving an Email Attachment
1. On the accounts screen, touch the email account you want to use.
2. Touch the email message you want to view.
3. Touch
Save
4. Select a path for saving the attachment and touch
next to the attachment in the email.
Save
.
6.2.4 Creating and Sending an Email Message
1. On the accounts screen, touch the email account you want to use.
2. On the
Inbox
3. In the To field, enter the recipients’ name or email address.
4. Enter the subject of your message and compose the message.
5. When you are finished, touch
screen, touch , and then touch
To send an attachment with the message, touch , and then touch
attachment
.
If you are not ready to send the message, touch
save the message as a draft.
Send
.
Compose
Save as draft
in the options panel.
Add
or touch to
6.2.5 Replying to an Email Message
1. On the accounts screen, touch the email account you want to use.
2. Touch the email message to which you want to reply.
3. Touch
Reply
or
Reply all
to reply to the email message.
6.2.6 Deleting an Email Account
1. On the accounts screen, touch and hold the email account you want to delete.
2. Touch
Remove account
3. Touch OK.
.
31
Page 38

6.2.7 Changing Email Account Settings
You can change a number of account settings, including how often you check for
emails, how you are notified of a new mail, and details about the servers the account
uses to send and receive mails.
Your account’s incoming and outgoing settings depend on the kind of email
service you are using. You can enter the necessary details manually, although
you may need to contact your email service provider to obtain the correct
information.
1. Touch >
2. On the accounts screen, touch and hold the email account you want to change.
3. Touch
4. Change
Email
.
Account settings
General settings, Notification settings
.
, or
Server settings
.
7 Getting Connected
7.1 Mobile Networks
Your mobile phone will be automatically configured to use your network operator’s
2G/3G service (if available) when you turn on the phone for the first time. Note that the
SIM/UIM card must be inserted (some CDMA mobile phones have an integrated UIM
card and do not need a separate UIM card)
7.1.1 Checking the Network Connection
1. Touch >
2. Touch
3. Touch
connection.
Settings
Wireless & networks
Network settings
Your mobile phone will automatically read the access point settings from the
SIM/UIM card (if any). For this reason, do not change the access point
parameters; otherwise, you might not be able to access network resources.
.
>
Mobile networks
>
Access Point Names
.
to check the network
32
Page 39

7.1.2 Turning on the Data Service
1. Touch >
2. Touch
3. Select the
7.2 Wi-Fi
Wi-Fi gives you wireless access to broadband Internet. To use Wi-Fi on your mobile
phone, you must have an access to wireless access points (hotspots). Obstacles that
block the Wi-Fi signal will reduce its strength.
Settings
Data enabled
.
check box to turn on the data connection.
Wireless & networks
®
>
Mobile networks
.
7.2.1 Turning On Wi-Fi
1. Touch >
2. Touch
Settings
Wireless & networks
.
, and then select the
Wi-Fi
check box to turn on Wi-Fi.
7.2.2 Connecting to a Wireless Network
1. After turning on Wi-Fi, touch >
2. Touch
Wireless & networks
networks in the
3. Touch a Wi-Fi network to connect to it.
• If you select an open network, you will be automatically connected to the
• If you select a network that is secured with Wired Equivalent Privacy (WEP)
Wi-Fi networks
network.
and connect to it for the first time, enter the password as prompted, and then
touch
Connect
already used, you will not be prompted to enter the password again unless you
have reset your mobile phone to its default settings.
On the
network.
. If you connect to a secured wireless network that you have
Wi-Fi settings
Settings
>
Wi-Fi settings
section.
screen, touch
.
. You will see a list of detected Wi-Fi
Add Wi-Fi network
to add a new Wi-Fi
33
Page 40

7.3 WPS
The Wi-Fi Protected Setup (WPS) function simplifies the operations to set up Wi-Fi
networks and configure network security settings.
When connecting to a Wi-Fi network via WPS, ensure that the Wi-Fi access
point to be connected supports the WPS function.
7.3.1 Connecting to a Wireless Network via the WPS Button
1. Turn on Wi-Fi, and then access the
2. Touch
WPS button connection
3. Press the WPS button of the Wi-Fi access point. When your phone connects to the
network, it displays a message.
Wi-Fi settings
.
screen.
7.3.2 Connecting to a Wireless Network via the WPS PIN
1. Turn on Wi-Fi, and then access the
2. In the
Wi-Fi networks
Then select
WPS PIN connection
PIN of the selected Wi-Fi access point.
3. Enter the PIN on the Wi-Fi access point. When your phone connects to the
network, it displays a message.
To add a new Wi-Fi network, touch
enter the Service Set Identifier (SSID) of the network.
Wi-Fi settings
section, press and hold the Wi-Fi network to be connected.
in the options menu. Your phone displays the
screen.
Add Wi-Fi network
on the screen, and then
7.4 Browser
Your mobile phone comes with an Internet browser pre-installed.
7.4.1 Opening the Browser
Touch >
Browser
to open the home page.
When known or open Wi-Fi networks and mobile data networks are available at
the same time, your phone will preferably select a Wi-Fi network for Internet
access.
34
Page 41

Touch to open the browser options menu and perform one of the following
operations:
•
New window
•
Bookmarks
•
Windows
another browser window or open a new one on this screen.
•
Refresh
•
Forward
•
More
selecting text, downloading, or setting options.
: Touch to open a new window.
: Touch to display bookmarks.
: Touch to view thumbnails of open browser windows. You can switch to
: Touch to refresh the current webpage.
: Touch to browse the next web page.
: Touch to open other menus and perform operations such as searching,
7.4.2 Opening a Webpage
1. In a browser window, touch the URL field at the top of the screen.
2. Use the keyboard to enter a webpage address. You can touch to enter the
web page address by voice.
3. As you enter the address, matching webpage addresses will appear on the screen.
If you see the address you want, touch it and go directly to that webpage or
complete entering your desired webpage.
7.4.3 Setting a Home Page
1. In a browser window, touch .
2. Touch
More
>
Settings
>
3. Enter the address of the desired home page, and then touch OK.
Set home page
.
7.4.4 Managing Bookmarks
You can store as many bookmarks as you want on your mobile phone.
Adding a Bookmark
1. In a browser window, go to the webpage you want to save as a bookmark.
2. Touch , and then touch
3. Edit the bookmark name and then touch OK.
Bookmarks
>
Add
.
35
Page 42

Opening a Bookmark
1. In a browser window, touch , and then touch
On the
Bookmarks
visited, or touch the
frequently.
2. Touch the bookmark of the website you want to open.
screen, touch the
Most visited
Bookmarks
History
tab to view the pages you have visited most
.
tab to view the pages you have
7.4.5 Customizing Browser Settings
Customize the browser to suit your browsing style. Use
privacy, and security preferences. In the browser window, touch , and then touch
More
>
Settings
.
7.5 Bluetooth
Your mobile phone has Bluetooth, which allows you to create a wireless connection
with other Bluetooth devices so you can share files with your friends, talk hands-free
with a Bluetooth headset, or even transfer photos from your phone to your PC.
If you are using Bluetooth, remember to stay within 10 meters (33 feet) of the other
Bluetooth devices to which you want to connect. Be aware that obstacles like walls or
other electronic equipment may interfere with your Bluetooth connection.
®
Browser
to set page content,
7.5.1 Turning On Bluetooth
1. Touch >
2. Touch
Bluetooth. When Bluetooth is turned on, the Bluetooth icon appears in the
notification bar.
3. Touch
mobile phone visible to other Bluetooth devices.
Settings
Wireless & networks
Bluetooth settings
.
, and then select the
, and then select the
Bluetooth
Discoverable
check box to turn on
to make your
7.5.2 Pairing with and Connecting to a Bluetooth Device
Your mobile Bluetooth lets you do the following:
• Hands Free Profile (HFP): allows you to use a hands-free Bluetooth device.
• Headset Profile (HSP): allows you to use a mono Bluetooth headset.
36
Page 43

• Object Push Profile (OPP): allows you to transfer files over a Bluetooth connection.
• Advanced Audio Distribution Profile (A2DP): allows you to use a stereo Bluetooth
headset.
• A/V Remote Control Profile (AVRCP): allows you to control audio playing using a
Bluetooth headset remotely.
Before you use Bluetooth, pair your mobile phone with another Bluetooth device as
follows:
1. Ensure that the Bluetooth function on your mobile phone is enabled.
2. On the Home screen, touch >
settings
. Your mobile phone will then scan for Bluetooth devices in range.
3. Touch the device you want to pair your mobile phone with.
4. If required, enter the pairing password to complete the connection.
Settings
>
Wireless & networks
>
Bluetooth
7.5.3 Sending Files via Bluetooth
With Bluetooth, you can share pictures, videos, or music files with your family and
friends. To send files via Bluetooth:
1. Touch and hold the file to be sent in your mobile phone or SD card. The active
options menu is displayed.
2. Touch
Share
, then
Bluetooth
to select a paired device.
7.5.4 Disconnecting from or Unpairing with a Bluetooth Device
1. Touch >
2. Navigate to the
which you are connected.
3. Touch
Settings
>
Wireless & networks
Bluetooth devices
Unpair
to disconnect from the device.
>
section, and then touch and hold the device to
Bluetooth settings
.
8 Entertainment
In addition to being a communication device and personal assistant, your mobile
phone also provides you with a multitude of entertainment possibilities. You can take
photos, create videos and audio clips, and download and listen to music.
37
Page 44

8.1 Taking Photos and Recording Videos
3
5
Touch to customize the camera settings.
Thumbnail of the
last photo. Touch
to preview the
photos or videos.
Slide up to record
videos; slide down
to take photos.
Touch to take a
photo.
The camera is a combination of camera and camcorder that you can use to shoot and
share pictures and videos.
8.1.1 Opening Your Camera
• Touch >
mode, ready to take a picture or record a video.
• Touch to close the camera.
Capture Screen
On the capture screen, touch to show the capture panel.
8.1.2 Taking a Photo
1. Open your camera application and switch it to camera mode.
2. If necessary, change the camera settings. The preview changes as you change
the settings.
3. Frame your photo within the photo capture screen.
4. Touch and hold . When the frame turns green, the image is in focus.
5. Release to take your photo.
Photos taken are displayed for a moment. You can take another photo or review your
photos.
38
Camera
to open the camera. The camera opens in landscape
Page 45

8.1.3 Viewing Your Photos
1. After taking a photo, a thumbnail of the photo you have just taken is shown in the
upper right corner of the capture screen. Touch the thumbnail to view it.
2. Touch the onscreen button to do any of the following:
• Touch
Share
• Touch
• Touch
to send the photo in a message or post it online.
Delete
to delete the photo.
More
>
Set as
to set the photo as a contact icon or the wallpaper.
8.1.4 Recording a Video
1. Open the camera application, and then switch it to camcorder mode.
2. If necessary, change the camcorder settings.
3. Frame the scene with which you want to start your video.
4. Touch to start recording a video.
5. Touch to stop recording.
8.1.5 Viewing Your Videos
1. After recording a video, a thumbnail of the video you have just recorded is shown in
the upper right corner of the capture screen. Touch the thumbnail to view it.
2. Touch the onscreen buttons to do any of the following:
• Touch
Share
• Touch
On the video playback screen, touch the controls to fast-forward or rewind or to
play or pause the video.
3. If you want to view more videos, flick your finger left or right across the screen.
to send the video in a message or post it online.
Delete
to delete the video.
8.2 Using the Gallery
Your
Gallery
application can automatically search for pictures and videos on your
mobile phone and microSD card. Use
view and edit pictures, watch videos, and set a picture as wallpaper or as a photo for
a contact.
Gallery
to sort photos and videos into folders,
39
Page 46

8.2.1 Opening the Gallery
On the Home screen, touch >
The
Gallery
application categorizes your pictures and videos by storage location and
displays these files in folders. Touch a folder to view the pictures or videos inside.
Gallery
.
8.2.2 Viewing a Picture
1. In
Gallery
, touch the folder that contains the pictures you want to view.
2. Touch the picture to view it in full-screen mode.
3. Touch the screen. Then the zoom panel appears. You can zoom in or zoom out on
the picture.
The picture viewer supports the automatic rotation function. When you rotate
your mobile phone, the picture adjusts itself to the rotation.
8.2.3 Rotating a Picture
1. When viewing a picture, touch to display the operations panel.
2. Touch
More
orientation.
.
Rotate Left
or
Rotate Right
. The picture is saved with the new
3. Select either
8.2.4 Cropping a Picture
1. When viewing a picture, touch to display the operation panel, and then touch
More
>
Crop
2. Use the cropping tool to select the portion of the picture to crop.
3. Touch
.
• Drag from the inside of the cropping tool to move it.
• Drag an edge of the cropping tool to resize the image.
• Drag a corner of the cropping tool to resize the image without changing its
length to width ra tio.
Save
to save the cropped picture. Touch
Discard
to discard the changes.
40
Page 47

8.3 DTS Envelo™
DTS Envelo is a virtual surround sound solution for consumer electronics. It can
create virtual surround sound from any input source: mono, stereo, or 5.1 multichannel.
DTS can also be activated in >
Settings
>
Sound
>
DTS mode
.
8.4 Enjoying Music
8.4.1 Opening the Music Library
Touch >
The music library automatically scans for music stored on your microSD card and
displays them in
8.4.2 Playing Music
1. From the music library, select a way to view your music.
2. Touch the music file you want to play.
Play Music
to open the music library.
ALBUMS,SONGS,PLAYLIST
.
Back
Progress bar
While playing music, touch to return to the Home screen, the music will continue
to play in the background and you can use other applications. Open the notifications
panel and touch the playing music to return to the music playing screen.
Search music
Music player controls
41
Page 48

8.4.3 Adding Music to a Playlist
1. From the mu sic library select a way to view your music.
2. Press and hold a music file, and then touch
Add to playlist
.
8.4.4 Playing Music in a Playlist
1. In music library, touch
2. Press and hold the playlist you want to play.
3. Touch
Play
Playlists
to play the playlist.
.
9 Google Services
Availability of Google applications, services, and features may vary according to
your country or carrier. Please follow local laws and regulations to use them.
When you turn on your mobile phone for the first time, touch a Google services such
as
Talk, Gmail
, or
Play Store
account.
Ensure that your mobile phone has an active data connection (3G) before you
sign in to your Google account.
If you already have a Google account, touch
password.
9.1 Creating a Google™ Account
If you do not have a Google account, you can create one:
1. After reading the setup information, touch
2. Touch
Create
3. Enter a first name, last name, and user name for your Google account, and then
touch
Next
. The mobile phone will connect to the Google server to check whether
the username is available. If the username you entered is already in use, you will be
prompted to choose another one or select one from a list.
4. Enter and confirm your Google account password.
5. Select a security question from the drop down menu, and then enter the answer.
42
, and you will be prompted to sign in to your Google
Sign in
and enter your username and
Next
.
.
Page 49

6. Touch
Create
7. When the
8. Enter the characters that appear on the screen, and then touch
.
Finish creating account
To use another Google account, go to the
screen, and touch
add.
Add account
screen appears, touch
to select which type of accounts you want to
I agree, next
Next
.
Accounts & sync settings
.
9.2 Gmail™
Gmail
is Google’s web-based email service. When you first set up your phone, you
may have configured it to use an existing
The first time you open the
the messages from your
Gmail
Gmail
9.2.1 Opening Gmail
On the Home screen, touch >
you decide to keep on your mobile phone will go to your
9.2.2 Switching Between Accounts
1. In the mail list, touch , and then touch
2. Touch the account that contains the email you want to read.
9.2.3 Creating and Sending an Email
1. In the mail list, touch , and then touch
2. Enter the message recipient’s email address in the To field. If you are sending the
email to several recipients, separate the email addresses with commas. You can
add as many message recipients as you want.
If you want to send a copy (Cc) or a blind copy (Bcc) of the email to other
recipients, touch , and then touch
3. Enter the email subject and write your email.
If you want to add a picture attachment, touch , and then touch
select the picture you want to attach.
4. After writing your email, touch .
Gmail
application on your phone, your
web account.
account or create a new account.
Gmail
. The
Inbox
Accounts
Compose
Add Cc/Bcc
mail list appears. Any emails
Inbox
.
.
Inbox
will contain
folder.
.
Attach
to
43
Page 50

9.2.4 Replying to or Forwarding an Email
1. In the mail list, touch the email that you want to reply to or forward.
2. Touch to reply. You can also touch , and then touch
or
Forward
3. Do one of the following:
4. Touch to send, or touch to save as a draft.
.
• If you selected
• If you selected
additional text you want to include in the forwarded message.
Reply
or
Reply all
Forward
, enter your message.
, specify the message recipients and add any
Reply, Reply all
9.2.5 Searching for an Email
1. In the mail list, touch , and then touch
2. Enter the search keywords in the box, and then touch .
Search
.
9.2.6 Customizing Your Gmail Settings
In the mail list, touch >
Settings
to customizing your
Gmail
.
9.3 Talk
Talk
is Google’s instant messaging service. You can use it to communicate in real
time with other people using
9.3.1 Opening Talk
On the Home screen, touch >
Your
Talk
account is based on the Google account you set up with your mobile
phone.
9.3.2 Adding a Friend
1. In the friends list, touch , and then touch
2. Enter the
Talk
add.
3. Touch
Send invitation
44
Talk
on a phone or on the web.
Talk
to open the application.
Add friend
instant messaging ID or Gmail address of the friend you want to
.
.
,
Page 51

9.3.3 Accepting an Invitation
1. If someone else has invited you to chat, this information will appear in the friends list.
2. Touch a pending invitation, and then touch
Accept
.
9.3.4 Starting a Chat
1. In the friends list, touch a Gmail address in the friends list.
2. Use the onscreen keyboard to enter text and chat with your friend.
3. After entering your message, touch
Send.
9.3.5 Setting Notifications for New Instant Messages
Whenever you receive an instant message, your mobile phone can play a sound,
vibrate, or display an icon. To set up one of these handy notifications, start in the
friends list, and then touch >
set. Now choose from one of the following:
Settings
. Then touch the account that you want to
IM notifications
Notification
ringtone
Vibrate
Select the check box to receive a notification on the
notification bar when you receive an instant message.
Touch to choose the ringtone used for a new instant
message. You will hear a short sample of the ringtone
when you select it. To turn the ringtone off, select
Select the check box to make your mobile phone vibrate
when you receive a new instant message.
9.3.6 Signing out of Talk
On the friends list screen, touch , and then touch
Sign out
to quit
Talk
.
Silent
.
45
Page 52

9.4 Maps
Maps
lets you find your current location, view real-time traffic conditions (depending
on availability in your locale), and get detailed directions to various destinations. You
can view satellite images, traffic maps, or other kinds of maps of your current or other
locations.
9.4.1 Enabling the Location Service
Before you open
enable the location service.
1. On the Home screen, touch >
2. Touch
3. Select the
or both.
9.4.2 Opening Maps
On the Home screen, touch >
9.4.3 Searching for Places of Interest
1. On the map, touch , and then touch
2. Enter the place you want to search for in the search box, and then touch the Search
icon.
3. Your search results will then be displayed. Touch a place you are interested in and
the application will show where it is on the map.
9.4.4 Getting Directions
1. While viewing a map, to Touch > .
2. Enter the starting point in the first text box, and then enter your destination in the
second text box.
3. Touch the icon for car, public transit, or walking directions.
4. Touch
5. Touch a direction item on the list to show it on the map.
Maps
to find your location or search for places of interest, you must
Location services
Use wireless networks
Get directions
. Your directions will appear in a list.
.
Maps
Settings
.
check box, the
Use GPS satellites
to open the application.
Search
.
check box,
46
Page 53

6. When you finish viewing or following the directions, touch , and then touch
Clear Map
to reset the map.
9.5 YouTube™
YouTube
is Google’s free online video streaming service for watching, searching for,
and uploading videos.
9.5.1 Opening YouTube
On the Home screen, touch >
YouTube
. You will then see the YouTube screen.
9.5.2 Searching for a Video
1. On the
YouTube
2. Enter a search keyword, and then touch the Search icon.
3. You will see a number of search results displayed below the notification bar. Scroll
through the results and touch a video to watch it.
screen, touch .
9.5.3 Sharing a Video
From the video list on the
share the video.
YouTube
screen, select a video clip and touch to
10 Synchronizing Information
Some applications on your mobile phone give you access to the same personal
information that you can add, view, and edit on your computer. If you add, change, or
delete your information in any of these applications on the web, the updated
information also appears on your mobile phone.
This is made possible through over-the-air data synchronization. The process occurs
in the background and does not interfere with use of your mobile phone. When your
phone is synchronizing, a data synchronization icon will be shown in the notification
bar.
47
Page 54

10.1 Managing Your Accounts
You can synchronize contacts, email, and other information on your mobile phone
with multiple Google accounts or other kinds of accounts, depending on the
applications installed on your mobile phone.
For example, you can start by adding your personal Google account, so your
personal email, contacts, and calendar are always available. You could then add a
work account, so your work-related emails and work contacts are handy. If you like,
you may add multiple Google accounts or other accounts.
10.1.1 Adding an Account
When you add an account, the
newly synchronized account with contacts from your existing mobile phone accounts
and attempts to merge duplicates into a single entry in
as a single contact entry, the contact data itself is not merged.
1. Touch >
synchronization settings and a list of your current accounts.
2. Touch
3. Touch the kind of account to add.
4. Follow the onscreen steps to enter the required and optional information about the
account. Most accounts require a username and password, but the details depend
on the kind of account and the configuration of the service to which you are
connecting.
5. Configure the account. Depending on the kind of account, you may be asked to
configure what kind of data you want to synchronize to the mobile phone, to name
the account, and for other details. When you are finished, the account is added to
the list on the
Settings
In some cases, you may need to obtain account details from IT support. For
example, you may need to know the account’s domain or server address.
Add account
Accounts & sync settings
10.1.2 Adding an Exchange Account
1. On the Home screen, touch >
2. Touch
Add account
Contacts
>
Accounts & sync
.
>
Corporate
application compares contacts from the
Contacts
. While it is presented
. The screen displays your current
screen.
Settings
>
Accounts & sync
.
.
48
Page 55

3. Follow the instructions and enter the required information about the exchange
account you want to add. For details, contact the server administrator.
4. Touch
Next
to display the
synchronization settings for this account.
5. Touch
Next
to finish configuring the account settings. If emails are not
synchronized properly, contact the server administrator.
Account options
screen. Configure the
10.1.3 Removing an Account
You can remove an account, deleting it and all information associated with it from your
mobile phone, including email, contacts, settings, and so on. You cannot, however,
remove some accounts, such as the first account you signed into on the mobile
phone. If you attempt to remove certain accounts, all personal information associated
with it will be deleted.
You can only remove the first Google Account by resetting the phone to factory
defaults.
1. On the
Accounts & sync settings
2. Touch
Sign Out
3. Confirm that you want to remove the account.
.
screen, touch the account to be deleted.
10.2 Customizing Your Account Synchronization
You can configure background data use and synchronization options for all the
applications on your phone. You can also configure what kind of data you synchronize
for each account.
For some accounts, synchronization is bi-directional; changes that you make to the
information on your mobile phone are made to the copy of that information on the
web. Some accounts support only one-way synchronization; the information on your
mobile phone is read-only.
49
Page 56

10.2.1 Configuring General Synchronization Settings
On the
Accounts & sync settings
• Select or clear the
and services can transmit data when you are not working with them directly (that is,
when they are running in the background).
If you clear this option,
synchronizing events, and so on, until you touch the
email.
• Select or c lear the
information on the phone or on the web are automatically synchronized with each
other.
For example, when this option is selected, changes that you make in
on the phone are automatically made in Google Contacts on the web.
Background data
Auto-sync
screen, do the f ollowing:
check box to control whether applications
Gmail
stops receiving new mail,
check box to control whether changes you make to
Calendar
Refresh
stops
option or send an
Contacts
10.2.2 Changing an Account’s Synchronization Settings
1. On the
Accounts & sync settings
synchronization settings you want to change. The data and synchronization screen
opens, displaying a list of the kinds of information the account can synchronize.
2. Selected items are configured to synchronize to your mobile phone.
3. Select or clear the check box of information you want to synchronize with the
mobile phone.
screen, touch the account whose
11 Using Other Applications
11.1 All Backup
You can back up data using
Backup to SD, Restore from SD, Quick Backup, Schedule Backup
Applications
.
All Backup
, which provides the following options:
and
50
Page 57

11.1.1 Backing Up data by using Backup to SD
1. On the Home screen, touch >
2. Touch
Backup to SD
3. Enter a file name in the
4. In the
Backup contents:
5. Touch
Backup
To cancel the backup, touch
.
to back up the selected data.
All Backup
.
Filename:
field.
field, select the contents you want to back up.
Cancel
.
11.2 Calendar
Use
Calendar
Depending on your synchronization settings, the calendar on your phone can be
synchronized with the internet-based calendar you use.
11.2.1 Opening Calendar
Touch >
11.2.2 Creating an Event
1. In any calendar view, touch , and then touch
2. Enter the event name.
3. Enter the location of the event and a description.
to create and manage events, meetings, and appointments.
Calendar
to open the application.
When you add a Google Account that includes a calendar service to your phone,
you can access Google calendar: Touch , and then touch
Calendars
.
details
screen.
If you have more than one calendar, select the calendar where you want to save
the event.
• If there is a time frame for the event, touch
and end times of the event.
• If the event is a special occasion such as a birthday or a day-long activity, set
the date for
From
and To, and then select the
New event
From
All day
More
>
to open the
Event
and To to set the beginning
check box.
51
Page 58

4. Set the time of your event reminder in
whether the event recurs and, if it does, how frequently.
5. Touch
Done
.
To quickly create an event in the
empty time slot, and then touch
appear with the selected time slot and date in the
Reminders
, and then specify in
Day, Week
, or
New event
Month
. A new event details screen will
From
Repetition
view, touch and hold an
and To fields.
11.2.3 Setting an Event Reminder
1. In any calendar view, touch an event to view its details or an event summary.
2. Touch the
Add reminder
button to delete an existing reminder.
3. Touch the reminder time, and then, from the list displayed, touch the length of time
before the event when you want to be reminded. When the time comes, you will
receive a notification about the event.
button to add a reminder, or touch the reminder’s “-”
11.2.4 Setting Synchronization and Display
1. In any calendar view, touch . Then touch
The Calendars screen displays all the calendars you have added or subscribed
to for each account that is configured to synchronize events to your phone,
organized by account. (Calendars for accounts you have configured not to
synchronize Calendar events are not included in the list.)
2. Touch the icon next to a calendar to change whether it is synchronize and whether
it is displayed.
You remain subscribed to Calendars that you configure not to store on the
phone and you can still work with them with Google Calendar on the web.
3. Touch OK.
More
>
Calendars
.
11.2.5 Customizing Calendar Settings
In any calendar view, touch . Then touch
following:
•
Hide declined events
invitations.
: Select to hide events for which you have decline d
More
>
Settings
and choose from the
52
Page 59

•
Set alerts & notifications
a notification, or to turn off event notifications on your mobile phone.
•
Select ringtone
reminder.
•
Vibrate
: Select to vibrate the mobile phone when you receive an event notification.
•
Default reminder time
reminders to occur.
: Touch to set event reminders to alert you, to send you
: Touch to select the ringtone to sound when you receive an event
: Touch to select the default time before an event for event
11.3 File Manager
File Manager
organize, edit, and delete files and folders.
11.3.1 Opening File Manager
On the Home screen, touch >
11.3.2 Creating a Folder
1. On the
2. Touch to open the options panel, and then touch
3. Enter the name of the new folder in the text box.
4. Touch
11.3.3 Moving or Copying a File
1. On the
2. Touch the file or folder you want to move or copy. When a file or a folder is selected,
3. Touch
is like having a pocket-sized personal assistant (PA), letting you
File Manager
new folder.
Save
File Manager
Multiselect
a check mark will appear.
To select all files, touch
to cancel the selection).
Cut
screen, access the directory in which you want to create a
.
screen, press to show the options panel, and then touch
.
or
Copy
to cut or copy the file.
File Manager
Select all
to open the application.
to select all files in a folder (touch
New folder
.
Unselect all
53
Page 60

4. Select the path where you want the file to be copied or moved. Press to open
the options panel, and then touch
path.
Paste
to move or copy the file to the selected
11.3.4 Searching for a File
1. On the
File Manager
you want is located.
2. Press to open the options panel, and then touch
3. Write a key word of the name of your file in the search box.
4. Touch . Your mobile phone will start the search.
5. A list of search results will be displayed. Touch a file in the list to open it.
6. Touch
New search
manager screen.
screen, touch a folder to access the directory where the file
Search
.
for a new search or press the back key to return to the file
11.3.5 Compressing or Extracting Files
Your phone supports compressing and extracting files.
You can only compress files and folders into .zip files, but can extract both .zip
and .rar files.
Compressing Files
1. On the
File Manager
2. Select the files or folders you want to compress. When a file is selected, a check
mark will appear.
To select all files and folders, touch
selection.
3. Touch
Compress
4. Edit the save path and the name of the target file, and then touch OK to start
compressing the files and folders.
Extracting a File
1. Touch and hold a compressed file.
2. Touch
Extract
3. Edit the save path for the extracted files.
54
screen, Touch , and then touch
Select all
.
.
or
Unselect all
Multiselect
to cancel the
.
Page 61

4. Touch OK to start extracting.
11.3.6 Viewing Your Memory Status
On the
File Manager
Memory Status
allows you to view the memory status and available memory on your mobile phone
and microSD card.
screen, press to open the options panel, and then touch
. The memory management screen will be displayed. This screen
11.4 Clock
In addition to displaying the date and time, the
about the weather and your phone. You can also use
phone into an alarm clock.
11.4.1 Opening the Clock
On the Home screen, touch >
Clock
opens with the date and time displayed on your Home screen wallpaper, along
with your local weather and other useful information.
11.4.2 Opening the Alarms
On the
Clock
screen, touch to open the
Adding an Alarm
1. On the alarm list screen, touch
2. Set the alarm, and then touch
Setting an Alarm
1. On the alarm list screen, touch one of the alarms on the screen.
2. Touch
Time
3. Touch
4. Touch
5. Select the
6. Touch
to set the time of the alarm.
Repeat
Ringtone
Vibrate
the ringtone.
Label
to enter a name for the alarm.
to set the days when you want the alarm to sound.
to select a ringtone for the alarm.
check box to enable the phone to vibrate, in addition to playing
Clock
to open the application.
Add alarm
Done
.
Clock
application displays information
Clock
to turn your mobile
Alarms
.
.
55
Page 62

7. Touch
Done
Customizing Alarm Settings
On the alarm list screen, touch , and then touch
.
The alarm clock still works when the phone is powered off.
Settings
.
11.5 Calculator
Use
Calculator
solve more complex equations.
to solve simple arithmetic problems or use its advanced operators to
11.5.1 Opening Calculator
On the Home screen, touch >
Calculator
to open the application.
11.5.2 Switching Between Basic and Advanced panel
On the
Calculator
Advanced panel
screen, flick the screen to the right or left to switch between
and
Basic panel
.
11.6 Notepad
Notepad
features a simple text processor. In the note list, you can add, edit, and
delete notes.
1. On the Home screen, touch >
2. Touch , and then touch
3. Touch to save the note.
Add note
Notepad
to open the application.
to create a note.
12 Managing Your Mobile Phone
To configure your mobile phone, touch >
Settings
.
56
Page 63

12.1 Setting the Date and Time
By default, your mobile phone automatically uses the date, time, and time zone
provided by the network.
When your mobile phone is using the date and time settings provided
automatically by the network, you cannot manually set the date, time, and time
zone.
1. On the
Settings
2. Clear the
3. Touch
month, and year, and then touch
4. Touch
the list to view more time zones.
5. Touch
minute. Touch
6. Select or clear the
12-hour formats.
7. Touch
mobile phone.
screen, touch
Automatic
Set date
. On the set date screen, touch or to adjust the date,
Select time zone
Set time
. On the set time screen, touch or to adjust the hour and
Set
Select date format
Date & time
check box.
, and then select the desired time zone from the list. Scroll
when the configuration is complete.
Use 24-hour format
to select how you want the date to display on your
.
Set
when the configuration is complete.
check box to switch between 24-hour and
12.2 Setting the Display
12.2.1 Adjusting the Screen Brightness
1. On the
Settings
2. Drag the slider left to make the screen darker, or right to make it brighter.
3. Touch OK to save the adjustment.
screen, touch
12.2.2 Adjusting the Time Before the Screen Turns Off
If your mobile phone is idle for several minutes, it will turn off the screen to save battery
power. To set a longer or shorter idle time:
1. On the
Settings
2. Select the duration you want the screen to be illuminated.
screen, touch
Display
Display
>
Brightness
>
Screen timeout
.
.
57
Page 64

12.3 Setting Ringers
12.3.1 Turning On Silent Mode
1. On the
Settings
2. Select the
and video media.
screen, touch
Silent mode
12.3.2 Adjusting the Volume
You can adjust the volume from the Home screen or any application screen (except
during a call or when playing music or videos). Press the Volume keys to adjust
volume to the level you desire.
You can also adjust the volume from the settings screen.
1. On the
Settings
2. Drag the slider left to make the volume lower, or right to make it higher.
3. Touch OK to save the adjustment.
screen, touch
12.3.3 Changing the Phone Ringtone
1. On the
Settings
2. Touch the ringtone you want to use, and then touch OK. The ringtone plays when
selected.
screen, touch
12.3.4 Changing the Message Ringtone
1. On the Home screen, touch >
2. In the message list, touch >
3. Touch the ringtone you want to use, and then touch OK. The ringtone plays when
selected.
Sound
Sound
Sound
Settings
.
>
Volume
>
Phone ringtone
Messaging
>
.
.
.
Select ringtone
.
check box to silence all sounds except alarms, and music
58
Page 65

12.4 Setting Phone Services
12.4.1 Customizing Call Settings
Mobile phone service providers offer different services such as call forwarding, call
waiting, fixed dialing numbers, and voicemail. You can customize many of these
services if they are part of your calling plan.
On the
Settings
screen, touch
Call settings
to customize your call functions.
12.4.2 Switching off the Data Service
1. On the
Settings
2. Clear the
screen, touch
Data enabled
Wireless & networks
check box.
>
Mobile networks
.
12.5 Configuring Text-to-Speech
Use the Text-to-Speech settings to configure the Android text-to-speech synthesizer,
for applications that can take advantage of this feature.
12.5.1 Installing Voice Data
1. On the
Settings
>
Install voice data
2. If your mobile phone does not have speech synthesizer data installed, connect to
Android Market™/Google Play™ Store and let it guide you through the process of
downloading and installing the data.
3. Follow the instructions to install the voice data.
screen, touch
12.5.2 Adjusting the Speech Rate
1. On the
Settings
>
Speech rate
2. Select a speed at which the text is to be spoken.
screen, touch
.
.
Voice input & output
Voice input & output
>
Text-to-speech settings
>
Text-to-speech settings
59
Page 66

12.6 Protecting Your Mobile Phone
12.6.1 Protecting Your Mobile Phone with a Screen Lock
To keep your data more secure, lock the screen and/or require a screen unlock
pattern every time your mobile phone is turned on or wakes up from sleep mode.
1. On the
Settings
Pattern
2. Flick your finger vertically, horizontally or diagonally, connect at least four dots in
any order you choose. Lift your finger from the screen when you are finished.
You must drag your finger between the dots on the screen to create the pattern,
not simply touch individual dots.
3. Your mobile phone will record the pattern. Touch
4. When prompted, draw the screen unlock pattern again, and then touch
To change your unlock screen pattern, touch
lock
.
screen, touch
.
12.6.2 Protecting Your Mobile Phone with a Numeric PIN
You can set up a numeric PIN to lock your phone.
1. On the
Settings
Continue
screen, touch
.
2. Enter at least four characters.
3. Touch
4. Enter the same characters again and touch OK.
To change your PIN, touch
12.6.3 Unlocking Your Mobile Phone If You Forget the Screen
Lock Pattern
If you have already created a Google account, you can unlock your mobile phone
using the following methods.
• After you have entered the wrong sequence five times, a
will appear. Touch this button to enter the Google account interface. After you have
entered your Google account password, you will be able to reset the unlock pattern.
Location & security
Location & security
Location & security
Location & security
>
Set up screen lock
Continue
.
>
Set up screen lock
>
Change screen lock
Forgot pattern?
Confirm
>
Change screen
.
>
>
PIN
button
.
.
60
Page 67

• After you have entered the wrong pattern five times, you will be taken directly to the
Google account interface. After you have entered your Google account password,
you will be able to reset the unlock pattern.
12.7 Managing Applications
12.7.1 Viewing an Installed Application
1. On the
Settings
details.
Settings
screen, touch
screen, touch
2. In the applications list, do either of the following:
• Touch , and then touch
• Touch an application directly to view its details.
12.7.2 Uninstalling an Application
You cannot uninstall the applications that are pre-installed on the system.
1. On the
2. Touch an application, and then touch
12.7.3 Moving an Application to the microSD Card
Some applications are designed to be stored on your phone’s USB storage or
microSD card (depending on the model of your phone), rather than in its internal
storage. Others are designed so you can change where they are stored. You may find
it helpful to move large applications off your internal storage, to make more room for
other applications that do not offer the option.
1. On the
Settings
2. Touch an application in the list. Then touch
the application from the phone’s internal storage.
The
memory used by the application. If the application can be moved, the
SD card
Touch
storage.
screen, touch
Storage
section of the application’s details screen shows details about the
button is active.
Move to phone
Applications
Applications
Applications
to move the application back to the phone’s internal
>
Manage applications
Sort by size
. Then touch an application to view its
>
Manage applications
Uninstall
.
>
Manage applications
Move to SD card
.
.
.
to move the bulk of
Move to
61
Page 68

12.7.4 Ways to Free Up Your Mobile Phone Memory
• Move files and email attachments to the microSD card.
• In
Browser
, clear all temporary Internet files and Browser history information.
• Move applications to the microSD card.
• Uninstall any downloaded programs that you no longer use.
• Reset your mobile phone.
12.8 Resetting Your Mobile Phone
12.8.1 Backing Up My Data
You can use your Google account to back up your mobile phone’s settings to Google
servers. If you replace your mobile phone, the settings you have backed up will be
transferred to the new mobile phone the first time you sign in to your Google account.
1. On the
Settings
2. Select the
screen, touch
Back up my data
Privacy
check box.
.
12.8.2 Restoring Factory Data
If you reset your phone to the settings that were configured at the factory, all of your
personal data stored on the phone, including information about your Google Account,
any other accounts, your system and application settings, and any applications you
have downloaded will be erased. Resetting the phone does not erase any system
software updates you have downloaded or any files on your microSD card, such as
music clips or photos.
1. On the
Settings
2. When prompted, touch
mobile phone resets the settings to the original factory settings, and then restarts.
screen, touch
Privacy
Reset phone
>
Factory data reset
, and then touch
.
Erase everything
. The
12.9 Setting Power saving mode
1. On the Home screen, touch >
2. Select the
Power saving mode
Settings
check box.
>
Power saving mode
.
62
Page 69

12.10 Online Update
Your mobile phone has pre-installed the online update function. When there is new
software available, the version information appears and prompts you to update. You
can also touch
software is available.
When updating:
1.
2.
3.
Settings
>
About phone
Back up your personal information. All personal information will be
removed after the update.
Make sure that your microSD card has sufficient space to store the new
software version.
Perform the online update following the onscreen instructions.
>
Online update
to check whether the new
13 Appendix
13.1 FAQ
How Can I Use a microSD Card to Import Contacts to My Phone from a
Different Mobile Phone?
Your mobile phone only supports contact files in the
1.
Save the contacts you want to import to your mobile phone to a microSD
card as a
.vcf
2.
Insert the microSD card into your mobile phone and find the
using the
3.
Touch the
want to import the co ntacts.
4.
Touch OK to import the contacts.
Compatibility problems may occur with
phones and certain contact information may be lost after contacts are imported.
You can also use Bluetooth to share and import contacts.
file.
File Manager
.vcf
.
file. The phone displays a prompt asking whether you
.vcf
format.
.vcf
files created by different mobile
.vcf
file
63
Page 70

How do I prevent automatic switching of orientation when rotating phone?
On the Home screen, touch >
disable the function.
How do I set the unlock pattern?
On the Home screen, touch >
lock
>
Pattern
.
How can I change the input method?
Touch and hold the area where you write text and then select the input method you
prefer.
How do I stop the song playing in the background?
Touch the notification bar, flick downwards to open the notifications panel, touch the
music playing notification to go to the music playing screen, and then stop playing the
song.
How do I return to the calling screen?
While on a call, if you’re on another screen, you can touch the notification bar, and
drag downwards to open the notifications panel. Then touch the current call
notification to return to the calling screen.
How do I create an application shortcut on the Home screen?
Touch and hold an application icon on the application screen until the Home screen is
displayed. Then drag the icon where you want it to go and release your finger.
How do I hide the keyboard?
Touch to hide the keyboard.
Settings
Settings
>
Display
>
Auto-rotate screen
>
Location & security
>
Set up screen
to
64
 Loading...