


Basics
Inside the box
You will find the following inside the box:
Phone
Battery (preinstalled)
microSD card (preinstalled)
USB cable
3.5mm stereo headset
Power adapter
Power plug
Quick start guide
Safety and regulatory guide
Your phone
Front panel
1
2
3
9
1 Notification LED
2 MENU
3 HOME
4 Microphone
5 SEARCH
8
7
6
5
6 BACK
7 Optical trackball
8 Touch screen
9 Earpiece
4
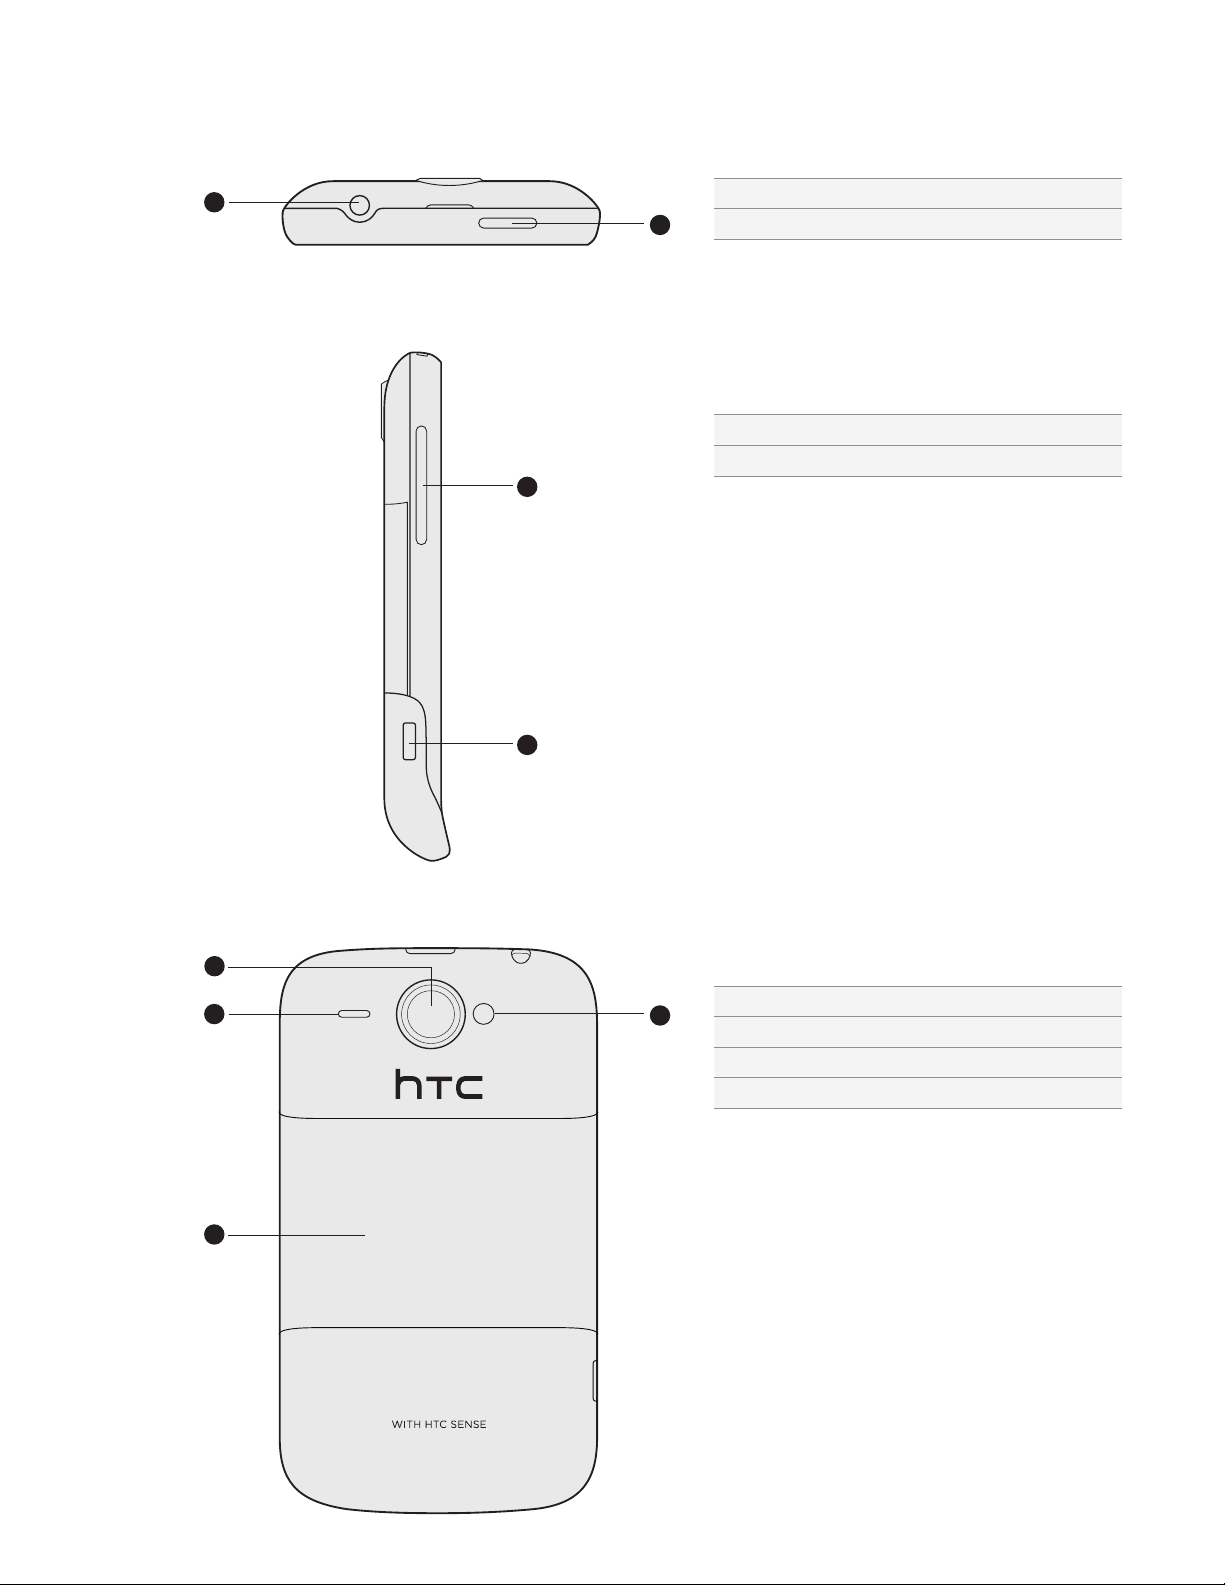
Top panel
Basics 13
Left panel
1
2
1 3.5mm audio jack
2 POWER
1 VOLUME UP/DOWN
2 USB connector
1
2
Back panel
1
2
3
4
1 5 megapixel camera
2 Speaker
3 Back cover
4 LED flashlight
14 Your HTC Wildfire user guide
1
2
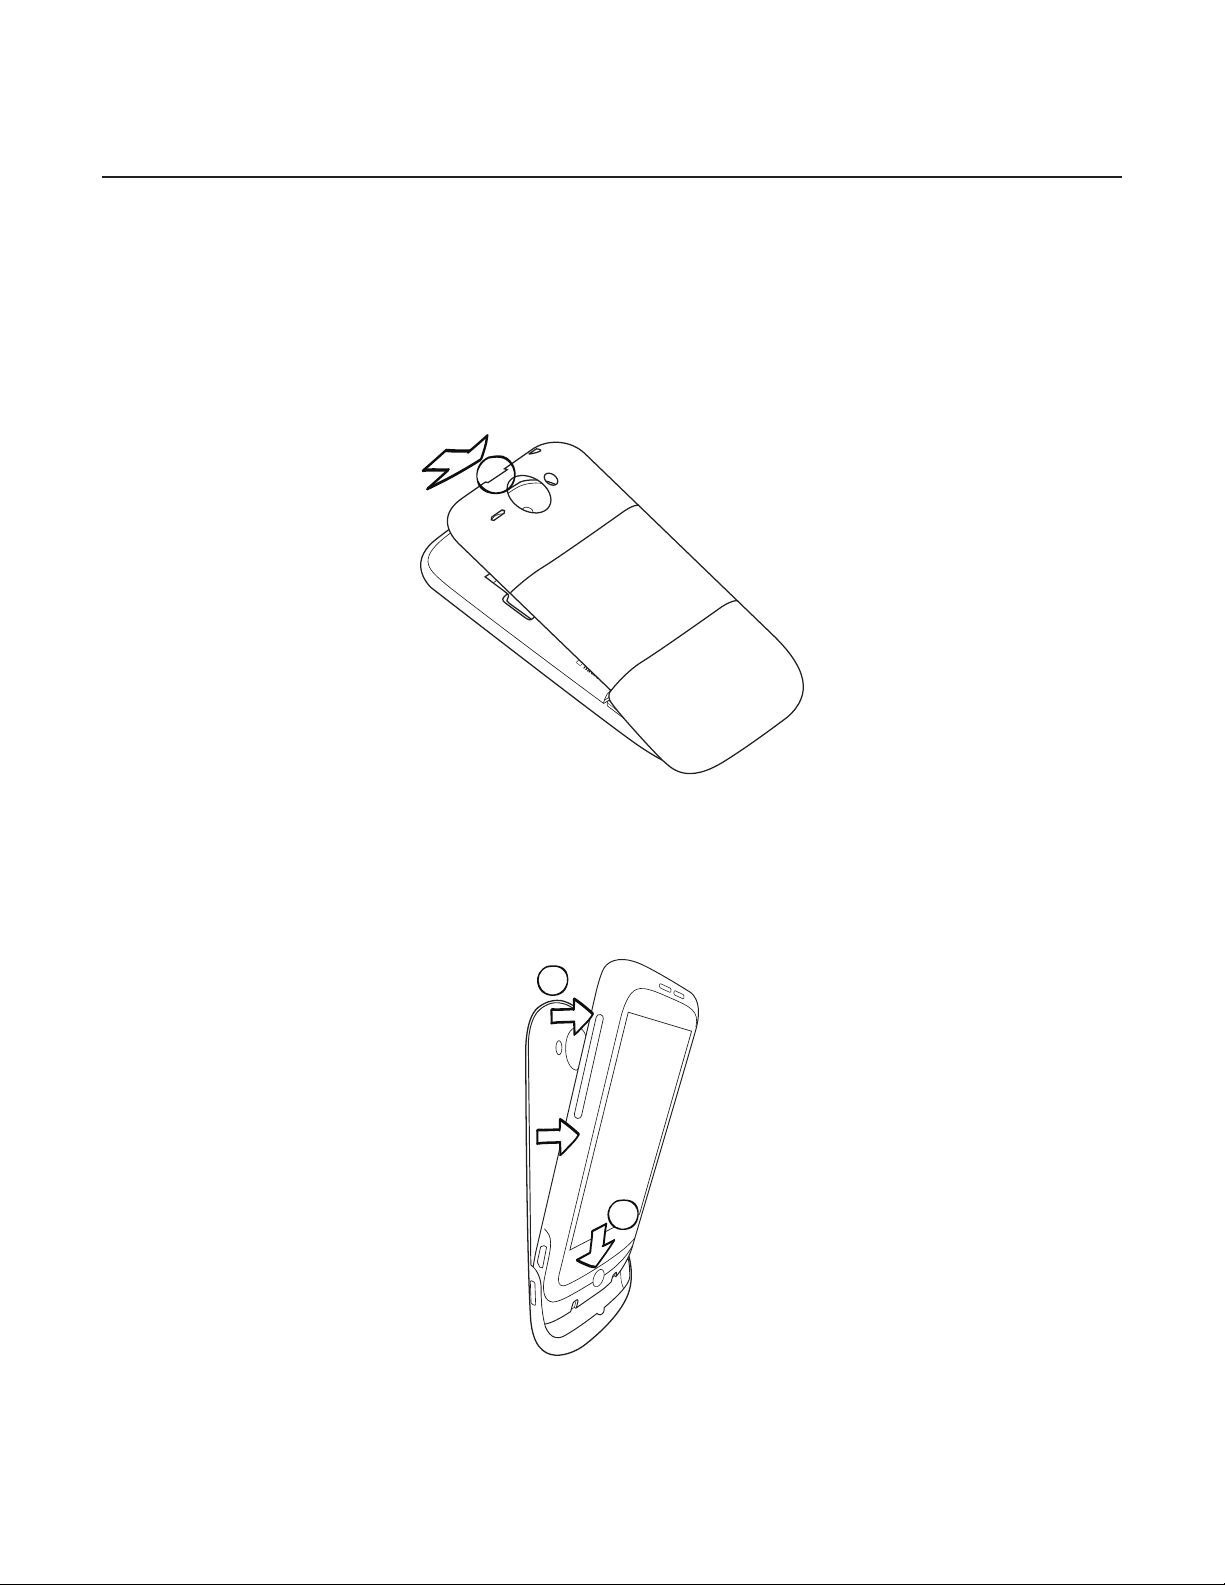
Back cover
Removing the back cover
Remove the back cover to access the battery compartment, SIM card slot, and storage
card slot.
With the phone turned off, hold your phone securely with the front facing down.
1.
With your thumb or finger, lift the back cover off from the small opening on the top of
2.
your phone.
Replacing the back cover
Dock the phone onto the inside bottom of the back cover.
1.
To close the back cover, press the sides and the top part of the back cover towards the
2.
phone. You’ll hear a click when the back cover is locked in place.

SIM card
SIM CARD
The SIM card contains your phone number, service details, and phonebook/message memory.
Your phone supports both 1.8V and 3 V SIM cards.
Some legacy SIM cards may not function with your phone. You should consult with your mobile
operator for a replacement SIM card. There may be fees for this service.
Inserting the SIM card
1. Take the back cover off.
See “Removing the back cover.”
2. Take out the battery.
See “Battery.”
3. Insert the SIM card with its gold contacts facing down and its cut-off corner facing out.
Basics 15
3. Push the SIM card all the way in.
Removing the SIM card
1. Take the back cover off.
See “Removing the back cover.”
2. Take out the battery.
See “Battery.”
3. Press and hold the small tab that’s on the front side of the SIM card slot. Then push the
SIM card out from the back of the slot.

16 Your HTC Wildfire user guide
Battery
Your phone comes with a rechargeable Lithium-ion battery and is designed to use only
manufacturer-specified original batteries and accessories. Battery performance depends
on many factors, including network configuration, signal strength, the temperature of the
environment in which you operate your phone, the features and/or settings you select and
use, items attached to connecting ports, and your voice, data, and other program usage
patterns.
Removing the thin film from the battery
When you take your phone out from the box and remove the back cover for the first time,
you’ll find that the battery is inside the phone with a thin film. Pull the upper flap of the film
to release the battery. Make sure to peel off the film before placing back the battery.
Inserting the battery
Line up the battery’s copper contacts with the connectors inside the battery slot. Then
gently push the battery into place.

Removing the battery
Lift out the battery from the small opening on the left side of the battery compartment.
Charging the battery
The battery is partially charged when shipped. Before you turn on and start using your
phone, it is recommended that you charge the battery. Some batteries perform best after
several full charge/discharge cycles.
Basics 17
Only the power adapter and USB sync cable provided with your phone must be used to charge
the battery.
Do not remove the battery from the phone while you are charging it using the power or car adapter.
1. Attach the power plug to the power adapter.
2. Plug the power adapter into the USB connector on the left side of your phone.
3. Plug in the power adapter to an electrical outlet to start charging the battery.
As the battery is being charged, the notification LED shows a solid red light when the battery
is being charged. The light turns to solid green when the phone is fully charged.
When you charge the battery while the phone is on, the charging battery icon ( ) is
displayed in the status bar of the Home screen. After the battery has been fully charged, a
full battery icon ( ) will be displayed in the status bar of the Home screen.
As a safety precaution, the battery stops charging when it overheats.

18 Your HTC Wildfire user guide
Storage card
Use the microSD card to store your photos, videos, and music. You’ll find the microSD card
already inserted in your phone.
Inserting the storage card
1. Take the back cover off.
See “Removing the back cover.”
2. Insert the microSD card into the slot with its gold contacts facing down and push it all the
way in.
Removing the storage card
1. Take the back cover off.
See “Removing the back cover.”
2. Pull the storage card out from the slot.
Removing the storage card while the phone is on
When you need to remove the storage card while the phone is on, unmount the storage card
first to prevent corrupting or damaging the files in the storage card.
On the Home screen, press MENU, and then tap Settings.
1.
Scroll down the screen, and then tap SD card & phone storage.
2.
Tap Unmount SD card.
3.
Remove the storage card by following the steps in “Removing the storage card.”
4.

Specifications
CPU speed 528 MHz
Platform Android™ 2.1 (Éclair) with HTC Sense™
Memory ROM: 512 MB
RAM: 384 MB
Dimensions (LxWxT) 106.75 x 60.4 x 12.19 mm (4.2 x 2.4 x 0.48 inches)
Weight 118 grams (4.16 ounces) with battery
Display 3.2-inch touch-sensitive screen with 240 x 320 QVGA resolution
Network HSDPA/WCDMA:
Europe/Asia: 900/2100 MHz
Upload speed of up to 384 kbps and download speed of up to 7.2 Mbps
Quad-band GSM/GPRS/EDGE:
850/900/1800/1900 MHz
(Band frequency and data speed are operator dependent.)
Onscreen navigation Optical trackball
GPS Internal GPS antenna
Sensors G-Sensor
Digital compass
Proximity sensor
Ambient light sensor
Connectivity Bluetooth® 2.1 with FTP/OPP for file transfer, A2DP for wireless stereo
Camera 5 megapixel color camera with auto focus and flash
Audio supported
formats
Video supported
formats
Battery Rechargeable Lithium-ion battery
Expansion slot microSD™ memory card (SD 2.0 compatible)
AC adapter Voltage range/frequency: 100 ~ 240V AC, 50/60 Hz
Special features Friend Stream, App Sharing
headsets, and PBAP for phonebook access from the car kit
Wi-Fi®: IEEE 802.11 b/g
3.5 mm stereo audio jack
Standard micro-USB (5-pin micro-USB 2.0)
Playback: .aac, .amr, .ogg, .m4a, .mid, .mp3, .wav, .
Recording: .amr
Playback: .3gp, .3g2, .mp4, .wmv (Windows Media Video 9)
Recording: .3gp
Capacity: 1300 mAh
Talk time: Up to 440 minutes for WCDMA
Up to 490 minutes for GSM
Standby time: Up to 690 hours for WCDMA
Up to 480 hours for GSM
(The above are subject to network and phone usage.)
DC output: 5V and 1A
wma (Windows Media Audio 9)
Specifications are subject to change without prior notice.
 Loading...