

Page 1

Wireless LAN Mobility System
Wireless LAN Switch Manager
Reference Manual
3CRWXR10095A, 3CRWX120695A, 3CRWX440095A
http://www.3com.com/
Part No. DQA-WXM10-AAA01
Published June 2005
Page 2

3Com Corporation
350 Campus Drive
Marlborough, MA USA
01752-3064
Copyright © 2005, 3Com Corporation. All rights reserved. No part of this documentation may be reproduced
in any form or by any means or used to make any derivative work (such as translation, transformation, or
adaptation) without written permission from 3Com Corporation.
3Com Corporation reserves the right to revise this documentation and to make changes in content from time
to time without obligation on the part of 3Com Corporation to provide notification of such revision or change.
3Com Corporation provides this documentation without warranty, term, or condition of any kind, either
implied or expressed, including, but not limited to, the implied warranties, terms or conditions of
merchantability, satisfactory quality, and fitness for a particular purpose. 3Com may make improvements or
changes in the product(s) and/or the program(s) described in this documentation at any time.
If there is any software on removable media described in this documentation, it is furnished under a license
agreement included with the product as a separate document, in the hard copy documentation, or on the
removable media in a directory file named LICENSE.TXT or !LICENSE.TXT. If you are unable to locate a copy,
please contact 3Com and a copy will be provided to you.
UNITED STATES GOVERNMENT LEGEND
If you are a United States government agency, then this documentation and the software described herein are
provided to you subject to the following:
All technical data and computer software are commercial in nature and developed solely at private expense.
Software is delivered as “Commercial Computer Software” as defined in DFARS 252.227-7014 (June 1995) or
as a “commercial item” as defined in FAR 2.101(a) and as such is provided with only such rights as are
provided in 3Com’s standard commercial license for the Software. Technical data is provided with limited rights
only as provided in DFAR 252.227-7015 (Nov 1995) or FAR 52.227-14 (June 1987), whichever is applicable.
You agree not to remove or deface any portion of any legend provided on any licensed program or
documentation contained in, or delivered to you in conjunction with, this User Guide.
Unless otherwise indicated, 3Com registered trademarks are registered in the United States and may or may
not be registered in other countries.
3Com is a registered trademark of 3Com Corporation. The 3Com logo is a trademark of 3Com Corporation.
Mobility Domain, Mobility Point, Mobility Profile, Mobility System, Mobility System Software, MP, MSS, and
SentrySweep are trademarks of Trapeze Networks, Inc.
Intel and Pentium are registered trademarks of Intel Corporation. Microsoft, MS-DOS, Windows, Windows XP,
and Windows NT are registered trademarks of Microsoft Corporation.
All other company and product names may be trademarks of the respective companies with which they are
associated.
ENVIRONMENTAL STATEMENT
It is the policy of 3Com Corporation to be environmentally-friendly in all operations. To uphold our policy, we
are committed to:
Establishing environmental performance standards that comply with national legislation and regulations.
Conserving energy, materials and natural resources in all operations.
Reducing the waste generated by all operations. Ensuring that all waste conforms to recognized environmental
standards. Maximizing the recyclable and reusable content of all products.
Ensuring that all products can be recycled, reused and disposed of safely.
Ensuring that all products are labelled according to recognized environmental standards.
Improving our environmental record on a continual basis.
End of Life Statement
3Com processes allow for the recovery, reclamation and safe disposal of all end-of-life electronic components.
Regulated Materials Statement
3Com products do not contain any hazardous or ozone-depleting material.
Environmental Statement about the Documentation
The documentation for this product is printed on paper that comes from sustainable, managed forests; it is
fully biodegradable and recyclable, and is completely chlorine-free. The varnish is environmentally-friendly, and
the inks are vegetable-based with a low heavy-metal content.
Page 3

CONTENTS
ABOUT THIS GUIDE
Conventions 15
Documentation 16
Documentation Comments 17
1 INSTALLING 3WXM
Hardware Requirements 19
Hardware Requirements for 3WXM Client 19
Hardware Requirements for 3WXM Monitoring Service 20
Software Requirements 21
Preparing for Installation 21
User Privileges 22
Serial Number and License Key 22
HP OpenView Network Node Manager 22
Installing 3WXM 23
Unpacking Files 23
Using the Installation Wizard 24
Installing the HP OpenView Plug-In 27
Licensing 28
Installation Log File 30
Upgrading 3WXM 30
Uninstalling 3WXM 31
2 WORKING WITH THE 3WXM USER INTERFACE
Overview 33
Menu Options in Main 3WXM Window 35
Organizer Panel 41
Details Checkbox 42
Displaying Additional Object Details 43
Policy Objects 43
Equipment Objects 46
Page 4

Site Objects 49
Alerts Panel 50
Content Panel 52
Monitor Tab 52
Managed Devices Tab 60
Verification Tab 61
Events Tab 62
Rogue Detection Tab 63
Information Panel 64
Configuration Wizards 65
Reports 68
Copying and Pasting Objects 70
Copy and Paste 70
Copy and Paste Replace 71
Enabling Keyboard Shortcut Mnemonics (Windows XP Only) 72
3 GETTING STARTED
Starting 3WXM 75
Restricting Access to 3WXM 77
Creating an Administrator Account 78
Creating Provision or Monitor Accounts 79
Deleting 3WXM User Accounts 79
Disabling Access Control 80
Creating and Managing Network Plans 80
Creating a Network Plan 81
Managing Network Plans 82
Opening a Network Plan 84
Closing a Network Plan 86
Deleting a Network Plan 87
Sharing a Network Plan 88
Defining a Mobility Domain 90
Roaming Behavior 90
Traffic Ports Used by a Mobility Domain 91
Creating a Mobility Domain 92
Page 5

4 PLANNING THE 3COM MOBILITY SYSTEM
Building Wizard Overview 95
Accessing the Building Wizard 95
Creating a Site 105
Creating or Modifying Buildings in a Site 107
Modifying Floor Defaults 109
Importing or Drawing Floor Details 110
Importing a Drawing of a Floor 111
Cropping the Paper Space 118
Adjusting the Origin Point 119
Adjusting the Scale of a Drawing 121
Working with Layers 122
Cleaning Up a Drawing 124
Drawing Floor Objects Manually 128
Changing an Individual Floor’s Properties 129
Specifying the RF Characteristics of a Floor 130
Recommendations 130
Converting Objects into RF Obstacles 130
Drawing RF Obstacles 133
Defining Wireless Coverage Areas 134
Accessing the Define Coverage Page 135
Creating a Wiring Closet 135
Defining a Coverage Area 137
Adding a Third-Party Access Point 149
Computing MAP Placement 152
Computing and Placing MAP Access Points for a Coverage Area 153
Assigning MAP Channels 162
Computing Optimal Power 165
Verifying the Wireless Network 168
Showing RF Coverage 168
Placing RF Measurement Points 169
Using RF Interactive Measurement Mode 171
Reading the RF Measurement Table 171
Generating RF Network Design Information 173
Accessing the Report Page 173
Reviewing Layout Information 174
Reviewing the MAP List 174
Page 6

Generating a Work Order 175
Applying RF Auto-Tuning Settings to the Network Plan 176
5 CONFIGURING WX SYSTEM AND ADMINISTRATIVE PARAMETERS
WX Switch Wizard Overview 179
System and Administrative Page 182
Wireless Page 183
AAA Page 185
Adding a WX Switch to the Network Plan 186
To create a new WX switch based on a configured switch 186
To add a switch by uploading its basic configuration from the
network 187
To add a switch by importing a configuration file 187
Accessing the WX Switch Wizard 187
Configuring Basic WX Properties 188
Configuring VLANs 189
VLANs, IP Subnets, and IP Addressing 190
Users and VLANs 190
Traffic Forwarding 191
802.1Q Tagging 191
Creating a VLAN 192
Modifying VLANs 203
Deleting VLANs 203
Configuring the System IP Address 203
Configuring WX Management Services 204
Setting System Information 205
Enabling HTTPS 206
Configuring Telnet 207
Configuring SSH 207
Disabling or Reenabling WebAAA 208
Configuring SNMP 208
Configuring an SNMP V1 or V2c Community String 210
Configuring an SNMP V3 User 211
Configuring Logging 215
Setting the Timezone 220
Configuring Wired Authentication Ports 222
Configuring Network Ports 223
Page 7

Configuring Load Sharing 225
Load Sharing 225
Link Redundancy 225
Configuration Changes Based on Port Groups 225
To configure load sharing 225
Configuring IP Services 226
Configuring Static Routes 226
Configuring IP Aliases 229
Configuring DNS 230
Configuring NTP 231
Configuring ARP 233
6 CONFIGURING WIRELESS PARAMETERS
Overview 235
Configuring an SSID 237
Configuring a Service Profile 238
Configuring Encryption 240
Mapping a Service Profile to a Radio Profile 245
Configuring a Radio Profile 245
To create a radio profile 246
To change 802.11 attributes 247
To configure RF Auto-Tuning 248
To map the radio profile to a service profile 250
Configuring Directly Connected MAP Access Points 251
To configure a directly connected MAP 251
To modify MAP attributes 252
To modify radio settings 254
To modify a MAP connection 257
Configuring Distributed MAP Access Points 258
To configure a distributed MAP 258
7 CONFIGURING AUTHENTICATION, AUTHORIZATION, AND
A
CCOUNTING PARAMETERS
Overview 263
Connecting to RADIUS Servers and Server Groups 264
Defining RADIUS Default Values 265
Defining RADIUS Servers 266
Page 8

Defining RADIUS Server Groups 268
Creating and Managing Users in the Local User Database 269
Creating Named Users 270
Creating Named User Groups 271
Creating MAC Address Users 272
Creating MAC Address User Groups 273
Configuring User Authorization Attributes 274
Configuring and Managing Access Rules for Administrative Users 280
Using User Globs and MAC Address Globs 281
Creating Administrator and Console Access Rules 283
Managing Administrator and Console Access Rules 285
Configuring and Managing Access Rules for Network Users 286
Authentication 286
Authorization 291
Accounting 293
Configuring Authentication 293
Configuring Accounting 297
Changing the Order of Access Rules 298
Configuring Location Policies 299
About the Location Policy 299
Creating Location Policy Rules 300
Configuring AAA for Clients of Third-Party APs 303
Configuring Mobility Profiles 306
Using Access Control Lists for Security 307
Creating Access Control Lists 307
Adding ACEs to an ACL 315
Mapping ACLs 315
Configuring 802.1X Parameters 319
8 MANAGING WX SYSTEM IMAGES AND CONFIGURATIONS
Managing WX System Files 323
Uploading a WX Switch Configuration into 3WXM 325
Verifying Configuration Information 327
Toolbar Options 328
Filtering the Message List 329
Resolving an Error or Warning 329
Disabling a Rule from the Message List 330
Page 9

Changing Verification Options 330
Disabling and Reenabling Rules 331
Synchronizing Local and Network Changes 333
Change Management Options 333
Toolbar Options 334
Managing WX switch Configuration Changes 335
Synchronizing When the Network and 3WXM Have Nonmatching
Changes 337
Modifying Configuration Change Polling Options 337
Deploying WX switches from a Network Plan to the Network 339
To deploy network plan changes to the network 339
To deploy WX switches from a network plan to the network 339
Distributing Image and Configuration Files 340
Using the Image Repository 340
Distributing System Images 341
Importing and Exporting WX switch Configuration Files 342
To import a configuration 343
To export a configuration 344
Configuring and Applying Policies 345
How Changes Are Managed 345
Policies Created When You Migrate a 3.x Network Plan to 4.0 345
Configuring a Policy 346
Reviewing and Applying Policy Settings 347
Rebooting WX Switches or MAP Access Points 348
9 MANAGING CERTIFICATES
Overview 349
Processing Certificates 350
Managing Certificates 351
Reviewing Certificate Details 351
Deleting Certificates 351
Distributing PKCS #12 Files 352
10 MONITORING THE NETWORK
Overview 353
Requirements for Monitoring 354
Accessing Monitored Data 354
Page 10

Using the Explore Window 355
Toolbar Options 357
Threshold Flags 359
Displaying Object Details 361
Displaying 802.11 Coverage 362
Taking RF Measurements 364
Using the Status Summary Window 366
Using the Client Monitor Window 367
Toolbar Options 367
Refreshing Client Data 368
Displaying Client Activity Information 368
Displaying Client Session Information 379
Managing the Client Watch List 389
Displaying a Client’s Geographical Location 394
Terminating a Client’s Session 394
Using the RF Monitor Window 395
Displaying RF Neighborhood Information 396
Displaying the SSID-to-BSSID Mapping 397
Displaying the Activity Log 398
Displaying RF Environment Statistics 399
Using the RF Trends Window 400
Refreshing RF Trend Data 402
Accessing Realtime Performance Statistics 402
Viewing Performance Data 405
Accessing the Event Log 411
Displaying the event log 411
Toolbar Options 412
Refreshing the Data 412
Filtering the Messages 412
Reviewing Event Details 417
11 DETECTING AND COMBATTING ROGUE DEVICES
Overview 419
Rogue Access Points and Users 419
Ad Hoc Users 420
RF Detection Scans 420
Countermeasures 421
Page 11

Rogue Detection Requirements 421
Rogue Detection Lists 423
Using the Rogue Detection Tab 425
Toolbar Options 426
Filtering the Rogue List 426
Displaying Rogue Details 428
Displaying a Rogue’s Geographical Location 430
Ignoring Friendly Third-Party Devices 431
Adding a Device to the Attack List 431
Converting a Rogue into a Third Party AP 432
To convert a rogue into a third-party AP 432
To display the list 432
To remove a third-party AP 432
Adding a Rogue’s Clients to the Black List 433
Configuring RF Detection Options from the Organizer Panel 433
12 GENERATING REPORTS
Overview 438
Generating an Inventory Report 439
Generating a Mobility Domain Configuration Report 440
Generating a WX Configuration Report 441
Generating a Client Summary Report 442
Generating a Client Details Report 443
Generating a Client Errors Report 445
Generating a Watch List Client Report 446
Generating a Network Usage Report 447
Generating an RF Summary Report 448
Generating a Radio Details Report 449
Generating a Rogue Details Report 450
Generating a Rogue Summary Report 451
Generating a Site Survey Order 452
Generating a Work Order 453
13 OPTIMIZING A NETWORK PLAN
Importing RF Measurements 455
Importing the Measurements 455
Applying the RF Measurements to the Floor Plan 458
Page 12

Locating and Fixing Coverage Holes 459
Locating a Coverage Hole 459
Fixing a Coverage Hole 460
Computing and Placing New MAPs 461
Adding New MAPs that Are Already Installed to the Network Plan 461
A USING 3WXM WITH HP OPENVIEW
Preparing to Use HP OpenView and 3WXM 463
Starting 3WXM from Network Node Manager 463
B CHANGING 3WXM PREFERENCES
Overview 465
Resetting Preferences Values 466
Changing Network Synchronization Options 466
Changing User Interface Options 468
Changing Persistence Options 469
Changing Tools Options 469
Changing Certificate Management Options 470
Changing Options for RF Planning 471
Configuring the Typical Client’s Transmit Power 471
Changing Colors 472
Changing 3WXM Logging Options 477
C CHANGING 3WXM SERVICES PREFERENCES
Overview 479
Starting or Stopping the 3WXM Services 481
Connecting to 3WXM Services 482
Certificate Check 483
Completing the connection 484
Verifying that the 3WXM Client is Receiving Service Data 485
Changing Service Settings 485
Changing WX Connection Settings 487
Changing Monitoring Settings 489
To change monitoring settings 490
Accessing the 3WXM Services Log 492
Managing Network Plans 492
Page 13

Backing Up a Plan 493
Changing Backup Settings 493
Restoring a Plan from a Backup 494
Copying a Plan Backup from One Server to Another 494
Deleting a Plan Backup 495
D OBTAINING SUPPORT FOR YOUR PRODUCT
Register Your Product 497
Purchase Value-Added Services 497
Troubleshoot Online 497
Access Software Downloads 498
Telephone Technical Support and Repair 498
Contact Us 499
INDEX
Page 14

Page 15
ABOUT THIS GUIDE
This manual shows you how to plan, configure, deploy, and manage a
Mobility System wireless LAN (WLAN) using the 3Com Wireless LAN
Switch Manager (3WXM).
Read this manual if you are a network administrator or a person
responsible for managing a WLAN.
If release notes are shipped with your product and the information there
differs from the information in this guide, follow the instructions in the
release notes.
Most user guides and release notes are available in Adobe Acrobat
Reader Portable Document Format (PDF) or HTML on the 3Com
World Wide Web site:
http://www.3com.com/
Conventions Table 1 and Table 2 list conventions that are used throughout this guide.
Tab le 1 Notice Icons
Icon Notice Type Description
Information note Information that describes important features or
instructions
Caution Information that alerts you to potential loss of data or
potential damage to an application, system, or device
Page 16

16 ABOUT THIS GUIDE
This manual uses the following text and syntax conventions:
Tab le 2 Text Conventions
Convention Description
Menu Name >
Command
Monospace text Sets off command syntax or sample commands and system
Bold text Highlights commands that you enter or items you select.
Italic text Designates command variables that you replace with
[ ] (square brackets) Enclose optional parameters in command syntax.
{ } (curly brackets) Enclose mandatory parameters in command syntax.
| (vertical bar) Separates mutually exclusive options in command syntax.
Keyboard key names If you must press two or more keys simultaneously, the key
Words in italics Italics are used to:
Indicates a menu item that you select. For example,
File > New indicates that you select New from the File
menu.
responses.
appropriate values, or highlights publication titles or words
requiring special emphasis.
names are linked with a plus sign (+). Example:
Press Ctrl+Alt+Del
Emphasize a point.
Denote a new term at the place where it is defined in the
text.
Highlight an example string, such as a username or SSID.
Documentation The 3WXM documentation set includes the following documents.
Wireless LAN Switch Manager (3WXM) Release Notes
These notes provide information about the system software release,
including new features and bug fixes.
Wireless LAN Switch and Controller Release Notes
These notes provide information about the system software release,
including new features and bug fixes.
Wireless LAN Switch and Controller Quick Start Guide
This guide provides instructions for performing basic setup of secure
(802.1X) and guest (WebAAA™) access, for configuring a Mobility
Domain for roaming, and for accessing a sample network plan in
3WXM for advanced configuration and management.
Page 17

Documentation Comments 17
Wireless LAN Switch Manager Reference Manual
This manual shows you how to plan, configure, deploy, and manage a
Mobility System wireless LAN (WLAN) using the 3Com Wireless LAN
Switch Manager (3WXM).
Wireless LAN Switch Manager User’s Guide
This guide shows you how to plan, configure, deploy, and manage a
Mobility System wireless LAN (WLAN) using the 3Com Wireless LAN
Switch Manager (3WXM). It contains information about
recommended system requirements you should meet for optimum
3WXM performance, installing 3WXM client and 3WXM Services
software, and an introduction to using the 3WXM interface.
Wireless LAN Switch and Controller Installation and Basic
Configuration Guide
This guide provides instructions and specifications for installing a WX
wireless switch in a Mobility System WLAN, and basic instructions for
deploying a secure IEEE 802.11 wireless service.
Wireless LAN Switch and Controller Configuration Guide
Documentation Comments
This guide provides instructions for configuring and managing the
system through the Mobility System Software (MSS) CLI.
Wireless LAN Switch and Controller Command Reference
This reference provides syntax information for all MSS commands
supported on WX switches.
Your suggestions are very important to us. They will help make our
documentation more useful to you. Please e-mail comments about this
document to 3Com at:
pddtechpubs_comments@3com.com
Please include the following information when contacting us:
Document title
Document part number and revision (on the title page)
Page number (if appropriate)
Page 18
18 ABOUT THIS GUIDE
Example:
Wireless LAN Switch and Controller Configuration Guide
Part number 730-9502-0071, Revision B
Page 25
Please note that we can only respond to comments and questions about
3Com product documentation at this e-mail address. Questions related to
Technical Support or sales should be directed in the first instance to your
network supplier.
Page 19

1
INSTALLING 3WXM
This chapter describes how to install 3Com Wireless LAN Switch Manager
(3WXM).
Hardware Requirements
Hardware
Requirements for
3WXM Client
3WXM can be utilized with a client/server deployment or both client and
monitoring services can be run on the same machine. The monitoring
service is used for collecting historical data and for managing the
network. The client requires communication with the monitoring service
for managing the network. Larger installations needing multiple
management clients should utilize the client/server approach with 3WXM
clients communicating with a separate monitoring service. When
combining client and monitoring services on the same machine, please
use the requirements indicated for the monitoring service.
The monitoring service is not required to configure and manage WX
switches. However, data provided by the monitoring service (in the
Monitor tab) is not available if the monitoring service is not installed.
Table 3 shows the minimum and recommended requirements to run the
3WXM client.
Tab le 3 Hardware Requirements for Running 3WXM Client
Minimum Recommended
Processor Intel Pentium 4 2 GHz or
RAM 512 MB 1GB
Hard drive space
available
Monitor resolution 1024x768 pixels, 24-bit color 1600x1200 pixels, 32-bit
CD-ROM drive CD-ROM or equivalent CD-ROM
equivalent
100 MB 200 MB
Intel Pentium 4 3 GHz or
equivalent
color
Page 20

20 CHAPTER 1: INSTALLING 3WXM
Hardware
Requirements for
3WXM Monitoring
Service
Table 4 shows the minimum and recommended requirements to run the
3WXM monitoring service.
Tab le 4 Hardware Requirements for Running 3WXM Monitoring Service
Minimum Recommended
Processor Intel Pentium 4 2.4 GHz or
RAM 1GB 2GB
Hard drive space
available
Monitor resolution 1024x768 pixels, 24-bit
CD-ROM drive CD-ROM or equivalent CD-ROM
equivalent
1GB 2GB
color
Intel Pentium 4 3.6 GHz or
equivalent
1600x1200 pixels, 32-bit
color
Table 5 contains general recommended guidelines for hardware
requirements and memory allocation based on the number of radios and
WX switches your server will support. A larger number of WX switches
implies more connections and data processing, and consequently, more
CPU is required. A larger number of radios implies more data (including
client sessions) which requires more RAM and storage.
Tab le 5 Recommended Server Hardware Allocation
Number of
Radios
1 – 1000 2.4 MHz P4
1 – 2000 2.4 MHz P4
1-25 WX Switches 25-50 WX Switches 50+ WX Switches
500 MB RAM
1 GB HD
1 GB RAM
2 GB HD
2.8 MHz P4
500 MB RAM
1 GB HD
3.0 GHz P4
1 GB RAM
2 GB HD
3.2 MHz Xeon
1 GB RAM
1 GB HD
3.6 GHz Xeon
2 GB RAM
2 GB HD
Page 21
Software Requirements 21
Software Requirements
Preparing for Installation
3WXM client and 3WXM monitoring services are each supported on the
following operating systems:
Microsoft Windows Server 2003
Microsoft Windows XP with Service Pack 1 (SP1) or later
Microsoft Windows 2000 with Service Pack 4
You must use the English version of the operating system you select. Operating
system versions in other languages are not supported with 3WXM.
The following additional software is required for certain 3WXM features:
HP OpenView Network Node Manager 6.4 or later—Must be installed
prior to 3WXM if you plan to use 3WXM in your HP OpenView
environment.
Adobe Acrobat Reader 5.x or later (or plug-in)—For reading the
Wireless LAN Switch Manager Reference Manual and release notes.
Web browser (for example, Microsoft Internet Explorer 5.x or 6.x or
Netscape Navigator 6.x or 7.x)—For displaying 3WXM work orders
and inventory reports.
A licensed copy of 3WXM comes with a base license key. Before you
install 3WXM, make sure you have the appropriate administrative
privileges on the system.
After you have installed 3WXM, you will need to register your license and
the serial number with 3Com in order to obtain an activation key.
The base key along with its activation key enables you to manage up to 10
wireless LAN switches. To manage more than 10 wireless LAN switches, you
also need an upgrade key and an additional activation key, which you obtain
from 3Com. See “Serial Number and License Key” on page 22 for more
information.
If you plan to install the HP OpenView plug-in for 3WXM, which allows
you to integrate 3WXM into an HP OpenView environment, make sure
that HP OpenView is already installed.
If you are installing an evaluation copy, you still need to obtain an
activation key from 3Com after installation.
Page 22

22 CHAPTER 1: INSTALLING 3WXM
User Privileges Before you install 3WXM, make sure that you are logged in as a user who
has permission to install software, or as an administrator.
After you install 3WXM, you can configure 3WXM access privileges for
the user accounts on the machine. Likewise, you can configure access
privileges for the monitoring service, if installed. Access privileges for the
3WXM client are completely independent of access privileges for the
monitoring service, and are configured separately.
Serial Number and
License Key
HP OpenView
Network Node
Manager
3WXM comes with a base license key, which is provided on the CD cover.
To use 3WXM, you need to enter the base key and an activation key,
which you obtain from 3Com. The base key and activation key enable
you to manage up to 10 wireless LAN switches. To manage more than 10
wireless LAN switches, you also need an upgrade key and additional
activation key, which you obtain from 3Com.
Each time you start 3WXM, it checks the license information. If the
product is not licensed, the License wizard is displayed.
If you want to integrate 3WXM into your HP OpenView environment, you
have the option of installing the HP OpenView plug-in required to use
Network Node Manager with 3Com products. Make sure that HP
OpenView is already installed before installing 3WXM with the plug-in.
Page 23
Installing 3WXM Installing 3WXM involves the following tasks:
Unpack files. (See “Unpacking Files” on page 23.)
Use the installation wizard. (See “Using the Installation Wizard” on
page 24.)
Install the HP OpenView plug-in (optional). (See “Installing the HP
OpenView Plug-In” on page 27.)
Perform the licensing steps. (See “Licensing” on page 28.)
The installation wizard for the 3WXM client has an option to install the
monitoring service on the same machine. You must install the client in
order to install the monitoring service. You cannot install the monitoring
service separately.
Unpacking Files To unpack files on your Windows system, follow these steps.
1 Insert the 3WXM CD in the CD-ROM drive. If Autorun is enabled, wait
briefly for the install program to start. For more information about using
the installation wizard, see “Using the Installation Wizard” on page 24.
Installing 3WXM 23
If Autorun is disabled, follow these steps:
a In Windows Explorer, navigate to your CD-ROM drive.
b In the Windows\VM directory, double-click install.exe.
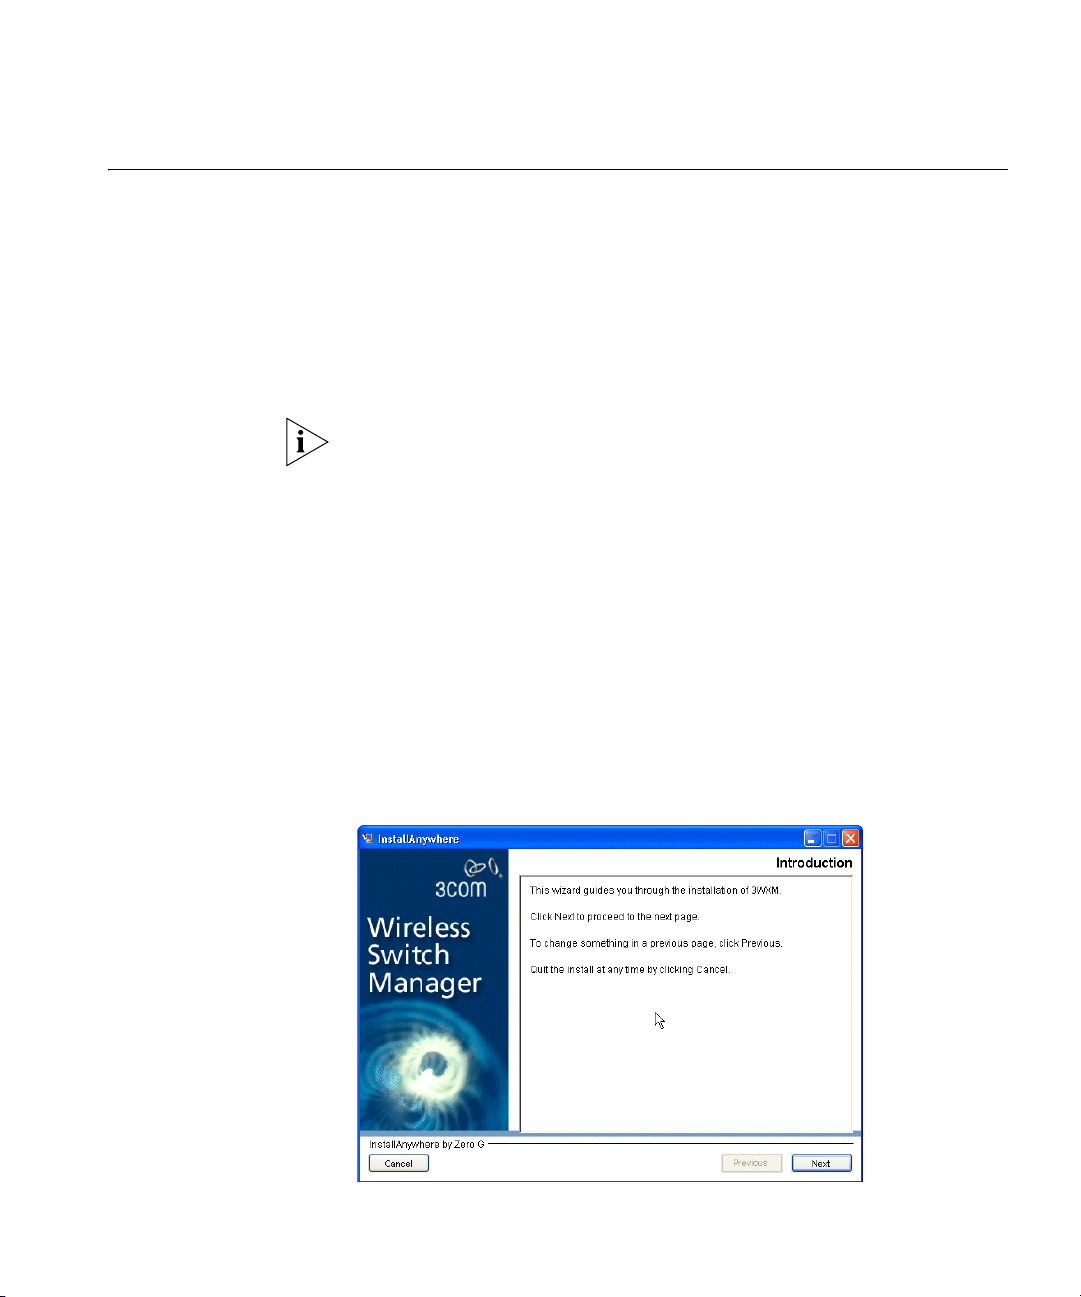
The Introduction page of the 3WXM installation wizard appears.
2 Go to “Using the Installation Wizard” on page 24.
Page 24

24 CHAPTER 1: INSTALLING 3WXM
Using the Installation
Wizard
To use the installation wizard:
1 On the Choose Installation Type page, choose one of the following:
To install both 3WXM Services and the client, click the 3WXM Services
icon.
To install only the 3WXM client, click the 3WXM client icon.
On Windows systems, the monitoring service is started automatically
when you complete installation and starts automatically whenever you
restart your system.
2 Click Next. The Select Plug-in page appears. To install the plug-in, select
the checkbox, then go to “Installing the HP OpenView Plug-In” on
page 27.
If you do not want to install the plug-in, leave the box unchecked and go
to step 3.
3 Click Next. The License Agreement page appears. After reading the
3WXM license agreement, select whether to accept the terms of the
agreement. (If you choose not to accept the terms of the license
agreement, you cannot proceed with the installation.)
4 Click Next. The Choose Install Folder page appears.
Page 25
Installing 3WXM 25
5 Type the name of the directory in which to install 3WXM, or accept the
default.
The default installation directory is C:\Program Files\3Com\Wireless
Switch Manager.
You can also type a directory name in the box, or select a directory by
clicking Choose and browsing the filesystem. To revert to the default
installation directory, click Restore Default Folder.
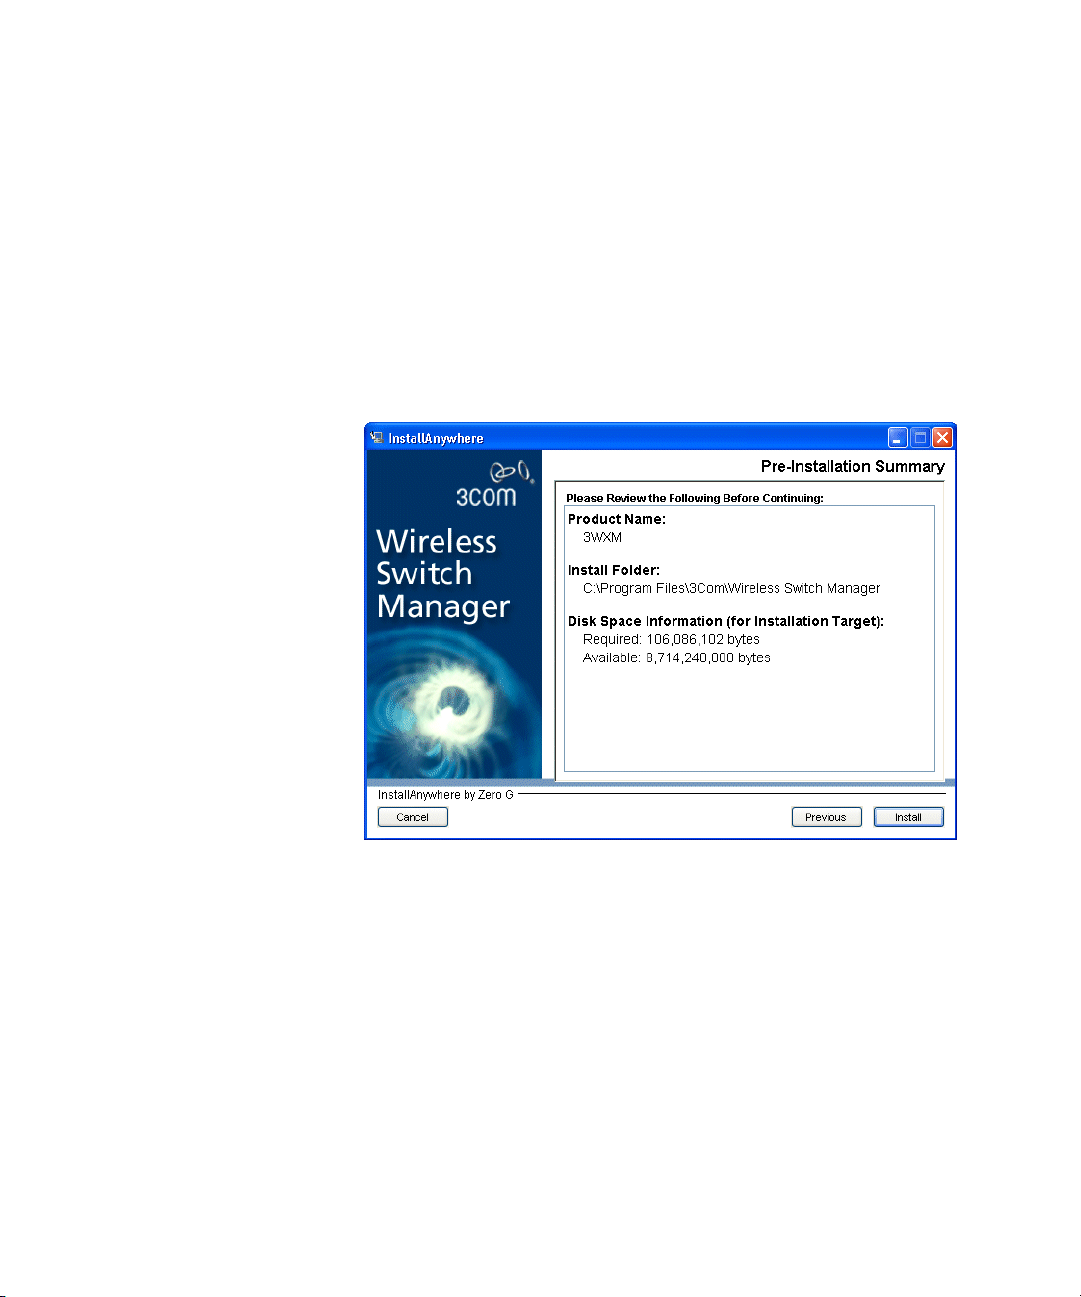
6 Click Next. The Pre-Installation Summary page appears.
7 Check the installation summary information. Click Previous to make any
changes to previous pages.
8 Click Install.
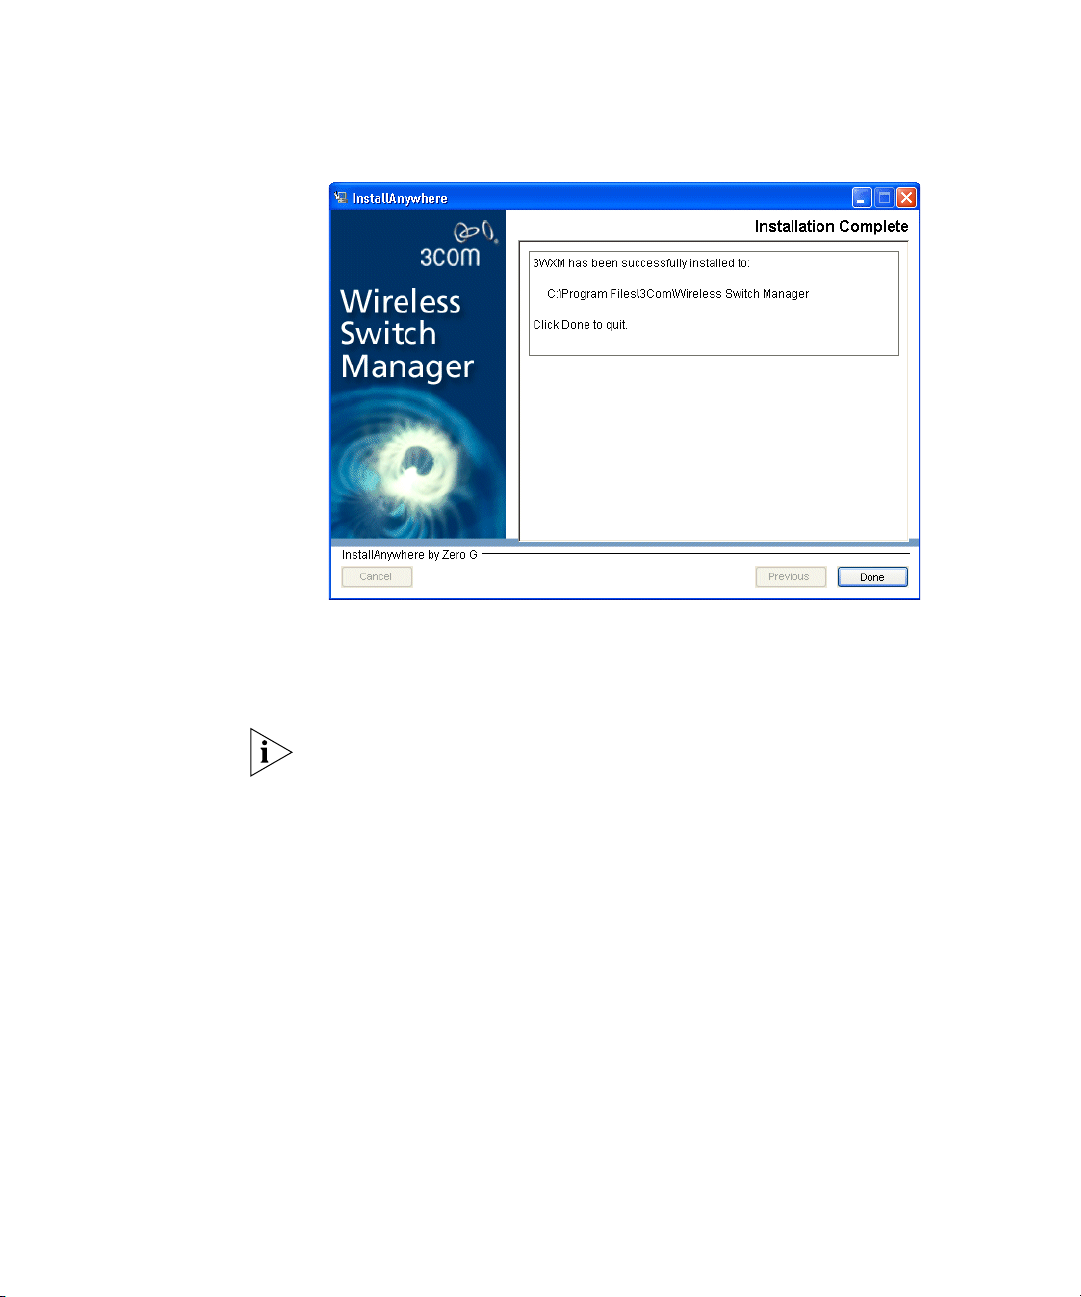
The installer installs 3WXM. The monitoring service also is installed, if you
selected this option.
When installation is complete, you see a page similar to the following,
which reports that the installation was successful and identifies the
directory in which 3WXM was installed.
Page 26
26 CHAPTER 1: INSTALLING 3WXM
If this page contains options for rebooting your system, you must reboot
to complete the installation. Generally, a reboot is required only if
another instance of 3WXM is running while you perform the installation
of this instance. Select one of the reboot options.
If the Database Export Failed page appears, this indicates that the installer
was unable to upgrade an existing database created by an earlier version
of 3WXM. Select Install to complete the installation, then use the
dbtools.exe command to manually upgrade the database. (See “Restoring
a Plan from a Backup” on page 494.)
9 Click Done.
See “Getting Started” on page 75 for more information on getting
started with 3WXM.
Page 27

Installing 3WXM 27
Installing the HP
OpenView Plug-In
To install the HP OpenView plug-in:
1 Complete step 9 of the procedure in “Using the Installation Wizard” on
page 24.
2 Click Next. The Select Plug-in page appears.
3 Select the HPOV checkbox and click Next.
The License Agreement page appears. After reading the 3WXM license
agreement, select whether to accept the terms of the agreement. (If you
choose not to accept the terms of the license agreement, you cannot
proceed with the installation.)
4 Click Next.
5 To specify the directory in which HP OpenView Network Node Manager is
installed, click Choose.
Network Node Manager must be already be installed on the system. You
must specify the correct directory for Network Node Manager for the HP
OpenView plug-in to be installed correctly. The default Network Node
Manager installation directory is C:\Program Files\HP OpenView\NNM.
Click Restore Default Folder to reset the directory to the default value.
6 Click Next to display the Pre-Installation Summary page.
7 Check the installation summary information. Click Previous to make any
changes to previous pages.
8 Click Install.
When installation is complete, a page is displayed to report that the
installation was successful. The page also identifies the directory in which
3WXM was installed.
9 Click Done.
See “Getting Started” on page 75 for more information on getting
started with 3WXM. For more information about using HP OpenView
with 3Com products, see “Using 3WXM With HP OpenView” on
page 463.
Page 28
28 CHAPTER 1: INSTALLING 3WXM
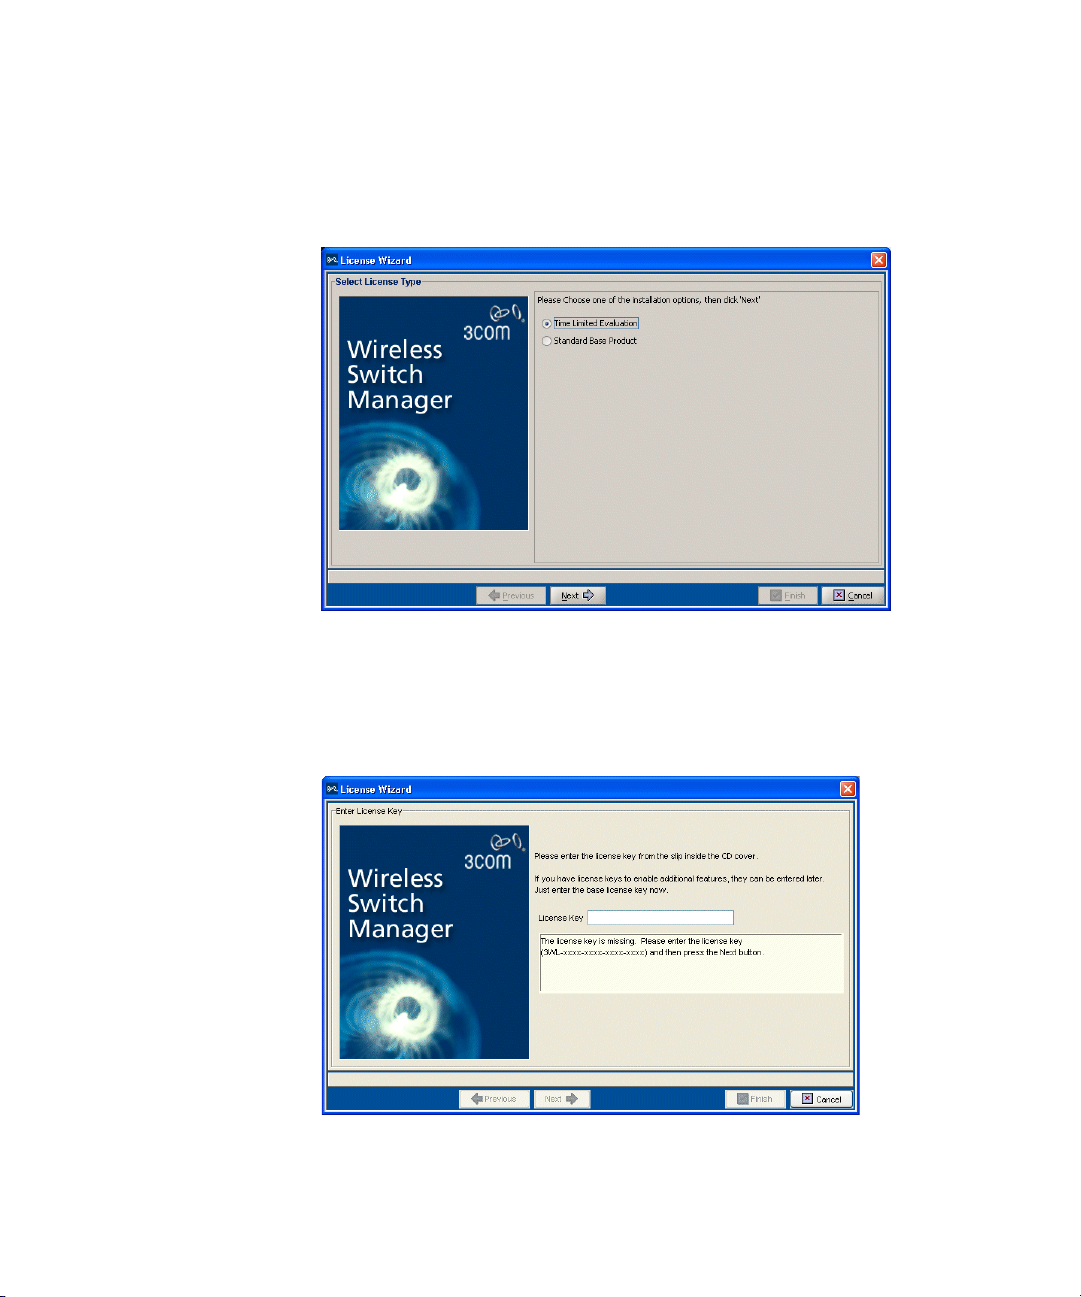
Licensing Each time you start 3WXM, it checks the license information. If the
product is not licensed, the following dialog is displayed.
1 If you are installing a licensed copy, select Standard Base Product and
click Next. Go to step 2.
If you are installing an evaluation copy, select Time Limited Evaluation
and click Next. Go to Step 3.
2 Type the license key that was supplied with the 3WXM CD, and click
Next.
Page 29
Installing 3WXM 29
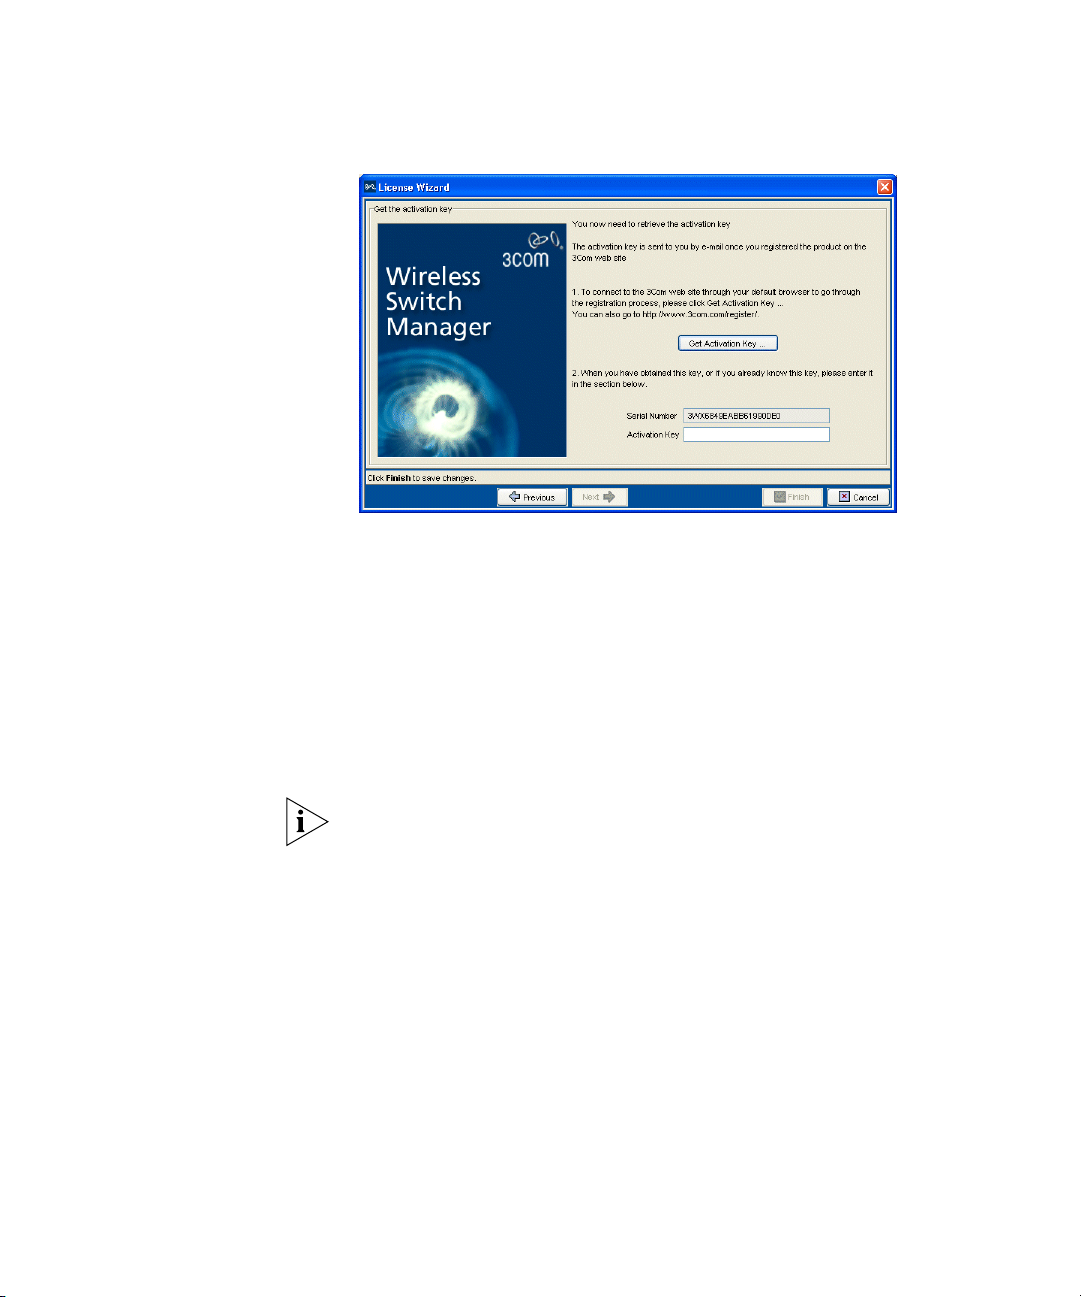
3 Click Get Activation Key.
A 3Com web page appears. Enter your registration information (and the
license key, if you are licensing a purchased copy) in order to obtain an
activation key.
4 Copy the activation key from the web page and paste it into the
Activation Key box of the Activation Key page.
5 If you plan to manage 10 or fewer wireless LAN switches, click Finish.
You are through with this procedure.
If you are activating an evaluation copy, you can manage up to 10
wireless LAN switches. Click Finish to complete this procedure.
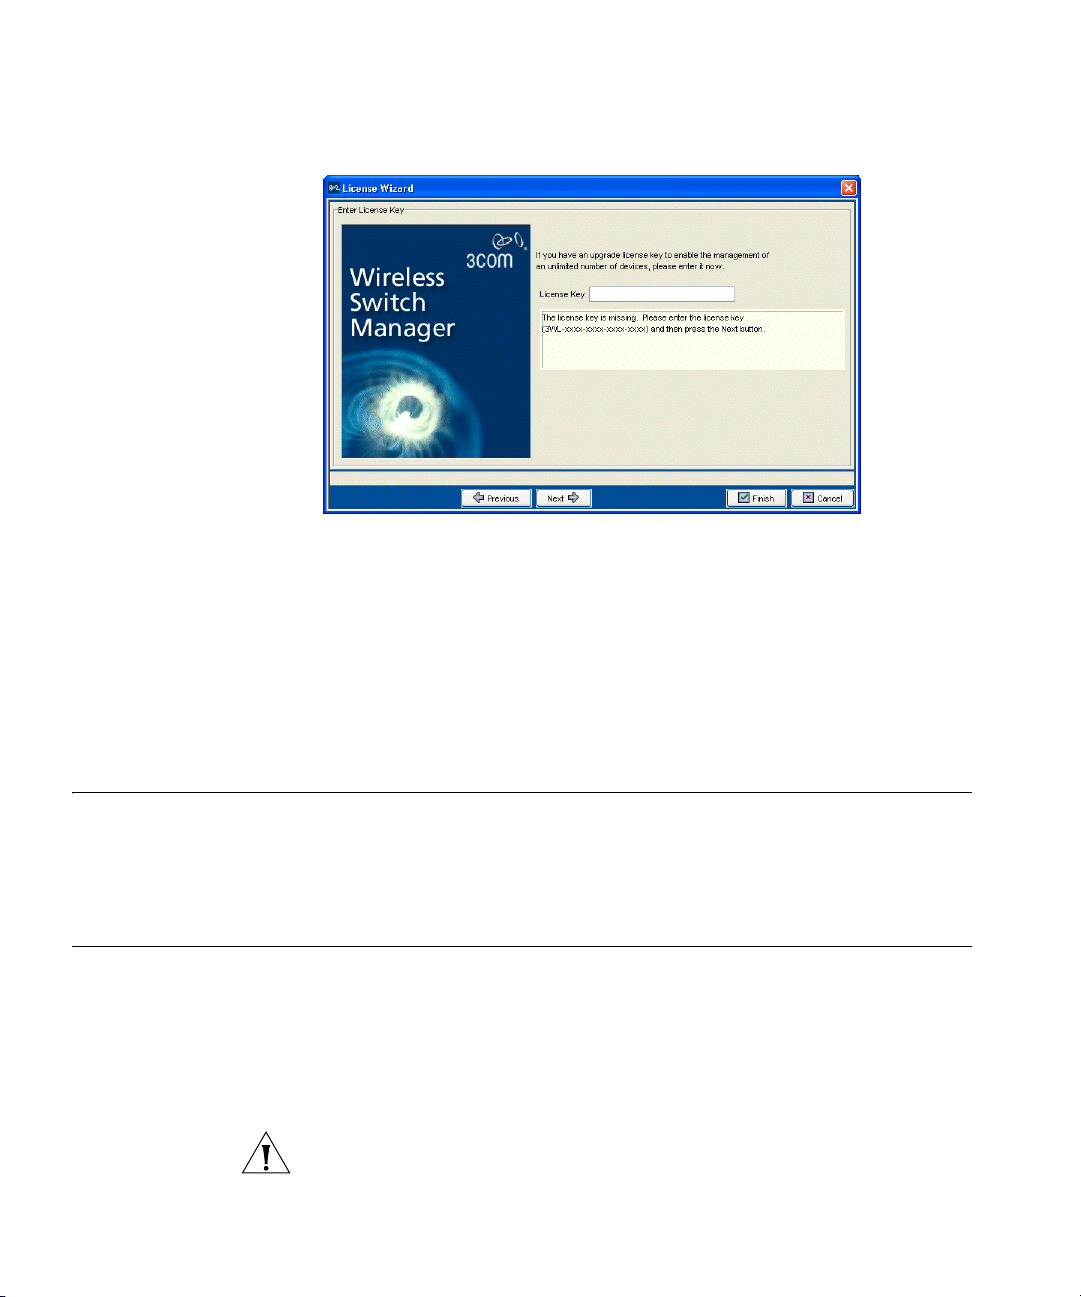
If you plan to manage more than 10 wireless LAN switches, click Next to
display the following page and go to step 6.
Page 30
30 CHAPTER 1: INSTALLING 3WXM
6 Type the upgrade license key in the License Key box and click Next.
7 Click Get Activation Key to access the product activation key for your
upgrade license. Register your upgrade license in order to obtain its
activation key.
8 Copy the evaluation key for the upgrade license from the web page and
paste it into the Activation Key box of the Activation Key page.
9 Click Finish.
Installation Log File During installation, an installation log file, 3WXM_InstallLog.log, is
created and placed on the desktop. Double-click the log file’s icon to read
the log file. Have this log file available if you need to contact 3Com
Technical Support about an installation problem.
Upgrading 3WXM You can upgrade 3WXM by installing a newer version of 3WXM over a
previous version. You do not need to uninstall the previous version before
installing a newer version. Before you upgrade, 3Com recommends that
you make a backup of the xml directory in the 3WXM installation
directory. As a best practice, back up the xml directory on a regular basis
to ensure that you have copies of your network plans.
CAUTION: If you uninstall a previous version of 3WXM before
upgrading, make sure you do not delete the serial number.
Page 31

Uninstalling 3WXM 31
Uninstalling 3WXM You uninstall 3WXM by using its Uninstall wizard. Access the Uninstall
wizard from the 3Com program list in the Windows Start menu or the
Control Panel.
To uninstall 3WXM on Windows systems:
1 Access the Windows Control Panel, and select Add or Remove
Programs.
2 Select 3WXM and click Change/Remove.
3 Click Uninstall.
The 3WXM Uninstall Options dialog appears.
By default, the following are removed when you uninstall the client
application:
Network plans
Access control
If the monitoring service was also installed, the monitoring service’s
database directory is also uninstalled by default. The database directory
contains the data collected by the monitoring service.
Page 32
32 CHAPTER 1: INSTALLING 3WXM
CAUTION: Do not delete the serial number unless specifically asked to do
so by 3Com Technical Support.
Your license(s) to use this software are registered against this serial
number. If you delete the serial number, the software will generate a new
serial number if it is ever reinstalled. You will then require new licenses to
register against the new serial number. If you delete the serial number,
the license information will also be deleted.
CAUTION: If you delete an item, the item is permanently lost. For
example, if you delete the database directory, all data collected by the
monitoring service is lost, including historical trend data.
To prevent an item from being uninstalled, click on the checkbox next to
the item to remove the checkmark.
The monitoring service and HP OpenView plug-in are uninstalled
automatically.
4 Click Continue.
The uninstall program reports its progress. When the uninstall process is
complete, the uninstall program reports that the items were successfully
deleted.
5 Click Done.
Page 33

WORKING WITH THE 3WXM
2
USER INTERFACE
This chapter describes how to use the 3Com Wireless LAN Switch
Manager (3WXM) interface.
Overview A network plan is the workspace in 3WXM you use to design a 3Com
network. In a network plan, you define components of the network (WX
switches, MAP access points, and optionally third-party access points).
Regardless of whether you intend to use physical planning features, you
must create a network plan before you can configure or manage WX
switches or monitor network data.
After you have created or opened a network plan, the main 3WXM
window is organized into panels, as shown in the following figure.
Page 34

34 CHAPTER 2: WORKING WITH THE 3WXM USER INTERFACE
Organizer panel
Toolbar
Content panel
Alerts panel
Object Details panel (hidden by default)
Network Activity icon
The main 3WXM window contains a toolbar with menu categories.
Underneath the categories are icons for frequently used menu options.
The window also contains panels for navigating to and displaying
information.
The main 3WXM window contains the following panels. (See the
previous figure.)
Organizer panel — Provides a tree-like display of objects and quick
access to them. The Organizer panel is located on the left side of the
main window.
Content panel — Displays monitored data for objects. The Content
panel is located to the right of the Organizer panel.
Page 35

Menu Options in Main 3WXM Window 35
Alerts panel — Displays summary statistics for configuration changes
or errors and for rogue access points detected in the 3Com Mobility
Domain.
Object Details panel — Displays details for an object selected in the
Organizer panel. When displayed, the Object Details panel is located
under the Content panel. This panel is hidden by default.
You can resize a panel by clicking and dragging the panel’s border. You
also can hide or redisplay the Information and Alerts panels by selecting
View > Object Details or View > Alerts from the main toolbar.
Panel sizes and window arrangements are associated with 3WXM
usernames. When you close 3WXM, 3WXM remembers the panel sizes
and window arrangements you assigned and restores them the next time
you run 3WXM.
The Network Activity icon displays statistics for management traffic
between 3WXM and the WX switches in the network plan. You can click
on the icon to display more details.
Menu Options in Main 3WXM Window
The Lock icon indicates whether the network plan has been locked.
When you make changes to a network plan, 3WXM locks it on the server.
The lock prevents other clients who open the network plan from
modifying it while you are making changes. The network plan remains
locked until you save your changes, after which the lock is released
Table 6 lists the options available from the menu at the top of the main
3WXM window. Click on a menu category to display the options for that
category. Most of the options have icons.
By default, icons for commonly used options on the File, Edit, View,
Config, Manage, Monitor, and Tools menus are displayed in the row
under the main 3WXM menu bar. To add or remove icons in this row,
select View > Toolbars. Icons for categories indicated with a checkmark
in the menu are available in the row under the categories. Selecting a
category toggles whether its icons are available.
Page 36

36 CHAPTER 2: WORKING WITH THE 3WXM USER INTERFACE
Tab le 6 3WXM Menu Options
Menu Menu Option Description
File (New) Create a new network plan.
(Open) Open a network plan.
Close Close a network plan.
(Switch Network
Plan)
(Delete Network Plan)
(Save) Save a network plan.
(Save As) Save a copy of a network plan under a new
Refresh Refresh the network plan with the most
(Import) Import a WX configuration file.
(Export) Export a WX configuration file.
(Exit) Close 3WXM.
Edit (Copy) Copy the selected object.
(Paste) Create a new copy of the object you copied
Select a different network plan to edit.
Delete a network plan.
name.
current data from the server.
If another user has made changes to the
network plan and saved them on the server,
this option is available to update your display
with the changes
under the parent object selected in the
Organizer panel.
(Paste Replace) Replace the object that is selected in the
Organizer panel with the object you copied.
View (Object Details) Open the Information panel.
The Information panel appears under the
Content panel.
Page 37

Menu Options in Main 3WXM Window 37
Tab le 6 3WXM Menu Options (continued)
(Alerts) Open the Alerts panel.
(Toolbars) Toggle display of toolbar icons.
Icons for selected toolbar categories are
displayed under the row of toolbar
categories.
Config (Insert) Add an object.
This option displays a wizard to a child
object to the selected object in the
Organizer panel. For example, if a Mobility
Domain name is selected, Config > Insert
displays the Create Wireless Switch wizard
to add a WX switch.
(Edit) Edit the selected object(s).
This option displays a wizard to modify the
object(s) currently selected in the Organizer
panel.
(View) View the properties of the selected object(s).
This option displays a wizard that shows the
properties of the object(s) currently selected
in the Organizer panel. The View option
does not allow you to edit the object’s
properties.
(Delete) Delete the selected object(s).
Manage (Managed Devices) Display a list of managed WX switches.
(Upload) Upload a WX configuration into 3WXM.
(Verification) Verify the configuration of a WX switch to
(Deploy) Deploy WX switch configurations to the
(Policy Manager) Synchronize the parameter settings in
(Distribute Images
& Configuration)
resolve warnings or errors.
network.
Domain Policies with the settings on
individual switches.
Distribute a system image and configuration
information to WX switches.
Page 38

38 CHAPTER 2: WORKING WITH THE 3WXM USER INTERFACE
Tab le 6 3WXM Menu Options (continued)
(Distribute
Certificates)
(Reboot WX/MAP
Devices)
(Apply Auto-Tune
Settings)
Monitor (New Monitor) View monitored data for the object selected
(Events) View log messages.
(Rogue Detection) View rogue detection scan results.
(Performance) Display Ethernet or radio statistics.
Reports (Inventory Report) Generate an inventory report of 3Com
Distribute certificates to WX switches.
Reboot WX switches or MAP access points.
Apply channel and power settings from live
radios to their counterparts in the network
plan to update the plan.
For example, if RF Auto-Tuning causes radio
configuration changes, you can easily
synchronize the network plan with the
changes using this option.
in the Organizer panel.
This opens the Monitor tab in the Content
panel. The content of the windows in the
Monitor tab changes based on the object
that is selected in the Organizer panel.
equipment.
(Mobility Domain
Configuration)
(WX
Configuration)
(Client Summary) Generate a report of summary data for client
(Client Details) Generate a report of detailed client session
Generate a report of the major configuration
parameters of all the WX switches in the
Mobility Domain.
Generate a report of the configuration
parameters of a specific WX switch.
sessions.
information.
Page 39

Menu Options in Main 3WXM Window 39
Tab le 6 3WXM Menu Options (continued)
(Client Errors) Generate a trend report on client-related
(Watch List Client) Generate a report of detailed information
(Network Usage) Generate a report on network resource
(RF Summary) Generate a report on overall network health
(Radio Details) Generate a detailed report of statistical
(Rogue Details) Generate a report of current and historical
(Rogue Summary) Generate a report of all rogues detected
health in the network. For example, this
report can indicate areas of the network
where clients have been experiencing high
association failure rates.
for a client on the watch list. (For more
information about the client watch list, see
“Managing the Client Watch List” on
page 389.)
usage and client activity.
using selected radio statistics. You can use
the report to compare RF environments
across the network and isolate potential
problem areas.
information for each radio in a specific MAP
access point.
information for a specific rogue access point.
within a specific time period.
(Site Survey Order) Generate a site survey order to prepare for
conducting a site survey.
(Work Order) Generate a work order for installing 3Com
equipment.
To ol s (Preferences) Change 3WXM user preferences.
(Certificate
Management)
(Image
Repository)
(3WXM Services
Setup)
Manage certificates.
Open the system image repository.
Configure preferences for the 3WXM
monitoring service.
Page 40

40 CHAPTER 2: WORKING WITH THE 3WXM USER INTERFACE
Tab le 6 3WXM Menu Options (continued)
(3WXM Services
Backup/Restore)
Configure settings for backing up the
database used by 3WXM services, as well as
restore a previously backed-up version of the
database.
(3WXM Services
Lock Management)
Display information about the lock placed on
the network plan and/or delete the lock.
(Launch Telnet) Open a Telnet connection to a selected
device.
(Launch Browser) Open a Web connection to a selected
device.
Window (Close All) Close all tabs or windows that are open in
the Content panel.
This menu also has an additional option for
each tab open in the Content panel.
Selecting one of these options places the
selected tab in the foreground, but does not
close other tabs or windows.
Help (3WXM Help) Open the 3Com 3WXM Administrator’s
Guide. (This book.) You can also open this
guide by pressing the F1 key.
(Licensing) Open the License Information dialog box.
(Report Problem) Report a problem to 3Com Technical
Support.
(About 3WXM) About 3WXM:
3WXM version information
3WXM serial number and license key
3WXM release notes
Memory usage
Java garbage collection (Force GC)
Page 41

Organizer Panel 41
Organizer Panel The Organizer panel provides a tree-like view of the 3Com equipment
and site data managed by 3WXM.
The Organizer panel contains the following sections:
Policies — The set of policies included in your network plan.
Equipment — The set of devices in your network plan. This includes
Mobility Domains, 3Com switches and MAP access points, as well as
third-party access points that 3WXM needs to be aware of while
planning or monitoring the network
Sites — Named sets of buildings and floors where 3Com equipment
is deployed.
The Equipment section is expanded by default.
Page 42

42 CHAPTER 2: WORKING WITH THE 3WXM USER INTERFACE
To display the objects in a section of the Organizer panel, click on the
right arrow next to the section name. For example, to display the
objects in the Sites section, click next to Sites. The section is
expanded to display the site names.
To expand the view of an object in the Policies, Equipment, or Sites panel
and display its contents, click on the plus sign next to the object. For
example, to display the buildings in a site, click on the plus sign next to
the site name. To display the floors in the building, click next to the
building name, and so on.
Details Checkbox In the Equipment and Sites sections, the Details checkbox controls the
level of detail displayed. When Details is enabled, all objects in the
Mobility Domain or site can be displayed. When Details is disabled, the
display is restricted to objects for which you can display data in the
Monitor tab of the Content panel.
Mobility Domains — The display is restricted to switches and their
port connections, including connections to MAP access points. Rogue
Detection objects are not displayed. The only objects listed under the
WX switches are for physical port connections and Distributed MAP
connections.
Sites — The display is restricted to coverage areas. Objects for
individual access points are not displayed, although you can expand a
coverage area to list the individual 3Com radios in the coverage area.
However, regardless of whether Details is enabled, you can drill down to
display details at the most granular level if needed.
Page 43

Organizer Panel 43
Displaying Additional
Object Details
Select an
object
To display details for an object in the Organizer panel, select the object.
Details about the object appear in the Information panel, located at the
bottom right of the main 3WXM window. For example, select a Mobility
Domain to display the system IP address and system name of the seed
switch for the domain.
Details are
displayed here
In addition, monitored data for the object selected in the Organizer panel
can be displayed in separate monitoring windows in the Content panel.
To open the Monitor tab and display monitored information for an
object, right-click on the object in the Organizer panel and select
New Monitor.
Policy Objects Policies are configuration parameters that you define once in 3WXM and
then can apply to multiple WX switches. You define policies in the
Policies section of the Organizer panel.
Page 44

44 CHAPTER 2: WORKING WITH THE 3WXM USER INTERFACE
To edit configuration parameters for an object, right-click on the object’s
icon and select Edit. To display parameters for an object, right-click on
the object’s icon and select View. To create a new instance of an object
(where applicable), right-click on the object’s icon and select Insert. You
also can create objects by copying and pasting. (See “Copying and
Pasting Objects” on page 70.)
Table 7 lists the objects for a policy. These objects control configuration
parameters for all WX switches to which the policy is applied.
Tab le 7 Policy Objects
Object Description
Management
Services
Settings for the following management services:
System Information, including contact and location
information, CLI prompt, and message of the day.
HTTPS—Controls Web Manager management access to the
WX switches.
Telnet—Controls Telnet management access to the WX
switches.
SSH—Controls Secure Shell (SSH) management access to the
WX switches.
Web Portal—Controls web-based login of network users
(clients).
SNMP—Configures traps, communities, and trap receivers.
Log—Controls log and trace settings.
Timezone—Controls local offsets to Universal Mean Time
(UMT).
ACLs Access Control Lists (ACLs) to filter traffic.
IP Services Settings for IP parameters:
IP routes to the default gateway
IP aliases
Domain Name Service (DNS) settings
Network Time Protocol (NTP) settings
Address Resolution Protocol (ARP) settings
RADIUS Settings for RADIUS servers and server groups.
Page 45

Tab le 7 Policy Objects (continued)
Object Description
Organizer Panel 45
Admin Access
Rules
Network Access
Rules
Rules for securing Admin access and console access to the WX
switch.
Rules for authenticating users attempting to access the network.
You can create rules for the following authentication types:
IEEE 802.1X
MAC authentication
Web AAA
Last-resort
RF Detection Settings for RF detection scans. RF detection scans can discover
third-party transmitters, in addition to other 3Com radios.
VLANs Groups of physical ports configured as a distinct Layer 2
broadcast domain. Each VLAN has its own Spanning Tree
Protocol (STP) and Internet Group Management Protocol (IGMP)
settings. Optionally, a VLAN can be associated with an IP
interface.
Spanning Tree
Settings for optional STP fast convergence features.
Properties
Service Profiles Sets of encryption parameters associated with an SSID and with
radio profiles.
Radio Profiles Sets of radio parameters that can be applied to multiple radios,
including the beacon interval, RF Auto-Tuning settings, and
service profiles. (Service profiles associate SSIDs with the radios.)
Mobility Profiles Attributes for Mobility Profiles. Mobility Profile attributes allow
or deny access to the network for a specific user or group of
users. When you create a Mobility Profile, you specify which
MAP ports, Distributed MAPs, or wired authentication ports are
to be included.
Local User
Database
Settings for the local user database on the WX switch. You can
use the local database to create users and authenticate them, or
you can use the local database in conjunction with a RADIUS
server.
Location Policy Settings for location policy rules. Location policies allow you to
locally override VLAN or security ACLs assigned to a user by a
RADIUS server.
Page 46

46 CHAPTER 2: WORKING WITH THE 3WXM USER INTERFACE
Equipment Objects The Equipment section of the Organizer panel contains configuration
objects for Mobility Domains, WX switches, and third-party APs. At the
top level of the hierarchy, the Equipment section of the Organizer panel
can contain the following types of objects:
Mobility Domain—Configuration parameters for a Mobility Domain.
You can configure parameters for the WX switches within a Mobility
Domain.
WX switches—Configuration parameters for WX switches not in a
Mobility Domain.
Third-Party APs—Configuration parameters for third-party
(non-3Com) APs.
An example Equipment section is shown below. The example shows a
network plan with a Mobility Domain called 3ComAir. The 3ComAir
Mobility Domain contains five WX switch objects.
Individual WX switches can be added to a Mobility Domain by 3WXM as
part of network planning. You also can add a switch running in the live
network by uploading it into 3WXM, or you can create a new switch with
the WX Switch wizard.
WX switches do not need to be configured under a Mobility Domain. The
example shows objects for two WX switches, WX1200-bottom and
WX1200-top, that do not belong to the 3ComAir Mobility Domain. The
example also shows an object for third-party APs.
Page 47

Organizer Panel 47
Table 8 lists the objects that can appear under a Mobility Domain. These
objects control configuration parameters for devices in the Mobility
Domain.
Tab le 8 Mobility Domain Objects
Object Description
WX switch Configuration parameters for the WX switches within a Mobility
Domain. See Table 9 for a description of the configurable objects
for a WX switch.
Rogue Detection Configuration parameters for rogue detection and
countermeasures.
Table 9 lists the objects that can appear under a WX switch, either within
a Mobility Domain or outside of a Mobility Domain. These objects control
configuration parameters for an individual WX switch
Tab le 9 WX Switch Objects
Object Description
Management
Services
Settings for the following management services:
System Information, including contact and location
information, CLI prompt, and message of the day.
HTTPS—Controls Web Manager management access to the
WX switches.
Telnet—Controls Telnet management access to the WX
switches.
SSH—Controls Secure Shell (SSH) management access to the
WX switches.
Web Portal—Controls web-based login of network users
(clients).
SNMP—Configures traps, communities, and trap receivers.
Log—Controls log and trace settings.
Timezone—Controls local offsets to Universal Mean Time
(UMT).
SSIDs Service Set Identifier (SSID) names and the network access rules
and service profiles associated with each SSID.
Page 48

48 CHAPTER 2: WORKING WITH THE 3WXM USER INTERFACE
Tab le 9 WX Switch Objects (continued)
Radio Profiles Sets of radio parameters that can be applied to multiple radios,
including the beacon interval, RF Auto-Tuning settings, and
service profiles. (Service profiles associate SSIDs with the radios.)
Service Profiles Sets of encryption parameters associated with an SSID and with
radio profiles.
Ports/MAPs Settings for individual ports and for directly connected access
points.
Distributed MAPs Settings for MAP access points that are indirectly connected to
the switch, through the network.
Load Sharing Groups of physical ports that function as a single logical link.
VLANs Groups of physical ports configured as a distinct Layer 2
broadcast domain. Each VLAN has its own Spanning Tree
Protocol (STP) and Internet Group Management Protocol (IGMP)
settings. Optionally, a VLAN can be associated with an IP
interface.
Spanning Tree
Settings for optional STP fast convergence features.
Properties
AAA Settings for Authentication, Authorization, and Accounting
(AAA) parameters:
RADIUS servers
Local user database (configured on the WX switch instead of
on the RADIUS server)
Access rules for administrative access to WX switches
Access rules for user access to the network
Location policies to locally override VLAN or security ACLs
assigned to a user by a RADIUS server.
802.1X Settings for 802.1X.
ACLs Access Control Lists (ACLs) to filter traffic.
Mobility Profiles Attributes for Mobility Profiles. Mobility Profile attributes allow
or deny access to the network for a specific user or group of
users. When you create a Mobility Profile, you specify which
MAP ports, Distributed MAPs, or wired authentication ports are
to be included.
Page 49

Organizer Panel 49
Tab le 9 WX Switch Objects (continued)
IP Services Settings for IP parameters:
IP routes to the default gateway
IP aliases
Domain Name Service (DNS) settings
Network Time Protocol (NTP) settings
Address Resolution Protocol (ARP) settings
Table 10 lists the object that can appear under Third Party APs.
Table 10 Third Party AP Objects
Object Description
AP: name Configuration parameters for a third-party (non-3Com) AP.
3WXM takes these third-party access points into consideration
when calculating MAP access point placement, channel settings,
and power settings. In addition, WX switches do not issue
countermeasures against these access points
Site Objects The Sites section of the Organizer panel contains objects for the buildings
where you want to deploy 3Com equipment. A site can contain one or
more buildings and each building can contain one or more floors. Each
floor contains objects for wiring closets, coverage areas, MAP access
points, and third-party access points.
Table 11 lists the objects in a site.
Table 11 Third Party AP Objects
Object Description
Building Building in the selected site.
Floor Floor in the selected building.
Wiring Closet Wiring closet (switching closet) on the selected floor. During
planning for 3Com equipment placement, 3WXM places WX
switches in the wiring closets.
Page 50

50 CHAPTER 2: WORKING WITH THE 3WXM USER INTERFACE
Table 11 Third Party AP Objects (continued)
Coverage Area Wireless coverage area on the selected floor. Coverage areas
MAP Access Point MAP access point on the selected floor. MSP access points
Third-party access
point
contain radios.
contain radios.
Third-party access point on the selected floor
Alerts Panel The Alerts panel provides brief configuration and rogue detection status.
You can click on a statistic in the Alerts section to open a tab in the
Content panel with more details.
When the Alerts panel is minimized, a flag on the panel’s title appears to
alert you when a new warning or error condition occurs. Warnings are
indicated with a yellow flag and errors are indicated with a red flag. Here
is an example of the warning flag.
To navigate to more information and correct the warning or error, click
on the arrow to expand the panel, then click on the statistic to open the
corresponding tab in the Content panel.
Page 51

Alerts Panel 51
Table 12 lists the types of alerts displayed in the Alerts panel.
Table 12 Alerts
Alert Category Description
Configuration Lists the number of configuration errors and warnings
Network Lists the number of configuration differences between all
Rogue Detection Lists the total number of rogues detected by 3Com radios
Local Changes Lists the number of WX switch configuration changes that
Network Changes Lists the number of WX switch configuration changes that
encountered when 3WXM verifies WX switch
configurations in the network plan.
3WXM compares a switch’s configuration to a set of
configuration rules, and flags the items that must (error) or
should (warning) be corrected before deploying the switch
configuration from the network plan to the live network.
Select this alert to open the Config Verification tab of the
Verification tab in the Content panel. You can use this tab
to correct configuration errors or disable rules.
WX switches in the network and their counterparts in the
network plan.
Select this alert to open the Network Verification tab of
the Verification tab in the Content panel. You can use this
tab to edit configuration items or disable rules.
and still operating in the Mobility Domain(s) defined in the
network plan.
Select this alert to open the Rogue Detection tab in the
Control panel. You can use this tab to list information
about non-3Com wireless devices detected in the
network.
have occurred in 3WXM (in the network plan) since the
last time the switches in the network were synchronized
with their counterparts in 3WXM.
Select this alert to open the Managed Devices tab in the
Content panel. You can use this tab to review the local
changes and deploy them to the network.
have occurred in the live network since the last time the
switches in the network were synchronized with their
counterparts in 3WXM.
Select this alert to open the Managed Devices tab in the
Content panel. You can use this tab to review the network
changes and upload them to 3WXM.
Page 52

52 CHAPTER 2: WORKING WITH THE 3WXM USER INTERFACE
Content Panel The Content panel displays information for objects selected in the
Organizer panel, or for options selected from the Manage or Monitor
toolbar option of the main 3WXM window.
Information is displayed in the following tabs:
Monitor
Managed Devices
Verification
Events
Rogue Detection
Performance Statistics
Clicking on a statistic in the Alerts panel also opens one of these tabs.
(The following sections provide more information.)
To close a tab, right-click on the tab title and select Close Selected Tab.
Monitor Tab The Monitor tab displays information retrieved from the monitoring
service. Information is presented in the following windows within the
Monitor tab:
Explore — Shows the operational status of 3Com equipment: WX
switches, MAP access points, and radios.
Status Summary — Shows tables of basic information for the 3Com
equipment.
Client Monitor — Shows activity, errors, and session information for
network clients. Additionally, you can configure a watch list of clients
and track their activity and session histories over time, up to 30 days.
RF Monitor — Shows RF information for radios, including power and
channel information.
RF Trends — Shows current and past statistics for radios. You can
view statistics up to 30 days old, and display graphs of data trends.
The Select a View drop-down list on the Monitor tab has options to
navigate to the tabs listed above.
Page 53

Content Panel 53
Drop-Down
List
The scope of the data displayed depends on the object that is selected.
For example, if you select a Mobility Domain, the information applies to
all the WX switches, MAP access points, and radios in the Mobility
Domain. If you select an individual radio, the information applies only to
that radio.
To open the Monitor tab, select an object in the Organizer panel, then do
one of the following:
Select Monitor > New Monitor from the main 3WXM toolbar.
Right-click on the object, then select New Monitor from the menu.
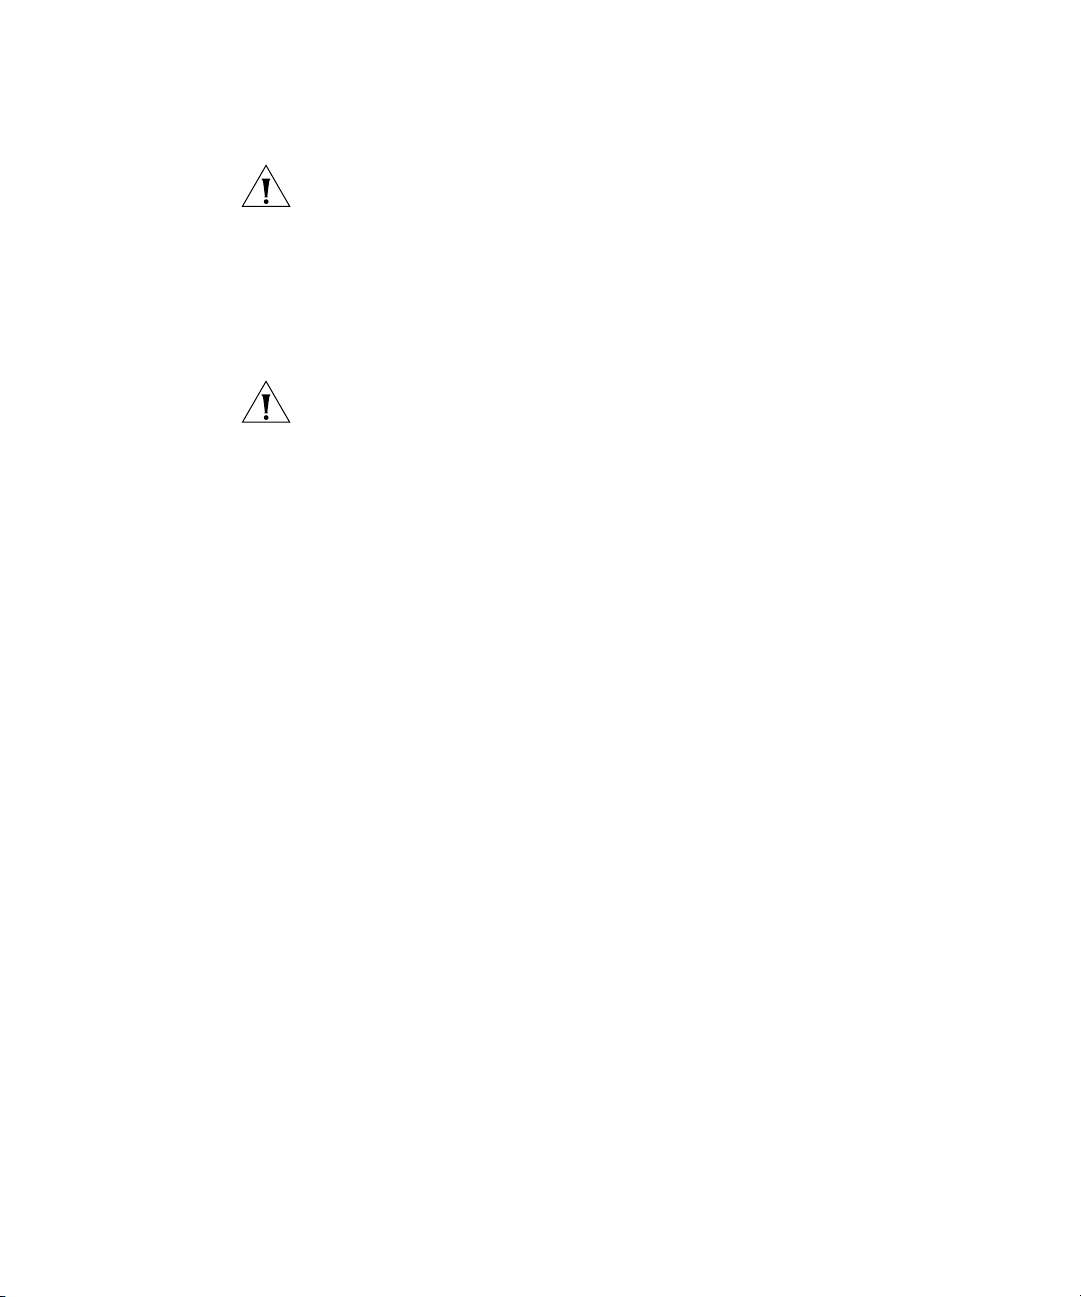
Monitor Tab — Explore Window
The Explore window shows the status of 3Com equipment within the
scope of the object selected in the Equipment or Sites section of the
Organizer panel.
If you select a Mobility Domain or WX switch, 3WXM presents a
link-based view of the equipment. You can hide or redisplay the MAP
access point connections on a WX switch by clicking on the minus
sign or plus sign in the right corner of the object. Likewise, you can
hide or redisplay the WX switches in a Mobility Domain.
Page 54
54 CHAPTER 2: WORKING WITH THE 3WXM USER INTERFACE
If you select a MAP access point or a radio, the floor plan containing
the MAP or radio is displayed. The floor plan also is displayed if you
select the floor or you select a wiring closet, coverage area, MAP, or
radio on the floor.
Page 55

Content Panel 55
Floor views are available only if you add the floor to the site information
in the network plan.
In either view, the operational status of 3Com equipment is indicated by
the following colors:
Green — Up
Yel lo w — Up (but with minor service degradation)
Orange — Up (but with major service degradation)
Red — Down
Blue — Unknown
You can double-click on an object to drill down to more detailed
information about the object.
Page 56
56 CHAPTER 2: WORKING WITH THE 3WXM USER INTERFACE
You can edit configuration parameters for an object displayed in the
Explore window by right-clicking on the object’s icon and selecting Edit.
To create a new instance of an object (where applicable), right-click on
the object’s icon and select Insert.
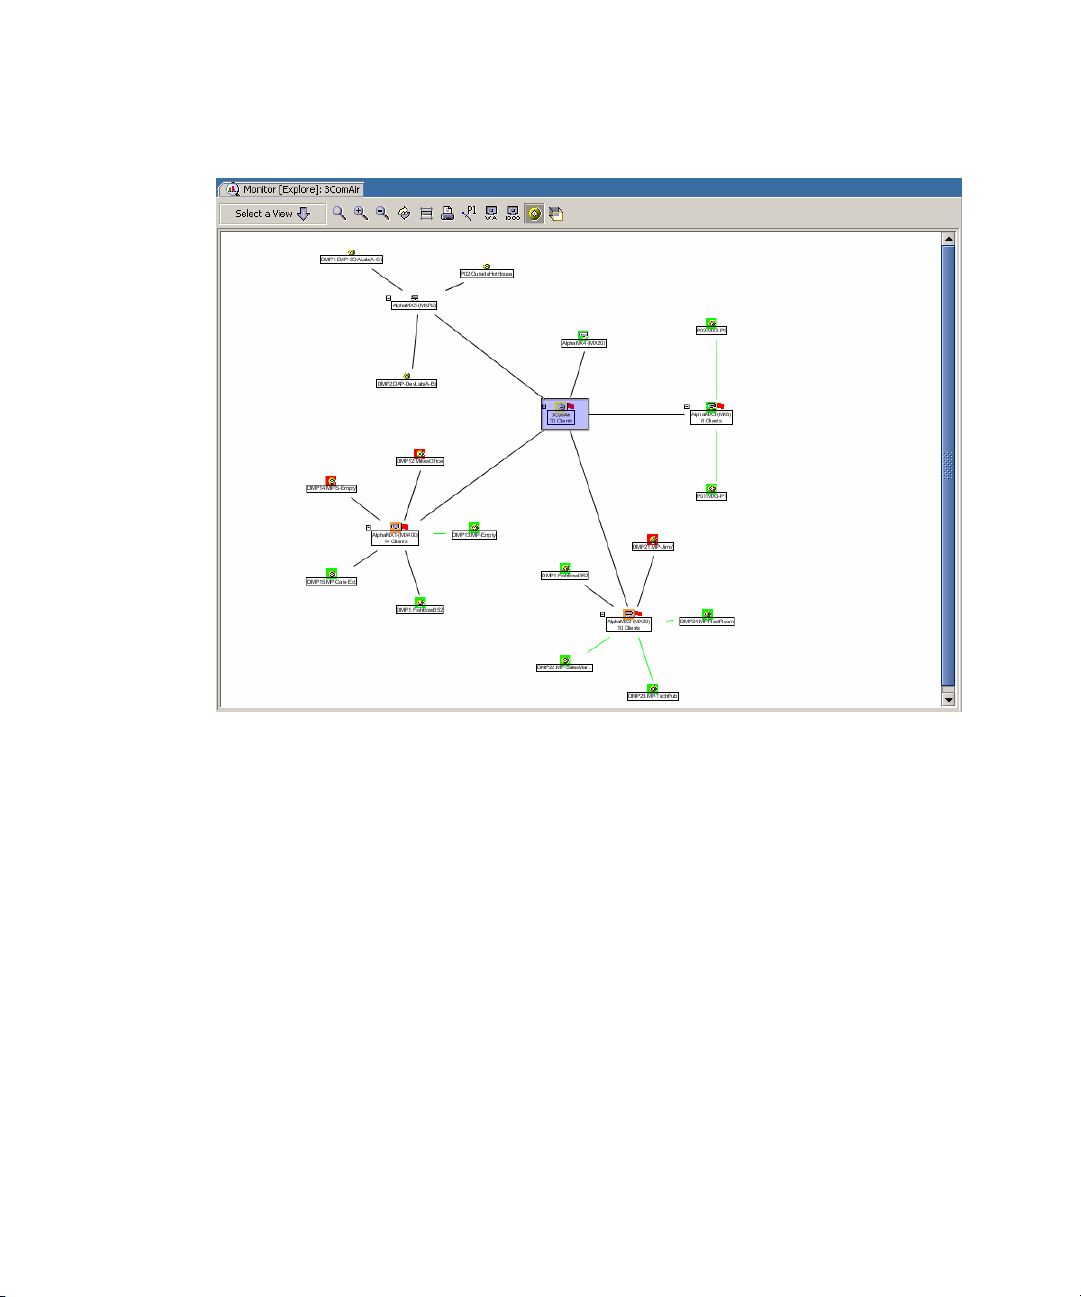
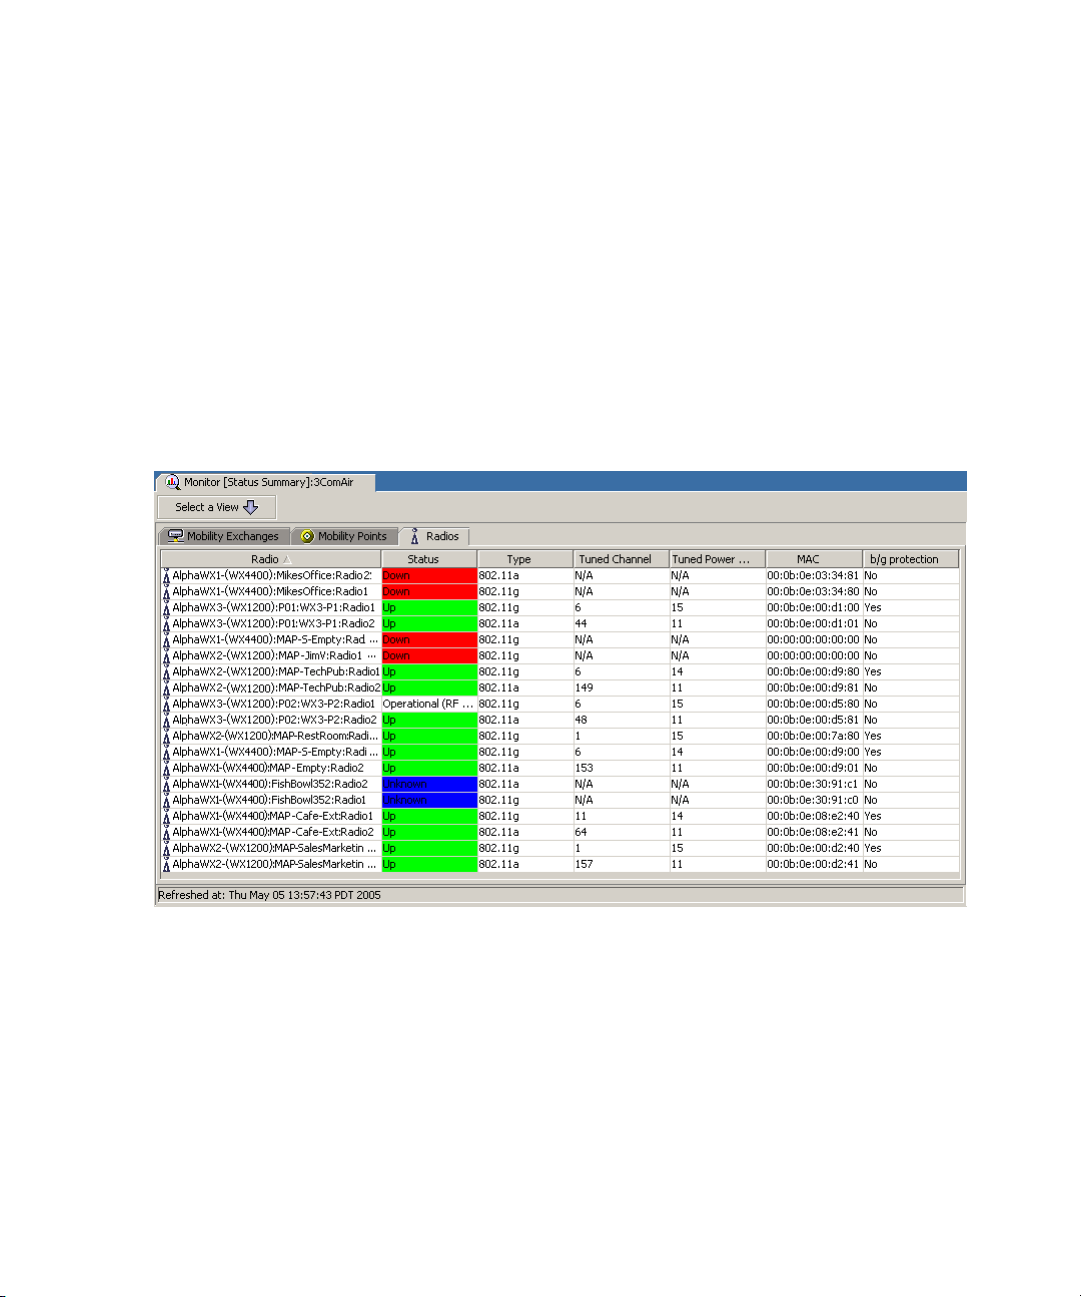
Monitor Tab — Status Summary Window
The Status Summary window shows the operational status of 3Com
equipment (WX switches, their MAP access points, and MAP radios). The
Status column shows the equipment status, using the same colors as the
Explore window. Additional information is displayed for each equipment
type.
You can double-click on a row in the Status Summary window to display
more information about the object in the Explore window:
Double-click on a row in the Wireless Switches tab to display the
switch and its MAP access points.
Double-click on a row in the Managed Access Points or Radios tab to
display the floor plan where the MAP or radio is located, and the
operational status of each MAP on that floor.
Page 57
Content Panel 57
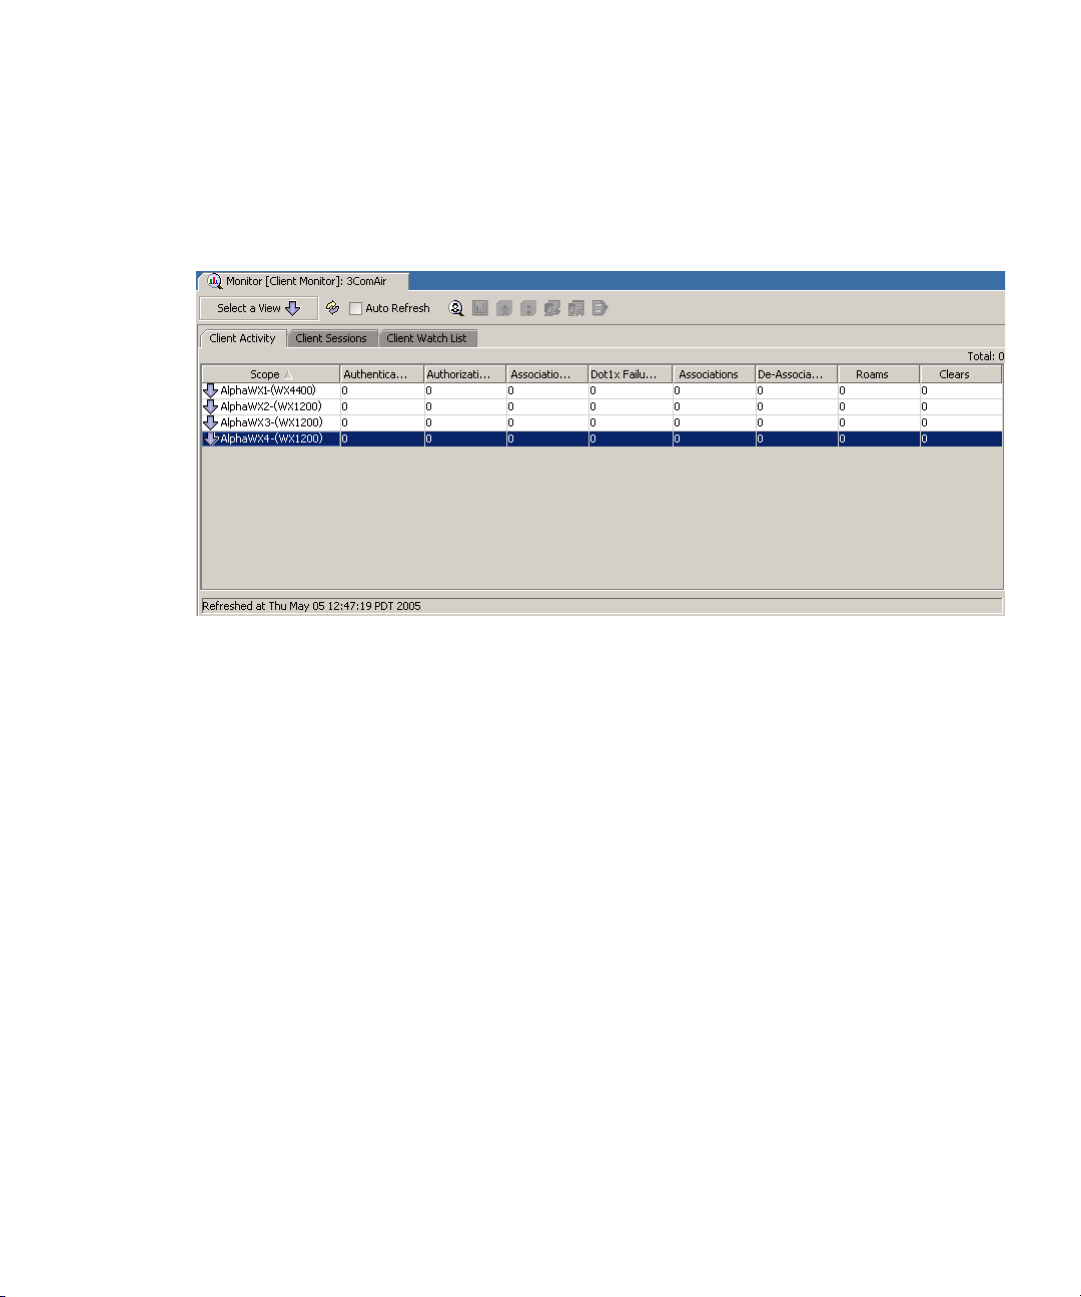
Monitor Tab — Client Monitor Window
The Client Monitor window shows detailed information about client
activity on the network.
Client information is displayed in the following tabs:
Client Activity — displays association and 802.1X information for
the clients
Client Sessions — lists bandwidth, signal-to-noise-ratio (SNR), and
received signal strength indicator (RSSI) information for client sessions
Client Watch List — lists the clients 3WXM is tracking. You can set
up a watch list of clients you want 3WXM to track. 3WXM collects
session and roaming information for the clients.
Page 58

58 CHAPTER 2: WORKING WITH THE 3WXM USER INTERFACE
Monitor Tab — RF Monitor Window
The RF monitor window shows detailed RF information for each radio.
Radio information is displayed in the following tabs:
RF Neighborhood — lists the other transmitting devices that the
radio can hear.
SSID-BSSID Mapping — lists the MAC address associated with each
SSID the radio can hear
Activity — lists log messages for the radio
RF Environment — lists 802.11 statistics for the radio
Page 59

Content Panel 59
Monitor Tab — RF Trends Window
The RF trends window shows current and historical 802.11 statistics and
shows graphs of the data. You can graph absolute values or deltas from
previous values.
Page 60

60 CHAPTER 2: WORKING WITH THE 3WXM USER INTERFACE
Managed Devices Tab The Managed Devices tab enables you to examine and reconcile
configuration differences between WX switches in the live network and
their counterparts in a network plan.
You can display this tab in the following ways:
Click on Local Changes or Network Changes in the alerts section of
the Organizer panel.
Select Manage > Managed Devices from the main 3WXM toolbar.
Page 61

Content Panel 61
Verification Tab The Verification tab enables you to troubleshoot configuration issues on
WX switches in the network plan or in the live network. Warning or error
messages are displayed to indicate issues.
Warning and
error messages
Resolutions
Error/Warning Details
You can fix configuration errors and verify the results. If you want to
instead disregard specific error or warning messages, you can disable the
messages.
The verification tab has two pages — a Config Verification page and a
Network Verification page. The Config Verification page checks the
configuration of 3Com equipment in the network plan. The Network
Verification page checks the configuration of 3Com equipment running
in the network.
Page 62

62 CHAPTER 2: WORKING WITH THE 3WXM USER INTERFACE
Events Tab The Events tab displays log messages for 3WXM, the monitoring service,
and for WX switches.
To display the Events tab, select Monitor > Events from the main
3WXM toolbar.
Page 63

Content Panel 63
Rogue Detection Tab The Rogue Detection tab lists information about non-3Com wireless
devices detected in the Mobility Domain. The Mobility System Software
(MSS) running on WX switches continually performs RF scans to detect
rogue access points. Normally, if a scan detects a third-party access point,
MSS assumes the access point is a rogue and issues countermeasures
against it. You can identify friendly access points and prevent
countermeasures from being used against them by adding them to the
third-party APs section.
Unless you identify a third-party wireless device as a known device or
third-party AP, WX switches consider the device to be a rogue AP and
issue countermeasures against the device to prevent clients from being
able to use it.
You can display data about rogues that are currently in operation as well
as currently inactive rogues that were detected in the past. You can even
display the estimated physical location of a rogue.
To display the Rogue Detection tab, select Monitor > Rogue Detection
from the main 3WXM toolbar.
Page 64

64 CHAPTER 2: WORKING WITH THE 3WXM USER INTERFACE
Information Panel The Information panel displays details about the object selected in the
Organizer panel. For example, if a WX switch is selected, details about
the switch are displayed.
Information panel
Page 65

Configuration Wizards 65
Configuration Wizards
3WXM provides configuration wizards for configuring site information
and 3Com equipment. The wizards provide a general workflow for
configuration and enable you to easily set or change the parameters for
an object.
You display the configuration wizard for an object by selecting the object
in the Organizer panel, then right-clicking and selecting Insert (to create
a new one) or Edit (to edit the one that is selected).
For example, to edit RADIUS configuration settings for a WX switch,
select RADUIS (under AAA), then right-click and select Edit. The Modify
RADUIS wizard appears.
Wizard pages. Workflow is from left to right.
Most wizards contain multiple pages, and buttons at the top of the
wizard to allow direct access to the pages. You also can click the Next
and Previous buttons at the bottom of the wizard to navigate among
the wizard’s pages.
The Finish button saves the changes you make in the wizard.
Page 66

66 CHAPTER 2: WORKING WITH THE 3WXM USER INTERFACE
CAUTION: None of the information you enter in a wizard is saved until
you click Finish. If you want to stop working in a wizard and return to
finish later, click Finish to save your work before closing the wizard.
Some pages have buttons that open additional wizards. For example, the
RADIUS Server page contains buttons to add, change, copy and paste, or
delete a RADIUS server.
Clicking the New RADIUS Server button opens the Create RADIUS
Server wizard.
Page 67

Configuration Wizards 67
The Modify RADIUS Server wizard remains open in the background. After
you enter information in the Create RADIUS Server wizard and click Finish,
the Modify RADIUS Server returns to the foreground. The new server
added with the Create RADIUS Server wizard appears in the server list.
Page 68

68 CHAPTER 2: WORKING WITH THE 3WXM USER INTERFACE
Most of the configuration wizards in 3WXM are similar to the Modify
RADIUS Server wizard. Two of the wizards are more complex:
Building wizard — Enables you to import or create floor drawings,
characterize RF obstacles, plan wireless coverage, and generate work
orders for 3Com equipment installation. (See “Planning the 3Com
Mobility System” on page 95.)
WX Switch wizard — Enables you to modify a switch’s configuration
parameters. (See “Configuring WX System and Administrative
Parameters” on page 179.)
Each of these wizards contains options that display other wizards such as
the Modify RADIUS Server wizard.
Reports The Reports option of the main toolbar enables you to generate reports
for network clients, RF usage, rogue devices, and 3Com equipment.
3Com equipment reports:
Inventory Report
Mobility Domain Configuration
WX Configuration
Network client reports:
Client Summary
Client Details
Client Errors
Watch List Client
RF reports:
Network Usage
RF Summary
Radio Details
Rogue reports:
Rogue Details
Rogue Summary
Work order
Page 69
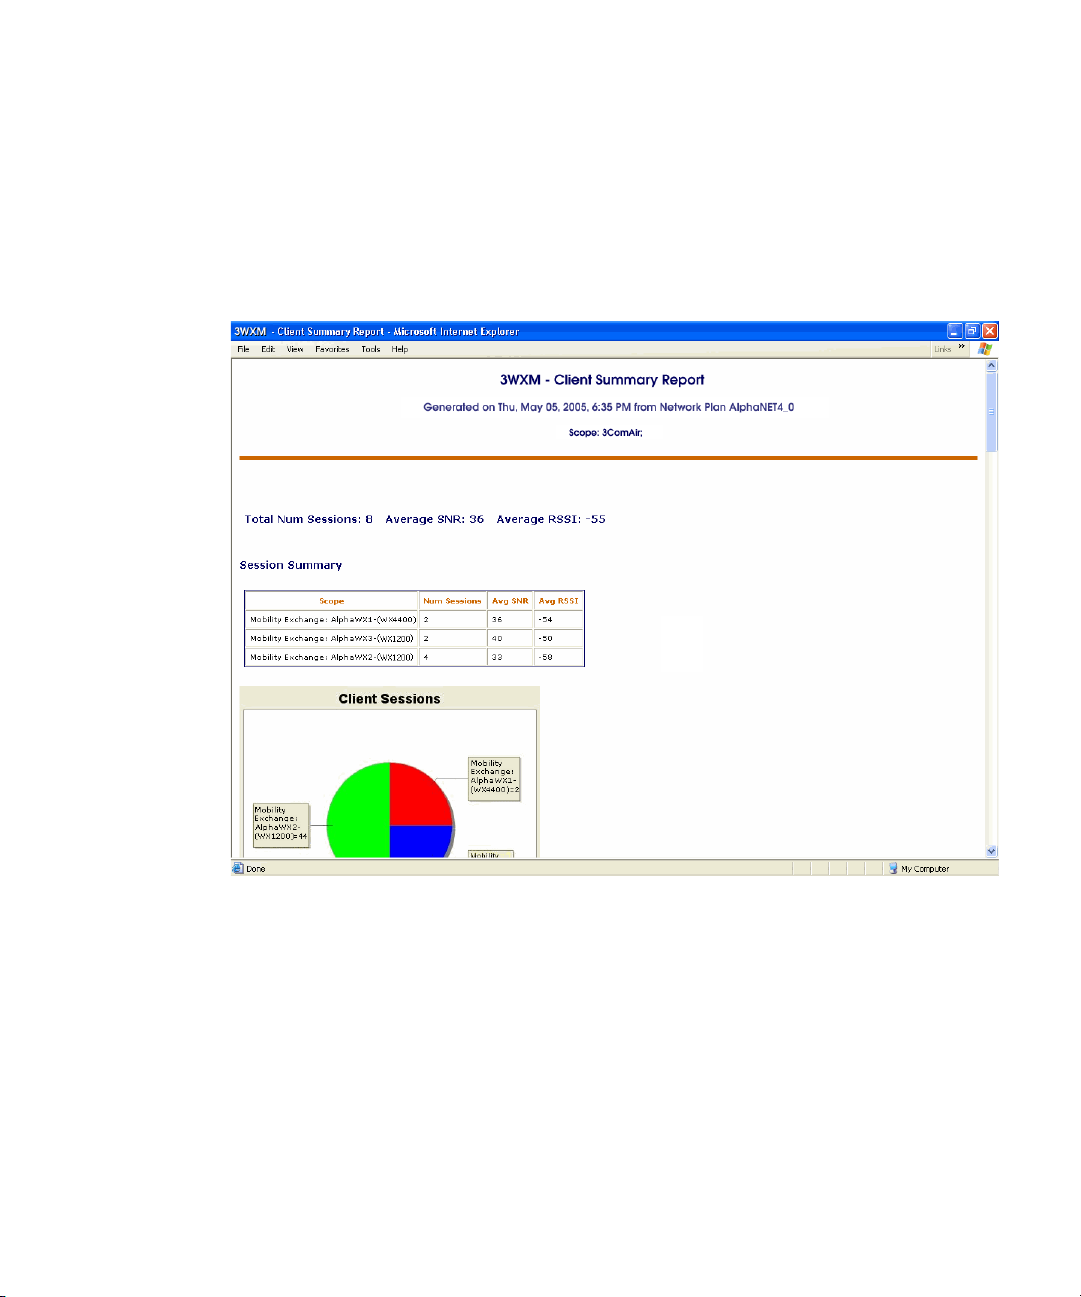
Reports 69
When you generate a report, you can specify the scope of the report and
the location where 3WXM saves the report. Some reports also have
additional options. 3WXM saves the reports in HTML format.
Here is an example of a client summary report.
Page 70

70 CHAPTER 2: WORKING WITH THE 3WXM USER INTERFACE
Copying and Pasting Objects
Copy and Paste To create a new object with the copy and paste options:
3WXM allows you to duplicate objects, using the copy, paste, and paste
replace options.
Use the copy and paste options to create a new object.
Use the copy and paste replace options to replace an object with a
copy of another instance of the same type of object.
You can copy and paste objects selected in the Organizer panel or in the
Building wizard.
When pasting or replacing an object, the wizard for the new object is
automatically started so that you can edit object properties. To
successfully create the object, you must change its unique attributes (for
example, WX name). If the object is a parent of other objects, all the child
objects are also created or replaced (depending on the paste action).
After an object is copied into the buffer, the object can be pasted or
replaced as many times as required.
1 Select the object you want to copy in the Organizer panel.
2 Right-click on the object and select Copy, or select Edit > Copy from the
main toolbar.
3 Select the parent object where you want the copy to go.
4 Right-click on the parent object and select Paste, or select Edit > Paste
from the main toolbar.
The new copy of the object appears under the parent object.
For example, to create a new WX switch in a Mobility Domain:
1 Expand the view of a Mobility Domain in the Organizer panel to display
the WX switches in the Mobility Domain.
2 Select the switch you want to copy, then right-click on the switch and
select Copy.
3 Select the Mobility Domain where you want the copy to appear, then
right-click and select Paste.
Page 71

Copying and Pasting Objects 71
Copy and Paste
Replace
To replace an object with the copy and paste replace options:
1 Select the object you want to copy in the Organizer panel.
2 Right-click on the object and select Copy, or select Edit > Copy from the
main toolbar.
3 Select the object you want to replace.
4 Right-click on the parent object and select Paste Replace, or select Edit
> Paste Replace from the main toolbar.
The configuration wizard for the new copy appears.
5 Make configuration changes to the new object if required, then click
Finish to close the wizard and save the changes. (Generally, you will
need to make some configuration changes in order to make the object
unique. Otherwise, 3WXM cannot complete the paste operation.)
After you click Finish to close the configuration wizard, the new object
appears.
For example, to copy a RADIUS server from one WX switch to another:
1 Expand the view of a Mobility Domain in the Organizer panel to display
the WX switches in the Mobility Domain.
2 Select the switch you want to copy, then right-click on the switch and
select Copy.
3 Select the Mobility Domain where you want the copy to appear, then
right-click and select Paste Replace.
The Modify WX switch wizard appears.
4 Edit the switch name and other parameters as needed. (For example, you
will need to modify the switch name as well as its IP interfaces and system
IP address.) Then click Finish to close the wizard and complete the copy.
The new switch appears under the Mobility Domain.
Page 72

72 CHAPTER 2: WORKING WITH THE 3WXM USER INTERFACE
Enabling Keyboard Shortcut Mnemonics (Windows XP Only)
Keyboard shortcut mnemonics (also called action mnemonics) in 3WXM
underline shortcut characters in action names in toolbars and menus.
When a character is underlined, you can press the corresponding letter
key on the keyboard to display the toolbar menu or perform the menu
action. Depending on your Windows XP desktop setup, 3WXM might not
show action mnemonics.
To enable action mnemonics:
1 Right-click on the desktop, and select Properties.
2 Click the Appearance tab. The Display Properties dialog box appears.
3 Click Effects.
Page 73
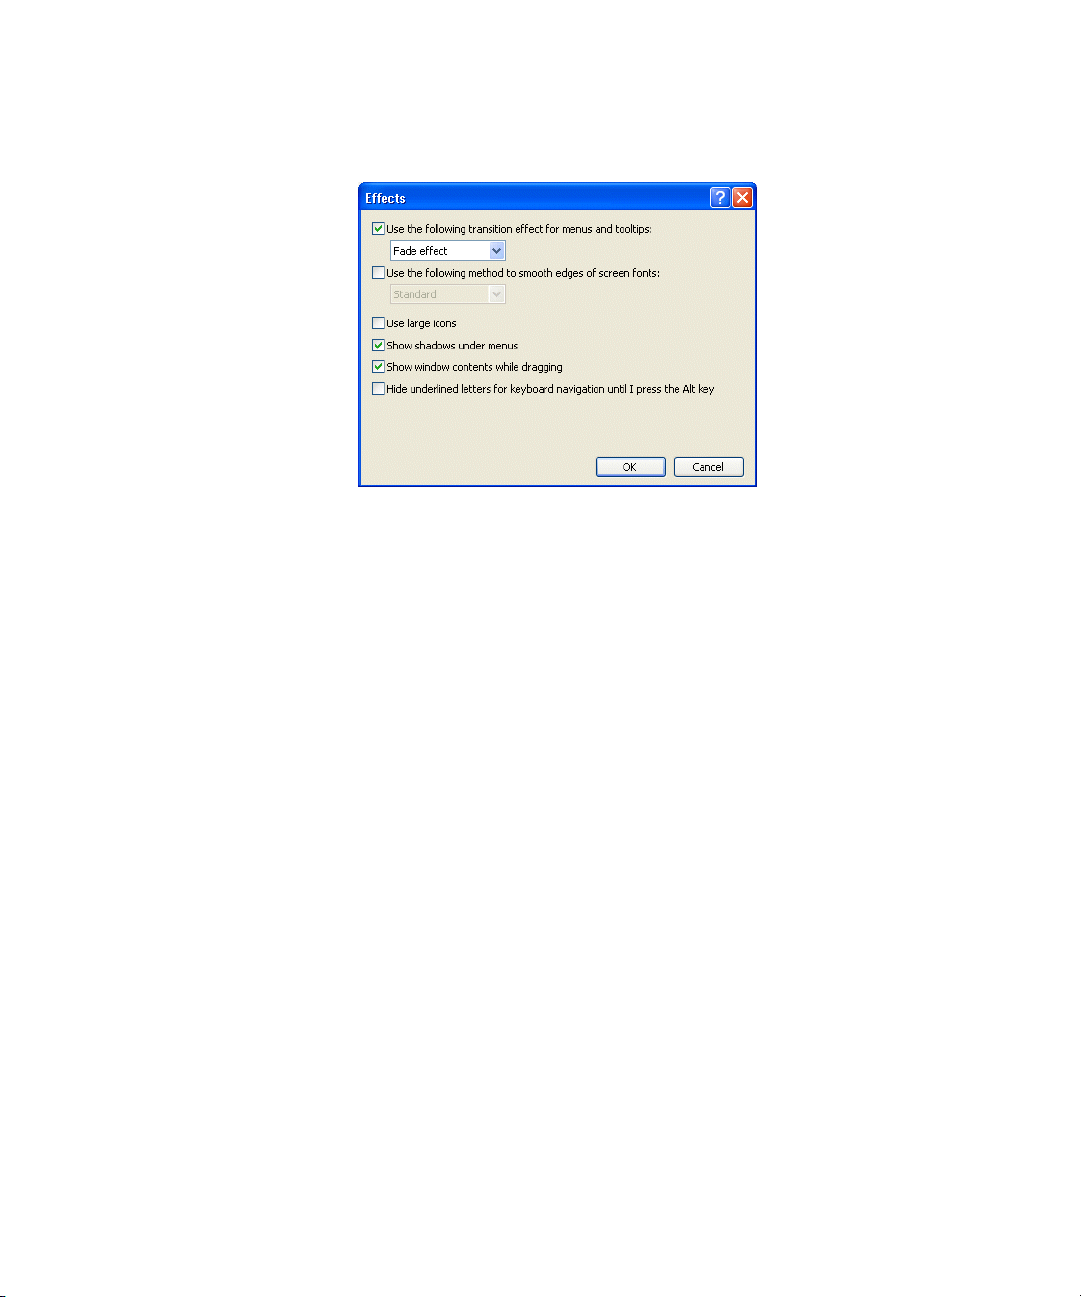
Enabling Keyboard Shortcut Mnemonics (Windows XP Only) 73
4 Clear the box labeled Hide underlined letters for keyboard
navigation until I press the Alt key.
Clearing this option allows programs to show the underlined character
for mnemonics in 3WXM.
5 Click OK.
6 In the Display Properties dialog box, click OK.
Page 74

74 CHAPTER 2: WORKING WITH THE 3WXM USER INTERFACE
Page 75

GETTING STARTED
3
This chapter contains information about starting 3Com Wireless LAN
Switch Manager (3WXM), restricting access to 3WXM, creating and
managing network plans, and defining a Mobility Domain.
Starting 3WXM The following steps describe how to start 3WXM.
1 Select Start > Programs > 3Com > 3WXM > 3WXM, or double-click
the 3WXM icon on the desktop.
If you are starting 3WXM for the first time, or you have not entered
license information previously, the License wizard appears.
2 If you are installing a licensed copy, select Standard Base Product and
click Next. Go to step 3.
If you are installing an evaluation copy, select Time Limited Evaluation
and click Next. Go to step 4.
3 Type the license key that was supplied with the 3WXM CD, and click
Next.
4 Click the Get Activation Key. A 3Com web page appears. Enter your
registration information (and the license key, if you are licensing a
purchased copy) in order to obtain an activation key.
5 Copy the activation key from the web page and paste it onto the
Activation Key box of the Activation Key page.
6 If you plan to manage 10 or fewer wireless LAN switches, click Finish and
go to step 11.
If you are activating an evaluation copy, you can manage up to 10
wireless LAN switches. Click Finish and go to step 11.
If you plan to manage more than 10 wireless LAN switches, click Next to
display the following page and go to step 7.
Page 76

76 CHAPTER 3: GETTING STARTED
7 Type the upgrade license key in the License Key box and click Next.
8 Click the Get Activation Key to access the product activation key for
your upgrade license. Register your upgrade license in order to obtain its
activation key.
9 Copy the activation key for the upgrade license from the web page and
paste it into the Activation Key box of the Activation Key page.
10 Click Finish.
11 After you enter or skip the license information, the 3WXM main window
and the 3WXM Services Connection dialog box appear.
12 In the 3WXM Services Connection dialog box, enter the IP address of a
host running 3WXM Services (leave this as 127.0.0.1 if the services are
being run on this host), and then click Next.
13 If the 3WXM Service is installed on the same machine as the one you are
using to run 3WXM, enter 127.0.0.1 as the IP address. This is a standard
IP loopback address.
14 After a connection is established to the specified 3WXM Services host, do
one of the following:
Edit the currently loaded network plan. The first time you start 3WXM,
a network plan called default is opened.
Create a new network plan.
If you select this option, wizard pages guide you in setting up a
network plan. For more information, see “Creating and Managing
Network Plans” on page 80.
Page 77

Restricting Access to 3WXM 77
Switch to an existing network plan. You can open the sample plan
included with 3WXM or a plan that you or another 3WXM user has
saved on the 3WXM Services host.
3WXM comes with a sample plan called 3ComStarterExample. This
plan contains a two-floor building with two WX1200 switches and
two AP2750 MAP access points on each switch. Each switch and its
MAPs provide coverage for a floor. The 3Com equipment is
configured to provide both clear (unencrypted) and secure (802.1X)
wireless access.
To open an existing network plan, select File > Switch Network Plan
and select the network plan from the list of available network plans.
3WXM connects to the 3WXM Services host and opens the specified
network plan on the server. See “Opening a Network Plan” on
page 84 for more information.
Restricting Access to 3WXM
This section describes how to restrict access to the 3WXM client
application.
To restrict access to the 3WXM monitoring service, see “Verifying that the
3WXM Client is Receiving Service Data” on page 485.
By default, all users who have been successfully authenticated to a system
with 3WXM installed on it can run 3WXM. You can restrict the users
allowed to access 3WXM on a system and define their access privileges
by creating three types of 3WXM user accounts:
Administrator — This account can monitor the network, configure
the network, and administer 3WXM. When creating an administrator
account, you must assign an administrator password, which you are
required to provide the next time you configure access privileges.
Provision — This account can configure and monitor the network.
Monitor — This account can only monitor the network. When users
with a monitor account open a network plan, they can see
configuration changes that have been deployed to the network. Any
configuration changes that have not been deployed are not visible.
The 3WXM user accounts you create must also exist in the Windows domain
or local operating system. Otherwise, those users cannot start 3WXM.
Page 78

78 CHAPTER 3: GETTING STARTED
Creating an
Administrator
Account
Before you can restrict user access to 3WXM, you must create an
administrator account. After creating an administrator account, you can
create provision or monitor accounts.
To create an administrator account:
1 Select Tools > 3WXM Services Setup. The 3WXM Services Setup dialog
box appears.
2 In the Access Control section of the dialog box, de-select Allow all
users.
The Add Account dialog box appears. The name of the user currently
logged in appears in the Account Name box.
Page 79

Restricting Access to 3WXM 79
3 Type a new password for the administrator (1 to 80 alphanumeric
characters, with no spaces or tabs). The password is case-sensitive.
4 Type the administrator password again for verification.
5 Click OK.
6 In the 3WXM Services Setup dialog box, click Save to save the changes.
Creating Provision or
Monitor Accounts
Deleting 3WXM User
Accounts
After creating an administrator account, you can create a provision or
monitor accounts.
To create a provision or monitor account:
1 Select Tools > 3WXM Services Setup. The 3WXM Services Setup dialog
box appears.
2 To add a provision user account, click Add Provision Account. To add a
monitor account, click Add Monitor Account. The Add Account dialog
box appears.
3 Type the name of a user account that has access to the system.
4 Type a new password for the administrator (1 to 80 alphanumeric
characters, with no spaces or tabs). The password is case-sensitive.
5 Type the administrator password again for verification.
6 Click OK.
7 In the 3WXM Services Setup dialog box, click Save to save the changes.
To delete a 3WXM user account:
1 Select Tools > 3WXM Services Setup. The 3WXM Services Setup dialog
box appears.
2 Select a user account from the Authorized Users list.
3 Click Remove an Account. The account is deleted.
4 In the 3WXM Services Setup dialog box, click Save to save the changes.
Page 80

80 CHAPTER 3: GETTING STARTED
Disabling Access
Control
Creating and Managing Network Plans
If you have enabled access control for 3WXM, you can disable access
control. This allows all users who have successfully authenticated to the
system on which 3WXM is installed to run 3WXM.
If you disable access control, the permissions and account types are
deleted from 3WXM. These deletions have no effect on the Windows
user accounts.
To disable access control:
1 Select Tools > 3WXM Services Setup. The 3WXM Services Setup dialog
box appears.
2 Click Allow all users. All 3WXM accounts that were created are deleted.
3 In the 3WXM Services Setup dialog box, click Save to save the changes.
A network plan is the workspace in 3WXM you use to design a 3Com
network. In a network plan, you define components of the network (WX
switches, MAP access points, and optionally third-party access points).
You must create a network plan before you can configure or manage WX
switches or monitor network data.
A network plan allows modular management of large networks based on
organizational or geographical boundaries. For example, a network plan
can represent a campuswide network. You also can define a physical
representation of the network (sites, buildings, and floors). In this case,
you can import drawings of your floor plans into the network plan or
draw plan details manually. You can then identify the RF characteristics
by identifying RF objects.
3Com recommends that you limit a network plan to a single campus or
Mobility Domain.
Different countries have different regulatory limits for 802.11 radios.
Setting the country code in the network plan automatically enforces the
appropriate regulatory limits for all configured radios. The greatest
geographical scope for a network plan is a country, because a network
plan is based on one specific country code.
Page 81

Creating and Managing Network Plans 81
Creating a Network
Plan
To create a network plan
1 From the main 3WXM window, select File > New. The Options wizard
appears.
2 In the Network Plan Name box, type a name for the network plan. You
can use 1 to 60 alphanumeric characters, with no spaces, tabs, or any of
the following: slash (/), backslash (\), quotation marks (“ ”), asterisk (*),
question mark (?), angle brackets (< >), or vertical bar (|).
3 In the Country Code list, select the country where the network is to be
deployed.
You must select a country code before continuing.
4 In the Channel Set list, select the set of operating channels for any
802.11b/g MAP radios you plan to use.
The choices in the list are dependent on the country code you chose in
step 3. The channel numbers you select are used later in the planning
process when you assign channels to 802.11b/g radios.
You might be able to select a set of overlapping channels. However, in
some network layouts, using overlapping channels reduces network
performance.
Channel numbers used for 802.11a radios do not overlap and are not
listed at this stage of the planning process You can modify channel
selections for 802.11a and 802.11b/g radios later in the planning process
or allow WX switches to set the channels automatically.
Page 82

82 CHAPTER 3: GETTING STARTED
5 If 3WXM detected third-party (non-3Com) APs, they appear in the Third
Party AP list. If you want to include any of the listed third-party APs in
your network plan, click Choose Available and select the APs from the
list.
6 Click Next to save the network plan on the server and open it in 3WXM.
7 Do one of the following:
If you intend to use the physical planning features, click Next to
If you intend to configure and manage WX switches without using the
configure Site information. Go to “Planning the 3Com Mobility
System” on page 95.
physical planning features, go to “Configuring WX System and
Administrative Parameters” on page 179.
Managing Network
Plans
After creating a network plan, you can save, close, open, or delete it. You
can also share a network plan with others.
When you exit 3WXM or close a network plan, you are given the option
to save the changes on the server (the host running the 3WXM service) or
locally (the host on which you are working).
If you elect to save changes locally, the changes are not saved on the
server. In this case, the next time you start 3WXM, the software checks
whether your client still holds the lock for the network plan; if it does,
then the network plan with the locally saved changes is opened in
3WXM.
Saving a Network Plan
When you save a network plan, a directory with the same name as the
network plan is created in the config-db directory of the 3WXM
installation directory. You should regularly back up the config-db
directory so that you have additional copies of your network plans.
Page 83
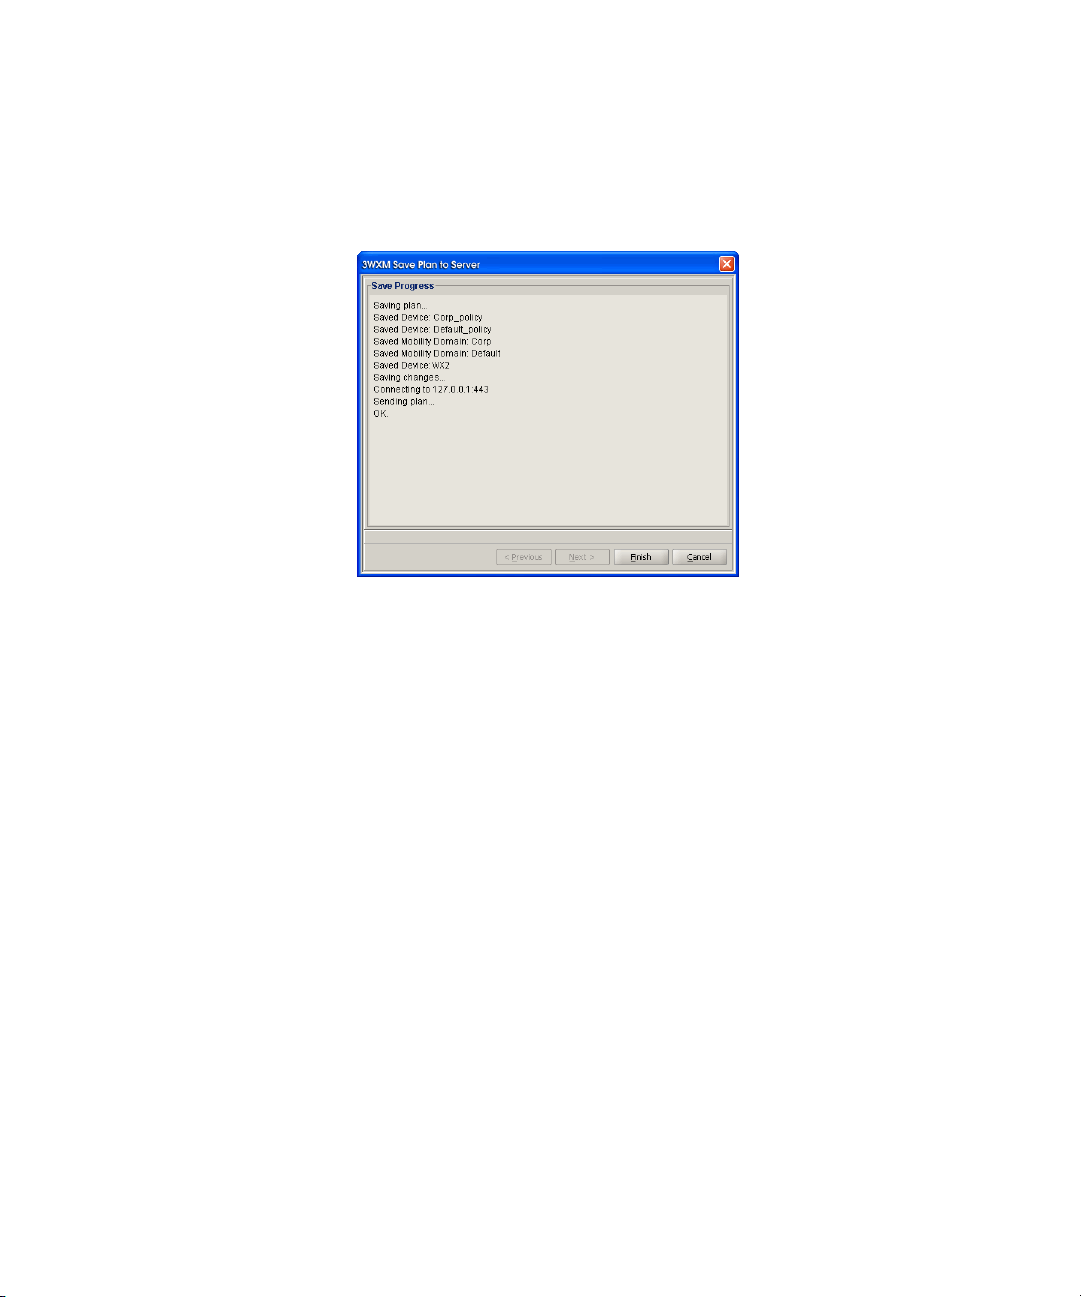
Creating and Managing Network Plans 83
To save a network plan:
1 In the main 3WXM window, select File > Save.
2 Click Finish.
You can also save a network plan with a new name.
Page 84
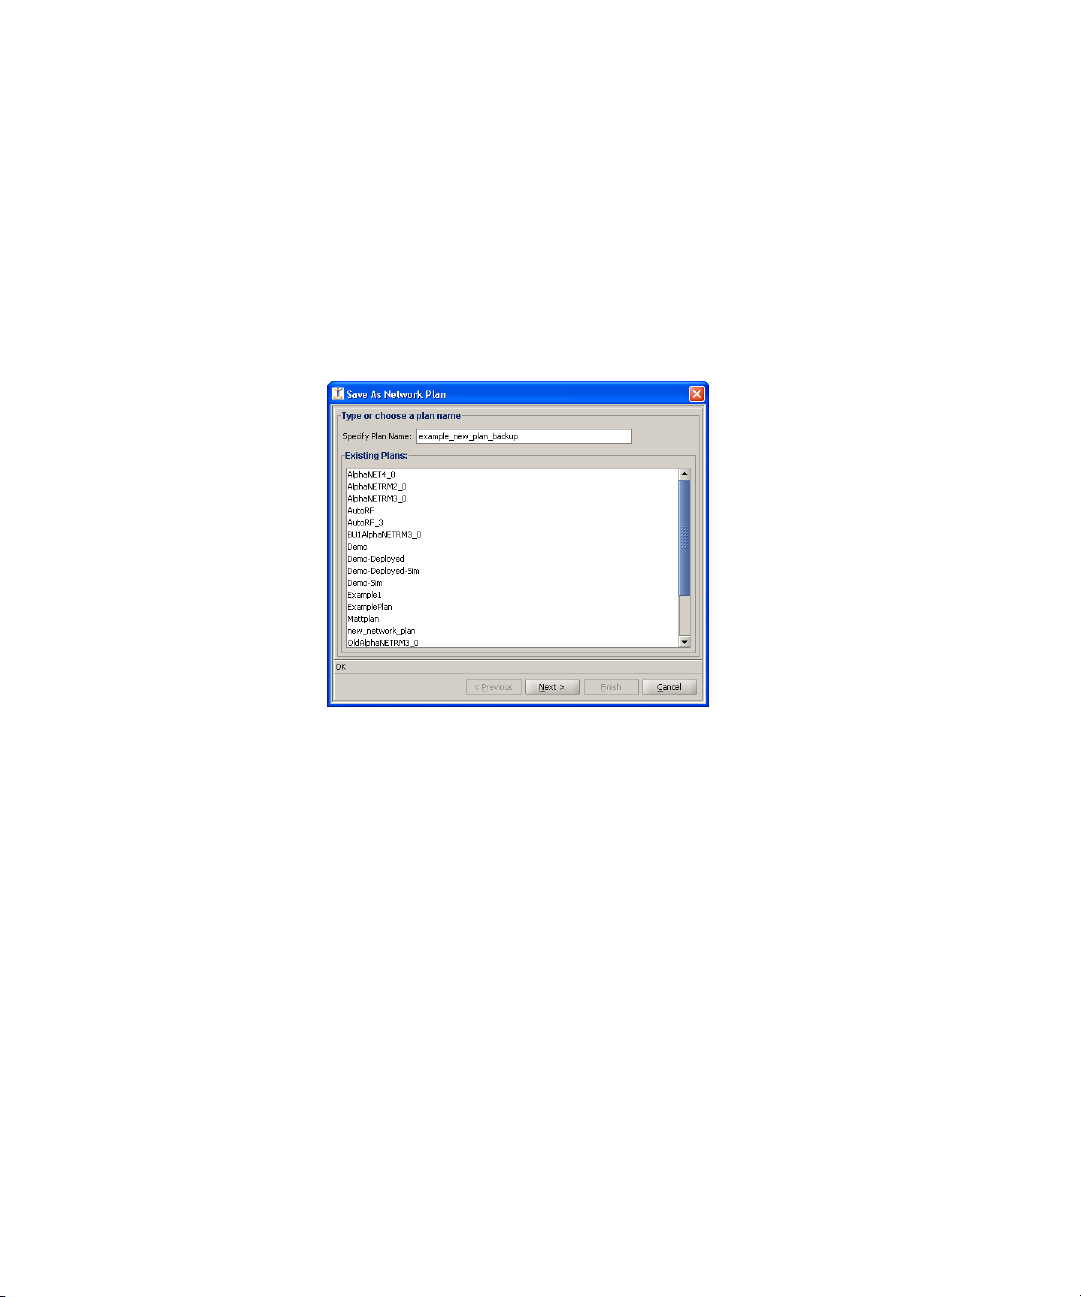
84 CHAPTER 3: GETTING STARTED
Saving a Network Plan with a New Name
You can save a network plan with a new name by using the Save As
feature.
To save a network plan with a new name:
1 In the main 3WXM window, select File > Save As. The Save As Network
Plan wizard appears.
Opening a Network
Plan
2 In Specify Plan Name, type a new network plan name.
Optionally, you can select an existing network plan name to replace it.
3 Click Next. You see the status of the save process.
4 Click Finish.
Network plans reside on a host running 3WXM services. You can open an
existing network plan by connecting to the 3WXM services host where
the plan resides, selecting File > Switch Network Plan, then specifying
the plan’s name in the dialog.
When you exit 3WXM or close a network plan, you are given the option
to save the changes on the server (the host running the 3WXM service) or
locally (the host on which you are working).
If you had previously saved changes to a network plan to the local client
(rather than to the server), then when you open the network plan,
3WXM checks whether your client still holds the lock for the network
plan; if the client does, then 3WXM opens the network plan with the
locally saved changes included.
Page 85
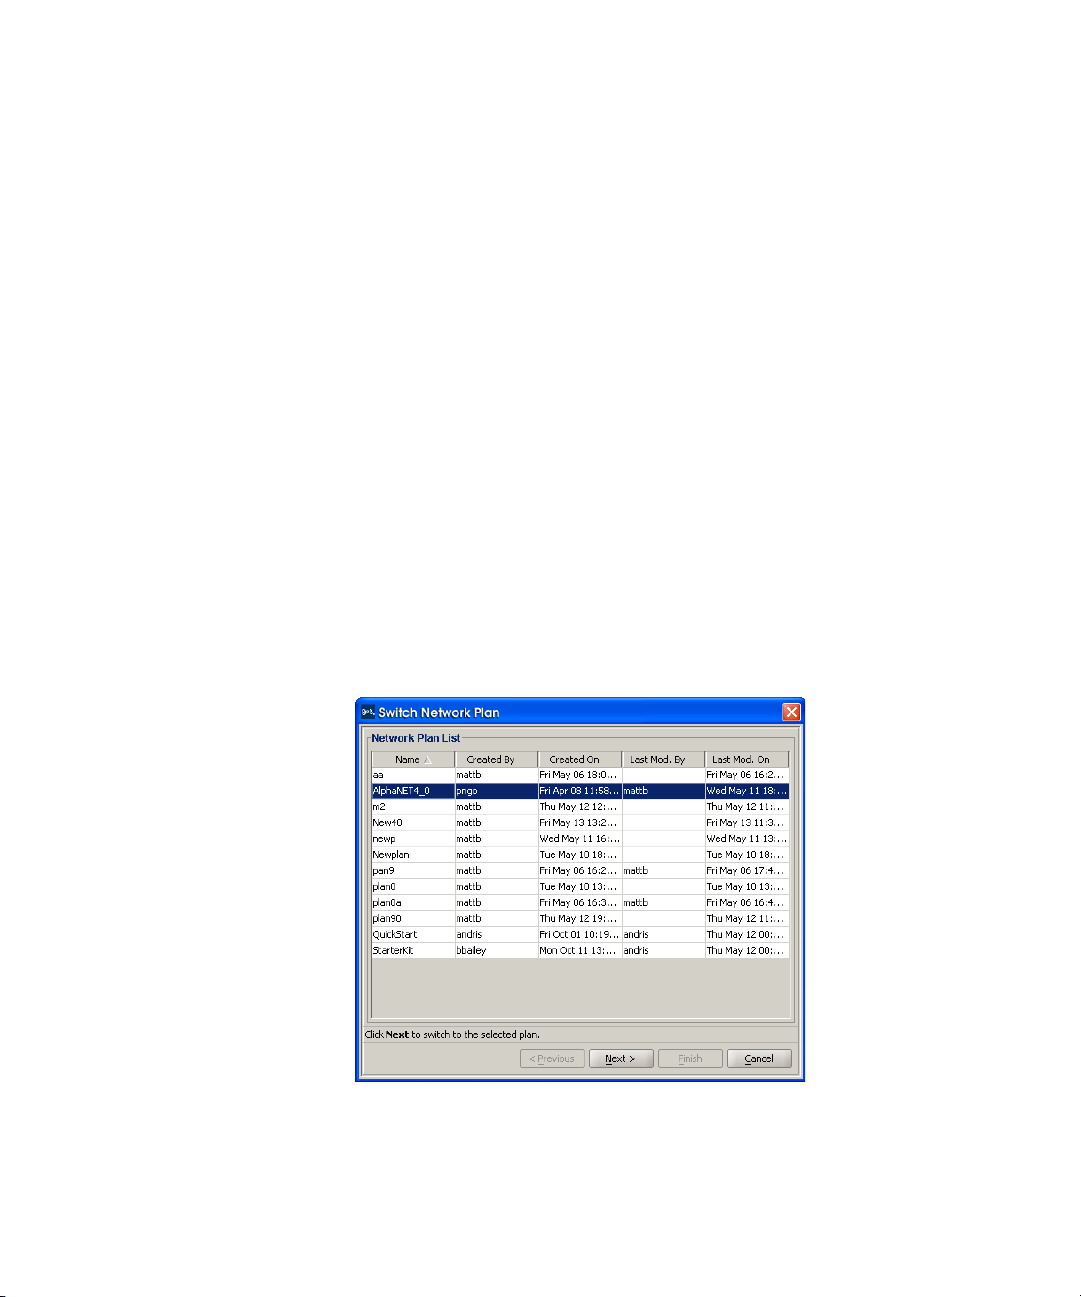
Creating and Managing Network Plans 85
You can open a network plan created in a previous version of 3WXM
with a later version of 3WXM. For example, if you created a network plan
in 3WXM Version 2.1, you can open the plan in 3WXM Version 4.0.
However, because a network plan created in 3WXM Version 2.1
manages WX switches running MSS Version 2.1, you cannot use new
features available in MSS Version 4.0 unless you upgrade the WX to MSS
Version 4.0.
To open a network plan:
1 Establish a connection to the 3WXM Services host on which the network
plan is saved.
You can do this by restarting 3WXM or selecting File > Open, and then
entering the IP address of the 3WXM Services host in the 3WXM Services
Connection dialog box.
2 After the connection is established with the 3WXM Services host, select
File > Switch Network Plan.
If any changes were made to the currently loaded network plan, you are
prompted to save them and close the file. The Switch Network Plan
dialog box appears.
3 Select the network plan you want to open and click Next.
3WXM establishes a connection to the host running 3WXM Services and
loads the specified network plan.
Page 86

86 CHAPTER 3: GETTING STARTED
Closing a Network
Plan
You can close a network plan at any time. If you have unsaved changes,
you are asked whether you want to save the changes. You can save the
changes on the server (the host running the 3WXM service) or locally (the
host on which you are working).
If you elect to save changes locally, the changes are not saved on the
server. In this case, the next time you start 3WXM, the software checks
whether your client still holds the lock for the network plan; if it does,
then the network plan with the locally saved changes is opened in
3WXM.
To close a network plan:
1 In the main 3WXM window, select File > Close or File > Exit.
If the network plan has no unsaved changes, the network plan is closed.
Otherwise, go to the next step.
2 Specify whether you want to save the changes since the network plan
was opened or cancel the close process.
If you choose to save the changes, you are prompted whether you want
to send them to the server or save them locally.
3 Do one of the following:
Select Send Changes to Server to save the network plan changes on
the host running the 3WXM service.
Select Save Changes Locally to save the network plan changes on
the local host running the 3WXM client.
Page 87
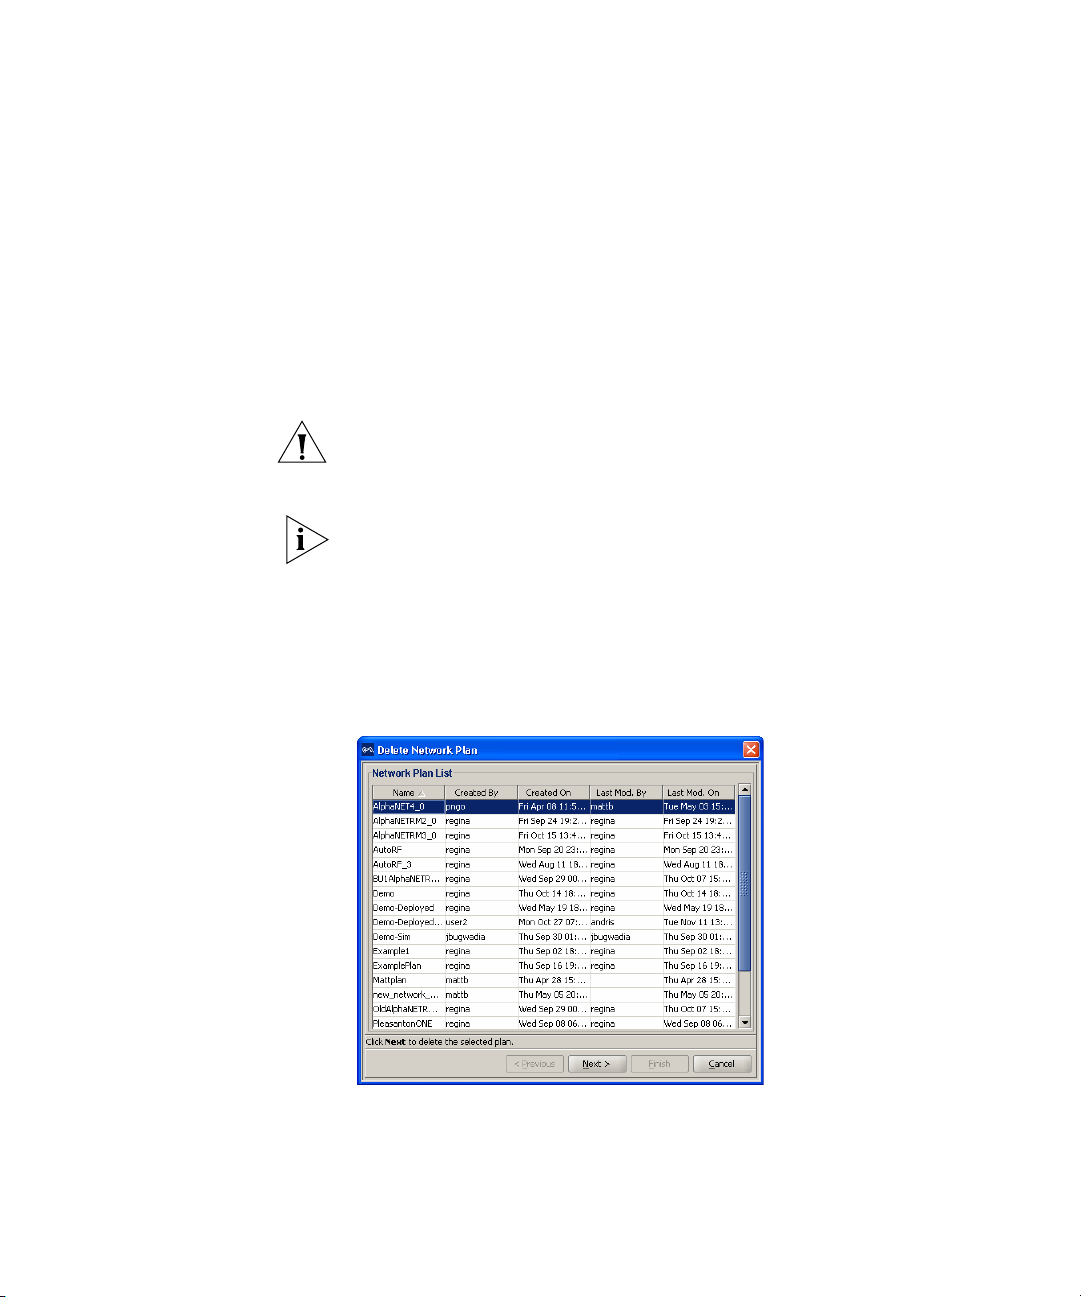
Creating and Managing Network Plans 87
If you select Save Changes Locally, the changes are not saved on the
server. In this case, the next time you start 3WXM, the software checks
whether your client still holds the lock for the network plan; if it does,
then the network plan with the locally saved changes is opened in
3WXM.
4 Click Next to save and close the network plan.
Deleting a Network
Plan
You can delete a network plan at any time.
CAUTION: The Delete Network Plan wizard has a Next button, but this
button does not lead on to any further deletion options. 3WXM deletes
the plan as soon as you click Next.
You cannot delete the currently active plan. To delete the active plan, first
use the File > Switch Network Plan option to select another plan to be
active, then delete the plan
To delete a network plan:
1 In the main 3WXM window, select File > Delete Network Plan. The
Delete Network Plan wizard appears.
2 Select the network plan you want to delete from the list.
3 Click Next. The network plan is deleted.
4 Click Finish.
Page 88
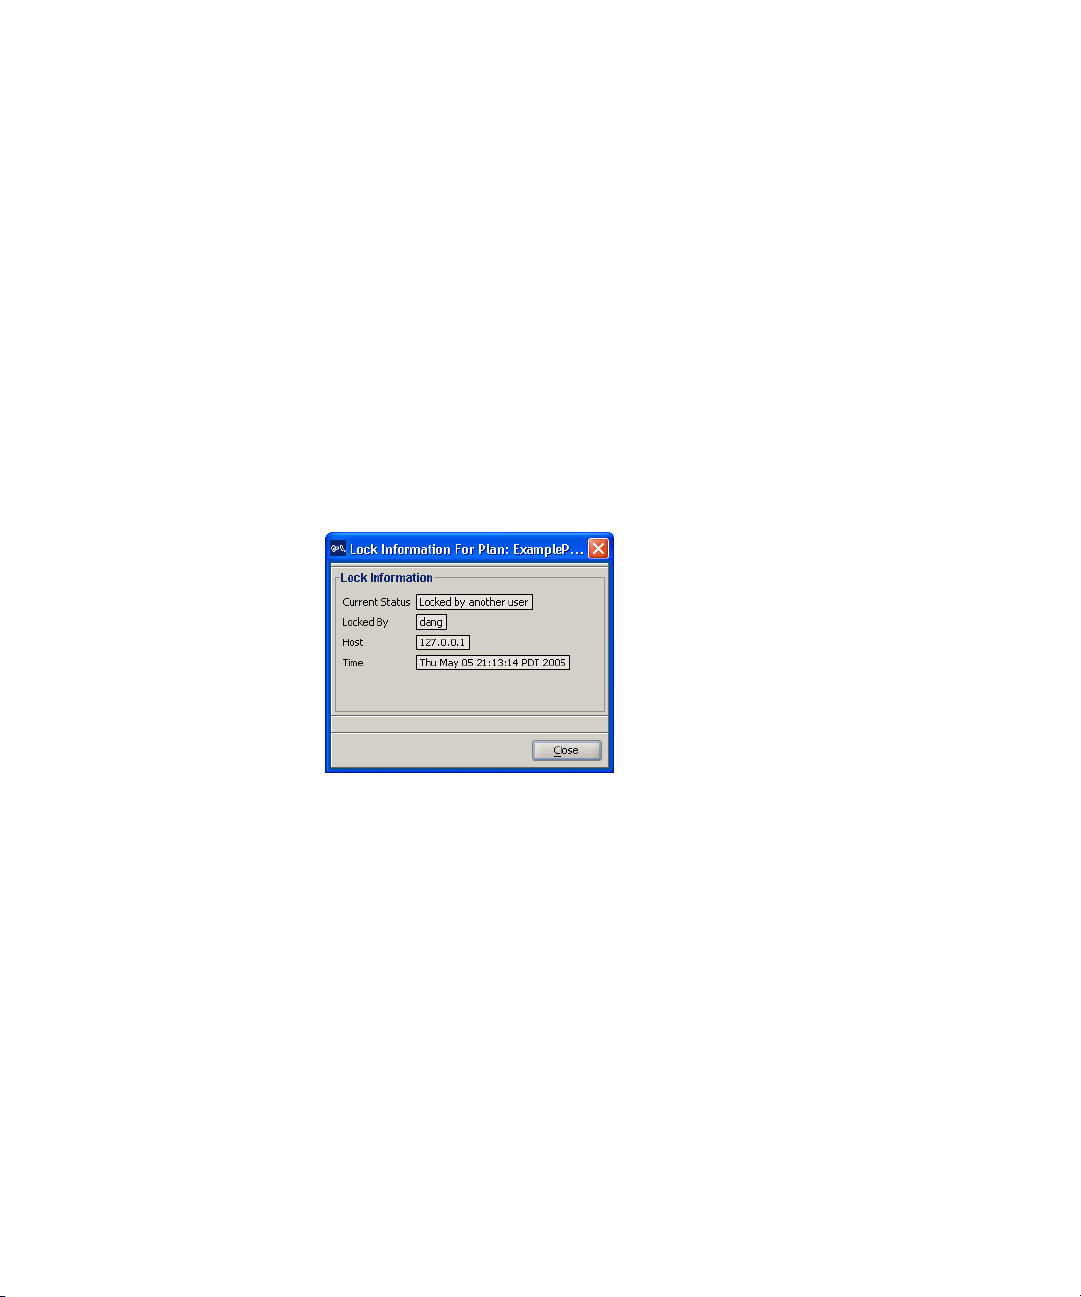
88 CHAPTER 3: GETTING STARTED
Sharing a Network
Plan
Since the 3WXM plan repository resides on a networked server (the host
running 3WXM Services), you can easily share access to network plans
among hosts running the 3WXM client.
When you make changes to a network plan, 3WXM locks it on the server.
Other 3WXM clients can still open the network plan, but the lock
prevents the other clients from modifying it while you are making
changes. The network plan remains locked until you save your changes,
after which the lock is released. Another client who has the network plan
open can then retrieve the changes you made, make their own changes,
and save the network plan on the server.
When a user with an administrator or provision account tries to open a
plan that is already locked by another user, 3WXM displays the Lock Info
page:
The Lock Info page indicates who has locked the network plan. You can
optionally override the user’s lock. Note that only a user with
Administrator privileges can override another user’s lock.
Page 89

Creating and Managing Network Plans 89
To override another user’s lock
1 Select To ol s > 3WXM Services Lock Management. The 3WXM
Services Lock Management dialog box appears.
2 Select the lock you want to delete and click on Delete Lock. (Only an
Administrator can delete a lock.)
3 A message is displayed indicating that the user whose lock you selected
will not be able to save their changes when you delete their lock. Click
Yes to confirm that you want to do this.
If you override the lock, 3WXM unlocks the network plan, and notifies
the other 3WXM users about the lock change. From this point on, the
former lock holder cannot save any current or future changes to the plan.
By default, 3WXM sends a message to all users who have the plan open
with monitor access to inform them when changes are saved to the plan.
In addition, when a plan is closed, 3WXM sends a message to each
monitor user, so that one of them can then open the plan for edit.
To disable notification:
1 In the main 3WXM window, select Tools > Preferences.
2 Click the Persistence tab.
3 To disable change notification, clear Plan Change Notification.
4 Click Close.
Page 90

90 CHAPTER 3: GETTING STARTED
Defining a Mobility Domain
A Mobility Domain is a collection of WX switches that work together to
support roaming users. One of the WX switches is defined as a seed
device, which distributes information to the other WX switches defined in
the Mobility Domain.
A Mobility Domain allows users to roam geographically from one WX
switch to another without losing network connectivity. Users connect as
a member of a VLAN through their authorized identities. If the native
VLAN for a user is not present on the WX to which the user connects, the
WX creates a tunnel to that VLAN.
A network plan can contain more than one Mobility Domain. Standalone
WX switches and third-party APs do not need to be configured within a
Mobility Domain.
You use 3WXM to create a Mobility Domain and define its seed device
and the other WX switches in the Mobility Domain. If you already have
WX switches installed and configured, you can upload the configurations
of the switches to 3WXM to have them included in a Mobility Domain.
Roaming Behavior For a client session to be considered a roaming session (and not a new
session), the following criteria must be met:
The client associates or reassociates with a MAP in the Mobility
Domain, and the client already has a session on a different MAP in the
Mobility Domain. The existing session can be in one of two states:
Active—The normal state for a client that has left radio range
without sending a request to disassociate
Deassociated—The state of a client that has sent an 802.11
disassociate frame, but has not roamed or aged out yet
Mobility Domain communications are stable. Generally, the
communications required for roaming are the same as those required
for VLAN tunneling. Roaming between ports on a WX is possible even
if the Mobility Domain is down.
Authentication, authorization, and accounting (AAA) on the MAP to
which the client roams is successful on the first attempt. An
authentication or authorization failure clears the client session.
Depending on when the failure occurs, roaming can be disqualified or
delayed.
Page 91

Defining a Mobility Domain 91
The client uses the same authorization parameters for the new session
as for the old session. For example, changing the Encryption-Type or
VLAN-Name parameter might cause a new session to be recorded,
rather than a roam within the same session.
A disassociated session has a grace period of 5 seconds in which the
session history can be retrieved and forwarded. After 5 seconds, the
session is cleared, and its accounting is stopped. You cannot configure
the grace period.
If the client MAC address in a Mobility Domain is not found in 5 seconds,
the session is considered new.
The 802.1X reauthentication timeout has little impact on roaming. If the
timeout lapses, 802.1X processing is performed on the existing
association. Accounting and roaming history are not affected if the
reauthentication is successful, because the client is still associated with
the same MAP. If reauthentication fails, the session is cleared, and it is
not eligible for roaming. If the client associates to the same MAP, that is
recorded as a new session.
Traffic Ports Used by
a Mobility Domain
Roaming creates the following effects:
Remote Authentication Dial-In User Service (RADIUS) accounting is
treated as a continuation of an existing session, rather than a new
one.
For tracked users, you can view roaming history in the Monitor tab.
See “Using the Client Monitor Window” on page 367.
The old session is cleared from the WX, even if the client did not
explicitly disassociate from the MAP and the 802.1X reauthentication
interval has not lapsed.
When deploying a Mobility Domain, you might attach the WX switches to
subnets that have firewalls or access controls between them. Within a
Mobility Domain, the WX switches exchange information and other types
of traffic, depending on your configuration of AAA and various
management services.
Table 13 provides a summary of the traffic ports typically used by a
Mobility Domain and its associated AAA and management functions.
Page 92

92 CHAPTER 3: GETTING STARTED
Table 13 Traffic Ports Used for AAA Servers and Management Servers
Protocol Port Function
IP/UDP (17) 1812 RADIUS authentication
IP/UDP (17) 1813 RADIUS accounting (default
IP/TCP (6) 443 Secure Sockets Layer
IP/TCP (6) 8889 SSL management using
IP/TCP (6) 23 Telnet management
IP/UDP (17) 161 SNMP get and set operations
IP/UDP (17) 162 SNMP traps
IP/ICMP (1) N/A Several types (for example,
IP/UDP (17) 123 Network Time Protocol (NTP)
IP/UDP (17) 53 Domain Name Service (DNS)
(default setting)
setting)
protocol (SSL) management
using Web Manager
3WXM
ping)
Creating a Mobility
Domain
The traffic typically sent between WX switches within a Mobility Domain
uses IP/UDP protocol 17 traffic on port 8817 for both source and
destination. Roaming traffic uses IP protocol 4.
To create a mobility domain, follow these steps.
1 Access the Mobility Domain wizard by doing one of the following:
In the main 3WXM window, select Config > Insert > Mobility
Domain.
In the Equipment section of the Organizer panel, right click and select
Insert > Mobility Domain.
Page 93

Defining a Mobility Domain 93
2 In the Mobility Domain Name box, type the name for the Mobility
Domain (1 to 16 characters, with no spaces or tabs).
3 In the Seed Member list, select the WX switch that is the seed member.
Only a WX in the Mobility Domain can be specified as a seed member. If
the only value in the list is Not Assigned, you must create a WX switch
and assign it a valid system IP address before completing the wizard.
4 Do one of the following:
To close the wizard, click Finish.
To create a WX switch and add it to the Mobility Domain, see
“Adding a WX Switch to the Network Plan” on page 186.
Page 94

94 CHAPTER 3: GETTING STARTED
Page 95

4
PLANNING THE 3COM MOBILITY SYSTEM
The 3Com Wireless LAN Switch Manager (3WXM) planning tools help
you plan your mobility system. This chapter discusses the Building wizard
and describes how to create a site, create or modify buildings, import or
draw floor details, specify the RF characteristics of a floor, define a
wireless coverage area, compute MAP placement, and generate RF
network design information.
Building Wizard Overview
Accessing the
Building Wizard
The 3WXM planning tools calculate the 3Com equipment you need, how
to configure it, and where to install it, all based on the information you
provide about your wireless coverage needs.
You can display projected coverage, and even experiment with network
changes. You can also optimize the plan based on RF measurements from
the live network.
In addition, when you add the geographical information about your
network to 3WXM, you can use 3WXM to visually find network clients or
rogue devices.
The planning tools are provided by the Building wizard. To access the
wizard, do one of the following:
If you are creating a new site, navigate to the Building page in the Site
wizard, and either select Building1 and click Modify, or click New
Building. (To create a site, see “Creating a Site” on page 105.)
If you are modifying an existing site, right-click on a building name or
floor name under a site in the Sites section of the Organizer panel and
select Edit.
Page 96
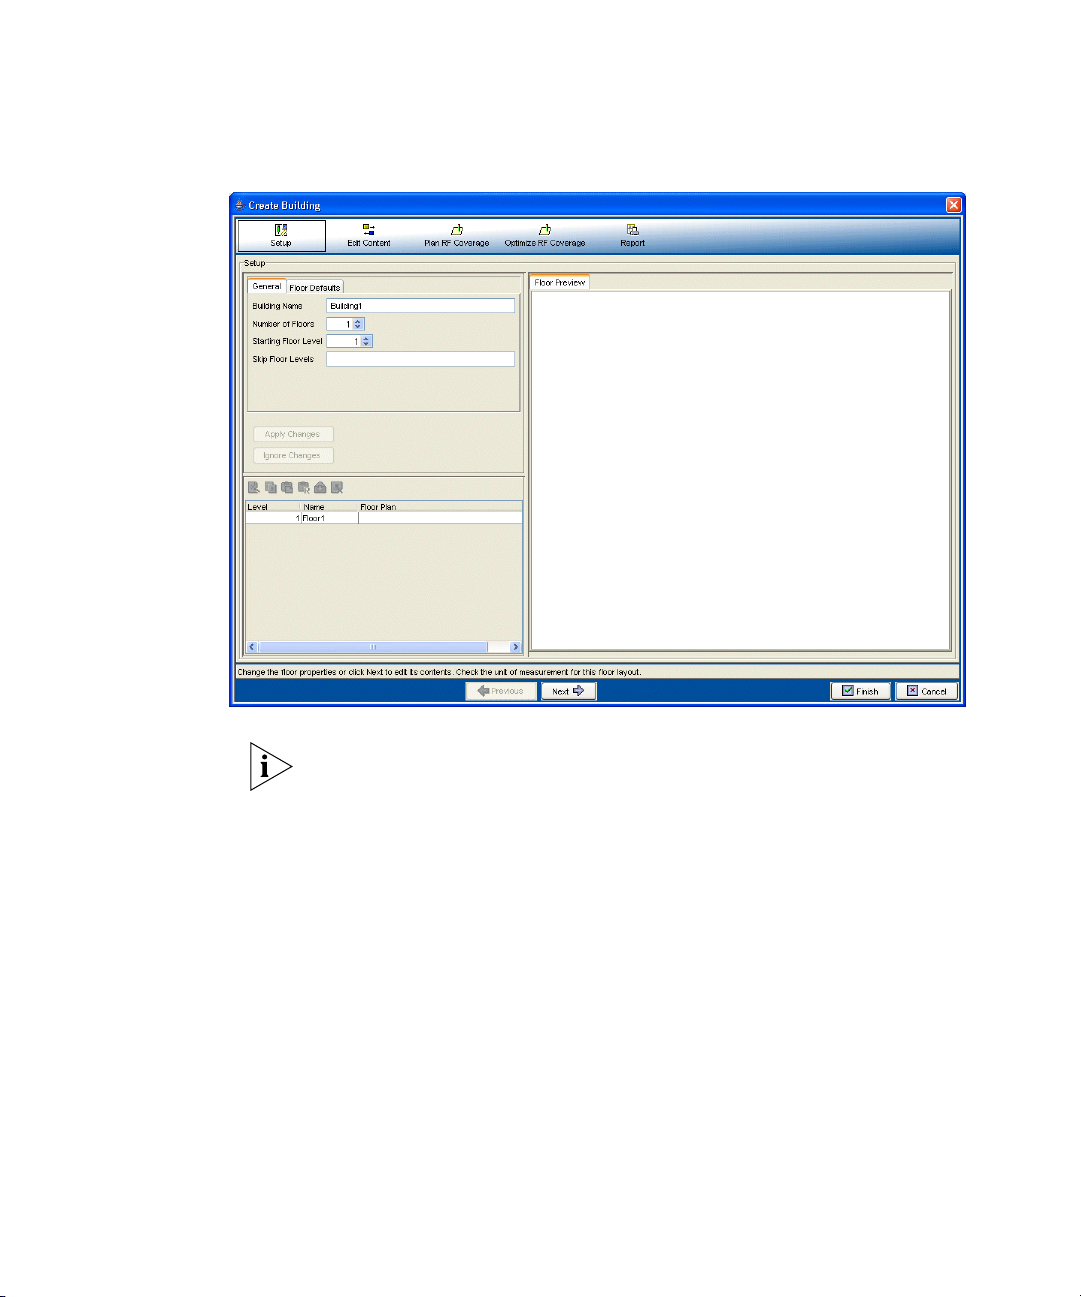
96 CHAPTER 4: PLANNING THE 3COM MOBILITY SYSTEM
Depending on how you access the wizard, the wizard’s title can be
Create Building, Modify Building, Create Floor, or Modify Floor. The
wizard is the same regardless of the title.
The Building wizard contains the following pages:
Setup
Edit Content
Plan RF Coverage
Report
Page 97

Building Wizard Overview 97
Building Wizard — Setup Page
The Setup page (shown above) enables you to configure basic building
parameters including the building name, number of floors for which you
want to plan wireless coverage, and default settings for unit of
measurement and ceiling attenuation.
Table 14 lists the toolbar icons in the edit options area of the page.
Table 14 Toolbar Options on Setup Page
Option Description
Edit floor properties, including the name, level, and ceiling
attenuation levels.
Copy the floor contents to create a new floor.
Paste the floor contents to create a new floor.
Replace the floor contents.
Import a CAD drawing.
Clear the contents of the floor plan.
Page 98

98 CHAPTER 4: PLANNING THE 3COM MOBILITY SYSTEM
Building Wizard — Edit Content Page
The Edit Content page enables you to modify imported floor drawings or
create new ones, and characterize RF obstacles. You can assign
attenuation information to objects or import the information from a site
survey data file.
The edit options area has icons for free-drawing objects and for inserting
RF obstacles. These icons are described in “Drawing Floor Objects
Manually” on page 128 and “Drawing RF Obstacles” on page 133.
Page 99
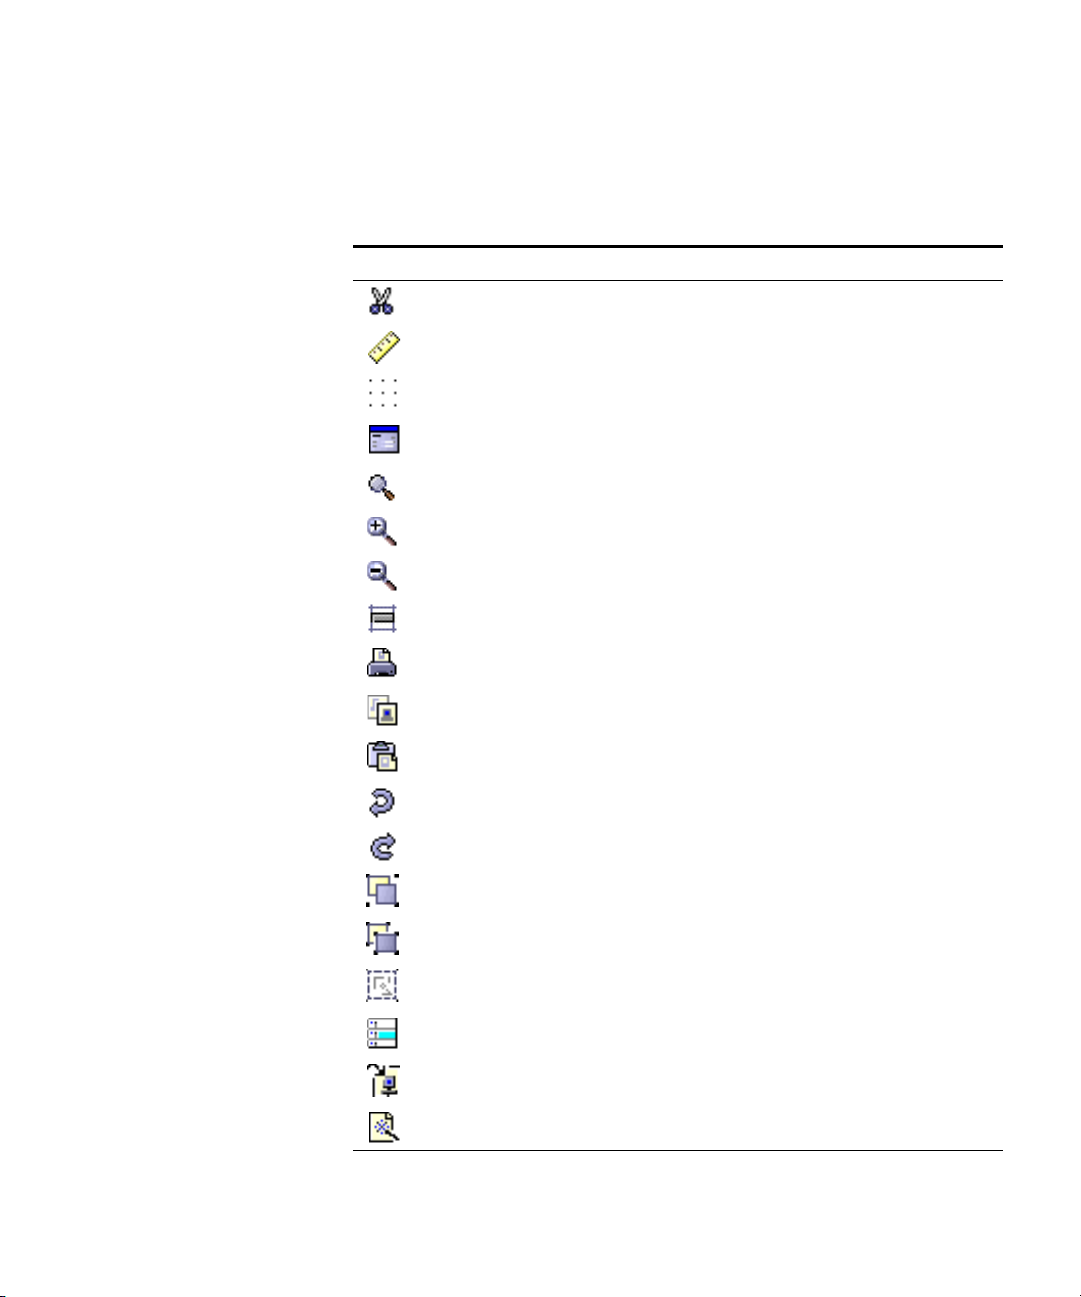
Building Wizard Overview 99
Table 15 lists the toolbar icons at the top of the floor display area.
Table 15 Toolbar Options on Edit Content Page
Option Description
Adjust the paper space (crop the drawing).
Define the drawing scale.
Change the grid size.
Open the Information pane. The Information pane appears
under the Floor display.
Show the zoom navigator pane.
Zoom in.
Zoom out.
Fit view in window.
Print the view displayed in the Floor display area.
Copy selected objects.
Paste selected objects.
Undo last change.
Redo last change.
Group selected objects.
Ungroup selected objects.
Select all visible objects.
Assign layers to selected objects.
Create RF obstacle.
Edit properties.
Page 100

100 CHAPTER 4: PLANNING THE 3COM MOBILITY SYSTEM
Table 15 Toolbar Options on Edit Content Page (continued)
Option Description
Remove RF obstacle information.
Delete selected components.
View or change dimensions.
Building Wizard — Plan RF Coverage Page
The Plan RF Coverage page enables you to identify the wiring closet
locations, draw and characterize the wireless coverage areas, insert
third-party access points, and compute installation locations for WX
switches and 3Com access points. You also can calculate channel and
power settings, although 3Com access points are enabled to configure
their own channel and power settings by default.
 Loading...