


HP Sprocket 200 Printer
Print, scan, and relive memories with the HP Sprocket 200!
Parts and Controls
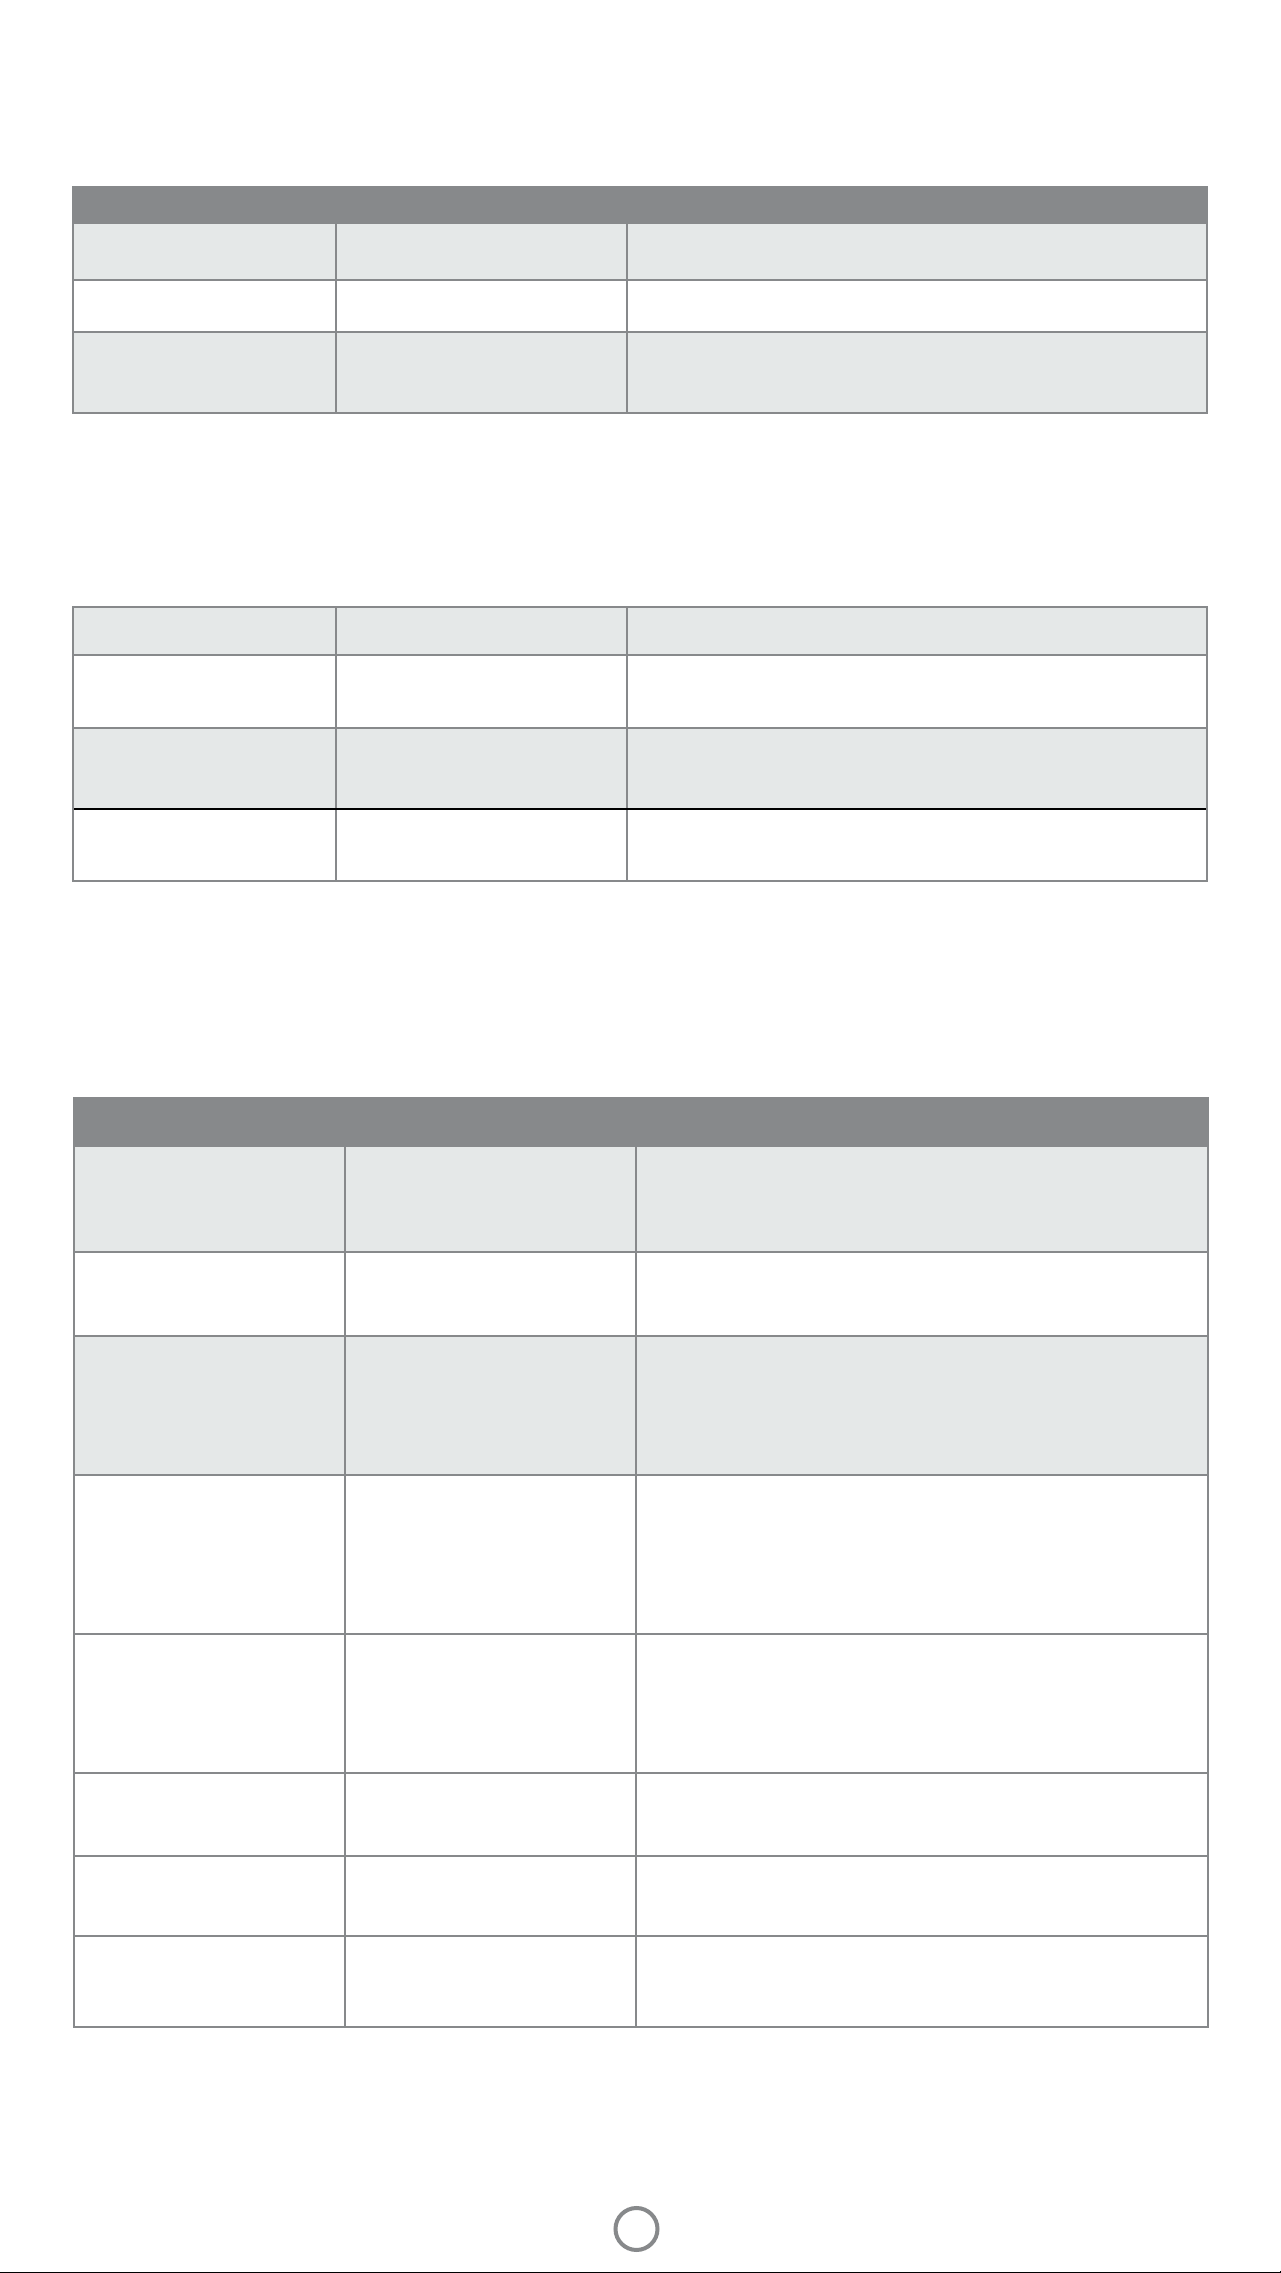
Supplied Items
Product Overview
LED Indicator Lights: Charge and Status
How to Reset your Sprocket 200
Caring for your HP Sprocket 200
Getting Started
Installing Mobile App
Loading Paper
Charging Battery and Powering On/O
Pairing a Mobile Device and the HP Sprocket 200
Safety Information
Specications
Troubleshooting
The information contained herein is subject to change without notice.
© Copyright 2017 HP Development Company, L.P.
Parts and Controls
Supplied Items
HP Sprocket 200 printer
Setup Instructions
HP Sprocket Photo Paper (10 sheets)
USB Charging Cable
Regulatory Information
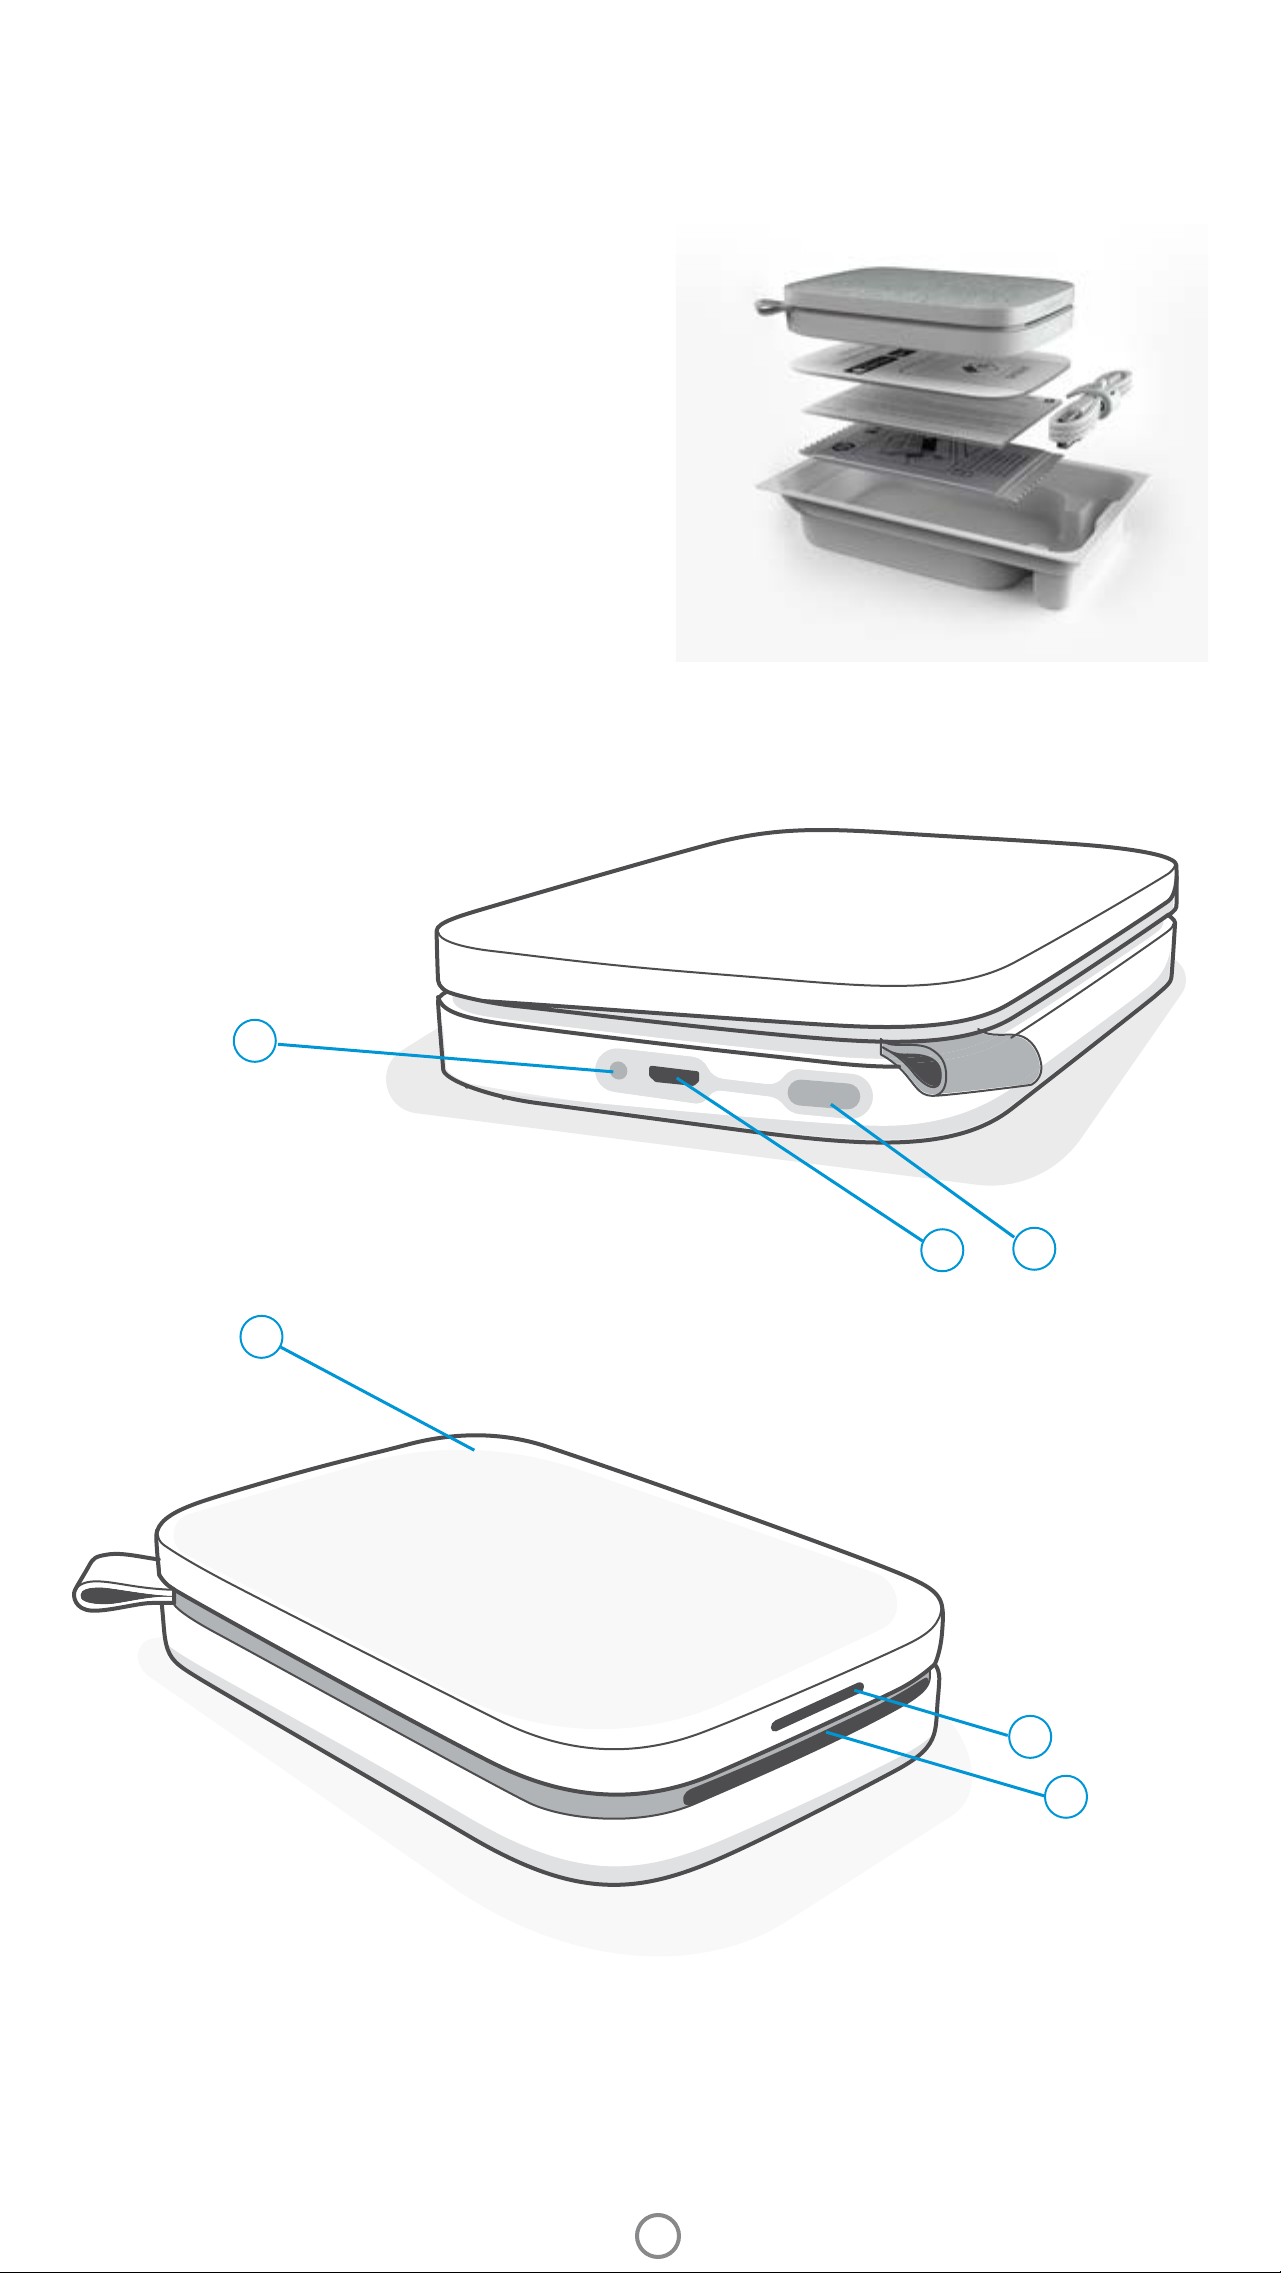
Product Overview
1. Power Button
2. Micro-USB Charging Port
3. Status LED Indicator Light
4. Charge LED Indicator Light
5. Paper Cover
6. Paper Output Slot
4
2
1
5
3
6
1
Charge LED Indicator Light
Charge LED: USB cable not connected
Color/Status HP Sprocket Condition Description
Green Fully Charged Device is fully charged, 90-100%
Amber Medium Charge Device charge is between 11-89%
Blinking Red Low Charge Device has a low battery and will need to be
charged soon (4-10%).
If the USB cable is not connected and your printer battery is critically low (1-3% charged), the Status LED light will turn o and you
won't be able to print and the printer will become nonresponsive. The Charge LED will continue to blink red. Charge the printer as
soon as possible.
Charge LED: USB cable connected
Green Fully Charged Device is fully charged.
Amber Charging, 90-99%
Device is nearly charged.
charged
Blinks Red 3 times,
Medium Charge Device charge is 11-89%
then solid Amber
Red Low and Critically Low
Device has a low battery and is charging.
Charge
Status LED Indicator Light
The color of the Status LED Indicator Light can be personalized in the sprocket app. The default color is White,
indicated in this table.
Color/Status HP Sprocket Condition Description
O Powered o/Sleep Device is turned o, in Sleep mode, or the battery
is completely drained. If the battery is Critically
Low or drained, you cannot print.
White (default)
(Or owner's personal color)
White (default),
Blinking
(Or owner's personal color)
Idle Printer is idle. The color of this LED can be
personalized in the sprocket app.
Sprocket is printing from
the Owner's mobile
device
The LED will quickly ash white/personal color
three times when a print job is sent from an
Owner's mobile device. While printing, the LED
will slowly pulses white/personal color.
Personal or Assigned
Guest Color
(Yellow, Blue, Green, Indigo,
Purple, Pink. Color set in the
sprocket app)
Sprocket is printing from
a Guest mobile device
The LED will quickly ash the owner/guest’s
color three times when a print job is sent by a
particular user. While printing, the LED will slowly
pulse the owner/guest's color.
Red, Blinking slowly Printer Error State Printer might be out of paper or the Paper Cover
might be o. Check the Charge LED light for
battery status. Resolve the error to continue
printing.
Solid Red Printer Error State The printer is in an unrecoverable state. Complete
a hardware reset to resolve.
Red, Blinking fast Printer Error State The printer might have a paper jam. The printer
will restart and automatically clear the jam.
Alternating colors,
Sparkling
The sprocket app will alert you to various error conditions through in-app messaging. Follow the app instrutions to
resolve issues.
For additional help on specic issues, see Troubleshooting and FAQs in this document or the HP Support site.
Firmware Update Printer rmware updating. Please do not close
the sprocket app during the update.
2

How to Reset your Sprocket 200
There are two ways you might need to reset your sprocket printer.
Hardware Reset
If the printer isn't responding or won't connect to your mobile device, try performing a hardware reset. Remove the
Paper Cover and press and hold the small round button near the Paper Tray until the printer turns o. The printer
will automatically restart. When you complete a hardware reset, your personalized settings will not be reset (Custom
Name, Personal Color, etc.).
What if my HP Sprocket isn’t responding or won’t
connect to my mobile device?
If you have trouble connecting or other issues, reset the device.
Remove the Paper Cover and press and hold the small button near the
Paper Tray until the printer turns o. Restart the device.
Factory Reset
If you need to return to the factory default settings or want to gift your sprocket to someone else, complete a
factory reset. A factory reset might also be used if Privacy is turned on for your mobile device and the device is lost.
Completing a factory reset would allow a new phone to connect. Before completing a factory reset, update your printer
rmware.
You can initiate a factory reset by using the steps below. A factory reset can only be completed when the USB
charging cable is NOT connected to the printer.
1. Hold the power button for about 7 seconds total. After 3 seconds, the Status LED light will turn o to indicate the printer
is shutting down; continue to hold the Power button until the LED lights start to ash.
2. Release the power button. The LEDs will continue blinking for about 6 seconds.
3. While the LEDs are blinking, press and release the power button. The device will remain o until you power on again.
4. Power on; the printer will be reset to factoring settings. After a factory reset, all settings are reset to factory defaults
(Custom Name, LED color, Sleep Time, Auto-O, etc.)
If you decide you do NOT want to reset the printer to factory defaults, you can abandon the reset. While the LEDs are
blinking, do not press the Power button as directed in step three above. This will also cancel the factory reset.
If you want to pair again with your device after a Factory Reset, make sure to also "forget" your device in your operating
system's Paired Devices list. Then, re-pair.
Caring for your HP Sprocket 200
• Remove ngerprints, dust, and dirt from the printer using a dry microber cloth.
• Keep the Paper Cover on to prevent dust and debris from entering the paper path.
• Update the printer rmware. Make sure your mobile device is connected to the Internet and then open the HP
Sprocket app. If there is a rmware update available, a rmware update screen displays. Follow the on-screen
prompts to complete the update. Your printer must be charged to 25% or higher before a rmware update.
• Keep your sprocket app updated. If you don’t have your mobile app set to automatically update, go to the
appropriate app store and make sure the latest version is installed.
3

Getting Started
Installing Mobile App
To use your HP Sprocket 200 with your mobile device, you must download the companion HP sprocket app from the
App Store® or on Google Play™ (or your local app store). To download the sprocket app, visit hpsprocket.com/start.
There, you will be directed to the appropriate app store for your device.
• The sprocket app is supported by Android™ devices using OS v4.4 and above and compatible
with iPhone X, iPhone 8, iPhone 8 Plus, iPhone 7, iPhone 7 Plus, iPhone SE, iPhone 6s, iPhone
6s Plus, iPhone 6, iPhone 6 Plus, iPhone 5s, iPhone 5c, iPhone 5, iPad (6th generation), iPad Pro
12.9-inch (2nd generation), iPad Pro 10.5-inch, iPad (5th generation), iPad Pro 9.7-inch, iPad
Pro 12.9-inch (1st generation), iPad Air 2, iPad Air, iPad mini 2, iPad mini 3, iPad mini 4, iPad (4th
generation), iPod touch (6th generation)
• You must install the companion sprocket app to operate the HP Sprocket with your mobile
device.
• If you previoulsy installed the HP Sprocket app, you can access setup instructions for HP Sprocket 200 in the Help & How To menu.
Apple, the Apple logo, iPhone, iPad, iPod, and iPod touch are trademarks of Apple Inc., registered in the U.S. and other countries. App Store is a service mark of
Apple Inc.
Android and Google Play are trademarks of Google Inc. Google and Google Logo are registered trademarks of Google Inc.
Loading Paper
1. Take o the Paper Cover by lifting up. This will release the lid and allow you to lift o the Paper Cover to load
paper. The lid is attached with magnets.
2. Unwrap a pack of HP Sprocket Photo Paper (10
sheets). Make sure the included blue Print Quality
Card (formerly called the Smartsheet®) is on the
bottom of the stack with the barcodes and HP logo
facing down. Stack the photo paper on top of the
Smartsheet® with the HP logos facing down. The
shiny side of the paper should be facing up in the
tray.
3. Place both the paper and Print Quality Card into the
Paper Tray.
4. Replace the Paper Cover to nish loading paper. You
will feel the magnets latch the lid into place.
Print Quality Card Use:
Load the Print Quality Card (formerly the Smartsheet®) with each new pack of paper. Each foil-pack has an included colored card;
the card is specially-made to prepare your printer for the paper in that pack. The Print Quality Card cleans and calibrates the
printer for the pack of paper that it came in. The card will pass through the HP Sprocket 200 printer automatically when you send
your rst print after loading paper.
If you notice print quality issues, load the colored card again. Discard the colored card after you have printed all ten sheets in the
foil-pack. You will get a new Print Quality Card for the next pack of paper you load.
What size paper do I need to buy for my HP Sprocket?
Only use 2 x 3” (5 x 7.6 cm) HP Sprocket Photo Paper with HP Sprocket 200.
You can purchase additional paper in the sprocket app by tapping “Buy Paper”
in the Main Menu or from hpsprocket.com/start.
Make sure to use genuine HP Sprocket Photo Paper. You can purchase genuine
HP Sprocket Photo Paper from the app or from other retailers.
4

Caution:
• Do not insert more than 1 pack of HP Sprocket Photo Paper (10 sheets plus the Print Quality Card) into the device at a time to avoid
paper jams or print errors.
• Only use 2 x 3” (5 x 7.6 cm) HP Sprocket Photo Paper with the device to avoid paper jams and malfunctions. You can purchase
additional paper within the sprocket app by tapping “Buy Paper” in the Main Menu.
• In the case of a paper jam, do not pull on the paper. Instead, turn the device o and on again to automatically eject the paper.
• Do not pull the paper out of the device during printing.
• If spills or moisture collect on a photo, wipe it away as soon as possible to prevent color damage.
• Keep photo paper clean and free of bends or damage for best print quality.
Charging Battery and Powering On/O
1. To charge, insert the Micro-USB Charging Cable into the HP
Sprocket 200.
2. Connect the Micro-USB Cable to a power source.
3. When connected, the Charge LED Indicator Light will turn on
to indicate charging. See "LED Indicator Lights: Charge and
Status" for more information.
4. To charge fully, allow the device to charge until the Charge
LED Indicator Light turns green.
5. Turn on the device by pressing the Power Button until the
Status LED Indicator Light illuminates and turns solid white
(default) or personalized color. The printer can also be
turned on by connecting the USB cable to power.
6. Turn o the device by pressing the Power Button until the
Status LED Indicator Light goes dark.
• Continued use during charging will slow down the charging speed.
• Connect the Micro-USB Cable to a power source capable of supplying 5Vdc/1A.
Pairing a Mobile Device and the HP Sprocket 200
Pair quickly and easily with your HP Sprocket 200 using the in-app setup instructions. On rst launch of the sprocket
app, select “Setup”. The in-app instructions will help you easily pair with your mobile device within the app. You can
also access the setup instructions anytime from the Help & How To menu. When successfully connected, a green dot
will appear by “sprocket” in the Main Menu.
You can also pair in your operating system menu, as a backup.
For Android™
1. Press and hold the Power Button until the Status LED Indicator Light turns white when fully powered on.
2. Be sure Bluetooth is turned on for your mobile device or tablet and then open the sprocket app. Select the Main Menu in the
upper left-hand corner.
3. Tap sprocket and then Printers to pair your printer with your mobile device or tablet. A pop up message will direct you to Android™
Settings to pair your printer. Select the printer from the list of available devices.
For iPhone®
1. Press and hold the Power Button for 3 seconds to turn on the printer. The Status LED Indicator Light will turn white once fully
powered on.
2. Open iPhone® Settings and select Bluetooth. Turn Bluetooth on and then select the printer from the listed devices.
3. Next, launch the sprocket app.
• A reminder message will appear if you try to print a photo and are not paired with your printer.
• If your mobile device and printer will not pair, try reseting the printer.
Check out the HP Sprocket app user guide to learn more how to use the sprocket app
and all the fun features available for your printer!
5

Troubleshooting and FAQs
What if the device will not print?
• Turn on the printer. By default, the device is set to sleep after 5 minutes (default) and turn o after 2 hours. You can adjust
the sleep and auto-o time windows in the HP sprocket app on your mobile device. Tap
your desired timing.
• Charge the printer. If the Charge LED Incator is blinking red, you need to charge your printer.
• Conrm Bluetooth is turned on and paired with your printer. If the printer is already paired to your mobile device, turning
Bluetooth o and then on might resolve the issue.
• Make sure the device has photo paper in the input tray. Load up to 10 sheets of HP Sprocket Photo Paper with the colored
HP Print Quality Card (formerly the HP ZINK™ Smartsheet).
• Move the printer and your mobile device closer together. Bluetooth signals can be weaker at greater distances.
• Update the printer rmware. Make sure your mobile device is connected to the Internet and then open the HP sprocket
app. If there is a rmware update available, a rmware update screen displays. Follow the on-screen prompts to complete
the update. Your printer must be charged to 25% or higher before a rmware update.
• Reset the printer. On the printer, locate the round reset button under the Paper Cover and press it until the printer turns o.
The printer will automatically restart. If the Status LED light is red, you will want to reset the printer.
, tap sprocket, and then adjust
What can I do to improve print quality?
Use these recommendations and the sprocket app editing capabilities to improve print quality.
• Use genuine HP Sprocket Photo Paper. ZINK™ makes custom photo paper for a variety of
printers. HP recommends using HP Sprocket Photo Paper for best results. To purchase genuine
HP Sprocket Photo Paper, go to hpsprocket.com/start. You can also purchase genuine HP
Sprocket Photo Paper from other retailers.
• Always load the blue HP Print Quality Card (formerly the ZINK™ Smartsheet) from the same
pack of photo paper currently in the printer. Load the blue card into the paper tray with the
barcode facing down and the photo paper with the HP logos facing down. Each blue card is
specically calibrated to improve best print quality for that specic pack of photo paper (10
sheets). Using a blue card from other packs of paper might not provide ideal results.
• Allow the printer a few minutes to cool down between print jobs. The sprocket app will alert
you when the printer is cooling down and won't print the next image until a cooler temperature is
reached.
• Store the photo paper in a cool, dry place and avoid contact with water. If water spills on a
photo, wipe it away as soon as possible to prevent damaging the photo.
• Update the printer rmware.
6

Safety Information
For regulatory and safety notices, refer to the included sheet in your product packaging and the following statements.
Battery Safety
• Do not disassemble the product or battery or short the battery terminals.
• Avoid contact with a leaking or damaged battery.
• Adult supervision is recommended when the product is being used by young children.
• Do not disassemble, strike, press, or put in a re.
• Do not use the printer if the product battery is swelling and causing product expansion.
• Keep the device clear of high temperatures and moisture.
Specications
Specication Description
Product numbers
Dimensions and weight
Connectivity
Printer management
Power supply
Charge time
Power consumption
Print technology
Supported paper
Borderless printing
1AS85A; 1AS86A; 1AS87A; 1AS88A; 1AS89A; 1AS90A; 1AS91A
• Dimensions: 3.15 x 4.63 x 0.98 in (80 x 117.5 x 25 mm)
• Weight: 0.379 lb (0.172 kg)
Bluetooth 5.0
HP sprocket app
Li-Polymer 7.4 V – 2 cell internal rechargeable battery
850 mAh Li-ion polymer battery
120 minutes
0.9 W (standby)
Average 15.91 W (based on rst print)
Maximum 34.49 W at 25° C (77° F)
Thermal printing with a ZINK™ Zero Ink® printer
• Note: The HP Sprocket does not use ink cartridges to print.
HP Sprocket Photo Paper—
Yes
2 x 3” (5 x 7.6 cm)
Supported le types
Paper tray capacity
Memory
Print quality
Mobile connectivity
Control panel
Environmental parameters
.jpeg, .ti (iOS only), .gif, .bmp, and .png
• Note: If you send a non-supported le type, the print job does not print.
Up to 10 pages with the Smartsheet®
512 MB
313 x 400 dots per inch (dpi)
• Supported by Android™ devices using OS v4.4 and above / iOS 8.0 and above
• Compatible with iPhone X, iPhone 8, iPhone 8 Plus, iPhone 7, iPhone 7 Plus, iPhone
SE, iPhone 6s, iPhone 6s Plus, iPhone 6, iPhone 6 Plus, iPhone 5s, iPhone 5c, iPhone
5, iPad (6th generation), iPad Pro 12.9-inch (2nd generation), iPad Pro 10.5-inch, iPad
(5th generation), iPad Pro 9.7-inch, iPad Pro 12.9-inch (1st generation), iPad Air 2,
iPad Air, iPad mini 2, iPad mini 3, iPad mini 4, iPad (4th generation), iPod touch (6th
generation)
Power Button; Reset Button; Charge and Status Indicator LED Lights
• Operating humidity: 5% to 90% RH (recommended)
• Non-operating humidity: 5% to 90% RH
• Operating temperature: 5° to 40° C (41° to 104° F)
• Recommended operating temperature: 15° to 32° C (59° to 90° F)
• Storage temperature: -30° to 70° C (-22° to 158° F)
Warranty
Regulatory Model Number
One-year limited hardware warranty
Visit hpsprocket.com/start for more information.
For regulatory identication purposes, your product is assigned with a
Regulatory Model Number. The regulatory model number should not be
confused with the marketing names or product numbers. The Regulatory
Model Number for your product is VCVRA-1801.
7

Technical Information
Recycling Program
HP oers an increasing number of product return and recycling programs in many countries/regions, and partners with some of the largest
electronic recycling centers throughout the world. HP conserves resources by reselling some of its most popular products. For more
information regarding recycling of HP products, please visit: www.hp.com/recycle
FCC statement
The United States Federal Communications Commission (in 47 CFR 15.105) has specied that the following notice be brought to the attention
of users of this product.
This equipment has been tested and found to comply with the limits for a Class B digital device, pursuant to Part 15 of the FCC Rules. These
limits are designed to provide reasonable protection against harmful interference in a residential installation. This equipment generates, uses
and can radiate radio frequency energy and, if not installed and used in accordance with the instructions, may cause harmful interference to
radio communications. However, there is no guarantee that interference will not occur in a particular installation. If this equipment does cause
harmful interference to radio or television reception, which can be determined by turning the equipment o and on, the user is encouraged to
try to correct the interference by one or more of the following measures:
-- Reorient or relocate the receiving antenna.
-- Increase the separation between the equipment and receiver.
-- Connect the equipment into an outlet on a circuit dierent from that to which the receiver is connected.
-- Consult the dealer or an experienced radio/TV technician for help.
Modications (part 15.21)
Any changes or modications made to this device that are not expressly approved by HP may void the user’s authority to operate the
equipment.
For further information, contact:
Manager of Corporate Product Regulations
HP Inc.
1501 Page Mill Road, Palo Alto, CA 94304, U.S.A
Email contact: (techregshelp@hp.com) or Telephone contact: +1 (650) 857-1501
This device complies with Part 15 of the FCC Rules. Operation is subject to the following two conditions: (1) this device may not cause harmful
interference, and (2) this device must accept any interference received, including interference that may cause undesired operation.
Exposure to radio frequency radiation
CAUTION! The radiated output power of this device is far below the FCC radio frequency exposure limits. Nevertheless, the device shall be used
in such a manner that the potential for human contact during normal operation is minimized. This product and any attached external antenna,
if supported, shall be placed in such a manner to minimize the potential for human contact during normal operation. In order to avoid the
possibility of exceeding the FCC radio frequency exposure limits, human prominity to the antenna shall be no less than 20 cm (8 inches) during
normal operation.
Notice to users in Canada
Under Industry Canada regulations, this radio transmitter may only operate using an antenna of a type and maximum (or lesser) gain approved
for the transmitter by Industry Canada. To reduce potential radio interference to other users, the antenna type and its gain should be so
chosen that the equivalent isotropically radiated power (e.i.r.p.) is not more than that necessary for successful communication.
This device complies with ISED Canda's applicable license-exempt RSSs. Operation is subject to the following two conditions: (1) this device
may not cause interference, and (2) this device must accept any interference, including interference that may cause undesired operation of the
device.
WARNING! Exposure to Radio Frequency Radiation The radiated output power of this device is below the Industry Canada radio frequency
exposure limits. Nevertheless, the device should be used in such a manner that the potential for human contact is minimized during normal
operation.
To avoid the possibility of exceeding the Industry Canada radio frequency exposure limits, human proximity to the antennas should not be less
than 20 cm (8 inches).
Made for iPhone X, iPhone 8, iPhone 8 Plus, iPhone 7, iPhone 7 Plus, iPhone SE, iPhone 6s, iPhone 6s Plus, iPhone 6, iPhone 6 Plus, iPhone 5s,
iPhone 5c, iPhone 5, iPad (6th generation), iPad Pro 12.9-inch (2nd generation), iPad Pro 10.5-inch, iPad (5th generation), iPad Pro 9.7-inch,
iPad Pro 12.9-inch (1st generation), iPad Air 2, iPad Air, iPad mini 2, iPad mini 3, iPad mini 4, iPad (4th generation), iPod touch (6th generation)
Apple, iPad, iPad Air, iPad Pro, iPod touch, iPad mini, and iPhone are trademarks of Apple Inc., registered in the U.S. and other countries.
App Store is a service mark of Apple Inc. Android and Google Play are trademarks of Google Inc. Google and Google Logo are registered
trademarks of Google Inc.
The ZINK Technology™ and ZINK Trademarks™ are owned by ZINK Holdings LLC. Used under license.
8

#6 Group of products: Thermal printer
#6 第六分類: 其他類列印產品
Thermal receipt printer, Small format photo printer
包含產品類別: 熱感式印表機, 攜帶型相片印表機
單元
unit
限用物質及其化學符號
Restricted substances and chemical symbols
鉛
(Pb) 汞 (Hg)
鎘
(Cd)
六價鉻
(Cr
+6
)
多溴聯苯
(PBB)
多溴二苯醚
(PBDE)
電路板
Circuit board
—
O O O O O
外殼 Shell
O O O O O O
金屬結構件
Metal part
O O O O O O
印字頭
Print head
—
O O O O O
馬達
Motor
—
O O O O O
滾輪
Paper roller
O O O O O O
備考 1. “超出 0.1wt%”及“超出 0.01wt%”係指限用物質之百分比含量超出百分比含量基準
值。
備考 2. “○”係指該項限用物質之百分比含量未超出百分比含量基準值。
備考 3. “−”係指該項限用物質為排除項目
若要存取產品的最新使用指南或手冊,請前往 http://www.hp.com/support 。選取搜尋您的產品,然後依照畫面上的指示
繼續執行。
To access the latest user guides or manuals for your product, go to http://www.support.hp.com. Select
Find your product, and then
follow the on-screen instructions.
臺灣無線射頻聲明
低功率電波輻射性電機管理辦法
第十二條
經型式認證合格之低功率射頻電機,非經許可,公司、商號或使用者均不得擅自變更頻率、加大功率或變更設
計之特性及功能。
第十四條
低功率射頻電機之使用不得影響飛航安全及干擾合法通信;經發現有干擾現象時,應立即停用,並改善至無干
擾時方得繼續使用。
前項合法通信,指依電信法規定作業之無線電通信。低功率射頻電機須忍受合法通信或工業、科學及醫藥用電
波輻射性電機設備之干擾。
この機器は技術基準適合証明又は工事設計認証を受けた無線設備を搭載しています。
9
 Loading...