

Page 1

HP Workpath - HP for SharePoint Online User
Guide
SUMMARY
Public
Page 2

Copyright and License
© Copyright 2020 HP Development Company,
L.P.
Reproduction, adaptation, or translation without
prior written permission is prohibited, except as
allowed under the copyright laws.
The information contained herein is subject to
change without notice.
The only warranties for HP products and
services are set forth in the express warranty
statements accompanying such products and
services. Nothing herein should be construed as
constituting an additional warranty. HP shall not
be liable for technical or editorial errors or
omissions contained herein.
Edition 3.0, 05/2020
Page 3
1 Introduction
Use this document to learn how to install, use, and manage the HP for SharePoint Online app.
HP printers can now access documents stored in the cloud directly from the printer control panel using HP
Workpath Apps such as the HP for SharePoint Online.
NOTE: This document assumes that the HP for SharePoint Online app is already installed. HP Workpath Apps
are available from the HP Command Center using a web browser. For instructions, refer to the Deployment Guide
using HP Command Center.
Description
The HP for SharePoint Online app can be used to scan to and print from a SharePoint Online cloud account (Clio
document management system) using the printer control panel.
By providing a direct connection between the HP printer and the SharePoint Online account, the HP for
SharePoint Online app optimizes workows and worker eciency with the following key features:
● Scan directly to SharePoint Online and print or email directly from SharePoint Online in one integrated step
● Manage documents and apply document metadata directly from the control panel of any enabled HP
● Quickly locate stored documents using enhanced search and lter capabilities.
● Eliminate additional time-consuming sign on requirements and the extra step of downloading documents
Features
Learn about the features of the HP for SharePoint Online app.
The HP for SharePoint Online app includes the following features:
● Sends a notication email
● Supports Cloud SIO authentication
● File names are automatically date/time stamped
using the printer control panel.
printer.
to a computer with integrated document access and account sign-in steps.
● Searchable documents including MTIFF, TIFF, and XPS formats
● Supported le resolutions for SharePoint Online: 75 to 600 DPI
ENWW 1
Page 4

● File quality adjustment options for SharePoint Online: Low, Medium, or High
● Supported Scan to documents for SharePoint Online: JPEG, PDF, PDF/A, MTIFF, TIFF, OCR and XPS formats
● Searchable OCR documents including CSV (OCR), HTML (OCR), PDF(OCR), PDF/A(OCR), RTF (OCR), Text (OCR),
and Unicode Text (OCR) formats on supported HP printers.
App requirements
Learn about requirements for the HP for SharePoint Online app.
Before you can use HP for SharePoint Online, the following requirements must be met:
● An active SharePoint Online account
● A compatible HP printer with a DIMM accessory installed (A4 printers only)
● HP Command Center (HPCC) set up and congured
● The HP Workpath App(s) enabled and congured in HPCC
● The HP printer(s) registered with HPCC
● The printer set up and the HP Workpath Link platform enabled in HPCC
● The HP for SharePoint Online app is already installed
● The app Client ID's already whitelisted
● An optional registered swipe card connected (HP Universal USB proximity Card reader (X3DO3A) or HP HIP
Key Stroke Reader (Y7C05A) with a pass-code congured, OR account credentials set up for the device,
and/or cloud Sign In Once (SIO) login set up (for apps with SIO enabled and congured).
2 Chapter 1 Introduction ENWW
Page 5
2 Use the HP for SharePoint Online app
Learn how to use the HP for SharePoint Online app.
Use the information in this chapter to scan to and print from your SharePoint Online account directly from the
printer control panel using the HP for SharePoint Online app.
Sign in to the printer
Learn how to sign in to the printer.
To use the HP for SharePoint Online app as an administrator to enable features such as the Administrator Opt-in
(EULA) or store credentials using Sign in Once (SIO), you will be required to sign in to the printer using the device
administrator or authentication agent credentials. To do this, follow these steps:
1. On the printer control panel, select Sign In.
2. Log in using environment-specic credentials.
● If SIO is not enabled, log in as a device administrator using the device or EWS password.
● If SIO is enabled, log in using an authentication agent, and then type the HP ID and password (rst
sign-in only) and create a six-digit PIN. Future sign-in will require only the authentication agent and
the six-digit PIN.
ENWW 3
Page 6

NOTE: If you’re company is using a badge reader, you’ll need to swipe an identity badge and create
a six-digit pin to sign-in. If Sign In Once (SIO) is enabled on the printer and this is the rst time logging
in, you will need to set up the cloud account using the authentication agent credentials congured on
the printer. For instructions, go to support document Set up cloud Sign in Once (SIO) and see section
Link account and store credentials to the HP Cloud SIO vault.
Open the application
Steps to take when rst opening the app.
To open the HP for SharePoint Online app at the printer control panel, users must view and agree to the Terms
of Use and Privacy Policy the rst time they log in. To do this, follow these steps:
NOTE: If the EULA admin option is enabled, the user will only need to perform these steps the rst time they
open the app.
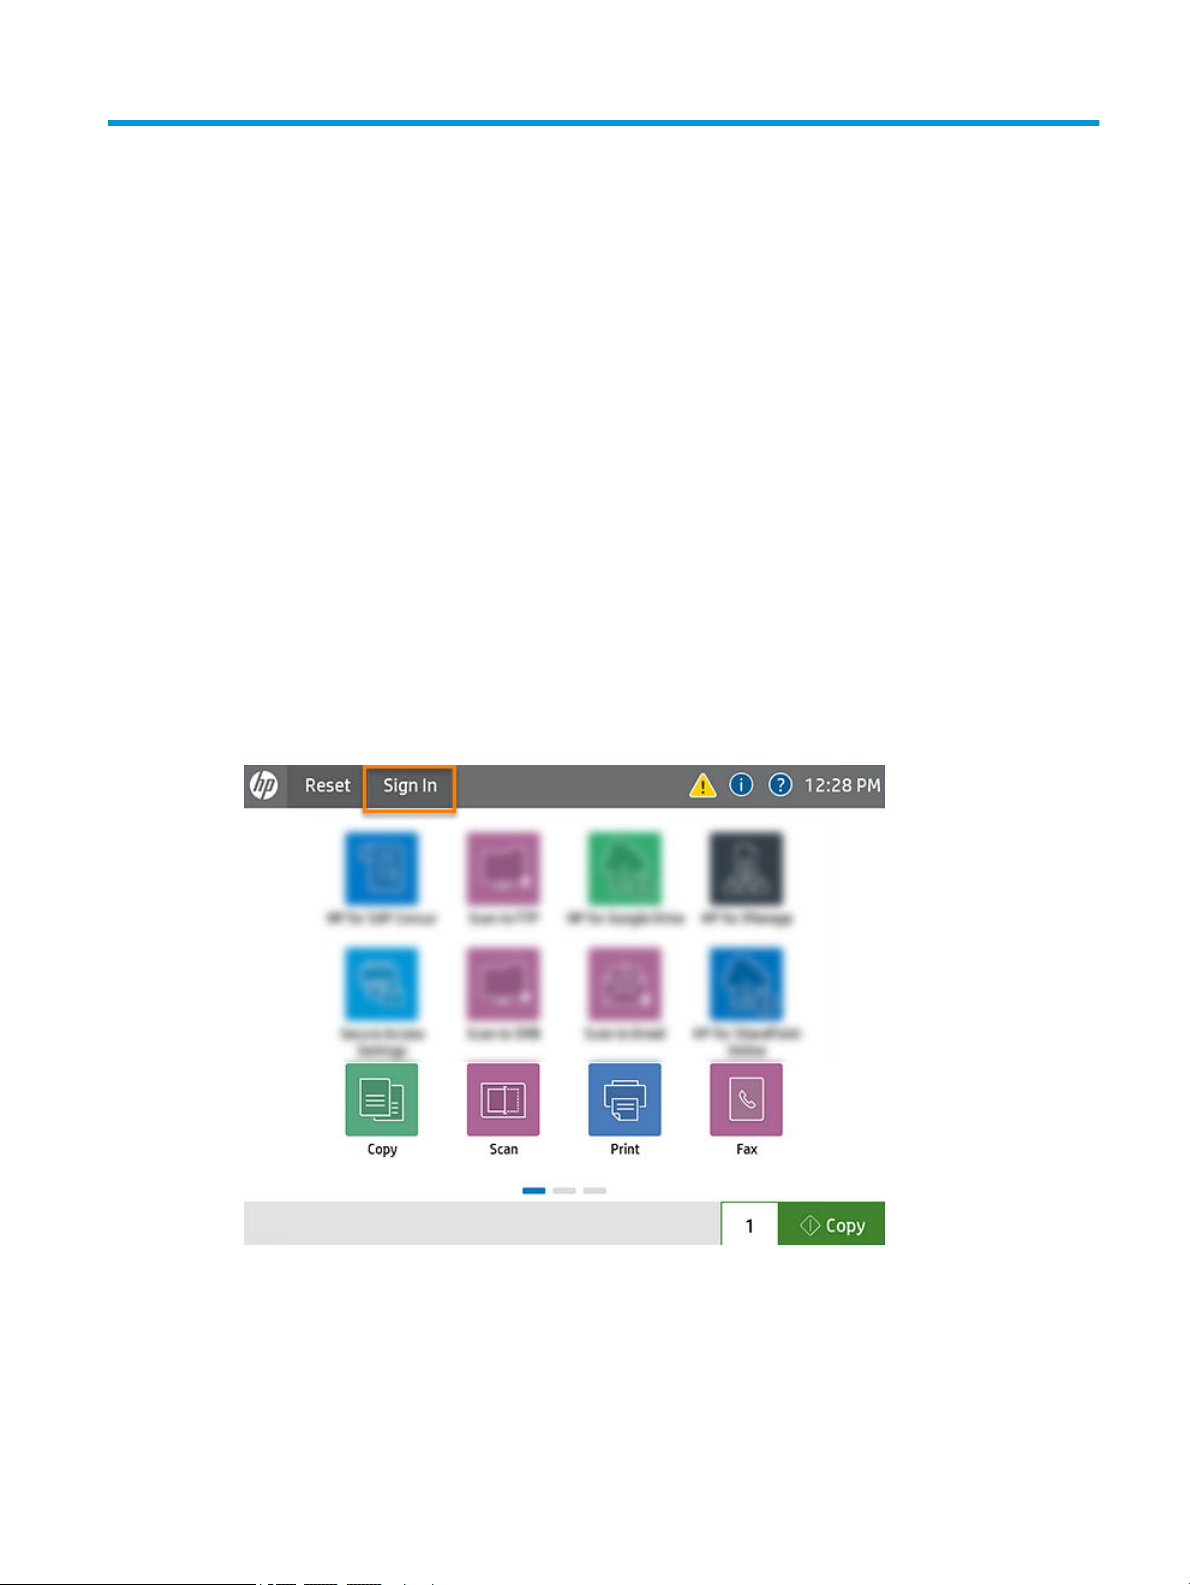
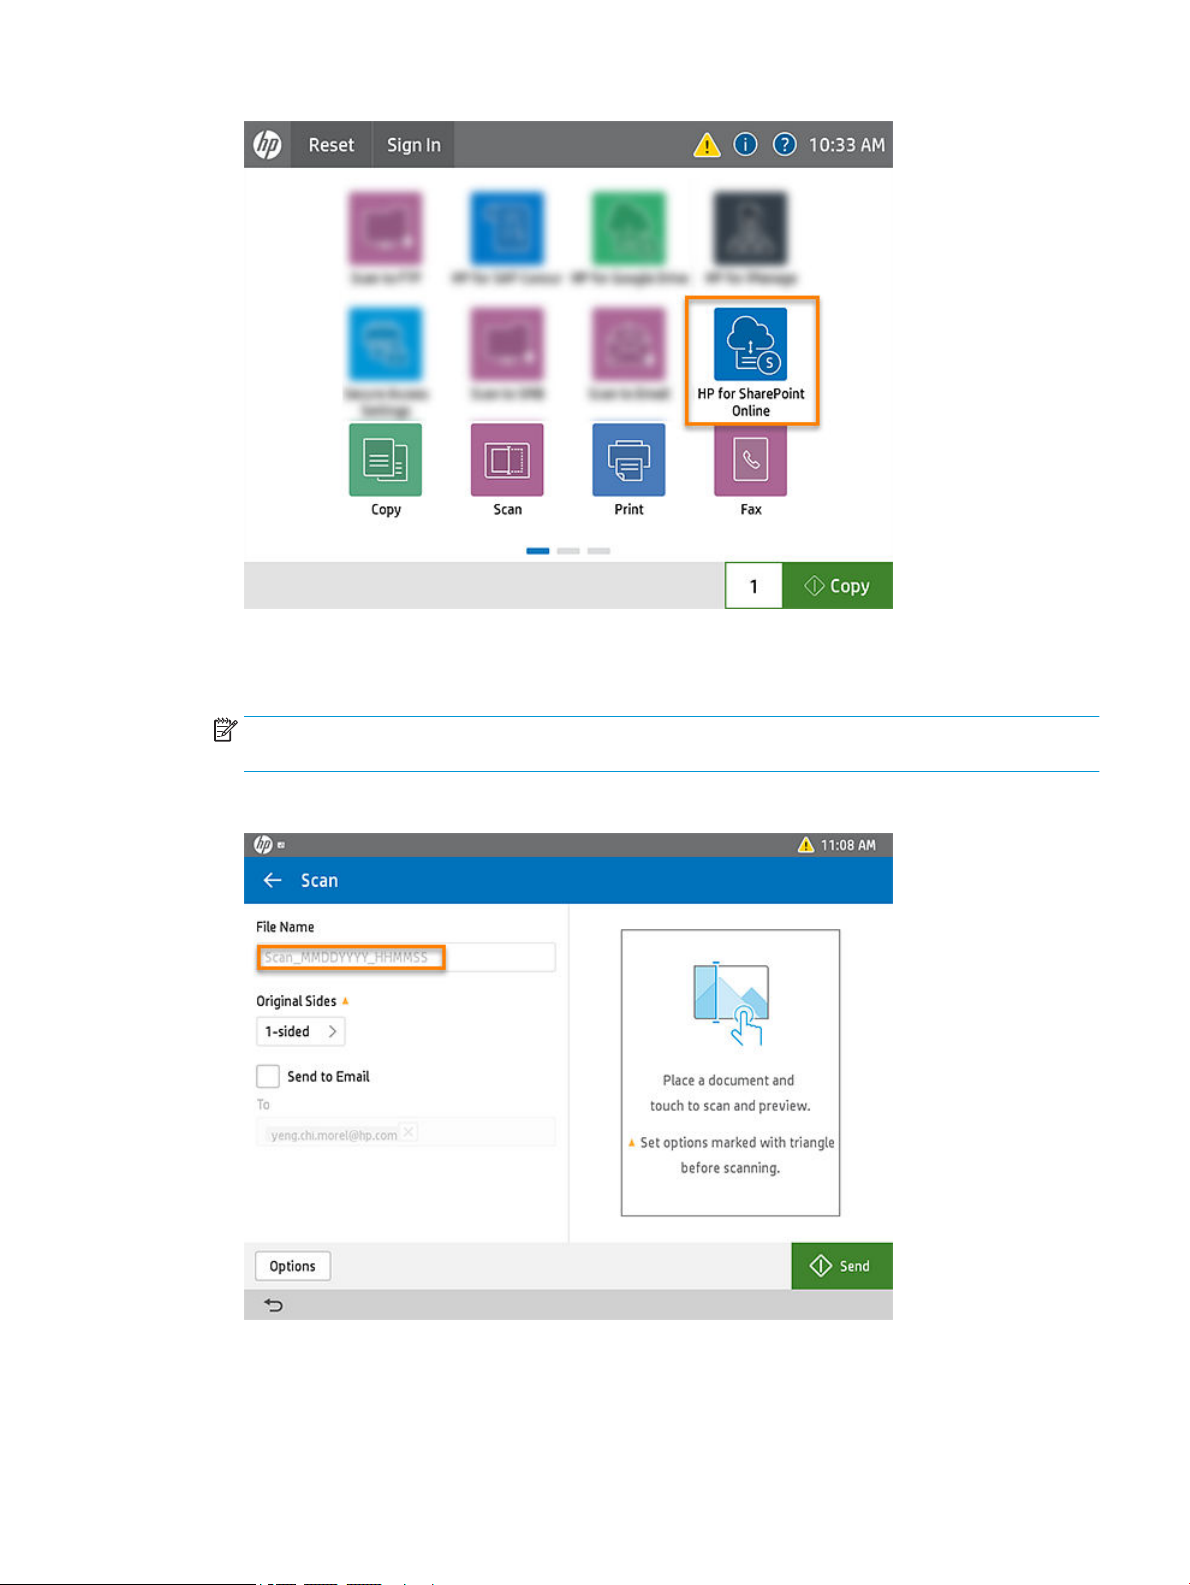
1. On the printer control panel, select the HP for SharePoint Online tile.
NOTE: You might need to scroll from side-to-side to see this tile.
4 Chapter 2 Use the HP for SharePoint Online app ENWW
Page 7
2. Select View to read the HP App End User License Agreement and HP Privacy Policy.
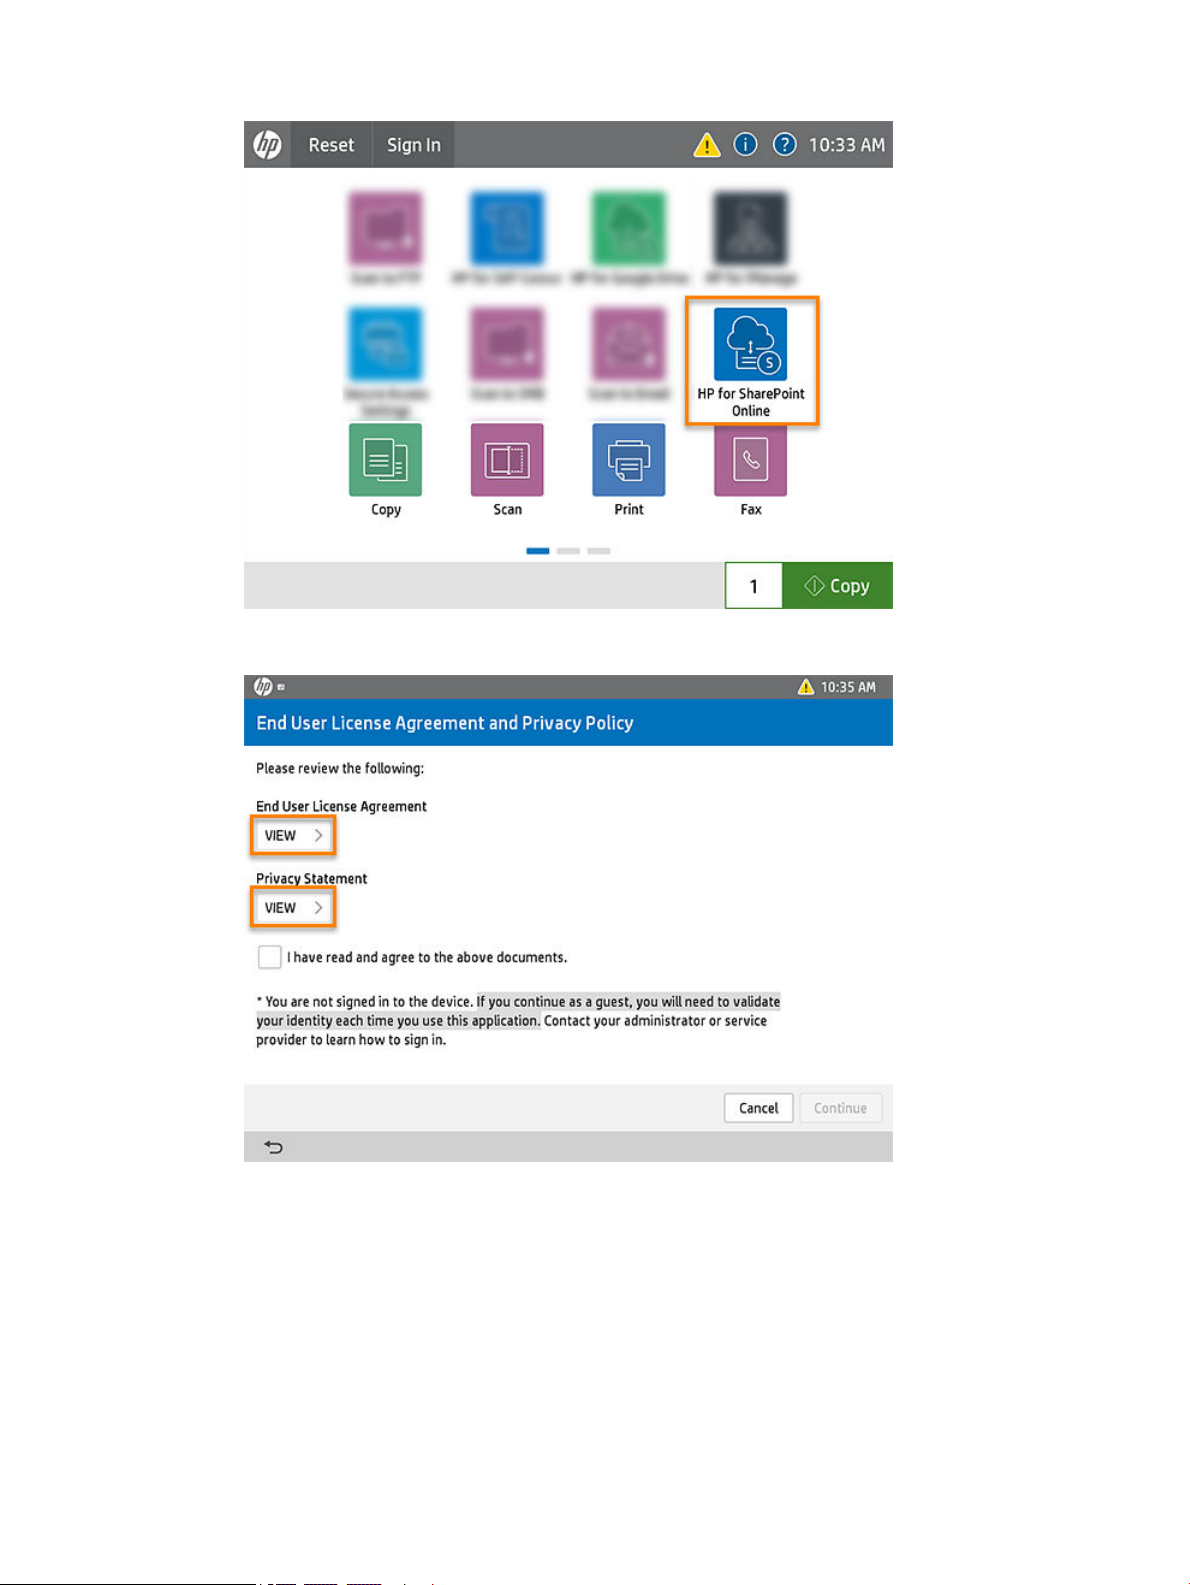
3. For each agreement, read and then select Done to return to the Terms of Use and Privacy Policy screen.
4. Select the check box to verify that you have read and agree to the information, and select Continue.
ENWW Open the application 5
Page 8
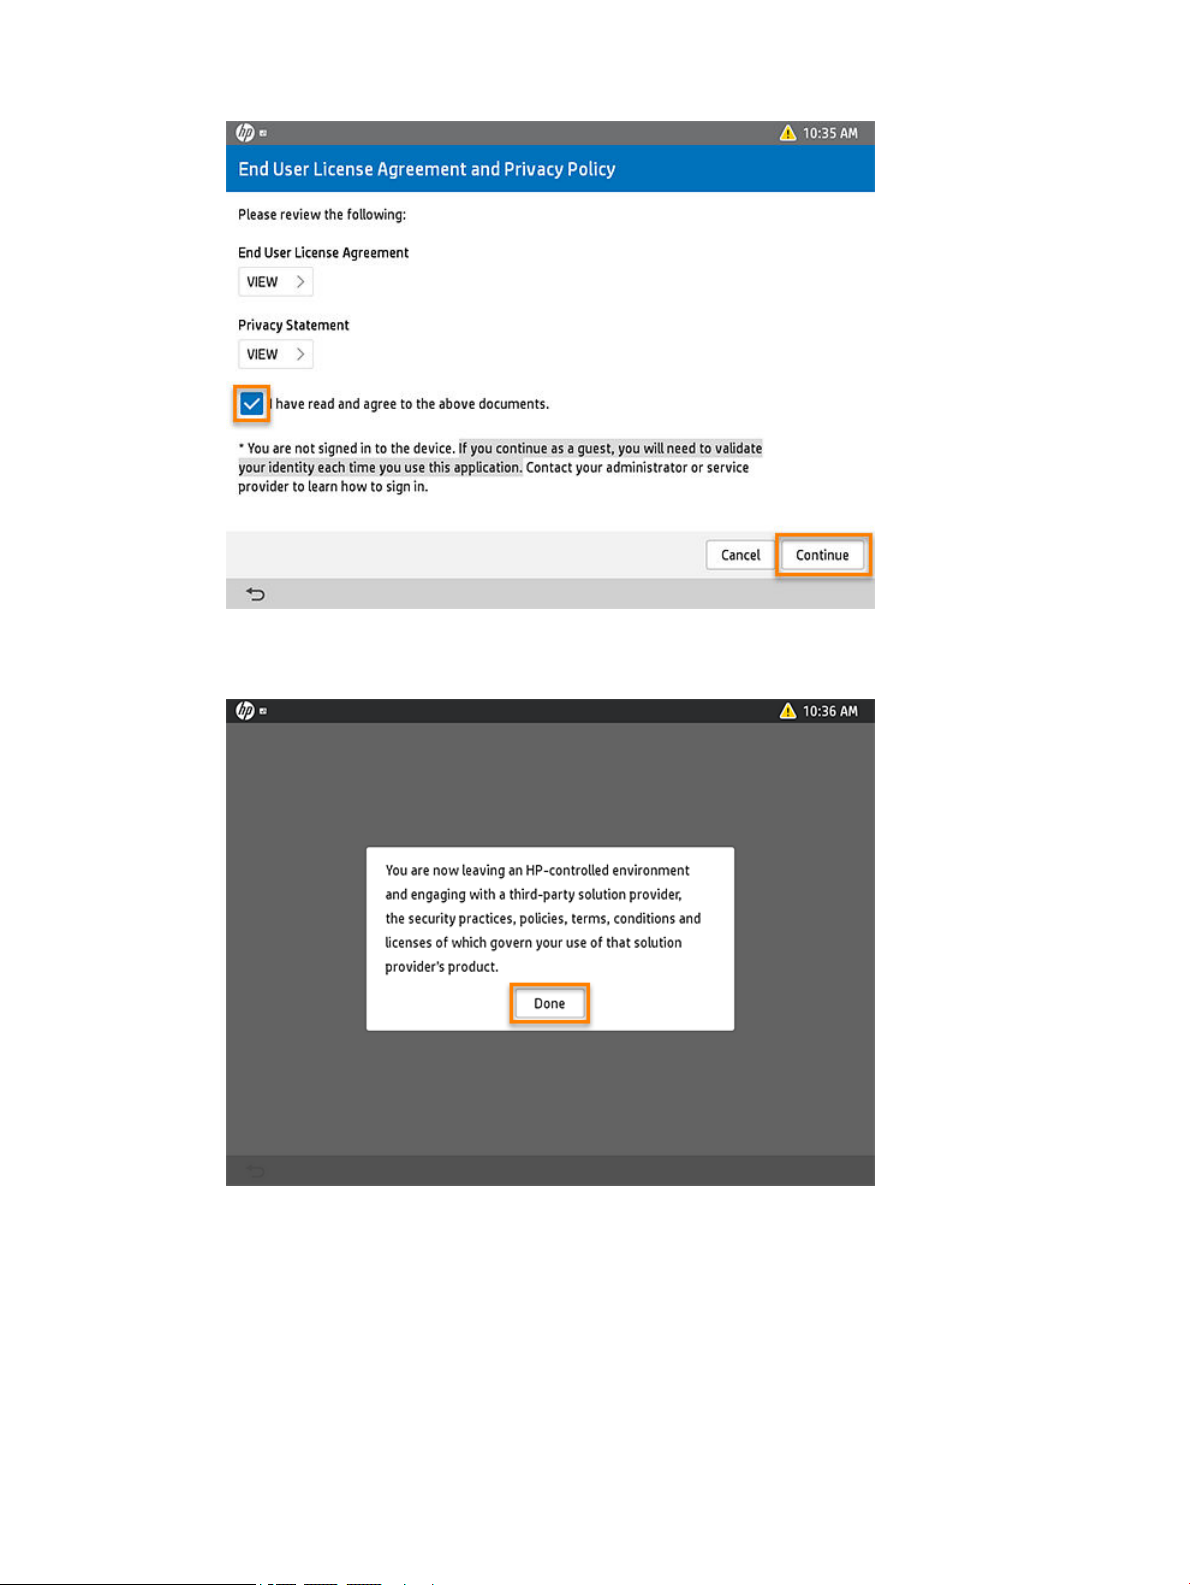
5. When notied that you are now leaving an HP-controlled environment and engaging with a third-party,
select Done to continue.
You will be redirected to the account log-in page.
Log in to the SharePoint Online account
Learn how to log into the SharePoint Online account from the printer control panel.
To use the HP for SharePoint Online app, sign-in to the SharePoint Online account from the printer control panel.
To do this, follow these steps:
6 Chapter 2 Use the HP for SharePoint Online app ENWW
Page 9

NOTE: If Sign In Once (SIO) is enabled, this step will only need to be performed one time. If the user signs out of
the app, the user will need to log in again using the steps below.
1. Type the email address and select Next.
2. Type the SharePoint Online account password and select Sign in.
3. Review the tutorial.
NOTE: You can return to this tutorial at any time. For instructions, see the section Open the App Guide
tutorial.
ENWW Log in to the SharePoint Online account 7
Page 10
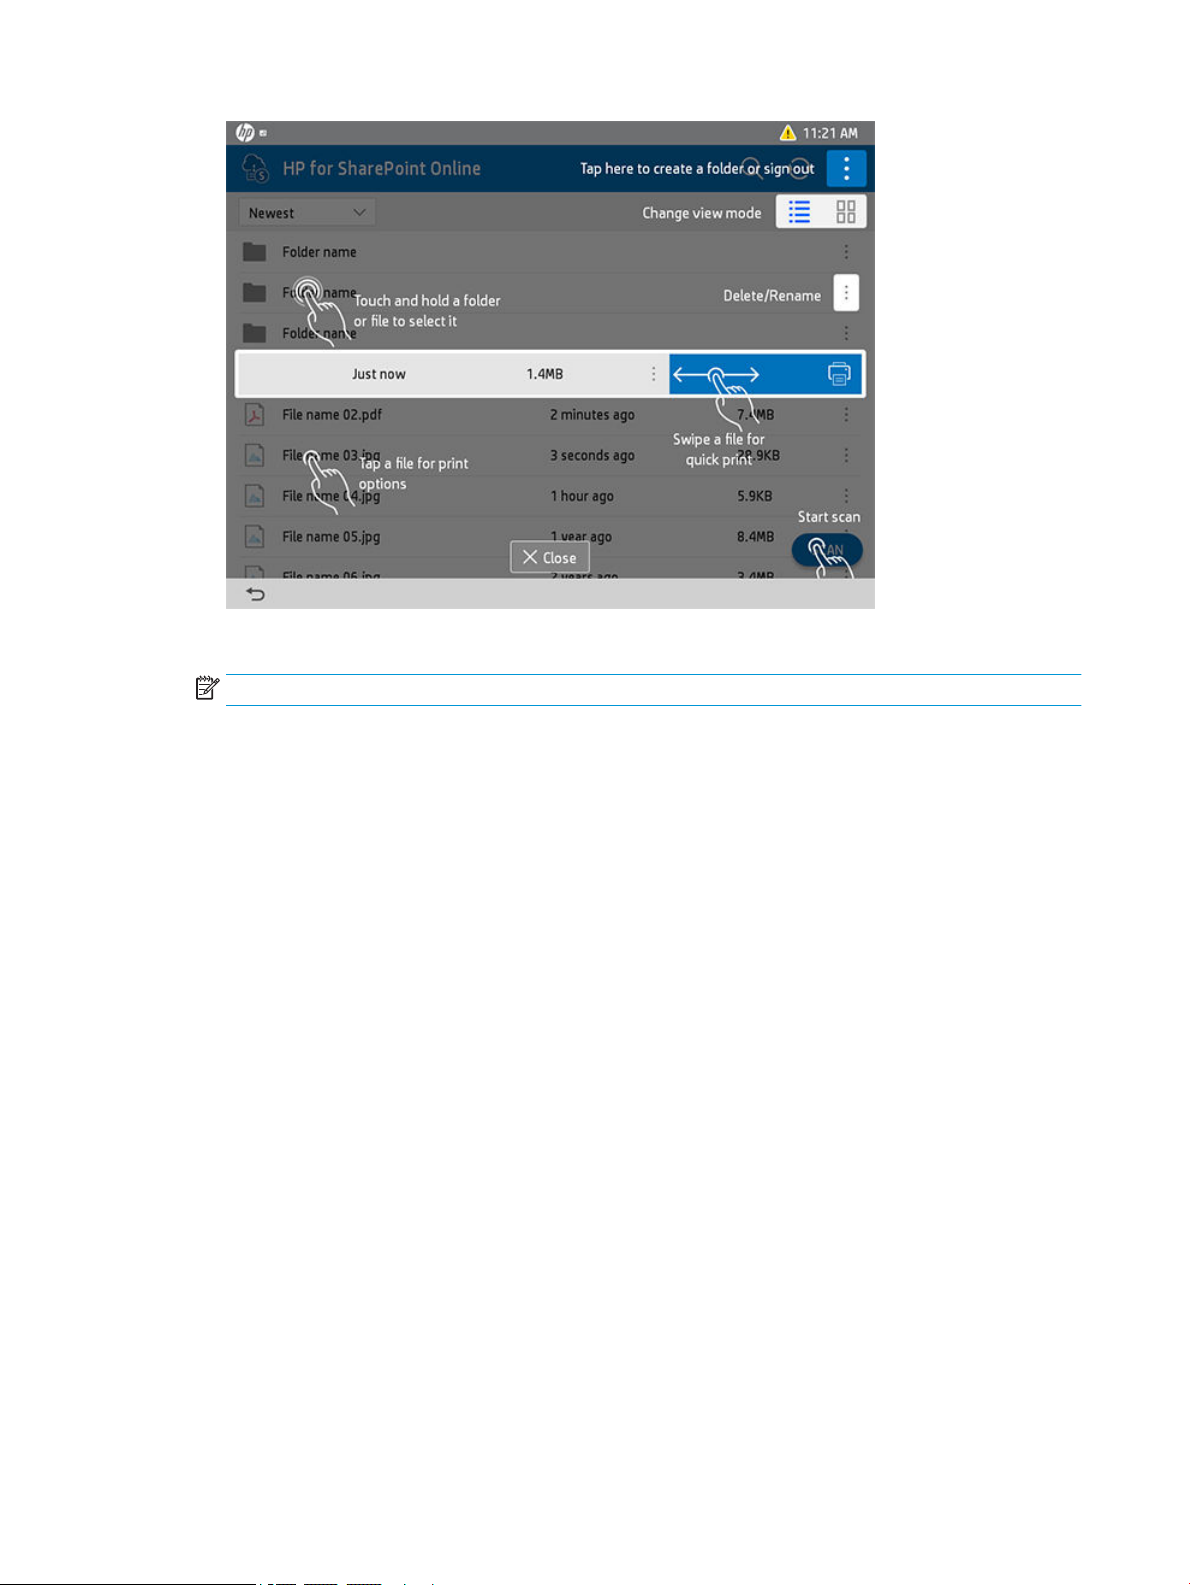
4. Select Close to return to the HP for SharePoint Online app.
NOTE: Select Do Not show Again to bypass this screen next time.
You are now logged into the account from the printer.
Scan a document to the SharePoint Online account
Learn how to scan a document to the SharePoint Online account.
One of the primary features of the HP for SharePoint Online app is the ability to scan documents directly to your
SharePoint Online account. To do this, follow these steps:
1. Open the HP for SharePoint Online app from the printer control panel.
8 Chapter 2 Use the HP for SharePoint Online app ENWW
Page 11
2. Sign in to the SharePoint Online account from the printer control panel.
3. From the HP for SharePoint Online home screen, select Scan or the Scan icon.
NOTE: If you wish to scan directly into an existing folder, you must rst open that folder by selecting the
folder name in the list.
4. On the scan preview screen, type a name for the scan you want to create.
5. If you plan to email the scan, select the Send to Email check box and then type the email address in the To
eld.
ENWW Scan a document to the SharePoint Online account 9
Page 12

NOTE: SMTP services must be congured on the printer to use the Send to Email feature. When scanning
to email, the From: eld will automatically populate when the email address is congured in the Embedded
Web Server (EWS) under SMTP server settings.
6. To adjust the document settings (size, le type, 2-sided, etc.), select Options. Use the following information
as a guide:
NOTE: The screen display might vary in color, appearance, and options depending on the App.
● File Type and Resolution - Use this option to change le size, le resolution, and le types from JPEG
or PDF (for example). Supported le types and resolutions vary depending on the App.
● Original Sides - Use this option to change from 1-sided to 2-sided (duplex).
● Color/Black - Use this option to change to Color, Black/Gray, or Black depending on the scanned
original.
● Original Size - Use this option to change the paper size for the scan. The default is Letter.
● Content Orientation - Use this option to change the page orientation to/from Portrait to Landscape.
● Image Adjustment - Use this option to change the Sharpness, Darkness, Contrast, and Background
Cleanup settings.
● Optimize Text/Picture - Use this option to change the image from Text to Mixed, Printed Picture, or
Photograph.
● Cropping Options - Use the Crop to content option to eliminate unnecessary white space or keep the
default Do not crop.
10 Chapter 2 Use the HP for SharePoint Online app ENWW
Page 13

● Blank Page Suppression - Use the Suppress Blank Pages option to exclude blanks when scanning
multiple pages or keep the default O.
● Multi-feed Detection - Use the Multi-feed Detection option when scanning large documents and stop
the scanning process if multiple page feeds are detected or keep the default O.
7. Select Send.
NOTE: A progress window displays where you can cancel the job before it completes if needed.
When the scan completes, the document will be visible in SharePoint Online.
Print a document from the SharePoint Online account
Learn how to print a document from the SharePoint Online account.
The HP for SharePoint Online app allows you to print a document directly from your SharePoint Online account.
To print a document, follow these steps:
NOTE: You must rst log in to the SharePoint Online account from the printer control panel (see the section
Sign in to the application).
1. Open the HP for SharePoint Online app from the printer control panel.
2. Sign in to the SharePoint Online account from the printer control panel.
3. Navigate to the document location.
4. Select the document you want to print. The Print Preview window opens.
NOTE: You can also touch and hold a document to open a check box view, and then use the check boxes
to select multiple documents, and touch the printer icon.
5. In the Print Preview window, select the print options for the print job (optional).
ENWW Print a document from the SharePoint Online account 11
Page 14

● Output Sides - Use this option to change from 1-sided to 2-sided (duplex).
● Color/Black - Use this option to select Color, Black/Gray, or Black.
● Paper Selection - Use this option to select Paper Size and Paper Tray. The default size is Letter.
6. Select Print, or if printing multiple les, select the print icon.
12 Chapter 2 Use the HP for SharePoint Online app ENWW
Page 15

3 Manage content using the HP for SharePoint
Online app
Use the information in this chapter to manage and refresh content in your SharePoint Online account directly
from the printer control panel using the HP for SharePoint Online app.
ENWW 13
Page 16

Manage documents
Learn how to manage documents in the HP for SharePoint Online app from the printer control panel.
The HP for SharePoint Online app allows you to manage your documents.
NOTE: To manage documents, you must rst log in to the SharePoint Online account from the printer control
panel. For detailed instructions, see the section Log in to the SharePoint Online account.
Rename a document
Learn how to rename a document from the printer control panel.
To rename a document in the SharePoint Online account from the printer control panel using the HP for
SharePoint Online app, follow these steps:
1. Open the HP for SharePoint Online app from the printer control panel.
2. Sign in to the SharePoint Online account from the printer control panel.
3. Navigate to the document location.
4. Touch the File menu (3 dots to the right of the document) and select Rename.
5. Type the new document name and select OK or Rename.
14 Chapter 3 Manage content using the HP for SharePoint Online app ENWW
Page 17

Delete a document
Learn how to delete a document from the printer control panel.
To delete a document from the SharePoint Online account using the HP for SharePoint Online app from the
printer control panel, follow these steps:
NOTE: To manage documents, you must rst rst log in to the SharePoint Online account from the printer
control panel.
1. Open the HP for SharePoint Online app from the printer control panel.
2. Sign in to the SharePoint Online account from the printer control panel.
3. Navigate to the document location.
4. Touch the File menu (3 dots to the right of the document) and select Delete.
ENWW Manage documents 15
Page 18

5. Select Delete or OK to conrm.
NOTE: This cannot be undone.
Search for a document
Learn how to search for a document from the printer control panel.
To search for a specic document or email in the SharePoint Online account using the HP for SharePoint Online
app from the printer control panel, follow these steps:
NOTE: To manage documents, you must rst log in to the SharePoint Online account from the printer control
panel.
1. Open the HP for SharePoint Online app from the printer control panel.
2. Sign in to the SharePoint Online account from the printer control panel.
3. From the main menu in HP for SharePoint Online, touch the Search icon or Search eld.
16 Chapter 3 Manage content using the HP for SharePoint Online app ENWW
Page 19
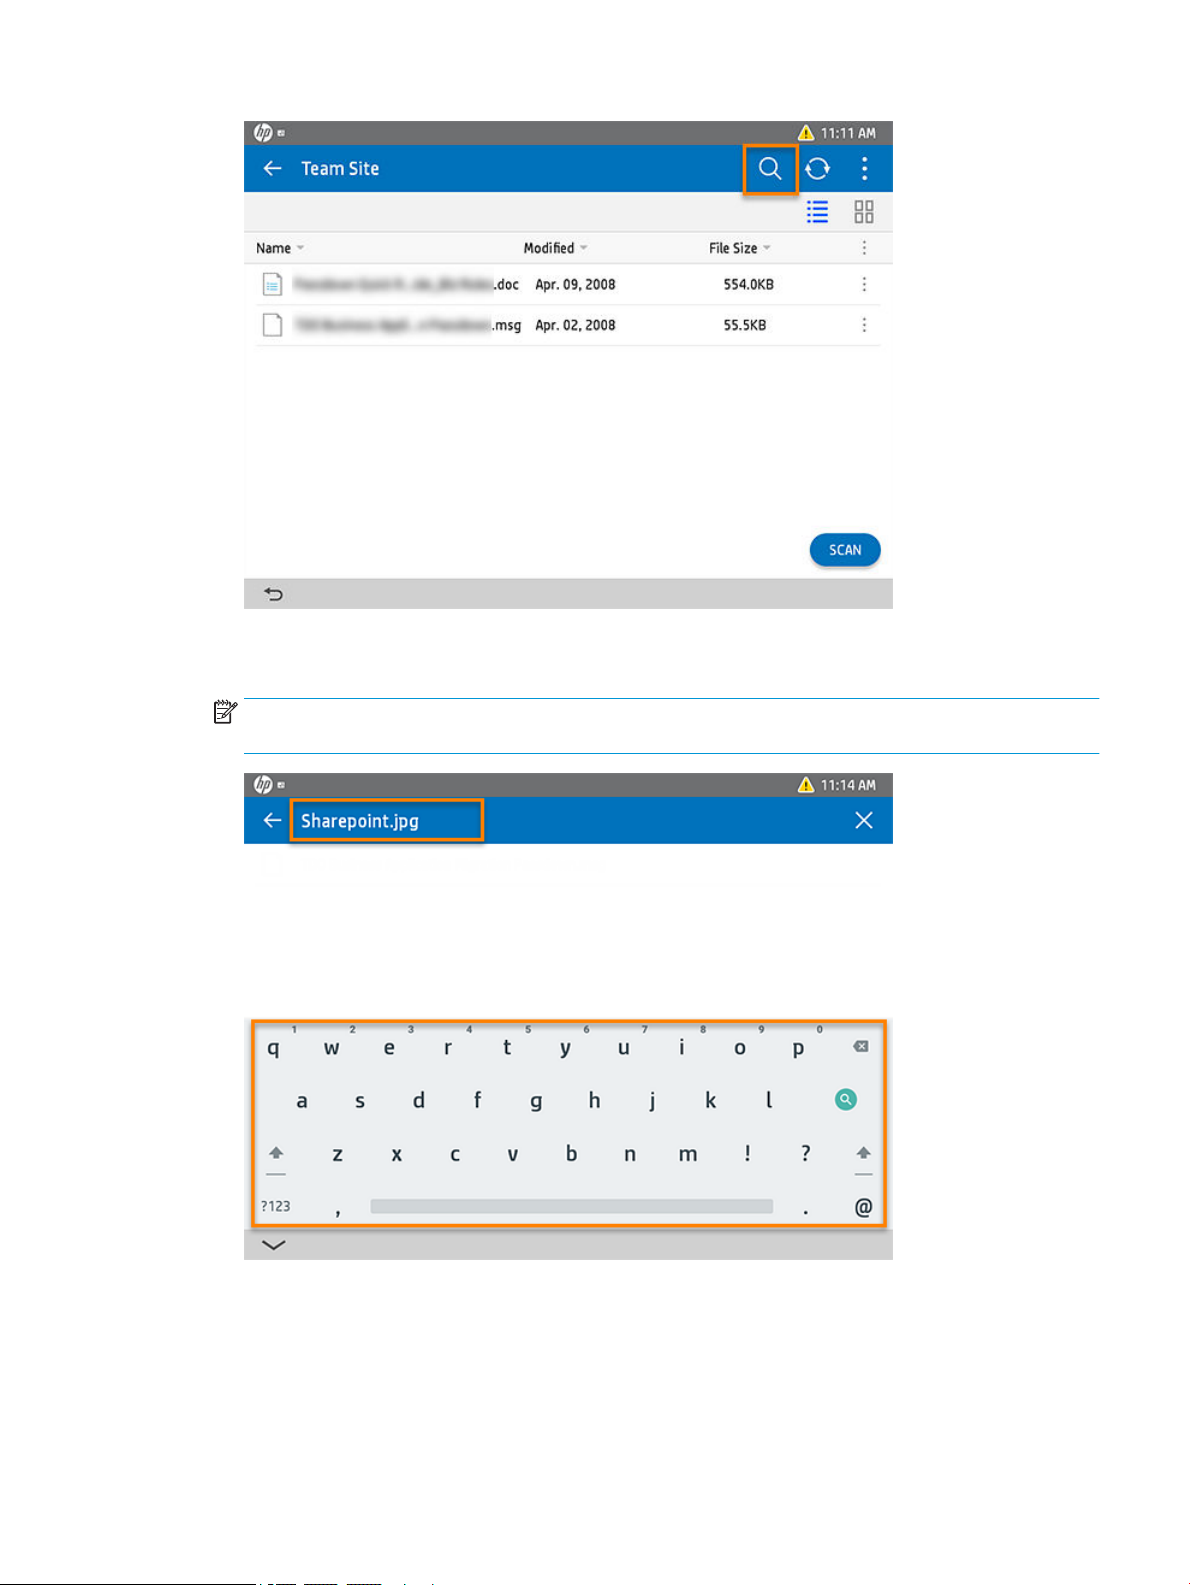
4. In the search eld, type the name of the document or keywords from the email for which you are
searching.
NOTE: As you type, documents that match your search criteria will automatically populate. Select a
suggested document or keep typing until the search is narrowed to the desired document.
Change the document view: List or Tile
Learn how to change the document view to either a detailed list or tile view.
To change the document view in the HP for SharePoint Online app to/from a detailed list to a tile view, follow
these steps:
ENWW Manage documents 17
Page 20

1. Open the HP for SharePoint Online app from the printer control panel.
2. Sign in to the SharePoint Online account from the printer control panel.
3. From the main menu in HP for SharePoint Online, touch the Tile icon.
4. To return to a list view, touch the List icon.
18 Chapter 3 Manage content using the HP for SharePoint Online app ENWW
Page 21

Manage folders
Learn how to manage folders in the HP for SharePoint Online app from the printer control panel.
The HP for SharePoint Online app allows you to manage your folders including the following tasks:
NOTE: To manage folders, you must rst log in to the SharePoint Online account from the printer control panel.
For detailed instructions, see the section Log in to the SharePoint Online account.
Create a folder
Learn how to create a folder from the printer control panel.
To create a folder in the SharePoint Online account from the printer control panel using the HP for SharePoint
Online app, follow these steps:
1. Open the HP for SharePoint Online app from the printer control panel.
2. Sign in to the SharePoint Online account from the printer control panel.
3. Touch the App menu (3 dots in the title bar) and select Create Folder.
4. Type the name for the new folder and select Create. The empty folder is opened.
ENWW Manage folders 19
Page 22

5. To return to the main folder list, touch the back arrow next to the folder name in the title bar.
Rename a folder
Learn how to rename a folder from the printer control panel.
To rename a folder in the SharePoint Online account from the printer control panel using the HP for SharePoint
Online app, follow these steps:
1. Open the HP for SharePoint Online app from the printer control panel.
2. Sign in to the SharePoint Online account from the printer control panel.
3. Navigate to the folder location.
4. Touch the menu icon (3 dots to the right of the folder name) and select Rename.
20 Chapter 3 Manage content using the HP for SharePoint Online app ENWW
Page 23
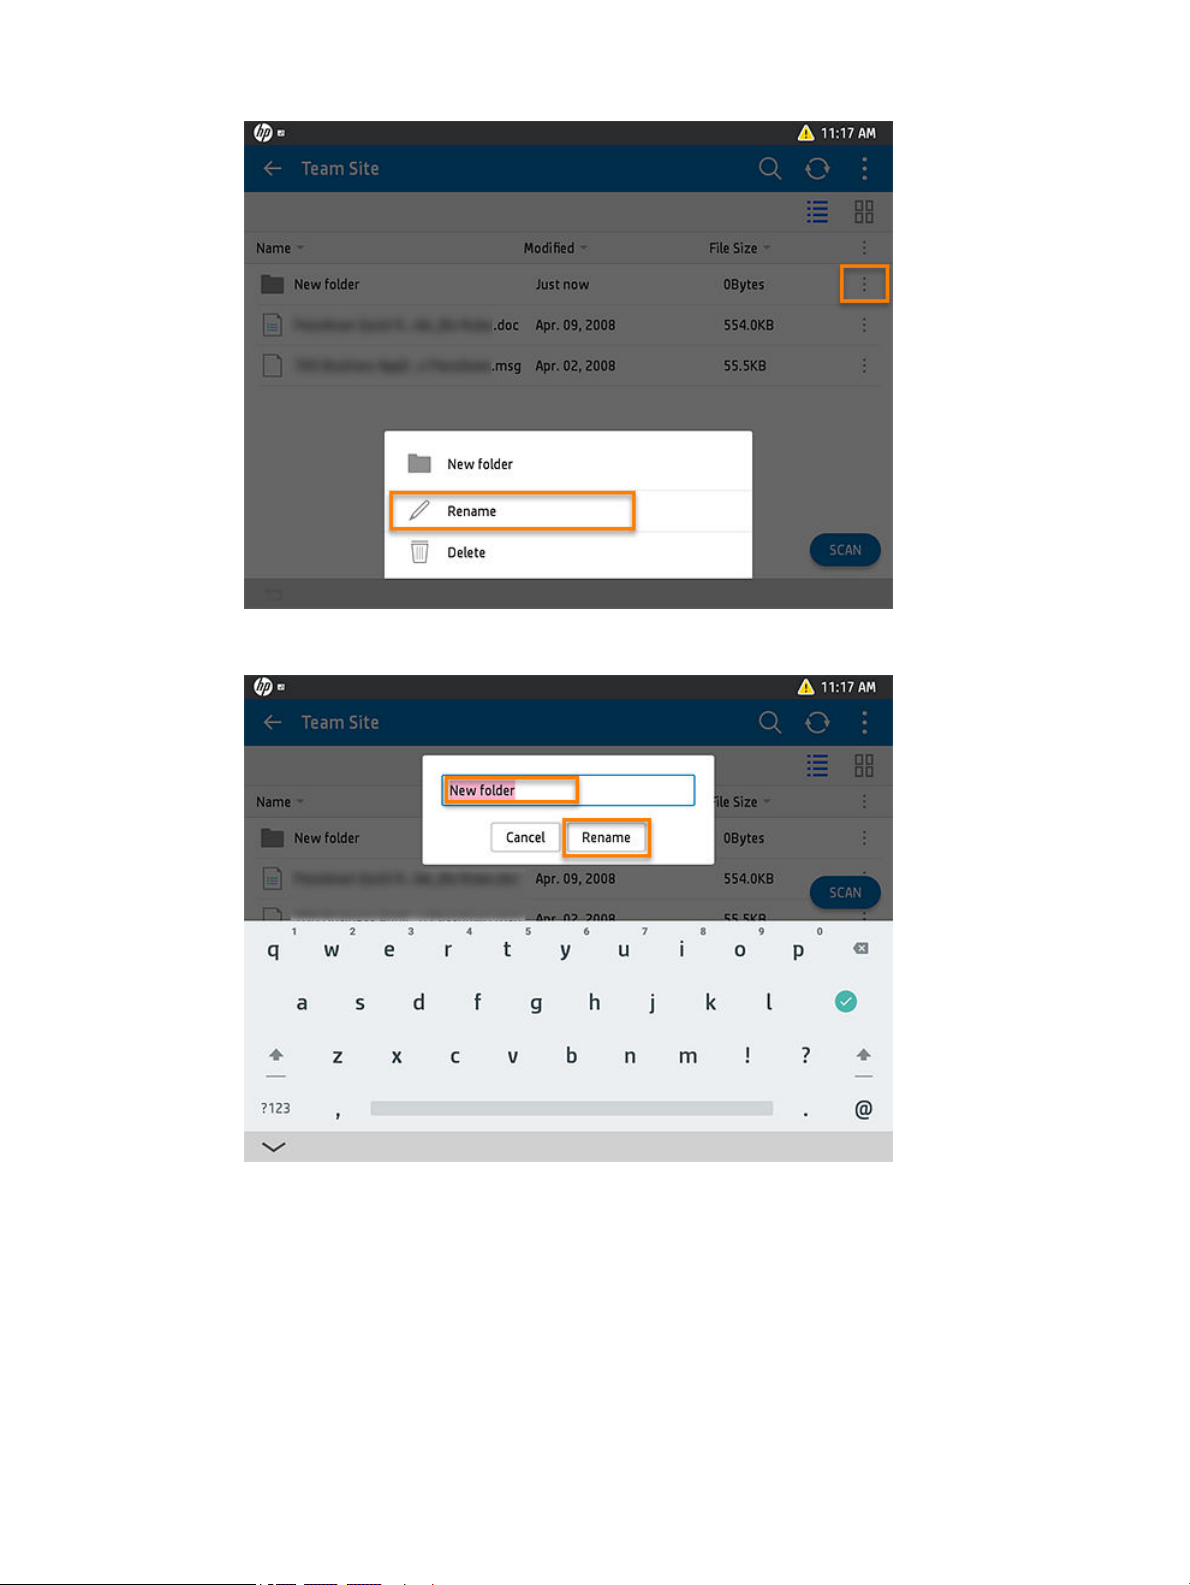
5. Type a new folder name and select Rename.
The renamed folder displays in the folder list.
Delete a folder
Learn how to delete a folder from the printer control panel.
To delete a folder from the SharePoint Online account using the HP for SharePoint Online app from the printer
control panel, follow these steps:
ENWW Manage folders 21
Page 24

1. Open the HP for SharePoint Online app from the printer control panel.
2. Sign in to the SharePoint Online account from the printer control panel.
3. Navigate to the folder location.
4. Touch the menu icon (3 dots to the right of the folder) and select Delete.
NOTE: You can also touch and hold the folder to open the check box view, select the check box next to
the folder, and touch the trash icon in the title bar.
5. Select Delete to conrm.
NOTE: This cannot be undone.
Refresh the screen
Learn how to refresh the screen.
The screen can be refreshed to update content in the SharePoint Online account using the HP for SharePoint
Online app from the printer control panel. To do this, follow these steps:
NOTE: To manage les, you must rst log in to the SharePoint Online account from the printer control panel.
1. Open the HP for SharePoint Online app from the printer control panel.
2. Sign in to the SharePoint Online account from the printer control panel.
3. From the main menu in HP for SharePoint Online, touch the circular icon in the title bar.
22 Chapter 3 Manage content using the HP for SharePoint Online app ENWW
Page 25

The content on the screen is refreshed.
ENWW Refresh the screen 23
Page 26

24 Chapter 3 Manage content using the HP for SharePoint Online app ENWW
Page 27

4 Manage the HP for SharePoint Online app
Learn how to manage the HP for SharePoint Online app.
Use the information in this chapter to manage the HP for SharePoint Online app from the printer control panel.
NOTE: To manage the HP for SharePoint Online, you must rst log in to the SharePoint Online account from the
printer control panel. For detailed instructions, see the section Log in to the SharePoint Online account.
View App Information, Version, and Open Source Licenses
Learn how to view App information.
The HP for SharePoint Online app information, including version details and associated Open Source Licenses,
can be viewed at any time from the printer control panel. To do this, follow these steps:
1. Open the HP for SharePoint Online app from the printer control panel.
2. Sign in to the SharePoint Online account from the printer control panel.
3. From the main menu in HP for SharePoint Online, touch the App menu (3 dots in the title bar).
4. Select Information.
ENWW 25
Page 28

5. To return to the main screen, touch the back arrow next to Information in the title bar.
Enable the administrator EULA option
Learn how to enable the administrator option that allows the device administrator to accept the End User
License Agreement (EULA) agreement on behalf of all users.
The Administrator Opt-in option can be enabled to allow the administrator to accept EULA agreements on behalf
of all users. To enable this feature and accept agreements on behalf of all users, follow these steps:
26 Chapter 4 Manage the HP for SharePoint Online app ENWW
Page 29

1. Sign in to the printer using administrator credentials.
2. Open the HP for SharePoint Online app from the printer control panel.
3. Sign in to the SharePoint Online account from the printer control panel.
4. Touch the App menu (3 dots in the title bar) and select Settings.
5. Under Agreement & Privacy Policy, select Administrator Opt-in.
6. Select Enabled, read and agree to the terms and conditions, and then select Done.
NOTE: You must be an authorized user designated by your company to enable this feature.
7. Repeat the steps above from each printer control panel.
These agreements will no longer prompt users when logging in at the control panel.
ENWW Enable the administrator EULA option 27
Page 30

Open the App Guide tutorial
Learn how to open the App Guide tutorial.
The HP for SharePoint Online App Guide tutorial that displays at initial startup can be viewed at any time from
the printer control panel. To open the tutorial, follow these steps:
1. Open the HP for SharePoint Online app from the printer control panel.
2. Sign in to the SharePoint Online account from the printer control panel.
3. From the main menu in HP for SharePoint Online, touch the App menu (3 dots in the title bar).
4. Select App Guide.
28 Chapter 4 Manage the HP for SharePoint Online app ENWW
Page 31

5. To close the App Guide, select Close.
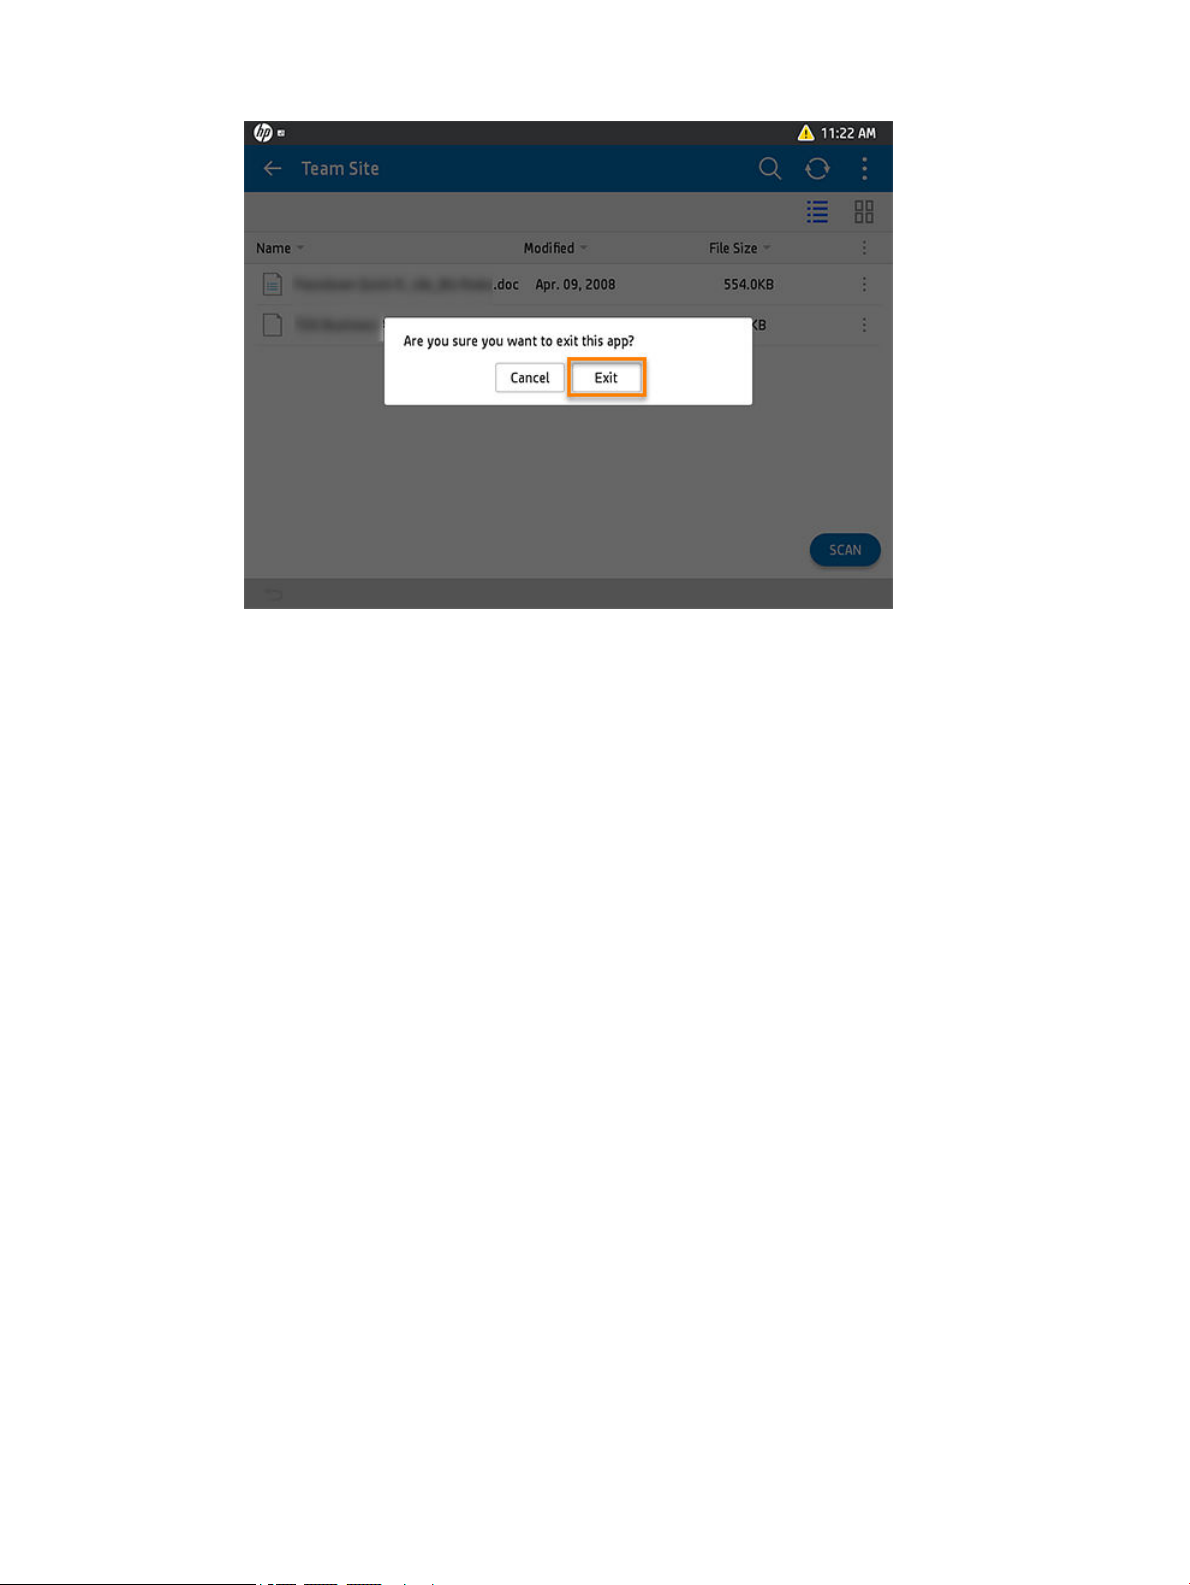
Sign out of the application
Learn how to sign out of the app and account from the printer control panel.
To sign out of the HP for SharePoint Online App and the SharePoint Online account, follow these steps:
NOTE: After signing out of the app, you will need to re-enter your SharePoint Online credentials the next time
you access the app from the printer control panel.
1. From the main menu in HP for SharePoint Online, touch the App menu (3 dots in the title bar).
ENWW Sign out of the application 29
Page 32

NOTE: You can also touch the return icon in the bottom left of the screen (where available).
2. Select Sign Out.
3. To conrm, select Exit.
30 Chapter 4 Manage the HP for SharePoint Online app ENWW
Page 33
Uninstall the application
Learn how to uninstall the application.
The HP for SharePoint Online app can be removed from the printer at any time.
To uninstall the HP for SharePoint Online app, follow these steps:
1. Log into HP Command Center.
2. In the Solutions pane, nd the app and select Manage.
3. Select Uninstall.
4. Select the device or devices from which you want to uninstall the app, and then select Next.
ENWW Uninstall the application 31
Page 34

5. Select Uninstall now or Schedule uninstallation, and then select Uninstall.
The app is uninstalled from the selected device(s). For detailed information, see the HP Workpath - Deployment
Guide using HP Command Center or contact the device administrator.
Support
Get support for the HP for SharePoint Online app.
If you need support for using the HP for SharePoint Online app, contact us.
32 Chapter 4 Manage the HP for SharePoint Online app ENWW
 Loading...