

HP ProLiant DL380 G4 9TB Installation Instructions Manual
HP ProLiant DL380 G4 9TB
Data Protection Storage
Server
installation instructions
About this document
This document provides procedures for rack installation of an HP
ProLiant DL380 G4 9TB Data Protection Storage Server (DP Storage
Server). Instructions for installing HP StorageWorks Modular Smart
Array (MSA) storage systems are included with the MSA storage
systems. HP assumes that you are qualified in servicing computer
equipment, and trained in recognizing hazards in products with
hazardous energy levels.
Safety information
Before installing this product, read the Important Safety Information
document provided.
Regulatory notice
The rating label on the device gives the class (A or B) of the
equipment. Class B devices have an FCC logo or ID on the label.
Class A devices do not have an FCC logo or ID on the label. After
you have determined the device class, see the HP ProLiant Data
Protection Storage Server user guide for complete regulatory
compliance notices. This guide is printed, and also provided in the
product kit as a file on the documentation CD.
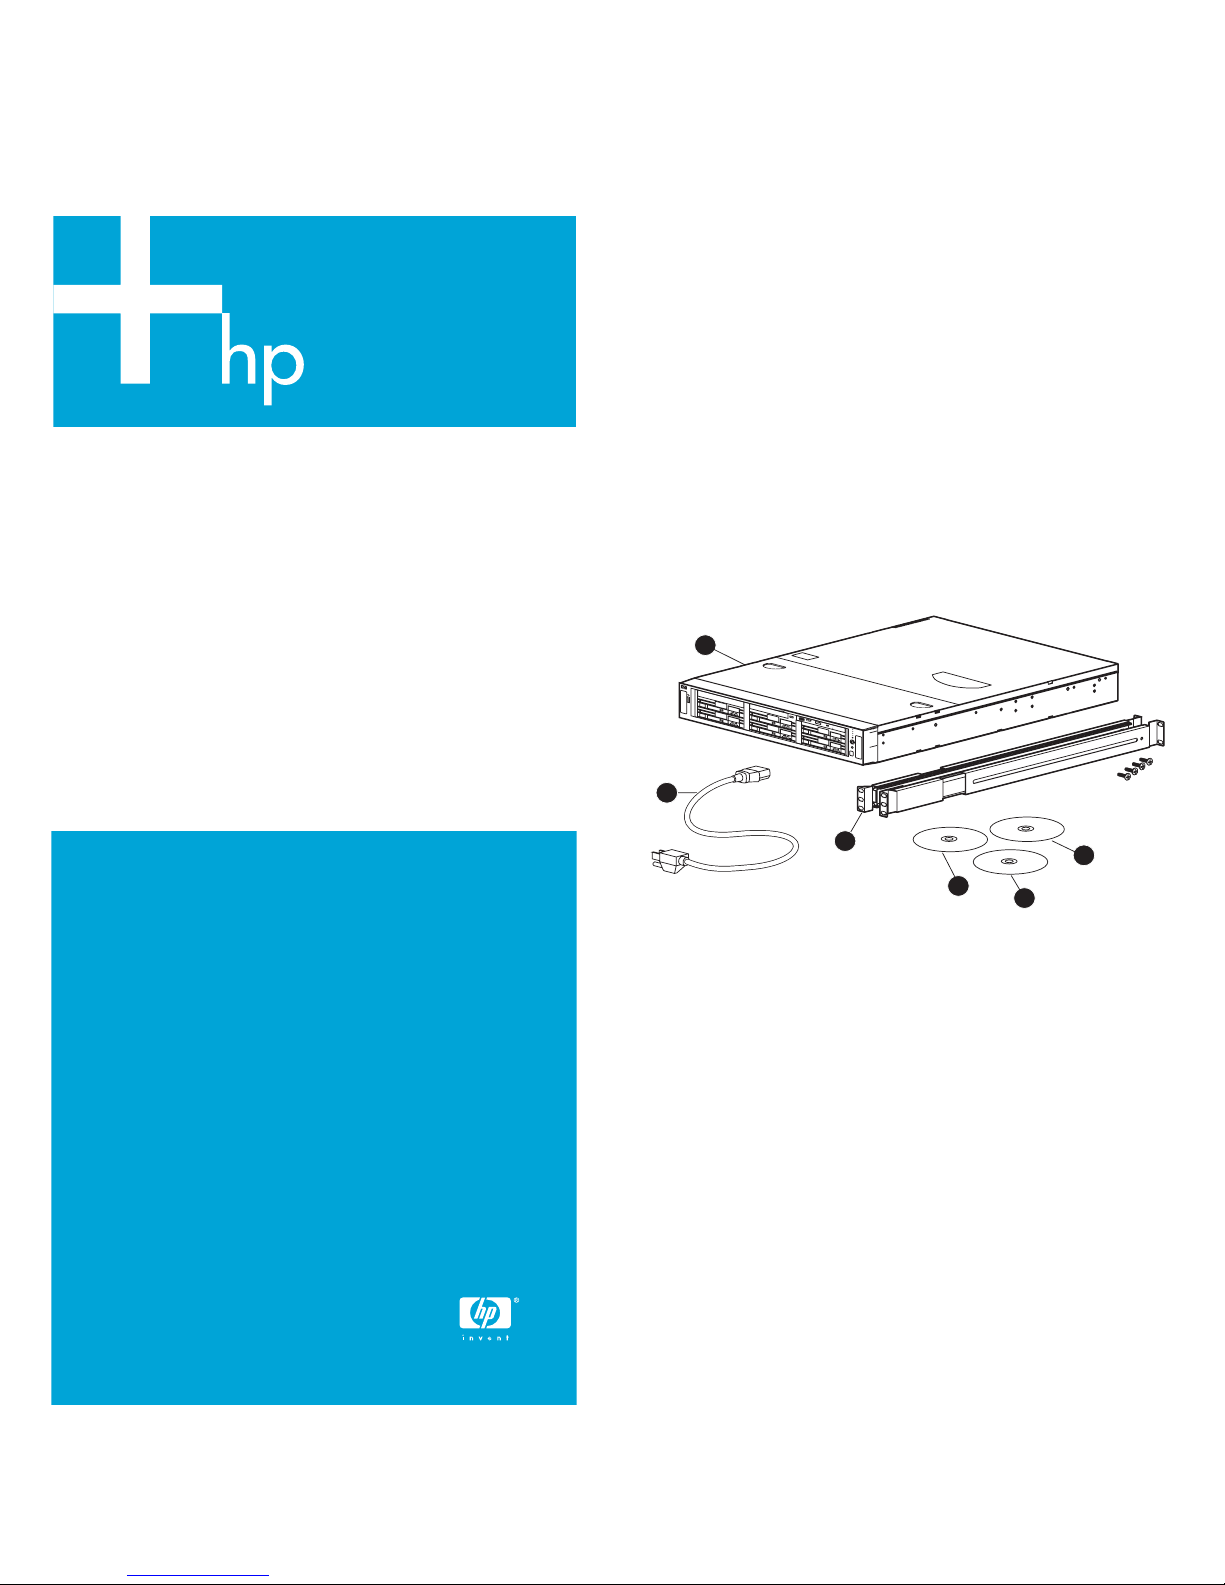
Kit contents
© Copyright 2005 Hewlett-Packard Development Company, L.P.
Third edition December 2005
Product names mentioned herein may be trademarks of their
respective companies as reflected by an associated footnote. The
information in this document is subject to change without notice.
Printed in the US.
www.hp.com
1
5
6
2
1 HP ProLiant DL380 G4 9TB
Data Protection Storage
Server (Microsoft® System
Center Data Protection
Manager (DPM) software and
OS preloaded)
3 Quick Restore DVD 4 HP Storage Server Service
5 Power cord 6 Rails
2 HP ProLiant Data Protection
Storage Server Documentation
CD (includes HP ProLiant Data
Protection Storage Server user
guide, HP ProLiant Data
Protection Storage Server
expansion guide, and the
Microsoft DPM Planning and
Deployment guide)
Release DVD; use only
Multi-lingual User Interface
(MUI) updates
4
3
5235
*378124-003*
*HP StorageWorks MSA30 and cables are shipped separately.
Page 1

Front panel
Installing the server into the rack
3 4
2
1 Hard drive bays 2 USB port
3 Diskette drive bay 4 DVD/CD-ROM drive
5 Internal health LED 6 External health LED
7 NIC 1 link/activity LED 8 NIC 2 link/activity LED
9 UID LED button 10 Power on/stand by
1
button/system power LED
Back panel
10
5
6
7
8
9
CAUTION: Always install the heaviest item first, and continue
to populate the rack from the bottom to top.
1. Install the server and cable management arm. See the
installation instructions that ship with the 2U Quick Deploy Rail
System. If you chose not to install the cable management arm,
install the power cord anchor to the server.
IMPORTANT: When using cable management arm
components, ensure that there is enough slack in each of the cables
to prevent damage to the cables when the server is extended from
the rack. If using the power cord anchor, ensure that there is enough
slack in the power cord so that the redundant power supply can be
removed without disconnecting the power cord from the primary
power supply.
2. Install the MSA cables, as shown, and any peripheral devices.
To MSA array
13 14
1
2 3 4 5 6
12 11 10 9 8 7 15 16
1 Non-hot-plug PCI-X expansion
slot 3, 64 bit/100 MHz, bus B
3 Serial connector 4 iLO connector
5 Mouse connector 6 Power cord connector
7 Keyboard connector 8 NIC 1 connector
9 NIC 2 connector 10 USB connectors
11 Video connector
13 RJ-45 link LED 14 RJ-45 activity LED
15 UID LED 16 Power supp ly LEDs
2 Smart Array 6402 128 MB
RAID controller
12 VHDCI SCSI connector (port 1)
10680B680
3. Connect the power cord to the back of the server.
4. Secure cables to the cable management arm, if installed.
WARNING! To reduce the risk of electric shock or damage to
the equipment, connect the VHDCI connector on the controller
module to the external connector of a sixth-generation Smart Array
Controller on the server.
Starting the DP Storage Server
10679B6
To begin the first-time startup procedure:
• Ensure that the server is safely installed in an adequate
environment.
• Ensure that the power cables and peripheral devices are
plugged in, and that AC power is supplied to the server.
• See the DP Storage Server startup chapter in the HP ProLiant
Data Protection Manager Server user guide.
Page 2
 Loading...