

Page 1
OneShred 8CC
EN
DENO
DEPL
DEPT
DEGR
DESV
DEHR
DETR
DEHU
AR
Shredder
DE
Aktenvernichter
DEBG
DECZ
DEDA
Makulator
ES
Destructora de documentos
DEFI
Asiakirjasilppuri
DEFR
Destructeur de documents
DEIT
Distruggidocumenti
DENL
Papierversnipperaar
Makuleringsmaskin
Niszczarka do dokumentów
Destruidor de documentos
DERO
DERU
DESK
DESR
Šreder
Dokumentförstörare
הסרגמ
DEHE
Art. No.: 2801, 2801SA, 2809
v1.14.1
03/2022
Page 2

Read the Operating Manual . . . . . . . . . . . . . . . . . . . . . . . . . . . . . . . . . . . . . . . . . . . . . . . . . . . . . . . . . . . . . .10
EN
Intended Use . . . . . . . . . . . . . . . . . . . . . . . . . . . . . . . . . . . . . . . . . . . . . . . . . . . . . . . . . . . . . . . . . . . . . . . . . . . 10
Observe the Safety Information . . . . . . . . . . . . . . . . . . . . . . . . . . . . . . . . . . . . . . . . . . . . . . . . . . . . . . . . . . 10
Checking the Package Contents . . . . . . . . . . . . . . . . . . . . . . . . . . . . . . . . . . . . . . . . . . . . . . . . . . . . . . . . . . 12
General View of the Shredder . . . . . . . . . . . . . . . . . . . . . . . . . . . . . . . . . . . . . . . . . . . . . . . . . . . . . . . . . . . . . 13
Positioning the Shredder and Starting It Up . . . . . . . . . . . . . . . . . . . . . . . . . . . . . . . . . . . . . . . . . . . . . . . . 14
Operating the Shredder . . . . . . . . . . . . . . . . . . . . . . . . . . . . . . . . . . . . . . . . . . . . . . . . . . . . . . . . . . . . . . . . . . 15
Troubleshooting . . . . . . . . . . . . . . . . . . . . . . . . . . . . . . . . . . . . . . . . . . . . . . . . . . . . . . . . . . . . . . . . . . . . . . . .15
Technical Data . . . . . . . . . . . . . . . . . . . . . . . . . . . . . . . . . . . . . . . . . . . . . . . . . . . . . . . . . . . . . . . . . . . . . . . . . . 18
Disposal . . . . . . . . . . . . . . . . . . . . . . . . . . . . . . . . . . . . . . . . . . . . . . . . . . . . . . . . . . . . . . . . . . . . . . . . . . . . . . . . 18
Information on Storage . . . . . . . . . . . . . . . . . . . . . . . . . . . . . . . . . . . . . . . . . . . . . . . . . . . . . . . . . . . . . . . . . . 19
Queries and Service . . . . . . . . . . . . . . . . . . . . . . . . . . . . . . . . . . . . . . . . . . . . . . . . . . . . . . . . . . . . . . . . . . . . .19
Declaration of Conformity . . . . . . . . . . . . . . . . . . . . . . . . . . . . . . . . . . . . . . . . . . . . . . . . . . . . . . . . . . . . . . . .19
Manufacturer . . . . . . . . . . . . . . . . . . . . . . . . . . . . . . . . . . . . . . . . . . . . . . . . . . . . . . . . . . . . . . . . . . . . . . . . . . . 20
DE
Bedienungsanleitung lesen . . . . . . . . . . . . . . . . . . . . . . . . . . . . . . . . . . . . . . . . . . . . . . . . . . . . . . . . . . . . . . .21
Bestimmungsgemäße Verwendung . . . . . . . . . . . . . . . . . . . . . . . . . . . . . . . . . . . . . . . . . . . . . . . . . . . . . . .21
Sicherheitshinweise beachten . . . . . . . . . . . . . . . . . . . . . . . . . . . . . . . . . . . . . . . . . . . . . . . . . . . . . . . . . . . . 21
Verpackungsinhalt prüfen . . . . . . . . . . . . . . . . . . . . . . . . . . . . . . . . . . . . . . . . . . . . . . . . . . . . . . . . . . . . . . . . 24
Ihr Aktenvernichter im Detail . . . . . . . . . . . . . . . . . . . . . . . . . . . . . . . . . . . . . . . . . . . . . . . . . . . . . . . . . . . . . 24
Aktenvernichter aufstellen und in Betrieb nehmen . . . . . . . . . . . . . . . . . . . . . . . . . . . . . . . . . . . . . . . . . .25
Aktenvernichter bedienen . . . . . . . . . . . . . . . . . . . . . . . . . . . . . . . . . . . . . . . . . . . . . . . . . . . . . . . . . . . . . . . .26
Wenn etwas nicht funktioniert . . . . . . . . . . . . . . . . . . . . . . . . . . . . . . . . . . . . . . . . . . . . . . . . . . . . . . . . . . . . 26
Technische Daten . . . . . . . . . . . . . . . . . . . . . . . . . . . . . . . . . . . . . . . . . . . . . . . . . . . . . . . . . . . . . . . . . . . . . . . 29
Entsorgung . . . . . . . . . . . . . . . . . . . . . . . . . . . . . . . . . . . . . . . . . . . . . . . . . . . . . . . . . . . . . . . . . . . . . . . . . . . . .29
Hinweise zur Lagerung . . . . . . . . . . . . . . . . . . . . . . . . . . . . . . . . . . . . . . . . . . . . . . . . . . . . . . . . . . . . . . . . . .30
Fragen und Service . . . . . . . . . . . . . . . . . . . . . . . . . . . . . . . . . . . . . . . . . . . . . . . . . . . . . . . . . . . . . . . . . . . . . .30
Konformitätserklärung. . . . . . . . . . . . . . . . . . . . . . . . . . . . . . . . . . . . . . . . . . . . . . . . . . . . . . . . . . . . . . . . . . . 31
Hersteller . . . . . . . . . . . . . . . . . . . . . . . . . . . . . . . . . . . . . . . . . . . . . . . . . . . . . . . . . . . . . . . . . . . . . . . . . . . . . . .31
BG
. . . . . . . . . . . . . . . . . . . . . . . . . . . . . . . . . . . . . . . . . . . . 32
. . . . . . . . . . . . . . . . . . . . . . . . . . . . . . . . . . . . . . . . . . . . . . . . . . . . . . . . . . .32
. . . . . . . . . . . . . . . . . . . . . . . . . . . . . . . . . . . . . . . . . . . . .32
. . . . . . . . . . . . . . . . . . . . . . . . . . . . . . . . . . . . . . . . . . 35
. . . . . . . . . . . . . . . . . . . . . . . . . . . . . . . . . . . . . . . . . . . . . . .35
. . . . . . . . . . . . . . . . . . . . . . . . . . . . . . . . . . . . . . . . . . . . . . . . . . . .36
. . . . . . . . . . . . . . . . . . . . . . . . . . . . . . . . . . . . . . . . . . . . . . . . . . . . . . . . . . . . . . .37
. . . . . . . . . . . . . . . . . . . . . . . . . . . . . . . . . . . . . . . . . . . . . . . . . . . . . . . . . . .38
. . . . . . . . . . . . . . . . . . . . . . . . . . . . . . . . . . . . . . . . . . . . . . . . . . . . . . . . . . . . . 40
. . . . . . . . . . . . . . . . . . . . . . . . . . . . . . . . . . . . . . . . . . . . . . . . . . . . . . . . . . . . . . . . . . . . . . . . . . . 41
. . . . . . . . . . . . . . . . . . . . . . . . . . . . . . . . . . . . . . . . . . . . . . . . . . . . . . . . . . . . . . . . .41
. . . . . . . . . . . . . . . . . . . . . . . . . . . . . . . . . . . . . . . . . . . . . . . . . . . . . . . . 42
. . . . . . . . . . . . . . . . . . . . . . . . . . . . . . . . . . . . . . . . . . . . . . . . . . . . . . . . . . . . 42
. . . . . . . . . . . . . . . . . . . . . . . . . . . . . . . . . . . . . . . . . . . . . . . . . . . . . . . . . . . . . . . . . . . . . . . . . . 42
- 2 -
Page 3

CZ
. . . . . . . . . . . . . . . . . . . . . . . . . . . . . . . . . . . . . . . . . . . . . . . . . . . . . . . . . . . . . . .43
. . . . . . . . . . . . . . . . . . . . . . . . . . . . . . . . . . . . . . . . . . . . . . . . . . . . . . . . . . . . 43
. . . . . . . . . . . . . . . . . . . . . . . . . . . . . . . . . . . . . . . . . . . . . . . . . . . . . . . 43
. . . . . . . . . . . . . . . . . . . . . . . . . . . . . . . . . . . . . . . . . . . . . . . . . . . . . . . . . . . . . . . . . .46
. . . . . . . . . . . . . . . . . . . . . . . . . . . . . . . . . . . . . . . . . . . . . . . . . . . . . . . . . . . . . . . . 46
. . . . . . . . . . . . . . . . . . . . . . . . . . . . . . . . . . . . . . . . . . . . . . . .47
. . . . . . . . . . . . . . . . . . . . . . . . . . . . . . . . . . . . . . . . . . . . . . . . . . . . . . . . . . . . . . . . . . . . .48
. . . . . . . . . . . . . . . . . . . . . . . . . . . . . . . . . . . . . . . . . . . . . . . . . . . . . . . . . . . . . . . . . . . 49
. . . . . . . . . . . . . . . . . . . . . . . . . . . . . . . . . . . . . . . . . . . . . . . . . . . . . . . . . . . . . . . . . . . . . . . . . 51
Likvidace . . . . . . . . . . . . . . . . . . . . . . . . . . . . . . . . . . . . . . . . . . . . . . . . . . . . . . . . . . . . . . . . . . . . . . . . . . . . . . . 52
. . . . . . . . . . . . . . . . . . . . . . . . . . . . . . . . . . . . . . . . . . . . . . . . . . . . . . . . . . . . . . . . . . . .52
. . . . . . . . . . . . . . . . . . . . . . . . . . . . . . . . . . . . . . . . . . . . . . . . . . . . . . . . . . . . . . . . . . . . . . . . .52
. . . . . . . . . . . . . . . . . . . . . . . . . . . . . . . . . . . . . . . . . . . . . . . . . . . . . . . . . . . . . . . . . . . . . . 53
Výrobce . . . . . . . . . . . . . . . . . . . . . . . . . . . . . . . . . . . . . . . . . . . . . . . . . . . . . . . . . . . . . . . . . . . . . . . . . . . . . . . . 53
DA
. . . . . . . . . . . . . . . . . . . . . . . . . . . . . . . . . . . . . . . . . . . . . . . . . . . . . . . . . 54
Tilsigtet brug . . . . . . . . . . . . . . . . . . . . . . . . . . . . . . . . . . . . . . . . . . . . . . . . . . . . . . . . . . . . . . . . . . . . . . . . . . . 54
Overhold sikkerhedsanvisningerne . . . . . . . . . . . . . . . . . . . . . . . . . . . . . . . . . . . . . . . . . . . . . . . . . . . . . . . . 54
Kontrol af emballagens indhold . . . . . . . . . . . . . . . . . . . . . . . . . . . . . . . . . . . . . . . . . . . . . . . . . . . . . . . . . . . 56
Oversigt over din makulator . . . . . . . . . . . . . . . . . . . . . . . . . . . . . . . . . . . . . . . . . . . . . . . . . . . . . . . . . . . . . . 57
Stil makulatoren op og tag den i brug . . . . . . . . . . . . . . . . . . . . . . . . . . . . . . . . . . . . . . . . . . . . . . . . . . . . . 58
. . . . . . . . . . . . . . . . . . . . . . . . . . . . . . . . . . . . . . . . . . . . . . . . . . . . . . . . . . . . . . . . 59
Hvis noget ikke fungerer . . . . . . . . . . . . . . . . . . . . . . . . . . . . . . . . . . . . . . . . . . . . . . . . . . . . . . . . . . . . . . . . . 59
Tekniske data . . . . . . . . . . . . . . . . . . . . . . . . . . . . . . . . . . . . . . . . . . . . . . . . . . . . . . . . . . . . . . . . . . . . . . . . . . . 62
. . . . . . . . . . . . . . . . . . . . . . . . . . . . . . . . . . . . . . . . . . . . . . . . . . . . . . . . . . . . . . . . . . . . . . . . . . .63
Henvisninger til opbevaring . . . . . . . . . . . . . . . . . . . . . . . . . . . . . . . . . . . . . . . . . . . . . . . . . . . . . . . . . . . . . . 63
Spørgsmål og service . . . . . . . . . . . . . . . . . . . . . . . . . . . . . . . . . . . . . . . . . . . . . . . . . . . . . . . . . . . . . . . . . . . . 63
Overensstemmelseserklæring . . . . . . . . . . . . . . . . . . . . . . . . . . . . . . . . . . . . . . . . . . . . . . . . . . . . . . . . . . . . 64
Producent . . . . . . . . . . . . . . . . . . . . . . . . . . . . . . . . . . . . . . . . . . . . . . . . . . . . . . . . . . . . . . . . . . . . . . . . . . . . . .64
ES
Leer el manual de instrucciones . . . . . . . . . . . . . . . . . . . . . . . . . . . . . . . . . . . . . . . . . . . . . . . . . . . . . . . . . . 65
Uso previsto . . . . . . . . . . . . . . . . . . . . . . . . . . . . . . . . . . . . . . . . . . . . . . . . . . . . . . . . . . . . . . . . . . . . . . . . . . . .65
Tener en cuenta las advertencias de seguridad . . . . . . . . . . . . . . . . . . . . . . . . . . . . . . . . . . . . . . . . . . . . . 65
. . . . . . . . . . . . . . . . . . . . . . . . . . . . . . . . . . . . . . . . . . . . . . . . . . . . . 68
La destructora de documentos en detalle . . . . . . . . . . . . . . . . . . . . . . . . . . . . . . . . . . . . . . . . . . . . . . . . . . 68
Instalar y poner en servicio la destructora de documentos . . . . . . . . . . . . . . . . . . . . . . . . . . . . . . . . . . . 69
. . . . . . . . . . . . . . . . . . . . . . . . . . . . . . . . . . . . . . . . . . . . . . . . . . 70
Si hay algo que no funciona . . . . . . . . . . . . . . . . . . . . . . . . . . . . . . . . . . . . . . . . . . . . . . . . . . . . . . . . . . . . . . 71
Datos técnicos . . . . . . . . . . . . . . . . . . . . . . . . . . . . . . . . . . . . . . . . . . . . . . . . . . . . . . . . . . . . . . . . . . . . . . . . . . 74
Eliminación . . . . . . . . . . . . . . . . . . . . . . . . . . . . . . . . . . . . . . . . . . . . . . . . . . . . . . . . . . . . . . . . . . . . . . . . . . . . .75
Advertencias sobre el almacenamiento . . . . . . . . . . . . . . . . . . . . . . . . . . . . . . . . . . . . . . . . . . . . . . . . . . . . 75
Preguntas y Servicio Técnico . . . . . . . . . . . . . . . . . . . . . . . . . . . . . . . . . . . . . . . . . . . . . . . . . . . . . . . . . . . . . 76
Declaración de conformidad . . . . . . . . . . . . . . . . . . . . . . . . . . . . . . . . . . . . . . . . . . . . . . . . . . . . . . . . . . . . . . 76
Fabricante . . . . . . . . . . . . . . . . . . . . . . . . . . . . . . . . . . . . . . . . . . . . . . . . . . . . . . . . . . . . . . . . . . . . . . . . . . . . . . 76
- 3 -
Page 4

FI
. . . . . . . . . . . . . . . . . . . . . . . . . . . . . . . . . . . . . . . . . . . . . . . . . . . . . . . . . . . . . . . . . . . . . . . . . . 77
Määräystenmukainen käyttö . . . . . . . . . . . . . . . . . . . . . . . . . . . . . . . . . . . . . . . . . . . . . . . . . . . . . . . . . . . . . 77
. . . . . . . . . . . . . . . . . . . . . . . . . . . . . . . . . . . . . . . . . . . . . . . . . . . . . . . . . . . . . . . 77
Pakkauksen sisällön tarkastaminen . . . . . . . . . . . . . . . . . . . . . . . . . . . . . . . . . . . . . . . . . . . . . . . . . . . . . . . 80
. . . . . . . . . . . . . . . . . . . . . . . . . . . . . . . . . . . . . . . . . . . . . . . . . . . . . . . . 80
. . . . . . . . . . . . . . . . . . . . . . . . . . . . . 81
. . . . . . . . . . . . . . . . . . . . . . . . . . . . . . . . . . . . . . . . . . . . . . . . . . . . . . . . . . . . . . . . . . 82
Häiriöiden esiintyessä. . . . . . . . . . . . . . . . . . . . . . . . . . . . . . . . . . . . . . . . . . . . . . . . . . . . . . . . . . . . . . . . . . . .82
Tekniset tiedot . . . . . . . . . . . . . . . . . . . . . . . . . . . . . . . . . . . . . . . . . . . . . . . . . . . . . . . . . . . . . . . . . . . . . . . . . . 85
Hävittäminen . . . . . . . . . . . . . . . . . . . . . . . . . . . . . . . . . . . . . . . . . . . . . . . . . . . . . . . . . . . . . . . . . . . . . . . . . . . 85
. . . . . . . . . . . . . . . . . . . . . . . . . . . . . . . . . . . . . . . . . . . . . . . . . . . . . . . . . . . . .86
. . . . . . . . . . . . . . . . . . . . . . . . . . . . . . . . . . . . . . . . . . . . . . . . . . . . . . . . . . . . 86
Vaatimustenmukaisuusvakuutus . . . . . . . . . . . . . . . . . . . . . . . . . . . . . . . . . . . . . . . . . . . . . . . . . . . . . . . . . 86
. . . . . . . . . . . . . . . . . . . . . . . . . . . . . . . . . . . . . . . . . . . . . . . . . . . . . . . . . . . . . . . . . . . . . . . . . . . . . .86
FR
Lire le mode d'emploi . . . . . . . . . . . . . . . . . . . . . . . . . . . . . . . . . . . . . . . . . . . . . . . . . . . . . . . . . . . . . . . . . . . . 87
Utilisation conforme à l'usage prévu . . . . . . . . . . . . . . . . . . . . . . . . . . . . . . . . . . . . . . . . . . . . . . . . . . . . . . . 87
Respecter les consignes de sécurité . . . . . . . . . . . . . . . . . . . . . . . . . . . . . . . . . . . . . . . . . . . . . . . . . . . . . . . 87
. . . . . . . . . . . . . . . . . . . . . . . . . . . . . . . . . . . . . . . . . . . . . . . . . . . . . . . . . . . . 89
Votre destructeur de documents en détail . . . . . . . . . . . . . . . . . . . . . . . . . . . . . . . . . . . . . . . . . . . . . . . . .90
Positionnement et mise en service du destructeur de documents . . . . . . . . . . . . . . . . . . . . . . . . . . . .91
Comment utiliser le destructeur de documents . . . . . . . . . . . . . . . . . . . . . . . . . . . . . . . . . . . . . . . . . . . . . 92
Si quelque chose ne fonctionne pas . . . . . . . . . . . . . . . . . . . . . . . . . . . . . . . . . . . . . . . . . . . . . . . . . . . . . . .93
Données techniques . . . . . . . . . . . . . . . . . . . . . . . . . . . . . . . . . . . . . . . . . . . . . . . . . . . . . . . . . . . . . . . . . . . . . 96
Élimination . . . . . . . . . . . . . . . . . . . . . . . . . . . . . . . . . . . . . . . . . . . . . . . . . . . . . . . . . . . . . . . . . . . . . . . . . . . . . 97
Remarques relatives au stockage du destructeur de documents . . . . . . . . . . . . . . . . . . . . . . . . . . . . . 97
Questions et service . . . . . . . . . . . . . . . . . . . . . . . . . . . . . . . . . . . . . . . . . . . . . . . . . . . . . . . . . . . . . . . . . . . . .98
Déclaration de conformité . . . . . . . . . . . . . . . . . . . . . . . . . . . . . . . . . . . . . . . . . . . . . . . . . . . . . . . . . . . . . . . . 98
Fabricant . . . . . . . . . . . . . . . . . . . . . . . . . . . . . . . . . . . . . . . . . . . . . . . . . . . . . . . . . . . . . . . . . . . . . . . . . . . . . . .98
GR
. . . . . . . . . . . . . . . . . . . . . . . . . . . . . . . . . . . . . . . . . . . . . . . . . . . . . . . . . . . . . 99
. . . . . . . . . . . . . . . . . . . . . . . . . . . . . . . . . . . . . . . . . . . . . . . . . . . . . . .99
. . . . . . . . . . . . . . . . . . . . . . . . . . . . . . . . . . . . . . . . . . . . . . . . . . . . . . . . . 99
. . . . . . . . . . . . . . . . . . . . . . . . . . . . . . . . . . . . . . . . . . . . . . . . . . . . .101
. . . . . . . . . . . . . . . . . . . . . . . . . . . . . . . . . . . . . . . . . . . . . . . .102
. . . . . . . . . . . . . . . . . . . . . . . . . . . . . .103
. . . . . . . . . . . . . . . . . . . . . . . . . . . . . . . . . . . . . . . . . . . . . . . . . . . . . .104
. . . . . . . . . . . . . . . . . . . . . . . . . . . . . . . . . . . . . . . . . . . . . . . . . . . . . . . . . . . . . . .104
. . . . . . . . . . . . . . . . . . . . . . . . . . . . . . . . . . . . . . . . . . . . . . . . . . . . . . . . . . . . . . . . . . . . . . .107
. . . . . . . . . . . . . . . . . . . . . . . . . . . . . . . . . . . . . . . . . . . . . . . . . . . . . . . . . . . . . . . . . . . . . . . . . . . . .108
. . . . . . . . . . . . . . . . . . . . . . . . . . . . . . . . . . . . . . . . . . . . . . . . . . . . . . . . . . .108
. . . . . . . . . . . . . . . . . . . . . . . . . . . . . . . . . . . . . . . . . . . . . . . . . . . . . . . . . . . . . . . . . . .109
. . . . . . . . . . . . . . . . . . . . . . . . . . . . . . . . . . . . . . . . . . . . . . . . . . . . . . . . . . . . . . . . .109
. . . . . . . . . . . . . . . . . . . . . . . . . . . . . . . . . . . . . . . . . . . . . . . . . . . . . . . . . . . . . . . . . . . . . . . .109
- 4 -
Page 5

HR
. . . . . . . . . . . . . . . . . . . . . . . . . . . . . . . . . . . . . . . . . . . . . . . . . . . . . . . . . . . . .110
. . . . . . . . . . . . . . . . . . . . . . . . . . . . . . . . . . . . . . . . . . . . . . . . . . . . . . . . . .110
. . . . . . . . . . . . . . . . . . . . . . . . . . . . . . . . . . . . . . . . . . . . . . . . . . . . . . . . . . . . . . .110
. . . . . . . . . . . . . . . . . . . . . . . . . . . . . . . . . . . . . . . . . . . . . . . . . . . . . . . . . . . . .112
. . . . . . . . . . . . . . . . . . . . . . . . . . . . . . . . . . . . . . . . . . . . . . . . . . .113
. . . . . . . . . . . . . . . . . . . . . . . . . . . . . . . . . . . . . .114
. . . . . . . . . . . . . . . . . . . . . . . . . . . . . . . . . . . . . . . . . . . . . . . . . . . .115
Ako nešto ne radi kako treba . . . . . . . . . . . . . . . . . . . . . . . . . . . . . . . . . . . . . . . . . . . . . . . . . . . . . . . . . . . .116
. . . . . . . . . . . . . . . . . . . . . . . . . . . . . . . . . . . . . . . . . . . . . . . . . . . . . . . . . . . . . . .118
. . . . . . . . . . . . . . . . . . . . . . . . . . . . . . . . . . . . . . . . . . . . . . . . . . . . . . . . . . . . . . . . . . . . . . . . . . .119
. . . . . . . . . . . . . . . . . . . . . . . . . . . . . . . . . . . . . . . . . . . . . . . . . . . . . . . . . . . . . . . . . . . .119
. . . . . . . . . . . . . . . . . . . . . . . . . . . . . . . . . . . . . . . . . . . . . . . . . . . . . . . . . . . . . . . . . . . . . . . . .119
. . . . . . . . . . . . . . . . . . . . . . . . . . . . . . . . . . . . . . . . . . . . . . . . . . . . . . . . . . . . . . . . . . . . .120
. . . . . . . . . . . . . . . . . . . . . . . . . . . . . . . . . . . . . . . . . . . . . . . . . . . . . . . . . . . . . . . . . . . . . . . . . . . .120
HU
. . . . . . . . . . . . . . . . . . . . . . . . . . . . . . . . . . . . . . . . . . . . . . . . . . . . . . . . . .121
. . . . . . . . . . . . . . . . . . . . . . . . . . . . . . . . . . . . . . . . . . . . . . . . . . . . . . . . . . . . .121
. . . . . . . . . . . . . . . . . . . . . . . . . . . . . . . . . . . . . . . . . . . . . . .121
. . . . . . . . . . . . . . . . . . . . . . . . . . . . . . . . . . . . . . . . . . . . . . . . . . .123
. . . . . . . . . . . . . . . . . . . . . . . . . . . . . . . . . . . . . . . . . . . . . . . . . . . . . . . . . . . . .124
. . . . . . . . . . . . . . . . . . . . . . . . . . . . . . . . . . . . .125
. . . . . . . . . . . . . . . . . . . . . . . . . . . . . . . . . . . . . . . . . . . . . . . . . . . . . . . . . .126
. . . . . . . . . . . . . . . . . . . . . . . . . . . . . . . . . . . . . . . . . . . . . . . . . . . . . . . . . . . . . . . .126
. . . . . . . . . . . . . . . . . . . . . . . . . . . . . . . . . . . . . . . . . . . . . . . . . . . . . . . . . . . . . . . . . . . . . . . .129
. . . . . . . . . . . . . . . . . . . . . . . . . . . . . . . . . . . . . . . . . . . . . . . . . . . . . . . . . . . . . . . . . . . . . . . .130
. . . . . . . . . . . . . . . . . . . . . . . . . . . . . . . . . . . . . . . . . . . . . . . . . . . . . . . . . .130
Kérdések és szerviz . . . . . . . . . . . . . . . . . . . . . . . . . . . . . . . . . . . . . . . . . . . . . . . . . . . . . . . . . . . . . . . . . . . .130
. . . . . . . . . . . . . . . . . . . . . . . . . . . . . . . . . . . . . . . . . . . . . . . . . . . . . . . . . . . . . . .131
. . . . . . . . . . . . . . . . . . . . . . . . . . . . . . . . . . . . . . . . . . . . . . . . . . . . . . . . . . . . . . . . . . . . . . . . . . . . . . . .131
IT
Leggere le istruzioni d'uso . . . . . . . . . . . . . . . . . . . . . . . . . . . . . . . . . . . . . . . . . . . . . . . . . . . . . . . . . . . . . . .132
Impiego conforme agli usi previsti . . . . . . . . . . . . . . . . . . . . . . . . . . . . . . . . . . . . . . . . . . . . . . . . . . . . . . . .132
Osservare le indicazioni di sicurezza . . . . . . . . . . . . . . . . . . . . . . . . . . . . . . . . . . . . . . . . . . . . . . . . . . . . . .132
. . . . . . . . . . . . . . . . . . . . . . . . . . . . . . . . . . . . . . . . . . . . . . . . . . .134
Vista dettagliata del distruggidocumenti . . . . . . . . . . . . . . . . . . . . . . . . . . . . . . . . . . . . . . . . . . . . . . . . . .135
Posizionamento e messa in funzione del distruggidocumenti . . . . . . . . . . . . . . . . . . . . . . . . . . . . . . .136
Esercizio del distruggidocumenti . . . . . . . . . . . . . . . . . . . . . . . . . . . . . . . . . . . . . . . . . . . . . . . . . . . . . . . . .137
Malfunzionamenti . . . . . . . . . . . . . . . . . . . . . . . . . . . . . . . . . . . . . . . . . . . . . . . . . . . . . . . . . . . . . . . . . . . . . .138
Dati tecnici . . . . . . . . . . . . . . . . . . . . . . . . . . . . . . . . . . . . . . . . . . . . . . . . . . . . . . . . . . . . . . . . . . . . . . . . . . . . .141
Smaltimento . . . . . . . . . . . . . . . . . . . . . . . . . . . . . . . . . . . . . . . . . . . . . . . . . . . . . . . . . . . . . . . . . . . . . . . . . . .142
Indicazioni sulla conservazione . . . . . . . . . . . . . . . . . . . . . . . . . . . . . . . . . . . . . . . . . . . . . . . . . . . . . . . . . .142
Domande e assistenza . . . . . . . . . . . . . . . . . . . . . . . . . . . . . . . . . . . . . . . . . . . . . . . . . . . . . . . . . . . . . . . . . .142
Dichiarazione di conformità . . . . . . . . . . . . . . . . . . . . . . . . . . . . . . . . . . . . . . . . . . . . . . . . . . . . . . . . . . . . .143
Produttore . . . . . . . . . . . . . . . . . . . . . . . . . . . . . . . . . . . . . . . . . . . . . . . . . . . . . . . . . . . . . . . . . . . . . . . . . . . .143
- 5 -
Page 6

NL
. . . . . . . . . . . . . . . . . . . . . . . . . . . . . . . . . . . . . . . . . . . . . . . . . . . . . . . . . . . . . . .144
Beoogd gebruik . . . . . . . . . . . . . . . . . . . . . . . . . . . . . . . . . . . . . . . . . . . . . . . . . . . . . . . . . . . . . . . . . . . . . . . .144
Veiligheidsinstructies in acht nemen . . . . . . . . . . . . . . . . . . . . . . . . . . . . . . . . . . . . . . . . . . . . . . . . . . . . .144
Inhoud van de verpakking controleren . . . . . . . . . . . . . . . . . . . . . . . . . . . . . . . . . . . . . . . . . . . . . . . . . . . .146
Uw papiervernietiger in detail . . . . . . . . . . . . . . . . . . . . . . . . . . . . . . . . . . . . . . . . . . . . . . . . . . . . . . . . . . . .147
Papierversnipperaar plaatsen en in gebruik nemen . . . . . . . . . . . . . . . . . . . . . . . . . . . . . . . . . . . . . . . .148
Papierversnipperaar bedienen . . . . . . . . . . . . . . . . . . . . . . . . . . . . . . . . . . . . . . . . . . . . . . . . . . . . . . . . . . .149
Als er iets niet werkt . . . . . . . . . . . . . . . . . . . . . . . . . . . . . . . . . . . . . . . . . . . . . . . . . . . . . . . . . . . . . . . . . . . .150
Technische gegevens . . . . . . . . . . . . . . . . . . . . . . . . . . . . . . . . . . . . . . . . . . . . . . . . . . . . . . . . . . . . . . . . . . .152
Gescheiden inzameling . . . . . . . . . . . . . . . . . . . . . . . . . . . . . . . . . . . . . . . . . . . . . . . . . . . . . . . . . . . . . . . . .153
Instructies voor opslag . . . . . . . . . . . . . . . . . . . . . . . . . . . . . . . . . . . . . . . . . . . . . . . . . . . . . . . . . . . . . . . . . .153
Vragen en service . . . . . . . . . . . . . . . . . . . . . . . . . . . . . . . . . . . . . . . . . . . . . . . . . . . . . . . . . . . . . . . . . . . . . .153
Verklaring van overeenstemming . . . . . . . . . . . . . . . . . . . . . . . . . . . . . . . . . . . . . . . . . . . . . . . . . . . . . . . .154
Fabrikant . . . . . . . . . . . . . . . . . . . . . . . . . . . . . . . . . . . . . . . . . . . . . . . . . . . . . . . . . . . . . . . . . . . . . . . . . . . . . .154
NO
Les bruksanvisningen . . . . . . . . . . . . . . . . . . . . . . . . . . . . . . . . . . . . . . . . . . . . . . . . . . . . . . . . . . . . . . . . . . .155
Tiltenkt bruk . . . . . . . . . . . . . . . . . . . . . . . . . . . . . . . . . . . . . . . . . . . . . . . . . . . . . . . . . . . . . . . . . . . . . . . . . . .155
Følg sikkerhetshenvisninger . . . . . . . . . . . . . . . . . . . . . . . . . . . . . . . . . . . . . . . . . . . . . . . . . . . . . . . . . . . . .155
Kontroller innholdet av pakken . . . . . . . . . . . . . . . . . . . . . . . . . . . . . . . . . . . . . . . . . . . . . . . . . . . . . . . . . .157
. . . . . . . . . . . . . . . . . . . . . . . . . . . . . . . . . . . . . . . . . . . . . . . . . . . . . . . . . .158
Sette opp makuleringsmaskinen og sette den i drift . . . . . . . . . . . . . . . . . . . . . . . . . . . . . . . . . . . . . . .159
. . . . . . . . . . . . . . . . . . . . . . . . . . . . . . . . . . . . . . . . . . . . . . . . . . . . . . . . . . . . .160
Hvis noe ikke fungerer . . . . . . . . . . . . . . . . . . . . . . . . . . . . . . . . . . . . . . . . . . . . . . . . . . . . . . . . . . . . . . . . . .161
Tekniske data . . . . . . . . . . . . . . . . . . . . . . . . . . . . . . . . . . . . . . . . . . . . . . . . . . . . . . . . . . . . . . . . . . . . . . . . . .163
Avfallshåndtering . . . . . . . . . . . . . . . . . . . . . . . . . . . . . . . . . . . . . . . . . . . . . . . . . . . . . . . . . . . . . . . . . . . . . .164
. . . . . . . . . . . . . . . . . . . . . . . . . . . . . . . . . . . . . . . . . . . . . . . . . . . . . . . . . . . . . . . . .164
Spørsmål og service . . . . . . . . . . . . . . . . . . . . . . . . . . . . . . . . . . . . . . . . . . . . . . . . . . . . . . . . . . . . . . . . . . . .164
Samsvarserklæring . . . . . . . . . . . . . . . . . . . . . . . . . . . . . . . . . . . . . . . . . . . . . . . . . . . . . . . . . . . . . . . . . . . . .165
Produsent . . . . . . . . . . . . . . . . . . . . . . . . . . . . . . . . . . . . . . . . . . . . . . . . . . . . . . . . . . . . . . . . . . . . . . . . . . . . .165
PL
. . . . . . . . . . . . . . . . . . . . . . . . . . . . . . . . . . . . . . . . . . . . . . . . . . . . . . .166
Zastosowanie zgodne z przeznaczeniem . . . . . . . . . . . . . . . . . . . . . . . . . . . . . . . . . . . . . . . . . . . . . . . . .166
. . . . . . . . . . . . . . . . . . . . . . . . . . . . . . . . . .166
. . . . . . . . . . . . . . . . . . . . . . . . . . . . . . . . . . . . . . . . . . . . . . . . . . . . .168
Widok detaliczny niszczarki do dokumentów . . . . . . . . . . . . . . . . . . . . . . . . . . . . . . . . . . . . . . . . . . . . . .169
Ustawianie i uruchamianie niszczarki do dokumentów . . . . . . . . . . . . . . . . . . . . . . . . . . . . . . . . . . . . .170
. . . . . . . . . . . . . . . . . . . . . . . . . . . . . . . . . . . . . . . . . . . . . . . . . . . . . .171
. . . . . . . . . . . . . . . . . . . . . . . . . . . . . . . . . . . . . . . . . . . . . . . . . . . . . .172
Parametry techniczne . . . . . . . . . . . . . . . . . . . . . . . . . . . . . . . . . . . . . . . . . . . . . . . . . . . . . . . . . . . . . . . . . .174
. . . . . . . . . . . . . . . . . . . . . . . . . . . . . . . . . . . . . . . . . . . . . . . . . . . . . . . . . . . . . . . . . . . . . . . . . . . . . .175
. . . . . . . . . . . . . . . . . . . . . . . . . . . . . . . . . . . . . . . . . . . . . . . . . . .175
Pytania i serwis . . . . . . . . . . . . . . . . . . . . . . . . . . . . . . . . . . . . . . . . . . . . . . . . . . . . . . . . . . . . . . . . . . . . . . . .176
. . . . . . . . . . . . . . . . . . . . . . . . . . . . . . . . . . . . . . . . . . . . . . . . . . . . . . . . . . . . . . . . . . .176
Producent . . . . . . . . . . . . . . . . . . . . . . . . . . . . . . . . . . . . . . . . . . . . . . . . . . . . . . . . . . . . . . . . . . . . . . . . . . . . .176
- 6 -
Page 7

PT
Leia o manual de instruções . . . . . . . . . . . . . . . . . . . . . . . . . . . . . . . . . . . . . . . . . . . . . . . . . . . . . . . . . . . . .177
. . . . . . . . . . . . . . . . . . . . . . . . . . . . . . . . . . . . . . . . . . . . . . . . . . . . . . . . .177
Observar os avisos de segurança . . . . . . . . . . . . . . . . . . . . . . . . . . . . . . . . . . . . . . . . . . . . . . . . . . . . . . . .177
. . . . . . . . . . . . . . . . . . . . . . . . . . . . . . . . . . . . . . . . . . . . . . . . . . . . . .179
O seu destruidor de documentos em detalhe . . . . . . . . . . . . . . . . . . . . . . . . . . . . . . . . . . . . . . . . . . . . .180
Ligar o destruidor de documentos e iniciar a utilização . . . . . . . . . . . . . . . . . . . . . . . . . . . . . . . . . . . . .181
Operar o destruidor de documentos . . . . . . . . . . . . . . . . . . . . . . . . . . . . . . . . . . . . . . . . . . . . . . . . . . . . . .182
Caso algo não funcione . . . . . . . . . . . . . . . . . . . . . . . . . . . . . . . . . . . . . . . . . . . . . . . . . . . . . . . . . . . . . . . . .182
Dados técnicos . . . . . . . . . . . . . . . . . . . . . . . . . . . . . . . . . . . . . . . . . . . . . . . . . . . . . . . . . . . . . . . . . . . . . . . . .185
Eliminação . . . . . . . . . . . . . . . . . . . . . . . . . . . . . . . . . . . . . . . . . . . . . . . . . . . . . . . . . . . . . . . . . . . . . . . . . . . .186
Avisos para a armazenamento. . . . . . . . . . . . . . . . . . . . . . . . . . . . . . . . . . . . . . . . . . . . . . . . . . . . . . . . . . .186
Perguntas e serviço . . . . . . . . . . . . . . . . . . . . . . . . . . . . . . . . . . . . . . . . . . . . . . . . . . . . . . . . . . . . . . . . . . . .186
Declaração de conformidade . . . . . . . . . . . . . . . . . . . . . . . . . . . . . . . . . . . . . . . . . . . . . . . . . . . . . . . . . . . .187
Fabricante . . . . . . . . . . . . . . . . . . . . . . . . . . . . . . . . . . . . . . . . . . . . . . . . . . . . . . . . . . . . . . . . . . . . . . . . . . . . .187
RO
Citirea manualului de utilizare . . . . . . . . . . . . . . . . . . . . . . . . . . . . . . . . . . . . . . . . . . . . . . . . . . . . . . . . . . .188
. . . . . . . . . . . . . . . . . . . . . . . . . . . . . . . . . . . . . . . . . . . . . . . . . . . . . . . . . . . .188
. . . . . . . . . . . . . . . . . . . . . . . . . . . . . . . . . . . . . . . . . . . . . . . . . .188
. . . . . . . . . . . . . . . . . . . . . . . . . . . . . . . . . . . . . . . . . . . . . . . . . . . . . . . . . .190
. . . . . . . . . . . . . . . . . . . . . . . . . . . . . . . . . . . . .191
. . . . . . . . . . . . . . . . . . . . . . . . . .193
. . . . . . . . . . . . . . . . . . . . . . . . . . . . . . . . . . . . . . . . . . . . . . . . . .193
. . . . . . . . . . . . . . . . . . . . . . . . . . . . . . . . . . . . . . . . . . . . . . . . . . . . . . . . . . . . . .194
Date tehnice . . . . . . . . . . . . . . . . . . . . . . . . . . . . . . . . . . . . . . . . . . . . . . . . . . . . . . . . . . . . . . . . . . . . . . . . . . .197
Eliminarea . . . . . . . . . . . . . . . . . . . . . . . . . . . . . . . . . . . . . . . . . . . . . . . . . . . . . . . . . . . . . . . . . . . . . . . . . . . . .198
. . . . . . . . . . . . . . . . . . . . . . . . . . . . . . . . . . . . . . . . . . . . . . . . . . . . . . . . . . . . .198
. . . . . . . . . . . . . . . . . . . . . . . . . . . . . . . . . . . . . . . . . . . . . . . . . . . . . . . . . . . . . . . . . . . . . .198
. . . . . . . . . . . . . . . . . . . . . . . . . . . . . . . . . . . . . . . . . . . . . . . . . . . . . . . . . . . . . .199
. . . . . . . . . . . . . . . . . . . . . . . . . . . . . . . . . . . . . . . . . . . . . . . . . . . . . . . . . . . . . . . . . . . . . . . . . . .199
RU
. . . . . . . . . . . . . . . . . . . . . . . . . . . . . . . . . . . . . . . . . . . . . . . . . . .200
. . . . . . . . . . . . . . . . . . . . . . . . . . . . . . . . . . . . . . . . . . . . . . . . . . . . . . . . .200
. . . . . . . . . . . . . . . . . . . . . . . . . . . . . . . . . . . . . . . . .200
. . . . . . . . . . . . . . . . . . . . . . . . . . . . . . . . . . . . . . . . . . . . . . . . . . . . . .203
. . . . . . . . . . . . . . . . . . . . . . . . . . . . . . . . . . . . . . . . . . . . . . . . . . . .203
. . . . . . . . . . . . . . . . . . . . . . . . . . . . . . . . . . . . . . . . . . . . .205
. . . . . . . . . . . . . . . . . . . . . . . . . . . . . . . . . . . . . . . . . . . . . . . . . . . . . . . . . . . . . . . .205
. . . . . . . . . . . . . . . . . . . . . . . . . . . . . . . . . . . . . . . . . . . . . . . . . . . . . . . . . . . . . . .206
. . . . . . . . . . . . . . . . . . . . . . . . . . . . . . . . . . . . . . . . . . . . . . . . . . . . . . . . . . . . . . . . . . .209
. . . . . . . . . . . . . . . . . . . . . . . . . . . . . . . . . . . . . . . . . . . . . . . . . . . . . . . . . . . . . . . . . . . . . . . . . . .210
. . . . . . . . . . . . . . . . . . . . . . . . . . . . . . . . . . . . . . . . . . . . . . . . . . . . . . . . . . . . . . . . .210
. . . . . . . . . . . . . . . . . . . . . . . . . . . . . . . . . . . . . . . . . . . . . . . . . . .210
. . . . . . . . . . . . . . . . . . . . . . . . . . . . . . . . . . . . . . . . . . . . . . . . . . . . . . . . . . . . . .211
. . . . . . . . . . . . . . . . . . . . . . . . . . . . . . . . . . . . . . . . . . . . . . . . . . . . . . . . . . . . . . . . . . . . . . . . . .211
- 7 -
Page 8

SK
. . . . . . . . . . . . . . . . . . . . . . . . . . . . . . . . . . . . . . . . . . . . . . . . . . . . . . . . . . .212
. . . . . . . . . . . . . . . . . . . . . . . . . . . . . . . . . . . . . . . . . . . . . . . . . . . . . . . . . . . . . . . . . .212
. . . . . . . . . . . . . . . . . . . . . . . . . . . . . . . . . . . . . . . . . . . . . . . . . . . . . .212
. . . . . . . . . . . . . . . . . . . . . . . . . . . . . . . . . . . . . . . . . . . . . . . . . . . . . . . . . . . . . . . .214
. . . . . . . . . . . . . . . . . . . . . . . . . . . . . . . . . . . . . . . . . . . . . . . . . .215
. . . . . . . . . . . . . . . . . . . . . . . . . . . . . . . . . . . . . . . . . .216
. . . . . . . . . . . . . . . . . . . . . . . . . . . . . . . . . . . . . . . . . . . . . . . . . . . . . . . . . . . . . . . . . . .217
. . . . . . . . . . . . . . . . . . . . . . . . . . . . . . . . . . . . . . . . . . . . . . . . . . . . . . . . . . . . . . . . . . . . .218
. . . . . . . . . . . . . . . . . . . . . . . . . . . . . . . . . . . . . . . . . . . . . . . . . . . . . . . . . . . . . . . . . . . . . . . .220
. . . . . . . . . . . . . . . . . . . . . . . . . . . . . . . . . . . . . . . . . . . . . . . . . . . . . . . . . . . . . . . . . . . . . . . . . . . . . .221
Pokyny na uskladnenie . . . . . . . . . . . . . . . . . . . . . . . . . . . . . . . . . . . . . . . . . . . . . . . . . . . . . . . . . . . . . . . . .221
. . . . . . . . . . . . . . . . . . . . . . . . . . . . . . . . . . . . . . . . . . . . . . . . . . . . . . . . . . . . . . . . . . . . . . . .221
. . . . . . . . . . . . . . . . . . . . . . . . . . . . . . . . . . . . . . . . . . . . . . . . . . . . . . . . . . . . . . . . . . . . .222
Výrobca . . . . . . . . . . . . . . . . . . . . . . . . . . . . . . . . . . . . . . . . . . . . . . . . . . . . . . . . . . . . . . . . . . . . . . . . . . . . . . .222
SR
. . . . . . . . . . . . . . . . . . . . . . . . . . . . . . . . . . . . . . . . . . . . . . . . . . . . . . . . . . .223
Pravilna upotreba . . . . . . . . . . . . . . . . . . . . . . . . . . . . . . . . . . . . . . . . . . . . . . . . . . . . . . . . . . . . . . . . . . . . . .223
Poštovati sigurnosne napomene . . . . . . . . . . . . . . . . . . . . . . . . . . . . . . . . . . . . . . . . . . . . . . . . . . . . . . . . .223
. . . . . . . . . . . . . . . . . . . . . . . . . . . . . . . . . . . . . . . . . . . . . . . . . . . . . . . . . . . . . .225
. . . . . . . . . . . . . . . . . . . . . . . . . . . . . . . . . . . . . . . . . . . . . . . . . . . . . . . . . . . . . . . . . . . . .226
Postaviti šreder i pustiti ga u rad . . . . . . . . . . . . . . . . . . . . . . . . . . . . . . . . . . . . . . . . . . . . . . . . . . . . . . . . .227
Upotreba šredera . . . . . . . . . . . . . . . . . . . . . . . . . . . . . . . . . . . . . . . . . . . . . . . . . . . . . . . . . . . . . . . . . . . . . .228
Ako nešto ne funkcioniše . . . . . . . . . . . . . . . . . . . . . . . . . . . . . . . . . . . . . . . . . . . . . . . . . . . . . . . . . . . . . . . .229
. . . . . . . . . . . . . . . . . . . . . . . . . . . . . . . . . . . . . . . . . . . . . . . . . . . . . . . . . . . . . . . . . . . . . . . . .231
. . . . . . . . . . . . . . . . . . . . . . . . . . . . . . . . . . . . . . . . . . . . . . . . . . . . . . . . . . . . . . . . . . . . . . . . . . .232
. . . . . . . . . . . . . . . . . . . . . . . . . . . . . . . . . . . . . . . . . . . . . . . . . . . . . . . . . . . . . . .232
. . . . . . . . . . . . . . . . . . . . . . . . . . . . . . . . . . . . . . . . . . . . . . . . . . . . . . . . . . . . . . . . . . . . . . . . .232
. . . . . . . . . . . . . . . . . . . . . . . . . . . . . . . . . . . . . . . . . . . . . . . . . . . . . . . . . . . . . . . . . . .233
. . . . . . . . . . . . . . . . . . . . . . . . . . . . . . . . . . . . . . . . . . . . . . . . . . . . . . . . . . . . . . . . . . . . . . . . . . . .233
SV
Läs bruksanvisningen . . . . . . . . . . . . . . . . . . . . . . . . . . . . . . . . . . . . . . . . . . . . . . . . . . . . . . . . . . . . . . . . . . .234
Ändamålsenlig användning . . . . . . . . . . . . . . . . . . . . . . . . . . . . . . . . . . . . . . . . . . . . . . . . . . . . . . . . . . . . . .234
Beakta säkerhetsanvisningarna . . . . . . . . . . . . . . . . . . . . . . . . . . . . . . . . . . . . . . . . . . . . . . . . . . . . . . . . . .234
Kontrollera förpackningsinnehållet . . . . . . . . . . . . . . . . . . . . . . . . . . . . . . . . . . . . . . . . . . . . . . . . . . . . . . .236
. . . . . . . . . . . . . . . . . . . . . . . . . . . . . . . . . . . . . . . . . . . . . . . . . . . . . . . . . . . .237
Ställa upp dokumentförstöraren och ta den i drift . . . . . . . . . . . . . . . . . . . . . . . . . . . . . . . . . . . . . . . . .238
Hantering av dokumentförstörare. . . . . . . . . . . . . . . . . . . . . . . . . . . . . . . . . . . . . . . . . . . . . . . . . . . . . . . .239
Om något inte fungerar . . . . . . . . . . . . . . . . . . . . . . . . . . . . . . . . . . . . . . . . . . . . . . . . . . . . . . . . . . . . . . . . .240
Tekniska data . . . . . . . . . . . . . . . . . . . . . . . . . . . . . . . . . . . . . . . . . . . . . . . . . . . . . . . . . . . . . . . . . . . . . . . . . .242
Avfallshantering . . . . . . . . . . . . . . . . . . . . . . . . . . . . . . . . . . . . . . . . . . . . . . . . . . . . . . . . . . . . . . . . . . . . . . .243
Förvaringsanvisningar . . . . . . . . . . . . . . . . . . . . . . . . . . . . . . . . . . . . . . . . . . . . . . . . . . . . . . . . . . . . . . . . . .243
Frågor och service . . . . . . . . . . . . . . . . . . . . . . . . . . . . . . . . . . . . . . . . . . . . . . . . . . . . . . . . . . . . . . . . . . . . . .243
Försäkran om överensstämmelse . . . . . . . . . . . . . . . . . . . . . . . . . . . . . . . . . . . . . . . . . . . . . . . . . . . . . . . .244
Tillverkare . . . . . . . . . . . . . . . . . . . . . . . . . . . . . . . . . . . . . . . . . . . . . . . . . . . . . . . . . . . . . . . . . . . . . . . . . . . . .244
- 8 -
Page 9

TR
. . . . . . . . . . . . . . . . . . . . . . . . . . . . . . . . . . . . . . . . . . . . . . . . . . . . . . . . . .245
. . . . . . . . . . . . . . . . . . . . . . . . . . . . . . . . . . . . . . . . . . . . . . . . . . . . . . . . . . . . . . . .245
. . . . . . . . . . . . . . . . . . . . . . . . . . . . . . . . . . . . . . . . . . . . . . . . . . . . . . . .245
. . . . . . . . . . . . . . . . . . . . . . . . . . . . . . . . . . . . . . . . . . . . . . . . . . . . . . .247
. . . . . . . . . . . . . . . . . . . . . . . . . . . . . . . . . . . . . . . . . . . . . . . . . . . . . . . .248
. . . . . . . . . . . . . . . . . . . . . . . . . . . . . . . . . . . . .249
. . . . . . . . . . . . . . . . . . . . . . . . . . . . . . . . . . . . . . . . . . . . . . . . . . . . .250
. . . . . . . . . . . . . . . . . . . . . . . . . . . . . . . . . . . . . . . . . . . . . . . . . . . . . . . . . . . . . . . . . . .251
Teknik veriler . . . . . . . . . . . . . . . . . . . . . . . . . . . . . . . . . . . . . . . . . . . . . . . . . . . . . . . . . . . . . . . . . . . . . . . . . .253
. . . . . . . . . . . . . . . . . . . . . . . . . . . . . . . . . . . . . . . . . . . . . . . . . . . . . . . . . . . . . . . . . . . . . . . . . . . . . . . . .254
Depolama bilgileri . . . . . . . . . . . . . . . . . . . . . . . . . . . . . . . . . . . . . . . . . . . . . . . . . . . . . . . . . . . . . . . . . . . . . .254
Sorular ve servis . . . . . . . . . . . . . . . . . . . . . . . . . . . . . . . . . . . . . . . . . . . . . . . . . . . . . . . . . . . . . . . . . . . . . . .254
. . . . . . . . . . . . . . . . . . . . . . . . . . . . . . . . . . . . . . . . . . . . . . . . . . . . . . . . . . . . . . . . . . . . . . .255
Üretici . . . . . . . . . . . . . . . . . . . . . . . . . . . . . . . . . . . . . . . . . . . . . . . . . . . . . . . . . . . . . . . . . . . . . . . . . . . . . . . . .255
AR
. . . . . . . . . . . . . . . . . . . . . . . . . . . . . . . . . . . . . . . . . . . . . . . . . . . . . . . . . . . . . . . . . . . . . . . . . . .265
. . . . . . . . . . . . . . . . . . . . . . . . . . . . . . . . . . . . . . . . . . . . . . . . . . . . . . . . . . . . . . . . . . . . . .265
. . . . . . . . . . . . . . . . . . . . . . . . . . . . . . . . . . . . . . . . . . . . . . . . . . . . . . . . . . . . . . . . . . . . . . . . .265
. . . . . . . . . . . . . . . . . . . . . . . . . . . . . . . . . . . . . . . . . . . . . . . . . . . . . . . . . . . . . . . . . . . . . . . . . .263
. . . . . . . . . . . . . . . . . . . . . . . . . . . . . . . . . . . . . . . . . . . . . . . . . . . . . . . . . . . . . . . .263
. . . . . . . . . . . . . . . . . . . . . . . . . . . . . . . . . . . . . . . . . . . . . . . . . . . . . . . . . . . . . . . . . . . .262
. . . . . . . . . . . . . . . . . . . . . . . . . . . . . . . . . . . . . . . . . . . . . . . . . . . . . . . . . . . . . . . . . . . . . . . .261
. . . . . . . . . . . . . . . . . . . . . . . . . . . . . . . . . . . . . . . . . . . . . . . . . . . . . . . . . . . . . . . . . . . . .260
. . . . . . . . . . . . . . . . . . . . . . . . . . . . . . . . . . . . . . . . . . . . . . . . . . . . . . . . . . . . . . . . . . . . . . . . . . . . .258
. . . . . . . . . . . . . . . . . . . . . . . . . . . . . . . . . . . . . . . . . . . . . . . . . . . . . . . . . . . . . . . . . . . . . . . . . . .257
. . . . . . . . . . . . . . . . . . . . . . . . . . . . . . . . . . . . . . . . . . . . . . . . . . . . . . . . . . . . . . . . . . . . . . . . . . . .257
. . . . . . . . . . . . . . . . . . . . . . . . . . . . . . . . . . . . . . . . . . . . . . . . . . . . . . . . . . . . . . . . . . . . . . . . . . . . .256
. . . . . . . . . . . . . . . . . . . . . . . . . . . . . . . . . . . . . . . . . . . . . . . . . . . . . . . . . . . . . . . . . . . . . . . . . . . . . .256
. . . . . . . . . . . . . . . . . . . . . . . . . . . . . . . . . . . . . . . . . . . . . . . . . . . . . . . . . . . . . . . . . . . . . . . . . . . . . .256
HE
הלעפהה תוארוה תא ארק . . . . . . . . . . . . . . . . . . . . . . . . . . . . . . . . . . . . . . . . . . . . . . . . . . . . . . . . . . . . . . . . . . . .275
דועייל םאתהב שומיש . . . . . . . . . . . . . . . . . . . . . . . . . . . . . . . . . . . . . . . . . . . . . . . . . . . . . . . . . . . . . . . . . . . . . . .275
תוחיטבה תויחנהל עמשיהל שי . . . . . . . . . . . . . . . . . . . . . . . . . . . . . . . . . . . . . . . . . . . . . . . . . . . . . . . . . . . . . . . .275
הזיראה תלוכת תקידב . . . . . . . . . . . . . . . . . . . . . . . . . . . . . . . . . . . . . . . . . . . . . . . . . . . . . . . . . . . . . . . . . . . . . . .273
הסרגמה יקלח טוריפ . . . . . . . . . . . . . . . . . . . . . . . . . . . . . . . . . . . . . . . . . . . . . . . . . . . . . . . . . . . . . . . . . . . . . . .273
שומיש תלחתהו הסרגמה תבצה . . . . . . . . . . . . . . . . . . . . . . . . . . . . . . . . . . . . . . . . . . . . . . . . . . . . . . . . . . . . . . .272
הסרגמב שומיש . . . . . . . . . . . . . . . . . . . . . . . . . . . . . . . . . . . . . . . . . . . . . . . . . . . . . . . . . . . . . . . . . . . . . . . . . . .271
הלקת לש הרקמב . . . . . . . . . . . . . . . . . . . . . . . . . . . . . . . . . . . . . . . . . . . . . . . . . . . . . . . . . . . . . . . . . . . . . . . . . .271
ינכט טרפמ . . . . . . . . . . . . . . . . . . . . . . . . . . . . . . . . . . . . . . . . . . . . . . . . . . . . . . . . . . . . . . . . . . . . . . . . . . . . . .268
קוליס . . . . . . . . . . . . . . . . . . . . . . . . . . . . . . . . . . . . . . . . . . . . . . . . . . . . . . . . . . . . . . . . . . . . . . . . . . . . . . . . . .267
ןוסחא תויחנה . . . . . . . . . . . . . . . . . . . . . . . . . . . . . . . . . . . . . . . . . . . . . . . . . . . . . . . . . . . . . . . . . . . . . . . . . . . .266
תורישו תולאש . . . . . . . . . . . . . . . . . . . . . . . . . . . . . . . . . . . . . . . . . . . . . . . . . . . . . . . . . . . . . . . . . . . . . . . . . . . .266
תומיאת תרהצה . . . . . . . . . . . . . . . . . . . . . . . . . . . . . . . . . . . . . . . . . . . . . . . . . . . . . . . . . . . . . . . . . . . . . . . . . . .266
ןרציה . . . . . . . . . . . . . . . . . . . . . . . . . . . . . . . . . . . . . . . . . . . . . . . . . . . . . . . . . . . . . . . . . . . . . . . . . . . . . . . . . .266
- 9 -
Page 10
EN
Read the Operating Manual
Read this operating manual through carefully, observing all the information contained
regarding handling and using the shredder. Keep the operating manual close by for future
reference.
Intended Use
The shredder has been designed to shred paper, credit cards, paper clips and staples. The shredder is only intended for private use indoors.
not permitted and lead to loss of rights to claims under the terms of guarantee.
Observe the Safety Information
Read and observe all the warnings to protect yourself and the environment from any harm.
Warning!
insertion slot.
Warning!
shredder immediately in the case of damage or improper functioning and disconnect the
power plug.
shredder is set-up in the vicinity of an easily accessible power socket so that the shredder can be disconnected from the power supply in an emergency. Never handle the
shredder with wet hands. Avoid any contact with water.
Always unplug the power plug when the device is not being used. Only use the power
cable supplied.
Warning!
or choke on small parts, packaging and protective foils. Keep the device and its packaging materials out of reach of children.
Warning!
This device can be used by children from the age of eight and persons with restricted
physical, sensory or mental capabilities or a lack of experience and/or knowledge when
they are supervised or have been instructed with regard to safe use of the device and the
risks involved with its use. Children must not be allowed to play with the device. Children
must not be allowed to complete any cleaning or service work on the device without
adequate supervision.
- 10 -
Page 11
EN
Caution!
Risk of tripping due to improperly laid power cable. Lay the power cable in such a way
that nobody can trip over it. Make sure the power plug and cable cannot be damaged.
Important!
smoke, dust, vibration, chemicals, moisture, heat or direct sunlight.
Only use the shredder in indoor rooms and within the permissible ambient conditions stipulated in
the Technical Data.
Observe the following information to ensure that the shredder always functions as you expect it
to.
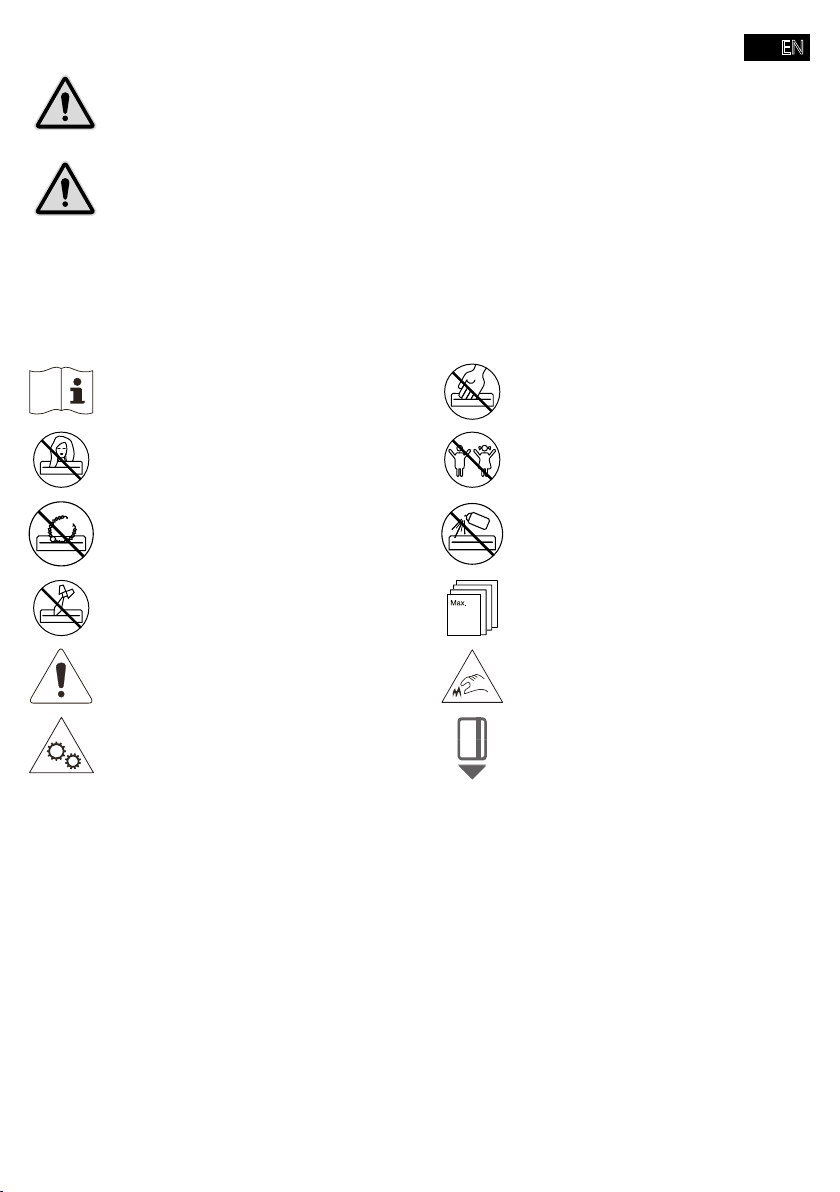
Read the operating instructions thoroughly before starting to use the device.
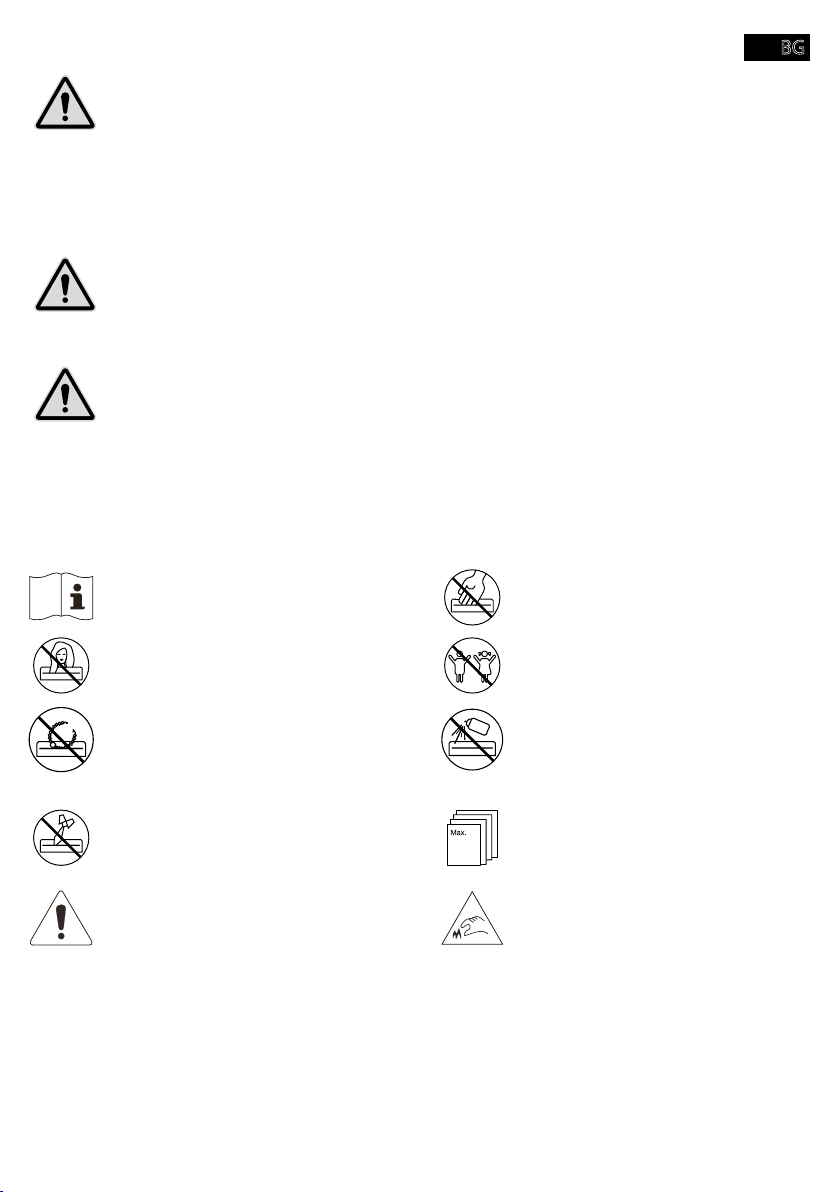
Keep long hair away from the shredder. Keep children and pets away from
lery or other loose items away from the
shredder.
Keep ties and scarves away from the
shredder.
General indication of potential risks, so
that particular care is required.
Warning! This equipment is not intend-
ed for use by children. Avoid touching
the media feed opening with the hands,
clothing or hair, Unplug this equipment
when not in use for an extended period
of time. Hazardous moving part is in this
equipment, keep body parts away from
moving parts.
Never reach into the insertion slot.
the shredder.
in the direction of the shredder.
Insert a maximum of 8 sheets into
the shredder at one time.
8
Caution!
sharp edge of cutting mechanism!
Credit cards must be inserted
vertically.
- 11 -
Page 12

EN
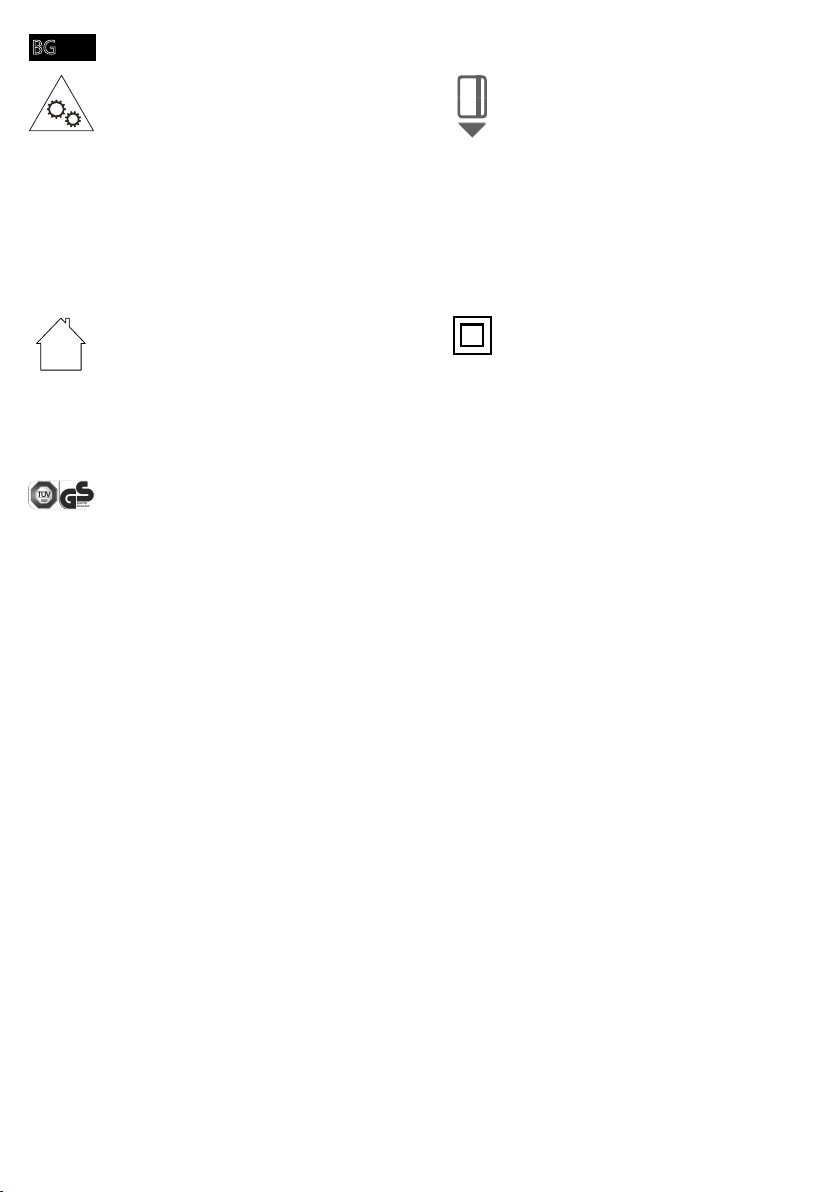
Only use the product indoors. The symbol indicates that the
design of the product complies with
Protection Class II (double insulation).
A safety connection to the electrical
earthing (ground) is not necessary.
The «Geprüfte Sicherheit» mark (GS
(ProdSG).
The GS tested safety mark indicates that
when implemented for its intended use
and in the event of foreseeable misuse
the safety and health of the user. It concerns a voluntary safety mark which was
issued by an authorized testing institute.
Checking the Package Contents
Check the package contents of your shredder before putting the shredder into operation.
If anything is missing or damaged, do not use the shredder. Contact our Service department.
■ OneShred 8CC shredder with waste bin for cuttings
■ Operating manual
■ 1 oiled sheet
- 12 -
Page 13
EN
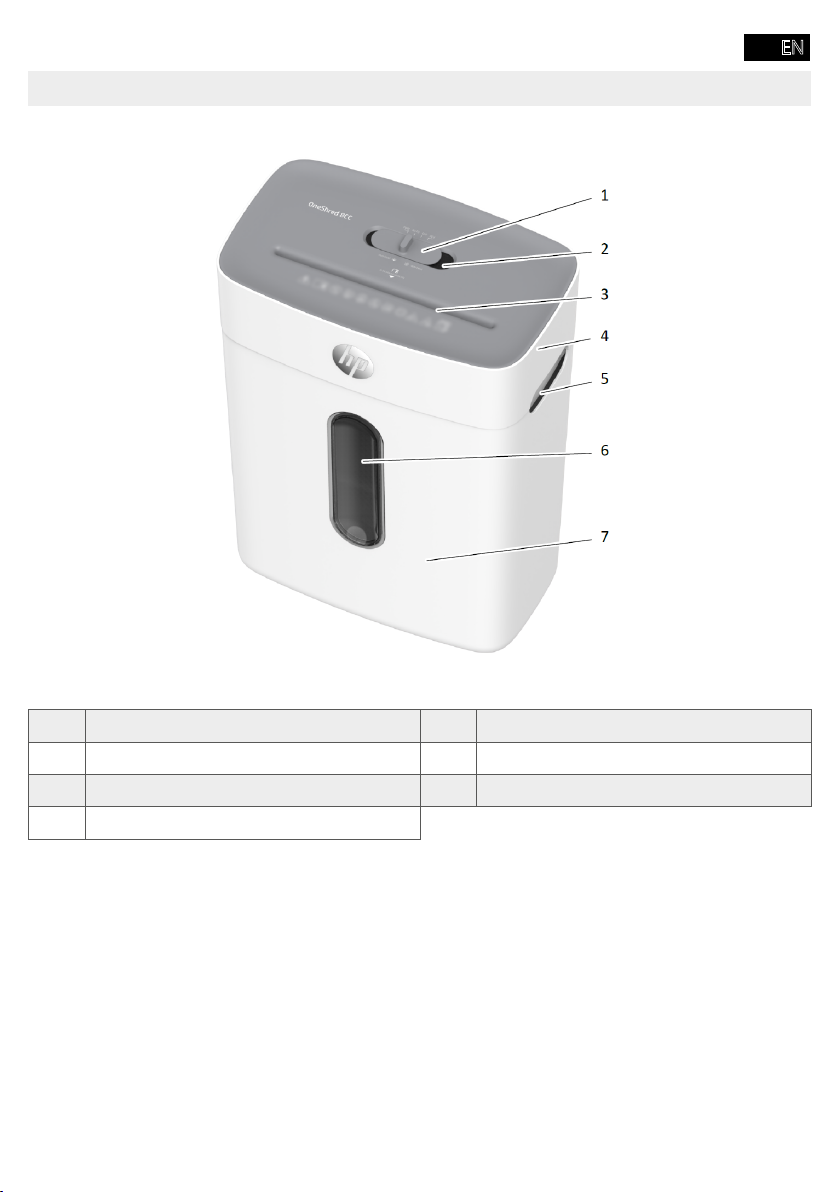
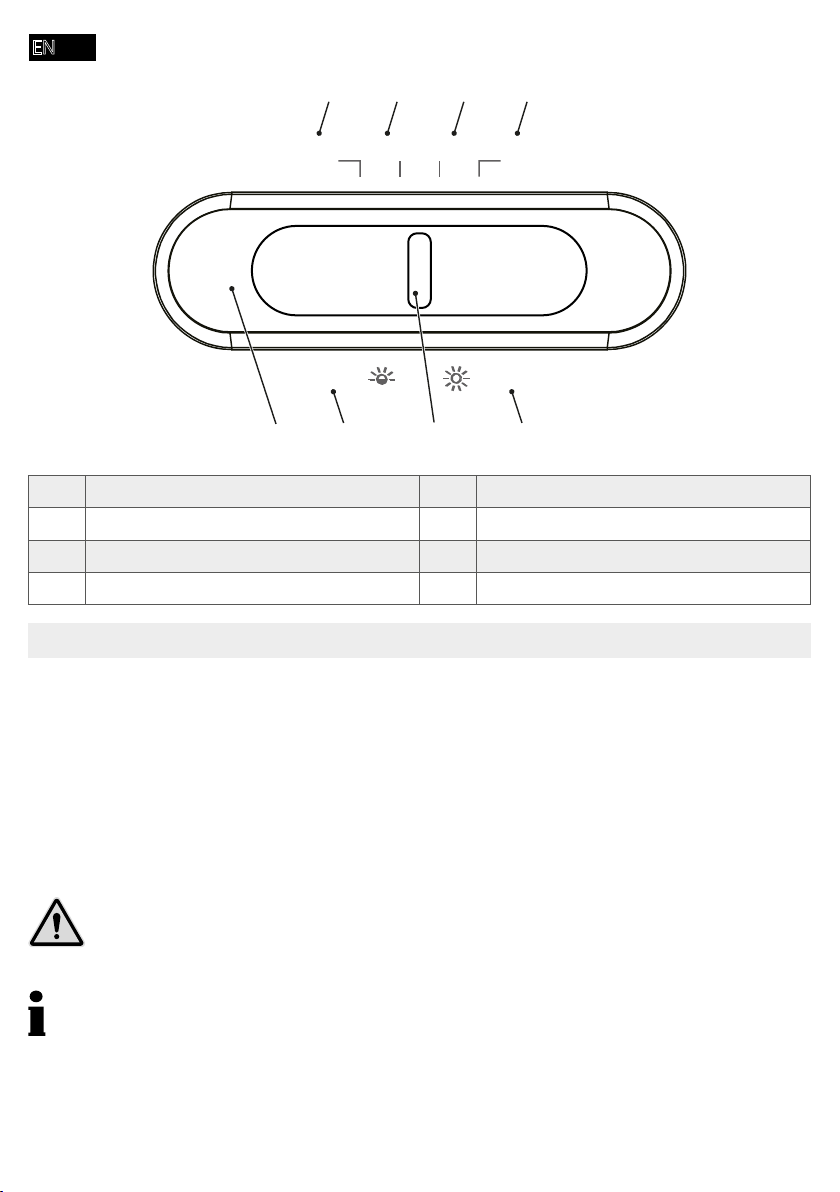
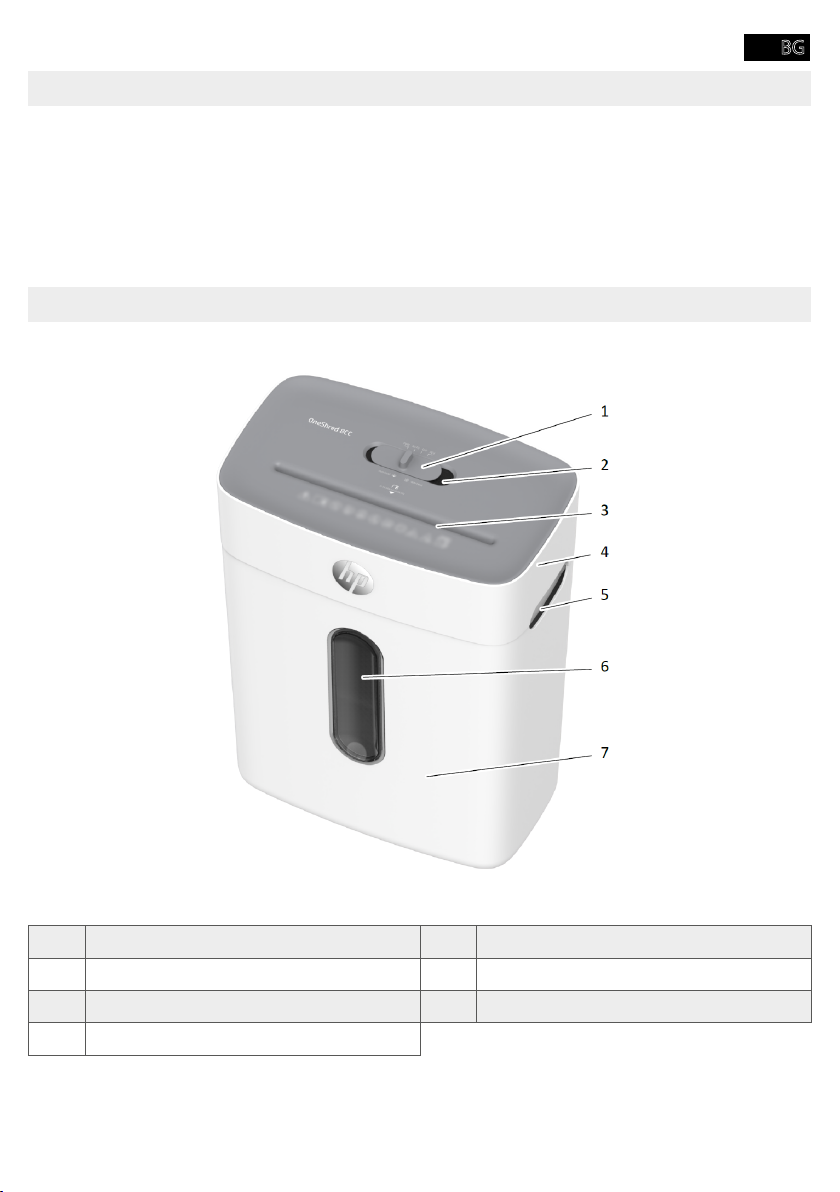
General View of the Shredder
1 Main switch 5 Viewing window
2 Insertion slot 6 Grip
3 Shredder attachment 7 Status indicator
4 Waste bins
- 13 -
Page 14
EN
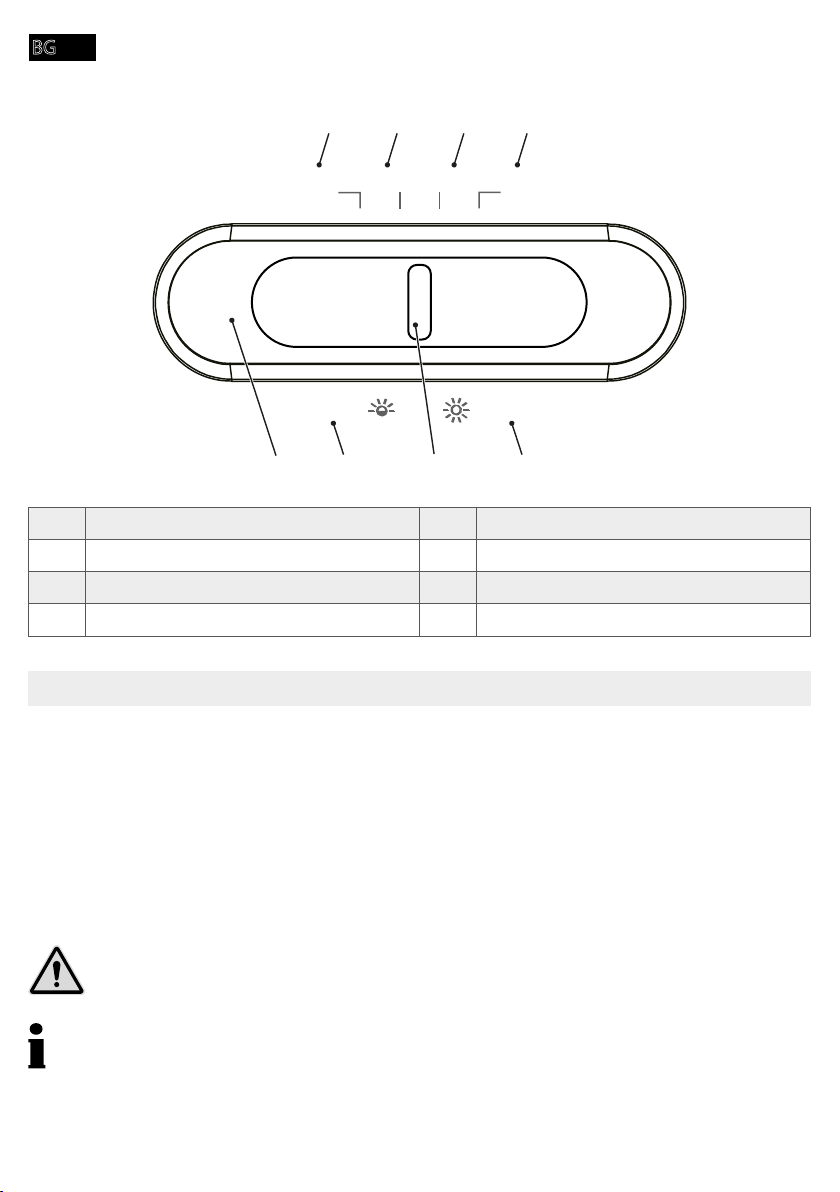
1 2 3 4
FWD AUTO OFF REV
overload
7 5
1 Manual operation (forward) 5 Overheating
2 Automatic operation 6 Main switch
3 Power OFF 7 Overloading
4 Reverse operation 8 Status indicator
overheat
68
Positioning the Shredder and Starting It Up
near any sources of heat and maintain a distance of at least 10 cm to walls. This ensures the
1 Set the waste bin down on a stable, level, horizontal surface and in the vicinity of an easily
accessible power socket.
2 Mount the shredder attachment on the waste bin. The shredder attachment latches audibly in
be switched on.
Caution!
mechanism has sharp edges and corners. Only take hold of the cutting mechanism by the
grips.
Only use the power cable supplied.
3 Slide the main switch to OFF and connect the power plug to the power socket.
4 Slide the main switch to AUTO.
Î You have put the shredder into operation. The status indicator lights up blue.
- 14 -
Page 15

EN
Operating the Shredder
The shredder works using an automatic shredding mechanism. The shredder functions are is
operated by sliding the main switch to the respective positions.
Shredding Material Automatically
"Technical Data".
Warning!
This equipment is not intended for use by children. Avoid touching the media feed opening
with the hands, clothing or hair, Unplug this equipment when not in use for an extended
period of time. Hazardous moving part is in this equipment, keep body parts away from
moving parts.
Important!
insertion slot.
1 Feed the material to be shredded in the centre of the insertion slot.
Î The insertion slot draws the material in automatically and stops when no more material is
fed in.
Shredding Material Manually
On rare occasions, it is possible that the sensors do not detect the material inserted.
1 Slide the main switch to FWD.
Î The material is then drawn in and shredded.
2 Slide the main switch to OFF.
1 Slide the main switch to OFF.
Î
2 Disconnect the power plug from the power socket if the shredder will not be used for a longer
period of time.
Troubleshooting
The following information should provide help if something is not working as would be expected.
Overheating Protection
red.
- 15 -
Page 16

EN
1 Wait at least 50 minutes until the shredder has cooled down. Observe the minimum clearance
to walls and the information on continuous operation in Technical Data.
Î When the cool down phase has elapsed, the status indicator lights up blue and shredding
is resumed.
Overload Protection
1 Pull the material out of the shredder.
Î The blockage has now been cleared.
After the material has been removed from the shredder, the cutting mechanism continues to
run for 3 seconds to clean itself. Wait until the shredder has stopped and the status indicator
lights up blue.
Oiling the Cutting Mechanism
If you want to increase the working life of the shredder, you should oil the shredder's cutting
mechanism at regular intervals.
Special oil and oiled sheets are available for the shredder from HP.
Important!
Risk of property damage through using the wrong oil! Do not use spray oils. Only use a special oil
intended for shredders.
There are various ways to oil the cutting mechanism.
Oiling Using Self-Oiled Paper:
1 Apply the special oil for shredders in several lines horizontally across a sheet of paper.
2 Insert the oiled sheet of paper in the insertion slot.
Î The paper with oil applied is inserted and oils the cutting mechanism.
Oiling Using Oiled Sheets
1 Insert the oiled sheet in the paper infeed.
Î The paper with oil applied is inserted and oils the cutting mechanism.
Emptying the Waste Bin
80% full, empty it. This prevents the shredded material from accumulating, which could lead to
malfunctions.
1 Slide the main switch to OFF.
- 16 -
Page 17
EN
2 Disconnect the power plug from the power socket.
Caution!
mechanism has sharp edges and corners. Only take hold of the cutting mechanism by the
grips.
3 Lift the shredder attachment from the waste bin.
4 Empty the waste bin.
Caution!
mechanism has sharp edges and corners. Only take hold of the cutting mechanism by the
grips.
5 Mount the shredder attachment on the waste bin.
Î The waste bin latches audibly in place.
Clearing Residual Material
If the shredder no longer shreds material as you expect, remove any residual material from the
cutting mechanism.
1 Slide the main switch to REV. The cutting mechanism runs in reverse and releases any materi-
al remaining in the cutting mechanism.
2 Slide the main switch to OFF.
3 Disconnect the power plug from the power socket.
4 Lift the shredder attachment from the waste bin.
Caution!
removing the material residue.
5 Remove the residual material carefully from the cutting mechanism using an appropriate
6 Mount the shredder attachment on the waste bin.
Cleaning the Shredder
Clean the shredder at regular intervals.
Caution!
Never use air sprays.
1 Slide the main switch to OFF.
2 Disconnect the power plug from the power socket.
- 17 -
Page 18
EN
3 Clean the surface of the housing with a soft, dry, lint-free cloth. Do not use any aerosols,
solvents or cleaning agents.
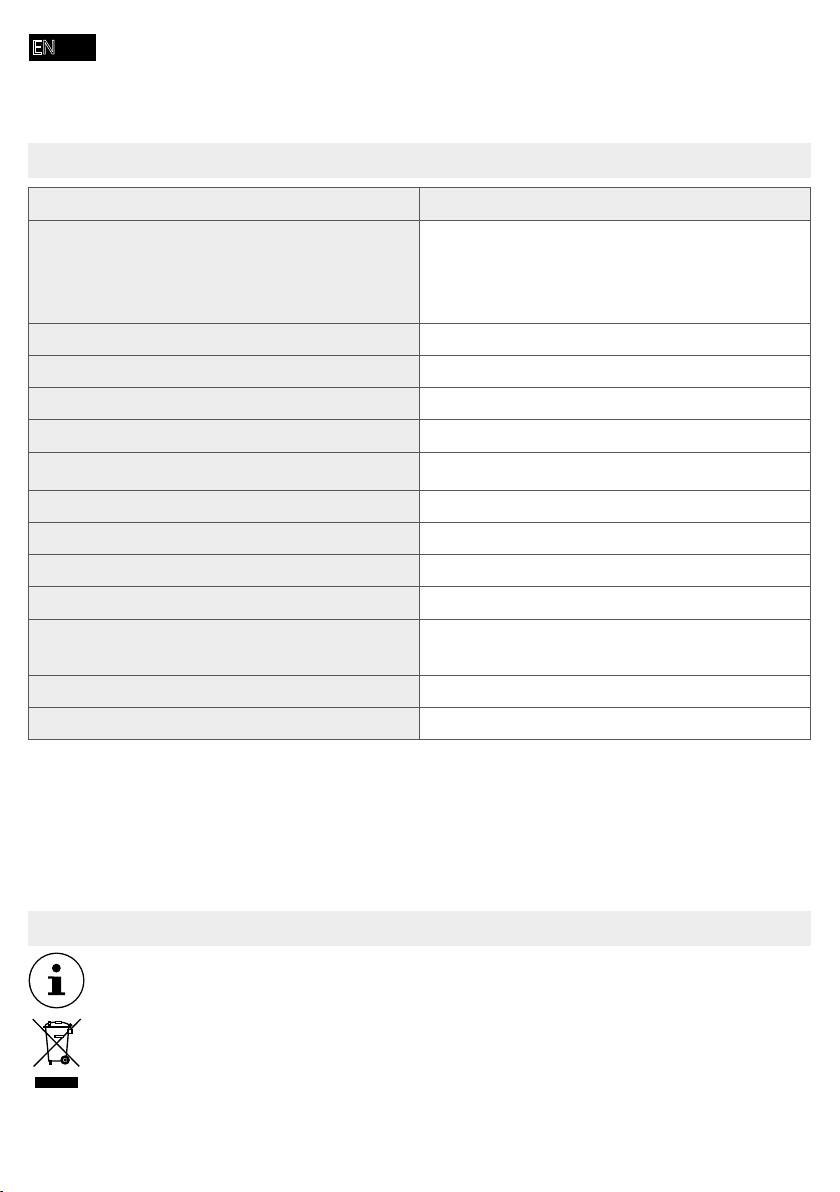
Technical Data
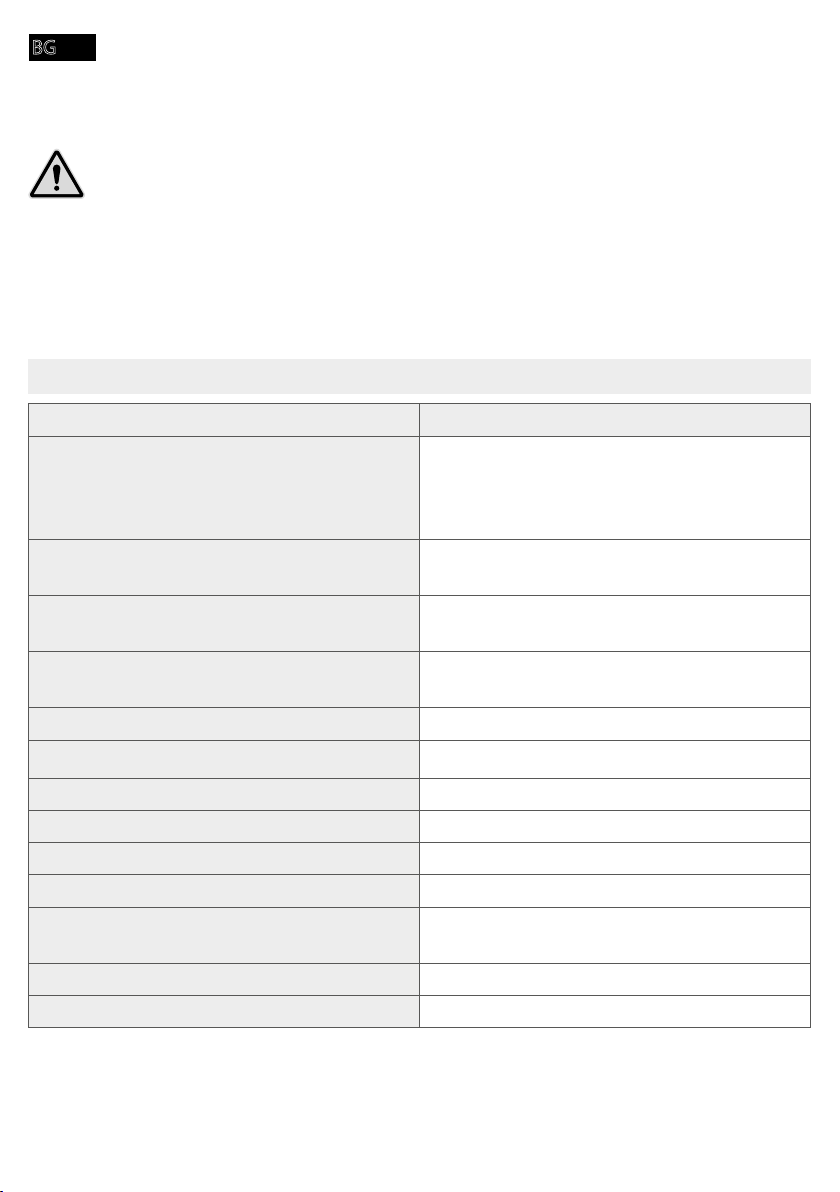
Model OneShred 8CC
W: 320
Dimensions (mm)
Security level compliant with DIN 66399-2 P-4
Cuttings size (thickness × width, mm) 5 ×18
Max. cutting capacity (sheets / credit cards) 8 / 1
Working width (mm) 220
Power supply
Max. ambient temperature [°C] 25
Capacity, waste bin (l) 15
Weight (kg) 4,3
Volume (dB) 68
Continuous operation (min) / Cool down phase
(min)
Operating speed (m/min) 1,8
Shred type Cross cut
mm).
L: 190
H: 416
4 / 50
Disposal
Find out about the possibilities of taking back used appliances free of charge from your
dealer.
longer required must be disposed of separate from domestic waste. Dispose of your
device at a collection point provided by your local public waste authority. Packaging
materials must be disposed of according to local regulations.
- 18 -
Page 19
EN
a
c
d
b
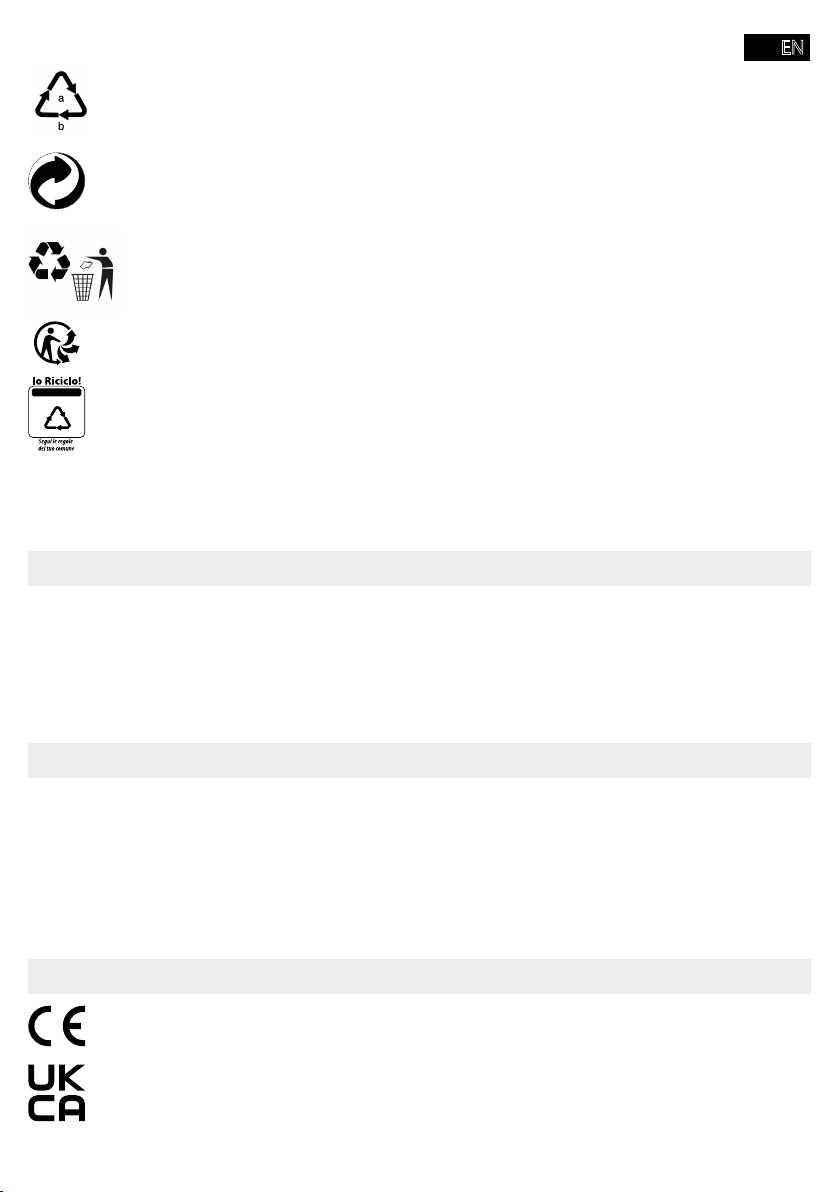
cance: 1–7: plastic/20–22: paper and cardboard/80–98: composite materials
Packaging materials must be disposed of according to local regulations.
The packaging is made of environmentally friendly materials that you can dispose of
at local recycling points. Advice on the options with which to dispose of your old
waste management. The Triman logo is only relevant for France.r Frankreich.
The device and the packaging material can be recycled, so sort them prior to disposal for
better waste management. Contact your local authorities for information on the various
packaging materials: (a) numbers, (b) abbreviations and (c) materials which have the
materials and (d) type of packaging. The logo is only applicable to Italy.
Information on Storage
The shredder must be stored safely after use. Observe the following information:
Store the shredder
■ in its original packaging
■ in a dry, clean location
■ in a cooled state
Queries and Service
Dear customer,
we are delighted that you have chosen this equipment.
In the case of a defect, please return the device together with the receipt and original packing
material to the point of sale.
Further information is available under the heading Contact & Service on our website:
Declaration of Conformity
The Declaration of Conformity is available at
The Declaration of Conformity can be read online at
- 19 -
Page 20

EN
Manufacturer
GO Europe GmbH
Zum Kraftwerk 1
D-45527 Hattingen
Germany
- 20 -
Page 21
DE
Bedienungsanleitung lesen
Lesen Sie die Bedienungsanleitung aufmerksam durch und beachten Sie die Hinweise bei
der Handhabung Ihres Aktenvernichters. Bewahren Sie die Bedienungsanleitung für eine
spätere Verwendung auf.
Bestimmungsgemäße Verwendung
Ihr Aktenvernichter ist geeignet für das Zerkleinern von Papier, Kreditkarten, Büroklammern und
Heftklammern. Der Aktenvernichter ist ausschließlich für den privaten gebrauch in geschlossenen
Räumen geeignet.
Jede andere Verwendung gilt als nicht bestimmungsgemäß. Eigenmächtige Veränderungen oder
Umbauten oder Umbauten sind nicht zulässig und führen zu Garantieverlust.
Sicherheitshinweise beachten
Lesen und beachten Sie die Warnhinweise, um sich und die Umwelt zu schützen.
Warnung!
Verletzungsgefahr durch Einzugsmechanismus. Lose Gegenstände könne sich im Einzug
verfangen und Verletzungen hervorrufen. Halten Sie Finger, Haare, Schals, Krawatten,
Schmuck etc. vom Einzug fern.
Warnung!
Verletzungsgefahr durch Stromschlag. Fehlerhafter Umgang mit dem Aktenvernichter
kann zu Stromschlag führen. Eigenmächtige Veränderungen oder Umbauten am Aktenvernichter sind nicht zulässig. Betreiben Sie den Aktenvernichter nicht mit einem beschädigten Netzkabel. Schalten Sie den Aktenvernichter bei Beschädigungen oder nicht
ordnungsgemäßer Funktion sofort ab und ziehen Sie den Netzstecker.
Aktenvernichter in der Nähe einer leicht zugänglichen Steckdose auf, damit der Aktenvernichter im Notfall schnell vom Stromnetz getrennt werden kann. Niemals mit nassen
Händen anfassen. Jeden Kontakt mit Wasser vermeiden.
Ziehen Sie immer den Netzstecker, wenn das Gerät nicht verwendet wird. Verwenden Sie
ausschließlich das mitgelieferte Netzkabel.
Warnung!
Erstickungsgefahr durch Kleinteile, Verpackungsmaterialien oder Schutzfolien. Kinder
können Kleinteile, Verpackungsmaterialien oder Schutzfolien verschlucken. Kinder vom
Gerät und dessen Verpackung fernhalten.
- 21 -
Page 22
DE
Warnung!
Dieses Gerät kann von Kindern ab einem Alter von acht Jahren und von Personen mit
eingeschränkten physischen, sensorischen oder geistigen Fähigkeiten oder einem Mangel an Erfahrung und/oder Wissen verwendet werden, wenn sie beaufsichtigt werden
oder bezüglich des sicheren Gebrauchs des Geräts unterwiesen wurden und die daraus
resultierenden Gefahren verstanden haben. Kinder dürfen nicht mit dem Gerät spielen.
Reinigung und Benutzerwartung dürfen nicht durch Kinder ohne Beaufsichtigung durchgeführt werden.
Vorsicht!
Stolpergefahr durch unsachgemäß verlegtes Netzkabel. Verlegen Sie das Netzkabel so,
dass niemand darüber stolpern kann. Achten Sie darauf, dass keine Schäden am Netzstecker und am Netzkabel auftreten können.
Wichtig!
kalien, Feuchtigkeit, Hitze oder direkte Sonneneinstrahlung vermeiden.
Verwenden Sie den Aktenvernichter nur in geschlossenen Räumen und innerhalb der in den Tech-
nischen Daten angegebenen zulässigen Umgebungsbedingungen.
Beachten Sie die folgenden Hinweise, damit Ihr Aktenvernichter stets so funktioniert, wie Sie es
erwarten.
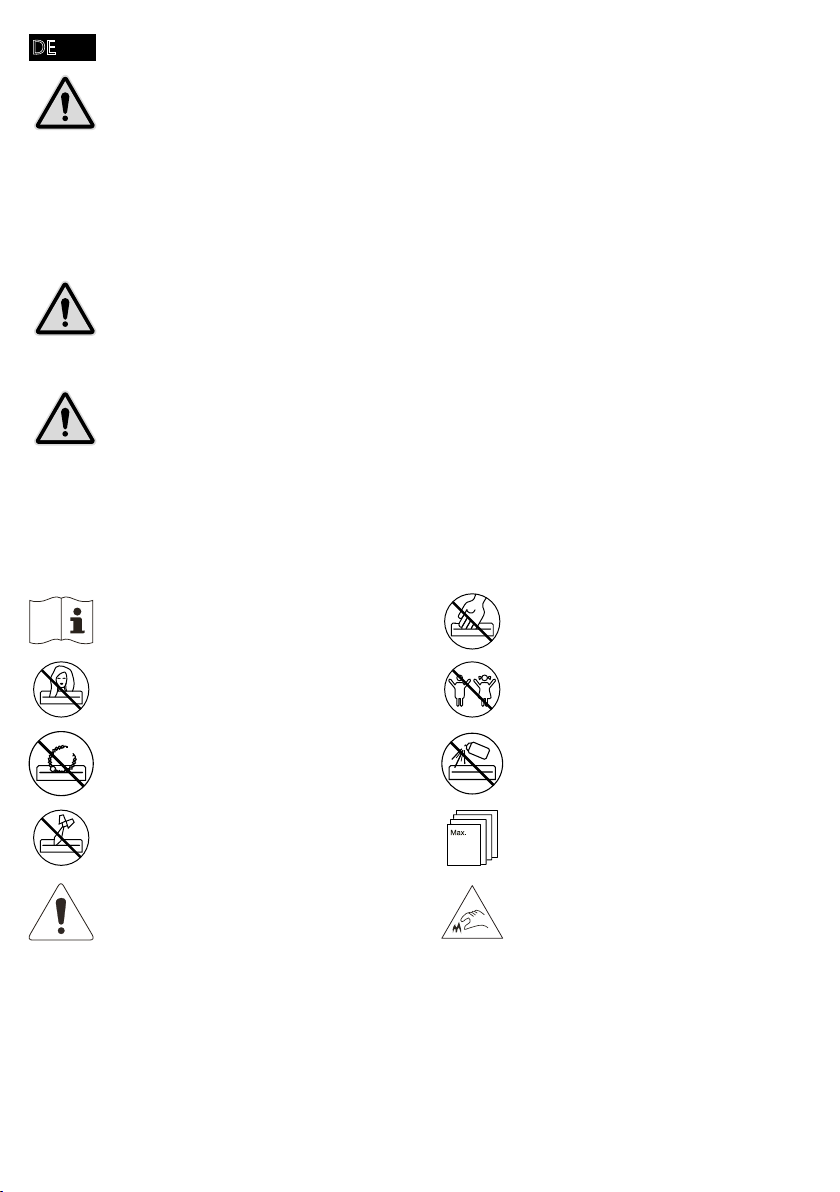
Lesen Sie vor der Inbetriebnahme die
Bedienungsanleitung durch.
Halten Sie langes Haar von Ihrem Aktenvernichter fern.
Halten Sie lose Teile von Bekleidung,
Schmuck oder andere lose Gegenstände
von Ihrem Aktenvernichter fern.
Halten Sie Krawatten und Schals von
Ihrem Aktenvernichter fern.
Allgemeiner Hinweis auf mögliche Gefahren, die Ihre besondere Aufmerksamkeit
erfordern.
- 22 -
Greifen Sie niemals direkt in den
Einzug.
Halten Sie Kinder und Haustiere von
Ihrem Aktenvernichter fern.
Sprühen Sie keine brennbaren Gase
in die Richtung Ihres Aktenvernichters.
Führen Sie maximal 8 Blätter gleichzeitig in den Einzug ein.
8
Vorsicht! Verletzungsgefahr durch
scharfkantiges Schneidwerk!
Page 23
DE
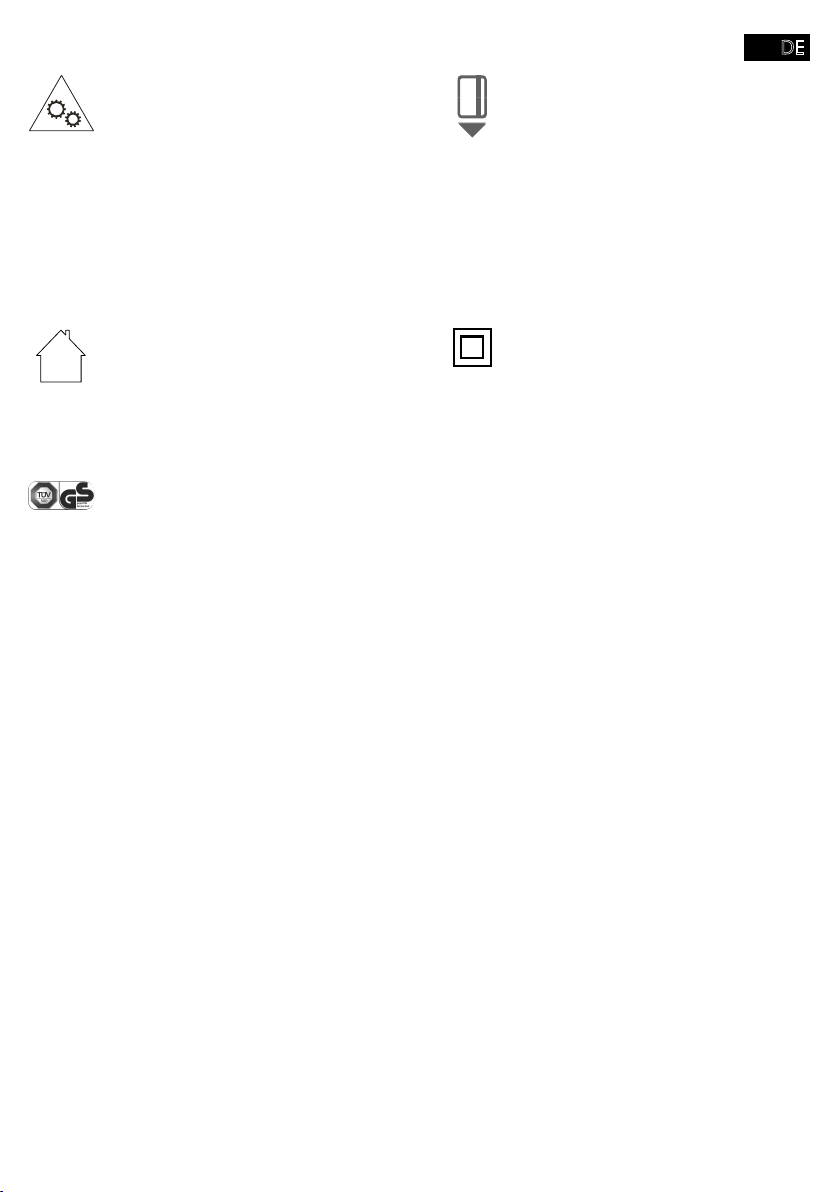
Warnung! Dieses Gerät ist nicht für die
Verwendung durch Kinder vorgesehen.
mit den Händen, Kleidung oder Haaren
zu berühren. Ziehen Sie den Netzstecker,
wenn Sie das Gerät über einen längeren
Zeitraum nicht benutzen. In diesem Gerät
Teile, halten Sie Körperteile von beweglichen Teilen fern.
Verwenden Sie das Produkt nur in Innenräumen.
Das Siegel «Geprüfte Sicherheit» (GS-Zeichen) bescheinigt, dass das Produkt den
Anforderungen des deutschen Produktsicherheitsgesetzes (ProdSG) entspricht.
Das GS-Zeichen zeigt an, dass bei bestimmungsgemäßer Verwendung und
bei vorhersehbarer Fehlanwendung des
gekennzeichneten Produkts die Sicherheit und Gesundheit des Nutzers nicht
gefährdet sind. Es handelt sich hierbei
um ein freiwilliges Sicherheitszeichen,
ausgestellt wurde.
Führen Sie Kreditkarten nur vertikal
ein.
Das Symbol gibt an, dass die Bauart
des Produkts der Schutzklasse II
entspricht (doppelte Isolierung).
Ein Sicherheitsanschluss an die
elektrische Erdung (Masse) ist nicht
erforderlich.
- 23 -
Page 24
DE
Verpackungsinhalt prüfen
Prüfen Sie den Verpackungsinhalt Ihres Aktenvernichters, bevor Sie Ihren Aktenvernichter in Betrieb nehmen.
Sollte etwas fehlen oder beschädigt sein, nehmen Sie den Aktenvernichter keinesfalls in Betrieb.
Wenden Sie sich an unseren Service.
■
■ Bedienungsanleitung
■ 1 Blatt Öl-Papier
Ihr Aktenvernichter im Detail
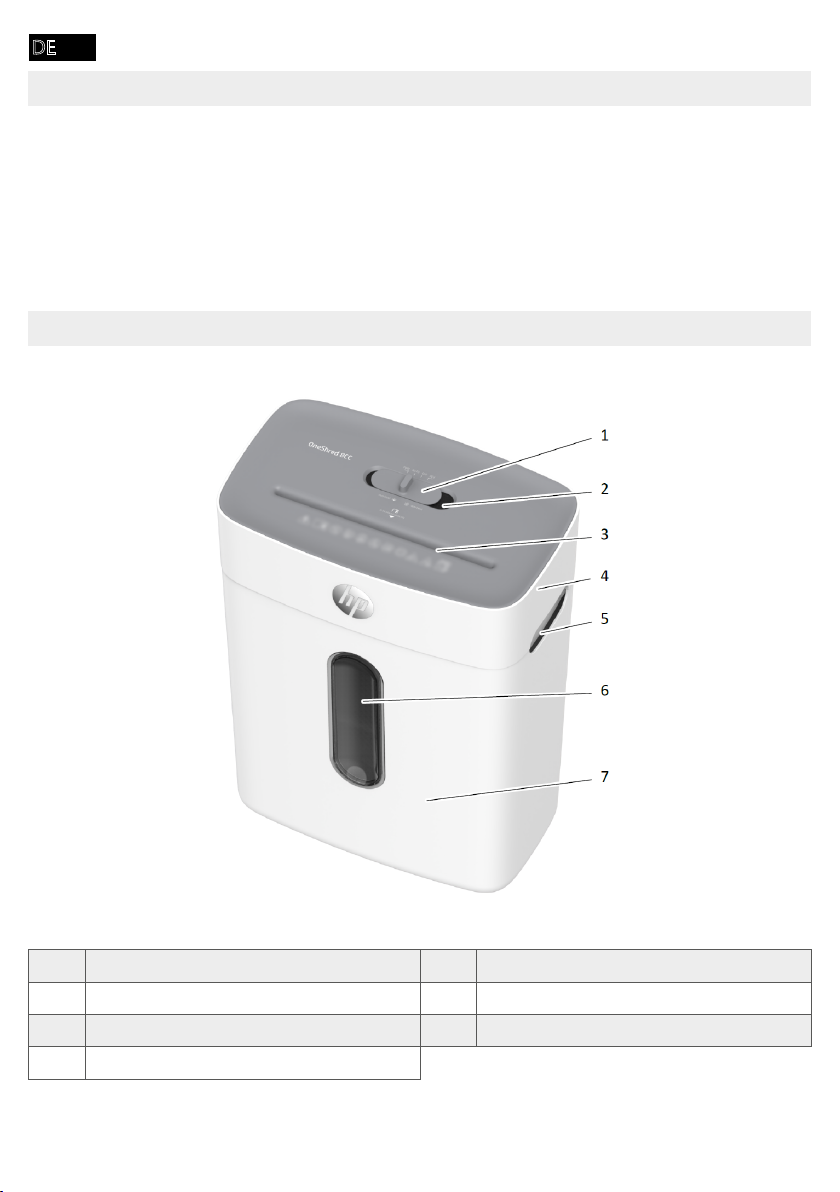
Die folgende Abbildung zeigt Ihnen den Aktenvernichter im Detail.
1 Hauptschalter 5
2 Statusanzeige 6 Sichtfenster
3 Einzug 7
4 Schneidwerkaufsatz
- 24 -
Page 25
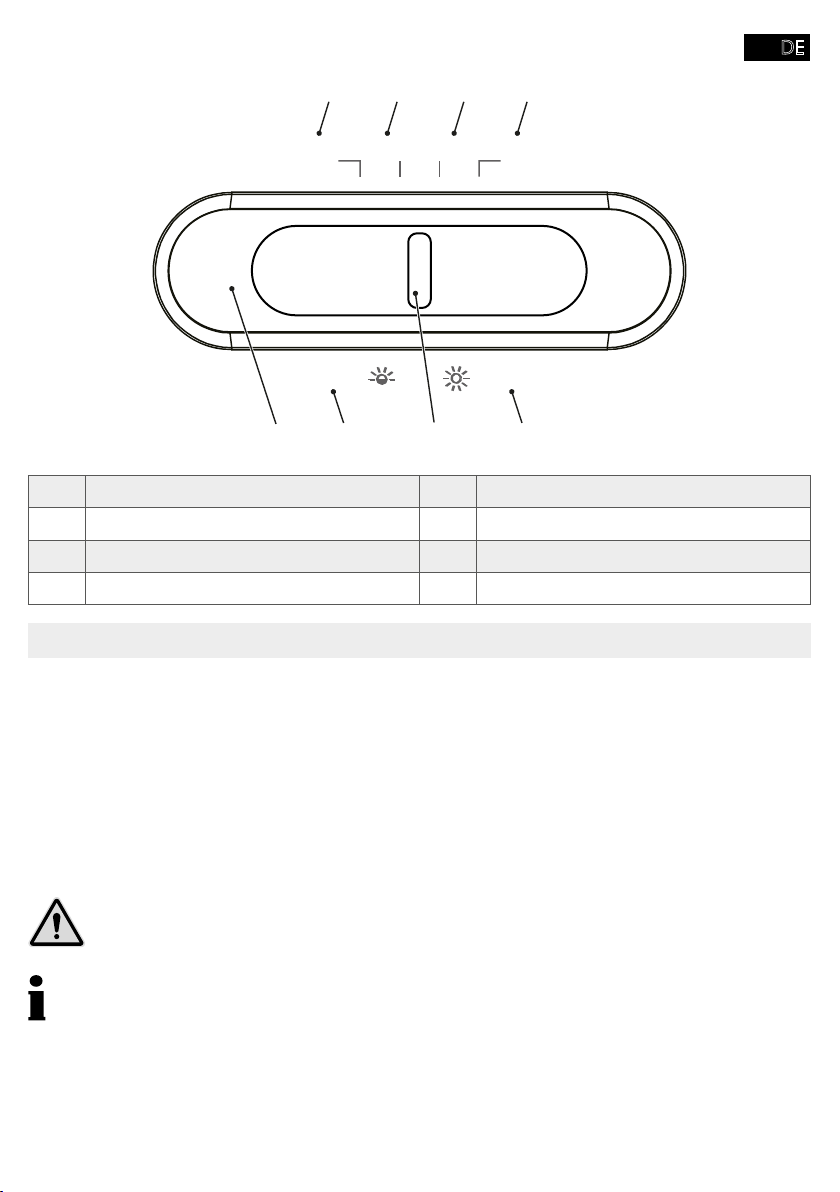
DE
1 2 3 4
FWD AUTO OFF REV
overload
7 5
1 manueller Betrieb 5 Überhitzung
2 automatischer Betrieb 6 Hauptschalter
3 Gerät Aus 7 Überladung
4 rückwärts Betrieb 8 Statusanzeige
overheat
68
Aktenvernichter aufstellen und in Betrieb nehmen
nicht in der Nähe von Wärmequellen auf und halten Sie einen Abstand von mindestens 10 cm zur
Wand ein. So wird der Aktenvernichter ausreichend gekühlt.
1
in der Nähe einer leicht zugänglichen Steckdose auf.
2
kann der Aktenvernichter nicht eingeschaltet werden.
Vorsicht!
Verletzungsgefahr durch scharfkantiges Schneidwerk! Die Unterseite des Schneidwerks
Verwenden Sie ausschließlich das mitgelieferte Netzkabel.
3 Schieben Sie den Hauptschalter in die Position OFF und schließen Sie den Netzstecker an der
Steckdose an.
4 Schieben Sie den Hauptschalter in die Position AUTO.
Î Sie haben Ihren Aktenvernichter in Betrieb genommen. Die Statusanzeige leuchtet blau.
- 25 -
Page 26

DE
Aktenvernichter bedienen
Ihr Aktenvernichter arbeitet mit einer automatischen Zerkleinerung. Der Aktenvernichter wird über
das Verschieben des Hauptschalters bedient.
Material automatisch zerkleinern
Beachten Sie die maximal zulässige Schnittleistung und weitere in den technischen Daten angege-
Warnung!
Dieses Gerät ist nicht für die Verwendung durch Kinder vorgesehen. Vermeiden Sie es, die
Netzstecker, wenn Sie das Gerät über einen längeren Zeitraum nicht benutzen. In diesem
Teilen fern.
Wichtig!
Sachschaden durch Materialstau! Beachten Sie die maximale Schnittleistung des Einzugs.
1 Führen Sie zu zerkleinerndes Material mittig in den Einzug ein.
Î Der Einzug zieht das Material ein und stoppt, wenn kein weiteres Material eingeführt wird.
Material manuell zerkleinern
In seltenen Fällen erkennen die Sensoren eingeführtes Material nicht.
1 Schieben Sie den Hauptschalter in die Position FWD.
Î Das Material wird manuell eingezogen und zerkleinert.
2 Schieben Sie den Hauptschalter in die Position OFF.
Aktenvernichter ausschalten
Schalten Sie den Aktenvernichter aus, wenn Sie den Aktenvernichter nicht mehr benötigen.
1 Schieben Sie den Hauptschalter in die Position OFF.
Î Sie haben den Aktenvernichter ausgeschaltet.
2 Ziehen Sie den Netzstecker aus der Steckdose, wenn der Aktenvernichter über einen längeren
Zeitraum nicht benutzt wird.
Wenn etwas nicht funktioniert
Die folgenden Hinweise helfen Ihnen, wenn etwas nicht so funktioniert, wie Sie es erwarten.
Überhitzungsschutz
Der Aktenvernichter schaltet sich bei Überhitzung automatisch ab. Die Statusanzeige leuchtet rot.
- 26 -
Page 27

DE
1 Warten Sie mindestens 50 Minuten bis der Aktenvernichter abgekühlt ist. Beachten Sie den
Mindestabstand zur Wand und die Angaben zum Dauerbetrieb in den technischen Daten.
Î Nach der Abkühlphase leuchtet die Statusanzeige blau und die Zerkleinerung wird fort-
gesetzt.
Überladungsschutz
Haben Sie mehr Material zugeführt als in den technischen Daten angegeben, blinkt die Statusanzeige rot und der Aktenvernichter startet für 5 Sekunden den automatischen Rückwärtslauf.
1 Ziehen Sie das Material aus dem Aktenvernichter.
Î Sie haben die Blockierung gelöst.
Nachdem das Material aus dem Aktenvernichter entfernt wurde, bewegt sich das Schneidwerkfür 3 Sekunden weiter um sich zu reinigen. Warten Sie, bis der Aktenvernichter wider still
steht und die Statusanzeige blau leuchtet.
Schneidwerk ölen
Ölen Sie das Schneidwerk des Aktenvernichters in regelmäßigen Abständen, um die Lebensdauer
des Aktenvernichters zu verlängern.
Es sind spezielles Öl und Öl-Blätter für Aktenvernichter von HP erhältlich.
Wichtig!
Sachschaden durch die Verwendung falscher Öle! Keine Sprühöle verwenden. Ausschließlich Spezialöl für Aktenvernichter verwenden.
Sie haben verschiedene Möglichkeiten das Schneidwerk zu ölen.
Ölen mit selbst geölten Papier:
1 Tragen Sie Spezialöl für Aktenvernichter in mehreren Querlinien auf ein Blatt Papier auf.
2 Führen Sie das geölte Blatt Papier dem Einzug zu.
Î Das mit Öl benetzte Papier wird eingezogen und ölt das Schneidwerk.
Ölen mit Öl-Blättern
1 Führen Sie das Öl-Blatt Papier in den Einzug ein.
Î Das mit Öl benetzte Papier wird eingezogen und ölt das Schneidwerk.
einem Füllstand von ca. 80 % geleert werden. So verhindern Sie, dass sich zerkleinertes Material
staut und zu Fehlfunktionen führt.
- 27 -
Page 28
DE
1 Schieben Sie den Hauptschalter in die Position OFF.
2 Ziehen Sie den Netzstecker aus der Steckdose.
Vorsicht!
Verletzungsgefahr durch scharfkantiges Schneidwerk! Die Unterseite des Schneidwerks
3
4
Vorsicht!
Verletzungsgefahr durch scharfkantiges Schneidwerk! Die Unterseite des Schneidwerks
5
Î
Materialreste entfernen
Wenn Ihr Aktenvernichter das Material nicht mehr so zerkleinert, wie Sie es erwarten, entfernen
Sie verbliebene Materialreste aus dem Schneidwerk.
1 Schieben Sie den Hauptschalter in die Position REV. Das Schneidwerk läuft rückwärts und gibt
im Schneidwerk verbliebenes Material frei.
2 Schieben Sie den Hauptschalter in die Position OFF.
3 Ziehen Sie den Netzstecker aus der Steckdose.
4
Vorsicht!
Verletzungsgefahr durch scharfkantiges Schneidwerk! Lassen Sie beim Entfernen von
Materialresten besondere Vorsicht walten.
5 Entfernen Sie verbliebene Materialreste mit einem geeigneten spitzen Gegenstand vorsichtig
aus dem Schneidwerk.
6
Aktenvernichter reinigen
Reinigen Sie den Aktenvernichter in regelmäßigen Abständen.
Vorsicht!
- 28 -
Page 29
DE
1 Schieben Sie den Hauptschalter in die Position OFF.
2 Ziehen Sie den Netzstecker aus der Steckdose.
3 -
wenden Sie keine Druckluftsprays, Reinigungs- oder Lösungsmittel.
Technische Daten
Modell OneShred 8CC
B: 320
Abmessungen (mm)
Sicherheitsstufe nach DIN 66399-2 P-4
Größe Schnittgut (Dicke × Breite, mm) 5 ×18
max. Schnittleistung (Blätter / Kreditkarte) 8 / 1
Arbeitsbreite (mm) 220
Stromversorgung
Max. Umgebungstemperatur [°C] 25
15
Gewicht (kg) 4,3
Lautstärke (dB) 68
Dauerbetrieb (min) / Abkühldauer (min) 4 / 50
Arbeitsgeschwindigkeit (m/min) 1,8
Schnittart Partikelschnitt
Wir erklären, dass dieses Gerät bei der Vernichtung von Dokumenten die Voraussetzungen der
Sicherheitsstufe P-4 nach DIN 66399 erfüllt.
P-4: Empfohlen für Datenträger mit besonders sensiblen und vertraulichen Daten. Materialteil
4 x 40 mm).
L: 190
H: 416
Entsorgung
Informieren Sie sich über die Möglichkeiten der unentgeltlichen Rücknahme von Altgeräten
bei Ihrem Händler.
Das nebenstehende Symbol bedeutet, dass elektrische und elektronische Altgeräte
aufgrund gesetzlicher Bestimmungen getrennt vom Hausmüll zu entsorgen sind. Entsorgen Sie Ihr Gerät bei der Sammelstelle Ihres kommunalen Entsorgungsträgers.
- 29 -
Page 30
DE
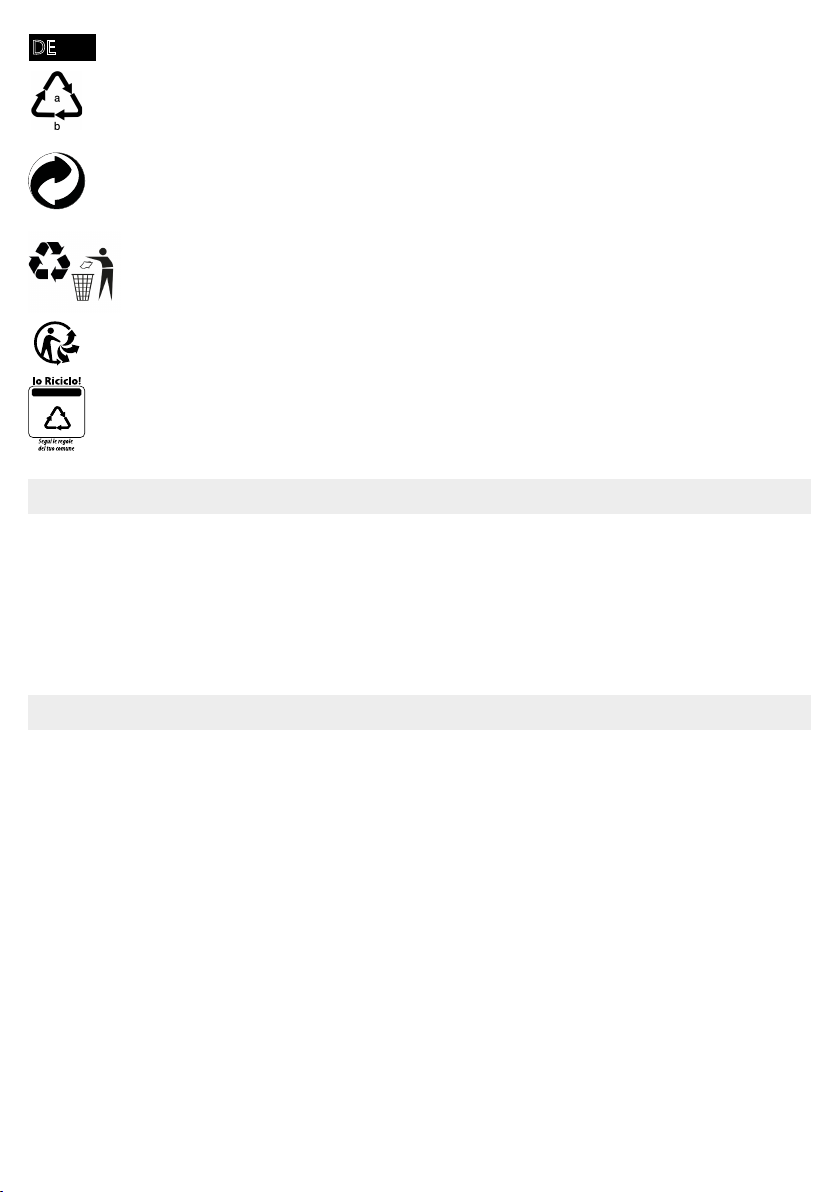
Beachten Sie die Kennzeichnung des Verpackungsmaterials bei der Abfalltrennung, diese
a
c
d
b
sind gekennzeichnet mit Abkürzungen (a) und Nummern (b) mit folgender Bedeutung:
Entsorgen Sie Verpackungsmaterialien entsprechend den lokalen Vorschriften.
Die Verpackung besteht aus umweltfreundlichen Materialien, die Sie über die örtlichen
Recyclingstellen entsorgen können. Informieren Sie sich bei Ihrer Kommune über die
Möglichkeiten der korrekten Entsorgung.
Das Gerät und das Verpackungsmaterial sind recycelbar, entsorgen Sie diese getrennt für
eine bessere Abfallbehandlung. Das Triman-Logo gilt nur für Frankreich.
Das Gerät und das Verpackungsmaterial sind recycelbar, entsorgen Sie diese getrennt für
eine bessere Abfallbehandlung. Informieren Sie sich bei Ihrer Kommune über die Möglichkeiten der korrekten Entsorgung. Dieses Symbol gilt nur für Italien.
Hinweise zur Lagerung
Nach der Verwendung muss der Aktenvernichter sicher gelagert werden. Beachten Sie die folgenden Hinweise:
Lagern Sie den Aktenvernichter
■ nur in der Originalverpackung
■ an einem trockenen, sauberen Ort
■ nur in abgekühlten Zustand
Fragen und Service
Lieber Kunde,
wir freuen uns, dass Sie sich für dieses Gerät entschieden haben.
Bei Fragen und Problemen steht Ihnen unsere Service-Hotline unter der Telefonnummer
+49 (0) 180 5 007514 (Kosten aus dem dt. Festnetzt bei Drucklegung: 14ct/Min., mobil maximal
42ct/Min.) zur Verfügung.
Eine Rücksendung erfolgt unter Beifügung des Kaufbelegs und idealerweise in der Originalverpackung an:
- 30 -
Page 31

DE
WSG Wilhelmshavener Service Gesellschaft mbH
Krabbenweg 14
26388 Wilhelmshaven
Deutschland
Konformitätserklärung
Das CE-Kennzeichen auf dem Gerät bestätigt die Konformität.
Das UKCA-Kennzeichen auf dem Gerät bestätigt die Konformität.
Hersteller
GO Europe GmbH
Zum Kraftwerk 1
D-45527 Hattingen
Deutschland
- 31 -
Page 32
BG
- 32 -
Page 33
BG
8
-
- 33 -
Page 34
BG
-
- 34 -
Page 35
BG
■
■
■
1 5
2 6
3 7
4
- 35 -
Page 36
BG
1 2 3 4
FWD AUTO OFF REV
overload
7 5
1 5
2 6
3 7
4 8
overheat
68
1
2 -
- 36 -
Page 37
BG
3 OFF
4 AUTO.
Î
1
Î
1 FWD.
Î
2 OFF.
1 OFF.
Î
2
- 37 -
Page 38

BG
1 -
Î -
1
Î
1
2
Î
1
Î
- 38 -
Page 39
BG
1 OFF.
2
3
4
5
Î
1 REV-
2 OFF.
3
4
5
6
- 39 -
Page 40
BG
1 OFF.
2
3 -
OneShred 8CC
2
220
25
15
4,3
68
-
1,8
P-4
5 ×18
8 / 1
4 / 50
- 40 -
Page 41
BG
a
c
d
b
■
■
■
- 41 -
Page 42
BG
GO Europe GmbH
Zum Kraftwerk 1
D-45527 Hattingen
- 42 -
Page 43
CZ
Výstraha!
Výstraha!
vodou.
Výstraha!
- 43 -
Page 44
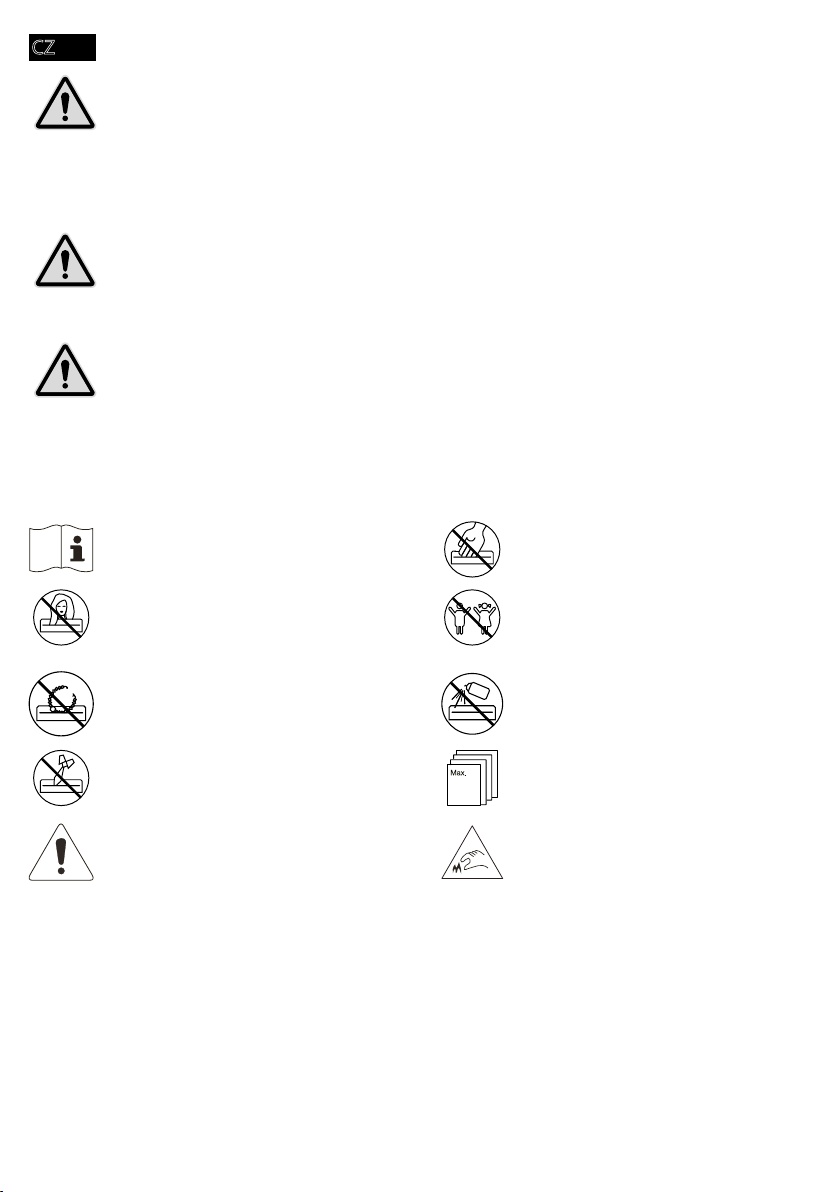
CZ
Výstraha!
Pozor!
kabel nebyly poškozeny.
-
ho otvoru.
8
hranami!
- 44 -
Page 45
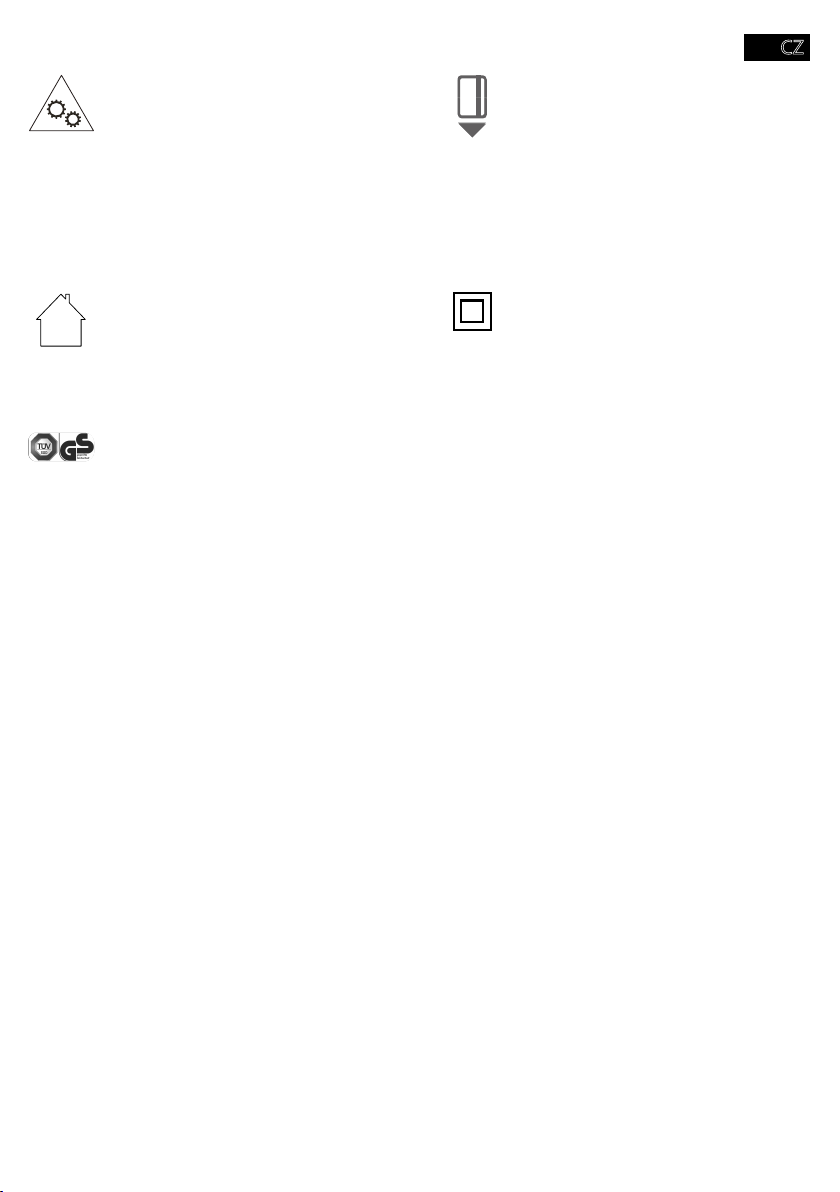
CZ
-
- 45 -
Page 46
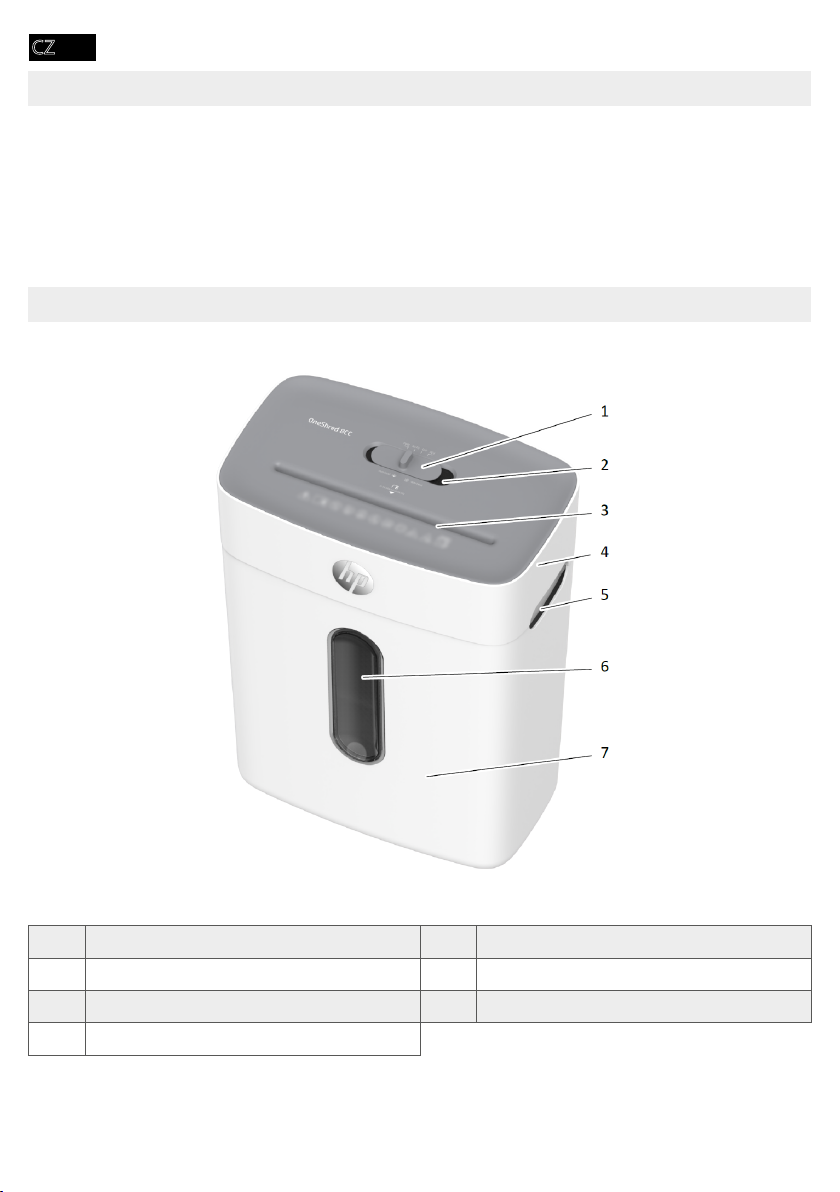
CZ
Kontrola obsahu balení
■
■
■
1 5
2 6
3 7
4
- 46 -
Page 47
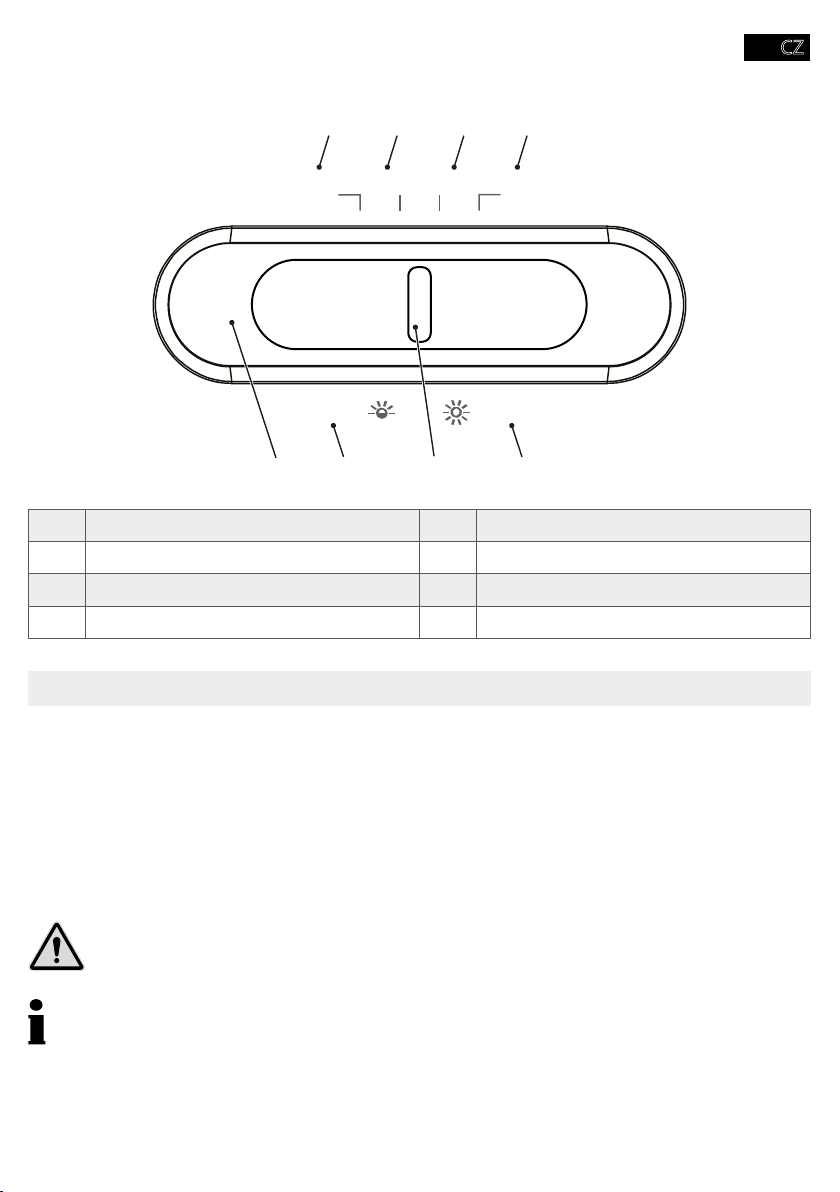
CZ
1 2 3 4
FWD AUTO OFF REV
overload
7 5
1 5
2 Automatický provoz 6
3 7
4 8
overheat
68
1
2 -
3 OFF
4 AUTO.
Î
- 47 -
Page 48

CZ
1
Î
1 FWD.
Î
2 OFF.
1 OFF.
Î
2
- 48 -
Page 49

CZ
1
Î
2 REV.
3
Î
1
Î
1
2
Î
- 49 -
Page 50
CZ
1
Î
1 OFF.
2
3
4
5
Î
1 REV-
2 OFF.
3
4
5
6
- 50 -
Page 51
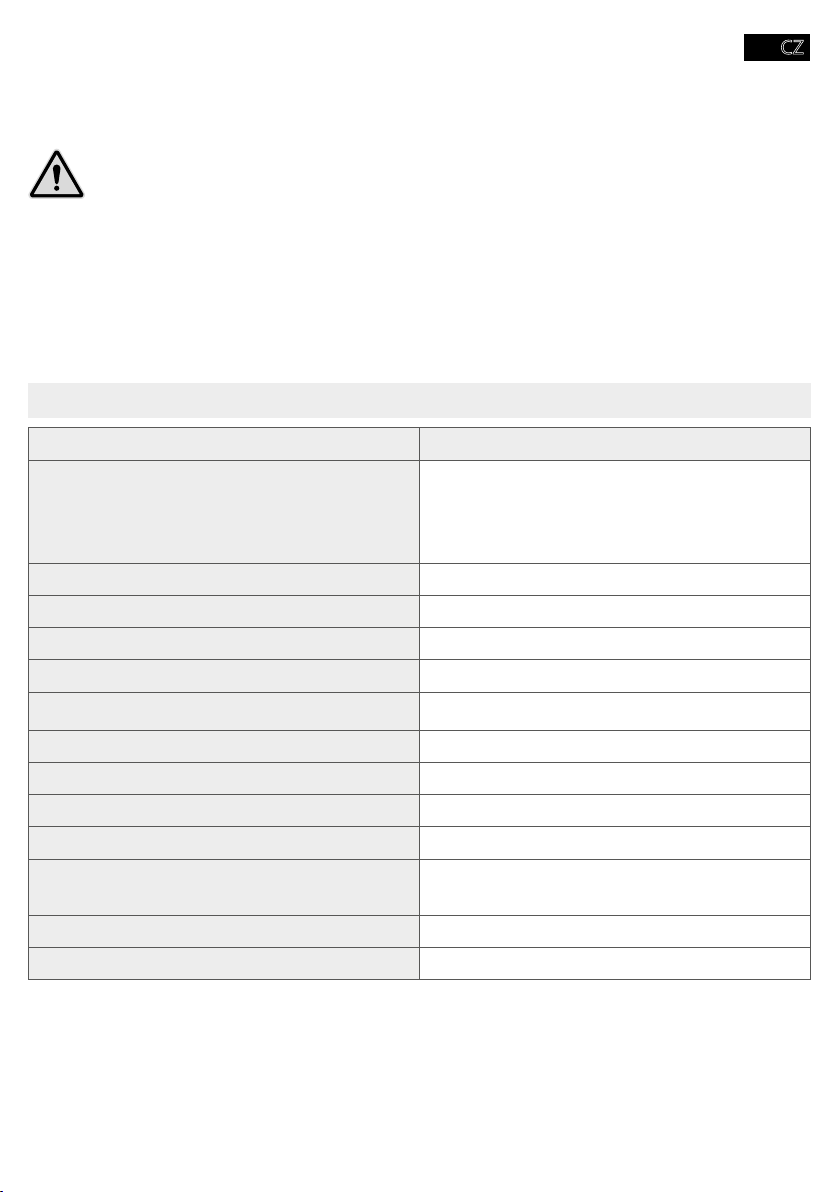
CZ
1 OFF.
2
3
Model OneShred 8CC
š: 320
P-4
5 ×18
8 / 1
220
25
15
Hmotnost (kg) 4,3
Hlasitost (dB) 68
(min)
1,8
d: 190
v: 416
4 / 50
- 51 -
Page 52
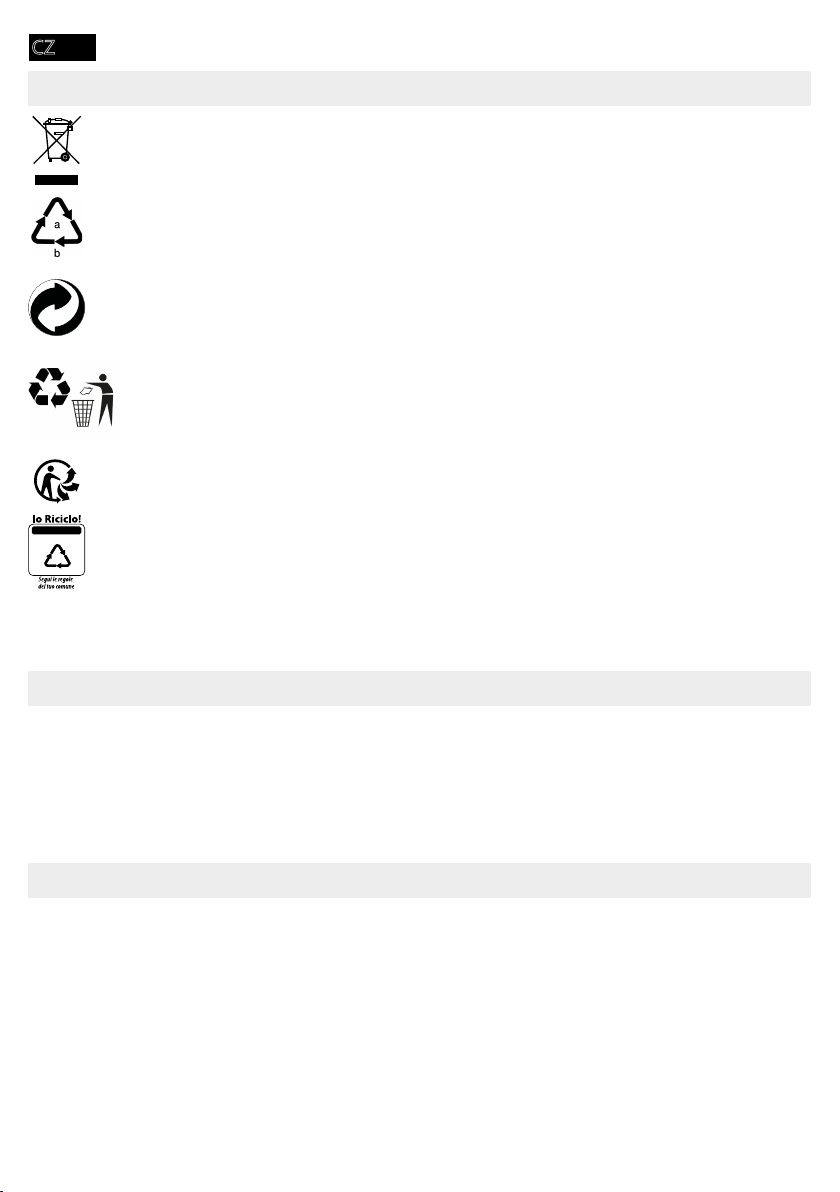
CZ
Likvidace
a
c
d
b
■
■
■
tento výrobek zakoupili.
-
ment.
- 52 -
Page 53

CZ
Výrobce
GO Europe GmbH
Zum Kraftwerk 1
D-45527 Hattingen
- 53 -
Page 54
DA
Læs brugervejledningen igennem
Tilsigtet brug
egnet til privat brug i lukkede rum.
Alt anden brug er ikke tilsigtet. Egenhændige ændringer eller ombygninger er ikke tilladt og medfører, at garantien bortfalder.
Overhold sikkerhedsanvisningerne
Advarsel!
Fare for kvæstelser pga. indtrækket. Løse genstande kan blive fanget i indtrækket og
forårsage kvæstelser. Hold hænder, hår, halstørklæder, slips, smykker etc. væk fra indtrækket.
Advarsel!
Fare for kvæstelser pga. strømstød. Forkert omgang med makulatoren kan medføre
strømstød. Det er ikke tilladt at foretage egenhændige ændringer eller ombygninger på
makulatoren. Brug ikke makulatoren med et beskadiget strømkabel. Sluk med det samme for makulatoren ved skader eller hvis den ikke fungerer korrekt og træk strømkablet
ud.
Lad reparationer kun blive udført af faguddannede personer. Placer makulatoren i nærheden af en let tilgængelig stikdåse, så strømmen i nødstilfælde hurtigt kan slås fra. Tag
aldrig om apparatet med våde hænder. Undgå enhver kontakt mellem apparat og vand.
Træk altid stikket ud, når maskinen ikke bruges. Brug udelukkende det medleverede
strømkabel.
Advarsel!
emballagen.
Advarsel!
Dette apparat kan bruges af børn fra otte år og over samt af personer med nedsat
fysiske, sensoriske eller mentale evner eller mangel på erfaring og/eller viden, hvis de
er under opsyn eller er blevet instrueret i apparatets sikre brug samt om farerne ved
brugen. Børn må ikke lege med apparatet. Børn må ikke rengøre eller vedligeholde apparatet uden opsyn.
- 54 -
Page 55
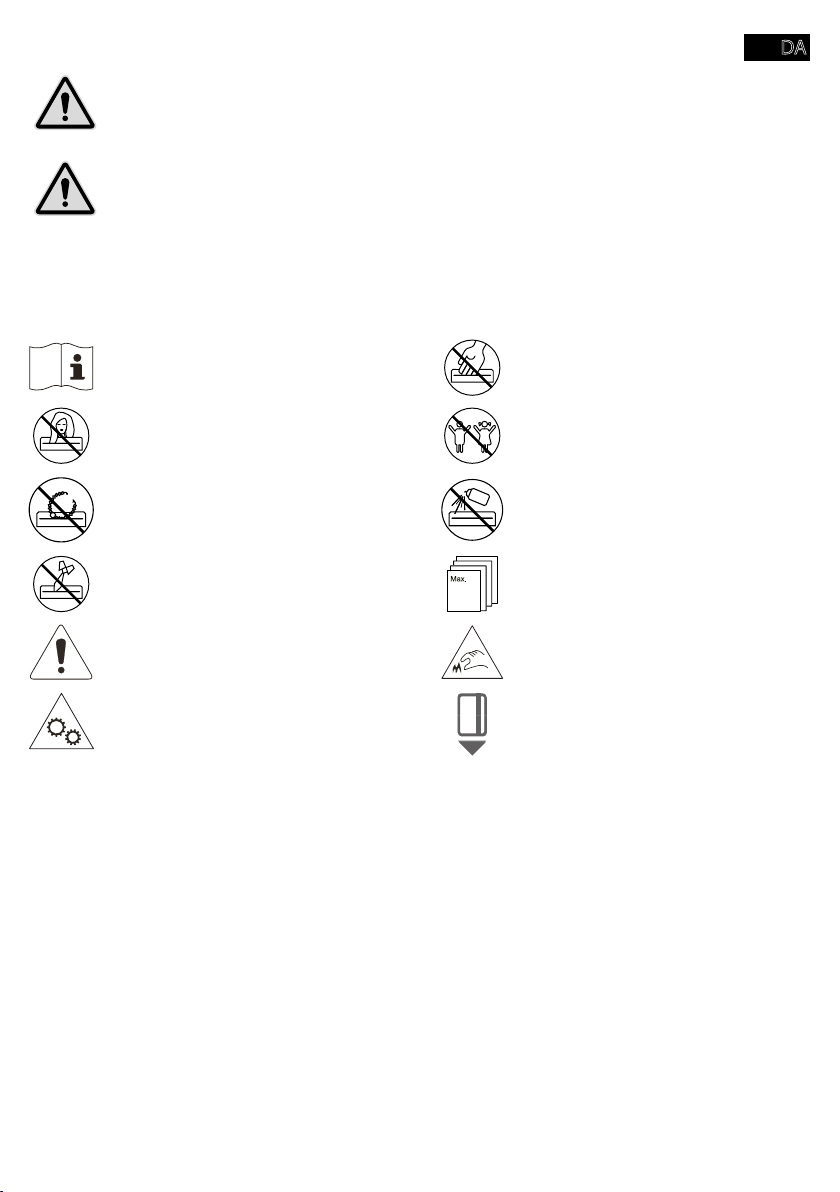
DA
Forsigtig!
Der er fare for at snuble, hvis strømkablet er udlagt forkert. Udlæg strømkablet således,
at ingen kan snuble over det. Sørg for, at der ikke kan ske skader på stikket eller kablet.
Vigtigt!
kemikalier, fugt, varme eller direkte sollys skal undgås.
Brug kun makulatoren i lukkede rum og under de tilladte omgivelsesbetingelser, der er angivet i
de tekniske data.
Overhold de følgende anvisninger, så makulatoren altid fungerer som ønsket.
brug.
Hold langt hår væk fra makulatoren. Hold børn og husdyr væk fra maku-
løse genstande væk fra makulatoren.
Hold slips og halstørklæder væk fra
makulatoren.
Generel henvisning til mulige farer, som
kræver opmærksomhed.
Advarsel! Fare for kvæstelser på det
automatiske indtræk! Indtrækket starter
automatisk, når der tilføres materiale.
Hold langt hår, slips, smykker, løse dele
makulatorens indtræk.
Grib aldrig direkte ind i indtrækket.
latoren.
mod makulatoren. Brug aldrig
trykluftsprays.
Indfør maksimalt 8 ark samtidigt i
indtrækket.
8
Forsigtig! Fare for kvæstelser på
det skarpe skæreværk!
Før kun kreditkort vertikalt ind i
indtrækket.
- 55 -
Page 56

DA
Brug kun produktet indendørs.
om et produkt i klasse II (dobbeltisoleret).
ikke nødvendig.
Mærket «Geprüfte Sicherheit» (kontrolleret sikkerhed) eller GS-mærket sikrer, at
produktet opfylder kravene i den tyske
produktsikkerhedslov (ProdSG).
GS-mærket angiver, at produktet ikke
er til fare for brugerens sundhed og
sikkerhed, hvis det anvendes i overensstemmelse med formålet eller ved forkert
brug, der kan forudses. Det er et frivilligt
sikkerhedsmærke, som udstedes af en
egnet kontrolinstans.
Kontrol af emballagens indhold
Kontrollér indholdet af makulatorens emballage, før makulatoren tages i brug.
Mangler der noget eller er noget blevet beskadiget, må makulatoren ikke bruges. Henvend dig til
vores service.
■
■
■ 1 ark oliepapir
- 56 -
Page 57
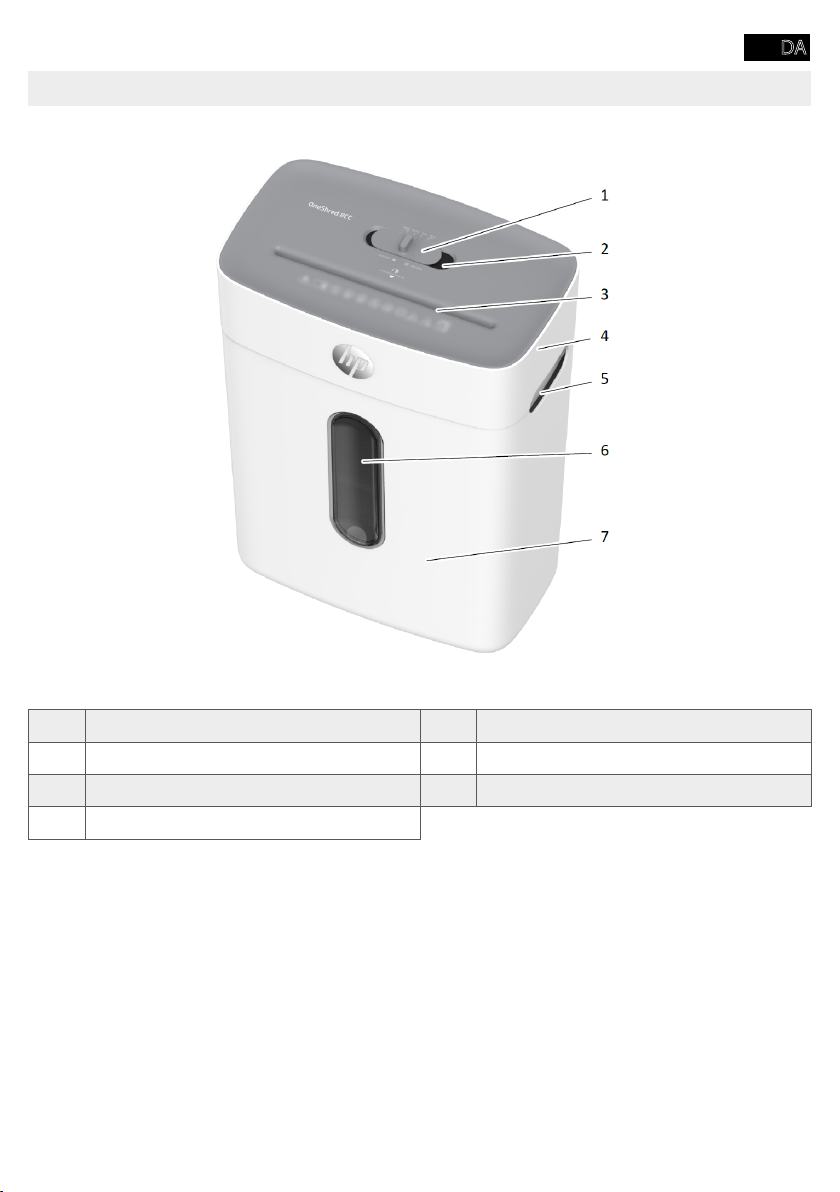
DA
Oversigt over din makulator
Det følgende billede viser en oversigt over din makulator.
1 Kontakt 5 Håndtag
2 Statusmelding 6 Rude
3 Indtræk 7 Opsamlingsbeholder
4 Skæreværksdel
- 57 -
Page 58
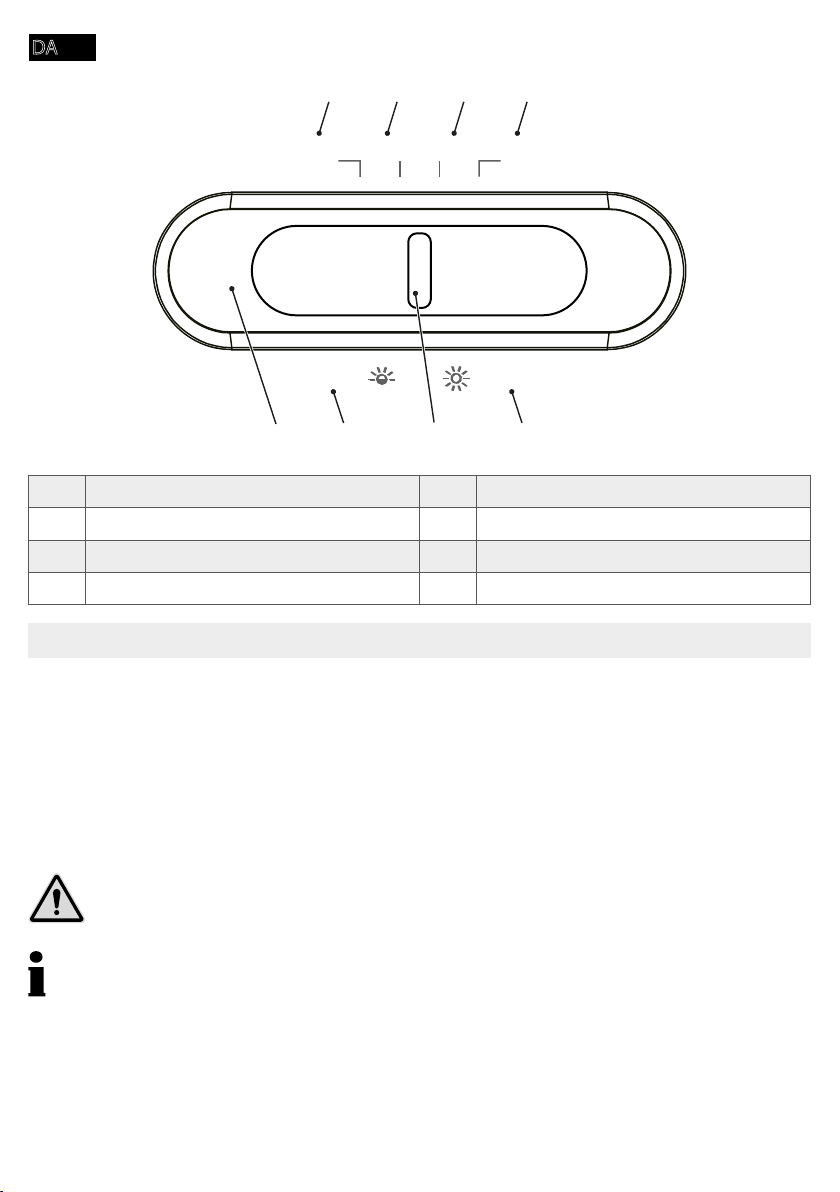
DA
1 2 3 4
FWD AUTO OFF REV
overload
7 5
1 Manuel drift 5
2 Automatisk drift 6 Kontakt
3 Apparat fra 7 Overbelastning
4 Baglæns brug 8 Statusmelding
overheat
68
Stil makulatoren op og tag den i brug
Din makulator fungerer kun sammen med opsamlingsbeholderen. Stil ikke makulatoren i nærheden af varme kilder og hold en afstand på mindst 10 cm til væggen. På den måde bliver makulatoren kølet nok af.
1
tilgængelig stikdåse.
2 Sæt skæreværkdelen på opsamlingsbeholderen. Skæreværkdelen går i hak. Når skæreværk-
delen ikke sidder korrekt på opsamlingsbeholderen, kan makulatoren ikke tilsluttes.
Forsigtig!
Fare for kvæstelser på det skarpe skæreværk! Skæreværkets underside har skarpe
Brug udelukkende det medleverede strømkabel.
3 Skub kontakten mod OFF og sæt stikket i stikdåsen.
4 Skub kontakten mod AUTO.
Î Makulatoren er sat i drift. Statusmeldingen lyser blåt.
- 58 -
Page 59

DA
Betjening af makulatoren
eller tilbage.
Den maksimalt tilladte skæreydelse samt andre oplysninger i de tekniske data.
Advarsel!
Fare for kvæstelser på det automatiske indtræk! Indtrækket starter automatisk, når der
væk fra makulatorens indtræk.
Vigtigt!
Tingsskader pga. materialekø! Vær opmærksom på indtrækkets maksimale skæreydelse.
1
Î Indtrækket trækket materialet ind og stopper, når der ikke tilføres yderligere materiale.
I nogle tilfælde registrerer sensorerne ikke det indførte materiale.
1 Skub her kontakten mod FWD.
Î
2 Skub kontakten mod OFF.
Sluk for makulatoren
Sluk for makulatoren, når den ikke længere skal bruges.
1 Skub kontakten mod OFF.
Î Makulatoren er slukket.
2 Træk stikket ud af stikdåsen, hvis makulatoren ikke skal bruges over en længere tid.
Hvis noget ikke fungerer
Beskyttelse mod for høj varmedannelse
1 Vent mindst 50 minutter, indtil makulatoren er kølet af. Overhold minimumsafstanden til
væggen samt oplysningerne om kontinuerlig brug i de tekniske data.
Î
- 59 -
Page 60

DA
Beskyttelse mod overbelastning
Har du tilført mere materiale end angivet i de tekniske data, blinker statusmeldingen rødt og
makulatoren kører automatisk baglæns i 5 sekunder.
1 Træk materialet ud af makulatoren.
Î
Vent, indtil makulatoren igen er standset og statusmeldingen lyser blåt.
Smøring af skæreværk
Der fås specialolie og oliepapirer til makulatorer fra HP.
Vigtigt!
makulatorer.
Du kan smøre skæreværket på forskellige måder.
Smøring med papir, der er påført olie:
1
2 Indfør det oliesmurte papir i indtrækket.
Î Papiret trækkes ind og smører skæreværket.
Smøring med olieark
1 Indfør oliearket i indtrækket.
Î Papiret trækkes ind og smører skæreværket.
Tømning af opsamlingsbeholder
1 Skub kontakten mod OFF.
2 Træk stikket ud af stikdåsen.
Forsigtig!
Fare for kvæstelser på det skarpe skæreværk! Skæreværkets underside har skarpe
3 Løft skæreværkdelen af beholderen.
4 Tøm beholderen.
- 60 -
Page 61
DA
Forsigtig!
Fare for kvæstelser på det skarpe skæreværk! Skæreværkets underside har skarpe
5 Sæt skæreværkdelen på beholderen.
Î Opsamlingsbeholderen går tydeligt i hak.
Fjern materialerester
skæreværket.
1 Skub kontakten mod REV
2 Skub kontakten mod OFF.
3 Træk stikket ud af stikdåsen.
4 Løft skæreværkdelen af beholderen.
Forsigtig!
5
6 Sæt skæreværkdelen på beholderen.
Rengøring af makulator
Forsigtig!
bruges en trykluftspray. Brug aldrig trykluftsprays.
1 Skub kontakten mod OFF.
2 Træk stikket ud af stikdåsen.
3 -
rings- eller opløsningsmidler.
- 61 -
Page 62
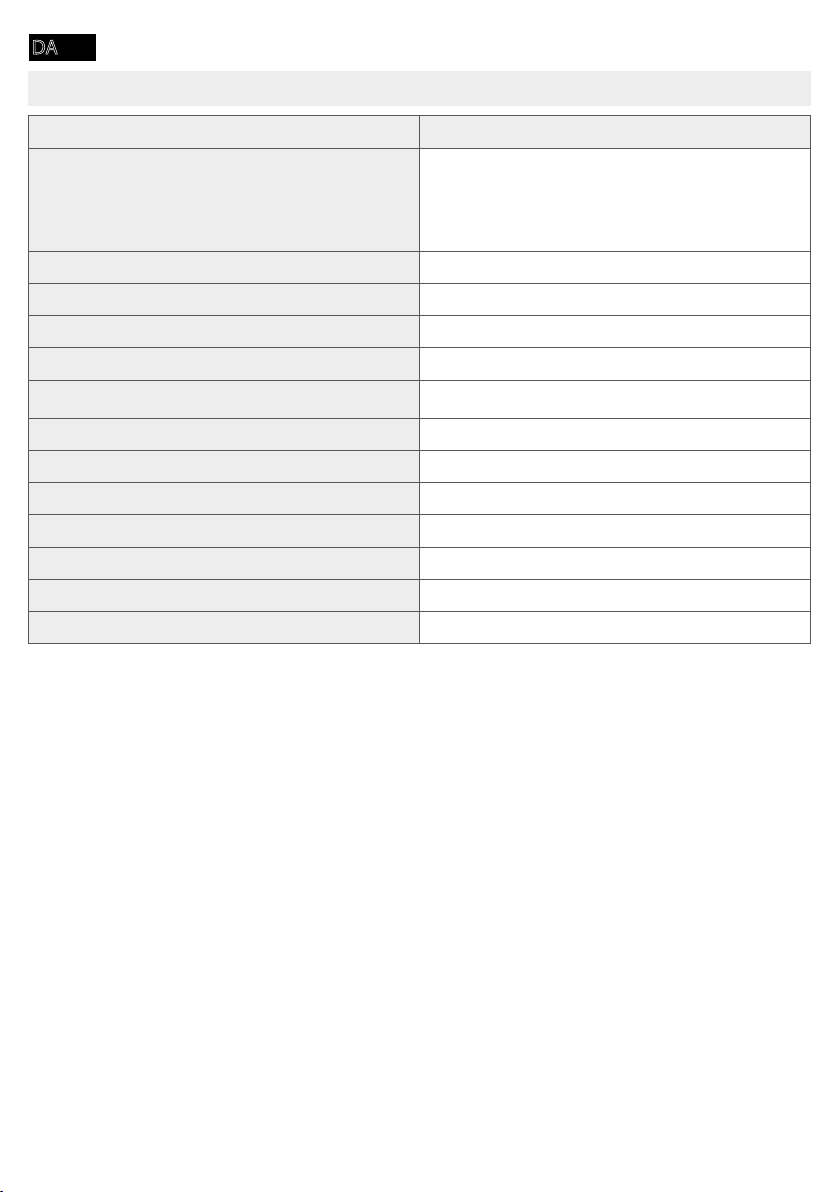
DA
Tekniske data
Model OneShred 8CC
B: 320
Mål (mm)
P-4
5 ×18
Maks. skæreydelse (ark/kreditkort) 8 / 1
220
Strømforsyning
Maks. omgivelsestemperatur [°C] 25
Rumfang opsamlingsbeholder (l) 15
Vægt (kg) 4,3
Lydstyrke (dB) 68
Kontinuerlig drift (min)/afkøling (min) 4 / 50
1,8
Skæretype Partikelsnit
Vi erklærer, at denne maskine opfylder kravene til sikkerhedsniveau P-4 iht. DIN 66399 ved makulering af dokumenter.
P-4: Anbefales til datamedier med meget følsomme og fortrolige oplysninger. Partikelstørrelse
mm).
L: 190
H: 416
- 62 -
Page 63
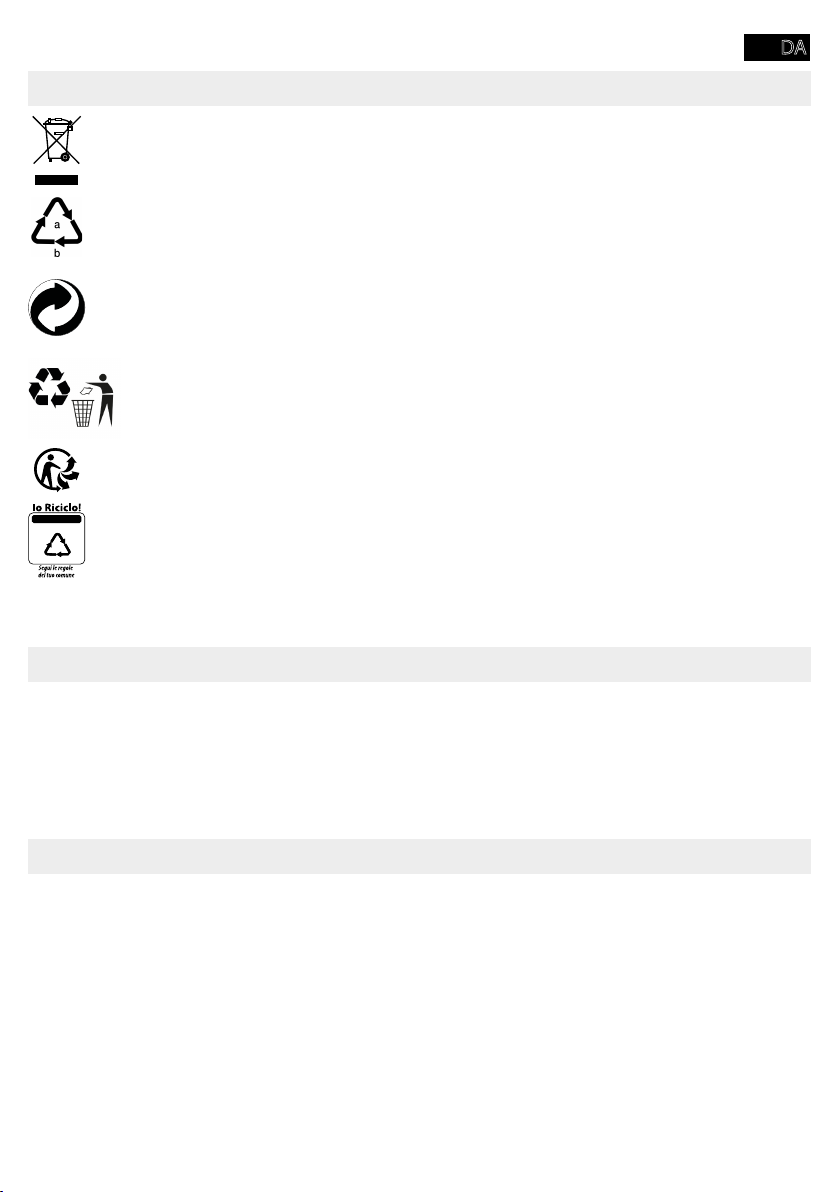
DA
a
c
d
b
kommunale renovationsselskab.
med en forkortelse (b) og et nummer (a) med følgende betydning: 1-7: Plast / 20-22:
Papir og pap / 80-98: Kompositmateriale.
Bortskaf emballagen i overensstemmelse med lokale forskrifter.
kommunekontor.
kommunekontor.Vær opmærksom på følgende mærkning på emballagen: (a) Nummer, (b)
forkortelse og (c) materiale med følgende betydning: 1-7: Plast / 20-22: Papir og pap /
80-98: Kompositmateriale samt (d) emballagetype. Logoet gælder kun i Italien.
Henvisninger til opbevaring
Makulatoren skal opbevares korrekt efter brug. Overhold følgende anvisninger:
Opbevar makulatoren
■ kun i den originale emballage
■ på et tørt, rent sted
■ kun i afkølet tilstand
Spørgsmål og service
Kære kunde.
Tak fordi du har købt dette produkt.
Fungerer det ikke som forventet eller er det defekt, bedes du henvende dig til den forhandler, hvor
du har købt produktet.
.
- 63 -
Page 64

DA
Overensstemmelseserklæring
CE-mærket på apparatet bekræfter overensstemmelsen.
UKCA-mærket på produktet bekræfter overensstemmelsen.
Producent
GO Europe GmbH
Zum Kraftwerk 1
D-45527 Hattingen
Tyskland
- 64 -
Page 65
ES
Leer el manual de instrucciones
Lea el manual de instrucciones atentamente y tenga en cuenta las advertencias relativas
cualquier utilización posterior.
Uso previsto
grapas. La destructora de documentos ha sido concebida exclusivamente para el uso particular en
habitaciones cerradas.
Tener en cuenta las advertencias de seguridad
¡Aviso!
den quedar enganchados en la entrada y provocar lesiones. Evite, en todo caso, que los
¡Aviso!
cuenta propia. No utilice la destructora de documentos si el cable de red presenta daños.
observar cualquier daño o funcionamiento incorrecto.
cualquier contacto con agua.
exclusivamente el cable de red suministrado.
¡Aviso!
- 65 -
Page 66
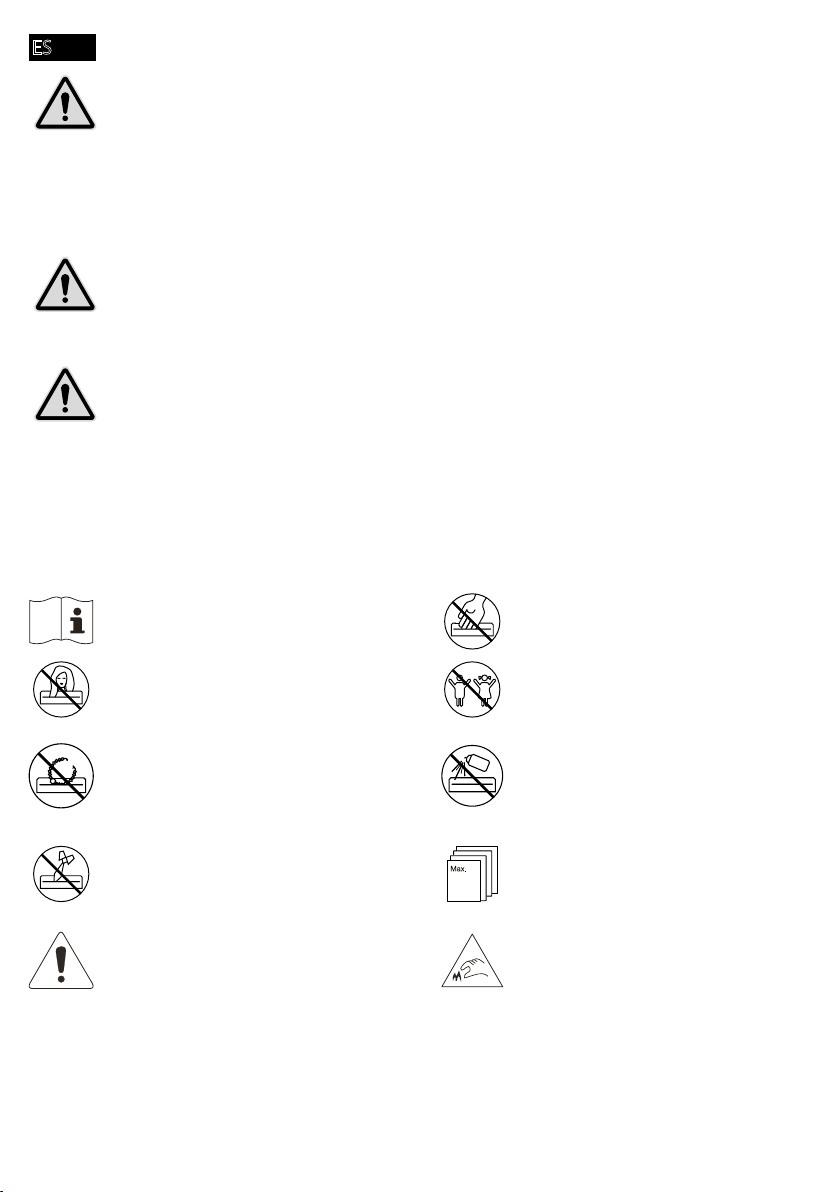
ES
¡Aviso!
acerca del uso seguro del aparato y de haber comprendido los peligros resultantes. Los
¡Precaución!
cable de red de tal modo que nadie pueda tropezar. Preste atención a que no se produz-
¡Importante!
directa.
.
Tenga en cuenta las siguientes advertencias para que su destructora de documentos funcione
siempre cumpliendo sus expectativas.
Lea detenidamente el manual de instrucciones antes de la puesta en servicio.
destructora de documentos.
de documentos las partes sueltas de la
-
das de la destructora de documentos.
Advertencia general sobre posibles peligros que requieren su atención especial.
- 66 -
No introduzca las manos directamente en la entrada de papel.
animales domésticos de la destructora de documentos.
sentido a la destructora de docu-
aire a presión.
8
entrada.
¡Precaución! ¡Peligro de lesiones
provocado por el cabezal destructor
Page 67
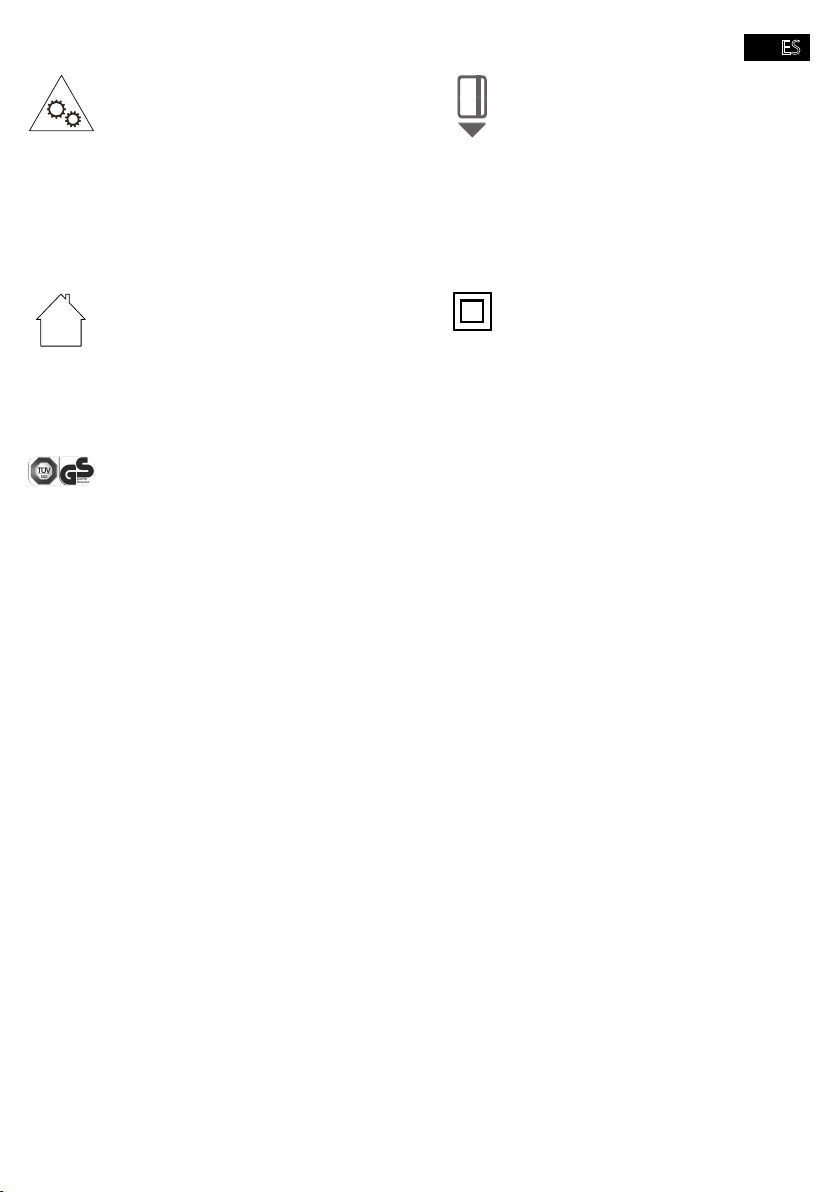
ES
¡Aviso! ¡Peligro de lesiones provocado por
material. El pelo largo, las corbatas, la bisu-
entrada de la destructora de documentos.
solo en sentido vertical.
Utilice el producto solo en habitaciones
interiores.
requisitos de la Ley alemana de seguridad de productos (ProdSG).
La marca GS indica que la seguridad y la
el producto etiquetado se utiliza según
lo previsto o si se produce una aplicación
errónea previsible. Se trata de una marca
de seguridad voluntaria emitida por un
instituto de pruebas adecuado.
producto corresponde al tipo de
protección II (doble aislamiento).
No se requiere una conexión de seguridad a la puesta a tierra eléctrica
(masa).
- 67 -
Page 68
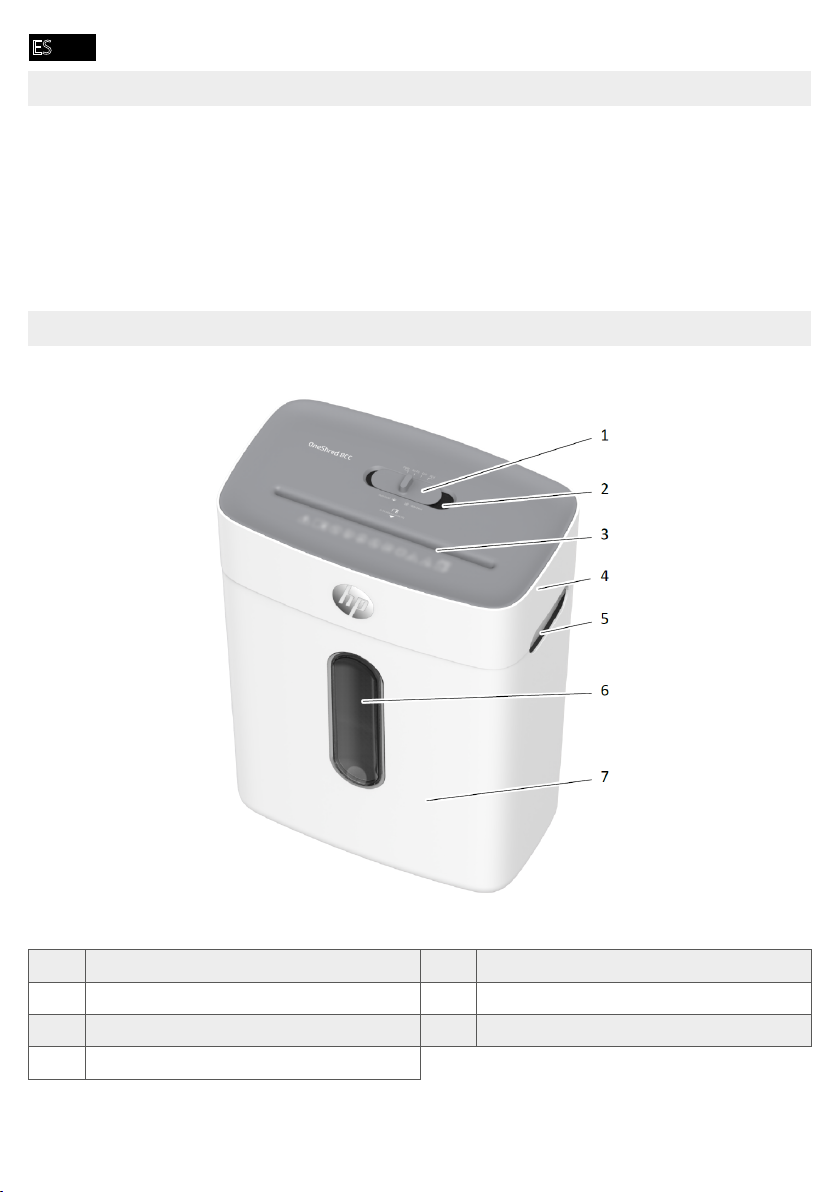
ES
Comprobar el contenido del embalaje
servicio.
ninguna circunstancia. Póngase en contacto con nuestro Servicio Técnico.
■ Destructora de documentos OneShred 8CC con depósito de recogida para el material cortado
■ Manual de instrucciones
■
La destructora de documentos en detalle
1 Interruptor principal 5 Asa
2 Indicación de estado 6 Ventana de control visual
3 Entrada 7 Depósito de recogida
4 Cubierta del cabezal destructor
- 68 -
Page 69
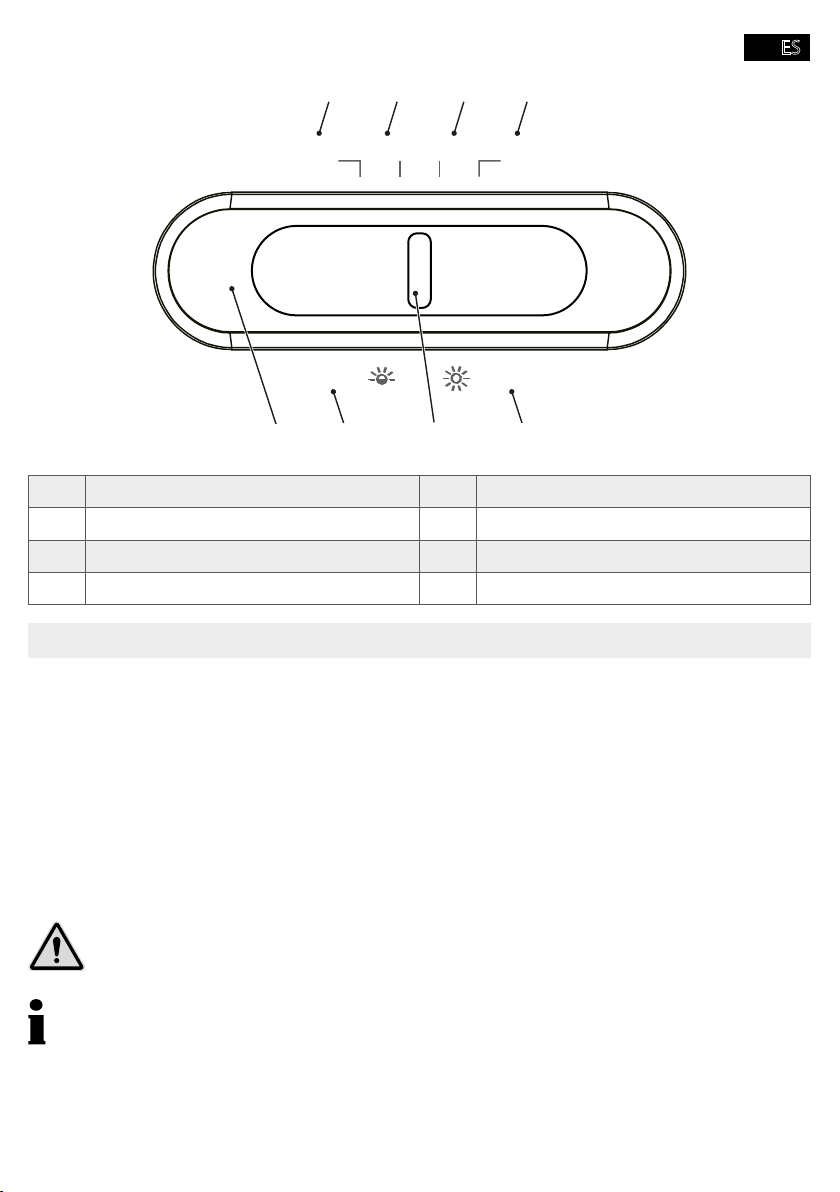
ES
1 2 3 4
FWD AUTO OFF REV
overload
7 5
1 Funcionamiento manual 5 Sobrecalentamiento
2 6 Interruptor principal
3 Aparato apagado 7 Sobrecarga
4 8 Indicación de estado
overheat
68
Instalar y poner en servicio la destructora de documentos
La destructora de documentos solo funciona con el depósito de recogida. No coloque la destruc-
1
2 Coloque la cubierta del cabezal destructor sobre el depósito de recogida. La cubierta del ca-
tra colocada correctamente en el depósito de recogida, no es posible encender la destructora
de documentos.
¡Precaución!
Utilice exclusivamente el cable de red suministrado.
- 69 -
Page 70

ES
3 Deslice el interruptor principal a la posición OFF
de enchufe.
4 Deslice el interruptor principal a la posición AUTO.
Î La destructora de documentos se ha puesto correctamente en servicio. La indicación de
estado se ilumina en azul.
Manejo de la destructora de documentos
se controla moviendo el interruptor principal.
en los datos técnicos.
¡Aviso!
destructora de documentos.
¡Importante!
dad de corte de la entrada de material.
1 Introduzca el material a destruir por el medio de la entrada de papel.
Î
Destruir material manualmente
En muy pocos casos puede ocurrir que los sensores no detecten el material introducido.
1 Deslice el interruptor principal a la posición FWD.
Î El material es arrastrado y triturado manualmente.
2 Deslice el interruptor principal a la posición OFF.
Apagar la destructora de documentos
Apague la destructora de documentos cuando no la necesite.
1 Deslice el interruptor principal a la posición OFF.
Î Usted ha apagado la destructora de documentos correctamente.
2 Desconecte el cable de alimentación de la toma de corriente cuando no vaya a utilizar la des-
- 70 -
Page 71

ES
Las siguientes advertencias le ayudan cuando algo no funciona como es debido.
Protección contra sobrecalentamientos
1 Espere al menos 50 minutos hasta que la destructora de documentos se haya enfriado. Ten-
Î Después de la fase de enfriamiento se ilumina la indicación de estado en azul y la des-
trucción continúa.
Protección contra sobrecarga
-
tico.
1 Saque el material de la destructora de documentos.
Î El bloqueo se ha eliminado.
Una vez retirado el material de la destructora de documentos, el cabezal destructor se sigue
moviendo durante 3 segundos para limpiarse. Espere hasta que la destructora de documentos
vuelva a quedarse parada y la indicación de estado se ilumine en azul.
Lubricación del cabezal destructor
Debe aceitar el cabezal destructor de la destructora de documentos periódicamente para alargar
la vida útil de la destructora de documentos.
¡Importante!
¡El uso de aceites incorrectos puede originar daños materiales! No utilizar aceites para rociar.
Utilizar exclusivamente aceite especial para destructoras de documentos.
Existen varias posibilidades para aceitar el cabezal destructor.
- 71 -
Page 72
ES
Aceitar con papel aceitado por el cliente:
1
2
Î El papel humectado con aceite es arrastrado y se encarga de aceitar el cabezal destruc-
tor.
Aceitar con hojas aceitadas
1
Î El papel humectado con aceite es arrastrado y se encarga de aceitar el cabezal destruc-
tor.
Vaciado del depósito de recogida
El nivel de llenado del depósito de recogida debe controlarse periódicamente a través de la ventana de control visual y se debe vaciar el depósito de recogida cuando alcance un nivel de llenado de
aproximadamente el 80 %. De este modo, se puede evitar la acumulación de material triturado y,
al mismo tiempo, errores en el funcionamiento.
1 Deslice el interruptor principal a la posición OFF.
2 Desenchufe el cable de alimentación de la toma de corriente.
¡Precaución!
3 Separe la cubierta del cabezal destructor del depósito de recogida.
4
¡Precaución!
5 Coloque la cubierta del cabezal destructor sobre el depósito de recogida.
Î
- 72 -
Page 73
ES
Eliminar restos de material
Si la destructora de documentos no destruye el material correctamente, debe retirar los posibles
restos de material del cabezal destructor.
1 Deslice el interruptor principal a la posición REV
soltando el material que se haya quedado en el cabezal destructor.
2 Deslice el interruptor principal a la posición OFF.
3 Desenchufe el cable de alimentación de la toma de corriente.
4 Separe la cubierta del cabezal destructor del depósito de recogida.
¡Precaución!
precaución al retirar los restos de material.
5
destructor.
6 Coloque la cubierta del cabezal destructor sobre el depósito de recogida.
Limpiar la destructora de documentos
Limpie la destructora de documentos periódicamente.
¡Precaución!
¡Peligro de lesiones provocado por llamaradas! La utilización de aerosol de aire a presión
1 Deslice el interruptor principal a la posición OFF.
2 Desenchufe el cable de alimentación de la toma de corriente.
3
utilice aerosoles de aire a presión, detergentes no disolventes.
- 73 -
Page 74
ES
Modelo OneShred 8CC
B: 320
Dimensiones (mm)
Nivel de seguridad según norma DIN 66399-2 P-4
Tamaño del material cortado (espesor × an-
chura, mm)
crédito)
220
Alimentación eléctrica
25
Capacidad del depósito de recogida (l) 15
Peso (kg) 4,3
Volumen (dB) 68
-
miento (min)
1,8
Tipo de corte
Declaramos que este dispositivo cumple con los requisitos de nivel de seguridad P-4 según DIN
66399 al destruir documentos.
L: 190
H: 416
5 ×18
8 / 1
4 / 50
- 74 -
Page 75
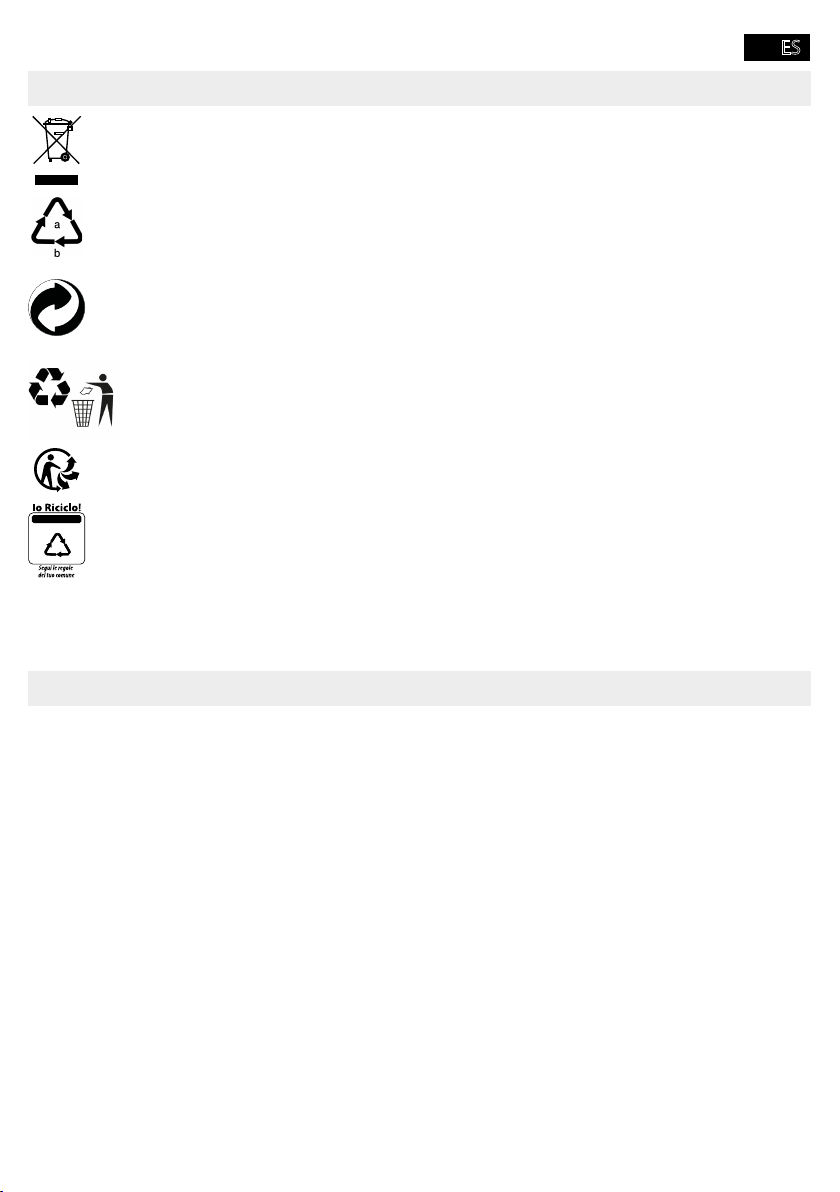
ES
Eliminación
a
c
d
b
aparato a través del punto de recogida de su organismo de eliminación competente.
20–22: papel y cartón / 80–98: materiales compuestos.
logotipo solo es aplicable a Italia.
correcta eliminación.
Advertencias sobre el almacenamiento
Después de su uso, debe guardarse la destructora de documentos en un sitio seguro. Tenga en
cuenta las siguientes advertencias:
Almacene la destructora de documentos:
■
■ En un lugar seco y limpio
■ Solo en estado enfriado
- 75 -
Page 76
ES
Estimado cliente:
Muchas gracias por haberse decidido por este producto.
Si alguna vez no funcionara como usted lo espera o si presentara algún defecto, rogamos que se
ponga en contacto con el distribuidor donde ha adquirido este producto.
.
Declaración de conformidad
El marcado UKCA (Conformidad Evaluada del Reino Unido, por sus siglas en inglés) en el
Fabricante
GO Europe GmbH
Zum Kraftwerk 1
D-45527 Hattingen
Alemania
- 76 -
Page 77
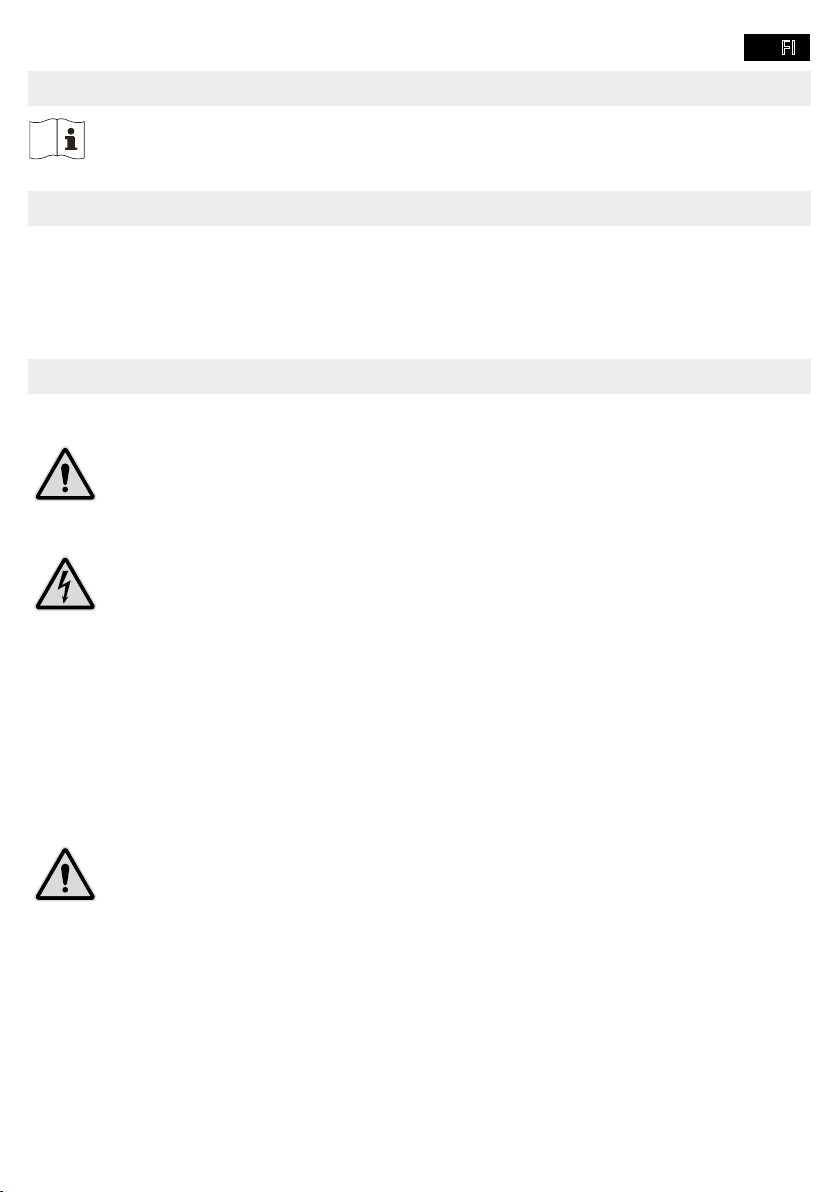
FI
Lue käyttöohje
Määräystenmukainen käyttö
Kaikki muu käyttö on määräystenvastaista käyttöä. Omavaltaiset muutokset tai lisäasennukset
Huomioi turvallisuusohjeet
Varoitus!
Varoitus!
vahingoittunut tai se ei toimi asianmukaisesti.
sähköverkosta. Älä koskaan tartu märin käsin. Vältä kosketusta veteen.
Irrota virtapistoke aina, kun laitetta ei käytetä. Käytä vain laitteen mukana toimitettua
Varoitus!
- 77 -
Page 78
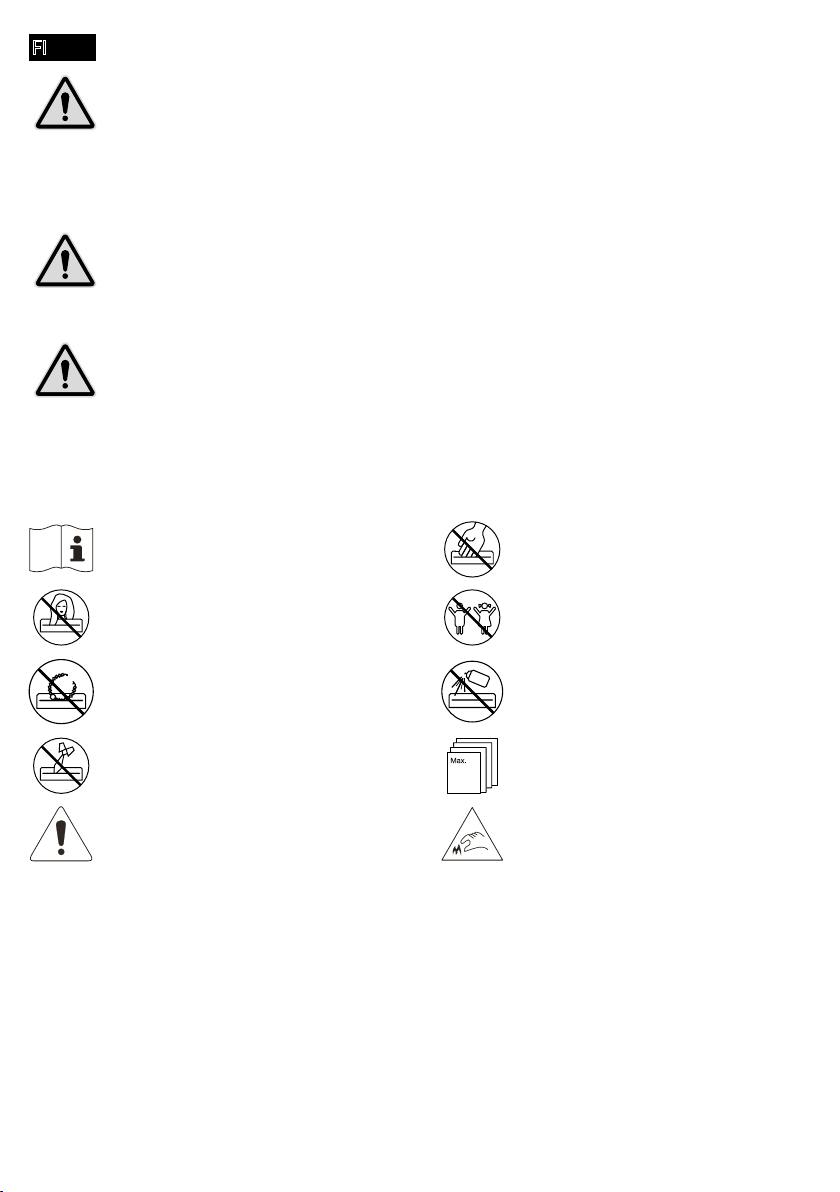
FI
Varoitus!
Huomio!
vahingoittua.
Tärkeää!
Aineelliset vahingot mahdollisia. Vältä ympäristövaikutuksia, kuten esim. savua, pölyä,
-
ristöolosuhteissa.
Älä koskaan laita käsiäsi suoraan
syöttöaukkoon.
purista.
-
rista.
Yleinen huomautus mahdollisista vaa-
- 78 -
Älä suihkuta palavaa kaasua asia-
käytä paineilmasuihkeita.
Laita enintään 8 paperiarkkia sa-
manaikaisesti syöttöaukkoon.
8
Huomio! Teräväreunaisen leikkurin
aiheuttama vammautumisvaara!
Page 79
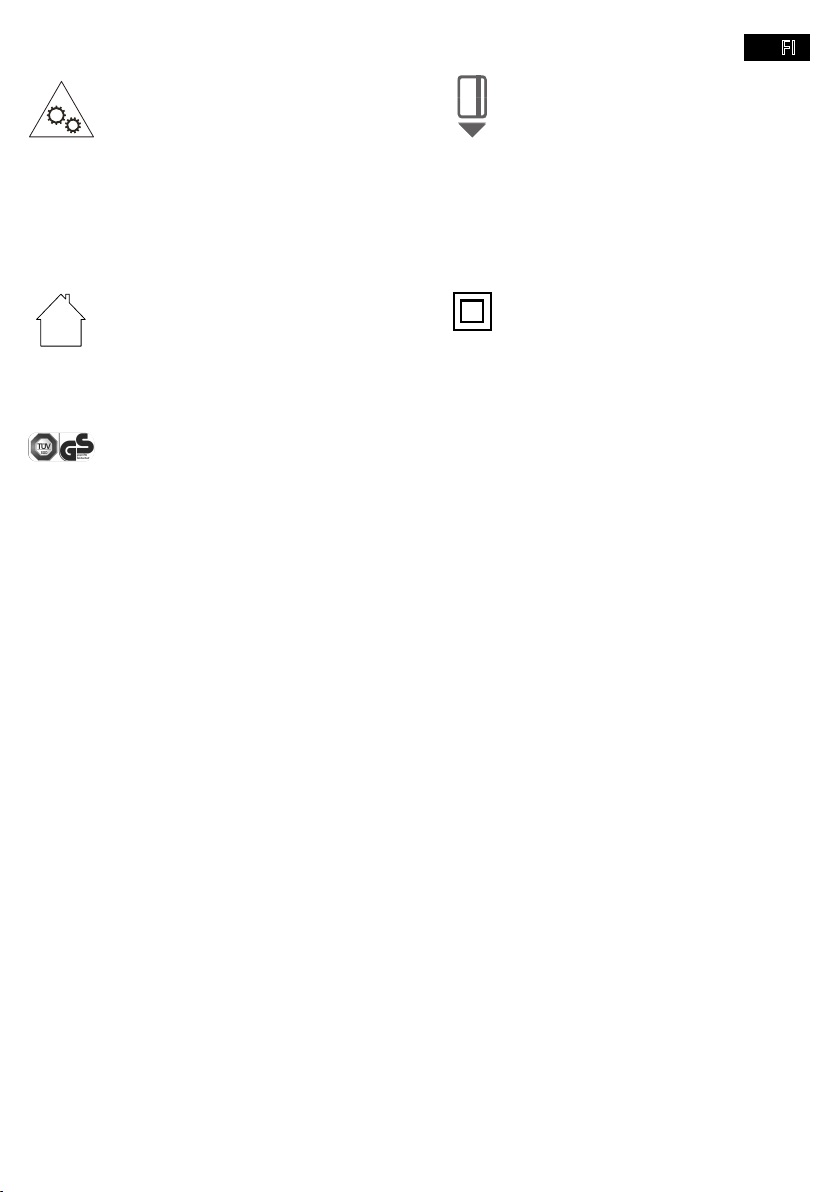
FI
Varoitus! Automaattisen sisäänve-
don aiheuttama vammautumisvaara!
Sisäänveto käynnistyy automaattisesti
heti, kun materiaalia syötetään. Pidä
pitkät hiukset, solmiot, korut, vaatteiden
Käytä tuotetta vain sisätiloissa. Symboli ilmaisee, että tuotteen
GS-merkki («Geprüfte Sicherheit») tarkoittaa, että tuote vastaa Saksan tuoteturvallisuuslain (ProdSG) vaatimuksia.
laitetta käytetään sen käyttötarkoituksen
mukaisesti, eikä myöskään ennakoitavissa olevan väärinkäytön yhteydessä.
Kyseessä on vapaaehtoinen turvalli-
tarkastuslaitos.
asennossa.
(kaksinkertainen eristys).
peen.
- 79 -
Page 80
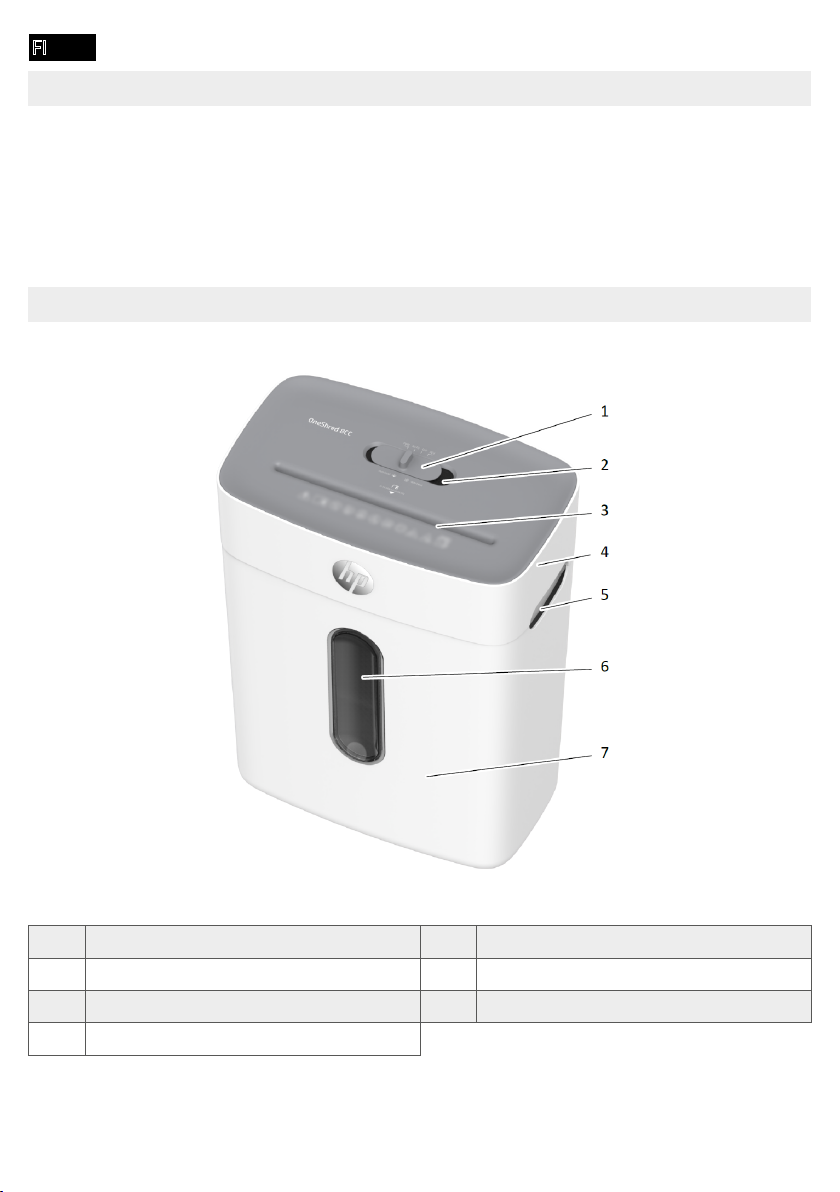
FI
Pakkauksen sisällön tarkastaminen
-
töön. Ota yhteyttä asiakaspalveluumme.
■
■
■
Asiakirjasilppuri yksityiskohtaisesti
1 Pääkytkin 5 Kahva
2 Tilanäyttö 6 Tarkistusikkuna
3 Syöttöaukko 7 Keräyssäiliö
4 Leikkuuosa
- 80 -
Page 81
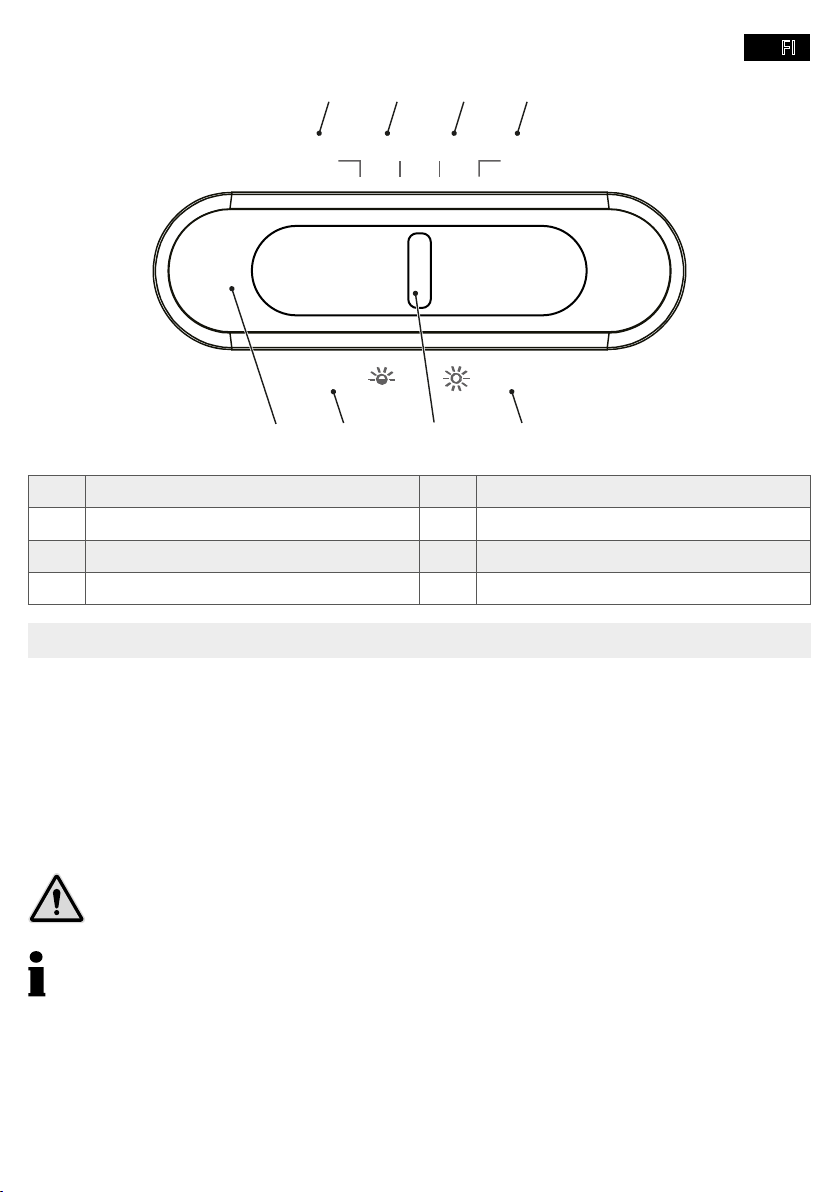
FI
1 2 3 4
FWD AUTO OFF REV
overload
7 5
1 Käsikäyttö 5 Ylikuumentuminen
2 Automaattikäyttö 6 Pääkytkin
3 Laite pois päältä 7 Ylitäyttö
4 Käyttö vastasuuntaan 8 Tilanäyttö
overheat
68
Asiakirjasilppurin asettaminen paikalleen ja käyttöön ottaminen
1 -
rasian lähelle.
2 Aseta leikkuuosa keräyssäiliön päälle. Leikkuuosa lukittuu paikalleen kuuluvasti. Jos leik-
Huomio!
Teräväreunaisen leikkurin aiheuttama vammautumisvaara! Leikkurin alaosassa on
teräväreunaisia kulmia. Tartu leikkuriin vain kahvoista.
3 Aseta pääkytkin asentoon OFF
4 Aseta pääkytkin asentoon AUTO.
Î
- 81 -
Page 82

FI
Asiakirjasilppurin käyttö
Materiaalin automaattinen silppuaminen
Varoitus!
Automaattisen sisäänvedon aiheuttama vammautumisvaara! Sisäänveto käynnistyy
automaattisesti heti, kun materiaalia syötetään. Pidä pitkät hiukset, solmiot, korut,
Tärkeää!
Materiaaliruuhkasta aiheutuvat aineelliset vahingot! Huomioi syöttöaukon suurin sallittu leikkausteho.
1
Î
ei enää syötetä.
Materiaalin silppuaminen manuaalisesti
Harvinaisissa tapauksissa anturit eivät tunnista sisään syötettyä materiaalia.
1 Aseta pääkytkin asentoon FWD.
Î
2 Aseta pääkytkin asentoon OFF.
Asiakirjasilppurin kytkeminen pois päältä
1 Aseta pääkytkin asentoon OFF.
Î
2
Häiriöiden esiintyessä
Ylikuumentumissuoja
palaa punaisena.
1 -
Î
- 82 -
Page 83

FI
Ylikuormitussuoja
Jos olet syöttänyt laitteeseen teknisissä tiedoissa määriteltyä määrää enemmän materiaalia,
1
Î Tukos on poistettu.
sinisenä.
Leikkurin voiteleminen
Tärkeää!
Leikkuri voidaan voidella eri tavoin.
Voiteleminen öljytyllä paperiarkilla:
1
2
Î
Voiteleminen öljypapereilla
1
Î
Keräyssäiliön tyhjennys
seuraavat toimintahäiriöt.
1 Aseta pääkytkin asentoon OFF.
2 Vedä virtapistoke irti pistorasiasta.
Huomio!
Teräväreunaisen leikkurin aiheuttama vammautumisvaara! Leikkurin alaosassa on
teräväreunaisia kulmia. Tartu leikkuriin vain kahvoista.
3 Nosta leikkuuosa pois keräyssäiliöstä.
- 83 -
Page 84
FI
4
Huomio!
Teräväreunaisen leikkurin aiheuttama vammautumisvaara! Leikkurin alaosassa on
teräväreunaisia kulmia. Tartu leikkuriin vain kahvoista.
5 Aseta leikkuuosa keräyssäiliön päälle.
Î Keräyssäiliö lukittuu paikalleen kuuluvasti.
Materiaalijäänteiden poistaminen
rista.
1 Aseta pääkytkin asentoon REV
vapautuu.
2 Aseta pääkytkin asentoon OFF.
3 Vedä virtapistoke irti pistorasiasta.
4 Nosta leikkuuosa pois keräyssäiliöstä.
Huomio!
Teräväreunaisen leikkurin aiheuttama vammautumisvaara! Ole erityisen varovainen
5
6 Aseta leikkuuosa keräyssäiliön päälle.
Asiakirjasilppurin puhdistaminen
Huomio!
Pistoliekistä aiheutuva vammautumisvaara! Paineilmasuihkeita käytettäessä voi esiintyä
1 Aseta pääkytkin asentoon OFF.
2 Vedä virtapistoke irti pistorasiasta.
3 -
neilmasuihkeita, puhdistus- tai liuotinaineita.
- 84 -
Page 85
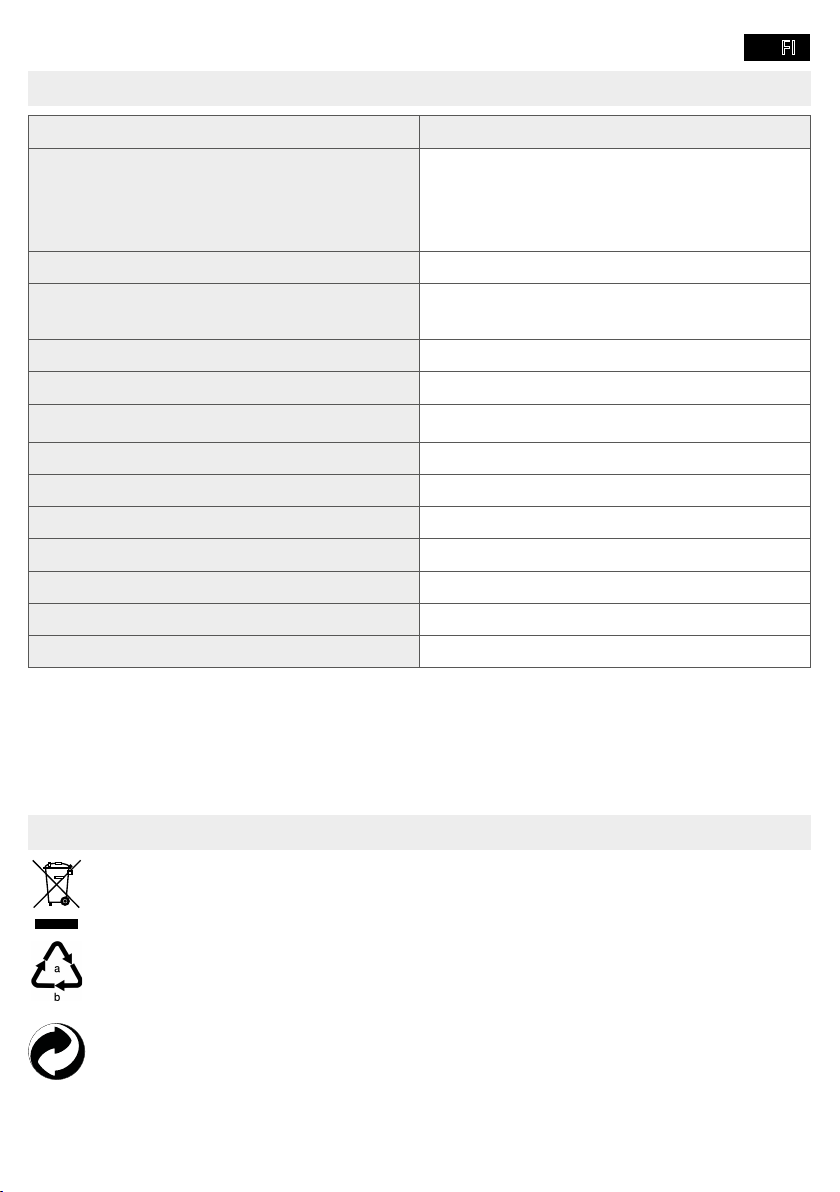
FI
Tekniset tiedot
Malli OneShred 8CC
L: 320
Mitat (mm)
Turvallisuusluokka DIN 66399-2:n mukaan P-4
Leikattavan materiaalin koko (paksuus ×
leveys, mm)
Suurin leikkausteho (arkit / luottokortti) 8 / 1
Työleveys (mm) 220
Virransyöttö
Maks. ympäristön lämpötila [°C] 25
Keräyssäiliön tilavuus (l) 15
Paino (kg) 4,3
Äänenvoimakkuus (dB) 68
4 / 50
Työnopeus (m/min) 1,8
Leikkaustapa Partikkelileikkaus
turvallisuustason P-4 vaatimukset.
P: 190
K: 416
5 ×18
Hävittäminen
hävitettäväksi.
80–98: materiaaliyhdistelmät.
Hävitä pakkausmateriaalit paikallisten määräysten mukaisesti.
- 85 -
Page 86
FI
a
c
d
b
paikallisissa kierrätyspisteissä. Tiedustele kuntasi viranomaisilta oikeista hävitysmahdollisuuksista.
käsittelyn varmistamiseksi. Triman-logo on voimassa vain Ranskassa.
käsittelyn varmistamiseksi. Tiedustele kuntasi viranomaisilta oikeista hävitysmahdollisu-
Varastointia koskevia ohjeita
■ vain alkuperäisessä pakkauksessa
■ kuivassa, puhtaassa paikassa
■
Kysymykset ja asiakaspalvelu
Arvoisa asiakas,
kiitos, että olet päättänyt hankkia tämän tuotteen.
laite on ostettu.
Vaatimustenmukaisuusvakuutus
Laitteessa oleva CE-merkki vahvistaa vaatimustenmukaisuuden.
Vaatimustenmukaisuusvakuutus on osoitteessa
Laitteessa oleva UKCA-merkki vahvistaa vaatimustenmukaisuuden.
Vaatimustenmukaisuusvakuutus löytyy osoitteesta.
Valmistaja
GO Europe GmbH
Zum Kraftwerk 1
D-45527 Hattingen
Germany
- 86 -
Page 87
FR
Lire le mode d'emploi
Veuillez lire attentivement ce mode d'emploi et respecter les consignes lorsque vous
manipulez le destructeur de documents. Conservez le mode d'emploi pour pouvoir vous y
reporter ultérieurement.
Votre destructeur de documents est destiné au broyage de papier, de cartes de crédit, de trombones et agrafes. Il n'est conçu que pour un usage strictement domestique dans des espaces clos.
Toute autre forme d'utilisation n'est pas conforme à l'usage prévu. Il est interdit d'y apporter de
Veuillez lire les consignes de sécurité et en tenir compte pour vous protéger, ainsi que pour respecter l'environnement.
prendre dans la fente et provoquer des blessures. N'approchez pas doigts, cheveux,
Danger de mort par électrocution. Une manipulation incorrecte du destructeur de do-
un câble d'alimentation défectueux. Déconnectez-le immédiatement en cas d'endom-
courant.
cez le destructeur de documents à proximité d'une prise de courant facilement accessible
des mains humides. Éviter tout contact avec de l'eau.
tection. Les enfants peuvent les avaler. Tenez-les hors de portée de l'appareil et de son
emballage.
- 87 -
Page 88
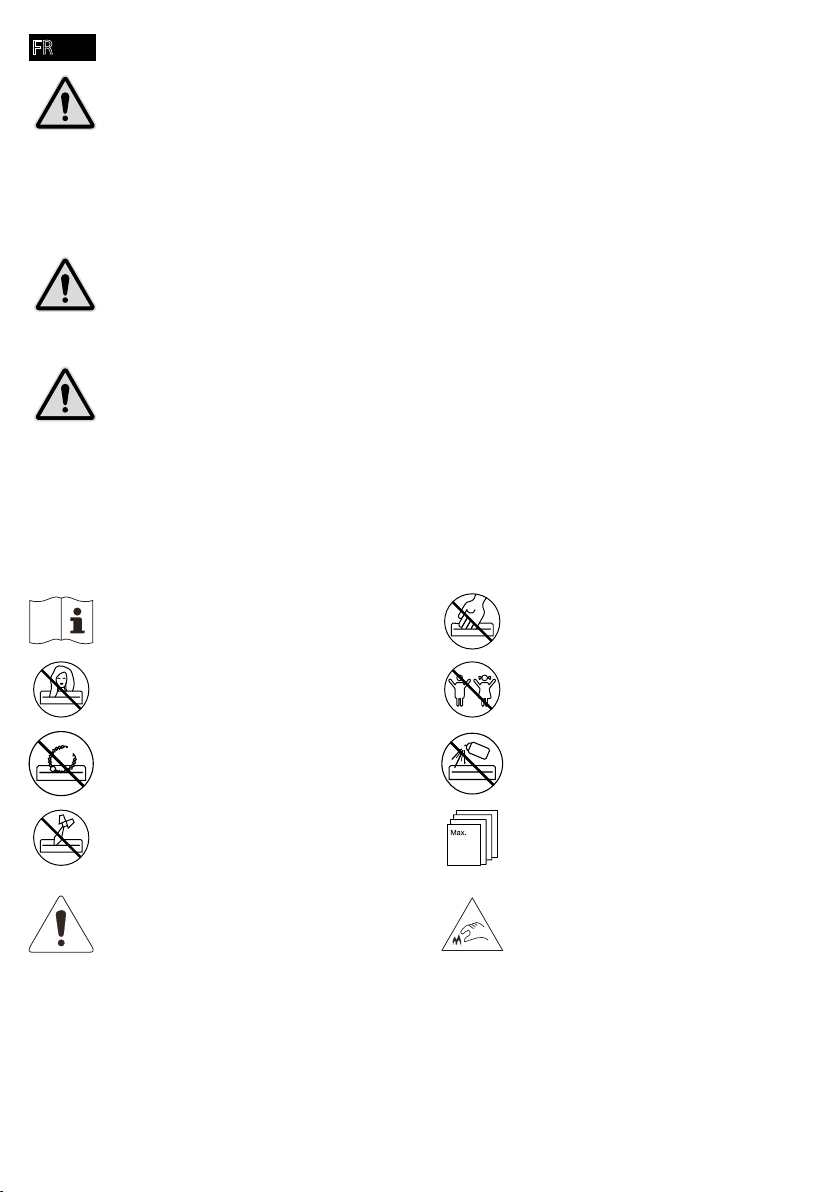
FR
Cet appareil peut être utilisé par des enfants à partir de 8 ans et des personnes présentant une diminution de leurs aptitudes physiques, sensorielles ou mentales ou un
manque d'expérience et/ou de connaissances si elles sont sous surveillance ou si on leur
a enseigné l'utilisation sûre de l'appareil et si elles ont compris les dangers résultant de
Risque de trébucher à cause d'un câble posé de manière incorrecte. Poser celui-ci de
câble ne puissent pas être endommagés.
Dommage matériel éventuel. Éviter les impacts environnementaux tels que fumée,
poussière, vibrations, produits chimiques, humidité, grande chaleur ou ensoleillement
direct.
N‘utilisez le destructeur de documents qu‘à l‘intérieur et dans les conditions d‘environnement
tolérées mentionnées dans les données techniques.
comme vous le voulez.
Veuillez lire les consignes de sécurité
avant d'utiliser ce dernier.
N'approchez pas des cheveux longs du
destructeur de documents.
N'approchez pas du destructeur des
N'approchez pas cravates et écharpes du
destructeur de documents.
Remarque générale sur des risques
éventuels nécessitant votre attention
particulière.
- 88 -
la fente d'insertion.
Tenez-le hors de portée des enfants
et des animaux domestiques.
Ne vaporisez pas de gaz combustibles dans sa direction. N'utilisez
Introduisez au maximum 8 feuilles
en même temps dans la fente
8
d'insertion.
Risque de blessure dû
Page 89
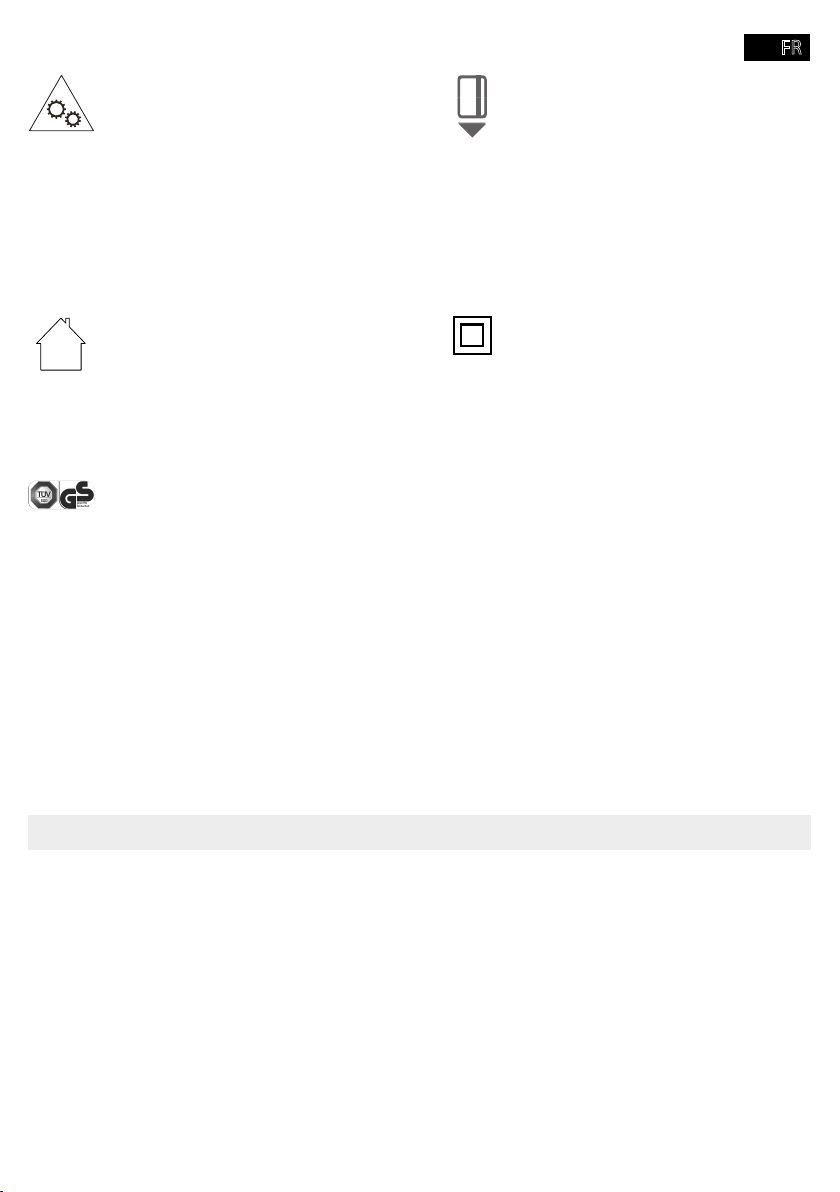
FR
Risque de blessure dû
Celui-ci démarre automatiquement dès
que vous l'alimentez en support. N'approchez donc pas de ce dernier cheveux
N'introduisez les cartes de crédit
que verticalement.
N‘utilisez-le produit que dans des espaces intérieurs.
exigences de la loi allemande sur la sécurité des produits (ProdSG).
Le marquage GS indique que la sécurité
et la santé de l‘utilisateur ne sont pas
mises en danger lorsque le produit est
utilisé conformément à l‘usage prévu et
en cas d‘utilisation incorrecte prévisible.
Il s‘agit d‘un marquage de sécurité non
obligatoire émis par un contrôle technique approprié.
Ce symbole indique que la conception du produit correspond à la classe
II de protection (double isolation).
Un raccordement de sécurité de
mise à la terre (masse) n‘est pas
nécessaire.
Contrôlez le contenu de l'emballage de votre destructeur de documents avant d'utiliser ce dernier.
N'utilisez en aucun cas l'appareil si une pièce manque ou est endommagée. Veuillez vous adresser
à notre service après-vente.
■ Destructeur de documents OneShred 8CC avec bac pour réception des particules
■ Mode d'emploi
■ 1 feuille de papier huilé
- 89 -
Page 90
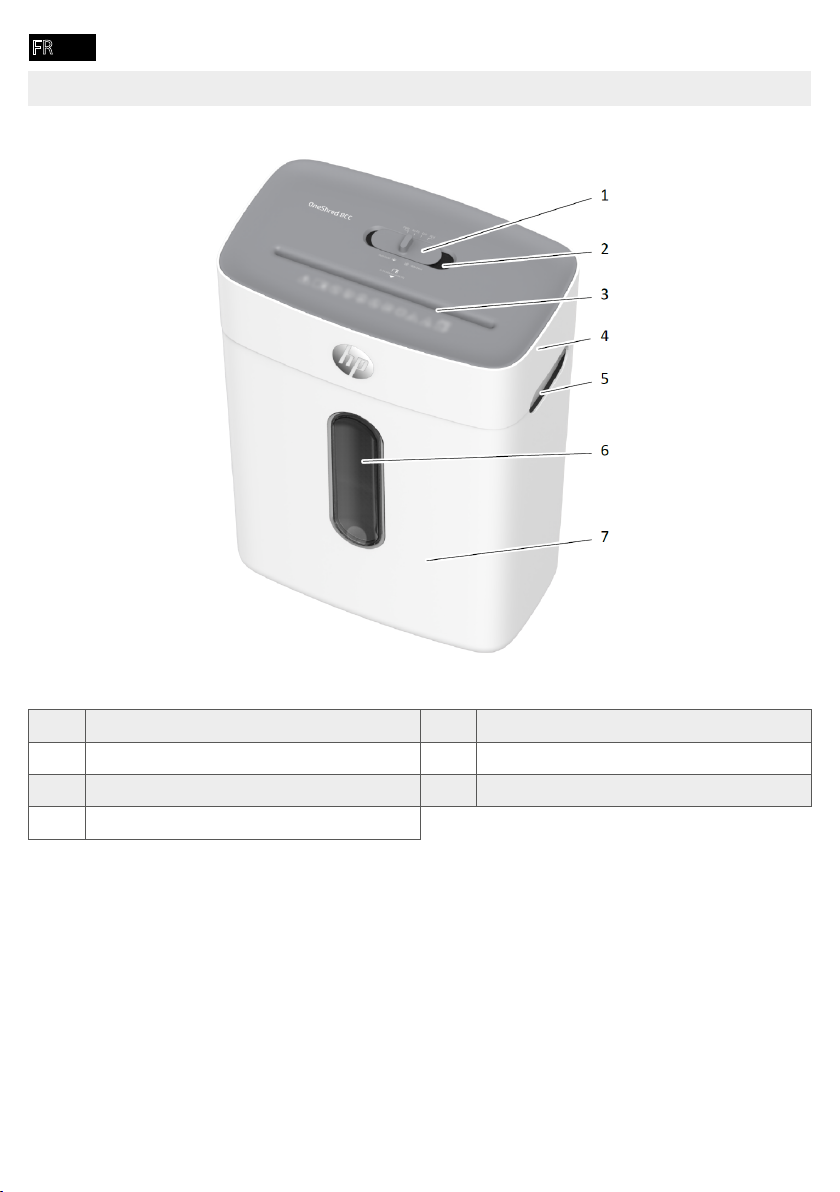
FR
1 Interrupteur marche/arrêt 5 Poignée
2 6 Fenêtre de contrôle
3 Fente d'insertion 7 Bac
4 Cache du bloc de coupe
- 90 -
Page 91
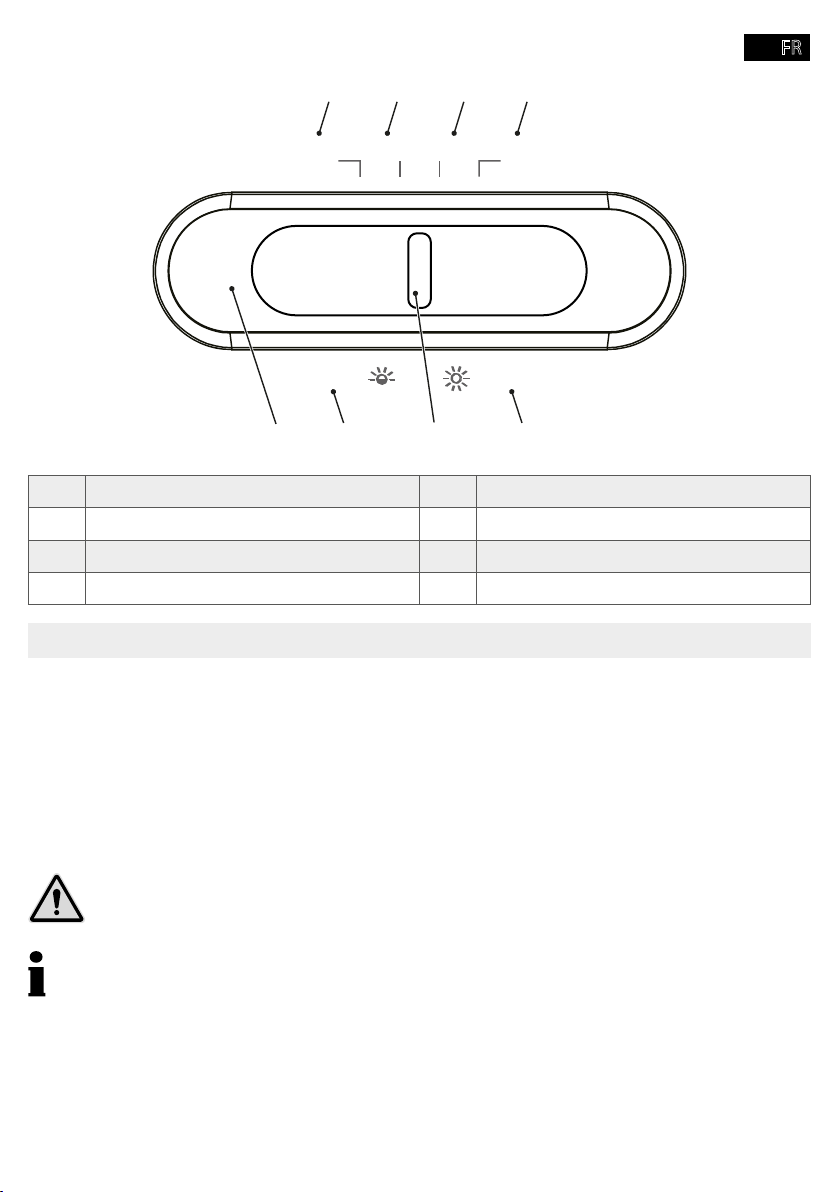
FR
1 2 3 4
FWD AUTO OFF REV
overload
7 5
1 Marche manuelle 5
2 Marche automatique 6 Interrupteur marche/arrêt
3 Appareil hors tension 7 Surcharge
4 Marche arrière 8
overheat
68
Positionnement et mise en service du destructeur de documents
Votre destructeur de documents fonctionne uniquement avec le bac. Ne le posez pas à proximité
1 Posez le bac de façon stable sur une surface horizontale plane et à proximité d'une prise de
courant facilement accessible.
2 Placez le cache du bloc de coupe sur le bac. Il s'enclenche de façon audible. Si le cache du bloc
de coupe n'est pas placé correctement sur le bac, vous ne pouvez pas brancher le destructeur.
contient des bords à arêtes vives. Ne tenez le bloc que par les poignées
N‘utilisez que le câble d‘alimentation fourni.
3 Positionnez l'interrupteur Marche/Arrêt sur OFF
courant.
- 91 -
Page 92

FR
4 Positionnez l'interrupteur Marche/Arrêt sur AUTO.
Î Vous avez mis votre destructeur de documents en service. Le voyant lumineux devient
bleu.
Comment utiliser le destructeur de documents
Le destructeur de documents fonctionne avec un broyage automatique. Vous le faites fonctionner
en déplaçant l'interrupteur marche/arrêt.
nées techniques.
quement dès que vous l'alimentez en support. N'approchez donc pas de ce dernier
male de la fente d'insertion.
1 Insérez le support à broyer au centre de la fente.
Î Celle-ci happe le support et s'arrête quand aucun autre support n'est introduit.
Broyage manuel du support
Dans de rares cas, les capteurs ne détectent pas le support inséré.
1 Positionnez l'interrupteur Marche/Arrêt sur FWD.
Î Le support est happé manuellement et broyé.
2 Positionnez l'interrupteur Marche/Arrêt sur OFF.
Débranchez le destructeur de documents si vous n'en n'avez plus besoin.
1 Positionnez l'interrupteur Marche/Arrêt sur OFF.
Î Vous avez mis le destructeur hors tension.
2
période prolongée.
- 92 -
Page 93

FR
Les informations suivantes vous aident lorsque quelque chose ne fonctionne pas comme vous le
voulez.
lumineux devient rouge.
1 Attendez 50 minutes que le destructeur ait refroidi. Tenez compte de la distance minimum par
rapport au mur, ainsi que les informations concernant le fonctionnement permanent mentionnées dans les données techniques.
Î Après la phase de refroidissement, le voyant lumineux devient bleu et le broyage conti-
nue.
Protection contre une surcharge
Si vous avez inséré une quantité plus importante de support qu'indiquée dans les données
techniques, le voyant lumineux clignote rouge et le destructeur de documents démarre la marche
arrière automatique pour une durée de 5 secondes.
1 Retirez le support du destructeur de documents.
Î Vous avez éliminé le blocage.
Lorsque vous avez retiré le support, le bloc de coupe continue son mouvement pendant 3
secondes pour se nettoyer. Attendez que le destructeur s'arrête et que le voyant lumineux
devienne bleu.
Huilage du bloc de coupe
Huilez le bloc de coupe du destructeur de documents à des intervalles réguliers si vous voulez en
prolonger sa durée de vie.
Des feuilles spéciales huilées, ainsi que de l'huile spéciale sont en vente chez HP.
pulvérisation. Utilisez uniquement une huile spéciale pour destructeurs de documents.
Vous avez plusieurs possibilités de huiler le bloc de coupe.
- 93 -
Page 94
FR
1 Enduisez une feuille de papier de cette huile sous forme de lignes transversales.
2 Approchez la feuille huilée de la fente.
Î Celle-ci est happée et huile le bloc de coupe.
1 Insérez la feuille huilée dans la fente.
Î Celle-ci est happée et huile le bloc de coupe.
Vidage du bac
Vous devez contrôler régulièrement le bac à l'aide de la fenêtre et le vider quand il est rempli à
des dysfonctionnements.
1 Positionnez l'interrupteur Marche/Arrêt sur OFF.
2
contient des bords à arêtes vives. Ne tenez le bloc que par les poignées.
3 Soulevez le cache du bloc de coupe du bac.
4 Videz le bac.
contient des bords à arêtes vives. Ne tenez le bloc que par les poignées.
5 Placez le cache du bloc de coupe sur le bac.
Î
Extraction des restes de support
Si votre destructeur ne broie plus le support comme vous le souhaitez, retirez les restes du bloc de
coupe.
- 94 -
Page 95
FR
1 Positionnez l'interrupteur Marche/Arrêt sur REV. Le bloc de coupe tourne en marche arrière et
libère les restes de support.
2 Positionnez l'interrupteur Marche/Arrêt sur OFF.
3
4 Soulevez le cache du bloc de coupe du bac.
prudent lorsque vous retirez des restes de support.
5
approprié.
6 Placez le cache du bloc de coupe sur le bac.
Nettoyage du destructeur de documents
Nettoyez le destructeur de documents à intervalles réguliers.
1 Positionnez l'interrupteur Marche/Arrêt sur OFF.
2
3
sprays à air comprimé ni de produits d'entretien et de solvants.
- 95 -
Page 96
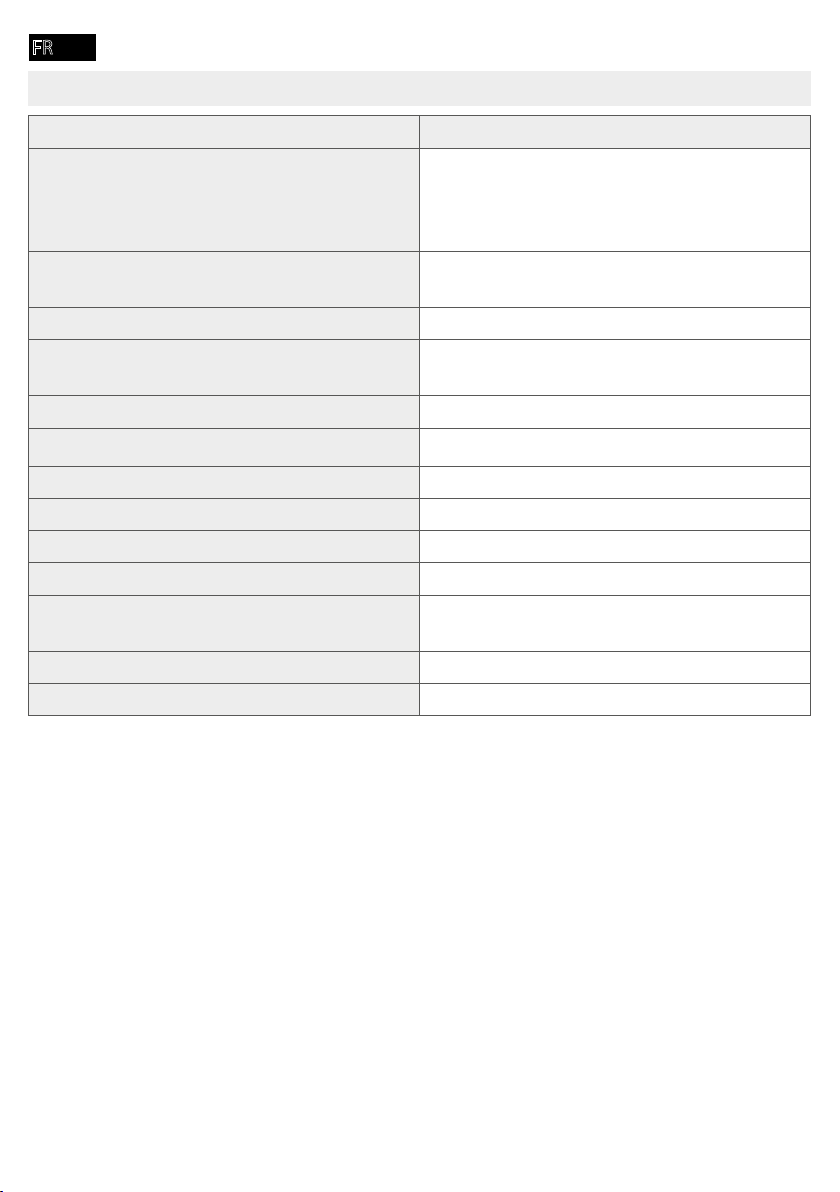
FR
Modèle OneShred 8CC
Larg.: 320
Dimensions (mm)
Niveau de sécurité conforme à la norme DIN
66399-2.
Taille de la particule (épaisseur× largeur, mm) 5 ×18
Capacité de coupe max. (feuilles / carte de
crédit)
Largeur de passage (mm) 220
Alimentation en courant
Température ambiante max. [°C] 25
Contenance du bac (l) 15
Poids (kg) 4,3
Volume (dB) 68
Fonctionnement permanent (min) / Temps de
refroidissement (min)
1,8
Type de coupe Coupe en particules
Nous déclarons que cet appareil répond aux conditions du niveau de sécurité P-4, conformément
à la norme DIN 66399 lorsqu‘il détruit les documents.
Long: 190
Haut: 416
P-4
8 / 1
4 / 50
( par ex. particules 4 x 40 mm).
- 96 -
Page 97
FR
Élimination
a
c
d
b
et électroniques usagés ne doivent pas être éliminés avec les ordures ménagères. Veuillez
apporter votre appareil au centre de collecte de l‘organisme d‘élimination des déchets de
votre commune. Éliminez les matériaux d‘emballage conformément aux règlements
locaux.
20–22 : papiers et cartons / 80–98 : composites.
Les matériaux d‘emballage doivent être éliminés conformément aux réglementations
locales.
L‘appareil et les matériaux d‘emballage sont recyclables, éliminez-les séparément pour
une meilleure gestion des déchets. Le logo Triman est valable en France uniquement.
L‘appareil et les emballages sont recyclables. Éliminez-les séparément pour une meilleure
gestion des déchets. Informez-vous auprès de votre commune sur les possibilités d‘une
valable que pour l‘Italie.
L‘emballage est constitué de matériaux recyclables que vous pouvez apporter à des
centres de collecte locaux qui se chargent de son recyclage. Renseignezvous sur les
Après l'avoir utilisé, vous devez stocker le destructeur de façon sûre. Tenez compte des remarques
Stockez le destructeur de documents
■ uniquement dans son emballage original
■ à un endroit sec et propre
■ uniquement s'il est refroidi
- 97 -
Page 98
FR
Questions et service
Cher client,
nous vous félicitons d'avoir choisi cet appareil.
S'il ne fonctionne pas comme vous le souhaitez ou s'il est défectueux, veuillez vous adresser au
revendeur auprès duquel vous avez acheté le produit.
Pour plus d‘informations, consultez également notre portail Contact et Service sur notre site Inter-
net.
Ladite conformité est attestée sur l'appareil par le marquage CE.
Vous trouverez la déclaration de conformité de ce produit sur le site
La conformité est attestée sur l‘appareil par le marquage UKCA (UK Conformity Assessed).
Vous trouverez la déclaration de conformité de ce produit sur le site-
Fabricant
GO Europe GmbH
Zum Kraftwerk 1
D-45527 Hattingen
Allemagne
- 98 -
Page 99
GR
- 99 -
Page 100
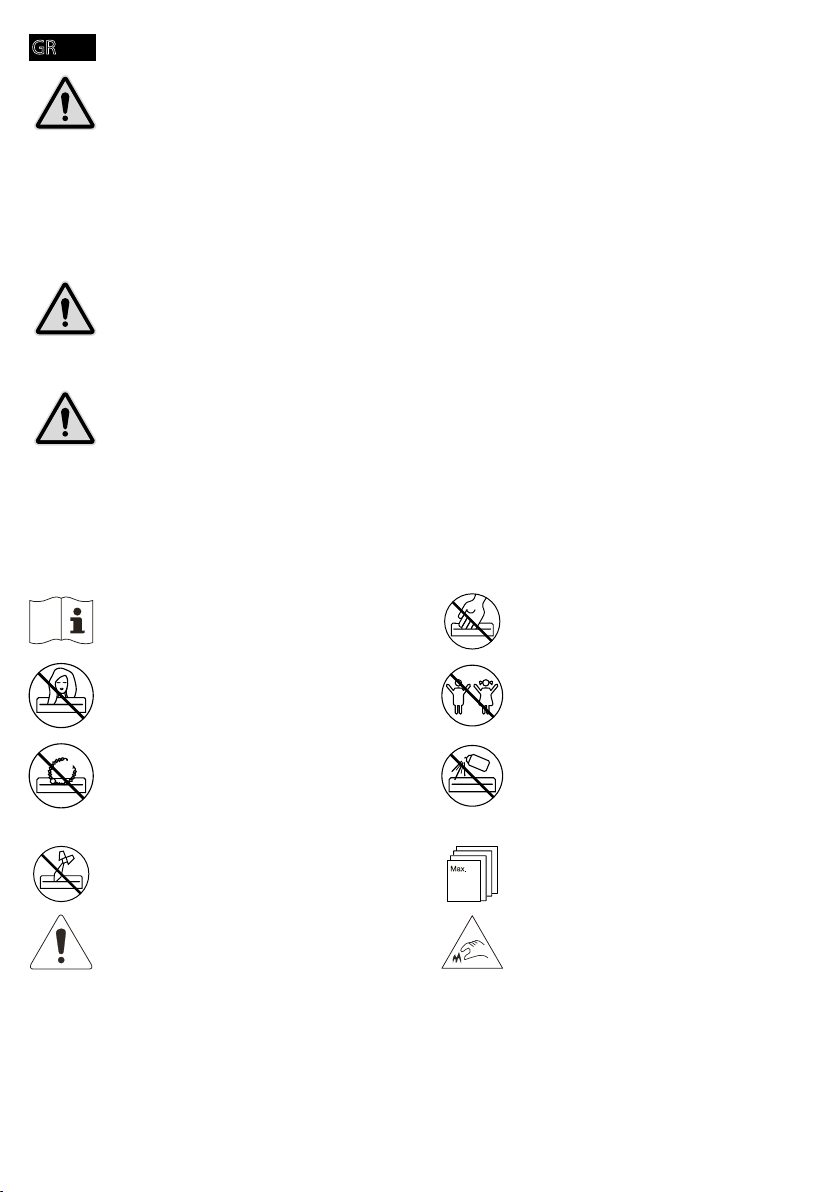
GR
- 100 -
8
 Loading...