

Page 1
ODBCLink/SETM
Version F.00
Head Office: 82 Main Street South
Chesterville, Ontario
K0C 1H0 Canada
Telephone: (613) 448-2333
Fax: (613) 448-2588
www.mbfoster.com
November 2000
Page 2

NOTICE
The information in this manual is subject to change without notice.
LIMITATIONS ON WARRANTIES AND LIABILITY
M.B. Foster Software Labs makes no warranties, either express or implied, regarding this manual or the
computer software package described in this manual, its merchantability or its fitness for any particular
purpose. The exclusion of implied warranties is not permitted by some states.
COPYRIGHT
This manual is copyrighted by M.B. Foster Associates Limited, with all rights reserved. Under the copyright
laws, this manual may not be copied, in whole or in part, without the written consent of M.B. Foster
Associates Limited. Under the law, copying includes translating to another language.
ODBCLink/SE is a trademark of M. B. Foster Software Labs, Inc.
Impromptu, PowerPlay, Axiant and PowerHouse PDL are trademarks of Cognos Incorporated.
Jetform is a trademark of Jetform Corporation.
PowerBuilder is a trademark of Powersoft Corporation.
Reflection, Reflection for Windows, Reflection Network Series and PPL (Process-to-Process Link) are
trademarks of WRQ, Inc.
IMAGE/SQL, ALLBASE/SQL, Query, MPE/XL and MPE/iX are trademarks of the Hewlett-Packard
Company.
Windows, Windows for Workgroups, Microsoft Access, Visual Basic, Visual C++, Visual FoxPro, Excel 5.0,
MS-Query and Word for Windows are trademarks of Microsoft Corporation.
Dr. DeeBee Spy © 1995 Syware, Inc., All rights reserved.
Page 3

ODBCLink/SE offers the following features:
⊗ ODBC Level 3 compliance (except SQLBrowseConnect,
SQLExtendedFetch and SQLSetPos)
⊗ Access to IMAGE/SQL database environments (DBE)
⊗ Access to ALLBASE/SQL DBE
⊗ Access to a single DBE
⊗ DSN and DSNless connections
The additional features of DataExpress for Client-Server are:
⊗ Connectivity to TurboIMAGE and Oracle databases
⊗ Serial/Modem connection
⊗ Create a mini-dictionary for access to Image data sets, KSAM or
MPE files.
⊗ Read/Write KSAM, MPE and Suprtool files
⊗ Support for PowerHouse PDL dictionaries
⊗ Support for TPI keyword indexes used by Omnidex and Superdex
⊗ Enhanced security via field level access controls
⊗ Multi-threaded access to host-based data ensures fast and reliable
data access
⊗ Use-able in MTS/IIS environments
⊗ Secure reliable access to data through browser clients
Introducing MBF-Console
For monitoring and controlling ODBCLink/SE or MBF-UDALink
activities such as:
⊗ Providing a list of each client connection to the server
⊗ Changing logging levels in real time
⊗ Start/stop logging for a single process
⊗ Kill a single process as required
Inquire about available upgrading programs to DataExpress Client Server at
sales@mbfoster.com
or globalsales@mbfoster.com
)
Page 4

If you require any of the following features:
•Support for Serial and/or Modem connections
•Read/Write access to KSAM files
•Read/Write access to MPE files
•Native read/write access to TurboIMAGE databases
•Read/Write access to Suprtool files
•Support for PowerHouse dictionaries including PDL and PowerHouse subfiles support
•Support for TPI keyword indexes used by Omnidex and Superdex
•Access to Oracle databases on HP3000 and HP9000 platforms
•Access to Multiple DBE’s
•Access to HP intrinsics and procedures via a remote procedure call mechanism
•Enhanced security via field level access controls
Please contact M. B. Foster Associates at 613-448-2333 or 1-800-ANSWERS (800267-9377) or use the enclosed faxback sheet to order a fully functional evaluation
copy of MBF-UDALink.
Page 5

FAX BACK
to
M. B. FOSTER ASSOCIATES LIMITED
613-448-2588
NAME _________________________________________________________
TITLE _________________________________________________________
COMPANY _________________________________________________________
ADDRESS _________________________________________________________
CITY/STATE _________________________________________________________
ZIP _________________________________________________________
COUNTRY _________________________________________________________
E-MAIL _________________________________________________________
PHONE _________________________________________________________
FAX _________________________________________________________
Please check the features that you are most interested in:
__Serial/Modem connection __KSAM file access
__MPE file access __TurboIMAGE access
__PowerHouse PDL support __Suprtool file access
__Oracle access __TPI interface support
__Multthreading __Enhanced security (field level)
__MBF-Console
I am using the following desktop product(s):
__MS Access __Visual Basic __Fox Pro
__MS Query __Paradox __Jetform
__Impromptu __Axiant __PowerBuilder
__Lotus __Excel __Crystal Reports
__Other_____________________________________________________________________________
__I am interested in a demo, please send one immediately!
HPCPUNAME: _______________________
HPSUSAN NUMBER: _______________________
Media Required:__DAT__Tape
IN A HURRY? GET YOUR QUESTIONS READY AND
CALL 1-800-ANSWERS (267-9377) NOW!
We can also be reached at:
PHONE: 613-448-2333
FAX: 613-448-2588
sales@mbfoster.com
Page 6

Notes
Page 7

DataExpress Administration Guide Table of Contents
Table of Contents
Chapter 1 Overview and Specifications
ODBC Compliancy Level . . . . . . . . . . . . . . . . . . . . . . . . . . . . . . . . . . . . . . . . . . . . . . . . . . . . . . 2
Client Environment . . . . . . . . . . . . . . . . . . . . . . . . . . . . . . . . . . . . . . . . . . . . . . . . . . . . . . . . . . . 2
Server Environment . . . . . . . . . . . . . . . . . . . . . . . . . . . . . . . . . . . . . . . . . . . . . . . . . . . . . . . . . . 2
The Connecting Link . . . . . . . . . . . . . . . . . . . . . . . . . . . . . . . . . . . . . . . . . . . . . . . . . . . . . . . . . 2
Microsoft ODBC Overview . . . . . . . . . . . . . . . . . . . . . . . . . . . . . . . . . . . . . . . . . . . . . . . . . . . . .3
ODBCLink/SE System Requirements . . . . . . . . . . . . . . . . . . . . . . . . . . . . . . . . . . . . . . . . . . . . 4
Chapter 2 Preparing the Database Server
Verify Software Version Numbers . . . . . . . . . . . . . . . . . . . . . . . . . . . . . . . . . . . . . . . . . . . . . . . 7
Verify the Connection Assurance Parameters . . . . . . . . . . . . . . . . . . . . . . . . . . . . . . . . . . . . . 7
Starting and Stopping the Listener . . . . . . . . . . . . . . . . . . . . . . . . . . . . . . . . . . . . . . . . . . . . . . 8
Chapter 3 Installing ODBCLink/SE on the Client PC
Downloading ODBCLink/SE to the Client PC . . . . . . . . . . . . . . . . . . . . . . . . . . . . . . . . . . . . . 11
Extracting the ODBCLink/SE file . . . . . . . . . . . . . . . . . . . . . . . . . . . . . . . . . . . . . . . . . . . . . . . 13
Running the SETUP program . . . . . . . . . . . . . . . . . . . . . . . . . . . . . . . . . . . . . . . . . . . . . . . . . 13
Notes on 32-bit Access . . . . . . . . . . . . . . . . . . . . . . . . . . . . . . . . . . . . . . . . . . . . . . . . . . . . . . 18
Chapter 4 Configuring Data Sources
Setup for MPE/iX . . . . . . . . . . . . . . . . . . . . . . . . . . . . . . . . . . . . . . . . . . . . . . . . . . . . . . . . . . . . 22
Setup for HP-UX . . . . . . . . . . . . . . . . . . . . . . . . . . . . . . . . . . . . . . . . . . . . . . . . . . . . . . . . . . . . 23
Select Translator . . . . . . . . . . . . . . . . . . . . . . . . . . . . . . . . . . . . . . . . . . . . . . . . . . . . . . . . . . . . 25
ODBC Translator . . . . . . . . . . . . . . . . . . . . . . . . . . . . . . . . . . . . . . . . . . . . . . . . . . . . . . . . . . . . 25
Successful Completion . . . . . . . . . . . . . . . . . . . . . . . . . . . . . . . . . . . . . . . . . . . . . . . . . . . . . . 25
Migrating HP PCAPI Data Sources . . . . . . . . . . . . . . . . . . . . . . . . . . . . . . . . . . . . . . . . . . . . . 26
Chapter 5 Application Development
Using Stored Procedures . . . . . . . . . . . . . . . . . . . . . . . . . . . . . . . . . . . . . . . . . . . . . . . . . . . . .28
Performance Considerations . . . . . . . . . . . . . . . . . . . . . . . . . . . . . . . . . . . . . . . . . . . . . . . . . . 29
Turning AutoCommit On/Off . . . . . . . . . . . . . . . . . . . . . . . . . . . . . . . . . . . . . . . . . . . . . . . . . . 30
Supported Functions . . . . . . . . . . . . . . . . . . . . . . . . . . . . . . . . . . . . . . . . . . . . . . . . . . . . . . . . 31
Isolation Levels . . . . . . . . . . . . . . . . . . . . . . . . . . . . . . . . . . . . . . . . . . . . . . . . . . . . . . . . . . . . . 33
Supported Data Types . . . . . . . . . . . . . . . . . . . . . . . . . . . . . . . . . . . . . . . . . . . . . . . . . . . . . . . 34
DataExpress
©M.B. Foster Associates Limited 1995-2000 i
Page 8

Table of Contents DataExpress Administration Guide
Note on Using BLOBs . . . . . . . . . . . . . . . . . . . . . . . . . . . . . . . . . . . . . . . . . . . . . . . . . . . . . . . 35
Chapter 6 Using ODBCLink/SE With ODBC Applications
Updating Data . . . . . . . . . . . . . . . . . . . . . . . . . . . . . . . . . . . . . . . . . . . . . . . . . . . . . . . . . . . . . . 37
Using Cognos Impromptu . . . . . . . . . . . . . . . . . . . . . . . . . . . . . . . . . . . . . . . . . . . . . . . . . . . . 38
Special Notes for Users of Impromptu . . . . . . . . . . . . . . . . . . . . . . . . . . . . . . . . . . . . . . . . . . 39
Using Lotus 123 Release 5.0 . . . . . . . . . . . . . . . . . . . . . . . . . . . . . . . . . . . . . . . . . . . . . . . . . .42
Using Microsoft Access . . . . . . . . . . . . . . . . . . . . . . . . . . . . . . . . . . . . . . . . . . . . . . . . . . . . . . 43
Notes for Users of MS-Access . . . . . . . . . . . . . . . . . . . . . . . . . . . . . . . . . . . . . . . . . . . . . . . . . 45
Using MS-Query . . . . . . . . . . . . . . . . . . . . . . . . . . . . . . . . . . . . . . . . . . . . . . . . . . . . . . . . . . . . 46
Using Visual Basic (4.0 or higher) . . . . . . . . . . . . . . . . . . . . . . . . . . . . . . . . . . . . . . . . . . . . . . 48
Connection Examples . . . . . . . . . . . . . . . . . . . . . . . . . . . . . . . . . . . . . . . . . . . . . . . . . . . . . . . 49
Connect Using SQL API . . . . . . . . . . . . . . . . . . . . . . . . . . . . . . . . . . . . . . . . . . . . . . . . . . . . . .49
Connect Using SQLAPI in VB 4.0-6.0 . . . . . . . . . . . . . . . . . . . . . . . . . . . . . . . . . . . . . . . . . . . 49
Connecting with DAO’s . . . . . . . . . . . . . . . . . . . . . . . . . . . . . . . . . . . . . . . . . . . . . . . . . . . . . . 52
Connecting with RDO’s . . . . . . . . . . . . . . . . . . . . . . . . . . . . . . . . . . . . . . . . . . . . . . . . . . . . . . 53
Connecting with ADO’s . . . . . . . . . . . . . . . . . . . . . . . . . . . . . . . . . . . . . . . . . . . . . . . . . . . . . . 54
Chapter 7 Troubleshooting
Terminating an ODBC Connection . . . . . . . . . . . . . . . . . . . . . . . . . . . . . . . . . . . . . . . . . . . . . 55
Using Microsoft ODBC Test (32-bit) . . . . . . . . . . . . . . . . . . . . . . . . . . . . . . . . . . . . . . . . . . . . 56
Verifying Software Version Numbers . . . . . . . . . . . . . . . . . . . . . . . . . . . . . . . . . . . . . . . . . . . 57
Verifying the Client-Side Components . . . . . . . . . . . . . . . . . . . . . . . . . . . . . . . . . . . . . . . . . . 57
Deleting a Translation DLL . . . . . . . . . . . . . . . . . . . . . . . . . . . . . . . . . . . . . . . . . . . . . . . . . . . . 58
Tools on the Database Server . . . . . . . . . . . . . . . . . . . . . . . . . . . . . . . . . . . . . . . . . . . . . . . . . 60
Host Logging . . . . . . . . . . . . . . . . . . . . . . . . . . . . . . . . . . . . . . . . . . . . . . . . . . . . . . . . . . . . . . . 62
Tools on the Client PC . . . . . . . . . . . . . . . . . . . . . . . . . . . . . . . . . . . . . . . . . . . . . . . . . . . . . . . 63
ODBC Call Tracing using ODBCLink.LOG . . . . . . . . . . . . . . . . . . . . . . . . . . . . . . . . . . . . . . . 63
ODBC Call Tracing using Dr. DeeBee Spy . . . . . . . . . . . . . . . . . . . . . . . . . . . . . . . . . . . . . . . 63
Modifying the System Registry and ODBC.INI Files . . . . . . . . . . . . . . . . . . . . . . . . . . . . . . . 65
Error Messages . . . . . . . . . . . . . . . . . . . . . . . . . . . . . . . . . . . . . . . . . . . . . . . . . . . . . . . . . . . . . 66
Appendix A Implementation Notes
Primary key name returned by SQLStatistics . . . . . . . . . . . . . . . . . . . . . . . . . . . . . . . . . . . . 67
Reading or writing to ALLBASE/SQL LongVarBinary items . . . . . . . . . . . . . . . . . . . . . . . . . 67
Maximum number of statements . . . . . . . . . . . . . . . . . . . . . . . . . . . . . . . . . . . . . . . . . . . . . . . 67
ALLBASE/SQL and IMAGE/SQL Restrictions on the ODBC Grammar . . . . . . . . . . . . . . . . 68
DataExpress
ii ©M.B. Foster Associates Limited 1995-2000
Page 9

DataExpress Administration Guide Table of Contents
Using the ANSI Character Set . . . . . . . . . . . . . . . . . . . . . . . . . . . . . . . . . . . . . . . . . . . . . . . . . 68
Unsupported ALLBASE/SQL and IMAGE/SQL Statements . . . . . . . . . . . . . . . . . . . . . . . . . . 69
ALLBASE/SQL and IMAGE/SQL Statements That Work Only with Embedded SQL . . . . . 70
ALLBASE/SQL and IMAGE/SQL Statements Replaced by Functions on the PC Client . . . 70
Appendix B Creating a DBEnvironment
On the HP3000 Database Server . . . . . . . . . . . . . . . . . . . . . . . . . . . . . . . . . . . . . . . . . . . . . . . 71
On the HP9000 Database Server . . . . . . . . . . . . . . . . . . . . . . . . . . . . . . . . . . . . . . . . . . . . . . . 73
Appendix C List of Installed Files
32 Bit Driver Client - For Windows 95 and Greater . . . . . . . . . . . . . . . . . . . . . . . . . . . . . . . . 75
32 Bit Driver Client - For Windows NT 4.0 and Greater . . . . . . . . . . . . . . . . . . . . . . . . . . . . . 77
MPE/iX Host . . . . . . . . . . . . . . . . . . . . . . . . . . . . . . . . . . . . . . . . . . . . . . . . . . . . . . . . . . . . . . . . 79
HP-UX 9.x Host . . . . . . . . . . . . . . . . . . . . . . . . . . . . . . . . . . . . . . . . . . . . . . . . . . . . . . . . . . . . . 79
HP-UX 10.x Host . . . . . . . . . . . . . . . . . . . . . . . . . . . . . . . . . . . . . . . . . . . . . . . . . . . . . . . . . . . . 79
Appendix D ODBCLink/SE Companion Product MBF-Console
MBF-Console Introduction . . . . . . . . . . . . . . . . . . . . . . . . . . . . . . . . . . . . . . . . . . . . . . . . . . .81
How MBF-Console Works . . . . . . . . . . . . . . . . . . . . . . . . . . . . . . . . . . . . . . . . . . . . . . . . . . . . 81
Running MBF-Console . . . . . . . . . . . . . . . . . . . . . . . . . . . . . . . . . . . . . . . . . . . . . . . . . . . . . . .81
File Menu Options . . . . . . . . . . . . . . . . . . . . . . . . . . . . . . . . . . . . . . . . . . . . . . . . . . . . . . . . . . . 82
Connect Menu Options: . . . . . . . . . . . . . . . . . . . . . . . . . . . . . . . . . . . . . . . . . . . . . . . . . . . . . .83
Connections Windows . . . . . . . . . . . . . . . . . . . . . . . . . . . . . . . . . . . . . . . . . . . . . . . . . . . . . . .84
Server Window . . . . . . . . . . . . . . . . . . . . . . . . . . . . . . . . . . . . . . . . . . . . . . . . . . . . . . . . . . . . . 85
“View” Menu Option . . . . . . . . . . . . . . . . . . . . . . . . . . . . . . . . . . . . . . . . . . . . . . . . . . . . . . . . . 87
“Window” Menu Option . . . . . . . . . . . . . . . . . . . . . . . . . . . . . . . . . . . . . . . . . . . . . . . . . . . . . .87
Help Menu Options . . . . . . . . . . . . . . . . . . . . . . . . . . . . . . . . . . . . . . . . . . . . . . . . . . . . . . . . . . 88
Installing MBF-Console for MBF-UDALink . . . . . . . . . . . . . . . . . . . . . . . . . . . . . . . . . . . . . . . 89
Installing MBF-Console for ODBCLink/SE . . . . . . . . . . . . . . . . . . . . . . . . . . . . . . . . . . . . . . . 97
Indexi
Index . . . . . . . . . . . . . . . . . . . . . . . . . . . . . . . . . . . . . . . . . . . . . . . . . . . . . . . . . . . . . . . . . . . . . 105
DataExpress
©M.B. Foster Associates Limited 1995-2000 iii
Page 10

Table of Contents DataExpress Administration Guide
Notes
DataExpress
iv ©M.B. Foster Associates Limited 1995-2000
Page 11
ODBCLink/SE Reference Manual Overview and Specifications
Overview and Specifications
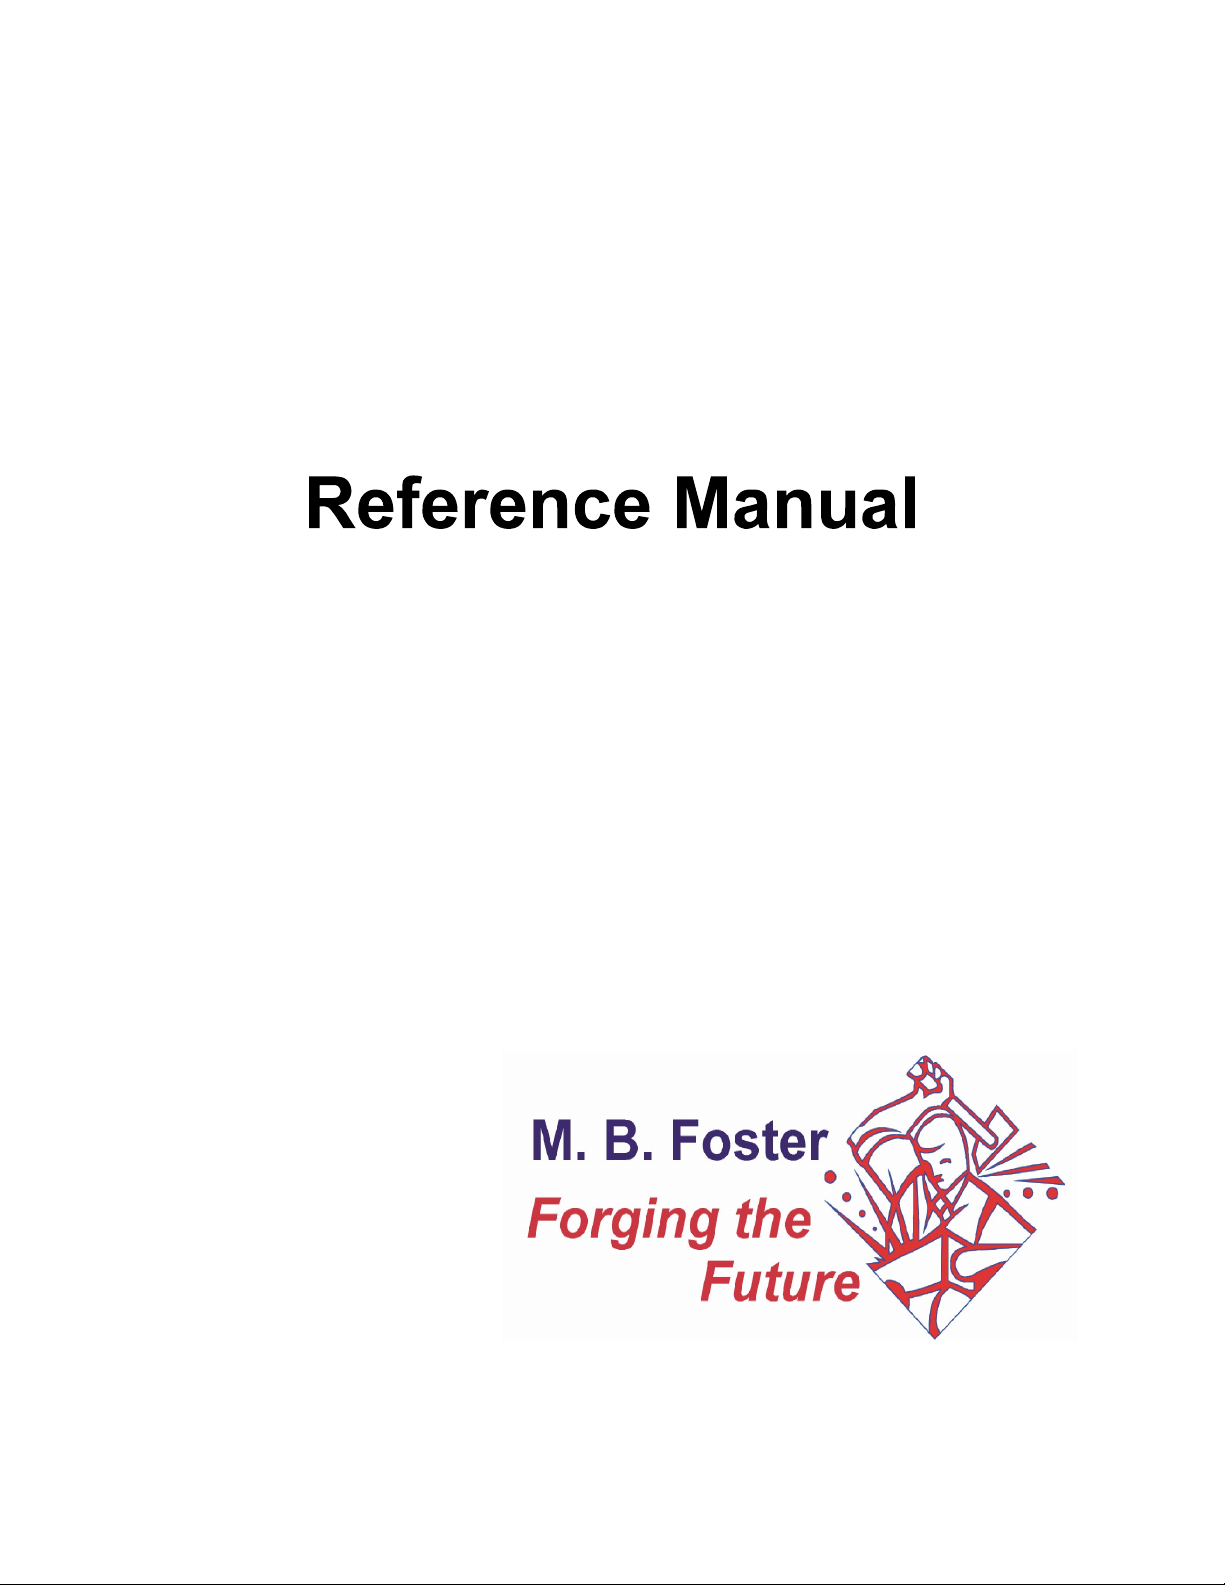
ODBCLink/SE is an implementation of Microsoft's Open Database Connectivity (ODBC) interface that enables
Microsoft Windows based applications and tools to access IMAGE/SQL on the HP3000 and ALLBASE/SQL on the
HP3000 and HP9000, in a client/server environment.
In this environment, application developers and end-users can take advantage of the Client PC's graphical user
interface (GUI) and processing power, while relying on the security, integrity, and database management capabilities
of ALLBASE/SQL and IMAGE/SQL.
ODBCLink/SE runs under MPE/iX 5.0 or higher on the HP3000 server, or under HP-UX Versions 9.x, 10.x and 11.x
on the HP9000 Series 7xx and 8xx servers. ODBCLink/SE runs under Windows95, or WindowsNT, on the client.
Connection via Winsock is available regardless of the host environment.
ODBCLink/SE can be used in two ways: either by direct calls to the Windows DLL from a Windows program
(Foxbase, etc.) or else through an ODBC-compliant application such as Microsoft Access, Visual Basic, etc.
ODBCLink/SE supports the ODBC LongVarBinary data type for binary large objects (BLOBs), such as compressed
photographs or document images. These are stored on the host as ALLBASE/SQL LongVarBinary items.
ODBCLink/SE
©M.B. Foster Associates Limited 1995-2000 1
Page 12

Overview and Specifications ODBCLink/SE Reference Manual
ODBC Compliancy Level
ODBCLink/SE is ODBC Level 3 with the following exceptions:
SQLBrowseConnect, SQLExtendedFetch, SQLSetPos are not supported. Scalar Functions are not support.
SQL_BIT, SQL_TINYINT and SQL_BIGINT data types are not supported.
Client Environment
ODBCLink/SE and application software reside on the PC client. Using ODBCLink/
SE and applications software you can develop SQL applications, generate reports,
and query ALLBASE/SQL or IMAGE/SQL on the database server. The tested client
applications include:
Cognos Axiant Cognos Impromptu
Jetform Cold Fusion
Lotus 123 PowerBuilder
Crystal Reports MSExcel
MSAccess MSQuery
Visual Basic Visual C++
Visual FoxPro Paradox
and many more.
Server Environment
The networked HP 3000 Series 900 with ALLBASE/SQL and/or IMAGE/SQL or the HP9000 Series 7xx or 8xx with
ALLBASE/SQL provide the relational database environment on the server. Security is provided by the MPE/iX or
HP-UX logon system and ALLBASE/SQL or IMAGE/SQL.
The Connecting Link
ODBCLink/SE links the client to the server with a collection of dynamic link libraries (DLLs) and other files that
reside on the client and run under Microsoft Windows95 and greater or Microsoft WindowsNT. ODBCLink/SE
routes requests, made from the PC client application, over the network to an ALLBASE/SQL or IMAGE/SQL
database on the database server, and returns replies to the client application.
A listener process establishes the connection between the PC client application and the target database on the server.
The listener works with HP ThinLAN 3000/iX on the HP3000 or ARPA Services on the HP9000.
ODBCLink/SE
2 ©M.B. Foster Associates Limited 1995-2000
Page 13

ODBCLink/SE Reference Manual Overview and Specifications
Microsoft ODBC Overview
ODBC applications make functions calls into ODBC32.DLL, the Microsoft driver manager. Since a single
application can make calls to more than one ODBC database (e.g. Sybase, Microsoft SQL server) the driver manager
is in charge of routing ODBC calls to the appropriate driver. The ODBC.INI file contains a list of drivers and
associated data sources (one driver may have several data-sources). In Windows 95 or NT, some of this information
is kept in the system registry.
To connect to an ODBC database, you call SQLDriverConnect (or you let your ODBC-compliant application call it
for you) and specify your data-source name in the connection string variable, which is in the form
"DSN=data_source”. The driver manager reads ODBC.INI or the registry, to find out which driver handles that data
source and passes the call on to the driver. The driver opens the communication channel and does all necessary
initialization.
The ODBC.INI file (or the ODBC System Registry) is maintained through the ODBC Control Panel application
ODBCADM.EXE , or the 32-bit ODBC Control Panel application ODBCAD32.EXE. The control panel application
will call the setup DLL for the driver it is accessing ODBCLS32.DLL, in the case of ODBCLink/SE, which will
update ODBC.INI or the system registry.
ODBCLink/SE
©M.B. Foster Associates Limited 1995-2000 3
Page 14

Overview and Specifications ODBCLink/SE Reference Manual
ODBCLink/SE System Requirements
HP3000 Server Requirements:
Operating System Requirements:
MPE/iX Version 5.0 or greater
Database Requirements :
IMAGE/SQL Version B.G1.10
ALLBASE/SQL Version A.G1.15
Network Requirements:
ThinLANLink/XL must be configured and turned on.
HP9000 Server Requirements:
Operating Systems Requirements
HP-UX Version 9.0 or greater
Database Requirements:
ALLBASE/SQL Version A.G1.15
Network Requirements:
ARPA Services must be configured and turned on.
Client Requirements:
Platform:
486 processor at a minimum, preferably a Pentium
8 mg memory at a minimum, preferably 16 mg
5 mgs of free disc space
Operating Systems:
Windows 95 and greater
Windows NT Version 3.51 and greater
Network Requirements
Winsock or other TCP/IP software
Software provided:
Server program for the HP3000 or HP9000 as appropriate
Client programs
ODBCLink/SE
4 ©M.B. Foster Associates Limited 1995-2000
Page 15

ODBCLink/SE Reference Manual Overview and Specifications
Field types supported:
All data types supported by Allbase and Image/SQL.
SQL Commands supported:
ODBCLink/SE supports the complete ALLBASE/SQL and IMAGE/SQL syntax dynamic SQL.
ODBCLink/SE
©M.B. Foster Associates Limited 1995-2000 5
Page 16

Overview and Specifications ODBCLink/SE Reference Manual
Notes
ODBCLink/SE
6 ©M.B. Foster Associates Limited 1995-2000
Page 17

ODBCLink/SE Reference Manual Preparing the Database Server
Preparing the Database Server
Before you install ODBCLink/SE on the PC client, perform the following steps to prepare the database server:
⊗ Verify the software version numbers.
⊗ Verify the Connection Assurance Parameters.
⊗ Starting and Stopping the listener.
⊗ Gather information.
⊗ Create the DBEnvironment
Verify Software Version Numbers
Note: If you are using ALLBASE/SQL, version A.G1.15 or higher is
On the HP3000 enter:
: SQLVER.PUB.SYS
required.
Note: If you are using IMAGE/SQL, the version number should be
On the HP9000 enter:
$sqlver
:IMAGESQL.PUB.SYS
>>exit
Note: If both ALLBASE/SQL and IMAGE/SQL are installed, both
B.G1.10 or higher. Type:
must be either the respective version state above or newer in
order to use ODBCLink/SE.
Verify the Connection Assurance Parameters
When the connected PC client application terminates abnormally or aborts, connection assurance parameters, set
under MPE/iX, determine the length of time that the server takes to time out the connection. Because the server
process may be holding locks when the PC aborts, it is important that these parameters are set properly.
Your network administrator should verify that the settings for Connection Assurance Interval and Maximum
Connection Assurance Retransmissions parameters are set appropriately.
The Connection Assurance Interval specifies the amount of time between each polling event. The default value is
600 seconds.
The Maximum Connection Assurance Retransmissions specifies the number of retries the server is polled after a PC
client abort has been detected by the polling event. The default value is four times.
After the connection abort, the server polls the connection five times (the polling event plus four retries). The
connection times out after 4 ten-minute intervals plus the amount of time between the polling event and the first retry
after the connection aborted.
ODBCLink/SE
©M.B. Foster Associates Limited 1995-2000 7
Page 18

Preparing the Database Server ODBCLink/SE Reference Manual
To change the network assurance parameters, you must bring the network down. The sequence of commands used to
set network assurance parameters are as follows:
:HELLO MANAGER.SYS
:NMMGR
Next, press the function keys in the sequence shown in the following example (these function key labels are for MPE/
iX 5.0):
F1 Open Config
F2 NS
F2 Unguided Config
F1 Go To Netxport
F2 Go To GPROT
F2 Go To TCP
:
Modify values for Connection Assurance Interval (e.g. 60) and Maximum Connection Assurance Retransmissions
(e.g. 2).
:
F6 Save Data
Note: Connection assurance parameter values control polling
times on all active server LAN connections (not just
ODBCLink/SE connections). More frequent polling uses
more server CPU time and increases LAN traffic.
Starting and Stopping the Listener
To start the listener on the HP3000 data base server, enter:
STREAM ODBCJOB.ODBCSE.SYS
Note: PM and NM capability is required to start the listener job,
To start the listener on the HP9000 database server, enter:
/usr/bin/odbcse/odbclnse server On a 9.x server
/opt/allbase/bin/odbcse/odbclnse server On a 10.x server and 11.x server
Note: You should start the listener as root user-id preferably in
Note: When the server is started it makes a call to sqlver and puts
therefore it is normal for the job to be started by
MANAGER.SYS.
your system startup file.
the output into a file called odbcver in the same directory
that the server is running from. For this reason, upon
startup, it may take 20 or more seconds for the program to
return. The odbcver file is used to determine the DBMS
version for a SQLGetInfo call. If the odbcver file is deleted
the SQLGetInfo call for DBMS version will return
“UNKNOWN”
ODBCLink/SE
8 ©M.B. Foster Associates Limited 1995-2000
Page 19

ODBCLink/SE Reference Manual Preparing the Database Server
To determine whether or not the listener job is running:
On the HP3000 database server, enter:
SHOWJOB JOB=@J
The resulting display will besimilar to the following:
JOBNUM STATE IPRI JIN JLIST SCHEDULED-INTRO JOB NAME
#Jnnn SCHED 8 10S LP 12/ 6/00 4:00 ODBCLNSE,MANAGER.SYS
On the HP9000 database server, enter:
# ps -ef | grep odbclnse
The resulting display will be something like this:
root 7223 1 0 15:37:15 ? 0:00 /usr/bin/odbcse server
paw 7226 7223 0 15:40:56 ? 0:00 /usr/bin/odbcse server
root 7238 7230 1 15:41:29 ttys2 0:00 grep odbcse
The first line shows the server running. The second line shows a user with a login of “paw” is using the server and the
last line shows the command you just entered.
To stop the listener:
On the HP3000 database server, enter:
ODBCLNSE.ODBCSE.SYS STOP
Note: If there is a connection open when the stop command is
On the HP9000 database server, enter:
/usr/bin/odbcse/odbclnse stop On HP-UX 9.x
/opt/allbase/bin/odbcse/odbclnse stop On HP-UX 10.x and 11.x
Note that in Unix, the STOP command will prevent any new connections but will not affect connections that were
active at the time the command was issued.
issued the process will not be stopped. If you are not able to
stop the listener in the normal way, or if you want to
terminate active ODBC client sessions, you may abort the
listener Job with the :ABORTJOB command
You may also use the following command to stop the listener. It is, however, strongly suggested that you use the
“odbcse stop” command to stop the listener.
kill -16 “pid” where “-16" is the “siguser1" and “pid” is the process ID number
ODBCLink/SE
©M.B. Foster Associates Limited 1995-2000 9
Page 20

Preparing the Database Server ODBCLink/SE Reference Manual
In the example above, if the “pid” was 7223" then “kill -16 7223" would stop the server. Using a “kill -16" is less
dangerous than using “kill (pid)”. If you issue a kill command without the -16 and enter the wrong “pid” number then
you may stop a server process that does not belong to you. Using “kill -16" will prevent this from happening.
Gather Information
When you install ODBCLink/SE on the PC client, you will need database server information. Now is a good time to
Note it. The database administrator will have information about the database.
⊗ Host or node name of the HP3000 or HP9000 database server, or its IP
address (For example: HP3000 or HP9000 or 123.456.789.123)
To obtain the host name used by the ARPA interface:
⊗ On the HP3000 check the HOSTS.NET.SYS file. If the hosts file does not
exist, check the domain name service file. This file contains the names of the
systems that have hosts files.
⊗ On the HP9000 check the /etc/hosts file. If the hosts file does not exist, check
the domain name service file, /etc/resolv.conf. This file contains the names of
the systems that have hosts files.
⊗ Fully qualified name or the absolute pathname of the DBEnvironment on
the server: (For example: PartsDBE.SomeGrp.SomeAcct on the HP3000 or
/usr/hpsql/sampledb/PartsDBE on the HP9000)
⊗ Logon string and password used to connect to the DBEvironment:(For
example: SomeUser/passwd.SomeAcct/AcctPass,SomeGrp/GrpPass on the
HP3000 orUser1,passwd on the HP9000)
Create the DBEnvironment
For details, see Appendix B - Creating a DBEnvironment.
ODBCLink/SE
10 ©M.B. Foster Associates Limited 1995-2000
Page 21

ODBCLink/SE Reference Manual Installing ODBCLink/SE on the Client PC
Installing ODBCLink/SE on the Client PC
ODBCLink/SE is contained in a self-extracting archive files. Installing ODBCLink/SE requires:
⊗ Downloading the ODBCLink/SE file to a temporary sub-directory.
⊗ Extracting the files on your Client PC.
⊗ Running the SETUP program to install the driver.
Once the driver has been successfully installed, the sub-directories created as part of the install may be deleted.
Downloading ODBCLink/SE to the Client PC
In the following section, replace Server with the name of your HP3000 or HP9000 server and nn with 32.
Using Reflection® software:
From your Client PC:
⊗ Create a directory called ODBCLinkSE
⊗ Start Reflection and copy the appropriate ODBCLink/SE self-extracting file
to your Client PC.
For the HP3000 server, press Alt/Y to open the Command Window and enter
receive \odbcsenn\odbcclnn.exe from odbcclnn.odbcse.sys binary
For the HP9000 server use any login as the Username:
For HP-UX Version 9.x
receive \odbcsenn\odbcclnn.exe from \usr\bin\odbcse\odbcclnn binary
ODBCLink/SE
©M.B. Foster Associates Limited 1995-2000 11
Page 22

Installing ODBCLink/SE on the Client PC ODBCLink/SE Reference Manual
For HP-UX Version 10.x:
receive\odbcsenn\odbcclnn.exe from \opt\allbase\bin\odbcse\odbcclnn binary
Using ARPA Services (FTP):
From your Client PC:
⊗ Create a directory:
•ODBCSEnn
⊗ Copy the appropriate ODBCLink/SE self-extracting file to your Client PC
For the HP3000 server, use MANAGER.SYS,ODBCSE as the Username. In ODBCSEnn, nn refers to 16 or 32 bit.
C:\ODBCSEnn>
ftp Server
binary
get odbcclnn odbcclnn.exe
quit
For the HP9000 server use any login as the Username:
C:\ODBCSEnn>
ftp Server
binary
get /usr/bin/odbcse/odbcclnn odbcclnn.exe (for HP-UX V9.x)
or
get /opt/allbase/bin/odbcse/odbcclnn odbcclnn.exe (for HP-UX V10.x and 11.x)
Using NS Services (DSCOPY) on the HP3000:
From your Client PC:
⊗ Create a directory:
⊗ Copy the appropriate ODBCLink/SE self-extracting file to your Client PC
dscopy -r -F -B -L256 Server#manager.sys,odbcse# odbcclnn odbcclnn.exe
•ODBCSEnn
ODBCLink/SE
12 ©M.B. Foster Associates Limited 1995-2000
Page 23

ODBCLink/SE Reference Manual Installing ODBCLink/SE on the Client PC
Extracting the ODBCLink/SE file
From your Client PC, double click the self-extracting file.
Note: If you are installing ODBCLink/SE on a number of Client
PC’s, after extracting the files you might wish to create
installation disks by copying the extracted files onto a
diskette.
Running the SETUP program
Note: A problem associated with Microsoft ODBC 2.10 setup
causes the setup on a WindowsNT 4.0 system to install as if
it was a Windows95 system. We have therefore created two
information files to be used with the 32-bit setup program. A
batch file copies the appropriate file to odbc.inf depending
on the parameters given.
On a WindowsNT system run “infsetup wnt”
On a Windows95 systems run “infsetup w95"
The batch file will read the parameter entered and copy the appropriate file to odbc.inf. Entering infsetup with no
parameter specified will simply describe the usage but will not copy the file.
Once the above has been accomplished proceed with the setup program as follows:
Select: Start, Run. The Run window is displayed.
Type: C:\ODBCLinkSE\SETUP.EXE in the command field
Note: C:\ODBCLinkSE\SETUP.EXE is the directory the file was
extracted into.
ODBCLink/SE
©M.B. Foster Associates Limited 1995-2000 13
Page 24
Installing ODBCLink/SE on the Client PC ODBCLink/SE Reference Manual
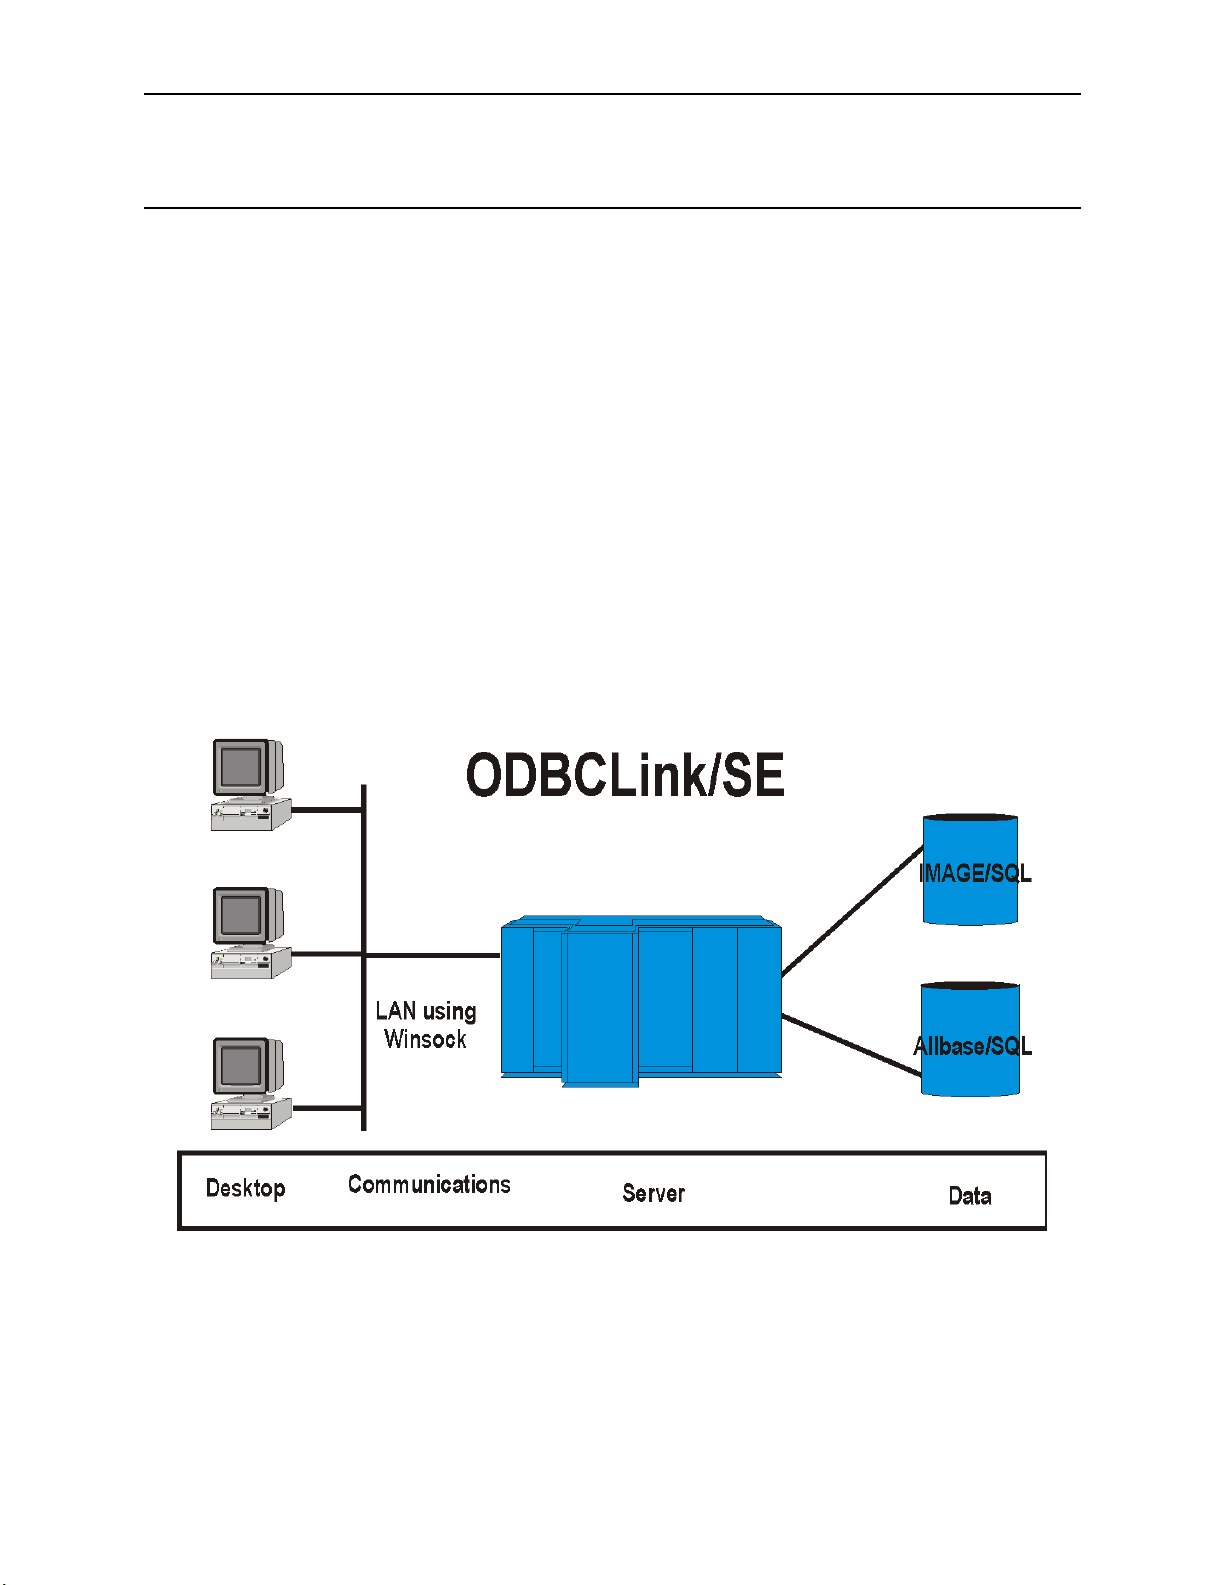
The Driver Setup Program will display this window.
Select NEXT
ODBCLink/SE
14 ©M.B. Foster Associates Limited 1995-2000
Page 25
ODBCLink/SE Reference Manual Installing ODBCLink/SE on the Client PC
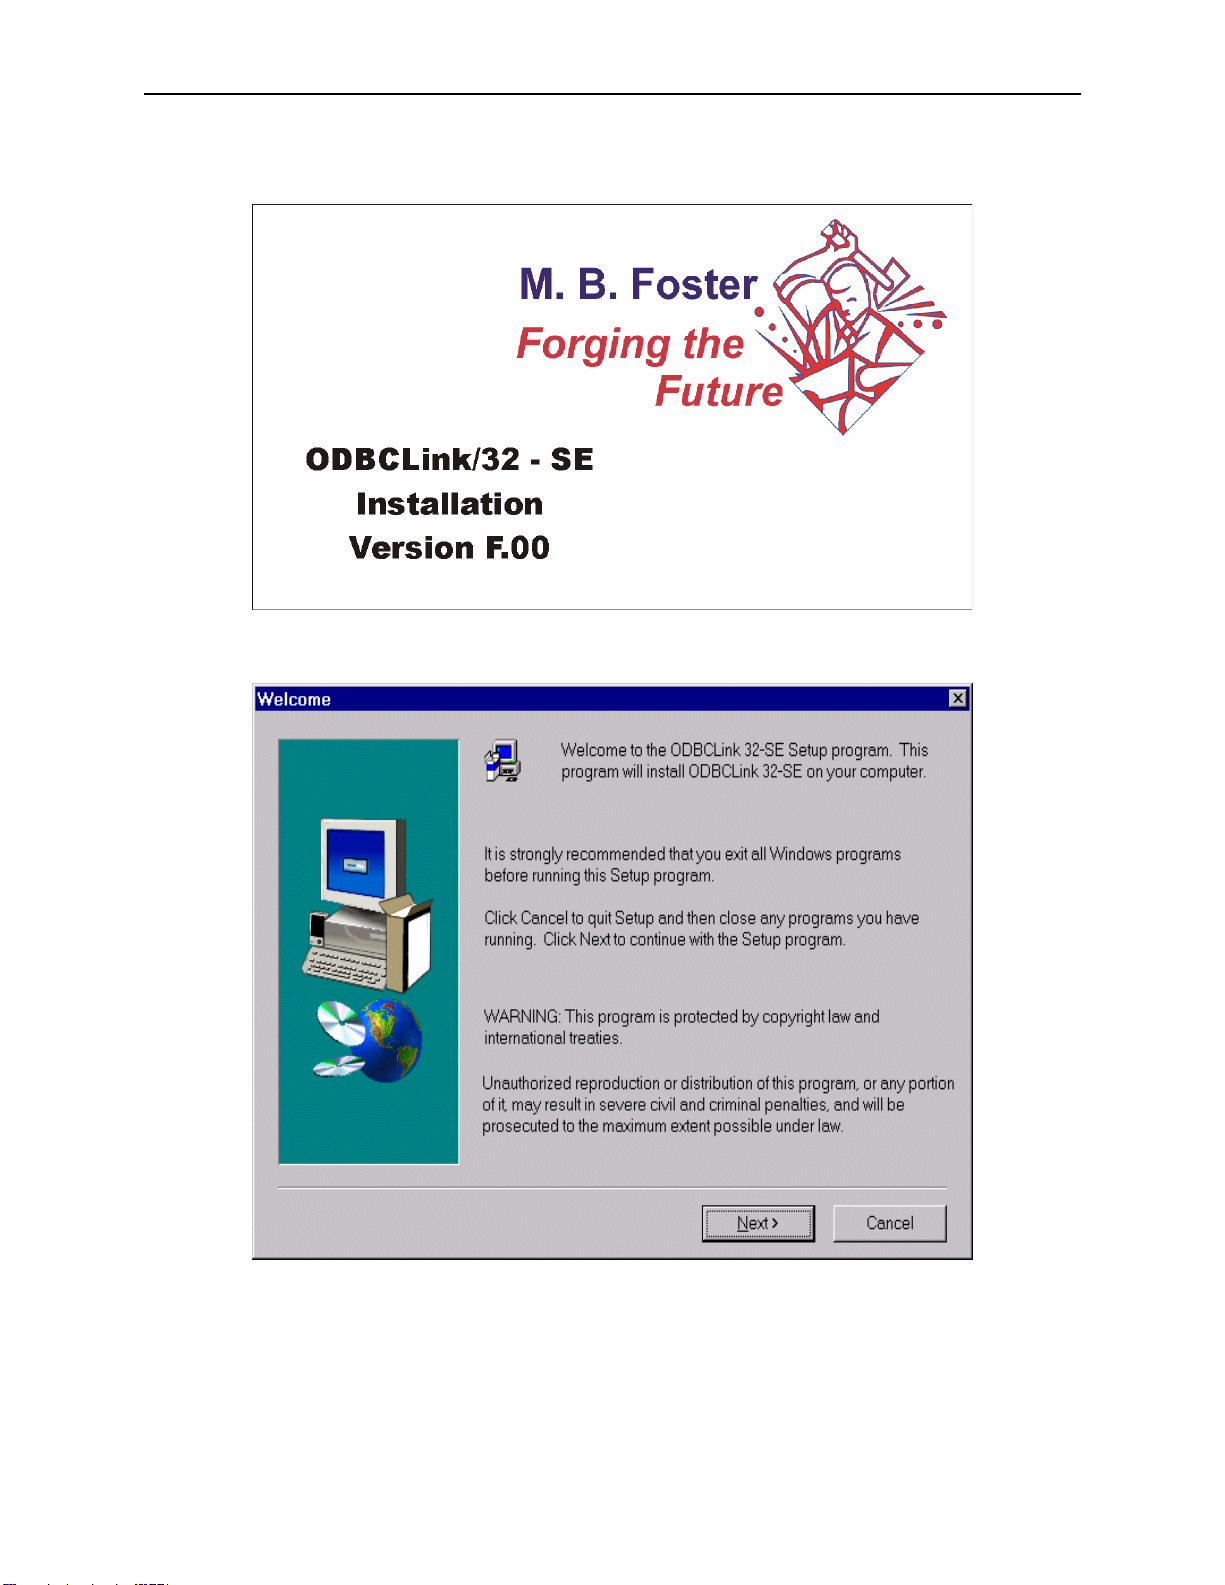
Select NEXT to accept the default folder or Browse to select an anternate
ODBCLink/SE
©M.B. Foster Associates Limited 1995-2000 15
Page 26
Installing ODBCLink/SE on the Client PC ODBCLink/SE Reference Manual
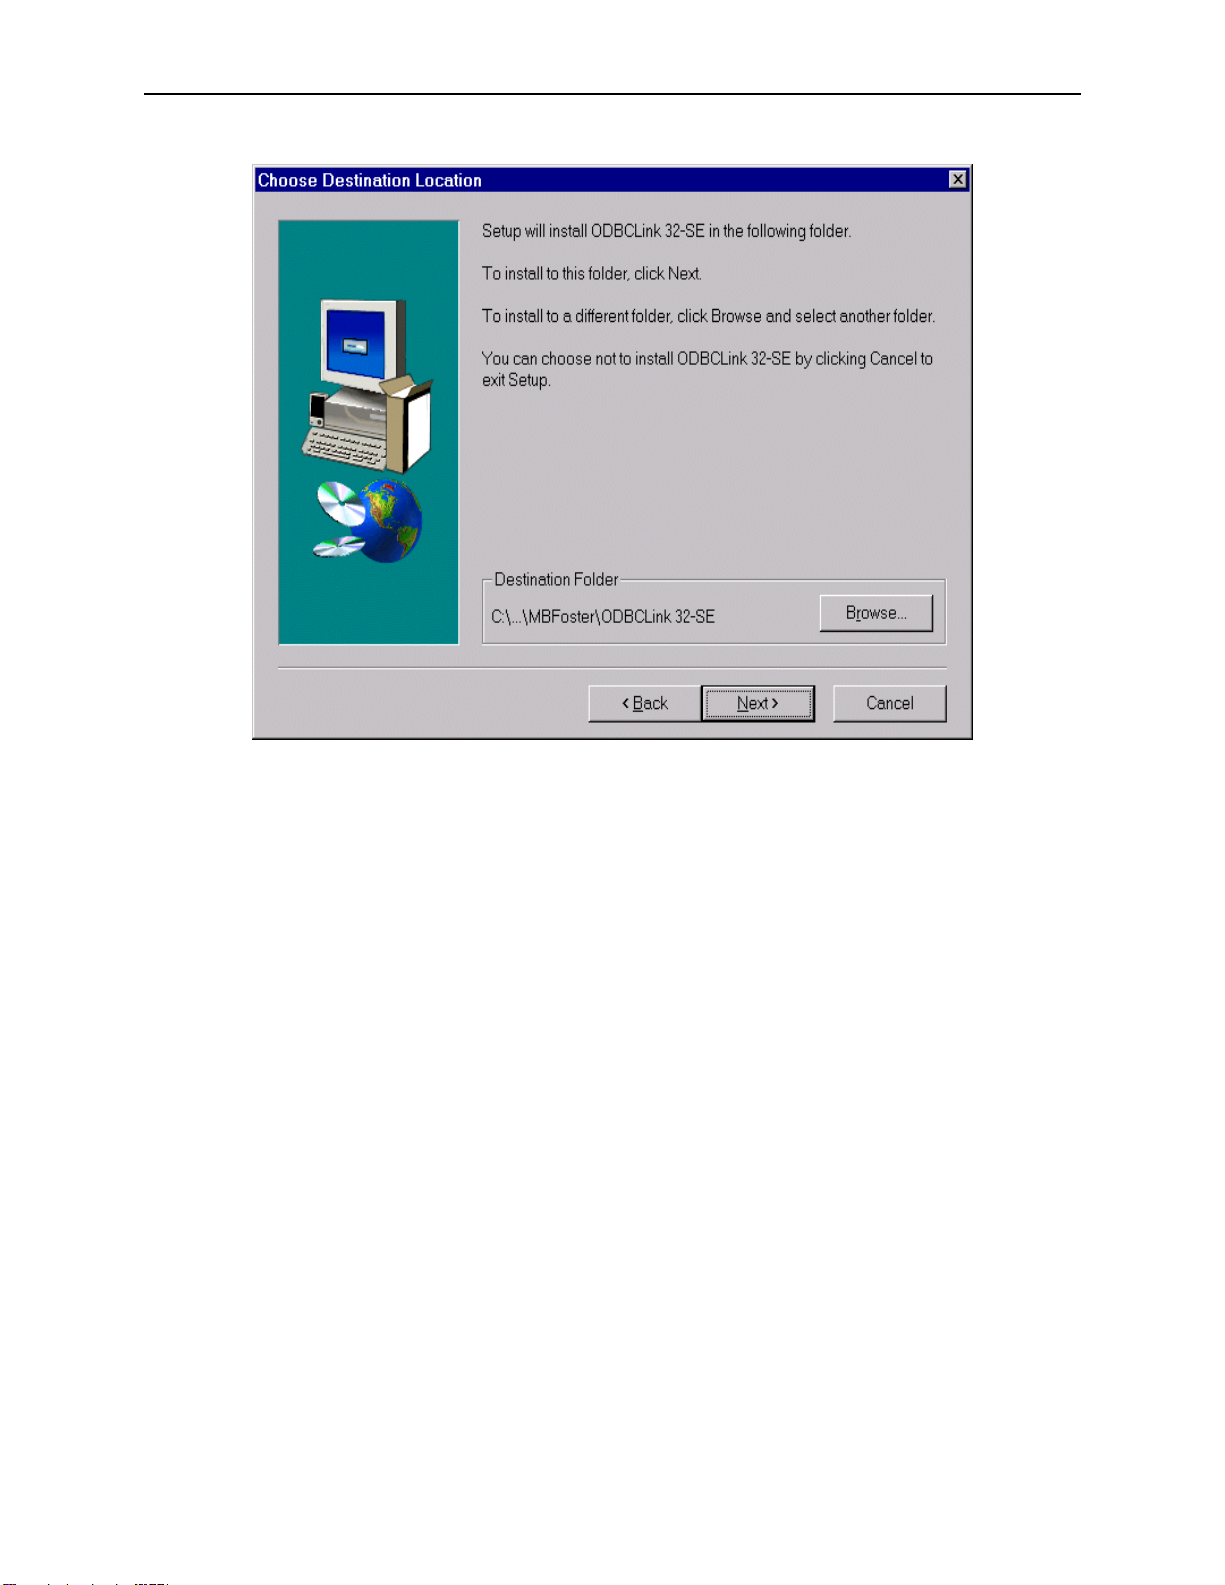
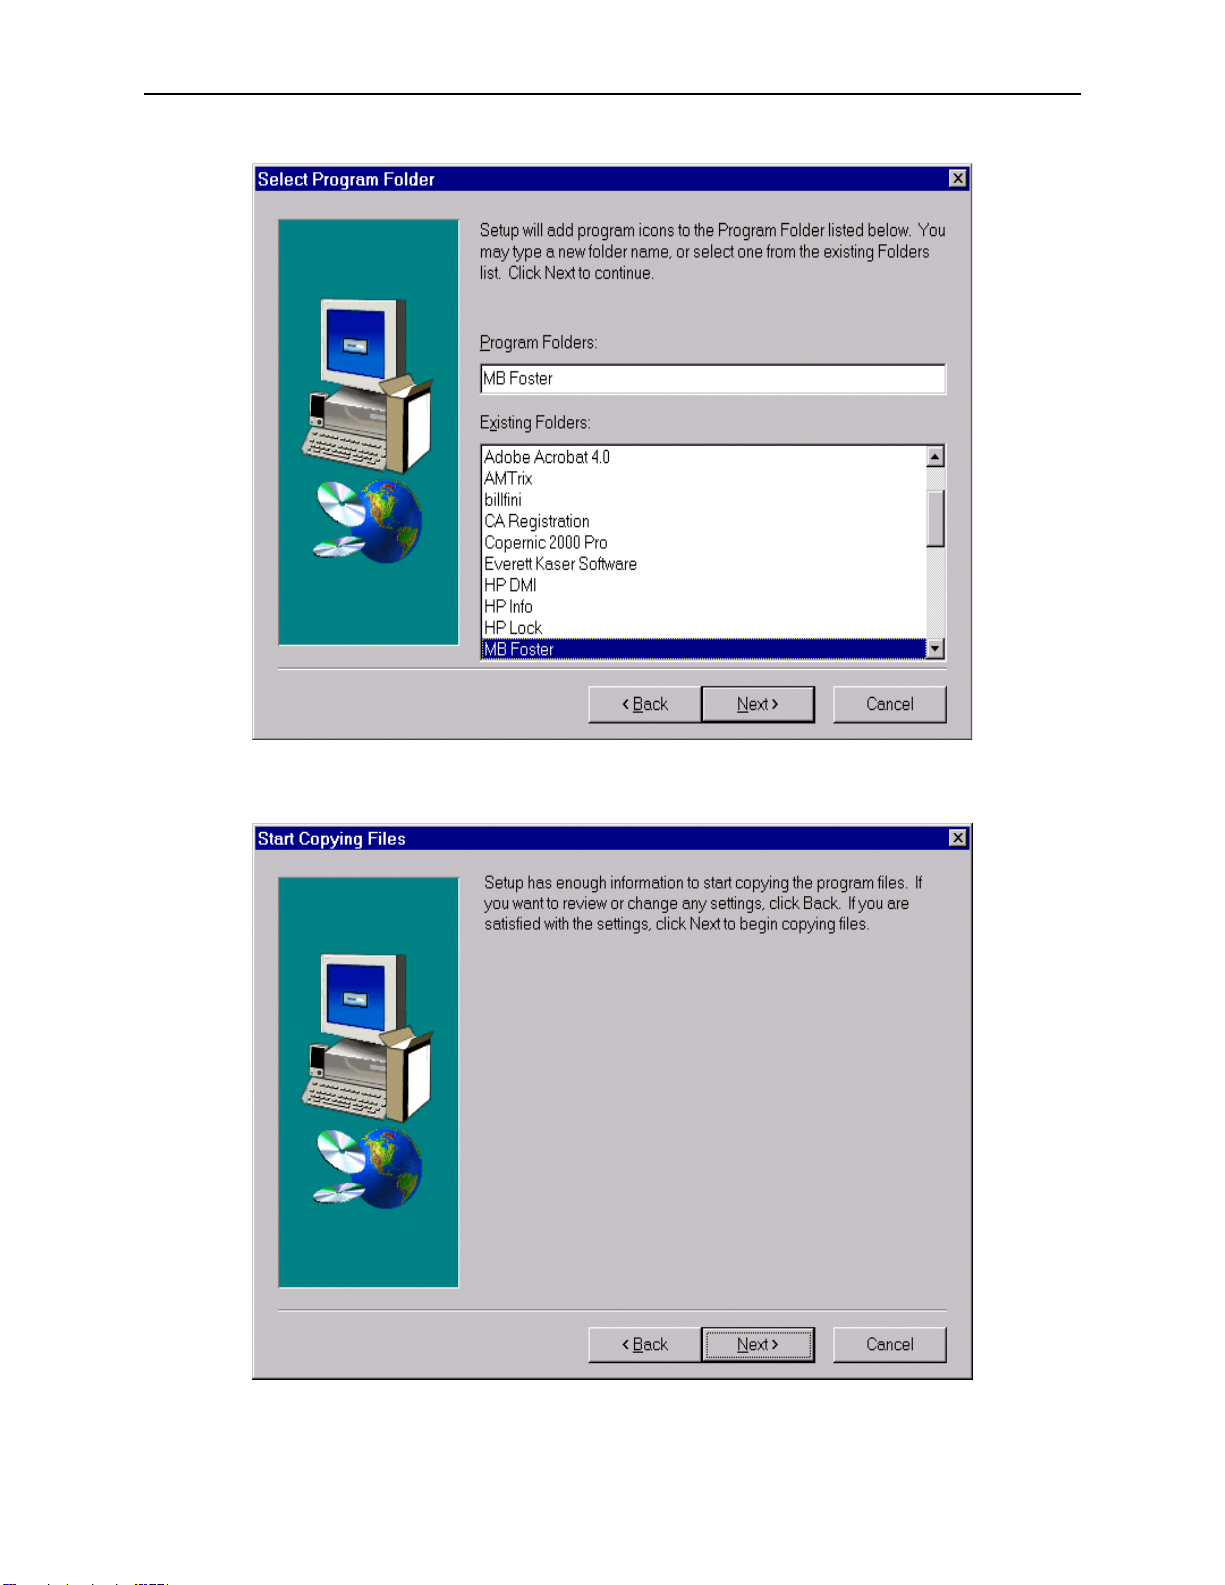
Select NEXT to accept the MBFoster Program Folder or select an alternate Program Folder.
Select NEXT
ODBCLink/SE
16 ©M.B. Foster Associates Limited 1995-2000
Page 27
ODBCLink/SE Reference Manual Installing ODBCLink/SE on the Client PC
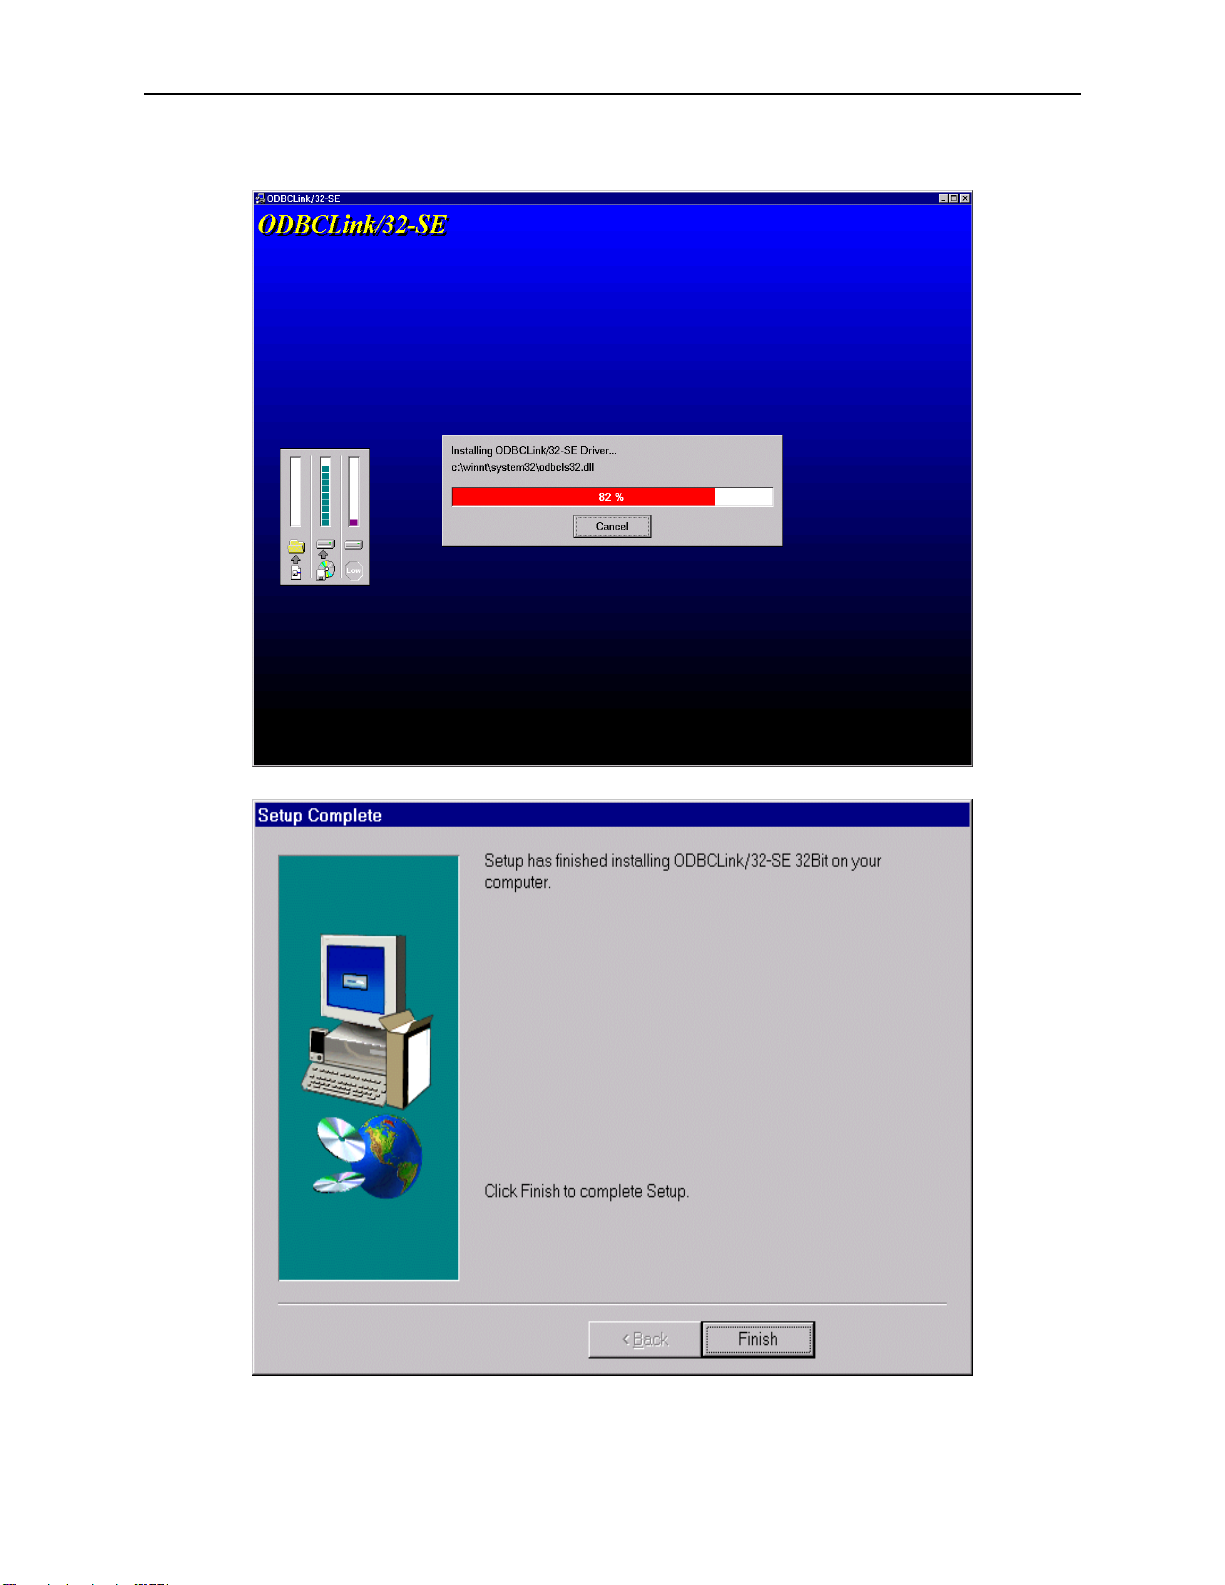
The Progress Bar Is Displayed
Click Finish
ODBCLink/SE
©M.B. Foster Associates Limited 1995-2000 17
Page 28

Installing ODBCLink/SE on the Client PC ODBCLink/SE Reference Manual
The driver has been successfully installed. You may now create data sources for use in applications that use this
driver. See Section 4 for a complete description of creating data sources.
Notes on 32-bit Access
32-bit data-source information is kept in the registry, and maintained by the 32-bit ODBC control panel application
ODBCAD32.EXE.
You do not normally make entries manually into either the registry or the ODBC.INI file. However information has
been provide in the manual to help you do this.
ODBCLink/SE
18 ©M.B. Foster Associates Limited 1995-2000
Page 29
ODBCLink/SE Reference Manual Configuring Data Sources
Configuring Data Sources
Before you access data defined to ALLBASE/SQL or IMAGE/SQL you must configure one or more data sources for
each Client PC you wish to access your server.
A data source includes the name you wish to give for a database environment and the information necessary to find it.
You configure data sources with the "ODBC" application in the Windows Control Panel.
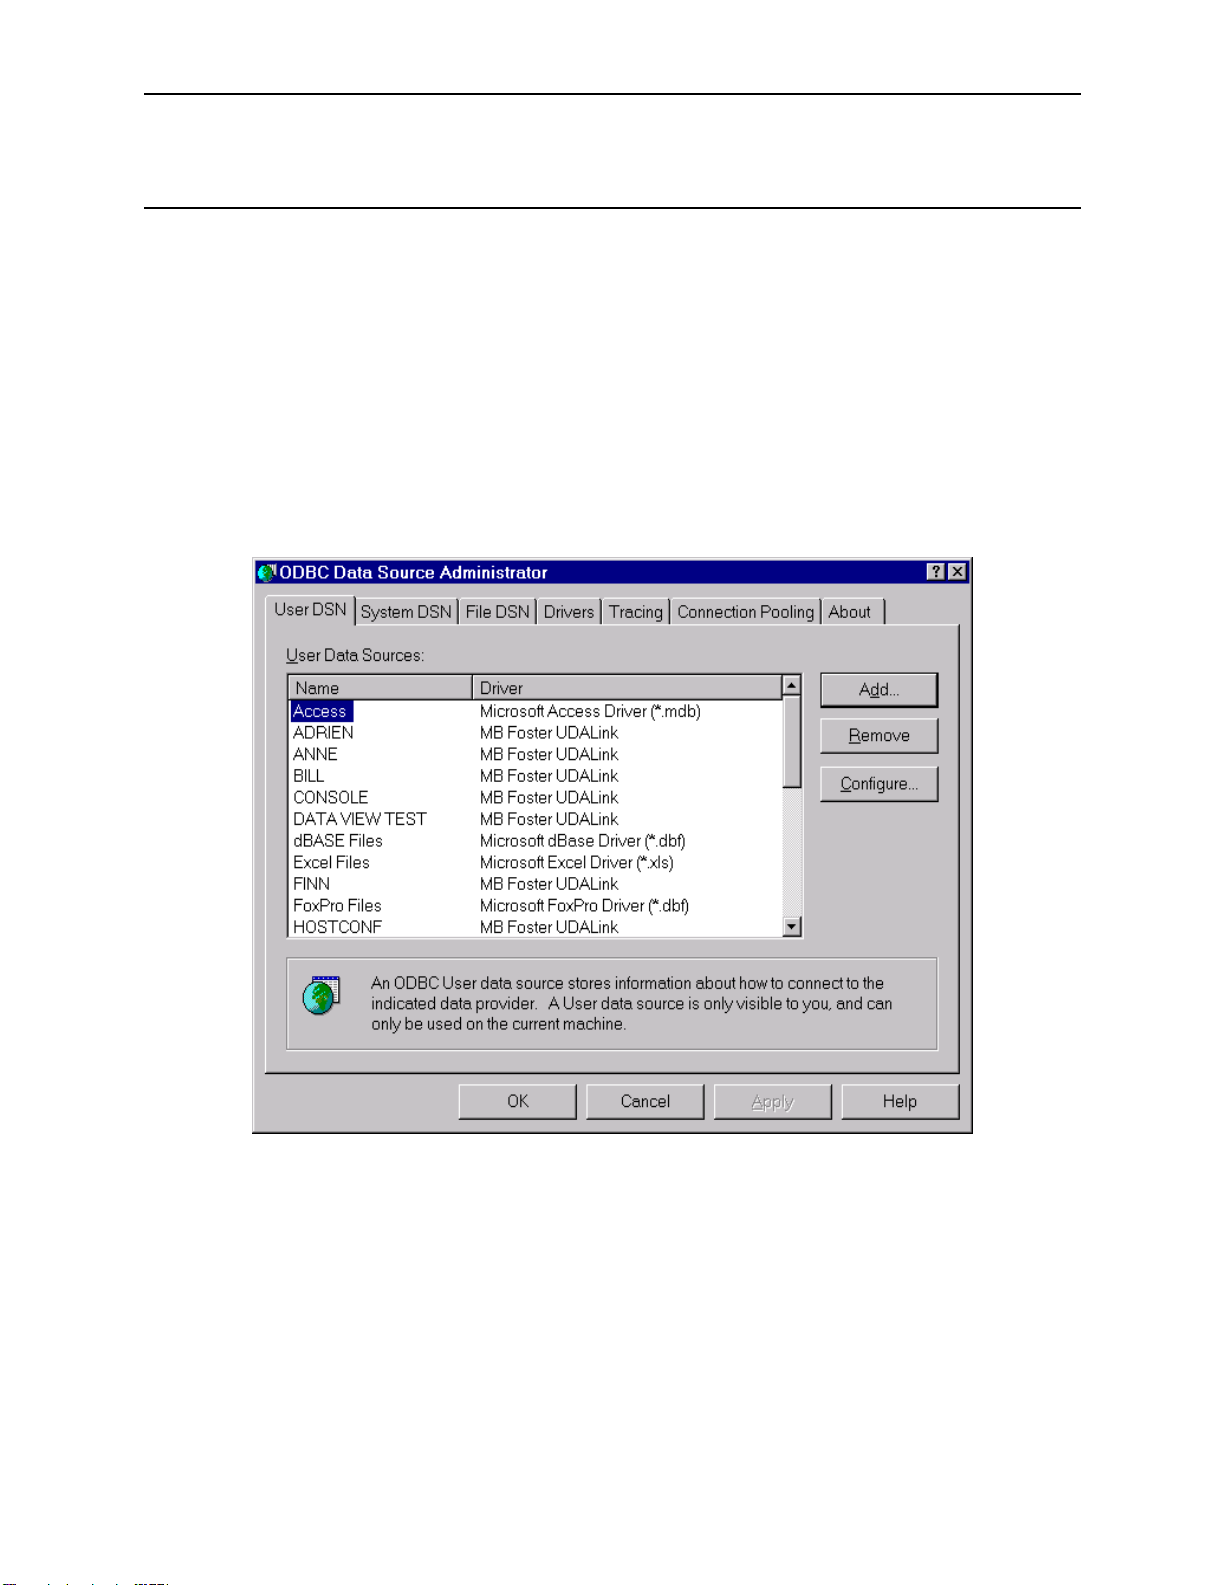
⊗ In Windows95 or greater and WindowsNT 4.0 or greater , click on Start,
Settings, Control Panel and double click on ODBC.
Data sources created in HP ALLBASE/SQL PCAPI can be migrated to ODBCLink/SE using the Data Set Migration
Too l.
Select Add
ODBCLink/SE
©M.B. Foster Associates Limited 1995-2000 19
Page 30
Configuring Data Sources ODBCLink/SE Reference Manual
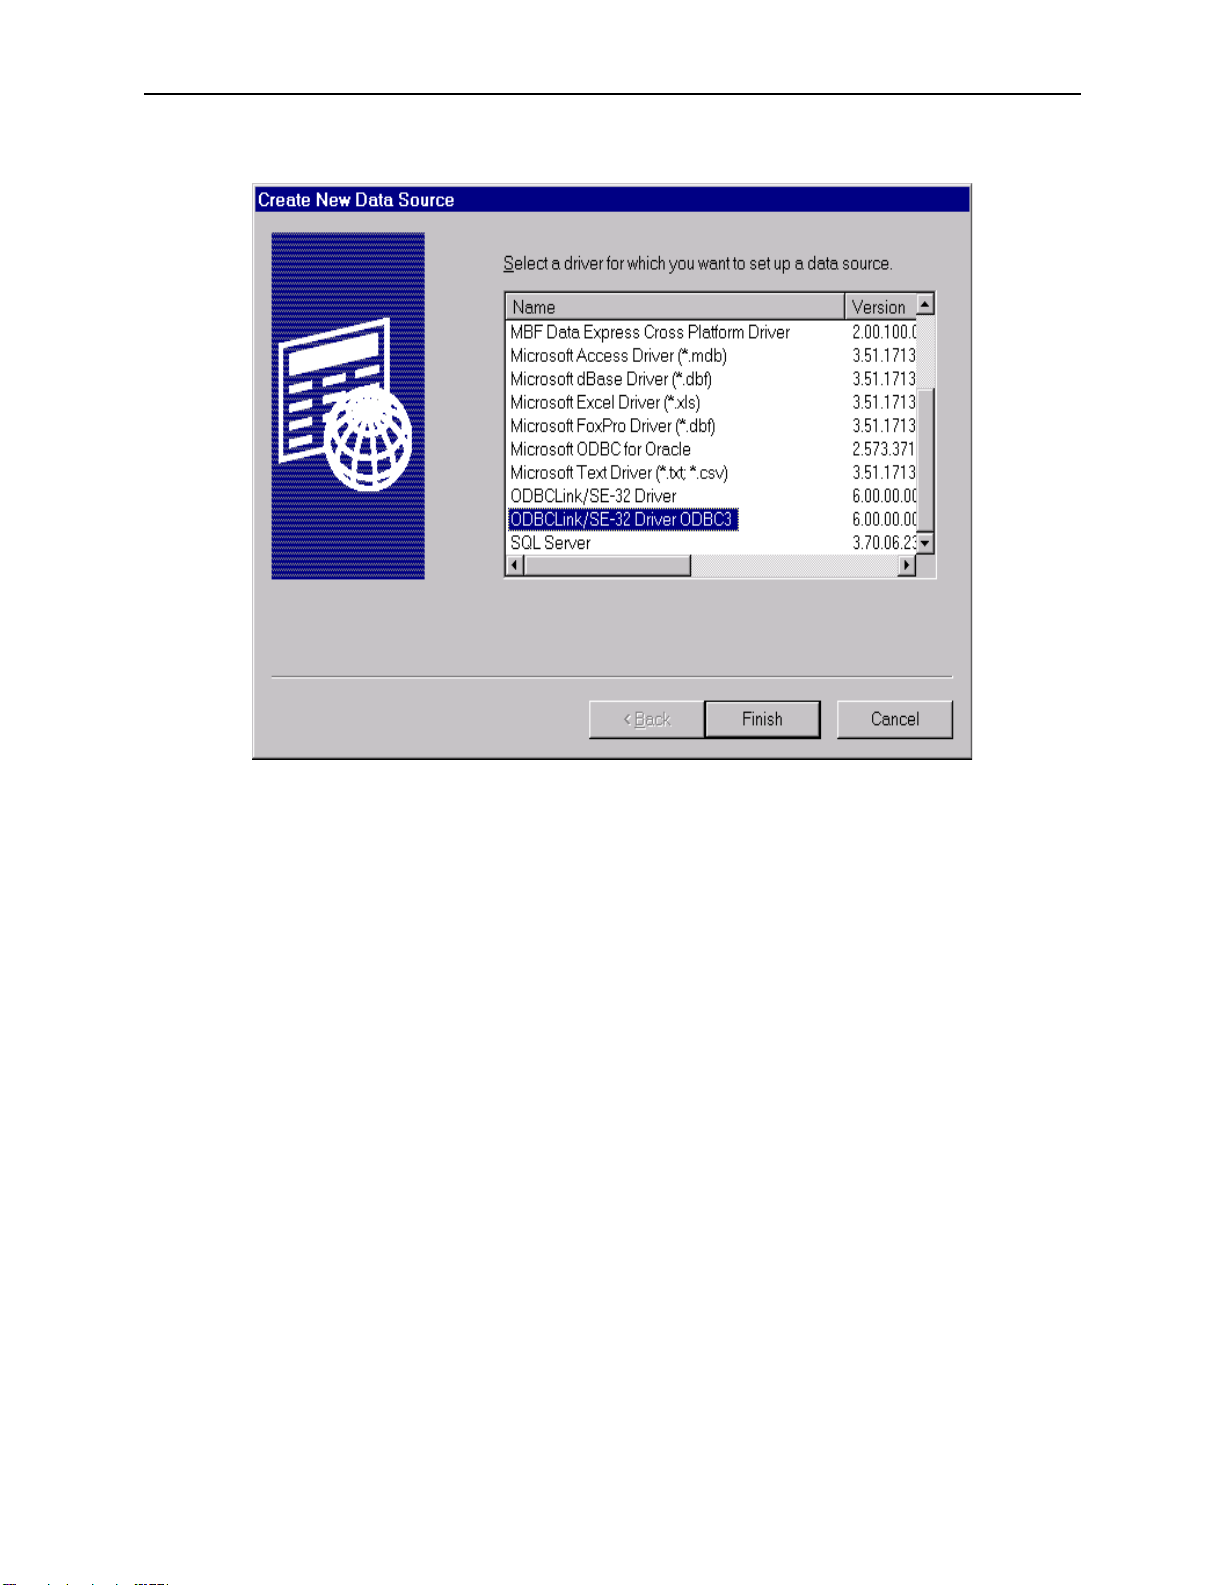
Scroll down to ODBCLink/SE-32 Driver ODBC3. Click Finish
Note: The ODBCLink/SE-32 Driver ODBC3 driver is ODBC 3
compliant. The previously installed driver, which is ODBC 2
compliant is still available.
ODBCLink/SE
20 ©M.B. Foster Associates Limited 1995-2000
Page 31

ODBCLink/SE Reference Manual Configuring Data Sources
On this screen you give the database environment a name and indicate where it is located. The Data Source Name
may be any combination of alphanumeric characters including blanks.
The maximum length is 30 characters.
The Description is optional and may contain any string of characters you wish. It may be longer than the display
window.
The Database Name is the name of the ALLBASE/SQL Database Environment you want to access with this data
source. The name will usually include the location of the DBE as shown in the sample screen. If the logon provided
in the next screen does not include the same logon group, the location MUST be provided. A sample HP/UX name
might be:
/usr/users/data/PartsDBE
The Server Name or IP Address is the name or address of the computer where your database environment resides. If
you don't know this name, contact your network administrator.
The Server Type radio button indicates the type of computer on which the DBE is located. Click on:
MPE/iX if it is an HP3000
HP-UX if it is an HP9000
Select Continue when you are finished
ODBCLink/SE
©M.B. Foster Associates Limited 1995-2000 21
Page 32

Configuring Data Sources ODBCLink/SE Reference Manual
Setup for MPE/iX
The SessionID, User Name, Acct Name, Group Name, User Password, Acct Password and Group Password entries
correspond to those used if you were manually connecting to the HP3000 or HP9000. If you don't know this
information, contact your System Manager.
If you want the client application to prompt for the passwords at run-time, enter a “?” in the password field. If you put
a question mark in any password field, you will get a dialogue box and be prompted to enter the password every time
you run your application and request a connection. For an attached table in MS-Access, ODBCLink/SE will not
store the password anywhere within the application, so you will have to enter the password the first time you open the
table. However, many applications, including Access, connect more than once to the same data-source, and if you
have already entered the passwords and created a new connection, you will not normally have to enter it again for
additional connections to the same data-source.
Note: As you might expect, "mandatory" means you must enter a
value. However, "optional" doesn't necessarily mean you
don't have to enter a value; it means there may not be a
value required. For example, on the MPE/iX logon, "Session
ID" is any 8 characters you choose, starting with an
alphabetic character with no embedded blanks. You may
choose not to enter a "Session ID". On the other hand,
"Group Name" will default you to your "home group" so may
be left blank; if your "User Name" does not have a "home
group" this field is required or the connection will fail.
ODBCLink/SE
22 ©M.B. Foster Associates Limited 1995-2000
Page 33

ODBCLink/SE Reference Manual Configuring Data Sources
Setup for HP-UX
Note: On HP-UX, the Login name and password are case sensitive.
If you want the client application to prompt for the passwords at run-time, enter a “?” in the password field. If you put
a question mark in any password field, you will get a dialogue box and be prompted to enter the password every time
you run your application and request a connection. For an attached table in MS-Access, ODBCLink/SE will not
store the password anywhere within the application, so you will have to enter the password the first time you open the
table. However, many applications, including Access, connect more than once to the same data-source, and if you
have already entered the passwords and created a new connection, you will not normally have to enter it again for
additional connections to the same data-source.
ODBCLink/SE
©M.B. Foster Associates Limited 1995-2000 23
Page 34

Configuring Data Sources ODBCLink/SE Reference Manual
Setup Options
Encoded passwords: Check this box to encrypt the connection passwords in the ODBC.INI file or system registry.
For security reasons once the passwords are encoded if you decide to un-click the box you must DELETE the current
passwords first.
AutoCommit transactions: Check this box to have UPDATE and INSERT transactions committed as soon as they
are executed. If this box is not checked, transactions must be explicitly committed by the client application.
Note: It is recommended that AutoCommit be left enabled
Trace ODBC calls on client: Check this box to have client calls to ODBC logged in the file ODBCLINK.LOG on
the Client PC.
Trace ODBC calls on server: check this box to have server calls to ODBC logged in the file
ODBCLOG.ODBCSE.SYS on the HP3000 or /tmp/odbclog on the HP-UX.
Isolation levels allow you to control the degree of concurrency by regulating the extent to which operations
performed by one user in a multi-user environment can be affected by operations performed by other users.
Note: The recommended isolation level is “RU” for Read
Uncommitted. This minimizes the number of locks that are
held on your database.
ODBCLink/SE
24 ©M.B. Foster Associates Limited 1995-2000
Page 35

ODBCLink/SE Reference Manual Configuring Data Sources
Select Translator
ODBC Translator
Select “Roman8 to PC-ANSI Translator” if you want extended characters on your HP3000 (such as foreign accented
characters) to appear correctly on your Client PC. The translation goes both ways. For example; extended characters
are entered on the Client PC and sent to the host in an SQL update or Insert operation will be translated.
Note: Roman9 to PC-ANSI Translator will recognize the symbol for
the European Currency Symbol, known as the EURO.
Successful Completion
The new data source is now ready for use in your client application.
Some applications may allow you to go directly to the "Data Sources" menu without going to Control Panel to click
on the ODBC Administrator. Check you client application documentation for details.
ODBCLink/SE
©M.B. Foster Associates Limited 1995-2000 25
Page 36

Configuring Data Sources ODBCLink/SE Reference Manual
Migrating HP PCAPI Data Sources
Data sources created in the HP ALLBASE/SQL PCAPI can be migrated to ODBCLink/SE by running the data set
migration tool DXNMIG16.EXE either from the RUN window or in an MS-DOS prompt window.
Click on all the data source names you wish to migrate and then click OK. Data sources will be migrated to
ODBCLink/SE data sources with the same name. Copies of the PCAPI data sources will be made with the same name
followed by “-orig”.
When the copies of the originals are no longer required, they may be deleted with the 16-bit ODBC Administrator
program.
ODBCLink/SE
26 ©M.B. Foster Associates Limited 1995-2000
Page 37

ODBCLink/SE Reference Manual Application Development
Application Development
If you are developing applications that use the ODBC interface, you may want to order the Microsoft Developer
Network (MSDN) Professional (Level 2) from Microsoft. The MSDN contains the ODBC Software Developers Kit
(SDK), which includes the ODBC API Reference, sample ODBC applications, and other technical information to
assist you in developing your applications. There are also many good books written on the use of ODBC.
ODBCLink/SE
©M.B. Foster Associates Limited 1995-2000 27
Page 38

Application Development ODBCLink/SE Reference Manual
Using Stored Procedures
ODBCLink/SE implements all types of ALLBASE/SQL stored procedures, including those which return multipleformat results sets. You can list the stored procedures available to your ODBC session by calling SQLProcedures and
you can get parameter information for stored procedures by calling SQLProcedureColumns.
Stored procedures return data either through bound parameters or through one or more results sets. To get a return
value that is a procedure parameter, prepare an SQL statement (with SQLPrepare) of the form:
{?=call owner.procedue (?,?..)}
Then bind the parameters with SQLBindParameter, specifying an output parameter where appropriate
(SQLProcedureColumn will tell you which are input, which are output, and which are input/output parameters). Then
call SQLExecute. The return value(s) will be copied to the storage locations that you specify. Note that all stored
procedures return an integer return status called RETURN_STATUS.
If your stored procedure also returns one or more result sets, you call SQLNumResultCols, SQLDescribeCol,
SQLFetch, SQLGetData in the normal way you would for any Select statement. If the procedure returns more than 1
result set, you call SQLMoreResults when you get to the end of the first result set, and, if successful, you can then
retrieve another result set. It is permissible to call SQLMoreResults() at any time to switch to a different result set.
ODBCLink/SE
28 ©M.B. Foster Associates Limited 1995-2000
Page 39

ODBCLink/SE Reference Manual Application Development
Performance Considerations
Many users find ODBC access to their server very fast. You should however be aware of the following:
⊗ If you are reading and sorting a large table, the host may not return control
to the client until the entire data-base has been read and sorted. If this
occurs, even restarting your Client PC will have no effect and you will have
to manually abort the server, or terminate the connection with the ISQL
“Terminate User” command.
⊗ When you are opening a large table in MS-Access, the program typically
displays a screenful of data and then seems to wait for user input. In many
cases, however, it will actually be downloading data to the client in the
background. You should think about this when giving your users ODBC
access to large tables on the server. You may give or withhold access to
certain tables with the ALLBASE/SQL GRANT and REVOKE commands.
There is no way currently of limiting the number of rows or the time the
server is allowed to execute a request.
⊗ As a rule of thumb, ODBCLink/SE will not complete any request faster than
ISQL will, and could be considerably slower due to network overhead. If
you are writing your own SQL, you may want to verify in ISQL how
ALLBASE/SQL optimizes your queries by reading the SYSTEM.PLAN
pseudo-table.
⊗ If you are writing your own SQL to do multi-row inserts or updates, you can
speed up your application by using dynamic substitution parameters. See
the ODBC SDK manual (from Microsoft Press) for details.
ODBCLink/SE
©M.B. Foster Associates Limited 1995-2000 29
Page 40

Application Development ODBCLink/SE Reference Manual
Turning AutoCommit On/Off
AutoCommit “on” is the default value for all ODBC drivers. Turning AutoCommit on/off is normally accomplished
by the application calling SQLSetConnectOption. The AutoCommit on/off setting in ODBC Administrator is there
for historical reasons only and should not be used. Setting AutoCommit “off:” in the ODBC Administrator is not a
good idea as the application can get confused. For instance, it can incorrectly assume that AutoCommit is on, and
then emit SQL that never gets committed.
ODBCLink/SE
30 ©M.B. Foster Associates Limited 1995-2000
Page 41

ODBCLink/SE Reference Manual Application Development
Supported Functions
The ODBC functions are listed here for application software developers. These functions are supported by the
ODBCLink/SE driver at the time of publication of this manual. Refer to the README.HLP file included with
ODBCLink/SE for further developments.
You can use the ODBC SQLGetFunctions call for a list of the supported ODBCLink/SE driver functions.
Descriptions and conformance designations are listed in ODBC API Reference included in the Microsoft Software
Development Kit (SDK).
Functions that are not completely implemented are noted by an R in parenthesis and are discussed below this list.
SQLAllocConnect
SQLAllocEnv
SQLAllocStmt
SQLBindCol
SQLFindParam
SQLCancel
SQLColAttributes (R1)
SQLColumns
SQLColumnPrivileges
SQLConnect
SQLDataSources
SQLDescribeCol
SQLDisconnect
SQLDriverConnect
SQLError
SQLExecute
SQLExecDirect
SQLFetch
SQLForeignKeys
SQLFreeConnect
SQLFreeEnv
SQLFreeStmt
SQLGetConnectOption
SQLGetCursorName
SQLGetFunctions
SQLGetInfo (R3)
SQLGetTypeInfo
SQLNumResultCols
SQLPrepare
SQLPrimaryKeys
SQLProcedureColumns
SQLProcedures
SQLRowCount
SQLSetConnectOption (R2)
SQLSetCursorName
SQLSetParam
SQLSetStmtOption (R4)
SQLSpecialColumns
SQLStatistics
SQLTablePrivileges
SQLTables
⊗ R1: The following SQLColAttributes options are implemented; the
SQLTransact
others will receive a return value of 'Not Implemented'.
ODBCLink/SE
©M.B. Foster Associates Limited 1995-2000 31
Page 42

Application Development ODBCLink/SE Reference Manual
SQL_COLUMN_COUNT
SQL_COLUMN_NAME
SQL_COLUMN_TYPE
SQL_COLUMN_LENGTH
SQL_COLUMN_PRECISION
SQL_COLUMN_SCALE
SQL_COLUMN_DISPLAY_SIZE
SQL_COLUMN_NULLABLE
⊗ R2: The following SQLSetConnectOptions are supported. All other will
return a “Driver not Capable (SQLState S1C00)”.
SQL_AUTOCOMMIT 1=ON (default) 0=OFF
SQL_MAX_ROWS 0=All Rows (default)
SQL_OPT_TRACE supported by Driver Manager
SQL_OPT_TRACEFILE supported by Driver Manager
SQL_QUERY_TIMEOUT 0=No Timeout (default) Use ALLBASE
SQL_TRANSLATE_DLL supported
SQL_TRANSLATE_OPTION supported
SQL_TXN_ISOLATION supported: Cursor Stability isolation level
SQL_TXN_READ_UNCOMMITTED (Read Uncommitted (RU))
SQL_TXN_READ_COMMITTED (Read Committed (RC))
SQL_TXN_REPEATABLE_READ (Repeatable Read (RR))
SQL_TXN_SERIALIZABLE (Note: Sets to Repeatable Read (RR))
SQL_TXN_VERSIONING Not Implemented - DO NOT USE
Timeout
(CS) is not supported by
SQLSetConnectOption but you may set
it from the ODBC Administrator
Note: For information on isolation levels, refer to the "Isolation
Levels" section in this chapter.
⊗ R3: All SQLGetInfo Options are supported.
⊗ R4: SQLSetStmtOptions are not supported. The driver will return
either a “Driver not Capable (SQLState S1C00)” or “Option value changed
(SQLState 01S02)”.
ODBCLink/SE
32 ©M.B. Foster Associates Limited 1995-2000
Page 43

ODBCLink/SE Reference Manual Application Development
Isolation Levels
Isolation levels allow you to control the degree of concurrency by regulating the extent to which operations
performed by one user in a multi-user environment can be affected by operations performed by another user.
ALLBASE/SQL allows four different isolation levels:
⊗ Repeatable Read (RR)
⊗ Cursor Stability (CS)
⊗ Read Committed (RC)
⊗ Read Uncommitted (RU)
ODBCLink/SE uses the isolation level specified in the ODBC setup screen. The application can later change this by
calling SQLSetConnectOptions with SQL_TXN_ISOLATION option.
The recommended isolation level is “RU” for Read Uncommitted. This minimizes the number of locks that are held
on your database.
Note: Refer to the ALLBASE/SQL Reference Manual for further
information.
ODBCLink/SE
©M.B. Foster Associates Limited 1995-2000 33
Page 44

Application Development ODBCLink/SE Reference Manual
Supported Data Types
The following is a table of correspondence between HP data types and ODBC data types.
ALLBASE/SQL or Image or
IMAGE/SQL Data Type
CHAR, max length <255 SQL_CHAR
CHAR, max length >=255 SQL_LONGVARCHAR
VARCHAR, max length <255 SQL_VARCHAR
VARCHAR, max length >=255 SQL_LONGVARCHAR
BINARY, length <256 SQL_BINARY
BINARY, length >=256 SQL_LONGVARBINA
VARBINARY <256 SQL_VARBINARY
VARBINARY >=256 SQL-
LONG BINARY SQL_LONGVARBINA
LONG VARBINARY SQL_LONGVARBINA
ODBC Data Type Comments
RY
LONGVARBINARY
RY
RY
INTEGER (32-bit) SQL_INTEGER
DECIMAL (Internal
representation is packed decimal)
Image Zoned (Z) SQL_DECIMAL Converted by Image/SQL
Image Packed (P) SQL_DECIMAL Converted by Image/SQL
Image I3 (48-bit integer) SQL_DECIMAL Converted by Image/SQL
Image I4 (64-bit integer) SQL_DECIMAL Converted by Image/SQL
FLOAT(24) or REAL or ImageE2SQL_REAL
FLOAT(53) or DOUBLE
PRECISION or Image E4
Image R2 (non-IEEE float) SQL_REAL Converted by Image/SQL
Image R4 (non-IEEE float) SQL_DOUBLE Converted by Image/SQL
34 ©M.B. Foster Associates Limited 1995-2000
SQL_DECIMAL Character representation with leading sign
and decimal point
SQL_DOUBLE
ODBCLink/SE
Page 45

ODBCLink/SE Reference Manual Application Development
DATE SQL_DATE 6-byte with year, month, day in 2-byte
binary fields
TIME SQL_TIME 6-byte with hour, minute, second in 2-byte
binary fields
DATETIME SQL_TIMESTAMP 16-byte made up of year(2), month(2), day
(2), hour (2), minute (2), second (2),
fraction (4)
INTERVAL SQL_CHAR Format is “ddddddd hh:mm:ss.fff”
Note: When creating a table using CHAR and BINARY data types
that are greater than 255 characters the resulting data types
used will be LONGVARCHAR and LONGVARBINARY, which
may not be the data type expected by the the application.
Note on Using BLOBs
It is strongly recommended that when creating an ALLBASE table for storage of BLOBs that you use a LONG
VARBINARY column. ALLBASE will allocate storage space according to the actual size of the BLOB. Eg. Creating
a table with a column defined as LONG VARBINARY (200000000) and writing a 10K BLOB to it will result in only
10K of space being used (not the maximum of 2 GB as specified when the column was created).
Although you can store a BLOB using a LONG BINARY column, this is not recommended, because ALLBASE will
allocate storage space according to the specified column size for each BLOB regardless of the size of the actual data.
Eg. Creating a table with a column defined as LONG BINARY(1000000) and writing a 10K BLOB will result in
1000000 bytes of space being used for each BLOB. You would quickly run out of space in your database.
ODBCLink/SE
©M.B. Foster Associates Limited 1995-2000 35
Page 46

Application Development ODBCLink/SE Reference Manual
Notes
ODBCLink/SE
36 ©M.B. Foster Associates Limited 1995-2000
Page 47

ODBCLink/SE Reference Manual Using ODBCLink/SE With ODBC Applications
Using ODBCLink/SE With ODBC Applications
To access your host through ODBCLink/SE, you will first have to set up one or more data sources via the ODBC
Control Panel.
Updating Data
Most ODBC applications require a unique primary key, existing on a table or data set, to be able to update the table.
For ALLBASE/SQL tables created with a primary key this is not a problem, but in many cases you will have to enter
the primary key name, if one exists.
ODBCLink/SE
©M.B. Foster Associates Limited 1995-2000 37
Page 48

Using ODBCLink/SE With ODBC Applications ODBCLink/SE Reference Manual
Using Cognos Impromptu
Select Catalog, Database, Add. Enter HP3000-1 as the logical database name, ODBC Gateway as the Gateway, and
the name of your data source, e.g. HP3000. Enter your User ID and password, and click OK.
ODBCLink/SE
38 ©M.B. Foster Associates Limited 1995-2000
Page 49

ODBCLink/SE Reference Manual Using ODBCLink/SE With ODBC Applications
Select Catalog, New. Enter a catalog name and your logical database name (HP3000-1). Impromptu should then
establish the connection and put you into the Edit Tables Screen.
The left side of the Edit Tables screen is a list of table owners. In ALLBASE/SQL, a table owner is the owner name
assigned by the database administrator (default is UserAccount). For a TurboIMAGE dataset, the owner name is the
database name. To get a list of all the tables for a specific owner name, double click it.
You may now select the tables you want included in your catalog. After you click OK, Impromptu will load the table
definition into the catalog.
If you want to add tables from another database to your catalog, select Catalog, Edit Tables, and follow the same
procedure again.
You may now create a report through the File, New command. You will be prompted for the fields to include in your
report, and Impromptu will generate the report on your screen.
Note: You cannot create summary reports on TurboIMAGE tables
with this version of the driver. The GROUP BY command is
not implemented. You can, however, group rows and
compute subtotals.
Special Notes for Users of Impromptu
Viewing the SQL generated by Impromptu
Enter a new report and select Report, Query, Profile, View SQL. You can also write your own SQL and override that
generated by Impromptu. Search for help on topic
ODBCLink/SE
©M.B. Foster Associates Limited 1995-2000 39
AWriting your own SQL@.
Page 50
Using ODBCLink/SE With ODBC Applications ODBCLink/SE Reference Manual
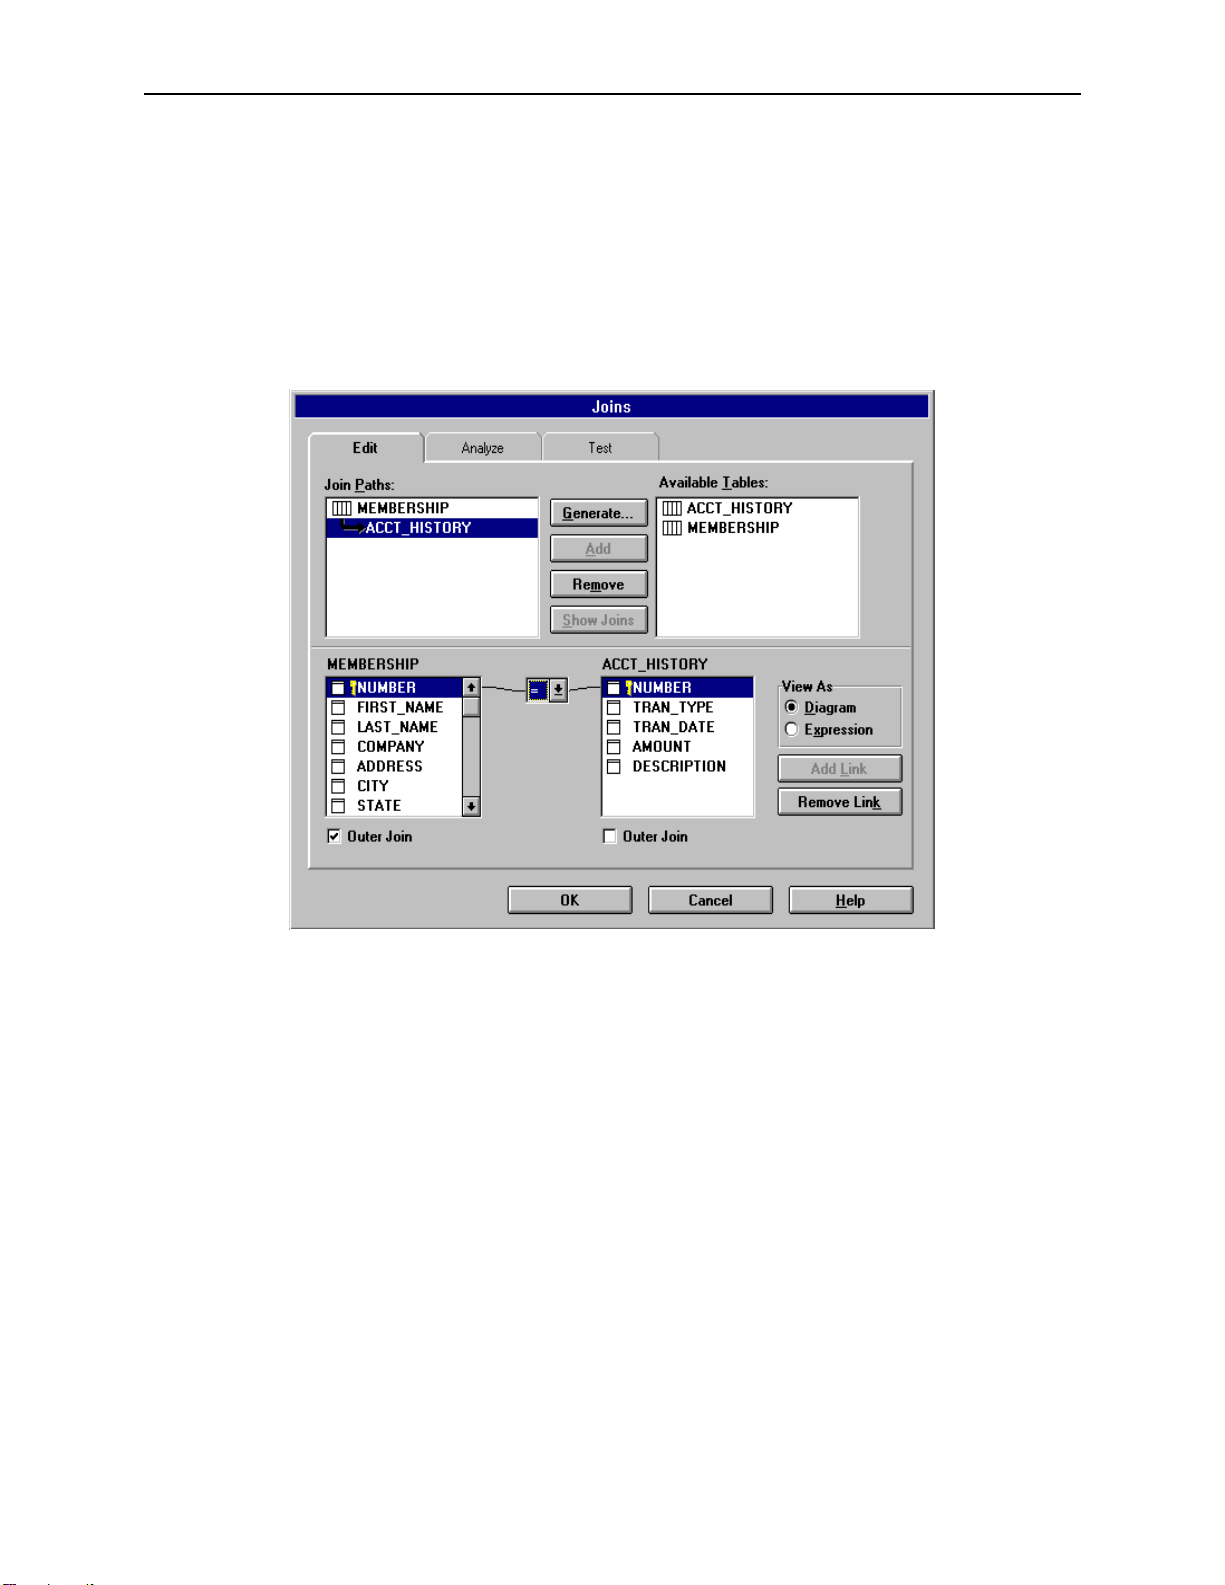
Joins
ODBCLink/SE supports two kinds of joins: inner joins, sometimes called natural joins, and Left Outer joins. An inner
join will return no records if any of the secondary records are not found; a left outer joins will still return the
primary
record and give nulls (or zeros) on the secondary table. To add or
following figure illustrates this process by creating a Left Outer join from table MEMBERSHIP to table ACCT-
HISTORY.
modify a join definition, select Catalog, Joins. The
Note: To do left outer joins on the host (as opposed to Impromptu
[Exception tables]
Joined=T
Impromptu has been known to generate incorrect SQL when joining three tables or more using a left outer join. To
correct, modify the SQL that is generated and re-run the report.
downloading both tables and doing the joins locally) you
must modify file COGDMOD.INI in directory
\COGNOS\COGAPPS as follows:
Changing the display format
Impromptu has a limited number of display formats available. To change the display format, highlight the column and
select Format Data. You cannot specify edit masks, however you have a choice of numeric display formats. To add
dashes or other constants to your output, you must build an expression with SUBSTRING functions. To add a
decimal point to a number that is not defined as a decimal, you must create a calculated field by dividing the number
by 100.
ODBCLink/SE
40 ©M.B. Foster Associates Limited 1995-2000
Page 51

ODBCLink/SE Reference Manual Using ODBCLink/SE With ODBC Applications
Creating Joins Using Calculated Columns
It is possible in Impromptu to create a join using a column that is calculated from two or more fields in one or more
tables. To do this, select Catalog, Edit joins; select your primary table and the table you want to join in the upper left
part of the screen; click
The left hand side of this expression is the table you want to join to, and the right hand side is the expression to
generate the key. An expression can consist of concatenated fields, SUBSTRING statements, constants, or all of
these.
AView as Expression@; and then enter an equation such as:
Table3.Column3 = Table1.column1 + Table2.Column2 ....
ODBCLink/SE
©M.B. Foster Associates Limited 1995-2000 41
Page 52

Using ODBCLink/SE With ODBC Applications ODBCLink/SE Reference Manual
Using Lotus 123 Release 5.0
To enable Lotus123 to use ODBC, you will have to add the following line to the file
\LOTUSAPP\DATALENS\LOTUS.BCF. (Note: The following information is summarized from the file
\123R5W\readme.txt):
DN=
@ODBC@ DL=@DLODBC@ DD=@All ODBC Sources@;
Once you have done this, you may access ODBC data sources.
⊗ Select Tools, Database, New Query, External, ODBC.
⊗ Select a data-source from the list box.
⊗ Select a table to query.
⊗ You can then choose fields to include in the query, set criteria, enter joins,
etc.
ODBCLink/SE
42 ©M.B. Foster Associates Limited 1995-2000
Page 53

ODBCLink/SE Reference Manual Using ODBCLink/SE With ODBC Applications
Using Microsoft Access
To access data using MSAccess , open a blank database and click Create, New, Link Table, on the associated screens
that are presented, and select ODBC Databases from the
The Data Sources Window is displayed.
Afiles of type:@ pull down list.
If the data source you require is not in the list, click on New and create a new data
source.
Note: You must click on the name of the data source you wish to
use even if there is only one.
ODBCLink/SE
©M.B. Foster Associates Limited 1995-2000 43
Page 54

Using ODBCLink/SE With ODBC Applications ODBCLink/SE Reference Manual
You may highlight one or more tables and then click
AOK@. This will create an Aattached table@ which you may later
open and modify. An attached table is treated like a local table in every way (you may read it, update it, delete it,
import it, or join it to other local or remote tables.)
Note: Ensure you have checked the SAVE PASSWORD box. This
stores the User-ID returned by the driver in the Table
Properties field and allows you to connect afterwards with
the same User-ID. You should get a list of tables on the
HP3000. Whenyou select one of them, it will load the batle
structure (which you may examine by opening the table in
Design View) and store the table in the database as an
attached table. Once the table is attached, it is treated like a
local table in every way, except that you may not modift the
table structure. You may open the table in taew, run reports
or queries against it, or link it to other local or remote tables.
ODBCLink/SE
44 ©M.B. Foster Associates Limited 1995-2000
Page 55

ODBCLink/SE Reference Manual Using ODBCLink/SE With ODBC Applications
Notes for Users of MS-Access
⊗ For a table to be updatable in Access, it must have a unique key and Access
must know about it. If the table is defined in ALLBASE/SQL with a unique
key, this will be reported by ODBCLink/SE (in the SQLStatistics call that
Access makes) and the table will be updatable. If Access cannot locate a
primary key, it will prompt for the column or combination of columns that
make up a unique key. You can ignore this prompt, and the table will not be
updatable from Access; or you can specify one or more
unique key. If this combination of columns is not unique (i.e. if there are
duplicate records with the same key combination) Access will not work
properly. When you enter a unique key combination, ensure that it really is
unique within the table. To see the column or columns that Access uses as
the unique key, look at the table in
symbol in the left most column.
Design view. The column will have A
⊗ Access uses a different algorithm to access a table depending on whether a
unique key exists or not. If it finds a unique key, it downloads the key values
and then issues an SQL statement of the form
Or key=?...@
that it may continue to download the keys in the background so long as the
table is open in
a regular Select statement to read the table. It will display a screenful of data
but will still continue to read the table in the background. You may view the
SQL that Access (and any ODBC application) generates by turning on
logging in the ODBC Setup Screen .
@. It then displays a screenful of data and stops. (Note, however,
@@
AAAAtable view@@@@.) If a unique key is not defined, Access just does
AAAAselect...From...Where key=?
columns that make a
Akey@@@@
AA
⊗ To update a record in Access, you highlight the column you want to change,
make the change, and then click on any other record. Access uses an
algorithm called
not been changed by another user. This is a less secure method than the
SELECT FOR UPDATE used by other applications, however it minimizes
the number of locks that are held on the database. Optimistic concurrency
control works by Access generating and Update statement of the form
AAAAUpdate Table Set column1=?, column2=?,...WHERE column1=? AND
column2=? AND column3=? And ....
if the record has been changed by another user since the time it was last read
in by Access.
•The default type of join used by Access is the Inner Join. When
creating a Query with a join between two tables, you can change this to
a Left Outer Join by double-clicking on the link between the tables. You
may also use the Edit Joins screen to change the default join between
specific tables, so that you don
create a new Query.
AAAAOptimistic concurrency control@@@@ to verify that a record has
@@@@. This ensures that the update will fail
====t have to edit the join every time you
⊗ You cannot join a local table to a remote table efficiently in Access unless
there is a one-to-one correspondence between records in the local table and
records in the remote table; in other words, you must have all the columns in
the local table that are necessary to form a unique key on the remote table. If
this is not the case, Access will attempt to download the remote table to the
local machine.
ODBCLink/SE
©M.B. Foster Associates Limited 1995-2000 45
Page 56

Using ODBCLink/SE With ODBC Applications ODBCLink/SE Reference Manual
Using MS-Query
To Run MS-QUERY from Microsoft Excel, select Data, Get External Data, New Database Query.
The following screen is displayed.
Select the data-source you are going to use to connect (you must have pre-configured a data source with ODBC
administrator).
After connecting, a list of the tables on your host you have access to is displayed.
ODBCLink/SE
46 ©M.B. Foster Associates Limited 1995-2000
Page 57

ODBCLink/SE Reference Manual Using ODBCLink/SE With ODBC Applications
Select one or more tables and click OK. You may join tables by dragging the column you want to join on from one
table to another in the upper part of the screen. You may view the data by double-clicking on any column name or by
dragging it from the upper to the lower part of the screen.
Note: MS QUERY must be installed during the installation of
Microsoft Excel. Do a custom installation selecting MS
Query as one of the installed options.
ODBCLink/SE
©M.B. Foster Associates Limited 1995-2000 47
Page 58

Using ODBCLink/SE With ODBC Applications ODBCLink/SE Reference Manual
Using Visual Basic (4.0 or higher)
You can use ODBCLink/SE either with VB Database controls or with Database and dynaset variables. In addition, of
course, you may call ODBC functions directly from the DLL.
To use VB database controls, define a data control and assign it a Connect property of the form
"DSN=HP3000;UID=users;PWD=password" and a RecordSource property of the form "SELECT * FROM
TableName". If you want to create a SnapShot (no update) set the Options property to 64 (SQL_PASSTHROUGH).
You may then place text controls on the screen, set the DataSource property to the name of the data control, and set
the DataField property to the name of the column in the Select statement. When the application is run, it will
download all records qualified by the Select statement (or all primary key values, depending on the
SQL_PASSTHROUGH option) and display the first record on the screen. You may scroll through the records by
using the "Up", "Down", "Top", "Bottom" buttons on the data control.
A second option is to use dynaset variables which gives the program more control, such as for loading a grid with
data. Define a database object, assign it Connect and Options properties as above, and open it with an OpenDatabase
call, as in SET DBVar=OpenDatabase(...). Then define a dynaset variable (DIM DSVar as DYNASET) and open it
with a statement of the form "Set DSVar=DBVar.OpenDynaset (SQLstatement)." If SQL Statement is a Select
statement, you can read the results from "DSVar.FieldName" and move to the next record with "DSVar.MoveNext".
If SQLStatement is an Insert or Update statement, no results are returned. You can update records with the Update
method, and you can get the selection count by calling SQLRowCount or with a query of the form "Select COUNT(*)
From Ta bl e Where Conditions". To update the table, you will of course need a primary key defined and you will need
to disable the SnapShot only button.
A third option is to call ODBC functions directly. Generally you will do an SQLAllocEnv, SQLAllocConnect and
SQLDriverConnect to open the database, followed by SQLExecDirect, followed by multiple SQLFetch and
SQLGetData calls. If you plan to use SQLBindCol to bind fetch results to local variables you must use the following
procedure:
A) Declare strings variables as: Dim mystr as String
B) Initialize your string variables before use: mystr=String(255,0)
C) Use the ByVal keyword when passing the variable to the ODBC driver.
Declare Function SQLFindCol Lib
Integer, lpdBuf As Any, ByVal dwbuflen As Long, lpcbout As Long) As Integer.
Do not use the ByVal keyword in the
character data, as the goal is to pass the address of the parameter, not the
value. Declare SQLBindCol as follows:
Aodbc.dll@ (ByVal hstmt AS long, ByVal col As Integer, By Val wConvType As
AlpbBuf@ parameter except for
ODBCLink/SE
48 ©M.B. Foster Associates Limited 1995-2000
Page 59

ODBCLink/SE Reference Manual Using ODBCLink/SE With ODBC Applications
Connection Examples
Connect Using SQL API
1. DECLARE YOUR VARIABLES FOR THE CONNECTION
2. CREATE YOUR CONNECTION STRING
3. ALLOCATE A ENVIROMENT HANDLE
4. ALLOCATE A CONNECTION HANDLE
5. CONNECT TO YOUR DSN WITH SQLDriverConnect
6. ALLOCATE A STATEMENT HANDLE
7. QUERY THE DATASOURCE USING SQLExecDirect
8. CALL AN ERROR ROUTINE IF AN ERROR OCCURS See Sub GetError
9. MAKE SURE YOU RELEASE ANY ENVIROMENT THAT YOU HAVE CREATED
WHEN ERRORS OCCUR(or on exiting)
Connect Using SQLAPI in VB 4.0-6.0
The following example demonstrates how to use SQLAPI in VB 4.0-6.0. It is to be used as a basic guide line for
creating a project to use SQLAPI. This examples assumes you have the necessary SQL Declare functions and
Constants etc.
1. Global sDSNConnect As String 'Connection string
Global henv As Long 'handle to the environment
Global hdbc As Long 'handle to the connection
Global hstmt As Long 'handle to the statement
Global rc As Integer 'Return code
Dim outstr As String * 256
Dim outlen As Integer
Function DBConnect() As Integer
2. ‘Add your connection string to be used
Example “DSN=YOUR DSN;UID=USERPWD=PASSWORD;”
sDSNConnect = “YOUR_DSN_STRING”
3. 'First Allocate an Environment Handle
rc = SQLAllocEnv(henv)
If rc <> SQL_SUCCESS Then
MsgBox ("SQLAllocEnv failed rc=" + Str(rc))
Exit Function
End If
ODBCLink/SE
©M.B. Foster Associates Limited 1995-2000 49
Page 60

Using ODBCLink/SE With ODBC Applications ODBCLink/SE Reference Manual
4. 'Second allocate a connection handle
rc = SQLAllocConnect(henv, hdbc)
If rc <> SQL_SUCCESS Then
MsgBox ("SQLAllocConnect failed rc=" + Str(rc))
Call GetError
Call FreeEnv
Exit Function
End If
5. 'Third allocate the connection and pass in the Connection string
rc = SQLDriverConnect(hdbc, Form1.hWnd, sDSNConnect, Len(sDSNConnect),
outstr, 256, outlen, 3)
If rc <> SQL_SUCCESS Then
If rc = SQL_NO_DATA_FOUND Then
Exit Function 'User cancelled dialogue
End If
Call GetError
Call Freeconnect
Call FreeEnv
Exit Function
End If
6. 'After connecting, allocate a statement handle
rc = SQLAllocStmt(hdbc, hstmt)
If rc <> SQL_SUCCESS Then
Call GetError
Call Disconnect
Exit Function
End If
7. 'Now call an SQL query to select your data
rc = SQLExecDirect("Select * from member.membership")
If rc <> SQL_SUCCESS Then
Call GetError
MsgBox "Unable to connect to the Database Environment!", vbCritical
Call Disconnect
Exit Function
End If
End Function
8. Sub GetError()
Dim error_str As String * 256
Dim SQLState As String * 20
Dim outlen As Integer
Dim NativeError As Long
Dim msg As String
ODBCLink/SE
50 ©M.B. Foster Associates Limited 1995-2000
Page 61

ODBCLink/SE Reference Manual Using ODBCLink/SE With ODBC Applications
rc = SQLError(henv, hdbc, SQL_NULL_HSTMT, SQLState, NativeError, error_str,
256, outlen)sDSNConnect = Space(256)
If rc <> SQL_NO_DATA_FOUND Then
msg = Left(error_str, outlen)
If gl_SQLStatement <> "" Then
msg = msg + " (" + gl_SQLStatement + ")"
End If
MsgBox msg
End If
End Sub
9. Sub Freeconnect()
rc = SQLFreeConnect(hdbc)
If rc <> SQL_SUCCESS Then
Call GetError
End If
End Sub
Sub FreeEnv()
rc = SQLFreeEnv(henv)
If rc <> SQL_SUCCESS Then
Call GetError
End If
End Sub
Sub Freestmt()
rc = SQLFreeStmt(hstmt, SQL_DROP)
If rc <> SQL_SUCCESS Then
Call GetError
End If
End Sub
Sub Disconnect()
rc = SQLDisconnect(hdbc)
If rc <> SQL_SUCCESS Then
Call GetError
End If
rc = SQLFreeConnect(hdbc)
If rc <> SQL_SUCCESS Then
MsgBox ("SQLFreeConnect failed rc=" + Str(rc))
Exit Sub
End If
rc = SQLFreeEnv(henv)
ODBCLink/SE
©M.B. Foster Associates Limited 1995-2000 51
Page 62

Using ODBCLink/SE With ODBC Applications ODBCLink/SE Reference Manual
If rc <> SQL_SUCCESS Then
MsgBox ("SQLFreeEnv failed rc=" + Str(rc))
Exit Sub
End If
End Sub
Connecting with DAO’s
1. DECLARE YOUR VARIABLES FOR THE CONNECTION
2. SET THE DAO WORKSPACE
3. SET AND OPEN THE CONNECTION TO THE DATABASE
4. SET AND OPEN THE RECORDSET FOR THE TABLE
5. SE THE RECORDSET INFORMATION YOU NEED AND PROCESS IT
ACORDINGLY
6. MAKE SURE YOU CLOSE ANY ODJECTS THAT YOU HAVE CREATED WHEN
ERRORS OCCUR(OR WHEN EXITING)
1. Dim DAOWS As DAO.Workspace
Dim DAORS As DAO.Recordset
Dim DAODB As DAO.Database
2. 'SET A WORKSPACE ENVIROMENT FOR YOUR CONNECTION
'AND SET THE TYPE TO DBUSEODBC
'Set DAOWS = CreateWorkspace("NewODBCWorkspace", "", "", dbUseODBC)
3. 'OPEN THE CONNECTION PASS IN YOU CONNECTION STRING
'Set DAODB = Workspaces(0).OpenDatabase("", dbDriverComplete, True,
"ODBC;DSN=YOURDSN;UID=YOURUID;PWD=YOURPASSWORD;")
4. 'OPEN THE TABLE AND ENTER THE SQL QUERY
'Set DAORS = DAODB.OpenRecordset("Select * from membership", dbOpenDynaset,
dbSQLPassThrough)
5. While Not DAORS.EOF
' Insert your query processing code here.
DAORS.MoveNext
Wend
6. ‘Close Resultset
DAORS.Close
'Close Data Base Connection
DAODB.Close
ODBCLink/SE
52 ©M.B. Foster Associates Limited 1995-2000
Page 63

ODBCLink/SE Reference Manual Using ODBCLink/SE With ODBC Applications
Connecting with RDO’s
1. DECLARE YOUR VARIABLES FOR THE CONNECTION
2. SET THE RDO ENIVROMENT
3. SET AND OPEN THE CONNECTION TO THE DATABASE
4. SET AND OPEN THE RECORDSET FOR THE TABLE
5. USE THE RECORDSET INFORMATION YOU NEED AND PROCESS IT
ACORDINGLY
6. MAKE SURE YOU CLOSE ANY ODJECTS THAT YOU HAVE CREATED
WHEN ERRORS OCCUR(OR WHEN EXITING)
1. Dim RDOEN As RDO.rdoEnvironment
Dim RDOCN As New RDO.rdoConnection
Dim RDORS As RDO.rdoResultset
Dim RDOCL As RDO.rdoColumn
2. 'Create an RDO Environment and specify the type
'of cursor we want. The Client Side cursor seems
'to give the most accurate results.
Set RDOEN = rdoEngine.rdoEnvironments(0).CursorDriver = rdUseOdbc
3. 'Open a connection to the database
Set RDOCN = RDOEN.OpenConnection(YOURDSN)
4. ‘Open the table
Set RDORS = RDOCN.OpenResultset
(“Select * from Member.Membership”,rdOpenKeyset)
5. While Not RDORS.EOF
' Insert your query processing code here.
RDORS.MoveNext
Wend
6. 'Close resultset
RDORS.Close
'Close db connection
RDOCN.Close
ODBCLink/SE
©M.B. Foster Associates Limited 1995-2000 53
Page 64

Using ODBCLink/SE With ODBC Applications ODBCLink/SE Reference Manual
Connecting with ADO’s
1. DECLARE YOUR VARIABLES FOR THE CONNECTION
2. SET THE CONNECTION STRING
3. SET AND OPEN THE CONNECTION TO THE DATABASE/TABLE
4. SET AND OPEN THE RECORDSET FOR THE TABLE
5. USE THE RECORDSET INFORMATION YOU NEED AND PROCESS IT ACCORDINGLY
6. MAKE SURE YOU CLOSE ANY ODJECTS THAT YOU HAVE CREATED
WHEN ERRORS OCCUR(OR WHEN EXITING)
1 Dim ADORS As ADODB.Recordset
Dim ADOCN As ADODB.Connection
Dim strConnect As String
2 strConnect = "DSN=YOURDSN;UID=YOURUID;PWD=YOURPWD;"
3 Set ADOCN = New ADODB.Connection
'Set cursor for the client or server end
ADOCN.CursorLocation = adUseClient
'Open Connection
ADOCN.Open strConnect
4 'Open the Recordset
Set ADORS = New ADODB.Recordset
With ADORS
'Set the cursor type to be used with the recordset
.CursorType = adOpenForwardOnly
.LockType = adLockReadOnly
'Open the recordset with query, connection
.Open "SELECT * FROM TABLE", strConnect
End With
5 While Not ADORS.EOF
' Insert your query processing code here.
ADORS.MoveNext
Wend
6 'close objects and set to nothing
ADORS.Close
ADOCN.Close
Set ADORS = Nothing
Set ADOCN = Nothing
End Sub
ODBCLink/SE
54 ©M.B. Foster Associates Limited 1995-2000
Page 65

ODBCLink/SE Reference Manual Troubleshooting
Troubleshooting
Terminating an ODBC Connection
Occasionally it may be necessary to terminate an ODBC session that has deadlocked or is attempting to read a very
large table (note that rebooting the Client PC will not be sufficient as the server has control at this point). You may do
this from ISQL with the command TERMINATE USER user@account.
When an ODBC client terminates abnormally, the server process that handles the connection will normally go down
after the timeout interval has expired. This is typically 30 minutes to 2 hours.
On an HP-UX system, you can kill the process manually (if you know the process-id) with the command “kill -16
pid” (pid is the process id).
On MPE/iX you must either use the ISQL TERMINATE USER command or abort the listener job using the
ABORTJOB command.
ODBCLink/SE
©M.B. Foster Associates Limited 1995-2000 55
Page 66

Troubleshooting ODBCLink/SE Reference Manual
Using Microsoft ODBC Test (32-bit)
You can use ODBC Test to verify correct functioning of the driver and to enter ad-hoc SQL commands. ODBCTEST
and ODBCTE32 are part of the ODBC SDK that comes with the Microsoft Developers Network.
To run ODBCTE32.EXE:
⊗ Select Connect, Full Connect. You must enter a data source name, User-ID
and a password, and click “OK”. You should get a message “Successfully
connected to databasename”.
⊗ You can get a list of tables by selecting Catalog, SQL Tables, then click OK
and then Results, Get Data All.
⊗ You can enter an SQL statement, such as “Select * from tablename” in the
Query Window and then execute it by choosing Statement, SQLExecdirect
and view the results with “Results, Get Data All”.
ODBCLink/SE
56 ©M.B. Foster Associates Limited 1995-2000
Page 67
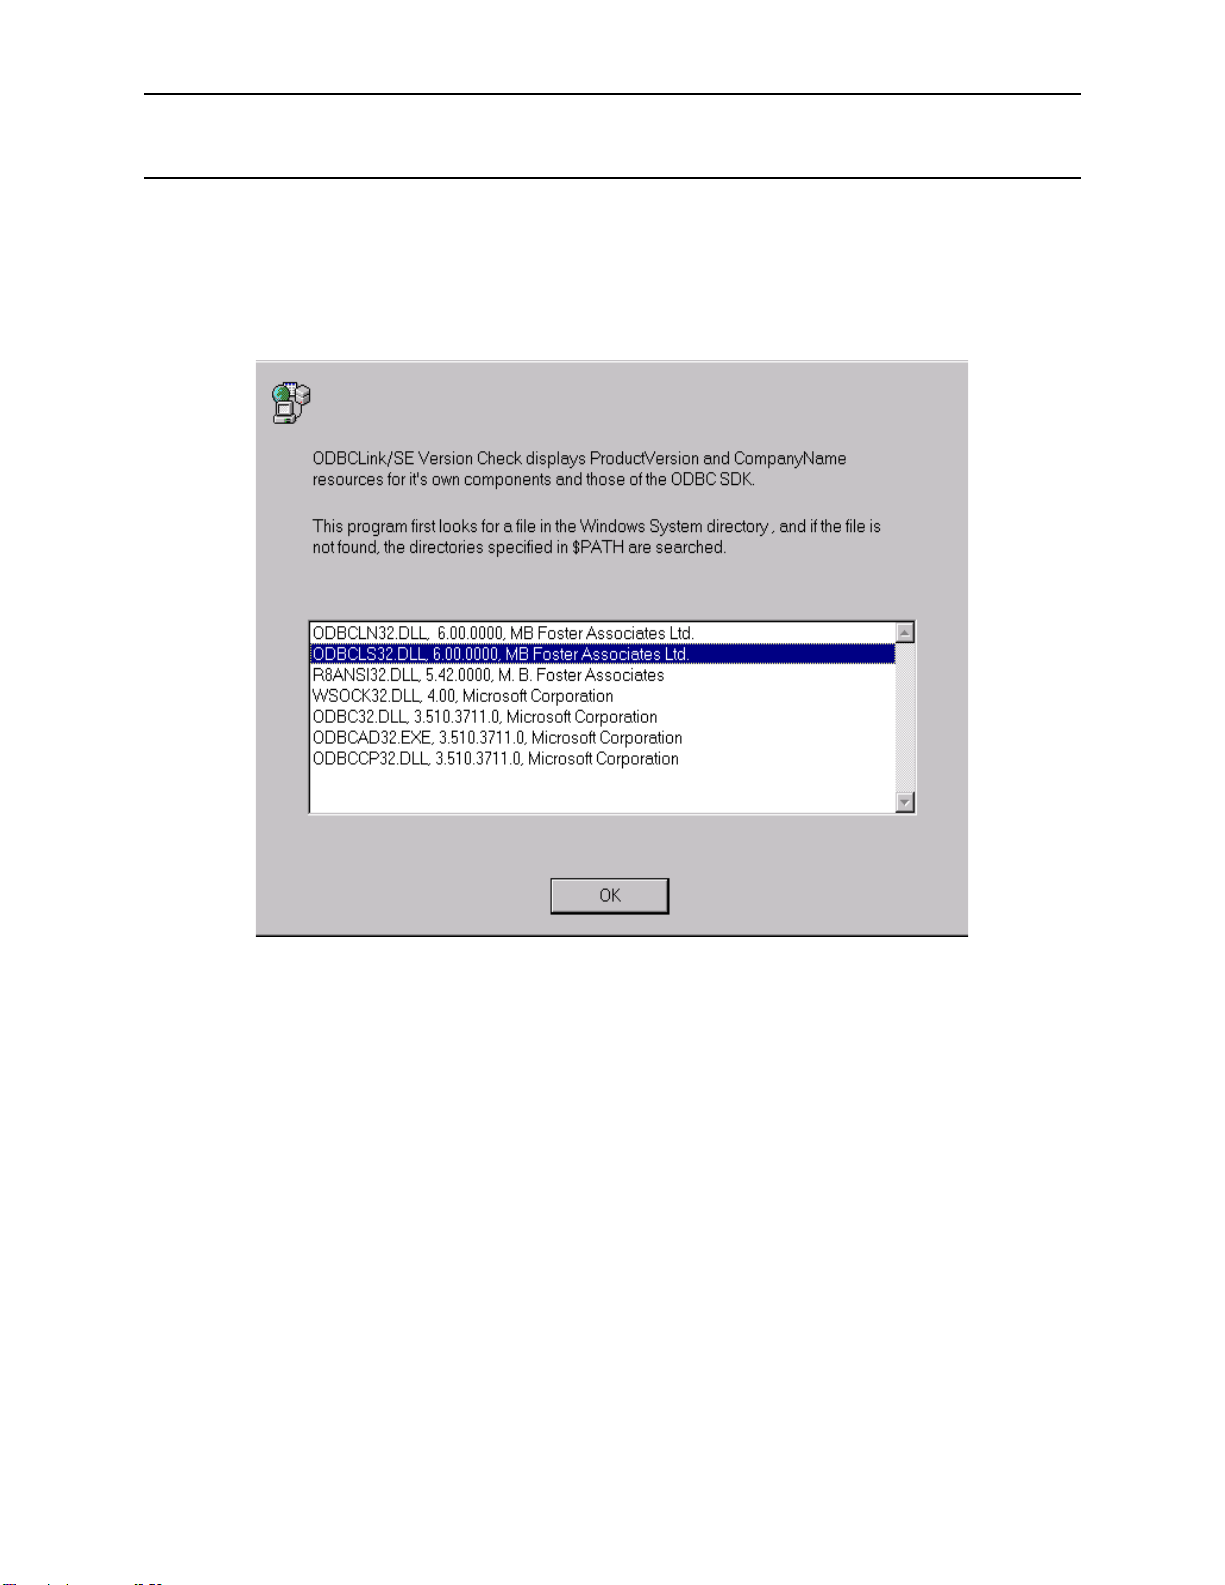
ODBCLink/SE Reference Manual Troubleshooting
Verifying Software Version Numbers
Verifying the Client-Side Components
To determine which version of ODBCLink/SE is installed, run WHAT32.EXE from the RUN window.
ODBCLink/SE
©M.B. Foster Associates Limited 1995-2000 57
Page 68

Troubleshooting ODBCLink/SE Reference Manual
Deleting a Translation DLL
Enter TRNDEL32.EXE in the RUN window.
A welcome screen will be shown first. Click Continue.
Select the translator you want to uninstall and press OK. The translator information will then be deleted from the
registry. If the program is successful it will show a window indicating the successful removal.
ODBCLink/SE
58 ©M.B. Foster Associates Limited 1995-2000
Page 69
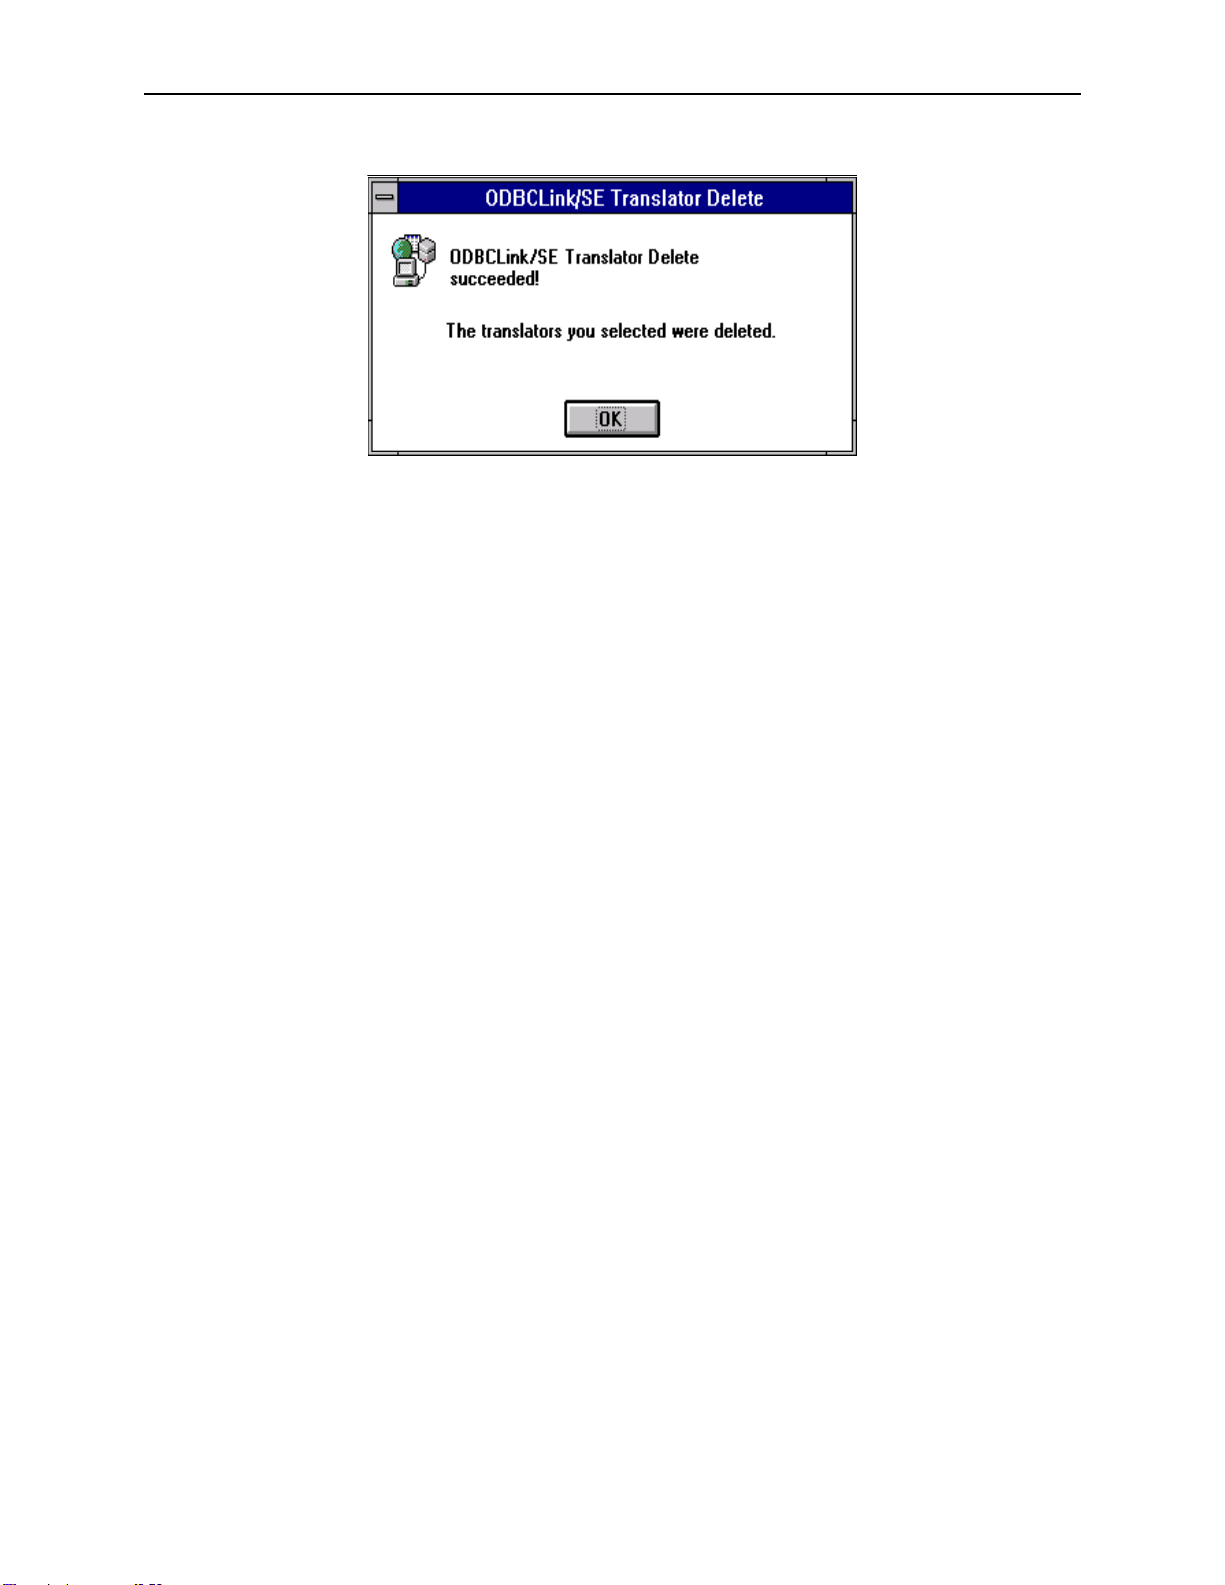
ODBCLink/SE Reference Manual Troubleshooting
Once the translator has been deleted it will no longer be displayed in the translator list in the driver setup. To add the
translator back in simply rerun the ODBC driver install program.
Note: The translator DLL file will still be in the windows directory
after the program is run, but it will not be shown in the
registries translator information.
ODBCLink/SE
©M.B. Foster Associates Limited 1995-2000 59
Page 70

Troubleshooting ODBCLink/SE Reference Manual
Tools on the Database Server
Monitoring Activity with HP GlancePlus/XL (HP3000)
Program.
HP GlancePlus/XL allows you to monitor a job, session, or process on MPE/iX. The GlancePlus screens display
statistics on how different system resources are used. For information, refer to the HP GlancePlus/XL User's Manual.
Monitoring Activity with HP GlancePlus/UX (HP9000)
Program
HP GlancePlus/UX allows you to monitor a login or process on HP-UX. The GlancePlus screens display statistics on
how different system resources are used. For information, refer to the HP GlancePlus/UX User's Manual.
Displaying Active Processes with HP-UX Process
Status (ps) Command
You can use the HP-UX ps command to display the status of your active processes. For information, refer to the HPUX man page.
.
.
Monitoring ALLBASE/SQL Activity with SQLMON.
SQLMON is a component of ALLBASE/SQL and monitors the activity of an ALLBASE/SQL DBEnvironment.
SQLMON summarizes the activity for the entire DBEnvironment, or focuses on individual sessions, programs, or
database components. For information, refer to the ALLBASE/SQL Performance and Monitoring Guidelines.
Checking the Listener Log File on the HP3000
Look for ODBCLOG where the listener is running.
Checking the Listener Log File on the HP9000
Look for odbclog in the /tmp/ directory.
Using the Host Testing Utility ODBCUTSE
If you are having problems connecting or accessing a table on the host, you can access it directly on the host in the
same way the ODBC server accesses it, by running the ODBCUTSE utility.
To run the program on MPE/iX, enter:
ODBCUTSE.ODBCSE.SYS “dbe name”
To run the program on HP/UX, enter:
/usr/bin/odbcse/odbcutse “dbe name” (for HP-UX V9.x systems)
or
/opt/allbase/bin/odbcutse “dbe name” (for HP-UX V10.x and V11.x systems)
ODBCLink/SE
60 ©M.B. Foster Associates Limited 1995-2000
Page 71

ODBCLink/SE Reference Manual Troubleshooting
You should now be connected to the database. To see a menu of available commands, enter HELP:
0>HELP
SHOW Display tables and table structures
EXIT Exit program
SELECT SQL Select
FETCH SQL Fetch [ALL|##]
INSERT SQL Insert
UPDATE SQL Update
DELETE SQL Delete
SQL Execute immediate SQL command
COMMIT SQL Commit
PARAM Parameter substitution on a prepared statement
STMT Change current statement/cursor number
ROLLBACK SQL Rollback
EXECUTE Execute stored procedure
QUIT Exit program
FOREIGN Display foreign Keys
TABPRIV Display table privileges
0>
Enter the command you wish to use. For example, enter SHOW to see a list of available tables:
>show
Dataset/Table Database Type
MANUFDB.SUPPLYBATCHES partsdbe.sql.mbftest ALLBASE TABLE
MANUFDB.TESTDATA partsdbe.sql.mbftest ALLBASE TABLE
PURCHDB.PARTS partsdbe.sql.mbftest ALLBASE TABLE
PURCHDB.INVENTORY partsdbe.sql.mbftest ALLBASE TABLE
PURCHDB.SUPPLYPRICE partsdbe.sql.mbftest ALLBASE TABLE
PURCHDB.VENDORS partsdbe.sql.mbftest ALLBASE TABLE
PURCHDB.ORDERS partsdbe.sql.mbftest ALLBASE TABLE
PURCHDB.ORDERITEMS partsdbe.sql.mbftest ALLBASE TABLE
PURCHDB.PARTINFO partsdbe.sql.mbftest ALLBASE VIEW
PURCHDB.VENDORSTATS partsdbe.sql.mbftest ALLBASE VIEW
RECDB.CLUBS partsdbe.sql.mbftest ALLBASE TABLE
RECDB.MEMBERS partsdbe.sql.mbftest ALLBASE TABLE
RECDB.EVENTS partsdbe.sql.mbftest ALLBASE TABLE
To see the list of columns and indexes for a table, enter SHOW followed by the name of the table. For example:
>sho recdb.clubs
Field ODBC-Datatype HP-Datatype Length Offset Nulls
CLUBNAME CHAR(15) 15 0
CLUBPHONE SMALLINT 2 16 1
ACTIVITY CHAR(18) 18 20 1
Indexed field Index Type Index Name
CLUBNAME CONSTRAINT PRIMARY CLUBS_PK
ODBCLink/SE
©M.B. Foster Associates Limited 1995-2000 61
Page 72

Troubleshooting ODBCLink/SE Reference Manual
Host Logging
Normally, only connections and errors are logged to the ODBCLOG file on the host. If you check the box labelled
“Trace SQL calls on the server” in the data-source setup dialogue, all the SQL sent from the host and the ALLBASE
operation will be logged as well.
If a listener error occurs, an error message is logged in the ODBCLOG file.
Here is the format of the ODBCLOG file (this file can be found in group and account of the listener job, typically
ODBCLOG.ODBCSE.SYS on MPE systems and /tmp on Unix systems).
00/1000/10/20 14:12:09 068ODBC listener started
00/10/20 14:13:13 068 Listener created new connection as SYS1 (PIN 77), IP=192.9.3.102
00/10/20 14:13:13 077 ODBCLNSE E.52.00 started from sockets
00/10/20 14:13:22 077 Allbase Prepare[49]SELECT NAME, OWNER, TYPE, NPAGES, NROWS FROM
CATALOG.TABLE;
00/10/20 14:13:26 077 Allbase SetParams[49]
00/10/20 14:13:27 077 Allbase Fetch[49] Rows=119 MaxRows=200
00/10/20 14:13:27 077 Allbase Fetch[49] Rows=0 MaxRows=200
00/10/20 14:13:27 077 Allbase Close cursor[49]
00/10/20 14:13:27 077 Allbase Commit
00/10/20 14:13:27 077 Allbase Prepare[49]SELECT NAME,OWNER,NUMP,NUMR,MULTIRESULT FROM
CATALOG.PROCEDURE;
00/10/20 14:13:27 077 Allbase SetParams[49]
00/10/20 14:13:28 077 Allbase Fetch[49] Rows=6 MaxRows=200
00/10/20 14:13:28 077 Allbase Fetch[49] Rows=0 MaxRows=200
00/10/20 14:13:28 077 Allbase Close cursor[49]
00/10/20 14:13:28 077 Allbase Commit
00/10/20 14:13:28 077 Connected to partsdbe, ClientVersion=E.52.00
00/10/20 14:13:35 077 Prepare[0]SELECT _TABLES
00/10/20 14:13:35 077 SetParams[0] nparam=0
00/10/20 14:13:53 077 FreeStmt[0]
00/10/20 14:13:54 077 Normal exit, Received 3 requests (133 bytes), Sent 0 records (5141 bytes), CPU=2
(5.6%)
The first three columns of the list are the date, time, and pin (process id number) of the requesting connection. The
last column is the Allbase operation being performed, with the statement or cursor number in square brackets. The
number is square brackets (as in Allbase prepare[49]) is the statement number.
ODBCLink/SE
62 ©M.B. Foster Associates Limited 1995-2000
Page 73

ODBCLink/SE Reference Manual Troubleshooting
Tools on the Client PC
The preferred method to trace ODBC calls on the client is by setting the “Trace ODBC Calls” check box in ODBC
setup. However, Syware’s Dr. DeeBee Spy is installed with ODBCLink/SE (in the Windows directory). It can be used
to trace calls to any ODBC driver.
ODBC Call Tracing using ODBCLink.LOG
To log all the ODBC calls made by the client, check the box “Trace ODBC calls on the client” on the data-source
setup screen. This will create a file, called ODBCLINK.LOG, of all the ODBC calls made by the client. This file
normally resides in the directory where the ODBC application was started from. Some applications however change
their working directory, for MS-Access for instance look for the log file in “My Documents” directory.
Here is the format of the ODBCLINK.LOG file:
SQLDriverConnect(0) hstmt=0 Ver= 5.52.0000 szConnStrIn=<DSN=DBA
MEMBER; UID=Admin; PWD=>,Completed_string=<DSN=DBA MEMBER;
UID=#mpeix/192.9.3.10:MembrDBE.SQL.mbftest,,an# DBA,dba/.MBFTEST/
password,work/> Login=<>
SQLError(100) hstmt=0 pfNativeError=0,szErrorMsg=
SQLGetInfo(0) hstmt=0 fInfoType=23, rgbInfoValue= [1,0,0,0]
SQLSetConnectOption(0) hstmt=0 fOption=101 vParam=1
SQLAllocStmt(0) hstmt=0
SQLGetStmtOption(0) hstmt=0 fOption=0 vParam=0
SQLSetStmtOption(-1) hstmt=0 fOption=0 vParam=60
SQLError(0) hstmt=0 pfNativeError=-57,szErrorMsg=[ODBCLN32.DLL] Driver not
capable
SQLError(100) hstmt=0 pfNativeError=0,szErrorMsg=
SQLExecDirect(0) hstmt=0 SELECT
MEMBERDB.ACCTHIST.NUMBER,MEMBERDB.ACCTHIST.TRANTYPE,MEMB
ERDB.ACCTHIST.
TRANDATE FROM MEMBERDB.ACCTHIST
SQLFetch(0) hstmt=0
SQLGetData(0) hstmt=0 icol=1 fCType=99 pcbValue=4 data= '[25,39,0,0]
SQLGetData(0) hstmt=0 icol=2 fCType=99 pcbValue=3 data=INV[73,78,86,0]
SQLGetData(0) hstmt=0 icol=3 fCType=99 pcbValue=6 data=È [-56,7,1,0]
Each line starts with the name of the function being called, with the return code in brackets, followed by the different
parameters of the call. Refer to the ODBC SDK manual for a description of the parameters of the call.
ODBC Call Tracing using Dr. DeeBee Spy
Dr. DeeBee Spy traces calls to the ODBC driver. Dr. DeeBee Spy logs each function call along with the input and
output values. To turn on logging, do the following:
⊗ From the Program Manager Menu in Windows, click on RUN.
⊗ Type DRDBSP.
⊗ Choose OK.
⊗ Select the Data Source Name to be traced.
⊗ Choose OK.
ODBCLink/SE
©M.B. Foster Associates Limited 1995-2000 63
Page 74

Troubleshooting ODBCLink/SE Reference Manual
The Dr. DeeBee Spy icon will appear at the bottom of the screen. It will flash when it is logging.
To turn off logging:
⊗ Click on the Dr. DeeBee Spy icon.
⊗ Choose CLOSE.
The log is located in C:\WINDOWS\DRDEEBEE.LOG.
Note: “Dr. DeeBee Spy is © 1995 Syware, Inc., All rights reserved”
ODBCLink/SE
64 ©M.B. Foster Associates Limited 1995-2000
Page 75

ODBCLink/SE Reference Manual Troubleshooting
Modifying the System Registry and ODBC.INI Files
You only need to do this if you want to modify an option that you cannot configure in the ODBC control panel. An
example of this is the MAXSTMT options.
To add or change an option, either edit the ODBC.INI file (for 16-bit data-sources) or run the registry editor
(regedt32.exe) in Windows 95 and greater or WindowsNT. In the registry editor, look under
HKEY_CURRENT_USERS / Software / Microsoft / ODBC.INI.
ODBCLink/SE
©M.B. Foster Associates Limited 1995-2000 65
Page 76

Troubleshooting ODBCLink/SE Reference Manual
Error Messages
Errors in ODBCLink/SE can come from several sources; all messages have a prefix which indicates the source of the
error, as follows:
[ODBCLN32] Generated by the 32-bit client DLL.
[WINSOCK] Comes from the Winsock driver.
[ALLBASE] Generated by the ALLBASE/SQL command interpreter.
The first action you should take in case of a problem is to attempt to execute the command manually, e.g. try to login
using a terminal emulator, or else try issuing the SQL statement that causes a problem in ODBCUTSE or ISQL. If
you do not know the command causing the error (because you are using Microsoft Access for instance), turn on host
logging and examine your ODBCLOG file.
Errors from ALLBASE/SQL or IMAGE/SQL are followed by DBERR or DBWARN and a number. These error
messages are documented in the ALLBASE/SQL Message Manual or in the IMAGE/SQL Administration Guide.
Error messages are returned by ODBCLink/SE to the application. Each message is followed by a CAUSE which
gives information as to why the warning or error occurred. This is followed by an ACTION which gives information
on how to resolve the problem.
Note: For all other errors, refer to the appropriate documentation
or manuals.
ODBCLink/SE
66 ©M.B. Foster Associates Limited 1995-2000
Page 77

ODBCLink/SE Reference Manual Appendix A Implementation Notes
Appendix A Implementation Notes
Following is a list of features that are unique or specific to ODBCLink/SE and some details about them.
Primary key name returned by SQLStatistics
Most ODBC applications including Microsoft Access, Visual Basic and PowerBuilder require a unique primary key
for a table to be updatable.
Note: If a unique key has not be defined in ALLBASE/SQL the table
will not be updatable.
Reading or writing to ALLBASE/SQL LongVarBinary items
Any file residing on the HP can be inserted into an ALLBASE/SQL LongVarBinary field with the SQL command:
INSERT INTO Table VALUES (..., '<BLOB >%$', ...);
Where BLOB is the name of the file on the HP and the '>%$' tells ALLBASE/SQL to copy the contents to a memory
location when retrieving the row. You can also have ALLBASE/SQL copy it to a file during retrieval
('<BLOB >OUTFILE'). In either case, the data can be retrieved in the standard way (SQLFetch followed by
SQLGetData in chunks).
You may also create a binary column on the HP by using ODBC functions call sequence: SQLPrepare,
SQLBindparameter (DATA_AT_EXECUTION), SQLExecute, SQLParamData, SQLPutData.
Maximum number of statements
ODBCLink/SE supports up to 50 concurrent statements, or cursors, per connection. However, SQLGetInfo with
option SQL_MAX_STMT will only report 1 as the maximum number of concurrent statements. This is because
multiple statements (or cursors) in ALLBASE/SQL on the same connection are not truly independent. Having
SQLGetInfo return 1 for SQL_MAX_STMT forces MS-Access, and other applications, to use multiple connections
(multiple SQLDriverConnect’s) instead of multiple statements on the same connection (one SQLDriverConnect and
multiple SQLAllocStmt’s).
Yo u can use multiple statements from within the same connection (in fact, some applications ignore the SQLGetInfo
and do this anyway). There is a performance advantage to doing things this way since a new statement (or cursor) in
ALLBASE/SQL takes much less overhead than a new connection. However you should be aware of the following:
⊗ In ALLBASE/SQL, a COMMIT or ROLLBACK operation closes all open
cursors within the connection. If you have multiple Select statements going
on different statements, the next time you SQLFetch on one statement, after
a Commit on another statement, you will get an error from ALLBASE/SQL
“ALLBASE has closed the cursor for this statement”. You may not get this
error immediately, as ODBCLink/SE caches a certain number of rows
during a fetch.
ODBCLink/SE
©M.B. Foster Associates Limited 1995-2000 67
Page 78

Appendix A Implementation Notes ODBCLink/SE Reference Manual
⊗ If you are in AUTOCOMMIT mode ON (this is the default option, set
through SQLSetConnectOptions and in ODBC Administrator), there is an
implicit Commit done whenever you fetch the last row. This is so that locks
held on the database by the open cursor are released. This may destroy other
open cursors. Note also that opening a table for the first time automatically
triggers various initialization calls that cause a commit to be done when
AUTOCOMMIT is ON.
⊗ If you are using prepared statements with substitution parameters to insert
or update you need not be concerned about this, as the prepared statement
will still be valid after a Commit, and you may bind new parameters and
SQLExecute again with no problem. Prepared statements are SQL
statements with question marks ‘?’ that you SQLPrepare and then call
SQLBindParam or SQLBindCol.
If you wish to use multiple statements, but are not writing your own SQL (i.e. you are using a 4GL application) you
can tell ODBCLink/SE to have SQLGetInfo report more than 1 statement per connection. To do this, modify the
ODBC.INI or the registry manually, and add a new parameter “MAXSTMT=50".
ALLBASE/SQL and IMAGE/SQL Restrictions on the ODBC Grammar
The following table summarizes the ALLBASE/SQL restrictions on the ODBC grammar:
Statement Programming Considerations
CREATE TABLE UNIQUE PRIMARY KEY must follow NOT NULL
DROP TABLE ALLBASE/SQL does not provide CASCADE or RESTRICT
REVOKE ALLBASE/SQL does not provide RESTRICT.
ALLBASE/SQL provides a DATETIME data type that is similar to TIMESTAMP.
ALLBASE/SQL does not implement optimistic locking. Optimistic locking means that the DBMS does not lock data
until just before an update is made, thus improving concurrency because locks are not held for long.
Using the ANSI Character Set
The HP3000 and HP9000 both use the default ROMAN8 character set. Most applications running under Microsoft
Windows use the 8-bit ANSI (ISO 8859/1) character set to provide support for Western European languages
(including American). The first 127 characters are the same for both ROMAN8 and ANSI character sets, so only the
extended and special characters are different.
If your PC client application uses these extended or special characters, then the data from the database server must be
converted from ROMAN8 to ANSI, and the data returning to the database server must be converted from ANSI to
ROMAN8. To activate the conversion, select the “Roman8 to PC-ANSI translation DLL during the data-source
setup. The conversion takes place on the PC client.
Bind variables of datatype CHAR and VARCHAR are also converted. A bind variable in an SQL statement is
associated (bound) to variables defined in a program. A bind variable is another name for a dynamic parameter.
ODBCLink/SE
68 ©M.B. Foster Associates Limited 1995-2000
Page 79

ODBCLink/SE Reference Manual Appendix A Implementation Notes
Note: Roman9 to PC-ANSI Translator will recognize and convert
the symbol used for the European Currency Symbol, the
EURO.
Some characters cannot be converted to ROMAN8 and then back to ANSI. For example, when the copyright sign in
ANSI is converted to ROMAN8, it is changed to a lowercase "c." When the data is returned to the PC client, the
copyright sign cannot be recognized, as it was converted to a "c." The following characters, sent from the PC client,
cannot be properly converted from ANSI to ROMAN8 in a round-trip fashion. (The hex designation is listed along
with the character name.)
•_A6 broken bar
•_A9 copyright sign
•_AC not sign
•_AE registered trade mark
•_B2 superscript 2
•_B3 superscript 3
•_B8 cedilla
•_B9 superscript 1
•_D7 multiply sign
•_F7 divide sign
Similarly, the following characters, sent from the database server, cannot be properly converted from ROMAN8 to
ANSI in a round-trip fashion.
•_A9 accent grave
•_AA circumflex accent
•_AC tilde accent
•_BE Dutch guilder
•_EB uppercase S caron
•_EC lowercase s caron
•_EE uppercase Y umlaut
•_F6 long dash
•_FC solid box
Unsupported ALLBASE/SQL and IMAGE/SQL Statements
There are several reasons why some ALLBASE/SQL and IMAGE/SQL statements are not supported in the
ODBCLink/SE environment. They are explained here:
⊗ Several ALLBASE/SQL statements work only with embedded SQL;
ODBCLink/SE does not support embedded SQL.
⊗ Some ALLBASE/SQL statements relate to functions, such as connection,
that have been replaced by functions resident on the PC client.
⊗ Some ALLBASE/SQL and IMAGE/SQL functions are best restricted to the
DBA; statements which control these functions are accessible only through
Interactive Structured Query Language (ISQL) on the server.
⊗ ODBCLink/SE internally prepares an SQL statement to be dynamically
preprocessed. Therefore, you cannot use some statements such as
EXECUTE IMMEDIATE.
ODBCLink/SE
©M.B. Foster Associates Limited 1995-2000 69
Page 80

Appendix A Implementation Notes ODBCLink/SE Reference Manual
ALLBASE/SQL and IMAGE/SQL Statements That Work Only with Embedded SQL
PC client application software that accesses ALLBASE/SQL and IMAGE/SQL databases through ODBCLink/SE do
not support embedded SQL. The application software calls the database functions directly; there is no need for
preprocessing.
Because the following ALLBASE/SQL and IMAGE/SQL statements function only with embedded SQL, they are not
supported by ODBCLink/SE:
CLOSE CURSOR
BEGIN DECLARE SECTION
DECLARE CURSOR
DESCRIBE
END DECLARE SECTION
EXECUTE
EXECUTE IMMEDIATE
FETCH
INCLUDE
OPEN
PREPARE
REFETCH
SQLEXPLAIN
WHENEVER
ALLBASE/SQL and IMAGE/SQL Statements Replaced by Functions on the PC Client
Some of the functionality has been moved from the database server to the PC client with ODBCLink/SE.
The following ALLBASE/SQL and IMAGE/SQL statements are not supported because they have been replaced by
other functions resident on the PC client:
CONNECT
DISCONNECT
RELEASE
RESET
SET CONNECT
SET MULTITRANSACTION
START DBE
START DBE NEW
START DBE NEWLOG
STOP DBE
Note: If you attempt to use any of these unsupported statements,
you will receive an error message.
ODBCLink/SE
70 ©M.B. Foster Associates Limited 1995-2000
Page 81

ODBCLink/SE Reference Manual Appendix B Creating a DBEnvironment
Appendix B Creating a DBEnvironment
On the HP3000 Database Server
To enable a connection between a PC client and database server, you must set up an ALLBASE/SQL
DBEnvironment. If you do not have an existing database for testing purposes, you can use the ALLBASE/SQL
SQLSetup tool to create a DBEnvironment called PartsDBE. If you are using IMAGE/SQL, you can use the
IMSQL.SAMPLEDB.SYS command to create an IMAGE/SQL database called MusicDBE. For more information,
refer to Getting Started with HP IMAGE/SQL.
Follow these steps to create the PartsDBE database on the HP3000:
⊗ Logon to the group and account where you want to create the
DBEnvironment.
⊗ From the command prompt, enter the following command:
:SQLSETUP.SAMPLEDB.SYS
A menu like the following will appear on your screen:
Options for Setting Up ALLBASE/SQL Sample DBEnvironments
===============================================================
Choose one:
1. Create PartsDBE without sample programs
2. Create PartsDBE, copy, preprocess and compile sample programs
3. Copy, preprocess and compile sample programs only
4. Generate a schema for PartsDBE
5. Display schema for PartsDBE
6. Purge PartsDBE and sample programs
7. Help
0. Exit
===============================================================
Enter your choice=>
⊗ Choose option 1 to create PartsDBE. This option creates the
DBEnvironment, defines all of its tables, views, indexes, and security
structure, and then loads it with data. As the system creates PartsDBE, you
see several messages displayed. At the end of the creation process, you see
the following message:
Creation and Loading of PartsDBE is now complete!
Press Return to continue...
⊗ Choose 0 to exit the menu.
If you have designed your own database for testing purposes, you can consult your database administrator and
complete the following tasks:
ODBCLink/SE
©M.B. Foster Associates Limited 1995-2000 71
Page 82

Appendix B Creating a DBEnvironment ODBCLink/SE Reference Manual
⊗ Plan the security structure of the DBEnvironment. Decide which users will
be granted access to the DBEnvironment, databases within the
DBEnvironment, and tables within the databases.
⊗ Create the account where the DBEnvironment is to reside.
⊗ Grant authorizations to users who will be using the test DBEnvironment.
⊗ Create the DBEnvironment, including databases and tables.
After you setup the DBEnvironment, ensure that you can connect to it. For example,
: isql
isql=> CONNECT TO 'PartsDBE.SomeGrp.SomeAcct';
isql=> SELECT * FROM SYSTEM.TABLE;
:
At this point you should see the system table information.
:
U[p],d[own],l[eft],r[ight],t[op],b[ottom],pr[int]<n>,or e[nd]
> e;
isql=> exit;
ODBCLink/SE
72 ©M.B. Foster Associates Limited 1995-2000
Page 83

ODBCLink/SE Reference Manual Appendix B Creating a DBEnvironment
On the HP9000 Database Server
To enable a connection between a PC client and database server, you must set up an ALLBASE/SQL
DBEnvironment. If you do not have an existing database for testing purposes, you can use the ALLBASE/SQL
SQLSetup tool to create a DBEnvironment called PartsDBE.
Follow these steps to create the PartsDBE database on the HP9000:
⊗ Login to the directory where you want to create the DBEnvironment.
⊗ From the C shell, enter the following command:
$ /usr/lib/allbase/hpsql/sqlsetup
•From the Korn shell or Bourne shell, enter the following command:
$ csh /usr/lib/allbase/hpsql/sqlsetup
A menu like the following will appear on your screen:
Options for Setting Up ALLBASE/SQL Sample DBEnvironments
=======================================
Choose one:
1. Create PartsDBE without sample programs
2. Create PartsDBE, copy, preprocess and compile sample programs
3. Copy, preprocess and compile sample programs only
4. Generate a schema for PartsDBE
5. Display schema for PartsDBE
6. Purge PartsDBE and sample programs
7. Help
0. Exit
========================================
Enter your choice=>
⊗ Choose option 1 to create PartsDBE. This option creates the
DBEnvironment, defines all of its tables, views, indexes, and security
structure, and then loads it with data. As the system creates PartsDBE, you
see several messages displayed. At the end of the creation process, you see
the following message:
Creation and Loading of PartsDBE is now complete!
Press Return to continue...
⊗ Choose 0 to exit the menu.
If you have designed your own database for testing purposes, you can consult your database administrator and
complete the following tasks:
⊗ Plan the security structure of the DBEnvironment. Decide which users will
be granted access to the DBEnvironment, databases within the
DBEnvironment, and tables within the databases.
⊗ Create the directory where the DBEnvironment is to reside.
ODBCLink/SE
©M.B. Foster Associates Limited 1995-2000 73
Page 84

Appendix B Creating a DBEnvironment ODBCLink/SE Reference Manual
⊗ Grant authorizations to users who will be using the test DBEnvironment.
⊗ Create the DBEnvironment, including databases and tables.
After you setup the DBEnvironment, ensure that you can connect to it. For example,
$ isql
isql=> CONNECT TO '/users/hpsql/sampledb/PartsDBE’;
isql=> SELECT * FROM SYSTEM.TABLE;
:
At this point you should see the system table information.
:
U[p],d[own],l[eft],r[ight],t[op],b[ottom],pr[int]<n>,or e[nd]
> e;
isql=> exit;
ODBCLink/SE
74 ©M.B. Foster Associates Limited 1995-2000
Page 85

ODBCLink/SE Reference Manual Appendix C List of Installed Files
Appendix C List of Installed Files
32 Bit Driver Client - For Windows 95 and Greater
Note: “..\” is a short-hand that represents the location of the
windows installation (e.g. c”\windows\”)
Install Disc Windows 95 Description
_bootstp.exe not installed to hard drive
_mssetup.ex_ not installed to hard drive
ctl3d95.dl_ ..\system\ctl3d95.dll DLL for 3D controls in Windows95
b5ccdc32.dl_ ..\system\b5ccdc32.dll Used for character translation for Chinese characters
drdbsp32.ex_ ..\system\drdbsp32.exe 32-bit Dr. DeeBee spy used for debugging
drdbsp32.dl_ ..\system\drdbsp32.dll 32-bit Dr. DeeBee spy used for debugging
drvstp32.exe not installed to hard drive 32-bit ODBC driver setup program
dvrdel32.ex_ ..\system\dvrdel32.exe Utility used to delete a 32-bit driver from the registry
ds32gt.dl_ ..\system\ds32gt.dll 32-bit Driver Setup Generic Thunking DLL.
mfc30.dl_ ..\system\mfc30.dll Microsoft Foundation Class Library
msvcrt20.dl_ ..\system\msvcrt20.dll Microsoft Run-Time Library
odbc.inf not installed to hard drive Installation control file
odbc32.dl_ ..\system\odbc32.dll 32-bit ODBC Driver Manager
odbc32gt.dl_ ..\system\odbc32gt.dll 32-bit ODBC Generic Thunking DLL
odbcad32.ex_ ..\system\odbcad32.exe ODBC Administrator Application
odbccp32.cp_ ..\system\odbccp32.cpl 32-bit ODBC Installer Control Panel Tool
odbccp32.dl_ ..\system\odbccp32.dll 32-bit ODBC Control Panel Installer DLL
odbccr32.dl_ ..\system\odbccr32.dll 32-bit cursor library
odbcinst.hl_ ..\system\odbcinst.hlp Installation help file
odbcln32.dl_ ..\system\odbcln32.dll 32-bit ODBCLink/SE Driver
odbcls32.dll ..\system\odbcls32.dll 32-bit ODBCLink/SE Driver Setup DLL
r8ansi32.dl_ ..\system\r8ansi32.dll 32-bit character translation DLL for translations between the
ANSI and roman-8 character sets.
ODBCLink/SE
©M.B. Foster Associates Limited 1995-2000 75
Page 86

Appendix C List of Installed Files ODBCLink/SE Reference Manual
r9ansi32.dl_ ..\system\r9ansi32.dll 32-bit character translation DLL for translations between the
ANSI and roman-9 character sets.
setup.exe not installed to hard drive Microsoft ODBC Setup program drive
setup.lst not installed to hard drive
trndel32.exe ...\system\trndel32.exe Translator uninstall utility to “de-register” translator
information
what32.ex_ ...\system\what32.exe Utility to determine what versions of drivers required by
ODBC application are currently loaded on the Client PC
ODBCLink/SE
76 ©M.B. Foster Associates Limited 1995-2000
Page 87

ODBCLink/SE Reference Manual Appendix C List of Installed Files
32 Bit Driver Client - For Windows NT 4.0 and Greater
NOTE: “..\” is a short-hand that represents the location of the
Install Disc Windows NT Description
_bootstp.exe not installed to hard drive
_mssetup.ex_ not installed to hard drive
b5ccdc32.dl_ ..\system32\b5ccdc32.dll Used for character translation for Chinese characters
ctl3dnt.dl_ ..\system32\ctl3dnt.dll DLL for 3D controls in WindowsNT
drdbsp32.ex_ ..\system32\drdbsp32.exe 32-bit Dr. DeeBee spy used for debugging
drdbsp32.dl_ ..\system32\drdbsp32.dll 32-bit Dr. DeeBee spy used for debugging
drvstp32.exe not installed to hard drive 32-bit ODBC driver setup program
dvrdel32.ex_ ..\system32\dvrdel32.exe Utility used to delete a 32-bit driver from the registry
ds32gt.dl_ ..\system32\ds32gt.dll 32-bit Driver Setup Generic Thunking DLL.
mfc30.dl_ ..\system32\mfc30.dll Microsoft Foundation Class Library
msvcrt20.dl_ ..\system32\msvcrt20.dll Microsoft Run-Time Library
windows installation (e.g. c”\windows\”)
odbc.inf not installed to hard drive Installation control file
odbc32.dl_ ..\system32\odbc32.dll 32-bit ODBC Driver Manager
odbc32gt.dl_ ..\system32\odbc32gt.dll 32-bit ODBC Generic Thunking DLL
odbcad32.ex_ ..\system32\odbcad32.exe ODBC Administrator Application
odbccp32.cp_ ..\system32\odbccp32.cpl 32-bit ODBC Installer Control Panel Tool
odbccp32.dl_ ..\system32\odbccp32.dll 32-bit ODBC Control Panel Installer DLL
odbccr32.dl_ ..\system32\odbccr32.dll 32-bit cursor library
odbcinst.hl_ ..\system32\odbcinst.hlp Installation help file
odbcln32.dl_ ..\system32\odbcln32.dll 32-bit ODBCLink/SE Driver
odbcls32.dll ..\system32\odbcls32.dll 32-bit ODBCLink/SE Driver Setup DLL
r8ansi32.dl_ ..\system32\r8ansi32.dll 32-bit character translation DLL for translation between the
ANSI and roman-8 character set.
r9ansi32.dl_ ..\system32\r9ansi32.dll 32-bit character translation DLL for translation between the
ANSI and roman-9 character set.
setup.exe not installed to hard drive Microsoft ODBC Setup program drive
ODBCLink/SE
©M.B. Foster Associates Limited 1995-2000 77
Page 88

Appendix C List of Installed Files ODBCLink/SE Reference Manual
setup.lst not installed to hard drive
trndel32.exe ...\system32\trndel32.exe Translator uninstall utility to “de-register” translator
information
what32.ex_ ...\system32\what32.exe Utility to determine what versions of drivers required by
ODBC application are currently loaded on the Client PC
ODBCLink/SE
78 ©M.B. Foster Associates Limited 1995-2000
Page 89

ODBCLink/SE Reference Manual Appendix C List of Installed Files
MPE/iX Host
ODBCJOB.ODBCSE.SYS sample jobstream to run the listener process
ODBCLNSE.ODBCSE.SYS the listener program
ODBCXLSE.ODBCSE.SYS an XL library containing common code
ODBCUTSE.ODBCSE.SYS utility for technical support purposes
ODBCCL32.ODBCSE.SYS a self-extracting archive for the 32bit client
ODBCLOG.ODBCSE.SYS log file (when created).
software
HP-UX 9.x Host
/usr/bin/odbcse/odbclnse the listener program
/usr/bin/odbcse/odbcutse utility for technical support purposes
/usr/bin/odbcse/odbccl32 a self-extracting archive of the 32bit client
software
HP-UX 10.x and 11.x Host
/opt/allbase/bin/odbcse/odbclnse the listener program
/opt/allbase/bin/odbcse/odbcutse utility for technical support purposes
/opt/allbase/bin/odbcse/odbccl32 a self-extracting archive of the 32bit client
software
/tmp/odbclog log file (when created).
ODBCLink/SE
©M.B. Foster Associates Limited 1995-2000 79
Page 90

Appendix C List of Installed Files ODBCLink/SE Reference Manual
Notes
ODBCLink/SE
80 ©M.B. Foster Associates Limited 1995-2000
Page 91

ODBCLink/SE Reference Manual Appendix D ODBCLink/SE Companion Product
Appendix D ODBCLink/SE Companion Product
MBF-Console
MBF-Console Introduction
MBF-Console is a software tool that will increase the visibility of ODBC use. It will:
⊗ Monitor resource utilisation of ODBC connections to a specific HP-3000 or
HP-9000 computer
⊗ Kill “runaway” or inactive server processes
⊗ Start or stop logging of a specific ODBC connection and then view activity
from the host logfile, including all SQL sent from the client
How MBF-Console Works
The listener process creates server processes as needed to handle incoming connection requests. On MPE, these
processes run as children of the listener process and are therefore not visible in SHOWJOB. Normally, the system
administrator has no way of knowing the identity and resource utilization of ODBC users on the system. That is the
purpose of MBF-Console.
MBF-Console creates an ODBC connection to the listener process and to a server. For this it needs a valid datasource configuration (through the ODBC Control Panel). Once connected, it is able to obtain information about other
server processes by reading the statistics file. The statistics file is a shared file on the host that is updated by active
server processes at a maximum interval of 1 minute. The server processes are not interrupted by the MBF-Console
program; rather, they produce statistical information when ODBC requests come in from the client.
MBF-Console displays information for all ODBC server processes on the specific host, even when multiple listeners
are running. If information is required from several hosts, multiple copies of MBF-Console may be run, one for each
host to be monitored.
Note: MBF-Console requires MBF-UDALink version 5.57.09 or
ODBCLink/SE version E.57 or greater to run on both the host
and client side.
Running MBF-Console
To Start MBF-Console, go to "Startup, Programs, MB Foster, MBF-Console and double click on the MBF-Console
Icon. The MBF-Console screen is displayed. The following pages will discuss the Option Headings located at the
top of the screen.
ODBCLink/SE
©M.B. Foster Associates Limited 1995-2000 81
Page 92

Appendix D ODBCLink/SE Companion Product ODBCLink/SE Reference Manual
File Menu Options
Set Refresh Interval (in seconds)
The Refresh Interval is the interval of time, in seconds, after which MBF-Console will automatically refresh its
information. The time interval is normally determined by the System Administrator.
Page Setup
Define the Page Setup for the printer using Standard Windows Dialog
ODBCLink/SE
82 ©M.B. Foster Associates Limited 1995-2000
Page 93

ODBCLink/SE Reference Manual Appendix D ODBCLink/SE Companion Product
Print
Print using Standard Windows Dialog
Exit
Exit from the Program
Connect Menu Options:
Configure DSNs... (Console Data Sources Configuration)
Select: Connect from the top of the screen then Configure DSN” from the
drop down menu.
The following screen is displayed.
⊗ Click the “Add New DSN” button and enter the name of the Data Source
you are going to use.
⊗ Click “Ok”.
Note: A data-source should be added for every machine for which
you require statistical information. If you require
information on setting up a Data Source, refer to the MBFUDALink or ODBCLink/SE documentation.
ODBCLink/SE
©M.B. Foster Associates Limited 1995-2000 83
Page 94

Appendix D ODBCLink/SE Companion Product ODBCLink/SE Reference Manual
Connections Windows
Select: the appropriate “Connect, DSN=” menu to bring up the following
windows:
The top window is the Listener Window. The lower window is the Connections Window.
The Listener Window
The listeners window contains information about ODBCLink listener processes running on your system. It is a
graphic representation of active listener jobs. To view detailed process information in the Connections Window,
double-click anywhere on the table, or use the “Window, Connections” command. The following statistics are
available in the Listeners Windows:
⊗ Port Number
⊗ Time Process Started
⊗ Version
⊗ Number of Job
⊗ Number of Users
⊗ Number of CPU Seconds
The Connections Window
The connections window lists all ODBCLink connections to your system from all listener processes including
Console itself. The following information is presented for each connection:
ODBCLink/SE
84 ©M.B. Foster Associates Limited 1995-2000
Page 95

ODBCLink/SE Reference Manual Appendix D ODBCLink/SE Companion Product
⊗ Port Number
⊗ Pin Number
⊗ Time Process Started
⊗ IP Address of Process
⊗ Login ID of Process
⊗ CPU Seconds Used
⊗ Number and Rate of Messages Received
⊗ Number and Rate of Messages Sent
To obtain more detailed information about a specific connection, double-click on it. This will open the Server
Window
Server Window:
The server window is displayed by double clicking a connection in the Connections window. In addition to repeating
what is in the connections window, the following statistics are available in the Server Windows:
ODBCLink/SE
©M.B. Foster Associates Limited 1995-2000 85
Page 96

Appendix D ODBCLink/SE Companion Product ODBCLink/SE Reference Manual
⊗ ODBCLOG Setting
⊗ Client Version
⊗ Statistics for Time Period
⊗ Time of Last Server Activity Reported
⊗ Bytes Received
⊗ Bytes Sent
⊗ Number of Select Statements
⊗ Number of Records Fetched
⊗ Number of Update Statements
⊗ Number of Delete Statements
The options available in the Server Window include:
⊗ View Logfile
Click “View logfile” to view the logfile entries for this process. This will display ODBCLink commands sent to the
server.
⊗ Start Logging
From the Server window, click the “Start Logging” button to start logging all SQL statements sent to the host. This
will start logging all ODBCLink commands sent to the server. If the server is doing a long sort or fetching a lot of
data, this may not be immediately reflected in the logfile. There may be a delay of up to 1 minute until these settings
take effect on the server.
Note: The “Start logging” command is the same as setting the
ODBCLINK_LOG environment variable on the host. MBFConsole will display the Listeners window and the
Connections window.
⊗ Stop Logging
This will stop the logging of ODBC commands sent to the server.
⊗ Kill Process
This command, available from the Server window, will kill an ODBCLink server process. Use it to kill nonresponding or deadlocked server processes, or processes that are using up too many resources on the system
⊗ Help
This will call up the Windows Help subsystem.
⊗ Close Window
This will close the Server window.
ODBCLink/SE
86 ©M.B. Foster Associates Limited 1995-2000
Page 97

ODBCLink/SE Reference Manual Appendix D ODBCLink/SE Companion Product
“View” Menu Option
Refresh the Screen with this menu option.
“Window” Menu Option
This will list all open windows. From this list you can navigate between the available windows.
ODBCLink/SE
©M.B. Foster Associates Limited 1995-2000 87
Page 98

Appendix D ODBCLink/SE Companion Product ODBCLink/SE Reference Manual
Help Menu Options:
Look for help using Standard Windows Dialog.
Note: Context-sensitive help is available at any time by pressing
F1.
ODBCLink/SE
88 ©M.B. Foster Associates Limited 1995-2000
Page 99

ODBCLink/SE Reference Manual Appendix D ODBCLink/SE Companion Product
Installing MBF-Console for MBF-UDALink
The following example uses Reflection File Transfer from an HP-3000 to obtain the zipped file containing MBFConsole. Similar procedures in other binary transfer methods can be used.
Note: If you are installing from a CD, go to page 91
Prior to the Reflection File Transfer, you will have to do the following:
⊗ Logon as MANAGER.SYS.
⊗ Restore DXINSTAL.PUB.SYS from the installation tape.
⊗ Run DXINSTAL.PUB.SYS. You will be prompted throughout the
installation. Put the tape back on line and reply to any requests.
DataExpress will prompt you for a group to reside in. This will be
DX.MBFOSTER by default.
⊗ If you encounter problems, contact out Technical Support Department at 1-
800-ANSWERS or E-Mail to support@mbfoster.com
.
Note: Create a directory called MBFoster for the client software.
This can be done using MS Explorer.
In the main menu at the top of the Reflection screen,
Select: File from the drop down menu
Select: Transfer… The File Transfer window is displayed.
Move the cursor to the Local File Name field, located at the top left of the File Transfer Window,
and type the name of the.exe file
Type: c:\mbfoster\odbccons.exe
Note: If you are installing a demo version of MBF-Console, enter
c:\mbfoster\democons.exe. The demo version will remain
active for 45 days after it has been installed. A demo version
can be downloaded from the MBFoster web page,
www.mbfoster.com, under Products. The demo version
obtained from the web page can be installed by running
democons.exe from the Run option of the Windows 95,
Windows 98 or Windows NT Start button.
Place the cursor in the Host File Names field,
Type: odbccons.dx/dxdemo.mbfoster
DX or DXDEMO illustrates that both can be used but only one is entered
depending if the version being installed is production or demo. If you are testing a
beta version, use DXBETA.
ODBCLink/SE
©M.B. Foster Associates Limited 1995-2000 89
Page 100

Appendix D ODBCLink/SE Companion Product ODBCLink/SE Reference Manual
Note: Ensure the Transfer Type is Binary
Select: the left side of the Transfer button, located top center of the screen,
to receive from the Host, to the local PC.
The File Transfer in Process screen appears briefly.
When the File Transfer is completed, the zipped file containing MBF-Console is ready to be installed on your PC.
Select: Start, Run. The Run window is displayed.
Type: C:\MBFOSTER\ODBCCONS.EXE and press OK
ODBCLink/SE
90 ©M.B. Foster Associates Limited 1995-2000
 Loading...