

Page 1

Quick Reference Guide
HP Digital Signage Player MP6 and MP4
®
Microsoft
Windows Embedded Standard 7
Page 2

© Copyright 2013 Hewlett-Packard
Development Company, L.P.
Microsoft and Windows are U.S. registered
trademarks of Microsoft Corporation.
The information contained herein is subject
to change without notice.
The only warranties for HP products and
services are set forth in the express
warranty statements accompanying such
products and services. Nothing herein
should be construed as constituting an
additional warranty. HP shall not be liable
for technical or editorial errors or omissions
contained herein.
This document contains proprietary
information that is protected by copyright.
No part of this document may be
photocopied, reproduced, or translated to
another language without the prior written
consent of Hewlett-Packard Company.
First Edition (January 2013)
Document Part Number: 722929-001
Page 3

About this book
This guide supplements the standard Windows Embedded Standard (WES) documents supplied by
Microsoft Corporation. This document highlights the differences, enhancements, and additional
features provided by the latest image of your digital signage player.
WARNING! Text set off in this manner indicates that failure to follow directions could result in bodily
harm or loss of life.
CAUTION: Text set off in this manner indicates that failure to follow directions could result in
damage to equipment or loss of information.
NOTE: Text set off in this manner provides important supplemental information.
iii
Page 4

iv About this book
Page 5

Table of contents
1 For more information and updates ............................................................................................................... 1
HP updates ........................................................................................................................................... 1
For more information ............................................................................................................................ 1
2 Introduction ..................................................................................................................................................... 2
The desktop .......................................................................................................................................... 2
User desktop ........................................................................................................................ 2
Administrator desktop .......................................................................................................... 3
3 Configuration .................................................................................................................................................. 4
Logging on ............................................................................................................................................ 4
Automatic logon ................................................................................................................... 4
Manual logon ....................................................................................................................... 5
Administrator logon access .................................................................................................. 5
Logging off, restarting, and shutting down the digital signage player ................................................... 6
Write filters ........................................................................................................................... 6
System date and time .......................................................................................................... 6
Local drives .......................................................................................................................................... 8
Drive C and flash ................................................................................................................. 8
User accounts ...................................................................................................................................... 8
Creating a new user account ............................................................................................... 8
User Accounts utility ............................................................................................................ 9
User profiles ......................................................................................................................... 9
Regional and language options .......................................................................................................... 10
Administrative tools ............................................................................................................................ 11
Wireless network configuration .......................................................................................................... 11
4 Applications .................................................................................................................................................. 12
Windows Firewall ............................................................................................................................... 12
Remote Desktop Connection (RDC) .................................................................................................. 12
PDF Complete .................................................................................................................................... 13
v
Page 6

Microsoft Internet Explorer ................................................................................................................. 13
Windows Media Player ....................................................................................................................... 14
Windows Embedded Standard 7 P specific features ......................................................................... 14
5 Control panel extended selections ............................................................................................................. 15
Write filters ......................................................................................................................................... 16
Choosing the write filter ..................................................................................................... 16
Enhanced Write Filter Manager ......................................................................................... 16
Benefits of the Enhanced Write Filter ................................................................ 16
Enhanced Write Filter status service ................................................................. 17
Enhanced Write Filter GUI ................................................................................ 18
EWF GUI Buttons ............................................................................. 18
DOS command-line tool boot commands ......................................................... 19
Using boot commands ...................................................................... 19
File-Based Write Filter Manager ........................................................................................ 19
Benefits of the File-Based Write Filter ............................................................... 19
File-Based Write Filter Status Service .............................................................. 20
File-Based Write Filter GUI ............................................................................... 21
6 Administration and image upgrades ........................................................................................................... 23
HP Digital Signage Player Imaging Tool ............................................................................................ 23
Index ................................................................................................................................................................... 24
vi
Page 7

1 For more information and updates
HP updates
HP provides periodic updates and add-ons for digital signage player images. Check the HP support
http://www.hp.com/support for updates and add-ons that apply to your image version. Select
site at
the country/region from the map, then select Drivers & Software. Type the digital signage player
model in the field and click Search.
For more information
For important documentation that provides specific information for your image version, check the HP
support site at
Product Support & Troubleshooting. Type the digital signage player model in the field and click
Search.
http://www.hp.com/support. Select the country/region from the map, and then select
HP updates 1
Page 8

2Introduction
This guide provides information pertaining to HP digital signage player models that use the Windows
Embedded Standard (WES) 7 P operating system.
Flexible
●
Win32-based application support
◦
User interface similar to familiar Windows 7 desktop
●
● Improved security
◦
Microsoft
Locked down protected flash drive (on MP4) or hard drive (on MP6)
◦
Multimedia
●
Windows Media Player
◦
Internet browsing
●
Windows Internet Explorer
◦
Extensive Multilingual User Interface (MUI) support
●
HP provides this client “ready to go” out of the box to meet most common customer requirements.
You may want to add/remove features using the Programs and Features control panel applet or the
add-ons provided on the HP support site to customize it to specific needs.
®
Firewall
®
This guide will introduce you to the features of this client that are not found in the standard Windows
operating system.
The desktop
This section provides a general overview of WES 7 user and administrator desktop features and
functions.
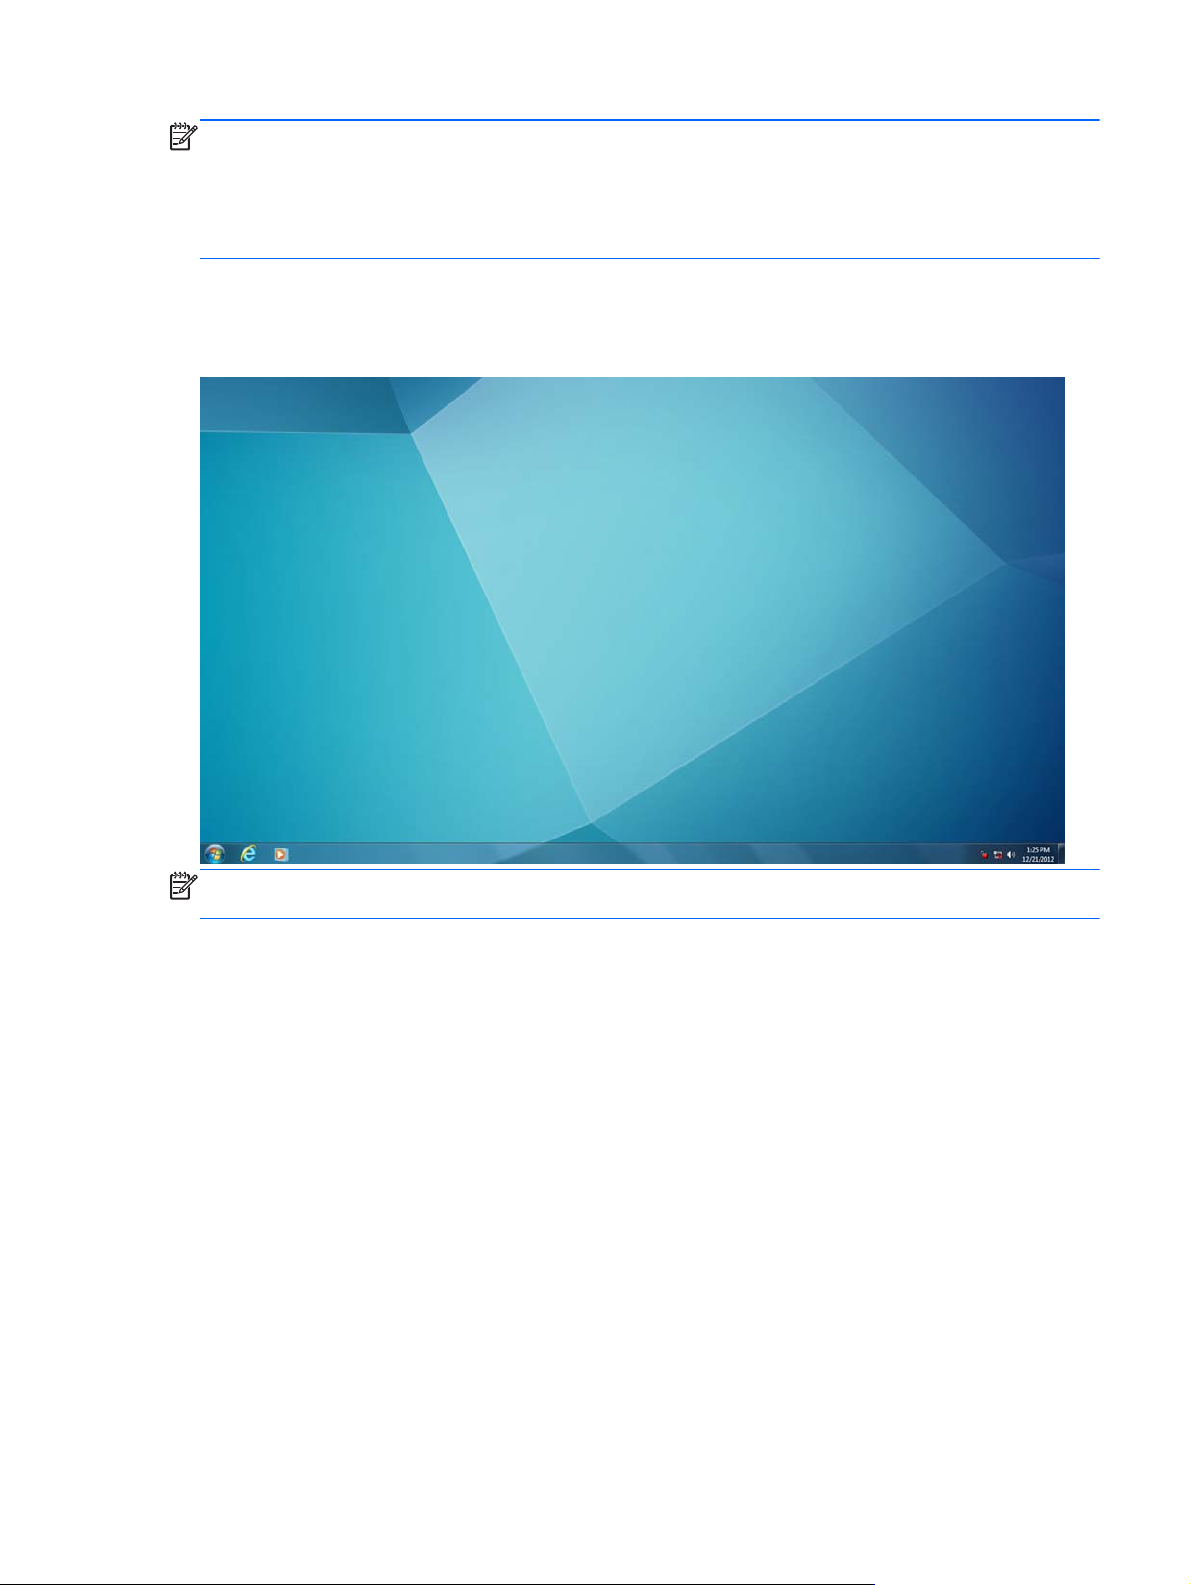
User desktop
The desktop that opens when you are logged on as a user is a standard WES 7 desktop. To access
applications, go to the Start menu.
For information about the functionality of the standard WES desktop and Start menu items, refer to
the applicable Microsoft documentation:
2 Chapter 2 Introduction
http://msdn.microsoft.com/en-us/embedded/bb981920.aspx
Page 9
NOTE: The control panel, available by clicking Start > Control Panel, provides access to a limited
set of resources for changing user preferences. You must log on as Administrator to access the
extended set of control panel options and utilities.
Right-clicking the mouse when the pointer is on a user’s desktop background does not open a pop-up
menu in the default windows policies configuration.
Administrator desktop
The desktop that opens when you are logged on as an administrator is a standard Windows desktop.
NOTE: Right-clicking the mouse when the pointer is on the administrator’s desktop background
opens a pop-up menu.
The desktop 3
Page 10
3 Configuration
Logging on
You can log on to the digital signage player either automatically or manually.
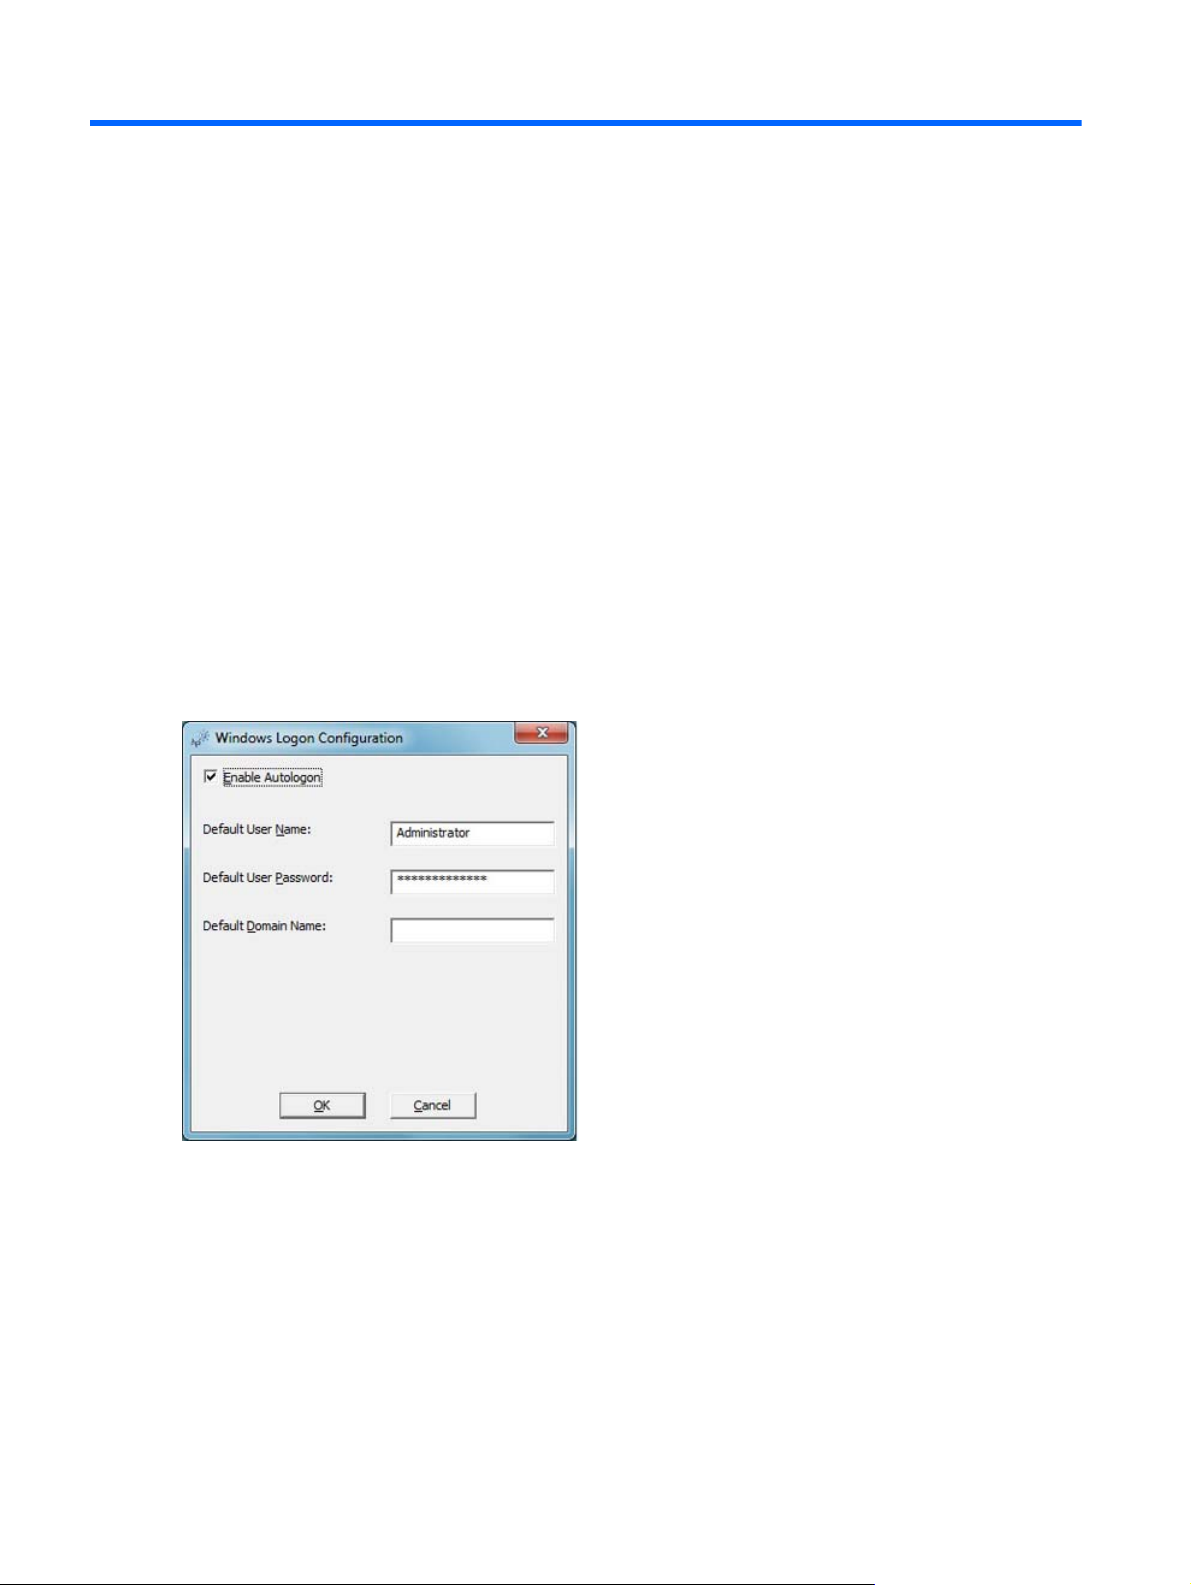
Automatic logon
The default for the WES-based digital signage player is automatic logon of the Administrator account.
The administrator can use the HP Logon Manager in the control panel to enable/disable auto logon
and change the auto logon user name, password, and domain. Only the administrator account can
change auto logon properties.
The default password for auto logon is Administrator.
Enabling automatic logon bypasses the Log On to Windows dialog box.
To log on as a different user while auto logon is enabled:
▲ Press and click Start > Shut Down > Log Off.
This opens the Log On to Windows dialog box and allows you to select a different account.
4 Chapter 3 Configuration
Page 11

Manual logon
When automatic logon is disabled, digital signage player startup displays the Log On to Windows
dialog box. Type the logon information in the User Name and Password text boxes. Note the
following:
For a user account, the factory-default user name and password are both User.
●
For an administrator account, the factory-default user name and password are both
●
Administrator.
For security purposes, HP recommends that you change the passwords from their default
●
values. An administrator can change passwords by pressing Ctrl+Alt+Delete to open the
Windows Security dialog box, and then selecting Change Password. You cannot change the
password when logged on as a user.
Passwords are case-sensitive.
●
The administrator may create additional user accounts: right-click Computer, select Manage >
●
Local Users and Groups. However, due to local memory constraints, you should keep the
number of additional users to a minimum. For more information, see
on page 8.
Administrator logon access
To access Administrator logon regardless of the state of the digital signage player user mode:
User accounts
1. Click Start.
2. Click Log Off.
The screen for Administrator logon is displayed.
NOTE: The default password for the Administrator account is Administrator. The default user
name and password for the User account is User.
You can use the HP Logon Manager to permanently modify the default login user. Located in the
control panel, only the Administrator can access this application.
Logging on 5
Page 12

Logging off, restarting, and shutting down the digital signage player
To restart, shut down, or log off from the digital signage player:
1. Click Start > Shut Down.
2. From the Shut Down dialog box, select the desired action, and then click OK.
NOTE: You may also log off or shut down using the Windows Security dialog box. Press Ctrl+Alt
+Delete to open the dialog box.
If automatic logon is enabled, when you log off (without shutting down), the digital signage player
immediately logs on the predefined User account set up in HP Logon Manager. For instructions for
logging on as a different user, see
The following utilities are affected by restarting or shutting down the digital signage player:
Write filters on page 6
●
System date and time on page 6
●
Write filters
HP Windows Embedded Standard digital signage players include both the Enhanced Write Filter
(EWF) and the File-based Write Filter (FBWF) to protect the operating system. Write filters are
disabled by default.
For detailed information, see
Filter Manager on page 19.
System date and time
You can manually set the local time, or you can automatically set the local time utility to synchronize
the system clock to a time server at a designated time.
Logging on on page 4.
Enhanced Write Filter Manager on page 16 and File-Based Write
6 Chapter 3 Configuration
Page 13

NOTE: The Windows Time service is stopped by default. You can start the service via the
administrative tools control panel applet. You may want to start the service and maintain correct time
because some applications may require access to the local digital signage player time. To open the
Date and Time Properties dialog, double-click the time in the task bar or double-click the Date and
Time icon in the control panel.
▲ Click Change Settings.
Logging off, restarting, and shutting down the digital signage player 7
Page 14

Local drives
The following sections describe the local drives located on the digital signage player.
Drive C and flash
Drive C is in the onboard flash drive (MP4) or hard disk drive (MP6). HP recommends that you do not
allow the free space on Drive C to drop below 10% of the storage device’s size.
CAUTION: If the available free space on the C drive is reduced to below 15 MB, the digital signage
player becomes unstable.
User accounts
This section describes how to create a new user account and user profile.
Creating a new user account
You must log on as Administrator to create user accounts locally or remotely. With the MP4 model,
due to local flash/disk space constraints, you should keep the number of additional users to a
minimum.
Use the User Accounts utility to create new user accounts.
To access the User Accounts utility:
Click Control Panel > User Accounts > Manage Another Account > Create a New Account.
▲
8 Chapter 3 Configuration
Page 15

User Accounts utility
The User Accounts utility allows the administrator to create, delete, and maintain user accounts.
To access the User Accounts utility:
Click Control Panel > User Accounts > Manage Another Account.
▲
User profiles
A new user’s profile is based on the Default User profile template, which includes policies similar to
the factory-defined Administrator account. This new account will default to membership within the
local Users group. If the Default User profile settings are changed from those set at the factory, the
changed settings are automatically applied to any newly created user profile—local or domain. Any
local accounts created or cached domain accounts logged into this device prior to changes made to
the Default User profile are unaffected by these changes—only accounts logged in or cached after
the changes are affected.
For a new user to match the characteristics of the predefined User account, the Administrator must
add the new user to the Power Users group. The user's actions are still limited while the user is in the
Power Users group. The Administrator may also want to apply specific Windows policies to the new
account to restrict certain actions or behaviors.
To create a user profile:
1. Log on as Administrator.
2. Click Start > Control Panel > User Accounts.
3. Select Manage Another Account to open the Manage Accounts window.
User accounts 9
Page 16

4. Select Create a New Account.
5. Type in the user name, and then select Standard User or Administrator.
6. Click Create Account and follow the on-screen instructions.
The newly created user is now a member of both the Power Users and Users groups and will have
Windows policies applied similar to that of the Administrator account. It may be desirable to apply
specific Windows policies to limit the capabilities of this new account.
To edit a user account, select User in the Manage Accounts window.
Regional and language options
The keyboard language options are preset at the factory. Should you need to make a change, the
keyboard language selection is made through the Region and Language selection in the control
panel. From this program, you can select the type of keyboard you are using as well as the layout/
Input Method Editor (IME) settings.
10 Chapter 3 Configuration
Page 17

Administrative tools
To gain access to the available administrative tools:
Click the Administrative Tools icon in the Control Panel.
▲
Wireless network configuration
To add a wireless network:
1. Click Control Panel > Network and Sharing Center.
2. Select Manage Wireless Network.
3. Click Add.
4. Select either:
Manually Create a Network
●
or
Create an AdHoc Network
●
Administrative tools 11
Page 18

4 Applications
The latest WES image has the following preinstalled applications:
Windows Firewall on page 12
●
Remote Desktop Connection (RDC) on page 12
●
Microsoft Internet Explorer on page 13
●
Windows Media Player on page 14
●
Windows Embedded Standard 7 P specific features on page 14
●
PDF Complete on page 13
●
Additional applications in the form of add-ons are provided and can be downloaded from the HP
website.
Check the HP support site for these applications or for other important updates or documentation:
http://www.hp.com/support. Select the country/region from the map, then select Product Support &
Troubleshooting or Drivers & Software. Type the digital signage player model in the field and click
Search.
Windows Firewall
The HP WES 7 image includes the Windows Firewall.
To configure firewall settings:
Select Control Panel > Windows Firewall.
▲
For more detailed information about the firewall, visit
http://www.microsoft.com/.
Remote Desktop Connection (RDC)
Use the Remote Desktop Connection dialog box to establish connections to a Windows Terminal
Server or to access remote applications using Microsoft RDP.
Refer to the Microsoft website for documentation that offers a detailed explanation and instructions on
how to use the Microsoft RDC dialog box.
Click Start > All Programs > Accessories > Remote Desktop Connection.
▲
12 Chapter 4 Applications
Page 19

PDF Complete
PDF Complete Special Edition enables you to view, search, and print existing PDF documents and to
copy to the clipboard.
For more information on this application, go to
Microsoft Internet Explorer
The Microsoft Internet Explorer browser is installed locally on the digital signage player.
Internet Explorer has more control over the execution of all content, including a built-in facility to
manage pop-up windows. Furthermore, Internet Explorer now prevents scripts from moving or
resizing windows and status bars to hide them from view or obscure other windows and includes a
block unsafe file transfers feature. For more information, see
NOTE: To downgrade from Internet Explorer 9 to Internet Explorer 8, simply uninstall Internet
Explorer 9. Internet Explorer 8 does not need to be installed.
1. Log on as Administrator.
2. Open Control Panel > Programs and Features.
3. Click View installed updates in the left pane.
4. Scroll down to the Microsoft Windows section.
5. Right-click Windows Internet Explorer 9, and click Uninstall.
6. When prompted, click Yes.
http://www.pdfcomplete.com.
http://support.microsoft.com/kb/291369.
7. Reboot.
For more information, see the Microsoft website: http://windows.microsoft.com/en-US/windows7/how-
do-i-install-or-uninstall-internet-explorer-9.
PDF Complete 13
Page 20

Windows Media Player
The Windows Media Player contains security, performance, and functionality improvements. For
more information about improvements to Windows Media Player, refer to the Windows Media Player
home page at
http://windows.microsoft.com/en-US/windows/products/windows-media-player.
Windows Embedded Standard 7 P specific features
Anti-malware/defender
●
Tablet/touch
●
Photo viewer
●
Direct access
●
Branchcache
●
Enterprise search scopes
●
Applocker
●
Remote media streaming
●
Snipping tool
●
Sticky notes
●
For detailed information, see the Microsoft website:
us/develop/windows-embedded-standard-7-os-components.aspx.
http://www.microsoft.com/windowsembedded/en-
14 Chapter 4 Applications
Page 21

5 Control panel extended selections
The control panel is accessed by selecting Start > Control Panel.
15
Page 22

Write filters
Choosing the write filter
HP Windows Embedded Standard digital signage players include both the Enhanced Write Filter
(EWF) and the File-based Write Filter (FBWF) to protect the operating system.
The writer filter is disabled by default.
TIP: Choose the Enhanced Write Filter to protect an entire partition from writes, or choose the File-
based Write Filter to allow specific local applications and files to be updated dynamically.
To select the EWF or FBWF, perform the following steps:
1. Log on as an Administrator.
2. Select Start > Control Panel > HP Write Filter Configuration.
3. Select and configure the desired write filter.
4. Reboot the system for the chosen write filter selection and configuration to take effect.
Enhanced Write Filter Manager
WES includes the Enhanced Write Filter (EWF) console application command-line tool, ewfmgr.exe.
In addition to the DOS command-line tool, the WES image includes an Enhanced Write Filter GUI.
The EWF allows the operating system (OS) to boot from a disk volume residing on any read-only
media or write-protected hard drive while appearing to have read/write access to the OS. The EWF
saves all writes to another storage location called an overlay. Changes made to the overlay will not
be committed to the flash memory or hard drive unless the EWF has been disabled or the user
performs an intentional commit.
The EWF manager console application can be used to issue a set of commands to the EWF driver,
report the status of each protected volume overlay, and report the format of the overall EWF
configurations.
By including the EWF manager console application component in the configuration and building it into
the run-time image, you enable the use of ewfmgr.exe and the corresponding commands.
Benefits of the Enhanced Write Filter
The EWF provides a secure environment for digital signage player computing. It does this by
protecting the digital signage player from undesired writes. For the MP4 unit, the write filter also
extends the life of the digital signage player by preventing excessive flash write activity. It gives the
appearance of read-write access to the flash by employing a cache to intercept all flash writes and
returning success to the process that requested the I/O.
The intercepted flash writes stored in cache are available as long as the digital signage player
remains active, but they will be lost when the digital signage player is rebooted or shut down. To
preserve the results of writes to the registry, the contents of the cache can be transferred to the flash
on demand or manually using the Enhanced Write Filter Manager.
After the write filter has been disabled, all future writes during the current boot session are written to
the storage device, with no further caching until a reboot occurs. The write filter may also be enabled/
disabled through the command line. Always enable the writer filter after all of the permanent changes
have been successfully made.
16 Chapter 5 Control panel extended selections
Page 23

The EWF is a powerful tool for any digital signage player environment by preventing unauthorized
users from altering or damaging the image.
Enhanced Write Filter status service
This service creates an icon in the system tray that shows the status of EWF. The EWF Status icon
will appear as a red 'lock' when disabled, a green 'lock' when enabled, and a yellow 'lock' when the
state is set to change on the next boot.
Status Description Example
Red Disabled
Green Enabled
Yellow Commit Mode
Yellow with Red 'X' Write Filter Corrupted
NOTE: In the event of a corrupted EWF state, you may be able to correct this by issuing the
command 'rundll32 c:\windows\system32\ewfdll.dll,ConfigureEwf' from an
Administrator's command prompt (type the command exactly as shown without the quotes) and
reboot. If this is unsuccessful, you will need to re-flash the digital signage player unit with the
standard factory image provided on the web.
If you are logged-on as Administrator, you can change the status of EWF by right-clicking on the icon
and selecting the desired EWF state.
NOTE: Since EWF Manager console utility (ewfmgr.exe) and the EWF status service execute
separate code, any status changes by ewfmgr.exe will not be automatically reflected by the EWF
status icon.
To refresh the status icon after modifying EWF through ewfmgr.exe, you must right-click on the icon
(you can then click anywhere on the screen to close the context menu). However, any operations
made through the EWF status icon menu will be visible through the EWF Manager console
application. Status and changes to the Enhanced Write Filter will be synchronized between the EWF
status icon and the EWF Manager control panel applet.
Write filters 17
Page 24

Enhanced Write Filter GUI
The EWF GUI (part of the HP Write Filter Configuration) can be accessed through the control panel
or the Administrative Tools option only by the administrator.
To access the EWF GUI, perform the following steps:
1. Log on as an administrator.
2. Select Start > Control Panel > HP Write Filter Configuration >.
3. Click the EWF Manager icon.
4. Use the EWF GUI to select the Write Filter options.
EWF GUI Buttons
The current version of the EWF GUI includes the following buttons:
Button Description
Overlay
Configuration
Clear Boot
Command
Commit Data to
Volume
NOTE: When using the Commit boot command, all the temporary contents will be permanently
written to the flash memory or hard disk. In addition, all content accessed (and changes made) after
running Commit, but before rebooting the system, will be written as well. This includes changes made
during any number of login/logout sessions before the next reboot.
This button simply brings to view the Overlay information and is a combination of the information
supplied when executing ewfmgr.exe c: -Description and ewfmgr.exe c: -Gauge from the DOS
prompt.
This button is the same as executing ewfmgr.exe c: -NoCmd from the DOS prompt.
This button is the same as executing ewfmgr.exe c: -Commit from the DOS prompt.
18 Chapter 5 Control panel extended selections
Page 25

DOS command-line tool boot commands
The following table lists the EWF boot commands that are supported.
Boot Command Description
All Displays information about all protected volumes and performs a command, such as Disable, Enable,
and Commit, on each volume if specified.
Commit Commits all current level data in the overlay to the protected volume and resets the current overlay
level to 1 upon shutdown.
Disable Allows user to write to the image after the next reboot.
Enable Prevents the user from writing to the image after the next reboot.
Commitanddisable Combination of the Commit and Disable commands. This command will commit data in the overlay
upon shutdown. Additionally, EWF will be disabled after the system reboots.
NOTE: When using the Commit boot command, all the temporary contents will be permanently
written to the flash memory or hard disk. In addition, all content accessed (and changes made) after
running Commit, but before rebooting the system, will be written as well. This includes changes made
during any number of login/logout sessions before the next reboot.
Using boot commands
To use the EWF manager boot commands, type the following syntax in a command prompt:
EWFMGR <drive-letter> —[boot command].
NOTE: Because the EWF manager commands are executed on the next boot, you must reboot the
system for the command to take effect.
File-Based Write Filter Manager
WES includes the File-Based Write Filter (FBWF) console application command-line tool,
fbwfmgr.exe. In addition to the DOS command-line tool, the WES image includes a write filter GUI.
Benefits of the File-Based Write Filter
The FBWF provides a secure environment for digital signage player computing. It does this by
protecting the digital signage player from undesired writes. For the MP4 model, the write filter also
extends the life of the digital signage player by preventing excessive flash write activity. It maintains
the appearance of read and write access to write-sensitive or read-only storage to the operating
system, making read and write access transparent to applications. File and/or folder exclusions can
be configured to allow certain changes to persist, while preventing others from writing to disk.
Write filters 19
Page 26

File-Based Write Filter Status Service
This service creates an icon in the system tray that shows the status of FBWF. The FBWF status icon
will appear as a red 'lock' when disabled and a green 'lock' when enabled.
Status Description Example
Red Disabled
Green Enabled
Yellow Commit Mode
Yellow with Red 'X' Write Filter Corrupted
If you are logged on as Administrator, you can change the status of FBWF by right-clicking on the
icon and selecting the desired FBWF status.
20 Chapter 5 Control panel extended selections
Page 27

File-Based Write Filter GUI
The FBWF GUI (part of the HP Write Filter Configuration) can be accessed through the control panel
or the Administrative Tools option only by the administrator.
Write filters 21
Page 28

22 Chapter 5 Control panel extended selections
Page 29

6 Administration and image upgrades
This section highlights and discusses the Remote Administration capabilities and firmware upgrade
methods applicable to the digital signage player.
HP Digital Signage Player Imaging Tool
The HP Digital Signage Player Imaging Tool is part of the SoftPaq deliverable that contains the
original factory image for the HP digital signage player. You can use this utility to restore the original
factory image to the digital signage player.
This utility allows you to perform the following options:
Create a bootable image on a USB flash device (such as on a disk on key)
●
Unbundle the image to a directory for use in a custom deployment scenario or PXE image
●
For additional information about this utility and its uses, visit the HP website at
support. Select the country/region from the map, then select Product Support & Troubleshooting.
Type the digital signage player model in the field and click Search.
http://www.hp.com/
HP Digital Signage Player Imaging Tool 23
Page 30

Index
A
accounts
creating user 8
user 8
administration 23
Administrative Tools 11
administrator
desktop 3
logon 5
applications 12
automatic logon 4
C
changing the password 5
control panel 15
creating user account 8
D
default passwords 5
desktop 2
desktop administrator 3
desktop, user 2
Digital Signage Player Imaging
Tool 23
drive C 8
drives 8
drive C and flash 8
E
Enhanced Write Filter Manager
16
extended selections, control
panel 15
F
features, digital signage player 2
File-Based Write Filter Manager
19
filter
write 16, 19
write filters 6
flash drive 8
H
HP Digital Signage Player Imaging
Tool 23
HP support website, 12
HP updates 1
I
image upgrades 23
imaging tool 23
information, websites 1
internet 2
Internet Explorer 13
Internet Explorer unsafe file list
13
L
language options 10
local drives 8
log on as Administrator 5
logging off 6
logon
automatic 4
manual 5
Logon Configuration Manager 4
M
manual logon 5
Media Player 14
Microsoft Internet Explorer 13
Microsoft Internet Explorer unsafe
file list 13
multimedia 2
N
network, wireless 11
P
password 5
password, changing 5
PDF Complete 13
preinstalled applications 12
profiles 9
R
regional language options 10
Remote Desktop Connection 12
restarting 6
S
security 2
shutting down 6
system time 6
T
time utility 6
U
unsafe file list for Internet
Explorer 13
Updates 1
upgrades 23
user
accounts 8
profiles 9
User Accounts 9
user desktop 2
utilities 9
Digital Signage Player Imaging
Tool 23
system time 6
utilities, User Accounts 9
W
web site
more information 1
24 Index
Page 31

website
HP support 12
WES 2
Windows Media Player 14
WES 7 P features 14
WES website 2
Windows Media Player 14
Windows Media Player website
14
wireless network configuration 11
write filter 16, 19
write filters 6, 16
Index 25
 Loading...