

Page 1
LASERJET PRO M1530
MFP SERIES / MFP 系列
Installation Guide
EN
Panduan Instalasi
ID
TH
คู่มือการติดตั้ง
VI
Hương Dân Cai Đăt
Terdaftar di Deperindag Provinsi DKI Jakarta No :
安装指南
CN
설치 설명서
KO
TW
安裝指南
0089/1.824.51
Page 2
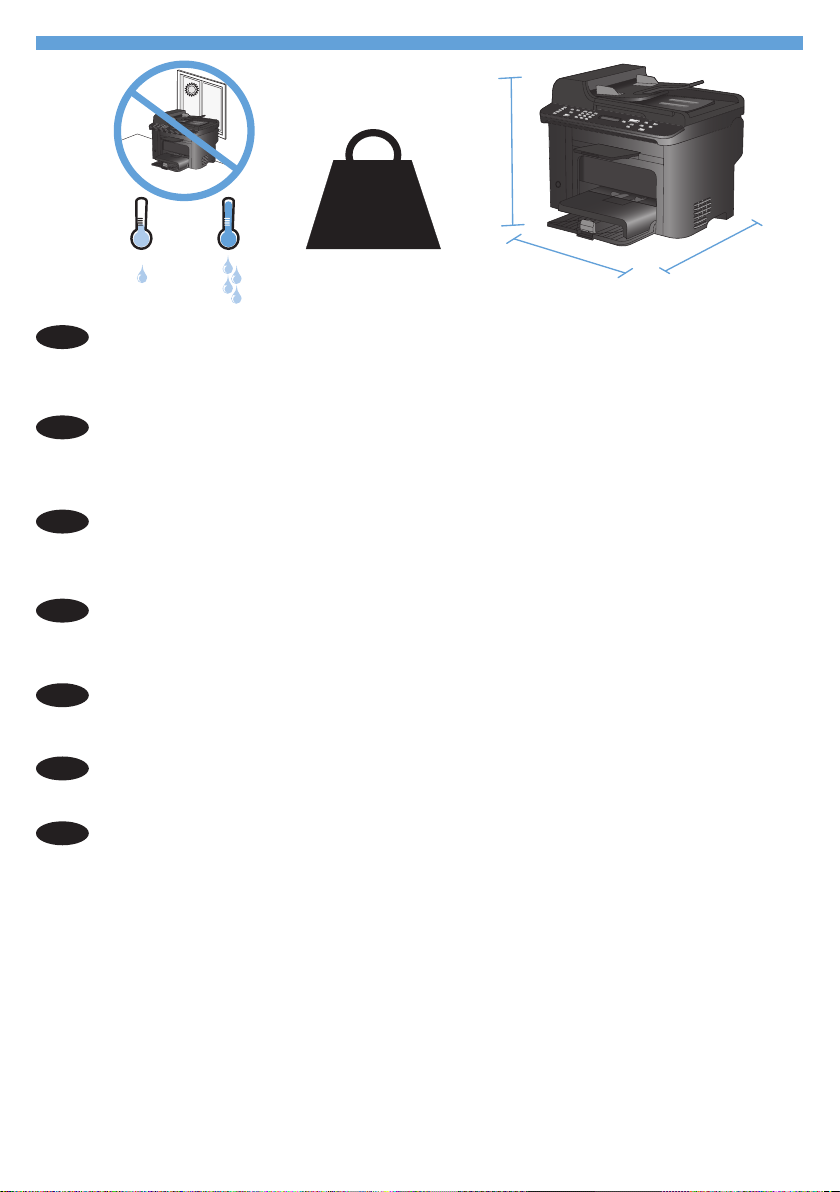
10% - 80%
10 - 32.5°C
(50 - 91°F)
PP
LQFKHV
PP
LQFKHV
PP
LQFKHV
11.7 kg
25.8 lb
1
Select a sturdy, well-ventilated, dust-free area, away from direct sunlight to position
EN
the product.
选择一处通风良好、免受灰尘侵扰且没有直射阳光的固定区域来安放
CN
该产品。
Pilih tempat yang kokoh, berventilasi baik, bebas debu, dan jauh dari sinar matahari
ID
langsung untuk meletakkan produk.
제품을 설치하기 위해 안정감 있고 환기가 잘 되며 먼지가 없고 직사광선이 없는 장소를
KO
선택합니다.
TH
TW
VI
เลือกวางเครื่องพิมพ์ไว้ในบริเวณที่แข็งแรง มีการระบายอากาศที่ดี ปราศจากฝุ่น และไม่โดนแสงแดดโดยตรง
請選擇一個堅固、通風良好、無塵的區域且沒有陽光直接照射的地方來放置本產品。
Chon nơi vưng chăc, đươc thông hơi tôt, không co bui băm, không tiếp xúc trực tiếp
với ánh sáng mặt trời đê đăt sản phẩm.
1
Page 3
2
4
6
7
8
1 3
5
9
H
P
Las
erJet
3
Page 4
2 31
4
EN
CN
1.
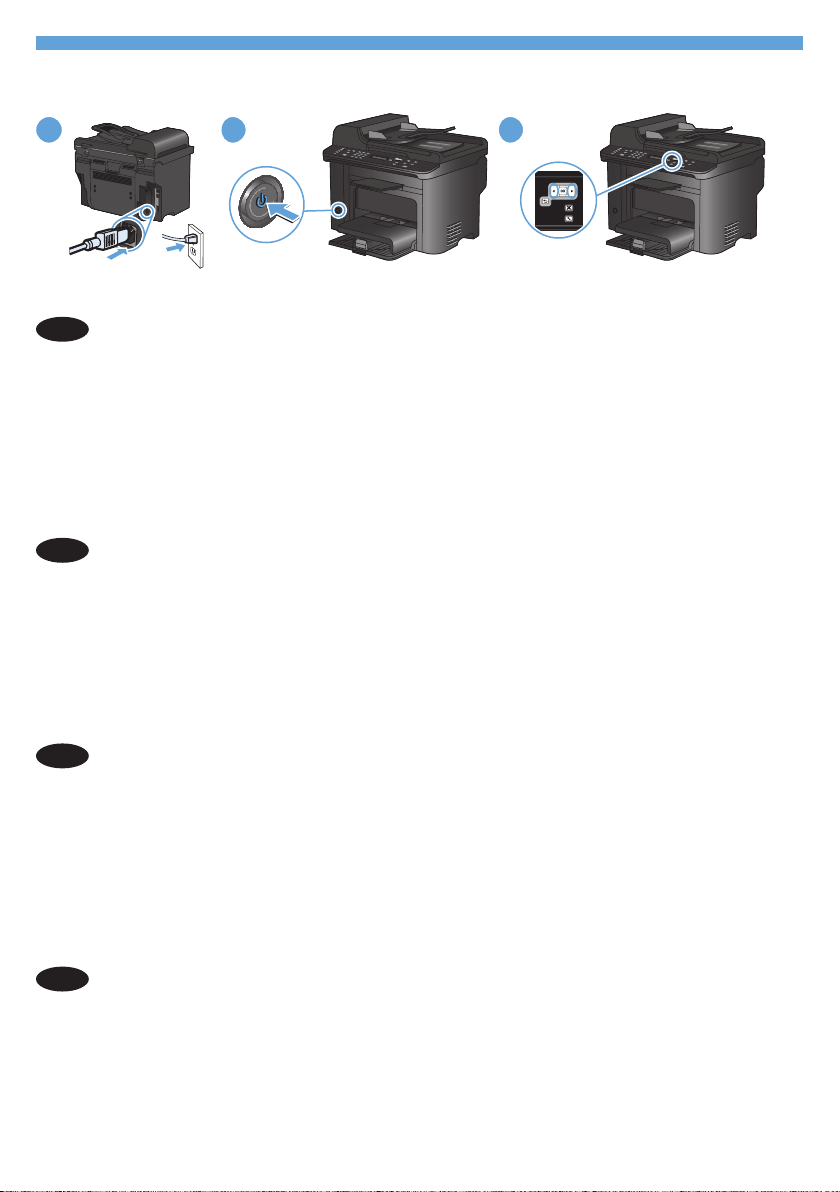
Connect the power cord between the product and a grounded AC outlet, and turn on
the product. Make sure your power source is adequate for the product voltage rating.
The voltage rating is on the product label. The product uses either 110-17 Vac or
0-40 Vac and 50/60 Hz. Caution: To prevent damage to the product, use only
the power cord that is provided with the product.
On the control panel, use the arrow buttons to select your language and location,
.
and then press OK.
用电源线连接本产品和接地的交流电插座,然后打开产品电源。
1.
确保电源提供的电压符合产品额定电压。额定电压位于产品标签上。
本产品使用 110-17 Vac 或 0-40 Vac 电压,频率为 50/60 Hz。
小心:为防止损坏产品,请仅使用随产品提供的电源线。
在控制面板上,使用箭头按钮选择语言和所在位置,然后按下 OK。
2.
ID
KO
1.
Hubungkan kabel listrik antara produk dan stopkontak AC yang dibumikan, lalu
nyalakan produk. Pastikan sumber daya Anda memadai untuk peringkat tegangan
produk. Peringkat tegangan ada pada label produk. Produk ini menggunakan
110-17 Vac atau 0-40 Vac dan 50/60 Hz. Awas: Untuk mencegah kerusakan
pada produk, gunakan hanya kabel listrik yang disediakan bersama produk.
Di panel kontrol, gunakan tombol panah untuk memilih bahasa dan lokasi, lalu
.
tekan OK.
제품과 접지 AC 콘센트 사이에 전원 코드를 연결하고 제품의 전원을 켭니다. 콘센트의
1.
전압이 제품 전압에 맞는지 확인합니다. 전압은 제품 레이블에 나와 있습니다.
제품은
110-17V 또는 0-40V 및 50/60Hz를 사용합니다. 주의: 제품이 손상될 수
있으므로 제품과 함께 제공되는 전원 코드만 사용하십시오.
제어판에서 화살표 버튼을 사용하여 해당 언어 및 위치를 선택한 다음 OK를 누릅니다.
2.
3
Page 5

TH
TW
VI
เชื่อมต่อสายไฟระหว่างเครื่องพิมพ์และเต้าเสียบไฟ AC ที่มีสายดิน แล้วเปิดเครื่องพิมพ์ ตรวจสอบให้แน่ใจว่า
1.
แหล่งจ่ายไฟของคุณเพียงพอสำหรับพิกัดแรงดันไฟฟ้าของเครื่องพิมพ์ พิกัดแรงดันไฟฟ้าอยู่บนฉลากของ
เครื่องพิมพ์ เครื่องพิมพ์อาจใช้
110-17 Vac
หรือ
0-40 Vac
และ
50/60 Hz
ข้อควรระวัง: เพื่อป้องกัน
ไม่ให้เกิดความเสียหายต่อเครื่องพิมพ์ ให้ใช้สายไฟที่มาพร้อมกับเครื่องพิมพ์เท่านั้น
บนแผงควบคุม ให้กดปุ่มลูกศรเพื่อเลือกภาษาและที่ตั้งของคุณ แล้วกด
2.
利用電源線將產品連接至接地的 AC 插座,然後開啟電源。請確定您的電源適用於本產品
1.
的電壓額定值。電壓額定值標示於產品標籤上。產品使用
以及 50/60 Hz。注意:為避免損壞產品,請僅使用產品提供的電源線。
在控制面板上,使用箭頭按鈕選擇您的語言與位置,然後按下 OK。
2.
1.
Nối dây nguồn giữa sản phẩm và ổ AC nối đất, sau đó bật sản phẩm. Đảm bảo
nguồn điện phù hợp với định mức điện áp của sản phẩm. Định mức điện áp được
in trên nhãn sản phẩm. Sản phẩm sử dụng 110-127 Vac hoặc 220-240 Vac và
50/60 Hz. Cân thân: Để tránh làm hư sản phẩm, chỉ sử dụng dây điện đi kèm
với sản phẩm.
Trên bảng điều khiển, sử dụng các nút mũi tên để chọn ngôn ngữ và vị trí của bạn,
2.
sau đó bấm OK.
OK
110-17 VAC 或 0-40 VAC
4
Page 6
5
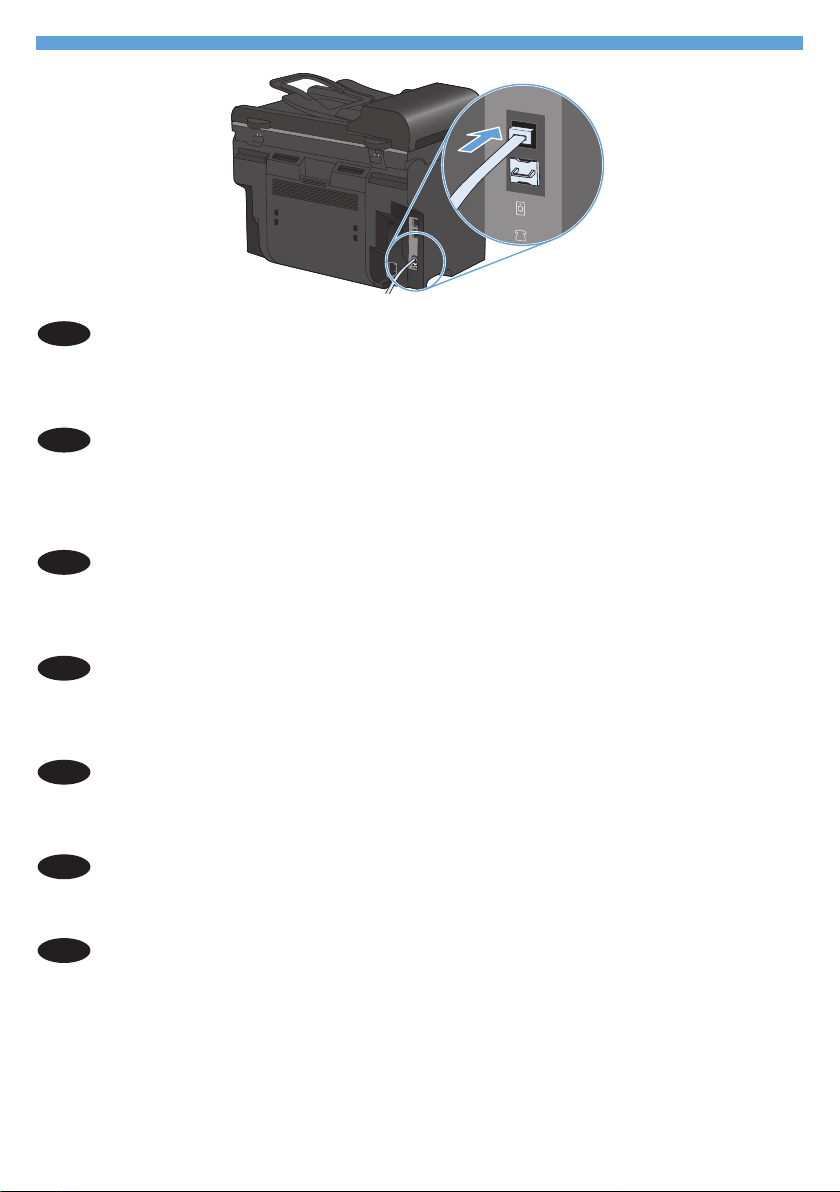
Connect the phone cord for the fax.
EN
Note: A country/region specic adapter for the RJ11 telephone cord may be required to
connect to the telephone jack.
连接传真电话线。
CN
注意:特定国家/地区可能需要用于 RJ11 电话线的适配器,才能连接
至电话插孔。
Hubungkan kabel telepon untuk faks.
ID
Catatan: Adaptor negara/kawasan tertentu untuk kabel telepon RJ11 mungkin dibutuhkan
untuk menghubungkan ke colokan telepon.
팩스용 전화 코드를 연결합니다.
KO
참고: 전화기 잭에 연결하려면 RJ11 전화 코드의 국가별 또는 지역별 어댑터가 필요할
수 있습니다.
TH
ต่อสายโทรศัพท์สำหรับแฟกซ์
หมายเหตุ: อาจต้องใช้อะแดปเตอร์สายโทรศัพท์ RJ11 เฉพาะของประเทศ/พื้นที่เพื่อต่อกับแจ็คโทรศัพท์
連接傳真電話線。
TW
注意:可能需要有特定國家/地區適用的
Nối dây điện thoại để sử dụng chức năng fax.
VI
Lưu ý: Cần phải có một bộ điều hợp tùy chỉnh theo nước hoặc theo vùng dành cho dây
điện thoại RJ11 để kết nối với đầu cắm điện thoại.
RJ11 電話線配接器,以連接至電話插孔。
5
Page 7
6
7
8
9
6
Page 8
7
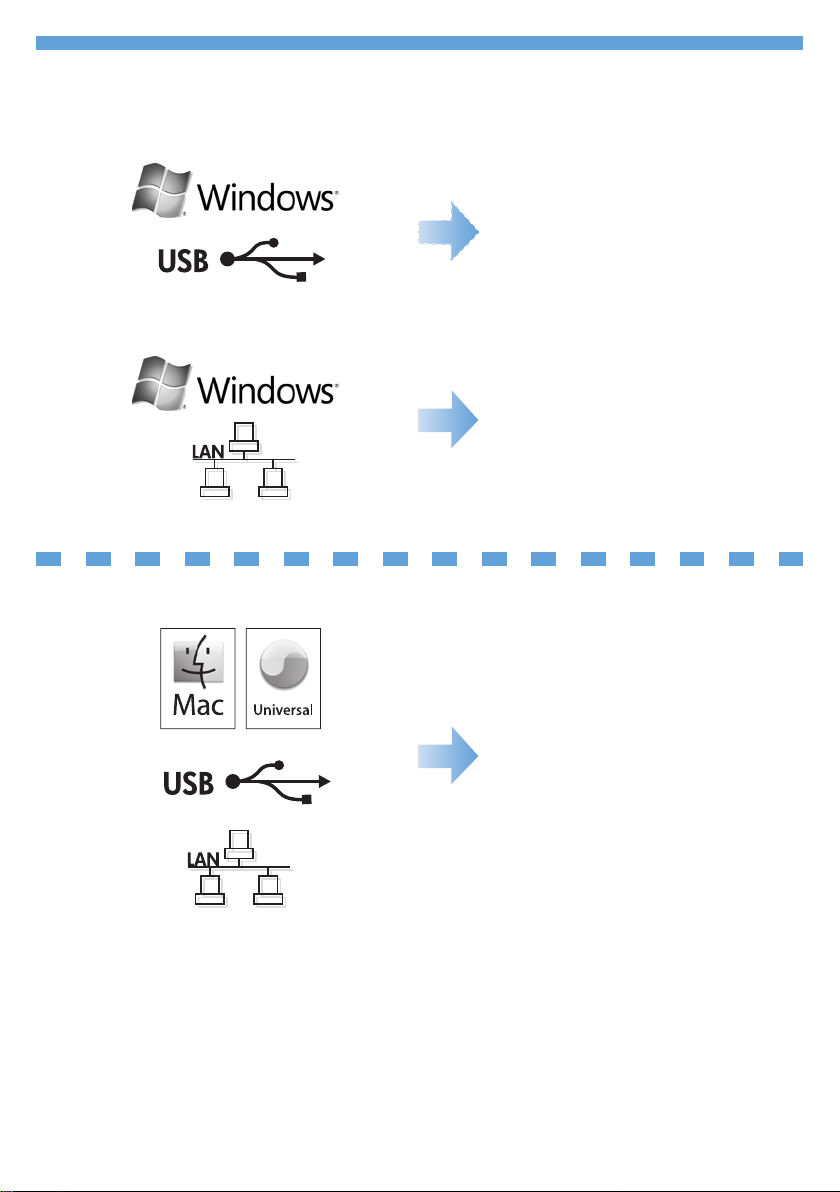
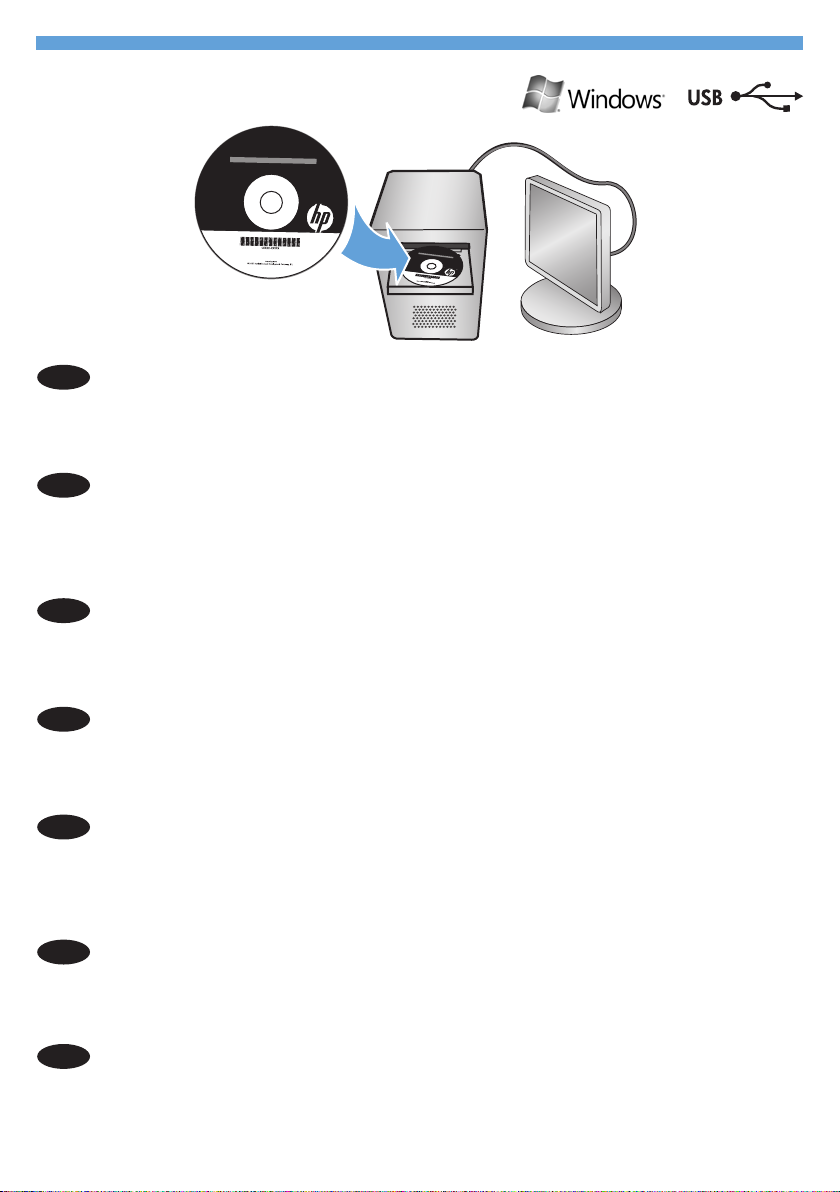
Windows USB installation
EN
Insert the CD and follow the onscreen instructions to install the software.
If the installation program does not start automatically, browse the computer and select
the CD drive. Double-click the Setup.exe le to run the program and install the product.
CN
Windows USB 安装
插入 CD 并按照屏幕上的说明安装软件。
如果安装程序未自动运行,请浏览计算机并选择 CD 盘。
双击 Setup.exe 文件运行程序,然后安装产品。
Instalasi USB Windows
ID
Masukkan CD dan ikuti petunjuk pada layar untuk menginstal perangkat lunak.
Jika program instalasi tidak dimulai secara otomatis, buka direktori komputer dan pilih
drive CD. Klik ganda le Setup.exe untuk menjalankan program dan menginstal produk.
Windows USB 설치
KO
소프트웨어를 설치하려면 CD를 삽입하고 화면의 지침을 따릅니다.
설치 프로그램이 자동으로 시작되지 않을 경우 컴퓨터에서 CD 드라이브를 찾아 선택합
니다. Setup.exe 파일을 두 번 눌러 제품 설치 프로그램을 실행하고 설치합니다.
TH
การติดตั้งแบบ USB สำหรับ Windows
ใส่ซีดีและทำตามคำแนะนำบนหน้าจอเพื่อติดตั้งซอฟต์แวร์
หากโปรแกรมติดตั้งไม่เริ่มต้นโดยอัตโนมัติ ให้เรียกดูคอมพิวเตอร์และดับเบิลคลิกที่ไดรฟ์ซีดี ดับเบิลคลิกไฟล์
Setup.exe เพื่อเรียกใช้โปรแกรมและติดตั้งเครื่องพิมพ์
Windows USB 安裝
TW
插入光碟並依照畫面上的指示安裝軟體。
若安裝程式未自動開始,請瀏覽電腦並選擇光碟機。連按兩下 Setup.exe 檔案以執行程式
並安裝本產品。
VI
Cài đặt qua USB trên Windows
Cho đĩa CD vào và thực hiện theo hướng dẫn trên màn hình để cài đặt phần mềm.
Nếu chương trình cài đặt không tự động chạy, hãy duyệt qua máy tính và chọn ổ CD.
Nhấp đúp vào tập tin Setup.exe để chạy chương trình và cài đặt sản phẩm.
7
Page 9

Connect the USB cable when prompted, and then follow the onscreen instructions to nish
EN
the procedure.
CN
在提示时连接 USB 电缆,然后按照屏幕上的说明完成安装。
Hubungkan kabel USB jika diminta, dan ikuti petunjuk pada layar untuk menyelesaikan
ID
prosedur.
메시지가 나타나면 USB 케이블을 연결한 다음 화면의 지침을 따라 절차를 완료합니다.
KO
TH
เชื่อมต่อสาย USB เมื่อมีข้อความแจ้ง แล้วทำตามคำแนะนำบนหน้าจอเพื่อเสร็จสิ้นขั้นตอน
出現提示時,請連接 USB 纜線,並依照畫面上的指示完成程序。
TW
Cắm cáp USB khi được nhắc rồi sau đó thực hiện theo hướng dẫn trên màn hình để
VI
hoàn tất quy trình.
Page 10
LASERJET M1530 MFP SERIES
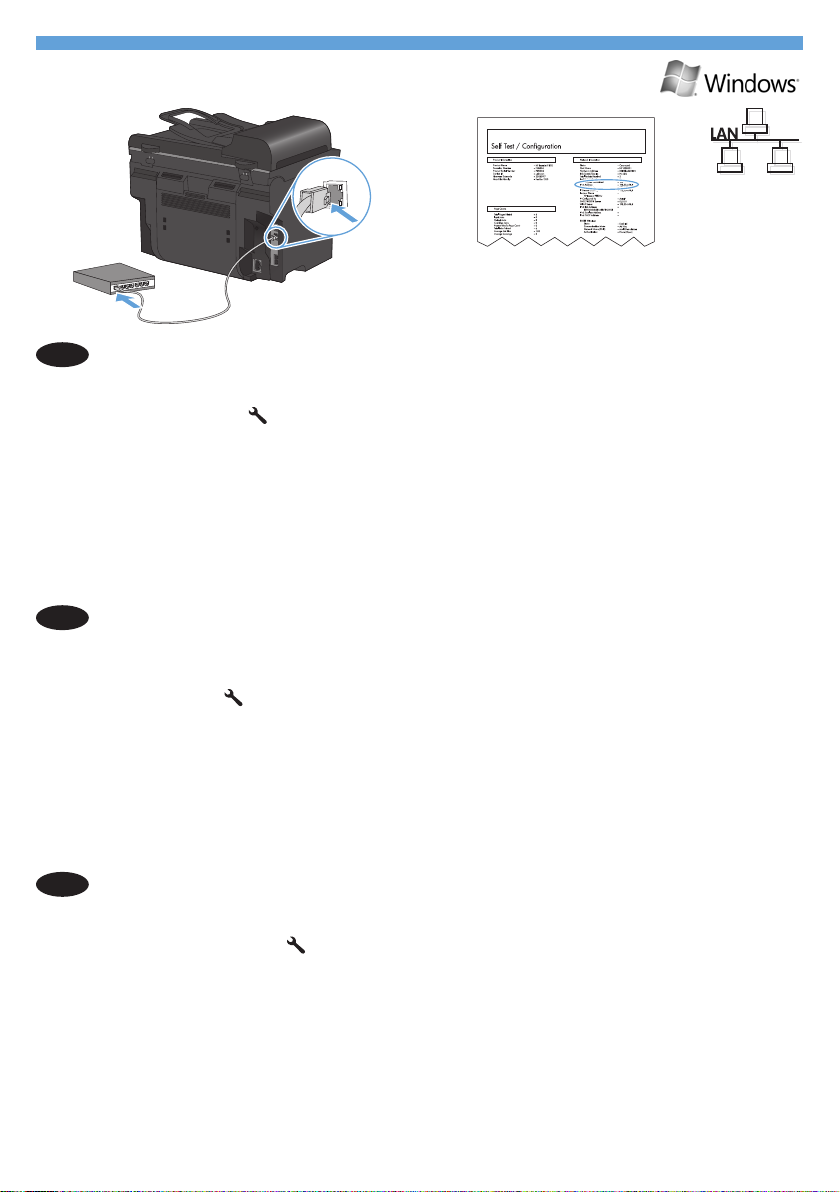
Windows network installation
EN
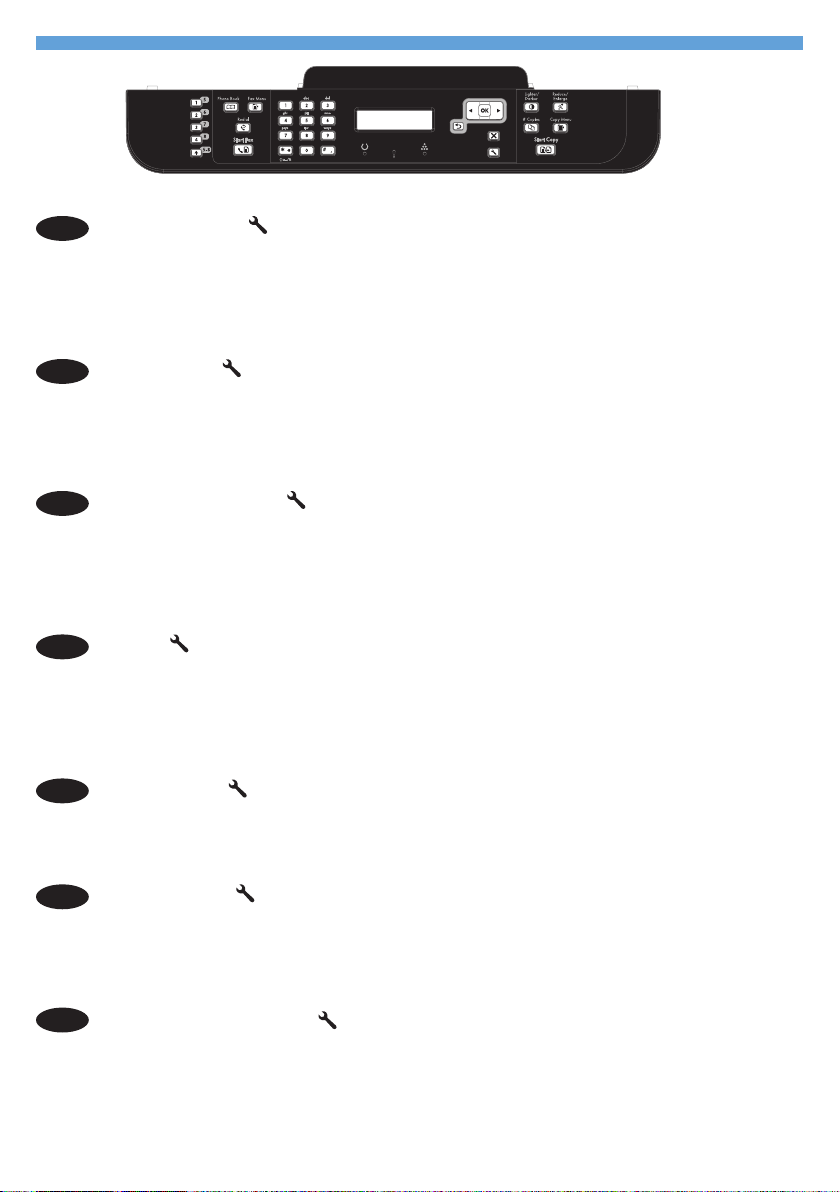
1.
With the product turned off, connect the network cable to the product, turn on the
product, and wait for one minute.
.
Press the Setup
3.
Use the arrow buttons to select Cong report, and then press OK. Locate the product IP
address on the page that prints in order to conrm that the product is connected to the
network.
4.
Insert the CD and follow the onscreen instructions to install the software. If the
installation program does not start automatically, browse the computer and doubleclick the Setup.exe le on the CD. When prompted, type the IP address from the
conguration page in the installer program screen.
CN
Windows 网络安装
在产品关闭的情况下,将网线连接至产品,然后打开产品电源并等
1.
待一分钟。
按下设置 按钮。使用箭头按钮选择报告,然后按下 OK。
2.
使用箭头按钮选择配置报告,然后按下 OK。在打印的页面上找到产
3.
品 IP 地址,以便确认产品已连接至网络。
插入 CD 并按照屏幕上的说明安装软件。如果安装程序未自动运行,
4.
请浏览计算机并双击 CD 上的 Setup.exe 文件。提示时,在安装程序
屏幕上键入从配置页上找到的 IP 地址。
button. Use the arrow buttons to select Reports, and then press OK.
ID
Instalasi jaringan Windows
1.
Saat produk mati, hubungkan kabel jaringan ke produk, hidupkan produk, dan
tunggu selama satu menit.
.
Tekan tombol Setup
tekan OK.
3.
Gunakan tombol panah untuk memilih Laporan kong., kemudian tekan OK. Cari
alamat IP produk pada halaman yang dicetak untuk mengkonrmasi bahwa produk
telah terhubung ke jaringan.
4.
Masukkan CD dan ikuti petunjuk pada layar untuk menginstal perangkat lunak.
Jika program instalasi tidak dimulai secara otomatis, buka direktori komputer dan
klik ganda le Setup.exe pada CD. Saat diminta, ketikkan alamat IP dari halaman
kongurasi pada layar program penginstal.
. Gunakan tombol panah untuk memilih Laporan, kemudian
Page 11

Windows 네트워크 설치
KO
1.
제품 전원이 꺼진 상태에서 제품에 네트워크 케이블을 연결하고, 제품의 전원을 켠
다음 잠시 기다립니다.
2.
설정
버튼: 화살표 버튼을 사용하여 보고서를 선택한 다음 OK를 누릅니다.
3.
화살표 버튼을 사용하여 구성 보고서를 선택한 다음 OK를 누릅니다. 제품이 네트워
크와 연결되었는지 확인하려면 인쇄 페이지에 있는 제품 IP 주소를 찾습니다.
4.
소프트웨어를 설치하려면 CD를 삽입하고 화면의 지침을 따릅니다. 설치 프로그램
이 자동으로 시작되지 않을 경우 컴퓨터에서 CD에 있는 Setup.exe 파일을 찾아 두
번 누릅니다. 메시지가 표시되면 구성 페이지의 IP 주소를 설치 프로그램 화면에 입
력합니다.
TH
การติดตั้งแบบเครือข่ายสำหรับ Windows
เชื่อมต่อสายเคเบิลเครือข่ายกับเครื่องพิมพ์ในขณะที่เครื่องปิดอยู่ เปิดเครื่องพิมพ์ และรอหนึ่งนาที
1.
กดปุ่ม การตั้งค่า ใช้ปุ่มลูกศรเพื่อเลือก รายงาน แล้วกด OK
2.
ใช้ปุ่มลูกศรเพื่อเลือก รายงานค่าคอนฟิเกอเรชัน แล้วกด OK ค้นหา IP แอดเดรสของเครื่องพิมพ์ในหน้าที่พิมพ์
3.
เพื่อยืนยันว่าเครื่องพิมพ์เชื่อมต่อกับเครือข่ายแล้ว
ใส่ซีดีและทำตามคำแนะนำบนหน้าจอเพื่อติดตั้งซอฟต์แวร์ หากโปรแกรมติดตั้งไม่เริ่มต้นโดยอัตโนมัติ ให้เรียกดู
4.
คอมพิวเตอร์และดับเบิลคลิกไฟล์ Setup.exe ในซีดี เมื่อมีข้อความแจ้ง ให้พิมพ์ IP แอดเดรสจากหน้าแสดงค่า
คอนฟิกในหน้าจอโปรแกรมติดตั้ง
Windows 網路安裝
TW
1.
關閉產品,將網路線連接至產品,開啟產品然後靜待一分鐘。
2.
按下「設定」
3.
使用箭頭按鈕選取組態報告,然後按下 OK。在頁面中輸入產品 IP 位址,以確認產品
連線至網路。
4.
插入光碟並依照畫面上的指示安裝軟體。若安裝程式未自動開始,請瀏覽電腦,
並且在光碟中連按兩下 Setup.exe 檔案。出現提示時,請在安裝程式畫面中的組態頁
輸入 IP 位址。
按鈕。使用箭頭按鈕選擇報告,然後按下 OK。
VI
Cài đặt qua mạng Windows
1.
Tắt sản phẩm, cắm cáp mạng, rồi bật lại sản phẩm và đợi khoảng một phút.
2.
Bấm nút Setup (Cài đặt)
sau đó bấm OK.
3.
Sử dụng các nút mũi tên để chọn Cong report (Báo cáo cấu hình), rồi bấm OK.
Tìm địa chỉ IP của sản phẩm trên trang in để xác nhận rằng sản phẩm đã được nối
mạng.
4.
Cho đĩa CD vào và thực hiện theo hướng dẫn trên màn hình để cài đặt phần mềm.
Nếu chương trình cài đặt không tự động chạy, hãy duyệt qua máy tính và nhấp đúp
vào tập tin Setup.exe trên ổ CD. Khi được nhắc, hãy nhập địa chỉ IP từ trang cấu
hình trên màn hình chương trình cài đặt.
. Sử dụng các nút mũi tên để chọn Reports (Báo cáo),
10
Page 12
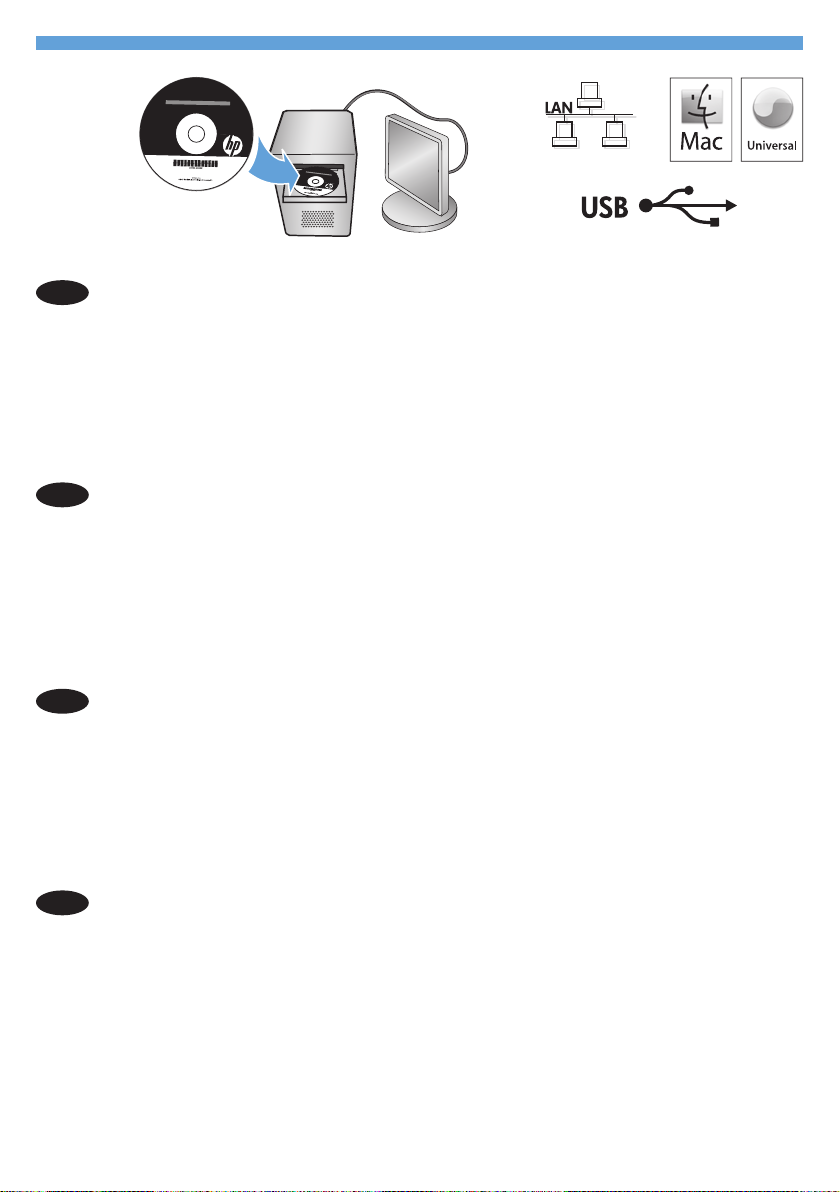
Mac installation
EN
1.
.
3.
CN
Mac 安装
1.
2.
3.
Connect the USB or network cable.
Insert the product CD into the computer, and follow the onscreen instructions.
If the software installation program does not start automatically, browse the CD
contents and run the HP LaserJet Pro M1530 MFP Series.pkg le, and then follow
the onscreen instructions.
连接 USB 或网线。
将产品 CD 插入计算机,然后按照屏幕上的说明进行操作。
如果软件安装程序未自动启动,请浏览 CD 内容并运行 HP LaserJet
Pro M1530 MFP Series.pkg 文件,然后按照屏幕上的说明进行操作。
Instalasi Mac
ID
1.
.
3.
Mac 설치
KO
1.
2.
3.
Hubungkan USB atau kabel jaringan.
Masukkan CD produk ke dalam komputer, dan ikuti petunjuk pada layar.
Jika program instalasi perangkat lunak tidak dimulai secara otomatis, telusuri isi CD
dan jalankan le HP LaserJet Pro M1530 MFP Series.pkg, lalu ikuti petunjuk pada
layar.
USB 또는 네트워크 케이블을 연결합니다.
제품 CD를 컴퓨터에 삽입하고 화면의 지침을 따릅니다.
소프트웨어 설치 프로그램이 자동으로 시작되지 않을 경우 CD 콘텐츠에서 HP LaserJet
Pro M1530 MFP Series.pkg 파일을 찾아 실행한 다음 화면의 지침을 따릅니다.
11
Page 13

TH
การติดตั้งสำหรับ Mac
เชื่อมต่อสาย USB หรือเครือข่าย
1.
ใส่ซีดีเครื่องพิมพ์ในคอมพิวเตอร์ และทำตามคำแนะนำบนหน้าจอ
2.
หากโปรแกรมติดตั้งไม่เริ่มต้นโดยอัตโนมัติ ให้เรียกดูซีดีและเรียกใช้ไฟล์ HP LaserJet Pro M1530 MFP
3.
Series.pkg และทำตามคำแนะนำบนหน้าจอ
Mac 安裝
TW
1.
連接 USB 或網路線。
2.
將產品光碟插入電腦,將產品光碟插入電腦,然後按照畫面上的指示進行。
3.
若產品安裝程式未自動開始,請瀏覽光碟內容,然後執行 HP LaserJet Pro M1530
MFP Series.pkg 檔案,並按照畫面上的指示進行。
VI
Cài đặt trên Mac
1.
Cắm USB hoặc cáp mạng.
2.
Cho đĩa CD sản phẩm vào máy tính, và thực hiện theo hướng dẫn trên màn hình.
3.
Nếu chương trình cài đặt phần mềm không tự động chạy, duyệt qua nội dung đĩa
CD và chạy tập tin HP LaserJet Pro M1530 MFP Series.pkg, rồi sau đó thực hiện
theo hướng dẫn trên màn hình.
1
Page 14
10
EN
4.
Press the Setup
OK button.
5.
Use the arrow buttons to select Basic Setup, and then select either Time/Date or Fax
Header to change the appropriate settings.
button, use the arrow buttons to select Fax Setup, and then press the
CN
ID
KO
TH
TW
按下设置 按钮,使用箭头按钮选择传真设置,然后按下 OK 按钮。
4.
使用箭头按钮选择基本设置,然后选择时间/日期或传真标题以更改相
5.
应设置。
4.
Tekan tombol Setup
kemudian tekan tombol OK.
5.
Gunakan tombol panah untuk memilih Pengaturan Dasar, dan pilih Waktu/Tanggal
atau Header Faks untuk mengganti pengaturan yang terkait.
4.
5.
4.
5.
4.
5.
버튼을 누르고, 화살표 버튼을 사용하여 팩스 설정을 선택한 다음 OK
설정
버튼을 누릅니다.
적절한 설정으로 변경하려면 화살표 버튼을 사용하여 기본 설정을 선택한 다음
시간/날짜 또는 팩스 머리글을누릅니다.
กดปุ่ม การตั้งค่า ใช้ปุ่มลูกศรเพื่อเลือก การตั้งค่าแฟกซ์ แล้วกดปุ่ม OK
ใช้ปุ่มลูกศรเพื่อเลือก การตั้งค่าพื้นฐาน แล้วเลือก เวลา/วันที่ หรือ หัวแฟกซ์ เพื่อเปลี่ยนแปลงการตั้งค่าที่เหมาะสม
按下「設定」
使用箭頭按鈕選擇 Basic Setup(基本設定),然後選擇 Time/Date(時間/日期)
或 Fax Header(傳真頁首)以變更適當的設定。
, gunakan tombol panah untuk memilih Pengaturan Faks,
按鈕,使用箭頭按鈕選擇傳真設定,然後按下 OK 按鈕。
VI
Bấm nút Setup (Cài đặt) , sử dụng các nút mũi tên để chọn Fax Setup (Cài đặt Fax),
4.
rồi sau đó bấm nút OK.
Sử dụng các nút mũi tên để chọn Basic Setup (Cài đặt Cơ bản), sau đó chọn hoặc
5.
Time/Date (Thời gian/Ngày tháng) hoặc Fax Header (Tiêu đề Fax) để thay đổi thông
số cài đặt phù hợp.
13
Page 15

11
Test the document feeder. Load the conguration report face-up in the document feeder,
EN
adjust the media guides against the edges of the paper, and then press Start Copy
测试文档进纸器。将配置报告面朝上装入文档进纸器,调整介质导板
CN
使其紧靠纸张边缘,然后按下开始复印 。
Uji pengumpan dokumen. Muat laporan kongurasi dengan menghadap ke atas pada
ID
pengumpan dokumen, sesuaikan pemandu media dengan tepi kertas, kemudian tekan
Mulai Salin
.
.
문서 공급기를 테스트합니다. 구성 보고서의 인쇄면이 위를 향하도록 문서 공급기에 넣고,
KO
용지 조정대를 용지의 가장자리에 맞게 조절한 다음 복사 시작
TH
ทดสอบอุปกรณ์ป้อนกระดาษ ใส่รายงานแสดงค่าคอนฟิกหงายหน้าขึ้นในอุปกรณ์ป้อนกระดาษ ปรับตัวกั้นกระดาษ
을누릅니다.
ให้ชิดขอบกระดาษ แล้วกด เริ่มทำสำเนา
測試文件進紙器。在文件進紙器中放入組態報告(面朝上),調整紙張邊緣的紙材導板,
TW
然後按下 Start Copy(開始影印)
Kiểm tra khay nạp tài liệu. Nạp báo cáo cấu hình với mặt hướng lên vào khay nạp tài
VI
liệu, điều chỉnh các thanh dẫn giấy cho khớp với các cạnh giấy, sau đó bấm Start Copy
(Bắt đầu Sao chép)
.
。
14
Page 16

1
Test the atbed scanner. Load the conguration report face-down on the scanner glass,
EN
and then press Start Copy
测试平板扫描仪。将配置报告面朝下放在扫描仪玻璃板上,然后按下
CN
开始复印 。
Uji pemindai atbed. Muat laporan kongurasi dengan menghadap ke bawah pada kaca
ID
pemindai, kemudian tekan Mulai Salin
.
.
평판 스캐너를 테스트합니다. 구성 보고서의 인쇄면을 아래로 향하도록 스캐너 유리에
KO
놓은 다음 복사 시작
TH
ทดสอบเครื่องสแกนแบบแท่น วางรายงานแสดงค่าคอนฟิกคว่ำหน้าลงบนกระจกของสแกนเนอร์ แล้วกด
을 누릅니다.
เริ่มทำสำเนา
測試平台掃描器。在掃描器玻璃板上放入組態報告(面朝下),然後按下 Start Copy
TW
(開始影印)
Kiểm tra máy quét hình phẳng. Nạp báo cáo cấu hình với mặt hướng lên trên kính máy
VI
quét, sau đó bấm Start Copy (Bắt đầu Sao chép)
。
.
15
Page 17

13
Test scan. Load the control-panel description page on the scanner glass. Windows:
EN
In the HP program group, select Scan to, and select a scanning destination.
Mac: Open the HP Director, click Scan, and click Scan again. Click Finish, and then click
Destinations. Name the le and specify the destination location. Click Save.
CN
测试扫描。将控制面板说明页放在扫描仪玻璃板上。Windows:
在 HP 程序组中,选择扫描到,然后选择扫描目标。
Mac: 打开 HP Director,单击扫描,然后再次单击扫描。单击完成,
然后单击目标。为文件命名,指定目标位置。单击保存。
Uji pindai. Muat halaman deskripsi panel kontrol pada kaca pemindai. Windows:
ID
Pada grup program HP, pilih Scan to [Pindai ke], dan pilih tujuan pemindaian.
Mac: Buka HP Director, klik Scan
kemudian klik Tujuan. Beri nama le dan tentukan lokasi tujuan. Klik Save [Simpan].
스캔을 테스트합니다. 제어판 설명 페이지를 스캐너 유리에 놓습니다. Windows:
KO
HP 프로그램 그룹에서 스캔 보내기를 선택하고 스캔할 대상을 선택합니다.
Mac: HP Director를 열고 스캔을 누르고 스캔을 다시 누릅니다. 차례대로 완료, 대상을
누릅니다. 파일 이름을 정하고 대상 위치를 지정합니다. 그 다음 저장을 누릅니다.
[Pindai]
, dan klik Scan
[Pindai]
lagi. Klik Selesai,
TH
ทดสอบการสแกน วางหน้าคำอธิบายแผงควบคุมบนกระจกของเครื่องสแกน
HP
ให้เลือก สแกนไปที่ และเลือกปลายทางการสแกน
Mac:
เปิด
HP Director
ตำแหน่งปลายทาง คลิก
測試掃描。將控制面板描述頁放在掃描器玻璃板上。Windows:在 HP 程式群組中,
TW
選取掃描至,然後選取掃描目的地。
Mac:開啟 HP Director,按一下掃描,然後再按一下掃描。按一下完成,然後按一
下目的地。將檔案命名並指定目的地位置。按一下儲存。
Quét thử. Nạp trang mô tả bảng điều khiển trên kính máy quét. Windows: Trong
VI
nhóm chương trình của HP, chọn Scan to (Quét tới), rồi chọn vị trí định quét tới.
Mac: Mở HP Director, nhấp Scan
Finish
(Xong)
vị trí nơi nhận. Nhấp Save
คลิก
Scan
และคลิก
Save
và sau đó nhấp Destinations
(Lưu)
(Quét)
.
Scan
อีกครั้ง คลิก
, rồi nhấp Scan
Finish
(Nơi nhận)
Windows:
แล้วคลิก
(Quét)
. Đặt tên tập tin và xác định
ในกลุ่มโปรแกรมของ
Destinations
lại lần nữa. Nhấp
16
ตั้งชื่อไฟล์และระบุ
Page 18

14
Setup is complete. If you did not register the product during software installation, go
EN
to www.register.hp.com to register now. The HP Help and Learn Center and other
documentation are on the CD that came with the product or in the HP program folder on
your computer. The HP Help and Learn Center is a product help tool that provides easy
access to product information, HP product Web support, troubleshooting guidance, and
regulatory and safety information.
安装完成。如果在软件安装期间未注册产品,请立即访问
CN
www.register.hp.com 进行注册。产品随附的 CD 或您计算机上的
HP Program 文件夹中均有“HP 帮助和学习中心”及其它文档。
“HP 帮助和学习中心”是一个产品帮助工具,通过它可轻松访问产
品信息、HP 产品 Web 支持、故障排除指南以及管制和安全信息。
Penataan selesai. Jika Anda tidak mendaftarkan produk pada saat instalasi perangkat
ID
lunak, kunjungi www.register.hp.com untuk mendaftar sekarang. Pusat Bantuan dan
Belajar HP dan dokumentasi lain tersedia pada CD yang disertakan dengan atau di
dalam folder Program HP pada komputer. Pusat Bantuan dan Belajar HP adalah alat
bantu produk yang memberi akses mudah ke informasi produk, dukungan web untuk
produk HP, panduan pemecahan masalah, serta informasi peraturan dan keselamatan.
설치가 완료됩니다. 소프트웨어 설치 도중 제품을 등록하지 않은 경우 www.register.hp.com
KO
으로 이동하여 이제 등록하십시오.
공된
CD
에 있거나 사용자 컴퓨터의 HP 프로그램 폴더에 있습니다. HP 도움말 및 학습 센터
는 제품 정보,
제품 지원 도구입니다.
HP
제품 웹 지원, 문제 해결 안내, 규정 및 안전 정보에 쉽게 액세스할 수 있는
HP
도움말 및 학습 센터와 기타 설명서는 제품과 함께 제
17
Page 19

TH
การติดตั้งเสร็จสมบูรณ์แล้ว หากคุณยังไม่ได้ลงทะเบียนผลิตภัณฑ์ระหว่างการติดตั้งซอฟต์แวร์ ให้ไปที่
www.register.hp.com เพื่อลงทะเบียนได้ทันที HP Help and Learn Center และเอกสารอื่นๆ จะอยู่ในแผ่น
ซีดีที่มาพร้อมกับเครื่องพิมพ์ หรือในโฟลเดอร์โปรแกรมของ
Center เป็นเครื่องมือวิธีใช้เครื่องพิมพ์ที่ช่วยให้เข้าถึงข้อมูลเครื่องพิมพ์, การสนับสนุนทางเว็บของเครื่องพิมพ์ HP,
HP ในคอมพิวเตอร์ของคุณ HP Help and Learn
คำแนะนำการแก้ไขปัญหา และข้อมูลข้อกำหนดและความปลอดภัย
此時安裝即完成。若您未在軟體安裝期間註冊產品,請立即至 www.register.hp.com 註冊。
TW
您可以在產品隨附的 CD 或電腦的 HP 程式資料夾中,找到 HP Help and Learn Center 和其
他文件。HP Help and Learn Center 為產品說明工具,可讓使用者輕鬆獲得產品資訊、
HP 產品網路支援、故障排除指引,以及法規與安全資訊。
Cài đặt đã hoàn tất. Nếu bạn chưa đăng ký sản phẩm trong khi cài đặt phần mềm, hãy
VI
vào trang www.register.hp.com để đăng ký ngay bây giờ. Trợ giúp HP và Trung tâm Tri
thức và các tài liệu khác nằm trên đĩa CD đi kèm với sản phẩm hoặc nằm trong thư mục
HP Program trên máy tính của bạn. Trợ giúp HP và Trung tâm Tri thức là công cụ trợ
giúp sản phẩm cho phép truy cập dễ dàng vào thông tin sản phẩm, hỗ trợ trang web sản
phẩm HP, hướng dẫn khắc phục sự cố, và các thông tin về quy định và an toàn.
1
Page 20

www.hp.com
Copyright and License
© 010 Copyright Hewlett-Packard Development Company, L.P.
Reproduction, adaptation or translation without prior written permission
is prohibited, except as allowed under the copyright laws.
The information contained herein is subject to change without notice.
The only warranties for HP products and services are set forth in the
express warranty statements accompanying such products and services.
Nothing herein should be construed as constituting an additional
warranty. HP shall not be liable for technical or editorial errors or
omissions contained herein.
Part number: CE53-04
Edition 1, /010
FCC Regulations
This equipment has been tested and found to comply with the limits for
a Class B digital device, pursuant to Part 15 of the FCC rules. These
limits are designed to provide reasonable protection against harmful
interference in a residential installation. This equipment generates,
uses, and can radiate radio-frequency energy. If this equipment is not
installed and used in accordance with the instructions, it may cause
harmful interference to radio communications. However, there is no
guarantee that interference will not occur in a particular installation. If
this equipment does cause harmful interference to radio or television
reception, which can be determined by turning the equipment off and
on, correct the interference by one or more of the following measures:
• Reorient or relocate the receiving antenna.
• Increase separation between equipment and receiver.
• Connect equipment to an outlet on a circuit different from that to
which the receiver is located.
• Consult your dealer or an experienced radio/TV technician.
Any changes or modications to the product that are not expressly
approved by HP could void the user’s authority to operate this
equipment. Use of a shielded interface cable is required to comply
with the Class B limits of Part 15 of FCC rules. For more regulatory
information, see the electronic user guide. Hewlett-Packard shall not
be liable for any direct, indirect, incidental, consequential, or other
damage alleged in connection with the furnishing or use of this
information.
Trademark Credits
Windows® is a U.S. registered trademark of Microsoft Corporation.
版权与许可
© 010 Copyright Hewlett-Packard Development
Company, L.P.
未经事先书面许可,严禁进行任何形式的复制、改编或
翻译,除非版权法另有规定。
此处包含的信息如有更改,恕不另行通知。
HP 产品和服务的保修仅以随该产品和服务提供的书面保
修声明为准。此处内容不代表任何额外保修。HP 公司对
此处任何技术性或编辑性的错误或遗漏概不负责。
部件号: CE53-04
Edition 1, /010
FCC 规则
本设备已经过测试,确认符合 FCC 规则第 15 部分有关
B 类数字设备的限制规定。在住宅区安装时,这些限制
为防止有害干扰提供了合理保护。本设备可以产生、利
用并发射无线射频能量。如果不按说明中的要求安装和
使用本设备,有可能对无线电通信产生有害干扰。但也
不能保证在特定的安装中不会产生干扰。如果本设备确
实对无线电或电视接收造成干扰(可以通过开关设备来
确定),可通过以下一种或多种措施排除干扰:
• 重新调整接收天线的方向或位置。
• 增加设备和接收器之间的距离。
• 将本设备电源插座与接收器电源的插座设在不同的
电路上。
• 咨询代理商或经验丰富的无线电/电视技术人员。
未经 HP 书面批准而对产品进行任何更改或修改都将导
致用户不能操作此设备。使用屏蔽的接口电缆时必须遵
循 FCC 规则第 15 部分中的 B 类限制。有关更多管制信
息,请参阅电子版《用户指南》。对于由本信息的提供
或使用所引起的任何直接、间接、偶然、继发性或其它
损失,Hewlett-Packard 概不负责。
商标说明
Windows® 是 Microsoft Corporation 在美国的注册商
标。
*CE538-90942*
*CE538-90942*
CE53-04
 Loading...