

Page 1
HP LaserJet M1522 MFP Series
Software Technical Reference
Page 2

Page 3

HP LaserJet M1522 MFP Series
Software Technical Reference
Page 4

Copyright and License
© 2008 Copyright Hewlett-Packard
Development Company, L.P.
Trademark Credits
®
Adobe
, Acrobat®, and PostScript® are
trademarks of Adobe Systems Incorporated.
Reproduction, adaptation, or translation
without prior written permission is prohibited,
except as allowed under the copyright laws.
Edition 1, 1/2008
The information contained herein is subject
to change without notice.
The only warranties for HP products and
services are set forth in the express warranty
statements accompanying such products
and services. Nothing herein should be
construed as constituting an additional
warranty. HP shall not be liable for technical
or editorial errors or omissions contained
herein.
ENERGY STAR and the ENERGY STAR
mark are registered U.S. marks.
Intel® Core™ are trademarks of Intel
Corporation in the U.S. and other countries.
Microsoft®, Windows®, and Windows® XP
are U.S. registered trademarks of Microsoft
Corporation.
Windows Vista® is either a registered
trademark or trademark of Microsoft
Corporation in the United States and/or other
countries.
®
UNIX
is a registered trademark of The Open
Group.
Page 5

Table of contents
1 Purpose and scope
Introduction ........................................................................................................................................... 1
Product comparison ............................................................................................................................. 2
Product features ................................................................................................................................... 3
Product walkaround .............................................................................................................................. 4
Front view ............................................................................................................................ 4
Back view ............................................................................................................................. 4
Interface ports ...................................................................................................................... 5
Serial number and model number location .......................................................................... 5
Printing-system software ...................................................................................................................... 6
In-box printing-system software CDs ................................................................................... 6
Supported operating systems .............................................................................................. 6
Supported printer drivers ..................................................................................................... 6
Software components included with the installation ............................................................ 7
Recommended installation for Windows ............................................................. 7
Express installation (USB or network) for Windows ............................................ 8
Connect another HP LaserJet M1522 MFP Series ............................................. 8
Macintosh installation .......................................................................................... 9
Printing-system software component information ................................................................ 9
New software features ...................................................................................... 10
Software component comparison ...................................................................... 10
Software component availability ........................................................................ 11
Software component localization ...................................................................... 12
Availability .......................................................................................................................... 18
Print from other operating systems .................................................................................... 21
Documentation availability and localization ........................................................................................ 22
Documentation on the software CD ................................................................................... 22
Hewlett-Packard LaserJet M1522 MFP Series Install Notes ............................ 23
HP LaserJet M1522 MFP Series User Guide ................................................... 23
Availability .......................................................................................................................... 24
2 Software description
Windows printing-system software ..................................................................................................... 28
Supported operating systems for Windows ....................................................................... 28
ENWW iii
Page 6

Windows system requirements .......................................................................................... 28
Supported printer drivers for Windows .............................................................................. 29
Select the correct printer driver for Windows ..................................................................... 29
Priority for print settings ..................................................................................................... 29
Change printer-driver settings for Windows ....................................................................... 30
Printing-system software components for Windows .......................................................... 30
Supported utilities for Windows .......................................................................................................... 32
HP ToolboxFX ................................................................................................................... 32
HP Web Jetadmin .............................................................................................................. 32
Other Windows components and utilities ........................................................................... 32
Product alerts and status messages .................................................................................. 33
HP ToolboxFX .................................................................................................................................... 34
Overview of HP ToolboxFX ............................................................................................... 34
Start HP ToolboxFX .......................................................................................... 35
Structure ............................................................................................................ 35
Key features ....................................................................................................................... 35
Receive faxes to this computer ......................................................................... 35
Display a message when a fax is received to this computer ............................. 36
Receive alert messages for product events ...................................................... 37
HP pop-up alert messages ............................................................... 37
System-tray icon alert ....................................................................... 38
Desktop alert .................................................................................... 38
E-mail alert ....................................................................................... 39
HP ToolboxFX folders ........................................................................................................ 39
Status ................................................................................................................ 39
Device Status ................................................................................... 40
Supplies Status ................................................................................. 41
Device Configuration ........................................................................ 41
Network Summary ............................................................................ 46
Print Info Pages ................................................................................ 49
Event Log ......................................................................................... 51
Alerts ................................................................................................................. 51
Set up Status Alerts .......................................................................... 51
Set up E-mail Alerts .......................................................................... 53
Fax .................................................................................................................... 54
Fax Tasks ......................................................................................... 55
Fax Phone Book ............................................................................... 55
Fax Send Log and Fax Receive Log ................................................ 57
Block Faxes ...................................................................................... 60
Fax Data Properties .......................................................................... 60
Help ................................................................................................................... 61
User Guide ....................................................................................... 62
Troubleshooting ................................................................................ 63
Animated Demonstrations ................................................................ 64
iv ENWW
Page 7

System Settings ................................................................................................ 65
Device Information ............................................................................ 66
Paper Handling ................................................................................. 66
Print Quality ...................................................................................... 70
Paper Types ..................................................................................... 72
System Setup ................................................................................... 74
Service .............................................................................................. 75
Device Polling ................................................................................... 76
Save/Restore Settings ...................................................................... 77
Password .......................................................................................................... 78
Print Settings ..................................................................................................... 78
Printing ............................................................................................. 79
PCL5c ............................................................................................... 80
PostScript ......................................................................................... 81
Network Settings ............................................................................................... 81
Network Summary ............................................................................ 82
IPv4 Configuration ............................................................................ 83
IPv6 Configuration ............................................................................ 84
Network Identification ....................................................................... 85
Advanced .......................................................................................... 86
SNMP ............................................................................................... 87
Other screens .................................................................................................................... 89
About HP ToolboxFX dialog box ....................................................................... 89
HP Instant Support ............................................................................................ 90
Support and Troubleshooting ............................................................................ 90
Product Registration .......................................................................................... 91
Shop for Supplies .............................................................................................. 91
Use HP Web Jetadmin software ........................................................................................................ 92
HP Easy Printer Care (network models only) ..................................................................................... 93
Installation .......................................................................................................................... 93
Access ............................................................................................................................... 94
HP Customer Participation Program .................................................................................................. 95
HP Driver Diagnostic Printer Check Tool ........................................................................................... 96
Scan software ..................................................................................................................................... 97
Scan methods .................................................................................................................... 97
HP LaserJet Scan software ............................................................................................... 97
E-mail .............................................................................................................. 101
Scan settings ................................................................................................... 101
Scan drivers ..................................................................................................................... 102
WIA driver ....................................................................................................... 103
TWAIN driver ................................................................................................... 106
TWAIN compatibility ....................................................................... 106
TWAIN-driver user interface ........................................................... 107
HP LaserJet Fax Setup Utility .......................................................................................................... 109
ENWW v
Page 8

HP LaserJet Send Fax software ....................................................................................................... 125
Fax to multiple recipients ................................................................................................. 127
Create a cover page ........................................................................................................ 129
Fax pages scanned from the product ADF ...................................................................... 130
Fax without first printing and scanning the document ...................................................... 130
Available product configurations ...................................................................................................... 131
Software features by connection type .............................................................................. 131
Supported configurations ................................................................................................. 132
Direct connection ............................................................................................ 132
Network connection options ............................................................................ 132
Local connection that uses Microsoft peer-to-peer networking
(Windows only) ............................................................................... 132
Printer sharing disclaimer ............................................................... 132
Networking requirements ................................................................ 132
Multitasking capabilities ................................................................................................... 132
Differences between the network-connected and the direct-connected
configurations .................................................................................................................. 134
Supported third-party software ......................................................................................................... 135
Text-recognition software ................................................................................................ 135
About text-recognition reliability ...................................................................... 135
Other PC fax programs .................................................................................................... 135
3 Install Windows printing-system components
Installation overview ......................................................................................................................... 138
Installation options ............................................................................................................................ 139
General Windows installation instructions ........................................................................................ 140
General Windows installation for direct connections ....................................................... 140
Windows installation instructions for direct-connected (USB) products .......... 140
Printer-driver only installation instructions (Microsoft Add Printer Wizard) ..... 140
Set up Windows sharing (peer-to-peer networking) ........................................ 142
Printer sharing disclaimer ............................................................... 142
Set up the host computer running Windows 2000 or Windows
Server 2003 .................................................................................... 142
Set up the host computer running Windows XP or Windows
Vista ................................................................................................ 143
Set up the client computers running Windows 2000 or Windows
Server 2003 .................................................................................... 143
Set up the client computers running Windows XP or Windows
Vista ................................................................................................ 144
General Windows installation for network connections ................................................... 144
Network setup ................................................................................................. 144
Windows installation instructions for network-connected products ................. 145
Printer-driver only installation instructions (Microsoft Add Printer Wizard) ..... 145
Point-and-Print installation ............................................................................................... 146
vi ENWW
Page 9

Modify a pre-existing installation ...................................................................................... 147
Detailed Windows installation instructions ....................................................................................... 148
Recommended Install ...................................................................................................... 149
Easy Install (recommended) ........................................................................... 153
USB connection .............................................................................. 155
Network connection ........................................................................ 161
Advanced Install .............................................................................................. 170
Recommended* .............................................................................. 172
Custom (for advanced users)* ........................................................ 175
Express USB Install ......................................................................................................... 177
Express Network Install ................................................................................................... 183
User uninstall .................................................................................................................................... 192
Uninstall instructions for Windows ................................................................................... 192
Uninstall a Recommended or Express installation .......................................... 192
Use the product software Uninstall component
(recommended) .............................................................................. 192
Use the Windows Add or Remove Programs component .............. 192
Use the printing-system software CD ............................................. 193
Uninstall a printer-driver only installation ........................................................ 194
Files and folders not removed, and manual uninstall for Windows .................................. 194
4 HP PCL 6 and HP postscript level 3 emulation printer drivers, and HP PCL 5 UPD for Windows
HP PCL 6 and HP postscript level 3 emulation printer drivers for Windows .................................... 198
Introduction ...................................................................................................................... 198
Access to printer drivers .................................................................................................. 198
Printing Preferences printer-driver tabs .......................................................... 198
Properties printer-driver tabs ........................................................................... 199
Help system .................................................................................................................... 200
What's this? Help ............................................................................................ 200
Context-sensitive Help .................................................................................... 200
Warning icons ................................................................................................. 200
HP postscript level 3 emulation support ......................................................................... 201
Advanced tab features .................................................................................................... 201
Paper/Output ................................................................................................... 203
Copy Count setting ........................................................................ 203
Graphic ............................................................................................................ 204
TrueType Font settings ................................................................... 204
Document Options .......................................................................................... 204
Advanced Printing Features ........................................................... 204
Print Optimizations (HP PCL 6 printer driver only) ......................... 204
PostScript Options (HP postscript level 3 emulation printer driver
only) ................................................................................................ 204
Printer Features .............................................................................. 205
Layout Options ............................................................................... 206
ENWW vii
Page 10

Printing Shortcuts tab features ........................................................................................ 206
Use defined printing shortcuts ......................................................................... 207
Create a custom printing shortcut ................................................................... 208
Paper/Quality tab features ............................................................................................... 209
Paper Options ................................................................................................. 210
Paper sizes: .................................................................................... 210
Custom Paper Size ......................................................................... 211
Paper source: ................................................................................. 213
Paper type: ..................................................................................... 213
Special pages: ................................................................................ 214
Document preview image ................................................................................ 215
Print Quality ..................................................................................................... 215
Effects tab features .......................................................................................................... 216
Resizing Options ............................................................................................. 216
Actual size ...................................................................................... 217
Print document on ......................................................................... 217
Scale to fit ...................................................................................... 217
% of actual size .............................................................................. 217
Document preview image ................................................................................ 218
Watermarks ..................................................................................................... 218
Current watermarks ........................................................................ 219
Watermark Message ...................................................................... 220
Message Angle ............................................................................... 220
Font Attributes ................................................................................ 220
Default watermark settings ............................................................. 221
Finishing tab features ...................................................................................................... 221
Document options ........................................................................................... 222
Print on both Sides (manually) ....................................................... 223
Flip pages up .................................................................................. 223
Booklet layout ................................................................................. 224
Pages per sheet ............................................................................. 225
Print page borders .......................................................................... 225
Page order ...................................................................................... 225
Document preview image ................................................................................ 226
Orientation ....................................................................................................... 226
Services tab features ....................................................................................................... 227
Device Settings tab features ............................................................................................ 227
Form To Tray Assignment ............................................................................... 229
Font Substitution Table ................................................................................... 230
External Fonts (HP PCL 6 printer driver only) ................................................. 230
Install external fonts ........................................................................ 231
Remove external fonts .................................................................... 232
HP postscript level 3 emulation printer driver Device Settings ........................ 232
Available PostScript Memory .......................................................... 233
viii ENWW
Page 11

Output Protocol ............................................................................... 233
Send Ctrl-D Before Each Job ......................................................... 233
Send Ctrl-D After Each Job ........................................................... 233
Convert Gray Text to PostScript Gray ............................................ 233
Convert Gray Graphics to PostScript Gray ..................................... 234
Add Euro Currency Symbol to PostScript Fonts ............................. 234
Job Timeout .................................................................................... 234
Wait Timeout .................................................................................. 234
Minimum Font Size to Download as Outline ................................... 234
Maximum Font Size to Download as Bitmap .................................. 234
Installable Options ........................................................................................... 234
Allow Manual Duplexing ................................................................. 235
Postscript Passthrough (HP postscript level 3 emulation printer
driver only) ...................................................................................... 235
JPEG Passthrough (HP postscript level 3 emulation printer driver
only) ................................................................................................ 235
About tab features ........................................................................................................... 235
HP Universal Printer Driver .............................................................................................................. 237
Introduction ...................................................................................................................... 237
HP universal printer drivers ............................................................................................. 237
HP Managed Print Administration .................................................................................... 237
Managed printer policies ................................................................................. 237
Managed printer lists ....................................................................................... 237
User groups ..................................................................................................... 237
5 Macintosh software and utilities
Supported Macintosh operating systems ......................................................................................... 240
Macintosh system requirements ....................................................................................................... 241
Macintosh printing-system software ................................................................................................. 242
Supported printer drivers for Macintosh ........................................................................... 242
Change printer-driver settings for Macintosh ................................................................... 242
Embedded Web server .................................................................................................... 242
Supported software components for Macintosh .............................................................. 243
Software components for Macintosh ............................................................... 243
Software features not available on Macintosh operating systems .................. 244
Software component availability for Macintosh ................................................................ 244
Macintosh software component descriptions ................................................................... 245
HP LaserJet PPDs .......................................................................................... 245
PDEs ............................................................................................................... 245
Install notes (Readme file) .............................................................................. 245
Online help ...................................................................................................... 245
Software component localization ..................................................................................... 245
Order software for Macintosh .......................................................................................... 245
HP embedded Web server (EWS) ................................................................................... 246
ENWW ix
Page 12

Access ............................................................................................................. 247
HP EWS screens ............................................................................................ 247
Status ............................................................................................. 248
System ............................................................................................ 248
Print ................................................................................................ 249
Fax .................................................................................................. 249
Networking ...................................................................................... 250
HP embedded Web server (EWS) ................................................................................................... 252
Status ............................................................................................................................... 252
Device Status .................................................................................................. 253
Supplies Status ............................................................................................... 254
Device Configuration ....................................................................................... 254
Network Summary ........................................................................................... 257
Print Info Pages ............................................................................................... 259
Event Log ........................................................................................................ 259
System ............................................................................................................................. 259
Device Information .......................................................................................... 260
Paper Handling ............................................................................................... 260
Print Quality ..................................................................................................... 261
Paper Types .................................................................................................... 261
System Setup .................................................................................................. 262
Service ............................................................................................................ 262
Password ........................................................................................................ 263
Print ................................................................................................................................. 263
Printing ............................................................................................................ 263
PCL5c ............................................................................................................. 264
PostScript ........................................................................................................ 264
Fax ................................................................................................................................... 264
Fax Receive .................................................................................................... 265
Fax Phone Book .............................................................................................. 266
Networking ....................................................................................................................... 266
Network Summary ........................................................................................... 267
IPv4 Configuration ........................................................................................... 268
IPv6 Configuration ........................................................................................... 268
Network Identification ...................................................................................... 269
Advanced ........................................................................................................ 270
SNMP .............................................................................................................. 270
Install and uninstall Macintosh printing-system software components ............................................. 271
Installation options ........................................................................................................... 271
General Macintosh installation instructions for direct connections .................. 271
General Macintosh installation instructions for networked computers ............ 271
Detailed Macintosh installation instructions ..................................................................... 272
Printing-system software installation ............................................................... 272
HP Setup Assistant ......................................................................................... 278
x ENWW
Page 13

HP LaserJet MFP uninstall instructions for Macintosh .................................................... 285
Use features in the Macintosh printer driver ..................................................................................... 286
Print ................................................................................................................................. 286
Scan from the product and HP Director (Macintosh) ........................................................................ 289
Scanning tasks ................................................................................................................ 289
Fax a document from a Macintosh computer (fax models only) ....................................................... 290
6 Engineering details
Paper and print media ...................................................................................................................... 292
Understand paper and print media use ........................................................................... 292
Supported paper and print media sizes ........................................................................... 292
Special paper or print media guidelines ........................................................................... 294
Load paper and print media ............................................................................................. 294
Configure trays ................................................................................................................ 295
Media sources and destinations ...................................................................................... 296
Source commands ........................................................................................................... 296
Media types and sizes ..................................................................................................... 297
Firmware updates ............................................................................................................................. 301
Problem solve ................................................................................................................................... 302
Port communication ......................................................................................................... 302
File to E-mail utility ........................................................................................................... 304
Manual scrubber .............................................................................................................. 304
E-mail ............................................................................................................................... 305
HP Scan ........................................................................................................................... 305
Create and use printing presets in Macintosh ................................................. 286
Resize documents or print on a custom paper size ........................................ 286
Print a cover page ........................................................................................... 286
Use watermarks .............................................................................................. 287
Print multiple pages on one sheet of paper in Macintosh ............................... 287
Print on both sides of the page (duplex printing) ............................................. 288
Use the Services menu ................................................................................... 288
Priority input tray ............................................................................................. 294
Tray 1 .............................................................................................................. 295
Media features and attributes .......................................................................... 297
Custom media sizes ........................................................................................ 299
Media-type commands .................................................................................... 299
Overview ......................................................................................................... 302
USB port connections ..................................................................................... 302
Device conflicts in Windows ............................................................................ 302
Open the Windows Device Manager .............................................. 302
Check for product conflicts ............................................................. 303
Guidelines for troubleshooting and resolving product conflicts ...... 303
Installed product ............................................................................. 303
ENWW xi
Page 14

Summary of HP ToolboxFX known issues ....................................................................................... 306
.NET Framework dependencies ...................................................................................... 306
Product communication ................................................................................................... 307
Obtain debug information from HP ToolboxFX ................................................................ 308
USB drivers are unsigned ............................................................................................... 309
A need to enable or disable HP ToolboxFX arises .......................................................... 310
Hewlett-Packard LaserJet M1522 MFP Series Printer Install Notes (Read Me First) ...................... 311
Introduction ...................................................................................................................... 311
Purpose of this document ............................................................................... 311
Who needs this software? ............................................................................... 312
Overview of the printing-system components ................................................. 312
Late-breaking information ................................................................................................ 314
Known issues and workarounds ..................................................................... 314
Issues fixed ..................................................................................................... 316
Installation Instructions .................................................................................................... 316
Installation options .......................................................................................... 316
INSTALLING SOFTWARE ON WINDOWS XP AND WINDOWS VISTA ...... 317
INSTALLING SOFTWARE ON WINDOWS 2000 AND WINDOWS SERVER
2003 ................................................................................................................ 317
Uninstaller ....................................................................................................... 317
Technical assistance ....................................................................................................... 318
Customer support ............................................................................................ 318
Web ................................................................................................................. 318
HP software and support services — additional information ........................... 318
Legal statements ............................................................................................................. 318
Trademark notices .......................................................................................... 318
Warranty and copyright ................................................................................... 318
Glossary ........................................................................................................................................................... 319
Index ................................................................................................................................................................. 323
xii ENWW
Page 15

List of tables
Table 1-1 Software component comparison .................................................................................................... 10
Table 1-2 Software component availability ...................................................................................................... 11
Table 1-3 Software component localization by language, AR-HE ................................................................... 12
Table 1-4 Software component localization by language, HR-PT .................................................................... 13
Table 1-5 Software component localization by language, RO-ZHTW .............................................................. 14
Table 1-6 CD part numbers for the printing-system software ........................................................................... 19
Table 1-7 Documentation availability ............................................................................................................... 22
Table 1-8 User documentation availability and localization ............................................................................. 24
Table 2-1 Software components for Windows .................................................................................................. 30
Table 2-2 Configure product alerts and status messages ................................................................................ 33
Table 2-3 Alerts ................................................................................................................................................ 52
Table 2-4 Paper Handling options and settings ............................................................................................... 67
Table 2-5 Print Quality options and settings .................................................................................................... 71
Table 2-6 Print mode settings and default fuser modes ................................................................................... 73
Table 2-7 Printing options and settings ............................................................................................................ 79
Table 2-8 Advanced network settings options and settings ............................................................................. 87
Table 2-9 Examples of supported e-mail programs ....................................................................................... 101
Table 2-10 Available scan settings ................................................................................................................ 101
Table 2-11 Software features by connection type .......................................................................................... 131
Table 2-12 Multitasking capabilities ............................................................................................................... 133
Table 4-1 HP PCL6 printer driver custom paper sizes .................................................................................. 212
Table 4-2 Font Attribute settings for new and preset watermarks .................................................................. 221
Table 4-3 Page orientation ............................................................................................................................. 223
Table 5-1 Software components for Macintosh .............................................................................................. 243
Table 5-2 Software component availability for Macintosh .............................................................................. 244
Table 5-3 Macintosh printing-system software CD ......................................................................................... 246
Table 6-1 Supported paper and print media sizes ......................................................................................... 292
Table 6-2 Supported envelopes and postcards ............................................................................................. 293
Table 6-3 HP LaserJet M1522 MFP Series media sources and destinations ............................................... 296
Table 6-4 Media-source commands .............................................................................................................. 296
Table 6-5 Supported features and attributes, by driver .................................................................................. 297
Table 6-6 Supported media types .................................................................................................................. 298
Table 6-7 Custom media sizes ....................................................................................................................... 299
Table 6-8 Media-type commands ................................................................................................................... 299
ENWW xiii
Page 16

Table 6-9 Devices installed by the printing-system software in Windows 2000, Windows XP, and Windows
Vista .................................................................................................................................................................. 304
xiv ENWW
Page 17

List of figures
Figure 1-1 HP LaserJet M1522 MFP Series CD browser screen — Welcome Back! ........................................ 9
Figure 1-2 Printing-system software CD – More Information screen ............................................................... 22
Figure 2-1 HP ToolboxFX – Windows system tray icon ................................................................................... 35
Figure 2-2 HP ToolboxFX – Fax Received pop-up message ........................................................................... 36
Figure 2-3 HP Alert – CLOSE DOOR pop-up message ................................................................................... 38
Figure 2-4 HP Alert – CLOSE DOOR System Tray and Desktop pop-up message ........................................ 38
Figure 2-5 Device Status screen ...................................................................................................................... 40
Figure 2-6 Supplies Status screen ................................................................................................................... 41
Figure 2-7 Device Configuration screen – 1 of 5 .............................................................................................. 42
Figure 2-8 Device Configuration screen – 2 of 5 .............................................................................................. 42
Figure 2-9 Device Configuration screen – 3 of 5 .............................................................................................. 43
Figure 2-10 Device Configuration screen – 4 of 5 ............................................................................................ 44
Figure 2-11 Device Configuration screen – 5 of 5 ............................................................................................ 45
Figure 2-12 Network Summary screen – 1 of 3 ................................................................................................ 47
Figure 2-13 Network Summary screen – 2 of 3 ................................................................................................ 47
Figure 2-14 Network Summary screen – 3 of 3 ................................................................................................ 48
Figure 2-15 Print Info Pages screen ................................................................................................................. 50
Figure 2-16 Event Log screen .......................................................................................................................... 51
Figure 2-17 Set up Status Alerts screen .......................................................................................................... 52
Figure 2-18 Set up E-mail Alerts screen – 1 of 2 ............................................................................................. 53
Figure 2-19 Set up E-mail Alerts screen – 2 of 2 ............................................................................................. 54
Figure 2-20 Fax Tasks screen .......................................................................................................................... 55
Figure 2-21 Fax Phone Book screen ................................................................................................................ 56
Figure 2-22 Fax Send Log screen .................................................................................................................... 58
Figure 2-23 Fax Receive Log screen ............................................................................................................... 59
Figure 2-24 Block Faxes screen ....................................................................................................................... 60
Figure 2-25 Fax Data Properties screen .......................................................................................................... 61
Figure 2-26 User Guide screen ........................................................................................................................ 62
Figure 2-27 Troubleshooting screen ................................................................................................................ 63
Figure 2-28 Problem solve – HP LaserJet M1522 MFP Series User Guide .................................................... 64
Figure 2-29 Animated Demonstrations screen ................................................................................................. 65
Figure 2-30 Device Information screen ............................................................................................................ 66
Figure 2-31 Paper Handling screen ................................................................................................................. 67
Figure 2-32 Print Quality screen ....................................................................................................................... 70
ENWW xv
Page 18

Figure 2-33 Paper Types screen ...................................................................................................................... 72
Figure 2-34 System Setup screen .................................................................................................................... 74
Figure 2-35 Service screen .............................................................................................................................. 75
Figure 2-36 Device Polling screen ................................................................................................................... 76
Figure 2-37 Save / Restore Settings screen .................................................................................................... 77
Figure 2-38 Password screen .......................................................................................................................... 78
Figure 2-39 Printing screen .............................................................................................................................. 79
Figure 2-40 PCL5c screen ............................................................................................................................... 80
Figure 2-41 PostScript screen .......................................................................................................................... 81
Figure 2-42 Network Summary screen (1 of 2) ................................................................................................ 82
Figure 2-43 Network Summary screen (2 of 2) ................................................................................................ 83
Figure 2-44 IPv4 Configuration screen ............................................................................................................. 84
Figure 2-45 IPv6 Configuration screen ............................................................................................................. 85
Figure 2-46 Network Identification screen ........................................................................................................ 86
Figure 2-47 Advanced screen .......................................................................................................................... 87
Figure 2-48 SNMP screen ................................................................................................................................ 88
Figure 2-49 About HP ToolboxFX screen ........................................................................................................ 90
Figure 2-50 HP Registration Web page ........................................................................................................... 91
Figure 2-51 HP Easy Printer Care Software screen ......................................................................................... 93
Figure 2-52 Welcome to the HP Product Survey Program screen ................................................................... 95
Figure 2-53 HP LaserJet Scan dialog box ....................................................................................................... 99
Figure 2-54 HP LaserJet Scan drop-down menu ............................................................................................. 99
Figure 2-55 Scan Setup Options dialog box .................................................................................................. 100
Figure 2-56 WIA scanning – WIA compliant software program ..................................................................... 103
Figure 2-57 WIA scanning – Scanners and Cameras folder .......................................................................... 104
Figure 2-58 WIA-driver user interface — flatbed ............................................................................................ 105
Figure 2-59 WIA-driver user interface — ADF (no preview) ........................................................................... 105
Figure 2-60 TWAIN-driver user interface ....................................................................................................... 107
Figure 2-61 HP LaserJet Fax Setup Utility – Welcome screen ...................................................................... 109
Figure 2-62 HP LaserJet Fax Setup Utility – Dial prefix? screen ................................................................... 110
Figure 2-63 Fax Setup Utility – Confirmation page after fax? screen ............................................................ 111
Figure 2-64 Fax Setup Utility – Fax Line? screen .......................................................................................... 112
Figure 2-65 Fax Setup Utility – User Information screen ............................................................................... 113
Figure 2-66 Fax Setup Utility – Distinctive Ring Service? screen .................................................................. 114
Figure 2-67 Fax Setup Utility – Telephone answering machine? screen ....................................................... 115
Figure 2-68 Fax Setup Utility – Phone connection? screen ........................................................................... 116
Figure 2-69 Fax Setup Utility – Shared fax line? screen ................................................................................ 117
Figure 2-70 Fax Setup Utility – Automatically answer all incoming calls? screen .......................................... 118
Figure 2-71 Fax Setup Utility – Answer all calls automatically mode screen ................................................. 119
Figure 2-72 Fax Setup Utility – Manual answer mode screen ....................................................................... 120
Figure 2-73 Fax Setup Utility – Shared telephone line screen ....................................................................... 121
Figure 2-74 Fax Setup Utility – Current date and time screen ....................................................................... 122
Figure 2-75 Fax Setup Utility – Date and time screen ................................................................................... 123
Figure 2-76 Fax Setup Utility – Complete screen ........................................................................................... 124
xvi ENWW
Page 19

Figure 2-77 HP LaserJet Send Fax dialog box – user interface .................................................................... 125
Figure 2-78 HP LaserJet Send Fax dialog box – multiple recipients ............................................................. 127
Figure 2-79 HP LaserJet Send Fax dialog box – multiple recipients – Phone Book ...................................... 128
Figure 2-80 HP LaserJet Send Fax dialog box – cover page ........................................................................ 129
Figure 3-1 HP LaserJet M1522 MFP Series CD browser screen — Welcome Back! .................................... 147
Figure 3-2 HP LaserJet M1522 MFP Series CD browser screen ................................................................... 148
Figure 3-3 Installation software CD – More Information screen ..................................................................... 149
Figure 3-4 Recommended Install – Initial screen ........................................................................................... 150
Figure 3-5 Recommended Install – Please Allow All HP Install Wizard Processes screen ........................... 151
Figure 3-6 Recommended Install – Choose Easy Install or Advanced Install screen .................................... 152
Figure 3-7 Recommended Install – Easy Install – Initial screen .................................................................... 153
Figure 3-8 Recommended Install – Easy Install – Connection Type screen .................................................. 154
Figure 3-9 Recommended Install – Easy Install – USB – Connect Your Device Now screen ....................... 155
Figure 3-10 Recommended Install – Easy Install – USB – Device has been detected screen ...................... 156
Figure 3-11 Recommended Install – Easy Install – USB – Auto Firmware Downloader screen .................... 157
Figure 3-12 Recommended Install – Easy Install – USB – Test Page screen ............................................... 158
Figure 3-13 Recommended Install – Easy Install – USB – Congratulations! screen ..................................... 159
Figure 3-14 Recommended Install – Easy Install – USB – Install More Software screen .............................. 160
Figure 3-15 Recommended Install – Easy Install – Network – Initial screen ................................................. 161
Figure 3-16 Recommended Install – Easy Install – Network – Identify Printer screen .................................. 161
Figure 3-17 Recommended Install – Easy Install – Network – Firewall Notice screen .................................. 162
Figure 3-18 Recommended Install – Easy Install – Network – Searching screen ......................................... 162
Figure 3-19 Recommended Install – Easy Install – Network – Printers Found screen .................................. 163
Figure 3-20 Recommended Install – Easy Install – Network – Printer Not Found screen ............................. 164
Figure 3-21 Recommended Install – Easy Install – Network – Auto Firmware Downloader screen .............. 165
Figure 3-22 Recommended Install – Easy Install – Network – Test Page screen ......................................... 166
Figure 3-23 Recommended Install – Easy Install – Network – Sign up now screen ...................................... 166
Figure 3-24 Recommended Install – Easy Install – Network – HP Registration screen ................................ 167
Figure 3-25 Recommended Install – Easy Install – Network – Congratulations! screen ............................... 168
Figure 3-26 Recommended Install – Easy Install – Network – Install More Software screen ........................ 169
Figure 3-27 Recommended Install – Advanced Install – Initial screen .......................................................... 170
Figure 3-28 Recommended Install – Advanced Install – Automatically check for updates screen ................ 170
Figure 3-29 Recommended Install – Advanced Install – Installation Options screen .................................... 171
Figure 3-30 Recommended Install – Advanced Install – Recommended* Install – Initial screen .................. 172
Figure 3-31 Recommended Install – Advanced Install – Recommended* Install – License Agreement
screen ............................................................................................................................................................... 173
Figure 3-32 Recommended Install – Advanced Install – Recommended* Install – Thank you for buying
another HP product! screen .............................................................................................................................. 174
Figure 3-33 Recommended Install – Advanced Install – Custom (for advanced users)* Install – Custom
Installation screen ............................................................................................................................................. 175
Figure 3-34 Recommended Install – Advanced Install – Custom (for advanced users)* Install – License
Agreement screen ............................................................................................................................................. 176
Figure 3-35 Recommended Install – Advanced Install – Custom (for advanced users)* Install – Thank you
for buying another HP product! screen ............................................................................................................. 177
ENWW xvii
Page 20

Figure 3-36 Express USB Install – Initial screen ............................................................................................ 178
Figure 3-37 Express USB Install – Connect Your Device Now screen .......................................................... 178
Figure 3-38 Express USB Install – Device has been detected screen ........................................................... 179
Figure 3-39 Express USB Install – Auto Firmware Downloader screen ......................................................... 180
Figure 3-40 Express USB Install – Test Page screen .................................................................................... 181
Figure 3-41 Express USB Install – Congratulations! screen .......................................................................... 182
Figure 3-42 Express USB Install – Install More Software screen .................................................................. 183
Figure 3-43 Express Network Install – Initial screen ...................................................................................... 184
Figure 3-44 Express Network Install – Identify Printer screen ....................................................................... 184
Figure 3-45 Express Network Install – Firewall Notice screen ....................................................................... 185
Figure 3-46 Express Network Install – Searching screen .............................................................................. 185
Figure 3-47 Express Network Install – Printers Found screen ....................................................................... 186
Figure 3-48 Express Network Install – Printer Not Found screen .................................................................. 187
Figure 3-49 Express Network Install – Auto Firmware Downloader screen ................................................... 188
Figure 3-50 Express Network Install – Test Page screen .............................................................................. 189
Figure 3-51 Express Network Install – Congratulations! screen .................................................................... 190
Figure 3-52 Express Network Install – Install More Software screen ............................................................. 191
Figure 3-53 HP LaserJet M1522 MFP Series CD browser — Welcome Back! screen ................................. 193
Figure 4-1 About This Driver screen ............................................................................................................. 199
Figure 4-2 Paper/Quality tab with warning icons ............................................................................................ 201
Figure 4-3 Advanced tab – PCL 6 printer driver ............................................................................................. 202
Figure 4-4 Advanced tab – HP postscript level 3 emulation printer driver ..................................................... 203
Figure 4-5 Printing Shortcuts tab .................................................................................................................... 207
Figure 4-6 Printing shortcuts dialog box ......................................................................................................... 208
Figure 4-7 Printing Shortcuts tab – custom shortcut ...................................................................................... 209
Figure 4-8 Paper/Quality tab .......................................................................................................................... 210
Figure 4-9 Custom Paper Size dialog box .................................................................................................... 211
Figure 4-10 Covers dialog box ....................................................................................................................... 214
Figure 4-11 Print pages on different paper dialog box ................................................................................... 215
Figure 4-12 Effects tab ................................................................................................................................... 216
Figure 4-13 Watermark Details dialog box ..................................................................................................... 219
Figure 4-14 Finishing tab ................................................................................................................................ 222
Figure 4-15 Page-order preview images ........................................................................................................ 226
Figure 4-16 Services tab ................................................................................................................................ 227
Figure 4-17 HP PCL 6 printer driver Device Settings tab ............................................................................... 228
Figure 4-18 HP postscript level 3 emulation printer driver Device Settings tab ............................................. 229
Figure 4-19 HP Font Installer dialog box ........................................................................................................ 230
Figure 4-20 About tab ..................................................................................................................................... 236
Figure 5-1 HP Director ................................................................................................................................... 247
Figure 5-2 HP EWS – Status tab .................................................................................................................... 248
Figure 5-3 HP EWS – System tab .................................................................................................................. 248
Figure 5-4 HP EWS – Print tab ...................................................................................................................... 249
Figure 5-5 HP EWS – Fax tab ........................................................................................................................ 250
Figure 5-6 HP EWS – Networking tab ............................................................................................................ 251
xviii ENWW
Page 21

Figure 5-7 Device Status screen .................................................................................................................... 253
Figure 5-8 Supplies Status screen ................................................................................................................. 254
Figure 5-9 Device Configuration screen – 1 of 6 ............................................................................................ 254
Figure 5-10 Device Configuration screen – 2 of 6 .......................................................................................... 255
Figure 5-11 Device Configuration screen – 3 of 6 .......................................................................................... 255
Figure 5-12 Device Configuration screen – 4 of 6 .......................................................................................... 256
Figure 5-13 Device Configuration screen – 5 of 6 .......................................................................................... 256
Figure 5-14 Device Configuration screen – 6 of 6 .......................................................................................... 257
Figure 5-15 Network Summary screen – 1 of 3 .............................................................................................. 257
Figure 5-16 Network Summary screen – 2 of 3 .............................................................................................. 258
Figure 5-17 Network Summary screen – 3 of 3 .............................................................................................. 258
Figure 5-18 Print Info Pages screen ............................................................................................................... 259
Figure 5-19 Event Log screen ........................................................................................................................ 259
Figure 5-20 Device Information screen .......................................................................................................... 260
Figure 5-21 Paper Handling screen ............................................................................................................... 260
Figure 5-22 Print Quality screen ..................................................................................................................... 261
Figure 5-23 Paper Types screen .................................................................................................................... 261
Figure 5-24 System Setup screen .................................................................................................................. 262
Figure 5-25 Service screen ............................................................................................................................ 262
Figure 5-26 Password screen ........................................................................................................................ 263
Figure 5-27 Printing screen ............................................................................................................................ 263
Figure 5-28 PCL5c screen ............................................................................................................................. 264
Figure 5-29 PostScript screen ........................................................................................................................ 264
Figure 5-30 Fax Receive screen .................................................................................................................... 265
Figure 5-31 Fax Phone Book screen ............................................................................................................. 266
Figure 5-32 Network Summary screen ........................................................................................................... 267
Figure 5-33 IPv4 Configuration screen .......................................................................................................... 268
Figure 5-34 IPv6 Configuration screen .......................................................................................................... 268
Figure 5-35 Network Identification screen ...................................................................................................... 269
Figure 5-36 Advanced screen ........................................................................................................................ 270
Figure 5-37 SNMP screen .............................................................................................................................. 270
Figure 5-38 HP LaserJet installer browser screen ......................................................................................... 273
Figure 5-39 LaserJetMFP1522_2727series CD image .................................................................................. 273
Figure 5-40 Authenticate screen .................................................................................................................... 274
Figure 5-41 License screen – HP Software License ...................................................................................... 275
Figure 5-42 License Agreement screen – HP Software License Agreement ................................................. 276
Figure 5-43 Installing screen – progress indicator ......................................................................................... 276
Figure 5-44 If you are using a USB cable... screen ....................................................................................... 277
Figure 5-45 HP Setup Assistant – Introduction screen .................................................................................. 278
Figure 5-46 HP Setup Assistant – Select Device – Network screen .............................................................. 278
Figure 5-47 HP Setup Assistant – Select Device – USB screen .................................................................... 279
Figure 5-48 HP Setup Assistant – Select Device – Other screen .................................................................. 279
Figure 5-49 HP Setup Assistant – Configure Device screen ......................................................................... 280
Figure 5-50 HP Setup Assistant – Configure Device – 2 ............................................................................... 280
ENWW xix
Page 22

Figure 5-51 HP Setup Assistant – Configure Device – 3 screen ................................................................... 281
Figure 5-52 HP Setup Assistant – Configure Device – 4 screen ................................................................... 282
Figure 5-53 HP Setup Assistant – Configure Device – 5 screen ................................................................... 283
Figure 5-54 HP Setup Assistant – Finish screen .......................................................................................... 284
Figure 5-55 HP Setup Assistant – Congratulations screen ............................................................................ 284
Figure 6-1 HP ToolboxFX – sample error screen – 1 ..................................................................................... 306
Figure 6-2 HP ToolboxFX – sample error screen – 2 ..................................................................................... 308
xx ENWW
Page 23

1 Purpose and scope
Introduction
Product comparison
●
Product features
●
Product walkaround
●
Printing-system software
●
Documentation availability and localization
●
This software technical reference (STR) provides information about and troubleshooting tips for the
printing-system software for the product.
This STR is prepared in an electronic format to serve as a quick-reference tool for Customer Care Center
(CCC) agents, support engineers, system administrators, management information systems (MIS)
personnel, and end users, as appropriate.
Purpose and scope
NOTE: This STR describes drivers that are shipped on the printing-system software CD that comes
with the product. This STR does not describe drivers that will become available on the Web.
The following information is included in this STR:
Descriptions of drivers, operating systems, and system environments
●
Procedures for installing and uninstalling the printing-system software components
●
For information about the location of information within chapters, see the table of contents. An index is
also provided in this STR.
ENWW Introduction 1
Page 24
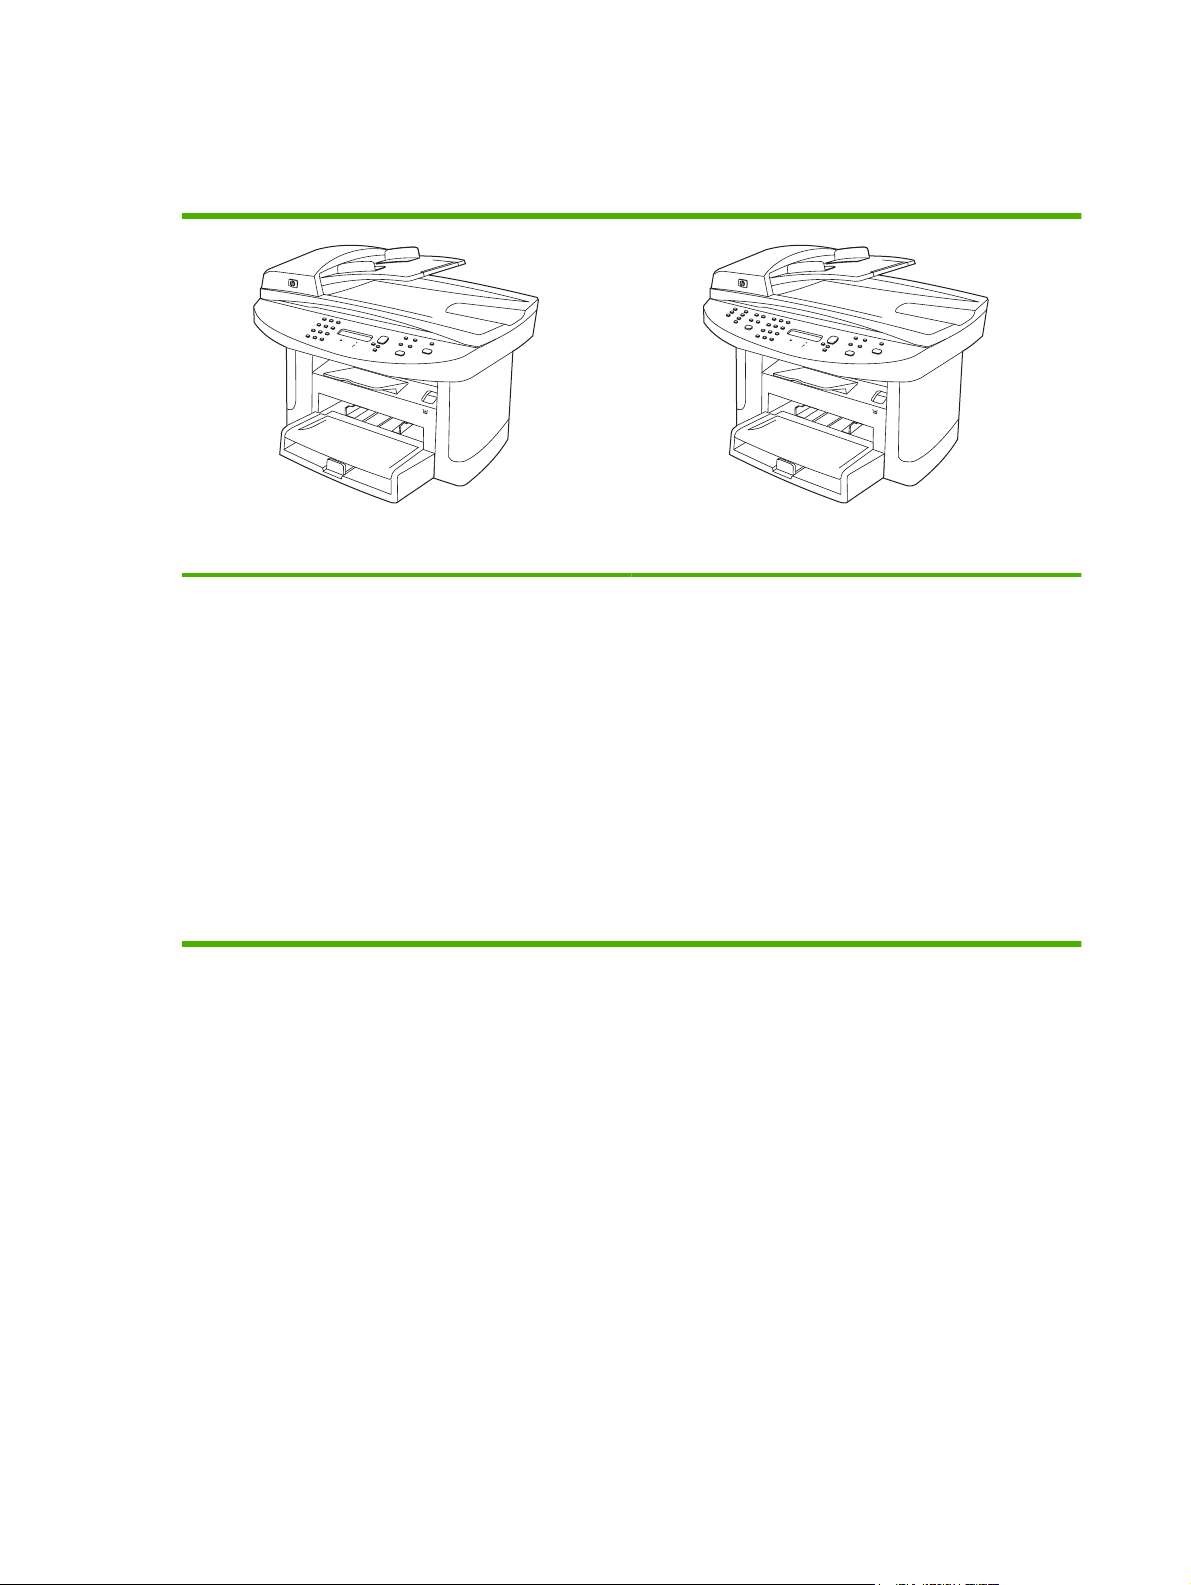
Product comparison
The product is available in the following configurations.
HP LaserJet M1522n MFP HP LaserJet M1522nf MFP
Prints letter-size pages at speeds up to 24 pages per
●
minute (ppm) and A4-size pages at speeds up to 23 ppm.
HP PCL 6 and HP postscript level 3 emulation printer
●
drivers and PCL 5 Universal Print Driver (UPD) (Web
only).
Priority input tray holds up to 10 sheets of print media.
●
Tray 1 holds up to 250 sheets of print media or 10
●
envelopes.
Hi-Speed USB 2.0 port and 10/100 Base-T network port.
●
64-MB random-access memory (RAM).
●
Flatbed scanner and 50-page automatic document
●
feeder (ADF).
HP LaserJet M1522n MFP, plus:
V.34 fax modem and 4-megabyte (MB) flash fax-storage
●
memory.
Two RJ-11 fax phone line ports
●
2 Chapter 1 Purpose and scope ENWW
Page 25

Product features
Performance
Print quality
Fax (fax models only)
Copy
Scan
Networking
Printer driver features
Prints up to 24 ppm (letter) or 23 ppm (A4).
●
600 x 2 dots per inch (dpi) with Resolution Enhancement technology (REt).
●
Adjustable settings to optimize print quality.
●
The HP UltraPrecise print cartridge has a finer toner formulation that provides sharper text
●
and graphics.
Full-functionality fax capabilities with a V.34 fax; includes a phone book, fax/tel, and
●
delayed-fax features.
Includes ADF that allows faster, more efficient copy jobs with multiple-page documents.
●
The product provides 1,200 pixels per inch (ppi), 24-bit full-color scanning from letter/A4-
●
size scanner glass.
The product provides 300 ppi, 24-bit full-color scanning from the automatic document
●
feeder (ADF).
Includes an ADF that allows faster, more efficient scan jobs with multiple-page documents.
●
TCP/IP
●
IPv4
◦
IPv6
◦
Fast printing performance, built-in Intellifont and TrueType scaling technologies, and
●
advanced imaging capabilities are benefits of the PCL 6 printer language.
Purpose and scope
Interface connections
Economical printing
Supplies
Accessibility
Hi-Speed USB 2.0 port.
●
10/100 Base-T ethernet network port (RJ-45).
●
RJ-11 fax/phone cable ports (fax models only).
●
N-up printing (printing more than one page on a sheet).
●
EconoMode setting.
●
A supplies status page that displays the amount of life remaining in the print cartridge.
●
The product ships with a 1,000-page (average yield) starter cartridge. The average yield
●
for replacement cartridges is 2,000 pages.
Authentication for HP print cartridges.
●
Enabled supplies-ordering capability.
●
Online user guide that is compatible with text screen-readers.
●
Print cartridges can be installed and removed by using one hand.
●
All doors and covers can be opened by using one hand.
●
ENWW Product features 3
Page 26
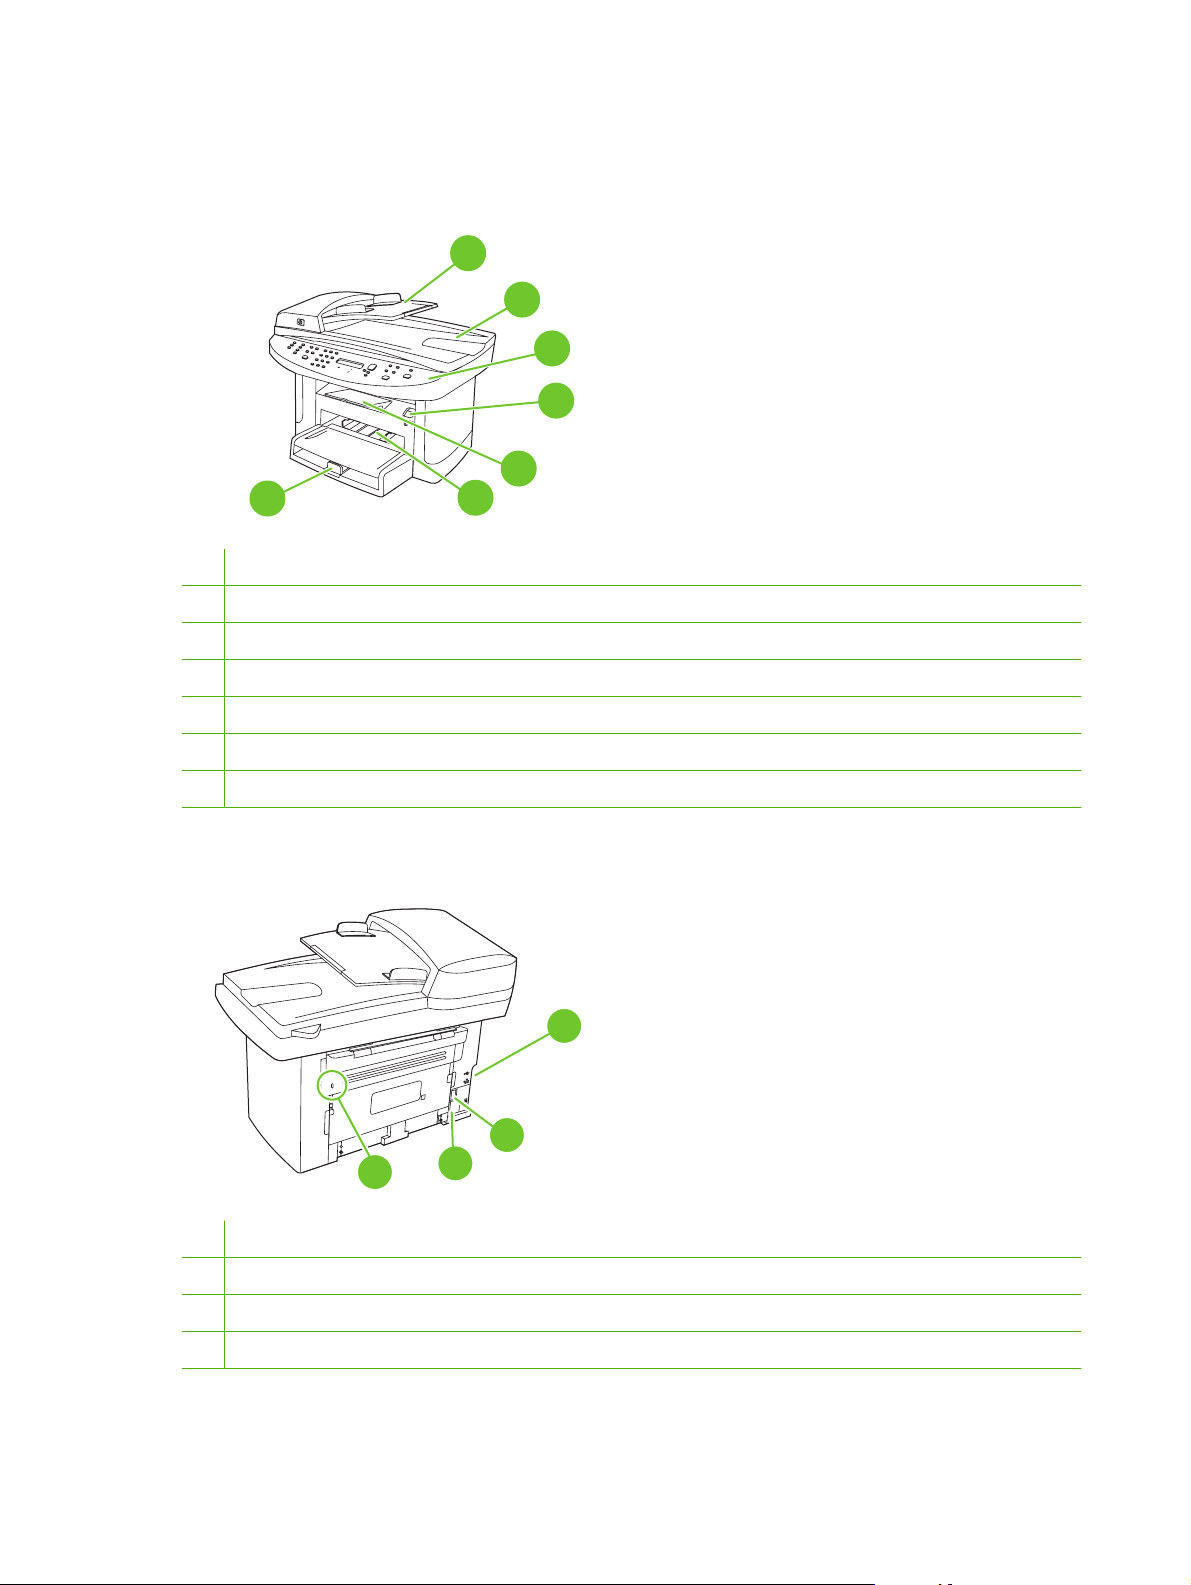
Product walkaround
Front view
7
1 Automatic document feeder (ADF) input tray
2 Automatic document feeder (ADF) output bin
3 Control panel
4 Print-cartridge door latch
5 Output bin
1
2
3
4
5
6
6 Priority input tray
7 Tray 1
Back view
8 Interface ports
9 Power switch
10 Power connector
11
10
9
8
7
11 Kensington lock
4 Chapter 1 Purpose and scope ENWW
Page 27
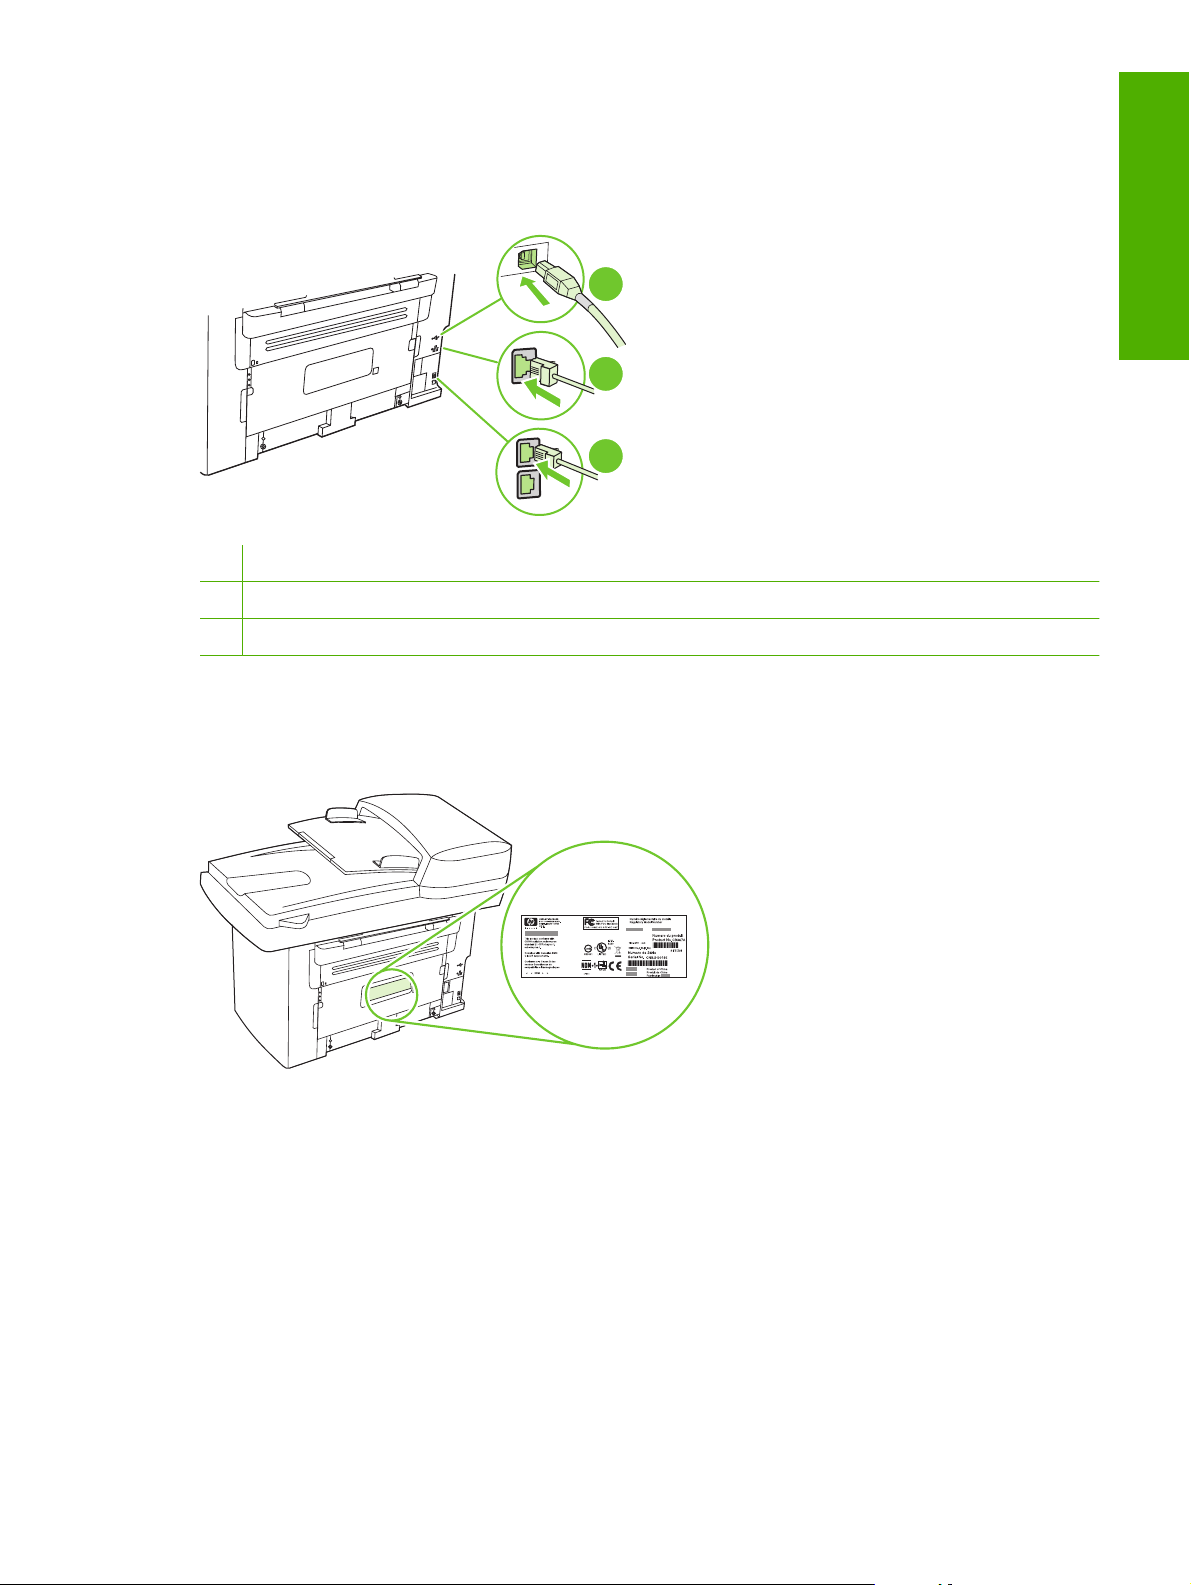
Interface ports
All models have a 10/100 Base-T (RJ-45) network port and a Hi-Speed USB 2.0 port. Fax models have
fax ports as well.
1 Hi-Speed USB 2.0 port
2 Network port
3 Fax ports (fax models only)
1
Purpose and scope
2
3
Serial number and model number location
The serial number and product model number label is on the back of the product.
ENWW Product walkaround 5
Page 28

Printing-system software
In-box printing-system software CDs
●
Supported operating systems
●
Supported printer drivers
●
Software components included with the installation
●
Printing-system software component information
●
Availability
●
Print from other operating systems
●
In-box printing-system software CDs
The printing-system software CDs contain a variety of files for installing the printing-system software on
the computer.
There are two in-box printing-system software CDs, one for each of the following operating systems:
Microsoft Windows
●
Macintosh
●
Each CD includes documentation files and files that are required to install and uninstall the printingsystem software components.
NOTE: The Readiris software uses a separate installer that comes in-box on a separate CD.
Supported operating systems
The product supports the following operating systems:
Full software installation
Windows XP (32-bit and 64-bit)
●
Windows Vista (32-bit and 64-bit)
●
Mac OS X v10.3, v10.4, and later
●
NOTE: For Mac OS X v10.4 and later, PPC and Intel Core Processor Macs are supported.
Supported printer drivers
Operating system PCL 5 UPD (Web only) PCL 6 HP postscript level 3
Windows
Print and scan driver
Windows 2000
●
Windows Server 2003 (32-bit)
●
Printer driver only
Linux (Web only)
●
UNIX model scripts (Web only)
●
emulation
1
Mac OS X v10.3, v10.4, and later
6 Chapter 1 Purpose and scope ENWW
Page 29

Operating system PCL 5 UPD (Web only) PCL 6 HP postscript level 3
2
Linux
1
Printer driver must be installed by using the Microsoft Add Printer Wizard.
2
For Linux, download the HP postscript level 3 emulation printer driver from www.hp.com/go/linuxprinting.
The printer drivers include online Help that has instructions for common printing tasks and also describes
the buttons, checkboxes, and drop-down lists that are in the printer driver.
Software components included with the installation
Recommended installation for Windows
●
Express installation (USB or network) for Windows
●
Connect another HP LaserJet M1522 MFP Series
●
Macintosh installation
●
Recommended installation for Windows
NOTE: There are two options for completing a Recommended Install of the printing-system software
for Windows. Easy Install completes the installation with default settings. Advanced Install allows you
to select custom settings and choose the printing-system software components that are installed.
emulation
Purpose and scope
HP drivers
●
PCL 6 printer driver
◦
Scan drivers:
◦
— WIA (Windows XP and Vista only)
— TWAIN
Fax driver
◦
HP MFP software
●
HP ToolboxFX
◦
HP LaserJet Scan program
◦
HP LaserJet Send Fax program
◦
HP LaserJet Fax Setup Utility
◦
Uninstall program
◦
HP Update program
●
HP Customer Participation Program
●
ENWW Printing-system software 7
Page 30

Shop for HP Supplies program
●
Other programs
●
Readiris optical character recognition (OCR)
◦
NOTE: Not installed with other software; separate installation required.
Express installation (USB or network) for Windows
HP MFP drivers
●
PCL 6 printer driver
◦
Scan drivers:
◦
— WIA (Windows XP and Vista only)
— TWAIN
Fax driver
◦
NOTE: Express installation supports faxing by using the control panel.
NOTE: The HP postscript level 3 emulation printer driver must be installed by using the Microsoft Add
Printer wizard.
Connect another HP LaserJet M1522 MFP Series
If an HP LaserJet M1522 MFP Series has been installed on the computer, the appearance of the main
CD browser screen changes, and the Connect another HP LaserJet M1522 MFP Series option
appears. A pre-existing installation also changes the sequence of installation screens that are
presented, depending on the selections that are made.
Use the following directions to connect another HP LaserJet M1522 MFP Series:
1. Quit all open programs.
8 Chapter 1 Purpose and scope ENWW
Page 31

2. Insert the printing-system software CD into the CD-ROM drive. After the system is checked, the
Welcome back! screen appears.
Figure 1-1 HP LaserJet M1522 MFP Series CD browser screen — Welcome Back!
Purpose and scope
3. Click Connect another HP LaserJet M1522 MFP Series and follow the onscreen prompts.
Macintosh installation
HP Setup Assistant
●
HP Uninstaller
●
HP LaserJet software
●
HP Scan
◦
HP Director
◦
Fax program
◦
Scan to e-mail program
◦
HP Photosmart
◦
Printing-system software component information
New software features
●
Software component comparison
●
Software component availability
●
Software component localization
●
ENWW Printing-system software 9
Page 32

New software features
The printing-system software includes new features since the release of the HP LaserJet
3050/3052/3055/3390/3392 All-in-One products. The following are new features for the HP LaserJet
M1522 MFP Series:
New installer. The product includes a new installer that improves the printing-system software
●
installation process and supports a software-first installation.
Software-first is the recommended installation method.
◦
You can perform an Express installation, which consists of printer and scan drivers only.
◦
New HP LaserJet Scan software. The HP LaserJet Scan software has been redesigned to
●
consolidate all scanning user interfaces.
HP LaserJet Scan provides easy, two-step scanning from either the computer or from the
◦
product control panel.
HP LaserJet Scan uses a wizard-based interface that guides creating, changing, or deleting
◦
destinations with settings that are used most often. All destinations are available when
scanning from the computer, and you can specify the destinations that are available when
you press the Scan To button on the product control panel by using the Setup... option.
When selected, a new default destination (Prompt me for settings first and then scan)
◦
launches a wizard that guides configuring settings for a one-time scan job.
Improved network scanning
●
Software component comparison
The following table lists the differences between the HP LaserJet 3050/3052/3055/3390/3392 All-inOne software and the HP LaserJet M1522 software.
Table 1-1 Software component comparison
Windows software components HP LaserJet 3050/3052/3055/3390/3392
HP installer X X
Uninstaller X X
Printer driver software X X
HP LaserJet Send Fax/Fax Driver X X
HP ToolboxFX and Fax Management X (Windows 2000, XP, and Vista only) X (Windows XP and Vista only)
Network Receive to PC fax functionality X X
HP LaserJet Scan software X X
WIA scan driver (Windows XP and Vista
only)
All-in-One products
HP LaserJet M1522
1
NOTE: The scrubber utility runs as
part of the uninstall process.
2
X X
TWAIN scan driver X X
Readiris Professional text-recognition
software by IRIS
V10.0 V11.0
10 Chapter 1 Purpose and scope ENWW
Page 33

Table 1-1 Software component comparison (continued)
Windows software components HP LaserJet 3050/3052/3055/3390/3392
Online Help X X
Scrubber utility X X
Online user guide X X
Web registration X X
1
Two installers run in sequence.
2
Includes Scan To configuration.
Software component availability
The following table lists the availability of the printing-system software components by operating system.
Table 1-2 Software component availability
Component Windows
Drivers and software
HP PCL 6
All-in-One products
2000 and
Windows
Server 2003
X X
Windows XP
and
Windows
Vista
Macintosh
OS X v10.3,
v10.4 and
later
HP LaserJet M1522
UNIX Linux
Purpose and scope
HP PCL 5 UPD (Web only) X X
HP postscript level 3 emulation X X
HP traditional Postscript Printer Description
(PPD)
UNIX Model Script X (Web only)1
Linux printer drivers and model script X (Web only)
Fax driver X
HP LaserJet Send Fax software X
WIA scan driver (Windows XP and Vista only) X
TWAIN scan driver X X
HP LaserJet Scan software X
Installers
Common Windows Installer
CD browser X X
.INF file (Microsoft Add Printer Wizard) X X
X
2
X X
Bidirectional communication
Direct Connect Bidirectional Communications
X X
ENWW Printing-system software 11
Page 34

Table 1-2 Software component availability (continued)
Component Windows
2000 and
Windows
Server 2003
Windows XP
and
Windows
Vista
Macintosh
OS X v10.3,
v10.4 and
later
UNIX Linux
Remote management and status
HP Web Jetadmin
4
Applet for HP Web Jetadmin
HP ToolboxFX
3
4
X X
X X
X
Online documentation
HP LaserJet M1522 MFP Series User Guide
Hewlett-Packard LaserJet M1522 MFP Series
Printer Install Notes
5
X X X
X X X
Help systems X X X
Other
Fonts
X
3
PS Fonts X X
1
This component is available at the following Web site: www.hp.com/support/net_printing
2
This component is available at the following Web site: www.hp.com/go/linuxprinting
3
Installed only during a Recommended installation, not during an Express installation.
4
This component is available at the following Web site: www.hp.com/go/webjetadmin_software
5
This document is also available at the following Web site: www.hp.com/support
Software component localization
The following tables provide localization information about the printing-system software components for
the product.
NOTE: A language key follows each table.
Table 1-3 Software component localization by language, AR-HE
Component
HP ToolboxFX XP, Vista X X X X X X X
HP PCL 6, HP
postscript level 3
emulation, and HP
PCL 5 UPD
Common Windows
Installer
Online manuals
(.PDF)
Scan drivers WIA scan driver
1
Windows
operating system
All supported
operating systems
All supported
operating systems
XP, Vista X X X X X X X X X X X X X
(XP, Vista)
AR BG CA CS DA DE EL EN ES ET FI FR HE
X X X X X X X X X X X
X X X X X X X
X X X X X X X X X X X
12 Chapter 1 Purpose and scope ENWW
Page 35

Table 1-3 Software component localization by language, AR-HE (continued)
Component
1
Windows
operating system
TWAIN scan driver
(all supported
operating systems)
AR BG CA CS DA DE EL EN ES ET FI FR HE
Readiris text
recognition
Readiris UI 2000, XP, Vista X X X X X X X X
1
Components that are not available in a specific language are supported in English.
2000, XP, Vista X X X X X X X X X X X X X
Language key for Table 1-3 Software component localization by language, AR-HE on page 12
AR = Arabic
●
BG = Bulgarian
●
CA = Catalan
●
CS = Czech
●
DA = Danish
●
DE = German
●
EL = Greek
●
EN = English
●
ES = Spanish
●
Purpose and scope
ET = Estonian
●
FI = Finnish
●
FR = French
●
HE = Hebrew
●
Table 1-4 Software component localization by language, HR-PT
Component
HP ToolboxFX XP, Vista X X X X X X X
HP PCL 6, HP
postscript level 3
emulation, and HP PCL
5 UPD
Common Windows
Installer
Online manuals (.PDF) XP, Vista X X X X X X X X X X X X
Scan drivers WIA scan driver (XP,
1
Windows operating
system
All supported operating
systems
All supported operating
systems
Vista)
HR HU ID IT KK KO LT LV NL NO PL PT
X X X X X X X
X X X X X X X
X X X X X X X
ENWW Printing-system software 13
Page 36

Table 1-4 Software component localization by language, HR-PT (continued)
Component
1
Windows operating
system
TWAIN scan driver (all
supported operating
systems)
HR HU ID IT KK KO LT LV NL NO PL PT
Readiris text
recognition
Readiris UI 2000, XP, Vista X X X X X X X
1
Components that are not available in a specific language are supported in English.
2000, XP, Vista X X X X X X X X X X X X
Language key for Table 1-4 Software component localization by language, HR-PT on page 13
HR = Croatian
●
HU = Hungarian
●
ID = Indonesian
●
IT = Italian
●
KK = Kazakh
●
KO = Korean
●
LT = Lithuanian
●
LV = Latvian
●
NL = Dutch
●
NO = Norwegian
●
PL = Polish
●
PT = Portuguese
●
Table 1-5 Software component localization by language, RO-ZHTW
Component
HP ToolboxFX XP, Vista X X X X X X
HP PCL 6, HP
postscript level 3
emulation, and HP PCL
5 UPD
Common Windows
Installer
Online manuals (.PDF) XP, Vista X X X X X X X X X X X X
Scan drivers WIA scan driver (XP,
1
Windows operating
system
All supported operating
systems
All supported operating
systems
Vista)
TWAIN scan driver (all
supported operating
systems)
RO RU SK SL SR SV TH TR UK VI ZHCNZH
X X X X X X X
X X X X X
X X X X X
TW
14 Chapter 1 Purpose and scope ENWW
Page 37

Table 1-5 Software component localization by language, RO-ZHTW (continued)
Component
1
Windows operating
system
RO RU SK SL SR SV TH TR UK VI ZHCNZH
TW
Readiris text
recognition
Readiris UI 2000, XP, Vista X X X X X
1
Components that are not available in a specific language are supported in English.
2000, XP, Vista X X X X X X X X X X X X
Language key for Table 1-5 Software component localization by language, RO-ZHTW on page 14
RO = Romanian
●
RU = Russian
●
SK = Slovak
●
SL = Slovenian
●
SR = Serbian
●
SV = Swedish
●
TH = Thai
●
TR = Turkish
●
UK = Ukrainian
●
Purpose and scope
VI = Vietnamese
●
ZHCN = Simplified Chinese
●
ZHTW = Traditional Chinese
●
The Readiris text-recognition software component is also available in the following languages:
Afaan Oromo
●
American English
●
Afrikaans
●
Albanian
●
Arabic
●
Aymara
●
Asturian
●
Azeri Latin
●
Balinese
●
Basque
●
Bemba
●
Bikol
●
ENWW Printing-system software 15
Page 38

Bislama
●
Brazilian
●
Breton
●
British English
●
Bulgarian - English
●
Byelorussian
●
Byelorussian - English
●
Catalan
●
Cebuano
●
Chamorro
●
Corsican
●
Esperanto
●
Faroese
●
Fijian
●
Frisian
●
Friulian
●
Galician
●
Ganda
●
Greek - English
●
Greenlandic
●
Haitian (Creole)
●
Hani
●
Hebrew
●
Hiligaynon
●
Icelandic
●
Ido
●
Ilocano
●
Interlingua
●
Irish (Gaelic)
●
Japanese
●
Javanese
●
16 Chapter 1 Purpose and scope ENWW
Page 39

Kapampangan
●
Kicongo
●
Kinyarwanda
●
Kurdish
●
Latin
●
Luba
●
Luxemburgh
●
Macedonian
●
Macedonian-English
●
Madurese
●
Malagasy
●
Malay
●
Maltese
●
Manx (Gaelic)
●
Purpose and scope
Maori
●
Mayan
●
Minangkabau
●
Nahuatl
●
Numeric
●
Nyanja
●
Nynorsk
●
Occitan
●
Papiamento
●
Pidgin English
●
Quechua
●
Rhaeto-Roman
●
Rundi
●
Russian - English
●
Samoan
●
Sardinian
●
Scottish (Gaelic)
●
ENWW Printing-system software 17
Page 40

Serbian
●
Serbian - English
●
Serbian (Latin)
●
Shona
●
Somali
●
Sotho
●
Sudanese
●
Swahili
●
Tagalog
●
Tahitian
●
Tatar
●
Tok Pisin
●
Tonga
●
Tswana
●
●
●
●
●
●
●
●
●
●
Availability
To order the printing-system software CD if the in-box CD is damaged or missing, contact HP Support
at the following Web site:
www.hp.com/support/ljm1522
To request the printing-system software CD by phone, go to the following Web site for the correct contact
number for your country/region:
Turkmen
Ukrainian
Ukrainian-English
Waray
Welsh
Wolof
Xhosa
Zapotec
Zulu
www.hp.com/country/us/en/wwcontact.html
The following table contains the part numbers and language groups on the printing-system software
CDs for the product.
18 Chapter 1 Purpose and scope ENWW
Page 41

Table 1-6 CD part numbers for the printing-system software
Part number Description Languages on CD
CB534–60149 CD 1 – Windows printing-system software CD
CB534–60150 CD 2 – Windows printing-system software CD
●
●
●
●
●
●
●
●
●
●
●
●
●
●
●
●
Arabic
Catalan
Dutch
English
French
German
Italian
Portuguese
Spanish
Czech
Danish
English
Finnish
Greek
Hebrew
Norwegian
Purpose and scope
CB534–60151 CD 3 – Windows printing-system software CD
CB534–60152 CD 4 – Windows printing-system software CD
●
●
●
●
●
●
●
●
●
●
●
●
●
●
●
●
Slovak
Swedish
Bulgarian
Croatian
English
Hungarian
Polish
Romanian
Slovenian
English
Estonian
Kazakh
Latvian
Lithuainian
Russian
Serbian
ENWW Printing-system software 19
Page 42

Table 1-6 CD part numbers for the printing-system software (continued)
Part number Description Languages on CD
Turkish
●
Ukrainian
●
CB534–60153 CD 5 – Windows printing-system software CD
CB534–60142 Macintosh printing-system software CD
5851–3401 Readiris software CD
NOTE: The Readiris CD is not set up at fulfillment. The CD
will be available from the Global Support Organization (GSO)
or HP Parts because of contractual and licensing
agreements.
English
●
Indonesian
●
Korean
●
Simplified Chinese
●
Thai
●
Traditional Chinese
●
Vietnamese
●
Dutch
●
English
●
French
●
German
●
Italian
●
Spanish
●
The Readiris user interface is
available in the following
languages:
Czech
●
Danish
●
Dutch
●
English
●
Finnish
●
French
●
German
●
Greek
●
Hungarian
●
Italian
●
Korean
●
Norwegian
●
Polish
●
Portuguese-Brazilian
●
Russian
●
Spanish
●
20 Chapter 1 Purpose and scope ENWW
Page 43

Table 1-6 CD part numbers for the printing-system software (continued)
Part number Description Languages on CD
Print from other operating systems
NOTE: For information about the printing-system software for Macintosh operating systems, see
Macintosh software and utilities on page 239.
You can print to the product from any operating system that complies with the PCL command language,
such as OS/2, UNIX®, or Linux systems. The OS/2 drivers will be available from the HP support Web
site shortly after the product release.
Swedish
●
Simplified Chinese
●
Traditional Chinese
●
Turkish
●
NOTE: Readiris can
perform text recognition (also
known as optical character
recognition, or OCR) in 124
languages.
Purpose and scope
UNIX systems require a Model Script to set up the UNIX environment for printing. The HP LaserJet III
Model Script, or any generic HP LaserJet printer Model Script, should work. These files are written and
provided by the individual UNIX vendor. Users of HP-UX can check for availability of the Model Script
and the support model at the following Web site:
www.hp.com/support/net_printing
Click the Support & Drivers link.
Linux users can check for drivers at the following Web site:
www.hp.com/go/linuxprinting
NOTE: The Linux drivers are supported through the Linux community.
The HP LaserJet M1522 MFP Series printer drivers have been tested and have print-only support with
Windows Terminal Server or Citrix Metaframe.
ENWW Printing-system software 21
Page 44

Documentation availability and localization
Documentation on the software CD
●
Availability
●
Documentation on the software CD
On the main screen of the printing-system software CD browser, click More Information to open the
More Information screen.
Figure 1-2 Printing-system software CD – More Information screen
The following table lists the documents that are available for each operating system.
Table 1-7 Documentation availability
Document Windows 2000, Server
Hewlett-Packard LaserJet M1522 MFP Series Install Notes (.HTM)
NOTE: The Hewlett-Packard LaserJet M1522 MFP Series Install Notes are
also called Read Me First.
HP LaserJet M1522 MFP Series User Guide (.PDF) x x
HP LaserJet M1522 MFP Series User Guide (.CHM) x x
2003, XP, and Vista
x x
Macintosh
22 Chapter 1 Purpose and scope ENWW
Page 45

Access to the documents depends on the type of document and its location:
Some documents can be opened from the CD browser.
●
Some documents can be opened by navigating to the folder on the CD where they reside.
●
Some documents are available on the Web through links in the CD browser or CD folders.
●
Documents are available in the following file formats:
Portable Document Format (.PDF). When you click a link to a .PDF document, Adobe® Acrobat®
●
Reader opens the file on the computer screen.
Compiled HTML (.CHM). When you click a link to a .CHM document, a Microsoft HTML viewer
●
opens the file on the computer screen.
Hypertext markup (.HTM). When you click a documentation link to an .HTM document, a Web
●
browser opens the file on the computer screen.
The following documents are available on the printing-system software CD:
Hewlett-Packard LaserJet M1522 MFP Series Install Notes
●
HP LaserJet M1522 MFP Series User Guide
●
Hewlett-Packard LaserJet M1522 MFP Series Install Notes
The Hewlett-Packard LaserJet M1522 MFP Series Install Notes (in .HTM format) contains important
information about product features, instructions for installing the printing-system software, and technical
assistance.
View this guide from the software CD by following these steps:
1. On the main screen of the CD browser, click More Information.
Purpose and scope
2. Click Read Me First.
Gain access to the file by following these steps:
1. Insert the printing-system software CD into the CD-ROM drive.
2. Navigate to the <LANGUAGE>\MANUALS folder.
3. Open the following file:
LJM1522MFP_INSTALL-NOTES_XXWW.HTM
NOTE: The "XX" in the file name corresponds to the language. For instance, the file name for
the French version is LJM1522MFP_INSTALL-NOTES_FRWW.HTM.
4. When the file is open, click File, and then click Save As to save a copy of the file to another location.
HP LaserJet M1522 MFP Series User Guide
The HP LaserJet M1522 MFP Series User Guide (in .CHM and .PDF) describes basic product features.
ENWW Documentation availability and localization 23
Page 46

View this guide from the software CD by clicking View User Guide on the main screen of the CD
browser, or by following these steps:
1. On the main screen of the CD browser, click More Information.
2. Click View User Guide.
Gain access to the file by following these steps:
1. Insert the printing-system software CD into the CD-ROM drive.
2. Navigate to the <LANGUAGE>\MANUALS folder.
3. Open the following file:
LJM1522MFP_USE_XXWW.CHM
NOTE: The "XX" in the file name corresponds to the language. For example, the file name for the
French version is LJM1522 MFP_USE_FRWW.CHM.
The guide opens as a Windows Help file (.CHM file). This readable, onscreen version of the guide is
provided in accordance with the Americans with Disabilities Act (ADA).
Gain access to the .PDF file by following these steps:
1. Insert the printing-system software CD into the CD-ROM drive.
2. Navigate to the <LANGUAGE>\MANUALS folder.
3. Open the following file:
NOTE: The "XX" in the file name corresponds to the language. For example, the file name for the
French version is LJM1522MFP_USE_FRWW.PDF.
Availability
The documentation in the following table is available for the product.
Table 1-8 User documentation availability and localization
Document name Document location Languages
HP LaserJet M1522 MFP Series User
Guide
HP LaserJet M1522 MFP Series Getting
Started Guide
Arabic
Bulgarian
Catalan
LJM1522MFP_USE_XXWW.PDF
Available in electronic format on the
printing-system software CD. Printed
copies are also available from HP.
A printed copy comes in-box with the
product. Printed copies are also
available from HP.
Croation
Czech
Danish
24 Chapter 1 Purpose and scope ENWW
Page 47

Table 1-8 User documentation availability and localization (continued)
Document name Document location Languages
Dutch
English
Estonian
Finnish
French
German
Greek
Hebrew
Hungarian
Indonesian
Italian
Kazakh
Korean
Latvian
Purpose and scope
Lithuanian
Norwegian
Polish
Portuguese (Brazilian)
Romanian
Russian
Serbian
Simplified Chinese
Slovak
Slovenian
Spanish
Swedish
Thai
Traditional Chinese
Turkish
Ukrainian
Vietnamese
ENWW Documentation availability and localization 25
Page 48

26 Chapter 1 Purpose and scope ENWW
Page 49

2 Software description
Windows printing-system software
●
Supported utilities for Windows
●
HP ToolboxFX
●
Use HP Web Jetadmin software
●
HP Easy Printer Care (network models only)
●
HP Customer Participation Program
●
HP Driver Diagnostic Printer Check Tool
●
Scan software
●
Software description
HP LaserJet Fax Setup Utility
●
HP LaserJet Send Fax software
●
Available product configurations
●
Supported third-party software
●
NOTE: For information about the printing-system software for Macintosh operating systems, see
Macintosh software and utilities on page 239.
ENWW 27
Page 50

Windows printing-system software
Supported operating systems for Windows
●
Windows system requirements
●
Supported printer drivers for Windows
●
Select the correct printer driver for Windows
●
Priority for print settings
●
Change printer-driver settings for Windows
●
Printing-system software components for Windows
●
Supported operating systems for Windows
The product supports the following Windows operating systems:
Full software installation
Windows XP (32-bit and 64-bit)
●
Windows Vista (32-bit and 64-bit)
●
Windows system requirements
The product can function as a standalone copier and a standalone fax machine without installing the
printing-system software, but certain functions are not available unless the full printing-system software
is installed. HP strongly recommends installing the printing-system software. This provides full
functionality and is the easiest method for setting required features.
The HP printing-system software has the following minimum system requirements.
NOTE: Operating-system requirements might be greater than these minimum requirements.
Recommended installation (all operating systems):
●
A Pentium® II (233 MHz) processor or greater
◦
256 MB of RAM
◦
700 MB of available hard-disk space
◦
1024 x 768 24-bit color display
◦
Print and scan driver
Windows 2000
●
Windows Server 2003 (32-bit)
●
Express installation:
●
A Pentium II (233 MHz) processor or greater
◦
128 MB of RAM
◦
350 MB of available hard-disk space
◦
1024 x 768 24-bit color display
◦
28 Chapter 2 Software description ENWW
Page 51

Custom installation:
●
A Pentium 4 processor
◦
256 MB of RAM
◦
500 MB of available hard-disk space
◦
1024 x 768 24-bit color display
◦
A 2x or faster CD-ROM drive (required for installation)
●
A direct connection to a computer and full product functionality requires a USB port.
●
NOTE: If the USB port has another device attached, such as an external storage device, the
device must be disconnected or an additional USB port must be added. Add an additional USB
port by using a powered USB hub or by installing an additional USB card.
Supported printer drivers for Windows
PCL 5
●
PCL 6
●
PS level 3 emulation
●
The printer drivers include online Help that has instructions for common printing tasks and also describes
the buttons, checkboxes, and drop-down lists that are in the printer driver.
Select the correct printer driver for Windows
Printer drivers allow you to gain access to the device features and allow the computer to communicate
with the device (using a printer language). Check the installation notes and readme files on the device
CD for additional software and languages.
Use the PCL 6 printer driver for the best overall performance.
●
Use the PCL 5 printer driver for general office printing.
●
Use the HP postscript level 3 emulation driver for printing from postscript level 3 emulation needs,
●
or for postscript flash font support.
Priority for print settings
Changes to print settings are prioritized depending on where the changes are made:
NOTE: The names of commands and dialog boxes might vary depending on your software program.
Software description
Page Setup dialog box: Click Page Setup or a similar command on the File menu of the program
●
you are working in to open this dialog box. Settings changed here override settings changed
anywhere else.
Print dialog box: Click Print, Print Setup, or a similar command on the File menu of the program
●
you are working in to open this dialog box. Settings changed in the Print dialog box have a lower
priority and do not override changes made in the Page Setup dialog box.
ENWW Windows printing-system software 29
Page 52

Printer Properties dialog box (printer driver): Click Properties in the Print dialog box to open
●
the printer driver. Settings changed in the Printer Properties dialog box do not override settings
anywhere else in the printing software.
Default printer driver settings: The default printer driver settings determine the settings used in
●
all print jobs, unless settings are changed in the Page Setup, Print, or Printer Properties dialog
boxes.
Printer control panel settings: Settings changed at the printer control panel have a lower priority
●
than changes made anywhere else.
Change printer-driver settings for Windows
Change the settings for all print jobs
until the software program is closed
1. On the File menu in the software
program, click Print.
2. Select the driver, and then click
Properties or Preferences.
The steps can vary; this procedure is
most common.
Change the default settings for all
print jobs
1. Windows XP and Windows
Server 2003 (using the default
Start menu view): Click Start, and
then click Printers and Faxes.
-or-
Windows 2000, Windows XP, and
Windows Server 2003 (using the
Classic Start menu view): Click
Start, click Settings, and then click
Printers.
-or-
Windows Vista: Click Start, click
Control Panel, and then in the
category for Hardware and
Sound click Printer.
2. Right-click the driver icon, and then
select Printing Preferences.
Change the product configuration
settings
1. Windows XP and Windows
Server 2003 (using the default
Start menu view): Click Start, and
then click Printers and Faxes.
-or-
Windows 2000, Windows XP, and
Windows Server 2003 (using the
Classic Start menu view): Click
Start, click Settings, and then click
Printers.
-or-
Windows Vista: Click Start, click
Control Panel, and then in the
category for Hardware and
Sound click Printer.
2. Right-click the driver icon, and then
select Properties.
3. Click the Device Settings tab.
Printing-system software components for Windows
Table 2-1 Software components for Windows
Component Description
HP installer Installs the printing-system software based on the hardware it detects from the host computer.
Uninstaller
NOTE: The scrubber
utility runs as part of the
uninstall process.
HP LaserJet Scan
software
HP LaserJet Send Fax
software
30 Chapter 2 Software description ENWW
Removes files and folders that were installed when the printing-system software was originally
installed on the computer.
Provides access to the scan functions on the product.
Provides the ability to send faxes from the computer.
Page 53

Table 2-1 Software components for Windows (continued)
Component Description
HP ToolboxFX (Windows
XP and Vista only)
Driver software Use the driver software to print, fax, and scan with the computer and the product.
Provides an interface to manage the product. Use HP ToolboxFX to perform the following tasks:
Monitor the status of the product.
●
Change the print, phone book, and limited fax settings for the product.
●
Find troubleshooting information and instructions for performing basic tasks.
●
Receive Status Alerts when certain events occur or conditions exist on the product.
●
This software includes the following drivers:
The HP PCL 6 printer driver. The HP PCL 6 printer driver is installed by default.
●
The HP PCL 5 Universal Printer Driver (UPD). This printer driver is not installed by default.
●
To install the HP PCL 5 UPD, use the Microsoft Add Printer wizard.
The HP postscript level 3 emulation printer driver and PostScript printer description (PPD) file
●
for printing with PS level 3 emulation. This printer driver is not installed by default. To install
the HP PS printer driver, use the Microsoft Add Printer wizard.
The HP LaserJet Send Fax driver
●
Scan drivers
●
Windows Image Acquisition (WIA) driver for Windows XP and Vista. WIA scanning
◦
can be started from a WIA-compliant program or from the computer. WIA has its own
user interface that is relatively simple and does not contain the wide range of imagequality options that are available in the TWAIN driver user interface.
Software description
TWAIN driver. TWAIN is an industry-standard scanning protocol. Scanning from the
◦
product can be initiated from any TWAIN-compliant software program.
Readiris Professional
V11.0 text-recognition
software by IRIS
Online Help Provides help for using the product software.
Converts scanned images into text that can be edited in word-processing programs.
The user interface is localized into six languages. However, the software supports text-recognition
in 124 languages.
Readiris Professional supports text recognition in 2-byte Asian characters. You must have your
operating system set up to display 2-byte characters in order to see the text.
NOTE: For better text-recognition scanning results, start Readiris and scan directly into the
program. Readiris V11.0 automatically starts a wizard to help guide this process.
When Readiris is installed on the computer, it appears as an option in the destination drop-down
box in the HP Scan software. If you select Readiris as the destination, the image is scanned
into .TIFF format and Readiris automatically starts the text-recognition process.
The Readiris software uses a separate installer that comes on a separate CD. The initial release
of the product includes Readiris Professional software.
The user documentation for this product is included on the installation CD as both .CHM (online
help) files and Adobe® Acrobat® .PDF files. A Web browser must be installed on the computer to
view the contents from any .CHM file. Adobe Acrobat Reader must be installed on the computer
to view the contents from any .PDF file.
ENWW Windows printing-system software 31
Page 54

Supported utilities for Windows
HP ToolboxFX
●
HP Web Jetadmin
●
Other Windows components and utilities
●
Product alerts and status messages
●
HP ToolboxFX
HP ToolboxFX is a program that you can use for the following tasks:
Check the product status
●
Check the supplies status
●
Configure system settings
●
Set up alerts for error conditions on the product
●
Configure fax settings
●
Configure print settings
●
Configure network settings
●
View faxes that have been received by the computer
●
View product documentation
●
Gain access to problem-solving and maintenance tools
●
HP ToolboxFX is installed during the Recommended installation from the printing-system software CD.
For more information, see
HP Web Jetadmin
HP Web Jetadmin is a browser-based management tool for network-connected products within an
intranet, and it should be installed only on the network administrator’s computer.
To download a current version of HP Web Jetadmin and for the latest list of supported host systems,
go to the following Web site:
www.hp.com/go/webjetadmin
When installed on a host server, a Windows client can gain access to HP Web Jetadmin by using a
supported Web browser (such as Microsoft® Internet Explorer 4.x or Netscape Navigator 4.x or later)
by navigating to the HP Web Jetadmin host.
NOTE: All HP Web Jetadmin functions are not supported on the product.
HP ToolboxFX on page 34.
Other Windows components and utilities
Software installer — automates the printing-system installation
●
Online Web registration
●
32 Chapter 2 Software description ENWW
Page 55

HP Update
●
HP Easy Printer Care (network models only)
●
HP Customer Participation Program
●
HP Driver Diagnostic Printer Check Tool
●
Product alerts and status messages
Depending on the type of printing-system software installation, there are several utilities that can be
used to configure product alerts and to view product status messages.
Table 2-2 Configure product alerts and status messages
Installation type Utility
Recommended – USB X
Recommended – network X X
Express – USB
Express – network X
Printer driver only – USB
Printer driver only – network X
HP ToolboxFX HP EWS
Whenever possible, use the appropriate supported utility to configure the product alerts and to view the
product status messages as follows:
Use HP ToolboxFX to configure product alerts for the following conditions:
●
When the product cannot print
◦
When the HP print cartridge is low or non HP cartridge installed
◦
Use HP EWS to view product status messages (non-configurable).
●
Device Status
◦
Software description
Supplies Status
◦
ENWW Supported utilities for Windows 33
Page 56

HP ToolboxFX
Overview of HP ToolboxFX
●
Key features
●
HP ToolboxFX folders
●
Other screens
●
Overview of HP ToolboxFX
NOTE: HP ToolboxFX is available for Windows XP and Windows Vista operating systems only.
There are differences between this version of HP ToolboxFX and previous versions.
Use the HP ToolboxFX software program to communicate with and manage the product. HP ToolboxFX
is a program that you can use for the following tasks:
Check the product status
●
Check the supplies status
●
Configure system settings
●
Set up alerts for error conditions on the product
●
Configure fax settings
●
Configure print settings
●
Configure network settings
●
View faxes that have been received by the computer
●
View product documentation
●
Gain access to problem-solving and maintenance tools
●
Use HP ToolboxFX when the product is directly connected to the computer or when it is connected to
the network.
34 Chapter 2 Software description ENWW
Page 57

Start HP ToolboxFX
Open HP ToolboxFX in one of these ways:
Double-click the HP ToolboxFX icon in the Windows system tray or on your desktop.
●
Figure 2-1 HP ToolboxFX – Windows system tray icon
Click Start, select Programs or All Programs, select HP, select HP LaserJet M1522, and then
●
click HP ToolboxFX.
Structure
HP ToolboxFX contains two main sections: the Devices section and the main content section. The
Devices section lists all products that HP ToolboxFX is monitoring. Expand the folder structure under
a product to view information or change settings for that product. Click on the information or product
settings sub-folder to gain access to that screen, which appears in the main content section. In addition
to these two sections, HP ToolboxFX has an Other Links section, as well as other pages that are
accessible from HP ToolboxFX.
Software description
Key features
Receive faxes to this computer
●
Display a message when a fax is received to this computer
●
Receive alert messages for product events
●
Receive faxes to this computer
This feature allows the computer to receive incoming faxes rather than printing them or forwarding them
to another fax number.
NOTE: If the host computer is turned off or disconnected from the product when a fax is received, the
fax is stored on the product until the host computer is turned on and reconnected.
Laptop users must shut down and disconnect the computer instead of undocking from a docking station.
Laptop users cannot receive faxes when the laptop is undocked or not connected to the product. The
product stores the received faxes until the laptop is turned on and reconnected.
ENWW HP ToolboxFX 35
Page 58

Follow these steps to enable the Receive faxes to this computer feature:
1. Open HP ToolboxFX.
2. Navigate to the Fax Tasks page under the Fax folder.
3. On the Fax Tasks screen, select the Receive faxes to this computer option, and then click
Apply.
Incoming faxes are uploaded to the computer where they can be viewed from the Fax Receive Log
screen. If the computer is turned off when faxes arrive, they are stored in the product memory and are
automatically uploaded to the computer when it is turned on again.
NOTE: The Receive faxes to this computer option can be set for one computer only. If a computer
has enabled the Receive faxes to this computer option, then that option is not available for any other
computers.
Display a message when a fax is received to this computer
Select this option to view a pop-up message on the computer when a fax is uploaded.
Follow these steps to enable the Display a message when a fax is received to this computer feature:
1. Open HP ToolboxFX.
2. Navigate to the Fax Tasks page under the Fax folder.
3. On the Fax Tasks screen, select the Display a message when a fax is received to this
computer option, and then click Apply.
Figure 2-2 HP ToolboxFX – Fax Received pop-up message
36 Chapter 2 Software description ENWW
Page 59

View the fax by clicking View fax.
Receive alert messages for product events
By using HP ToolboxFX, you can be alerted when certain events occur at the product. You can receive
pop-up messages (Status Alerts) or automatically generated e-mail messages (E-mail Alerts) for these
events. In addition, alerts are shown as a taskbar icon or as a desktop message. Some of the alert
events include:
Cartridge low
●
Replace cartridge
●
Close door
●
Paper out
●
Paper jam
●
Manual feed
●
Product errors (such as insufficient memory)
●
For status alerts, a group of errors or a group of print-cartridge warnings can be selected, but not specific
items within those groups. To configure alerts, use the Set up Status Alerts screen in the Alerts folder
in HP ToolboxFX.
Software description
The following alert messages are available:
HP pop-up alert messages
●
System-tray icon alert
●
Desktop alert
●
E-mail alert
●
HP pop-up alert messages
Pop-up alert messages notify you immediately when an error or print-cartridge warning occurs in the
product. An error, such as a paper jam, halts product operation and requires correction. The alert
ENWW HP ToolboxFX 37
Page 60

condition can be corrected at any time. Alerts are sent only to the specific computer that is used to print
to the product. This feature is provided through HP ToolboxFX and is enabled by default.
Figure 2-3 HP Alert – CLOSE DOOR pop-up message
System-tray icon alert
The system-tray icon feature shows information about all of the current alert conditions for the product.
An icon appears in the Windows system tray when an alert condition occurs. This feature is provided
through HP ToolboxFX and is turned on by default.
Figure 2-4 HP Alert – CLOSE DOOR System Tray and Desktop pop-up message
Desktop alert
Desktop alert messages notify you immediately when an error or print-cartridge warning occurs in the
product. Desktop alerts only appear for a few seconds, and then automatically disappear. This feature
is provided through HP ToolboxFX and is disabled by default.
38 Chapter 2 Software description ENWW
Page 61

E-mail alert
E-mail alert messages notify up to two users when a specific alert condition occurs in the product. The
alert condition can be a specific error alert or a print-cartridge warning. This feature can be used to alert
administrators or service providers that the product requires attention. For example, when the toner low
alert occurs, the person in charge of ordering print cartridges can be notified by e-mail.
This feature is provided through HP ToolboxFX and is disabled by default. To use this feature, set up
your e-mail address, select the events for which you want notification, configure the SNMP e-mail server,
and then enable the feature in HP ToolboxFX.
HP ToolboxFX folders
Status
●
Alerts
●
Fax
●
Help
●
System Settings
●
Password
●
Print Settings
●
Software description
Status
Network Settings
●
Device Status
●
Supplies Status
●
Device Configuration
●
Network Summary
●
Print Info Pages
●
Event Log
●
ENWW HP ToolboxFX 39
Page 62

Device Status
View product status information. This screen indicates product conditions such as a jam or an empty
tray. After you correct a problem with the product, click the refresh button
status.
Figure 2-5 Device Status screen
to update the product
NOTE: HP ToolboxFX includes a Supplies Status section and a Supplies Information section on
the Device Status screen which provide information about the estimated toner level, the approximate
pages remaining based on the estimated toner level, and the HP part number for easy reference when
ordering new consumables.
40 Chapter 2 Software description ENWW
Page 63

Supplies Status
View detailed supplies information such as the estimated percentage of life remaining in the print
cartridge and the number of pages that have been printed with the current print cartridge. This screen
also has links to order supplies and to find recycling information.
Figure 2-6 Supplies Status screen
Software description
ENWW HP ToolboxFX 41
Page 64

Device Configuration
View a detailed description of the current product configuration.
Figure 2-7 Device Configuration screen – 1 of 5
42 Chapter 2 Software description ENWW
Page 65

Figure 2-8 Device Configuration screen – 2 of 5
Software description
ENWW HP ToolboxFX 43
Page 66

Figure 2-9 Device Configuration screen – 3 of 5
44 Chapter 2 Software description ENWW
Page 67

Figure 2-10 Device Configuration screen – 4 of 5
Software description
ENWW HP ToolboxFX 45
Page 68

Figure 2-11 Device Configuration screen – 5 of 5
46 Chapter 2 Software description ENWW
Page 69

Network Summary
View a detailed description of the current network configuration.
Figure 2-12 Network Summary screen – 1 of 3
Software description
ENWW HP ToolboxFX 47
Page 70

Figure 2-13 Network Summary screen – 2 of 3
48 Chapter 2 Software description ENWW
Page 71

Figure 2-14 Network Summary screen – 3 of 3
Software description
ENWW HP ToolboxFX 49
Page 72

Print Info Pages
Print the configuration page and various other information pages that are available for the product, such
as the Supplies page and the Demo page.
Figure 2-15 Print Info Pages screen
The contents of these reports are generated by the product firmware, not by HP ToolboxFX.
50 Chapter 2 Software description ENWW
Page 73

Event Log
View a history of product errors. The most recent error is at the top of the list.
Figure 2-16 Event Log screen
Software description
The Event Log is a four-column table where the product events are logged for reference. The log
contains codes that correspond to the error messages that appear on the product control-panel display.
The number in the Page Count column specifies the total number of pages that the product had printed
when the error occurred. The event log also contains a brief description of the error.
Alerts
Set up Status Alerts
●
Set up E-mail Alerts
●
Set up Status Alerts
Use HP ToolboxFX to set up the product so that it sends pop-up alerts to the computer when certain
events occur. Events that trigger alerts include jams, low levels of toner in HP print cartridges, non-HP
print cartridge in use, empty input trays, and specific error messages.
Select the pop-up format, the tray icon format, or both for the alerts. The pop-up alerts only appear when
the product is printing from the computer on which you set up the alerts.
NOTE: Click Apply for the changes take effect.
ENWW HP ToolboxFX 51
Page 74

Figure 2-17 Set up Status Alerts screen
By selecting the options under Show an alert, you can receive alerts like those listed in the following
table.
Table 2-3 Alerts
Setting Alerts
When the product cannot print
When the HP print cartridge is low
When the product cannot scan
Close Door
●
Manual Feed
●
Paper Out
●
Paper Jam
●
Product errors (for example, insufficient memory)
●
Cartridge Low
●
Replace Cartridge
●
Unauthorized Supply Installed
●
ADF Door Open
●
ADF Jam
●
52 Chapter 2 Software description ENWW
Page 75

By selecting the options under Show the alert, you can receive alerts in one or all of three forms:
As a pop-up message
●
As a system tray icon
●
As a desktop alert
●
NOTE: Click Apply for the changes to take effect.
Set up E-mail Alerts
Use HP ToolboxFX to configure up to two e-mail addresses to receive alerts when certain events occur.
You can specify different events, such as a low cartridge or a paper jam, for each e-mail address. Enter
the information for the e-mail server that will send out the e-mail alert messages for the product.
Figure 2-18 Set up E-mail Alerts screen – 1 of 2
Software description
ENWW HP ToolboxFX 53
Page 76

Figure 2-19 Set up E-mail Alerts screen – 2 of 2
Fax
E-mail messages can be sent to you when certain events occur at the product. You can select the
specific events about which you want to be notified.
To use this feature, you must use a valid e-mail address, select the events for which you want notification,
configure the SNMP e-mail server that will be used to send the e-mail message, and then click Apply
to save the settings.
Up to two e-mail addresses can be configured to receive separate e-mail messages for separate events.
To ensure that the proper e-mail addresses have been used and that the SNMP server information is
valid, click the Test E-mail Settings button.
NOTE: Click Apply for the changes to take effect.
Fax Tasks
●
Fax Phone Book
●
Fax Send Log and Fax Receive Log
●
Block Faxes
●
Fax Data Properties
●
54 Chapter 2 Software description ENWW
Page 77

Fax Tasks
Use HP ToolboxFX to configure faxing options.
Figure 2-20 Fax Tasks screen
Software description
The Fax Receive Mode section lists the following options for receiving faxes:
Print the received faxes. This is the default selection. If you select this option, you also have the
●
option to receive a notification (pop-up) message when a fax is printed.
Receive faxes to this computer. If you select this option, you also have the option to receive a
●
notification (pop-up) message when a fax is received.
NOTE: The Receive faxes to this computer option can be set for one computer only.
Forward received faxes to a different fax machine. If you select this option, you also must type
●
a fax number for the machine to which the fax is forwarded.
NOTE: Click Apply for the changes to take effect.
Fax Phone Book
The Fax Phone Book screen shows the product phone book data.
The maximum number of characters that a name can have in a phone book entry is 16. Only 12 of these
characters are displayed on the product control panel, because 4 characters are used to display the
phone-book entry number (for example, 001:).
ENWW HP ToolboxFX 55
Page 78

The maximum number of characters that a telephone number can have is 50. This includes special
characters that are used to insert pauses in the dial sequence.
Figure 2-21 Fax Phone Book screen
Use the Fax Phone Book screen to add and remove individuals or groups on your speed-dial list, import
phone books from a variety of sources, and update and maintain the contact list.
To add an individual contact to the speed-dial list, select the row of the speed dial number that you
●
want to specify. Type the contact name in the Contact name window. Type the fax number in the
Fax number window. Click Add.
To add a group of contacts to the speed-dial list, select the row of the speed-dial number that you
●
want to specify. Click Add Group. Double-click a contact name from the list on the left to move it
to the group list on the right, or select a name on the left and then click the appropriate arrow to
move it to the group list on the right. You can also use those two methods to move names from
right to left. When you have created a group, type a name in the Group name window, and then
click Apply.
To edit an existing individual speed-dial entry, click anywhere on the row containing the contact
●
name to select it, and then click Update. Type changes in the appropriate windows, and then click
Apply.
To edit an existing group-speed-dial entry, click anywhere on the row containing the group name
●
to select it, and then click Update Group. Make any required changes, and then click Apply.
To delete an entry from the speed-dial list, select the item, and then click Delete.
●
56 Chapter 2 Software description ENWW
Page 79

To move speed dial entries, select the entry and then click Move, or select Move and then specify
●
the entry in the dialog box. Either select Next empty row or specify the number of the row where
you want to move the entry.
NOTE: If you specify a row that is occupied, then the new entry will overwrite the existing entry.
To import contacts from a phone book that exists in Lotus Notes, Outlook, or Outlook Express, click
●
Import/Export Phone Book. Select the Import option, and then click Next. Select the appropriate
software program, navigate to the appropriate file, and then click Finish. To export contacts from
a phone book, click Import/Export Phone Book. Select the Export option, and then click Next.
Enter the file name or browse to the file to which you want to export contacts, and then click
Finish. You can also select individual entries from the phone book instead of importing the entire
phone book.
To delete all entries, click Delete All, and then click Yes.
●
In addition to numerical digits, the following are valid characters for fax numbers:
(
●
)
●
+
●
-
●
*
●
#
●
R
●
W
●
.
●
,
●
<space>
●
NOTE: Click Apply for the changes to take effect.
Fax Send Log and Fax Receive Log
The Fax Send Log lists all recently sent faxes and information about them, including the date and time
sent, job number, fax number, page count, and the results.
The Fax Receive Log provides a list of all recently received faxes and information about them including
the date and time received, job number, fax number, page count, results, and a link to the fax if the
Receive faxes to this computer feature is enabled.
Software description
NOTE: The Fax Receive Log is not self-refreshing. If left open, new received faxes will not appear
until the screen is refreshed.
The Results column provides the fax status. If the fax attempt was unsuccessful, this column provides
a description of why the fax was not sent.
The fax receive log can be used to block future faxes. Check the Block Fax box next to a received fax
listed on the log.
ENWW HP ToolboxFX 57
Page 80

Figure 2-22 Fax Send Log screen
58 Chapter 2 Software description ENWW
Page 81

Figure 2-23 Fax Receive Log screen
Software description
Click the refresh button to view new fax data from the product. The following information for each
fax is displayed in the logs:
Date and time
●
Job number
●
Fax number
●
Pages
●
Result
●
Click any column heading in the fax send log to re-sort the information in that column in ascending or
descending order.
When a computer that is connected to the product receives a fax, the fax contains a View link. Clicking
this link opens a new page that provides information about the fax.
NOTE: A maximum of 40 fax log entries are listed.
ENWW HP ToolboxFX 59
Page 82

Block Faxes
The Block Faxes screen provides a list of all numbers that are blocked. Add, modify, or delete blocked
fax numbers on this screen.
Figure 2-24 Block Faxes screen
60 Chapter 2 Software description ENWW
Page 83

Fax Data Properties
Use the Fax Data Properties settings to manage the space used to store faxes on the computer. You
can save more faxes if you specify a larger total data size.
Figure 2-25 Fax Data Properties screen
Software description
These settings apply to faxes that have been received to the computer. These settings apply only if you
have chosen to receive faxes to the computer.
If you select either the Delete fax data files older than check box or the Limit total data storage size
to check box, you must type a corresponding value in the Days or MB field, and then click Apply to
save the settings. If you do not type a value in the Days or the MB field, the following error message
appears:
Invalid entry. Please enter a valid value.
An entry will remain in the fax log even if the stored fax is deleted. When data files are deleted, only the
fax data is deleted.
Help
User Guide
●
Troubleshooting
●
Animated Demonstrations
●
ENWW HP ToolboxFX 61
Page 84

User Guide
All of the content in the Help folder is static HTML content, except for the animated demonstrations.
This content contains hyperlinks, and Next and Previous buttons to navigate through the various
sections of the Help content.
Figure 2-26 User Guide screen
Use the User Guide screen to gain access to the HP LaserJet M1522 MFP Series User Guide.
62 Chapter 2 Software description ENWW
Page 85

Troubleshooting
Figure 2-27 Troubleshooting screen
Software description
Click Troubleshooting on the Troubleshooting screen to gain access to the Problem solve chapter
of the HP LaserJet M1522 MFP Series User Guide.
ENWW HP ToolboxFX 63
Page 86

Figure 2-28 Problem solve – HP LaserJet M1522 MFP Series User Guide
64 Chapter 2 Software description ENWW
Page 87

Animated Demonstrations
Figure 2-29 Animated Demonstrations screen
Software description
Click the links on the Animated Demonstrations screen to view animated demonstrations about
removing paper jams in the product.
System Settings
Device Information
●
Paper Handling
●
Print Quality
●
Paper Types
●
System Setup
●
Service
●
Device Polling
●
Save/Restore Settings
●
ENWW HP ToolboxFX 65
Page 88

Device Information
The Device Information screen stores data about the product for future reference. The information that
you type in these fields appears on the configuration page. You can type any character in each of these
fields.
Figure 2-30 Device Information screen
NOTE: Click Apply for the changes to take effect.
Paper Handling
Use the HP ToolboxFX paper-handling options to configure the default settings. These are the same
options that are available on the product control-panel.
66 Chapter 2 Software description ENWW
Page 89

The following options are available for handling print jobs when the product is out of media:
Wait for paper to be loaded
●
Select Paper out action and then select Cancel from the Paper out action drop-down list to cancel
●
the print job.
Select Paper out action and then select Override from the Paper out time drop-down list to send
●
the print job to another paper tray. The Paper out time field specifies how long the product waits
before acting on the selections. Specify a wait time from 0 to 3600 seconds.
Figure 2-31 Paper Handling screen
Software description
The following table shows the Paper Handling settings that are available.
Table 2-4 Paper Handling options and settings
Option Settings
Default paper size
Letter
●
Legal
●
A4
●
A6
●
Executive
●
Envelope#10
●
Envelope Monarch
●
Envelope C5
●
ENWW HP ToolboxFX 67
Page 90

Table 2-4 Paper Handling options and settings (continued)
Option Settings
●
●
●
●
●
●
●
●
●
●
●
Envelope DL
Envelope B5
Custom
B5 (JIS)
Postcard (JIS)
Double Postcard (JIS)
A5
8.5 x 13 (Foolscap)
16K 197 x 273
16K 184 x 260
16K 195 x 270
Default paper type
Manual feed
Bond
●
Colored
●
Envelope
●
Heavy (111-130 g/m
●
Extra Heavy (131-175 g/m
●
Labels
●
Letterhead
●
Light (60-74 g/m
●
Plain; default setting
●
Preprinted
●
Prepunched
●
Recycled
●
Rough
●
Transparency
●
Mid Weight (96–110 g/m
●
Off
●
2
)
2
)
2
)
2
)
On
●
Tray 1 size
Any
●
Letter
●
Legal
●
A4
●
A6
●
68 Chapter 2 Software description ENWW
Page 91

Table 2-4 Paper Handling options and settings (continued)
Option Settings
●
●
●
●
●
●
●
●
●
●
●
●
●
●
Executive
Envelope#10
Envelope Monarch
Envelope C5
Envelope DL
Envelope B5
Custom
B5 (JIS)
Postcard (JIS)
Double Postcard (JIS)
A5
A6
Software description
8.5 x 13 (Foolscap)
16K 197 x 273
Tray 1 type
16K 184 x 260
●
16K 195 x 270
●
Any (default)
●
Bond
●
Colored
●
Envelope
●
Heavy (111-130 g/m
●
Extra Heavy (131-175 g/m
●
Labels
●
Letterhead
●
● Light (60-74 g/m
Plain
●
Preprinted
●
Prepunched
●
Recycled
●
Rough
●
2
)
2
)
2
)
Transparency
●
NOTE: Click Apply for the changes to take effect.
ENWW HP ToolboxFX 69
Page 92

Print Quality
Use the HP ToolboxFX print-quality options to improve the appearance of print jobs. These are the same
options that are available on the product control panel.
The options provided for controlling print quality are resolution, Resolution Enhancement technology
(REt), print density, and Economode.
●
●
●
●
Figure 2-32 Print Quality screen
Resolution. Select 600 resolution for average print jobs and FastRes 1200 for higher-quality print
jobs.
REt. You can turn on REt, which HP provides for improved print quality.
Print Density. For increased print density, select a higher number. For decreased print density,
select a lower number.
Economode. Turn Economode on when you are printing average print jobs. Economode is a
feature that allows the product to use less toner per page. Selecting this option might extend the
life of the toner supply and might reduce cost per page. However, it will also reduce print quality.
The printed image is lighter, but it is adequate for printing drafts or proofs. HP does not recommend
full-time use of Economode. If Economode is used full-time, it is possible that the toner supply will
outlast the mechanical parts in the print cartridge. If print quality begins to degrade under these
circumstances, you will need to install a new print cartridge, even if there is toner supply remaining
in the cartridge.
The following table shows the options and settings for the Print Quality screen.
70 Chapter 2 Software description ENWW
Page 93

Table 2-5 Print Quality options and settings
Option Settings
Resolution
REt
Print Density
Economode
NOTE: Click Apply for the changes to take effect.
600
●
FastRes 1200
●
On (default)
●
Off
●
1
●
2
●
3 (default)
●
4
●
5
●
On
●
Off (default)
●
Software description
ENWW HP ToolboxFX 71
Page 94

Paper Types
Use the HP ToolboxFX paper types options to configure print modes that correspond to the various
media types. Select Restore Modes to reset all modes to the factory settings.
Figure 2-33 Paper Types screen
A print mode is a special setting that controls the print speed and the fuser temperature of the product.
The product speed and fuser temperature are adjusted to match the print mode that you select, which
can result in better print quality when printing on certain media types. The following list shows the print
modes listed in the drop-down menu for each media type:
NOTE: Not all of the paper types listed in the driver can be adjusted from the Print Types screen.
Normal Mode
●
Light Mode
●
Heavy Mode
●
Cardstock Mode
●
Transparency Mode
●
Label Mode
●
Envelope Mode
●
72 Chapter 2 Software description ENWW
Page 95

The following table shows the media types that the product supports and the default fuser mode for each
type.
Table 2-6 Print mode settings and default fuser modes
Media type Fuser mode default setting
Plain Normal Mode
Light (<75 g/m2)
Heavy (90 to 105 g/m2)
Bond Heavy Mode
Color Normal Mode
Letterhead Normal Mode
Preprinted Normal Mode
Prepunched Normal Mode
Transparency Transparency Mode
Recycled Normal Mode
Labels Label Mode
Envelope Envelope Mode
Rough Heavy Mode
Transparency Transparency Mode
Extra Heavy Cardstock Mode
Mid-Weight 96-110g Heavy Mode
Light Mode
Heavy Mode
Software description
NOTE: Narrow and heavy media can cause the product to print slowly.
Clicking Restore Modes and then clicking Apply sets all of the print modes to the original factory
defaults.
NOTE: Click Apply for the changes to take effect.
ENWW HP ToolboxFX 73
Page 96

System Setup
Use the HP ToolboxFX system settings options to configure global settings for copy, fax, scan, and print,
such as jam recovery and auto-continue.
Figure 2-34 System Setup screen
The following Jam recovery settings are available:
Auto (default)
●
On
●
Off
●
The following Auto continue settings are available:
On
●
Off (default)
●
Set the Connection time-out (I/O) to any value from 5 to 7200 seconds.
Set the Cartridge low threshold to any value from 1 to 20%. The Cartridge low threshold option sets
the percentage threshold that triggers a toner low alert.
NOTE: Click Apply for the changes to take effect.
74 Chapter 2 Software description ENWW
Page 97

Service
Use the Service screen to start the cleaning mode procedure on the product.
Figure 2-35 Service screen
Software description
During the printing process, paper, toner, and dust particles accumulate inside the product. Over time,
this buildup can cause print-quality problems such as toner specks or smearing. Click Start to run the
cleaning mode procedure on the product.
ENWW HP ToolboxFX 75
Page 98

Device Polling
Use the Device Polling screen to control product polling.
Figure 2-36 Device Polling screen
You can turn off Device Polling to reduce network traffic, but doing so also disables some HP
ToolboxFX features: pop-up alerts, fax log updates, the ability to receive faxes to this computer, and
scanning using the Scan To button.
Selecting Turn off device polling on the Device Polling screen and then clicking Apply does not turn
off HP ToolboxFX, but acts like a master switch to turn off all polling. You can then go back into the
HP ToolboxFX and turn off individual components such as the Scan To function or some fax functions.
76 Chapter 2 Software description ENWW
Page 99

Save/Restore Settings
Use the Save/Restore Settings screen to save all of the settings to a file on the computer. You can
also load the saved product settings from this screen.
Figure 2-37 Save / Restore Settings screen
Software description
When you click Save, the Save as dialog box might be hidden. Look behind your browser window or
on the task bar.
You cannot restore settings that were saved from a previous HP product. You can only restore settings
that were saved from an HP LaserJet M1522 MFP Series product.
NOTE: HP ToolboxFX will not function until settings have been fully loaded and the product control
panel returns to the Ready state.
ENWW HP ToolboxFX 77
Page 100

Password
Use the Password screen to set a password for the product.
Figure 2-38 Password screen
Network administrators can set a product password to protect product settings. After a password is set,
only users who know the password have access to product settings. If a product password has been
set, users are prompted for the password. Only users who type the correct password within three
attempts can access and change product settings.
NOTE: Setting a password here sets the same product password for HP ToolboxFX, HP EWS, and
the product control panel.
If the password is lost or forgotten, the factory settings for the product must be restored and a new
password must be assigned.
Print Settings
Printing
●
PCL5c
●
PostScript
●
78 Chapter 2 Software description ENWW
 Loading...