

Page 1

366425-021.book Page i 5:11 PMWednesday, September 1, 2004
© 2004 Hewlett-Packard Development Company, L.P.
Microsoft, Windows, the Windows logo, Outlook, and ActiveSync are
trademarks of Microsoft Corporation in the U.S. and other countries.
HP iPAQ products are Powered by Windows Mobile
the Pocket PC.
Getting started
HP iPAQ hx2000 series
First Edition (August 2004)
Document Part Number: 366425-021
TM
2003 software for
Page 2

366425-021.book Page ii 5:11 PMWednesday, September 1, 2004
Contents
Getting started
HP iPAQ hx2000 series .......................
Sådan kommer du i gang
HP iPAQ hx2000-serien............................
Aan de slag
HP iPAQ hx2000 Series ...........................
Komme i gang
HP iPAQ hx2000 ...................................
Aloitusopas
HP iPAQ hx2000 -sarja ............................
Komma igång
HP iPAQ hx2000-serien............................
Page 3

366425-021.book Page 1 5:11 PMWednesday, September 1, 2004
Congratulations on purchasing an HP iPAQ Pocket PC. This
Getting started guide will help you set up your iPAQ Pocket PC
and familiarize you with how it works.
Do not connect the Pocket PC to your computer until you
have finished installing ActiveSync on your computer.
1. Install the battery
Getting started 1
Page 4
366425-021.book Page 2 5:11 PMWednesday, September 1, 2004
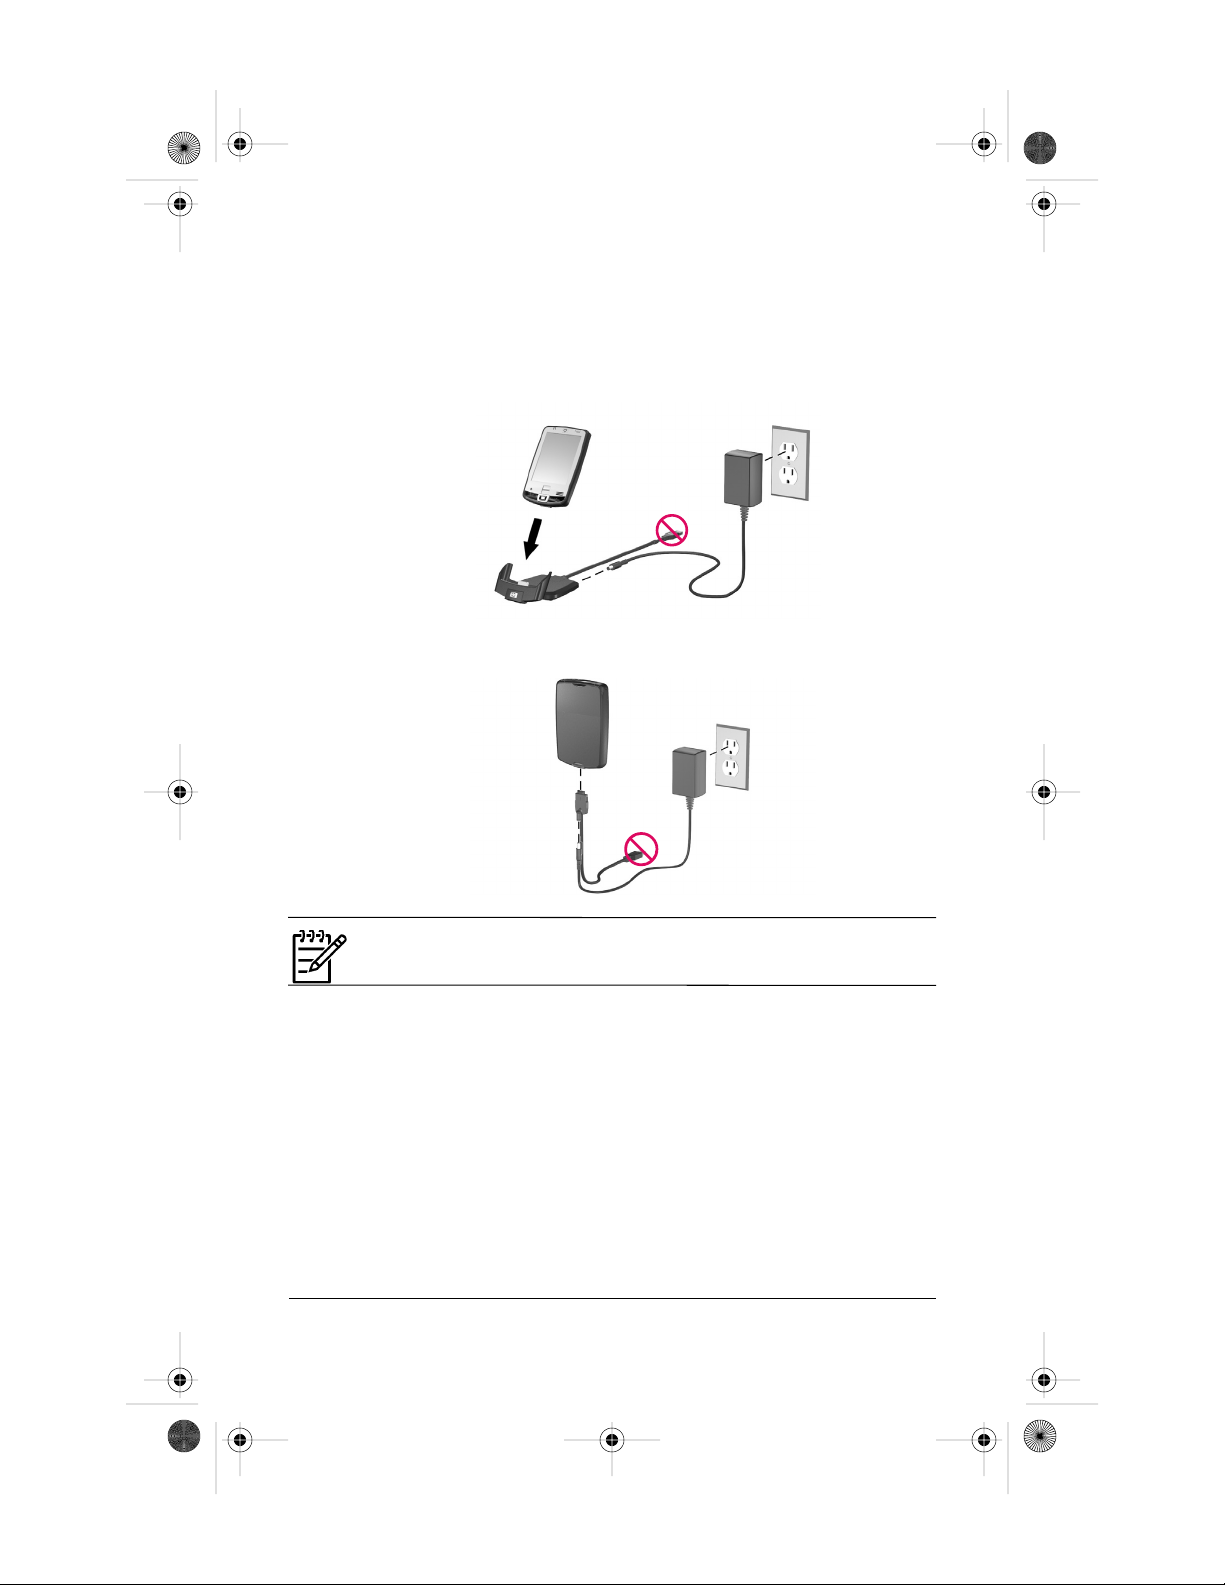
2. Charge the Pocket PC
Do not connect the Pocket PC to the computer at this time.
OR
NOTE: It can take up to four hours to fully charge the battery.
Getting started 2
Page 5

366425-021.book Page 3 5:11 PMWednesday, September 1, 2004
3. Power on
Press the Power button to turn on the unit.
4. Set up the device
When the Windows Mobile screen displays, lift the removable
flip cover, tap anywhere on the screen, then follow the on-screen
instructions until setup is complete.
5. Insert the Companion CD into the
computer
Insert the Companion CD into your computer. Click Start Here.
Follow the on-screen instructions.
The Setup Wizard installs:
ActiveSync 3.7.1 (or greater)
Microsoft Outlook
Other optional software applications
Getting started 3
Page 6

366425-021.book Page 4 5:11 PMWednesday, September 1, 2004
6. Connect the Pocket PC to computer when
instructed by Setup Wizard on the
computer
7. Establish a partnership
Follow the on-screen ActiveSync instructions to establish a
connection between your Pocket PC and your computer.
Use ActiveSync to synchronize your calendar, tasks, contacts,
e-mail messages, and favorite Web content between the
Pocket PC and computer.
Click on the Microsoft ActiveSync icon on the computer desktop to view
Help Topics and the ActiveSync Troubleshooter.
Getting started 4
Page 7

366425-021.book Page 5 5:11 PMWednesday, September 1, 2004
Helpful Hints
Power Saving
Leave your device connected to AC power at all times when
not using it.
Dim the backlight. On the Tod ay screen, in the TodayPanel
Lite, use your stylus to adjust the Backlight Brightness
Level slider, located under the Light bulb icon, halfway
across to the middle position.
Turn off the backlight. On the Tod ay screen, tap the Light
bulb icon > Battery Power tab; then set the backlight to turn
off soon after you stop using the device.
Leave the device set to turn off after not being used for a short
period of time. On the Today screen, tap the Battery icon >
Advanced tab. On battery power, set the device to power off
in the shortest acceptable time.
Turn off Wi-Fi and Bluetooth power when not in use. Tap
Start > iPAQ Wireless > ALL OFF button.
Set the device to receive incoming infrared beams manually.
On the Tod ay screen, in the TodayPanel Lite, tap the
Battery icon > Adjust beam settings to conserve power,
then uncheck Receive all incoming beams.
Assign a program button to turn off the screen display while
listening to music. Tap Start > Programs > Windows Media
> Tools > Settings > Buttons. From the Select Function
dropdown list, tap Screen Toggle. Press a program button
and tap OK. Then, when listening to music, press that
program button to turn off the screen display.
Tap Start > ActiveSync > Tools > Options > Mobile
Schedule tab. Select Manually for both Peak times and
Off-peak times. Selecting automatic synchronization can
cause your iPAQ Pocket PC to “wake up” regularly causing
your battery to drain.
Getting started 5
Page 8

366425-021.book Page 6 5:11 PMWednesday, September 1, 2004
Fingerprint Reader (not available on all
models)
Maintain a firm, consistent pressure against the sensor when
swiping a finger. One way to do this is to press your thumb
against the bottom of the iPAQ Pocket PC while swiping your
index finger.
For best results, refer to “How Do I Use the Fingerprint
Reader on my Pocket PC?” in the printed How Do I...? guide.
Getting started 6
Page 9

366425-021.book Page 7 5:11 PMWednesday, September 1, 2004
NOTE: Not all models or features available in all regions.
Front panel components
1 Flip cover: Lift the flip cover before tapping on the screen
2 Power button: Turns unit on and off
3 Speaker: Listen to notes or music
4 iTask button: Open, close, and switch between applications, run utilities, and change
settings
5 Messaging button: Access your Inbox for sending and receiving e-mail
iPAQ Wireless*: Launches iPAQ Wireless application
6 5-Way Navigation button: Scroll through a list and push to select (similar to using a
joystick)
7 Contacts button: Display a list of your contacts from the category you select
HP ProtectTools*: Launch security application
(Continued)
Getting started 7
Page 10

366425-021.book Page 8 5:11 PMWednesday, September 1, 2004
Front panel components (Continued)
8
Calendar button: Schedule appointments, set reminders, or view your calendar
Landscape/Portrait*: Switch between landscape and portrait display modes
Microphone: Speak into the microphone to record notes
9
10 Biometric Fingerprint Reader: Authenticate access to your device
11 Charge/Notification LED indicator:
LED off = not charging or no notifications
Amber flash = charging
Green flash = one or more notification events have occurred
Amber solid = charging complete
12 Wireless LED indicator:
LED off = Wi-Fi and Bluetooth are both off
Blue flash = Wi-Fi and/or Bluetooth are on
* To access this function, press and hold for two seconds.
Getting started 8
Page 11

366425-021.book Page 9 5:11 PMWednesday, September 1, 2004
Top, back, and side panel components
1 Stylus: Use to input information. Slide up to remove, slide down to replace
2 Type II Compact Flash (CF) slot: Supports CF Type I or Type II expansion cards
3 Secure digital expansion slot: Supports Secure Digital (SD) and MMC memory
cards and SDIO expansion cards
4 3.5 mm stereo headphone/headset jack: Supports standard 3.5 mm
headphones or headsets
5 Removable flip cover hinge: Connects the removable flip cover to the
iPAQ Pocket PC
6 Record button: Record voice or sound
7 Battery release latch: Pull out to release battery
8 Battery cover: Remove to install or remove the battery
Getting started 9
Page 12

366425-021.book Page 10 Wednesday, September 1, 2004 5:11 PM
Bottom panel components
1 Reset button: Push the stylus into this hole for a soft reset of your Pocket PC
2 Universal sync connector: Connects to HP desktop cradle, AC adapter, and USB
synchronization cable
HP desktop cradle (not included with all models)
Connects to the Pocket PC for charging and/or synchronizing and serves as a recommended
home for your Pocket PC when it is not in use
Getting started 10
Page 13

366425-021.book Page 11 Wednesday, September 1, 2004 5:11 PM
Learning more about the Pocket PC
for information on... see this source...
Using your Pocket PC HP iPAQ hx2000 series Pocket PC User’s Guide located
Bluetooth and Wi-Fi connections HP iPAQ hx2000 series Pocket PC User’s Guide located
Additional programs that can be Companion CD
installed on your Pocket PC
Safety precautions Important Safety Information document on the
Global limited warranty Global limited warranty and technical support document
HP iPAQ accessory products Accessories information brochure included with your
Support for your Pocket PC http://www.hp.com/support
Worldwide telephone support http://www.hp.com/country/us/eng/wwcontact.html
phone numbers
Registering your HP iPAQ to
receive e-mail from HP regarding
special offers and promotions
on the Companion CD. For on device help, tap Start,
and then Help.
on the Companion CD
Companion CD
in the box
Pocket PC and on the Companion CD, or
http://www.hp.com/go/ipaqaccessories
http://www.register.hp.com
Getting started 11
 Loading...