

HP designjet 2000cp, designjet 2500cp, designjet 2800cp, designjet 3000cp, designjet 3500cp schematic
...Page 1
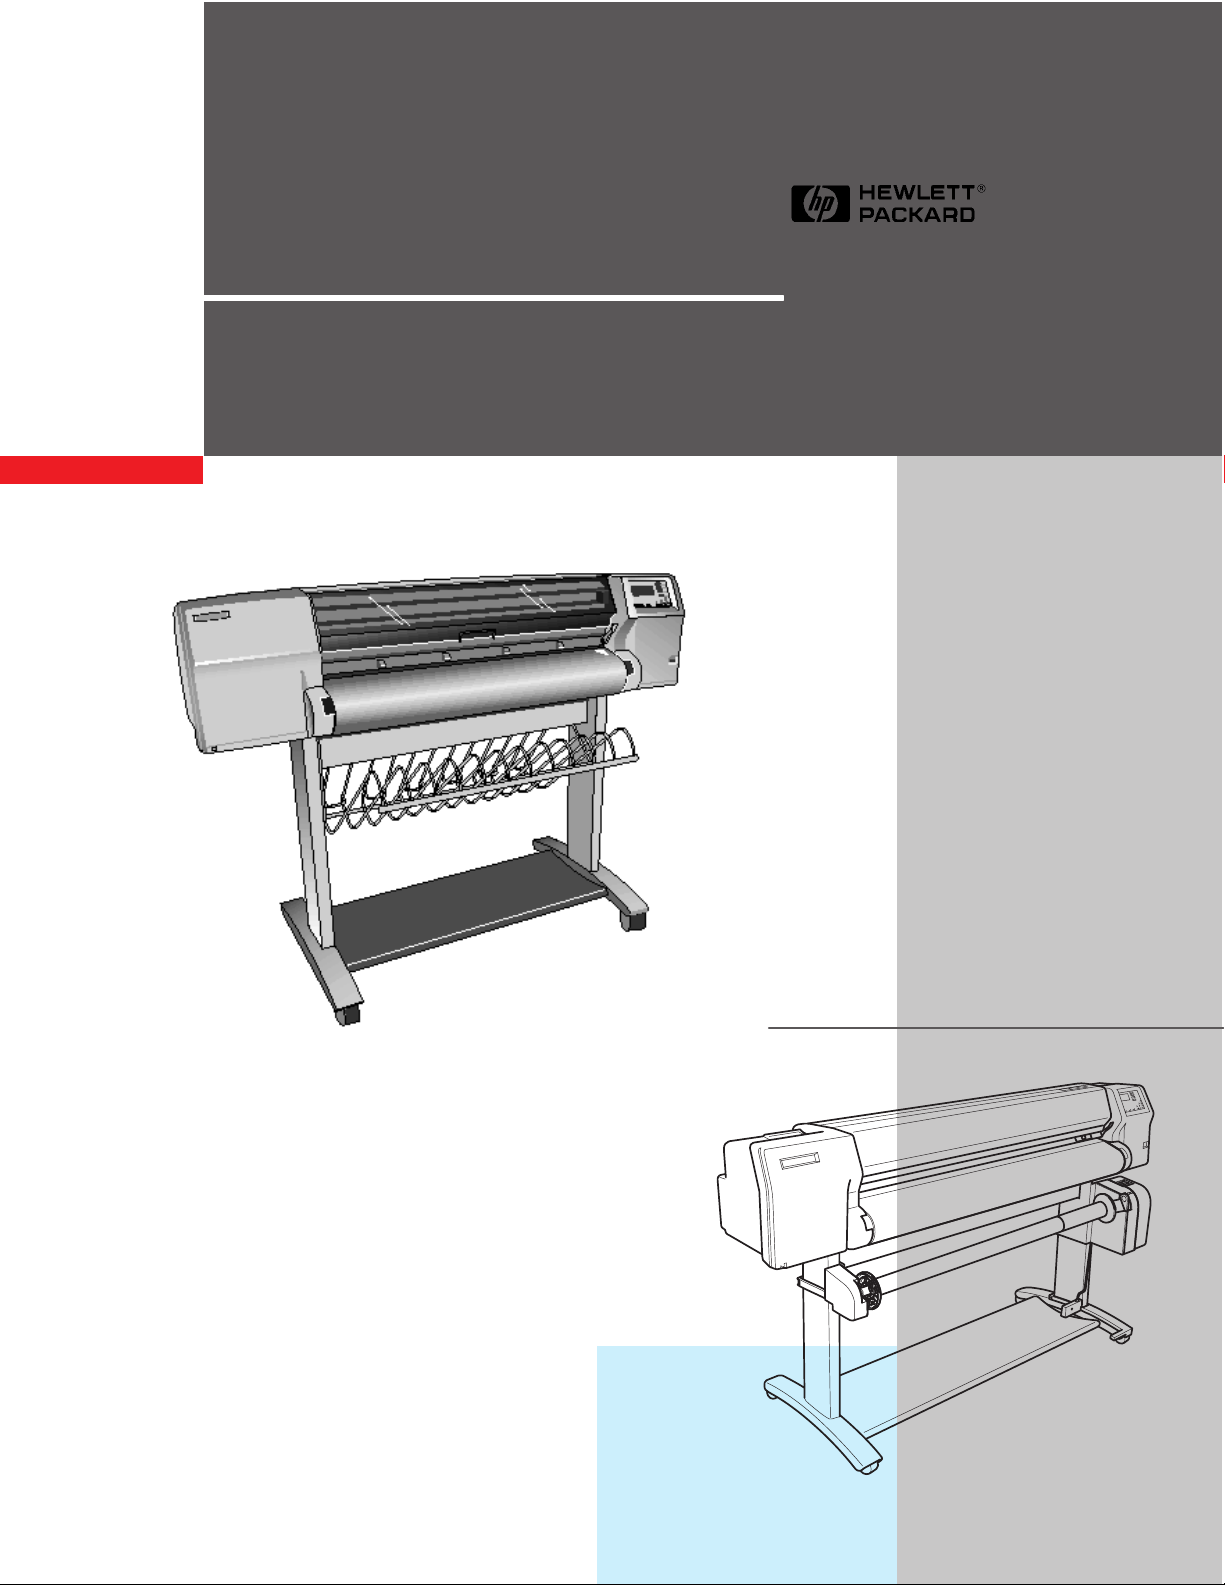
HP DesignJet 2000CP
HP DesignJet 2500CP
HP DesignJet 2800CP
HP DesignJet 3000CP
HP DesignJet 3500CP
HP DesignJet 3800CP
Printers
Service Manual
Page 2

For HP Internal Use Only
Warranty
WARNING
E Copyright HewlettPackard Company 1998
This document contains
proprietary information that is
protected by copyright. All
rights are reserved. No part of
this document may be
photocopied, reproduced, or
translated into another
language without the prior
written consent of HewlettPackard Company.
First edition, March 1998
Second edition, Nov 1998
Third Edition, September 1999
The information contained in
this document is subject to
change without notice.
Hewlett-Packard makes no
warranty of any kind with
regard to this material,
including, but not limited to,
the implied warranties of
merchantability and fitness
for a particular purpose.
Hewlett-Packard shall not be
liable for errors contained
herein or for incidental or
consequential damages in
connection with the furnishing,
performance, or use of this
material.
The procedures described in
this manual are to be
performed by HP-qualified
service personnel only.
Electrical Shock Hazard
Serious shock hazard leading
to death or injury may result if
you do not take the following
precautions:
D Ensure that the ac power
outlet (mains) has a
protective earth (ground)
terminal.
D Disconnect the Printer from
the power source prior to
performing any
maintenance.
D Prevent water or other
liquids from running onto
electrical components or
circuits, or through openings
in the enclosure.
Electrostatic Discharge
Refer to the beginning of
Chapter 8 of this manual, for
precautions you should take to
prevent damage to the Printer
circuits from electrostatic
discharge.
Technical Marketing, Barcelona Division
Hewlett-Packard Española, S.A.
Avda. Graells, 501
08190 Sant Cugat del Vallès
Spain
Safety Symbols
General definitions of safety
symbols are given
immediately after the table of
contents.
Page 3
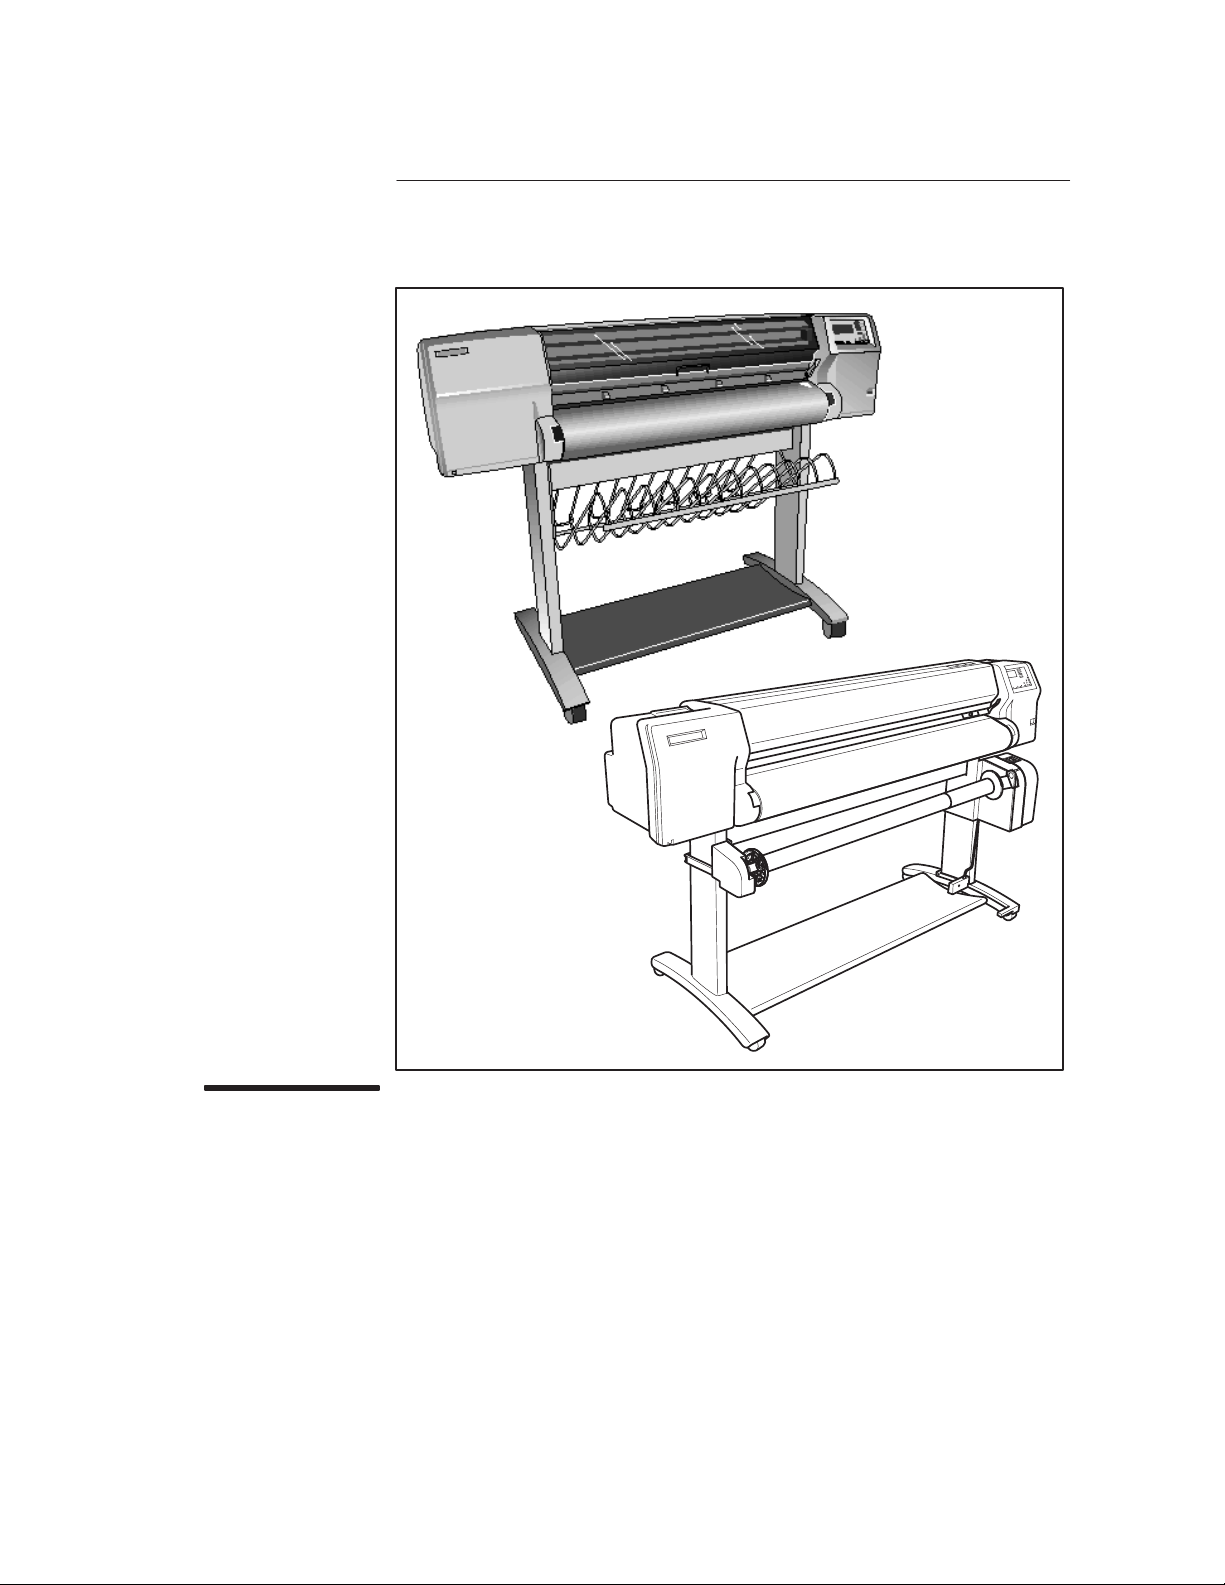
Service Manual
HP DesignJet 2000CP
HP DesignJet 2500CP
HP DesignJet 2800CP
HP DesignJet 3000CP
HP DesignJet 3500CP
HP DesignJet 3800CP
Printers
Page 4

Using this Manual
Purpose
This manual contains information necessary to test, calibrate and service:
D HP DesignJet 2000CP printer (model C4703A)
D HP DesignJet 2500CP printer (model C4704A)
D HP DesignJet 2800CP printer (model C6085A)
D HP DesignJet 3000CP printer (model C4723A)
D HP DesignJet 3500CP printer (model C4724A)
D HP DesignJet 3800CP printer (model C6084A)
For information about using these printers, refer to the corresponding user
and quick-reference guides.
Readership
The procedures described in this manual are to be performed by
HP-certified service personnel only.
Part Numbers
Part numbers for plotter options, accessories and service parts are located in
chapter 7.
Conventions
This manual contains information for the color HP DesignJet 2000CP,
2500CP, 2800CP, 3000CP, 3500CP and 3800CP printers. Throughout this
Manual, these printers will be referred to as the HP DesignJet CP Series
Printers.
Concerning the hardware perspective, DesignJets 2800CP and 3800CP are
basically DesignJets 2000CP and 3000CP (respectively) connected with an
external Fiery RIP. Therefore, all information applicable to the DesignJets
2000CP/3000CP will also be applicable to DesignJets 2800CP/3800CP.
A small arrow ' is used to indicate other parts of the Service Manual or
User ’s Guide where you can find information related to the topic you are
consulting.
ii Using this Manual
HP DesignJet CP Series Printers
Page 5

Contents
Using this Manual ii. . . . . . . . . . . . . . . . . . . . . . . . . . . . . . . . . . . . . . . . . . . . . . . . .
Safety Symbols x. . . . . . . . . . . . . . . . . . . . . . . . . . . . . . . . . . . . . . . . . . . . . . . . . . . . .
1 T roubleshooting
Which Firmware relates to which Ink system? 1-2. . . . . . . . . . . . . . . . . . . . . . . . . . .
How do I Check the Hard Disk Drive Version?
(Only applicable to HP DesignJet 2500CP/3500CP) 1-2. . . . . . . . . . . . . . . . . . . . . . .
Is the Printer Using the Latest Firmware Revision? 1-2. . . . . . . . . . . . . . . . . . . . . .
How do I upgrade the Firmware Revision on the Flash SIMM? 1-3. . . . . . . . . . . .
How do I upgrade the PostScript Revision on the Flash SIMM? 1-4. . . . . . . . . . . .
How can I Copy Firmware Data from One Flash SIMM
to a Second Flash SIMM? 1-6. . . . . . . . . . . . . . . . . . . . . . . . . . . . . . . . . . . . . . . . . . . . . .
What Can I do when a System Error Code Appears
on the Front-Panel Display? 1-7. . . . . . . . . . . . . . . . . . . . . . . . . . . . . . . . . . . . . . . . . . . .
Have you performed a Service Test on the Failed Component/Assembly? 1-7. . . .
Have you Performed the Necessary Service Calibrations? 1-8. . . . . . . . . . . . . . . . .
What can I do to Solve Image Quality Problems? 1-8. . . . . . . . . . . . . . . . . . . . . . . . .
What can I do if the Carriage is Noisy? 1-9. . . . . . . . . . . . . . . . . . . . . . . . . . . . . . . . . .
What can I do if the Service Station is Noisy? 1-9. . . . . . . . . . . . . . . . . . . . . . . . . . . .
What can I do if the Printer continuously rejects Printheads? 1-9. . . . . . . . . . . . . .
What can I do if the Printer has problems with Media Loading? 1-9. . . . . . . . . . .
What can I do if the Cover Sensors aren’t Working? 1-10. . . . . . . . . . . . . . . . . . . . . . .
What can I do if the “Switch Power Off / Check Printhead Path”
message appears when the Printer is about to cut or is cutting? 1-10. . . . . . . . . . . .
What can I do if the Bail Assembly does not lower all the way? 1-10. . . . . . . . . . . .
What can I do if the “Lens Maintenance” message
appears on the Front-Panel? 1-10. . . . . . . . . . . . . . . . . . . . . . . . . . . . . . . . . . . . . . . . . . . .
Troubleshooting Media Jams/Printhead Crashes 1-10. . . . . . . . . . . . . . . . . . . . . . . . .
What can I do if the Printer does not Power ON? 1-12. . . . . . . . . . . . . . . . . . . . . . . . .
What can I do if the Line Sensor has Problems Detecting Media? 1-12. . . . . . . . . .
What is the Ink System? 1-13. . . . . . . . . . . . . . . . . . . . . . . . . . . . . . . . . . . . . . . . . . . . . . .
How Do I Troubleshoot the Ink System? 1-13. . . . . . . . . . . . . . . . . . . . . . . . . . . . . . . . .
Does the Customer have Mid-Print Refill Problems in
HP DesignJets 3500CP/3000CP? 1-15. . . . . . . . . . . . . . . . . . . . . . . . . . . . . . . . . . . . . . . .
How Do I Clean the Electrical Contacts? 1-17. . . . . . . . . . . . . . . . . . . . . . . . . . . . . . . . .
How Do I Print some of the Internal Prints? 1-18. . . . . . . . . . . . . . . . . . . . . . . . . . . . .
The Service Print 1-18. . . . . . . . . . . . . . . . . . . . . . . . . . . . . . . . . . . . . . . . . . . . . . . . . .
The Usage report 1-19. . . . . . . . . . . . . . . . . . . . . . . . . . . . . . . . . . . . . . . . . . . . . . . . . . .
The PostScript Config 1-20. . . . . . . . . . . . . . . . . . . . . . . . . . . . . . . . . . . . . . . . . . . . . .
How to Navigate through the Front-Panel Menu on
HP DesignJets 2500CP and 2000CP 1-21. . . . . . . . . . . . . . . . . . . . . . . . . . . . . . . . . . . . .
HP DesignJet CP Series Printers
iiiContents
Page 6

2 System Error Codes
System Error: 0000D8 XXXXXXXX 2-3. . . . . . . . . . . . . . . . . . . . . . . . . . . . . . . . . . . . .
System Error: 010020 2-3. . . . . . . . . . . . . . . . . . . . . . . . . . . . . . . . . . . . . . . . . . . . . . . . . .
System Error: 010021 AXXXXXXX 2-4. . . . . . . . . . . . . . . . . . . . . . . . . . . . . . . . . . . . .
System Error: 010022 2-4. . . . . . . . . . . . . . . . . . . . . . . . . . . . . . . . . . . . . . . . . . . . . . . . . .
System Error: 010023 2-5. . . . . . . . . . . . . . . . . . . . . . . . . . . . . . . . . . . . . . . . . . . . . . . . . .
System Error: 010024 2-5. . . . . . . . . . . . . . . . . . . . . . . . . . . . . . . . . . . . . . . . . . . . . . . . . .
System Error: 010030 2-5. . . . . . . . . . . . . . . . . . . . . . . . . . . . . . . . . . . . . . . . . . . . . . . . . .
System Error: 010031 2-6. . . . . . . . . . . . . . . . . . . . . . . . . . . . . . . . . . . . . . . . . . . . . . . . . .
System Error: 010032 000000XX 2-7. . . . . . . . . . . . . . . . . . . . . . . . . . . . . . . . . . . . . . .
System Error: 010033 2-8. . . . . . . . . . . . . . . . . . . . . . . . . . . . . . . . . . . . . . . . . . . . . . . . . .
System Error: 010034 000X0000 2-8. . . . . . . . . . . . . . . . . . . . . . . . . . . . . . . . . . . . . . .
System Error: 010035 0XABCDEF 2-9. . . . . . . . . . . . . . . . . . . . . . . . . . . . . . . . . . . . .
System Error: 010036 2-10. . . . . . . . . . . . . . . . . . . . . . . . . . . . . . . . . . . . . . . . . . . . . . . . . .
System Error: 010036 0000XX00 2-11. . . . . . . . . . . . . . . . . . . . . . . . . . . . . . . . . . . . . . . .
System Error: 010037 2-12. . . . . . . . . . . . . . . . . . . . . . . . . . . . . . . . . . . . . . . . . . . . . . . . . .
System Error: 010038 2-12. . . . . . . . . . . . . . . . . . . . . . . . . . . . . . . . . . . . . . . . . . . . . . . . . .
System Error: 010039 2-13. . . . . . . . . . . . . . . . . . . . . . . . . . . . . . . . . . . . . . . . . . . . . . . . . .
System Error: 010040 2-13. . . . . . . . . . . . . . . . . . . . . . . . . . . . . . . . . . . . . . . . . . . . . . . . . .
System Error: 010041 2-13. . . . . . . . . . . . . . . . . . . . . . . . . . . . . . . . . . . . . . . . . . . . . . . . . .
System Error: 010042 0000000X 2-14. . . . . . . . . . . . . . . . . . . . . . . . . . . . . . . . . . . . . . .
System Error: 010043 2-15. . . . . . . . . . . . . . . . . . . . . . . . . . . . . . . . . . . . . . . . . . . . . . . . . .
System Error: 010100 2-16. . . . . . . . . . . . . . . . . . . . . . . . . . . . . . . . . . . . . . . . . . . . . . . . . .
System Error: 010101 2-16. . . . . . . . . . . . . . . . . . . . . . . . . . . . . . . . . . . . . . . . . . . . . . . . . .
System Error: 010102 2-16. . . . . . . . . . . . . . . . . . . . . . . . . . . . . . . . . . . . . . . . . . . . . . . . . .
System Error: 010110 2-17. . . . . . . . . . . . . . . . . . . . . . . . . . . . . . . . . . . . . . . . . . . . . . . . . .
System Error: 010111 2-17. . . . . . . . . . . . . . . . . . . . . . . . . . . . . . . . . . . . . . . . . . . . . . . . . .
System Error: 010120 2-18. . . . . . . . . . . . . . . . . . . . . . . . . . . . . . . . . . . . . . . . . . . . . . . . . .
System Error: 010121 2-18. . . . . . . . . . . . . . . . . . . . . . . . . . . . . . . . . . . . . . . . . . . . . . . . . .
System Error: 020000 2-19. . . . . . . . . . . . . . . . . . . . . . . . . . . . . . . . . . . . . . . . . . . . . . . . . .
System Error: 020001 2-20. . . . . . . . . . . . . . . . . . . . . . . . . . . . . . . . . . . . . . . . . . . . . . . . . .
System Error: 020002 2-21. . . . . . . . . . . . . . . . . . . . . . . . . . . . . . . . . . . . . . . . . . . . . . . . . .
System Error: 020003 2-22. . . . . . . . . . . . . . . . . . . . . . . . . . . . . . . . . . . . . . . . . . . . . . . . . .
System Error: 020004 2-23. . . . . . . . . . . . . . . . . . . . . . . . . . . . . . . . . . . . . . . . . . . . . . . . . .
System Error: 020005 2-24. . . . . . . . . . . . . . . . . . . . . . . . . . . . . . . . . . . . . . . . . . . . . . . . . .
System Error: 020006 2-25. . . . . . . . . . . . . . . . . . . . . . . . . . . . . . . . . . . . . . . . . . . . . . . . . .
System Error: 020010 2-25. . . . . . . . . . . . . . . . . . . . . . . . . . . . . . . . . . . . . . . . . . . . . . . . . .
System Error: 020011 2-26. . . . . . . . . . . . . . . . . . . . . . . . . . . . . . . . . . . . . . . . . . . . . . . . . .
System Error: 040xxx 2-26. . . . . . . . . . . . . . . . . . . . . . . . . . . . . . . . . . . . . . . . . . . . . . . . . .
System Error: 040601 2-27. . . . . . . . . . . . . . . . . . . . . . . . . . . . . . . . . . . . . . . . . . . . . . . . . .
System Error: 050000 2-27. . . . . . . . . . . . . . . . . . . . . . . . . . . . . . . . . . . . . . . . . . . . . . . . . .
System Error: 060000 2-28. . . . . . . . . . . . . . . . . . . . . . . . . . . . . . . . . . . . . . . . . . . . . . . . . .
System Error: 060100 2-28. . . . . . . . . . . . . . . . . . . . . . . . . . . . . . . . . . . . . . . . . . . . . . . . . .
System Error: 060200 2-28. . . . . . . . . . . . . . . . . . . . . . . . . . . . . . . . . . . . . . . . . . . . . . . . . .
System Error: 060300 2-29. . . . . . . . . . . . . . . . . . . . . . . . . . . . . . . . . . . . . . . . . . . . . . . . . .
System Error: 060400 2-29. . . . . . . . . . . . . . . . . . . . . . . . . . . . . . . . . . . . . . . . . . . . . . . . . .
System Error: 060500 2-29. . . . . . . . . . . . . . . . . . . . . . . . . . . . . . . . . . . . . . . . . . . . . . . . . .
System Error: 07xxxx XXXXXXXX 2-29. . . . . . . . . . . . . . . . . . . . . . . . . . . . . . . . . . . . . .
System Error: 08xxxx 2-30. . . . . . . . . . . . . . . . . . . . . . . . . . . . . . . . . . . . . . . . . . . . . . . . . .
System Error: 080001 2-30. . . . . . . . . . . . . . . . . . . . . . . . . . . . . . . . . . . . . . . . . . . . . . . . . .
System Error: 09xxxx 2-31. . . . . . . . . . . . . . . . . . . . . . . . . . . . . . . . . . . . . . . . . . . . . . . . . .
iv Contents
HP DesignJet CP Series Printers
Page 7

System Error: 090004 2-31. . . . . . . . . . . . . . . . . . . . . . . . . . . . . . . . . . . . . . . . . . . . . . . . . .
Error Message: Ink System Error XX-YYYY 2-31. . . . . . . . . . . . . . . . . . . . . . . . . . . . .
3 User Messages
User Messages for HP DesignJets 2500CP and 2000CP with Firmware
Version A.02.14 or Higher and HP DesignJets 3500CP and 3000CP 3-2. . . . . . . .
4 Service Tests
Introduction 4-2. . . . . . . . . . . . . . . . . . . . . . . . . . . . . . . . . . . . . . . . . . . . . . . . . . . . . . . . . .
Diagnostics - Self Test 4-2. . . . . . . . . . . . . . . . . . . . . . . . . . . . . . . . . . . . . . . . . . . . . . . . . .
Initialization Sequences 4-2. . . . . . . . . . . . . . . . . . . . . . . . . . . . . . . . . . . . . . . . . . . .
Service Tests (Diagnostics) 4-3. . . . . . . . . . . . . . . . . . . . . . . . . . . . . . . . . . . . . . . . . . . . .
Entering the Service Tests (Diagnostics) Menu System 4-5. . . . . . . . . . . . . . . .
D01. Electronics 4-6. . . . . . . . . . . . . . . . . . . . . . . . . . . . . . . . . . . . . . . . . . . . . . . . . . . .
D02. Line Sensor 4-9. . . . . . . . . . . . . . . . . . . . . . . . . . . . . . . . . . . . . . . . . . . . . . . . . . .
D03. Carriage Axis (Y-axis) 4-11. . . . . . . . . . . . . . . . . . . . . . . . . . . . . . . . . . . . . . . . . .
D04. Media Axis (X-axis) 4-13. . . . . . . . . . . . . . . . . . . . . . . . . . . . . . . . . . . . . . . . . . . .
D05. Service Station 4-15. . . . . . . . . . . . . . . . . . . . . . . . . . . . . . . . . . . . . . . . . . . . . . . .
D06. Refill 4-16. . . . . . . . . . . . . . . . . . . . . . . . . . . . . . . . . . . . . . . . . . . . . . . . . . . . . . . . .
D07. Front Panel 4-17. . . . . . . . . . . . . . . . . . . . . . . . . . . . . . . . . . . . . . . . . . . . . . . . . . .
D08. Sensors 4-18. . . . . . . . . . . . . . . . . . . . . . . . . . . . . . . . . . . . . . . . . . . . . . . . . . . . . . .
D09. MIO Presence 4-21. . . . . . . . . . . . . . . . . . . . . . . . . . . . . . . . . . . . . . . . . . . . . . . . .
D10. Cutter 4-22. . . . . . . . . . . . . . . . . . . . . . . . . . . . . . . . . . . . . . . . . . . . . . . . . . . . . . . .
D11. Bail 4-23. . . . . . . . . . . . . . . . . . . . . . . . . . . . . . . . . . . . . . . . . . . . . . . . . . . . . . . . . .
D12. Image Quality 4-24. . . . . . . . . . . . . . . . . . . . . . . . . . . . . . . . . . . . . . . . . . . . . . . .
D13. Printhead ID 4-26. . . . . . . . . . . . . . . . . . . . . . . . . . . . . . . . . . . . . . . . . . . . . . . . . .
D14. Printhead Continuity 4-27. . . . . . . . . . . . . . . . . . . . . . . . . . . . . . . . . . . . . . . . .
D15. Clean Roller 4-28. . . . . . . . . . . . . . . . . . . . . . . . . . . . . . . . . . . . . . . . . . . . . . . . . .
D16. Erase EEROM 4-29. . . . . . . . . . . . . . . . . . . . . . . . . . . . . . . . . . . . . . . . . . . . . . . .
D17. Reset Counters 4-30. . . . . . . . . . . . . . . . . . . . . . . . . . . . . . . . . . . . . . . . . . . . . . . .
D19. Hard Disk Drive Revision (Only 2500CP/3500CP) 4-31. . . . . . . . . . . . . . .
5 Service Calibrations
Service Calibrations 5-3. . . . . . . . . . . . . . . . . . . . . . . . . . . . . . . . . . . . . . . . . . . . . . . . . . .
Entering the Service Calibrations Menu System 5-5. . . . . . . . . . . . . . . . . . . . . .
C01. Carriage 5-6. . . . . . . . . . . . . . . . . . . . . . . . . . . . . . . . . . . . . . . . . . . . . . . . . . . . . .
C02. Refill 5-8. . . . . . . . . . . . . . . . . . . . . . . . . . . . . . . . . . . . . . . . . . . . . . . . . . . . . . . . .
C03. Line Sensor 5-9. . . . . . . . . . . . . . . . . . . . . . . . . . . . . . . . . . . . . . . . . . . . . . . . . . .
C04. Service Station 5-11. . . . . . . . . . . . . . . . . . . . . . . . . . . . . . . . . . . . . . . . . . . . . . . .
C05. Printheads Alignment 5-12. . . . . . . . . . . . . . . . . . . . . . . . . . . . . . . . . . . . . . . . .
C06. Printheads Check 5-13. . . . . . . . . . . . . . . . . . . . . . . . . . . . . . . . . . . . . . . . . . . . .
C07. Color Calib. (Only available in DesignJet 2500CP/3500CP printer) 5-15.
C08. Service Accuracy 5-16. . . . . . . . . . . . . . . . . . . . . . . . . . . . . . . . . . . . . . . . . . . . . .
C09. Maintenance 5-18. . . . . . . . . . . . . . . . . . . . . . . . . . . . . . . . . . . . . . . . . . . . . . . . . .
C10. Font Type Set (Only available in DesignJet 2500CP/3500CP printer)
5-19
HP DesignJet CP Series Printers
vContents
Page 8

6 Image Quality
Image Quality Troubleshooting Checklist 6-2. . . . . . . . . . . . . . . . . . . . . . . . . . . . . . . .
Print Modes 6-4. . . . . . . . . . . . . . . . . . . . . . . . . . . . . . . . . . . . . . . . . . . . . . . . . . . . . . . . . . .
Image Quality Print 6-5. . . . . . . . . . . . . . . . . . . . . . . . . . . . . . . . . . . . . . . . . . . . . . . . . . .
Introduction 6-5. . . . . . . . . . . . . . . . . . . . . . . . . . . . . . . . . . . . . . . . . . . . . . . . . . . . . . .
Using the Image Quality Print 6-5. . . . . . . . . . . . . . . . . . . . . . . . . . . . . . . . . . . . . .
Producing the Image Quality Print 6-5. . . . . . . . . . . . . . . . . . . . . . . . . . . . . . . . . .
Analyzing the Image Quality Print 6-7. . . . . . . . . . . . . . . . . . . . . . . . . . . . . . . . . . .
No Printing Defects Found in the Image Quality Print 6-17. . . . . . . . . . . . . . . . .
Media 6-17. . . . . . . . . . . . . . . . . . . . . . . . . . . . . . . . . . . . . . . . . . . . . . . . . . . . . . . . . . . . .
Print Quality Problems 6-18. . . . . . . . . . . . . . . . . . . . . . . . . . . . . . . . . . . . . . . . . . . . . . . .
7 Parts List
Printer Support (HP DesignJets 2500CP and 2000CP Only) 7-4. . . . . . . . . . . . . . .
Printer Support (HP DesignJets 3500CP and 3000CP Only) 7-6. . . . . . . . . . . . . . .
Right Hand Cover Area 7-8. . . . . . . . . . . . . . . . . . . . . . . . . . . . . . . . . . . . . . . . . . . . . . . .
Left Hand Cover Area 7-10. . . . . . . . . . . . . . . . . . . . . . . . . . . . . . . . . . . . . . . . . . . . . . . . . .
Printer Rear (HP DesignJets 2500CP and 2000CP Only) 7-12. . . . . . . . . . . . . . . . . .
Printer Rear (HP DesignJets 3500CP and 3000CP Only) 7-14. . . . . . . . . . . . . . . . . .
Electronics Module (Internal) 7-16. . . . . . . . . . . . . . . . . . . . . . . . . . . . . . . . . . . . . . . . . . .
Y-axis Assembly 7-18. . . . . . . . . . . . . . . . . . . . . . . . . . . . . . . . . . . . . . . . . . . . . . . . . . . . . . .
Elevator Assembly 7-24. . . . . . . . . . . . . . . . . . . . . . . . . . . . . . . . . . . . . . . . . . . . . . . . . . . . .
Refill Assembly 7-26. . . . . . . . . . . . . . . . . . . . . . . . . . . . . . . . . . . . . . . . . . . . . . . . . . . . . . . .
Carriage Assembly 7-28. . . . . . . . . . . . . . . . . . . . . . . . . . . . . . . . . . . . . . . . . . . . . . . . . . . .
Roll Cover Area 7-30. . . . . . . . . . . . . . . . . . . . . . . . . . . . . . . . . . . . . . . . . . . . . . . . . . . . . . .
Service Station Assembly Area 7-32. . . . . . . . . . . . . . . . . . . . . . . . . . . . . . . . . . . . . . . . .
X-axis Motor Assembly 7-34. . . . . . . . . . . . . . . . . . . . . . . . . . . . . . . . . . . . . . . . . . . . . . . . .
Drive Roller Area (HP DesignJets 2500CP and 2000CP Only) 7-36. . . . . . . . . . . . .
Drive Roller Area (HP DesignJets 3500CP and 3000CP Only) 7-38. . . . . . . . . . . . .
Entry Platen Area 7-40. . . . . . . . . . . . . . . . . . . . . . . . . . . . . . . . . . . . . . . . . . . . . . . . . . . . .
Pincharm Assembly 7-42. . . . . . . . . . . . . . . . . . . . . . . . . . . . . . . . . . . . . . . . . . . . . . . . . . .
Refill Interconnect PCA and Cutter Assembly 7-44. . . . . . . . . . . . . . . . . . . . . . . . . . . .
Media Button (HP DesignJets 3500CP and 3000CP Only) 7-46. . . . . . . . . . . . . . . . .
Compatible Documentation 7-48. . . . . . . . . . . . . . . . . . . . . . . . . . . . . . . . . . . . . . . . . . . . .
Front Panel Overlays (HP DesignJets 2500CP and 2000CP Only) 7-51. . . . . . . . . .
Front Panel Overlays (HP DesignJets 3500CP and 3000CP Only) 7-51. . . . . . . . . .
Interface Cables 7-52. . . . . . . . . . . . . . . . . . . . . . . . . . . . . . . . . . . . . . . . . . . . . . . . . . . . . . .
Plug-in memory (DRAMM SIMM) 7-52. . . . . . . . . . . . . . . . . . . . . . . . . . . . . . . . . . . . . . .
Ink Delivery Systems 7-52. . . . . . . . . . . . . . . . . . . . . . . . . . . . . . . . . . . . . . . . . . . . . . . . . .
8 Removal and Installation
Introduction 8-3. . . . . . . . . . . . . . . . . . . . . . . . . . . . . . . . . . . . . . . . . . . . . . . . . . . . . . . . . .
Safety Precautions 8-4. . . . . . . . . . . . . . . . . . . . . . . . . . . . . . . . . . . . . . . . . . . . . . . . . . . . .
Electrostatic Discharge (ESD) Precautions 8-4. . . . . . . . . . . . . . . . . . . . . . . . . . . . . . .
Required Tools 8-5. . . . . . . . . . . . . . . . . . . . . . . . . . . . . . . . . . . . . . . . . . . . . . . . . . . . . . . .
Electronics Module 8-6. . . . . . . . . . . . . . . . . . . . . . . . . . . . . . . . . . . . . . . . . . . . . . . . . . . .
Removal 8-6. . . . . . . . . . . . . . . . . . . . . . . . . . . . . . . . . . . . . . . . . . . . . . . . . . . . . . . . . . .
Installation 8-7. . . . . . . . . . . . . . . . . . . . . . . . . . . . . . . . . . . . . . . . . . . . . . . . . . . . . . . .
vi Contents
HP DesignJet CP Series Printers
Page 9

Additional Rear Cover
(Only applicable to HP DesignJets 3500CP and 3000CP) 8-10. . . . . . . . . . . . . . . . . .
Removal 8-10. . . . . . . . . . . . . . . . . . . . . . . . . . . . . . . . . . . . . . . . . . . . . . . . . . . . . . . . . . .
Installation 8-10. . . . . . . . . . . . . . . . . . . . . . . . . . . . . . . . . . . . . . . . . . . . . . . . . . . . . . . .
Hard Disk Drive, Power Switch Cable 8-12. . . . . . . . . . . . . . . . . . . . . . . . . . . . . . . . . . .
Removal 8-12. . . . . . . . . . . . . . . . . . . . . . . . . . . . . . . . . . . . . . . . . . . . . . . . . . . . . . . . . . .
Installation 8-13. . . . . . . . . . . . . . . . . . . . . . . . . . . . . . . . . . . . . . . . . . . . . . . . . . . . . . . .
Window and Top Cover 8-15. . . . . . . . . . . . . . . . . . . . . . . . . . . . . . . . . . . . . . . . . . . . . . . . .
Removal 8-15. . . . . . . . . . . . . . . . . . . . . . . . . . . . . . . . . . . . . . . . . . . . . . . . . . . . . . . . . . .
Installation 8-15. . . . . . . . . . . . . . . . . . . . . . . . . . . . . . . . . . . . . . . . . . . . . . . . . . . . . . . .
Left Hand Cover and Left Hand Trim Assembly 8-18. . . . . . . . . . . . . . . . . . . . . . . . . .
Removal 8-18. . . . . . . . . . . . . . . . . . . . . . . . . . . . . . . . . . . . . . . . . . . . . . . . . . . . . . . . . . .
Installation 8-19. . . . . . . . . . . . . . . . . . . . . . . . . . . . . . . . . . . . . . . . . . . . . . . . . . . . . . . .
Right Hand Cover and Right Hand Trim Assembly 8-21. . . . . . . . . . . . . . . . . . . . . . .
Removal 8-21. . . . . . . . . . . . . . . . . . . . . . . . . . . . . . . . . . . . . . . . . . . . . . . . . . . . . . . . . . .
Installation 8-22. . . . . . . . . . . . . . . . . . . . . . . . . . . . . . . . . . . . . . . . . . . . . . . . . . . . . . . .
Front Panel and Stand-by Button 8-24. . . . . . . . . . . . . . . . . . . . . . . . . . . . . . . . . . . . . . .
Removal 8-24. . . . . . . . . . . . . . . . . . . . . . . . . . . . . . . . . . . . . . . . . . . . . . . . . . . . . . . . . . .
Installation 8-24. . . . . . . . . . . . . . . . . . . . . . . . . . . . . . . . . . . . . . . . . . . . . . . . . . . . . . . .
Service Station Assembly and Service Station Flag 8-26. . . . . . . . . . . . . . . . . . . . . . .
Removal of the Service Station Assembly 8-26. . . . . . . . . . . . . . . . . . . . . . . . . . . . .
Removal of the Service Station Flag. 8-26. . . . . . . . . . . . . . . . . . . . . . . . . . . . . . . . .
Installation of the Service Station Assembly 8-27. . . . . . . . . . . . . . . . . . . . . . . . . .
Installation of the Service Station Flag 8-27. . . . . . . . . . . . . . . . . . . . . . . . . . . . . . .
Primer Assembly (Only Applicable to HP DesignJets 2500CP/2000CP) 8-29. . . . . . . .
Removal 8-29. . . . . . . . . . . . . . . . . . . . . . . . . . . . . . . . . . . . . . . . . . . . . . . . . . . . . . . . . . .
Installation 8-30. . . . . . . . . . . . . . . . . . . . . . . . . . . . . . . . . . . . . . . . . . . . . . . . . . . . . . . .
Encoder Strip 8-32. . . . . . . . . . . . . . . . . . . . . . . . . . . . . . . . . . . . . . . . . . . . . . . . . . . . . . . . .
Removal 8-32. . . . . . . . . . . . . . . . . . . . . . . . . . . . . . . . . . . . . . . . . . . . . . . . . . . . . . . . . . .
Installation 8-33. . . . . . . . . . . . . . . . . . . . . . . . . . . . . . . . . . . . . . . . . . . . . . . . . . . . . . . .
Trailing Cable 8-36. . . . . . . . . . . . . . . . . . . . . . . . . . . . . . . . . . . . . . . . . . . . . . . . . . . . . . . . .
Removal 8-36. . . . . . . . . . . . . . . . . . . . . . . . . . . . . . . . . . . . . . . . . . . . . . . . . . . . . . . . . . .
Installation 8-37. . . . . . . . . . . . . . . . . . . . . . . . . . . . . . . . . . . . . . . . . . . . . . . . . . . . . . . .
Y-Axis Belt 8-39. . . . . . . . . . . . . . . . . . . . . . . . . . . . . . . . . . . . . . . . . . . . . . . . . . . . . . . . . . . .
Removal 8-39. . . . . . . . . . . . . . . . . . . . . . . . . . . . . . . . . . . . . . . . . . . . . . . . . . . . . . . . . . .
Installation 8-40. . . . . . . . . . . . . . . . . . . . . . . . . . . . . . . . . . . . . . . . . . . . . . . . . . . . . . . .
Carriage Assembly 8-42. . . . . . . . . . . . . . . . . . . . . . . . . . . . . . . . . . . . . . . . . . . . . . . . . . . .
Removal 8-42. . . . . . . . . . . . . . . . . . . . . . . . . . . . . . . . . . . . . . . . . . . . . . . . . . . . . . . . . . .
Installation 8-43. . . . . . . . . . . . . . . . . . . . . . . . . . . . . . . . . . . . . . . . . . . . . . . . . . . . . . . .
Y-Axis Motor Assembly 8-45. . . . . . . . . . . . . . . . . . . . . . . . . . . . . . . . . . . . . . . . . . . . . . . . .
Removal 8-45. . . . . . . . . . . . . . . . . . . . . . . . . . . . . . . . . . . . . . . . . . . . . . . . . . . . . . . . . . .
Installation 8-46. . . . . . . . . . . . . . . . . . . . . . . . . . . . . . . . . . . . . . . . . . . . . . . . . . . . . . . .
Cutter Assembly (Only Applicable to HP DesignJets 2500CP and 2000CP) 8-48. . . .
Removal 8-48. . . . . . . . . . . . . . . . . . . . . . . . . . . . . . . . . . . . . . . . . . . . . . . . . . . . . . . . . . .
Installation 8-48. . . . . . . . . . . . . . . . . . . . . . . . . . . . . . . . . . . . . . . . . . . . . . . . . . . . . . . .
Cutter Assembly (Only Applicable to HP DesignJets 3500CP and 3000CP) 8-50. . . .
Removal 8-50. . . . . . . . . . . . . . . . . . . . . . . . . . . . . . . . . . . . . . . . . . . . . . . . . . . . . . . . . . .
Installation 8-50. . . . . . . . . . . . . . . . . . . . . . . . . . . . . . . . . . . . . . . . . . . . . . . . . . . . . . . .
Elevator Assembly 8-52. . . . . . . . . . . . . . . . . . . . . . . . . . . . . . . . . . . . . . . . . . . . . . . . . . . . .
Removal 8-52. . . . . . . . . . . . . . . . . . . . . . . . . . . . . . . . . . . . . . . . . . . . . . . . . . . . . . . . . . .
Installation 8-53. . . . . . . . . . . . . . . . . . . . . . . . . . . . . . . . . . . . . . . . . . . . . . . . . . . . . . . .
HP DesignJet CP Series Printers
viiContents
Page 10

Refill Assembly 8-55. . . . . . . . . . . . . . . . . . . . . . . . . . . . . . . . . . . . . . . . . . . . . . . . . . . . . . . .
Removal 8-55. . . . . . . . . . . . . . . . . . . . . . . . . . . . . . . . . . . . . . . . . . . . . . . . . . . . . . . . . . .
Installation 8-56. . . . . . . . . . . . . . . . . . . . . . . . . . . . . . . . . . . . . . . . . . . . . . . . . . . . . . . .
Bail Assembly and Star Wheel Assemblies 8-58. . . . . . . . . . . . . . . . . . . . . . . . . . . . . . .
Removal 8-58. . . . . . . . . . . . . . . . . . . . . . . . . . . . . . . . . . . . . . . . . . . . . . . . . . . . . . . . . . .
Installation 8-58. . . . . . . . . . . . . . . . . . . . . . . . . . . . . . . . . . . . . . . . . . . . . . . . . . . . . . . .
Starguard Assembly 8-60. . . . . . . . . . . . . . . . . . . . . . . . . . . . . . . . . . . . . . . . . . . . . . . . . . .
Removal 8-60. . . . . . . . . . . . . . . . . . . . . . . . . . . . . . . . . . . . . . . . . . . . . . . . . . . . . . . . . . .
Installation 8-60. . . . . . . . . . . . . . . . . . . . . . . . . . . . . . . . . . . . . . . . . . . . . . . . . . . . . . . .
Bail Stepper Motor 8-62. . . . . . . . . . . . . . . . . . . . . . . . . . . . . . . . . . . . . . . . . . . . . . . . . . . .
Removal 8-62. . . . . . . . . . . . . . . . . . . . . . . . . . . . . . . . . . . . . . . . . . . . . . . . . . . . . . . . . . .
Installation 8-62. . . . . . . . . . . . . . . . . . . . . . . . . . . . . . . . . . . . . . . . . . . . . . . . . . . . . . . .
Refill Interconnect PCA 8-64. . . . . . . . . . . . . . . . . . . . . . . . . . . . . . . . . . . . . . . . . . . . . . . .
Removal 8-64. . . . . . . . . . . . . . . . . . . . . . . . . . . . . . . . . . . . . . . . . . . . . . . . . . . . . . . . . . .
Installation 8-64. . . . . . . . . . . . . . . . . . . . . . . . . . . . . . . . . . . . . . . . . . . . . . . . . . . . . . . .
X-Axis Assembly 8-66. . . . . . . . . . . . . . . . . . . . . . . . . . . . . . . . . . . . . . . . . . . . . . . . . . . . . .
Removal 8-66. . . . . . . . . . . . . . . . . . . . . . . . . . . . . . . . . . . . . . . . . . . . . . . . . . . . . . . . . . .
Installation 8-67. . . . . . . . . . . . . . . . . . . . . . . . . . . . . . . . . . . . . . . . . . . . . . . . . . . . . . . .
Overdrive Assembly and Drive Roller
(Only Applicable to HP DesignJets 2500CP and 2000CP) 8-69. . . . . . . . . . . . . . . . . .
To remove the Drive Roller only 8-69. . . . . . . . . . . . . . . . . . . . . . . . . . . . . . . . . . . . .
Installation of the drive roller 8-70. . . . . . . . . . . . . . . . . . . . . . . . . . . . . . . . . . . . . . .
Installation of the overdrive assembly 8-70. . . . . . . . . . . . . . . . . . . . . . . . . . . . . . . .
Overdrive Assembly and Drive Roller
(Only Applicable to HP DesignJets 3500CP and 3000CP) 8-72. . . . . . . . . . . . . . . . . .
To remove the Drive Roller only 8-72. . . . . . . . . . . . . . . . . . . . . . . . . . . . . . . . . . . . .
Installation of the drive roller 8-73. . . . . . . . . . . . . . . . . . . . . . . . . . . . . . . . . . . . . . .
Installation of the overdrive assembly 8-73. . . . . . . . . . . . . . . . . . . . . . . . . . . . . . . .
Entry Platen 8-78. . . . . . . . . . . . . . . . . . . . . . . . . . . . . . . . . . . . . . . . . . . . . . . . . . . . . . . . . .
Removal 8-78. . . . . . . . . . . . . . . . . . . . . . . . . . . . . . . . . . . . . . . . . . . . . . . . . . . . . . . . . . .
Installation 8-79. . . . . . . . . . . . . . . . . . . . . . . . . . . . . . . . . . . . . . . . . . . . . . . . . . . . . . . .
Roll Cover and Roll Feed Assemblies 8-81. . . . . . . . . . . . . . . . . . . . . . . . . . . . . . . . . . . .
Removal 8-81. . . . . . . . . . . . . . . . . . . . . . . . . . . . . . . . . . . . . . . . . . . . . . . . . . . . . . . . . . .
Installation 8-82. . . . . . . . . . . . . . . . . . . . . . . . . . . . . . . . . . . . . . . . . . . . . . . . . . . . . . . .
Pincharm Assemblies, Pincharm Shaft and Pincharm Sensor 8-84. . . . . . . . . . . . . .
Removal of the pincharm sensor 8-84. . . . . . . . . . . . . . . . . . . . . . . . . . . . . . . . . . . . .
Removal of the pincharm assemblies and the pincharm shaft. 8-84. . . . . . . . . .
Installation of the pincharm sensor. 8-85. . . . . . . . . . . . . . . . . . . . . . . . . . . . . . . . . .
Installation of the pincharm assemblies and the pincharm shaft. 8-85. . . . . . .
Interconnect Cables 8-87. . . . . . . . . . . . . . . . . . . . . . . . . . . . . . . . . . . . . . . . . . . . . . . . . . . .
Removal of the refill interconnect cable. 8-87. . . . . . . . . . . . . . . . . . . . . . . . . . . . .
Removal of the service station interconnect cable. 8-87. . . . . . . . . . . . . . . . . . . . .
Installation of the service station interconnect cable 8-88. . . . . . . . . . . . . . . . . . .
Installation of the refill interconnect cable 8-88. . . . . . . . . . . . . . . . . . . . . . . . . . . .
Media Button (Only Applicable to HP DesignJets 3500CP and 3000CP) 8-90. . . .
Removal 8-90. . . . . . . . . . . . . . . . . . . . . . . . . . . . . . . . . . . . . . . . . . . . . . . . . . . . . . . . . . .
Installation 8-90. . . . . . . . . . . . . . . . . . . . . . . . . . . . . . . . . . . . . . . . . . . . . . . . . . . . . . . .
9 Preventive Maintenance
Moisture on the Printer 9-2. . . . . . . . . . . . . . . . . . . . . . . . . . . . . . . . . . . . . . . . . . . . . . . .
viii Contents
HP DesignJet CP Series Printers
Page 11

Noisy Carriage Bushing 9-2. . . . . . . . . . . . . . . . . . . . . . . . . . . . . . . . . . . . . . . . . . . . . . . .
Belt Swelling 9-2. . . . . . . . . . . . . . . . . . . . . . . . . . . . . . . . . . . . . . . . . . . . . . . . . . . . . . . . . .
Cleaning the Printer 9-2. . . . . . . . . . . . . . . . . . . . . . . . . . . . . . . . . . . . . . . . . . . . . . . . . . .
General Cleaning 9-2. . . . . . . . . . . . . . . . . . . . . . . . . . . . . . . . . . . . . . . . . . . . . . . . . .
Cleaning the Drive Roller 9-3. . . . . . . . . . . . . . . . . . . . . . . . . . . . . . . . . . . . . . . . . . .
Cleaning the Electrical Contacts? 9-4. . . . . . . . . . . . . . . . . . . . . . . . . . . . . . . . . . . .
Scheduled Maintenance 9-4. . . . . . . . . . . . . . . . . . . . . . . . . . . . . . . . . . . . . . . . . . . . . . . .
Level of Printer Usage 9-4. . . . . . . . . . . . . . . . . . . . . . . . . . . . . . . . . . . . . . . . . . . . . .
Preventive Maintenance Kit - Part Number C4704-60198 9-5. . . . . . . . . . . . . .
Y-axis Maintenance Parts 9-5. . . . . . . . . . . . . . . . . . . . . . . . . . . . . . . . . . . . . . . . . . .
10 Functional Overview
DesignJet 2500CP-PostScript SKU 10-3. . . . . . . . . . . . . . . . . . . . . . . . . . . . . . . . . . . . . .
DesignJet 2000CP-RTL SKU 10-3. . . . . . . . . . . . . . . . . . . . . . . . . . . . . . . . . . . . . . . . . . .
Printed Circuit Assemblies (PCA) 10-3. . . . . . . . . . . . . . . . . . . . . . . . . . . . . . . . . . . . . . .
Y-Axis Assembly 10-4. . . . . . . . . . . . . . . . . . . . . . . . . . . . . . . . . . . . . . . . . . . . . . . . . . . . . . .
Carriage 10-4. . . . . . . . . . . . . . . . . . . . . . . . . . . . . . . . . . . . . . . . . . . . . . . . . . . . . . . . . . .
Y-axis belt and Y-axis belt tensioner 10-4. . . . . . . . . . . . . . . . . . . . . . . . . . . . . . . . . .
Y-axis motor assembly 10-4. . . . . . . . . . . . . . . . . . . . . . . . . . . . . . . . . . . . . . . . . . . . . .
Encoder Strip 10-4. . . . . . . . . . . . . . . . . . . . . . . . . . . . . . . . . . . . . . . . . . . . . . . . . . . . . .
Trailing cable 10-5. . . . . . . . . . . . . . . . . . . . . . . . . . . . . . . . . . . . . . . . . . . . . . . . . . . . . .
Service Station Assembly 10-5. . . . . . . . . . . . . . . . . . . . . . . . . . . . . . . . . . . . . . . . . . . . . .
Primer Assembly 10-5. . . . . . . . . . . . . . . . . . . . . . . . . . . . . . . . . . . . . . . . . . . . . . . . . . . . . .
Refill Assembly 10-5. . . . . . . . . . . . . . . . . . . . . . . . . . . . . . . . . . . . . . . . . . . . . . . . . . . . . . . .
Elevator Assembly 10-6. . . . . . . . . . . . . . . . . . . . . . . . . . . . . . . . . . . . . . . . . . . . . . . . . . . . .
X-Axis Assembly 10-6. . . . . . . . . . . . . . . . . . . . . . . . . . . . . . . . . . . . . . . . . . . . . . . . . . . . . .
Electronics Module 10-6. . . . . . . . . . . . . . . . . . . . . . . . . . . . . . . . . . . . . . . . . . . . . . . . . . . .
Stepper Motors 10-7. . . . . . . . . . . . . . . . . . . . . . . . . . . . . . . . . . . . . . . . . . . . . . . . . . . . . . . .
Sensors 10-7. . . . . . . . . . . . . . . . . . . . . . . . . . . . . . . . . . . . . . . . . . . . . . . . . . . . . . . . . . . . . . .
Line Sensor 10-7. . . . . . . . . . . . . . . . . . . . . . . . . . . . . . . . . . . . . . . . . . . . . . . . . . . . . . . .
Cover Sensors 10-7. . . . . . . . . . . . . . . . . . . . . . . . . . . . . . . . . . . . . . . . . . . . . . . . . . . . . .
Mechanical Interface Sensors 10-8. . . . . . . . . . . . . . . . . . . . . . . . . . . . . . . . . . . . . . .
APPENDIX - Reinstalling the Fiery Box
HP DesignJet CP Series Printers
ixContents
Page 12
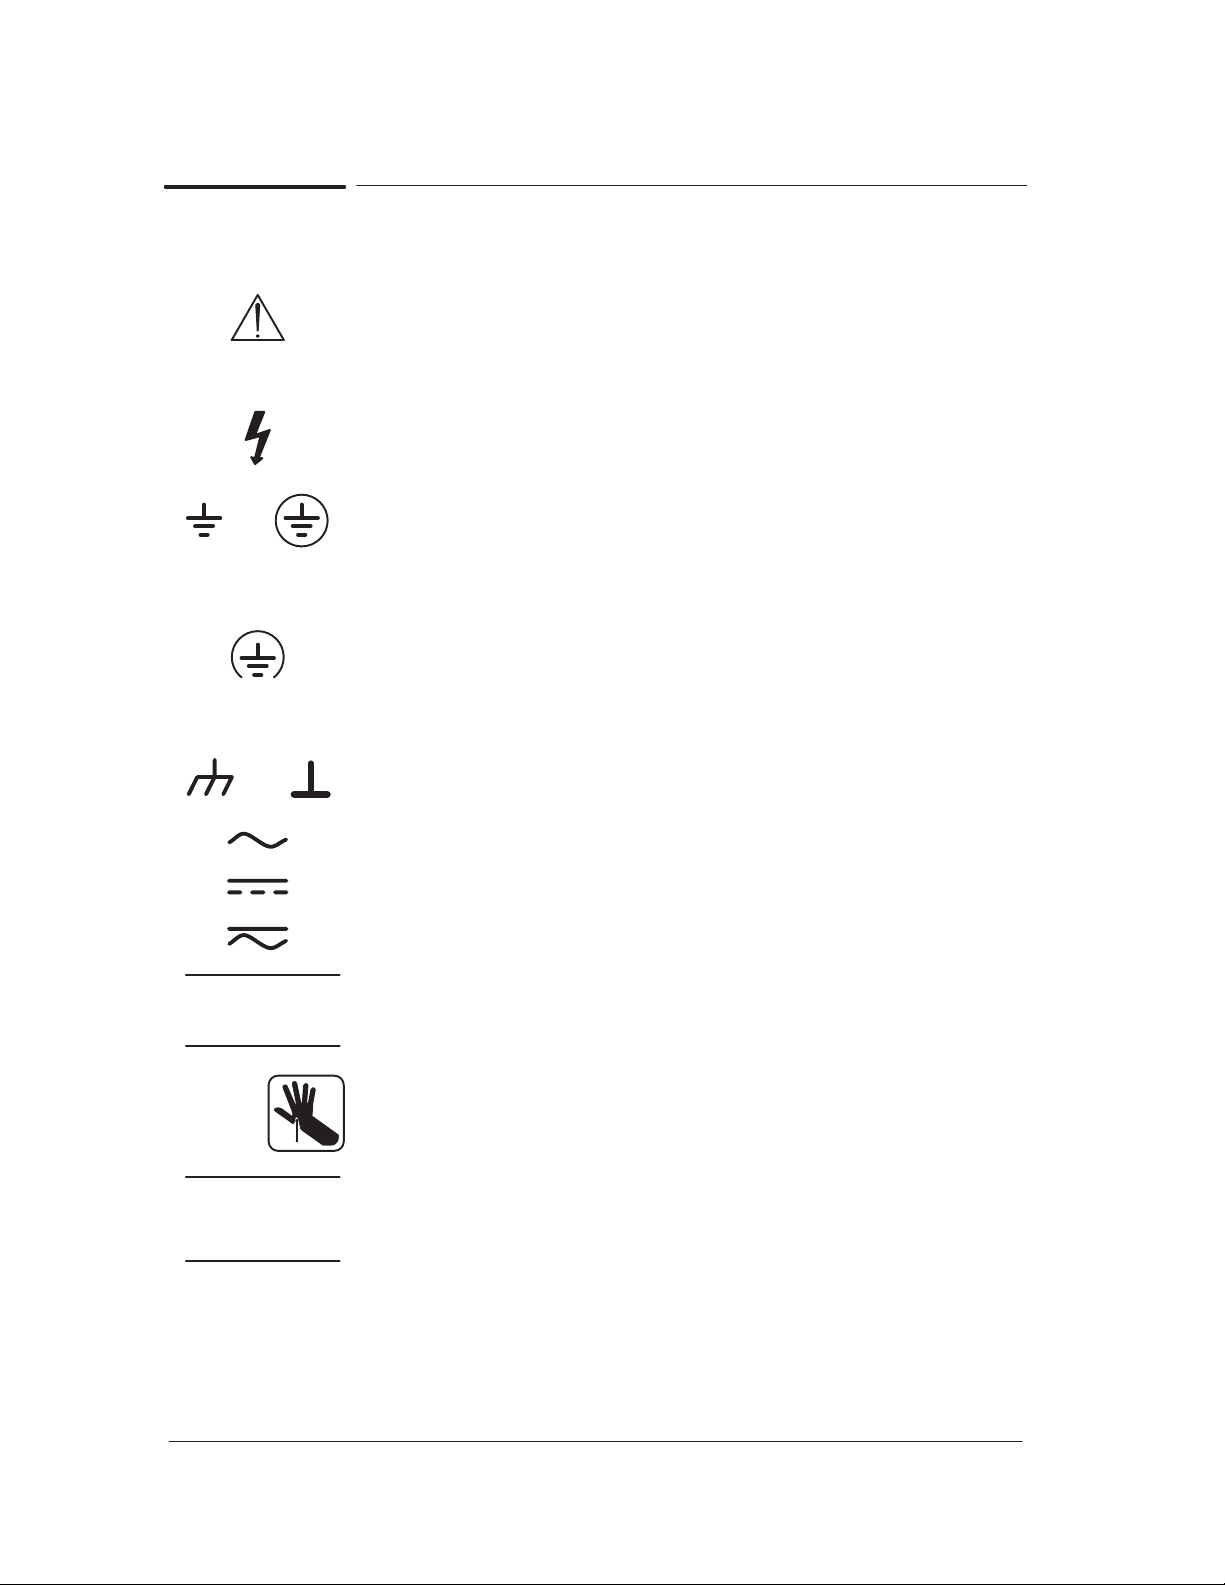
General Definition of Safety Symbols
International caution symbol (refer to manual): the product is
marked with this symbol when it is necessary for the user to refer
to the instruction manual in order to protect against damage to the
instrument.
Indicates dangerous voltage (terminals fed from the interior by
voltage exceeding 1000 volts must also be marked).
OR
OR
Protective conductor terminal. For protection against electrical
shock in case of a fault. Used with field wiring terminals to
indicate the terminal that must be connected to ground before
operating equipment.
Low-noise or noiseless, clean ground (earth) terminal. Used for a
signal common, as well as providing protection against electrical
shock in case of a fault. A terminal marked with this symbol must
be connected to ground in the manner described in the installation
(operating) manual, and before operating the equipment.
Frame or chassis terminal. A connection to the frame (chassis) of
the equipment, which normally includes all exposed metal.
Alternating current
Direct current
Alternating or direct current
The WARNING sign denotes a hazard. It calls attention to a
procedure, practice, or the like, which, if not correctly performed
or adhered to, could result in personal injury.
x Contents
Take care not to cut yourself on the encoder strip inside the plotter.
The CAUTION sign denotes a hazard. It calls attention to an
operating procedure, practice, or the like, which, if not correctly
performed or adhered to, could result in damage to or destruction
of part or all of the product.
HP DesignJet CP Series Printers
Page 13

1
T
roubleshooting
HP DesignJet CP Series Printers
1-1
Page 14

Introduction
This chapter will guide you through the relevant steps to take when
troubleshooting the printer.
Which Firmware relates to which Ink system?
A.01.XX - This firmware revision is applicable to HP DesignJets 2500CP
and 2000CP and means that the Printers can only use Imaging Inks.
A.02.XX - This firmware revision is applicable to HP DesignJets 2500CP
and 2000CP and means that the Printers can use both the Imaging Inks
and the new UV Durable Inks.
A.03.XX - This firmware revision is applicable to HP DesignJets 3500CP
and 3000CP and means that the Printers can use both the Imaging Inks
and the new UV Durable Inks.
A.04.XX - This firmware revision is applicable to all HP DesignJet CP
Series Printers and means that the Printers can use both the Imaging Inks
and the new UV Durable Inks.
How do I Check the Hard Disk Drive Version? (Only applicable to
HP DesignJet 2500CP/3500CP)
For HP DesignJet 2500CP - To check which Hard Disk Drive Version the
printer is using, print the PostScript Configuration using the front-panel
menu in Internal Prints / PostScript Config.
For HP DesignJet 3500CP - To check which Hard Disk Drive Version the
printer is using, use the front-panel menu in Utilities / Statistics / Disk Rev.
Is the Printer Using the Latest Firmware Revision?
Before spending time troubleshooting the problem by doing the various tests
or replacing parts (which may not need replacing), check which firmware
revision the printer is using. To check which firmware revision the printer is
using, use the front-panel menu in Utilities / Statistics / Code Rev. Some
problems which occurred in earlier firmware releases may have been solved
in later revisions. So if there is a new firmware revision then update the
Flash SIMM before replacing any parts. See below for information on
upgrading the Flash SIMM.
Remember that:
For the HP DesignJet 2000CP/3000CP, the first slot from the left
contains an 8MB SIMM with the firmware code inside.
For the HP DesignJet 2500CP/3500CP, the first slot from the left
contains an 8MB SIMM with the firmware code inside and the second
slot contains a 4 MB SIMM with the PostScript code inside.
1-2 Troubleshooting
HP DesignJet CP Series Printers
Page 15

How do I upgrade the Firmware Revision on the Flash SIMM?
You will need to have the Printer connected to a PC or a UNIX Workstation
with a Parallel cable. Download the latest Firmware Revision from the
Plotter Support WEB to your local drive and then follow these instructions:
1 Make sure the printer is switched OFF from the power switch on the back
of the printer and not from the standby button on the front of the printer.
2 Hold the CANCEL key down and switch the printer ON. Wait until the
message “Flash Programmer 1.X / Push to continue” is displayed on the
front-panel before releasing the CANCEL key.
3 Press the Down Arrow key and the message “Program Flash / Copy to
2nd Flash” is displayed on the front-panel.
4 Press the Up Arrow key and the message “Program 2nd Flash /
Program 1st Flash” is displayed on the front-panel.
5 Press the Down Arrow key and the message “Really Erase Yes / 1st
Flash? No” is displayed on the front-panel.
If you do not wish to continue press the Down Arrow key and the message
“Cancelled Program / Power off the board” is displayed on the front-panel.
Switch the Printer OFF from the power switch on the back of the printer.
6 Press the Up Arrow key and the message “Erasing Flash” is displayed.
THE DATA ON THE FLASH SIMM IS BEING ERASED AT THIS POINT.
DO NOT SWITCH OFF THE PRINTER BECAUSE IT WILL DAMAGE
THE FLASH SIMM.
7 When the data on the Flash SIMM is erased the message “Please
Download Binary Code” is displayed on the front-panel.
8 To download the firmware data to the Flash SIMM follow these instructions:
If using a UNIX Workstation, type:
$ cat filename > device.file
Substitute “filename” with the name of the file that contains the firmware
data which you downloaded from the Plotter Support WEB. Substitute
“device.file” with the name of your Workstation parallel device file.
If using a PC, type in MS-DOS:
C:\> copy /b filename lpt1:
Substitute “filename” with the name of the file that contains the
firmware data which you downloaded from the Plotter Support WEB.
Substitute “lpt1” with name of the parallel port that you have your
Printer connected to on the PC.
Troubleshooting
HP DesignJet CP Series Printers
1-3
Page 16

9 While the firmware data is being received by the printer, the message
“Receiving Binary Code” will be displayed on the front-panel.
THE DATA IS BEING DOWNLOADED ONTO THE FLASH SIMM AT
THIS POINT. DO NOT SWITCH OFF THE PRINTER BECAUSE IT WILL
DAMAGE THE FLASH SIMM.
10 When the Flash SIMM is completely programmed, the message “Finished
Programming / Power OFF the board” will be displayed on the front-panel.
11 Switch the Printer OFF from the power switch on the back of the printer.
12 Switch the Printer ON from the power switch on the back of the printer
and the Printer will start the initialization procedure.
13 When the message “Status/Ready” is displayed on the front-panel, check
that the new firmware revision has been correctly downloaded by using
the front-panel menu in Utilities / Statistics / Code Rev. The front-panel
should now show the new Firmware Revision of the Flash SIMM.
How do I upgrade the PostScript Revision on the Flash SIMM?
YOU ONLY NEED TO UPGRADE THE POSTSCRIPT SIMM IF THE
FIRMWARE CODE IS A.02.08 OR HIGHER.
1 Make sure the printer is switched OFF from the power switch on the
back of the printer and not from the standby button on the front of the
printer.
2 Install an additional 4MB Flash SIMM into the second slot.
3 Hold the CANCEL key down and switch the printer ON. Wait until the
message “Flash Programmer 1.X / Push to continue” is displayed on the
front-panel before releasing the CANCEL key.
If the Printer has problems starting up, the 8MB flash SIMM with the
firmware code has been incorrectly upgraded (it can be dead) or it is
incorrectly installed.
4 Press the Down Arrow key and the message “Program Flash / Copy to
2nd Flash” is displayed on the front-panel.
5 Press the Up Arrow key and the message “Program 2nd Flash /
Program 1st Flash” is displayed on the front-panel.
6 Press the Up Arrow key and the message “Flash Size 8MB / 4MB” is
displayed on the front-panel. The printer is asking you if you want to
program a 4MB or 8MB SIMM.
7 Press the Down Arrow key and the message “Erasing Flash” is
displayed on the front-panel.
THE DATA ON THE FLASH SIMM IS BEING ERASED AT THIS POINT.
DO NOT SWITCH OFF THE PRINTER BECAUSE IT WILL DAMAGE
THE FLASH SIMM.
1-4 Troubleshooting
HP DesignJet CP Series Printers
Page 17

8 When the data on the Flash SIMM is erased the message “Please
Download Binary Code” is displayed on the front-panel.
9 To download the PostScript data to the Flash SIMM follow these
instructions:
If using a UNIX Workstation, type:
$ cat filename > device.file
Substitute “filename” with the name of the file that contains the
PostScript data which you downloaded from the Plotter Support
WEB. Substitute “device.file” with the name of your Workstation
parallel device file.
If using a PC, type in MS-DOS:
C:\> copy /b filename lpt1:
Substitute “filename” with the name of the file that contains the
PostScript data which you downloaded from the Plotter Support
WEB. Substitute “lpt1” with name of the parallel port that you have
your Printer connected to on the PC.
10 While the PostScript data is being received by the printer, the message
“Receiving Binary Code” will be displayed on the front-panel.
THE DATA IS BEING DOWNLOADED ONTO THE FLASH SIMM AT
THIS POINT. DO NOT SWITCH OFF THE PRINTER BECAUSE IT WILL
DAMAGE THE FLASH SIMM.
11 When the Flash SIMM is completely programmed, the message
“Finished Programming / Power OFF the board” will be displayed on the
front-panel.
12 Switch the Printer OFF from the power switch on the back of the printer.
13 Switch the Printer ON from the power switch on the back of the printer
and the Printer will start the initialization procedure.
14 When the message “Status/Ready” is displayed on the front-panel, check that
the new PostScript revision has been correctly downloaded by using the
front-panel menu in Utilities / Statistics / PS rev = PostScript. The
front-panel should now show the new PostScript Revision of the Flash
SIMM.
Troubleshooting
HP DesignJet CP Series Printers
1-5
Page 18

How can I Copy Firmware Data from One Flash SIMM to a Second
Flash SIMM?
This procedure can be used to copy Data from one Flash SIMM to another.
This is very useful when you have to update the Firmware Revision of
several Printers and is much faster than updating from the PC.
1 Make sure the printer is switched OFF from the power switch on the back
of the printer and not from the standby button on the front of the printer.
2 Remove the SIMM cover on the back of the Electronics Module.
3 Make sure that the master Flash SIMM is in the first slot from the left.
4 Install the 2nd Flash SIMM (that needs to be programmed) in the second
slot from the left. If a DRAM SIMM is installed in the 3rd slot, then
remove it first to allow more space to install the 2nd Flash SIMM.
5 Hold the CANCEL key down and switch the printer ON. Wait until the
message “Flash Programmer 1.X / Push to continue” is displayed on the
front-panel before releasing the CANCEL key.
6 Press the Down Arrow key and the message “Program Flash / Copy to
2nd Flash” is displayed on the front-panel.
7 Press the Down Arrow key and the message “Erasing Flash” is
displayed on the front-panel.
THE DATA ON THE SECOND FLASH SIMM IS BEING ERASED AT
THIS POINT. DO NOT SWITCH OFF THE PRINTER BECAUSE IT WILL
DAMAGE THE FLASH SIMM.
8 After a short while the message “Copying Binary Code” will be displayed on
the front-panel while the firmware data is being received by the printer.
THE DATA IS BEING DOWNLOADED ONTO THE SECOND FLASH
SIMM AT THIS POINT. DO NOT SWITCH OFF THE PRINTER
BECAUSE IT WILL DAMAGE THE FLASH SIMM.
9 When the Second Flash SIMM is completely programmed, the message
“Finished Programming / Power OFF the board” will be displayed on the
front-panel.
10 Switch the Printer OFF from the power switch on the back of the printer.
11 Remove the master Flash SIMM from the first slot from the left and
remove the 2nd Flash SIMM (that has just been programmed) from the
second slot from the left.
12 To verify if the Second Flash SIMM is programmed correctly, install the
2nd Flash SIMM in the first slot from the left and switch the Printer ON
from the power switch on the back of the printer. If the Printer initializes
correctly, then the Flash SIMM has been programmed correctly.
1-6 Troubleshooting
HP DesignJet CP Series Printers
Page 19

What Can I do when a System Error Code Appears on the
Front-Panel Display?
Chapter 2 contains a list of system error codes and their respective
descriptions and recommended corrective actions. Only try one
recommended action at a time and check if the error code has disappeared.
If you have an error code which is not documented in this Service Manual or
you have an error which you cannot resolve, then report the error to the HP
Response Center or the nearest HP Support Office. When reporting the
error, have the following information ready:
D Model and Serial Number of the printer.
D Which firmware revision the printer is using.
D The complete error number.
D The Service Print (Utilities / Service Tests).
D The Current configuration sheet.
D Which software application the customer is using (name, version, etc.).
D Is the problem reproducible by you?
D Additional comments about the usage, the setting, etc..
Have you performed a Service Test on the Failed
Component/Assembly?
If possible, always perform a Service Test on the component/assembly that
you are about to replace, just to make sure that is the component/assembly
that has failed. If the test on that component/assembly passes, you
should NOT replace it. For information on the Service Tests and how to
use them ' Chapter 4.
Troubleshooting
HP DesignJet CP Series Printers
1-7
Page 20

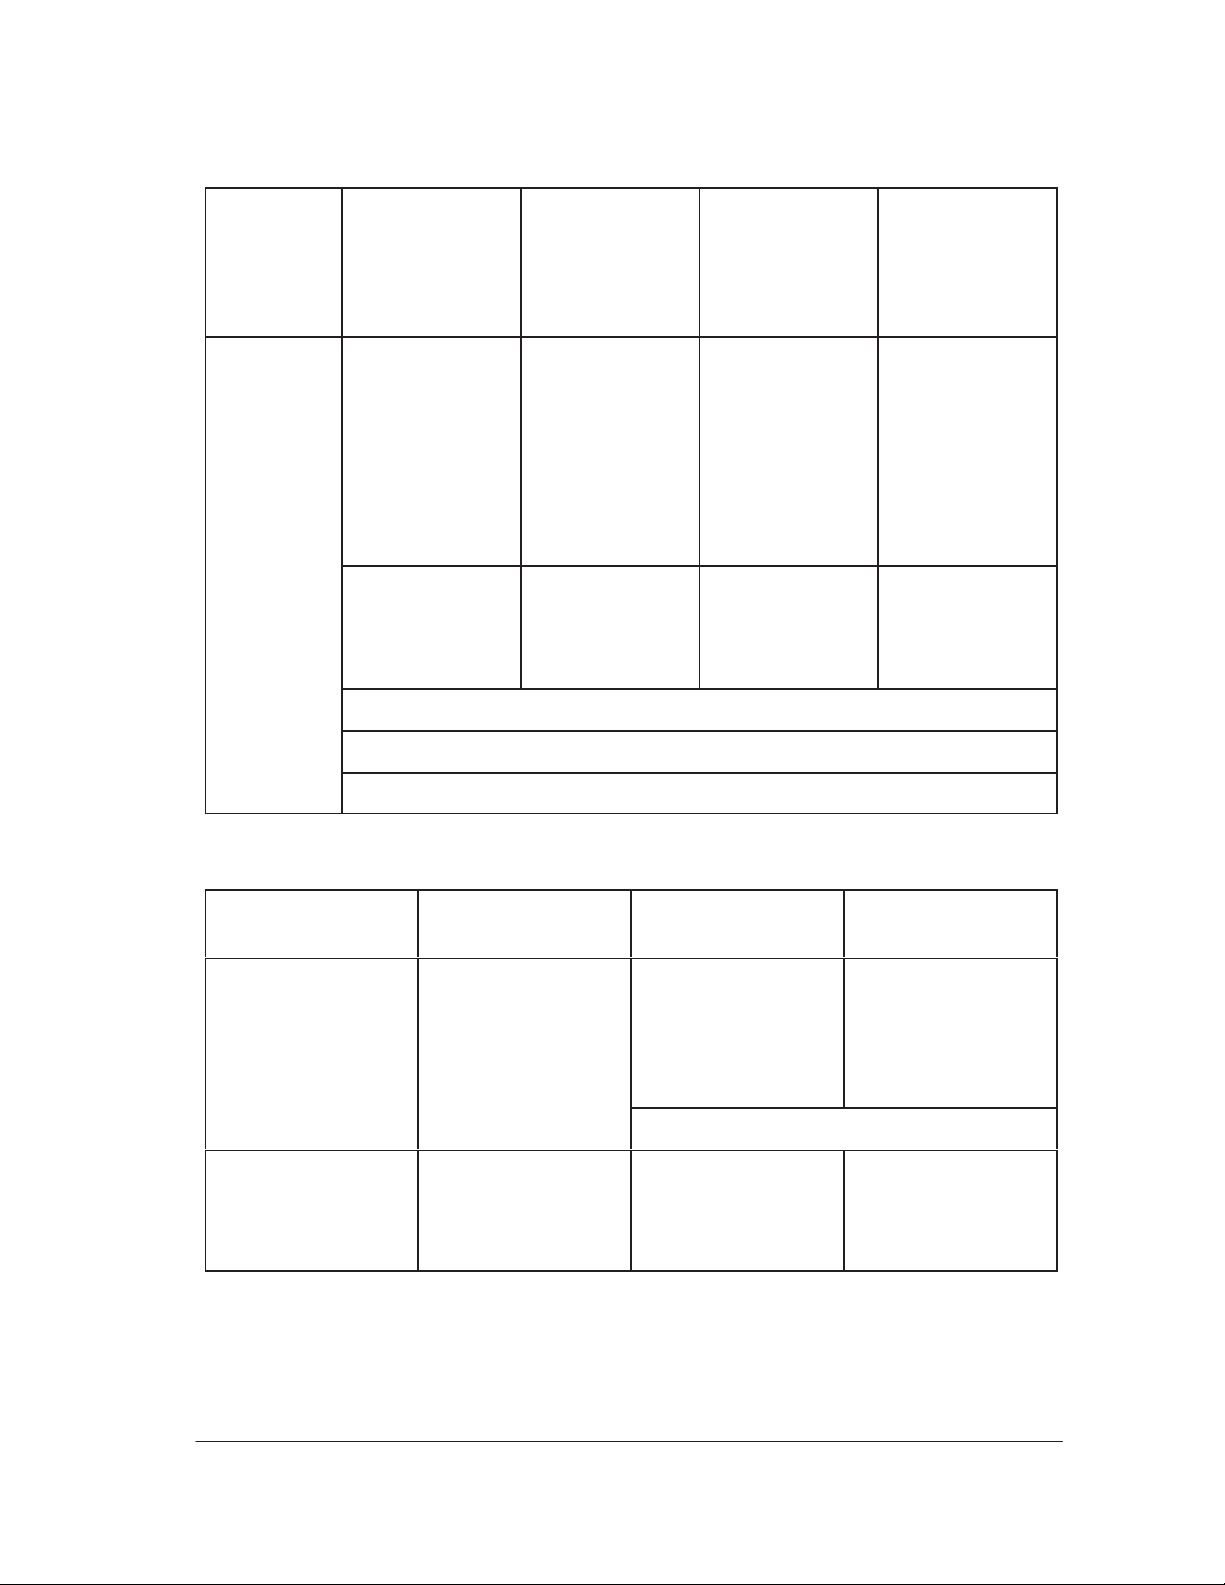
Have you Performed the Necessary Service Calibrations?
Is the printer calibrated correctly after replacing a component? Refer to the
table below to determine when a calibration is required. For information on
the Service Calibrations and how to use them Chapter 5.
REMEMBER THAT CERTAIN CALIBRATIONS ARE REQUIRED
EVEN IF AN ASSEMBLY HAS BEEN DISASSEMBLED TO GAIN
ACCESS TO ANOTHER ASSEMBLY OR COMPONENT.
Calibrations To Be Done
When Required
Electronics Module is
replaced
Carriage is disassembled or
replaced
Refill Assembly is
disassembled or replaced
X-axis Assembly is
disassembled or replaced
Drive Roller is
disassembled or replaced
Banding Problem No No Yes Yes Yes No Yes No No
Edge Detect Problem No No Yes No No No No No No
Misalignment between
Colors
Color Accuracy Problem No No Yes No No Yes No No No
Nozzles Out or Misdirected No No No No Yes No No No No
C01 C02 C03 C05 C06 C07 C08 C09 C10
Yes Yes Yes Yes Yes Yes Yes Yes Yes
Yes Yes Yes Yes Yes Yes Yes No No
No Yes No Yes No Yes No No No
No No No No No No Yes No No
No No No No No No Yes No No
No No Yes Yes Yes No Yes No No
What can I do to Solve Image Quality Problems?
Whenever an Image Quality problem appears, it is advisable to print the
Image Quality Print to help diagnose the problem. The Image Quality Print
will help you differentiate between possible printhead errors and other
problems such as incorrect front-panel selection, driver or RIP configuration
or mechanical problems. For information on solving Image Quality
problems Chapter 6.
1-8 Troubleshooting
HP DesignJet CP Series Printers
Page 21

What can I do if the Carriage is Noisy?
1 Dirty Carriage bushings. Remove dust particles from the Carriage
bushings and from the slider rods along which the Carriage moves. If
necessary, apply lubricant to the slider rods.
2 Check for a faulty Carriage. Perform the Carriage Axis Test page 4-12.
What can I do if the Service Station is Noisy?
1 Dirty Service Station slider rod. Remove dust particles from the Service
Station slider rod along which the Service Station moves. If necessary,
apply lubricant to the slider rod.
2 Check for a faulty Service Station. Perform the Service Station Test
page 4-16.
What can I do if the Printer continuously rejects Printheads?
1 Clean the contacts on the Printhead and in the Carriage using the Ink
Cleaner Part Number C6247A.
2 Remove all the Printheads from the Carriage and try installing just the
rejected Printhead. If the Printhead is still rejected then replace the
Printhead with a new one. If the new Printhead is not rejected then
check, one by one, if the other Printheads are rejected or not.
3 Perform the Printhead Continuity Test page 4-29.
4 Perform the Electronics Test page 4-7.
5 Replace the Trailing Cable page 8-36.
6 Replace the Carriage Assembly page 8-42.
What can I do if the Printer has problems with Media Loading?
On HP DesignJets 3500CP and 3000CP a new Media Button has been
installed to assist in Media Loading.
1 Check that the Media Sensor/Media Button is installed correctly.
2 Check if the cable for the Media Sensor/Media Button is connected correctly.
3 Check if the Pincharms are down (the Pincharm lever should be up).
4 Perform the Line Sensor calibration page 5-10.
5 If the media is continuously rejected during the media edge check, then
make sure that the Line Sensor is installed correctly. If necessary,
replace the Carriage Assembly page 8-42 .
6 Replace the Media Sensor/Media Button page 8-78.
7 Perform the Electronics Test page 4-7.
Troubleshooting
HP DesignJet CP Series Printers
1-9
Page 22

What can I do if the Cover Sensors aren’t Working?
1 Check if the faulty sensor is installed correctly.
2 Check if the cable for the faulty sensor is connected correctly.
3 Replace the faulty Sensor.
What can I do if the “Switch Power Off / Check Printhead Path”
message appears when the Printer is about to cut or is cutting?
1 Check the media path and clear it if necessary.
2 Perform the Cutter Test ' page 4-24.
3 Replace the Cutter Assembly ' page 8-48.
What can I do if the Bail Assembly does not lower all the way?
1 Check that there are no obstructions in the way of the Bail Assembly.
2 Perform the Bail Test ' page 4-25.
What can I do if the “Lens Maintenance” message appears on the
Front-Panel?
1 The Mark Encoder, on the Drive Roller, is dirty. Clean the Mark Encoder
first before trying anything else.
2 The lens cover, which is installed on the line sensor, is dirty. Replace the
lens cover ' Users Guide, Chapter 10 (Lens Maintenance).
Troubleshooting Media Jams/Printhead Crashes
The failure modes “media jam” and “head crash” are grouped together
because in many cases a media jam causes the media to lift up into the
carriage path and cause a head crash, thus causing many media jam
failures to be reported as head crashes.
1 Did the media jam occur when loading media?
D If the client has had media jams, it is common for pieces of media to
get stuck in the media path. Clear the media path.
2 Is the customer using non-HP media?
D The use of non-HP media can easily be the cause of media jams and
head crashes (especially head crashes because HP media is specially
formulated to avoid cockle, one of the primary causes of head
crashes). If the media is not HP approved, advise the customer to use
HP media and check to see if the problem now solved.
1-10 Troubleshooting
HP DesignJet CP Series Printers
Page 23

3 Is the client using Best Mode on Coated Media in high humidity?
In this particular case, head crashes could occur due to worst casing.
Recommend a change of media, print mode, or humidity conditions.
4 What is the Firmware Revision? (Only applicable to HP DesignJets
2500CP and 2000CP)
Must be A02.01 or more recent. If not, upgrade.
Explanation - In earlier releases of firmware a media jam/head
crash can be caused at the start of a plot. This can occur in the
“POME” pen alignment or closed loop color calibration, because
the leading edge of the media is brought back very close to the
Media Separator edge. If the edges cross, the media can lift up
when it is advanced, causing a media jam or head crash. It is more
likely to occur the more curled the media is.
5 Check the Media Separator (Only applicable to HP DesignJets
2500CP and 2000CP)
For units fabricated before Serial Numbers C4703A ESA7C04586 and
C4704A ESA7C10343. If the Media Separator is detaching do not
stick it down again, as it will detach again. Also, never reposition a
Media Separator, because it has an extremely tight positioning
tolerance. For Media Separators that are lifting off the Overdrive
Assembly, replace the entire Overdrive Assembly.
Explanation - The previous adhesive used under the Media
Separator can detach from the Overdrive Assembly. New
Overdrive Assemblies use a much better adhesive – it can be
easily differentiated from the old adhesive because it is white
instead of transparent. The Media Separator should never be
repositioned; it has an extremely tight tolerance. If it is too far
from the linear blade it can cause media crashes against the
Linear Blade. If it is too close it can cause media jams between the
leading edges of the media and the Media Separator.
6 Did the failure occur at the end of the media roll?
There are two known failure modes in this case. One is with Vinyl
media, in which case the end of the media was glued too strongly to the
roll, which can cause a head crash. The other is with Coated Media,
where some rolls have the final edge of the media bent in a “C” shape
which could cause a head crash when passing under the carriage. In
both cases the problem has been fixed and a new roll of media should
solve it.
Troubleshooting
HP DesignJet CP Series Printers
1-11
Page 24

7 Replace the Overdrive Assembly and the Clutch ' page 8-69.
D Explanation - For a unit fabricated before September of 1997 the
clutch could cause intermittent media jams. Refer to the applicable
Service Note. For a printer fabricated before July 1997 the linear
blade could be too high, causing media jams.
8 Check for missing/blocked starwheels or starwheel mount assemblies.
D Explanation - These parts can lead to media jams if missing or
blocked.
9 The Carriage is at the incorrect height in relation to the Drive Roller.
Perform the Refill Calibration ' page 5-9 and try to load the media
again.
D The refill station positioning must be checked afterwards since it is
affected. The refill station can be adjusted to accommodate the change
in Printhead Height. The specification for Printhead Height is 1.2 -
1.4mm. Printhead Heights higher than this can adversely affect print
quality.
What can I do if the Printer does not Power ON?
1 Check that the power cord is connected correctly.
2 Check that the Flash SIMM is installed correctly in the correct slot (the
first slot from the left) at the back of the Printer.
3 On the Main PCA, in the Electronics Module, there are other fuses that
are not controlled by the firmware so that, if they are burnt, they can
cause a no-power-up problem. It is recommended to check the
resistance of the motors in a no-power-up situation before
installing a new Electronics Module. If you have a short in one
motor, you will burn the new Electronics Module.
4 Try to disconnect all the cables, apart from the Front Panel Cable, from
the Electronics Module and then try to power ON the Printer again. If
nothing appears on the front-panel display, then replace the Electronics
Module ' page 8-6. If the Printer does Power On with the cables
disconnected, then the problem must be with another component of the
Printer. To find the faulty component, power OFF the Printer and
connect one of the cables and power ON again. Once the faulty
component is connected, it will not allow the Printer to power ON. This
component should then be replaced.
What can I do if the Line Sensor has Problems Detecting Media?
1 Excessive ink deposits on the drive-roller surface can fool the sensor by
reflecting the light. Clean the drive-roller ' page 9-3.
1-12 Troubleshooting
HP DesignJet CP Series Printers
Page 25

2 The lens cover, which is installed on the line sensor, is dirty. Replace the
lens cover Users Guide, Chapter 10 (Lens Maintenance).
3 The Line Sensor is not calibrated correctly. Perform the Line Sensor
calibration page 5-10.
4 The Line Sensor is installed incorrectly. Try to reinstall it and make sure
that it is connected and seated correctly. If the problem continues,
replace the Carriage Assembly page 8-42.
Troubleshooting
HP DesignJet CP Series Printers
1-13
Page 26
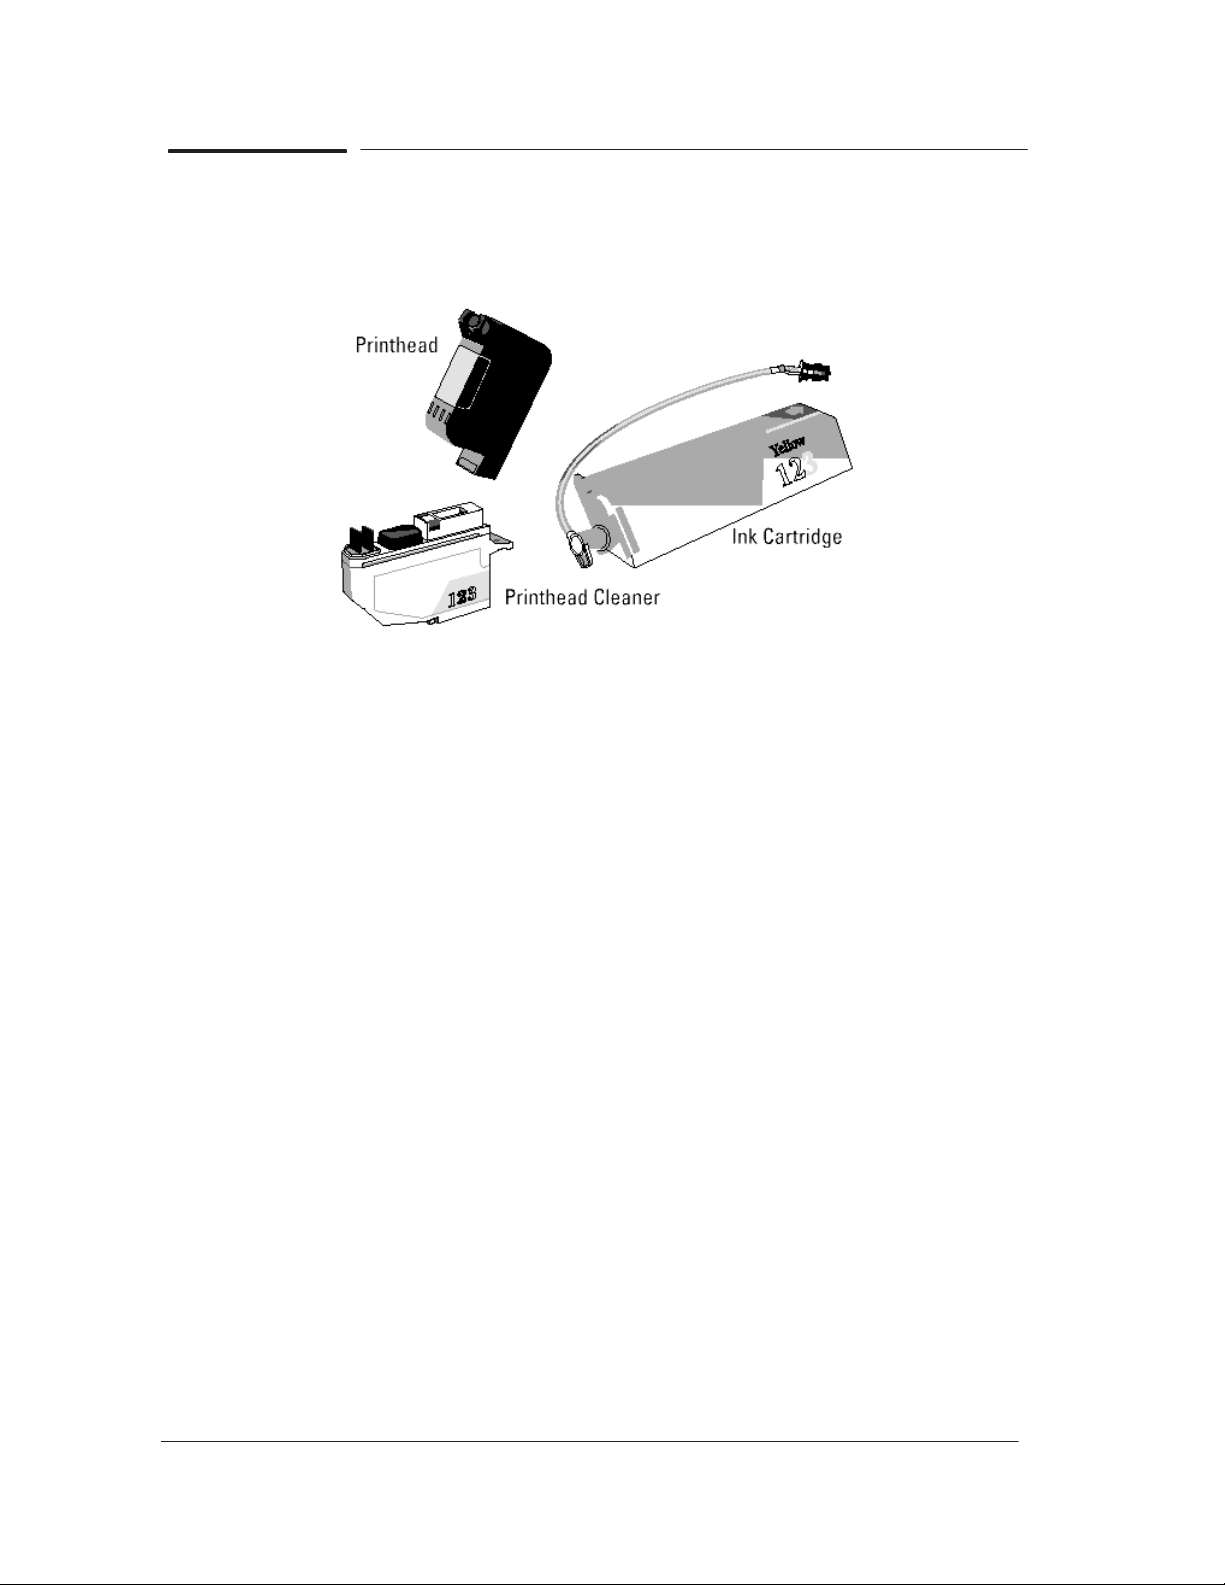
What is the Ink System?
For each of the four colors of ink in your printer ’s ink system, there are
three separate components that work together as a system. The components
for each ink color are color-coded to help you install them correctly.
Ink Cartridge
The ink cartridges are a large-capacity ink supply from which the
printheads are refilled whenever the ink volume in the printhead drops
below a minimum level.
Printhead
The printhead has a 600 dpi thermal inkjet head for firing ink droplets onto
the media and a reservoir which holds enough ink for a large number of
prints. The actual number of prints between refills depends on the size and
type of images you are printing.
Printhead Cleaner
The printer uses the printhead cleaner to clean and maintain the printhead
to ensure the best possible image quality, and to seal the printhead when it
is not in use to prevent it from drying out.
How Do I Troubleshoot the Ink System?
1 If the error message IInk system IncompltI appears on the
front-panel it means that the ink cartridge valve has been disconnected,
so:
D If this is the first failure try to REINSTALL the failing Ink System.
D If the failure has been very frequent REPLACE the failing Ink
System (The valve could be damaged).
If this doesn’t solve the problem, continue with the following process.
1-14 Troubleshooting
HP DesignJet CP Series Printers
Page 27

2 Reinstall the Ink Delivery System as follows:
1 Remove the four printheads from the carriage. On the front panel you
will see the four squares representing the printheads flashing.
2 Clean the electrical contacts using the Ink Cleaner Part Number
C6247A.
3 Reinstall all the printheads, one by one, checking on the front panel
that the squares representing the reinstalled printheads are steady.
D DO NOT INSERT THE NEXT PRINTHEAD UNTIL THE
PRINTER HAS ACCEPTED THE CURRENT PRINTHEAD.
D If, even after the electrical contacts have been cleaned, the
printhead is not accepted REPLACE THE COMPLETE INK
SYSTEM (Printhead/Head Cleaner/Ink Cartridge) for this color.
D If, after inserting a NEW Ink System, the printhead is not
accepted, the problem may be with the printer. Replace the
Carriage Assembly ' 8-42.
4 If you have reinserted the four printheads and the printer has
accepted them continue reinstalling the head cleaners.
5 Remove and reinstall the ink cartridge valves, one by one, checking
on the front panel that the squares representing the reinstalled ink
cartridge are steady.
D If the ink cartridge is not accepted, REPLACE THE COMPLETE
INK SYSTEM (Printhead/Head Cleaner/Ink Cartridge) for this
color.
D If, after reinserting the NEW Ink System, the ink cartridge is not
accepted, the problem may be with the printer. Make sure that the
Refill Assembly cable is not damaged and is correctly connected to
the Interconnect PCA. If the cable is correctly connected and is not
damaged then replace the Refill Assembly ' page 8-55.
3 If the problem is fixed, but it reappears frequently, contact a HP dealer
for a replacement (the Ink System may be damaged.)
Troubleshooting
HP DesignJet CP Series Printers
1-15
Page 28

Does the Customer have Mid-Print Refill Problems in
HP DesignJets 3500CP/3000CP?
New Refill Features in HP DesignJet CP Series (in the case of
DesignJets 2X00CP, the firmware release must be at least A.04.05)
1 Adaptive trigger. The printer looks for low density places to stop and
refill in the print where it will be less noticeable. This feature becomes
active when 75% of the ink in the printhead has been used up. RIP’s
may have disabled this feature, or enabled it at a different ink level.
2 Slightly more useable ink for Imaging printheads. There is an
additional 10% of usable ink.
3 New refill type selections. User can select from three different refill
types through the front panel (Device Setup / Refill=). RIP’s may
support these selections, too:
Type A is similar to what HP DesignJet 2xxxCP does at refill.
Type B finishes the print to a clean edge before refilling.
Type C does a quicker, more frequent refill.
The Default type makes the correct selection for HP media types.
When using non-HP medias, the following settings are probably best:
Glossy - B or C Coated - A or B Backlit - B or A
4 Additional printhead servicing and warming activities are done during
refills, which improves the quality over the 2xxxCP. The user may notice
some new servicing (i.e. noises) at mid-page refills.
5 “Big print” feature. When a refill happens during a large print, the
printer will automatically refill again at the end of the print, to make
sure the maximum ink is available for the next print, which might also
be expected to be large. The user is unlikely to notice this difference in
behavior, since the printer often refills at the end of large pages.
Working with refill problems
General tips:
Check media type is loaded correctly.
Check refill type is set to default.
Try a higher image quality setting for better performance.
Check user’s expectations - refill performance is not always “perfect”, but
almost always is acceptable for poster-type applications. Photo medias
are the most sensitive to defects.
1-16 Troubleshooting
HP DesignJet CP Series Printers
Page 29
Troubleshooting Table 1
Problem
Solutions
Hazy stripe in
dark or black
area with
Hi/Semi Gloss
Light line,
any media
High Gloss/
Semi Gloss
Photo
problems
Photo
Check that
black contains
undercolor
Try higher
image quality
setting
Try higher
image quality
setting
(send RGB to
printer, or add
33% CMY to
black areas
yourself)
Make sure
type B or
default refill
is selected
Switch
between Type
A and B
refills
Make sure
type B or
default refill
is selected
Use higher image quality settings
Use a LOWER image quality setting
Non-HP
medias
Try different
refill types
A,B or C
Use higher
image quality
settings
Use HP media
Troubleshooting Table 2
Problem
Missing color
PRIOR to refill
Reason Printhead is out
of ink (but got a
little more when
it refilled)
Solution Replace
printhead
Missing nozzles
AFTER refill
Error hiding
does not work in
Poor start-up
AFTER refill
Occasional
occurrence
the first swath
after a type B
refill
First swath after a Type B refill
None/ replace
printhead
Check
printheads/
recover
printheads
Troubleshooting
HP DesignJet CP Series Printers
1-17
Page 30

Refill Avoidance Tips
Printer:
1 Try to “top off” printheads before large prints with “Refill Now” option in
Front Panel (Image Quality / Printhead Service / Refill now). If a refill
happened at the end of the last print (usually happens with big prints),
this is not necessary.
2 If you have just canceled a print, you may need to use the “refill now”
option to guarantee the maximum ink available for the next print.
Print Composition Tips:
1 Don’t try to nest more than 15 ft^2 of prints.
2 If the print is lighter in color at one end, rotate print so that it is the last
part to be printed. Refills are less noticeable in light prints.
3 If possible, lighten background colors or use a gradient in place of a solid
fill.
4 Textured areas make refills less noticeable than “flat” color areas.
How Do I Clean the Electrical Contacts?
The problem.
The printer fires drops by sending electrical signals from the printhead
carriage to the printhead through the electrical contacts present on the
carriage and on the printheads. The problem is that when you load the
printheads into their stalls, sometimes some ink goes over the carriage
electrical contacts, and when the printhead is installed over the printhead
electrical contacts. When the printer prints, some ink goes to the bottom of the
electrical contacts. This causes electrical continuity problems that can be fixed
very easily.
The solution.
A new tool has been created especially to clean the electrical contacts and is
called the Ink Cleaner (Part Number C6247A - includes the instructions).
1-18 Troubleshooting
HP DesignJet CP Series Printers
Page 31

How Do I Print some of the Internal Prints?
The Service Print
The purpose of the Service Print is to give information about the operating
conditions, Usage Level, Serviceability and the MIO Configuration. This
Print is very useful when troubleshooting the Printer, as it gives you
information regarding the firmware revision, the last system error and the
internal sensors.
If the EEROM is cleared, you will loose all the information on the
Service Print (including the MIO Configuration).
Print the Service Print as follows:
Load media (A4 minimum) before printing the Service Print.
1 In the Utilities submenu, scroll to “Service Tests” and press Enter.
SERVICE TESTS
Service print
2 Scroll to “Service Print” and press Enter.
3 The Service Print will then be printed.
Troubleshooting
HP DesignJet CP Series Printers
1-19
Page 32

The Usage report
The purpose of the Usage Report is to give information about some of the
Internal Counters which can help you to know the usage of the Printer.
If the EEROM is cleared, the counters will be reset to zero.
Print the Usage Report as follows:
Load media (A4 minimum) before printing the Usage Report.
1 In the Internal Prints submenu, scroll to “Usage Report” and press
Enter.
INTERNAL PRINTS
Usage Report
2 The Usage Report will then be printed.
1-20 Troubleshooting
HP DesignJet CP Series Printers
Page 33

The PostScript Config
The purpose of the PostScript Config is to give information about the
internal Hard Disk, Internal Fonts and the PostScript part of the
front-panel configuration.
Print the PostScript Config as follows:
Load media (A4 minimum) before printing the PostScript Config.
1 In the Internal Prints submenu, scroll to “PostScript Config” and press
Enter.
INTERNAL PRINTS
PostScript Config
2 The PostScript Config will then be printed.
Troubleshooting
HP DesignJet CP Series Printers
1-21
Page 34

How to Navigate through the Front-Panel Menu
Move Media
Max X=
Max Y=
Code rev=
PS rev=
Disk rev=
RAM present=
Ink=
Media=
Applicable only to
DesignJets 3XXXCP
Applicable only to
DesignJets 2XXXCP
On
Off*
Continued on Next Page
1-22 Troubleshooting
HP DesignJet CP Series Printers
Page 35

Continued from Previous Page
Take up reel=–>
Refill=–>
On*
Off
Default*
Type A
Type B
Type C
Extrawide–>
1.0x1.4m
1.2x1.7m
44x62in.
52x73in.
54x76in.
Troubleshooting
HP DesignJet CP Series Printers
Applicable only to
DesignJets 3XXXCP
1-23
Page 36

2
System Error Codes
HP DesignJet CP Series Printers
2-1
Page 37

System Error Codes
System error codes are hexa-decimal based numbers generally caused by
internal system errors. The following pages contain a list of system error
codes and their respective descriptions and recommended corrective actions.
The following table gives a quick explanation of the error codes:
Error code Type of Problem
0100xx Electrical Failure
010xxx EEROM Failure
02xxxx Mechanical Failure
04xxxx MIO Card Error
05xxxx X-mark Error
06xxxx Line Sensor Error
07xxxx Firmware Failure
08xxxx PostScript Error
09xxxx Hard Disk Failure
If you have an error code which is not documented in this Service Manual or
you have an error which you cannot resolve, then report the error to the HP
Response Center or the nearest HP Support Office. When reporting the
error, have the following information ready:
Model and Serial Number of the printer.
Which firmware revision the printer is using.
The complete error number.
The Service Print (Utilities / Service Tests).
The Current configuration sheet.
Which software application the customer is using (name, version, etc.).
Is the problem reproducible by you?
Additional comments about the usage, the setting, etc..
2-2 System Error Codes
HP DesignJet CP Series Printers
Page 38

Important Information on Troubleshooting Error Codes
Before spending time troubleshooting the problem by doing the various tests
or replacing parts (which may not need replacing), check which firmware
revision the printer is using or check if a service note deals with this
particular problem. Some problems which occurred in earlier firmware
releases may have been solved in later revisions. So if there is a new
firmware revision then update the Flash SIMM before replacing any parts.
Refer to page 1-3 for information on how to upgrade the firmware revision.
Refer to Chapter 7 for the part number of the Flash SIMM.
System Error: 0000D8 XXXXXXXX
Problem Description: Library Error.
Corrective Action: Refer to System Error Code 07xxxx.
System Error: 010020
Problem Description: The Checksum read on the Flash SIMM is
incorrect.
Corrective Action: Try the following:
D Reseat the Flash SIMM.
D Replace the Flash SIMM.
D Replace the Electronics Module ' page 8-6.
Only replace one component at a time and
check if the error has gone before replacing
another component. Using this procedure
you will be able to determine exactly which
component failed.
System Error Codes
HP DesignJet CP Series Printers
2-3
Page 39

System Error: 010021 AXXXXXXX
Problem Description: The base DRAM or the RAM SIMM tests failed.
Corrective Action: Try the following:
NOTE: The Printer will not function
without any RAM SIMMs installed.
Make sure that you have a
minimum of 4MB memory module
installed.
D If the Error Data is higher than A4000000
then the failure is in the RAM SIMM. Try the
following to solve the problem.
S Check that the RAM SIMMs (memory
modules) are the original HP supported
parts. If the RAM SIMMs are from a 3rd
Party then they should be replaced by HP
supported parts before troubleshooting the
problem any further. Product functionality
cannot be guaranteed with 3rd party RAM
SIMMs.
S If more than one RAM SIMM (memory
module) is installed, remove one of them
and power on the printer again. If this
system error is displayed again, reinstall
the removed RAM SIMM and remove the
other RAM SIMM and then power on the
printer again. If this system error appears
again then try to replace both RAM SIMMs
with new ones.
D If the Error Data is lower than A4000000
then the failure is in the Base DRAM. Replace
the Electronics Module ' page 8-6.
System Error: 010022
Problem Description: The SWATH RAM test failed.
Corrective Action: Replace the Electronics Module ' page 8-6.
2-4 System Error Codes
HP DesignJet CP Series Printers
Page 40

System Error: 010023
Problem Description: A fuse on the Main PCA has blown.
Corrective Action: Try the following:
D Check the X-encoder and optical sensors cable
path for damage. If the cables are damaged,
they could cause the fuses in the new
electronics module to also blow.
D Replace the Electronics Module ' page 8-6.
System Error: 010024
Problem Description: Problem initializing the encoder pulse generator.
Corrective Action: Replace the Electronics Module ' page 8-6.
System Error Codes
HP DesignJet CP Series Printers
2-5
Page 41

System Error: 010030
Problem Description: One of the two interconnect boards not detected.
Corrective Action: Try the following:
D Make sure that the Interconnect Cables (the
two black cables that connect the Refill
Assembly and the Service Station Assembly to
the Electronics Module) are correctly connected
to the Electronics Module.
D Replace the interconnect cables:
S Service Station Interconnect
Cable ' Page 8-87.
S Refill Interconnect Cable ' Page 8-87.
D Replace the Refill Interconnect PCA ' page
8-64.
D Replace the Service Station Assembly ' page
8-26.
D Replace the Electronics Module ' page 8-6.
Only replace one component at a time and
check if the error has gone before replacing
another component. Using this procedure
you will be able to determine exactly which
component failed.
2-6 System Error Codes
HP DesignJet CP Series Printers
Page 42

System Error: 010031
Problem Description: The Printhead Primitive Driver ASIC Test Failed.
Corrective Action: Try the following:
D Make sure that the Trailing Cable is connected
correctly.
D Perform the Carriage Calibration ' page 5-7.
D Replace the Trailing Cable ' page 8-36.
D Replace the Carriage Assembly ' page 8-42.
D Replace the Electronics Module ' page 8-6.
Only replace one component at a time and
check if the error has gone before replacing
another component. Using this procedure
you will be able to determine exactly which
component failed.
System Error Codes
HP DesignJet CP Series Printers
2-7
Page 43

System Error: 010032 000000XX
Problem Description: Fan Test Failed - Current not detected in one or
both fans.
Error data (XX):
1 ³ Electronics Module fan not running.
2 ³ Service station fan not running.
3 ³ Both fans not running.
10 ³ Electronics Module fan is short-circuited.
20 ³ Service Station fan is short-circuited.
30 ³ Both fans are short-circuited.
12 ³ Service Station fan is not running and the
Electronics Module fan is short-circuited.
21 ³ Electronics Module fan is not running and
the Service Station fan is short-circuited.
Corrective Action: Try the following:
D Make sure that the Service Station fan is
connected correctly to the interconnect PCA.
D If both fans fail, replace the Electronics
Module ' page 8-6.
D If the error code is related to the Service
Station:
S Make sure that the Service Station
Interconnect Cable is correctly connected to
the Electronics Module.
S Replace the Service Station interconnect
cable ' Page 8-87.
S Replace the Service Station Assembly '
page 8-26.
D Replace the Electronics Module ' page 8-6.
Only replace one component at a time and
check if the error has gone before replacing
another component. Using this procedure
you will be able to determine exactly which
component failed.
2-8 System Error Codes
HP DesignJet CP Series Printers
Page 44

System Error: 010033
Problem Description: The DC Motor Driver ASIC Test Failed.
Corrective Action: Replace the Electronics Module ' page 8-6.
System Error: 010034 000X0000
Problem Description: One of the DC Motors has failed.
Error data:
00010000 ³ Y-axis Motor Failed.
00020000 ³ X-axis Motor Failed.
00030000 ³ Both DC Motors Failed.
Corrective Action: Try the following:
D Make sure that both DC Motors are connected
correctly.
D If the error code is related to the Y-axis motor:
S Make sure that the Refill Interconnect Cable
(the black cable that connects the Refill
Assembly to the Electronics Module) is
correctly connected to the Electronics Module.
S Replace the Refill Interconnect PCA '
page 8-64.
S Replace the Y-axis Motor Assembly '
Page 8-45.
D If the error code is related to the X-axis Motor,
replace the X-axis Motor Assembly ' Page
8-66.
D If both DC Motors fail, replace the Electronics
Module ' page 8-6.
Only replace one component at a time and
check if the error has gone before replacing
another component. Using this procedure
you will be able to determine exactly which
component failed.
System Error Codes
HP DesignJet CP Series Printers
2-9
Page 45

System Error: 010035 0XABCDEF
Problem Description: One of the Stepper Motors has failed.
Error data (0XABCDEF):
If the value of each letter is 0, then the component
is OK. If the value of each letter is different
from 0 then the component has failed.
X ³ Electronics signal failed (ignore other values).
A ³ Elevator Stepper Motor Failed.
B ³ Refill Stepper Motor Failed.
C ³ Primer Stepper Motor Failed.
D ³ Service station (Z-axis) Stepper Motor
Failed.
E ³ Service station (X-axis) Stepper Motor
Failed.
F ³ Bail Stepper Motor Failed.
Corrective Action: Try the following:
D If the Error is related to the Electronic Signal
(X is not 0) then replace the Electronics
Module ' Page 8-6.
D Make sure that the Refill Interconnect Cable
and the Service Station Interconnect Cable are
correctly connected to the Electronics Module.
D Make sure that the failed Stepper Motor is
connected correctly.
D If the Error is related to the Bail Stepper
Motor, Elevator Stepper Motor or the Refill
Stepper Motor then:
S Replace the Refill interconnect cable '
Page 8-87.
S Replace the Refill interconnect PCA '
Page 8-64.
D If the Error is related to the Primer or the Service
Station Stepper Motors then replace the Service
Station Interconnect cable ' Page 8-87.
D If the Error is related to the Elevator Stepper
Motor then replace the Elevator Assembly '
Page 8-52.
2-10 System Error Codes
HP DesignJet CP Series Printers
Page 46

D If the Error is related to the Refill Stepper
Motor then replace the Refill Assembly ' Page
8-55.
D If the Error is related to the Primer Stepper
Motor then replace the Primer Assembly ' Page
8-29.
D If the Error is related to the Service Station
Stepper Motors then replace the Service
Station Assembly ' Page 8-26.
D If the Error is related to the Bail Stepper
Motor then replace the Bail Stepper Motor
Assembly ' Page 8-62.
D Replace the Electronics Module ' page 8-6.
Only replace one component at a time and
check if the error has gone before replacing
another component. Using this procedure
you will be able to determine exactly which
component failed.
System Error: 010036 (see next page for 010036 0000XX00)
Problem Description: ADC Test Failure in the Main PCA.
Corrective Action: Try the following:
D Switch the Printer OFF from the back and
then disconnect the Trailing Cable from the
Electronics Module. Switch the Printer ON and
see if the Error Code now changes to “010037”.
If the error code remains as “010036”, replace
the Electronics Module ' page 8-6.
D If the Error Code changes to “010037” then try
the following:
S Make sure that the Trailing Cable is
connected correctly.
S Replace the Trailing Cable ' page 8-36.
S Replace the Carriage Assembly ' page 8-42.
System Error Codes
HP DesignJet CP Series Printers
2-11
Page 47

S Replace the Electronics Module ' page 8-6.
Only replace one component at a time and
check if the error has gone before replacing
another component. Using this procedure
you will be able to determine exactly which
component failed.
System Error: 010036 0000XX00
Problem Description: A short circuit in the Y/X-axis or ANY stepper
motor. This short circuit is causing some of the
fuses in the Electronics Module to burn.
Error data:
00000800 ³ Problem with the Y-axis.
00001000 ³ Problem with the X-axis.
Corrective Action: Try the following:
D Check which stepper motor has failed by
measuring the resistance values of the
connectors. Make sure that you check the
resistance between pins 1-3 and 4-6. If any of
the stepper motors are burnt, you will get a
value of X0-5 ohms. ONCE YOU HAVE
IDENTIFIED THE FAILING MOTOR YOU
MUST REPLACE THE FAILING MOTOR
ASSEMBLY AND THE ELECTRONICS
MODULE TOGETHER AT THE SAME
TIME TO SOLVE THE PROBLEM. IF YOU
INSTALL A NEW ELECTRONICS
MODULE WITHOUT REPLACING THE
FAILING MOTOR, THE ELECTRONICS
MODULE WILL BE BURNED AGAIN.
Stepper Motor
Bail
Refill
Service Station (X-
Resistance (ohms)
120 20%
200 20%
54.4 20%
axis)
Service Station (Z-
50 20%
axis)
2-12 System Error Codes
HP DesignJet CP Series Printers
Page 48

Primer
46 20%
Elevator
52 20%
System Error: 010037
Problem Description: ADC Test Failure in the Carriage PCA.
Corrective Action: Try the following:
D Make sure that the Trailing Cable is connected
correctly.
D Replace the Trailing Cable ' page 8-36.
D Replace the Carriage Assembly ' page 8-42.
D Replace the Electronics Module ' page 8-6.
Only replace one component at a time and
check if the error has gone before replacing
another component. Using this procedure
you will be able to determine exactly which
component failed.
System Error: 010038
Problem Description: A Printhead voltage could not be set - Main PCA
Failure.
Corrective Action: Try the following:
D Make sure that the Trailing Cable is connected
correctly.
D Replace the Trailing Cable ' page 8-36.
D Replace the Electronics Module ' page 8-6.
D Replace the Carriage Assembly ' page 8-42.
Only replace one component at a time and
check if the error has gone before replacing
another component. Using this procedure
you will be able to determine exactly which
component failed.
System Error Codes
HP DesignJet CP Series Printers
2-13
Page 49

System Error: 010039
Problem Description: A Printhead voltage could not be set - Carriage
PCA Failure
Corrective Action: Try the following:
D Make sure that the Trailing Cable is connected
correctly.
D Replace the Trailing Cable ' page 8-36.
D Replace the Carriage Assembly ' page 8-42.
Only replace one component at a time and
check if the error has gone before replacing
another component. Using this procedure
you will be able to determine exactly which
component failed.
System Error: 010040
Problem Description: The Ambient Temperature measured is out of the
normal range.
Corrective Action: Try the following:
D Make sure that the Trailing Cable is connected
correctly.
D Replace the Trailing Cable ' page 8-36.
D Replace the Carriage Assembly ' page 8-42.
D Replace the Electronics Module ' page 8-6.
Only replace one component at a time and
check if the error has gone before replacing
another component. Using this procedure
you will be able to determine exactly which
component failed.
System Error: 010041
Problem Description: Problem in setting the Printhead Voltage.
Corrective Action: Switch the Printer OFF and ON again. During
initialization another error code will appear. Refer
to the relevant error code for further information.
2-14 System Error Codes
HP DesignJet CP Series Printers
Page 50

System Error: 010042 0000000X
Problem Description: The status of one of the optical sensors is not
stable when it should be.
Error data (X):
0 ³ Problem with the Media Sensor.
1 ³ Problem with the Pinch-arm Sensor.
2 ³ Problem with the Refill Assembly Sensor.
3 ³ Problem with the Elevator Sensor.
4 ³ Problem with the Service Station Sensor.
5 ³ Problem with the Primer Sensor.
Corrective Action: Try the following:
D Make sure that all sensors are connected
correctly.
D If the error code is related to the Service
Station or the Primer then:
S Make sure that the Service Station
Interconnect Cable (the black cable that
connects the Service Station to the
Electronics Module) is correctly connected
to the Electronics Module.
S Replace the Service Station Interconnect
cable ' Page 8-87.
D If the error code is related to the Refill
Assembly or the Elevator then:
S Make sure that the Refill Interconnect
Cable (the black cable that connects the
Refill Assembly and Elevator to the
Electronics Module) is correctly connected
to the Electronics Module.
S Replace the Refill Interconnect cable '
Page 8-87.
D If the Error is related to the Pinch-arm sensor
then replace the Pinch-arm Sensor ' Page
8-84.
D If the Error is related to the Refill Assembly
Sensor then replace the Refill Assembly '
Page 8-55.
System Error Codes
HP DesignJet CP Series Printers
2-15
Page 51

D If the Error is related to the Elevator Sensor
then replace the Elevator Assembly ' Page
8-52.
D If the Error is related to the Service Station
Sensor then replace the Service Station
Assembly ' Page 8-26.
D If the Error is related to the Media
Sensor/Media Button then:
The Media Button is only applicable to HP
DesignJets 3500CP and 3000CP.
S Make sure that the Media Sensor/Media
Button is installed correctly.
S Make sure that the cable for the Media
Sensor/Media Button is connected correctly.
S Replace the Media Sensor ' Page 8-78.
S Replace the Media Button ' Page NO TAG.
D If the Error is related to the Primer Sensor
then replace the Primer Assembly ' Page 8-29.
D Replace the Electronics Module ' page 8-6.
Only replace one component at a time and
check if the error has gone before replacing
another component. Using this procedure
you will be able to determine exactly which
component failed.
System Error: 010043
Problem Description: Problem with the Carriage Board.
Corrective Action: Try the following:
D Make sure that the Trailing Cable is connected
correctly.
D Replace the Carriage Assembly ' page 8-42.
D Replace the Electronics Module ' page 8-6.
Only replace one component at a time and
check if the error has gone before replacing
another component. Using this procedure
you will be able to determine exactly which
component failed.
2-16 System Error Codes
HP DesignJet CP Series Printers
Page 52

System Error: 010100
Problem Description: Error reading the EEROM.
Corrective Action: Replace the Electronics Module ' page 8-6.
System Error: 010101
Problem Description: An action outside the EEROM limits has been
performed.
Corrective Action: Make sure you have the latest version of the Flash
SIMM (firmware) installed or upgrade the
firmware revision of the Flash SIMM ' page 1-3.
If the error code remains after installing the latest
Flash SIMM then report the error to the HP
Response Center or the nearest HP Support
Office, stating the following information:
D Model and Serial Number of the printer.
D the complete error number.
D service print (Utilities / Service Tests).
D plot file where the error has occurred.
D additional comments about the usage, the
setting, etc..
System Error: 010102
Problem Description: Physical EEROM write and/or write operations
failed. The EEROM data that is written does not
match the data that is read.
Corrective Action: Replace the Electronics Module ' page 8-6.
System Error Codes
HP DesignJet CP Series Printers
2-17
Page 53

System Error: 010110
Problem Description: The content of the permanent configuration area
of the EEROM is not valid when the printer is
initialized in Service Mode.
Corrective Action: Try the following:
D Test the Electronics Module ' page 4-7.
D Perform the following Calibrations:
S Carriage ' page 5-7.
S Refill ' page 5-9.
S Line Sensor ' page 5-10.
S Printhead Alignment ' page 5-13.
S Color Calib. ' page 5-16.
S Service Accuracy ' page 5-17.
D Make sure you have the latest version of the
Flash SIMM (firmware) installed.
D Replace the Electronics Module ' page 8-6.
System Error: 010111
Problem Description: The content of the User configuration area of the
EEROM is not valid when the printer is
initialized.
Corrective Action: Press ENTER and re-configure the front panel
settings. If the error code continues to appear then
replace the Electronics Module ' page 8-6.
2-18 System Error Codes
HP DesignJet CP Series Printers
Page 54

System Error: 010120
Problem Description: The content of the permanent configuration area
of the EEROM is not valid when the printer is
initialized in Normal Mode.
Corrective Action: Try the following:
D If this Error Code appeared during normal
operation and not during the initialization,
then the problem can be solved by switching
the printer OFF and ON again.
D Enter in Service Mode ' page 4-6. During the
initialization sequence the Error Code
“010110” appears. Refer to that error code for
further information.
System Error: 010121
Problem Description: One of the banks of the user area was corrupted
while writing or reading in that area.
Corrective Action: Try the following:
D Switch the printer OFF and ON again.
D If the Error Code appears again then replace
the Electronics Module ' page 8-6.
System Error Codes
HP DesignJet CP Series Printers
2-19
Page 55

System Error: 020000
Problem Description: Error in finding the Primer home position.
Corrective Action: Try the following:
D Make sure that the Service Station
Interconnect Cable (the black cable that
connects the Service Station to the Electronics
Module) is correctly connected to the
Electronics Module.
D Make sure that the cables for the Primer
Stepper Motor and Sensor are correctly
connected to the Service Station Interconnect
PCA.
D Make sure that the air tubes that are
connected between the primer assembly and
the service station are in the correct position
and are not squeezed together.
D Make sure that the Primer Stepper Motor is
NOT shorted.
D Replace the Service Station interconnect cable
' Page 8-87.
D Replace the Primer Assembly ' Page 8-29.
D Replace the Service Station Assembly '
page 8-26.
D Replace the Electronics Module ' page 8-6.
Only replace one component at a time and
check if the error has gone before replacing
another component. Using this procedure
you will be able to determine exactly which
component failed.
2-20 System Error Codes
HP DesignJet CP Series Printers
Page 56

System Error: 020001
Problem Description: Error in finding the Elevator home position.
Corrective Action: Try the following:
D Make sure that there are no obstacles in the
Elevator path. Check if the ink cartridges are
installed correctly on the Elevator.
D Make sure that the Refill Interconnect Cable
(the black cable that connects the Refill
Assembly and Elevator to the Electronics
Module) is correctly connected to the
Electronics Module.
D Make sure that the cables for the Elevator
Stepper Motor and Sensor are correctly
connected to the Refill Interconnect PCA.
D Make sure that the Elevator Stepper Motor is
NOT shorted.
D Replace the Refill interconnect cable '
Page 8-87.
D Replace the Refill Interconnect PCA ' Page
8-64.
D Replace the Elevator Assembly ' Page 8-52.
D Replace the Electronics Module ' page 8-6.
Only replace one component at a time and
check if the error has gone before replacing
another component. Using this procedure
you will be able to determine exactly which
component failed.
System Error Codes
HP DesignJet CP Series Printers
2-21
Page 57

System Error: 020002
Problem Description: Error in finding the Refill Arm home position.
Corrective Action: Try the following:
D Make sure that the Refill Interconnect Cable
(the black cable that connects the Refill
Assembly and Elevator to the Electronics
Module) is correctly connected to the
Electronics Module.
D Make sure that the cables for the Refill
Stepper Motor and Sensor are correctly
connected to the Refill Interconnect PCA.
D Make sure that the Refill stepper motor is
NOT shorted.
D Replace the Refill interconnect cable '
Page 8-87.
D Replace the Refill Interconnect PCA '
Page 8-64.
D Replace the Refill Assembly ' Page 8-55.
D Replace the Electronics Module ' page 8-6.
Only replace one component at a time and
check if the error has gone before replacing
another component. Using this procedure
you will be able to determine exactly which
component failed.
2-22 System Error Codes
HP DesignJet CP Series Printers
Page 58

System Error: 020003
Problem Description: Error in finding the Refill Stepper Motor home
position.
Corrective Action: Try the following:
D Perform the Refill Calibration ' page 5-9.
D Make sure that there are no obstacles in the
Refill path.
D Make sure that the Refill Interconnect Cable
(the black cable that connects the Refill
Assembly and Elevator to the Electronics
Module) is correctly connected to the
Electronics Module.
D Make sure that the cables for the Refill
Stepper Motor and Sensor are correctly
connected to the Refill Interconnect PCA.
D Make sure that the Refill stepper motor is
NOT shorted.
D Replace the Refill Interconnect cable '
Page 8-87.
D Replace the Refill Interconnect PCA ' Page
8-64.
D Replace the Refill Assembly ' Page 8-55.
D Replace the Electronics Module ' page 8-6.
Only replace one component at a time and
check if the error has gone before replacing
another component. Using this procedure
you will be able to determine exactly which
component failed.
System Error Codes
HP DesignJet CP Series Printers
2-23
Page 59

System Error: 020004
Problem Description: Error in finding the Service Station home
position.
Corrective Action: Try the following:
D Make sure that the Service Station flag is
installed correctly ' page 8-26.
D Make sure that the Service Station nut is
installed correctly. The nut is located on the
front side of the Service Station, just below the
Printhead Cleaner holder.
D Make sure that the Service Station
Interconnect Cable (the black cable that
connects the Service Station to the Electronics
Module) is correctly connected to the
Electronics Module.
D Make sure that the cables for the Service
Station components are correctly connected to
the Service Station Interconnect PCA.
D Make sure that the Service Station stepper
motors are NOT shorted.
D Replace the Service Station interconnect cable
' Page 8-26.
D Replace the Service Station Assembly '
page 8-26.
D Replace the Electronics Module ' page 8-6.
Only replace one component at a time and
check if the error has gone before replacing
another component. Using this procedure
you will be able to determine exactly which
component failed.
2-24 System Error Codes
HP DesignJet CP Series Printers
Page 60

System Error: 020005
Problem Description: Elevator has problem reaching a desired position.
Corrective Action: Try the following:
D Make sure that there are no obstacles in the
Elevator path. Check if the ink cartridges are
installed correctly on the Elevator.
D Make sure that the Refill Interconnect Cable
(the black cable that connects the Refill
Assembly and Elevator to the Electronics
Module) is correctly connected to the
Electronics Module.
D Make sure that the cables for the Elevator
Stepper Motor and Sensor are correctly
connected to the Refill Interconnect PCA.
D Make sure that the Elevator stepper motor is
NOT shorted.
D Replace the Refill interconnect cable '
Page 8-87.
D Replace the Refill Interconnect PCA ' Page
8-64.
D Replace the Elevator Assembly ' Page 8-52.
D Replace the Electronics Module ' page 8-6.
Only replace one component at a time and
check if the error has gone before replacing
another component. Using this procedure
you will be able to determine exactly which
component failed.
System Error Codes
HP DesignJet CP Series Printers
2-25
Page 61

System Error: 020006
Problem Description: The refill position in the Y-axis is not calibrated.
Corrective Action: Perform the Refill Calibration ' Page 5-9.
System Error: 020010
Problem Description: Problem with fine movement of the Y-axis motor.
Corrective Action: Try the following:
D Switch the printer OFF and ON again and
check if the error code disappears. If the error
code disappears, do NOT try to
troubleshoot any further.
D Check that the Encoder Strip is NOT damaged
or dirty. If necessary, clean the encoder strip,
or if damaged, replace the Encoder Strip '
Page 8-32.
D Clean and lubricate the slider rods.
D Replace the Y-axis Motor Assembly ' Page
8-45.
D Replace the Tensioner Holder Assembly (with
spring) ' Page 8-39.
D Replace the Y-axis belt ' Page 8-39.
D Replace the Carriage Assembly ' page 8-42.
Only replace one component at a time and
check if the error has gone before replacing
another component. Using this procedure
you will be able to determine exactly which
component failed.
2-26 System Error Codes
HP DesignJet CP Series Printers
Page 62

System Error: 020011
Problem Description: Error during initialization of the Y-axis.
Corrective Action: Try the following:
D Switch the printer OFF and ON again and
check if the error code disappears. If the error
code disappears, do NOT try to
troubleshoot any further.
D Check that the Encoder Strip is NOT damaged
or dirty. If necessary, clean the encoder strip,
or if damaged, replace the Encoder Strip '
Page 8-32.
D Clean and lubricate the slider rods.
D Replace the Y-axis Motor Assembly ' Page
8-45.
D Replace the Tensioner Holder Assembly (with
spring) ' Page 8-39.
D Replace the Y-axis belt ' Page 8-39.
D Replace the Carriage Assembly ' page 8-42.
Only replace one component at a time and
check if the error has gone before replacing
another component. Using this procedure
you will be able to determine exactly which
component failed.
System Error: 040xxx
Problem Description: MIO Card Error
Corrective Action: Try the following:
D Press ENTER and switch the printer OFF.
Make sure the MIO card is installed correctly
and switch the printer ON again. If this error
code continues to appear then replace the MIO
Card.
D If the system error continues to appear after
replacing the MIO card, then replace the
Electronics Module ' page 8-6.
System Error Codes
HP DesignJet CP Series Printers
2-27
Page 63

System Error: 040601
Problem Description: The MIO card does not support the MIO 6 protocol.
Cards with version 5 or below can not be used with
this plotter. Version 5.1 cards behave as expected
but do not support PML instructions. Install the
latest version.
Corrective Action: Install the latest version of the MIO Card.
System Error: 050000
Problem Description: The Line Sensor has problems finding the Mark
Encoder.
Corrective Action: Try the following:
D Clean the Mark Encoder if necessary.
D Make sure the Line Sensor is installed and
connected correctly.
D Perform the Service Accuracy Calibration '
Page 5-17.
D Replace the lens cover which is installed on the
line sensor.
D Replace the Trailing Cable ' Page 8-36.
D Replace the Carriage Assembly ' Page 8-42.
D Replace the Electronics Module ' page 8-6.
Only replace one component at a time and
check if the error has gone before replacing
another component. Using this procedure
you will be able to determine exactly which
component failed.
2-28 System Error Codes
HP DesignJet CP Series Printers
Page 64

System Error: 060000
Problem Description: The Line Sensor is not functioning properly because
there is too much ambient light.
Corrective Action: Try the following:
D Close the Window if it is open.
D Move the printer to a location with less light.
The Printer MUST be kept away from direct
intense sunlight or a spotlight.
D Replace the Trailing Cable ' Page 8-36.
D Replace the Carriage Assembly ' Page 8-42.
D Replace the Electronics Module ' page 8-6.
Only replace one component at a time and
check if the error has gone before
replacing another component. Using this
procedure you will be able to determine
exactly which component failed.
System Error: 060100
Problem Description: Incorrect Line Sensor type in the EEROM.
Corrective Action: Try the following:
D Calibrate the Line Sensor ' page 5-10.
D Clear the EEROM ' page 4-32 and perform all
the calibrations again.
D Replace the Electronics Module ' page 8-6 and
perform all the calibrations again.
System Error: 060200
Problem Description: Incompatible Firmware and Carriage PCA.
Corrective Action: Upgrade the Firmware.
System Error Codes
HP DesignJet CP Series Printers
2-29
Page 65

System Error: 060300
Problem Description: Incompatible Firmware and Line Sensor.
Corrective Action: Upgrade the Firmware.
System Error: 060400
Problem Description: Incompatible Carriage PCA and Line Sensor OR
Line Sensor not calibrated after replacing
Carriage Assembly.
Corrective Action: Try the following:
D Calibrate the Line Sensor ' page 5-10.
D Replace the Carriage Assembly ' page 8-42.
System Error: 060500
Problem Description: Line Sensor not calibrated.
Corrective Action: Calibrate the Line Sensor ' page 5-10.
System Error: 07xxxx XXXXXXXX
Problem Description: Firmware Error.
Corrective action: Make sure you have the latest version of the Flash
SIMM (firmware) installed or upgrade the
firmware revision of the Flash SIMM ' page 1-3.
If the error code remains after installing the latest
Flash SIMM then report the error to the HP
Response Center or the nearest HP Support
Office, stating the following information:
D Model and Serial Number of the printer.
D the complete error number (07xxxx
XXXXXXXX).
D service print (Utilities / Service Tests).
D plot file where the error has occurred.
D additional comments about the usage, the
setting, etc..
2-30 System Error Codes
HP DesignJet CP Series Printers
Page 66

HP DesignJet 2500CP/3500CP only
System Error: 08xxxx
Problem Description: PostScript Error.
Corrective Action: Make sure you have the latest version of the Flash
SIMM (firmware) installed or upgrade the
firmware revision of the Flash SIMM ' page 1-3.
If the error code remains after installing the latest
Flash SIMM then report the error to the HP
Response Center or the nearest HP Support
Office, stating the following information:
D Model and Serial Number of the printer.
D the complete error number.
D service print (Utilities / Service Tests).
D plot file where the error has occurred.
D additional comments about the usage, the
setting, etc..
HP DesignJet 2500CP/3500CP only
System Error: 080001
Problem Description: Hard Disk Drive installed without PostScript.
Corrective Action: Install the PostScript SIMM in the 2nd slot from
the left in the Electronics Module.
System Error Codes
HP DesignJet CP Series Printers
2-31
Page 67

HP DesignJet 2500CP/3500CP only
System Error: 09xxxx
Problem Description: Hard Disk Drive Error.
Corrective Action: Try the following:
D Switch the printer OFF and ON again.
D If the Error Code appears again then check
that the Hard Disk data cable is correctly
connected at both ends. Also check that the
Hard Disk Power Cable is correctly connected.
D Replace the Hard Disk data cable ' page 8-12.
D If the Error Code continues to appear, then
replace the Hard Disk ' page 8-12.
HP DesignJet 2500CP/3500CP only
System Error: 090004
Problem Description: PostScript installed without the Hard Disk Drive.
Corrective Action: Install the Hard Disk Drive in to the Electronics
Module ' page 8-12.
HP DesignJets 2500CP and 2000CP with firmware version A.02.14
or higher and HP DesignJets 3500CP and 3000CP only
Error Message: Ink System Error XX-YYYY
Ink Delivery System errors are identified by code numbers composed of 2
digits plus 4 additional digits, like this: XX-YYYY. These digits mean:
D XX is the proper code between 01 and 98
D YYYY indicates which ink system is affected. Each Y represents one
color in the order YCMK (as installed in the Carriage) and can be either:
D 0 - if the error DOES NOT apply to that color.
D 1 - if the error DOES apply to that color.
The error codes (XX) are codified following these rules:
D A bigger number means higher severity of the error.
2-32 System Error Codes
HP DesignJet CP Series Printers
Page 68

Each X can be a digit from 0 to 9.
The 1st digit is the severity and the main cause of the error. Codes (XX)
that are below 50 correspond to ignorable errors (currently they are not
displayed).
1st Digit
Cause of Error
9 Missing Ink Systems
8 Mixed Ink Systems
7 Removed Components
6 Electrical Problem
5 Logical Problem (Incorrect Ink System)
3 Alignment Error
2 Printhead Check Error
1 Other errors
The 2nd digit indicates the component causing the error or the secondary
source of the error. Ignore (when possible) a “0” or “1” in the 2nd X if the
optional YYYY is present (because it is coded with these digits).
1st Digit
Component Causing Error
0 Media
1 LED or Lens Cover
2 Ink Cartridge
3 Head Cleaner
4 Printhead
5 Thermal Shutdown
6 Bad Printhead Initialization
7 Continuity Error
8 Ink Delivery System (the whole kit
System Error Codes
potentially affected)
HP DesignJet CP Series Printers
2-33
Page 69

3
User Messages
HP DesignJet CP Series Printers
3-1
Page 70

User Messages for HP DesignJets 2500CP and 2000CP
with Firmware Version A.02.14 or Higher and HP
DesignJets 3500CP and 3000CP
NOTE FOR HP DESIGNJETS 2500CP AND 2000CP: IF YOU HAVE
ANY USER MESSAGES WHICH ARE NOT LISTED IN THIS
CHAPTER, THEN CHECK WHICH FIRMWARE VERSION IS
INSTALLED IN THE PRINTER, AND IF NECESSARY UPGRADE TO
FIRMWARE VERSION A.02.14 OR HIGHER.
This is a list of the messages in the front–panel display. If an action is
needed, it is shown in italics in the Explanation and Action column. The
messages are listed in alphabetical order, except that the STATUS messages
follow all other messages.
Message Explanations and Actions
Message Explanation and Action
Accessing head
cleaners
Accessing
printheads
Action unavailable
Entry being printed
Calibrate error
Continue →
Calibrate Yes →
Color Νο →
The printer is moving the platform that contains the printhead cleaners to a place
where you can access them.
Wait for a few seconds until this operation has finished.
The printer is moving the carriage that contains the printheads to a place where
you can access them.
Wait for a few seconds until this operation has finished.
A print is being printed and you have requested to move, delete or modify the
number of copies through the queue management menu. You cannot change the
current entry until the print has finished.
Wait until the print has finished.
The calibration print was loaded incorrectly and it could not be measured.
Press ↓ to continue, then reload the print for measurement. Follow front panel
instructions.
You are using sheet media and color calibration is on. The printer is asking you if
you want to calibrate the color for the loaded media.
Press ↑ for yes.
↓ for no.
Press
3-2 User Messages
HP DesignJet CP Series Printers
Page 71

Message Explanation and Action
Calibration done
Continue →
Cancelled
Continue →
Check JJ-J
Close right door
Check ink
cartridges
JJ-J Abort →
Check ink system→
Ignore →
Accuracy calibration is complete.
Press ↓ to continue.
You have just cancelled the last print or function.
Press ↓ to continue.
The printer has detected an error in the printhead cleaners indicated by the stars.
Reseat (do not replace) the indicated cleaners. When you have done so, close the
right door of the printer.
The printer has detected an error in the cartridges indicated by the empty squares.
Reseat (do not replace) the indicated cartridges or press the ↓ key to terminate
the procedure. In that case, you will not be able to print, and you may later
resume checking the ink system by pressing the Replace Ink System button.
After an error has been detected in the ink system, you are given the chance to
check it.
Press ↑ to check the ink system right now. The printer will indicate which ink
systems are affected.
Press ↓ to ignore the error and continue printing. In this case the image quality
cannot be assured.
Check printheads
JJ-J Abort →
Close left door to
continue
Close roll cover
Continue →
Close window to
continue
Create pattern →
Measure pattern →
Disk error
Continue
→
The printer has detected an error in the printheads indicated by the empty
squares. The printhead can be replaced, but you should replace all components of
the failing ink systems as soon as possible.
Reseat (do not replace) the indicated printheads or press the ↓ key to terminate
the procedure. In that case, you will not be able to print, and you may later
resume checking the ink system by pressing the Replace Ink System button.
You opened the left door while the printer was busy, or you have finished
installing the ink cartridges.
Close the left door to continue.
Rewind the media to take up any slack in the roll, close the roll cover, then press
↓ to continue.
You have finished installing the printheads.
Close the window to continue.
Press ↑ to create the pattern for automatic calibration.
Press ↓ to measure the pattern for automatic calibration.
(HP DesignJet 2500CP/3500CP only) An error on the hard disk has been detected.
Press ↓ to continue.
User Messages
HP DesignJet CP Series Printers
3-3
Page 72

Message Explanation and Action
Edge not found
Reload media
Error processing job
Flushing rest of
job→
Fatal disk error
Continue →
Head cleaner full
JJ-J →
The printer could not find edge of media during loading procedure.
Check the leading edge of the media for unevenness or tears; cut a straight edge,
if necessary , and reload. Be sure to position the right edge along the perforated
line on the entry platen when loading.
An error was encountered while the print was being processed. The print has
been lost.
Press ↓ to delete the print.
(HP DesignJet 2500CP/3500CP only) An error on the hard disk has been detected.
Press ↓ to continue. Retry the operation by cycling the power. If the problem
persists, Replace the Hard Disk Drive.
Either: After finishing printing, the printer has detected that one or more of
the printhead cleaners are full of ink. The squares that are flashing indicate
the head cleaners that are full.
Press ↓ to continue. The message [Check ink system → / Ignore → {is displayed.
If you press ↓ again to continue, you may still be able to print again, but the ink
in the head cleaner may overflow and the print quality of your images may be
affected. To fix the problem, select ↑ to check the ink system.
Or: In the ink system replacement process, one or more of the printhead cleaners
have not been replaced at the same time as the corresponding printheads. The
squares that are flashing indicate the head cleaners that are full.
Head cleaner ink
may overflow →
Head cleaner
removed
JJ-J →
Press ↓ to continue. You may still be able to print again, but image print quality
may be affected, as indicated by a subsequent message.
One or more of the printhead cleaners are full of ink, and the ink may overflow.
Press ↓ to continue. Image print quality may be affected, and ink may leak
inside the printer and damage it. Replacement of the ink systems affected is
recommended.
The printer has detected that one or more printhead cleaners have become
dislodged or the printer cannot detect them, as indicated by the flashing
squares. Printing is disabled.
Press ↓ to check the failing head cleaner. You should reseat the head cleaners
immediately. If this does not solve the problem, you will have to replace
the entire ink system (printhead, printhead cleaner, and ink cartridge)
using the Replace Ink System key.
If you don’t correct the error now, you will see the status message “Ink
system error”.
3-4 User Messages
HP DesignJet CP Series Printers
Page 73

Message Explanation and Action
Image quality not
assured
Imaging inks
YES
→
→
installed ΝΟ →
Incorrect ink system
JJ-J→
This message appears after the printer finds an error in the ink system. One or
more of the ink systems have passed their specified life, one or more of the
printhead cleaners are full of ink, or one or more of the printheads has failed an
electrical test, or an alignment or nozzle check.
Press ↓ to continue. You may continue printing, but you may not get your
usual image print quality.
After you have finished installing a new ink cartridge, you are asked to confirm
that you have changed the type of ink cartridges from UV Pigmented to Imaging.
Press ↑ to confirm that you have changed the ink cartridges from UV Pigmented
to Imaging.
Press ↓ to indicate that you have not changed the ink cartridges from UV
Pigmented to Imaging. You will then be given the opportunity of replacing the
incorrect ink cartridges by the correct ones.
After you used the Replace Ink System procedure, which was cancelled by a
time–out or aborted; the printer has detected that one or more of the ink systems
are still faulty or have not been fully replaced, as indicated by the flashing
squares. This message also appears if the printer believes that a component is
incorrect; you must then confirm that the ink system is indeed correct, or rectify
the error.
Press ↓ to continue, to replace the ink systems. Printing will be disabled. You
should replace the faulty ink systems immediately.
Initializing
new ink system
Ink cartridge
removed
JJ-J→
If you don’t correct the error now, you will see the status message “Ink
system error”
In the ink system replacement process, you have swapped an Imaging ink system
for a UV Pigmented ink system, or vice versa. The printer will reinitialize and
prepare to print with the new ink system. (This message only applies to firmware
revision levels A.02.08 or higher.)
Wait until the new ink system has been initialized.
The printer has detected that one or more ink cartridges have been removed or
cannot be detected, as indicated by the flashing squares.
Press ↓ to check the failing ink cartridge. Printing has been disabled. You should
reseat the ink cartridge immediately. If this does not solve the problem, you
will have to replace the entire ink system (printhead, printhead cleaner,
and ink cartridge) using the Replace Ink System key.
If you don’t correct the error now, you will see the status message “Ink
system error”.
User Messages
HP DesignJet CP Series Printers
3-5
Page 74

Message Explanation and Action
Ink cartridge valve
out
JJ-J→
Ink system at end of
life
JJ-J→
Ink system at end of
life. Retry→
INK SYSTEM
ERROR
xx-xxxx
The printer has detected that one or more of the ink cartridge valves (as indicated
by flashing squares) has popped out during refilling.
Press ↓ to check the failing ink cartridge. You should reseat the valves
immediately
. If this does not solve the problem, you will have to replace
the entire ink system (printhead, printhead cleaner, and ink cartridge)
using the Replace Ink System key.
The printer has found that an earlier “Out of ink” error has not been
corrected. One or more components of the ink system, as indicated by
flashing squares, have reached the end of their intended lives. You should
now replace all three components of those ink systems affected (the
printheads, the printhead cleaners and the ink cartridges).
Press ↓ to continue. Image print quality may be affected. Replacement of
the ink systems affected is recommended.
The printer has detected that one or more components of the ink system have
reached the end of their intended lives. You should now replace all three
components of those ink systems affected (the printheads, the printhead
cleaners and the ink cartridges).
Press ↓ to replace the erroneous ink systems.
The printer has detected an error in the ink system, as shown in earlier messages.
Printing will be disabled until the error has been corrected. If more than one error
is pending, the one with the highest number, corresponding to the most severe
error, will be displayed.
Possible error codes (xx-xxxx) are:
• 58.... See the message “Incorrect ink system”
• 65.... or 66.... See the message “Printhead failure”
• 67.... See the message “Printhead contact error”
• 72.... See the message “Ink cartridge removed”
• 73.... See the message “Head cleaner removed”
• 74.... See the message “Printhead removed”
• 88.... See the message “Mixed ink system”.
Press the Replace Ink System key to replace the erroneous ink systems in or der
to print with your printer again.
Press the Enter key to access the main front panel menus.
FOR FURTHER INFORMATION REFER TO INK SYSTEM ERROR
XX-YYYY IN CHAPTER 2.
Install complete Ink system replacement has been completed successfully.
Resume normal operations.
3-6 User Messages
HP DesignJet CP Series Printers
Page 75

Message Explanation and Action
Lift lever after
aligning
Lift lever to
continue
Load arrow edge
print side down
Load cancelled
Remove media
Load error
Remove media
Load media for
calibration
Load media
to align printheads
Load media to
check printheads
You have lowered the media lever to align the media with the entry platen.
Lift the lever at the right edge of the paper path on the printer when you’ve
finished aligning the roll media as instructed.
The media lever was lowered while the processor was busy.
Lift the lever at the right edge of the paper path on the printer.
Remove the accuracy calibration print, turn it so that the edge with the arrows
printed on it is print–side down, then load that edge into the printer.
The Cancel key was pressed while media loading was in progress.
Remove media.
Media was inserted with the media lever raised.
Lower the lever and reload the media.
Load media to proceed with calibration.
Load media to proceed with printhead alignment.
The printer is telling you to load media so it can perform the printhead check.
Load media to proceed with printhead check.
Load sheet for
calibration
Lower lever Lower the lever at the right of the printer.
Lower lever
Remove media
Lower window
to continue
Media too small You may have sent a print file that is too lar ge for the media loaded; the print
User Messages
The printer is ready to perform the accuracy calibration procedure, but media is
not present.
Load media to continue.
Lower the lever at the right of the printer and remove the media.
The window was opened while the printer was busy.
Close the window to continue.
may be clipped.
Press Cancel if the media is unsuitable, and reload with appropriate media.
HP DesignJet CP Series Printers
3-7
Page 76

Message Explanation and Action
Media too small for
calibration
MIO error
Communication
break
MIO error
handshake
Mispositioned
Reload roll
→
The media you loaded for printhead alignment or a printhead check is too small.
The procedure has been cancelled. You may continue printing without calibrating
the printer, but the image quality is not assured.
Press ↓ to continue. If you want to complete the interrupted procedure, reload
with appropriate media (A3–size paper or larger, in landscape orientation) and
redo the procedure:
• Use Image quality / Printhead service / Align now for printhead
alignment.
• Use Image quality / Printhead service / Printheads check / Now for a
printhead check.
The flow of data from the computer to the printer stopped prematurely (for
example, the computer may have been shut down before all data was sent).
Press Enter to clear the message from the front panel display.
You configured the modular interface incorrectly.
Press the Enter key to clear the message from the front panel. Check the
handshake settings in the printer’s front panel, in the hardware configuration,
and in your application software configuration to make sure they are
compatible with one another.
The roll media is mispositioned.
Remove and reload the roll.
Mispositioned
Reload sheet
MISSING INK
SYSTEM
Install→
Mixed ink system
-JJJ→
The sheet media is mispositioned.
Remove and reload the sheet.
One or more ink systems are missing.
Press ↓ or the Replace Ink System key to install the ink systems in order to
print with your printer.
At power–on or after the ink systems have been serviced, the printer has detected
components of different ink system types (for example, Imaging and UV
Pigmented). Printing will be disabled until the ink systems are all of the same
type. The flashing squares indicate which ink systems need checking. The error
may be because
the printhead, printhead cleaner and ink cartridge within an
ink system are not all of the same type (UV Pigmented or Imaging) or that
entire ink systems are of different types.
Press ↓ to continue, to check the ink systems.
3-8 User Messages
HP DesignJet CP Series Printers
Page 77

Message Explanation and Action
MIXED INK
SYSTEM
88xxxx
No code for UV
inks
Continue→
Open left door to
access ink cartrg.
Open right door to
access head cleaners
The printer has earlier detected components of different ink system types (for
example, Imaging and UV Pigmented). Printing will be disabled until the ink
systems are all of the same type. The error code “88xxxx” indicates a mixed ink
system error.
Press the Replace Ink System key to replace the erroneous ink systems in or der
to print with your printer again. You can press the Enter key to access the main
front–panel menu.
The printer does not have the correct firmware for the HP DesignJet CP ink
system UV currently installed. (This message only applies to firmware revision
levels A.01.xx.)
Press ↓ to continue, and reinstall the HP DesignJet CP Ink System (Imaging ink
system) back into the printer.
Access the menu Utilities / Statistics / Code rev to confirm the firmware revision
present. If you have a code revision like A.01.xx, you need to upgrade your
firmware to code revision A.02.08 or higher to use the HP DesignJet CP Ink
System UV.
You are doing an ink system replacement.
Open the left door to access the ink cartridges.
You are doing an ink system replacement.
Open the right door to access the printhead cleaners.
Open window to
access printheads
Out of disk space
Data was lost
OUT OF INK
JJ-J→
Out of memory
Data was lost
Press ENTER when
done
You are doing an ink system replacement.
Open the window to access the printheads.
(HP DesignJet 2500CP/3500CP only) The current print file is too large for the
printer’s memory.
Try lowering the resolution of the file you are attempting to print, or otherwise
reducing its complexity.
The printer has detected that the amount of ink in the ink systems indicated
by one or more flashing squares, is below acceptable limits for satisfactory
printing.
Press ↓ to check the indicated ink systems.
The current file is too large for the printer’s memory; the printer has run out of
disk space for processing the file.
To print files of this size, you may need to install more memory to your printer.
The printer is waiting for you to confirm an action or selection.
When you have taken the appropriate action press the Enter key.
User Messages
HP DesignJet CP Series Printers
3-9
Page 78

Message Explanation and Action
Printhead alignment
cancelled
→
Printhead alignment
error JJ-J→
or
Printhead alignment
error →
The printhead alignment procedure has failed, or the printer has detected a fault
that stops the procedure from completing. Subsequent messages will explain the
error further:
D “Replacement of lens cover recommended” - You should check the section on
replacing lens covers in the User’s Guide.
D “Media too small for calibration” - The roll that is loaded is not wide
enough for the calibration to be done. It must be at least A3 size. You should
load appropriate media and repeat the procedure again, using Image Quality
/ Printhead Service / Align Now. If you use sheet media that is too small, the
printer will reject the media and prompt you to load new media.
Press ↓ to continue.
You may continue printing, but you may not get your
usual image print quality.
The printhead alignment procedure has failed, or the printer has detected a fault
that stops the procedure from completing. The squares that are flashing indicate
the ink systems that have failed. If the message contains no squares, the
procedure has failed because of a problem that is not related to specific
printheads, for example, a problem with the media.
Press ↓ to continue. The message Check ink system → / Ignore→should be
displayed. If you press ↓ again to continue, you may still be able to print again,
but image print quality may be affected. To fix the problem, select ↑ to check the
ink system.
Printhead check
cancelled→
The printhead check procedure has failed, or the printer has detected a fault that
stops the procedure from completing. Subsequent messages will explain the error
further:
D “Replacement of lens cover recommended” - You should check the section on
replacing lens covers in the User’s Guide.
D “Media too small for calibration” - The roll that is loaded is not wide
enough for the check to be done. It must be at least A3 size. You should load
appropriate media and repeat the check again, using Image Quality /
Printhead Service / Printheads Check / Now. If you use sheet media that is
too small, the printer will reject the media and prompt you to load new
media.
Press ↓ to continue.
You may continue printing, but you may not get your
usual image print quality.
3-10 User Messages
HP DesignJet CP Series Printers
Page 79

Message Explanation and Action
Printhead check
error
JJ-J →
or
Printhead check
error →
Printhead contact
error JJ-J→
The message “Printhead check error” may be displayed if:
D You are using colored media. Either disable checking or use media that is
clean, white, and opaque.
D There are dirty nozzles on the printhead. Replace your ink system. Do not
attempt to clean the nozzles.
The squares that are flashing indicate the ink systems that have failed. If the
message contains no squares, the procedure has failed because of a problem that
is not related to specific printheads, for example, a problem with the media.
Press ↓ to continue. The message Check ink system → / Ignore → will be
displayed. If you press ↓ again to continue, you may still be able to print again,
but image print quality may be affected. To fix the problem, select
↑ to check the
ink system.
The printheads, indicated by flashing squares, have failed to function because of
an unusual electrical signal from the printhead. The most likely cause of this
message is that the electrical contacts on the printhead or printer carriage are
dirty and need cleaning.
Press the ↓ key to check the printheads. Open the window when indicated, and
remove the printheads indicated.
Look at the electrical contacts on the printhead and carriage. If they are
dirty, they should be cleaned.
CAUTION:
Printhead failure
JJ-J→
Do not touch, wipe, or attempt to clean the printhead nozzles. This can
damage the printhead. Handle the ink systems with care.
If you don’t correct the error now, you will see the status message “Ink
system error”.
The printheads indicated by flashing squares have failed, either during printhead
initialization or during printing. The printer may have detected an unusual
electrical or thermal signal from the printhead that may require attention. The
most likely causes of this message are:
D The ink cartridge is empty. If this is so, your ink system has reached the
end of its normal life, and you will need to buy a new ink system to
replace the old one.
D There has been a problem inside the printhead that has caused it to fail, for
example, the printhead has overheated.
You should replace the indicated ink systems immediately.
Press the ↓ key to check the printheads. Open the window when indicated, and
remove the printheads indicated. Try reseating the printhead.
If you don’t correct the error now, you will see the status message “Ink
system error”.
User Messages
HP DesignJet CP Series Printers
3-11
Page 80

Message Explanation and Action
Printhead removed
JJ-J→
The printer has detected that one or more printheads have become dislodged or
the printer cannot detect them, as indicated by the flashing squares.
Press ↓ to continue. You should reseat the printheads immediately or replace the
ink system.
If you don’t correct the error now, you will see the status message “Ink
system error”.
Printing
disabled
→
The printer cannot print, because of errors previously notified.
Press ↓ to continue. Then press the Replace Ink System key to replace the
erroneous ink systems in order to print with your printer again.
Pull ↓
Align ↔ edges to
roll
Reload media There was an error loading the media and the printer has ejected it. The printer is
Reload sheet Sheet media was loaded skewed and the printer ejected it.
You are aligning roll media.
Grasp the left and right free edges of the roll media and pull them towards you
until the media is taut. At the same time, align the left and right edges of the
media so that they are flush with the left and right edges of the roll.
waiting for you to reload the media.
Reload the media.
Reload the sheet.
Remove all
ink cartridge(s)
Remove all
printheads
Remove head
cleaners
Close right door
Remove media The ink is dry.
Remove media
Lift lever
You have selected the option Utilities / Transport mode of the front-panel
menu, and opened the left door when instructed.
The printer is instructing you to remove all the ink cartridges.
You have selected the option Utilities / Transport mode of the front–panel
menu, and lifted the window when instructed.
The printer is instructing you to remove all the printheads.
You have selected the option Utilities / Transport mode of the front–panel
menu, and opened the right door when instructed.
The printer is instructing you to remove all the printhead cleaners, and then close
the right door.
Remove the accuracy calibration print that has just been produced.
Press ↓ to continue with accuracy calibration.
An attempt to load media was made while the media lever was lowered.
Remove the media, lift the lever, and reload media with the lever up.
3-12 User Messages
HP DesignJet CP Series Printers
Page 81

Message Explanation and Action
Replace ink
cartridge(s)
JJJ-
Replace lens cover
Continue→
Replace
printhead(s)
JJ-J
Replace
printhead(s)
Close window
Replace JJJ-
Close right door
You are in the ink system replacement process, and opened the left door when
instructed.
The printer is waiting for you to replace the ink cartridges indicated by flashing
squares.
You are in the ink system replacement process, and lifted the window when
instructed.
The printer is waiting for you to replace the lens cover on the printhead carriage
with a new one. Spare lens covers are inside the right door. Press ↓ to continue
when you have completed the lens replacement.
You are in the ink system replacement process, and lifted the window when
instructed.
The printer is waiting for you to replace the printheads indicated by flashing
squares.
You are in the ink system replacement process, and lifted the window when
instructed.
The printer is waiting for you to replace a printhead, or you can close the
window without making any changes.
You are in the ink system replacement process, and opened the right door when
instructed.
Replacement of ink
system
recommended→
Replacement of lens
cover
recommended→
Resource area full
Unable to save res.
The printer is waiting for you to replace the printhead cleaners indicated by *s,
and then close the right door.
You are about to finish the ink system replacement process, and the printer
recommends replacing one or more of the four ink systems (for example, because
they have passed their specified life).
Press the ↓ key to continue. You will see the status message ILow on inkI. Then
press the Replace Ink System key to replace the ink systems that will be
indicated.
The printhead alignment procedure, or the printhead check procedure, or a
calibration check has failed because the lens cover is dirty and needs replacing.
Printing may continue but the image quality is not assured.
Press ↓ to continue. Replace the lens cover. Spare lens covers are inside the right
door.
(HP DesignJet 2500CP/3500CP only) The printer’s hard disk is full. You are
attempting to save resources. The printer is unable to process the request.
You need to remove some of the resources from the hard disk, for example, saved
print files, halftones, or fonts that you don’t use. Then try saving the resource
again.
User Messages
HP DesignJet CP Series Printers
3-13
Page 82

Message Explanation and Action
Roll empty
Load new roll
Roll misaligned
Reload roll
Set transport→ Yes
Mode→ Νο
Sheet load→
Roll load→
Sheet misaligned
Reload sheet
Sheet required
for calibration
Sheet / Roll?
Reload media
You have used all of the media roll.
Load a new roll of media.
Roll media is skewed.
Reload media.
You have selected transport mode in the front–panel menu. The printer is waiting
for you to accept or reject the transport mode. Accepting transport mode starts
the process of removing all ink systems.
Press ↑ to accept or press ↓ to reject.
Press ↑ to load sheet media.
Press ↓ to load roll media.
Sheet media is skewed.
Remove it and reload it so that the left and right edges being loaded into the
printer are square. The leading edge must also be straight.
You have started an accuracy calibration check but media is not present.
Load media.
Either: Sheet mode was chosen while loading roll media.
Reload media.
Or: a sheet more than 51 inches (130 cm) long was loaded.
Trim the sheet and reload.
Switch power off You have selected the transport mode shut-down sequence. The printer is waiting
for you to turn the power switch, on the rear of the printer, to OFF.
Switch OFF the printer.
Switch power off
Check paper path
Switch power off
Check printhead
path
System Error
060000
The printer may be jammed with media.
Turn OFF the printer. Check the media path and clear it if necessary. Then turn
on the printer.
The printhead carriage cannot move. The printer may be jammed with media.
Turn OFF the printer. Check the media path and clear it if necessary. Then turn
ON the printer.
The ambient light level in the area of your printer is too bright and is causing the
optical sensor in your printer to malfunction.
Reduce the ambient light level or move the printer to a location where the light
level is lower.
3-14 User Messages
HP DesignJet CP Series Printers
Page 83

Message Explanation and Action
System error
XXXXXX
System error
XXXXXX
XXXXXXXX
UV inks YES→
installed ΝΟ→
Verify ink system
JJ-J→
An internal error has occurred and a system error number is displayed.
Press Enter; this may clear the error and allow you to continue. If you
cannot continue, turn off the printer, and then turn it on again. If you still
see the system error message then refer to Chapter 2 for more information.
An internal error has occurred and a system error number is displayed.
Press Enter; this may clear the error and allow you to continue. If you
cannot continue, turn off the printer, and then turn it on again. If you still
see the system error message then refer to Chapter 2 for more information.
After you have finished installing a new ink cartridge, you are asked to confirm
that you have changed the type of ink cartridges from Imaging to UV Pigmented.
Press ↑ to confirm that you have changed the ink cartridges from Imaging to UV
Pigmented.
Press ↓ to indicate that you have not changed the ink cartridges from Imaging to
UV Pigmented. You will then be given the opportunity of replacing the incorrect
ink cartridges by the correct ones.
At power-on, the printer has detected an error in the ink systems shown by
flashing squares.
Press ↓ to continue. You should check the ink systems immediately.
STATUS Messages
Message Explanation and Action
STATUS
Accessing head
cleaners
STATUS
Accessing printheads
STATUS
Aligning printheads
User Messages
You have pressed the Replace Ink System key or there is an error in the head
cleaners and you have pressed ↑ or ↓. The carriage is moving so that you can
access the printhead cleaners.
Wait until the carriage is in position.
You have pressed the Replace Ink System key or there is an error in the
printheads and you have pressed ↑ or ↓. The carriage is moving out so that
you can access the printheads.
Wait until the carriage is in position.
The printer is printing a pattern to align the printheads.
Wait until the pattern has been printed.
HP DesignJet CP Series Printers
3-15
Page 84

Message Explanation and Action
STATUS
Calibrating
STATUS
Calibrating color
STATUS
Calibrating printhds
STATUS
Cancelling
STATUS
Check pending
STATUS
Checking ink system
The printer is performing the accuracy calibration check.
Wait until the printer has finished the check.
(HP DesignJet 2500CP/3500CP only) The printer is performing a color calibration.
Wait until the printer has finished calibrating.
The printer is performing an internal printhead calibration.
Wait until the printer has finished calibrating.
The Cancel key has been pressed and the printer is in the process of cancelling a file
or procedure.
Continue when this message is no longer displayed.
The right door has been opened while the printer was busy (for example, printing)
and the printer is waiting to check the ink system. You may have done something
that will affect image print quality.
Do not open any door or window on the printer when not instructed and it is busy.
The printer is verifying that the ink system was correctly installed, or that all the
components are present after any door or window on the printer has been opened.
Wait until the check is complete.
STATUS
Checking media
STATUS
Checking printheads
STATUS
Creating pattern
STATUS
Head cleaner(s) full
STATUS
Initializing
STATUS
Ink drying (xx m xx
s)
The printer is checking to see if media is correctly positioned with respect to the
perforated line of the entry platen.
Wait until the check is complete.
The printer is printing a pattern to test the printheads.
Wait until the check is complete.
The printer is performing an accuracy calibration.
Wait until the calibration is complete.
One or more of the printhead cleaners are full of ink. The printer will continue printing
but image quality may be affected, and ink may leak inside the printer and damage it.
Press the Replace Ink System key to replace the ink systems affected.
The printer is doing an internal check on power–up.
Wait until the printer has finished initializing.
The ink on your print is drying.
Wait before removing the print. If you remove it befor e the indicated time has passed,
avoid smearing the ink.
3-16 User Messages
HP DesignJet CP Series Printers
Page 85

Message Explanation and Action
STATUS
Lens maintenance
STATUS
Loading roll
STATUS
Loading sheet
STATUS
Low on ink
STATUS
Maintenance advised
STATUS
Measuring pattern
STATUS
Out of media
The lens cover on the printhead carriage requires maintenance.
Press the Replace Ink System key to replace the lens cover with a new one.
Spare lens covers are inside the right door.
The printer is loading roll media.
Wait for the loading to complete.
The printer is loading sheet media.
Wait for the loading to complete.
One or more of the four ink systems are out of ink.
Press the Replace Ink System key to replace the ink systems affected, if the last
print showed any degradation in image quality. If there is still a large amount of
ink remaining in the ink cartridges, see the message Printhead failure.
The printer is being used more intensively than the recommended duty cycle.
Refer to Chapter 9 to perform the Preventive Maintenance.
The printer is measuring the accuracy calibration print that you just loaded.
Wait for the calibration to complete.
The printer has received a file, is ready to print, but has no media loaded.
Load appropriate media.
ST ATUS
Pause pending
STATUS
Paused
STATUS
Printing
STATUS
Printing (Special)
STATUS
Processing
User Messages
You have pressed the Pause key but the printer was busy performing a previous
action. The printer will pause when it has completed its current action.
Wait for the current action to complete.
You have pressed the Pause key. The printer will remain paused until you press
the Pause key again.
Press the Pause key again when you are ready.
The printer is printing.
Wait for the printing to complete.
The printer is printing with a special print mode controlled by your software rather
than by the printer.
Wait for the printing to complete.
The printer has received a file from your software and is processing it ready to print.
Wait for the printing to complete.
HP DesignJet CP Series Printers
3-17
Page 86

Message Explanation and Action
STATUS
Ready
STATUS
Ready for media
ST ATUS
Receiving
ST ATUS
Recovering printhds.
STATUS
Refilling X m XX s
STATUS
Returning printheads
The printer is ready to print.
Send a file to the printer.
The printer is ready for you to load media.
Load appropriate media.
The printer has received data.
Wait for further messages.
The printer is recovering the printheads after an ink system replacement process
(only for UV Pigmented inks), or you have initiated the printhead recovery
procedure under Utilities / Service Tests/ Recover Printheads.
Wait for the printhead recovery procedure to complete.
The printer is filling the printheads. (This message only applies to firmware
revision levels A.02.08 or higher.)
Wait for the process to complete.
The ink system replacement process has been cancelled, and the printhead carriage is
returning to its station at the right of the printer.
Wait until the carriage is in position.
STATUS
Roll feed edge trim
STATUS
Waiting nest
The printer is trimming the edge of roll media.
Wait until the media has been trimmed.
Nesting is turned on. The printer is waiting for another print to nest.
Send the printer another file for printing.
3-18 User Messages
HP DesignJet CP Series Printers
Page 87

4
i
Serv
HP DesignJet CP Series Printers
ce Tests
4-1
Page 88

Introduction
This chapter explains how to use the built-in Service Tests (Diagnostics) and
what to do if the tests fail. If possible, always perform a Service Test on the
component that you are about to replace, just to make sure that is the
component that has failed. If the test on that component passes, there is no
need to replace it.
Diagnostics - Self Test
Initialization Sequences
Whenever the the Printer is switched on, it automatically performs a series
of internal self tests and mechanical initialization sequences. If the Printer
is switched ON in Service Mode, the front-panel display will show a code
next to the message “Initializing”. These codes refer to the part which the
printer is testing at that moment. If any of these parts fail, a system error
will appear and you should consult the System Error Codes Chapter 2.
Code Parts Tested System Error if failed
b Sensors and X-Encoder Fuse 010023
c Interconnect Boards detection 010030
d ADC in the Main PCA 010036
e Fans 010032
f DC Motor Driver ASIC 010033
g DC Motors detection 010034
h Stepper Motors detection 010035
i ADC in the Carriage PCA 010037
j Printhead Voltage in Main PCA 010038
k Printhead Voltage in Carriage PCA 010039
l Printhead Primitive Driver ASIC 010031
A RAM SIMM 010021
B Flash SIMM 010020
C Swath RAM 010022
I Hard Disk Drive 08xxxx
4-2 Service T ests
HP DesignJet CP Series Printers
Page 89

Service Tests (Diagnostics)
The following is a list of all internal service tests available in the Printers.
Instructions for entering the service tests menu are given on page 4-6.
WARNING
ALL THE COVER SENSORS ARE DISABLED WHEN IN THE
DIAGNOSTICS MENU. IF THE CARRIAGE IS MOVING IT WILL
NOT STOP IF THE WINDOW IS OPENED, SO BE VERY CAREFUL
NOT TO PUT YOUR HANDS INSIDE.
1 Electronics ' page 4-7
The purpose of this test is to verify the operation of the:
D Electronics Module.
D Line Sensor (only presence).
D Trailing Cable.
D Carriage Assembly.
2 Line Sensor ' page 4-10
The purpose of this test is to verify the operation of the Line Sensor
which is installed on the carriage assembly.
3 Carriage Axis ' page 4-12
The purpose of this test is to verify the operation of the components of
the Carriage Axis.
4 Media Axis ' page 4-14
The purpose of this test is to verify the operation of the components of
the Media Axis.
5 Service Station ' page 4-16
The purpose of this test is to verify the operation of the Service Station,
which also includes the Primer Assembly.
6 Refill ' page 4-18
The purpose of this test is to verify the operation of the Refill Assembly
and the Elevator Assembly.
7 Front Panel ' page 4-19
The purpose of this test is to verify the operation of the front-panel keys
and the LEDs.
Service T ests
HP DesignJet CP Series Printers
4-3
Page 90

8 Sensors ' page 4-20
The purpose of this test is to verify the operation of the following
Sensors:
D Window Sensor.
D Right Door Sensor.
D Left Door Sensor.
D Refill Valve Sensors.
D Standby Button Sensor.
D Media Sensor.
D Pincharm Sensor.
9 MIO Presence ' page 4-23
The purpose of this test is to verify the presence of the MIO Card and the
communication between the MIO Card and Main PCA.
10 Cutter ' page 4-24
The purpose of this test is to verify the operation of the cutter Assembly.
11 Bail ' page 4-25
The purpose of this test is to verify the operation of the bail stepper
motor.
12 Image Quality ' page 4-26
The purpose of this test is to verify the image quality attributes of the
printer.
13 Printhead ID ' page 4-28
The purpose of this test is to check the printhead ID.
14 Printhead Continuity ' page 4-29
The purpose of this test is to display the primitives and address maps of
the printheads.
15 Clean Roller ' page 4-31
The purpose of this test is to enable you to rotate the Drive Roller when
it requires cleaning.
16 Erase EEROM ' page 4-32
The purpose of this test is to clear the EEROM.
17 Reset Counters ' page 4-33
The purpose of this test is to reset the internal counters.
18 Not Applicable
19 Hard Disk Drive Revision ' page 4-34
4-4 Service T ests
HP DesignJet CP Series Printers
Page 91

The purpose of this test is to show the revision of the internal Hard Disk
Drive.
Service T ests
HP DesignJet CP Series Printers
4-5
Page 92

Entering the Service Tests (Diagnostics) Menu System
1 Make sure the printer is switched OFF from the power switch on the
back of the printer and not from the standby button on the front of the
printer.
2 Hold the UP and ENTER keys down and switch the printer ON. Wait
until the message “Status/Initializing” is displayed on the front-panel
before releasing the UP and ENTER keys.
The reason for entering the Service Tests by powering ON is because
various tests are performed during the initialization of the printer and
also certain System Errors will cause an abnormal start up and will
never reach the “Status/Ready” message on the front-panel.
3 Once the message “Status/Ready” is displayed on the front-panel, press
the Enter key.
4 Use the Arrow keys to scroll to the “Utilities” menu display and press
the Enter button. Make sure that you are in the Full menu mode
because otherwise you will not be able to access the “Service Tests”
submenu.
5 Use the Arrow keys to scroll to the “Service Tests” menu display and
press the Enter button.
6 Use the Arrow keys to scroll to the “Diagnostics” menu display and
press the Enter button.
7 Use the Arrow buttons to scroll through the test selections.
8 Press the Enter button to begin a specific test when the required test is
displayed.
If the printer is not used for 5 minutes, the printer exits out of the
Service Mode and you must repeat the above steps to enter the service
mode again.
In some cases a quick press of a button may not be recognized by the
processor. When pressing a button, be sure to press it deliberately and
all the way to the bottom of its travel.
If the Printer hangs up during a test, switch the Printer OFF and restart
from step 2.
Once you are inside the Diagnostics submenu, the front-panel keys can be
used in the following way:
Up Arrow - Go to the next test.
Down Arrow - Go to the previous test.
Previous - Exit the current test.
Enter - Perform the current test.
4-6 Service T ests
HP DesignJet CP Series Printers
Page 93

D01. Electronics
The purpose of this test is to verify the operation of the:
D Electronics Module.
D Hard Disk.
D Line Sensor (only presence).
D Trailing Cable.
D Carriage Assembly.
This test does not test the MIO Card. For testing the MIO Card, refer
to the MIO Presence test ' page 4-23.
IF POSSIBLE ALWAYS PERFORM THIS TEST BEFORE
REPLACING THE ELECTRONICS MODULE, TRAILING CABLE,
HARD DISK OR THE CARRIAGE ASSEMBLY. IF THIS TEST
PASSES, DO NOT REPLACE THE ELECTRONICS MODULE,
TRAILING CABLE, LINE SENSOR OR THE CARRIAGE ASSEMBLY.
Perform the Electronics test as follows:
1 In the Diagnostics submenu, scroll to “D01 Electronics” and press Enter.
Diagnostics
D01 Electronics
2 The test will start and a row of “***” will be displayed on the front-panel.
3 After a short while the message “Access Printheads / Continue” will be
displayed on the front-panel. Open the window and reseat all the
Printheads. Press the Down Arrow when you have reseated the
Printheads.
4 The test will continue and a row of “***” will be displayed on the
front-panel.
5 If the test passes, the “D0100 OK” message is displayed on the
front-panel.
IF THIS TEST PASSES, DO NOT REPLACE THE ELECTRONICS
MODULE, TRAILING CABLE, HARD DISK OR THE CARRIAGE.
6 If the test fails, an error message will be displayed on the front-panel.
The error messages are split into different areas depending on which
component failed.
The test is continued on the next page.
Service T ests
HP DesignJet CP Series Printers
4-7
Page 94

Electronics Failure
If there is a problem with the components within the Electronics module
then the following messages will appear.
D “D0101 Fail” - The Swath RAM has failed.
D “D0102 Fail” - The Writing System and Printhead control ASIC rotator
failed.
D “D0103 Fail” - The EEROM is corrupted.
In these cases, Replace the Electronics Module ' page 8-6.
Hard Disk Failure
If there is a problem with the Hard Disk then the following message will
appear.
D “D0104 Fail” - The Hard Disk has failed.
In this case, try one of the following:
1 If the Error Code appears again then check that the Hard Disk data
cable is correctly connected at both ends. Also check that the Hard
Disk Power Cable is correctly connected.
2 Replace the Hard Disk data cable ' page 8-12.
3 If the Error Code continues to appear, then replace the Hard Disk '
page 8-12.
Line Sensor Failure
If there is a problem with the Line Sensor then the following message will
appear.
D “D0105 Fail” - The Line Sensor presence test failed.
In this case, try one of the following:
1 Check if the Line Sensor is installed and connected correctly.
2 Check and if necessary replace the Trailing Cable ' page 8-36.
3 Replace the Carriage Assembly ' page 8-42.
Only replace one component at a time and perform the test again
before replacing another component. Using this procedure you
will be able to determine exactly which component failed.
The test is continued on the next page.
4-8 Service T ests
HP DesignJet CP Series Printers
Page 95

Carriage Failure
If there is a problem with the components within the Carriage Assembly
then the following message will appear.
D “D0106 Fail” - The problem could be related to several areas.
In this case, try one of the following:
1 Remove the Printheads and clean the flex contacts on the Carriage
and the Printheads. Reseat the Printheads and try the test again.
2 Perform the Printhead Continuity test ' page 4-29 to see if any of the
Printheads are having a continuity problem. If any of the Printheads
are having a continuity problem, replace the complete Ink Delivery
System of that color.
3 Replace the complete Ink Delivery System of each color one by one,
performing this test each time.
4 Check and if necessary replace the Trailing Cable ' page 8-36.
5 Replace the Carriage Assembly ' page 8-42.
Service T ests
HP DesignJet CP Series Printers
4-9
Page 96

D02. Line Sensor
The purpose of this test is to verify the operation of the Line Sensor which is
installed on the carriage assembly.
IF POSSIBLE ALWAYS PERFORM THIS TEST BEFORE
REPLACING THE LINE SENSOR. IF THIS TEST PASSES, DO NOT
REPLACE THE LINE SENSOR.
Perform the Line Sensor test as follows:
Load GLOSSY or COATED media before performing this test.
REPLACE THE LENS COVER BEFORE YOU PERFORM THIS
TEST IN ORDER TO PREVENT ANY AEROSOL PROBLEMS.
1 In the Diagnostics submenu, scroll to “D02 Line Sensor” and press
Enter.
Diagnostics
D02 Line Sensor
2 If media is not loaded the test will stop and the message “Load Media” will
be displayed on the front-panel. Load media in order to continue the test.
3 The message “Move Carriage” will be displayed on the front-panel. Use
the following keys to move the carriage left and right over the loaded
media.
Cancel - Move the carriage to the left.
Form Feed and Cut - Move the carriage to the right.
4 Make sure that the window is closed and then press Enter when the line
sensor of the carriage is placed over the media.
5 While the test is being performed, a row of “***” will be displayed on the
front-panel.
6 If the test passes, a message similar to the following is displayed on the
front-panel.
Green OK V: 8.0
Blue OK V: 11.0 T: 0
IF THIS TEST PASSES, DO NOT REPLACE THE LINE SENSOR.
7 Press Previous when you have completed the test. The “D0200 Done”
message is displayed on the front-panel if the test exits correctly.
4-10 Service T ests
HP DesignJet CP Series Printers
Page 97

The test is continued on the next page.
8 If the test fails, a message similar to the following is displayed on the
front-panel.
Green Fail V: 8.0
Blue Fail V: 11.0 T: 0
Refer to the following table in order to know the limits for value V
(Saturated Input Voltage) for the Green and Blue LEDs:
V
LED
Minimum Maximum
Green 7 10
Blue 7 12
If the test fails to resolve the problem, try one of the following:
1 The lens cover, which is installed on the line sensor, is dirty. Replace
the lens cover Users Guide, Chapter 10 (Lens Maintenance).
2 Make sure that the Mark Encoder on the Drive Roller is clean.
3 Perform the Electronics test page 4-7.
4 Check if the Media used is suitable for the printer.
5 Check if the Line Sensor is installed and connected correctly.
6 If the problem continues, replace the Carriage Assembly page 8-42.
Service T ests
HP DesignJet CP Series Printers
4-11
Page 98

D03. Carriage Axis (Y-axis)
The purpose of this test is to verify the operation of the components of the
Carriage Axis.
IF POSSIBLE ALWAYS PERFORM THIS TEST BEFORE
REPLACING THE Y-AXIS MOTOR OR THE ENCODER STRIP. IF
THIS TEST PASSES, DO NOT REPLACE THE Y-AXIS MOTOR
ASSEMBLY OR THE ENCODER STRIP.
Perform the Carriage Axis test as follows:
1 In the Diagnostics submenu, scroll to “D03 Carriage Axis” and press
Enter.
Diagnostics
D03 Carriage Axis
2 While the test is being performed, a row of “***” will be displayed on the
front-panel.
3 If the test passes, the “D0300 OK” message is displayed on the
front-panel.
IF THIS TEST PASSES, DO NOT REPLACE THE Y-AXIS MOTOR
ASSEMBLY OR THE ENCODER STRIP.
4 If the test fails, an error message will be displayed on the front-panel.
The error messages are split into different areas depending on which
component failed.
Y-axis Failure
If there is a problem with the components of the Y-axis then the following
messages will appear:
D “D0301 Fail” - The Static test has failed
D “D0302 Fail” - The PWM test has failed (PWM too low)
D “D0303 Fail” - The PWM test has failed (PWM too high)
In these cases, try one of the following:
1 Apply lubricant on the slider rods.
2 Replace the Encoder Strip ' page 8-32.
3 Replace the Y-axis Motor Assembly ' page 8-45.
4-12 Service T ests
HP DesignJet CP Series Printers
Page 99

Only replace one component at a time and perform the test again
before replacing another component. Using this procedure you
will be able to determine exactly which component failed.
The test is continued on the next page.
Encoder Strip Failure
If there is a problem with the Encoder Strip then the following message will
appear:
D “D0304 Fail” - The Encoder Strip has failed.
In this case, Replace the encoder strip ' page 8-32.
Service T ests
HP DesignJet CP Series Printers
4-13
Page 100

D04. Media Axis (X-axis)
The purpose of this test is to verify the operation of the components of the
Media Axis.
IF POSSIBLE ALWAYS PERFORM THIS TEST BEFORE
REPLACING THE X-AXIS MOTOR. IF THIS TEST PASSES, DO NOT
REPLACE THE X-AXIS ASSEMBLY.
Perform the Media Axis test as follows:
1 In the Diagnostics submenu, scroll to “D04 Media Axis” and press Enter.
Diagnostics
D04 Media Axis
2 While the test is being performed, a row of “***” will be displayed on the
front-panel.
3 If the test passes, the “D0400 OK” message is displayed on the
front-panel.
IF THIS TEST PASSES, DO NOT REPLACE THE X-AXIS ASSEMBLY.
4 If the test fails, an error message will be displayed on the front-panel.
The error messages are split into different areas depending on which
component failed.
X-axis Failure
If there is a problem with the components of the X-axis then the following
messages will appear:
D “D0401 Fail” - The Accuracy test has failed.
D “D0402 Fail” - The PWM test has failed (PWM too low).
D “D0403 Fail” - The PWM test has failed (PWM too high).
In these cases, Replace the X-axis Assembly ' page 8-66.
Mark Encoder Failure
If there is a problem with the Mark Encoder then the following message will
appear:
D “D0404 Fail” - Problem finding the Mark Encoder.
The test is continued on the next page.
4-14 Service T ests
HP DesignJet CP Series Printers
 Loading...