

Page 1
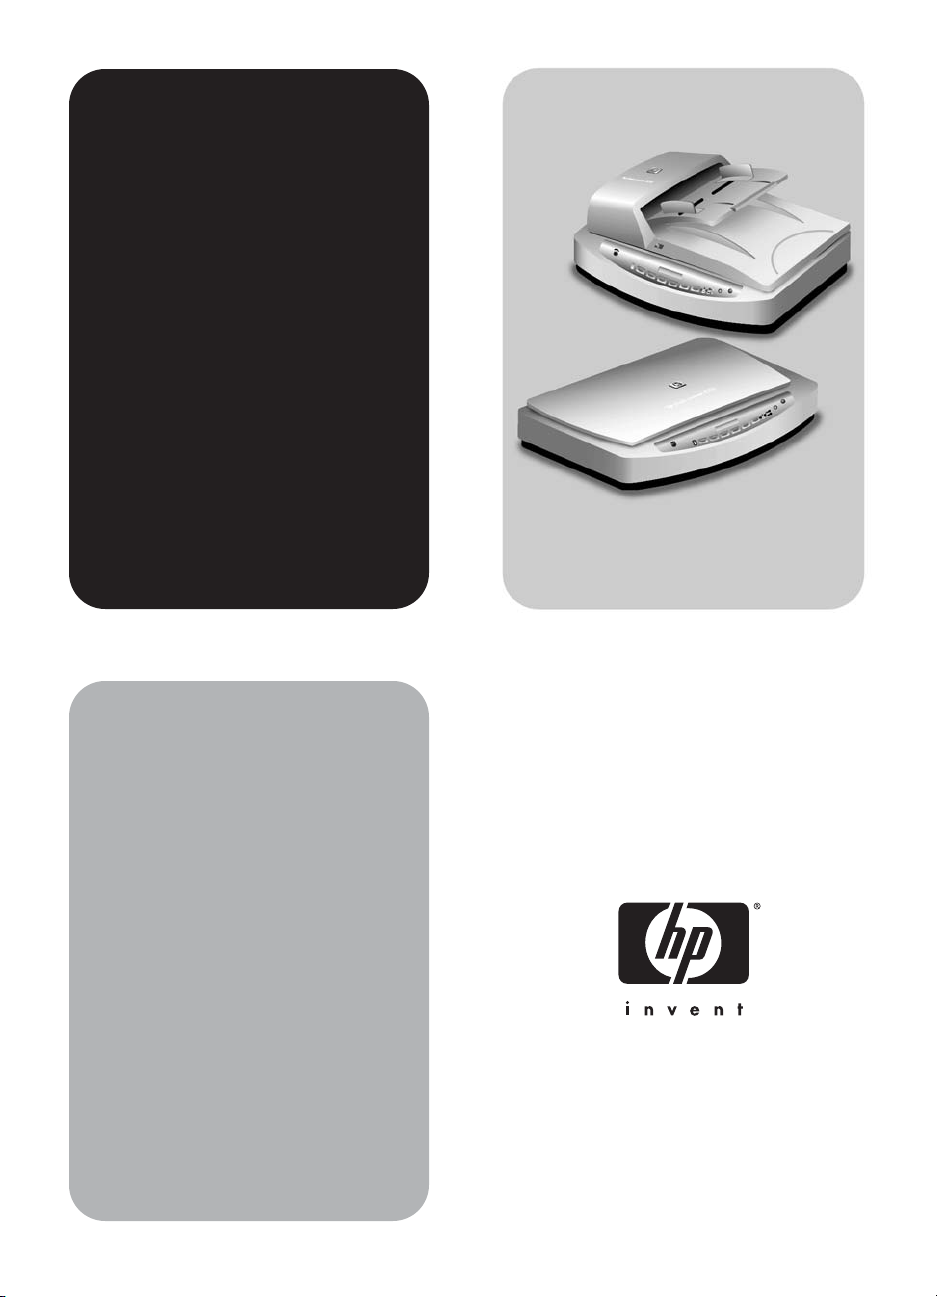
hp scanjet
8200 series
scanners
scanner
hp scanjet
série 8200
user's manual
guide de l'utilisateur
Page 2

Page 3

hp scanjet 8200 series scanner
English
user’s manual
Page 4

copyright information
© Copyright Hewlett-Packard Company 2003
All rights reserved. Reproduction, adaptation, or translation without prior written
permission is prohibited, except as allowed under copyright laws.
This product incorporates Adobe's PDF technology, which contains an implementation of
Lempel-Ziv-Welch (LZW) data compression licensed under U.S. Patent 4,558,302.
trademark credits
Adobe and the Acrobat logo are registered trademarks or trademarks of Adobe
Systems Incorporated in the United States and other countries and regions.
Energy Star is a U.S. registered service mark of the United States Environmental Protection
Agency.
Microsoft and Windows are registered trademarks of Microsoft Corporation.
All other product names mentioned herein may be trademarks of their respective
companies.
document warranty
The information contained in this document is subject to change without notice.
Hewlett-Packard makes no warranty of any kind with respect to this information.
HEWLETT-PACKARD SPECIFICALLY DISCLAIMS ANY IMPLIED WARRANTY OF
MERCHANTABILITY AND FITNESS FOR A PARTICULAR PURPOSE.
Hewlett-Packard shall not be liable for any direct, indirect, incidental, consequential, or
other damage alleged in connection with the furnishing or use of this information.
The TWAIN Toolkit is distributed as is. The developers and distributors of the TWAIN
Toolkit expressly disclaim all implied, express or statutory warranties including, without
limitation, the implied warranties of merchantability, noninfringement of third party rights
and fitness for a particular purpose. Neither the developers nor the distributors shall be
liable for damages, whether direct, indirect, special, incidental, or consequential, as a
result of the reproduction, modification, distribution, or other use of the TWAIN Toolkit.
NOTICE TO U.S. GOVERNMENT USERS: RESTRICTED RIGHTS COMMERCIAL
COMPUTER SOFTWARE: Use, duplication, or disclosure by the Government is subject to
restrictions as set forth in subparagraph (c) (1) (ii) of the Rights in Technical Data Clause at
DFARS 52.227-7013.
Material scanned by this product may be protected by governmental laws and other
regulations, such as copyright laws. The customer is solely responsible for complying with
all such laws and regulations.
product restricted material
This HP product contains the following materials that might require special handling at
end-of-life:
• mercury in the scanner fluorescent lamp and transparent materials adapter (< 5 mg)
• lead in solder
For recycling information, contact www.hp.com/go/recycle, your local authorities, or the
Electronic Industries Alliance at www.eiae.org.
For information about HP’s environmental stewardship program, see environmental
stewardship program on page 25. For product warranty information see hewlett-packard
limited warranty statement on page 24.
Page 5

contents
where do I find…? . . . . . . . . . . . . . . . . . . . . . . . . . . . . . . . . . 1
how to use the scanner. . . . . . . . . . . . . . . . . . . . . . . . . . . . . . 3
front panel overview . . . . . . . . . . . . . . . . . . . . . . . . . . . . . . . 3
install the software . . . . . . . . . . . . . . . . . . . . . . . . . . . . . . . . 4
scanning overview . . . . . . . . . . . . . . . . . . . . . . . . . . . . . . . . 4
scan documents . . . . . . . . . . . . . . . . . . . . . . . . . . . . . . . . . . 5
scan pictures . . . . . . . . . . . . . . . . . . . . . . . . . . . . . . . . . . . . 5
scan a document so text can be edited . . . . . . . . . . . . . . . . . . 6
save a document to disk or CD . . . . . . . . . . . . . . . . . . . . . . . . 6
e-mail a scanned document or picture . . . . . . . . . . . . . . . . . . . 7
copy documents or pictures . . . . . . . . . . . . . . . . . . . . . . . . . . 7
scan and preview multiple originals. . . . . . . . . . . . . . . . . . . . . 8
cancel a scan in progress . . . . . . . . . . . . . . . . . . . . . . . . . . . 8
change settings . . . . . . . . . . . . . . . . . . . . . . . . . . . . . . . . . . 9
select original types. . . . . . . . . . . . . . . . . . . . . . . . . . . . . . . 10
care and maintenance. . . . . . . . . . . . . . . . . . . . . . . . . . . . . 10
scanner installation problems . . . . . . . . . . . . . . . . . . . . . . . . 12
scanner initialization problems . . . . . . . . . . . . . . . . . . . . . . . 13
troubleshooting. . . . . . . . . . . . . . . . . . . . . . . . . . . . . . . . . . 13
scan from the ADF . . . . . . . . . . . . . . . . . . . . . . . . . . . . . . . . 14
choose acceptable media for the ADF . . . . . . . . . . . . . . . . . . 14
load originals in the ADF . . . . . . . . . . . . . . . . . . . . . . . . . . . 14
scan from the TMA . . . . . . . . . . . . . . . . . . . . . . . . . . . . . . . . 15
scan slides. . . . . . . . . . . . . . . . . . . . . . . . . . . . . . . . . . . . . 15
scan negatives . . . . . . . . . . . . . . . . . . . . . . . . . . . . . . . . . . 17
English
product support . . . . . . . . . . . . . . . . . . . . . . . . . . . . . . . . . . 19
accessibility website . . . . . . . . . . . . . . . . . . . . . . . . . . . . . . 19
hp scanjet website . . . . . . . . . . . . . . . . . . . . . . . . . . . . . . . 19
support process . . . . . . . . . . . . . . . . . . . . . . . . . . . . . . . . . 19
warranty . . . . . . . . . . . . . . . . . . . . . . . . . . . . . . . . . . . . . . . 24
hewlett-packard limited warranty statement. . . . . . . . . . . . . . . 24
regulatory information . . . . . . . . . . . . . . . . . . . . . . . . . . . . . 25
environmental stewardship program . . . . . . . . . . . . . . . . . . . 25
appendix A – SCSI setup and options . . . . . . . . . . . . . . . . . . 27
why use SCSI? . . . . . . . . . . . . . . . . . . . . . . . . . . . . . . . . . . 27
install the software . . . . . . . . . . . . . . . . . . . . . . . . . . . . . . . 27
install the scanner. . . . . . . . . . . . . . . . . . . . . . . . . . . . . . . . 27
compatible SCSI cards . . . . . . . . . . . . . . . . . . . . . . . . . . . . 29
iii
Page 6

contents
appendix B – product specifications and options. . . . . . . . . . 30
scanner specifications. . . . . . . . . . . . . . . . . . . . . . . . . . . . . 30
automatic document feeder (ADF) specifications . . . . . . . . . . . 30
transparent materials adapter (TMA) specifications . . . . . . . . . 31
environmental specifications for the scanner, ADF, and TMA . . 31
purchase accessories . . . . . . . . . . . . . . . . . . . . . . . . . . . . . 31
purchase maintenance parts . . . . . . . . . . . . . . . . . . . . . . . . 31
iv
hp scanjet 8200 series
Page 7

1
where do I find…?
This manual describes the HP Scanjet 8200 series scanner operation for a
computer using a Microsoft® Windows® operating system. See the table below
for information on Microsoft Windows NT® and Apple® Macintosh® systems.
Many resources are available to help you find the information you need. The
following table provides information resources.
Subject Location
Operating systems
•Apple Macintosh
•Windows NT
Product overview
Product introduction
Scanner setup
Software installation
Uninstall the software
Find help
•Software
• Third-party software
•Product specific
•SCSI users
Care and Maintenance
Apple Help Center
Setup Poster
User’s Manual – Install the Software
User’s Manual – Installation Problems
Precisionscan Pro Help
User’s Manual – Appendix A, SCSI Setup and Options
Setup Poster
User’s Manual – Front Panel Overview
HP Scanjet 8200 Series Help – Front Panel Overview
HP Scanjet 8200 Series Help – Product Introduction
Setup Poster – a single fold-out page that provides installation and
setup instructions
HP Scanjet 8200 Series Help – Install the Scanner
User’s Manual – Appendix A, SCSI Setup and Options
Setup Poster
User’s Manual – Install the Software
HP Scanjet 8200 Series Help – Uninstall the Software
HP Photo & Imaging Software Help – How to Use the Software
Third-party software documentation
HP Scanjet 8200 Series Help
User’s Manual – Appendix A, SCSI Setup and Options
HP Precisionscan Pro Help
User’s Manual – Care and Maintenance
English
1
Page 8

chapter 1
Subject Location
Troubleshooting
• Install and setup
User’s Manual – Installation Problems
User’s Manual – Initialization Problems
•Scanner
HP Scanjet 8200 Series Help – Troubleshooting, Scanner
Problems
• Accessories
HP Scanjet 8200 Series Help – Troubleshooting, ADF Problems
HP Scanjet 8200 Series Help – Troubleshooting, TMA Problems
•Software
• Cleaning the underside
HP Photo & Imaging Software Help – Troubleshooting
www.hp.com/support
of the scanner glass
Using
•the scanner
• the accessories
User’s Manual – How to Use the Scanner
User’s Manual – Scan from the TMA
User’s Manual – Scan from the ADF
•the software
HP Photo & Imaging Software Help – How to Use the Software
Support
• General information
User’s Manual – HP Support
HP Scanjet 8200 Series Help – HP Support
•Website
• Phone numbers
www.hp.com/support
User’s Manual – HP Support
HP Scanjet 8200 Series Help – HP Support
Warranty
Purchase accessories and
options
User’s Manual – Hewlett-Packard Limited Warranty Statement
User’s Manual – Appendix B, Purchase Accessories
www.hpshopping.com (USA only) – for other regions use
www.hp.com and select your language
Purchase maintenance
supplies
2
User’s Manual – Appendix B, Purchase Maintenance Parts
www.hpshopping.com (USA only) – for other regions, use
www.hp.com and select your language
hp scanjet 8200 series
Page 9
2
how to use the scanner
This section presents an overview of the scanner front panel and also contains
information about how to use and care for the scanner.
front panel overview
Feature Description
DESTINATION button Selects the destination (an application, such as a word
processor) for a scanned document. The destination
appears in the front panel display.
Select the destination before pressing the S
D
OCUMENT TO button.
S
CAN DOCUMENT TO
button
S
CAN PICTURE button Scans the picture into the HP Photo & Imaging Gallery.
E
DIT TEXT (OCR) button Scans the document text and pictures and displays
ILE DOCUMENTS button Scans the original document or picture to a file
F
E-MAIL button Scans the original document or picture and sends the
Scans an original document into the selected destination
(an application, such as a word processor). Use the
DESTINATION button to select the destination.
editable text in the defined word processor application.
destination that you enter. After scanning the original, a
dialog box appears where you can enter the file name,
file type, and location for the file.
scanned image to your e-mail software as an
attachment.
English
CAN
C
OPY button Starts the copy software and scans the original. The
scanned image is sent directly to the default printer.
Select the number of copies and whether the item should
be scanned in color or black and white before pressing
the COPY button.
N
UMBER OF COPIES button Selects the number of copies to be printed with the
C
OPY button. Select the number of copies before
pressing the C
appears in the front panel display.
OLOR/BLACK & WHITE
C
button
OWER SAVE button Turns off the scanner lamp, the panel lights, and the
P
Determines whether original items are scanned in color
or in black and white when copying.
front panel display.
OPY button. The number of copies
3
Page 10

chapter 2
Feature Description
ANCEL button Cancels a scan while the scanner is scanning, or
C
cancels a series of scans when you use the Automatic
Document Feeder (ADF).
B
UTTON SETTINGS button Opens the Button Settings dialog box. From this dialog
box, you can change how the scanner buttons work.
Front panel display Displays scanner information, such as destinations,
number of copies, and error messages.
install the software
1 Close all applications on the computer.
2 Locate the HP Photo & Imaging software CD that is appropriate for your
language and operating system.
3 Insert the CD into the computer.
Windows: Follow the instructions on the screen. If the installation
application does not start automatically:
On the Start menu, click Run, and type: x:setup.exe (where x is the
letter of the CD drive).
Macintosh: Double-click the installer icon on the CD and follow the
instructions.
scanning overview
You can start scanning in one of three ways: from the front panel buttons, from
the HP Director, or from other applications.
Note: The HP Scanning software can prompt you to scan additional items.
This allows you to scan multiple items and send them to the final destination
all at one time. When previewing, it also allows you to preview and scan
multiple images before closing the preview window. For more information,
see scan and preview multiple originals.
For Windows NT and Macintosh users, see where do I find…? on page 1 for
scanning procedures.
scan from the front panel buttons
The front panel buttons provide shortcuts to often-used scanning functions, such
as scanning pictures and documents. Descriptions for using all the front panel
buttons are located in this manual.
scan from the hp director
Click the HP Director icon on the desktop to start the HP Photo & Imaging
software. The HP Director window appears. From this window you can begin
scanning, viewing, or printing images.
If the HP Director icon is not on the desktop, click Start, point to Programs, point
to Hewlett-Packard, point to Cameras and Scanners, and click HP Photo &
Imaging Director.
4
hp scanjet 8200 series
Page 11

scan from other applications
You can bring an image directly into an open file in one of your applications if
the application is TWAIN compliant. Generally, the application is compliant if it
has a command such as Acquire, Scan, or Import New Object. If you are unsure
whether the application is compliant or what the command is, see the
documentation for the application.
scan documents
Use the SCAN DOCUMENT TO button ( ) to scan documents.
1 Place the originals face down on the scanner glass or face up in the ADF. If
you are scanning two-sided originals from an ADF, slide the D
to two-sided mode ( ).
2 Select a destination by pressing the D
desired destination appears in the front panel display.
3 Press the S
Note: A preview image will not appear when scanning from the ADF. To
change this preview setting, see the HP Photo & Imaging software Help.
4 Select the final scan area (the area inside the dotted lines) in the preview
image.
5 Make adjustments to the preview image if needed.
6 Click Accept.
The final scan area is scanned and appears in the specified destination.
how to use the scanner
English
UPLEX switch
ESTINATION button ( ) until the
CAN DOCUMENT TO button ( ).
scan pictures
Use the SCAN PICTURE button ( ) to scan pictures.
1 Place the original face down on the scanner glass and close the lid.
2 Press the SCAN PICTURE button ( ).
3 Select the final scan area (the area inside the dotted lines) in the preview
4 Make adjustments to the preview image if needed.
5 Click Accept.
user’s manual
Note: You can also use the S
from the TMA. For more information, see scan from the TMA on page 15.
A preview image of the scanned original appears.
image.
The final scan area is scanned and appears in the HP Photo & Imaging
Gallery. The scan is saved in the location specified in the Scan Pictures
Settings in the HP Photo & Imaging software.
CAN PICTURE but ton to sc an slid es or negat ives
5
Page 12

chapter 2
scan a document so text can be edited
Use the EDIT TEXT button ( ) to scan documents to software that converts the
image to text and graphics and then places the results in a supported wordprocessing application.
1 Place the original face down on the scanner glass or face up in the ADF. If
you are scanning two-sided originals from an ADF, slide the D
to two-sided mode ( ). If you are scanning multiple originals without an
ADF, see scan and preview multiple originals on page 8.
2 Press the E
DIT TEXT button ( ).
Note: A preview image will not appear when scanning from the ADF. To
change this preview setting, see the HP Photo & Imaging software Help.
3 Select the final scan area (the area inside the dotted lines) in the preview
image.
4 Make adjustments to the preview image if needed.
5 Click Accept.
The final scan area is scanned and processed. The scanned items display
in the selected application, such as a word processor.
Note: The application can be changed in the Scan Button Settings of the
HP Photo & Imaging software.
save a document to disk or CD
UPLEX switch
Use the FILE DOCUMENTS button ( ) to save scanned documents to disk, such
as a hard disk or a CD.
1 Place the original face down on the scanner glass or face up in the ADF. If
you are scanning two-sided originals from an ADF, slide the D
UPLEX switch
to two-sided mode ( ). If you are scanning multiple originals without an
ADF, see scan and preview multiple originals on page 8.
2 Press the F
ILE DOCUMENTS button ( ).
Note: A preview image will not appear when scanning from the ADF. To
change this preview setting, see the HP Photo & Imaging software Help.
3 Select the final scan area (the area inside the dotted lines) in the preview
image.
4 Make adjustments to the preview image if needed.
5 Click Accept.
The final scan area is scanned.
6 The Save As dialog box appears. Select a destination folder.
7 Type a file name and choose a file type, and click OK.
The document is saved in the specified folder.
6
hp scanjet 8200 series
Page 13

e-mail a scanned document or picture
Use the E-MAIL button ( ) to scan documents or pictures and insert them in an
e-mail message as an attachment. You must have an Internet connection and a
supported e-mail application.
1 Place the original face down on the scanner glass or face up in the ADF. If
you are scanning two-sided originals from an ADF, slide the D
to two-sided mode ( ).
Note: You ca n a lso use the E-
the TMA. For more information, see scan from the TMA on page 15.
2 Press the E-
MAIL button ( ).
A message appears asking if the original is a document or a picture.
3 Select Document or Picture, and click OK.
Note: A preview image will not appear when scanning from the ADF. To
change this preview setting, see the HP Photo & Imaging software Help.
4 Select the final scan area (the area inside the dotted lines) in the preview
image.
5 Make adjustments to the preview image if needed.
6 Click Accept.
The final scan area is scanned and your e-mail application is opened. The
scanned image is added as an attachment to the e-mail message.
7 The Save As dialog box appears. Type a file name and choose a file type,
and click OK.
8 Complete the e-mail as usual.
Note: To view the scanned image before you e-mail it, double-click the
attachment in your e-mail application.
Note: You can change the e-mail application in the HP Photo & Imaging
software. If your e-mail application does not appear in the list of supported
applications, save the scanned images to a file, and attach the file to your
e-mail.
MAIL button to scan slides or negatives from
how to use the scanner
UPLEX switch
English
copy documents or pictures
Use the COPY button ( ) to scan an original and send it to a printer.
1 Place the original face down on the scanner glass or face up in the ADF. If
you are scanning two-sided originals from an ADF, slide the D
to two-sided mode ( ).
2 Select the copy options:
– Select the number of copies by pressing the N
button ( ). The number of copies appears in the front panel display.
– Select how the original is scanned by pressing the COLOR/BLACK &
HITE button ( ).
W
3 Press the C
user’s manual
OPY button ( ). The copies are printed on the default printer.
UPLEX switch
UMBER OF COPIES
7
Page 14

chapter 2
Note: To change any copy settings, such as size, darkness, or the printer,
click Cancel during processing. The HP Copying dialog box appears, where
you can change settings.
scan and preview multiple originals
Multiple originals can be scanned from the ADF, the TMA, or the scanner glass.
The ADF can scan one-sided or two-sided originals.
scan multiple originals from the scanner glass or TMA
If the original was scanned from the scanner glass or TMA, a dialog box
appears asking if there are more originals to scan. If you have more originals to
scan, click Yes, and then perform one of the following steps:
• Place another original on the glass or in the TMA, click New Scan, make
adjustments, and then click Accept.
OR
• Select another image within the preview window, make adjustments, and
then click Accept.
When you have finished scanning your items, click No when you receive the
prompt for another scan.
scan multiple originals from an ADF
1 Place the originals in the ADF face up, with the first page on top.
2 Press a button on the front panel to start scanning, such as the S
OCUMENT TO button ( ) or the E-MAIL button ( ). The button you
D
select determines the scan settings.
When the ADF is empty, a dialog box appears asking if there are more
pages to scan. If you want to scan more originals to the same destination,
load the next set of pages, and then click Scan.
3 When you have finished, click Done. The scans appear in the selected
destination.
CAN
preview multiple originals from an ADF
If multiple originals are scanned, an image counter appears in the top-right of
the preview window. The image counter shows the current preview image and
the total number of preview images. Click on the arrows in the image counter to
preview other pages.
cancel a scan in progress
Use the CANCEL button ( ) to cancel a scan during processing, or to cancel a
series of scans when the ADF is being used.
8
image counter in the preview window
hp scanjet 8200 series
Page 15

change settings
You might want to change settings for the scanner to accommodate the type of
work that you do. The HP Scanjet 8200 series scanners enable you to change
button settings, scanning preferences, power usage, and whether the scanning
takes place immediately or waits for the warm-up cycle to complete.
how to use the scanner
change button settings
You can change settings for the scanner buttons by pressing the BUTTON
ETTINGS button ( ).
S
1 Press the B
The Button Settings dialog box appears.
2 Click the appropriate tab, and change the settings.
3 When finished with the changes, click OK.
UTTON SETTINGS button ( ).
change settings from the hp director
The Settings menu in the HP Photo & Imaging software provides a means of
changing all scanning settings. It includes button settings, scanning preferences,
and other settings that you can change. To change settings start the HP Director,
and click Settings.
turn preview image on or off
You can change whether a preview image appears or does not appear. See the
HP Photo & Imaging software help for instructions and locations.
use the Power Save button
Use the POWER SAVE button ( ) to turn off the lamp when not using the
scanner. When the P
small indicator lights, and the front panel display turn off.
To use the scanner again, press any button on the front panel or start a scan from
the HP Director. After a short warmup cycle, the scan begins.
OWER SAVE button ( ) is pressed, the scanner lamp, the
English
enable instant scanning
Use the instant scanning feature to set the scanner to begin scanning
immediately, without waiting for the lamp to warm up.
1 Open the HP Director, click Settings, and click Scan Preferences.
2 Click the Quality vs. Speed tab.
user’s manual
– To eliminate the lamp warm-up time and enable instant scanning, select
the Instant lamp warm-up check box.
– To reduce power consumption, clear the Instant lamp warm-up check
box.
9
Page 16

chapter 2
select original types
If the software prompts you for an original type, you have two choices: Picture or
Document. The scanner optimizes settings based on your choice. Use the
following guidelines to determine the best original type for your needs.
If your original consists of Select this original type
Text, or both text and graphics Document
A printed photograph or graphic Picture
To change the original types, see change button settings on page 9.
care and maintenance
Occasional cleaning of your scanner helps ensure optimal performance. The
amount of care necessary depends upon several factors, including the amount
of use, the type of media that is fed through the ADF, and the environment. You
should perform routine cleaning as necessary.
Routine cleaning should include cleaning the scanner glass, the TMA, and the
ADF.
clean the scanner glass
1 Disconnect the power cable from the scanner.
2 Open the scanner lid.
3 Clean the glass using a soft, lint-free cloth sprayed with a mild glass
cleaner.
Caution! Use only glass cleaner. Avoid abrasives, acetone,
benzene, and carbon tetrachloride, all of which can damage the
scanner glass. Avoid isopropyl alcohol because it can leave
streaks on the glass.
clean the TMA
clean the ADF
10
Do not spray the glass cleaner directly on the glass. If too much
glass cleaner is applied, the cleaner could run to the edges and
damage the scanner.
4 Dry the scanner glass using a dry, soft, lint-free cloth.
5 When finished, reconnect the power cable to the scanner.
Clean the TMA using a dry, soft, lint-free cloth. If necessary, lightly spray the cloth
with glass cleaner and wipe the TMA.
The ADF requires periodic cleaning depending upon the amount of use and the
type of media that is fed through the ADF. You can clean the ADF two ways:
running the cleaning cloth through the ADF, or by manually cleaning the feed
rollers. Set up a cleaning routine that is appropriate for your scanner.
hp scanjet 8200 series
Page 17
how to use the scanner
run the cleaning cloth through the ADF
1 Open the sealed container, starting at the notch. Take care not to tear the
cleaning cloth inside.
2 Remove the cleaning cloth and unfold.
3 Place the unfolded cloth into the paper input tray.
place the unfolded cloth into the paper input tray
4 Press the S
CAN DOCUMENT TO button.
The cleaning cloth will run through the ADF.
Wait two minutes to allow the components to dry before proceeding to the
next step.
5 Place up to five pages of printed paper in the paper input tray. Scan and
view the results.
English
user’s manual
scan up to five pages
6 If streaks still appear, repeat Steps 3 through 6.
The cleaning cloth can be cycled through the ADF up to five times.
clean the feed roll assembly manually
1 Open the hatch and lift the green tab to the fully open position. The feed
roller assembly should be in a nearly vertical position.
lift the green tab to expose the feed rollers
2 With a Paper Path Cleaning Cloth (C9915-60056), clean each of the feed
rollers and the small rubber pad located below the rollers.
Note: If you do not have the paper path cleaning cloth, use a lint-fee cloth
slightly dampened with isopropyl alcohol.
3 Wipe the area around the small rubber pad to remove any paper dust.
4 Lower the green tab and feed roller assembly.
5 Close the hatch.
11
Page 18

chapter 2
maintain the ADF
If an unusual number of misfeeds occur, follow these steps:
• Clean the ADF to help reduce misfeeds. See clean the ADF on page 10.
• See the HP Scanject 8200 series help – ADF problems.
• If that does not help, install the ADF Roller Replacement kit (C9937-
68001). The ADF Roller Replacement kit contains a roller mechanism, a
separation pad, and a wrench used to replace the separation pad. See
purchase maintenance parts on page 31.
The ADF Roller Replacement kit contains instructions for replacing the
parts.
ordering maintenance supplies
You can purchase maintenance parts online at www.hp.com. Use search to find
the item, such as cleaning cloth, or ADF Roller Replacement kit.
scanner installation problems
If an “Error 04” in the front panel displays, it indicates that a Hi-Speed USB
connection error has occurred. Ensure that the Hi-Speed USB cable is securely
connected between the scanner and the computer.
• First, check your computer:
– Ensure that your computer meets the minimum system requirements that
are listed on the scanner box.
– If you do not have enough hard-disk space, remove unnecessary files
or install the software on a different disk drive.
• On a Microsoft® Windows computer, if you receive a message, such as
“Destination Directory Is Invalid” or “Program Folder Is Invalid” during
installation, do one of the following:
– Type a valid destination folder name. The destination folder cannot
contain the following characters: /, \, :, ?, *, <, >, “, or |.
– Find a valid folder using the Browse button.
• Check the cables:
– Ensure that the power cable is securely connected between the scanner
and a live electrical outlet or surge protector.
– If the power cable is connected to a surge protector, ensure that the
surge protector is plugged into an outlet and turned on.
– Use the Hi-Speed USB cable that was included with the scanner. Other
Hi-Speed USB cables might not be compatible with the scanner.
– Ensure that the Hi-Speed USB cable is securely connected between the
scanner and the computer.
– Disconnect the power cable from the scanner and turn off the computer.
After 30 seconds, reconnect the power cable to the scanner and then
turn on the computer, in that order.
– On a Macintosh computer, use the Apple System Profiler to ensure that
the scanner is connected to the computer correctly.
• Enter the scanner diagnostic mode:
12
hp scanjet 8200 series
Page 19

a. Disconnect the Hi-Speed USB cable (or SCSI cable) from the scanner.
Ensure that the scanner power cable is still connected to the power
source.
b. Press the E
The carriage in the scanner should move forward and backward, and
the lamp should turn on.
c. To end the test, disconnect the power cable.
If the scanner lamp does not turn on or the carriage does not move, a
problem exists with the scanner hardware. See product support on
page 19.
DIT TEXT ( ) and E-MAIL ( ) buttons at the same time.
scanner initialization problems
If you receive a message that the scanner initialization failed:
1 Close the error message dialog box and close the application that was
open when you received the error message.
2 Then, do the following:
– Turn the scanner off by disconnecting the power cable. Turn the
scanner back on by reconnecting the power cable.
– Disconnect the USB cable from the computer and then reconnect the
USB cable.
– Ensure that the cables that connect the computer to the scanner are
securely fastened.
– Turn the computer off for 10 seconds and then turn it on again.
If the scanner still fails to initialize, run the Repair utility (Windows computers
only). See scanner still does not work properly in the troubleshooting section of
the HP Scanjet 8200 series help.
how to use the scanner
English
troubleshooting
To solve other problems with the scanner, see the troubleshooting section of the
HP Scanjet 8200 series help.
To solve problems with the scanner software, see the HP Photo & Imaging
software help.
user’s manual
13
Page 20
scan from the ADF
3
This section describes how to select originals that are acceptable for the
Automatic Document Feeder (ADF), and how to load and scan originals from the
ADF.
choose acceptable media for the ADF
The ADF works best when the originals meet the following specifications:
• standard media of A4, U.S. letter and legal sized paper
• nonstandard media ranging in size from 88.9 by 127 mm
(3.5 by 5 inches) to 216 by 356 mm (8.5 by 14 inches)
• media weights from 60 to 90 g/m
• media that is square-shaped or rectangular and in good condition
• media that is free of perforations, or punch holes
• media that is free of wet glue, correction fluid, or ink
Note: Avoid putting multipart forms, transparencies, magazine pages, gumbacked pages, and light-weight paper in the ADF.
Before placing an original in the ADF, check for and remove:
• curls or wrinkles
• staples, paper clips, and any other attached material
If the originals do not meet these criteria, scan from the scanner glass.
2
(16 to 24 pounds)
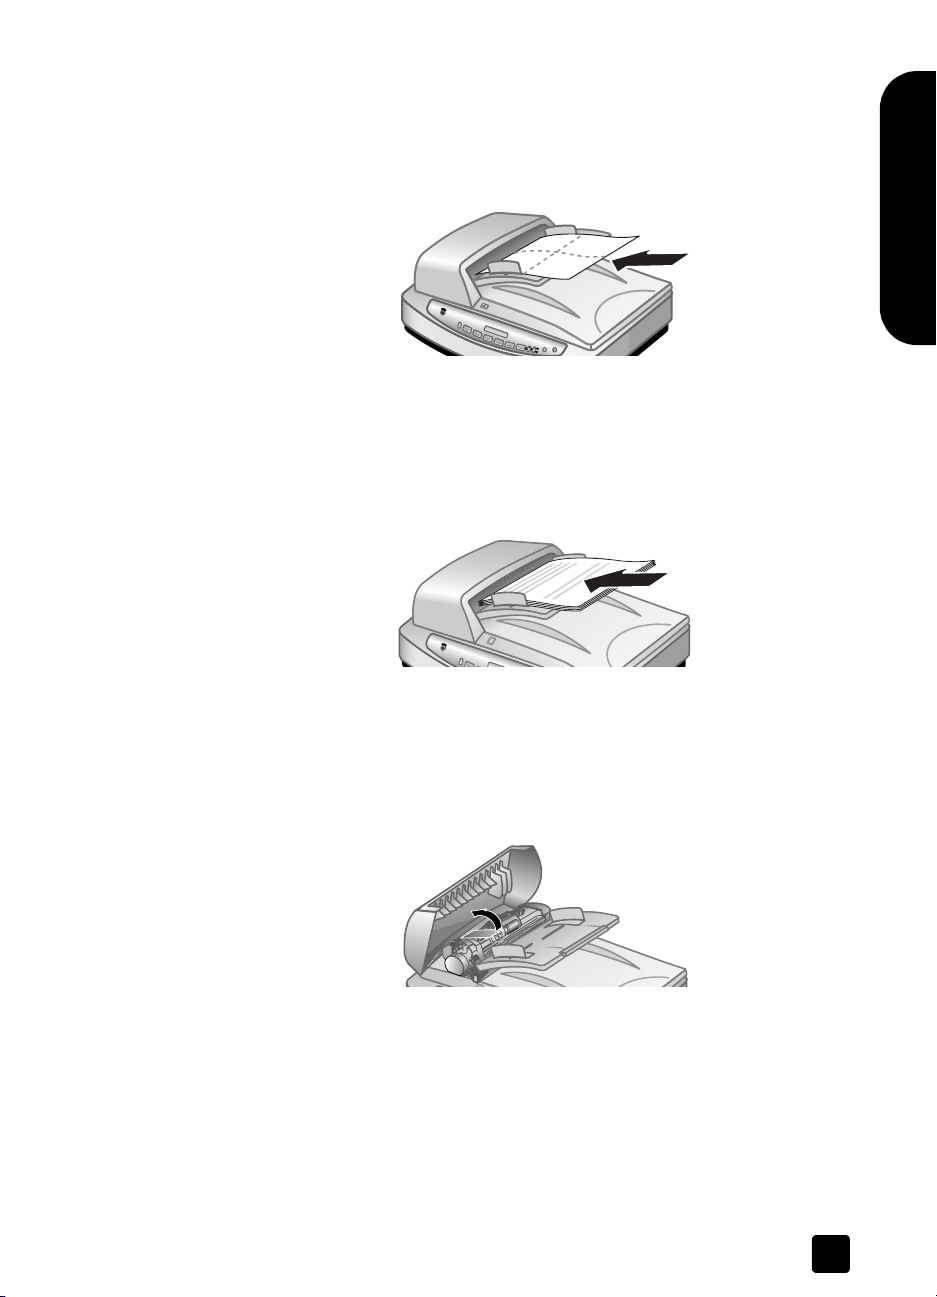
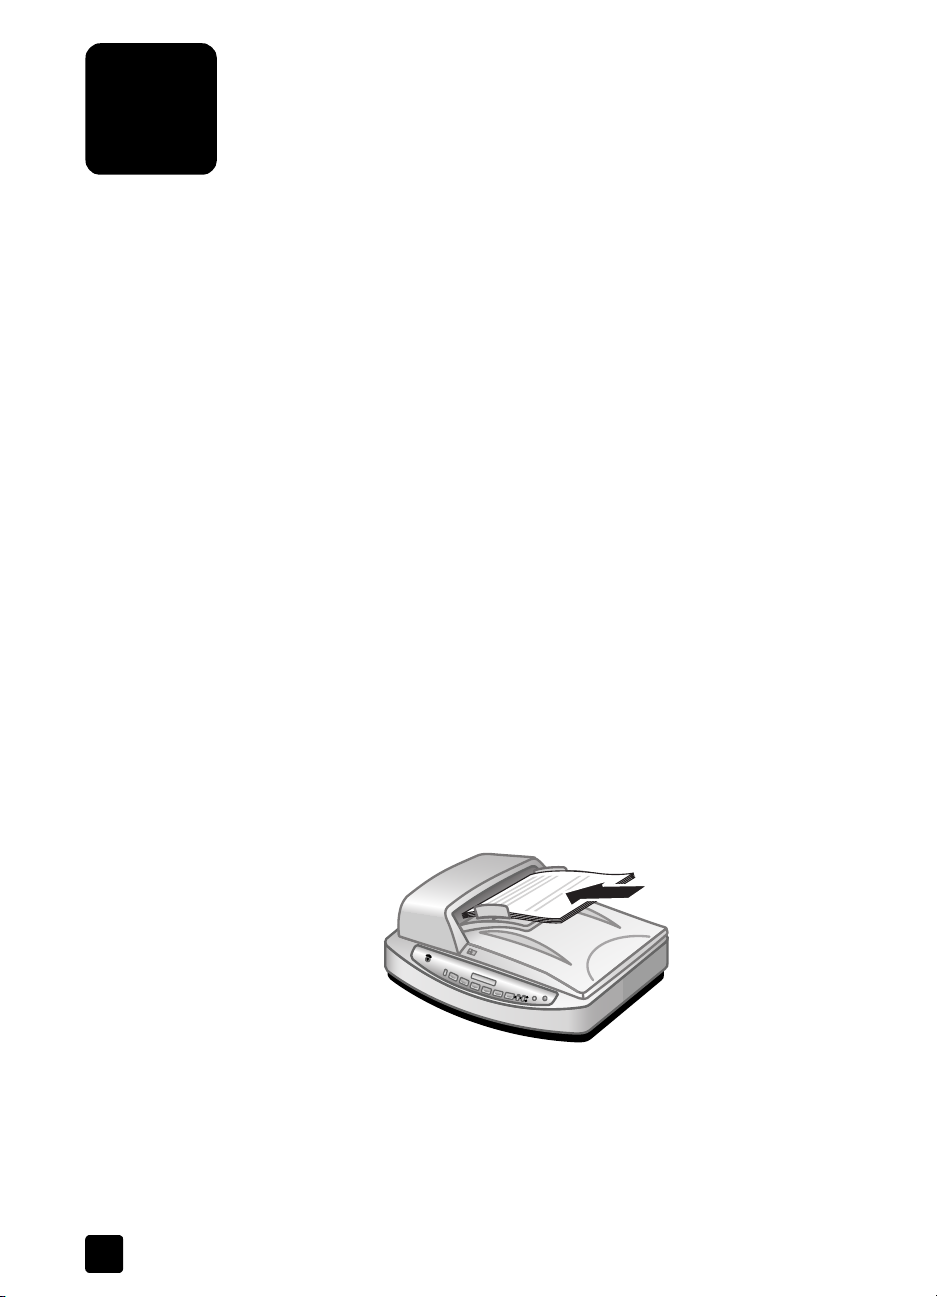
load originals in the ADF
1 Place a stack of similarly-sized originals face up in the document input tray,
with the first page on top. See the icon on the paper input tray.
2 Adjust the paper guides to center the stack.
3 Use the D
originals.
4 Press a scanner button or use the HP Director to begin scanning. Follow the
instructions on the computer screen to finish scanning.
14
UPLEX switch on the ADF to select one-sided or two-sided
load paper and center in the tray
Page 21
4
scan from the TMA
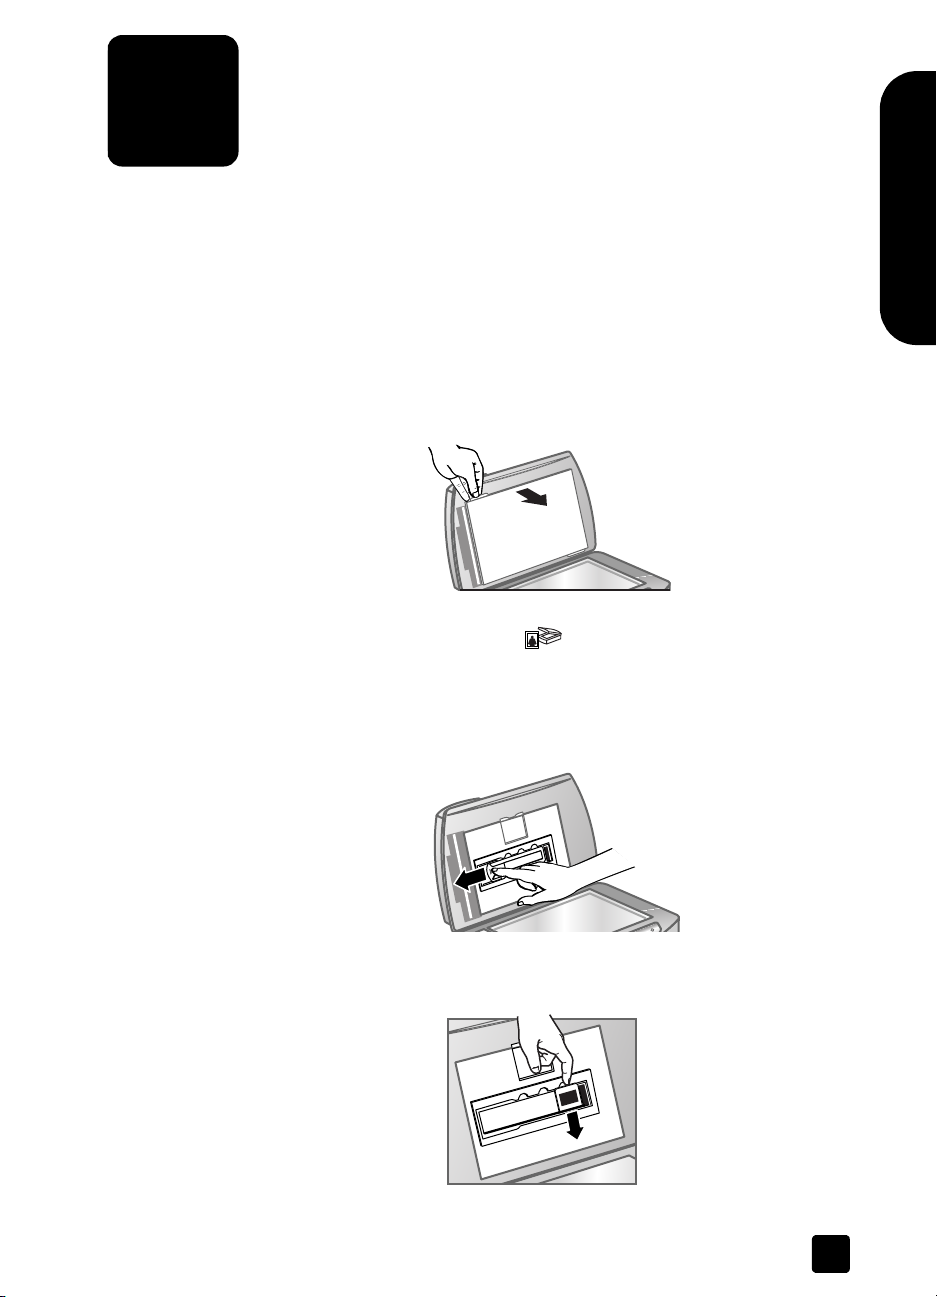
scan slides
Use the Transparent Materials Adapter (TMA) to scan 35 mm slides or negatives.
Note: To scan large transparent items, such as a presentation transparency,
place the item on the scanner glass under a sheet of white paper and scan
as usual.
To scan 35 mm slides, use the slide holder that is part of the built-in TMA.
1 Open the scanner lid and remove the TMA cover.
remove the TMA cover
2 Click the SCAN PICTURE button ( ).
A dialog box appears asking what you are scanning.
3 Select Slides from a Transparent Materials Adapter (TMA).
Note: Do not click Scan until the slides are loaded and the lid is closed.
4 Remove the negative holder, if present, from the slide holder.
English
remove the negative holder
5 Place up to three slides into the slide holder. Insert the slides with the front
of the slides facing you.
insert the slides
15
Page 22
chapter 4
6 After loading the last slide, insert the slide light-shield until it touches the
slides.
Note: Inserting the slide light-shield prevents stray light on the scanned
image.
insert the slide light-shield
7 Close the scanner lid.
8 In the Scan Picture window, click Scan.
9 The scanner performs a preview scan, and the preview image appears.
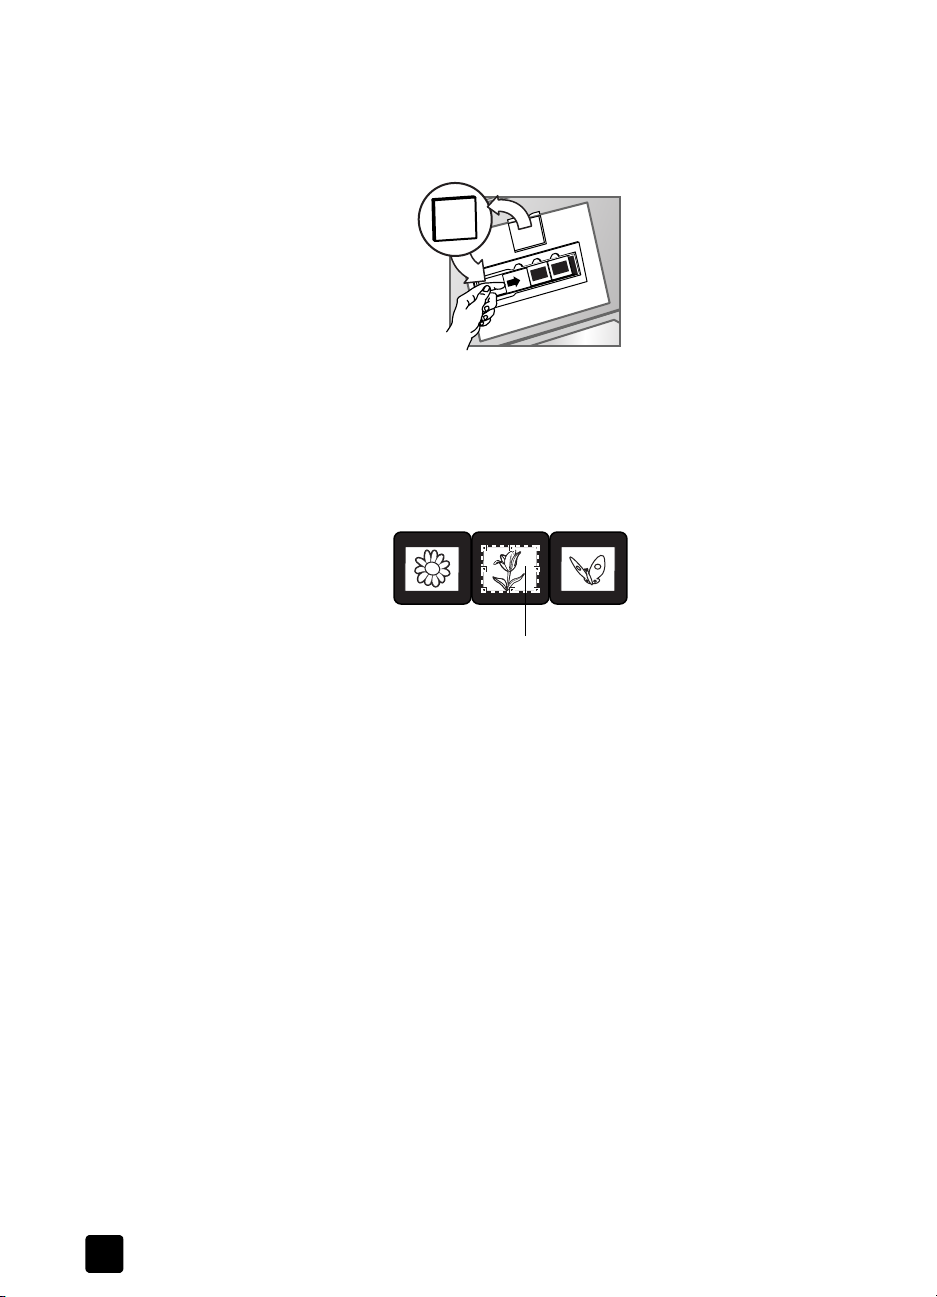
10 Select a final scan area within a slide. Click and drag a border around the
area you want for a final scan (final scan area).
Final scan area
select a final scan area
11 Scale the image to the desired size and make any other adjustments you
want, and then click Accept.
12 A dialog box appears asking if there are more originals to scan. If you
have more slides to scan, click Yes, and then perform one of the following
steps:
– Place another slide in the TMA, click New Scan, make adjustments,
and then click Accept.
OR
– Select another image within the preview window, make adjustments,
and then click Accept.
13 When you have finished scanning your items, click No when you receive
the prompt for another scan.
The images appear in the HP Photo & Imaging Gallery.
14 When finished, remove the slides. Replace the slide light-shield, the
negative holder, the negative light-shield, and the TMA cover.
16
hp scanjet 8200 series
Page 23

scan negatives
To scan 35 mm negatives use the negative holder that is part of the built-in TMA.
1 Open the scanner lid and remove the TMA cover.
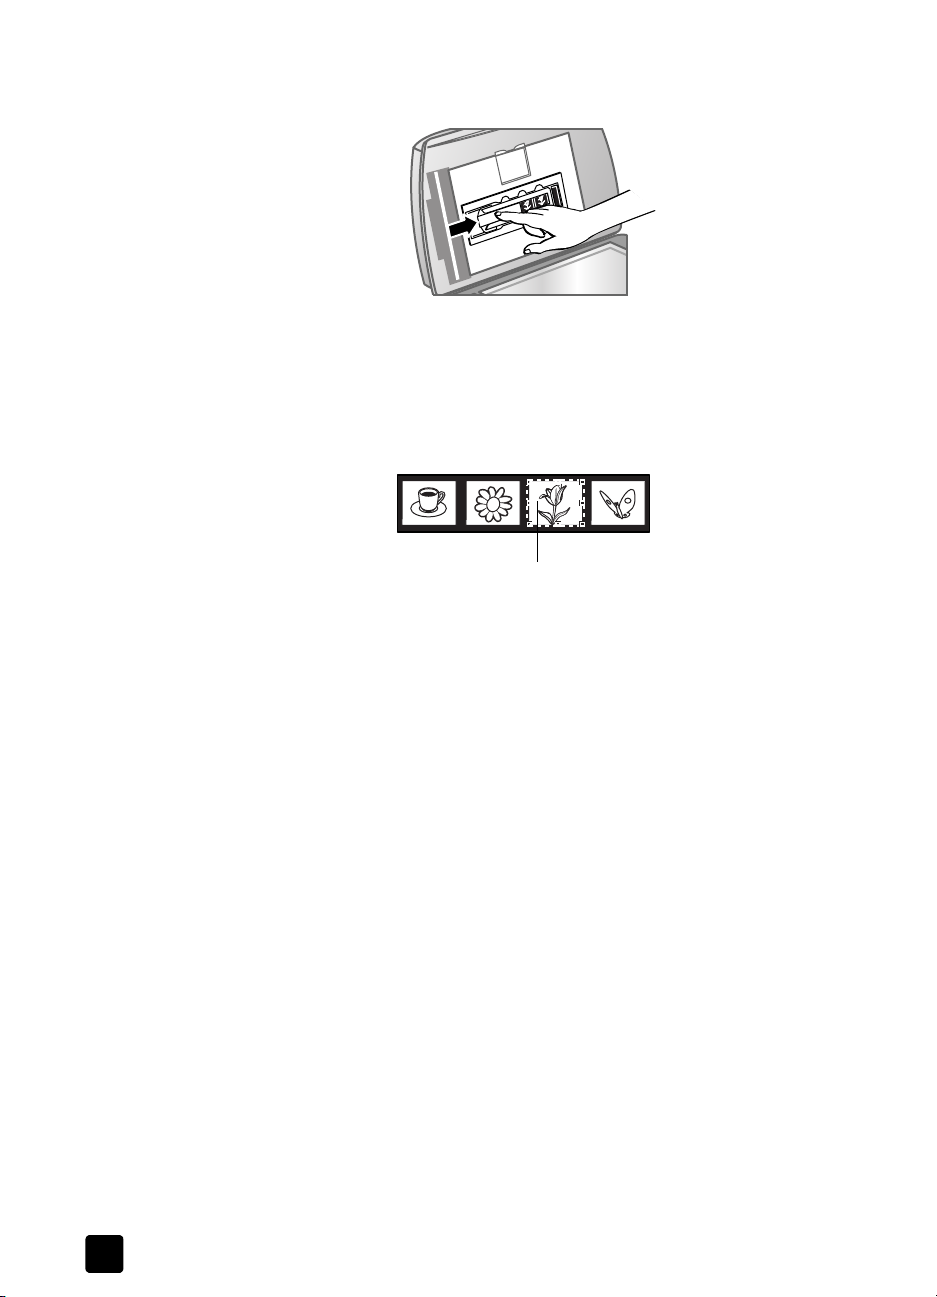
2 Click the S
3 Select Negatives from a Transparent Materials Adapter (TMA).
4 Remove the negative light-shield from the negative holder. The negative
scan from the TMA
English
remove the TMA cover
CAN PICTURE button ( ).
A dialog box appears asking what you are scanning.
Note: Do not click Scan until the negative is loaded and the lid is closed.
holder is stored in the slide holder.
user’s manual
remove the negative light-shield
5 Slide a negative strip into the negative holder so that the shiny side faces
the scanner glass when the scanner lid is closed.
insert a negative strip
Note: Negatives are easily damaged. Touch them only on their edges.
6 If you are scanning a negative strip that has fewer than four frames, insert
the negative light-shield into the negative holder until it touches the
negative strip.
17
Page 24
chapter 4
Note: Inserting the negative light-shield prevents stray light on the scanned
image.
insert the negative light-shield
7 Close the scanner lid.
8 In the Scan Picture window, click Scan.
The scanner performs a preview scan, and the preview image appears.
9 Select a final scan area. Click and drag a border around the area you
want for a final scan (final scan area).
Final scan area
select a final scan area
10 Scale the image to the desired size and make any other adjustments you
want, and then click Accept.
11 A dialog box appears asking if there are more originals to scan. If you
have more negatives to scan, click Yes, and then perform one of the
following steps:
– Place another negative strip in the TMA, click New Scan, make
adjustments, and then click Accept.
OR
– Select another image within the preview window, make adjustments,
and then click Accept.
12 When you have finished scanning your items, click No when you receive
the prompt for another scan.
The images appear in the HP Photo & Imaging Gallery.
13 When finished, remove the negative strip. Replace the negative holder, the
negative light-shield, and the TMA cover.
18
hp scanjet 8200 series
Page 25

5
product support
This section contains support information including phone numbers and website
information.
For regulatory information, see the regulatory_supplement.htm file on the CD that
comes with the scanner.
accessibility website
Customers with disabilities can get help by visiting www.hp.com/hpinfo/
community/accessibility/prodserv.
hp scanjet website
Visit www.scanjet.hp.com for the following information:
• tips for scanning more effectively and creatively
• HP Scanjet driver updates and software
support process
The HP support process works most effectively if you perform the following steps
in the order specified:
1 Read the troubleshooting section of the User's Manual and review the
electronic help for the software and scanner.
2 Access the HP Support website. If you have access to the Internet, you can
obtain a wide range of information about your scanner. Visit the HP
website for product help, drivers, and software updates at www.hp.com/
support. Customer Care is available in the following languages: Dutch,
English, French, German, Italian, Portuguese, Spanish, Swedish, Traditional
Chinese, Simplified Chinese, Japanese, and Korean. (Danish, Finnish, and
Norwegian support information is available in English only.)
3 Access HP e-support. If you have access to the Internet, connect with HP via
e-mail by going to www.hp.com/support. You will receive a personal reply
from an HP Customer Care technician. E-mail support is available in the
languages listed at that website.
4 Contact your local HP dealer. If your scanner has a hardware failure, take
it to your local HP dealer for a solution. Service is free during your
scanner's limited warranty period. After the warranty period, the dealer
will quote a service charge.
5 Contact HP support by phone. Please consult the following website to
check the details and conditions of phone support in your country or
region: www.hp.com/support. As a part of HP's continuing efforts to
improve phone support information services, we advise you to check the
HP website on a regular basis for new information regarding service
English
19
Page 26

chapter 5
features and delivery. If you cannot solve the problem by using the above
options, call HP while you are in front of your computer and scanner. For
faster service, please be prepared to provide the following information:
– the scanner's model number (located on the scanner's lid)
– the scanner's serial number (located on the bottom of the scanner)
– the computer's operating system
– the version of the scanner software (located on the scanner's CD label)
– messages displayed at the time the situation occurred
The applicable conditions for HP phone support are subject to change
without notice. Depending on your country/region, a fee may be charged
for phone information.
Telephone support is free from the date of purchase for the period shown in
the following table:
Locations Free Phone Support Period
United States 1 year
Africa 30 days
Asia Pacific 1 year
Canada 1 year
Europe 30 days
Latin America 1 year
Middle East 30 days
phone support in the United States
Support is available both during and after the warranty period.
Within the period of your warranty, telephone support is provided free of charge.
Call (208) 323-2551. If this is a long distance call for you, long distance charges
will apply.
U.S. phone support is available in both English and Spanish 24 hours a day, 7
days a week (days and hours of support may change without notice).
After the warranty period, call (208) 323-2551. Charges are $25.00 per issue,
and are charged to your credit card. If you think your HP product needs service,
call HP Customer Support, which can help determine if service is required.
20
hp scanjet 8200 series
Page 27

phone support in Europe, Middle East, and Africa
Algeria +213 (0) 61 56 45 43
Austria +43 (0) 820 87 4417
Bahrain +973 800 728
product support
Belgium +32 070 300 005 (Dutch)
+32 070 300 004 (French)
Czech Republic +42 (0) 2 6130 7310
Denmark +45 70202845
Egypt +20 02 532 5222
Finland +358 (0)203 66 767
France +33 (0) 8 92 69 60 22 (Euro 0.34/min)
Germany +49 (0) 180 5652 180 (Euro 0.12/min)
Greece +30 10 60 73 603
Hungary +36 (0) 1 382 1111
Ireland +353 1890 923902
Israel +972 (0) 9 830 4848
Italy +39 848 800 871
Luxembourg 900 40 006 (French)
900 40 007 (German)
Morocco +212 224 04747
Netherlands 0900 2020165 (Euro 0.10 per minute)
Norway +47 815 62 070
English
user’s manual
Poland +48 22 865 98 00
Portugal +351 808 201 492
Romania +40 1 315 44 42
Russian Federation + 7 095 797 3520 (Moscow)
+ 7 812 346 7997 (St Petersburg)
Saudi Arabia +966 800 897 1444
Slovakia +421 2 6820 8080
South Africa 086 000 1030 (RSA)
+27-11 258 9301 (Outside RSA)
Spain +34 902 010 059
Sweden +46 (0) 77-120 4765
Switzerland +41 0848 672 672 (German, French, Italian –
Peak time 0.08 CHF/Outside peak 0.04 CHF)
21
Page 28

chapter 5
Tunisia +216 1 891 222
Turkey +90 216 579 71 71
Ukraine +7 (380 44) 490-3520
United Arab
+971 4 883 845
Emirates
United Kingdom +44 (0)870 010 4320
other phone support worldwide
Argentina +54 0 810 555 5520
Australia +63 (3) 8877 8000 (or local (03) 8877 8000)
Brazil +55 (11) 3747 7799 (Grande São Paulo)
+55 0800 157751 (Outside Grande São Paulo)
Canada +1 905 206 4663 (During the warranty period)
+1 877 621 4722 (After the warranty period)
Central America
and the Caribbean
Chile +56 800 22 5547 (Post-sales Business Computing)
China +86 (10) 6564 5959
Colombia +57 9 800 114 726
Guatemala +502 1 800 999 5105
Hong Kong SAR +852 3002 8555
India 1 600 112267 or +91 11 682 6035 (Hindi & English)
+1 800 711 2884
+56 800 360 999 (Post-sales Home Computing)
22
Indonesia +62 (21) 350 3408
Japan 0570 000 511 (Inside Japan)
+81 3 3335 9800 (Outside Japan)
Korea, Republic of
+82 (2) 3270 0700 (Seoul)
0 80-999-0700 (Outside Seoul)
Malaysia +60 1 800 805 405
Mexico +52 58 9922 (Mexico City)
+52 01 800 472 6684 (Outside Mexico City)
New Zealand +64 (9) 356 6640
Peru +51 0 800 10111
Philippines + 63 (2) 867 3551
Puerto Rico +1 877 2320 589
Singapore +65 6272 5300
hp scanjet 8200 series
Page 29

Taiwan +886 0 800 010055
Thailand +66 (2) 661 4000
United States 1 800 474-6836 (800 HPINVENT)
Venezuela +58 0 800 4746 8368
product support
Vietnam +84 (0) 8 823 4530
English
user’s manual
23
Page 30

warranty
6
This topic contains warranty, regulatory, and environmental stewardship
program information.
hewlett-packard limited warranty statement
The HP Scanjet 8200 series digital flatbed scanner has a limited warranty of one
(1) year.
1 HP warrants to you, the end-user customer, that HP hardware, accessories,
and supplies will be free from defects in materials and workmanship after
the date of purchase, for the period specified above. If HP receives notice
of such defects during the warranty period, HP will, at its option, either
repair or replace products which prove to be defective. Replacement
products may be either new or equivalent in performance to new.
2 HP warrants to you that HP software will not fail to execute its
programming instructions after the date of purchase, for the period
specified above, due to defects in material and workmanship when
properly installed and used. If HP receives notice of such defects during the
warranty period, HP will replace software which does not execute its
programming instructions due to such defects.
3 HP does not warrant that the operation of HP products will be
uninterrupted or error free. If HP is unable, within a reasonable time, to
repair or replace any product to a condition as warranted, you will be
entitled to a refund of the purchase price upon prompt return of the
product.
4 HP products may contain remanufactured parts equivalent to new in
performance or may have been subject to incidental use.
5 This warranty does not apply to defects resulting from (a) improper or
inadequate maintenance or calibration, (b) software, interfacing, parts, or
supplies not supplied by HP, (c) unauthorized modification or misuse, (d)
operation outside of the published environmental specifications for the
product, or (e) improper site preparation or maintenance.
6 TO THE EXTENT ALLOWED BY LOCAL LAW, THE ABOVE WARRANTIES
ARE EXCLUSIVE AND NO OTHER WARRANTY OR CONDITION,
WHETHER WRITTEN OR ORAL, IS EXPRESSED OR IMPLIED, AND HP
SPECIFICALLY DISCLAIMS ANY IMPLIED WARRANTIES OR CONDITIONS
OF MERCHANTABILITY, SATISFACTORY QUALITY, AND FITNESS FOR A
PARTICULAR PURPOSE. Some countries, states, or provinces do not allow
limitations on the duration of an implied warranty, so the above limitation
or exclusion might not apply to you. This warranty gives you specific legal
rights, and you might also have other rights that vary from country to
country, state to state, or province to province.
24
Page 31

7 HP’s limited warranty is valid in any country or locality where HP has a
support presence for this product and where HP has marketed this product.
The level of warranty service you receive may vary according to local
standards. HP will not alter the form, fit, or function of the product to make
it operate in a country in which it was never intended to function for legal
or regulatory reasons.
8 TO THE EXTENT ALLOWED BY LOCAL LAW, THE REMEDIES IN THIS
WARRANTY STATEMENT ARE YOUR SOLE AND EXCLUSIVE REMEDIES.
EXCEPT AS INDICATED ABOVE, IN NO EVENT WILL HP OR ITS
SUPPLIERS BE LIABLE FOR LOSS OF DATA OR FOR DIRECT, SPECIAL,
INCIDENTAL, CONSEQUENTIAL (INCLUDING LOST PROFIT OR DATA),
OR OTHER DAMAGE, WHETHER BASED IN CONTRACT, TORT, OR
OTHERWISE. Some countries, states, or provinces do not allow the
exclusion or limitation of incidental or consequential damages, so the
above limitation or exclusion may not apply to you.
9 THE WARRANTY TERMS CONTAINED IN THIS STATEMENT, EXCEPT TO
THE EXTENT LAWFULLY PERMITTED, DO NOT EXCLUDE, RESTRICT, OR
MODIFY AND ARE IN ADDITION TO THE MANDATORY STATUTORY
RIGHTS APPLICABLE TO THE SALE OF THIS PRODUCT TO YOU.
regulatory information
Regulatory information is located on the HP Photo & Imaging software CD that
comes with the scanner. On the CD, browse for the file named
regulatory_supplement.htm.
warranty
English
environmental stewardship program
protecting the environment
Hewlett-Packard Company is committed to providing quality products in an
environmentally sound manner. This product has been designed with attributes
to minimize impacts on our environment.
energy consumption
Energy usage drops significantly while the scanner is in low-power mode, which
saves natural resources and saves money without affecting the high performance
of this product. This product qualifies for E
program to encourage the development of energy-efficient office products. As an
ENERGY STAR Partner, Hewlett-Packard Company has determined that this product
NERGY STAR guidelines for energy efficiency.
meets E
plastics
Plastic parts over 25 g (0.88 oz) are marked according to international
standards that enhance the ability to identify plastics for recycling purposes at
the end of the product's life.
user’s manual
NERGY STAR®, which is a voluntary
25
Page 32

chapter 6
disassembly/end of life
This HP product (the HP Scanjet 8200 series digital flatbed scanner) is designed
for ease of disassembly and to provide end-of-life disposal options by use of
common fasteners and snap-fitting parts.
product restricted material
This HP product contains the following materials that might require special
handling at end-of-life:
• mercury in the fluorescent lamp in the scanner and transparent materials
• lead in solder
For recycling information, contact
authorities or the Electronic Industries Alliance at www.eiae.org.
recycling materials
HP offers a variety of product end-of-life return programs in a number of
geographic areas. To determine if a program is available in your area, please
contact your nearest HP sales office.
Products returned to HP are reused, recycled, or disposed of in a responsible
manner. Each month, HP reuses or recycles more than 1.6 million kg (3.5 million
pounds) of material at our product recovery centers in Grenoble, France;
Boeblingen, Germany; and Roseville, California, USA. This represents 99
percent by weight of all the material we receive from customers and
HP operations.
adapter (< 5 mg)
www.hp.com/go/recycle or contact your local
26
hp scanjet 8200 series
Page 33

7
appendix A – SCSI setup and options
This section describes how to set up the HP Scanjet 8200 series scanner with a
Small Computer Serial Interface (SCSI).
why use SCSI?
If your computer uses Windows NT, the scanner must be attached with SCSI. If
your computer already has SCSI devices attached, you can attach the scanner
to an existing external SCSI string. The scanner must be the last device in the SCSI
string and the computer must have a compatible SCSI adapter. The scanner also
must have a SCSI module.
For a list of compatible SCSI adapter cards, see compatible SCSI cards on
page 29.
install the software
HP recommends that you install the software first.
Note: For Windows NT, users must install the HP Precisionscan Pro
software.
1 Remove any previous versions of HP scanning software.
2 Close all open applications on the computer and insert the CD.
3 From the Start menu, click Run, and type: x:setup.exe (where x is the letter
of the CD drive).
install the scanner
English
The SCSI module must be inserted in the scanner and a SCSI card must be in the
computer before installing the scanner.
1 Unplug the power cord from the scanner, and turn off the computer.
2 Install the SCSI module in the scanner:
a. Remove the two mounting screws that attach the SCSI access cover on
the back of the scanner and remove the cover.
1 2 1
remove SCSI access cover
27
Page 34

chapter 7
b. Insert the SCSI module (C9939AC3) into the scanner.
insert the SCSI module
c. Insert and tighten the two mounting screws.
tighten the two mounting screws
3 Install the SCSI card into your computer (from the SCSI kit –
C6271) using
the instructions that came with the SCSI kit.
4 Connect the SCSI cable between the computer and the SCSI module.
5 Connect the power cord and adapter as shown in the following illustration.
Power adapter cable
6 Turn on the computer.
7 If other SCSI devices are installed on this SCSI card and the scanner does
not work, there might be a SCSI address conflict.
8 If there is a SCSI address conflict, change the scanner SCSI address.
Change the scanner SCSI address
If you have several SCSI devices attached to a single SCSI adapter card, each
SCSI device must have a unique SCSI ID. If the scanner does not work after
adding the scanner to a multi-device SCSI string, you might need to change the
SCSI address. To change the scanner SCSI ID (preset to 2), follow these steps:
1 Turn the computer off.
2 Ensure that the scanner is on.
3 Press the S
button ( ) on the scanner at the same time.
SCSI Address: 2 should appear on the front panel display.
CAN DOCUMENT TO button ( ) and the EDIT TEXT
1
Power adapter
connect the power
2
Power co rd
28
hp scanjet 8200 series
Page 35

appendix A – SCSI setup and options
4 Press the NUMBER OF COPIES button ( ) to select a different SCSI address
number. The number appears in the front panel display.
5 To exit the SCSI address settings, press any button on the scanner front
panel except the N
6 Turn the computer on.
UMBER OF COPIES button ( ).
compatible SCSI cards
Windows Compatible SCSI Cards
Adaptec 19160 Adaptec APA 1480A Slim
Adaptec 2100S 1Channel Ultra Adaptec AVA 2906 PCI
Adaptec 2904 Adaptec AVA 2930 Ultra
Adaptec 29160 Ultra Adaptec AVA 39160 Ultra
Adaptec 39320D Ultra AdvanSys 915
Adaptec AAA 131U2 RAIDPCI To Ultra2 SIDE-2935LVD or SIDE-2936UW or SIDE-2930C
or SIDE-DU280
Adaptec AHA 291OC lomega Jaz Jet 32Bit PCI to SCSI
Adaptec AHA 2940U Ultra Symbios Logic 53C1010 or 53C895
Adaptec AHA 2944UW Ultra Wide Tekram DC390 or 395UW or DC315U or DC-
315 or DC-390U2W
Macintosh Compatible SCSI Cards
Adaptec AHA 2930 U2B AdvanSys SCSI 915
Adaptec AHA 2930 UI Apple 53C875
English
user’s manual
29
Page 36

appendix B – product specifications
8
and options
This section contains the product specifications for the HP Scanjet 8200 series
scanners and accessories.
scanner specifications
Name Description
Scanner type Flatbed
Weight (without lid) 2.79 kg (6.2 pounds)
Maximum original size 296 x 494 x 73 mm (11.7 x 19.8 x 2.9 inches)
Scanning element Charged-coupled device
Interface Hi-Speed USB and SCSI-2
Optical resolution 4800 dpi
Selectable resolution 12 dpi to 999,999 dpi at 100 percent scaling
AC line voltage 100 -120 V 60 Hz – North America
200-240 V 50 Hz – Continental Europe, United Kingdom, Australia
100-240 V 50 Hz/60 Hz – rest of the world
Power consumption For power consumption data, see the regulatory_supplement.htm file
on the HP Photo & Imaging software CD.
All HP Scanjet 8200 series scanners are E
NERGY STAR partner, Hewlett-Packard Company has determined
an E
that this product meets the E
efficiency.
NERGY STAR guidelines for energy
NERGY STAR compliant. As
automatic document feeder (ADF) specifications
Name Description
Size 584 x 318 x 89 mm (23.0 x 12.5 x 3.5 inches)
Weight (with TMA) 2.7 kg (6.0 pounds)
Paper tray capacity 50 peices of 75 g/m
Maximum paper size 216 x 356 mm (8.5 x 14 inches)
Minimum paper size 89 x 127 mm (3.5 x 5 inches)
Maximum paper weight 90g/m
Power requirements 1.0 A, 32 V, 32 watts (supplied by scanner)
30
2
(24 pounds)
800 mA, 19 watts (peak) 625 mA, 15 watts (nominal)
2
(20 pound bond)
Page 37

appendix B – product specifications and options
transparent materials adapter (TMA) specifications
Name Description
Media Types and
Capacity
Size 565 x 320 x 64 mm (22.2 x 12.6 x 2.5 inches)
Weight 1.6 kg (3.5 pounds)
Power requirements 16 VDC, 425 mA, 6.8 watts (supplied by scanner)
Slides: up to 3 slides, 35 mm, mounted on a frame that is
1.05 x 1.9 mm thick and 49.8 x 50.8 mm square.
Negatives: up to 4 frames of a 35 mm negative strip.
environmental specifications for the scanner, ADF, and TMA
Name Description
Temperature Operating: 10° to 35° C (50° to 95° F)
Storage: -40° to 70° C (-40° to 158° F)
Relative humidity Operating: 15 percent to 80 percent noncondensing
10° to 35° C (50° to 95° F)
Storage: up to 90 percent at
-40° to 70° C or (-40° to 158° F)
purchase accessories
You can purchase accessories at your local retailer or online at
www.hpshopping.com (USA only). For other regions, use www.hp.com and
select your language. Then select the shopping section.
English
Option Name Part Number
SCSI Kit (contains a SCSI card and cable) C6271
SCSI Module (contains a SCSI port for the scanner) C9939AC3
15 ppm ADF with built-in TMA C9936A
25 ppm ADF with built-in TMA C9937A
purchase maintenance parts
You can purchase the following maintenance parts at www.hp.com. In the
Search box, type “ADF Roller Replacement kit” or “cleaning cloth” to find
information on purchasing the parts.
Name Part Number
ADF Roller Replacement kit C9937-68001
Cleaning Cloth 10 pack C9915-60056
user’s manual
31
Page 38

index
index
A
accessibility, website for, 19
accessories, purchase, 31
acquire scans, 5
adapter cards, list of, 29
address, change SCSI, 28
ADF (automatic document
feeder)
choose acceptable
media,
14
clean, 10
maintain, 12
prepare media for use, 14
purchase, 31
roller replacement kit, 31
scan from, 14
attach files to e-mail, 7
automatic document feeder
(ADF)
choose acceptable
14
media,
clean, 10
maintain, 12
prepare media for use, 14
purchase, 31
roller replacement kit, 31
scan from, 14
B
Button Settings
4
button,
change, 9
buttons
Cancel,
Color/Black & White, 3
Copy, 3, 7
Destination, 3
Edit Text, 3
E-mail button, 3
File Documents, 3
Number of Copies, 3
Powe r Save, 3, 9
Scan Document To, 3
Scan Picture, 3
settings, 4, 9
4, 8
C
cancel
copies printing,
scanning, 8
Cancel button
description,
use, 8
change
preview images,
printer settings, 7
clean
ADF,
10
scanner glass, 10
TMA, 10
cleaning cloth, part
number,
cloth, cleaning, 31
Color/Black & White button,
description,
copies
7
print,
Copy button
description,
use, 7
curls in media, 14
customer support, 19
custom-size paper, 14
7
4
5
31
3
3
D
Destination button,
description,
destination directory
invalid,
directory invalid, 12
disabilities, assistance for, 19
display, front panel, 4
document scans
from Scan Document To
button, 5
3
12
E
Edit Text button
description,
use, 6
electrical specifications
TMA,
E-mail button
description,
use, 7
end-of-life return programs, 26
3
30
3
energy consumption
Energy Star,
TMA, 30
Energy Star
description,
website, 25
environmental
specifications,
stewardship program, ii, 25
25
25
31
F
feed roll assembly, replace, 12
File Documents button
on scanner,
use, 6
files
attach to e-mail,
output types, 10
final scan area, 16, 18
forms, scan, 14
Front Panel display,
description,
3
7
4
H
hardware
test mode,
help
phone support,
websites, 19
holder, negative, 17
HP Copying software, 7
HP Photo & Imaging Gallery, 5
HP Scanjet transparent
materials adapter (TMA)
negatives, scan, 17
slides, scan, 15
specifications, 30
humidity specifications, 31
12
20
I
ID, change SCSI, 28
images
preview and change,
import scans, 5
install
scanner with SCSI,
test hardware, 12
Instant Lamp Warm-up
9
setting,
5
27
32
Page 39

index
instant scan, 9
invalid directory or folder
message,
12
L
lamp in scanner
warm-up,
9
M
maintain
12
ADF,
clean scanner, 10
order supplies, 12
TMA, 10
media
acceptable types for
ADF, 14
messages
invalid directory or
folder, 12
multipart forms, scan, 14
N
negatives
17
holder,
light-shield, 17, 18
scan with TMA, 17
NT, software installation, 27
Number of Copies button,
description,
3
O
operating temperature
specifications,
31
order
maintenance supplies,
12
originals
preview multiple originals,
scan multiple, 8
select type of, 10
output file types, 10
P
paper
acceptable types for
ADF, 14
phone support, 20
power consumption
Energy Star,
25
TMA, 30
Power Save button
description,
3
use, 9
power specifications
TMA,
30
preview images
multiple originals,
view and change, 5
print
7
copies,
printers
change settings,
product specifications, 30
programs
scan from,
5
R
recycle, 25, 26
regulatory information, 25
replace
feed rolls in ADF,
return programs, 26
roller replacement kit, ADF, 31
S
scan
attach files to e-mail,
cancel, 8
multiple originals, 8
negatives, 17
overview, 4
slides, 15
with Copy button, 7
with Edit Text button, 6
with E-mail button, 7
with File Documents
6
button,
with Scan Document To
5
button,
8
with Scan Pictures button, 5
Scan Document To button, 3
scan documents, 5
Scan Picture button
scan pictures,
5
use, 5
scanner
care and cleaning,
glass, clean, 10
install, 27
SCSI
change scanner address,
install scanner, 27
list of compatible adapter
cards,
29
setup scanner with, 27
size
30
TMA,
8
slides
holder,
15
light-shield, 16
scan, 15
software
7
installation, SCSI,
27
English
specifications
environmental,
31
product, 30
scanner, 30
TMA, 31
stewardship program, 25
storage specifications, 31
12
supplies, order, 12
support, customer, 19
T
technical support, 19
telephone support, 20
7
temperature specifications, 31
test
scanner hardware,
12
TMA. See HP Scanjet
transparent materials
adapter (TMA)
transparencies, scan,
14
transparent materials adapter.
See HP Scanjet
transparent materials
adapter (TMA)
TWAIN
scan from,
5
V
view
preview images,
5
W
warranty, ii, 24
websites
10
disability assistance,
Energy Star, 25
19
recycling, 26
weight
TMA,
ADF,
30
14
28
weights of media acceptable
wrinkles in media, 14
user’s manual
33
Page 40

Page 41

scanner hp scanjet série 8200
guide de l'utilisateur
Français
Page 42

Copyright
© Copyright Hewlett-Packard Company 2003
Tous droits réservés. La reproduction, l'adaptation ou la traduction de ce document dans
une autre langue sans l’autorisation écrite préalable de Hewlett-Packard est interdite, ou
autorisée conformément aux lois relatives au copyright.
Ce produit intègre la technologie PDF de Adobe, qui inclut la compression LZW (LempelZiv-Welch), brevet déposé sous le numéro US Patent 4,558,302.
marques déposées
Adobe et le logo Acrobat sont des marques commerciales ou des marques déposées
de Adobe Systems Incorporated aux Etats-Unis et dans d'autres pays/régions.
Energy Star® est une marque déposée aux Etats-Unis de l'agence américaine de
protection de l'environnement (United States Environmental Protection Agency.
Microsoft et Windows sont des marques déposées de Microsoft Corporation.
Il se peut que les autres noms de produits mentionnés soient des marques déposées de
leurs détenteurs respectifs.
garantie
Les informations contenues dans ce document sont sujettes à modification sans préavis.
Hewlett-Packard n'offre aucune garantie d'aucune sorte sur ces informations.
HEWLETT-PACKARD REJETTE SPECIFIQUEMENT TOUTES GARANTIES DE
COMMERCIALISATION ET D'ADAPTATION A UN USAGE PARTICULIER.
Hewlett-Packard ne pourra être tenu pour responsable des dommages directs, indirects ou
accidentels liés à la fourniture ou à l'utilisation des informations contenues dans ce
document.
L'application TWAIN est distribué en l'état. Les développeurs et les distributeurs de
l'application TWAIN rejettent expressément toute garantie implicite, expresse ou
réglementaire, y compris, et sans aucune limitation, les garanties implicites de
commercialisation, de respect des droits des tiers et d'adaptation à un usage particulier.
Ni les développeurs, ni les distributeurs ne seront tenus pour responsables des dommages
directs, indirects, spéciaux, fortuits ou consécutifs qui résulteraient de la reproduction, de
la modification, de la distribution ou d'une autre utilisation de l'application TWAIN.
NOTICE TO U.S. GOVERNMENT USERS: RESTRICTED RIGHTS COMMERCIAL
COMPUTER SOFTWARE: Use, duplication, or disclosure by the Government is subject to
restrictions as set forth in subparagraph (c) (1) (ii) of the Rights in Technical Data Clause at
DFARS 52.227-7013.
Il se peut que les documents numérisés à l'aide de ce produit soient protégés par la
législation du gouvernement ou par d'autres réglementations, telles que les lois relatives
au copyright. Le respect de ces réglementations relève de la responsabilité exclusive du
client.
mise au rebut de certains matériaux
Ce produit HP contient des matériaux qui risquent de nécessiter un traitement spécial
lorsqu'ils seront hors d'usage :
• du mercure dans la lampe fluorescente du scanner et l'adaptateur de supports
transparents (< 5 mg) ;
• du plomb dans les soudures.
Vous pouvez obtenir des informations concernant le recyclage à l'adresse
http://www.hp.com/go/recycle, auprès des autorités locales ou sur le site de l'EIA
(Electronics Industries Alliance) : http://www.eiae.org.
Pour plus d'informations sur le programme de gestion de l'environnement de HP, reportezvous à la section programme de gestion de l'environnement à la page 29. Pour toutes
informations concernant la garantie du produit, reportez-vous à la section extension de
garantie hewlett-packard à la page 28.
Page 43

table des matières
où trouver... ? . . . . . . . . . . . . . . . . . . . . . . . . . . . . . . . . . . . . 1
utilisation du scanner . . . . . . . . . . . . . . . . . . . . . . . . . . . . . . . 3
présentation générale du panneau frontal . . . . . . . . . . . . . . . . 3
installation du logiciel . . . . . . . . . . . . . . . . . . . . . . . . . . . . . . 4
présentation générale du scanner . . . . . . . . . . . . . . . . . . . . . . 4
numérisation de documents . . . . . . . . . . . . . . . . . . . . . . . . . . 5
numérisation d'images. . . . . . . . . . . . . . . . . . . . . . . . . . . . . . 5
numérisation d'un document en vue d'éditer du texte. . . . . . . . . 6
enregistrement d'un document sur un disque ou un CD . . . . . . . 7
envoi de documents ou d'images numérisés . . . . . . . . . . . . . . . 7
copie de documents ou d'images . . . . . . . . . . . . . . . . . . . . . . 8
numérisation et prévisualisation de plusieurs originaux. . . . . . . . 9
annulation d'une numérisation en cours . . . . . . . . . . . . . . . . . 10
modification des paramètres . . . . . . . . . . . . . . . . . . . . . . . . 10
sélection du type de document d'origine . . . . . . . . . . . . . . . . 11
entretien et maintenance . . . . . . . . . . . . . . . . . . . . . . . . . . . 11
problèmes d'installation du scanner . . . . . . . . . . . . . . . . . . . 14
problèmes d'initialisation du scanner. . . . . . . . . . . . . . . . . . . 15
résolution des problèmes . . . . . . . . . . . . . . . . . . . . . . . . . . . 15
Français
numérisation à partir du bac d'alimentation automatique
(ADF) . . . . . . . . . . . . . . . . . . . . . . . . . . . . . . . . . . . . . . . . . . 16
choix d'un support compatible avec le bac d'alimentation
automatique. . . . . . . . . . . . . . . . . . . . . . . . . . . . . . . . . . . . 16
chargement des originaux dans le bac d'alimentation
automatique. . . . . . . . . . . . . . . . . . . . . . . . . . . . . . . . . . . . 17
numérisation à partir de l'adaptateur de supports
transparents (TMA). . . . . . . . . . . . . . . . . . . . . . . . . . . . . . . . 18
numérisation de diapositives. . . . . . . . . . . . . . . . . . . . . . . . . 18
numérisation de négatifs . . . . . . . . . . . . . . . . . . . . . . . . . . . 20
assistance produits. . . . . . . . . . . . . . . . . . . . . . . . . . . . . . . . 23
site Web dédié à l'accessibilité . . . . . . . . . . . . . . . . . . . . . . 23
site Internet hp scanjet . . . . . . . . . . . . . . . . . . . . . . . . . . . . . 23
procédure d'assistance . . . . . . . . . . . . . . . . . . . . . . . . . . . . 23
garantie. . . . . . . . . . . . . . . . . . . . . . . . . . . . . . . . . . . . . . . . 28
extension de garantie hewlett-packard . . . . . . . . . . . . . . . . . . 28
informations juridiques. . . . . . . . . . . . . . . . . . . . . . . . . . . . . 29
programme de gestion de l'environnement . . . . . . . . . . . . . . . 29
iii
Page 44

table des matières
annexe A – configuration et options SCSI . . . . . . . . . . . . . . . 31
pourquoi utiliser une interface SCSI ? . . . . . . . . . . . . . . . . . . 31
installation du logiciel . . . . . . . . . . . . . . . . . . . . . . . . . . . . . 31
installation du scanner . . . . . . . . . . . . . . . . . . . . . . . . . . . . 31
cartes SCSI compatibles . . . . . . . . . . . . . . . . . . . . . . . . . . . 33
annexe B – caractéristiques du produit et options . . . . . . . . . 34
caractéristiques du scanner . . . . . . . . . . . . . . . . . . . . . . . . . 34
caractéristiques du bac d'alimentation automatique (ADF) . . . . 34
caractéristiques de l'adaptateur de supports transparents (TMA)
conditions ambiantes du scanner, du bac d'alimentation
automatique et de l'adaptateur de supports transparents . . . . . 35
achat d'accessoires . . . . . . . . . . . . . . . . . . . . . . . . . . . . . . 35
achat de pièces de maintenance . . . . . . . . . . . . . . . . . . . . . 36
35
iv
hp scanjet série 8200
Page 45

où trouver... ?
1
Le présent manuel décrit le fonctionnement du scanner HP Scanjet série 8200
pour un ordinateur doté d'un système d'exploitation Microsoft® Windows®.
Reportez-vous au tableau ci-dessous pour obtenir des informations sur les
systèmes Microsoft Windows NT® et Apple® Macintosh®.
De nombreuses ressources sont à votre disposition pour vous permettre de trouver
les informations dont vous avez besoin. Le tableau suivant répertorie les sources
d'informations.
Sujet Emplacement
Systèmes d'exploitation
•Apple Macintosh
•Windows NT
Présentation générale du
produit
Description du produit
Configuration du scanner
Installation du logiciel
Désinstallation du logiciel
Recherche d'aide
• Logiciel
• Logiciels tiers
• Spécifique au produit
•Utilisateurs SCSI
Entretien et maintenance
Centre d'aide Apple
Poster d'installation
Guide de l'utilisateur – Installation du logiciel
Guide de l'utilisateur – Problèmes d'installation
Aide Precisionscan Pro
Guide de l'utilisateur – Configuration et options SCSI (Annexe A)
Poster d'installation
Guide de l'utilisateur – Présentation générale du panneau frontal
Aide HP Scanjet série 8200 – Présentation du panneau frontal
Aide HP Scanjet série 8200 – Description du produit
Poster d'installation – Simple page double qui fournit des
instructions relatives à l'installation et à la configuration
Aide HP Scanjet série 8200 – Installation du scanner
Guide de l'utilisateur – Configuration et options SCSI (Annexe A)
Poster d'installation
Guide de l'utilisateur – Installation du logiciel
Aide HP Scanjet série 8200 – Désinstallation du logiciel
Aide Photo et Imagerie HP – Comment utiliser le logiciel
Documentation des logiciels tiers
Aide HP Scanjet série 8200
Guide de l'utilisateur – Configuration et options SCSI (Annexe A)
Aide HP Precisionscan Pro
Guide de l'utilisateur – Entretien et maintenance
Français
1
Page 46

chapitre 1
Sujet Emplacement
Résolution des problèmes
• Installation et
configuration
•Scanner
Guide de l'utilisateur – Problèmes d'installation
Guide de l'utilisateur – Problèmes d'initialisation
Aide HP Scanjet série 8200 – Résolution des problèmes liés au
scanner
• Accessoires
Aide HP Scanjet série 8200 – Résolution des problèmes liés au
bac d'alimentation automatique
Aide HP Scanjet série 8200 – Résolution des problèmes liés à
l'adaptateur de supports transparents
• Logiciel
•Entretien de la face
Aide Photo et Imagerie HP – Résolution des problèmes
www.hp.com/support
intérieure de la vitre du
scanner
Utilisation
•du scanner
• des accessoires
Guide de l'utilisateur – Comment utiliser le scanner
Guide de l'utilisateur – Numérisation à partir de l'adaptateur de
supports transparents
Guide de l'utilisateur – Numérisation à partir du bac
d'alimentation automatique
•du logiciel
Aide Photo et Imagerie HP – Comment utiliser le logiciel
Assistance
• Informations générales
Guide de l'utilisateur – Assistance HP
Aide HP Scanjet série 8200 – Assistance HP
•Site Web
• Numéros de téléphone
www.hp.com/support
Guide de l'utilisateur – Assistance HP
Aide HP Scanjet série 8200 – Assistance HP
Garantie
Guide de l'utilisateur – Déclaration de garantie limitée de
Hewlett-Packard
Achat d'accessoires et
options
Guide de l'utilisateur – Achat d'accessoires (Annexe B)
www.hpshopping.com (Etats-Unis uniquement) ; dans les autres
régions, consultez l'adresse www.hp.com et sélectionnez votre
langue
Achat de fournitures de
maintenance
Guide de l'utilisateur – Achat de pièces de maintenance
(Annexe B)
www.hpshopping.com (Etats-Unis uniquement) ; dans les autres
régions, consultez l'adresse www.hp.com et sélectionnez votre
langue
2
hp scanjet série 8200
Page 47

utilisation du scanner
2
Le présent chapitre décrit le panneau frontal du scanner et fournit des
informations sur son utilisation et son entretien.
présentation générale du panneau frontal
Fonction Description
Bouton DESTINATION Sélectionne la destination (une application telle qu'un
traitement de texte) d'un document numérisé. La
destination s'affiche sur l'écran du panneau frontal.
Sélectionnez la destination avant d'appuyer sur le
bouton NUMÉRISER VERS.
Bouton N
Bouton NUMÉRISER IMAGE Numérise l'image vers la Galerie photo et imagerie HP.
Bouton E
Bouton D
Bouton M
ÉLECTRONIQUE
Bouton C
Bouton N
UMÉRISER VERS Numérise un document original dans la destination
sélectionnée (une application telle qu'un traitement de
texte). Utilisez le bouton DESTINATION pour sélectionner
la destination.
DITER TEXTE (OCR) Numérise le texte et les images du document et affiche
le texte modifiable dans l'application de traitement de
texte définie.
OCUMENT FICHIER Numérise le document ou l'image d'origine dans le
fichier cible que vous indiquez. Après la numérisation
de l'original, une boîte de dialogue s'affiche et vous
permet de préciser le nom, le type et l'emplacement du
fichier.
ESSAGERIE
OPIER Lance le logiciel de copie et numérise l'original. L'image
OMBRE DE COPIES Sélectionne le nombre de copies à imprimer à l'aide du
Numérise le document ou l'image d'origine et envoie
l'image numérisée vers votre logiciel de messagerie
électronique en tant que pièce jointe.
numérisée est envoyée directement à l'imprimante par
défaut.
Avant d'appuyer sur le bouton C
nombre de copies et indiquez si l'élément doit être
numérisé en couleur ou en noir et blanc.
bouton C
d'appuyer sur le bouton C
s'affiche sur l'écran du panneau frontal.
OPIER. Sélectionnez le nombre de copies avant
OPIER, sélectionnez le
OPIER. Le nombre de copies
Français
Bouton C
BLANC
OULEUR/NOIR ET
Détermine si les éléments originaux sont numérisés en
couleur ou en noir et blanc lors de la copie.
3
Page 48

chapitre 2
Fonction Description
Bouton E
D'ÉNERGIE
Bouton ANNULER Annule une numérisation en cours ou une série de
Bouton P
BOUTONS
Ecran du panneau frontal Affiche les informations relatives au scanner, telles que
CONOMIE
ARAMÈTRES DES
installation du logiciel
1 Fermez toutes les applications de l'ordinateur.
2 Recherchez le CD du logiciel Photo et Imagerie HP correspondant à votre
langue et à votre système d'exploitation.
3 Insérez le CD dans l'ordinateur.
Windows : suivez les instructions qui apparaissent à l'écran. Si
l'application d'installation ne démarre pas automatiquement, procédez
comme suit :
Dans le menu Démarrer, cliquez sur Exécuter, puis tapez : x:setup.exe
(où x représente la lettre désignant votre lecteur de CD).
Macintosh : cliquez deux fois sur l'icône du programme d'installation du
CD et suivez les instructions.
Eteint la lampe du scanner, les voyants et l'écran du
panneau frontal.
numérisations lorsque vous utilisez le bac d'alimentation
automatique de documents (ADF).
Ouvre la boîte de dialogue Paramètres des boutons à
partir de laquelle vous pouvez modifier le
fonctionnement des boutons du scanner.
les destinations, le nombre de copies et les messages
d'erreur.
présentation générale du scanner
Il est possible de lancer une numérisation à partir des boutons du panneau
frontal, à partir du Directeur HP ou d'autres applications.
Remarque : le logiciel de numérisation HP peut vous inviter à numériser des
éléments supplémentaires. Cela vous permet de numériser plusieurs
éléments, puis de les envoyer tous en même temps à la destination finale. Il
vous est également possible de prévisualiser et de numériser plusieurs
images avant de fermer la fenêtre de prévisualisation. Pour de plus amples
informations, reportez-vous à la section numérisation et prévisualisation de
plusieurs originaux.
Pour les utilisateurs de Windows NT et de Macintosh, reportez-vous au chapitre
où trouver... ? à la page 1 pour obtenir des informations sur les procédures de
numérisation.
numérisation à partir des boutons du panneau frontal
Les boutons du panneau frontal constituent des raccourcis vers les fonctions de
numérisation les plus fréquemment utilisées, telles que la numérisation d'images
et de documents. L'utilisation de ces boutons est décrite dans le présent manuel.
4
hp scanjet série 8200
Page 49

numérisation à partir du directeur hp
Cliquez sur l'icône du Directeur HP sur le bureau pour lancer le logiciel Photo et
Imagerie HP. La fenêtre du Directeur HP s'affiche. A partir de cette fenêtre, vous
pouvez numériser, visualiser ou imprimer des images.
S'il n'existe pas d'icône du Directeur HP sur le bureau, cliquez sur Démarrer,
pointez le curseur sur Programmes, puis sur Hewlett-Packard, sur Appareils
photo et scanners, puis cliquez sur Directeur Photo et Imagerie HP.
numérisation à partir d'autres applications
Vous pouvez importer une image directement vers un fichier ouvert dans l'une
de vos applications si cette dernière est compatible TWAIN. En général,
l'application est compatible à ce format si elle dispose des commandes
Acquérir, Numériser ou Importer nouvel objet. Si vous n'êtes pas certain de la
compatibilité de l'application ou de la signification de la commande, reportezvous à la documentation fournie avec l'application.
numérisation de documents
Le bouton NUMÉRISER VERS ( ) permet de numériser des documents.
1 Placez les originaux face imprimée contre la vitre du scanner ou face
imprimée vers le haut dans le bac d'alimentation automatique. Si vous
numérisez des documents en recto verso à partir du bac d'alimentation
automatique, sélectionnez le mode recto verso ( ) à l'aide du
commutateur D
2 Choisissez une destination en appuyant sur le bouton D
jusqu'à l'affichage de la destination souhaitée sur l'écran du panneau
frontal.
3 Appuyez sur le bouton N
Remarque : aucune image de prévisualisation ne s’affichera si la
numérisation est effectuée à partir du bac d'alimentation automatique. Pour
modifier ce paramètre de prévisualisation, consultez l’aide du logiciel
Photo et Imagerie HP.
4 Sélectionnez la zone de numérisation définitive (délimitée par des
pointillés) dans l'aperçu.
5 Apportez des modifications à l'image prévisualisée si nécessaire.
6 Cliquez sur Accepter.
La zone de numérisation définitive est numérisée et s'affiche dans la
destination spécifiée.
UPLEX.
utilisation du scanner
Français
ESTINATION ()
UMÉRISER VERS ().
numérisation d'images
Le bouton NUMÉRISER IMAGE ( ) permet de numériser des images.
guide de l'utilisateur
5
Page 50

chapitre 2
1 Placez l'original face imprimée contre la vitre du scanner et fermez le
capot.
Remarque : le bouton N
UMÉRISER IMAGE permet également de numériser
des diapositives ou des négatifs à partir de l'adaptateur de supports
transparents. Pour de plus amples informations, reportez-vous à la section
numérisation à partir de l'adaptateur de supports transparents (TMA) à la
page 18.
2 Appuyez sur le bouton N
UMÉRISER IMAGE ( ).
Un aperçu de l'image originale numérisée s'affiche.
3 Sélectionnez la zone de numérisation définitive (délimitée par des
pointillés) dans l'aperçu.
4 Apportez des modifications à l'image prévisualisée si nécessaire.
5 Cliquez sur Accepter.
La zone de numérisation définitive est numérisée et s'affiche dans la
Galerie photo et imagerie HP. Le document numérisé est enregistré à
l'emplacement spécifié dans les paramètres de numérisation d'images
du logiciel Photo et Imagerie HP.
numérisation d'un document en vue d'éditer du texte
Le bouton EDITER TEXTE ( ) permet de numériser des documents vers le
logiciel qui convertit une image en texte et graphiques, puis insère le document
obtenu dans une application de traitement de texte prise en charge.
1 Placez l'original face imprimée contre la vitre du scanner ou face imprimée
vers le haut dans le bac d'alimentation automatique. Si vous numérisez des
documents en recto verso à partir du bac d'alimentation automatique,
sélectionnez le mode recto verso ( ) à l'aide du commutateur D
Pour numériser plusieurs documents sans utiliser le bac d'alimentation
automatique, reportez-vous à la section numérisation et prévisualisation de
plusieurs originaux à la page 9.
2 Appuyez sur le bouton E
Remarque : aucune image de prévisualisation ne s’affichera si la
numérisation est effectuée à partir du bac d'alimentation automatique. Pour
modifier ce paramètre de prévisualisation, consultez l’aide du logiciel
Photo et Imagerie HP.
3 Sélectionnez la zone de numérisation définitive (délimitée par des
pointillés) dans l'aperçu.
4 Apportez des modifications à l'image prévisualisée si nécessaire.
5 Cliquez sur Accepter.
La zone de numérisation définitive est numérisée et traitée. Les éléments
numérisés s'affichent dans l'application sélectionnée (par exemple, un
logiciel de traitement de texte).
Remarque : vous pouvez sélectionner une autre application dans les
paramètres du bouton de numérisation du logiciel Photo et Imagerie HP.
DITER TEXTE ().
UPLEX.
6
hp scanjet série 8200
Page 51

utilisation du scanner
enregistrement d'un document sur un disque ou un CD
Le bouton DOCUMENT FICHIER ( ) permet d'enregistrer des documents
numérisés sur un disque (par exemple, le disque dur) ou sur un CD.
1 Placez l'original face imprimée contre la vitre du scanner ou face imprimée
vers le haut dans le bac d'alimentation automatique. Si vous numérisez des
documents en recto verso à partir du bac d'alimentation automatique,
sélectionnez le mode recto verso ( ) à l'aide du commutateur D
Pour numériser plusieurs documents sans utiliser le bac d'alimentation
automatique, reportez-vous à la section numérisation et prévisualisation de
plusieurs originaux à la page 9.
2 Appuyez sur le bouton D
Remarque : aucune image de prévisualisation ne s’affichera si la
numérisation est effectuée à partir du bac d'alimentation automatique. Pour
modifier ce paramètre de prévisualisation, consultez l’aide du logiciel
Photo et Imagerie HP.
3 Sélectionnez la zone de numérisation définitive (délimitée par des
pointillés) dans l'aperçu.
4 Apportez des modifications à l'image prévisualisée si nécessaire.
5 Cliquez sur Accepter.
La zone de numérisation définitive est numérisée.
6 La boîte de dialogue Enregistrer sous s'affiche. Sélectionnez un dossier de
destination.
7 Saisissez le nom du fichier et choisissez son type, puis cliquez sur OK.
Le document est enregistré dans le dossier spécifié.
OCUMENT FICHIER ().
UPLEX.
Français
envoi de documents ou d'images numérisés
Le bouton MESSAGERIE ÉLECTRONIQUE ( ) permet de numériser des
documents ou des images et de les joindre à un message électronique. Vous
devez également disposer d'une connexion Internet et d'un programme de
messagerie électronique compatible.
1 Placez l'original face imprimée contre la vitre du scanner ou face imprimée
vers le haut dans le bac d'alimentation automatique. Si vous numérisez des
documents en recto verso à partir du bac d'alimentation automatique,
sélectionnez le mode recto verso ( ) à l'aide du commutateur D
Remarque : le bouton M
numériser des diapositives ou des négatifs à partir de l'adaptateur de
supports transparents. Pour de plus amples informations, reportez-vous à la
section numérisation à partir de l'adaptateur de supports transparents
(TMA) à la page 18.
2 Appuyez sur le bouton M
Un message vous demandant si l'original est un document ou une image
s'affiche.
3 Sélectionnez Document ou Image, puis cliquez sur OK.
guide de l'utilisateur
ESSAGERIE ÉLECTRONIQUE permet également de
ESSAGERIE ÉLECTRONIQUE ().
UPLEX.
7
Page 52

chapitre 2
Remarque : aucune image de prévisualisation ne s’affichera si la
numérisation est effectuée à partir du bac d'alimentation automatique. Pour
modifier ce paramètre de prévisualisation, consultez l’aide du logiciel
Photo et Imagerie HP.
4 Sélectionnez la zone de numérisation définitive (délimitée par des
pointillés) dans l'aperçu.
5 Apportez des modifications à l'image prévisualisée si nécessaire.
6 Cliquez sur Accepter.
La zone de numérisation définitive est numérisée et votre application de
messagerie électronique s'ouvre. L'image numérisée est ajoutée au
message électronique en tant que pièce jointe.
7 La boîte de dialogue Enregistrer sous s'affiche. Saisissez le nom du fichier
et choisissez son type, puis cliquez sur OK.
8 Rédigez le message de la manière habituelle.
Remarque : pour visualiser l'image numérisée avant de l'envoyer, cliquez
deux fois sur la pièce jointe dans votre application de messagerie
électronique.
Remarque : vous pouvez sélectionner une autre application de messagerie
électronique dans le logiciel Photo et Imagerie HP. Si votre application n'est
pas prise en charge, enregistrez les images numérisées dans un fichier que
vous joindrez à votre message.
copie de documents ou d'images
Le bouton COPIER ( ) permet de numériser un original, puis de l'imprimer.
1 Placez l'original face imprimée contre la vitre du scanner ou face imprimée
vers le haut dans le bac d'alimentation automatique. Si vous numérisez des
documents en recto verso à partir du bac d'alimentation automatique,
sélectionnez le mode recto verso ( ) à l'aide du commutateur D
2 Sélectionnez les options de copie :
– sélectionnez le nombre de copies en appuyant sur le bouton NOMBRE
DE COPIES ( ). Le nombre de copies s'affiche sur l'écran du panneau
frontal ;
– sélectionnez le mode de numérisation de l'original en appuyant sur le
bouton C
3 Appuyez sur le bouton C
l'imprimante par défaut.
Remarque : pour modifier l'un des paramètres de copie (par exemple, la
taille ou la luminosité) ou sélectionner une autre imprimante, cliquez sur
Annuler au cours de la procédure. La boîte de dialogue du logiciel de
copie HP s'affiche et vous pouvez modifier les paramètres le cas échéant.
OULEUR/NOIR ET BLANC ( ).
OPIER ( ). Les copies sont imprimées sur
UPLEX.
8
hp scanjet série 8200
Page 53

utilisation du scanner
numérisation et prévisualisation de plusieurs originaux
Plusieurs originaux peuvent être numérisés à partir du bac d'alimentation
automatique, de l'adaptateur de supports transparents ou sur la vitre du scanner.
Le bac d'alimentation automatique peut numériser des originaux en recto ou en
recto verso.
numérisation de plusieurs originaux sur la vitre du scanner ou à partir de
l'adaptateur de supports transparents
Si l'original est numérisé sur la vitre du scanner ou à partir de l'adaptateur de
supports transparents, un message vous demandant si vous souhaitez numériser
d'autres pages s'affiche. Si vous avez d'autres pages à numériser, cliquez sur
Oui, puis effectuez l'une des opérations suivantes :
• placez l'autre original sur la vitre ou dans l'adaptateur de supports
transparents, cliquez sur Nouvelle numérisation, effectuez les réglages
nécessaires, puis cliquez sur Accepter ;
ou
• sélectionnez l'autre image dans la fenêtre de prévisualisation, effectuez les
réglages nécessaires, puis cliquez sur Accepter.
Lorsque vous avez terminé de numériser vos éléments, cliquez sur Non pour ne
pas procéder à une nouvelle numérisation.
numérisation de plusieurs originaux à partir d'un bac d'alimentation
automatique
1 Placez les originaux dans le bac d'alimentation automatique, face
imprimée et la première page au-dessus.
2 Appuyez sur l'un des boutons du panneau frontal pour lancer la
numérisation : le bouton N
ÉLECTRONIQUE ( ). Le bouton sélectionné définit les paramètres de
numérisation.
Lorsque le bac d'alimentation automatique est vide, un message vous
demandant si vous souhaitez numériser d'autres pages s'affiche. Si vous
souhaitez numériser d'autres originaux vers la même destination, chargez
les pages suivantes, puis cliquez sur Numériser.
3 Une fois la numérisation de toutes les pages effectuée, cliquez sur Terminé.
Les numérisations apparaissent dans la destination sélectionnée.
UMÉRISER VERS () ou MESSAGERIE
Français
prévisualisation de plusieurs originaux à partir d'un bac d'alimentation
automatique
Si plusieurs originaux sont numérisés, un compteur d'images apparaît en haut à
droite de la fenêtre de prévisualisation. Le compteur d'images affiche l'image en
cours de prévisualisation ainsi que le nombre total d'images. Cliquez sur les
flèches pour prévisualiser les autres pages.
sur
compteur d'images dans la fenêtre de prévisualisation
guide de l'utilisateur
9
Page 54

chapitre 2
annulation d'une numérisation en cours
Le bouton ANNULER ( ) permet d'annuler une numérisation en cours ou une
série de numérisations lorsque le bac d'alimentation automatique est utilisé.
modification des paramètres
Si vous souhaitez modifier les paramètres du scanner en fonction de la tâche que
vous avez à exécuter, les scanners HP Scanjet série 8200 vous permettent
d'adapter les paramètres des boutons, les préférences de numérisation, la
consommation d'énergie et de lancer la numérisation immédiatement ou après
le temps de chauffe.
modification des paramètres des boutons
Vous pouvez modifier les paramètres des boutons du scanner en appuyant sur
le bouton P
1 Appuyez sur le bouton P
2 Cliquez sur l'onglet approprié et modifiez les paramètres.
3 Une fois les modifications effectuées, cliquez sur OK.
modification des paramètres à partir du directeur hp
Le menu Paramètres du logiciel Photo et Imagerie HP permet de modifier tous les
paramètres de numérisation, notamment les paramètres des boutons, les
préférences de numérisation et d'autres paramètres que vous êtes autorisé à
changer. Pour ce faire, lancez le Directeur HP et cliquez sur Paramètres.
ARAMÈTRES DES BOUTONS ().
ARAMÈTRES DES BOUTONS ().
La boîte de dialogue Paramètres des boutons s'affiche.
ouverture ou fermeture de l'image de prévisualisation
Vous pouvez choisir d'afficher ou de masquer une image de prévisualisation.
Reportez-vous à l'aide du logiciel Photo et Imagerie HP pour connaître les
instructions et documents de référence à consulter.
utilisation du bouton d'économie d'énergie
Le bouton ECONOMIE D'ÉNERGIE ( ) permet d'éteindre la lampe lorsque vous
n'utilisez pas le scanner. Lorsque vous appuyez sur le bouton E
D'ÉNERGIE ( ), la lampe du scanner, le petit voyant lumineux et l'écran du
panneau frontal sont éteints.
Pour utiliser à nouveau le scanner, appuyez sur n'importe quel bouton du
panneau frontal et lancez la numérisation à partir du Directeur HP. Après une
courte période de chauffe, la numérisation démarre.
activation de la numérisation instantanée
Utilisez la fonction de numérisation instantanée pour lancer la numérisation
immédiatement, sans attendre que la lampe ne chauffe.
10
CONOMIE
hp scanjet série 8200
Page 55

1 Ouvrez le Directeur HP, cliquez sur Paramètres, puis sur Préférences de
numérisation.
2 Cliquez sur l'onglet Qualité et vitesse.
– Pour désactiver le temps de chauffe de la lampe et activer la
numérisation instantanée, cochez la case Temps de chauffe de la
lampe instantané.
– Pour réduire la consommation d'énergie, désactivez la case à cocher
Temps de chauffe de la lampe instantané.
sélection du type de document d'origine
Si le logiciel vous invite à indiquer le type de document d'origine, vous avez le
choix entre Image et Document. Le scanner optimise les paramètres en fonction
de votre choix. Suivez les indications ci-dessous pour faire le choix le mieux
adapté.
Document d'origine Type à sélectionner
utilisation du scanner
Texte ou document mixte (texte et
graphiques)
Photo imprimée ou graphique Image
Pour modifier le type de document d'origine, reportez-vous à la section
modification des paramètres des boutons à la page 10.
entretien et maintenance
Le nettoyage périodique de votre scanner permet de garantir des performances
optimales. L'entretien nécessaire dépend de plusieurs facteurs : le taux
d'utilisation, le type de support placé dans le bac d'alimentation automatique et
l'environnement. Nous vous conseillons d'effectuer un nettoyage de base lorsque
cela est nécessaire.
Le nettoyage de base doit comprendre le nettoyage de la vitre du scanner, de
l'adaptateur de supports transparents et du bac d'alimentation automatique.
nettoyage de la vitre du scanner
1 Déconnectez le câble d'alimentation du scanner.
2 Ouvrez le capot du scanner.
3 Nettoyez la vitre à l'aide d'un chiffon doux non pelucheux sur lequel vous
aurez vaporisé du nettoyant à vitres peu agressif.
Attention ! Utilisez exclusivement du nettoyant à vitres. Evitez
d'utiliser des substances abrasives, de l'acétone, du benzène et du
tétrachlorure de carbone, car tous ces produits risquent
d'endommager la vitre du scanner. Evitez également l'isopropanol
car il laisserait des traînées sur la vitre.
Document
Français
guide de l'utilisateur
Ne vaporisez pas de nettoyant directement sur la vitre. Si vous
employez trop de nettoyant, il risque de couler sur les bords de la
vitre et d'endommager le scanner.
11
Page 56

chapitre 2
4 Séchez la vitre du scanner avec un chiffon doux, sec et non pelucheux.
5 Une fois l'opération terminée, rebranchez le câble d'alimentation sur le
scanner.
nettoyage de l'adaptateur de supports transparents
Nettoyez l'adaptateur de supports transparents avec un chiffon doux, sec et non
pelucheux. Si nécessaire, pulvérisez un peu de nettoyant à vitres sur le chiffon et
passez ce dernier sur l'adaptateur.
nettoyage du bac d'alimentation automatique
Le bac d'alimentation automatique doit être nettoyé régulièrement en fonction du
taux d'utilisation et du type de support placé dedans. Il existe deux méthodes
pour nettoyer le bac d'alimentation automatique : faire passer un chiffon dans
le bac d'alimentation ou nettoyer manuellement les rouleaux d'alimentation du
papier. Définissez un nettoyage de base approprié à votre scanner.
nettoyage du bac d'alimentation automatique avec un chiffon
1 Ouvrez le boîtier fermé hermétiquement, au niveau de l'encoche. Prenez
soin de ne pas accrocher le chiffon à l'intérieur.
2 Enlevez le chiffon et dépliez-le.
3 Placez le chiffon déplié dans le bac d'entrée.
12
mise en place du chiffon déplié dans le bac d'entrée
4 Appuyez sur le bouton N
UMÉRISER VERS.
Le chiffon est entraîné dans le bac d'alimentation automatique.
Attendez deux minutes avant de passer à l'étape suivante afin de
permettre aux composants de sécher.
5 Placez cinq feuilles de papier imprimées au maximum dans le bac
d'entrée. Numérisez et observez le résultat.
numérisation de cinq pages
6 Si des rayures apparaissent encore sur les pages numérisées, répétez les
étapes 3 à 6.
Vous pouvez faire passer le chiffon dans l'appareil cinq fois au maximum.
hp scanjet série 8200
Page 57

nettoyage manuel des rouleaux d'alimentation du papier
1 Ouvrez le couvercle et relevez le taquet vert en position d'ouverture
intégrale. Les rouleaux d'alimentation du papier doivent être quasiment en
position verticale.
relèvement du taquet vert en vue d'exposer les rouleaux d'alimentation du papier
2 Utilisez le chiffon de nettoyage pour chemin de papier (référence
C9915-60056) pour nettoyer les rouleaux d'alimentation du papier et les
coussins de caoutchouc situés dessous.
Remarque : si vous ne disposez pas de ce chiffon, utilisez un chiffon non
pelucheux légèrement humidifié avec de l'isopropanol.
3 Essuyez soigneusement les coussins de caoutchouc afin de supprimer toute
trace de poussière de papier.
4 Abaissez le taquet vert et les rouleaux d'alimentation du papier.
5 Fermez le couvercle.
entretien du bac d'alimentation automatique
Si un décalage des pages trop important se produit, suivez les étapes ci-après :
• Nettoyez le bac d'alimentation automatique afin de réduire les risques de
décalage des pages. Reportez-vous à la section nettoyage du bac
d'alimentation automatique à la page 12.
• Reportez-vous à la rubrique "Problèmes liés au bac d'alimentation
automatique" de l'aide HP Scanjet série 8200.
• Faute de résultat, installez le kit de remplacement du rouleau du bac
d'alimentation (C9937-68001). Le kit de remplacement du rouleau du bac
d'alimentation se compose d'un mécanisme de rouleau, d'une bande de
séparation et d'une pince qui permet de remplacer cette dernière.
Reportez-vous à la section achat de pièces de maintenance à la page 36.
Le kit de remplacement du rouleau du bac d'alimentation contient les
instructions relatives au remplacement des pièces du scanner.
utilisation du scanner
Français
commande des fournitures de maintenance
Vous pouvez acheter des pièces de maintenance sur le Web à l'adresse
www.hp.com. Recherchez l'élément voulu (par exemple, le chiffon de nettoyage
ou le kit de remplacement du rouleau du bac d'alimentation) à l'aide de la
fonction correspondante.
guide de l'utilisateur
13
Page 58

chapitre 2
problèmes d'installation du scanner
Si l'écran du panneau frontal affiche “Erreur 04”, cela indique un problème
relatif à la connexion USB pleine vitesse. Vérifiez que le câble USB pleine vitesse
est bien connecté au scanner et à l'ordinateur.
• Dans un premier temps, procédez aux vérifications suivantes sur votre
ordinateur :
– assurez-vous que la configuration de votre ordinateur correspond bien
à la configuration requise figurant sur l'emballage du scanner ;
– si l'espace disponible sur votre disque dur n'est pas suffisant,
supprimez les fichiers superflus ou installez le logiciel sur une autre
unité de disque.
• Si un message du type "Répertoire de destination non valide" ou "Dossier
programme non valide" s'affiche au cours de l'installation sur un
ordinateur fonctionnant sous Microsoft ®Windows, essayez l'une des deux
procédures suivantes :
– tapez un nom de répertoire de destination valide ; le nom du répertoire
de destination ne peut pas contenir les caractères suivants : /, \, :, ?,
*, <, >, “ ou | ;
– cherchez un répertoire valide à l'aide du bouton Parcourir.
• Vérifiez les câbles :
– assurez-vous que le câble d'alimentation est bien connecté au scanner
et à une prise électrique ou à un parasurtenseur en état de marche ;
– si le câble d'alimentation est connecté à un parasurtenseur, veillez à ce
que celui-ci soit bien relié à une prise électrique et sous tension ;
– utilisez le câble USB pleine vitesse qui vous a été fourni avec le
scanner. Il se peut que d'autres câbles USB pleine vitesse ne soient pas
compatibles avec le scanner ;
– vérifiez que le câble USB pleine vitesse est bien connecté au scanner et
à l'ordinateur ;
– déconnectez le câble d'alimentation du scanner et éteignez
l'ordinateur. Au bout de 30 secondes, rebranchez le câble
d'alimentation sur le scanner et rallumez votre ordinateur (en
respectant cet ordre) ;
– sur Macintosh, utilisez Apple System Profiler pour vous assurer que le
scanner est correctement connecté à votre ordinateur.
• Passez en mode de diagnostic du scanner :
a. déconnectez le câble USB pleine vitesse (ou le câble SCSI) du
scanner ; assurez-vous que le câble d'alimentation du scanner est
toujours relié à une source d'alimentation ;
b. appuyez simultanément sur les boutons E
ESSAGERIE ÉLECTRONIQUE ().
M
Le chariot doit se déplacer en avant et en arrière et la lampe du
scanner doit s'allumer ;
c. enfin, débranchez le câble d'alimentation.
Si la lampe du scanner ne s'allume pas ou si le chariot ne bouge pas, le
scanner a effectivement un problème. Reportez-vous au chapitre assistance
produits à la page 23.
DITER TEXTE () et
14
hp scanjet série 8200
Page 59

problèmes d'initialisation du scanner
Si un message vous informe que l'initialisation du scanner a échoué, procédez
comme suit :
1 Fermez la boîte de dialogue et l'application qui était ouverte lorsque le
message d'erreur s'est affiché.
2 Effectuez ensuite les opérations suivantes :
– mettez le scanner hors tension en débranchant le câble d'alimentation,
puis remettez-le sous tension en rebranchant le câble d'alimentation ;
– déconnectez le câble USB de l'ordinateur, puis reconnectez-le ;
– vérifiez que les câbles de l'ordinateur sont bien reliés au scanner ;
– éteignez l'ordinateur pendant 10 secondes, puis rallumez-le.
Si l'initialisation du scanner échoue à nouveau, exécutez l'utilitaire de réparation
(sous Windows uniquement).
résolution des problèmes
utilisation du scanner
Pour tout autre problème rencontré avec votre scanner, reportez-vous à la section
résolution des problèmes de l'aide HP Scanjet série 8200.
Pour des problèmes relatifs au logiciel du scanner, reportez-vous à l'aide du
logiciel Photo et Imagerie HP.
Français
guide de l'utilisateur
15
Page 60

numérisation à partir du bac
3
d'alimentation automatique (ADF)
Le présent chapitre décrit comment sélectionner les originaux compatibles avec
le bac d'alimentation automatique (ADF) et comment les charger et les numériser
à partir de celui-ci.
choix d'un support compatible avec le bac d'alimentation
automatique
Le fonctionnement du bac d'alimentation automatique est optimal lorsque les
originaux répondent aux critères suivants :
• papier aux formats standard A4, Lettre US et Légal ;
• support non standard dont les dimensions sont comprises entre
88,9 x 127 mm et 216 x 356 mm ;
• grammage compris entre 60 et 90 g/m
• support de forme carrée ou rectangulaire et en bon état ;
• support non déchiré, perforé ou troué ;
• support sans tâche colle, de fluide correcteur ou d'encre.
Remarque : évitez de placer des éléments en plusieurs parties, des
transparents, des pages de magazine, des pages gommées ou des feuilles
extra-fines dans le bac d'alimentation automatique.
2
;
16
Avant de placer un original dans le bac d'alimentation automatique, enlevez les
éléments suivants, le cas échéant :
•plis ou incurvations ;
• agrafes, trombones et autres.
Si les originaux ne sont pas conformes à ces critères, numérisez-les en les plaçant
sur la vitre du scanner.
Page 61

numérisation à partir du bac d'alimentation automatique (ADF)
chargement des originaux dans le bac d'alimentation
automatique
1 Placez une pile de documents originaux de même dimension dans le bac
d'entrée, face imprimée et la première page au-dessus (voir l'icône sur le
bac d'entrée).
chargement et centrage du papier dans le bac d'entrée
2 Réglez les guides papier pour centrer la pile de documents.
3 A l'aide du commutateur D
sélectionnez recto ou recto verso.
4 Lancez la numérisation en appuyant sur l'un des boutons du scanner ou en
ouvrant le Directeur HP. Suivez les instructions qui s'affichent à l'écran de
l'ordinateur pour terminer la numérisation.
UPLEX du bac d'alimentation automatique,
Français
guide de l'utilisateur
17
Page 62

numérisation à partir de l'adaptateur
4
de supports transparents (TMA)
Utilisez l'adaptateur de supports transparents (TMA) pour numériser des
diapositives et des négatifs de 35 mm.
Remarque : pour numériser des supports transparents de grande taille, tels
que ceux utilisés lors des présentations, placez l'élément sur la vitre du
scanner sous une feuille de papier blanc et procédez à la numérisation
comme vous avez l'habitude de le faire.
numérisation de diapositives
Pour numériser des diapositives de 35 mm, utilisez le support prévu à cet effet
intégré à l'adaptateur.
1 Soulevez le capot du scanner et retirez le capot de l'adaptateur de
supports transparents.
18
retrait du capot de l'adaptateur de supports transparents
2 Appuyez sur le bouton N
Une boîte de dialogue vous demandant ce que vous souhaitez numériser
s'affiche.
3 Sélectionnez Diapositives d'un adaptateur de supports transparents.
Remarque : n'appuyez pas sur Numériser avant d'avoir chargé les
diapositives et fermé le capot.
4 Retirez le support de négatifs du support de diapositives, le cas échéant.
UMÉRISER IMAGE ().
retrait du support de négatifs
Page 63

numérisation à partir de l'adaptateur de supports transparents (TMA)
5 Placez trois diapositives au maximum dans le support. Insérez-les, le recto
orienté vers vous.
insertion des diapositives
6 Une fois la dernière diapositive chargée, insérez le cache-lumière pour
diapositives jusqu'à ce qu'il touche les diapositives.
Remarque : le cache-lumière pour diapositives empêche l'apparition de
reflets sur l'image numérisée.
mise en place du cache-lumière pour diapositives
7 Fermez le capot du scanner.
8 Dans la fenêtre de numérisation d'images, cliquez sur Numériser.
9 Le scanner effectue une prévisualisation et un aperçu de l'image s'affiche.
10 Sélectionnez une zone de numérisation définitive dans une diapositive.
Cliquez sur une bordure et faites-la glisser autour de la zone définitive à
numériser (zone de numérisation définitive).
Français
guide de l'utilisateur
Zone de numérisation définitive
sélection d'une zone de numérisation définitive
11 Si vous le souhaitez, vous pouvez redimensionner l'image à votre guise et
effectuer d'autres réglages. Cliquez ensuite sur Accepter.
12 Une boîte de dialogue vous demandant si vous souhaitez numériser
d'autres originaux s'affiche. Pour numériser d'autres diapositives, cliquez
sur Oui, puis effectuez l'une des opérations suivantes :
– placez une autre diapositive dans l'adaptateur de supports
transparents et cliquez sur Nouvelle numérisation. Procédez aux
réglages nécessaires, puis cliquez sur Accepter ;
ou
– sélectionnez une autre image dans la fenêtre de prévisualisation,
effectuez les réglages nécessaires, puis cliquez sur Accepter.
19
Page 64

chapitre 4
13 Lorsque vous avez terminé de numériser vos éléments, cliquez sur Non
pour ne pas procéder à une nouvelle numérisation.
Les images s'affichent dans la Galerie photo et imagerie HP.
14 Une fois la numérisation terminée, retirez les diapositives. Remettez en
place le cache-lumière pour diapositives, le support de négatifs, le cachelumière pour négatifs, puis le capot de l'adaptateur de supports
transparents.
numérisation de négatifs
Pour numériser des négatifs de 35 mm, utilisez le support prévu à cet effet intégré
à l'adaptateur.
1 Soulevez le capot du scanner et retirez le capot de l'adaptateur de
supports transparents.
retrait du capot de l'adaptateur de supports transparents
2 Appuyez sur le bouton N
Une boîte de dialogue vous demandant ce que vous souhaitez numériser
s'affiche.
3 Sélectionnez Négatifs d'un adaptateur de supports transparents.
Remarque : n'appuyez pas sur Numériser avant d'avoir chargé les
négatifs et fermé le capot.
4 Retirez le cache-lumière pour négatifs du support de négatifs. Le support
de négatifs est intégré au support de diapositives.
UMÉRISER IMAGE ().
20
retrait du cache-lumière pour négatifs
hp scanjet série 8200
Page 65

numérisation à partir de l'adaptateur de supports transparents (TMA)
5 Insérez une bande de négatifs dans le support de négatifs de façon à ce
que la partie brillante soit placée face à la vitre du scanner une fois le
capot refermé.
insertion d'une bande de négatifs
Remarque : les négatifs sont fragiles. Prenez-les uniquement par les bords.
6 Si vous numérisez une bande de négatifs de moins de quatre vues, insérez
le cache-lumière pour négatifs dans le support de négatifs jusqu'à ce qu'il
touche la bande de négatifs.
Remarque : le cache-lumière pour négatifs empêche l'apparition de reflets
sur l'image numérisée.
Français
guide de l'utilisateur
mise en place du cache-lumière pour négatifs
7 Fermez le capot du scanner.
8 Dans la fenêtre de numérisation d'images, cliquez sur Numériser.
Le scanner effectue une prévisualisation et un aperçu de l'image s'affiche.
9 Sélectionnez une zone de numérisation définitive. Cliquez sur une bordure
et faites-la glisser autour de la zone définitive à numériser (zone de
numérisation définitive).
Zone de numérisation définitive
sélection d'une zone de numérisation définitive
10 Si vous le souhaitez, vous pouvez redimensionner l'image à votre guise et
effectuer d'autres réglages. Cliquez ensuite sur Accepter.
11 Une boîte de dialogue vous demandant si vous souhaitez numériser
d'autres originaux s'affiche. Pour numériser d'autres négatifs, cliquez sur
Oui, puis effectuez l'une des opérations suivantes :
21
Page 66

chapitre 4
– placez une autre bande de négatifs dans l'adaptateur de supports
transparents et cliquez sur Nouvelle numérisation. Procédez aux
réglages nécessaires, puis cliquez sur Accepter ;
ou
– sélectionnez une autre image dans la fenêtre de prévisualisation,
effectuez les réglages nécessaires, puis cliquez sur Accepter.
12 Lorsque vous avez terminé de numériser vos éléments, cliquez sur Non
pour ne pas procéder à une nouvelle numérisation.
Les images s'affichent dans la Galerie photo et imagerie HP.
13 Une fois la numérisation terminée, retirez la bande de négatifs. Remettez
en place le support de négatifs, le cache-lumière pour négatifs, puis le
capot de l'adaptateur de supports transparents.
22
hp scanjet série 8200
Page 67

assistance produits
5
La présente section contient des informations relatives à l'assistance, notamment
les numéros de téléphone et les sites d'assistance Web.
Pour connaître les informations juridiques, reportez-vous au fichier
regulatory_supplement.htm figurant sur le CD livré avec le scanner.
site Web dédié à l'accessibilité
Les personnes atteintes d'un handicap peuvent obtenir de l'aide en consultant la
page Web suivante : www.hp.com/hpinfo/community/accessibility/prodserv.
site Internet hp scanjet
Consultez le site www.scanjet.hp.com pour obtenir les informations suivantes :
• Conseils pour numériser de manière plus efficace et plus créative
• Mises à jour des pilotes et logiciels HP Scanjet.
procédure d'assistance
La procédure d'assistance HP sera plus efficace si vous effectuez les opérations
suivantes dans l'ordre indiqué.
1 Lisez la rubrique consacrée à la résolution des problèmes dans le guide de
l'utilisateur et consultez l'aide en ligne du logiciel et du scanner.
2 Visitez le site Web de l'assistance HP (www.hp.com/support). Si vous
disposez d'un accès à Internet, vous pouvez obtenir de nombreuses
informations sur votre scanner, et de manière générale, une aide sur nos
produits, des pilotes et des mises à jour de logiciels. L'assistance clientèle
est disponible en néerlandais, anglais, français, allemand, italien,
portugais, espagnol, suédois, chinois traditionnel, chinois simplifié,
japonais et coréen. Pour le Danemark, la Finlande et la Norvège, les
informations relatives à l'assistance sont disponibles en anglais
uniquement.
3 Accédez à l'assistance technique HP. Si vous disposez d'un accès à
Internet, envoyez un e-mail à partir de la page www.hp.com/support.
Vous recevrez une réponse personnalisée d'un technicien HP. L'assistance
par e-mail est disponible dans les langues répertoriées sur ce site.
4 Contactez votre revendeur HP. En cas de défaillance matérielle de votre
scanner, confiez-le à votre revendeur local HP pour réparation. Ce service
est gratuit pendant la période de garantie limitée de votre scanner. Une
fois la garantie expirée, le revendeur établira un devis pour la réparation.
5 Contactez l'assistance HP par téléphone. Veuillez consulter le site Web
suivant pour vérifier les détails et les conditions de l'assistance
téléphonique dans votre pays ou votre région : www.hp.com/support.
Français
23
Page 68

chapitre 5
Dans le cadre des efforts permanents de HP pour améliorer ses services
d'assistance téléphonique, nous vous conseillons de consulter
régulièrement le site Web de HP pour obtenir de nouvelles informations
relatives aux services et à la livraison. Si les options précédentes ne vous
permettent pas de résoudre le problème, appelez HP alors que vous vous
trouvez devant votre ordinateur et votre scanner. Afin d'obtenir rapidement
une réponse, ayez les informations suivantes à portée de main :
– le numéro de modèle du scanner (indiqué sur le capot du scanner) ;
– le numéro de série du scanner (indiqué sous le scanner) ;
– le système d'exploitation de l'ordinateur ;
– la version du logiciel du scanner (indiquée sur l'étiquette du CD du
scanner) ;
– les messages qui s'affichaient lorsque le problème est survenu.
Les conditions en vigueur de l'assistance téléphonique HP sont sujettes à
modification sans préavis. Selon votre pays/région, les informations
téléphoniques peuvent être payantes.
L'assistance téléphonique est gratuite à compter de la date d'achat et
pendant la période indiquée dans le tableau suivant :
Pays/Région Période de gratuité de
l'assistance téléphonique
Etats-Unis 1 an
Afrique 30 jours
Asie-Pacifique 1 an
Canada 1 an
Europe 30 jours
Amérique latine 1 an
Moyen-Orient 30 jours
assistance clientèle aux Etats-Unis
L'assistance est disponible pendant la période de garantie et au-delà.
Pendant toute la durée de la garantie, vous bénéficiez d'une assistance
téléphonique gratuite en composant le (208) 323-2551. Les éventuels frais
d'appels longue distance sont à votre charge.
Aux Etats-Unis, l'assistance téléphonique est disponible en anglais et en
espagnol 24 heures sur 24, 7 jours sur 7 (jours et horaires sont sujets à
modification sans préavis).
Au-delà de la période de garantie, composez le (208) 323-2551. Les frais
s'élèvent à 25 USD par appel et seront prélevés sur votre carte de crédit. Si vous
pensez que votre produit HP doit être réparé, appelez les services d'assistance
clientèle HP, qui vous aideront à déterminer si une intervention est nécessaire.
24
hp scanjet série 8200
Page 69

assistance produits
assistance téléphonique en Europe, au Moyen-Orient et en Afrique
Afrique du Sud 086 000 1030 (en RSA)
+27-11 258 9301 (autres régions)
Algérie +213 (0) 61 56 45 43
Allemagne +49 (0) 180 5652 180 (0,12 Euro/mn)
Arabie Saoudite +966 800 897 1444
Autriche +43 (0) 820 87 4417
Bahrein +973 800 728
Belgique +32 070 300 005 (flamand)
+32 070 300 004 (français)
Danemark +45 70202845
Egypte +20 02 532 5222
Emirats arabes
+971 4 883 845
unis
Espagne +34 902 010 059
Fédération de
Russie
+7 095 797 3520 (Moscou)
+7 812 346 7997 (Saint-Petersbourg)
Finlande +358 (0)203 66 767
France +33 (0)8 92 69 60 22 (0,34 Euro/mn)
Grèce +30 10 60 73 603
Hongrie +36 (0) 1 382 1111
Irlande +353 1890 923902
Israël +972 (0) 9 830 4848
Italie +39 848 800 871
Luxembourg 900 40 006 (français)
900 40 007 (allemand)
Maroc +212 224 04747
Norvège + 47 815 62 070
Pays-Bas 0900 2020165 (0,10 Euro/mn)
Pologne +48 22 865 98 00
Portugal +351 808 201 492
Français
guide de l'utilisateur
République
+42 (0) 2 6130 7310
Tchèque
Roumanie +40 1 315 44 42
Royaume-Uni +44 (0)870 010 4320
25
Page 70

chapitre 5
Slovaquie +421 2 6820 8080
Suède +46 (0) 77-120 4765
Suisse +41 0848 672 672 (allemand, français, italien –
heures de pointe : 0,08 CHF/autres horaires : 0,04 CHF)
Tunisie +216 1 891 222
Turquie +90 216 579 71 71
Ukraine +7 (380 44) 490-3520
assistance téléphonique dans le reste du monde
Amérique centrale
+1 800 711 2884
et Caraïbes
Argentine +54 0 810 555 5520
Australie +63 (3) 8877 8000 (ou local (03) 8877 8000)
Brésil +55 (11) 3747 7799 (São Paulo centre)
+55 0800 157751 (en dehors de São Paulo centre)
Canada +1 905 206 4663 (au cours de la période de garantie)
+1 877 621 4722 (après la période de garantie)
Chili +56 800 22 5547 (service après-vente informatique aux
entreprises)
+56 800 360 999 (service après-vente informatique aux
particuliers)
Chine +86 (10) 6564 5959
Colombie +57 9 800 114 726
Etats-Unis 1 800 474-6836 (800 HPINVENT)
Guatemala +502 1 800 999 5105
Hong Kong SAR +852 3002 8555
Inde 1 600 112267 ou +91 11 682 6035 (hindi et anglais)
Indonésie +62 (21) 350 3408
Japon 0570 000 511 (au Japon)
+81 3 3335 9800 (en dehors du Japon)
26
Malaisie +60 1 800 805 405
Mexique +52 58 9922 (Mexico City)
+52 01 800 472 6684 (autres régions)
Nouvelle-Zélande +64 (9) 356 6640
Pérou +51 0 800 10111
Philippines + 63 (2) 867 3551
Porto Rico +1 877 2320 589
hp scanjet série 8200
Page 71

assistance produits
République de
Corée
+82 (2) 3270 0700 (Séoul)
0 80-999-0700 (autres régions)
Singapour +65 6272 5300
Taïwan +886 0 800 010055
Thaïlande +66 (2) 661 4000
Venezuela +58 0 800 4746 8368
Vietnam +84 (0) 8 823 4530
Français
guide de l'utilisateur
27
Page 72

garantie
6
Le présent chapitre contient les conditions de garantie, les informations juridiques
ainsi que des renseignements sur la gestion de l'environnement.
extension de garantie hewlett-packard
Le scanner numérique à plat HP Scanjet série 8200 a une garantie limitée d'un
(1) an.
1 HP vous garantit, en tant que client utilisateur final, que le matériel, les
accessoires et les consommables HP sont exempts de défauts matériels et
de malfaçons à partir de la date d'achat par le client et pour la période
spécifiée ci-dessus. Si HP a connaissance de tels défauts pendant la
période de garantie, les produits établis comme défectueux seront réparés
ou remplacés, à sa convenance. Les produits de remplacement pourront
être neufs ou équivalents dans leur fonctionnement à des produits neufs.
2 HP vous garantit que les logiciels HP ne manqueront pas d'exécuter leurs
instructions de programmation à partir de la date d'achat, pendant la
période indiquée ci-dessus, en raison de défauts matériels et de malfaçons
s'ils ont été correctement installés et utilisés. Si HP a connaissance de tels
défauts pendant la période de garantie, la société remplacera les logiciels
qui n'exécutent pas leurs instructions de programmation en raison de ces
défauts.
3 HP ne garantit pas que le fonctionnement des produits HP ne sera pas
exempt d'interruptions ni d'erreurs. Si HP ne peut, dans un délai
raisonnable, réparer ou remplacer le produit, quel qu'il soit, dans le cadre
de la garantie, vous aurez droit au remboursement du produit à son prix
d'achat après retour rapide du produit.
4 Les produits HP peuvent comporter des pièces remanufacturées
équivalentes à des pièces neuves dans leur fonctionnement ou qui peuvent
avoir été utilisées de façon fortuite.
5 La présente garantie ne s'applique pas aux défauts résultant (a) d'une
maintenance ou d'un étalonnage incorrect ou inadéquat, (b) de logiciels,
interfaces, pièces ou fournitures non fournis par HP, (c) de modifications
non autorisées ou d'un mauvais usage, (d) d'une utilisation non conforme
aux spécifications d'environnement indiquées pour le produit, ou (e) d'une
préparation ou d'une maintenance incorrecte du site.
6 DANS LES LIMITES AUTORISEES PAR LA LEGISLATION LOCALE EN
VIGUEUR, LES GARANTIES CI-DESSUS SONT EXCLUSIVES ET AUCUNE
AUTRE GARANTIE OU CONDITION, ECRITE OU ORALE, N'EST
ACCORDEE DE FACON EXPRESSE OU IMPLICITE. HP REJETTE
SPECIFIQUEMENT TOUTES GARANTIES OU CONDITIONS IMPLICITES
DE COMMERCIALISATION, DE QUALITE SATISFAISANTE ET
D'ADAPTATION A UN USAGE PARTICULIER. Certains pays, états ou
provinces n'autorisent pas de limitations de durée de la garantie implicite.
28
Page 73

garantie
Dans ce cas, la limitation ou l'exclusion ci-dessus peut donc ne pas
s'appliquer à vous. La présente garantie vous donne des droits spécifiques
et vous pouvez également disposer d'autres droits selon votre pays, état ou
province.
7 La garantie limitée de HP est valable dans tout pays ou localité où
HP dispose d'un centre d'assistance et d'une présence commerciale pour
ce produit. Le niveau des services de garantie offerts dépend des
réglementations locales. HP ne modifiera pas la forme, l’adaptation ou la
fonction du produit pour le rendre opérationnel dans un pays dans lequel il
n’a jamais été destiné à fonctionner pour des raisons légales ou
réglementaires.
8 DANS LES LIMITES AUTORISEES PAR LA LEGISLATION EN VIGUEUR, LES
RECOURS DE CETTE DECLARATION DE GARANTIE CONSTITUENT VOS
SEULS ET UNIQUES RECOURS. A L’EXCEPTION DES CAS MENTIONNES
PLUS HAUT, HP OU SES FOURNISSEURS NE SERONT EN AUCUN CAS
RESPONSABLES DES PERTES DE DONNEES OU DES DOMMAGES
DIRECTS, PARTICULIERS, FORTUITS, CONSECUTIFS (Y COMPRIS LES
PERTES DE PROFITS OU DE DONNEES) OU AUTRES, FONDES SUR UN
CONTRAT, UN PREJUDICE OU AUTRE. Certains pays, états ou provinces
n’autorisant pas les exclusions ou les limitations de dommages fortuits ou
consécutifs, les limitations ou les exclusions ci-dessus peuvent ne pas
s’appliquer à vous.
9 HORMIS DANS LES LIMITES AUTORISEES PAR LA LOI, LES CONDITIONS
DE GARANTIE CONTENUES DANS CETTE DECLARATION, N’EXCLUENT,
NE RESTREIGNENT NI NE MODIFIENT LES DROITS STATUTAIRES
OBLIGATOIRES APPLICABLES A LA VENTE DE CE PRODUIT A VOUSMEME, MAIS VIENNENT S’Y AJOUTER.
Français
informations juridiques
Les informations juridiques se trouvent sur le CD du logiciel Photo et Imagerie HP
fourni avec le scanner, dans le fichier regulatory_supplement.htm.
programme de gestion de l'environnement
protection de l'environnement
Hewlett-Packard Company s'engage à fournir des produits de qualité au sens
environnemental du terme. Ce produit a été doté de caractéristiques destinées à
réduire au minimum son impact sur l'environnement.
consommation d'énergie
La consommation d'énergie est sensiblement réduite lorsque le scanner est à
faible puissance, ce qui permet d'économiser les ressources naturelles et de
réduire les coûts sans affecter les performances du produit. Ce produit est doté
du label E
développement de produits de bureau à faible consommation d'énergie. En tant
que partenaire du programme E
établi que le présent produit remplissait les exigences de la norme E
sur l'économie d'énergie.
guide de l'utilisateur
NERGY STAR®, programme bénévole destiné à favoriser le
NERGY STAR®, Hewlett-Packard Company a
NERGY STAR®
29
Page 74

chapitre 6
matières plastiques
Les pièces en matière plastique de plus de 25 g sont signalées conformément
aux normes internationales destinées à favoriser une meilleure identification des
matières plastiques en vue de leur recyclage en fin de vie.
démontage/fin de vie
Ce produit HP (scanner numérique à plat HP Scanjet série 8200) est conçu pour
un démontage et un traitement faciles en fin de vie grâce à l'utilisation de
composants d'assemblage et de systèmes d'emboîtement courants.
mise au rebut de certains matériaux
Ce produit HP contient des matériaux qui risquent de nécessiter un traitement
spécial lorsqu'ils seront hors d'usage :
• du mercure dans la lampe fluorescente du scanner et l'adaptateur de
supports transparents (< 5 mg) ;
• du plomb dans les soudures.
Vous pouvez obtenir des informations concernant le recyclage à l'adresse
www.hp.com/go/recycle, auprès des autorités locales ou sur le site de l'EIA
(Electronics Industries Alliance) : www.eiae.org.
recyclage
HP propose plusieurs programmes de recyclage des produits en fin de vie dans
différentes régions du monde. Pour savoir si ce type de programme est
disponible dans votre région, contactez l'agence commerciale HP la plus proche
de chez vous.
Les produits retournés à HP sont réutilisés, recyclés ou traités de la façon qu'il
convient. Chaque mois, HP réutilise ou recycle plus de 1,6 millions de kilos de
matériaux dans ses centres de recyclage de Grenoble (France), Boeblingen
(Allemagne) et Roseville (Californie, Etats-Unis), soit 99 % du poids total des
matériaux reçus des clients et des représentations HP.
30
hp scanjet série 8200
Page 75

annexe A – configuration et options
7
SCSI
Le présent chapitre décrit comment configurer le scanner HP Scanjet série 8200
avec une interface SCSI (Small Computer Serial Interface).
pourquoi utiliser une interface SCSI ?
Si votre ordinateur fonctionne sous Windows NT, le scanner doit être relié à une
interface SCSI. Si des périphériques SCSI sont déjà connectés à votre ordinateur,
vous pouvez connecter le scanner à une chaîne SCSI externe existante. Le
scanner doit être le dernier périphérique de la chaîne SCSI et l'ordinateur doit
être doté d'un adaptateur SCSI compatible. Le scanner doit également disposer
d'un module SCSI.
Pour obtenir la liste des adaptateurs SCSI compatibles, reportez-vous à la section
cartes SCSI compatibles à la page 33.
installation du logiciel
HP vous recommande d'installer au préalable le logiciel.
Remarque : sous Windows NT, les utilisateurs doivent installer le logiciel
HP Precisionscan Pro.
1 Supprimez toutes les versions antérieures du logiciel de numérisation HP.
2 Fermez toutes les applications ouvertes sur l'ordinateur et insérez le CD.
3 Dans le menu Démarrer, cliquez sur Exécuter, puis tapez : x:setup.exe (où
x représente la lettre désignant votre lecteur de CD).
Français
installation du scanner
Avant d'installer le scanner, vous devez y insérer le module SCSI et installer une
carte SCSI dans l'ordinateur.
1 Débranchez le câble d'alimentation du scanner et éteignez l'ordinateur.
2 Installez le module SCSI dans le scanner.
a. Retirez les deux vis qui maintiennent le cache d'accès SCSI à l'arrière
du scanner et ôtez le capot.
1 2 1
retrait du cache d'accès SCSI
31
Page 76

chapitre 7
b. Insérez le module SCSI (C9939AC3) dans le scanner.
insertion du module SCSI
c. Insérez et serrez les deux vis.
serrage des deux vis
3 Installez la carte SCSI (du kit SCSI –
C6271) dans votre ordinateur en
suivant les instructions fournies avec le kit.
4 Connectez le câble SCSI de l'ordinateur au module SCSI.
5 Connectez le câble d'alimentation et l'adaptateur comme illustré
ci-dessous.
Câble de l'adaptateur
d'alimentation
6 Mettez l'ordinateur sous tension.
7 Si d'autres périphériques SCSI sont installés sur cette carte SCSI et que le
scanner ne fonctionne pas, un conflit d'adresses SCSI en est peut-être la
cause.
8 Si un conflit d'adresses SCSI se produit, modifiez l'adresse SCSI du
scanner.
modification de l'adresse SCSI du scanner
Si plusieurs périphériques SCSI sont connectés à une seule carte SCSI, chacun
doit avoir un identifiant SCSI unique. Si le scanner ne fonctionne pas après son
ajout dans une chaîne SCSI à plusieurs périphériques, il peut être nécessaire de
modifier l'adresse SCSI. Pour modifier l'identifiant SCSI du scanner (prédéfini
à 2), suivez les étapes ci-dessous.
1 Mettez l'ordinateur hors tension.
2 Vérifiez que le scanner est bien allumé.
32
1
Adaptateur d'alimentation
connexion de l'alimentation
2
Câble
d'alimentation
hp scanjet série 8200
Page 77

annexe A – configuration et options SCSI
3 Appuyez simultanément sur les boutons NUMÉRISER VERS () et
DITER TEXTE ( ) du scanner.
E
Adresse SCSI : 2 doit s'afficher sur l'écran du panneau frontal.
4 Appuyez sur le bouton N
OMBRE DE COPIES ( ) pour sélectionner un autre
identifiant d'adresse SCSI. L'identifiant s'affiche sur l'écran du panneau
frontal.
5 Pour quitter les paramètres d'adressage SCSI, appuyez sur l'un des
boutons du panneau frontal du scanner à l'exception du bouton N
DE COPIES ().
6 Mettez l'ordinateur sous tension.
cartes SCSI compatibles
Cartes SCSI compatibles Windows
Adaptec 19160 Adaptec APA 1480A Slim
Adaptec 2100S 1Channel Ultra Adaptec AVA 2906 PCI
Adaptec 2904 Adaptec AVA 2930 Ultra
Adaptec 29160 Ultra Adaptec AVA 39160 Ultra
Adaptec 39320D Ultra AdvanSys 915
Adaptec AAA 131U2 RAID PCI vers Ultra2 SIDE-2935LVD ou SIDE-2936UW ou
SIDE-2930C ou SIDE-DU280
OMBRE
Français
Adaptec AHA 291OC lomega Jaz Jet 32 bits PCI vers SCSI
Adaptec AHA 2940U Ultra Symbios Logic 53C1010 ou 53C895
Adaptec AHA 2944UW Ultra Wide Tekram DC390 ou 395UW ou DC315U ou
DC-315 ou DC-390U2W
Cartes SCSI compatibles Macintosh
Adaptec AHA 2930 U2B AdvanSys SCSI 915
Adaptec AHA 2930 UI Apple 53C875
guide de l'utilisateur
33
Page 78

annexe B – caractéristiques du produit
8
et options
Le présent chapitre contient les caractéristiques des accessoires et des scanners
HP Scanjet série 8200.
caractéristiques du scanner
Désignation Description
Type de scanner A plat
Poids (sans le capot) 2,79 kg
Taille initiale maximum 296 x 494 x 73 mm
Elément de numérisation Elément à couplage de charge
Interface USB pleine vitesse et SCSI-2
Résolution optique 4800 ppp
Choix de la résolution 12 ppp à 999 999 ppp, à échelle de 100 %
Tension de secteur 100-120 V, 60 Hz – Amérique du Nord
200-240 V, 50 Hz – Europe continentale, Royaume-Uni et Australie
100-240 V, 50 Hz/60 Hz – dans le reste du monde
Consommation d'énergie Reportez-vous au fichier regulatory_supplement.htm présent sur le CD
du logiciel Photo et Imagerie HP.
Tous les scanners HP Scanjet série 8200 sont conformes à E
TAR. En tant que partenaire du programme ENERGY STAR,
S
Hewlett-Packard Company a établi que le présent produit remplissait
les exigences de la norme ENERGY STAR sur l'économie d'énergie.
NERGY
caractéristiques du bac d'alimentation automatique (ADF)
Désignation Description
Taille 584x 318x 89mm
Poids (avec l'adaptateur de
supports transparents)
Capacité du bac d'entrée 50 rames de 75 g/m
Format de papier maximum 216 x 356 mm
Format de papier minimum 89 x 127 mm
Grammage maximum 90 g/m
Alimentation 1 A, 32 V, 32 watts (fournis par le scanner)
34
2,7 kg
2
(papier bond de 20 livres)
2
800 mA, 19 watts (pic) 625 mA, 15 watts (nominale)
Page 79

annexe B – caractéristiques du produit et options
caractéristiques de l'adaptateur de supports transparents
(TMA)
Désignation Description
Types de supports et
capacité
Taille 565 x 320 x 64 mm
Poids 1,6 kg
Alimentation 16 Vcc, 425 mA, 6,8 watts (fournis par le scanner)
Diapositives : 3 diapositives au maximum, 35 mm, montées sur un
cadre de 1,05 x 1,9 mm d'épaisseur et 49,8 x 50,8 mm de
rectangularité.
Négatifs : 4 vues au maximum dans une bande de négatifs de
35 mm.
conditions ambiantes du scanner, du bac d'alimentation
automatique et de l'adaptateur de supports transparents
Désignation Description
Température En fonctionnement : 10 °C à 35 °C
De stockage : -40 °C à 70 °C
Humidité relative En fonctionnement : 15 % à 80 % (sans condensation)
10° à 35 °C
De stockage : jusqu'à 90 %
-40 °C à 70 °C
achat d'accessoires
Français
guide de l'utilisateur
Vous pouvez vous procurer des accessoires auprès de votre revendeur local ou
en ligne à l'adresse www.hpshopping.com (Etats-Unis uniquement). Dans les
autres régions du monde, accédez à la page www.hp.com et sélectionnez votre
langue. Cliquez sur le lien qui pointe vers la section Comment acheter.
Désignation de l'option Référence
Kit SCSI (contient une carte et un câble SCSI) C6271
Module SCSI (contient un port SCSI pour le scanner) C9939AC3
Bac d'alimentation automatique (ADF) de 15 pages
par minute avec adaptateur de supports transparents
(TMA) intégré
Bac d'alimentation automatique (ADF) de 25 pages
par minute avec adaptateur de supports transparents
(TMA) intégré
C9936A
C9937A
35
Page 80

chapitre 8
achat de pièces de maintenance
Vous pouvez acheter les pièces de maintenance répertoriées ci-dessous sur le
site Web de HP à l'adresse www.hp.com. Dans le champ Recherche, tapez "kit
de remplacement du rouleau du bac d'alimentation automatique" ou "chiffon de
nettoyage" pour obtenir des informations sur l'achat de ces pièces.
Désignation Référence
Kit de remplacement du rouleau du bac d'alimentation
automatique
Chiffon de nettoyage (paquet de 10) C9915-60056
C9937-68001
36
hp scanjet série 8200
Page 81

index
A
accessibilité, site Web dédié
23
à,
accessoires, achat, 35
acquisition, 5
adaptateur de supports
transparents HP Scanjet
(TMA)
diapositives,
numérisation, 18
adaptateur de supports
transparents (TMA)
caractéristiques, 34
négatifs, numérisation, 20
adaptateur de supports
transparents.Voi r
adaptateur de supports
transparents (TMA) du HP
Scanjet
ADF (bac d’alimentation
automatique)
numérisation à partir de,
16
sélection de supports
compatibles,
16
adresse SCSI, modification, 32
aide
sites Web,
23
téléphone, assistance
24
par,
alimentation
adaptateur de supports
transparents, 34
Annuler
impression de copies,
8
numérisation, 10
assistance clientèle, 23
assistance technique, 23
assistance téléphonique, 24
assistance, clientèle, 23
B
bac d’alimentation
automatique
achat, 35
entretien, 13
kit de remplacement du
rouleau,
36
nettoyage, 12
préparation des supports à
utiliser,
16
bac d’alimentation
automatique (ADF)
achat, 35
entretien, 13
kit de remplacement du
rouleau,
36
nettoyage, 12
numérisation à partir de, 16
préparation des supports à
utiliser,
16
sélection de supports
compatibles,
16
bouton Annuler
description,
4
utilisation, 10
bouton Copier
description,
3
utilisation, 8
bouton Couleur/Noir et blanc,
description,
3
bouton Destination,
description,
3
bouton Document fichier
sur le scanner,
3
utilisation, 7
bouton Economie d'énergie
description,
4
utilisation, 10
bouton Editer texte
description,
3
utilisation, 6
bouton Messagerie
électronique
description, 3
utilisation, 7
bouton Nombre de copies,
description,
3
bouton Numériser image
numérisation d'images,
5
utilisation, 5
bouton Numériser vers, 3
numérisation de
documents,
5
boutons
Annuler,
4, 10
bouton Messagerie
électronique,
3
Copier, 3, 8
Couleur/Noir et blanc, 3
Destination, 3
Document fichier, 3
Economie d'énergie, 4, 10
Editer texte, 3
Nombre de copies, 3
Numériser image, 3
Numériser vers, 3
paramètres, 4, 10
C
caractéristiques
adaptateur de supports
transparents, 35
du produit, 34
du scanner, 34
environnement, 35
caractéristiques du produit, 34
caractéristiques techniques,
électricité
adaptateur de supports
transparents,
34
cartes, liste, 33
chiffon de nettoyage, 36
chiffon de nettoyage,
référence,
36
commande
fournitures de
maintenance, 13
configuration du temps de
chauffe de la lampe
instantané, 10
consommation d'énergie
adaptateur de supports
transparents,
34
Energy Star, 29
copies
impression,
8
D
diapositives
cache-lumière,
19
numérisation, 18
support, 19
Français
37
Page 82

index
documents en plusieurs parties,
numérisation,
16
document, numérisation, 16
E
écran du panneau frontal,
description,
4
écran, panneau frontal, 4
Energy Star
description,
29
site Web, 29
entretien
adaptateur de supports
transparents, 12
bac d’alimentation
automatique,
13
commande des
fournitures,
13
nettoyage du scanner, 11
environnement
caractéristiques,
35
programme de gestion, ii,
29
F
fichiers
joindre à un e-mail,
7
types de sorties, 11
format de papier
personnalisé,
16
fournitures, commande, 13
G
Galerie photo et imagerie HP, 5
garantie, ii, 28
grammages de supports
compatibles
ADF, 16
H
humidité, 35
I
identifiant SCSI,
modification,
32
images
prévisualisation et
modification, 5
importation, 5
impression
copies,
8
imprimantes
modification des
paramètres, 8
informations juridiques, 29
installation
du scanner avec l'interface
SCSI,
31
test matériel, 14
J
joindre des fichiers à un e-
mail,
7
K
kit de remplacement du
rouleau, bac
d’alimentation
automatique,
36
L
lampe du scanner
chauffe,
10
logiciel
installation, SCSI,
31
logiciel de copie HP, 8
M
matériel
mode test,
14
message indiquant qu’un
répertoire ou un dossier
n’est pas valide, 14
messages
répertoire ou dossier non
valide, 14
modification
paramètres d'impression,
prévisualisation des
images,
5
N
négatifs
cache-lumière,
20, 21
numérisation à l'aide de
l'adaptateur de supports
transparents, 20
support, 20
nettoyage
adaptateur de supports
transparents, 12
bac d’alimentation
automatique,
12
vitre du scanner, 11
NT, installation du logiciel, 31
numérisation
Annuler,
10
avec le bouton Copier, 8
avec le bouton Document
7
fichier,
avec le bouton Editer
6
texte,
avec le bouton Messagerie
électronique,
avec le bouton Numériser
image,
5
avec le bouton Numériser
vers,
5
de plusieurs originaux, 9
diapositives, 18
joindre des fichiers à un e-
mail,
7
négatifs, 20
présentation générale, 4
numérisation de documents
à partir du bouton
Numériser vers, 5
numérisation instantanée, 10
O
originaux
numérisations multiples,
prévisualisation de plusieurs
originaux,
sélection du type, 11
P
papier
compatible avec le bac
d'alimentation
automatique,
paramètres des boutons
bouton,
8
4
modification, 10
personnes handicapées,
assistance pour,
plis sur le support, 16
poids
adaptateur de supports
transparents, 34
prévisualisation des images
visualisation et
modification, 5
prévisualisation d'images
multiples,
9
programme de gestion, 29
programmes
numérisation à partir de,
R
recyclage, 29, 30
remplacement
rouleaux du bac
d’alimentation, 13
répertoire de destination non
valide,
14
répertoire non valide, 14
reprise, 30
7
9
9
16
23
5
38
hp scanjet série 8200
Page 83

index
reprise des produits en fin de
vie,
30
rouleaux d’alimentation du
papier, remplacement,
S
scanner
entretien et nettoyage,
11
installation, 31
vitre, nettoyage, 11
SCSI
configuration du scanner
avec, 31
installation du scanner, 31
liste des cartes
compatibles,
33
modification de l'adresse du
scanner,
32
sites Web
assistance aux personnes
handicapées,
Energy Star, 29
13
recyclage, 30
stockage, 35
support gondolé, 16
supports
compatibles avec le bac
d'alimentation
automatique,
support, négatifs, 20
T
taille
adaptateur de supports
transparents, 34
téléphone, assistance par, 24
température ambiante, 35
température en
fonctionnement,
16
23
35
test
matériel du scanner,
14
TMA.Voi r adaptateur de
supports transparents
(TMA) du HP Scanjet
transparents, numérisation,
TWAIN
numérisation à partir de,
types de fichiers de sortie, 11
V
visualisation
prévisualisation des
images, 5
Z
zone de numérisation
définitive,
19, 21
16
5
Français
guide de l'utilisateur
39
Page 84

www.hp.com
Printed in U.S.A. 2002
*C9930−90114*
C9930-90114
 Loading...