

Page 1
hp scanjet 4400c series
and 5400c series scanners
user’s manual
Page 2

Copyright information
Warranty
© Copyright Hewlett-Packard Company 2001
All rights reserved. Reproduction, adaptation, or translation without
prior written permission is prohibited, except as allowed under
copyright laws.
Trademark credits
Microsoft ®, Windows ®, Windows NT ®, Hotmail ®, Microsoft Word
®, Microsoft Outlook ®, and Outlook Express ® are U.S. registered
trademarks of Microsoft Corporation. Adobe
trademarks of Adobe Systems Incorporated. Netscape
registered product of Netscape. Energy Star
service mark of the United States Environmental Protection Agency.
All other products mentioned herein might be trademarks of their
respective companies.
™ and Acrobat™ are
® is a U.S.
® is a U.S. registered
The information contained in this document is subject to change
without notice.
Hewlett-Packard makes no warranty of any kind with respect to this
information. HEWLETT-PACKARD SPECIFICALLY DISCLAIMS THE
IMPLIED WARRANTY OF MERCHANTABILITY AND FITNESS FOR
A PARTICULAR PURPOSE.
Hewlett-Packard shall not be liable for any direct, indirect, incidental,
consequential, or other damage alleged in connection with the
furnishing or use of this information.
NOTICE TO U.S. GOVERNMENT USERS: RESTRICTED RIGHTS
COMMERCIAL COMPUTER SOFTWARE: “Use, duplication, or
disclosure by the Government is subject to restrictions as set forth in
subparagraph (c) (1) (ii) of the Rights in Technical Data Clause at
DFARS 52.227-7013.”
Material scanned by this product might be protected by governmental
laws and other regulations, such as copyright laws. The customer is
solely responsible for complying with all such laws and regulations.
Page 3

3 Front panel and accessories comparisons Back to TOC
Front panel and accessories comparisons
The following tables provide information about the HP Scanjet 4400c
series and 5400c series scanners, including descriptions of the
buttons available on the front panels and the accessories you can use
with these scanners.
To find information about your scanner, see the following tables:
"HP Scanjet 4400c scanner" on page 4.
"HP Scanjet 4470c scanner" on page 5.
"HP Scanjet 5400c scanner" on page 6.
"HP Scanjet 5470c scanner" on page 7.
"HP Scanjet 5490c scanner" on page 9.
Page 4
4 Front panel and accessories comparisons Back to TOC
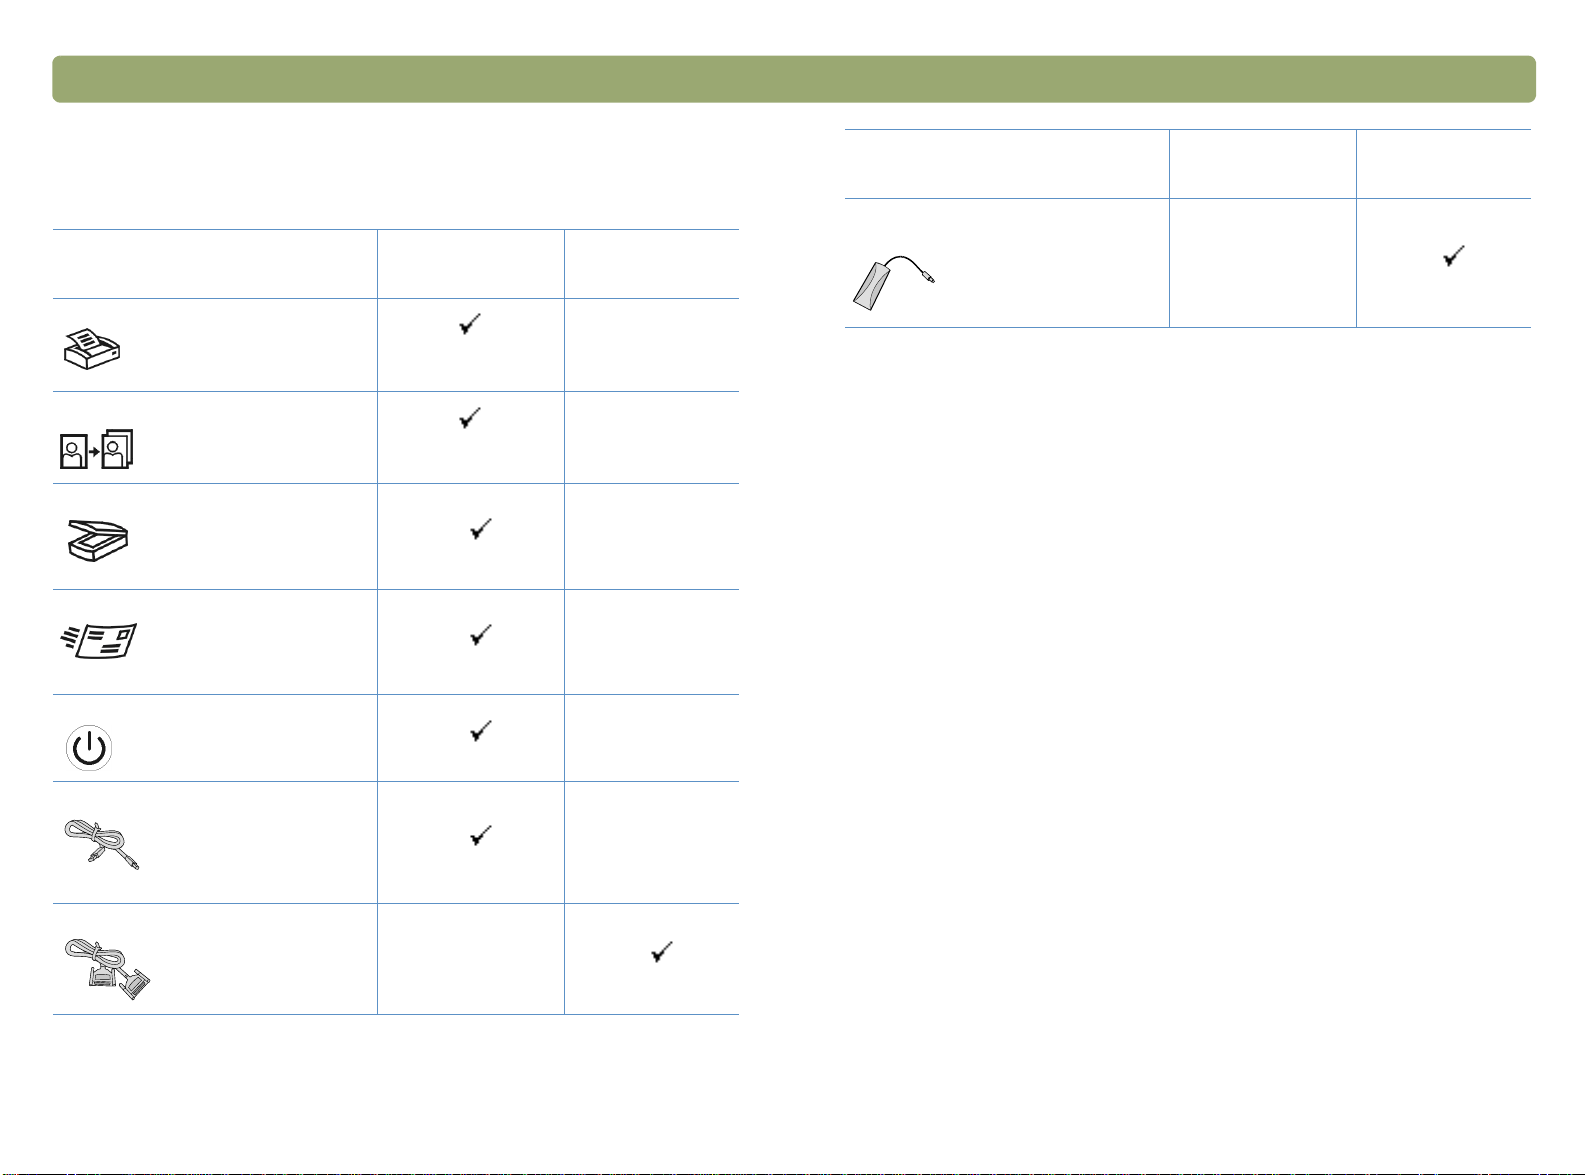
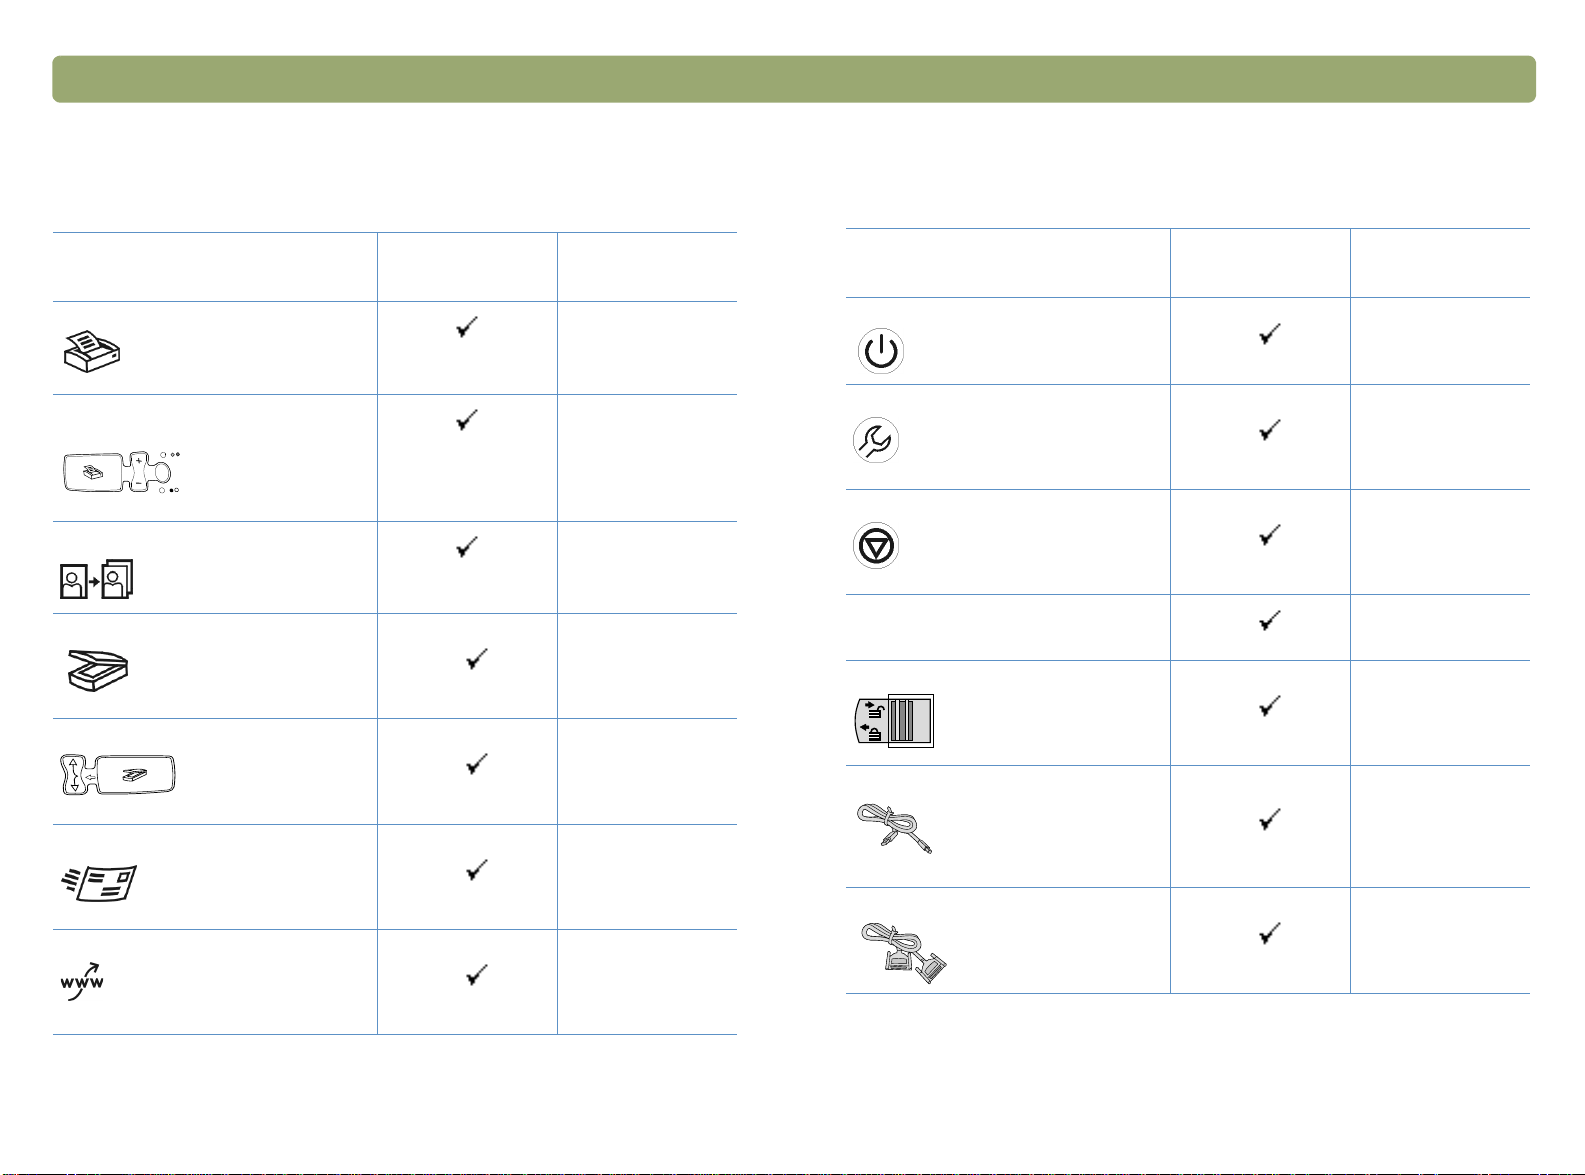
HP Scanjet 4400c scanner
Feature
Copy button
Photo Reprint button
Scan To button
E-mail button
Power Save button
Included on scanner
or in box
Supported
accessory
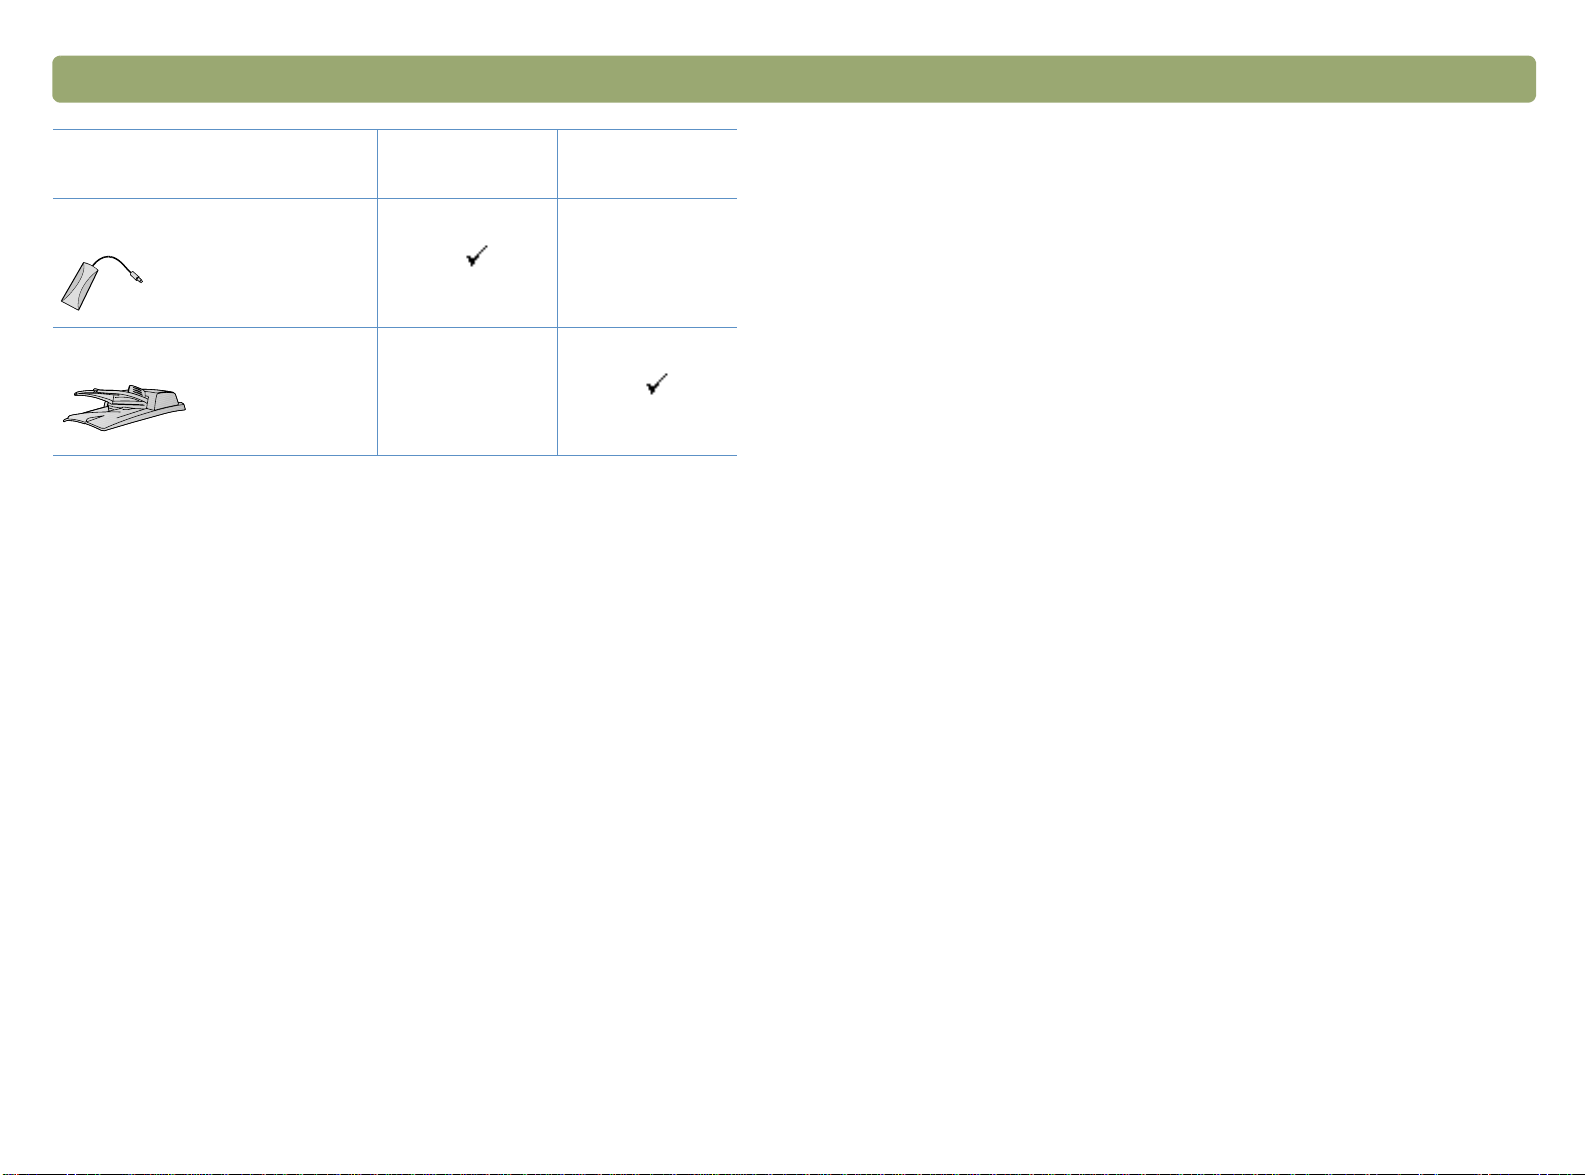
Feature
HP Scanjet Transparency Adapter
(XPA)
a
Included on scanner
or in box
Supported
accessory
a
a. Supported accessories include accessories that are not boxed with the
scanner, but can be purchased separately.
USB cable
Parallel cable
Page 5
Back to TOC Front panel and accessories comparisons 5
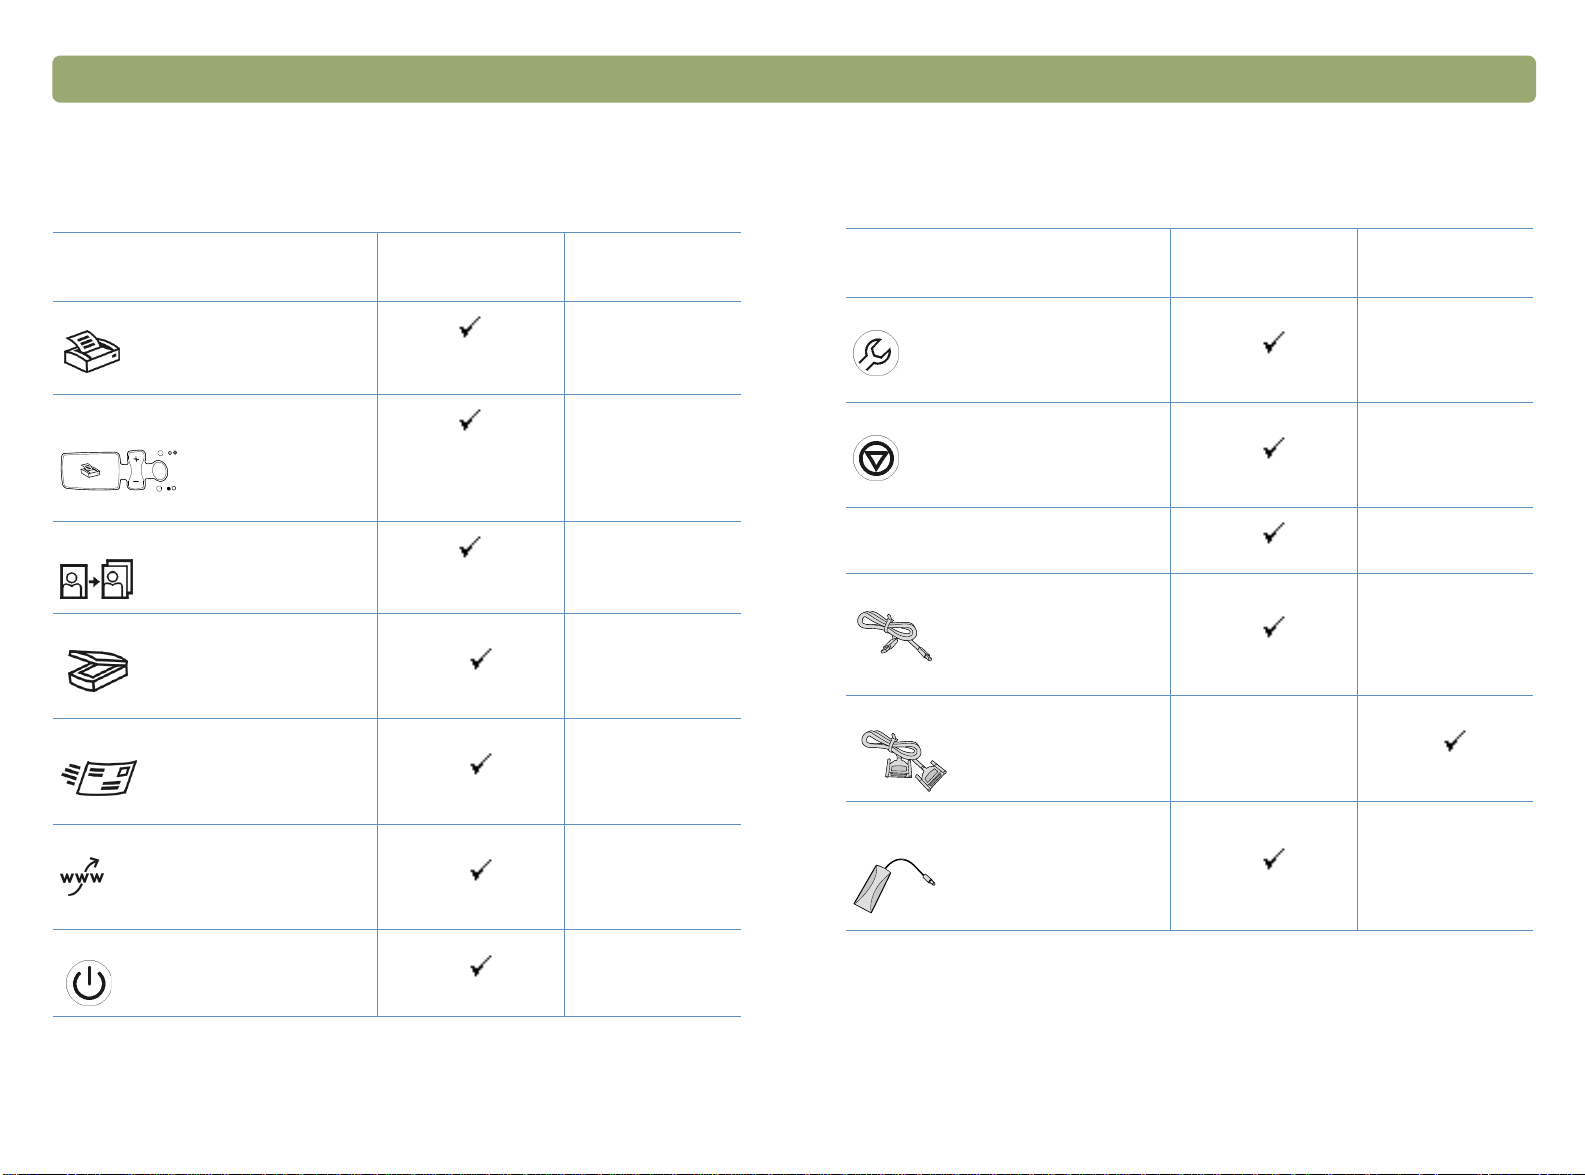
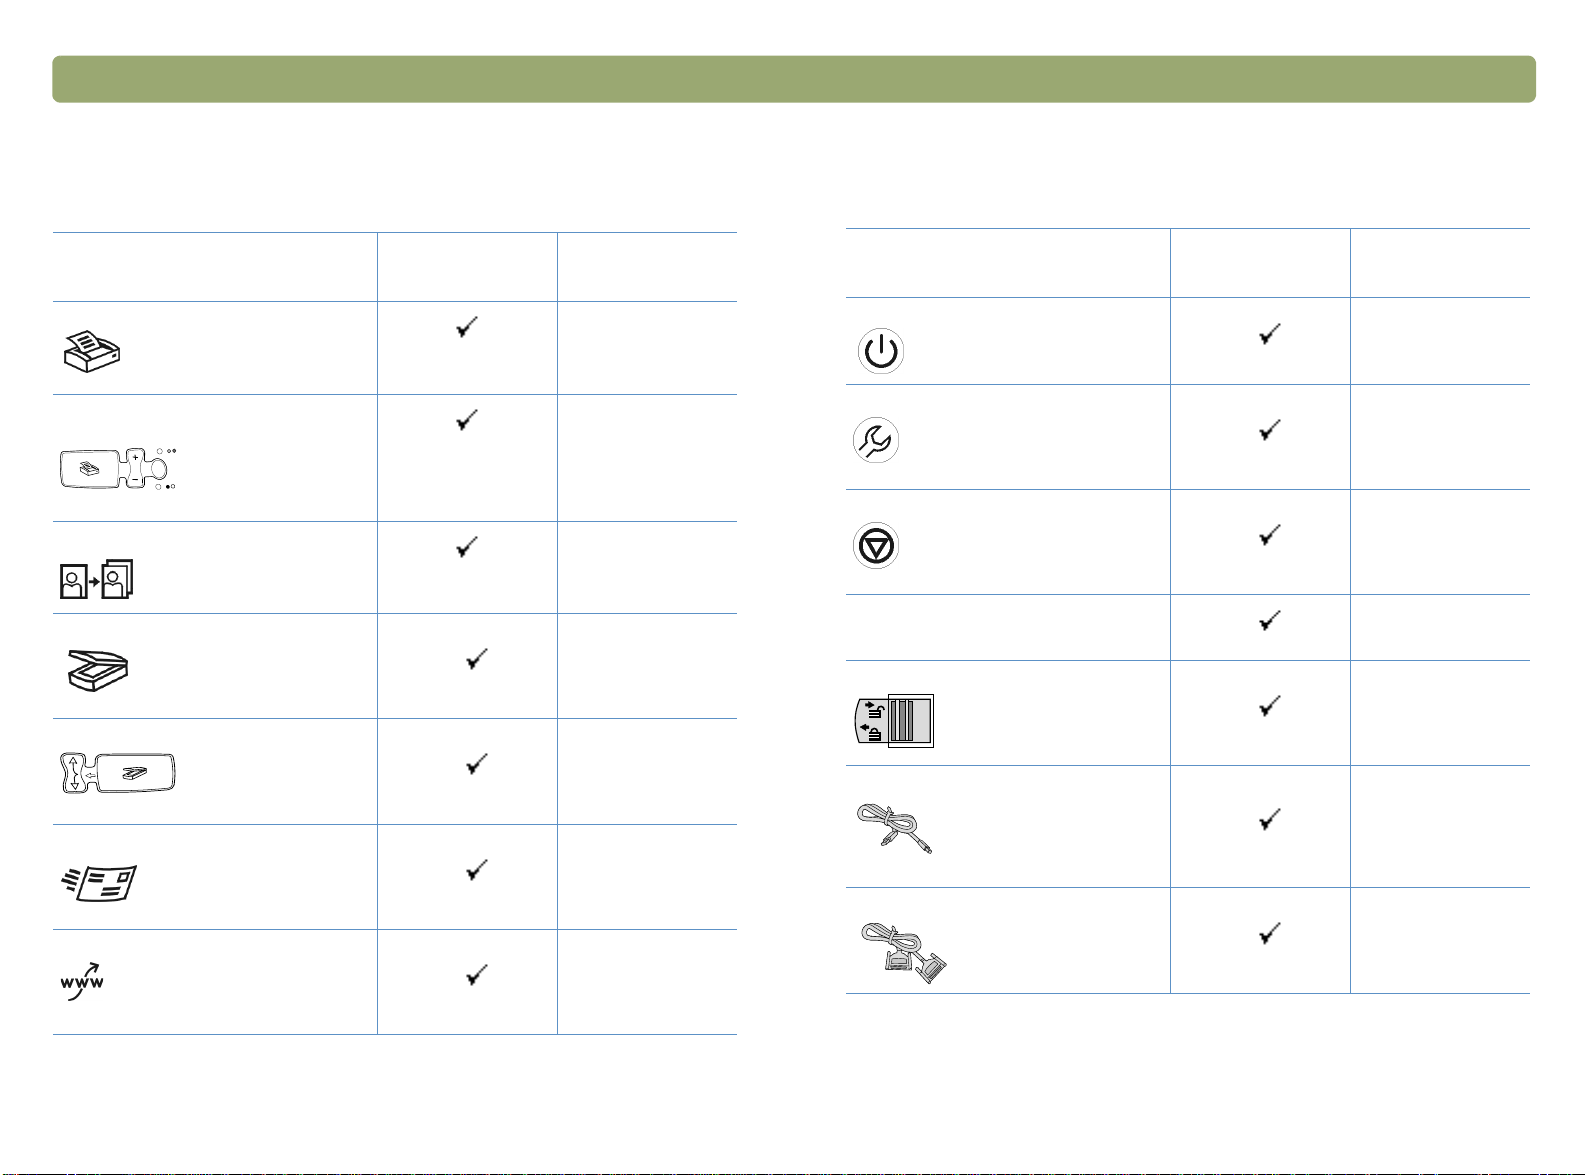
HP Scanjet 4470c scanner
Feature
Copy button
Color/black & white copy button and
select number of copies buttons
Photo Reprint button
Scan To button
E-mail button
Share-to-Web button
Included on scanner
or in box
Supported
accessory
a
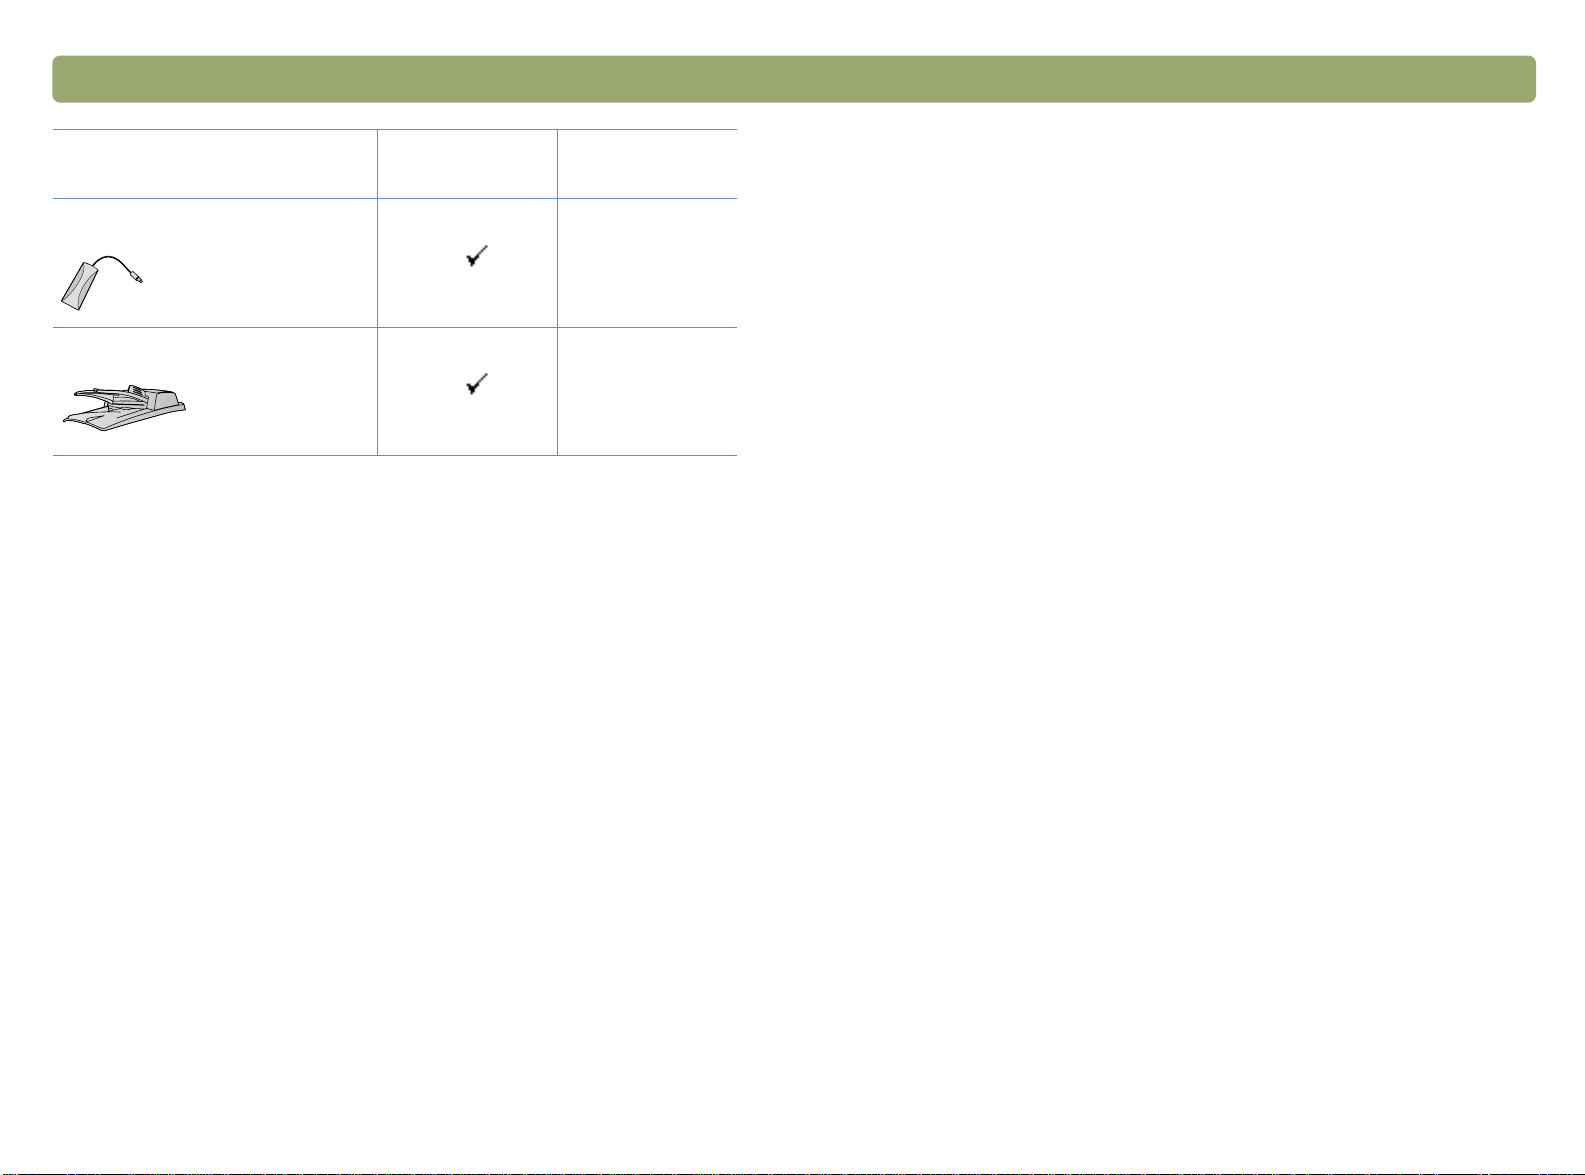
Feature
More options button
Cancel button
Two-digit LCD
USB cable
Parallel cable
HP Scanjet Transparency Adapter
(XPA)
Included on scanner
or in box
Supported
accessory
a
Power Save button
a. Supported accessories include accessories that are not boxed with the
scanner, but can be purchased separately.
Page 6
6 Front panel and accessories comparisons Back to TOC
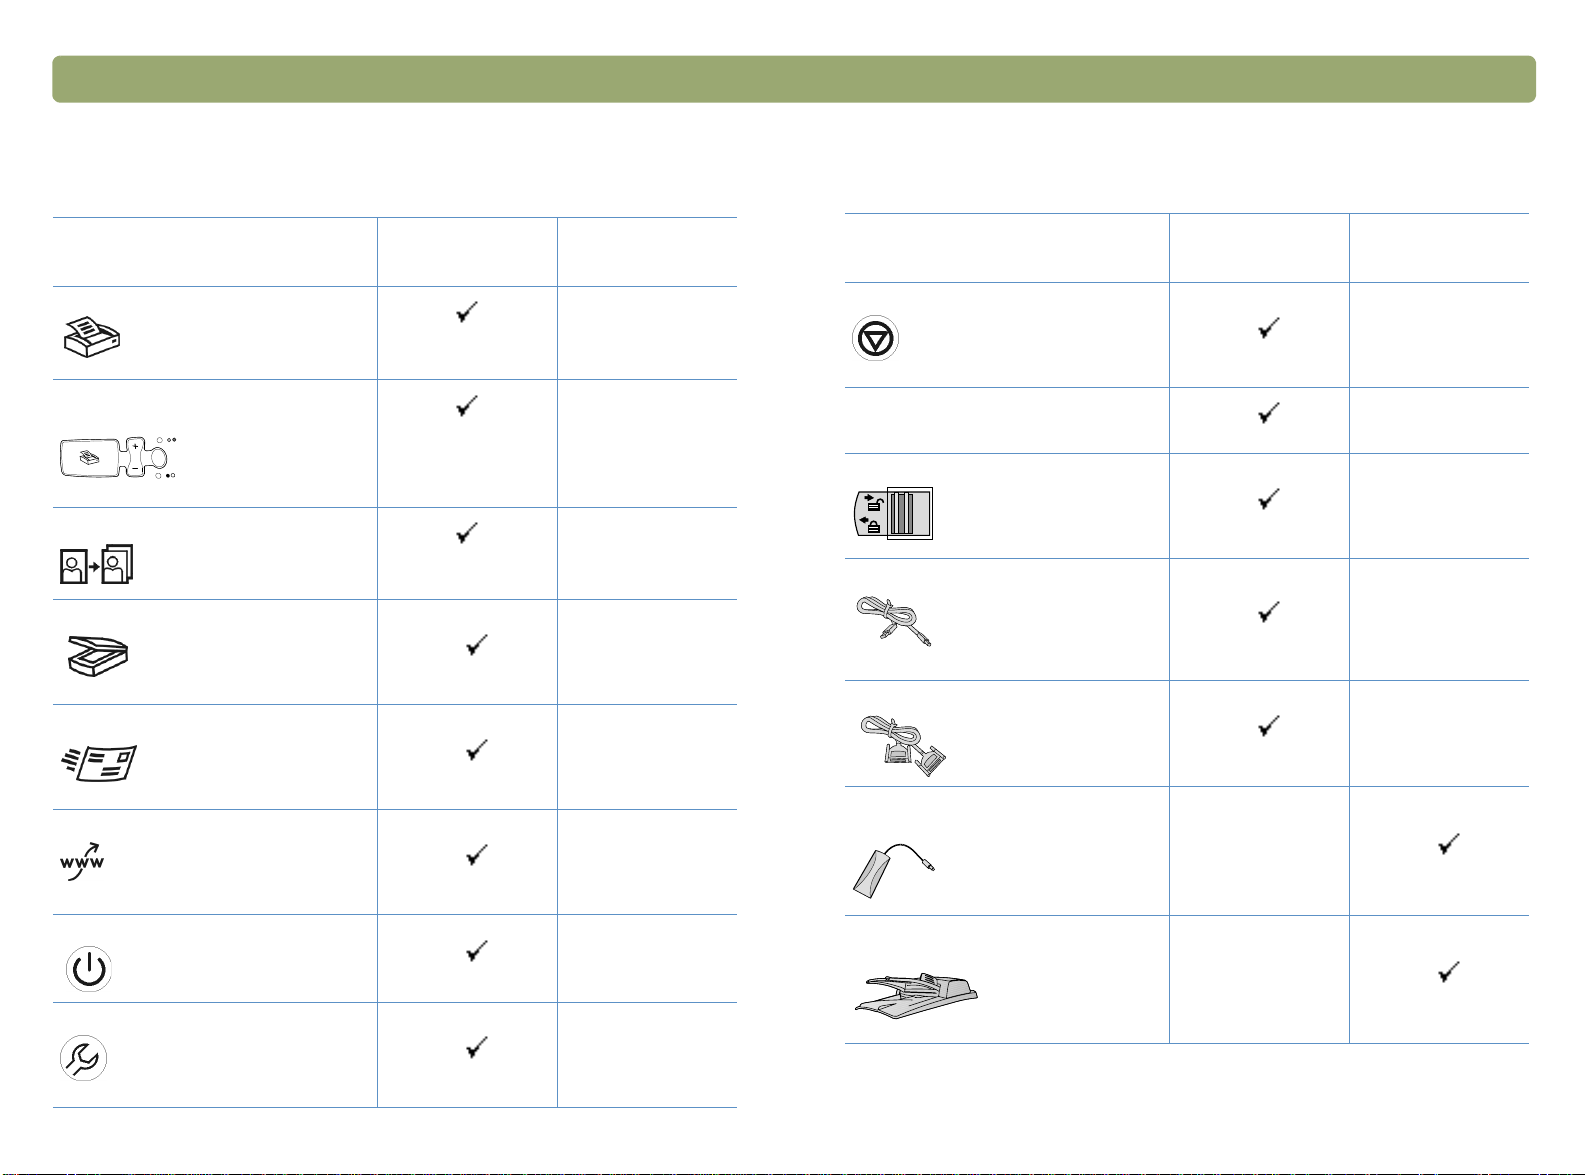
HP Scanjet 5400c scanner
Feature
Copy button
Color/black & white copy button and
select number of copies buttons
Photo Reprint button
Scan To button
E-mail button
Share-to-Web button
Included on scanner
or in box
Supported
accessory
a
Feature
Cancel button
Two-digit LCD
Scanner lock
USB cable
Parallel cable
HP Scanjet Transparency Adapter
(XPA)
Included on scanner
or in box
Supported
accessory
a
Power Save button
More options button
HP Scanjet Automatic Document
Feeder (ADF)
a. Supported accessories include accessories that are not b oxed with the
scanner, but can be purchased separately.
Page 7
Back to TOC Front panel and accessories comparisons 7
HP Scanjet 5470c scanner
Feature
Copy button
Color/black & white copy button and
select number of copies buttons
Photo Reprint button
Scan To button
Select Destination button
Included on scanner
or in box
Supported
accessory
a
Feature
Power Save button
More options button
Cancel button
16-character LCD
Scanner lock
USB cable
Included on scanner
or in box
Supported
accessory
a
E-mail button
Share-to-Web button
Parallel cable
Page 8
8 Front panel and accessories comparisons Back to TOC
Feature
HP Scanjet Transparency Adapter
(XPA)
HP Scanjet Automatic Document
Feeder (ADF)
Included on scanner
or in box
Supported
accessory
a
a. Supported accessories include accessories tha t are not boxed with the
scanner, but can be purchased separately.
Page 9
Back to TOC Front panel and accessories comparisons 9
HP Scanjet 5490c scanner
Feature
Copy button
Color/black & white copy button and
select number of copies buttons
Photo Reprint button
Scan To button
Select Destination button
Included on scanner
or in box
Supported
accessory
a
Feature
Power Save button
More options button
Cancel button
16-character LCD
Scanner lock
USB cable
Included on scanner
or in box
Supported
accessory
a
E-mail button
Share-to-Web button
Parallel cable
Page 10
10 Front panel and accessories comparisons Back to TOC
Feature
HP Scanjet Transparency Adapter
(XPA)
HP Scanjet Automatic Document
Feeder (ADF)
Included on scanner
or in box
Supported
accessory
a
a. Supported accessories include accessories tha t are not boxed with the
scanner, but can be purchased separately.
Page 11

11
Front panel and accessories comparisons
HP Scanjet 4400c scanner . . . . . . . . . . . . . . . . . . . . . . . .4
HP Scanjet 4470c scanner . . . . . . . . . . . . . . . . . . . . . . . .5
HP Scanjet 5400c scanner . . . . . . . . . . . . . . . . . . . . . . . .6
HP Scanjet 5470c scanner . . . . . . . . . . . . . . . . . . . . . . . .7
HP Scanjet 5490c scanner . . . . . . . . . . . . . . . . . . . . . . . .9
1 Getting started
Printing this information . . . . . . . . . . . . . . . . . . . . . . . . . .13
Viewing the product tour . . . . . . . . . . . . . . . . . . . . . . . . .13
Where do I start? . . . . . . . . . . . . . . . . . . . . . . . . . . . . . .14
Using the scanner buttons . . . . . . . . . . . . . . . . . . . . . .14
Using the HP Precisionscan Pro software . . . . . . . . . . . .14
Using another program . . . . . . . . . . . . . . . . . . . . . . .14
Using the HP Scanjet Copy Utility . . . . . . . . . . . . . . . .14
Selecting and preparing items. . . . . . . . . . . . . . . . . . . . . .15
Items for the scanner glass . . . . . . . . . . . . . . . . . . . .15
Items for the ADF . . . . . . . . . . . . . . . . . . . . . . . . . . .16
Items for the XPA . . . . . . . . . . . . . . . . . . . . . . . . . . . .16
Completing your first scan . . . . . . . . . . . . . . . . . . . . . . . .17
Frequently asked questions . . . . . . . . . . . . . . . . . . . . . . . .20
2 Scanning from scanner buttons
Overview of scanner buttons. . . . . . . . . . . . . . . . . . . . . . .24
Scanning quickly with scanner buttons . . . . . . . . . . . . . . . .26
Scanning to the HP Precisionscan Pro software . . . . . . . .26
Scanning to another program . . . . . . . . . . . . . . . . . . .27
Sending a scan to a website . . . . . . . . . . . . . . . . . . . .28
Scanning for photo reprints . . . . . . . . . . . . . . . . . . . . .29
Sending a scan using e-mail . . . . . . . . . . . . . . . . . . . .30
Printing copies . . . . . . . . . . . . . . . . . . . . . . . . . . . . .33
Changing settings for buttons . . . . . . . . . . . . . . . . . . . . . .34
List of options for scanner buttons . . . . . . . . . . . . . . . . .35
3 Scanning from HP Precisionscan Pro
Overview of the HP Precisionscan Pro software . . . . . . . . . .39
Starting the HP Precisionscan Pro software . . . . . . . . . . .40
Finding help for using the software . . . . . . . . . . . . . . . .40
Performing a new scan . . . . . . . . . . . . . . . . . . . . . . . . . .41
Cropping or selecting an area for final scan . . . . . . . . . . . .42
Getting a closer look (zooming) . . . . . . . . . . . . . . . . . . . .43
Selecting output type . . . . . . . . . . . . . . . . . . . . . . . . . . .43
Making optional adjustments, basic . . . . . . . . . . . . . . . . . .45
Resizing (output dimensions) . . . . . . . . . . . . . . . . . . . .45
Changing resolution . . . . . . . . . . . . . . . . . . . . . . . . .46
Changing contrast. . . . . . . . . . . . . . . . . . . . . . . . . . .46
Rotating an image. . . . . . . . . . . . . . . . . . . . . . . . . . .47
Mirroring (reversing) an image. . . . . . . . . . . . . . . . . . .47
Sharpening an image . . . . . . . . . . . . . . . . . . . . . . . .48
Resetting all adjustments . . . . . . . . . . . . . . . . . . . . . .48
Making optional adjustments, advanced. . . . . . . . . . . . . . .49
Inverting the image . . . . . . . . . . . . . . . . . . . . . . . . . .49
Changing midtones . . . . . . . . . . . . . . . . . . . . . . . . . .50
Changing highlights . . . . . . . . . . . . . . . . . . . . . . . . .51
Changing shadows . . . . . . . . . . . . . . . . . . . . . . . . .52
Checking for clipped areas. . . . . . . . . . . . . . . . . . . . .53
Setting pixel output levels . . . . . . . . . . . . . . . . . . . . . .54
Viewing RGB values and pixels . . . . . . . . . . . . . . . . . .55
About the histogram. . . . . . . . . . . . . . . . . . . . . . . . . .56
Changing the hue . . . . . . . . . . . . . . . . . . . . . . . . . . .56
Changing the saturation . . . . . . . . . . . . . . . . . . . . . . .57
Changing the black and white threshold . . . . . . . . . . . .58
Page 12

12 Back to TOC
Setting which colors become black or white in
black & white bitmaps . . . . . . . . . . . . . . . . . . . . .59
Descreening images . . . . . . . . . . . . . . . . . . . . . . . . .60
Resetting all adjustments . . . . . . . . . . . . . . . . . . . . . . .60
Completing the final scan. . . . . . . . . . . . . . . . . . . . . . . . .61
Sending to a program . . . . . . . . . . . . . . . . . . . . . . . .61
Returning the image to a TWAIN program. . . . . . . . . . .62
Saving to a file . . . . . . . . . . . . . . . . . . . . . . . . . . . . .62
Printing . . . . . . . . . . . . . . . . . . . . . . . . . . . . . . . . . .64
Placing a scan on a website . . . . . . . . . . . . . . . . . . . .64
Setting the scanned image as wallpaper . . . . . . . . . . . .65
Copying and pasting into another program . . . . . . . . . .65
Dragging-and-dropping into another program . . . . . . . . .65
Dragging-and-dropping to the Windows Desktop
or a folder . . . . . . . . . . . . . . . . . . . . . . . . . . . . .66
Scanning to CD . . . . . . . . . . . . . . . . . . . . . . . . . . . .66
Other features and tips . . . . . . . . . . . . . . . . . . . . . . . . . .67
Tips for best image quality . . . . . . . . . . . . . . . . . . . . .67
Saving settings . . . . . . . . . . . . . . . . . . . . . . . . . . . . .68
Setting preferences . . . . . . . . . . . . . . . . . . . . . . . . . .68
Scanning from other programs (TWAIN) . . . . . . . . . . . .71
Scanning from other programs (WIA) . . . . . . . . . . . . . .72
What to expect from OCR programs . . . . . . . . . . . . . .73
5 Troubleshooting and maintaining
Checking the basics . . . . . . . . . . . . . . . . . . . . . . . . . . . .85
Starting troubleshooting . . . . . . . . . . . . . . . . . . . . . . . . . .86
Resolving scanner messages. . . . . . . . . . . . . . . . . . . . . . .87
Resolving issues that did not generate messages. . . . . . . . . .87
Resolving image-quality issues. . . . . . . . . . . . . . . . . . . . . .90
Resolving issues with scanned images. . . . . . . . . . . . . .91
Resolving issues with printed copies . . . . . . . . . . . . . . .93
Resolving issues with slides and negatives . . . . . . . . . .95
Resolving issues with editable text . . . . . . . . . . . . . . . . . . .96
Resolving issues sending to destinations . . . . . . . . . . . . . . .97
Resolving issues with accessories. . . . . . . . . . . . . . . . . . .100
Resolving issues with the XPA. . . . . . . . . . . . . . . . . . .100
Resolving issues with the ADF . . . . . . . . . . . . . . . . . .101
Clearing jams from the ADF . . . . . . . . . . . . . . . . . . . . .102
Cleaning and maintaining . . . . . . . . . . . . . . . . . . . . . . .105
Cleaning the scanner glass . . . . . . . . . . . . . . . . . . . .105
Cleaning the XPA . . . . . . . . . . . . . . . . . . . . . . . . . .106
Cleaning the ADF glass . . . . . . . . . . . . . . . . . . . . . .106
Uninstalling the software . . . . . . . . . . . . . . . . . . . . . . . .107
Other resources, support, and specifications . . . . . . . . . . .107
A Using software commands and controls
4 Using accessories
Scanning from the ADF . . . . . . . . . . . . . . . . . . . . . . . . . .76
Scanning from the XPA . . . . . . . . . . . . . . . . . . . . . . . . . .77
Scanning slides . . . . . . . . . . . . . . . . . . . . . . . . . . . .77
Scanning negatives . . . . . . . . . . . . . . . . . . . . . . . . .79
Making optional adjustments for slides or negatives. . . . . . . .81
Adjusting midtones for slides or negatives. . . . . . . . . . . .81
Adjusting highlights for slides or negatives . . . . . . . . . . .82
Adjusting shadows for slides or negatives . . . . . . . . . . .82
Viewing RGB values and pixel color . . . . . . . . . . . . . . .83
Using keyboard shortcuts and the menus. . . . . . . . . . . . . .110
HP Precisionscan Pro tool and information bars . . . . . . . . .113
Toolbar . . . . . . . . . . . . . . . . . . . . . . . . . . . . . . . . .113
Adding tools to the toolbar . . . . . . . . . . . . . . . . . . . .114
Info bar. . . . . . . . . . . . . . . . . . . . . . . . . . . . . . . . .114
Status bar . . . . . . . . . . . . . . . . . . . . . . . . . . . . . . .115
Context-sensitive cursors. . . . . . . . . . . . . . . . . . . . . . . . .116
B Glossary
Index
Page 13

Back to TOC Getting started 13
Getting started
This section contains the basics to help you get started with your new
HP Scanjet scanner. From here, you can learn about viewing the
product tour, preparing items before you scan them, and choosing
which scanning method to use.
Printing this information
To print this .pdf manual, use the Print command on the File menu.
Print the whole document, or print only the chapters or topics you want
according to their page numbers. See the table of contents for page
numbers of topics.
Viewing the product tour
The product tour is a fast and easy way to explore the capabilities of
the scanner and see some interesting ways you can use the scanner
to meet your needs. The product tour, which only takes three minutes,
begins automatically when you start the HP Precisionscan Pro
software. However, you also have the option of disabling the product
tour and viewing it at another time.
To view the tour at other times: On the Start menu, point to Programs,
and click HP Precisionscan Pro. Then, on the Help menu, click
Product Tour.
Page 14
14 Getting started Back to TOC
Where do I start?
You can start scanning from one of these places:
Scanner buttons
HP Precisionscan Pro software
Another program
HP Scanjet Copy Utility
Where you start depends on what you want to do with the scan and on
your own preferences.
Using the scanner buttons
Use the scanner buttons, which are shortcuts, when you want to:
start at the scanner.
scan quickly without making changes.
scan an item using the default settings optimized for the
destination you choose.
See "Scanning from scanner buttons" on page 23.
Using another program
Start scanning from within another program when:
You want to bring a scanned item into an open program, such as
your word-processing program.
The program in which you are working is compliant with TWAIN or
WIA. A program is compliant if a command such as Acquire
Image or From Scanner appears on a menu such as the File
menu. If you are unsure whether your program complies with
TWAIN or WIA standards, or you do not know the command for
inserting a scanned item, see the documentation for the program.
See "Scanning from other programs (TWAIN)" on page 71.
If the program is compliant with WIA, see "Scanning from other
programs (WIA)" on page 72.
Using the HP Scanjet Copy Utility
Use the HP Scanjet Copy Utility when you need to make standard
copy adjustments, such as reducing or enlarging, or lightening or
darkening. You can also choose a printer other than the default.
Using the HP Precisionscan Pro software
Use the HP Precisionscan Pro software when you want to:
view or change a scanned image before you send it. Changes
might include resolution, cropping, or resizing.
send to a destination, such as a desktop publishing program, but
there is no button on the scanner for that destination.
See "Scanning from HP Precisionscan Pro" on page 39.
To start the utility: on the Start menu, point to Programs, point to HP
Scanjet Utilities, and click HP Copy Utility. For help using the utility,
click Help in the utility.
Page 15
Back to TOC Getting started 15
Selecting and preparing items
Before placing items in the scanner, follow these guidelines for
selecting and preparing them to prevent damage to the items and the
scanner.
CAUTION Improper placement and scanning can damage the
items and the scanner.
Items for the scanner glass
The scanner glass can scan the widest range of items, including:
paper items
news clippings, receipts, and business cards
items on all weights of media, including media lighter than 60 g/m2
(16 lb) or heavier than 105 g/m
gum-backed paper
multipart forms with carbon pages
old or worn photographs or documents
items containing tears, perforations, punch holes, wrinkles, or curls
flatter three-dimensional items such as fabric, pages in books, and
paper with texture
CAUTION Avoid placing items with sharp edges on the scanner
glass. Doing so can damage the scanner.
Before placing an item on the scanner glass, make sure the item is free
of wet glue, correction fluid, or other contaminating substances.
2
(28 lb)
Page 16

16 Getting started Back to TOC
Items for the ADF
The HP Scanjet Automatic Document Feeder (ADF), which is a fast,
convenient way to scan multiple-page items, is included or supported
on some scanner models. See "Front panel and accessories
comparisons" on page 3. The ADF accepts items that meet the
following specifications:
items on standard Letter-, A4-, and Legal-size media
items consisting of as many as 25 unbound pages
items ranging in size from 88.9 by 127 mm (3.5 by 5 inches) to
215.9 by 355.6 mm (8.5 by 14 inches)
items ranging in weight from 60 to 90 g/m2 (16 to 24 lb)
items that are square or rectangular and in good condition (not
fragile or worn)
items that are free of tears, perforations, or punch holes
items that are free of wet glue, correction fluid, or ink
Avoid multipart forms with carbon pages, transparencies, magazine
pages, gum-backed pages, and light “onionskin” pages.
Items for the XPA
The HP Scanjet Transparency Adapter (XPA) is included with some
scanner models or can be ordered. Use the XPA and its templates to
scan:
35 mm photographic negatives
35 mm slides
Because these items are easily damaged, handle them only by their
edges.
Before placing an item in the ADF, prepare the item by doing the
following:
Remove curls or wrinkles.
Remove staples, paper clips, paper sticky notes, and any other
materials from items.
If your item does not meet these guidelines or you cannot prepare it as
stated, use the scanner glass.
Page 17
Back to TOC Getting started 17
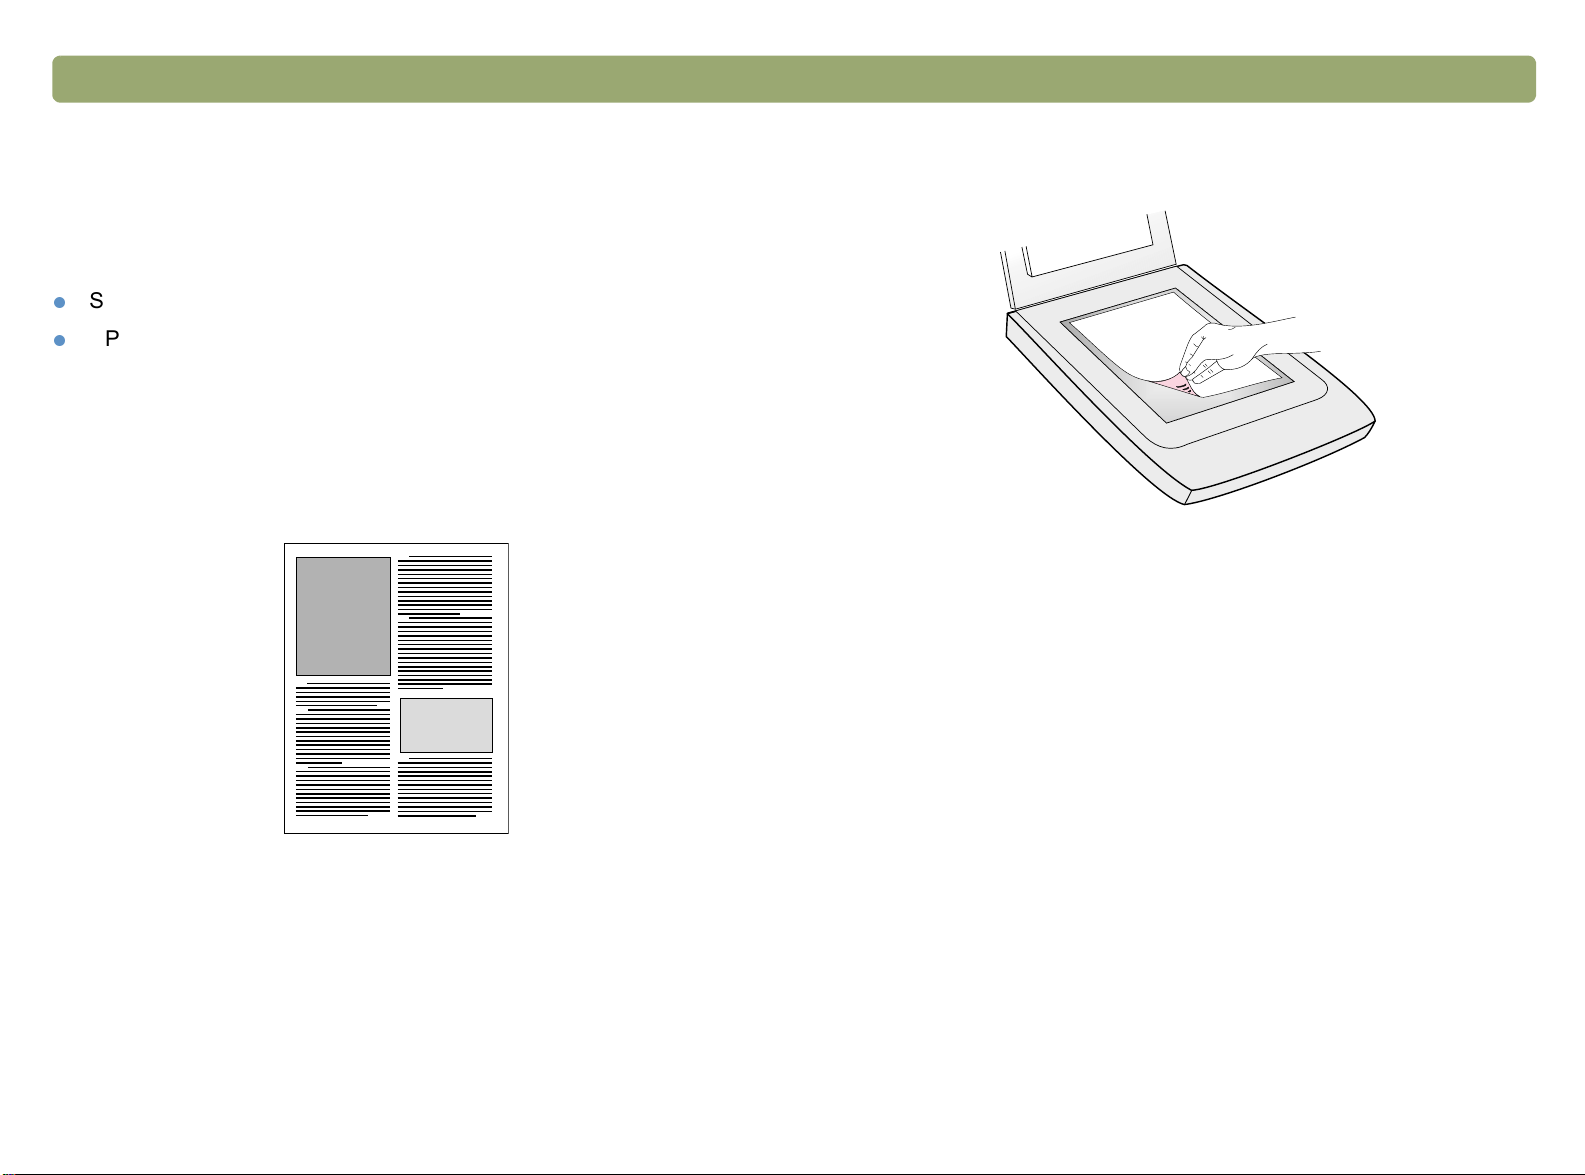
Completing your first scan
This section shows you how to take the same item and scan to print
using the two primary scanning methods:
Scanner buttons
HP Precisionscan Pro software
Before scanning, place the item in the scanner.
To load the item in the scanner
1 Choose an item to scan, such as a page from a magazine.
2 Place the item face down on the scanner glass and close the lid.
3 See "To complete your first scan using the scanner buttons" on
page 18.
Page 18
18 Getting started Back to TOC
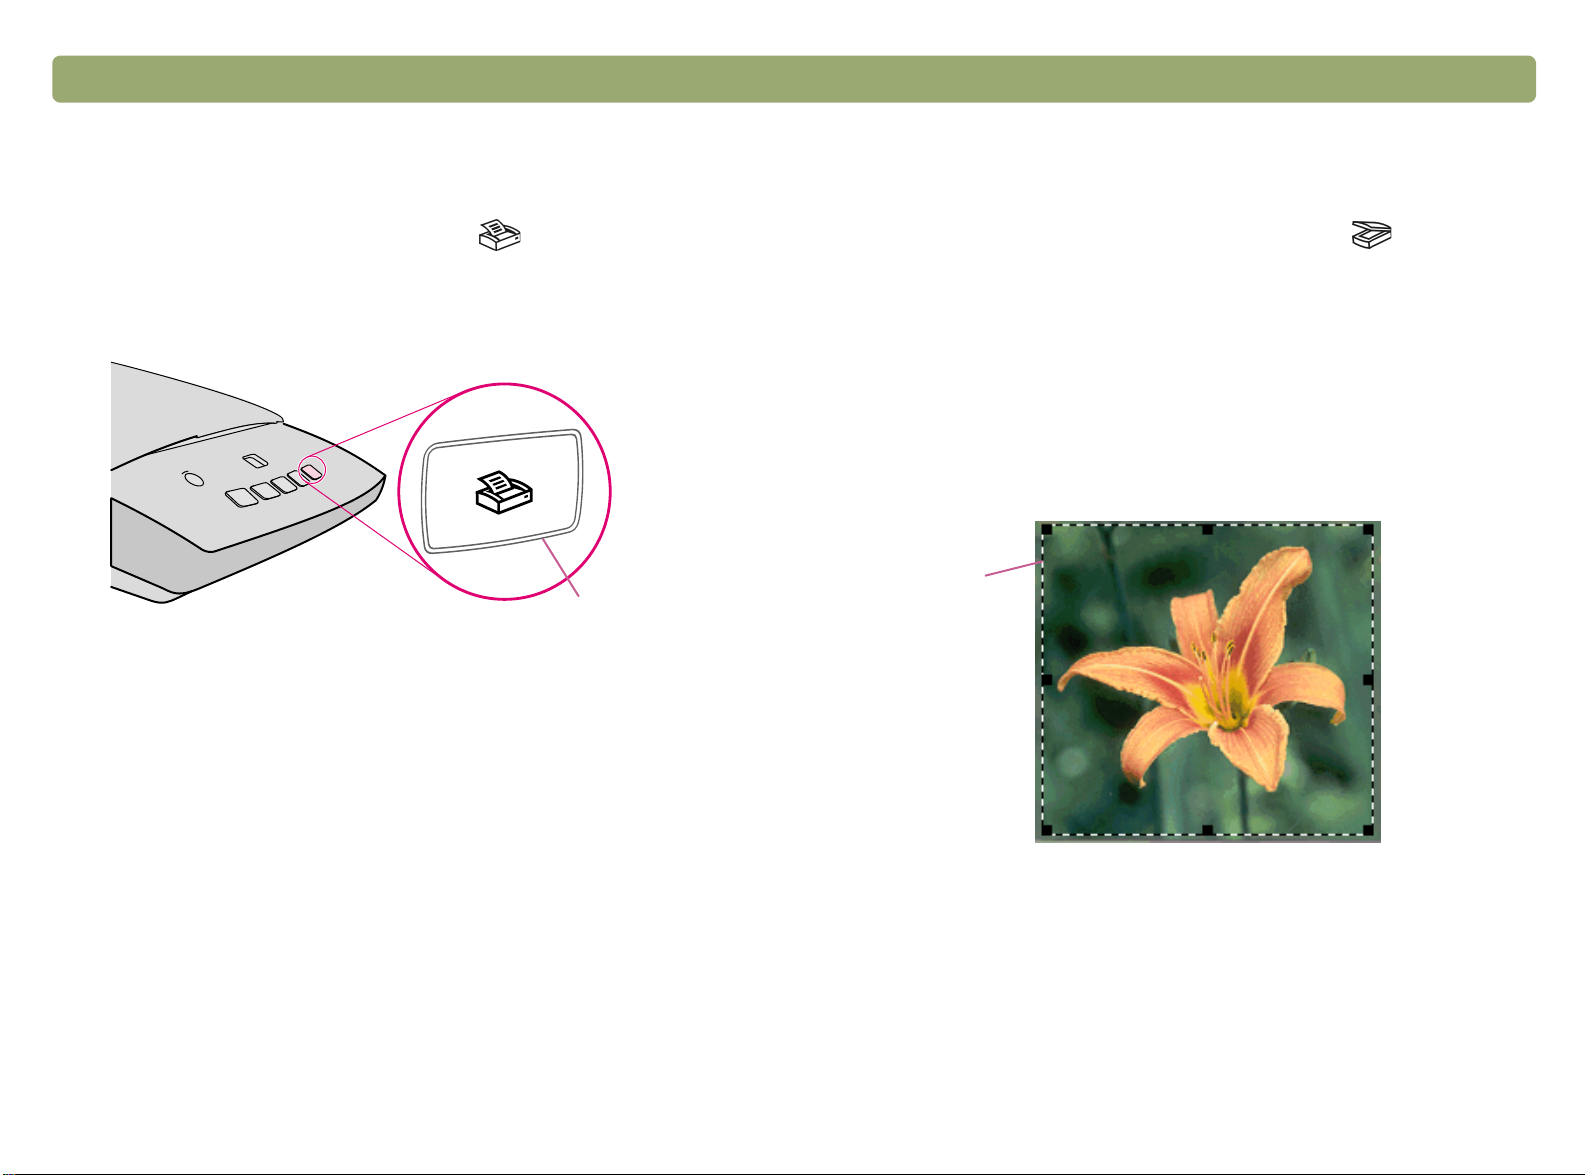
To complete your first scan using the scanner buttons
1 Load the item in the scanner. See "To load the item in the scanner"
on page 17.
2 On the scanner, press the Copy button ( ). The scanner
scans the item using settings optimized for printing this type of item
and then prints the item to the default printer.
Copy
3 If the scan does not work, or you have difficulty with this process,
please see "Resolving issues that did not generate messages" on
page 87.
To complete your first scan using the HP Precisionscan Pro software
1 Load the item in the scanner. See "To load the item in the scanner"
on page 17.
2 With the item loaded, press the Scan To button ( ) on the
scanner. The scanner scans the item to the HP Precisionscan Pro
software, choosing the best settings for this type of item.
3 When the scanned image appears in the preview window of the
software, draw a selection border around the image or the portion
of the image you want. To do so, click on one corner of the area
you want, and while holding down the mouse button, drag the
cursor to the opposite corner. Release the mouse button to
complete the border.
Selection
border
If you have not already scanned using the HP Precisionscan Pro
software, see "To complete your first scan using the HP Precisionscan
Pro software" on page 18.
Page 19

Back to TOC Getting started 19
4 Experiment with the image. Change the output type or make other
adjustments.
5 When you finish: On the Scan menu, click Print.
6 Select any printer options you want and click OK. The scanner
performs a final scan including your changes, then prints the
scanned image.
7 If the scan does not work, or you have difficulty with this process,
please see "Resolving issues that did not generate messages" on
page 87.
If you have not already scanned using the scanner buttons, see "To
complete your first scan using the scanner buttons" on page 18.
Page 20
20 Getting started Back to TOC
Frequently asked questions
This section contains answers to some questions users frequently ask
about scanning.
What settings does the HP Precisionscan Pro software set
automatically for an item I scan?
Based on the scanned item, the software automatically chooses
optimal values for these settings:
output type
resolution
sharpening
exposure (midtones, highlights, and shadows)
color (hue and saturation or black & white threshold)
Usually, the values the software selects provide optimal results.
However, you can change these values in the HP Precisionscan Pro
software.
How can I reduce the time it takes to scan?
You can reduce the time it takes to scan an item by scanning in black
and white when the original is one of the following:
a black-and-white photograph or drawing
a color photo or drawing, but you want a black-and-white image to
appear on the computer screen
contains only text
Another option is to reduce file size. See "How can I reduce the file
size?" on page 21.
Print color originals as black and white by selecting the Black & White
option on the front panel and pressing the Copy button ( ). Or, in
the HP Precisionscan Pro software, choose the Grayscale or Black &
White output types before your final scan (after the scanner completes
a preview scan). See "Selecting output type" on page 43.
In the HP Precisionscan Pro software, select the Extend lamp time
out setting on the Scanner tab. When selected, this setting keeps the
scanner lamp and the XPA light source (if connected) on beyond the
default time out period. See "Setting preferences" on page 68.
Page 21

Back to TOC Getting started 21
How can I reduce the file size?
To reduce file size:
Save files using a compressed format, such as TIFF compressed
or JPEG.
Avoid using the True Color output type unless necessary. This
output type offers exceptional quality for color photos or drawings,
but it also creates large file sizes.
Set the resolution no higher than necessary. Generally, the
resolution the software automatically sets provides the best
balance between image quality and small file size.
For photos, significantly reduce file size by cropping the photo to
select just one area as the final scanned image. Or, resize the
entire photo to smaller dimensions.
Should I change the resolution?
The HP Precisionscan Pro software sets the resolution for you based
on the original document attributes. In almost all cases, you get the
best results and the smallest file size using the default resolution.
What is the difference between screen and print quality?
What is the difference between zooming and resizing?
Use Zoom In to view an area of the scanned image close up. Use
Zoom Out to return to the original view of the image.
The zoom commands do not change the final size of your scan; they
just give you a different view on a monitor. To reduce or enlarge the
size of the final scan, use the Resize command on the Tools menu.
What do I need to know about scanning text?
When you scan an item containing text, you can use the text either as
a scanned image, such as a fax or image archive, or as text you can
edit.
To have the optical character recognition (OCR) software make the
text editable automatically and send the text to a supported wordprocessing program, press the Scan To button ( ). In the HP
Precisionscan Pro software, use the output type of Editable Text
(OCR) or Text & Image. Then, on the Scan menu, click Scan To,
choose your word-processing program, and click Scan.
Tip Perform a spell-check after you have successfully
scanned your text to a word-processing program.
A computer screen usually displays images at 72 to 75 pixels per inch
(PPI). Print resolution is usually higher. Screens also use fewer colors
to display an image. Even if an image looks incorrect on the screen, it
might print the way you want.
Page 22

22 Getting started Back to TOC
Page 23

Back to TOC 23
Scanning from scanner buttons
The scanner buttons provide an easy way to scan items directly to
destinations using settings optimized for the destination you choose.
You do not view or change scanned images before they go to the
destination.
To view or change images, scan to the HP Precisionscan Pro software
using the Scan To button ( ). For more help viewing or changing
images, see "Overview of the HP Precisionscan Pro software" on
page 39.
Tip You can change the default settings for some
buttons on the scanner. See "Changing settings for
buttons" on page 34.
Page 24
24 Scanning from scanner buttons Back to TOC
Overview of scanner buttons
For a list of buttons available on your scanner, see the "Front panel and accessories comparisons" on page 3.
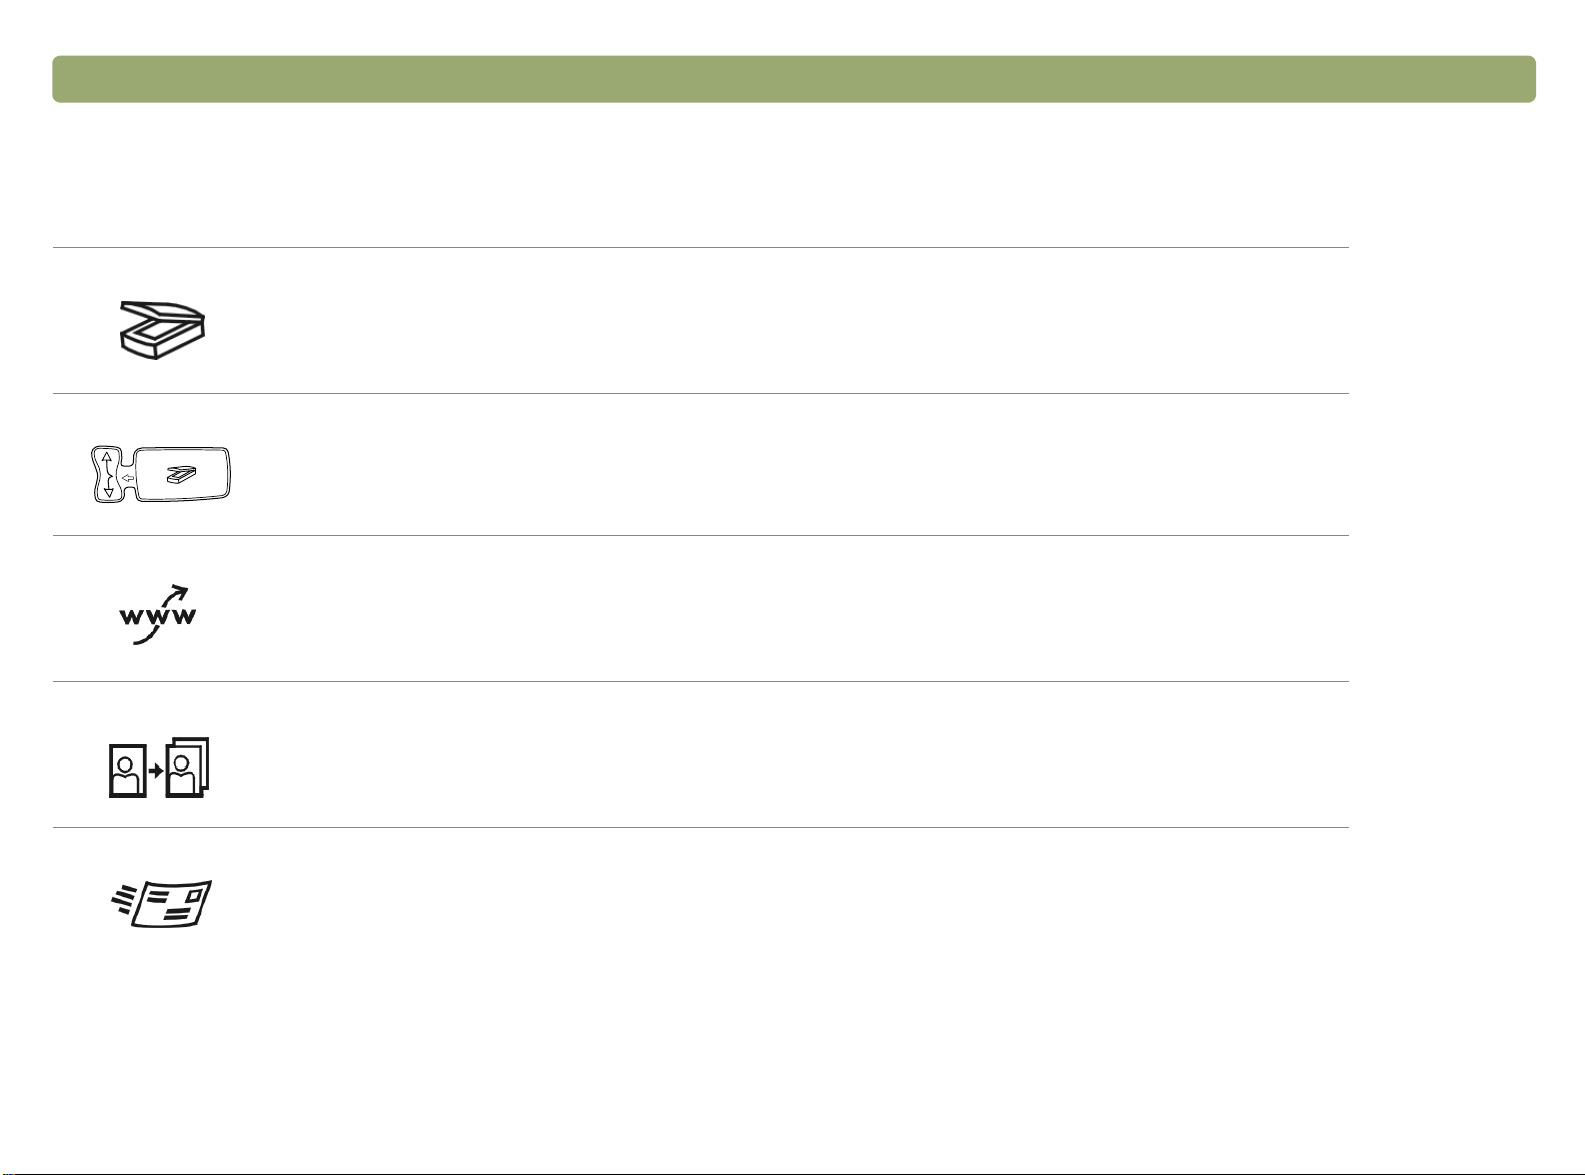
Scan To
Scan to the HP Precisionscan Pro software. View the image or make adjustments, such as changing
resolution or resizing. If your scanner also has a Select Destination button (some models only) next to the
Scan To button, you can select and scan to other programs on your computer.
Select Destination (some models only)
Press this button up or down to choose a program, then press the Scan To button. The Scan To button scans
the item using settings optimized for that destination and sends the scan to that destination.
Share-to-Web (some models only)
Scan a photo and send it to the HP Share-to-Web wizard on your computer. The HP Share-to-Web wizard
uploads the image to a website.
Photo Reprint
Scan a photo and send it to the HP Photo Printing software for printing multiple photos on one page, or for
creating photo album pages.
E-mail
Scan using settings optimized for e-mail. The e-mail program window automatically launches so you can
compose your message. The scanned image becomes a file attachment in the new e-mail message. If you
do not have a supported e-mail program, this button allows you to save the scanned image as an e-mail file.
Page 25
Back to TOC Scanning from scanner buttons 25
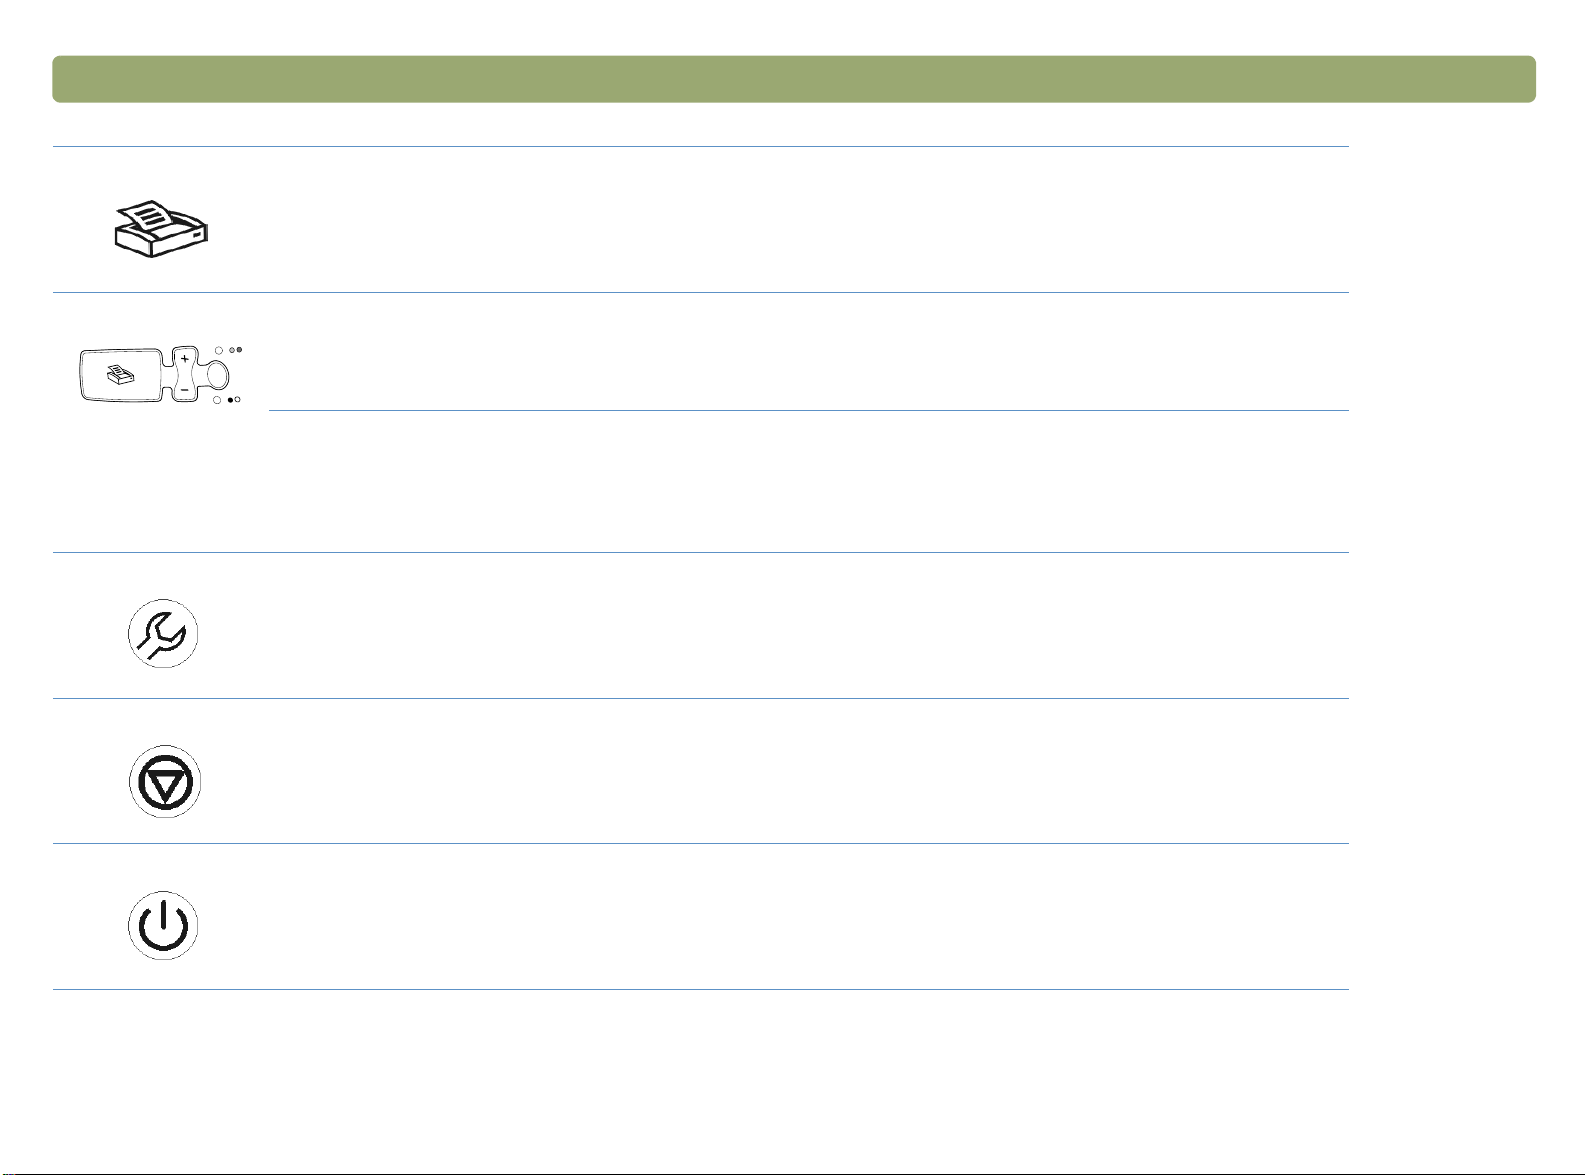
Copy
Print copies using settings optimized for printing. At the computer, you can click Cancel to choose additional
copy settings in the HP Scanjet Copy Utility before the pages print.
Number of copies (some models only)
Choose the number of copies before pressing Copy. The liquid crystal display (LCD) display shows the
number of copies selected.
Color/Black & White copy (some models only)
Choose the color or black and white setting before pressing Copy to ensure the best settings are used. Only
use color copy if you are printing to a color printer and want a color copy. The light adjacent to the currently
selected choice is lit.
More Options (some models only)
Open the dialog box to change settings, such as output quality, for some buttons on the scanner. If your
scanner does not have this button, change button settings with the HP Scanjet Button Options program on
your computer. See "To change settings for buttons or update destinations" on page 34.
Cancel (some models only)
Cancel a scan while the scanner is in the process of scanning, or cancel a series of scans from the HP
Scanjet Automatic Document Feeder (ADF).
Power Save
Puts the scanner in an energy-conservation mode. The scanner lamp and a small indicator light near the
Power Save button turn off. To use the scanner, press any button on the front panel of the scanner or start a
scan from the computer. The scan begins when the lamp is ready.
Page 26

26 Scanning from scanner buttons Back to TOC
Scanning quickly with scanner buttons
Use the scanner buttons to scan quickly to a destination using settings
optimized for that destination. A destination is a printer, file, or
program, such as your e-mail or word-processing program.
If you are scanning slides or negatives using the HP Scanjet
Transparency Adapter (XPA), you must scan from the HP
Precisionscan Pro software. See "Scanning from the XPA" on
page 77.
Scanning to the HP Precisionscan Pro software
When you use the Scan To button ( ), you send directly to the HP
Precisionscan Pro software. Using the HP Precisionscan Pro software,
you can preview scanned images and make changes to the images
before you send them to a destination or file them.
To scan to the HP Precisionscan Pro software
Before you begin, make sure no other program name displays in the
scanner’s LCD window or that the LCD window reads Ready. (Some
models only, see "Front panel and accessories comparisons" on
page 3). If another program name displays, press the Select
Destination button ( ) up or down until HP Precisionscan is listed
in the scanner’s LCD window.
1 Close the HP Scanjet Copy Utility program if it is open on your
computer.
2 Place the original face down on the scanner glass and close the lid.
To load items in the ADF, see "Scanning from the ADF" on
page 76.
3 Press the Scan To button on the front panel of the scanner.
4 Your computer opens the HP Precisionscan Pro software. A
preview of the scan appears in the Precisionscan Pro software
window.
For more information, see "Scanning from HP Precisionscan Pro" on
page 39.
Page 27
Back to TOC Scanning from scanner buttons 27
Scanning to another program
On some models, you can select from a list of destinations (including
the HP Precisionscan Pro software) on the front panel LCD display,
then scan directly to the selected destination.
When you select a program other than HP Precisionscan Pro using the
Select Destination button ( ), the scanner will automatically use
settings optimized for the destination you choose. You do not view or
change scanned images before they go to the destination.
To scan directly to another program
1 Close the HP Precisionscan Pro and HP Scanjet Copy Utility
programs if they are open on your computer.
2 Place the original face down on the scanner glass and close the lid.
To load items in the ADF, see "Scanning from the ADF" on
page 76.
3 If your scanner has a Select Destination button next to the Scan To
button ( ), press the Select Destination button up or down until
the destination you want to scan to is listed in the scanner’s LCD
window.
Note: For information about updating the destinations for
scanner buttons, see "Changing settings for buttons" on
page 34.
Tip If your scanner does not have a Select Destination
button next to the Scan To button, you can scan to
other programs through the HP Precisionscan Pro
software. See "Sending to a program" on page 61.
4 Press the Scan To button on the front panel of the scanner.
5 The item is scanned using settings optimized for the program you
selected. The program launches and the scan is sent to the
program.
Page 28
28 Scanning from scanner buttons Back to TOC
Sending a scan to a website
On some models, you can share images with other people by scanning
directly to the Web with the Share-to-Web button ( ). People you
know can view photos and other items by visiting your website, which
will have its own address.
To place a scan on a website
1 Close the HP Precisionscan Pro and HP Scanjet Copy Utility
programs if they are open on your computer.
2 Place the original face down on the scanner glass and close the lid.
To load items in the ADF, see "Scanning from the ADF" on
page 76.
3 Press the Share- to- Web button on the front panel of the scanner.
The scanner scans the item using settings optimized for the Web.
Your computer opens the HP Share-to-Web wizard.
4 Follow the instructions on the screen to finish posting the scanned
image to your website.
Tip If your scanner does not have a Share-to-Web
button, scan to the web using your HP
Precisionscan Pro software. See "Placing a scan on
a website" on page 64.
Page 29

Back to TOC Scanning from scanner buttons 29
Scanning for photo reprints
You can scan photographs and prepare them for photo reprints by
using the Photo Reprint button ( ). Photo reprints optimize the
use of photo paper, allowing you to print multiple photos on one page.
You can also create pages with multiple photographs for projects such
as photo albums.
At the computer, use the HP Photo Printing software provided with
your scanner to arrange photographs, make adjustments, and print
photographs.
To create a photo reprint
1 Close the HP Precisionscan Pro and HP Scanjet Copy Utility
programs if they are open on your computer.
2 Place the original face down on the scanner glass and close the lid.
3 Press the Photo Reprint button on the front panel of the scanner.
The scanner scans the item using settings optimized for
photograph printing. Your computer opens the HP Photo Printing
software.
To view the HP Photo Printing Quick Reference Guide
The HP Photo Printing software is available in English only in some
countries. For help in your language, press the Photo Reprint button
on the scanner, click Help, and then click Quick Reference Guide.
Page 30
30 Scanning from scanner buttons Back to TOC
Sending a scan using e-mail
When you send e-mail using the E-mail button ( ), the scanner
scans the item using default settings optimized for mailing. If you have
a supported e-mail program, the scanned image automatically appears
as a file attachment in a new e-mail message, which you then address
and send. If your e-mail program is not supported, choose E-mail
anyway. The computer prompts you to save the item as a file, and then
the scanner completes the scan. Open your e-mail program and attach
the file to a message as you normally do.
Note: When prompted to save the file, be sure to select the
file type you want.
Tip To view the scanned item before you send it, open
the file attachment from the new e-mail message.
Supported e-mail programs
Supported e-mail programs allow the scanner to scan an item as a file
and attach it to a new e-mail message. If a scanned image
automatically appears as a file attachment in a new e-mail message,
your e-mail program is supported.
Unsupported e-mail programs
If you are using an unsupported e-mail program, such as the Webbased program Microsoft Hotmail
directly into an e-mail message. The scanner prompts you to save the
item as a file and then scans the item with settings optimized for
e-mail. (When prompted to save the file, be sure to select the file type
you want.) After saving the image as a file, open an e-mail message
and attach the file as you normally do.
To be prompted to save the file, make sure that E-mail File is selected
as the destination in the button options.
See "Changing settings for buttons" on page 34 to check or change
which e-mail program is set as the default, or to set E-mail File as the
default.
®
, the scanner cannot scan items
Page 31

Back to TOC Scanning from scanner buttons 31
To e-mail a scan from the scanner
1 Close the HP Precisionscan Pro and HP Scanjet Copy Utility
programs if they are open on your computer.
2 Place the original face down on the scanner glass and close the lid.
To load items in the ADF, see "Scanning from the ADF" on
page 76.
3 Press the E-mail button on the scanner.
4 If the computer prompts you for the original type, select Photo or
Document. If you need help choosing the original type, see
"Selecting original type for e-mail" on page 32.
5 If you do not have a supported e-mail program, the computer
prompts you to save the image as a file. In the Save As dialog box,
name the file, choose a location in which to save it, and click Save.
If the computer prompts you for an attachment file name, enter a
name in the File name box. If you need more help, see "Naming
e-mail attachments" on page 32.
6 If you are scanning a document without using an ADF, the
computer may prompt you for another page. Do one of the
following:
If you do not have more pages to scan, click Done.
If there are additional pages of this item, load the next page and
click Scan. Repeat until all pages are scanned. Then, click
Done.
Note: To turn this feature off, see "To change settings for
buttons or update destinations" on page 34.
7 If you have a supported e-mail program, the scanned image
automatically appears as a file attachment in a new message.
Address the message and send it as you normally do. If you do not
have a supported e-mail program, the computer confirms that the
item is saved to a file. Open your e-mail program and attach the
saved file.
Page 32

32 Scanning from scanner buttons Back to TOC
Selecting original type for e-mail
If the software prompts you for an original type, you have two choices,
Photo or Document. The scanner will use optimized scan settings for
your item depending on your choice. Use the following guidelines to
determine the best original type for your needs:
Select Document if the item contains text or both text and graphics.
This produces a .pdf file.
Select Photo if the item is a printed photograph or image
(negatives and slides not supported). This produces a .jpg file.
If you frequently scan the same type of original, and do not want the
Original Type screen to appear each time, you can turn it off. To do so,
choose Photo or Document, then check the box labeled In the
future, use this setting. Do not prompt me.
To turn the original type prompt back on, see "Changing settings for
buttons" on page 34.
Naming e-mail attachments
The computer will prompt you each time for a filename. If you do not
want to be prompted, and you want the scanning software to assign an
attachment name automatically, check the box labeled In the future,
name the file automatically. Do not prompt me.
To turn the attachment name prompt back on, see "Changing settings
for buttons" on page 34.
Save as type displays the file type for the e-mail attachment. A photo
original type results in a .jpg file type. A document original type results
in a .pdf file type.
Note: If you need to save the item as a file type other than .jpg
or .pdf, scan and save the item using the HP
Precisionscan Pro software. See "To save to a file" on
page 62.
Page 33

Back to TOC Scanning from scanner buttons 33
Printing copies
You can scan an item and send it to a printer to make copies using the
Copy button ( ). Note that when you make copies, each page is
treated as a separate print job, so the printer will not collate copies.
To print copies from the scanner
1 Close the HP Precisionscan Pro program if it is open on your
computer.
2 Place the original face down on the scanner glass and close the lid.
To load items in the ADF, see "Scanning from the ADF" on
page 76.
3 (Some models only, see "Front panel and accessories
comparisons" on page 3.) On the scanner, select color or black
and white copies.
4 (Some models only, see "Front panel and accessories
comparisons" on page 3.) On the scanner, select the number of
copies. The default setting is one copy.
5 Press the Copy button on the scanner. Unless you click Cancel,
the number of copies specified in the scanner LCD window will
print directly to the default printer.
6 To reduce or enlarge the copies, lighten or darken them, or change
which printer prints them, click Cancel on the computer to set
options in the HP Scanjet Copy Utility. Change options and click
Copy.
Tip If your scanner doesn’t have buttons to select color
or black and white, or number of copies, use the HP
Scanjet Copy Utility.
Page 34

34 Scanning from scanner buttons Back to TOC
Changing settings for buttons
When you use the scanner buttons, the scanner scans the item using
settings optimized for the destination, such as e-mail, that is
associated with that button. You can change the default settings for
some scanner buttons. Settings are applied to all items being scanned
until you manually change the settings. You can also update the
scanner button destinations to include new programs on your
computer.
Tip To change the settings only for the current item, you
might want to scan using the HP Precisionscan Pro
software instead. See "Scanning from HP
Precisionscan Pro" on page 39.
To change settings for buttons or update destinations
1 Do one of the following:
(Some models only, see "Front panel and accessories
comparisons" on page 3.) On the scanner, press the More
Options button ( ).
On the Start menu, point to Programs, point to HP Scanjet
Utilities, and click HP Scanjet Button Options.
2 Click the tab for the options you want to change.
3 For the E-mail tab options, change the settings and click OK.
4 For the General tab options, click Update. The software
automatically searches your computer for supported new programs
and updates the scanner button destinations. When the update is
complete, click OK.
Page 35

Back to TOC Scanning from scanner buttons 35
To restore default E-mail button options
1 Do one of the following:
(Some models only, see "Front panel and accessories
comparisons" on page 3.) On the scanner, press the More
Options button ( ).
On the Start menu, point to Programs, point to HP Scanjet
Utilities, and click HP Scanjet Button Options.
2 Click the E-mail tab.
3 Click Restore Defaults, then click OK.
List of options for scanner buttons
E-mail tab options
This tab contains the scanning options that are applied to items you
scan using the E-mail button ( ).
Destination
Select the e-mail program into which scanned images will be placed as
files when scanning is completed. If no compatible e-mail programs
are installed on the computer, you cannot scan directly to e-mail.
Instead, select E-mail File here in the Destination field. Then when
you press the E-mail button ( ) on the scanner, you will be
prompted to save the scanned image as a file, which you can manually
attach to an e-mail message as you normally do.
If the e-mail program you want does not appear in the list, you can use
the update button under the General tab to update the destination list
for the E-mail button. If this is a newly released e-mail program, check
the page for this scanner on the HP support website for new drivers to
support the e-mail program. Otherwise, visit the page for this scanner
on the HP support website to check for known conflicts with the
program you want.
Visit the HP support website at:
http://www.hp.com/go/support
Page 36

36 Scanning from scanner buttons Back to TOC
Original type
Choose one:
Photo
Document
Prompt for original type each time
By default, the original type is set to Prompt for original type each
time. If you scan a variety of original types, this allows you to make the
original type choice each time. Use Photo or Document if you are
frequently scanning the same type of original.
Prompt for e-mail attachment name
Check the Prompt for e-mail attachment name box to enter a name
each time for e-mail attachments. Uncheck the Prompt for e-mail
attachment name box if you want the scanning software to assign an
attachment name automatically.
Original size
This option is available for Document original types only. Select the
size that most closely matches the item you are scanning. Some
scanners support an optional automatic document feeder (ADF) that
allows you to scan pages larger than the scanner glass.
Quality (for documents)
This option is available for Document original types only. Choose one:
Small file size with lower quality creates black and white scans
at 100 dpi.
Normal creates grayscale scans at 200 dpi.
Large file size with high quality creates color scans at 300 dpi.
Prompt to scan additional pages
This option is available for Document original types only. Check the
When done scanning, prompt to scan additional pages when ADF
is not being used box for a prompt to add more pages to the current
document. This option is useful if you scan documents without an ADF
and want multiple pages in a single .pdf file attachment. Uncheck the
When done scanning, prompt to scan additional pages when ADF
is not being used box to turn this option off.
Area to scan
This option is available for Photo original types only. Choose one:
Scan only items detected on the scanner bed automatically
crops a photograph on the scanner bed.
Scan entire scanner bed scans the full size of the scanner bed
without cropping.
Quality (for photos)
Choose one:
Small file size with lower quality creates scans at 75 dpi.
Normal creates scans at 100 dpi.
Large file size with high quality creates scans at 150 dpi.
For color photos, output type is True Color. For black and white
photos, output type is Grayscale.
Scan in color
This option is available for Photo original types only. To retain color
when scanning images, select the Scan in color box. To scan images
in black and white, clear the Scan in color box.
The file type is .pdf.
Page 37

Back to TOC Scanning from scanner buttons 37
General tab options
If you install a new software program on your computer after you install
the HP scanning software, update the scanner button destinations
using the General tab options. An update ensures that the scanner
buttons can send to supported new destinations on your computer. In
order to update the destinations, your scanner must be attached to the
computer before you press Update.
In the General tab, click Update. The software automatically searches
your computer for supported new programs and updates the scanner
button destinations. When the update is complete, click OK.
Note: If your scanner has a Select Destination button next to
the Scan To button, not all destinations appear in the
scanner’s destination list. For example, printers, e-mail
programs, and saving to a file are not included. The list
is also limited to the first 18 destinations found by the
HP scanning software. You can access additional
destinations through the HP Precisionscan Pro
software. See "To send to a program" on page 61 for
more information.
Power Save
Use the Power Save button ( ) to conserve energy when you are
not using the scanner. When you press the Power Save button, the
scanner lamp and a small indicator light near the Power Save button
turn off and the scanner lamp returns to its starting position.
To use the scanner again, press any button on the front panel of the
scanner or start a scan from the computer. After a short warm-up
cycle, the scan begins.
Cancel (some models only)
The Cancel button ( ) cancels a scan in progress. When you press
the Cancel button during a scan, the lamp shuts down and returns to
its starting position. If you press the Cancel button during a scan from
the ADF, the ADF ejects any pages that are in the process of scanning.
Page 38

38 Scanning from scanner buttons Back to TOC
Page 39

Back to TOC 39
Scanning from HP Precisionscan Pro
Using the HP Precisionscan Pro software, you can preview scanned
images and make changes to the images before you send them to a
destination or file them. You start the HP Precisionscan Pro software
from a scanner button or the Programs group in the Start menu.
You can also start the HP Precisionscan Pro software from another
program, such as a word-processing or image-editing program, if the
program is compliant with TWAIN. See "Scanning from other programs
(TWAIN)" on page 71 for more information.
Overview of the HP Precisionscan Pro software
The HP Precisionscan Pro software provides preview capabilities and
tools for changing an image. Some of the changes you can make
include:
Select only part of, or crop, the preview image to become the final
scanned image.
Change the resolution.
Resize the scanned image.
Change the contrast.
Page 40

40 Scanning from HP Precisionscan Pro Back to TOC
Starting the HP Precisionscan Pro software
To start the HP Precisionscan Pro software, press the Scan To button
( ), or on the Start menu, point to Programs, and click HP
Precisionscan Pro. The software starts.
To view the function of a command, place the cursor over the
command until an explanation appears.
For more information about the types of assistance the software itself
offers, see “Finding help for using the software” on this page. For more
information about keyboard shortcuts, menu items, toolbars, and
cursor appearance, see "Using software commands and controls" on
page 109.
Finding help for using the software
The HP Precisionscan Pro software provides a variety of assistance.
Guided Steps
Use the Guided Steps for step-by-step help as you move through the
scanning process. By default, the Guided Steps appear along the left
side of the preview window. As you become more comfortable with the
software, you can hide them. To show or hide the Guided Steps, on
the View menu, click Guided Steps. Or, on the toolbar click .
Smart Friends
Smart Friends are tips that appear automatically to notify you of
potential problems. For example, if you are setting a very high
resolution but want to use e-mail to send the scanned image, a Smart
Friend would alert you that the file will probably be too large for e-mail.
To turn individual messages off, select the Don’t remind me again
check box in the message’s dialog box. To turn all messages off, click
Disable All Smart Friends on the Help menu. To turn all messages
back on, click Enable All Smart Friends.
Online Help
The online Help is an easy-to-use source of information about using
the scanner and software, troubleshooting, support, and specifications.
To gain access to the Help: on the Help menu, click Contents. Or,
click the Help button in any dialog box in which it appears.
Note: Help is available for computers running Internet
Explorer version 4.0 or greater. See "Resolving issues
that did not generate messages" on page 87.
What’s This? Help
Click and click a button, menu, or command to find more
information about that feature.
Note: Help is available for computers running Internet
Explorer version 4.0 or greater. See "Resolving issues
that did not generate messages" on page 87.
Page 41

Back to TOC Scanning from HP Precisionscan Pro 41
Performing a new scan
Once you start a new scan, the scanner does a preliminary scan of the
item and displays the scanned image in the HP Precisionscan Pro
software. Then, you can see the scanned image and edit it, if
necessary, before sending it to a destination or saving it as a file.
To start a new scan
Use these steps to start a scan from the HP Precisionscan Pro
software. To start a scan from a scanner button, see "Scanning quickly
with scanner buttons" on page 26.
1 Place the original face down on the scanner glass and close the lid.
3 Start the scan in one of these ways:
In the HP Precisionscan Pro software, click on the toolbar
or the Guided Steps (if visible).
In the HP Precisionscan Pro software, click New Scan on the
Scan menu.
The scanned image appears in the HP Precisionscan Pro software.
This scanned image is the preview image. You can make changes,
such as selecting only part of the image or adjusting the contrast.
When you send the image to another program such as e-mail, place
the image on a website, or save it as a file, the scanner performs a final
scan of the item that includes any changes you made. Directions for
making optional adjustments and completing the scan appear in this
section.
Note: To load items in the HP Scanjet Automatic Document
Feeder (ADF), see "Scanning from the ADF" on
page 76.
2 On the Start menu, point to Programs, and click HP
Precisionscan Pro. The software starts.
Page 42

42 Scanning from HP Precisionscan Pro Back to TOC
Cropping or selecting an area for final scan
Once a scanned image appears in the HP Precisionscan Pro software,
you must select which area becomes the final scanned image by
creating a selection area. When you create a selection area, a dotted
selection border appears around the area:
selection
border
To crop or select an area for final scan
Do one of the following:
Move the cursor over the area you want and click.
When the cursor looks like this: , click on one corner of the
area you want and drag the cursor to the opposite corner to
draw a rectangular selection area.
On the Edit menu, click Select All. The entire scanner bed,
including blank areas, is selected.
To change the selection area
Click on a handle of the selection border and drag to change the
selection area.
To move the selection border
Move the cursor over the selection area. When the cursor looks like
this: , click and drag the selection border to the new location.
To remove the selection border
Do one of the following:
For information about the appearance of the cursor when it is over an
area of the selection border, see "Context-sensitive cursors" on
page 116.
Tip If you only want to look more closely at an area
without changing what will be included in the final
scan, see "Getting a closer look (zooming)" on
page 43.
Press ESC.
On the Edit menu, click Unselect All.
Page 43

Back to TOC Scanning from HP Precisionscan Pro 43
Getting a closer look (zooming)
Zoom in on the selection area to look at it more closely or make
changes to it. Zoom out to view the entire preview image, or so you
can select a different area of the image to view. Zooming in on the
selection area before making changes or performing a final scan
provides the best final results. The zoom commands are not available
if you have not created a selection area.
Zooming in and out does not change which part of the image becomes
the final scan, nor does it change the final output size (physical output
dimensions). To change which part of the image becomes the final
scanned image, see "Cropping or selecting an area for final scan" on
page 42. To resize the image, see "Resizing (output dimensions)" on
page 45.
To zoom in
After creating a selection area, do one of the following:
On the View menu, click Zoom in.
Click .
To zoom out
Selecting output type
When Automatically Set Type is selected, the scanning software
automatically chooses an output type based on the type of item you
are scanning. However, you can change the output type yourself when
you want. Choose the output type based on how you will use the final
scanned image as well as the type of item you are scanning.
To select an output type
1 Do one of the following:
If it is not already selected, click Automatically Set Type on the
Output Type menu, to allow the software to choose the best
output type for this type of original item.
To change the output type only for this scan, keep
Automatically Set Type selected and select an output type you
want from the Output Type menu. See "List of output types" on
page 44.
To change the output type for this scan and all other scans in
this session, clear Automatically Set Type and select an output
type you want from the Output Type menu. See "List of output
types" on page 44.
Do one of the following:
On the View menu, click Zoom out to return to the original view of
the image.
Click .
Tip For help choosing an output type, view the Guided
Steps. If they are not already displayed, click . In
step 3 “Confirm that the output type is what you
want,” select Help Me Choose.
Page 44

44 Scanning from HP Precisionscan Pro Back to TOC
List of output types To reset output type
For these uses
Color photos or drawings with lots of shading to be:
printed on a color printer.
displayed on a color monitor set to millions of colors.
displayed on the Web and saved in the .jpg or .png file
format.
Color photos or drawings with shading to be:
printed to a color printer.
sent via e-mail.
used in any way that requires a small file size.
viewed on a computer screen.
Color photos or drawings with shading to be printed to a
B&W printer.
B&W photos and drawings with shading to be used for any
purpose.
B&W drawings without shading to be placed in another
program without resizing in the other program.
B&W drawings without shading to be resized in another
program.
Use this output
type
True Color
(16.7 million
colors)
256-Color
(optimized palette)
Grayscale
Grayscale
Black & White
Bitmap
Black & White
Scalable
On the Output Type menu, click Automatically Set Type. The
software chooses the best output type based on the image inside the
selection area.
Any image to be saved in .gif file format and displayed on the
Web.
Text that needs to be editable in a word-processing program. Editable Text
Text that needs to be editable and graphics to be used. Text and Image
Color drawings or logos without much shading and with a
concentrated area of a single color. The image is to be used
for any purpose.
256-Color (web
palette)
(OCR)
Spot Color (16color)
Page 45

Back to TOC Scanning from HP Precisionscan Pro 45
Making optional adjustments, basic
These tools are needed most often, but using any of them is optional.
Depending on the output type chosen, some tools will not be available.
Resizing (output dimensions)
You can resize the image before you do the final scan by changing the
output dimensions. Resizing the scanned image to the actual
dimensions you need before performing the final scan helps ensure
the best image quality.
Tip If you need to resize images to fit in a file, such as a
word-processing document, resize them here in the
scanning software. Resizing images in the other
program can cause them to be fuzzy or have jagged
edges.
To resize an image
1 On the Tools menu, click Resize. The Resize dialog box opens.
2 Do one of the following:
If necessary, select a unit of measure in the Units field. In the
Output Dimensions area, type a new value in the Width or
Height field and press E
In the Scale field, select a scale percentage.
New values appear in the Scale, Width, and Height fields, but the
selection area and the scanned image on screen remain the same.
Resizing occurs when you complete the scan.
3 If you want, click . This locks the output dimensions you
defined so you can change the selection area without changing the
output dimensions. When you change the selection border, the
software resizes the border proportionally. The output dimensions
remain the same.
NTER.
Page 46

46 Scanning from HP Precisionscan Pro Back to TOC
Changing resolution
Resolution determines the amount of data in a scanned image. The
scanning software chooses the optimal resolution based on the output
type. This resolution generally does not need to change.
If you do change the resolution, choose one no higher than the
capabilities of the monitor or printer and one appropriate for the type of
scanned image. For example, to print on a 600 dpi printer, choose 600
for black and white bitmap images, but choose only 200 for color or
grayscale images. These resolutions produce optimal quality while
keeping file sizes small.
Selecting higher resolutions for color images increases file size while
not increasing quality. If you double the resolution, the file size
quadruples. Large file sizes can prevent you from doing certain tasks,
such as e-mailing, or can take up too much space on your computer.
For help choosing a resolution based on the type of original item and
destination, see "Tips for best image quality" on page 67.
To change resolution
1 On the Tools menu, click Change Resolution.
To reset resolution
On the Tools menu, click Change Resolution. Then, click .
Tip You can add the Change Resolution tool to the
toolbar. See "To add Change Resolution and
Sharpen tools to the toolbar" on page 114.
Changing contrast
The contrast is controlled by the midtone, highlight, and shadow
settings. See "Changing midtones" on page 50, "Changing highlights"
on page 51, and "Changing shadows" on page 52.
2 Do one of the following:
Select a value from the list.
Type a value between 12 and 999,999 in the field and press
NTER.
E
The resolution changes as soon as you select a value.
Page 47

Back to TOC Scanning from HP Precisionscan Pro 47
Rotating an image
You can rotate the image in 90-degree increments clockwise or
counterclockwise. You might need to rotate the image if you placed the
bottom of the item at the top of the scanner glass, or if the item was
sideways. Items such as negatives in their template often scan
sideways.
To rotate an image
Do one of the following:
To rotate an image clockwise: On the Tools menu, click Rotate
right 90°. Or, click on the toolbar. Repeat to continue turning.
To rotate an image counterclockwise: On the Tools menu, click
Rotate left 90°. Or, click on the toolbar. Repeat to continue
turning.
Tip Do not rotate scanned images with the output types
Editable Text, Text and Image, and Black & White
Scalable. Rotating images with these output types
results in a distorted image.
Mirroring (reversing) an image
You can mirror, or reverse, an image from side to side on the vertical
axis. Mirroring an image allows you to see the elements of the image
on the opposite side of their actual position. Mirroring can be
particularly useful for items such as negatives that might be placed in
their template backward and scanned in reverse.
To mirror (reverse) an image
On the Tools menu, click Mirror. Repeat to return to the original
layout.
Tip Do not mirror scanned images with the output types
Editable Text, Text and Image, and Black & White
Scalable. Mirroring images with these output types
results in a distorted image.
Page 48

48 Scanning from HP Precisionscan Pro Back to TOC
Sharpening an image
Increasing sharpening enhances detail in the image. The
HP Precisionscan Pro software automatically selects the optimal
sharpen level, but you can change it.
You might want to increase sharpening if the image looks fuzzy.
Conversely, you might want to decrease sharpening if the original item
has flaws or marks on it. Increasing sharpening, or increasing it too
much, can accent the flaws and create undesirable patterns.
To sharpen an image
1 On the Tools menu, click Sharpen.
2 Select a sharpen level from the list. The viewer shows the effect of
the changes on the image.
To reset sharpen levels
1 On the Tools menu, click Sharpen.
2 Click .
Resetting all adjustments
You can reset images to the optimal (default) values the scanning
software chose for the image. Optimal values are based on the output
type selected. Resetting removes all adjustments you have made
except the output type, zoom level, or the selection area.
To reset all adjustments
Do one of the following:
On the Edit menu, click Reset Tools.
On the toolbar, click .
Tip You can add the Sharpen tool to the toolbar. See
"To add Change Resolution and Sharpen tools to
the toolbar" on page 114.
Page 49

Back to TOC Scanning from HP Precisionscan Pro 49
Making optional adjustments, advanced
These optional adjustments are ones that most people generally do
not use or need, but some advanced users might want them for special
effects or other needs. Depending on the output type chosen, some
tools are not available.
Inverting the image
Use the Invert command to convert white areas of an image to black
and black to white. For color images, a color is converted to its
complementary color. Generally, this command is useful for drawings
and spot color images.
To invert the image
On the Advanced menu, click Invert Colors. Repeat to reverse the
colors again.
Page 50

50 Scanning from HP Precisionscan Pro Back to TOC
Changing midtones
The midtone setting lets you lighten or darken the middle values in an
image. The range for the number in the Midtone field is 1.0 to 4.0.
Moving toward 1.0 darkens the image. Moving toward 4.0 lightens the
image.
To adjust midtones for slides, negatives, or other transparent items,
use "Adjusting midtones for slides or negatives" on page 81.
Midtone set at 2.2
(the default)
Midtone set at 3.0
To lighten the image overall
1 On the Advanced menu, click Adjust Exposure.
2 Do one of the following:
Drag the Midtone slider to the right.
Type a higher number in the Midtone field and press ENTER.
Click the Up arrow next to the Midtone field.
To darken the image overall
1 On the Advanced menu, click Adjust Exposure.
2 Do one of the following:
Drag the Midtone slider to the left.
Type a lower number in the Midtone field and press ENTER.
Click the Down arrow next to the Midtone field.
To return to the default settings
1 On the Advanced menu, click Adjust Exposure.
2 Click Auto to return the midtone, highlight, and shadow to the
default settings for this scanned image. Clicking Auto also returns
output levels to the defaults. See "Setting pixel output levels" on
page 54.
Tip If you are sharing the image with others who will be
viewing it on a computer screen, the Midtone value
of 2.2 is recommended because it is an average
value that works with many different monitors.
Page 51

Back to TOC Scanning from HP Precisionscan Pro 51
Changing highlights
The highlight is the value in the image that is represented on the
screen as white. All values lighter than the highlight also appear as
white.
The image has a default highlight setting. Selecting a higher number
makes more of the lighter values distinct, which increases detail in light
areas. Selecting a lower number makes fewer of the lighter values
distinct, which reduces detail in the light areas.
To adjust highlights for slides, negatives, or other transparent items,
use "Adjusting highlights for slides or negatives" on page 82.
Highlights set at 215
Highlights set at 122
To increase detail in lighter areas
1 On the Advanced menu, click Adjust Exposure.
2 Do one of the following:
Drag the Highlight slider toward the right.
Type a higher number in the Highlights field and press ENTER.
Click the up arrow next to the Highlights field.
To decrease detail in lighter areas
1 On the Advanced menu, click Adjust Exposure.
2 Do one of the following:
Drag the Highlight slider toward the left.
Type a lower number in the Highlights field and press ENTER.
Click the down arrow next to the Highlights field.
To choose a value as the highlight value
Click (white eyedropper). When the cursor changes to the
eyedropper, move it over the area you want to be the highlight and
click.
To return to the default settings
1 On the Advanced menu, click Adjust Exposure.
2 Click Auto to return the midtone, highlight, and shadow to the
default settings for this scanned image. Clicking Auto also returns
output levels to the defaults. See "Setting pixel output levels" on
page 54.
Page 52

52 Scanning from HP Precisionscan Pro Back to TOC
Changing shadows
The shadow is the value in the image that is represented on the screen
as black. All values darker than the shadow also appear as black.
The image has a default shadows value. Selecting a lower number
makes more of the darker values distinct, which increases detail in
dark areas. Selecting a higher number makes fewer of the darker
values distinct, which reduces detail in the dark areas.
To adjust shadows for slides, negatives, or other transparent items,
use "Adjusting shadows for slides or negatives" on page 82.
Shadows set at 10
Shadows set at 3
To increase detail in darker areas
1 On the Advanced menu, click Adjust Exposure.
2 Do one of the following:
Drag the Shadows slider toward the left.
Type a lower number in the Shadows field and press ENTER.
Click the down arrow next to the Shadows field.
To decrease detail in darker areas
1 On the Advanced menu, click Adjust Exposure.
2 Do one of the following:
Drag the Shadows slider toward the right.
Type a higher number in the Shadows field and press ENTER.
Click the up arrow next to the Shadows field.
To select a value as the shadow value
Click (black eyedropper). When the cursor changes to the
eydropper, move it over the area you want to be the shadow and click.
To return to the default settings
1 On the Advanced menu, click Adjust Exposure.
2 Click Auto to return the midtone, highlight, and shadow to the
default settings for this scanned image. Clicking Auto also returns
output levels to the defaults. See "Setting pixel output levels" on
page 54.
Page 53
Back to TOC Scanning from HP Precisionscan Pro 53
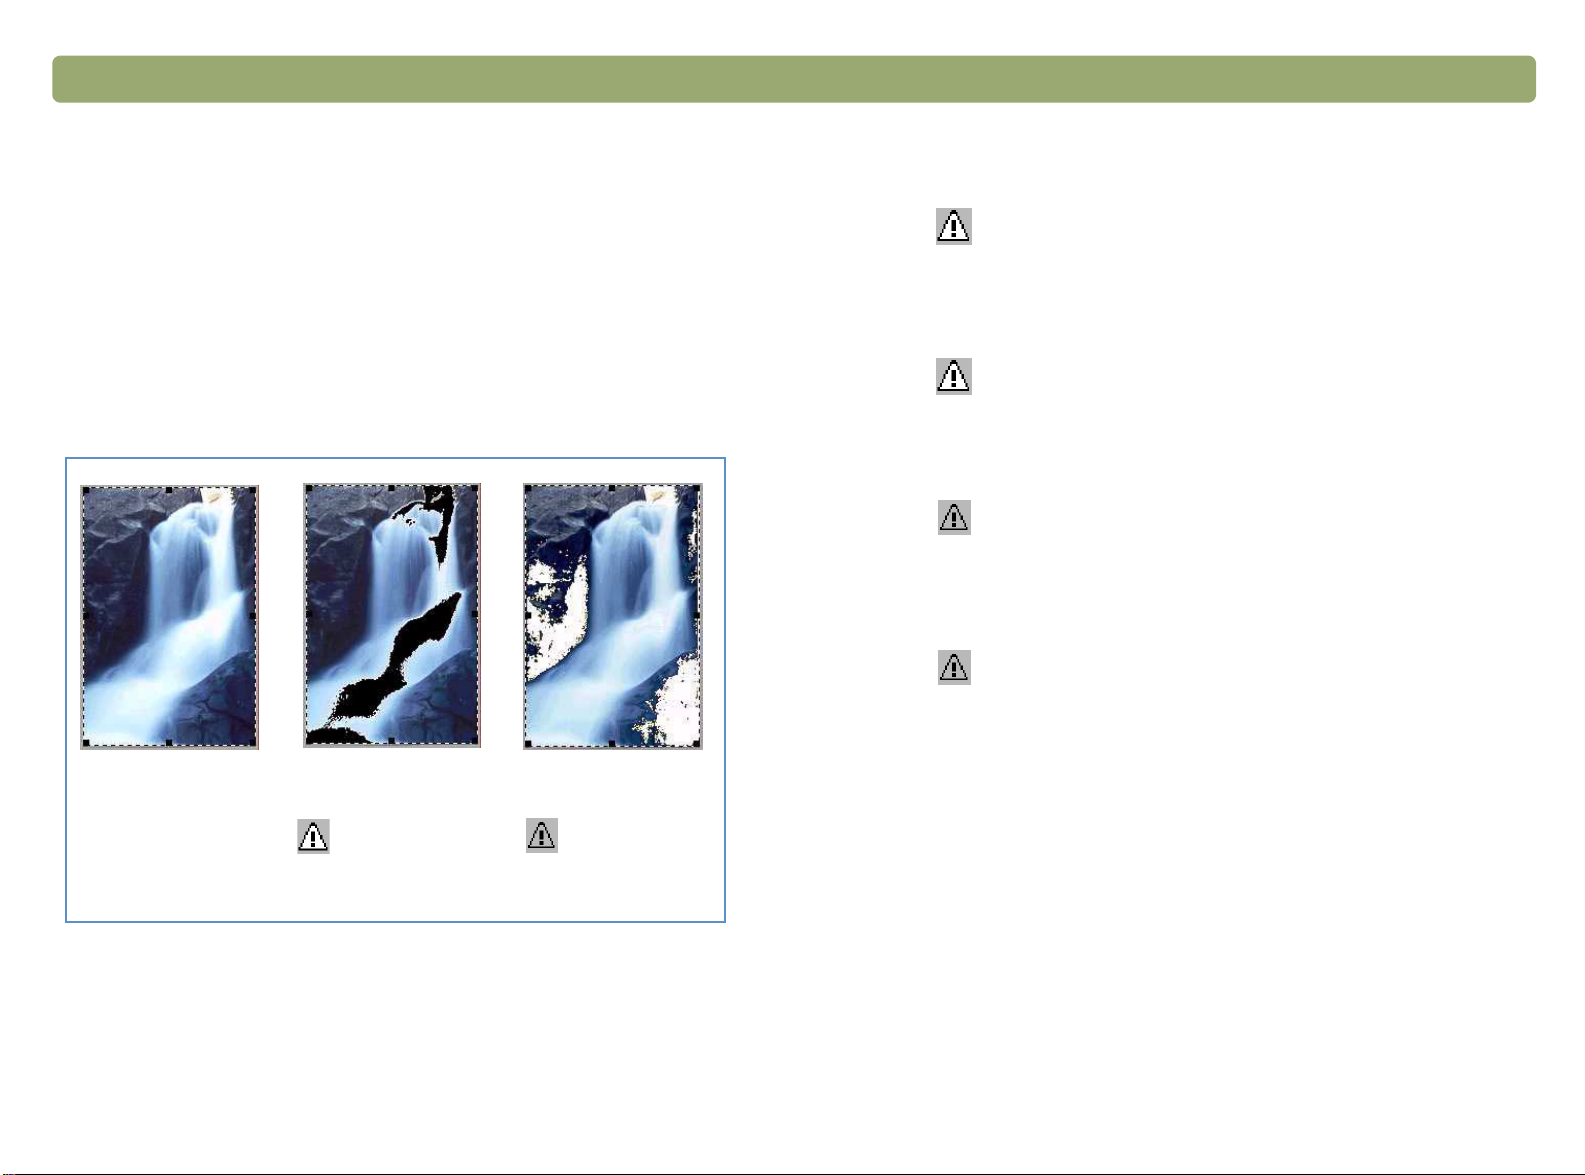
Checking for clipped areas
The lightest or darkest areas of an image that will print without any
detail in them are known as clipped areas. The lightest areas, or
highlights, will print as the color of the paper (without ink or toner) and
therefore will have no detail. The darkest areas, or shadows, will print
saturated in the blackest color of ink or toner, and therefore will also
have no detail.
You can view and change clipped areas if you want those areas to
contain detail when they print.
To view and change clipped light (highlight) areas
1 On the Advanced menu, click Adjust Exposure.
2 Click (Highlight Alarm). The light areas in the image that will
print as white (no detail) appear black.
3 In the Highlights setting, click the Up arrow repeatedly until the
clipped pixels disappear from the image. The result of the change
can be seen.
4 Click again to turn the Highlight Alarm off.
To view and change clipped dark (Shadow) areas
1 On the Advanced menu, click Adjust Exposure.
2 Click (Shadow Alarm). The darker areas in the image that will
print as black (without detail) appear white.
3 In the Shadow setting, click the Down arrow repeatedly until the
clipped pixels disappear from the image. The result of the change
can be seen.
4 Click again to turn the Shadow Alarm off.
Normal view View when
Highlight
Alarm
selected
View when
Shadow
Alarm
selected
Page 54

54 Scanning from HP Precisionscan Pro Back to TOC
Setting pixel output levels
The output levels setting lets you create interesting effects for scanned
pictures. When you select this command, the Black and White output
levels appear. By default, white is set to 255, and black is set to 0.
Decreasing the White output level makes the overall image darker.
Increasing the Black output level makes the image more faded.
Changing the White output level value to 0 and the Black output level
value to 255 inverts the colors in the image.
To change the ranges for the numbers in the White and Black fields,
see the Controls tab of "Setting preferences" on page 68.
Tip To use an image as a light background for dark text,
such as for an overhead transparency, increase the
Black output level until the image is as faint as you
want.
To change output levels
1 On the Advanced menu, click Adjust Exposure.
2 Click the Output Levels check box. The dialog box expands to
display the current White and Black output levels.
3 To change the levels, do one of the following:
Click one side of a slider.
Type a different number in the White or Black field and press
NTER.
E
Click the Up or Down arrow next to the White field or Black
field.
The result of the changes to output levels can be seen in the preview
area.
To return to the default settings
1 On the Advanced menu, click Adjust Exposure.
2 Click Auto to return the midtone, highlight, shadow, and output
levels to the default settings for this scanned image.
Page 55

Back to TOC Scanning from HP Precisionscan Pro 55
Viewing RGB values and pixels
You can view the RGB values and pixel color for any spot in a color or
grayscale image using the RGB meter.
To view the RGB values and pixel color for slides, negatives, or other
transparent items, use "Viewing RGB values and pixel color" on
page 83.
To view the RGB values and pixels
1 On the Advanced menu, click Adjust Exposure.
2 Click or .
3 Move the pointer over the image. The RGB values and pixel color
appear in the RGB meter.
RGB
values
Pixel
color
Note: Do not click while the eyedropper pointer is over the
image unless you want to change the setting for
highlight or shadow.
4 Click the same eyedropper button again. The RGB meter dims and
the cursor returns to normal.
Page 56

56 Scanning from HP Precisionscan Pro Back to TOC
About the histogram
The histogram is a graph of the distribution of pixels in the selection
area. The magenta line represents the current setting for shadow. The
red line represents the current setting for highlight. The midtone setting
is not represented.
Shadow
The turquoise line appears in the histogram when either eyedropper
cursor is positioned over the image. This line shows you where in the
histogram the pixels in that area of the image occur.
Where pixels in the
image under the
eyedropper fall
Highlight
Changing the hue
Color in an image consists of its hue and the saturation. Hue refers to
the overall color cast of the image.
The software sets the hue for an image, but you can change it. You
might want to change it if the image has too much of one color, or if
you want to create a special effect.
To change the hue
1 On the Advanced menu, click Adjust Color.
2 Change the overall color of the
image by doing one of the following
on the color wheel:
Drag the indicator circle to a new
area.
Click the arrow for a color on the
outer edge of the wheel.
The result of the change can be seen in
the image.
Arrows
Indicator circle
Tip If the image has too much of one color, move the
indicator circle away from that color.
The histogram represents pixel distribution in the preview image, not in
the final scanned image. Changing the selection area changes the
histogram. Changing the setting for highlight or shadow does not
change the histogram.
To return to the default settings
1 On the Advanced menu, click Adjust Color.
2 Click Auto to return to the default hue and saturation settings for
this scanned image.
Page 57

Back to TOC Scanning from HP Precisionscan Pro 57
Changing the saturation
Color in an image consists of its hue and the saturation. Saturation
refers to the intensity of the colors.
The software sets the saturation for an image, but you can change it.
You might want to change it to make colors in the image more or less
vivid, or to create a special effect. The range in the Saturation field is
0 to 150.
To increase saturation
1 On the Advanced menu, click Adjust Color.
2 Make colors more vivid by doing one of the following:
Click to the right of the slider.
Type a higher number in the Saturation field and press ENTER.
Click the Up arrow next to the Saturation field.
To decrease saturation
1 On the Advanced menu, click Adjust Color.
2 Make colors less vivid by doing one of the following:
Click to the left of the slider.
Type a lower number in the Saturation field and press ENTER.
Click the Down arrow next to the Saturation field.
To return to the default settings
1 On the Advanced menu, click Adjust Color.
2 Click Auto to return to the default hue and saturation settings for
this scanned image.
Page 58

58 Scanning from HP Precisionscan Pro Back to TOC
Changing the black and white threshold
Changing black and white threshold only applies to images using the
Black & White Bitmap output type. The threshold is a value in the
image that represents the border between black and white. All values
in the image that are lighter than the threshold appear as white, and all
values darker appear as black.
The image has a default threshold value. Choosing a number closer to
zero makes more values appear as white. Choosing a higher number
makes more values appear as black.
Threshold at 127
(the default for this image)
Threshold at 45
To change black and white threshold
1 Make sure that Black & White Bitmap is selected on the Output
Type menu. The selection should have a dot beside it.
2 On the Advanced menu, click Adjust Black & White.
3 Do one of the following:
Drag the slider.
Type a new value in the field and press ENTER.
Click the Up or Down arrow next to the field.
To reset black and white threshold
1 On the Advanced menu, click Adjust Black & White.
2 Click Auto.
Page 59

Back to TOC Scanning from HP Precisionscan Pro 59
Setting which colors become black or white in black & white bitmaps
This procedure only applies to color images that will be using the Black
& White Bitmap output type. It allows you to create special effects, or to
correct for originals on colored paper.
Images consist of pixels. In color images, each pixel has a varying
amount of Red, Green, or Blue to create its specific color. You can
determine whether the Red, Green, or Blue in each pixel turns to black
or white in the final scanned image.
To set which colors become black or white in black & white bitmaps
1 Make sure that Black & White Bitmap is selected on the Output
Type menu. The selection should have a dot beside it.
2 On the Advanced menu, click Adjust Black & White.
3 Select a color channel from the Scan using channel list.
Choose Red to change the red in the image to white. Green and
blue become black. Useful for originals printed on pink or red
paper.
Choose Green to change the green in the image to white. Red
and blue become black. Useful for originals printed on green
paper.
Choose Blue to change the blue in the image to white. Red and
green become black. Useful for originals printed on blue paper.
Choose NTSC Gray to convert light shades of all colors to white
and dark shades of all colors to black. (No one color becomes all
white or all black.) Colors are converted to gray at a ratio of 30%
red, 59% green, and 11% blue.
To reset to the default colors
1 Make sure that Black & White Bitmap is selected on the Output
Type menu. The selection should have a checkmark beside it.
2 On the Advanced menu, click Adjust Black & White.
3 Choose NTSC Gray from the Scan using channel list.
Page 60

60 Scanning from HP Precisionscan Pro Back to TOC
Descreening images
Use the Descreen command to reduce undesirable patterns in printed
items you are scanning. An example of an undesirable pattern is a
moiré pattern, or the circles that often appear on pictures printed in
newspapers.
Note that scanning takes longer when this command is selected. Use
Descreen only when you see undesirable patterns on the scan of a
printed original. When Descreen is turned on or off, a new preview
scan starts and image adjustments are reset.
To descreen images
On the Advanced menu, click Descreen. Select the option again to
turn it off.
Resetting all adjustments
You can reset images to the optimal (default) values the scanning
software chose for the image. Optimal values are based on the output
type selected. Resetting removes all adjustments you have made
except the output type, zoom level, or the selection area.
To reset all adjustments
Do one of the following:
On the Edit menu, click Reset Tools.
On the toolbar, click .
Page 61

Back to TOC Scanning from HP Precisionscan Pro 61
Completing the final scan
When you finish making changes, you need to complete the final scan
by doing one of these tasks:
"Sending to a program" on page 61.
"Returning the image to a TWAIN program" on page 62.
"Saving to a file" on page 62.
"Printing" on page 64.
"Placing a scan on a website" on page 64.
"Setting the scanned image as wallpaper" on page 65.
"Copying and pasting into another program" on page 65.
"Dragging-and-dropping into another program" on page 65.
"Dragging-and-dropping to the Windows Desktop or a folder" on
page 66.
"Scanning to CD" on page 66.
When you do any of these procedures, the scanner performs a final
scan including your changes before sending it to the program or printer
you choose, copying the image, or completing any other function.
Images are not automatically saved as files if you print them, send
them to a another program, or copy and paste them into a file in
another program. To use the scanned image again, be sure to save it.
See "Saving to a file" on page 62.
Sending to a program
Once you finish viewing and changing the scanned image, you can
perform a final scan and send it directly to a program such as e-mail. If
the program you want is not available, save the image as a file and
insert it into the destination program as you normally would.
Tip If you send text to Word or another word-processing
program and the text appears inside a frame you do
not want, double-click the frame border and click
Remove Frame or a similar command in the wordprocessing program. To prevent this from
happening in the future, see "Setting preferences"
on page 68.
To send to a program
1 Do one of the following:
On the Scan menu, click Scan To.
On the toolbar or the Guided Steps (if visible), click .
2 Choose a program from the list and click Scan.
3 If the program you select accepts multipage files, you might be
asked if you have more pages to scan to this file. Do one of the
following:
If this is a one-page item, click Done.
If there are more pages of this item, load the next page in the
scanner and click Scan on the computer. Repeat until all pages
are scanned. Then, click Done.
The destination program opens and displays the scanned image.
Page 62

62 Scanning from HP Precisionscan Pro Back to TOC
Returning the image to a TWAIN program
If you started the scan from a TWAIN-compliant program, you can
perform a final scan and return the image to that program using this
procedure. For more information about scanning using TWAIN, see
"Scanning from other programs (TWAIN)" on page 71.
To return the image to a TWAIN program
Do one of the following:
On the Scan menu, click Return Image to.
On the toolbar or the Guided Steps (if visible), click .
Note: You can also complete a final scan using WIA. See
"Scanning from other programs (WIA)" on page 72.
Saving to a file
Save scanned images as files when you want to use the images again
later. For help deciding on which file type to use, see "List of file types"
on page 63, or see "Tips for best image quality" on page 67. For
definitions of File types, see the "Glossary" on page 117.
To save to a file
1 Do one of the following:
On the Scan menu, click Save As.
On the toolbar or the Guided Steps (if visible), click .
2 Select a file type. See "List of file types" on page 63.
3 Select a name and location for the file and click OK.
4 If the Options button is available, more options are available for
this file type. Click Options, change any options you want, and
click OK.
The file type you need depends on how you will use the file. And, some
file types are not available when certain output types are selected.
Page 63

Back to TOC Scanning from HP Precisionscan Pro 63
List of file types
Image file formats
Bitmap (.bmp). Often a good choice because Windows itself and
most Windows programs accept the .bmp file type.
FlashPix (.fpx). A FlashPix file contains a complete image plus
several lower resolution copies of that image. The advantage of the
FlashPix file format over other file formats is that a program can
automatically select the best resolution for a particular job to make
editing and using images faster and easier. Cannot be used with
256-color output types.
GIF (.gif). GIF is a compressed file format suitable for an image
that will be used on the Web or on multiple platforms. You can save
your GIF file as an interlaced GIF. Cannot be used with True Color
output type.
JPEG (.jpg). JPEG is a compressed file format for images. Its
strengths are small file sizes and speed. The trade-off for these
advantages, though, is reduced image quality. Because each time
an image is compressed with JPEG it loses a little of the image
data, avoid compressing a file with JPEG more than once. JPEG is
an appropriate file format for an image that will be used on the Web
or on multiple platforms.
You can save your JPEG file as a progressive JPEG. When used
on a Web page, a progressive JPEG is initially sent as just every
other line, with the remaining lines sent immediately after. This
allows a (somewhat blurry) image to display sooner. Most people
prefer this. JPEG can be used only with True Color and Grayscale
output types.
PNG (.png). A compressed image file format that might replace
GIF. Like GIF, PNG uses non-lossy compression, which means all
the visual data is saved and restored when the file is
decompressed. Unlike GIF, PNG can be used with the True Color
output type, as well as grayscale ones.
TIFF (.tif). Usually created by scanners, TIFF files are widely
accepted by programs that work with photographs and other
images. A TIFF file is a bitmapped graphic (also called a raster
graphic) and can be any resolution. TIFF image files can be used
on multiple platforms.
TIFF compressed (.tif). TIFF compressed files for images are
smaller than standard TIFF files.
PCX image (.pcx). The PCX file format is for images used in
Windows programs such as PC Paintbrush and Paint.
Windows Metafile (.wmf). The Microsoft Windows Metafile file
format is used for scalable (vector) images in Windows programs.
It is only available for images using the Black & White Scalable
(vector) output type.
Text or text-and-image file formats
HTML (.htm). HTML is useful for text and graphics that will be
viewed on the World Wide Web. When this format is selected for a
scanned image containing both text and images, the text is
converted to editable text and is saved as HTML, and the graphics
are saved as GIF or JPEG files.
PDF (.pdf). PDF is a format useful for text, photos, and drawings.
Use Adobe Acrobat Reader to view .pdf files. If no changes need to
be made to the file, this file type is useful for sharing (as through
e-mail) and filing because of its generally small file size.
Rich Text (.rtf). The .rtf format can be used with a page that
contains text or text and pictures. The formatting of text in an .rtf file
can usually be retained and then interpreted by other programs.
Text (.txt). Use .txt file format for saving only the text in the
selection area and when you are using the Editable Text (OCR)
output type. Text will be editable, unformatted, ASCII text.
Page 64

64 Scanning from HP Precisionscan Pro Back to TOC
Printing
The selection area is the part of the image that prints. If there is no
selection border, the contents of the entire scanner bed, including
blank areas, print.
The Print command is disabled if one of these output types is
selected: Editable Text (OCR), Text and Image, or Black and White
Bitmap Scalable. To print, you must select a different output type.
Printing does not save the image to the computer. Save the scanned
image to a file to use the image later.
To print
1 Do one of the following:
On the Scan menu, click Print.
On the toolbar, or the Guided Steps (if visible), click .
2 In the Print dialog box, select the options you want and click OK.
Placing a scan on a website
Share photos with other people by scanning directly to the Web.
People you know can view the photos and other items by visiting your
website, which will have an address you can give them.
Tip If you want to place a scan on a site other than an
HP Share-to-Web website, save the scanned image
as a file and then place the file on the site as you
normally do.
To place a scan on a website
1 Do one of the following:
On the Scan menu, click Scan To.
On the toolbar, or the Guided Steps (if visible), click .
2 Select HP Share-to-Web from the list and click Scan.
3 Follow the instructions on the screen to finish posting the scanned
image to the website.
Page 65

Back to TOC Scanning from HP Precisionscan Pro 65
Setting the scanned image as wallpaper
When you choose this command, the software performs the final scan
and uses the results as the wallpaper on your Windows Desktop.
Right-click on the scanned image and click Set as Wallpaper.
To change to a different wallpaper, right-click on the Windows Desktop
and click Properties.
Copying and pasting into another program
You can copy the scanned image to the Clipboard and then paste it
into a file in the destination program. After the image is pasted, it
becomes a part of the file.
To copy and paste into another program
1 In the HP Precisionscan Pro software, do one of the following:
On the Edit menu, click Copy.
On the toolbar, click .
2 In the destination program, place the cursor where you want to
insert the scanned image and click.
Dragging-and-dropping into another program
You can drag-and-drop a scanned image into another program if that
program supports drag-and-drop. The cursor turns to a if you try to
drop a scanned image into a program that does not support drag-anddrop, or if you drag the image over a program or area that does not
support drag-and-drop.
To drag-and-drop into another program
1 Open a file in the destination program. Make sure you can see both
the destination program and the HP Precisionscan Pro software.
2 In the HP Precisionscan Pro software, place the cursor over the
scanned image.
3 Click inside the selection area and drag to the location in the
destination program. Then, release the mouse button. Wait for the
scanner to perform a final scan of the image.
3 Choose the Paste command in the program.
Page 66

66 Scanning from HP Precisionscan Pro Back to TOC
Dragging-and-dropping to the Windows Desktop or a folder
Scanned images you drag-and-drop to the Windows Desktop or a
folder in Windows Explorer become a bitmap file. The bitmap file is
given a generic name such as “scan.bmp.” Subsequent images
scanned to the Desktop or that folder replace the current one.
Therefore, if you want to save a scanned image, rename it before you
drag-and-drop another image to that location.
To drag-and-drop to the Windows Desktop or a folder
1 Make sure you can see both the HP Precisionscan Pro software
and the Desktop or the folder you want in Windows Explorer.
2 In the HP Precisionscan Pro software, place the cursor over the
scanned image.
3 Press C
4 While holding down the mouse button, drag the scanned image to
the Desktop or folder and release the mouse button. Wait until the
scanner performs the final scan.
TRL and click over the selection area.
Scanning to CD
The Scan to CD function is a quick, convenient way to scan and save
scanned items to a rewritable CD. This feature is a helpful shortcut for
people who frequently archive or store scans on CDs. To scan to a
CD, you must have CD-writer hardware installed and have a rewritable
CD available.
To scan to CD
1 Start a new scan, and make any adjustments you want in using the
scanning software.
2 In the HP Precisionscan Pro software, do one of the following:
On the Scan menu, click Scan to CD.On the toolbar, click
(Scan to CD).
A Save As dialog appears.
3 If a CD-writer drive is installed, this drive is automatically listed at
the top of the dialog. If you have created folders on your CD to
organize images, select the desired folder in which to save the
scan.
4 Type in a file name.
5 In the Save As Type list, select the file type. To change the file
type, select a different file type in the drop-down list.
6 Click Save.
Page 67

Back to TOC Scanning from HP Precisionscan Pro 67
Other features and tips
In this section, you can find information about:
Which settings to use to get the best image quality. (See "Tips for
best image quality" on page 67.)
How to save a group of settings and use them with future scans
when you select them. (See "Saving settings" on page 68.)
How to change the default settings the scanner uses to scan all
items. (See "Setting preferences" on page 68.)
How to start scanning from programs compliant with TWAIN. (See
"Scanning from other programs (TWAIN)" on page 71.)
How to scan using Windows Imaging Application (WIA). (See
"Scanning from other programs (WIA)" on page 72.)
How to make scanned text editable. (See "What to expect from
OCR programs" on page 73.)
Tips for best image quality
Output type, resolution, file type, and values for other controls
determine image quality and file size.
When you first scan an item, the scanner chooses the defaults for
output type and resolution, and you do not need to change them. If you
want to change these settings or want help choosing a file type, see:
"To select an output type" on page 43.
"Changing resolution" on page 46.
"List of file types" on page 63.
Tip For help choosing an output type, view the Guided
Steps. If they are not already displayed, click . In
step 3 “Confirm that the output type is what you
want,” select Help Me Choose from the drop-down
list.
Tip For any image that will be printed, choose TIFF
compressed as the file type to reduce the file size
while maintaining quality. Also, many different
programs recognize this file type.
Page 68

68 Scanning from HP Precisionscan Pro Back to TOC
Saving settings
You can save and name a group of settings that you frequently use for
a particular purpose and apply them to items you scan in the future.
For example, if you routinely e-mail pictures to someone, you can save
the settings including the output type, resolution, and dimensions that
you always use. The settings are automatically applied when you scan
a picture and choose the group of settings.
Saved settings override the default settings and any changes you
made up to that point. Any changes you make after that point are
preserved.
To save settings
1 Make sure the scanned image whose settings you want to save is
in the preview window and that you have adjusted any settings for
the image.
2 On the Scan menu, point to Settings, and click Save. The settings
for the current scanned image appear.
3 In the drop-down list at the bottom, type a name for these settings
and click Save.
Setting preferences
The preferences are the default settings for all scans performed. To
change a setting only for the item currently being scanned see "Making
optional adjustments, basic" on page 45 and "Making optional
adjustments, advanced" on page 49.
To set scanning preferences
1 On the Scan menu, click Preferences.
2 Click the tab you want.
3 Change any settings you want. See the next sections for
descriptions of options on tabs.
4 When finished, click OK.
To use settings
1 Scan an item to the HP Precisionscan Pro software.
2 On the Scan menu, point to Settings, and click Load.
3 Select the group of settings you want from the list at the bottom
and click Load.
Page 69

Back to TOC Scanning from HP Precisionscan Pro 69
Scanner tab options
The Scanner tab of the Preferences dialog box controls these
options.
Preview scan when the Scan To button is pushed
When selected, a preview of the scan appears when you press the
Scan To button on the scanner. When cleared, the software starts, but
the scanner does not scan. You will start a scan from the HP
Precisionscan Pro software.
Best Quality Scaling
When selected, the highest quality scaling is applied to the final scan.
When cleared, normal quality scaling is applied, making scanning
faster.
Best Quality Sharpening
When selected, the highest quality sharpening is applied to the final
scan. When cleared, normal quality sharpening is applied, making
scanning faster.
Maximum Pixel Depth
When selected, the largest pixel bit depth is acquired from the scanner
to produce the highest quality image. When cleared, less image data is
processed, making scanning faster.
Extend lamp time out
When selected, this setting keeps the scanner lamp and the XPA light
source (if it is connected) turned on beyond the default time out. This
feature provides the following benefits:
reduces scanning time by eliminating the lamp warm up that is
typically required between scans
keeps the XPA light source on beyond the default time out so
you can use it as a light table for viewing 35 mm slides
When cleared, the scanner lamp and the XPA light source (if
connected) time out and turn off after a period of inactivity.
Noise Reduction
When selected, reduces the noise in the image caused by the scanner.
When cleared, noise reduction is not applied, making scanning faster.
Enable Scan Another Page Dialog
When selected, a dialog box appears during final scanning that asks
you if there are more pages of this item to scan. When cleared, the
scanner assumes each job is only one page. Applies only to .pdf, .txt,
.rtf, and .html formats.
Page 70

70 Scanning from HP Precisionscan Pro Back to TOC
Selection Area tab options
The Selection Area tab controls the following preferences.
Automatically create selection area after a mouse click
When selected, a selection area will be created around an area on
which you click with the cursor.
Automatically set the Output Type after selection
When selected, the software automatically determines the output type
of the area inside the selection border.
Automatically adjust exposure after selection
When selected, the scanning software automatically changes the
values in the Adjust Exposure or Adjust Black and White dialogs to
the optimal values each time you create a new selection area. Values
for an image do not change if you adjust the selection area while the
Adjust Exposure or Adjust Black and White dialog box is
open.When cleared, the scanning software does not automatically
reset the controls in these two tools.
Automatically adjust color after selection
When selected, the scanning software automatically changes the
values in the Adjust Color dialog to the optimal values each time you
create a new selection area. Values never change if you create a
different selection area while the Adjust Color dialog box is open.
When cleared, the scanning software does not automatically reset the
controls.
Resolution tab options
The Resolution tab controls the default resolution values available
when you select Change Resolution on the Tools menu.
Default values are already set, but you can add custom resolution
values or delete values. Two resolutions that do not appear here, 200
dpi and 300 dpi, do appear in the Change Resolution dialog box.
These values cannot be deleted because they are the recommended
values for photos and black and white images.
The range of resolution is 12 to 999,999. Click Add to add a value. Or,
select a value and click Delete to delete that value.
Text tab options
The Text tab of the Preferences dialog box controls the following
preferences related to text output from the optical character
recognition (OCR) program.
Text Output (format)
Framed text places the text from the page into frames and
attempts to recreate the page formatting as closely as possible to
the original. The program into which the text is placed must support
this type of option.
Flowed text eliminates column and other formatting and inserts
any images in the text as closely as possible to where they were in
the original. Flowed text is easier to edit.
Current OCR Language
Allows you to choose the language the OCR program uses to check
words it is processing in the item.
Page 71

Back to TOC Scanning from HP Precisionscan Pro 71
Controls tab options
The Controls tab of the Preferences dialog box controls the control
range readout to use for scanning.
The control range sets the amount of tonal resolution per color
available for correction in the Adjust Exposure command and Adjust
Black & White command. Using a larger number of bits for the control
range results in greater control of compensation for exposure or
threshold correction.
Choose one of these options:
8-bit readout (0-255) — sets the controls to use 8 bits of tonal
resolution per color
10-bit readout (0-1023) — sets the controls to use 10 bits of tonal
resolution per color
12-bit readout (0-4095) — sets the controls to use 12 bits of tonal
resolution per color
16-bit readout (0-65535) — sets the controls to use 16 bits of tonal
resolution per color
Scanning from other programs (TWAIN)
You can bring an image directly into an open file in one of your
programs if the program is TWAIN-compliant. Generally, the program
is compliant if it has a command such as “Acquire,” “Scan,” or “Import
New Object.” If you are unsure if the program is compliant or you do
not know what the command is called, see the documentation for the
program.
When scanning from within a TWAIN-compliant program, the HP
Precisionscan Pro software may start if the TWAIN-program allows it. If
the HP Precisionscan Pro software starts, you can make changes to
the image as you normally would. If not, the image returns to the
TWAIN-program immediately.
Tip If your program is not TWAIN-compliant, you can try
to copy and paste or drag-and-drop the image into
the program. Or, save the image as a file and then
place the file in the program.
Page 72

72 Scanning from HP Precisionscan Pro Back to TOC
To scan from other programs (TWAIN)
1 Start a scan from within the other program by choosing the
Acquire (or similar) command.
2 If the HP Precisionscan Pro software opens and displays the
preview image, create a selection area. You can crop the scan (if
necessary), select the output type, and make optional adjustments
as you normally would. See the appropriate sections in this chapter
for instructions.
3 When finished making changes to the scanned image, do one of
the following to perform a final scan and place it in the program
from which you started scanning:
On the Scan menu, click Return Image to.
Click .
The image appears in the open program. You might have to reposition
the image.
If the image does not appear, the TWAIN-compliant program might not
accept the resolution or output type you selected. Rescan the image
using the default settings the software sets for the image.
Scanning from other programs (WIA)
(For Windows Me only) Windows Imaging Application (WIA) is another
way to scan an image directly into an application in which you are
working, such as Microsoft Word. With WIA, you are using Microsoft
software to scan.
Generally, a program is WIA-compliant if it has a command such as
Picture/From Scanner or Camera on the Insert or the File menu. If
you are unsure whether the program is compliant or you do not know
what the scan command is called, see the documentation for the WIA
program.
To scan from other programs (WIA)
1 On the Insert menu, point to Picture and then click From Scanner
or Camera.
2 If you have more than one scanner or camera connected, select
the scanner you want to use under Device.
3 Select the quality you want for your scan. Click Web Quality if you
want a lower resolution so your picture can be viewed on the
screen. Click Print Quality if you want a higher resolution for
printing the picture.
4 Click Insert to scan the picture and place it into the document
using predefined settings.
For more information, see the documentation for the WIA-compliant
program.
Page 73

Back to TOC Scanning from HP Precisionscan Pro 73
What to expect from OCR programs
Optical character recognition programs convert some text more
accurately than other text. Because OCR technology is never perfect,
proofread all converted text carefully to ensure the characters have
been correctly interpreted.
These types of text convert most accurately:
text in standard fonts
text in 9-point font or larger
crisp, clear text
black text on a white background
These types of text might convert less accurately:
text close to non-text elements, such as bullets, lines, or graphics
text in spreadsheets, tables, or forms
letters that have gaps, that “bleed” along their edges, or that touch
other letters
underlined text
text on colored paper
Handwriting cannot be converted.
Page 74

74 Scanning from HP Precisionscan Pro Back to TOC
Page 75

Back to TOC 75
Using accessories
Some scanners support using the HP Scanjet Automatic Document
Feeder (ADF) and the HP Scanjet Transparency Adapter (XPA) for
scanning slides and negatives. (Some models only, see the "Front
panel and accessories comparisons" on page 3.)
Page 76

76 Using accessories Back to TOC
Scanning from the ADF
You can scan multiple-page items quickly and easily using the ADF.
When you use the ADF, you can scan to the HP Precisionscan Pro
software or other destinations. For instructions about setting up the
ADF, see the Setup and Support Guide. For information about
preparing items for the ADF, see "Items for the ADF" on page 16.
To scan from the ADF
1 Place a stack of similarly sized originals in the document input tray,
face up with the first page on top.
2 Adjust the paper guides to center the stack.
3 Do one of the following:
Start the HP Precisionscan Pro software and follow the
directions on the computer screen.
Press a button on the front of the scanner.
If you start the scan from the HP Precisionscan Pro software or
scan to the HP Precisionscan Pro software using the Scan To
button ( ):
a The ADF Scan dialog box opens and displays the current
output type, resolution, and page size, which you can change.
Or, you can click Load Settings and choose settings you have
preset.
b To scan the item to a file, click Scan. Or, to scan directly to a
destination, click Scan To, select a destination, and click Scan.
If you start the scan from any scanner button except the Scan To
button, follow the directions on the screen to complete the scan.
Page 77

Back to TOC Using accessories 77
Scanning from the XPA
You can scan 35 mm slides or negatives using the XPA.
Tip Do not use the XPA to scan a letter-size item, such
as a presentation transparency. Place the
transparent item on the scanner glass, place a white
piece of paper on top, and scan as you normally
would using the Scanner Glass command on the
Scan menu.
See the Setup and Support Guide for information about installing the
XPA.
See "Items for the XPA" on page 16 for information about preparing
items for the XPA.
Scanning slides
To scan standard 35 mm slides, use the XPA light source and the
positioning plate. When scanning fewer than three slides, you also
need the slide light shield.
To scan slides
1 With the XPA light source connected to its port on the scanner,
restart the software.
2 Place the positioning plate on the scanner glass so the arrow is in
the upper right-hand corner. Push the positioning plate toward the
top right corner.
Page 78

78 Using accessories Back to TOC
3 Slide up to three slides into the slide holder on the bottom side of
the XPA light source. Slides should be right-side facing you.
Tip The XPA light source also functions as a light table
for viewing 35 mm slides. Insert slides as shown
above.
To keep the XPA light source on beyond the default
period, select the Extend lamp time out setting in
the HP Precisionscan Pro software. See "Setting
preferences" on page 68.
4 If you are scanning fewer than three slides, insert the slide light
shield after you load your last slide.
5 Place the XPA light source into the positioning plate with slides
facing down and the HP logo facing you.
6 From the HP Precisionscan Pro software, click the Scan menu,
and select XPA (Slides).
7 Before making any changes, see "Making optional adjustments for
slides or negatives" on page 81.
8 When you have finished using the XPA light source, on the Scan
menu, click Scanner Glass. Disconnect the XPA light source if you
want.
HP logo here
Page 79

Back to TOC Using accessories 79
Scanning negatives
To scan 35 mm negatives, use the XPA light source, the positioning
plate, and the negative holder. When scanning fewer than four
negative frames, you also need the negative light shield.
To scan negatives
1 With the XPA light source connected to its port on the scanner,
restart the software.
2 Place the positioning plate on the scanner glass so the arrow is in
the upper right-hand corner. Push the positioning plate toward the
top right corner.
3 Slide the strip of negatives into the negative holder. If the negative
strip curves, the curve should be facing out toward you.
CAUTION Negatives are easily damaged. Touch them only on
the edges.
4 If you are scanning a strip of negatives with fewer than four frames,
insert the negative light shield after the negative strip. See the icon
on the negative holder for assistance.
5 Slide the negative holder into the slide holder on the bottom side of
the XPA light source.
Page 80

80 Using accessories Back to TOC
6 Place the XPA light source into the positioning plate with negatives
facing down and the HP logo facing you.
HP logo here
7 From the HP Precisionscan Pro software, click the Scan menu,
and select XPA (Negatives).
8 Before making changes, see "Making optional adjustments for
slides or negatives" on page 81.
9 When finished using the XPA light source, on the Scan menu, click
Scanner Glass. Disconnect the XPA light source if you want.
Page 81

Back to TOC Using accessories 81
Making optional adjustments for slides or negatives
You can make optional adjustments to slides or negatives scanned
using the XPA. Before deciding to make adjustments, create a
selection area around one slide or negative so the software exposes it
correctly. See "Cropping or selecting an area for final scan" on
page 42.
If you choose to make adjustments to the image after you create a
selection area, make most of them as you normally would, except for
the following adjustments:
Midtone. See "Adjusting midtones for slides or negatives" on
page 81.
Highlight. See "Adjusting highlights for slides or negatives" on
page 82.
Shadow. See "Adjusting shadows for slides or negatives" on
page 82.
RGB values and pixel color. See "Viewing RGB values and pixel
color" on page 83.
Adjusting midtones for slides or negatives
You can adjust the overall lightness or darkness of the scanned image
using the midtone setting. The range for the number in the Midtone
field is -100 to 100.
To lighten slides or negatives overall
1 On the Advanced menu, click Adjust Exposure.
2 Do one of the following:
Drag the Midtone slider to the right.
Type a higher number in the Midtone field and press ENTER.
To darken slides or negatives overall
1 On the Advanced menu, click Adjust Exposure.
2 Do one of the following:
Drag the Midtone slider to the left.
Type a lower number in the Midtone field and press ENTER.
To return to the default settings
Tip See "Making optional adjustments, basic" on
page 45 and "Making optional adjustments,
advanced" on page 49 to make all adjustments
except the ones mentioned above.
Tip To enlarge a slide or negative, see "Resizing
(output dimensions)" on page 45.
1 On the Advanced menu, click Adjust Exposure.
2 Click Auto to return the midtone, highlight, and shadow settings to
the defaults for this slide or negative.
Page 82

82 Using accessories Back to TOC
Adjusting highlights for slides or negatives
You can adjust highlights to lighten or darken the light areas. The
range for the number in the Highlights field is -100 to 100.
To lighten lighter areas
1 On the Advanced menu, click Adjust Exposure.
2 Do one of the following:
Drag the Highlight slider to the right.
Type a higher number in the Highlights field and press ENTER.
To darken lighter areas
1 On the Advanced menu, click Adjust Exposure.
2 Do one of the following:
Drag the Highlight slider to the left.
Type a lower number in the Highlights field and press ENTER.
To return to the default settings
Adjusting shadows for slides or negatives
You can adjust shadows to lighten or darken the dark areas. The range
for the number in the Shadows field is -100 to 100.
To lighten darker areas
1 On the Advanced menu, click Adjust Exposure.
2 Do one of the following:
Drag the Shadow slider to the right.
Type a higher number in the Shadows field and press ENTER.
To darken darker areas
1 On the Advanced menu, click Adjust Exposure.
2 Do one of the following:
Drag the Shadow slider to the left.
Type a lower number in the Shadows field and press ENTER.
To return to the default settings
1 On the Advanced menu, click Adjust Exposure.
2 Click Auto to return the midtone, highlight, and shadow settings to
the defaults for this slide or negative.
1 On the Advanced menu, click Adjust Exposure.
2 Click Auto to return the midtone, highlight, and shadow settings to
the defaults for this slide or negative.
Page 83

Back to TOC Using accessories 83
Viewing RGB values and pixel color
You can view the RGB values and pixel color for any spot in an image,
color or grayscale, using the RGB Meter.
To view RGB values and pixel color
1 On the Advanced menu, click Adjust Exposure.
2 Click . The cursor changes to an eyedropper.
3 Move the cursor over the area in the item for which you want to see
the values. The values appear in the RGB area. A line appears in
the histogram to show you where those pixels occur.
4 When finished, click again.
Page 84

84 Using accessories Back to TOC
Page 85

Back to TOC 85
Troubleshooting and maintaining
This section provides information for:
Solving issues that might occur while using the scanner or
HP scanning software, or issues with the appearance of scanned
images. Start with "Checking the basics" on page 85.
Clearing jams from the ADF. See "Clearing jams from the ADF" on
page 102.
Cleaning and maintaining the scanner and accessories. See
"Cleaning and maintaining" on page 105.
See the Setup and Support Guide for installation and troubleshooting
information.
Checking the basics
If the scanner is not working, always perform these actions first.
Check that the power cable is securely connected between the
scanner and a live electrical outlet or surge protector.
If the power cable is connected to a surge protector, make sure the
surge protector is plugged into an outlet and turned on.
Check that the interface cable is securely connected between the
scanner and the computer.
Make sure the scanner is unlocked. Move the lock to the unlocked
position. (Some models only, see "Front panel and accessories
comparisons" on page 3.)
Disconnect the power cable from the scanner and turn off the
computer. After 30 seconds, reconnect the power cable to the
scanner and then turn on the computer, in that order.
If a program has frozen, close it. Press CTRL+ALT+DELETE to open
Close Programs or Task Manager. Select any program listed as
Not Responding and click End Task.
If these steps did not resolve the issue, see "Starting troubleshooting"
on page 86.
Page 86

86 Troubleshooting and maintaining Back to TOC
Starting troubleshooting
Start here to find the information you need. Choose one of these
general groups of issues, and then choose one of that group’s more
specific issues.
The scanner or software is not working.
A message is on the scanner or the computer. Follow the
directions in the message to resolve the issue.
There is no message. See "Resolving issues that did not
generate messages" on page 87.
There is an error message on the front panel liquid crystal
display (LCD). See "Resolving scanner messages" on page 87.
The quality of resulting scans is not what I expected.
Scanned images do not look good. See "Resolving issues with
scanned images" on page 91.
Printed copies do not look good. See "Resolving issues with
printed copies" on page 93.
Text on images is not editable. See "Resolving issues with
editable text" on page 96.
Slides or negatives do not look good. See "Resolving issues
with slides and negatives" on page 95.
I am having an issue with the HP Scanjet Transparency Adapter
(XPA) or the HP Scanjet Automatic Document Feeder (ADF).
Pages are jammed in the ADF. See "Clearing jams from the
ADF" on page 102.
There is an issue with the ADF, other than pages jamming. See
"Resolving issues with the ADF" on page 101.
There is an issue with the XPA. See "Resolving issues with the
XPA" on page 100.
Scans are not arriving at the destination I choose.
See "Resolving issues sending to destinations" on page 97.
Page 87

Back to TOC Troubleshooting and maintaining 87
Resolving scanner messages
(Some models only, see "Front panel and accessories comparisons"
on page 3.) If an error message appears on the 16-character front
panel LCD display on your scanner, look for the cause and solution in
this section.
ADF Paper Jam
Pages are jammed in the ADF. See "Clearing jams from the ADF"
on page 102 for information on clearing paper jams from the ADF.
Clear the paper jam. If the error message does not clear, unplug
the scanner and plug it back in.
Error ##
The scanner reported an error during the self-test.
Unplug the scanner and plug it back in. If this error message is still
on the scanner, contact HP support. Visit the HP support website
at:
http://www.hp.com/go/support
See the Setup and Support Guide for phone contact information.
Scanner Locked
(Some models only, see the "Front panel and accessories
comparisons" on page 3.) The scanner is not working because it is
locked. Make sure the scanner is unlocked. Move the lock to the
unlocked position. If the error message does not clear, unplug the
scanner and plug it back in.
Resolving issues that did not generate messages
If the scanner or software is not working but no message appears, look
for the cause and solution in this section.
Items you scanned previously are no longer on the computer.
The scanned image might not have been saved as a file. If you
send an image directly to a destination, the scanned image is not
saved on the computer. When you use HP Precisionscan Pro to
scan, use Save As to save the image to your computer.
The scanner lamp stays on.
The scanner lamp should time out and turn off automatically after a
period of inactivity.
If you have recently used the scanner, wait a few more minutes.
If the scanner lamp is still on, you might have activated the
Extend lamp time out feature. Check this setting on the
Scanner tab in the Preferences of the HP Precisionscan Pro
software. See "Setting preferences" on page 68.
Press the Power Save button on the front panel of the scanner
to immediately turn off the scanner lamp and the XPA light
source (if connected). See "General tab options" on page 37.
If you still encounter problems with the scanner lamp or the Power
Save button, contact HP Customer Support. (See “Contacting HP
Customer Support” in the Setup and Support Guide.)
Page 88

88 Troubleshooting and maintaining Back to TOC
I saved a scanned image to a file, but now I cannot open the file in
the program I want.
You might have saved the file in a format the other program cannot
use. Save the file in a different format the program can use. Look in
the File Open or Import command for the program to see which
file types it supports.
The scanner is not working.
One or more of these issues might be causing the problem:
The scanner was not installed properly.
The interface cable is not compatible with the scanner.
A cable might be loose. Check that the interface cable is
securely connected.
If the scanner is emitting a grinding sound, the scanner is
locked.
See "Checking the basics" on page 85, and the Setup and Support
Guide for installation and troubleshooting information.
The scanner does not scan right away.
If the scanner has not been used for a while, the scanner lamp has
turned itself off. The lamp goes through a warm-up period after you
start the software, or press the Scan To button. Wait for a few
seconds for scanning to begin.
When I press a button on the scanner, the incorrect program opens.
Check which function is set to open when you press the button on the
scanner:
In Windows 98 and 2000:
1 On the Start menu, point to Settings, and click Control Panel.
2 Double-click Scanners and Cameras. Select your scanner model
number from the list if it is not already selected.
3 Click Properties.
4 From the Scanner Events list, select the name of the button you
want to check. Verify what function is set for this button.
In Windows Me:
1 On the Start menu, point to Settings, and click Control Panel.
2 Double-click Scanners and Cameras. Double-click the icon next
to the name of your scanning device.
3 Click Properties.
4 From the Scanner Events list, select the name of the button you
want to check. Verify what function is set for this button.
In Windows NT 4.0 and Windows 95:
1 On the Start menu, point to Programs, point to HP Scanjet
Utilities, and click HP Scanjet Button Manager.
2 Click the Events tab.
3 From the Scanner Events list, select the name of the button you
want to check. Verify what function is set for this button.
Page 89

Back to TOC Troubleshooting and maintaining 89
When I choose Scan To on the scanner, the image does not appear
in the software.
A cable might be loose. Check that the interface cable is
securely connected.
You might have accidentally turned off the preview feature.
Check this setting on the Scanner tab in the Preferences of the
HP Precisionscan Pro software. See "Setting preferences" on
page 68.
(Some models only, see the "Front panel and accessories
comparisons" on page 3.) Check that the HP Precisionscan
software is the program set to start when you press the Scan To
button ( ) using the following steps.
In Windows 98 and 2000:
1 On the Start menu, point to Settings, and click Control Panel.
2 Double-click Scanners and Cameras. Select your scanner model
number from the list if it is not already selected.
3 Click Properties.
4 From the Scanner Events list, select the Scan To button.
5 Make sure the HP Precisionscan Pro check box is checked.
6 Make sure the Disable Device Events check box is unchecked.
In Windows Me:
1 On the Start menu, point to Settings, and click Control Panel.
2 Double-click Scanners and Cameras. Double-click the icon next
to the name of your scanning device.
3 Click Properties.
4 From the Scanner Events list, select the Scan To button.
5 Under Actions, make sure that HP Precisionscan Pro is selected
next to Start This Program.
In Windows NT 4.0 and Windows 95:
1 On the Start menu, point to Programs, point to HP Scanjet
Utilities, and click HP Scanjet Button Manager.
2 Click the Events tab.
3 From the Scanner Events list, select the Scan To button.
4 Make sure the HP Precisionscan Pro check box is checked.
5 Make sure the Disable Events check box is unchecked.
Scanner is scanning items very slowly.
If you are scanning to edit text, the optical character recognition
(OCR) program causes the scanner to scan more slowly, which
is normal. Wait for the item to scan.
Some default settings can cause the scanner to scan more
slowly. Check the settings. See "Setting preferences" on
page 68.
The resolution might be set too high. Return to the default
resolution. See "Changing resolution" on page 46.
The correct menu items do not appear in the HP Precisionscan Pro
software.
If you used the ADF and then disconnected it, restart the
software.
If you were using the XPA, on the Scan menu, click Scanner
Glass to scan from the glass again.
If you are trying to use the XPA and the XPA (Slides) or XPA
(Negatives) commands are unavailable, restart the software
while the XPA light source is connected to the scanner.
6 Verify that the Take No Action check box is unchecked.
Page 90

90 Troubleshooting and maintaining Back to TOC
The scanner is making a loud clicking or grinding noise.
The scanner is locked. Move the lock to the unlocked position.
(Some models only, see the "Front panel and accessories
comparisons" on page 3.)
The online Help or the Guided Steps in the HP Precisionscan Pro
software do not work.
Help is available for computers running Internet Explorer version 4.0 or
greater. You can install a newer version of Internet Explorer, or you can
view the Online User’s Manual for assistance.
To view the Online User’s Manual:
In the HP Precisionscan Pro software, point to the Help menu, and
click User’s Manual. Or, click the Help button in any dialog box in
which it appears.
Resolving image-quality issues
This section contains information for resolving image-quality issues,
whether you scanned using the scanner glass, the ADF, or the XPA.
"Resolving issues with scanned images" on page 91.
"Resolving issues with printed copies" on page 93.
"Resolving issues with slides and negatives" on page 95.
Tip For help getting the best output type possible, use
the Guided Steps. If they are not showing, click .
Page 91

Back to TOC Troubleshooting and maintaining 91
Resolving issues with scanned images
This section contains solutions to issues that affect all scanned
images, regardless of whether you used the scanner glass or the ADF.
If you were printing, see also "Resolving issues with printed copies" on
page 93.
Scanned images are too light or too dark.
The original image might be very light or dark or be printed on
colored paper. Adjust the midtone, highlight, and shadow settings
from the HP Precisionscan Pro software. See "Scanning from HP
Precisionscan Pro" on page 39.
Scanned images have black dots or streaks in top and bottom
margins.
There might be ink, glue, correction fluid, or some other substance
on the scanner glass. Clean the scanner glass. See "Cleaning the
scanner glass" on page 105.
Scanned images have unwanted lines through them.
The scanner glass might be dirty. Clean the glass. See
"Cleaning the scanner glass" on page 105.
If you are using the ADF, the ADF glass might be dirty or
scratched. Clean the ADF glass. See "Cleaning the ADF glass"
on page 106.
Scanned image is not clear.
The resolution, sharpening, or midtone, highlight, and shadow
settings might need to be adjusted before scanning. See
"Scanning from HP Precisionscan Pro" on page 39.
The original might be on colored paper. If the original was
printed on a colored paper, including brown recycled paper, the
image or text might not be clear. Try adjusting the resolution and
midtone, highlight, and shadow settings from the
HP Precisionscan Pro software. See "Scanning from HP
Precisionscan Pro" on page 39.
Page 92

92 Troubleshooting and maintaining Back to TOC
The image is completely black or completely white.
The item might not be placed correctly on the scanner glass or in
the ADF. Make sure that the item you are trying to scan is placed
face down on the glass, or face up in the ADF.
Colors in the scanned image are different from the original item.
Scanners, monitors, printers, and different operating systems
interpret color differently. Use the hue and saturation settings in the
HP Precisionscan Pro software to adjust the colors.
In the HP Precisionscan Pro software, all of the image scanned when
I only wanted part, or vice versa.
The selection area might not be selected correctly. Make sure the
selection border is surrounding the area you want in the final scan.
Scanned images are crooked.
The item might have been placed crookedly or shifted when you
closed the lid. Straighten the original on the scanner glass and
scan again.
Scanned images are grainy, jagged, or fuzzy.
You resized the image in a program other than the
HP Precisionscan Pro software. Resize the image in the
HP Precisionscan Pro software before you send it to the other
program. (See "Resizing (output dimensions)" on page 45.) Or,
if the original was a black and white drawing, use the Black &
White Scalable output type for the scanned image. (See
"Selecting output type" on page 43.)
In the HP Precisionscan Pro software, the resolution is set too
low. Set the resolution to a higher number, or return to the
default setting. See "Changing resolution" on page 46.
In the HP Precisionscan Pro software, too much or too little
sharpening was applied. Adjust the sharpening. See
"Sharpening an image" on page 48.
An original photo had marks, flaws, or scratches, and the scanned
image looks even worse in the HP Precisionscan Pro software.
You sharpened the image manually. Return to the default
setting. See "Sharpening an image" on page 48.
Best Quality Sharpening is selected. Check the setting. See
"Setting preferences" on page 68.
I thought I made the image smaller or larger before the final scan in
the HP Precisionscan Pro software, but it is still the same size as the
original.
You might have zoomed in or out, which does not change the size
of the image. Change the output size. See "Resizing (output
dimensions)" on page 45.
An original photo was fuzzy, and the scanned image looks even
worse.
The sharpening level needs to be increased. In the
HP Precisionscan Pro software, adjust the sharpening. See
"Sharpening an image" on page 48.
I set the image to a higher resolution in the HP Precisionscan Pro
software, but the output quality is no better.
Setting the resolution to a higher number does not necessarily
improve quality. The software sets the resolution automatically
based on the type of item you scanned. Keep or return to the
default. See "Changing resolution" on page 46 or "Tips for best
image quality" on page 67 for guidelines.
If you sent the image to another program, the program might not
support the resolution you set in the HP Precisionscan Pro
software. Determine the setting the program uses and set the
resolution in the HP Precisionscan Pro software to that
resolution.
Page 93

Back to TOC Troubleshooting and maintaining 93
Images scanned from the HP Precisionscan Pro software are larger
than the original when viewed or printed from another program,
such as MS Paint, MS Internet Explorer, or MS Imaging.
The other program did not accept the image size information. Scan
the image at a lower resolution. When you scan at a resolution the
program accepts, it will display or print the image at the correct
size.
The image is too big or too small.
In the HP Precisionscan Pro software, set the output dimensions in
the Resize dialog box. See "Resizing (output dimensions)" on
page 45.
When I try to scan to the Web from the HP Precisionscan Pro
software, the image is too large or does not look good on screen.
Scan settings for this image might be set incorrectly. Use the
Guided Steps for help choosing an output type. See also "Tips for
best image quality" on page 67.
Resolving issues with printed copies
Use this section to help resolve issues with printed pages.
Parts of the page around the edges are not printing.
Printers cannot print right up to the edge of the paper. To get the
image to fit inside the printable area, you must slightly reduce the
size of the image in the HP Precisionscan Pro software and then
reprint the image.
Page 94

94 Troubleshooting and maintaining Back to TOC
Copies are too light.
If you are copying an item printed on colored paper, there might
not be enough contrast between the ink and paper colors. Adjust
the highlights, shadows, midtones, and resolution settings from
the HP Precisionscan Pro software. See "Scanning from HP
Precisionscan Pro" on page 39. Or, adjust the contrast from the
HP Scanjet Copy Utility. Also, if possible for text, use originals
printed with black ink on white paper.
The printer might be out of toner or ink. Print a different file from
another program to the printer to see if the issue lies with the
printer.
Vertical white stripes appear on the page.
The bottom of the printed page is blank, or part of a graphic is cut
off.
The page might be too complex. (The printer does not have
enough memory to process the page.) Set the resolution of the
image to 300 dpi or less in the HP Precisionscan Pro software. See
"Changing resolution" on page 46.
Colors in printed images are incorrect.
The output type or printer settings might not be correct. Choose a
different output type and print again. Check the printer settings. If it
is a color printer, check if the printer is out of ink or toner.
Scanned images are jagged or fuzzy.
The printer might be out of toner or ink. Print a different file from
another program to the printer to see if the issue lies with the
printer.
The scanner internal mirror might be contaminated. Contact the
Customer Service Center for service.
The output type in the HP Precisionscan Pro software might not
be set correctly. Set the output type to True Color (16.7 million
colors) or Grayscale. See "Selecting output type" on page 43.
If you placed the image in a file in another program, resized the
image, and are printing from that program, resizing the image in
the program probably caused the issue. Resize in the HP
Precisionscan Pro software before placing it in a file in another
program. See "Resizing (output dimensions)" on page 45.
If the original image was fuzzy and you enlarged it, the fuzziness
becomes more obvious.
Page 95

Back to TOC Troubleshooting and maintaining 95
Resolving issues with slides and negatives
Use the following section to help resolve issues with slides or
negatives scanned using the XPA. All actions must be performed in the
HP Precisionscan Pro software, because you must scan slides or
negatives using this software. See also "Resolving issues with the
XPA" on page 100.
I tried to enlarge a scanned image of a slide, but the image
remained the same size.
You might have used the Zoom In command, which only changes
the view on the screen. Use the Resize command to change the
size of the final scanned image. See "Resizing (output
dimensions)" on page 45.
The colors are incorrect, or the image is too light or too dark.
The software might be setting exposure for the entire area
instead of one slide or negative. Create a selection area around
the slide or negative you want to use to ensure it is exposed
correctly.
The positioning plate is not placed completely on the scanner
glass. Make sure the positioning plate is completely on the
scanner glass.
If you are scanning fewer than three slides with the XPA, make
sure to use the slide light shield to cover the remaining area in
the slide holder. This ensures that no extra light leaks out into
the scan.
If you are scanning fewer than four negative frames with the
XPA, make sure to use the negative light shield to cover the
remaining area in the negative holder. This ensures that no extra
light leaks out into the scan.
The scanned image shows a colored tint, usually pink.
The image was probably scanned without the XPA, or the
positioning plate and XPA light source were placed incorrectly on
the scanner bed. For the steps for scanning 35 mm slides or
negatives, see "Scanning from the XPA" on page 77.
Scanned images appear as a box with multi-colored vertical lines or
as a dashed box with an arrow surrounding the area.
The positioning plate might be placed incorrectly on the scanner
bed. Place the positioning plate on the scanner glass so the
Hewlett-Packard logo is at the bottom right.
The scanned image is black even though the light on the XPA light
source is on.
The positioning plate might be placed incorrectly on the scanner
bed. Place the positioning plate on the scanner glass so the
Hewlett-Packard logo is at the bottom right.
Check the Adjust Exposure command in the Advanced menu.
There are streaks in the scanned image.
Check the original slide or negative for damage.
The XPA may be broken, and service may be required.
The scans are dark.
The bulb in the XPA light source might be broken or not working. If
the bulb is broken, service is required.
Page 96

96 Troubleshooting and maintaining Back to TOC
Resolving issues with editable text
This section contains resolutions to issues that might occur when you
are trying to make text editable.
Scanned text is not editable.
If you used the HP Precisionscan Pro software, the software might
have identified the text as a drawing. In the software, choose
Editable Text (OCR) or Text and Image on the Output Type
menu. Then, on the Scan menu, click Scan To and choose the
program you want. If the text is still not editable, work with the text
as an image or retype it.
Scanned text is editable in some programs but not in others.
Some programs accept only image formats and do not allow text.
Make sure the program accepts editable text.
Incorrect characters appear in the text that was converted using the
OCR software.
The accuracy of the OCR program depends on the program having
the correct settings on the quality of the original item. To obtain the
best possible results, choose the scan setting for text, and process
only crisp, clear text. See "What to expect from OCR programs" on
page 73.
Converted text does not appear in my word-processing program.
If you scanned to the HP Precisionscan Pro software, choose
Editable Text (OCR) or Text and Image on the Output Type
menu. Then, on the Scan menu, click Scan To and choose the
program you want. Or, cut and paste the text into the program you
want. If the text is still not editable, work with the text as an image
or retype it.
I do not know how to process text using a different OCR program.
Do one of the following:
Scan the item to the HP Precisionscan Pro software, save the
scanned image as an image file, and open the file in the other
OCR program.
Scan to the HP Precisionscan Pro software. Then, on the Scan
menu, click Scan To and choose the other OCR program.
The converted text did not retain font size and style when the text
was placed in a word-processing program.
Word-processing programs cannot always accept the original
formatting of the scanned text. Reformat the text in the word-
processing program.
Converted text appeared in the word-processing program without
its formatting and I wanted it, or vice versa.
Even if you want to retain the formatting and you have the setting
set correctly, the receiving word-processing program cannot
always accept the formatting. Reformat text in the word-processing
program.
Page 97

Back to TOC Troubleshooting and maintaining 97
After I scan using Text or Text and Image output type, some of the
text displays as squares or unrecognizable characters.
This is due to the display capability of your Microsoft Windows
operating system. For example, the English version of Windows 95
cannot properly display Russian, Turkish, Simplified Chinese,
Traditional Chinese, Korean, and potentially other non-western
European languages. Windows 2000 is able to display all
languages.
Resolving issues sending to destinations
Use this section to resolve issues sending images to destinations. Not
all functions are available on all scanners.
When I choose E-mail on the scanner, scanned images do not
automatically appear in a new e-mail message.
The e-mail program is Web-based or might not be supported. Save
the scanned image as a file and attach it to your e-mail message
as you normally do.
When I choose E-mail on the scanner, the scanned image attaches
as a bitmap, but it contains text I want the recipient to be able to
edit.
To make text editable for a recipient, scan the item to the
HP Precisionscan Pro software and change the output type for the
scanned image to Editable Text (OCR). Then, on the Scan menu,
click Scan To and select the e-mail program. Or, save the scanned
image as a text file and attach it to a message as you normally do.
When I press the E-mail button on the scanner, the incorrect e-mail
program opens.
Check which e-mail program is set to open when you press the
E-mail button ( ) on the scanner. See "Changing settings for
buttons" on page 34.
If you use Outlook, Outlook Express, or Netscape Mail, make
sure the program is set as your default MAPI application. If you
are not sure, see the documentation for your e-mail program.
Page 98

98 Troubleshooting and maintaining Back to TOC
When printing copies from the scanner or the HP Scanjet Copy
Utility, I cannot choose the printer I want.
Scan the item to the HP Precisionscan Pro software and print from
there.
When printing copies, I can only make multiple copies of one page
at a time (I cannot collate copy).
Even if you are using an ADF, each page is treated as a separate
job. You can make multiple copies of one page, but not multiple
copies of different pages and collate them.
When I try to print from the HP Precisionscan Pro software, the Print
command is unavailable.
If the Editable Text (OCR), Text and Image, or Black & White
Scalable output type is selected, the Print command is
unavailable. Choose a different output type and then print.
When I choose the Scan To button on the scanner, the image does
not appear in the software.
A cable might be loose. Check that the interface cable is
securely connected.
You might have accidentally turned off the preview feature.
Check this setting on the Scanner tab in the Preferences of the
HP Precisionscan Pro software. See "Setting preferences" on
page 68.
Check that the HP Precisionscan Pro software is the program
set to start when you press the Scan To button ( ). See
"When I choose Scan To on the scanner, the image does not
appear in the software." on page 89 for steps.
I tried to scan an image into an existing file, but the scanned image
appeared in a new file instead.
Some programs only allow scanned images to be placed in new
files. Cut and paste the image into the file you want. Or, save the
scanned image as a file and import it into the other program.
When I try to send a scanned image using the Scan To command on
the Scan menu of the HP Precisionscan Pro software, the program I
want does not appear.
The HP Precisionscan Pro software might not recognize the
program as a destination. Do one of the following:
Save the scanned image in a file type the other program uses,
and then open the file in the other program.
Copy and paste or drag-and-drop the image into the other
program.
Reinstall the program that is not being recognized. This might
allow the HP Precisionscan Pro software to recognize it.
I want to start scanning from another program, such as my wordprocessing program, so I can bring an image into my open file, but
I cannot start the scan.
The other program must be TWAIN or Windows Imaging
Application (WIA)-compliant. If you cannot find a command such as
Acquire or Insert, check the documentation for the program to see
if it is compliant. If not, do one of the following in the HP
Precisionscan Pro software:
Save the scanned image as a file and then insert the file into the
other program.
Click Scan To from the Scan menu, and choose a program.
Copy and paste or drag-and-drop the image into the other
program.
Page 99

Back to TOC Troubleshooting and maintaining 99
I am trying to return a scanned image to my TWAIN or WIAcompliant program, but the image will not appear.
The TWAIN or WIA-compliant program might not accept the
resolution or output type you selected. Rescan the image using the
default settings the HP Precisionscan Pro software sets for the
image.
I do not see the destinations I want when I use the Select Destination
button next to the Scan To button.
(Some models only, see the "Front panel and accessories
comparisons" on page 3.)
Not all destinations appear in the scanner’s destination list. For
example, printers, e-mail programs, and saving to a file are not
included. The list is also limited to the first 18 destinations found by
the HP scanning software. You can access additional destinations
through the HP Precisionscan Pro software. See "To send to a
program" on page 61 for more information, or do one of the
following.
Update the destinations for your scanner buttons. See "To
change settings for buttons or update destinations" on page 34
for steps.
Unplug the scanner and plug it back in.
Page 100

100 Troubleshooting and maintaining Back to TOC
Resolving issues with accessories
This section contains information for resolving issues when you are
using the XPA or ADF.
Resolving issues with the XPA
This section contains issues that might occur when you are using the
XPA (transparency adapter). See also "Resolving issues with slides
and negatives" on page 95.
The XPA is not working at all.
The XPA cable might not be connected correctly. Make sure the
XPA cable is connected securely to the XPA port on the scanner.
When using the XPA, I cannot choose XPA (Slides) or XPA
(Negatives) on the Scan menu.
The XPA cable might not be connected correctly. Make sure the
XPA cable is connected securely to the XPA port on the
scanner.
If you connected the XPA light source while the HP
Precisionscan Pro software was running, restart the software.
Doing so allows the software to detect the XPA.
When using the XPA, I cannot scan using the scanner buttons.
The XPA is not designed to work with the scanner buttons. Use the
HP Precisionscan Pro software when using the XPA.
There is no light or only a dim light in the transparency adapter after
checking XPA (Slides) or XPA (Negatives) in the Scan menu.
Make sure you have selected XPA (Slides) or XPA (Negatives)
from the Scan menu in the HP Precisionscan Pro software. If
these two commands are unavailable, restart the software while
the XPA light source is connected to the scanner.
The bulb in the XPA light source might be broken or not working.
With the XPA light source connected to the scanner, hold the
XPA light source up and look for illumination. If the bulb is
broken, service is required.
 Loading...