

Page 1
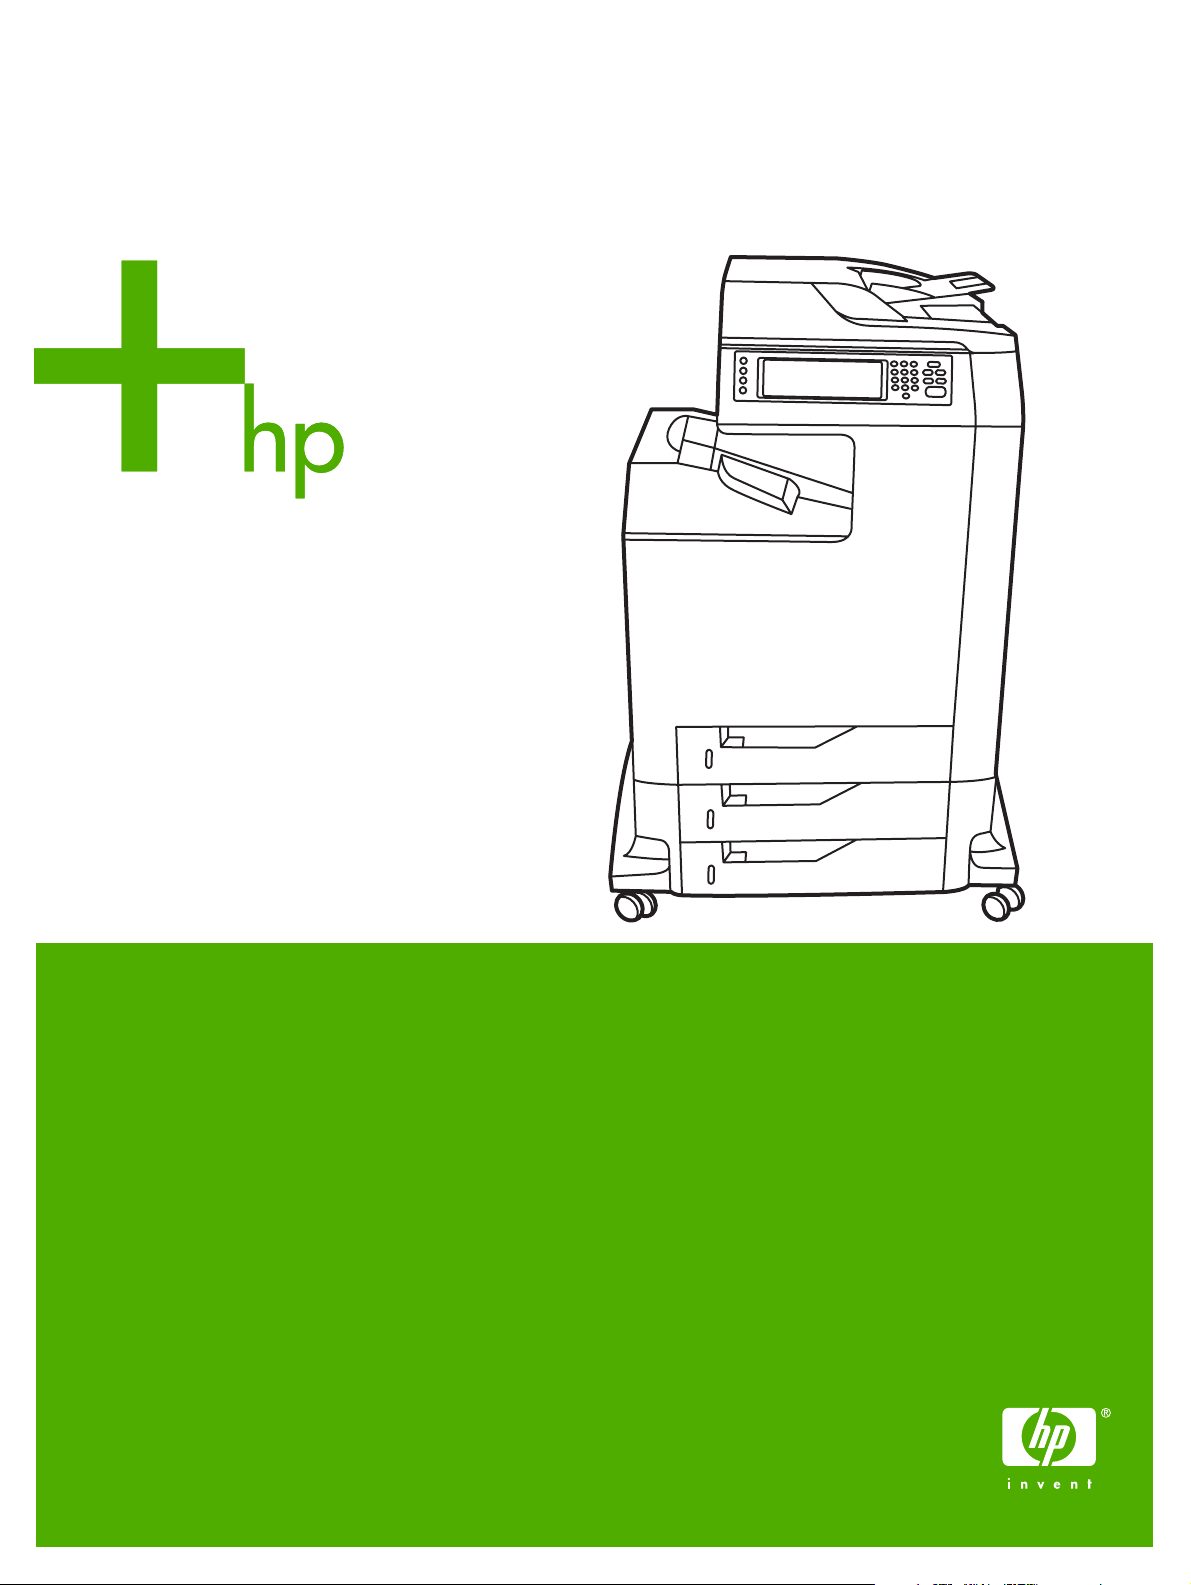
HP Color LaserJet 4730mfp
User Guide
Page 2

Page 3

HP Color LaserJet 4730mfp Series
User Guide
Page 4

Copyright and License
Trademark Credits
© 2005 Copyright Hewlett-Packard
Development Company, L.P.
Reproduction, adaptation, or translation
without prior written permission is prohibited,
except as allowed under the copyright laws.
The information contained in this document
is subject to change without notice.
The only warranties for HP products and
services are set forth in the express warranty
statements accompanying such products
and services. Nothing herein should be
construed as constituting an additional
warranty. HP shall not be liable for technical
or editorial errors or omissions contained
herein.
Part number Q7517-90981
Edition 1, 11/2005
Adobe® is a trademark of Adobe Systems
Incorporated.
Corel® and CorelDRAW™ are trademarks
or registered trademarks of Corel
Corporation or Corel Corporation Limited.
Energy Star® and the Energy Star logo® are
U.S. registered marks of the United States
Environmental Protection Agency.
Microsoft® is a U.S. registered trademark of
the Microsoft Corporation.
Netscape Navigator is a U.S. trademark of
Netscape Communications.
PANTONE® Colors generated may not
match PANTONE-identified standards.
Consult current PANTONE Publications for
accurate color. PANTONE® and other
Pantone, Inc. trademarks are the property of
Pantone, Inc. © Pantone, Inc., 2000.
PostScript® is a trademark of Adobe
Systems.
TrueType™ is a U.S. trademark of Apple
Computer, Inc.
UNIX® is a registered trademark of The
Open Group.
Windows®, MS Windows®, and Windows
NT® are U.S. registered trademarks of
Microsoft Corporation.
Page 5

HP customer care
Online services
For 24-hour access to information by using a modem or Internet connection
World Wide Web: Updated HP printer software, product and support information, and printer drivers in
several languages can be obtained from
Online troubleshooting tools
HP Instant Support Professional Edition (ISPE) is a suite of Web-based troubleshooting tools for desktop
computing and printing products. ISPE helps you quickly identify, diagnose, and resolve computing and
printing problems. The ISPE tools are available at
Telephone support
Hewlett-Packard Company provides free telephone support during the warranty period. When you call,
you will be connected to a responsive team that is waiting to help you. For the telephone number for
your country/region, see the flyer that came in the box with the product, or visit
support. Before calling HP, have the following information ready: the product name and serial number,
the date of purchase, and a description of the problem.
http://www.hp.com/support/clj4730mfp. (The site is in English.)
http://instantsupport.hp.com.
http://www.hp.com/
You can also find support on the Internet at
Software utilities, drivers, and electronic information
http://www.hp.com/go/clj4730mfp_software. (The site is in English, but printer drivers can be
Go to
downloaded in several languages.)
For information over the telephone, see the flyer that came in the box with the MFP.
HP direct ordering for accessories or supplies
Order supplies from the following Web sites:
United States:
Canada:
Europe:
Asia-Pacific:
Order accessories from
parts, accessories, and supplies.
To order supplies or accessories over the telephone, call the following numbers:
United States businesses: 800-282-6672
http://www.hp.com/sbso/product/supplies
http://www.hp.ca/catalog/supplies
http://www.hp.com/go/supplies
http://www.hp.com/paper/
http://www.hp.com/support/clj4730mfp. For more information, see Ordering
http://www.hp.com. Click the support & drivers block.
United States small and medium businesses: 800-888-9909
United States home and home offices: 800-752-0900
Canada: 800-387-3154
To find the phone numbers for other countries/regions, see the flyer that came in the box with the MFP.
ENWW iii
Page 6

HP service information
To locate HP-Authorized Dealers in the United States or Canada, call 800-243-9816 (United States) or
800-387-3867 (Canada). Or, go to
For service for your HP product in other countries/regions, call the customer support number for your
country/region. See the flyer that came in the box with the MFP.
HP service agreements
Call: 800-HPINVENT [800-474-6836 (U.S.)] or 800-268-1221 (Canada).
Out-of-Warranty Service: 800-633-3600.
Extended Service: Call: 800-HPINVENT [800-474-6836 (U.S.)] or 800-268-1221 (Canada). Or, go to
the HP Care Pack Services Web site at
HP support and information for Macintosh computers
http://www.hp.com/go/macosx for Mac OS X support information and HP subscription service for
Visit:
driver updates.
http://www.hp.com/go/mac-connect for products designed specifically for the Macintosh user.
Visit:
http://www.hp.com/go/cposupportguide.
http://www.hpexpress-services.com.
iv HP customer care ENWW
Page 7

Table of contents
1 MFP basics
HP Color LaserJet 4730mfp Series configurations ...............................................................................2
HP Color LaserJet 4730mfp (Q7517A-base model) .............................................................2
HP Color LaserJet 4730x mfp (Q7518A) ..............................................................................3
HP Color LaserJet 4730xs mfp (Q7519A) ............................................................................3
HP Color LaserJet 4730xm mfp (Q7520A) ...........................................................................4
Features and benefits of the multifunction peripheral (MFP) ................................................................5
Features list ..........................................................................................................................5
MFP parts and accessories ...................................................................................................................9
Identifying parts of the MFP ..................................................................................................9
Accessories and supplies ...................................................................................................10
Interface ports .....................................................................................................................11
Moving the MFP ..................................................................................................................12
Software ..............................................................................................................................................13
Operating systems and MFP components ..........................................................................13
Software features ................................................................................................................14
Driver Autoconfiguration .....................................................................................14
Update Now .......................................................................................................14
HP Driver Preconfiguration ................................................................................14
Installing the printing system software ................................................................................14
Installing Windows printing system software for direct connections ..................14
Installing Windows printing system software for networks .................................15
To set up a Windows computer to use the network MFP using Windows-
sharing ...............................................................................................................16
Installing the software after the parallel or USB cable has been
connected ...........................................................................................................16
Uninstalling the MFP software ............................................................................................17
To remove software from Windows operating systems .....................................17
Software for networks .........................................................................................................17
Summary of HP networking solutions ................................................................17
HP Web Jetadmin ..............................................................................................17
UNIX ...................................................................................................................18
Utilities ................................................................................................................................18
MFP utilities ........................................................................................................18
HP Easy Printer Care Software ..........................................................................18
Embedded Web server ......................................................................................19
Features ............................................................................................19
Other components and utilities ...........................................................................20
Software for Macintosh computers ......................................................................................................21
Installing Macintosh printing system software for networks ................................................21
ENWW v
Page 8

Installing Macintosh printing system software for direct connections (USB) ......................22
To remove software from Macintosh operating systems ....................................................23
Printer drivers ......................................................................................................................................24
Supported printer drivers ....................................................................................................24
Additional drivers ................................................................................................................24
Select the correct printer driver ...........................................................................................25
Printer-driver Help (Windows) .............................................................................................25
Gaining access to the printer drivers ..................................................................................25
Printer drivers for Macintosh computers ..............................................................................................27
Supported printer drivers ....................................................................................................27
Gaining access to the printer drivers ..................................................................................27
Install checklist ....................................................................................................................................29
2 Using the control panel
Control-panel layout ............................................................................................................................32
Control-panel features .........................................................................................................................33
Home-screen navigation .....................................................................................................................34
Help system .........................................................................................................................................35
What is This? Help ..............................................................................................................35
Show Me How Help ............................................................................................................35
Menu map ...........................................................................................................................................36
Retrieve job menu ...............................................................................................................................37
Information menu ................................................................................................................................38
Fax menu ............................................................................................................................................39
Paper handling menu ..........................................................................................................................40
Configure device menu .......................................................................................................................43
Originals submenu ..............................................................................................................43
Copying submenu ...............................................................................................................44
Enhancement submenu ......................................................................................................45
Sending submenu ...............................................................................................................45
Printing submenu ................................................................................................................46
PCL submenu .....................................................................................................................49
Print quality submenu .........................................................................................................50
System setup submenu ......................................................................................................51
Copy/send settings .............................................................................................................55
MBM-3 Configuration submenu ..........................................................................................56
Stapler/stacker submenu ....................................................................................................57
I/O submenu .......................................................................................................................57
Embedded Jetdirect submenu ............................................................................................58
Resets submenu .................................................................................................................61
Diagnostics menu ................................................................................................................................63
Service menu ......................................................................................................................................67
3 I/O Configuration
Network configuration ..........................................................................................................................70
Configuring TCP/IP parameters ..........................................................................................70
To manually configure TCP/IP parameters from the MFP control panel ............70
Setting an IP address .........................................................................................70
Setting the subnet mask .....................................................................................71
Setting the default gateway ................................................................................71
vi ENWW
Page 9

Parallel configuration ...........................................................................................................................73
USB configuration ...............................................................................................................................74
Auxiliary connection configuration .......................................................................................................75
HP Jetdirect print servers ....................................................................................................................76
Wireless printing ..................................................................................................................................77
4 Printing tasks
Controlling print jobs ............................................................................................................................80
Selecting print media ...........................................................................................................................82
Automatic media type sensing (auto sense mode) .............................................................................84
Configuring input trays ........................................................................................................................86
Printing on special media ..................................................................................................................100
Disabling network protocols (optional) ...............................................................72
To disable DLC/LLC ...........................................................................................72
NetWare networks ..............................................................................................................76
Windows networks ..............................................................................................................76
AppleTalk networks ............................................................................................................76
UNIX/Linux networks ..........................................................................................................76
IEEE 802.11 standard .........................................................................................................77
Bluetooth .............................................................................................................................77
Source ................................................................................................................................80
Type and Size .....................................................................................................................80
Print setting priorities ..........................................................................................................80
Media to avoid ....................................................................................................................82
Paper that can damage the MFP ........................................................................................82
Tray 1 sensing ....................................................................................................................84
Tray 2–N sensing ................................................................................................................85
Configuring trays when the MFP gives a prompt ................................................................86
To configure a tray when loading paper .............................................................................86
To configure a tray to match print job settings ....................................................................86
Configuring trays using the Paper Handling menu .............................................................87
Configuring Tray 2, 3, or 4 for a custom paper size ............................................................87
Printing from Tray 1 (multipurpose tray) .............................................................................89
Loading Tray 1 ...................................................................................................89
Printing envelopes from Tray 1 ...........................................................................................90
To load envelopes into Tray 1 ............................................................................90
Printing envelopes ..............................................................................................91
Printing from Tray 2, 3, or 4 ................................................................................................92
Loading detectable standard-sized media into Tray 2, 3, or 4 ............................................92
Loading undetectable standard-sized media into Tray 2, 3, and 4 .....................................94
Loading custom-sized media into Tray 2 ............................................................................97
Transparencies .................................................................................................................100
Glossy paper .....................................................................................................................100
Colored paper ...................................................................................................................101
Envelopes .........................................................................................................................101
Labels ...............................................................................................................................101
Heavy paper .....................................................................................................................102
HP LaserJet Tough paper .................................................................................................102
Preprinted forms and letterhead .......................................................................................103
Recycled paper .................................................................................................................103
ENWW vii
Page 10

Automatic two-sided (duplex) printing ...............................................................................................104
Control panel settings for automatic two-sided printing ....................................................105
To enable or disable two-sided printing from the MFP control panel ...............105
Options for binding two-sided printing jobs .......................................................................106
Manual two-sided printing .................................................................................................106
Printing booklets ...............................................................................................................106
Stapling documents ...........................................................................................................................107
To select the stapler in an application (Windows) ............................................................107
To select the stapler at the control panel ..........................................................................107
Loading staples .................................................................................................................107
To load staples .................................................................................................108
Special printing situations ..................................................................................................................110
Printing a different first page .............................................................................................110
Printing a blank back cover ...............................................................................................110
Printing on custom-size media ..........................................................................................110
Stopping a print request ....................................................................................................111
To stop the current print job from the MFP control panel .................................111
To stop the current print job from a software application .................................111
Selecting the output bin .....................................................................................................................112
3-bin mailbox output bins ..................................................................................................112
Selecting an output location ..............................................................................................113
To select an output location at the control panel ..............................................113
Job storage features ..........................................................................................................................114
Proofing and holding a job ................................................................................................114
Printing stored jobs ..........................................................................................114
Deleting stored jobs .........................................................................................114
Quick-copying a job ..........................................................................................................115
Private jobs .......................................................................................................................115
Printing a private job ........................................................................................115
Deleting a private job .......................................................................................116
Storing a print job ..............................................................................................................116
Mopier mode .....................................................................................................................116
Managing memory .............................................................................................................................117
Using features in the printer driver ....................................................................................................118
Creating and using quick sets ...........................................................................................118
Creating and using watermarks ........................................................................................119
Resizing documents .........................................................................................................119
Setting a custom paper size from the printer driver ..........................................................120
Using different paper/covers .............................................................................................120
Printing a blank first page .................................................................................................120
Printing multiple pages on one sheet of paper .................................................................120
Printing on both sides of the paper ...................................................................................121
To print on both sides by using the duplex-printing accessory ........................121
To print on both sides manually .......................................................................122
Layout options for printing on both sides .........................................................122
Setting the stapling options ...............................................................................................123
Setting the color options ...................................................................................................123
Using the HP Digital Imaging Options dialog box .............................................................124
Using the Services tab ......................................................................................................124
Using features in the Macintosh printer driver ...................................................................................126
viii ENWW
Page 11

5 Copying
Copy-screen navigation .....................................................................................................................132
Basic copying instructions .................................................................................................................133
Modifying copy settings for the current job ........................................................................................136
Copying multiple sized originals ........................................................................................................137
Creating a stored copy job ................................................................................................................138
Creating and using presets in Mac OS X ..........................................................................126
Printing a cover page ........................................................................................................126
Printing multiple pages on one sheet of paper .................................................................127
Printing on both sides of the paper ...................................................................................127
Setting the color options ...................................................................................................128
Cancel button ....................................................................................................................132
OK button ..........................................................................................................................132
Copying by using the default settings ...............................................................................133
To copy by using the default settings ...............................................................133
Copying by using user-defined settings ............................................................................133
To make copies by using settings other than the default settings ....................133
Copying by using the scanner glass .................................................................................135
Copying by using the ADF ................................................................................................135
Using Job Mode ................................................................................................................135
Adjusting the copy brightness ...........................................................................................136
Reducing or enlarging copies ...........................................................................................136
Background removal .........................................................................................................136
Sharpness .........................................................................................................................136
6 Scanning and sending to e-mail
What is SMTP? .................................................................................................................................140
What is LDAP? ..................................................................................................................................141
e-mail configuration ...........................................................................................................................142
Automatic e-mail configuration .........................................................................................142
Manual e-mail configuration ..............................................................................................142
To find gateways by using an e-mail program ..................................................................143
e-mail screen navigation ...................................................................................................................144
Help button .......................................................................................................................144
From: field .........................................................................................................................144
To:, CC:, and BCC: fields .................................................................................................144
Clear All button .................................................................................................................145
e-mail basics .....................................................................................................................................146
Loading documents ..........................................................................................................146
Sending documents ..........................................................................................................146
To send documents ..........................................................................................146
Using the auto-complete function .....................................................................147
Using the address book .....................................................................................................................148
Creating a recipient list .....................................................................................................148
Using the local address book ............................................................................................148
To add e-mail addresses to the local address book .........................................149
To delete e-mail addresses from the local address book .................................149
Additional e-mail features ..................................................................................................................150
Secondary e-mail ..............................................................................................................150
ENWW ix
Page 12

7 Faxing
8 Color
Send to folder ...................................................................................................................150
Send to workflow ..............................................................................................................150
Analog faxing .....................................................................................................................................152
Installing the fax accessory ...............................................................................................152
Connecting the fax accessory to a phone line ..................................................................156
Configuring and using the fax features .............................................................................157
Digital faxing ......................................................................................................................................158
Using color ........................................................................................................................................160
HP ImageREt 3600 ...........................................................................................................160
Color lockout .....................................................................................................................160
Paper selection .................................................................................................................161
Color options .....................................................................................................................161
sRGB ................................................................................................................................161
Printing in four colors — CMYK ........................................................................................162
CMYK ink set emulation (PostScript only) ........................................................................162
Color matching ..................................................................................................................................163
PANTONE® color matching .............................................................................................163
Sample book color matching ............................................................................................163
Printing color samples ......................................................................................................164
Managing printer color options on Windows computers ....................................................................165
Print in grayscale ..............................................................................................................165
RGB Color (Color Themes) ..............................................................................................165
Automatic or manual color adjustment .............................................................................165
Manual color options ........................................................................................166
Restricting color printing ....................................................................................................................168
Managing printer color options on Macintosh computers ..................................................................169
Print Color as Gray ...........................................................................................................169
Advanced color options for text, graphics, and photographs ............................................169
Halftone options ...............................................................................................169
Neutral Grays ...................................................................................................169
RGB Color ........................................................................................................170
Edge Control ....................................................................................................170
9 Optional output devices
Output accessory bridge ...................................................................................................................172
3-bin mailbox .....................................................................................................................................173
Mailbox mode ...................................................................................................................173
Stacker mode ....................................................................................................................173
Function-separator mode ..................................................................................................173
Configuring the printer driver to recognize the 3-bin mailbox/stapler/stacker ...................173
Windows ...........................................................................................................173
Macintosh .........................................................................................................174
To select the operating mode at the control panel ...........................................174
To configure a destination bin at the control panel (Mailbox and Function-
separator modes) .............................................................................................174
x ENWW
Page 13

Stapler/stacker accessory .................................................................................................................176
To configure the printer driver to recognize the optional stapler/stacker ..........................176
Windows ...........................................................................................................................176
Macintosh .........................................................................................................................177
To select the stapler at the control panel for printed jobs .................................................177
To select the stapler in the printer driver for printed jobs (Windows) ................................177
To select the stapler in the printer driver for printed jobs (Mac) .......................................177
To set the stapler at the control panel for all copy jobs ....................................................178
To set the stapler at the control panel for a single copy job .............................................178
To configure the MFP to stop or continue when the staple cartridge is empty .................178
Troubleshooting the output accessories ............................................................................................179
10 Security features
Securing the embedded Web server .................................................................................................182
To secure the embedded Web server ..............................................................................182
Foreign Interface Harness (FIH) ........................................................................................................183
Requirements ...................................................................................................................183
Using the FIH ....................................................................................................................183
Secure Disk Erase .............................................................................................................................185
Data affected ....................................................................................................................185
Gaining access to Secure Disk Erase ..............................................................................185
Additional Information .......................................................................................................185
Job-storage features .........................................................................................................................186
DSS authentication ............................................................................................................................187
Locking the control-panel menus ......................................................................................................188
Locking the formatter cage ................................................................................................................189
To select the operating mode in the printer driver (Windows 2000 and
Windows XP) ....................................................................................................174
Windows 98, Windows Me, and Windows NT 4.0 ............................................175
Mac OS X .........................................................................................................175
To enable the FIH portal ..................................................................................183
To disable the FIH portal ..................................................................................183
11 Managing and maintaining the MFP
Using the embedded Web server ......................................................................................................192
Opening the embedded Web server .................................................................................192
Information tab ..................................................................................................................193
Settings tab .......................................................................................................................193
Digital Sending tab ............................................................................................................194
Networking tab ..................................................................................................................194
Other links .........................................................................................................................194
Using the HP Easy Printer Care Software .........................................................................................196
Supported operating systems ...........................................................................................196
To use the HP Easy Printer Care Software ......................................................................196
HP Easy Printer Care Software sections ..........................................................................196
Using HP Web Jetadmin software .....................................................................................................198
Using the HP Printer Utility for Macintosh .........................................................................................199
Opening the HP Printer Utility ...........................................................................................199
Printing a cleaning page ...................................................................................................199
Printing a configuration page ............................................................................................199
ENWW xi
Page 14

Viewing supplies status ....................................................................................................200
Ordering supplies online and using other support features ..............................................200
Uploading a file to the printer ............................................................................................200
Uploading fonts to the printer ............................................................................................201
Updating the firmware .......................................................................................................201
Activating the two-sided printing (duplexing) mode ..........................................................201
Activating the Economode printing mode .........................................................................201
Changing the toner density ...............................................................................................202
Changing the resolution settings ......................................................................................202
Locking or unlocking printer storage devices ....................................................................202
Saving or printing stored jobs ...........................................................................................202
Configuring trays ...............................................................................................................203
Changing network settings ...............................................................................................203
Opening the embedded Web server .................................................................................203
Setting up e-mail alerts .....................................................................................................204
Configuring and verifying an IP address ...........................................................................................205
TCP/IP assignment ...........................................................................................................205
Automatic discovery .........................................................................................205
Dynamic Host Configuration Protocol (DHCP) .................................................205
Verifying the TCP/IP configuration ....................................................................................205
Changing an IP address ...................................................................................................205
To change an IP address by using HP Web Jetadmin .....................................205
To change an IP address by using the embedded Web server .......................206
To change an IP address using the control panel ............................................206
Setting the real-time clock .................................................................................................................208
Setting the date and time ..................................................................................................208
To set the date format ......................................................................................208
To set the date .................................................................................................208
To set the time format ......................................................................................208
To set the time .................................................................................................209
Setting the wake time .......................................................................................................209
To set the wake time ........................................................................................209
Setting the sleep delay .....................................................................................................210
To set the sleep delay ......................................................................................210
Configuring alerts ..............................................................................................................................211
Checking the MFP configuration .......................................................................................................212
To print an information page .............................................................................................212
Menu map .........................................................................................................................212
Configuration page ...........................................................................................................212
HP Jetdirect page .............................................................................................................213
Supplies status page ........................................................................................................214
Usage page ......................................................................................................................215
PCL or PS font list ............................................................................................................216
Upgrading the firmware .....................................................................................................................217
Determining the current level of firmware .........................................................................217
Downloading the new firmware from the HP Web site .....................................................217
Transferring the new firmware to the MFP .......................................................................217
Using FTP to upload the firmware through a browser ......................................217
To use a browser for firmware update .............................................217
Using FTP to upgrade the firmware on a network connection .........................218
xii ENWW
Page 15

To upgrade the firmware on a network connection by using
FTP ..................................................................................................218
Using HP Web Jetadmin to upgrade the firmware ...........................................219
Using MS-DOS commands to upgrade the firmware .......................................220
Using the HP Jetdirect firmware .......................................................................................220
Managing print cartridges ..................................................................................................................221
HP print cartridges ............................................................................................................221
Non-HP print cartridges ....................................................................................................221
Print cartridge authentication ............................................................................................221
HP fraud hotline ................................................................................................................221
Print cartridge storage ......................................................................................................222
Print cartridge life expectancy ...........................................................................................222
Checking the print cartridge life ........................................................................................222
Using the MFP control panel ............................................................................222
Using the embedded Web server .....................................................................222
Using HP Easy Printer Care Software .............................................................222
Using HP Web Jetadmin ..................................................................................222
Changing print cartridges ..................................................................................................223
To replace the print cartridge ...........................................................................223
Replacing supplies ............................................................................................................................227
Locating supplies ..............................................................................................................227
Supply replacement guidelines .........................................................................................227
Making room around the MFP for replacing supplies .......................................................228
Approximate replacement intervals for supplies ...............................................................228
Performing preventive maintenance ..................................................................................................229
ADF maintenance kit ........................................................................................................229
Cleaning the MFP ..............................................................................................................................230
Cleaning the outside of the MFP ......................................................................................230
Cleaning the touchscreen .................................................................................................230
To clean the scanner glass ...............................................................................................230
Cleaning the ADF delivery system ....................................................................................231
To clean the ADF delivery system ...................................................................231
To clean the ADF rollers ..................................................................................232
Cleaning the mylar strip ....................................................................................................235
To clean the mylar strip ....................................................................................235
Calibrating the scanner .....................................................................................................................237
To print the calibration target ............................................................................................237
12 Solving problems
Solving general problems ..................................................................................................................240
Troubleshooting checklist .................................................................................................240
Determining MFP problems ...............................................................................................................242
Troubleshooting information pages ...................................................................................................243
Configuration page ...........................................................................................................243
Paper path test page ........................................................................................................243
Registration page ..............................................................................................................243
Event log ...........................................................................................................................244
Control panel message types ............................................................................................................245
Status messages ..............................................................................................................245
Warning messages ...........................................................................................................245
ENWW xiii
Page 16

Error messages ................................................................................................................245
Critical error messages .....................................................................................................245
Control panel messages ....................................................................................................................246
Message listing .................................................................................................................246
Paper jams ........................................................................................................................................276
Paper jam recovery ...........................................................................................................277
To disable paper jam recovery .........................................................................277
Clearing jams ....................................................................................................................................278
Clearing jams in the right covers ......................................................................................278
Jam in Tray 1 ....................................................................................................................283
Jam in Tray 2, 3, or 4 ........................................................................................................283
Jam in the stapler/stacker .................................................................................................285
Staple jams .......................................................................................................................286
Jam in the 3-bin mailbox ...................................................................................................287
Other jams in the output accessory bridge .......................................................................290
Jam in the ADF .................................................................................................................291
Media-handling problems ..................................................................................................................293
Printer feeds multiple sheets ............................................................................................293
Printer feeds incorrect page size ......................................................................................293
Printer pulls from incorrect tray .........................................................................................294
Media does not feed automatically ...................................................................................294
Media does not feed from Tray 2, 3, or 4 ..........................................................................294
Transparencies or glossy paper will not feed ...................................................................295
Envelopes jam or will not feed in the MFP ........................................................................295
Output is curled or wrinkled ..............................................................................................296
Printer will not duplex or duplexes incorrectly ...................................................................296
Understanding MFP messages .........................................................................................................297
Using the MFP help system ..............................................................................................297
If a message persists ........................................................................................................297
Understanding accessory lights for the 3-bin mailbox and stapler/stacker .......................................298
Accessory lights ................................................................................................................298
Replacing accessories or accessory components ............................................................299
Understanding lights on the formatter ...............................................................................................300
HP Jetdirect LEDs ............................................................................................................300
Heartbeat LED ..................................................................................................................300
Fax LED ............................................................................................................................301
Color printing problems .....................................................................................................................302
Printout color error ............................................................................................................302
Incorrect shade .................................................................................................................302
Missing color .....................................................................................................................302
Cartridge error ..................................................................................................................303
Color match error ..............................................................................................................303
Correcting print quality and copy quality problems ............................................................................304
Print quality problems associated with media ...................................................................304
Overhead transparency defects ........................................................................................304
Print quality problems associated with the environment ...................................................305
Print quality problems associated with jams .....................................................................305
Print quality troubleshooting pages ...................................................................................305
Print quality troubleshooting tool .......................................................................................305
Image defect examples .....................................................................................................305
xiv ENWW
Page 17

Cleaning the scanner glass ..............................................................................................311
Calibrating the MFP ..........................................................................................................312
Repetitive defect ruler .......................................................................................................313
Solving e-mail problems ....................................................................................................................314
To validate the SMTP gateway address ...........................................................................314
To validate the LDAP gateway address ............................................................................314
Solving network connectivity problems .............................................................................................315
Troubleshooting network printing problems ......................................................................315
Verifying communication over the network .......................................................................315
To verify communication over the network .......................................................316
Troubleshooting common Macintosh problems .................................................................................317
Solving problems with Mac OS v9.x .................................................................................317
Solving problems with Mac OS X .....................................................................................319
Appendix A Working with memory and print server cards
Printer memory and fonts ..................................................................................................................324
Installing memory and fonts ..............................................................................................................325
To install DDR memory DIMMs ........................................................................................325
To install a flash memory card ..........................................................................................329
Enabling memory ..............................................................................................................333
To enable memory for Windows 98 and Me ....................................................333
To enable memory for Windows 2000 and XP .................................................334
Installing an HP Jetdirect print server card ........................................................................................335
To install an HP Jetdirect print server card .......................................................................335
Installing EIO cards ...........................................................................................................................338
To install EIO cards ..........................................................................................................338
Appendix B Supplies and accessories
Ordering parts, accessories, and supplies ........................................................................................342
Ordering directly from HP .................................................................................................342
Ordering through service or support providers .................................................................342
Ordering directly through the embedded Web server (for printers that are connected to
a network) .........................................................................................................................342
To order directly through the embedded Web server .......................................342
Part numbers .....................................................................................................................................343
Accessories ......................................................................................................................343
Print cartridges ..................................................................................................................343
Maintenance kits ...............................................................................................................343
Customer replaceable units ..............................................................................................344
Memory .............................................................................................................................344
Cables and interfaces .......................................................................................................344
Print media ........................................................................................................................344
Appendix C Service and support
Hewlett-Packard limited warranty statement .....................................................................................348
Print cartridge limited warranty statement .........................................................................................349
Fuser and transfer unit limited warranty statement ...........................................................................350
Availability of support and service .....................................................................................................351
HP maintenance agreements ............................................................................................................352
ENWW xv
Page 18

On-site service agreements ..............................................................................................352
Priority onsite service ........................................................................................................352
Next-day onsite service ....................................................................................................352
Weekly (volume) on-site service .......................................................................................352
Appendix D MFP specifications
Physical specifications ......................................................................................................................354
Electrical specifications .....................................................................................................................355
Acoustic specifications ......................................................................................................................356
Environmental specifications .............................................................................................................357
Appendix E Media specifications
Print media specifications ..................................................................................................................360
Printing and paper storage environment ...........................................................................360
Envelopes .........................................................................................................................361
Envelopes with double side seams ..................................................................361
Envelopes with adhesive strips or flaps ...........................................................362
Envelope margins ............................................................................................362
Envelope storage .............................................................................................362
Labels ...............................................................................................................................362
Label construction ............................................................................................362
Transparencies .................................................................................................................362
Print media weights and sizes ...........................................................................................................364
Supported media weights and sizes .................................................................................364
Appendix F Regulatory information
Introduction ........................................................................................................................................370
FCC regulations ................................................................................................................................371
Compliance with FCC regulations ....................................................................................371
Telecom .............................................................................................................................................372
Fax communications .........................................................................................................372
Environmental Product Stewardship program ...................................................................................373
Protecting the environment ...............................................................................................373
Ozone production .............................................................................................................373
Power consumption ..........................................................................................................373
HP LaserJet printing supplies ...........................................................................................373
Disposal of waste equipment by users in private households in the European
Union ................................................................................................................................375
Material safety data sheet .................................................................................................376
For more information ........................................................................................................376
Declaration of conformity (HP Color LaserJet 4730mfp) ...................................................................377
Country-/region-specific safety statements .......................................................................................378
Laser safety statement .....................................................................................................378
Canadian DOC statement .................................................................................................378
Japanese VCCI statement ................................................................................................378
Japanese cordset statement .............................................................................................378
Korean EMI statement ......................................................................................................379
Taiwan safety statement ...................................................................................................379
Finnish laser statement .....................................................................................................380
xvi ENWW
Page 19

Australia ............................................................................................................................380
Index.................................................................................................................................................................381
ENWW xvii
Page 20

xviii ENWW
Page 21

1 MFP basics
Congratulations on your purchase of the HP Color LaserJet 4730mfp. If you have not done so, see the
HP Color LaserJet 4730mfp Start Guide that is provided with the multifunction peripheral (MFP) for
setup instructions.
After the MFP is set up and ready to use, take a few moments to get to know the MFP. This chapter
introduces the following topics:
HP Color LaserJet 4730mfp Series configurations
●
Features and benefits of the multifunction peripheral (MFP)
●
MFP parts and accessories
●
Software
●
Software for Macintosh computers
●
Printer drivers
●
Printer drivers for Macintosh computers
●
Install checklist
●
ENWW 1
Page 22
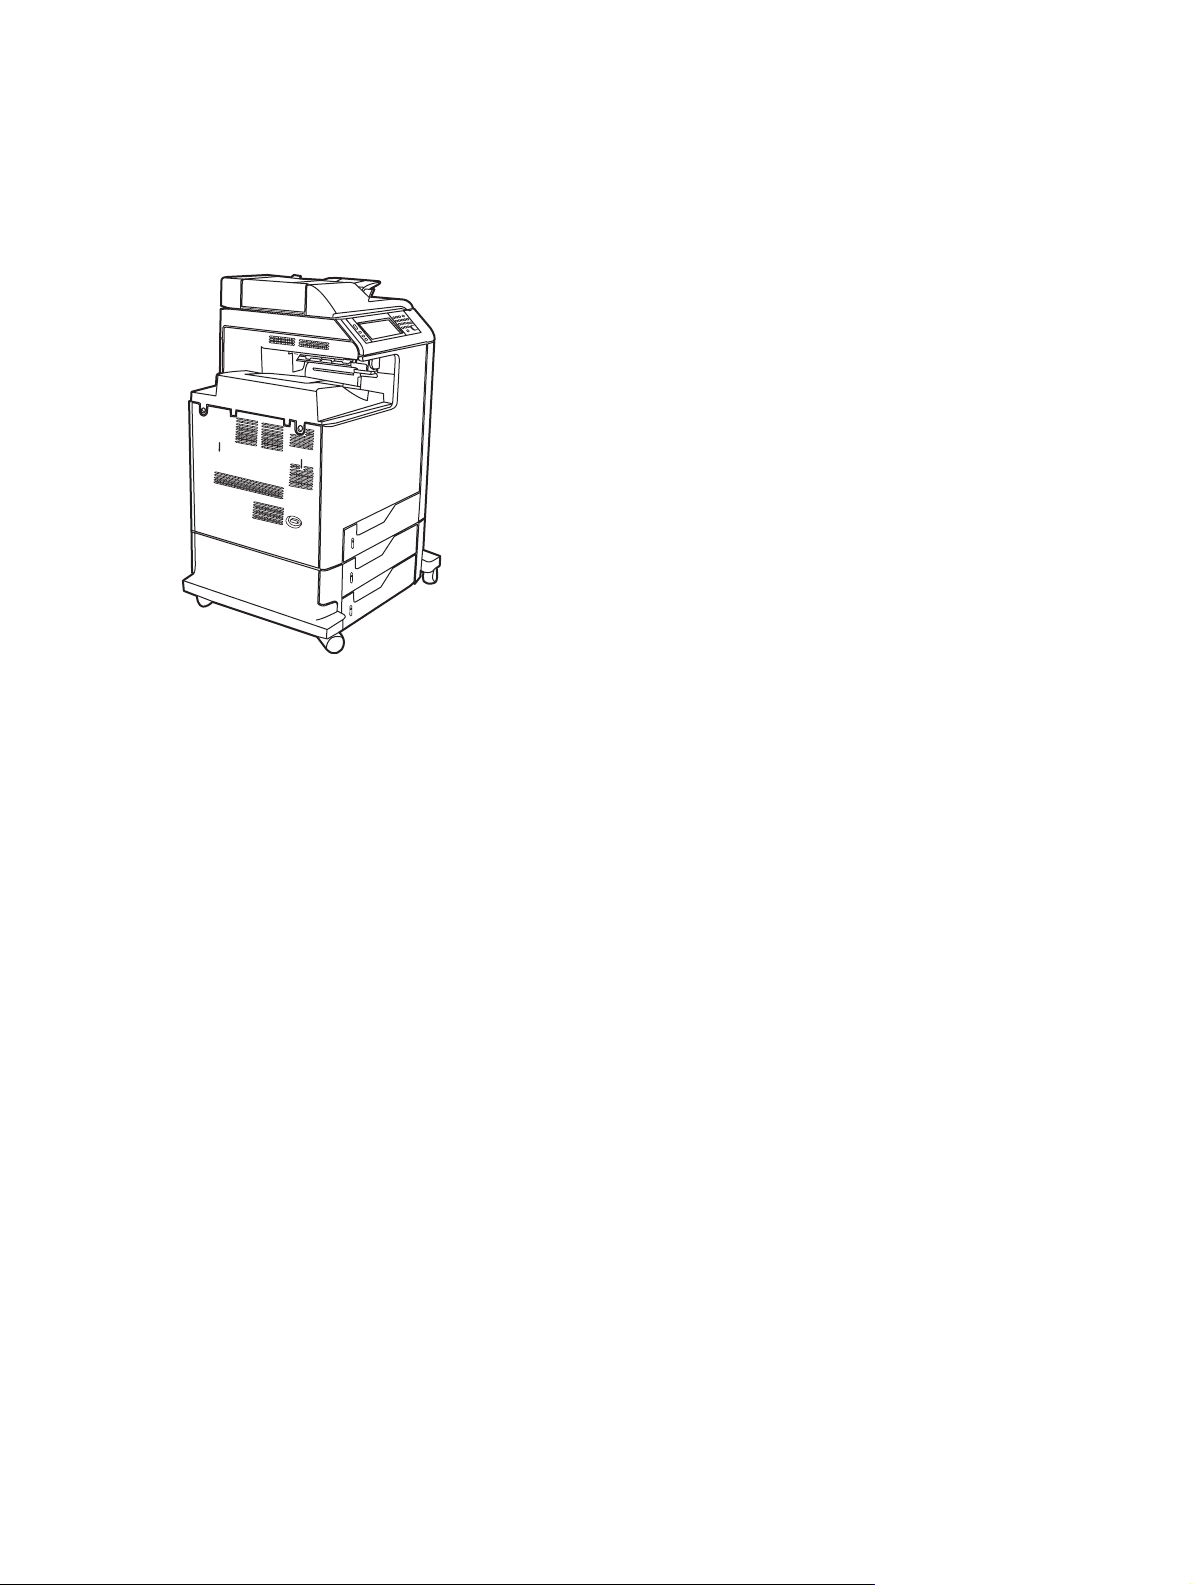
HP Color LaserJet 4730mfp Series configurations
The HP Color LaserJet 4730mfp series is available in the following configurations.
HP Color LaserJet 4730mfp (Q7517A-base model)
The HP Color LaserJet 4730mfp comes standard with the following items:
A 100-sheet multi-purpose input tray (tray 1)
●
3-500 sheet input trays
●
An automatic document feeder (ADF) that holds up to 50 pages
●
An HP Jetdirect embedded print server for connecting to a 10/100Base-TX network
●
256 megabytes (MB) synchronous dynamic random access memory (SDRAM)
●
Duplexer
●
Hard-drive
●
2 Chapter 1 MFP basics ENWW
Page 23
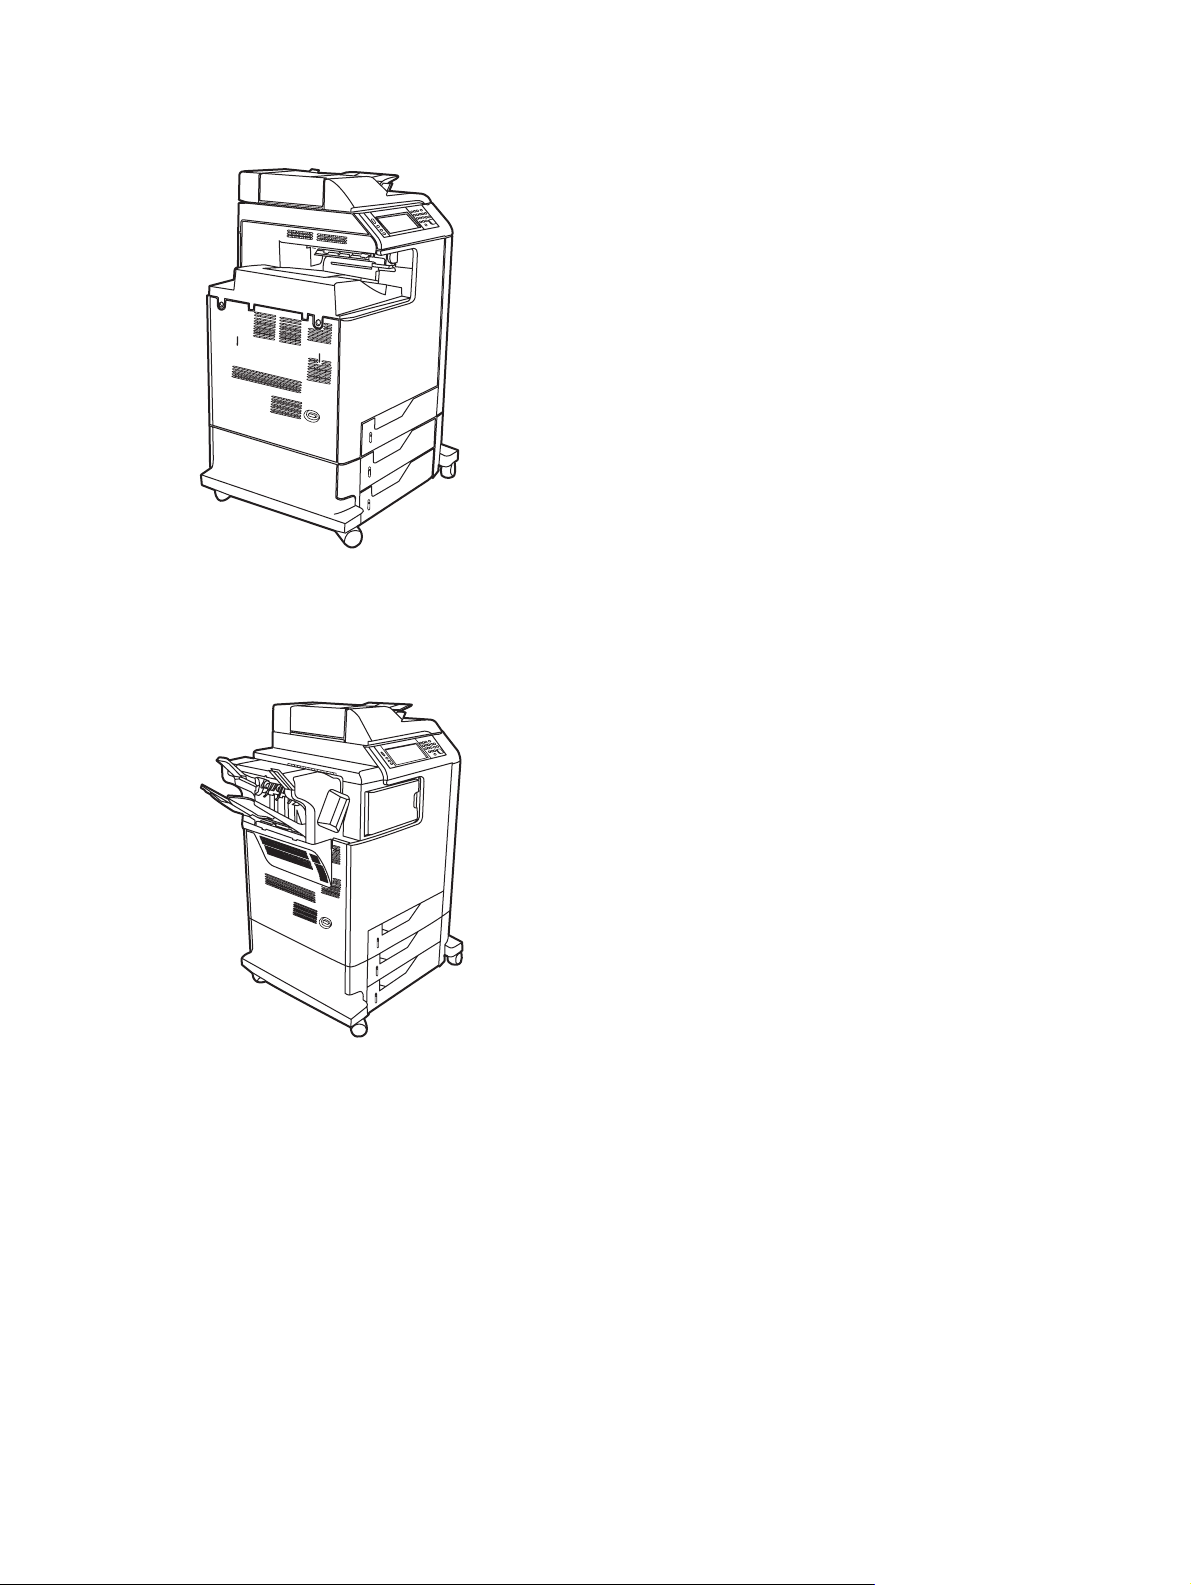
HP Color LaserJet 4730x mfp (Q7518A)
The HP Color LaserJet 4730x mfp has the same features as the base model and also includes an analog
fax accessory.
HP Color LaserJet 4730xs mfp (Q7519A)
The HP Color LaserJet 4730xs mfp has the same features as the base model and also includes the
following items:
An analog fax accessory
●
An output accessory bridge
●
A stapler/stacker accessory
●
ENWW HP Color LaserJet 4730mfp Series configurations 3
Page 24

HP Color LaserJet 4730xm mfp (Q7520A)
The HP Color LaserJet 4730xm mfp has the same features as the base model and also includes the
following items:
Output accessory bridge
●
An analog fax accessory
●
A 3-bin mailbox accessory
●
4 Chapter 1 MFP basics ENWW
Page 25

Features and benefits of the multifunction peripheral (MFP)
The HP Color LaserJet 4730mfp series is designed to be shared by a workgroup. Use the MFP to copy
and print color and black-and-white documents or to digitally send color or black-and-white documents.
The MFP is a standalone copier that does not require connection to a computer. With the optional
HP LaserJet Analog Fax Accessory 300 (included with some models), the MFP can also send and
receive faxes.
Features list
Functions
Two-sided copying (duplexing)
●
Image modification
●
Color digital sending
●
Two-sided document finishing
●
Network printing
●
Speed and throughput
31 pages per minute (ppm) when copying and printing on letter-size paper; 30 ppm when copying
●
and printing on A4-size paper
25% to 400% scalability when using the scanner glass
●
25% to 200% scalability when using the automatic document feeder (ADF)
●
Less than 10 seconds to print the first page
●
Transmit Once, Raster Image Processing (RIP) ONCE technology
●
Duty cycle of up to 85,000 pages per month
●
533 megahertz (MHz) microprocessor
●
Resolution
600 dots per inch (dpi) with Resolution Enhancement technology (REt)
●
The product features HP FastRes and HP Resolution Enhancement technology (REt) for 1200 by
●
1200 effective dpi at full engine speed.
Memory
256 megabytes (MB) of random-access memory (RAM), expandable to 512 MB by using industry
●
standard 100-pin double data rate dual inline memory modules (DDR DIMMs)
Memory Enhancement technology (MEt) that automatically compresses data to use RAM more
●
efficiently
ENWW Features and benefits of the multifunction peripheral (MFP) 5
Page 26

User interface
Graphic display on the control panel
●
An embedded Web server to gain access to support and order supplies (for network-connected
●
products)
HP Easy Printer Care software (a Web-based status and troubleshooting tool)
●
Internet-enabled supply-ordering capabilities using HP Easy Printer Care software
●
Languages and fonts
HP Printer Command Language (PCL) 6
●
HP PCL 5e for compatibility
●
Printer Management Language
●
PDF
●
XHTML
●
80 scalable TrueType typefaces
●
HP PostScript
●
®
3 emulation (PS)
Copying and sending
Modes for text, graphics, and mixed text and graphics formats
●
A job-interrupt feature (at copy boundaries)
●
Multiple pages per sheet
●
Operator attendance animations (for example, jam recovery)
●
E-mail compatibility
●
A sleep feature that saves energy
●
Automatic duplex (two-sided) scanning
●
Print cartridge (4 cartridges)
Prints up to 12,000 pages at 5% coverage
●
No-shake cartridge design
●
Authentic HP print cartridge detection
●
Automatic toner strip remover
●
6 Chapter 1 MFP basics ENWW
Page 27

Paper-handling
Input
●
Tray 1 (multipurpose tray): A multipurpose tray for paper, transparencies, labels, and
●
envelopes. Holds up to 100 sheets of paper or 20 envelopes.
Tray 2, 3, and 4: 500-sheet trays. These trays automatically detect standard paper sizes up
●
to legal and allow printing on custom-size paper.
Automatic document feeder (ADF): Holds up to 50 sheets of paper.
●
Duplex printing and copying: Provides two-sided printing and copying (printing on both
●
sides of the paper).
ADF duplex scanning: The ADF has an automatic duplexer for scanning two-sided
●
documents.
Output
●
Standard output bin: The standard output bin is located on the left side of the MFP. This bin
●
can hold up to 500 sheets of paper.
ADF output bin: The ADF output bin is underneath the ADF input tray. The bin holds up to
●
50 sheets of paper, and the MFP automatically stops when this bin is full.
Optional stapler/stacker: The stapler/stacker staples up to a 30 sheet document and stacks
●
up to 500 sheets.
Optional 3-bin mailbox: One bin stacks up to 500 sheets, and two bins stack up to
●
100 sheets each for a total capacity of 700 sheets.
Connectivity
IEEE 1284C-compliant parallel connection
●
A Foreign Interface Harness (FIH) connection (AUX) for connecting other devices
●
Local area network (LAN) connector (RJ-45) for the embedded HP Jetdirect print server
●
Optional analog fax card
●
Optional HP Digital Sending Software (DSS)
●
Optional enhanced input/output (EIO) cards
●
USB 2.0
●
ACC port (accessory port with USB host capabilities)
●
Accessory port (for connecting third-party devices)
●
Environmental features
The Sleep setting saves energy (meets ENERGY STAR
●
®
guidelines, Version 1.0).
NOTE See Protecting the environment for more information.
ENWW Features and benefits of the multifunction peripheral (MFP) 7
Page 28

Security features
Foreign Interface Harness (FIH)
●
Secure Disk Erase
●
Security lock
●
Job retention
●
DSS authentication
●
Minimum system requirements
To use the e-mail functionality, the MFP must be connected to an IP-based network that has a
simple mail transfer protocol (SMTP) server. This server can either be on the local area network
or at an outside Internet service provider (ISP). HP recommends that the MFP be located on the
same local area network (LAN) as the SMTP server. If you are using an ISP, you must connect to
the ISP by using a digital subscriber line (DSL) connection. If you are obtaining e-mail services
from an ISP, ask the ISP to provide the correct SMTP address. Dial-up connections are not
supported. If you do not have an SMTP server on your network, third-party software is available
that allows you to create an SMTP server. However, purchase and support of this software is your
responsibility.
8 Chapter 1 MFP basics ENWW
Page 29
MFP parts and accessories
Identifying parts of the MFP
Before using the MFP, familiarize yourself with the parts of the MFP.
1 ADF top cover
2 Automatic document feeder (ADF) input tray for copy/scan/fax originals
3 Control-panel status lights
4 Control-panel display with touch-screen functionality
5 Control-panel keypad
6 Right-side covers (provides access to the print cartridges and other consumables)
7 Tray 2, 3, and 4
8 Paper-level indicators
9 On/Off switch
10 Output bin
11 Scanner lock
ENWW MFP parts and accessories 9
Page 30
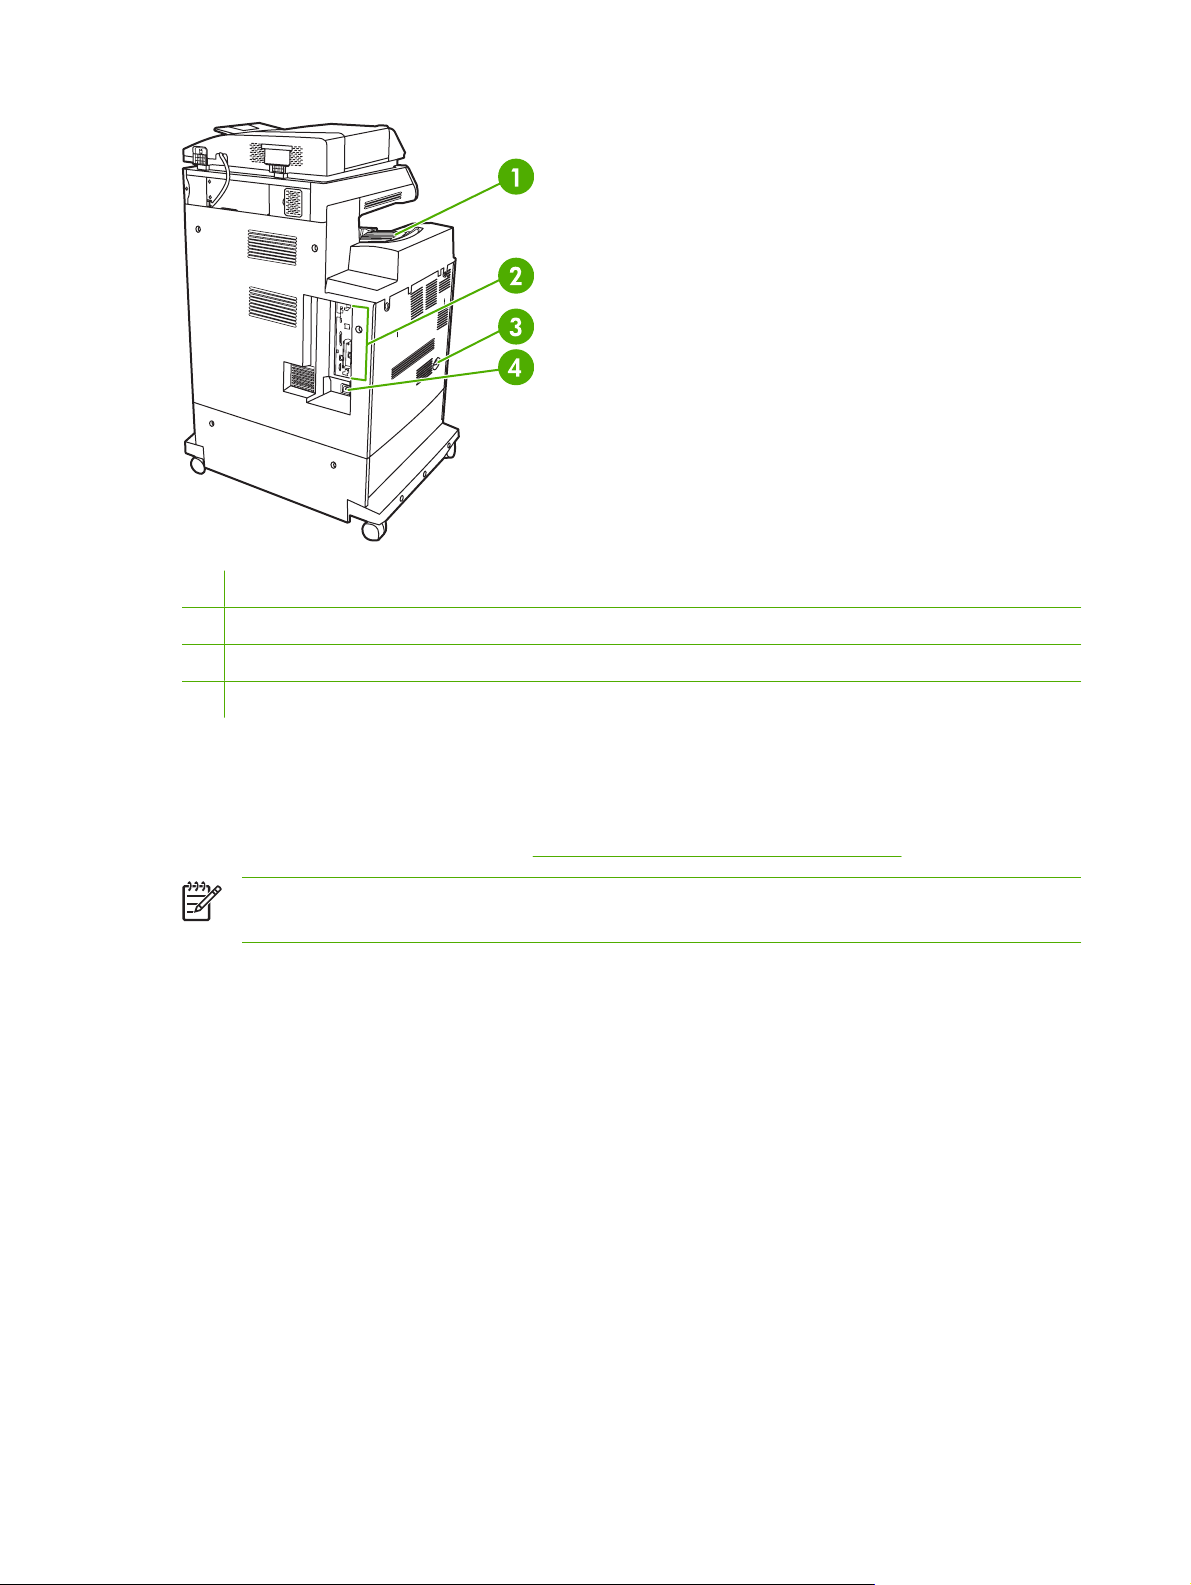
1 Output bin
2 Interface ports
3 On/off switch
4 Power connection
Accessories and supplies
You can increase the capabilities of the MFP by adding optional accessories. For information about
ordering accessories and supplies, see
NOTE Use the accessories and supplies that have been specifically designed for the MFP in
order to ensure optimum performance.
Ordering parts, accessories, and supplies.
10 Chapter 1 MFP basics ENWW
Page 31

1 Stapler/stacker (Q7521A). This accessory includes an output accessory bridge.
2 Staple cartridge (C8091A)
3 Print cartridge (4 print cartridges) (Q6460A, Q6461A, Q6462A, and Q6463A)
4 3-bin mailbox (Q7523A) This accessory includes an output accessory bridge.
5 Memory DIMMS and flash memory cards
6 HP Jetdirect print server (EIO card)
7 HP LaserJet analog fax accessory 300 (Q3701A)
Interface ports
The MFP has five ports for connecting to a computer or a network. The ports are at the left, rear corner
of the MFP.
ENWW MFP parts and accessories 11
Page 32

1 Foreign interface harness (FIH)
2 USB 2.0
3 ACC (accessory port uses host USB protocol)
4 Fax connection (for connecting to an optional analog fax accessory)
5 Parallel port
6 EIO interface expansion slot
7 Access port for Kensington lock
8 Network connection (embedded HP Jetdirect print server)
9 AUX port
Moving the MFP
Before moving the MFP, be sure to lock the scanner. The scanner lock is underneath the scanner lid,
to the left of the scanner glass.
12 Chapter 1 MFP basics ENWW
Page 33

Software
The MFP comes with helpful software, including printer drivers and optional software. For easy MFP
setup and access to the full range of MFP features, HP recommends that you install the software that
is provided.
Check the installation notes and Readme files on the MFP CD-ROM for additional software and
languages. HP software is not available in all languages.
Operating systems and MFP components
The MFP CD-ROM contains the software components and drivers for users and network administrators.
The printer drivers that are provided on the CD-ROM must be installed in order to take full advantage
of MFP features. The other programs are recommended, but are not required for operation. Check the
installation notes and Readme files on the MFP CD-ROM for more information.
The CD-ROM includes software that is designed for users and network administrators who are operating
in the following environments:
Microsoft
●
Microsoft Windows 2000, Windows XP, and Windows Server 2003
●
Apple Mac OS X version 10.2 or later
●
The most recent printer drivers for all supported operating systems are available at
®
Windows® 98 and Windows Millennium Edition (Me)
http://www.hp.com/
go/clj4730mfp_software. If you do not have access to the Internet, see the support flyer that came in
the MFP box for information about obtaining the most recent software.
The following table lists the available software for the MFP.
Software Windows 98/MeWindows 2000/
XP/Server 2003
Windows Installer x x
3
PCL 5
PCL 6 x x
PostScript emulation
HP Web Jetadmin
Macintosh Installer x
Macintosh PostScript Printer
Description (PPD) files
IBM drivers
Model scripts
1
Available only on the World Wide Web.
2
The Linux driver is available at http://hpinkjet.sourceforge.net. The Linux PPD file for all LaserJets is available at
http://linuxprinting.org.
3
Install by using the Custom Install.
1
3
1
2
x x
x x x
x x
Mac OS
x
®
UNIX
x
2
Linux
x
OS/2
NOTE You can also purchase the optional HP Digital Sending Software, which provides digital
fax capability. For more information go to
http://www.hp.com/go/digitalsending.
ENWW Software 13
Page 34

Software features
Automatic Configuration, Update Now, and Preconfiguration features are available with the MFP.
Driver Autoconfiguration
The HP LaserJet PCL 6 and PCL 5c drivers for Windows and the PS drivers for Windows 2000 and
Windows XP feature automatic discovery and driver configuration for printer accessories at the time of
installation. Some accessories that Driver Autoconfiguration supports are the duplexing unit, optional
paper trays, and dual inline memory modules (DIMMs). If the environment supports bidirectional
communication, the installer presents Driver Autoconfiguration as an installable component by default
for a Typical Installation and for a Custom Installation.
Update Now
If you have modified the configuration of the HP Color LaserJet 4730mfp series since installation, the
driver can be automatically updated with the new configuration in environments that support bidirectional
communication. Click the Update Now button to automatically reflect the new configuration in the driver.
NOTE The Update Now feature is not supported in environments where shared Windows 2000
or Windows XP clients are connected to Windows 2000 or Windows XP hosts.
HP Driver Preconfiguration
HP Driver Preconfiguration is a software architecture and set of tools that allows HP software to be
customized and distributed in managed corporate printing environments. Using HP Driver
Preconfiguration, information technology (IT) administrators can preconfigure the printing and device
defaults for HP printer drivers before installing the drivers in the network environment. For more
information, see the HP Driver Preconfiguration Support Guide, available at
clj4730mfp.
http://www.hp.com/support/
Installing the printing system software
The following sections contain instructions for installing the printing system software.
The MFP comes with printing system software and printer drivers on a CD-ROM. The printing system
software on the CD-ROM must be installed to take full advantage of the MFP features.
If you do not have access to a CD-ROM drive, you can download the printing system software from the
Internet at
You can download the latest software free of charge at http://www.hp.com/support/clj4730mfp.
Installing Windows printing system software for direct connections
This section explains how to install the printing system software for Microsoft Windows 98, Windows Me,
Windows 2000, and Windows XP.
When installing the printing software in a direct-connect environment, always install the software before
connecting the parallel or USB cable. If the parallel or USB cable was connected before the software
installation, see
http://www.hp.com/support/clj4730mfp.
NOTE Sample model scripts for UNIX® (HP-UX®, Sun Solaris) are available at
http://www.hp.com/go/unixmodelscripts. Sample model scripts for Linux networks are available
http://linuxprinting.org.
at
Installing the software after the parallel or USB cable has been connected.
14 Chapter 1 MFP basics ENWW
Page 35

Either a parallel or USB cable can be used for the direct connection. However, you cannot connect
parallel and USB cables at the same time. Use an IEEE 1284-compatible cable or a standard 2-meter
USB cable.
To install the printing system software
1. Close all software programs that are open or running.
2. Insert the MFP CD-ROM into the CD-ROM drive.
If the welcome screen does not open, start it by using the following procedure:
On the Start menu, click Run.
●
Type the following: X:\setup (where X is the letter of the CD-ROM drive).
●
Click OK.
●
3. When prompted, click Install Printer and follow the instructions on the computer screen.
4. Click Finish when the installation has completed.
5. You might need to restart the computer.
6. Print a Test Page or a page from any software program to make sure that the software is correctly
installed.
If installation fails, reinstall the software. If this fails, check the installation notes and Readme files on
the MFP CD-ROM or the flyer that came in the MFP box, or go to
clj4730mfp for help or more information.
http://www.hp.com/support/
Installing Windows printing system software for networks
The software on the MFP CD-ROM supports network installation with a Microsoft network. For network
installation on other operating systems, go to
The HP Jetdirect embedded print server in the HP Color LaserJet 4730mfp includes a 10/100 Base-TX
network port. If you need an HP Jetdirect print server with another type of network port, see
parts, accessories, and supplies, or go to http://www.hp.com/support/clj4730mfp.
The installer does not support MFP installation or MFP object creation on Novell servers. It supports
only direct-mode network installations between Windows computers and a MFP. To install your MFP
and create objects on a Novell server, use an HP utility (such as HP Web Jetadmin) or a Novell utility
(such as NWAdmin).
To install the printing system software
1. If you are installing the software on Windows 2000 or Windows XP, make sure that you have
administrator privileges.
2. Make sure that the HP Jetdirect print server is configured correctly for the network by printing a
configuration page (see
might need this address to complete network installation.
Configuration page). On the second page, locate the MFP IP address. You
http://www.hp.com/support/clj4730mfp.
Ordering
3. Close all software programs that are open or running.
4. Insert the MFP CD-ROM into the CD-ROM drive.
ENWW Software 15
Page 36

If the welcome screen does not open, start it by using the following procedure:
On the Start menu, click Run.
●
Type the following: X:\setup (where X is the letter of the CD-ROM drive).
●
Click OK.
●
5. When prompted, click Install Printer and follow the instructions on the computer screen.
6. Click Finish when installation has completed.
7. You might need to restart the computer.
8. Print a Test Page or a page from any software program to make sure that the software is correctly
installed.
If installation fails, reinstall the software. If this fails, check the installation notes and Readme files
on the MFP CD-ROM or the flyer that came in the MFP box, or go to
clj4730mfp for help or more information.
http://www.hp.com/support/
To set up a Windows computer to use the network MFP using Windows-sharing
If the computer will print directly to the MFP, you can share the MFP on the network so that other network
users can print to it.
See your Windows documentation to enable Windows-sharing. After the MFP is shared, install the MFP
software on all computers that share the MFP.
Installing the software after the parallel or USB cable has been connected
If you have already connected a parallel or USB cable to a Windows computer, the New Hardware
Found dialog box appears when you turn on the computer.
To install the software for Windows 98 or Windows Me
1. In the New Hardware Found dialog box, click Search CD-ROM drive.
2. Click Next.
3. Follow the instructions on the computer screen.
4. Print a Test Page or a page from any software program to make sure that the software is correctly
installed.
If installation fails, reinstall the software. If this fails, check the installation notes and readme files
on the MFP CD-ROM or the flyer that came in the MFP box, or go to
clj4730mfp for help or more information.
To install the software for Windows 2000 or Windows XP
1. In the New Hardware Found dialog box, click Search.
2. On the Locate Driver Files screen, select the Specify a Location check box, clear all other check
boxes, and then click Next.
http://www.hp.com/support/
3. Type the letter for the root directory. For example, X:\ (where "X:\" is the letter of the root directory
on the CD-ROM drive).
16 Chapter 1 MFP basics ENWW
Page 37

4. Click Next.
5. Follow the instructions on the computer screen.
6. Click Finish when installation has completed.
7. Select a language and follow the instructions on the computer screen.
8. Print a Test Page or a page from any software program to make sure that the software is correctly
installed.
If installation fails, reinstall the software. If this fails, check the installation notes and readme files
on the MFP CD-ROM or the flyer that came in the MFP box, or go to
clj4730mfp for help or more information.
http://www.hp.com/support/
Uninstalling the MFP software
This section explains how to uninstall the printing system software.
To remove software from Windows operating systems
Use the Uninstaller in the HP Color LaserJet 4730mfp/Tools program group to select and remove any
or all of the Windows HP printing system components.
1. Click Start and then click Programs.
2. Point to HP Color LaserJet 4730mfp.
3. Click Uninstaller.
4. Click Yes.
5. Follow the instructions on the computer screen to complete the uninstallation.
Software for networks
Summary of HP networking solutions
For a summary of available HP network installation and configuration software solutions, see the
HP Jetdirect Print Server Administrator’s Guide. You can find this guide on the CD-ROM included with
the MFP.
HP Web Jetadmin
HP Web Jetadmin allows you to manage HP Jetdirect-connected printers within your intranet using a
browser. HP Web Jetadmin is a browser-based management tool, and should be installed only on a
single network administration server. It can be installed and run on these systems:
Fedora Core and SuSE Linux
●
Windows 2000 Professional, Server, and Advanced Server
●
Windows Server 2003
●
Windows XP Professional Service Pack 1
●
When installed on a host server, HP Web Jetadmin can be accessed by any client through a supported
web browser, such as Microsoft Internet Explorer 5.5 and 6.0 or Netscape Navigator 7.0.
ENWW Software 17
Page 38

HP Web Jetadmin has the following features:
Task-oriented user interface provides configurable views, saving network managers significant
●
time.
Customizable user profiles let network administrators include only the function viewed or used.
●
Instant e-mail notification of hardware failure, low supplies, and other MFP problems now route to
●
different people.
Remote installation and management from anywhere using only a standard Web browser.
●
Advanced autodiscovery locates peripherals on the network, without manually entering each printer
●
into a database.
Simple integration into enterprise management packages.
●
Ability to quickly find peripherals based on parameters such as IP address, color capability, and
●
model name.
Ability to easily organize peripherals into logical groups, with virtual office maps for easy navigation.
●
Ability to manage and configure multiple printers at once.
●
To download a current version of HP Web Jetadmin and to see the latest list of supported host systems,
visit HP Customer Care Online at
http://www.hp.com/go/webjetadmin.
UNIX
The HP Jetdirect Printer Installer for UNIX is a simple printer installation utility for HP-UX and Solaris
networks. It is available for download from HP Customer Care Online at
net_printing.
http://www.hp.com/support/
Utilities
MFP utilities
The HP Color LaserJet 4730mfp series MFP is equipped with several utilities, which make it easy to
monitor and manage the MFP on a network.
HP Easy Printer Care Software
The HP Easy Printer Care Software is a software program that you can use for the following tasks:
Viewing color usage information
●
Checking the printer status
●
Checking the supplies status
●
Setting up alerts
●
Viewing printer documentation
●
Gaining access to troubleshooting and maintenance tools
●
You can view the HP Easy Printer Care Software when the printer is directly connected to your computer
or when it is connected to a network. Perform a complete software installation in order to use the HP
Easy Printer Care Software. For more information, see
18 Chapter 1 MFP basics ENWW
http://www.hp.com/go/easyprintercare.
Page 39

Embedded Web server
This MFP is equipped with an embedded Web server, which allows access to information about MFP
and network activities. A Web server provides an environment in which web programs may run, much
in the same way that an operating system, such as Windows, provides an environment for programs to
run on your computer. The output from these programs can then be displayed by a Web browser, such
as Microsoft Internet Explorer or Netscape Navigator.
When a Web server is "embedded", that means it resides on a hardware device (such as a printer) or
in firmware, rather than as software that is loaded on a network server.
The advantage of an embedded Web server is that it provides an interface to the MFP that anyone can
access with a network-connected computer or a standard Web browser. There is no special software
to install or configure. For more information about the HP embedded Web server, see the Embedded
Web Server User Guide. You can find this guide on the CD-ROM included with the MFP.
Features
The HP embedded Web server allows you to view MFP and network card status and manage printing
functions from your computer. With the HP embedded Web server, you can do the following:
View MFP status information.
●
Determine the remaining life on all supplies and order new ones.
●
View and change tray configurations.
●
View and change the MFP control panel menu configuration.
●
View and print internal pages.
●
Receive notification of MFP and supplies events.
●
Add or customize links to other Web sites.
●
Select the language in which to display the embedded Web server pages.
●
View and change network configuration.
●
For a complete explanation of the features and functionality of the embedded Web server, see
the embedded Web server.
Using
ENWW Software 19
Page 40

Other components and utilities
Several software applications are available for Windows and Mac OS users, as well as for network
administrators.
Windows Mac OS Network administrator
Software installer — automates the
●
printing system installation
Online Web registration
●
PostScript Printer Description files
●
(PPDs) — for use with the Apple
PostScript drivers that comes with
the Mac OS
HP LaserJet Utility (available from
●
the Internet) — a printer
management utility for Mac OS
users
HP Web Jetadmin — a browser-
●
based system management tool.
http://www.hp.com/go/
See
webjetadmin for the latest HP Web
Jetadmin software
HP Jetdirect Printer Installer for
●
UNIX — available for download
http://www.hp.com/support/
from
net_printing
20 Chapter 1 MFP basics ENWW
Page 41

Software for Macintosh computers
The HP installer provides PostScript® Printer Description (PPD) files, Printer Dialog Extensions (PDEs),
and the HP Printer Utility for use with Macintosh computers.
If both the printer and the Macintosh computer are connected to a network, use the printer embedded
Web server (EWS) to configure the printer. For more information, see
Installing Macintosh printing system software for networks
This section describes how to install Macintosh printing system software. The printing system software
supports Mac OS v9.1 and later and Mac OS X v10.2 and later.
The printing system software includes the following components:
PostScript Printer Description (PPD) files
●
The PPDs, in combination with the Apple PostScript printer drivers, provide access to printer
features. An installation program for the PPDs and other software is provided on the compact disc
(CD) that came with the printer. Use the Apple PostScript printer driver that comes with the
computer.
HP Printer Utility
●
The HP Printer Utility provides access to features that are not available in the printer driver. Use
the illustrated screens to select printer features and complete the following tasks with the printer:
Using the embedded Web server.
Name the printer.
●
Assign the printer to a zone on the network.
●
Assign an internet protocol (IP) address to the printer.
●
Download files and fonts.
●
Configure and set the printer for IP or AppleTalk printing.
●
You can use the HP Printer Utility when your printer uses a universal serial bus (USB) or is
connected to a TCP/IP-based network.
NOTE The HP Printer Utility is supported for Mac OS X v10.2 or later.
For more information about using the HP Printer Utility, see Using the HP Printer Utility for Macintosh.
To install printer drivers for Mac OS v9.1 and later
1. Connect the network cable between the HP Jetdirect print server and a network port.
2. Insert the CD into the CD-ROM drive. The CD menu runs automatically. If the CD menu does not
run automatically, double-click the CD icon on the desktop.
3. Double-click the Installer icon in the HP LaserJet Installer folder.
4. Follow the instructions on the computer screen.
5. On the computer hard drive, open Applications, open Utilities, and then open Desktop Printer
Utility.
ENWW Software for Macintosh computers 21
Page 42

6. Double-click Printer (AppleTalk).
7. Next to AppleTalk Printer Selection, click Change.
8. Select the printer, click Auto Setup, and then click Create.
NOTE The icon on the desktop looks generic. All of the print panels appear in the print dialog
box with each software program.
To install printer drivers for Mac OS X v10.2 and later
1. Connect the network cable between the HP Jetdirect print server and a network port.
2. Insert the CD into the CD-ROM drive.
The CD menu runs automatically. If the CD menu does not run automatically, double-click the CD
icon on the desktop.
3. Double-click the Installer icon in the HP LaserJet Installer folder.
4. Follow the instructions on the computer screen.
5. On the computer hard drive, open Applications, open Utilities, and then open Print Center or
Printer Setup Utility.
NOTE If you are using Mac OS X v10.4, then the Printer Setup Utility has replaced
the Print Center.
6. Click Add Printer.
7. Select Rendezvous as the connection type.
8. Select your printer from the list.
9. Click Add Printer.
10. Close the Print Center or the Printer Setup Utility by clicking the close button in the upper-left corner.
Installing Macintosh printing system software for direct connections (USB)
NOTE Macintosh computers do not support parallel port connections.
This section explains how to install the printing system software for Mac OS v9.1 and later and
Mac OS X v10.2 and later.
The Apple PostScript driver must be installed in order to use the PPD files. Use the Apple PostScript
driver that came with your Macintosh computer.
22 Chapter 1 MFP basics ENWW
Page 43

To install the printing system software
1. Connect a USB cable between the USB port on the printer and the USB port on the computer. Use
a standard 2-meter (6.56-foot) USB cable.
2. Insert the printer CD into the CD-ROM drive and run the installer.
The CD menu runs automatically. If the CD menu does not run automatically, double-click the CD
icon on the desktop.
3. Double-click the Installer icon in the HP LaserJet Installer folder.
4. Follow the instructions on the computer screen.
5. For Mac OS v9.1 and later:
a. On the computer hard drive, open Applications, open Utilities, and then open Print Center.
b. Double-click Printer (USB), and then click OK.
c. Next to USB Printer Selection, click Change.
d. Select the printer, and then click OK.
e. Next to Postscript Printer Description (PPD) File, click Auto Setup, and then click Create.
f. On the Printing menu, click Set Default Printer.
For Mac OS X v10.2 and later: USB queues are created automatically when the printer is attached
to the computer. However, the queue will use a generic PPD if the installer has not been run before
the USB cable is connected. To change the queue PPD, open the Print Center or Printer Setup
Utility, select the correct printer queue, and then click Show Info to open the Printer Info dialog
box. In the pop-up menu, select Printer Model, and then, in the pop-up menu in which Generic is
selected, select the correct PPD for the printer.
6. Print a test page or a page from any software program to make sure that the software is correctly
installed.
If installation fails, reinstall the software. If this fails, see the installation notes or late-breaking
readme files on the printer CD or the flyer that came in the printer box, or go to
support/clj4700 for help or more information.
NOTE The icon on the Mac OS v9.x desktop looks generic. All of the print panels appear in the
Print dialog box with each software program.
http://www.hp.com/
To remove software from Macintosh operating systems
To remove the software from a Macintosh computer, drag the PPD files to the trash can.
ENWW Software for Macintosh computers 23
Page 44

Printer drivers
The product comes with software that allows the computer to communicate with the product (by using
a printer language). This software is called a printer driver. Printer drivers provide access to product
features, such as printing on custom-sized paper, resizing documents, and inserting watermarks.
Supported printer drivers
The following printer drivers are provided for the product. If the printer driver that you want is not on the
product CD-ROM or is not available on
the program that you are using, and request a driver for the product.
NOTE The most recent drivers are available at http://www.hp.com. Depending on the
configuration of Windows-based computers, the installation program for the product software
automatically checks the computer for Internet access in order to obtain the latest drivers.
http://www.hp.com, contact the manufacturer or distributor of
Operating system
Microsoft Windows 98
Windows Millennium (Me)
Windows 2000
Windows XP
Windows Server 2003
Mac OS 9.1 or later
Mac OS 10.2 or later
1
Not all product features are available from all drivers or operating systems. See the context-sensitive help in the printer driver
for available features.
2
PostScript (PS) Printer Description files (PPDs)
1
PCL 6 printer
driver
X
X
X
X
X
PCL 5 printer
driver
X
X
X
X
X
PS printer driver PPD2 printer
X
X
X
X
X
X
X
driver
X
X
Additional drivers
The following drivers are not included on the CD-ROM, but are available from the Internet.
OS/2 PCL printer driver
●
OS/2 PS printer driver.
●
UNIX model scripts.
●
Linux drivers.
●
HP OpenVMS drivers.
●
NOTE The OS/2 drivers are available from IBM.
You can obtain Model Scripts for UNIX® and Linux by downloading them from the Internet or by
requesting them from an HP-authorized service or support provider. For Linux support see
www.hp.com/
go/linux. For UNIX support see www.hp.com/go/jetdirectunix_software.
24 Chapter 1 MFP basics ENWW
Page 45

Select the correct printer driver
Select a printer driver based on the operating system that you are using and the way that you use the
product. See the printer-driver Help for the features that are available. For information about gaining
access to the printer-driver Help, see Printer-driver Help.
The PCL 6 printer driver can provide the best overall performance and access to your printer
●
features.
The PCL 5 printer driver is recommended for general office monochrome and color printing.
●
Use the PostScript (PS) driver if you are printing primarily from PostScript-based programs such
●
as Adobe PhotoShop
®
and CorelDRAW®, for compatibility with PostScript Level 3 needs, or for PS
flash font support.
NOTE The product automatically switches between PS and PCL printer languages.
Printer-driver Help (Windows)
Printer-driver Help is separate from program Help. The printer-driver help provides explanations for the
buttons, checkboxes, and drop-down lists that are in the printer driver. It also includes instructions for
performing common printing tasks, such as printing on both sides, printing multiple pages on one sheet,
and printing the first page or covers on different paper.
Activate the printer-driver Help screens in one of the following ways:
Click the Help button.
●
Press the F1 key on the computer keyboard.
●
Click the question-mark symbol in the upper-right corner of the printer driver.
●
Right-click on any item in the driver, and then click What's This?.
●
Gaining access to the printer drivers
Use one of the following methods to open the printer drivers from your computer:
Operating System To change the settings for all
Windows 98 and
Windows Milennium
(Me)
print jobs until the software
program is closed
1. On the File menu in the
software program, click
Print.
2. Select the HP Color
LaserJet 4730mfp, and
then click Properties.
The steps can vary; this
procedure is most common.
To change the print job default
settings (for example, turn on
Print on Both Sides by default)
1. Click Start, click Settings,
and then click Printers.
2. Right-click the HP Color
LaserJet 4730mfp icon, and
then select Properties
(Windows 98 and Me) or
Document Defaults
(Windows NT 4.0).
To change the configuration
settings (for example, add a
tray or enable/disable Manual
Duplexing)
1. Click Start, click Settings,
2. Right-click the HP Color
3. Click the Configure tab.
and then click Printers.
LaserJet 4730mfp icon, and
then select Properties.
ENWW Printer drivers 25
Page 46

Operating System To change the settings for all
print jobs until the software
program is closed
To change the print job default
settings (for example, turn on
Print on Both Sides by default)
To change the configuration
settings (for example, add a
tray or enable/disable Manual
Duplexing)
Windows 2000, XP,
and Server 2003
Mac OS 9.1 or later 1. On the File menu, click
Mac OS 10.2 1. On the File menu, click
1. On the File menu in the
software program, click
Print.
2. Select the HP Color
LaserJet 4730mfp, and
then click Properties or
Preferences.
The steps can vary; this
procedure is most common.
Print.
2. Change the settings that
you want on the various
pop-up menus.
Print.
2. Change the settings that
you want on the various
pop-up menus.
1. Click Start, click Settings,
and then click Printers or
Printers and Faxes.
2. Right-click the HP Color
LaserJet 4730mfp icon, and
then select Printing
Preferences.
1. On the File menu, click
Print.
2. As you change settings on
the pop-up menu, click
Save Settings.
1. On the File menu, click
Print.
2. Change the settings that
you want on the various
pop-up menus.
3. On the Presets pop-up
menu, click Save as and
type a name for the preset.
1. Click Start, click Settings,
and then click Printers or
Printers and Faxes.
2. Right-click the HP Color
LaserJet 4730mfp icon, and
then select Properties.
3. Click the Device Settings
tab.
1. Click the desktop printer
icon.
2. From the Printing menu,
click Change Setup.
1. In the Finder, on the Go
menu, click Applications.
2. Open Utilities, and then
open Print Center.
3. Click on the print queue.
4. On the Printers menu, click
Show Info.
Mac OS 10.3 1. On the File menu, click
Print.
2. Change the settings that
you want on the various
pop-up menus.
These settings are saved in the
Presets menu. To use the new
settings, you must select the
saved preset option every time
you open a program and print.
1. On the File menu, click
Print.
2. Change the settings that
you want on the various
pop-up menus.
3. On the Presets pop-up
menu, click Save as and
type a name for the preset.
These settings are saved in the
Presets menu. To use the new
settings, you must select the
saved preset option every time
you open a program and print.
5. Click the Installable
Options menu.
NOTE Configuration
settings might not be
available in Classic
mode.
1. Open Printer Setup Utility
by selecting the hard drive,
clicking Applications,
clicking Utilities, then
double-clicking Printer
Setup Utility.
2. Click on the print queue.
3. On the Printers menu, click
Show Info.
4. Click the Installable
Options menu.
26 Chapter 1 MFP basics ENWW
Page 47

Printer drivers for Macintosh computers
The printer comes with printer-driver software that uses a printer language to communicate with the
printer. Printer drivers provide access to printer features, such as printing on custom-sized paper,
resizing documents, and inserting watermarks.
Supported printer drivers
A Macintosh printer driver and the necessary PPD files are included with the printer. If the printer driver
that you want is not on the printer CD, check the installation notes and the late-breaking readme files
to see if the printer driver is supported. If it is not supported, contact the manufacturer or distributor of
the software program that you are using, and request a driver for the printer.
NOTE The most recent drivers are available at www.hp.com.
Gaining access to the printer drivers
Use one of the following methods to open the printer drivers from your computer.
Operating System To change the settings for all
print jobs until the software
program is closed
Mac OS v9.1 or later 1. On the File menu, click
Print.
2. Change any settings that
you want to on the various
pop-up menus.
To change the print job default
settings (for example, turn on
Print on Both Sides by default)
1. On the File menu, click
Print.
2. As you change settings on
the pop-up menu, click
Save Settings.
To change the configuration
settings (for example, add a
physical option such as a tray,
or turn on or off a driver
feature such as Allow Manual
Duplexing)
1. Click the desktop printer
icon.
2. From the Printing menu,
click Change Setup.
ENWW Printer drivers for Macintosh computers 27
Page 48

Operating System To change the settings for all
print jobs until the software
program is closed
To change the print job default
settings (for example, turn on
Print on Both Sides by default)
To change the configuration
settings (for example, add a
physical option such as a tray,
or turn on or off a driver
feature such as Allow Manual
Duplexing)
Mac OS X v10.2 1. On the File menu, click
Print.
2. Change any settings that
you want to on the various
pop-up menus.
Mac OS X v10.3 1. On the File menu, click
Print.
2. Change any settings that
you want to on the various
pop-up menus.
1. On the File menu, click
Print.
2. Change the settings that
you want on the various
pop-up menus, and then,
on the Presets pop-up
menu, click Save as and
type a name for the preset.
These settings are saved in the
Presets menu. To use the new
settings, you must select the
saved preset option every time
you open a program and print.
1. In the Finder, on the Go
menu, click Applications.
2. Open Utilities, and then
open Print Center.
3. Click on the print queue.
4. On the Printers menu, click
Show Info.
5. Click the Installable
Options menu.
NOTE Configuration
settings might not be
available in Classic
mode.
1. Open Printer Setup Utility
by selecting the hard drive,
clicking Applications,
clicking Utilities, and then
double-clicking Printer
Setup Utility.
2. Click on the print queue.
3. On the Printers menu, click
Show Info.
4. Click the Installable
Options menu.
28 Chapter 1 MFP basics ENWW
Page 49

Install checklist
The following table is an installation checklist for the HP Color LaserJet 4730mfp series.
Table 1-1 HP Color LaserJet 4730mfp
Item Details
Verify that the MFP is connected to an adequate
power source.
Verify that MFP resides in an adequate space. Adequate space so that the MFP may be
Verify that surface has adequate, level support. Ensure the MFP is on a level and stable surface.
Verify that all orange tape and packaging
materials have been removed.
Verify that the toner cartridges and paper have
been installed in the MFP.
Clean the scanner glass before unlocking the
scanner. Wipe the glass gently with a clean,
slightly damp lint-free cloth.
Verify the scanner shipping lock has been moved
to the unlocked position.
Verify the correct language and date/time are set. See details in the HP Color LaserJet 4730mfp
Configure the e-mail gateways. Press Menu, scroll to and touch CONFIGURE
A minimum of 10A (110V) or 5A (220V) circuit
required. Do not use a power strip. Any devices
attached to the same power source can lead to
intermittent problems.
accessed from all sides. Tight space makes the
system difficult to access for jam clearing and
service.
Ensure wheel locks are engaged.
See details in the HP Color LaserJet 4730mfp
series, Getting Started Guide.
Use known good quality paper.
For more information, see To clean the scanner
glass. Also see the HP Color LaserJet 4730mfp
series, Getting Started Guide.
See details in the HP Color LaserJet 4730mfp
series, Getting Started Guide.
series, Getting Started Guide.
DEVICE, SENDING, E-MAIL, and FIND SEND
GATEWAYS. If auto-discovery does not find the
e-mail gateways, obtain the addresses from your
network administrator and manually configure
these on the MFP.
If the fax accessory is installed, ensure it is
Print the configuration pages. Press Menu, press INFORMATION, and then
On the configuration page printouts, verify the
properly configured.
following:
LDAP gateway address displays.
●
SMTP gateway address displays.
●
All optional devices display (for example,
●
the stapler/stacker or the 3-bin mailbox).
Press Menu, scroll to and touch FAX, and then
FAX SETUP SETTINGS. Fill in the date/time,
location and fax header information. See details
in the HP LaserJet Analog Fax Accessory 300
User Guide.
press PRINT CONFIGURATION.
The HP Color LaserJet 4730mfp Information &
Training CD provides detailed information on
how to read the configuration page.
ENWW Install checklist 29
Page 50

Table 1-1 HP Color LaserJet 4730mfp (continued)
Item Details
If the fax accessory is installed, the modem
●
status reads Operational/Enabled.
On the Embedded JetDirect Page, verify
●
that the status reads I/O Card Ready and
that you have a valid IP address.
Verify you can copy from the copier glass of the
MFP.
Verify you can copy from the Automatic
Document Feeder (ADF).
Verify you can send a fax from the MFP. Place document face up in the ADF and use the
Verify you can send an e-mail. Place document face up in the ADF, use keypad
Verify you can print to the MFP. After loading the printing system software on a
Verify the date and time are set. The MFP will not print until the date and time have
Verify that all users have access to the User
Training.
Place configuration page face down on copier
glass and press Start.
Place configuration page face up in ADF and
press Start.
key pad to send to a known functioning fax
number.
to enter e-mail address (LDAP must be
configured for this to function).
networked computer, print a test page from the
driver.
been set. See
information.
http://www.hp.com/go/usemymfp
Setting the real-time clock for more
30 Chapter 1 MFP basics ENWW
Page 51

2 Using the control panel
ENWW 31
Page 52

Control-panel layout
The control panel includes a touchscreen graphical display, job-control buttons, a numeric keypad, and
three light-emitting diode (LED) status lights.
1 Touchscreen graphical display
2 Numeric keypad
3 Sleep button
4 Menu button
5 Status button
6 Stop button
7 Reset button
8 Start button
9 Attention light
10 Data light
11 Ready light
12 Display contrast adjustment
32 Chapter 2 Using the control panel ENWW
Page 53

Control-panel features
Features/buttons Function
Reset Resets the job settings to factory or user-defined default
Stop Cancels the active job.
Provides access to What is This?, Show Me How, and HELP
FOR STATUS Help. This function is embedded in the
touchscreen menus.
values.
Start Begins a copy job, starts digital sending, or continues a job that
Numeric keypad Allows you to type numeric values for number of copies
Sleep If the MFP is inactive for a long period of time, it automatically
Status Opens the SUPPLIES STATUS menu. From this menu, you
Menu Opens the MFP menus.
has been interrupted.
required and other numeric values.
enters a sleep mode. To place the MFP into sleep mode or to
reactivate the MFP, press the Sleep button.
can retrieve the status of the print cartridges, the fuser, and the
transfer unit.
ENWW Control-panel features 33
Page 54

Home-screen navigation
Use the following control-panel elements in the graphical display to gain access to MFP features.
1 Touch this to use the copy screen. For more information, see Copy-screen navigation.
2 Touch this to use the e-mail screen. For more information, see e-mail screen navigation.
3 Touch this to use the fax screen. For more information, see Faxing and see the HP LaserJet Analog Fax Accessory 300
User Guide.
4 Rotate this dial to increase or decrease screen brightness.
5 The Ready light indicates that the MFP is ready.
6 The Data light indicates that the MFP is receiving data.
7 The Attention light indicates that the MFP has a problem and requires user intervention.
NOTE If installing the optional HP Digital Sending Software (DSS), additional fields appear on
the control-panel display. Scroll down to see all the fields.
34 Chapter 2 Using the control panel ENWW
Page 55

Help system
At any time, you can gain access to the help system on the touchscreen of the graphical display by
touching
What is This? Help
The MFP provides information about any topic on the touchscreen of the graphical display.
.
On the top level screen, touch
pop-up dialog box opens and displays information about the item you touched. After reading the
information, touch any other area on the screen to remove the What is This? pop-up dialog box.
On other levels of the touchscreen, you can gain access to the Help system by touching
which is located in the upper-left corner of each screen.
(Help button), and then touch What is This?. After touching an item, a
(Help button),
Show Me How Help
The Show Me How Help contains information about how to use the MFP features.
1. On the graphical touchscreen display on the control panel, touch
2. Touch Show Me How. Choose a topic from the What is This? screen by touching an item. You
can use the scroll bar to display more topics. After touching an item, an instruction sheet will print.
3. Touch OK to go back to the main window.
Show Me How also appears in a What is This? pop-up dialog box if the item that you select is a function
that includes instructions. For example, if you touch What is This? Help, and then touch mopies, you
see a Show Me How button in the pop-up dialog box. Touch the Show Me How button for information
about how to enhance your copies.
(Help button).
ENWW Help system 35
Page 56

Menu map
To see the current settings for the menus and items that are available in the control panel, print a controlpanel menu map:
1. Press Menu.
2. Touch INFORMATION.
3. Touch PRINT MENU MAP.
Many of these values can be overridden from the driver or program. You might want to store the menu
map near the MFP for reference.
The content of the menu map varies, depending on the options currently installed in the MFP. For a
complete list of control-panel items and possible values, see the sections for each menu in this chapter.
36 Chapter 2 Using the control panel ENWW
Page 57

Retrieve job menu
The Retrieve job menu contains options for retrieving proof and hold jobs, private jobs, quick copy job,
and stored jobs, The following table displays the options available in the Retrieve job menu.
Item Values Explanation
USER JOB Allows you to select the job to be
retrieved. After selecting the job, the
PRINT and DELETE options display.
Select PRINT to enter the number of
copies. Select DELETE to delete the job.
If you are retrieving a secured job, both
the PRINT and DELETE options contain
a dialog box where you must enter the
PIN number.
NOTE If no private, stored, quick copy, or proof-and-hold jobs are stored on the MFP hard disk
or in RAM memory, the message NO STORED JOBS appears when the menu is selected.
1. A list of user names appears on the control-panel display.
2. Press Menu.
3. Touch RETRIEVE JOB.
4. Touch a user name, and then a list of stored jobs for that user appears.
5.
Touch a job name, and then print or delete the job. If a job requires a PIN to print,
(lock symbol)
appears next to the PRINT command and a PIN must be provided. If a job requires a PIN to delete,
(lock symbol) appears next to the DELETE command and a PIN must be provided.
6. If you touch PRINT, the MFP prompts for the number of copies to print (1 to 32,000).
ENWW Retrieve job menu 37
Page 58

Information menu
To print an information page, scroll to and touch the information page(s) that you want.
Item Explanation
PRINT MENU MAP Generates a menu map that shows layout and current settings
PRINT CONFIGURATION Generates a page detailing the current configuration of the
of the control menu items.
The MFP will return to the Ready state when the page is
completed.
MFP.
The MFP will return to the online Ready state when the page
is completed.
PRINT SUPPLIES STATUS PAGE Generates a page that shows the number of pages remaining
SUPPLIES STATUS This page does not print. It displays status only.
PRINT USAGE PAGE Generates a page that contains information that could be used
PRINT DEMO Generates a demonstration page.
PRINT RGB SAMPLES Generates a page that displays RGB colors.
PRINT CMYK SAMPLES Generates a page that displays CMYK colors.
PRINT FILE DIRECTORY Generates a directory page containing information for all
for each supply in the MFP.
The MFP will return to the online Ready state when the page
is completed.
for cost accounting.
The MFP will return to the online Ready state when the page
is completed.
The MFP will return to the online Ready state when the page
is completed.
The MFP will return to the online Ready state when the page
is completed.
The MFP will return to the online Ready state when the page
is completed.
installed mass storage devices.
The MFP will return to the online Ready state when the page
is completed.
PRINT PCL FONT LIST Generates a typeface list of all PCL fonts available on the MFP.
The MFP will return to the online Ready state when the page
is completed.
PRINT PS FONT LIST Generates a typeface list of all PS fonts available on the MFP.
The MFP will return to the online Ready state when the page
is completed.
38 Chapter 2 Using the control panel ENWW
Page 59

Fax menu
This menu will appear only if the HP LaserJet analog fax accessory 300 is installed. For information
about the Fax menu, see the HP LaserJet Analog Fax Accessory 300 User Guide. A printed copy of
this guide is provided with the HP LaserJet 4730x mfp, HP LaserJet 4730xs mfp, and HP LaserJet
4730xm mfp.
ENWW Fax menu 39
Page 60

Paper handling menu
When paper-handling settings are correctly configured through the control panel, you can print by
selecting the type and size of paper from the driver or software application. For more information,
Selecting print media.
see
Some items in this menu (such as duplex and manual feed) are available from a software program, or
from the printer driver (if the correct printer driver is installed). Printer-driver and software-program
settings override control-panel settings.
NOTE Items that have an asterisk (*) are the default values.
Item Values Explanation
TRAY 1 SIZE ANY SIZE*
LETTER
LEGAL
EXECUTIVE
STATEMENT
8.5X13
A4
A5
B5(JIS)
EXECUTIVE(JIS)
DPOSTCARD(JIS)
DPOSTCARD (JIS)
16K
ENVELOPE #10
ENVELOPE MONARCH
ENVELOPE C5
Allows you to set the media size for
tray 1.
ENVELOPE DL
ENVELOPE B5
CUSTOM
TRAY 1 TYPE ANY TYPE*
PLAIN
PREPRINTED
LETTERHEAD
TRANSPARENCY
PREPUNCHED
Allows you to specify the type of media
in tray 1.
40 Chapter 2 Using the control panel ENWW
Page 61

Item Values Explanation
LABELS
BOND
RECYCLED
COLOR
LIGHT <75 G/M2
INTERMEDIATE90-104
HEAVY 105-119 G/M2
EXTRA HEAVY120-163
CARDSTOCK >163
ROUGH 90-105 G/M2
GLOSSY 75-105 G/M2
HEAVY GLOSSY120-160
EXTRA HEAVY GLOSSY
TOUGH PAPER
ENVELOPE
TRAY <N> SIZE LETTER*
LEGAL
EXECUTIVE
8.5X13
A4
A5
B5(JIS)
EXECUTIVE(JIS)
16K
CUSTOM
ANY CUSTOM
TRAY <N> TYPE PLAIN*
PREPRINTED
LETTERHEAD
TRANSPARENCY
PREPUNCHED
Allows you to set the media size for
tray 2, tray 3, and tray 4. Substitute the
tray number for <N>.
Allows you to specify the type of media
in each tray. Substitute the tray number
for <N>.
LABELS
BOND
ENWW Paper handling menu 41
Page 62

Item Values Explanation
RECYCLED
COLOR
LIGHT <75 G/M2
INTERMEDIATE90-104
HEAVY 105-119 G/M2
ROUGH 90-105 G/M2
GLOSSY 75-105 G/M2
TOUGH PAPER
42 Chapter 2 Using the control panel ENWW
Page 63

Configure device menu
This menu contains all of the administrative functions.
NOTE Items that have an asterisk (*) are the default values.
Originals submenu
Although you can gain access to each item using the touchscreen graphical display, you can also select
copying and sending items through the MFP menus. To gain access to this menu, touch CONFIGURE
DEVICE, and then touch ORIGINALS.
Item Values Explanation
PAPER SIZE EXECUTIVE
LETTER*
LEGAL
A5
A4
B5(JIS)
8.5X13
STATEMENT
MIXED LTR/LGL
NUMBER OF SIDES 1*
2
ORIENTATION PORTRAIT*
LANDSCAPE
CONTENT TEXT
PHOTO
GLOSSY PHOTO
MIXED*
Sets the paper size of the original
document.
Indicates whether one side or both sides
of the original document are scanned.
The MFP prompts you to turn the page
over if 2 is selected and the original is
placed on the flatbed.
Indicates whether the orientation of the
original is portrait (short-edge top) or
landscape (long-edge top).
Describes the type of image on the
original.
Select PHOTO if the original consists of
graphic images, or TEXT if the image
consists of text only.
Select GLOSSY PHOTO for continuous
tone originals.
Select MIXED if the original contains
graphics and text. Describe the Text/
Photo Mix with a value from 0 to 8,
where 0 represents mostly text, and 8
represents mostly graphics.
ENWW Configure device menu 43
Page 64

Item Values Explanation
NOTE You can override any of
these settings for a particular job
by using the Copy screen.
DENSITY 0 to 8
Default=4
Specifies the contrast and brightness of
the image. You can choose from nine
increments.
0=darkest
8=lightest
Copying submenu
To gain access to this menu, touch CONFIGURE DEVICE, and then touch COPYING.
Item Values Explanation
COLOR MODE COLOR COPIES
BLACK COPIES
NUMBER OF SIDES 1*
2
COLLATE OFF
ON*
PAPER DESTINATION OUTPUT BIN 1*
Indicates whether copies should be printed in color
or black-and-white.
Indicates whether images should be printed on one
side or both sides of the copy.
Indicates whether copies should be collated or not
collated.
Select the output bin on the optional 3-bin mailbox.
OUTPUT BIN 2*
OUTPUT BIN 3*
COPIES 1–999 Indicates the number of copies made when you
STAPLE NONE*
1-EDGE
FIRST COPY SPEED NO EARLY WARM UP*
EARLY WARM UP
Output Bin 1 is the default bin for copying.
Output Bin 2 is the default bin for faxing.
Output Bin 3 is the default bin for printing.
NOTE This item appears only if an
optional 3-bin mailbox is installed.
press Start without selecting the number of copies
by using the numeric keypad.
To enable stapling, select 1-EDGE.
NOTE This item is available only if the
stapler/stacker is installed.
Select NO EARLY WARM UP to disable the Fast
First Copy feature. Using the Fast First Copy
feature can cause excessive wear on the MFP.
This is the default setting.
Select EARLY WARM UP to enable the Fast First
Copy feature, which decreases the time that the
44 Chapter 2 Using the control panel ENWW
Page 65

Item Values Explanation
MFP requires to make a copy when it has been idle
for awhile.
Enhancement submenu
To gain access to this menu, touch CONFIGURE DEVICE, and then touch ENHANCEMENT.
Item Values Explanation
SHARPNESS 0 to 4 Specifies the sharpness setting.
0=minimum sharpness
4=maximum sharpness
DEFAULT=2
BACKGROUND REMOVAL 0 to 8 Controls the amount of background
material from the original that is
eliminated on the copy. Background
removal is useful when you copy both
sides and do not want the material on the
first side to be visible on the second side
of the copy.
0=minimum background removal (more
background is visible)
8=maximum background removal (less
background is visible)
DEFAULT=2
Sending submenu
To gain access to this menu, touch CONFIGURE DEVICE, and then touch SENDING.
Item Values Options Explanation
E-MAIL SCAN PREFERENCE BLACK AND WHITE
COLOR*
FILE TYPE PDF*
M-TIFF
Determines whether the
document is scanned in color
or black and white.
Specifies the file format of the
e-mail attachment.
TIFF
JPEG
FILE SIZE SMALL
STANDARD*
LARGE
RESOLUTION 75 dpi Specifies the resolution of a
Specifies the compression of
a file, which determines the
file size.
document or image; a lower
ENWW Configure device menu 45
Page 66

Item Values Options Explanation
150 dpi*
200 dpi
300 dpi
ADDRESS VALIDATION OFF
ON*
FIND SEND GATEWAYS The MFP searches the
SMTP GATEWAY The IP address of the SMTP
LDAP GATEWAY The IP address of the LDAP
TEST SEND GATEWAYS Tests the configured
REPLICATE MFP Copies the send settings from
DPI setting results in a smaller
file size, but image quality
might be affected.
Enables the MFP to check email syntax. Valid e-mail
addresses require the "@"
sign and a ".".
network for SMTP and LDAP
gateways that the MFP can
use to send e-mail.
server used to send e-mail.
gateway that the MFP uses to
look up e-mail information.
gateways to see if they are
functional.
one MFP to another.
NOTE This feature
might not work with
older MFPs.
Printing submenu
Some items in the Printing submenu are available in a software program, or in the printer driver (if the
correct printer driver is installed). Driver and program settings override control-panel settings.
To gain access to this menu, touch CONFIGURE DEVICE, and then touch PRINTING.
Item Values Explanation
COPIES 1 to 32,000 Set the default number of copies by
selecting any number from 1 to 32,000.
Use the numeric keypad to select the
number of copies.
NOTE It is recommended
that you set the number of
copies in the printer driver or
in the software program.
(Printer driver settings and
software program settings
override control-panel
settings.)
46 Chapter 2 Using the control panel ENWW
Page 67

Item Values Explanation
DEFAULT PAPER SIZE LETTER*
LEGAL
EXECUTIVE
STATEMENT
8.5X13
A4
A5
B5(JIS)
EXECUTIVE(JIS)
16K
ENVELOPE #10
ENVELOPE MONARCH
ENVELOPE C5
ENVELOPE DL
ENVELOPE B5
CUSTOM
Set the default image size for paper
and envelopes. (The item name will
change from paper to ENVELOPE as
you scroll through the available sizes.)
DEFAULT CUSTOM PAPER SIZE UNIT OF MEASURE
X DIMENSION
Y DIMENSION
PAPER DESTINATION OUTPUT BIN 1*
OUTPUT BIN 2
OUTPUT BIN 3
DUPLEX OFF
ON*
DUPLEX BINDING
Allows you to set a custom paper size
for any of the installed trays. Substitute
the tray number for <N>. Select the X
and Y dimensions of the custom paper
size. The X dimensions are
76-216 mm (3-8.5 inches). The Y
Dimensions are 127-356 mm
(5-14 inches).
Select the output bin on the optional 3bin mailbox.
NOTE This item appears
only if an optional 3-bin
mailbox is installed, and if it is
not configured for stacker
mode.
Set the value to ON to print on both
sides (duplex) or OFF to print on one
side (simplex) of a sheet of paper.
DUPLEX BINDING allows you to
select LONG EDGE or SHORT
EDGE*. This item displays only if
DUPLEX is set to ON.
For more information, see
two-sided (duplex) printing.
Automatic
OVERRIDE A4/LETTER NO This command is used to print on
Letter-size media when an A4 job is
ENWW Configure device menu 47
Page 68

Item Values Explanation
YES* sent but no A4-size media is loaded in
MANUAL FEED OFF*
ON
COURIER FONT REGULAR*
DARK
WIDE A4 NO*
YES
the MFP (or to print on A4-size media
when a Letter job is sent, but no Lettersize media is loaded in the MFP).
Feed the paper manually from tray 1,
rather than automatically from a tray.
When MANUAL FEED=ON and tray 1
is empty, the MFP goes offline when it
receives a print job. It then displays
MANUALLY FEED <PAPER SIZE>.
For more information, see
sided printing.
Select the version of Courier font to
use:
REGULAR: The internal Courier font
available on the HP LaserJet 4 series
printers.
DARK: The internal Courier font
available on the HP LaserJet III series
printers.
Both fonts are not available at the
same time.
The Wide A4 setting changes the
number of characters that can be
printed on a single line of A4 paper.
Manual two-
YES: Up to 80 10-pitch characters can
be printed on one line.
NO: Up to 78 10-pitch characters can
be printed on one line.
PRINT PS ERRORS OFF*
ON
PRINT PDF ERRORS OFF*
ON
PCL For information about this option, see
Select ON to print the PS error page
when PS errors occur.
Select ON to print the PDF error page
when PDF errors occur.
PCL submenu.
48 Chapter 2 Using the control panel ENWW
Page 69

PCL submenu
To gain access to this menu, touch CONFIGURE DEVICE, touch PRINTING, and then touch PCL
submenu.
Item Values Explanation
FORM LENGTH 5 to 128
Default=60
ORIENTATION PORTRAIT*
LANDSCAPE
FONT SOURCE INTERNAL X*
CARD SLOT X
FONT NUMBER 0 to 102 The MFP assigns a number to each font and lists
FONT PITCH 0.44 to 99.99 Use the numeric keypad to enter a value. This
FONT POINT SIZE 4.00 to 999.75 Use the numeric keypad to enter a value.
Sets vertical spacing from 5 to 128 lines for
default paper size. Enter the value by using the
numeric keypad.
Select the default page orientation.
NOTE It is recommended that you set
the page orientation in the printer driver
or in the software program. (Printerdriver settings and software-program
settings override control-panel settings.)
INTERNAL X: Internal fonts.
CARD SLOT 1, CARD SLOT 2, or CARD SLOT
3: Fonts stored in one of the three flash memory
slots.
them on the PCL Font List (see
configuration). The font number appears in the
Font # column of the printout.
item might not appear, depending on the font
selected.
Default=10.00
Checking the MFP
SYMBOL SET Variety of available
symbol sets
APPEND CR TO LF NO*
YES
SUPPRESS BLANK PAGES NO*
YES
MEDIA SOURCE MAPPING STANDARD*
CLASSIC
Default=12.00
Select any one of several available symbol sets
at the MFP control panel. A symbol set is a unique
grouping of all the characters in a font. PC–8 or
PC–850 is recommended for line-draw
characters.
Select YES to append a carriage return to each
line feed that is encountered in backwardcompatible PCL jobs (pure text, no job control).
Some environments, such as UNIX, indicate a
new line by using only the line-feed control code.
This option allows the user to append the required
carriage return to each line feed.
When set to YES, form feeds are ignored if the
page is blank.
The PCL5 MEDIA SOURCE MAPPING
command selects an input tray by a number that
maps to the available trays and feeders.
ENWW Configure device menu 49
Page 70

Print quality submenu
You can gain access to some of the items in this menu in either a software program, or in the printer
driver (if the correct printer driver is installed). Printer driver settings and software program settings
override control-panel settings.
To gain access to this menu, touch CONFIGURE DEVICE, and then touch PRINT QUALITY.
Item Values Explanation
ADJUST COLOR HIGHLIGHTS
MIDTONES
SHADOWS
RESTORE COLOR VALUES
SET REGISTRATION PRINT TEST PAGE
SOURCE
ADJUST TRAY N
AUTO SENSE MODE TRAY 1 SENSING
TRAY 2-N SENSING
PRINT MODES PLAIN
PREPRINTED
LETTERHEAD
TRANSPARENCY
PREPUNCHED
This item allows you to adjust the color
from +5 to –5.
Each value allows you to adjust CYAN
DENSITY, MAGENTA DENSITY,
YELLOW DENSITY, and BLACK
DENSITY
RESTORE COLOR VALUES removes
any color adjustments and returns the
color to the original value.
Shift the margin alignment to center the
image on the page from top to bottom,
and left to right. You can also align the
image on the front, with the image printed
on the back.
Allows you to set trays to automatically
sense the type of paper that is loaded.
Allows you to associate each media type
with a specific print mode.
LABELS
BOND
RECYCLED
COLOR
LIGHT <75 G/M2
INTERMEDIATE90-104
HEAVY 105-119 G/M2
EXTRA HEAVY120-163
CARDSTOCK >163
ROUGH 90-105 G/M2
GLOSSY 75-105 G/M2
HEAVY GLOSSY120-160
50 Chapter 2 Using the control panel ENWW
Page 71

Item Values Explanation
EXTRA HEAVY GLOSSY
TOUGH PAPER
ENVELOPE
RESTORE MODES
OPTIMIZE EXTRA HEAVY120-163
HIGH GLOSS IMAGES
BACKGROUND 1
BACKGROUND 2
TRANSPARENCY
MEDIA TYPE
REGISTRATION
LONG PAPER
PRE-ROTATION
RE-TRANSFER
FUSER TEMP
TRAY1
RESTORE OPTIMIZE
QUICK CALIBRATE NOW N/A. Performs partial printer calibrations.
FULL CALIBRATE NOW N/A Performs full printer calibrations.
COLOR RET OFF
ON*
This item optimizes a number of MFP
parameters for all jobs rather than by
media type. The default setting for each
value is OFF.
RESTORE OPTIMIZE resets all of the
optimize parameters to the default
settings.
The COLOR RET menu item allows you
to turn on or turn off the printer REt
(Resolution Enhancement Technology)
setting. The default is ON.
System setup submenu
Items in this menu affect the MFP function. Configure the MFP according to your printing needs.
To gain access to this menu, touch CONFIGURE DEVICE, and then touch SYSTEM SETUP.
Item Values Explanation
Date/Time DATE
DATE FORMAT
TIME
TIME FORMAT
ENWW Configure device menu 51
Sets the start date and time for the MFP.
The DATE format is YEAR 2004–2087;
JAN, FEB, MAR; DAY 1–31
The DATE FORMAT is YYYY/MMM/
DD*; MMM/DD/YYYY; DD/MMM/YYYY
The TIME format is HOUR 1–12,
MINUTE 0–59, AM, and PM
Page 72

Item Values Explanation
The TIME FORMAT is 12 HR or 24 HR.
This item defaults to 12 HR.
JOB STORAGE LIMIT 1 to 100 Specifies the number of QuickCopy and
JOB HELD TIMEOUT OFF*
1 HOUR
4 HOURS
1 DAY
1 WEEK
SHOW ADDRESS AUTO
OFF*
COLOR/BLACK MIX AUTO*
MOSTLY COLOR PAGES
MOSTLY BLACK PAGES
Proof-and-Hold jobs that can be stored
on the MFP hard-disk accessory.
Default=32
Sets the amount of time that QuickCopy
and proof-and-hold jobs are kept before
being automatically deleted from the
queue.
If you change the Job Held Timeout
value, only jobs that are stored after this
change are affected by the change. Any
jobs that were stored before you
changed the value will retain the original
timeout setting.
This item defines whether the IP address
is shown on the control-panel display
next to the Ready message.
The default setting is OFF.
This menu item establishes how the
printer switches from color to
monochrome (black and white) mode for
maximum performance and print
cartridge life.
TRAY BEHAVIOR USE REQUESTED TRAY
MANUALLY FEED PROMPT
PS DEFER MEDIA
SIZE/TYPE PROMPT
USE ANOTHER TRAY
DUPLEX BLANK PAGES
IMAGE ROTATION
AUTO resets the printer to the factory
default settings. The default is AUTO.
Select MOSTLY COLOR PAGES if
nearly all of your print jobs are color with
high page coverage.
Select MOSTLY BLACK PAGES if you
print mostly monochrome jobs, or a
combination of color and monochrome
jobs.
Specifies the behavior of the tray by
indicating which tray the MFP should
print from.
USE REQUESTED TRAY sets the tray
that the MFP should print from for
specified jobs. The values for this menu
item are EXCLUSIVELY (default) or
FIRST.
MANUALLY FEED PROMPT
determines whether or not the MFP
prompts the user when a job does not
match a requested configured tray. The
values for this menu item are Always
(default) or UNLESS LOADED.
PS DEFER MEDIA determines whether
the paper-handling model is based on
52 Chapter 2 Using the control panel ENWW
Page 73

Item Values Explanation
PostScript rules or HP rules. The values
for this menu item are ENABLED
(follows the HP rules) or Disabled.
SIZE/TYPE PROMPT controls whether
the tray configuration message and its
prompts are shown whenever a tray is
configured for a type or size other than
the type or size that is loaded in the tray.
USE ANOTHER TRAY determines
whether the MFP uses paper from
another tray of the designated tray is
empty.
DUPLEX BLANK PAGES determines
whether blank pages are duplexed.
IMAGE ROTATION determines if
images are rotated. The default is
STANDARD.
SLEEP DELAY 1 MINUTE
15 MINUTES
30 MINUTES
45 MINUTES
60 MINUTES*
90 MINUTES
2 HOURS
4 HOURS
WAKE TIME List of days of the week
OFF*
CUSTOM
Sets how long the MFP remains idle
before it enters sleep mode.Using sleep
mode offers the following advantages:
Minimizes the amount of power that
●
the MFP consumes when it is idle
Reduces wear on electronic
●
components in the MFP
NOTE Sleep mode turns off
the backlight on the display, but
the display is still readable.
The MFP automatically exits sleep mode
when you send a print job, open or close
a paper tray, receive a fax, touch any
button on the control panel, touch any
part of the touchscreen, open the
scanner lid, or load media into the ADF.
To enable or disable sleep mode, see
Resets submenu.
Sets the time that the MFP automatically
comes out of sleep mode. This feature
can be set for a different time for each
day of the week. Or, if you wish to apply
the same settings to each day, select
APPLY TO ALL DAYS
Each day displays the following values:
Hour 1–12, Minute 0–59, AM, and PM.
COPY SEND SETTINGS For information about these settings, see
the separate table
PERSONALITY AUTO*
PCL
PDF
Copy/send settings.
Select the default MFP language
(personality). Possible values are
determined by which valid languages are
installed in the MFP.
ENWW Configure device menu 53
Page 74

Item Values Explanation
PS Normally you should not change the
CLEARABLE WARNINGS JOB*
ON
AUTO CONTINUE OFF
ON*
product language (the default is AUTO).
If you change the setting to a specific
product language, the MFP does not
automatically switch from one language
to another unless specific software
commands are sent to the MFP.
Set the amount of time that a clearable
warning appears on the MFP control
panel.
JOB: Warning messages appear on the
control panel until the end of the job from
which they were generated.
ON: Warning messages appear on the
control panel until they are cleared.
This item determines how the MFP
reacts to errors.
OFF: If an error prevents printing, the
message remains on the display, and the
MFP does not print until you touch
CONTINUE.
ON: If an error prevents printing, the
message is displayed, and the MFP goes
offline for 10 seconds before returning
online.
REPLACE SUPPLIES STOP AT OUT*
STOP AT LOW
OVERRIDE AT OUT
ORDER AT 0–100 Default=15
COLOR SUPPLY OUT STOP*
AUTOCONTINUE AT BLACK
JAM RECOVERY AUTO*
OFF
ON
Sets printer behavior when a cartridge is
low. The default is STOP AT OUT. This
option allows the printer to continue
printing until a color supply is exhausted.
When the printer is set to STOP AT
LOW, printing pauses until the color
supply is replaced. OVERRIDE AT
OUT allows printing to continue when a
color supply is out, but displays a
warning the supply is out and must be
replaced.
Determine how the MFP behaves when
toner is out.
STOP: The MFP goes offline and waits
until the cartridge is replaced.
AUTOCONTINUE AT BLACK: The MFP
displays REPLACE CARTRIDGE until
the cartridge is replaced. The MFP
continues to print.
Determine how the MFP functions when
a jam occurs.
AUTO: The MFP automatically selects
the best mode for jam recovery
(usually ON). This is the default setting.
54 Chapter 2 Using the control panel ENWW
Page 75

Item Values Explanation
OFF: The MFP does not reprint pages
following a jam. Printing performance
might be increased with this setting.
ON: The MFP automatically reprints
pages after a jam is cleared.
LANGUAGE List of available languages Sets the language of the control panel.
Copy/send settings
This table lists the options that are available for the COPY SEND SETTINGS, which are part of the
SYSTEM SETUP submenu.
Item Values Explanation
INACTIVITY TIMEOUT 10–300 SECONDS Defines the amount of time until the copy settings return to the
AUTO SETTINGS RESET OFF*
ON
TIMEOUT AFTER SEND 10–300 SECONDS Defines the amount of time before the send settings return to
HOLD OFF PRINT JOB OFF
ON*
HOLD OFF TIME 0–300 SECONDS Defines the amount of time that print jobs must wait if HOLD
SCAN AHEAD OFF
ON*
default settings after any control panel activity is completed. If
you reset the MFP, the value resets to the default.
Default=60
Allows automatic reset of copy/send settings after the defined
timeout. When set to OFF, you are prompted to reset the
settings or continue with the same settings. If this item is set
to ON, the settings are automatically reset after each send job.
The default is OFF.
the default settings after any control-panel activity is
completed. This item displays only when AUTO SETTINGS
RESET is OFF.
Default=20
Prevents network print jobs from starting within a specified
period after a copy is completed.
OFF PRINT JOB is set to ON.
Default=15
Allows a copy job to be scanned even if the MFP is printing
another job. The job will be scanned and held until it can be
printed. If this setting is set to OFF, the job is not scanned until
the print job is completed.
AUTO JOB INTERRUPT OFF*
ON
COPY JOB INTERRUPT OFF*
ON
Allows a copy job to automatically interrupt any currently
printing network print job. The copy job is placed between full
copies of the job that is currently printing. If this setting is set
to OFF, the job is not printed until all copies of the print job are
completed.
Allows you to interrupt the current copy job to make a different
copy. When you press the Start button, the MFP shows a
message that asks if you want to interrupt the current copy job.
ENWW Configure device menu 55
Page 76

Item Values Explanation
AUDIBLE FEEDBACK OFF
ON*
COLOR COPY OPTION ENABLE*
DISABLE
Gives an audible indication when you press a button or when
you touch an interactive area of the touchscreen.
Allows an administrator to set the color lockout feature.
MBM-3 Configuration submenu
Use the items in this menu to set up the output bins on the 3-bin mailbox.
To gain access to this menu, touch CONFIGURE DEVICE, and then touch MBM-3 CONFIGURATION.
NOTE This menu appears only when the 3-bin mailbox is installed.
Item Values Explanation
OPERATION MODE JOB SEPARATION MODE*
MAILBOX MODE
STACKER MODE
Select the operation mode that you want
to use. For more information, see
mailbox.
NOTE The MFP restarts
automatically whenever the
operation mode is changed.
3-bin
56 Chapter 2 Using the control panel ENWW
Page 77

Stapler/stacker submenu
Use the items in this menu to configure the stapling options.
To gain access to this menu, touch CONFIGURE DEVICE, and then touch STAPLER/STACKER.
NOTE This menu appears only when the stapler/stacker is installed.
Item Values Explanation
STAPLES NONE*
ONE
STAPLES OUT STOP
CONTINUE*
To enable stapling, select ONE.
NOTE Printer-driver settings
override control-panel settings.
Use this item to configure the MFP to
either stop or continue when the staple
cartridge is empty. If you select
CONTINUE, jobs are stacked in the
output bin, but they are not stapled.
Default=15
I/O submenu
Items in the I/O (input/output) submenu affect the communication between the MFP and the computer.
To gain access to this menu, touch CONFIGURE DEVICE, and then touch I/O.
Item Values Explanation
I/O TIMEOUT 5 to 300 Use this to select the I/O timeout period
in seconds. (I/O timeout refers to the
time, measured in seconds, that the MFP
waits before ending a print job.)
Use this setting to adjust timeout for best
performance. If data from other ports
appear in the middle of your print job,
increase the timeout value.
Default = 15
PARALLEL INPUT HIGH SPEED
ADVANCED FUNCTIONS
HIGH SPEED accepts faster parallel
communications used for connections
with newer computers. This item
contains NO and YES* options.
ADVANCED FUNCTIONS turns the
bidirectional parallel communication on
or off. The default is set for a bidirectional
parallel port (IEEE-1284). This setting
allows the MFP to send status readback
messages to the computer. (Turning the
parallel advanced functions on might
slow language switching.) This item
contains OFF and ON* options.
ENWW Configure device menu 57
Page 78

Item Values Explanation
FIND SEND GATEWAYS No value to select This item searches the network for both
SMTP GATEWAY No value to select This is the IP address of the SMTP
LDAP GATEWAY No value to select This is the IP address of the LDAP
JETDIRECT See submenu below. JETDIRECT allows you to configure
TEST SEND GATEWAYS No value to select Tests the configured gateways to ensure
SMTP and LDAP gateways that can be
used to send e-mail.
Gateway that is used for sending e-mail.
Gateway that is used for looking up email address information.
network settings.
that they are functional.
Embedded Jetdirect submenu
To gain access to this menu, touch CONFIGURE DEVICE, and then touch I/O and then touch
JETDIRECT.
Item Options Values Explanation
TCP/IP ENABLE ON
OFF
ON: (default) Enable the TCP/IP
protocol.
OFF: Disable the TCP/IP protocol.
HOST NAME An alphanumeric string, up to 32
characters, that is used to identify the
device. This name is listed on the
Jetdirect configuration page. The
default host name is NPIxxxxxx,
where xxxxxx is the last six digits of
the LAN hardware (MAC) address.
CONFIG METHOD BOOTP
DHCP*
AUTO IP
MANUAL
DHCP RELEASE YES
NO*
Select BOOTP (Bootstrap Protocol)
for automatic configuration from a
BootP server.
Select DHCP (Dynamic Host
Configuration Protocol) for automatic
configuration from a DHCP server.
Select AUTO IP for automatic linklocal IP addressing. An address in
the form 169.254.x.x will be
automatically assigned.
Use the MANUAL settings menu to
configure TCP/IP parameters.
If DHCP is used and a DHCP lease
exists, selecting NO saves the
current lease. Selecting YES
releases the current DHCP lease and
the leased IP address.
58 Chapter 2 Using the control panel ENWW
Page 79

Item Options Values Explanation
DHCP RENEW YES
NO*
MANUAL SETTINGS (Available only if CONFIG METHOD
This menu appears if CONFIGURE
METHOD was set to DHCP and a
DHCP lease for the print server
exists.
NO (default): The current DHCP
●
lease is saved.
YES: The current DHCP lease
●
along with the leased IP
address are released.
is set to MANUAL) Configure
parameters directly from the printer
control panel:
IP ADDRESS (n.n.n.n.) The unique
IP address of the printer, where n is
a value from 0 to 255.
SUBNET MASKm.m.m.m.: The
subnet mask for the printer, where m
is a value from 0 to 255.
SYSLOG SERVERn.n.n.n.: The IP
address of the syslog server used to
receive and log syslog messages.
DEFAULT GATEWAYn.n.n.n: The
IP address of the gateway or router
used for communications with other
networks.
IDLE TIMEOUT: The time period, in
seconds, after which an idle TCP
print data connection is closed
(default is 270 seconds, 0 disables
the timeout).
DEFAULT IP
(parameters are AUTO
IP and LEGACY)
PRIMARY DNS Specify the IP address (n.n.n.n) of
SECONDARY DNS Specify the IP address (n.n.n.n) of
Specify the IP address to default to
when the print server is unable to
obtain an IP address from the
network during a forced TCP/IP
reconfiguration (for example, when
manually configured to use BootP or
DHCP).
AUTO IP: A link-local IP
●
address 169.254.x.x will be set.
LEGACY: The address
●
192.0.0.192 will be set,
consistent with older Jetdirect
products.
the Primary Domain Name System
(DNS) Server.
the Secondary Domain Name
System (DNS) Server.
ENWW Configure device menu 59
Page 80

Item Options Values Explanation
PROXY SERVER Specifies the proxy server to be used
PROXY PORT Enter the port number used by the
IPX/SPX ENABLE ON*
OFF
FRAME TYPE
AUTO
EN_8023
EN_II
EN_8022
EN_SNAP
by embedded applications in your
printer/MFP. A proxy server is
typically used by network clients for
Internet access. It caches Web
pages, and provides a degree of
Internet security, for those clients.
To specify a proxy server, enter its IP
address or fully-qualified domain
name. The name can be up to 64
characters.
For some networks, you may need to
contact your Independent Service
Provider (ISP) for the proxy server
address.
proxy server for client support. The
port number identifies the port
reserved for proxy activity on your
network, and can be a value from 0
to 65535.
ON: Enable the IPX/SPX protocol.
OFF: Disable the IPX/SPX protocol.
Select the frame-type setting for your
network.
AUTO: (default) Automatically sets
and limits the frame type to the first
one detected.
EN_8023, EN_II, EN_8022, and
EN_SNAP: Frame type selections for
Ethernet networks.
APPLETALK ENABLE ON*
OFF
DLC/LLC ENABLE ON*
OFF
SECURE WEB HTTPS REQUIRED
HTTPS OPTIONAL*
DIAGNOSTICS DIAGNOSTICS: Provides tests to
SECURE WEB: Specify whether the
Enable or disable the AppleTalk
protocol.
Enable or disable the DLC/LLC
protocol.
embedded Web server accepts
communications by using only
secure HTTP (HTTPS) or by using
both HTTP and HTTPS.
help diagnose network hardware or
TCP/IP network connection
problems.
60 Chapter 2 Using the control panel ENWW
Page 81

Item Options Values Explanation
RESET SECURITY YES
NO*
LINK SPEED AUTO
10T HALF
10T FULL
100TX HALF
100TX FULL
RESET SECURITY: Specifies
whether the current security settings
on the print server are saved or reset
to factory defaults.
The print server will automatically
configure itself to match the network
link speed and communication mode.
If this process fails, either 100TX
HALF or 10T HALF is set.
10T HALF: 10 Mbps, half-duplex
operation.
10T FULL: 10 Mbps, full-duplex
operation.
100TX HALF: 100 Mbps, half-duplex
operation.
100TX FULL: 100 Mbps, full-duplex
operation.
Resets submenu
To gain access to this menu, touch CONFIGURE DEVICE, and then touch RESETS.
NOTE Use this menu with caution. You can lose buffered page data or MFP configuration
settings when you select these items. Reset the MFP only under the following circumstances:
You want to restore the MFP default settings.
●
Communication between the MFP and computer has been interrupted, and you are not able to
●
resolve the problem by any other method. See
You are having problems with a port.
●
Solving network connectivity problems.
The items in the Resets submenu will clear all memory in the MFP, while pressing the Reset button
clears only the current job.
Item Values Explanation
RESTORE FACTORY SETTINGS No value to select This item restores all control-panel settings
to the original factory settings.
SLEEP MODE OFF
ON*
Turns sleep mode on or off. Using sleep
mode offers the following advantages:
Minimizes the amount of power that
●
the MFP consumes when it is idle
Reduces wear on electronic
●
components in the MFP
The MFP automatically exits sleep mode
when you send a print job, receive a fax,
touch any button on the control panel, touch
ENWW Configure device menu 61
Page 82

Item Values Explanation
any part of the touchscreen, open the
scanner lid, or load media into the ADF.
You can set how long the MFP remains idle
before it enters sleep mode. See the
SLEEP DELAY information in the
setup submenu.
System
LOCK CARRIAGE No value to select This item must be selected before engaging
CLEAR ADDRESS BOOK No value to select This item clears all addresses from the
the Scanner Head Lock. It moves the
carriage into a position where it can be
locked.
address book.
62 Chapter 2 Using the control panel ENWW
Page 83

Diagnostics menu
Item Options Values Explanation
PRINT EVENT LOG Generates a localized list of
PQ TROUBLESHOOTING This item prints a series of 8
SHOW EVENT LOG At the control panel, scroll
CALIBRATE SCANNER Use this item to calibrate the
PRINT DIAGNOSTICS PAGE Allows you to print a page
the 50 most recent entries in
the error log. For each entry,
the printed event log shows
the error number, page
count, error code, and
description or personality.
pages that include
instructions, pages for each
color, demo page, and
configuration page. These
pages can help isolate print
quality problems.
through the contents of the
event log, which lists the 50
most recent events.
scanner. You might need to
calibrate the scanner if it is
not capturing the correct
sections of scanned
documents.
that can assist in diagnosing
printer problems.
DISABLE CARTRIDGE
CHECK
PAPER PATH SENSORS Initiates a paper path sensor
PAPER PATH TEST PRINT TEST PAGE Generates a test page that is
Allows you to remove a print
cartridge to help determine
which print cartridge is the
source of a problem.
test. You can then enter the
menus to print internal pages
(including the paper path
test), set menu items, and
send jobs from the computer.
The sensors are updated as
paper passes each sensor,
but no messages are
generated this state.
useful for testing the paper
handling features of the
MFP.
Specifies which paper paths
are tested.
SOURCE ALL TRAYS
TRAY 1
Specifies to print a test page
from a specific tray or from all
trays.
ENWW Diagnostics menu 63
Page 84

Item Options Values Explanation
TRAY 2*
TRAY 3
TRAY 4
DESTINATION ALL BINS
OUTPUT BIN 1*
OUTPUT BIN 2
OUTPUT BIN 3
DUPLEX OFF*
ON
COPIES 1*
10
50
100
500
MANUAL SENSOR TEST Tests the paper path sensors
Specify which output bin to
use during the paper path
test.
This menu displays only if the
output bin is installed.
Specifies if the duplexer is
included when the test is
performed.
Specifies how many sheets
of paper from the specified
source are sent when the test
is performed.
and switches for correct
operation. During this test,
the MFP is offline.
On the control-panel display,
each sensor is represented
by a string of alphabetic
letters followed by a
corresponding status for
each sensor.
MANUAL SENSOR TEST 2 Performs tests to determine
COMPONENT TEST TRANSFER MODE
BELT ONLY
IMAGE DRUM MOTORS
BLACK LASER SCANNER
CYAN LASER SCANNER
MAGENTA LASER
SCANNER
YELLOW LASER
SCANNER
FUSER MOTOR
FUSER PRESSURE
RELEASE MOTOR
whether the paper path
sensors are operating
correctly.
This menu item is used by a
service technician to
exercise individual parts of
the MFP to isolate the source
of any problems.
64 Chapter 2 Using the control panel ENWW
Page 85

Item Options Values Explanation
ALIENATION MOTOR
ETB CONTACT/
ALIENATION
TRAY 1 PICKUP
SOLENOID
TRAY 1 PICKUP MOTOR
TRAY 3 PICKUP
SOLENOID
TRAY 2 PICKUP MOTOR
TRAY 3 PICKUP
SOLENOID
TRAY 3 PICKUP MOTOR
TRAY 4 PICKUP
SOLENOID
TRAY 4 PICKUP MOTOR
DUPLEXER PICKUP
MOTOR
REPEAT
PRINT/STOP TEST STOP TIME 0 to 60000 This menu item is used by a
COLOR BAND TEST PRINT TEST PAGE
COPIES
1–30 PRINT TEST PAGE option
service technician to isolate
the potential source of printquality problems with the
MFP. The time is expressed
in milliseconds.
generates a test page that is
useful for testing the color
band features of the MFP.
The COPIES option allows
you to select the number of
test pages to be printed.
Default = 1.
ENWW Diagnostics menu 65
Page 86

Item Options Values Explanation
SCANNER TESTS LOWER LAMP
ADF INPUT MOTOR
ADF INPUT MOTOR
REVERSE
FLATBED MOTOR
ADF READ MOTOR
ADF READ MOTOR
REVERSE
ADF DUPLEX SOLENOID
ADF LED INDICATOR
CONTROL PANEL LEDs
DISPLAY
BUTTONS
TOUCHSCREEN
This menu item is used by a
service technician to
diagnose potential problems
with the MFP scanner.
This menu item is used by a
service technician to
diagnose potential problems
with the MFP control panel.
66 Chapter 2 Using the control panel ENWW
Page 87

Service menu
The Service menu is locked. A service technician must type a PIN to open the menu.
ENWW Service menu 67
Page 88

68 Chapter 2 Using the control panel ENWW
Page 89

3 I/O Configuration
This chapter describes how to configure certain network parameters on the MFP. The following topics
are covered:
Network configuration
●
Parallel configuration
●
USB configuration
●
Auxiliary connection configuration
●
HP Jetdirect print servers
●
Wireless printing
●
ENWW 69
Page 90

Network configuration
You might need to configure certain network parameters on the MFP. You can configure these
parameters from installation software, the MFP control panel, the embedded Web server, or
management software, such as HP Web Jetadmin or the HP LaserJet Utility for Macintosh.
NOTE For more information about using the embedded Web server, see Using the
embedded Web server.
For more information on supported networks and network configuration tools, see the HP Jetdirect Print
Server Administrator’s Guide. The guide comes with printers in which an HP Jetdirect print server is
installed.
This section contains the following instructions for configuring network parameters from the MFP control
panel:
Configuring TCP/IP parameters.
●
Disabling unused network protocols.
●
Configuring TCP/IP parameters
You can use the MFP control panel to configure the following TCP/IP parameters:
IP address (4 bytes)
●
Subnet mask (4 bytes)
●
Default gateway (4 bytes)
●
To manually configure TCP/IP parameters from the MFP control panel
Use manual configuration to set an IP address, subnet mask, and default gateway.
Setting an IP address
1. Press Menu to enter the MENUS.
2. Touch CONFIGURE DEVICE.
3. Touch I/O.
4. Touch JETDIRECT MENU.
5. Touch TCP/IP.
6. Touch CONFIG METHOD.
7. Touch MANUAL or MANUAL SETTINGS.
8. Touch IP ADDRESS.
9. Use the right and left arrows to select each byte of the IP address, and then use the numeric keypad
to enter the value of each byte.
10. Touch OK.
70 Chapter 3 I/O Configuration ENWW
Page 91

Setting the subnet mask
1. Press Menu to enter the MENUS.
2. Touch CONFIGURE DEVICE.
3. Touch I/O.
4. Touch JETDIRECT MENU.
5. Touch TCP/IP.
6. Touch CONFIG METHOD.
7. Touch MANUAL.
Touch MANUAL SETTINGS.
▲
8. Touch SUBNET MASK
NOTE The first three sets of numbers are highlighted.
9. Use the right and left arrows to select each byte of the subnet mask, and then use the numeric
keypad to enter the value of each byte.
10. Touch OK.
Setting the default gateway
1. Press Menu to enter the MENUS.
2. Touch CONFIGURE DEVICE.
3. Touch I/O.
4. Touch JETDIRECT MENU.
5. Touch TCP/IP.
6. Touch CONFIG METHOD.
7. Touch MANUAL or MANUAL SETTINGS.
8. Touch DEFAULT GATEWAY.
NOTE The first set of 3 numbers shows the default settings. If there is not a number
highlighted, a highlighted empty underscore appears.
9. Use the right and left arrows to select each byte of the default gateway, and then use the numeric
keypad to enter the value of each byte.
10. Touch OK.
ENWW Network configuration 71
Page 92

Disabling network protocols (optional)
By factory default, all supported network protocols are enabled. Disabling unused protocols has the
following benefits:
decreases MFP-generated network traffic
●
prevents unauthorized users from printing to the MFP
●
provides only pertinent information on the configuration page
●
allows the MFP control panel to display protocol-specific error and warning messages
●
To disable DLC/LLC
1. Press Menu to enter the MENUS.
2. Touch CONFIGURE DEVICE.
3. Touch I/O.
4. Touch JETDIRECT MENU.
5. Touch DLC/LLC.
6. Touch ENABLE.
7. Touch ON or OFF.
8. Touch OK.
72 Chapter 3 I/O Configuration ENWW
Page 93

Parallel configuration
The HP Color LaserJet 4730mfp series supports network and parallel connections at the same time. A
parallel connection is made by connecting the MFP to the computer using a bidirectional parallel cable
(IEEE-1284-C compliant) with a c-connector plugged into the MFP’s parallel port. The cable can be a
maximum of 10 meters (30 feet) long.
When used to describe a parallel interface, the term bidirectional indicates that the MFP is able to both
receive data from the computer and send data to the computer through the parallel port.
Figure 3-1 Parallel port connection
1 C-connector
2 Parallel port
NOTE To use the enhanced capabilities of the bidirectional parallel interface such as
bidirectional communication between the computer and MFP, faster transfer of data, and
automatic configuration of printer drivers, ensure that the most recent printer driver is installed.
NOTE Factory settings support automatic switching between the parallel port and one or more
network connections on the MFP. If you are experiencing problems, see
Network configuration.
ENWW Parallel configuration 73
Page 94

USB configuration
This MFP supports USB 2.0 and host USB connections. The USB ports are located on the back of the
MFP, as shown in the figure below. You must use an A-to-B type USB cable.
Figure 3-2 USB connection
1 USB connector
2 USB port
74 Chapter 3 I/O Configuration ENWW
Page 95

Auxiliary connection configuration
This MFP supports an auxiliary connection for paper handling input devices. The port is located on the
back of the MFP, as shown in the figure below.
Figure 3-3 Auxiliary connection
1 Auxiliary connection port (Jetlink)
ENWW Auxiliary connection configuration 75
Page 96

HP Jetdirect print servers
The HP Jetdirect print servers facilitate network management by allowing you to connect a printer
directly to your network at any location. They support multiple network protocols and operating systems.
HP Jetdirect print servers also support the Simple Network Management Protocol (SNMP), which
provides network managers with remote printer management and troubleshooting through HP Web
Jetadmin software.
The HP Color LaserJet 4730mfp series is equipped with an embedded HP Jetdirect print server. The
server supports Ethernet 10/100-TX network connections. An HP Jetdirect EIO print server can also be
installed in the HP Color LaserJet 4730mfp series EIO slot to allow an additional network connection.
NOTE Installation of an EIO print server and network configuration should be performed by a
network administrator. Network configuration is performed using installation software, the MFP
control panel, embedded Web server, or network management software.
NOTE Refer to the HP Jetdirect print server documentation for information on supported EIO
network print servers.
For more information on supported networks and network configuration tools, refer to the HP Jetdirect
Print Server Administrator’s Guide, or visit HP Customer Care online at
net_printing.
NetWare networks
http://www.hp.com/support/
When using Novell NetWare products with an HP Jetdirect print server, use your NetWare utilities to
set up and manage the MFP.
Windows networks
For Windows 98, ME, 2000, Windows Server 2003, and XP systems, use your printer installation utility
for printer setup on a Microsoft Windows network. The utility supports printer setup for either peer-topeer or client-server network operation.
AppleTalk networks
Use the HP LaserJet Utility to set up the MFP on an EtherTalk network. For more information, refer to
the HP Jetdirect Print Server Administrator’s Guide included with printers equipped with the
HP Jetdirect print server.
UNIX/Linux networks
Use the HP Jetdirect printer installer for UNIX utility to set up the MFP on HP-UX or Sun Solaris networks.
For setup and management on UNIX or Linux networks, use HP Web Jetadmin.
To obtain HP software for UNIX/Linux networks, visit HP Customer Care online at
support/net_printing. For other installation options supported by the HP Jetdirect print servers, see the
HP Jetdirect Print Server Administrator’s Guide.
http://www.hp.com/
76 Chapter 3 I/O Configuration ENWW
Page 97

Wireless printing
Wireless networks offer a safe, secure, and cost-effective alternative to traditional wired network
connections. See
IEEE 802.11 standard
Optional HP Jetdirect wireless print servers support connection to an 802.11 network. This wireless
technology provides a high-quality printing solution without the physical constraints of wiring. Peripherals
can be conveniently placed anywhere in an office or home and can be easily moved without changing
network cables.
Installation is easy with the HP Install Network Printer Wizard.
HP Jetdirect 802.11 print servers are available for USB connections.
Bluetooth
Bluetooth wireless technology is a low-power, short-range radio technology that can be used to
wirelessly connect computers, MFPs, printers, personal digital assistants (PDAs), cell phones, and other
devices.
Unlike infrared technology, Bluetooth’s reliance on radio signals means that devices do not have to be
in the same room, office, or cubicle with an unobstructed line of sight in order to communicate. This
wireless technology increases portability and efficiency within business network applications.
Supplies and accessories for a list of available wireless print servers.
The HP Color LaserJet 4730mfp series uses a Bluetooth adapter (HP bt1300) to incorporate Bluetooth
wireless technology. The adapter is available for either USB or parallel connections. The adapter has
a 10-meter line-of-sight operation range in the 2.5 GHz ISM band and can achieve data transfer rates
up to 723 Kbps. The device supports the following Bluetooth profiles:
Hardcopy Cable Replacement Profile (HCRP)
●
Serial Port Profile (SPP)
●
Object Push Profile (OPP)
●
Basic Imaging Profile (BIP)
●
Basic Printing Profile (BPP) with XHTML-Print
●
ENWW Wireless printing 77
Page 98

78 Chapter 3 I/O Configuration ENWW
Page 99

4 Printing tasks
This chapter describes how to perform basic printing tasks. The following topics are covered:
Controlling print jobs
●
Selecting print media
●
Automatic media type sensing (auto sense mode)
●
Configuring input trays
●
Printing on special media
●
Automatic two-sided (duplex) printing
●
Stapling documents
●
Special printing situations
●
Selecting the output bin
●
Job storage features
●
Managing memory
●
Using features in the printer driver
●
Using features in the Macintosh printer driver
●
ENWW 79
Page 100

Controlling print jobs
In the Microsoft Windows operating system, three settings affect how the printer driver tries to pull paper
when you send a print job. The Source, Type, and Size settings appear in the Page Setup, Print, or
Print Properties dialog boxes in most software programs. If you do not change these settings, the MFP
automatically selects a tray using the default settings.
Source
Printing by Source means that you choose a specific tray from which you want the MFP to pull paper.
The MFP tries to print from this tray, no matter what type or size is loaded. If you choose a tray that is
configured for a type or size that does not match your print job, the MFP does not print automatically.
Instead, it waits for you to load the tray you chose with the type or size of print media for your print job.
If you load the tray, the MFP begins printing.
Type and Size
Printing by Type or Size means that you want the MFP to pull paper or print media from the appropriate
tray loaded with the correct type and size. Selecting media by type rather than source is similar to locking
out trays and helps protect special media from accidental use. For example, if a tray is configured for
letterhead and you specify the driver to print on plain paper, the MFP will not pull the letterhead from
that tray. Instead, it will pull paper from a tray that has plain paper loaded and is configured for plain
paper on the MFP control panel. Selecting media by Type and Size results in significantly better print
quality for heavy paper, glossy paper, and transparencies. Using the wrong setting might result in
unsatisfactory print quality. Always print by Type for special print media, such as labels or grayscale
transparencies. Print by Size for envelopes, if possible.
If you want to print by Type or Size, select the Type or Size from the Page Setup dialog box,
●
the Print dialog box, or the Print Properties dialog box, depending on the application.
If you often print on a certain type or size of media, the MFP administrator (for a network MFP) or
●
you (for a local MFP) can configure a tray for that type or size. Then, when you choose that type
or size as you print a job, the MFP pulls media from the tray configured for that type or size.
Print setting priorities
Changes made to print settings are prioritized according to where the changes are made as follows:
NOTE The names of commands and dialog boxes may vary depending on your program.
Page Setup dialog box. This dialog box opens when you click Page Setup or a similar command
●
on the File menu of the program you are working in. Settings changed here override settings
changed anywhere else.
Print dialog box. This dialog box opens when you click Print, Print Setup, or a similar command
●
on the File menu of the program you are working in. Settings changed in the Print dialog box have
a lower priority and do not override changes made in the Page Setup dialog box.
80 Chapter 4 Printing tasks ENWW
 Loading...