

Page 1

HP LaserJet 4050, 4050 T,
English
4050 N, and 4050 TN Printers
User’s Guide
Page 2

Page 3

HP LaserJet 4050, 4050 T,
4050 N, and 4050 TN Printers
User’s Guide
Page 4

© Copyright Hewlett-Packard
Company 1999
All Rights Reserved.
Reproduction, adaptation, or
translation without prior written
permission is prohibited,
except as allowed under the
copyright laws.
First Edition, February 1999
Warranty
The information contained in
this document is subject to
change without notice.
Hewlett-Packard makes no
warranty of any kind with
respect to this information.
HEWLETT-PACKARD
SPECIFICALLY DISCLAIMS
THE IMPLIED WARRANTY
OF MERCHANT ABILITY AND
FITNESS FOR A
PARTICULAR PURPOSE.
Hewlett-Packard shall not be
liable for any direct, indirect,
incidental, consequential, or
other damage alleged in
connection with the furnishing
or use of this information.
Trademark Credits
Adobe and PostScript are
trademarks of Adobe Systems
Incorporated which may be
registered in certain
jurisdictions.
Arial and Times New Roman
are U.S. registered trademarks
of the Monotype Corporation.
Microsoft, MS Windows,
Windows, and Windows NT
are U.S. registered trademarks
of Microsoft Corporation.
T rueT ype is a U.S. trademark of
Apple Computer, Inc.
NERGY STAR
E
registered service mark of the
U.S. EPA.
is a U.S.
Hewlett-Packard Company
11311 Chinden Boulevard
Boise, Idaho 83714
Page 5

How to Use This Online User’s Guide
This user’s guide is provided in an Adobe™ Acrobat portable
document format (PDF file). This section will help familiarize you
with using PDF documents.
Navigational Features in This Guide
Click the Table of Contents icon to go to the table of
contents for the online user’s guide. The entries are
linked to their related locations in the user’s guide.
Click the Introduction icon to return to this section for
tips on using this online user’s guide.
Click the Index icon to go to the index for the online
user’s guide . The index entries are linked to their related
topics.
Click the Up Arrow icon to go to the previous page.
Click the Down Arrow icon to go to the next page.
EN
Features of Acrobat Reader
Finding Information in PDF Documents
To find specific information in a PDF document, click Contents or
Index in the upper-left corner of the Acrobat Reader window, and
then click the topic you want.
Viewing PDF Documents
For complete instructions on how to view PDF documents , see the
online help included with Acrobat Reader.
iii
Page 6
Magnifying the Page View
You can use the zoom-in tool, the magnification box in the status
bar, or the toolbar buttons to change the screen magnification.
When you zoom in on a document, you can use the hand tool to
move the page around.
Acrobat Reader also offers magnification lev el choices that control
how the page fits on-screen:
Fit Page
Fit Width
Fit Visible
To increase magnification:
scales the page to fit within the main window.
scales the page to fit the width of the main window.
fills the window with the page’s content area only.
Select the zoom-in tool and click
on the document page to double the current magnification.
To decrease magnification:
Select the zoom-in tool while
holding down Ctrl (Windows and UNIX) or Option (Macintosh),
and click the center of the area you want to reduce.
Paging Through a Document
The following options are a v ailab le f or paging through a document.
T o go to the next page:
or press the Right Arrow or Down Arrow.
To return to the previous page:
in the toolbar, or press the Left Arrow or Up Arrow.
To go to the first page:
Click the Next P age button in the toolbar ,
Click the Previous Page button
Click the First Page button in the toolbar.
To go to the last page:
To jump to a specific numbered page:
Click the Last Page button in the toolbar.
Click the page number
box in the status bar at the bottom of the main window, type the
page number, and click OK.
iv
EN
Page 7

Browsing with Thumbnails
A thumbnail is a miniature view of each document page. You can
display thumbnails in the overview area. Use a thumbnail to jump
quickly to a page and to adjust the view of the current page.
Click on a thumbnail to move to the page it represents.
Finding Words
Use the Find command to find part of a word, a complete word, or
multiple words in the active document.
Click on the Find button, or choose Find from the Tools menu.
Printing the document
To print selected pages: From the File menu, choose Print.
Choose Pages. In the From and To box es type the range of pages
you wish to print. Then click OK.
T o print the whole document: F rom the File menu, choose Print.
Choose All
document), then click OK.
pages (
n
represents the total number of pages in the
n
Note
EN
Go to http://www.adobe .com/ for the lastest versions and additional
languages of Adobe™ Acrobat Reader.
v
Page 8
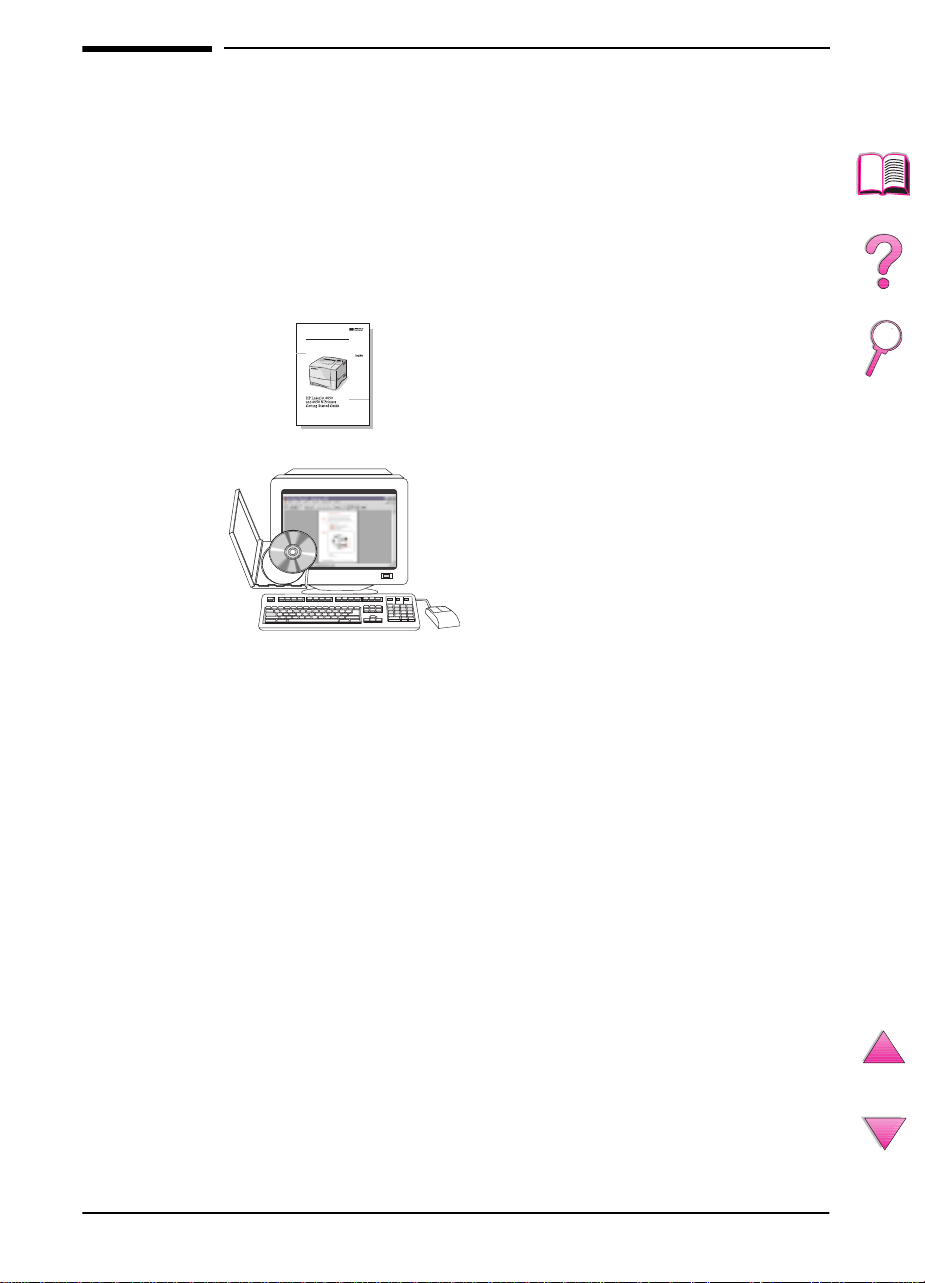
Where to Look for More Information . . .
Several ref erences are av ailable for use with this printer . F or additional
copies of the guides below , contact HP Direct at (800) 538-8787 (U.S.)
or contact your HP-authorized dealer. Additional information is
available at http://www.hp.com.
Setting Up the Printer
Getting Started Guide
Step-by-step instructions for
installing and setting up
the printer.
HP JetDirect Print Server
Software Installation Guide*
Step-by-step instructions for configuring
the HP JetDirect print server.
*Accompanies printers that include an HP JetDirect print server (network
card).
vi
EN
Page 9

Using the Printer
Online User’s Guide
Detailed information on using and
troubleshooting the printer.
Quick Reference Guide
Tips and quick information in a booklet
to keep by the printer . See y our network
administrator for the copy that came
with the printer.
Online Help
Information on printer options that are
available from within printer drivers. To
view a help file, access the online help
through the printer driver.
EN
HP Fast InfraRed Receiver
User Guide
Detailed information on using and
troubleshooting the HP Fast InfraRed
Receiver.
vii
Page 10

HP Customer Care Service and Support
Online Services
For 24-hour access to information over your modem, we suggest
these services:
World Wide Web
Printer drivers, updated HP printer software, plus product and support information
may be obtained from the following URLs
in the U.S. http://www.hp.com/go/support
Printer drivers may be obtained from the following sites:
in China ftp://www.hp.com.cn/go/support
in Japan ftp://www.jpn.hp.com/go/support
in Korea http://www.hp.co.kr/go/support
in Taiwan http://www.hp.com.tw/go/support
or the local driver website http://www.dds.com.tw
Obtaining Software Utilities and
Electronic Information for U.S.:
Monday - Friday: 6:00 am - 10:00 pm MST
Saturday: 9:00 am - 4:00 pm MST
Phone: (805) 257-5565
Fax: (805) 257-6995
:
HP website: http://www.hp.com/
Mail:
Hewlett-Packard Co.
P.O. Box 907
Santa Clarita, CA 91380-9007
U.S.A.
For Canada:
Phone: (905) 206-4663
viii
EN
Page 11

For Europe:
HP Distribution Europe
The languages supported are also listed above beside the
telephone numbers.
Hours of operation are 7:30 am GMT (8:30 am CET) to 17:00 GMT
(18:00 CET).
English speaking line 01429 865511 +44 1429 865511
French speaking line +44 1429 863343
German speaking line +44 1429 863353
Italian speaking line +44 1429 520013
Spanish speaking line +44 1429 520012
Portuguese speaking line +44 1429 890466
Within UK Internationally
For Asia Pacific Region:
Australia +61 3 9272 8000
P.R. China ( Beijing ) +86 10 65053888
Hong Kong +65 740-4477
India +91 (011) 682 6035
Indonesia +65 740-4477
Japan +81 3 53461891
Korea +82 2 3270 0805
Malaysia +65 740-4477
New Zealand 0800-445-543 (toll free) or (09) 356 6640
Philippines +65 740-4477
Singapore +65 740-4477
Taiwan +886 (02) 717 0055
Thailand +66 (02) 661-3900 ext 3224
For Latin America:
Argentina
8:30 a 19:30 hrs.
Buenos Aires:
787-8080
EN
Brazil
8:00 a 19:00 hrs.
São Paulo:
011-829-6612
Chile
8:30 a 18:30 hrs.
Chile:
800-360999
Colombia
* Local dealers provide technical assistance
ix
Page 12

Mexico “HP Contigo”
8:00 a 18:00 hrs.
Mexico:
01-800-4726684
Mexico:
01 800-4720684
Venezuela
8:00 a 18:00 hrs. 800-47-888
Caracas:
* Technical Assistance for Other Latin American countries are provided by local
dealers.
207-8488
HP Direct Ordering for Accessories or Supplies:
Call (800) 538-8787 (U.S.) or (800) 387-3154 (Canada).
HP Direct Ordering for Genuine HP Parts:
In the U.S., call (800) 227-8164
HP Service Parts Information Compact Disc:
This powerful, CD-ROM-based parts information tool is designed
to give users fast, easy access to parts information such as pricing
and recommended stocking lists for a wide range of HP products.
To subscribe to this quarterly service in the U.S. or Canada, call
(800) 336-5987. In Asia Pacific, call (65) 740-4484. Parts
identification and pricing information worldwide can also be
accessed via the World Wide Web at www.hp.com/go/partsinfo.
HP Support Assistant Compact Disc:
This support tool offers a comprehensive online information system
designed to provide technical and product information on HP
products. To subscribe to this quarterly service in the U.S. or
Canada, call (800) 457-1762. In Hong Kong, Indonesia, Mala ysia,
or Singapore, call Mentor Media at (65) 740-4477.
HP Service Information:
To locate authorized HP resellers, call (800) 243-9816 (U.S.) or
(800) 387-3867 (Canada).
HP Service Agreements:
Call (800) 835-4747 (U.S.) or (800) 268-1221 (Canada).
Extended Service (800) 446-0522
x
EN
Page 13

HP FIRST
HP FIRST fax-on-demand service will deliver detailed
troubleshooting information on common software and
troubleshooting tips for y our HP product. Call from any touch tone
phone and request up to three documents per call. These
documents will be sent to the fax of your choice. Many of these
numbers are local numbers and will not work internationally.
North and Latin America
Outside the U.S. and Canada (404) 329-2009
In the U.S. and Canada (800) 333-1917
Asia/Pacific
Australia (03) 9272 2627
China (10) 6505 5280
Hong Kong 2506 2422
India (11) 682 6031
Indonesia (21) 352 2044
Japan (03) 3335 8622
Korea (02) 769 0543
Malaysia (03) 298 2478
New Zealand (09) 356 6642
Philippines (02) 848 9880
Singapore 275 7251
Thailand (02) 661 3511
Vietnam (08) 823 4161
EN
Europe, Middle East and Africa
Austria 0660-8218
Belgium
Dutch 0800 1 1906
French 0800 1 7043
Denmark 800-10453
European International +31 20 681 5792
Finland 9800-13134
France 0800-905900
Germany 0130-810061
Hungary 36 1 461-8222
Italy 1678-59020
Netherlands 0800-0222420
Norway 800-11319
Portugal 05 05 313342
Spain 900-993123
Sweden 020-795743
Switzerland
French 0800-551526
German 0800-551527
United Kingdom 0800-960271
xi
Page 14

Customer Support Options Worldwide
The service and support chapter of this user’s guide contains
worldwide sales and service addresses and phone numbers for
countries not listed here.
HP Customer Care and Product Repair
Assistance for the U.S. and Canada
Refer to the service and support chapter of this user’s guide for
additional product repair information.
Call (208) 323-2551 Monday through Friday from 6 am to 6 pm
(Mountain Time) free of charge during the warranty period.
However, your standard long-distance phone charges still apply.
Have your system nearby and your serial number ready when
calling.
If you know your printer needs repair , call (800) 243-9816 to locate
your nearest authorized HP service provider.
Post-warranty telephone assistance is available to answer your
product questions. Call (900) 555-1500 ($2.50* per minute, U.S.
only) or call (800) 999-1148 ($25* per call, Visa or MasterCard, U.S.
and Canada) Monday through F rida y from 7am to 6 pm (Mountain
Time).
technician. *Prices subject to change.
Charges begin only when you connect with a support
xii
EN
Page 15

European HP Customer Care Center
Language and In-country Options Available
Open Monday through F rida y 8:30 - 18:00 Central European Time
(CET)
HP provides a free telephone support service during the warranty
period. By calling a telephone number listed below, you will be
connected to a responsive team waiting to help you. If you require
support after your warranty has expired, you can receive support
for a fee through the same telephone number. The fee is charged
on a per-incident basis. When calling HP, have the following
information ready: product name and serial number, date of
purchase, and description of the problem.
English Ireland: (353) (1) 662-5525
Dutch Belgium: (32) (2) 626-8806
French France: (33) (01) 43-62-3434
German Germany: (49) (180) 525-8143
Norwegian Norway: (47) 2211-6299
Danish Denmark: (45) 3929-4099
Finnish Finland: (358) (9) 0203-47288
Swedish Sweden: (46) (8) 619-2170
Italian Italy: (39) (2) 0-264-10350
Spanish Spain: (34) (90) 232-1123
Portuguese Portugal: (351) (1) 441-7199
U.K.: (44) (171) 512-5202
International: (44) (171) 512-5202
Netherlands: (31) (20) 606-8751
Belgium: (32) (2) 626-8807
Switzerland: (41) (84) 880-1111
Austria: (43) (1) 0660-6386
EN
xiii
Page 16

In-country Support Numbers
If you require support after your warranty has expired, additional
product repair services, or if your country is not listed below, see
“Worldwide Sales and Service Offices” on page 145.
Argentina 787-8080
Australia (61) (0) 3 8877 8000
Brazil 011-829-6612
Canada (208) 323-2551
China (86) (0) 10 6564 5959
Chile 800-360999
Czech Republic (420) (2) 613 07310
Greece (30) (1) 689-6411
Hong Kong 800 96 7729
Hungary (36) (1) 461-8110
India (91) (0) 11 682 6035
Indonesia 62 (0) 21 350 3408
Korea (Seoul) (82) (0) 2 3270 0700
Korea outside Seoul 080 999 0700
Japan (81) (3) 3335-8333
Malaysia (60) (0) 3 295 2566
Mexico (Mexico City) 01 800 4726684
Mexico (outside Mexico City) 01 800-90529
New Zealand (64) (0) 9 356 6640
Philippines (63) (0) 2 867 3551
Poland (48) (22) 608-7700
Portugal (351) (1) 301-7330
Russia (7) (95) 923-5001
Singapore +65 272 5300
Switzerland (41) (1) 0800-55-5353
Taiwan 886 (0) 2 717 0055
Thailand +66 (0) 2 661 4000
Turkey (90) (1) 224-5925
Vietnam +848 823 4530
01 800 4720684
xiv
EN
Page 17

Contents
How to Use This Online User’s Guide . . . . . . . . . . . . . . . . . . . . .iii
Navigational Features in This Guide . . . . . . . . . . . . . . . . . . .iii
Features of Acrobat Reader . . . . . . . . . . . . . . . . . . . . . . . . .iii
Where to Look for More Information . . . . . . . . . . . . . . . . . . . . . .vi
Setting Up the Printer . . . . . . . . . . . . . . . . . . . . . . . . . . . . . .vi
Using the Printer . . . . . . . . . . . . . . . . . . . . . . . . . . . . . . . . . vii
HP Customer Care Service and Support . . . . . . . . . . . . . . . . . .viii
Online Services . . . . . . . . . . . . . . . . . . . . . . . . . . . . . . . . . .viii
HP FIRST . . . . . . . . . . . . . . . . . . . . . . . . . . . . . . . . . . . . . . .xi
Customer Support Options Worldwide . . . . . . . . . . . . . . . . . . . xii
HP Customer Care and Product Repair Assistance
for the U.S. and Canada . . . . . . . . . . . . . . . . . . . . . . . . . . xii
European HP Customer Care Center Language and
In-country Options Available . . . . . . . . . . . . . . . . . . . . . . xiii
In-country Support Numbers . . . . . . . . . . . . . . . . . . . . . . . .xiv
1 Printer Basics
Overview . . . . . . . . . . . . . . . . . . . . . . . . . . . . . . . . . . . . . . . . . . . 1
Printer Features and Benefits . . . . . . . . . . . . . . . . . . . . . . . . . . . 2
Printer Information . . . . . . . . . . . . . . . . . . . . . . . . . . . . . . . . . . . . 3
Configurations . . . . . . . . . . . . . . . . . . . . . . . . . . . . . . . . . . . . 3
Printer Parts and Locations . . . . . . . . . . . . . . . . . . . . . . . . . . 4
Accessories and Supplies . . . . . . . . . . . . . . . . . . . . . . . . . . . . . .6
Suggested Accessories . . . . . . . . . . . . . . . . . . . . . . . . . . . . . 7
Ordering Information . . . . . . . . . . . . . . . . . . . . . . . . . . . . . . .8
Control Panel Layout . . . . . . . . . . . . . . . . . . . . . . . . . . . . . . . . . 12
Control Panel Lights . . . . . . . . . . . . . . . . . . . . . . . . . . . . . . 12
Control Panel Keys . . . . . . . . . . . . . . . . . . . . . . . . . . . . . . . 13
Using the Printer Online Help System . . . . . . . . . . . . . . . . . 14
Control Panel Menus . . . . . . . . . . . . . . . . . . . . . . . . . . . . . . 15
Printer Software . . . . . . . . . . . . . . . . . . . . . . . . . . . . . . . . . . . . . 17
Printer Drivers . . . . . . . . . . . . . . . . . . . . . . . . . . . . . . . . . . .20
Windows . . . . . . . . . . . . . . . . . . . . . . . . . . . . . . . . . . . . . . . 21
Macintosh . . . . . . . . . . . . . . . . . . . . . . . . . . . . . . . . . . . . . . 21
Software for Windows . . . . . . . . . . . . . . . . . . . . . . . . . . . . .22
Software for Macintosh Computers . . . . . . . . . . . . . . . . . . .28
Software for Networks . . . . . . . . . . . . . . . . . . . . . . . . . . . . . 29
EN
Contents xv
Page 18

2 Printing Tasks
Overview . . . . . . . . . . . . . . . . . . . . . . . . . . . . . . . . . . . . . . . . . . 31
Selecting the Output Bin . . . . . . . . . . . . . . . . . . . . . . . . . . . . . . 32
Printing to the Top Output Bin . . . . . . . . . . . . . . . . . . . . . . . 32
Printing to the Rear Output Bin . . . . . . . . . . . . . . . . . . . . . .33
Loading Tray 1 . . . . . . . . . . . . . . . . . . . . . . . . . . . . . . . . . . . . . . 34
Loading Tray 2 (4050/4050 N) . . . . . . . . . . . . . . . . . . . . . . . . . . 35
Loading Trays 2 and 3 (4050 T/4050 TN) . . . . . . . . . . . . . . . . . 37
Loading the Optional 500-Sheet Tray . . . . . . . . . . . . . . . . . . . . 39
Printing Both Sides of Paper (Optional Duplexer) . . . . . . . . . . . 41
Guidelines for Printing Both Sides of Paper . . . . . . . . . . . . 42
Printing Special Paper . . . . . . . . . . . . . . . . . . . . . . . . . . . . . . . . 45
Printing Letterhead, Prepunched, or Preprinted Paper . . . . 45
Paper Orientation . . . . . . . . . . . . . . . . . . . . . . . . . . . . . . . . 46
Printing Envelopes . . . . . . . . . . . . . . . . . . . . . . . . . . . . . . .47
Printing Labels . . . . . . . . . . . . . . . . . . . . . . . . . . . . . . . . . . . 53
Printing Transparencies . . . . . . . . . . . . . . . . . . . . . . . . . . .55
Printing Cards, Custom-Size, and Heavy Paper . . . . . . . . . 56
Advanced Printing Tasks . . . . . . . . . . . . . . . . . . . . . . . . . . . . . . 59
Using Features in the Printer Driver . . . . . . . . . . . . . . . . . . 59
Customizing Tray 1 Operation . . . . . . . . . . . . . . . . . . . . . . . 63
Printing by Type and Size of Paper . . . . . . . . . . . . . . . . . . . 65
Supported Types of Paper . . . . . . . . . . . . . . . . . . . . . . . . .66
Job Retention Features . . . . . . . . . . . . . . . . . . . . . . . . . . . . . . . 67
Quick Copying a Job . . . . . . . . . . . . . . . . . . . . . . . . . . . . . . 67
Printing Additional Copies of a Quick Copy Job . . . . . . . . . 67
Deleting a Stored Quick Copy Job . . . . . . . . . . . . . . . . . . . 68
Proofing and Holding a Job . . . . . . . . . . . . . . . . . . . . . . . . . . . . 69
Printing the Remaining Copies of a Held Job . . . . . . . . . . . 69
Deleting a Held Job . . . . . . . . . . . . . . . . . . . . . . . . . . . . . . . 70
Printing a Private Job . . . . . . . . . . . . . . . . . . . . . . . . . . . . . . . . 71
Specifying a Private Job . . . . . . . . . . . . . . . . . . . . . . . . . . . 71
Releasing a Private Job . . . . . . . . . . . . . . . . . . . . . . . . . . .71
Deleting a Private Job . . . . . . . . . . . . . . . . . . . . . . . . . . . . . 72
Storing a Print Job . . . . . . . . . . . . . . . . . . . . . . . . . . . . . . . . . . . 73
Printing a Stored Job . . . . . . . . . . . . . . . . . . . . . . . . . . . . . . 73
Deleting a Stored Job . . . . . . . . . . . . . . . . . . . . . . . . . . . . . 74
Printing with the Optional HP Fast InfraRed Receiver . . . . . . . . 75
Setting Up to Print with Windows 9x . . . . . . . . . . . . . . . . . .75
Printing a Job . . . . . . . . . . . . . . . . . . . . . . . . . . . . . . . . . . .75
Interrupting and Resuming Printing . . . . . . . . . . . . . . . . . . . 76
xvi Contents
EN
Page 19

3 Printer Maintenance
Overview . . . . . . . . . . . . . . . . . . . . . . . . . . . . . . . . . . . . . . . . . . 77
Managing the Toner Cartridge . . . . . . . . . . . . . . . . . . . . . . . . . . 78
HP Policy on Non-HP Toner Cartridges . . . . . . . . . . . . . . .78
Toner Cartridge Storage . . . . . . . . . . . . . . . . . . . . . . . . . . . 78
Toner Cartridge Life Expectancy . . . . . . . . . . . . . . . . . . . . . 78
Checking the Toner Level . . . . . . . . . . . . . . . . . . . . . . . . . .79
Resetting the HP TonerGauge . . . . . . . . . . . . . . . . . . . . . . 79
Continue Printing When Toner Is Low . . . . . . . . . . . . . . . . . 80
Cleaning the Printer . . . . . . . . . . . . . . . . . . . . . . . . . . . . . . . . . . 83
Performing Routine Maintenance . . . . . . . . . . . . . . . . . . . . . . . 87
4 Problem Solving
Overview . . . . . . . . . . . . . . . . . . . . . . . . . . . . . . . . . . . . . . . . . . 89
Clearing Paper Jams . . . . . . . . . . . . . . . . . . . . . . . . . . . . . . . . . 90
Clearing Jams from the Input Tray Areas . . . . . . . . . . . . . . 92
Clearing Jams from the Optional Envelope Feeder . . . . . .94
Clearing Jams from the Top Cover Area . . . . . . . . . . . . . . . 96
Clearing Jams from the Toner Cartridge Area . . . . . . . . . .98
Clearing Jams from the Output Areas . . . . . . . . . . . . . . . . .99
Clearing Jams from the Optional Duplexer . . . . . . . . . . . .100
Solving Repeated Paper Jams . . . . . . . . . . . . . . . . . . . . . 102
Understanding Printer Messages . . . . . . . . . . . . . . . . . . . . . . 103
Mopy Disk Error Messages . . . . . . . . . . . . . . . . . . . . . . . . . . .114
Correcting Output Quality Problems . . . . . . . . . . . . . . . . . . . . 116
Determining Printer Problems . . . . . . . . . . . . . . . . . . . . . . . . .118
Troubleshooting Flowchart . . . . . . . . . . . . . . . . . . . . . . . . 118
Troubleshooting Flowchart for Macintosh Users . . . . . . . .124
Troubleshooting the Printer Hard Disk . . . . . . . . . . . . . . . . . .127
PS Troubleshooting . . . . . . . . . . . . . . . . . . . . . . . . . . . . . . . . . 128
Troubleshooting HP Fast InfraRed Receiver Problems . . . . . . 129
Communicating with an Optional HP JetDirect Print Server . . 131
HP JetDirect 10/100TX print server . . . . . . . . . . . . . . . . . . 131
Checking the Printer’s Configuration . . . . . . . . . . . . . . . . . . . . 133
Menu Map . . . . . . . . . . . . . . . . . . . . . . . . . . . . . . . . . . . . .133
Configuration Page . . . . . . . . . . . . . . . . . . . . . . . . . . . . . . 134
PCL or PS Font List . . . . . . . . . . . . . . . . . . . . . . . . . . . . . . 136
EN
5 Service and Support
Warranty Information . . . . . . . . . . . . . . . . . . . . . . . . . . . . . . . . 137
Service During and After the Warranty Period . . . . . . . . . 137
Guidelines for Repacking the Printer . . . . . . . . . . . . . . . . . . . . 138
Contents xvii
Page 20

Hewlett-Packard Limited Warranty Statement . . . . . . . . . . . . . 139
Limited Warranty for Toner Cartridge Life . . . . . . . . . . . . . . . . 141
Service Information Form . . . . . . . . . . . . . . . . . . . . . . . . . . . . 142
HP Software License Terms . . . . . . . . . . . . . . . . . . . . . . . . . . 143
Worldwide Sales and Service Offices . . . . . . . . . . . . . . . . . . . 145
A Specifications
Overview . . . . . . . . . . . . . . . . . . . . . . . . . . . . . . . . . . . . . . . . . A-1
Paper Specifications . . . . . . . . . . . . . . . . . . . . . . . . . . . . . . . . A-2
Supported Sizes and Weights of Paper . . . . . . . . . . . . . . A-3
Supported Types of Paper . . . . . . . . . . . . . . . . . . . . . . . . A-7
Labels . . . . . . . . . . . . . . . . . . . . . . . . . . . . . . . . . . . . . . . A-10
Transparencies . . . . . . . . . . . . . . . . . . . . . . . . . . . . . . . . A-10
Envelopes . . . . . . . . . . . . . . . . . . . . . . . . . . . . . . . . . . . . A-11
Card Stock and Heavy Paper . . . . . . . . . . . . . . . . . . . . . A-13
Printer Specifications . . . . . . . . . . . . . . . . . . . . . . . . . . . . . . . A-15
Physical Dimensions . . . . . . . . . . . . . . . . . . . . . . . . . . . . A-15
Environmental Specifications . . . . . . . . . . . . . . . . . . . . . A-16
Serial Cable Specifications . . . . . . . . . . . . . . . . . . . . . . . . . . A-18
B Control Panel Menus
Overview . . . . . . . . . . . . . . . . . . . . . . . . . . . . . . . . . . . . . . . . . B-1
Quick Copy Jobs Menu . . . . . . . . . . . . . . . . . . . . . . . . . . . . . . B-2
Private/Stored Jobs Menu . . . . . . . . . . . . . . . . . . . . . . . . . . . . B-3
Information Menu . . . . . . . . . . . . . . . . . . . . . . . . . . . . . . . . . . . B-4
Paper Handling Menu . . . . . . . . . . . . . . . . . . . . . . . . . . . . . . . B-5
Print Quality Menu . . . . . . . . . . . . . . . . . . . . . . . . . . . . . . . . . . B-8
Printing Menu . . . . . . . . . . . . . . . . . . . . . . . . . . . . . . . . . . . . B-10
Configuration Menu . . . . . . . . . . . . . . . . . . . . . . . . . . . . . . . . B-14
I/O Menu . . . . . . . . . . . . . . . . . . . . . . . . . . . . . . . . . . . . . . . . B-19
EIO Menu (4050 N/4050 TN) . . . . . . . . . . . . . . . . . . . . . . . . . B-21
Resets Menu . . . . . . . . . . . . . . . . . . . . . . . . . . . . . . . . . . . . . B-23
C Printer Memory and Expansion
Overview . . . . . . . . . . . . . . . . . . . . . . . . . . . . . . . . . . . . . . . . . C-1
Installing Memory . . . . . . . . . . . . . . . . . . . . . . . . . . . . . . . . . . C-3
Checking Memory Installation . . . . . . . . . . . . . . . . . . . . . . C-5
Adjusting Memory Settings . . . . . . . . . . . . . . . . . . . . . . . . C-6
Installing EIO Cards/Mass Storage . . . . . . . . . . . . . . . . . . . . . C-8
xviii Contents
EN
Page 21

D Printer Commands
Overview . . . . . . . . . . . . . . . . . . . . . . . . . . . . . . . . . . . . . . . . . D-1
Understanding PCL 5e Printer Command Syntax . . . . . . . . . . D-2
Combining Escape Sequences . . . . . . . . . . . . . . . . . . . . . D-3
Entering Escape Characters . . . . . . . . . . . . . . . . . . . . . . . D-4
Selecting PCL 5e Fonts . . . . . . . . . . . . . . . . . . . . . . . . . . . . . . D-5
Common PCL 5e Printer Commands . . . . . . . . . . . . . . . . . . . D-6
E Regulatory Information
FCC Regulations . . . . . . . . . . . . . . . . . . . . . . . . . . . . . . . . . . . E-1
Environmental Product Stewardship . . . . . . . . . . . . . . . . . . . . E-2
Protecting the Environment . . . . . . . . . . . . . . . . . . . . . . . . E-2
Material Safety Data Sheets . . . . . . . . . . . . . . . . . . . . . . . E-5
Declaration of Conformity . . . . . . . . . . . . . . . . . . . . . . . . . E-6
Safety Statements . . . . . . . . . . . . . . . . . . . . . . . . . . . . . . . . . . E-7
Laser Safety Statement . . . . . . . . . . . . . . . . . . . . . . . . . . . E-7
Canadian DOC Regulations . . . . . . . . . . . . . . . . . . . . . . . E-7
VCCI Statement (Japan) . . . . . . . . . . . . . . . . . . . . . . . . . . E-7
Laser Statement for Finland . . . . . . . . . . . . . . . . . . . . . . . E-8
Glossary
Index
EN
Contents xix
Page 22

xx Contents
EN
Page 23

Printer Basics
Overview
Congratulations on your purchase of an HP LaserJet 4050 series
printer. If you have not done so, see the getting started guide
provided with the printer for setup instructions.
Now that the printer is set up and ready to use, take a f ew moments
to get to know the printer. This chapter introduces the following:
Features and benefits of the printer.
•
Important printer parts and locations.
•
Accessories and supplies available for the printer.
•
The layout and basic operation of the printer’s control panel.
•
Helpful printer software for increased printing flexibility.
•
1
EN
Chapter 1: Printer Basics 1
Page 24

Printer Features and Benefits
Speed and Throughput
•
Instant-on fuser prints the first page in 15 seconds
•
Prints letter-size paper 17 pages per minute (ppm) or A4-size
paper 16 ppm
•
“RIP ONCE” capability with 16 MB or hard disk option
Resolution
•
FastRes 1200 for faster printing
•
ProRes 1200 for better graphics
•
Up to 220 levels of gray for smooth, photo-like images
•
HP precision toner for clear, sharp output
Paper Handling
•
Handles up to 600 sheets of paper (base) and expandable to
handle up to 1100 sheets of paper with accessories
•
Prints a wide range of sizes and weights
Language and Fonts
•
HP PCL 6, PCL 5e, and PostScript Level 2 emulation
•
110 fonts for Microsoft Windows, plus HP FontSmart
Expandable Design
•
500-sheet universal paper tray, 75-envelope power feeder, and
duplex printing accessory available
•
Flash storage for forms, fonts, and signatures
•
Memory can be expanded up to 200 MB
•
Two EIO slots for connecting to networks or additional devices
•
HP JetSend enabled
2 Chapter 1: Printer Basics
EN
Page 25

Printer Information
Configurations
This printer is available in four configurations, as described below.
HP LaserJet 4050
The HP LaserJet 4050 comes standard with 8 MB RAM and one
500-sheet tray.
HP LaserJet 4050 N
The HP LaserJet 4050 N comes standard with 16 MB RAM,
a HP JetDirect 10/100Base-TX print server card for connecting to
a network, an HP Fast InfraRed (FIR Receiv er), and one 500-sheet
tray.
HP LaserJet 4050 T
The HP LaserJet 4050 T comes standard with 8 MB RAM and two
250-sheet trays.
HP LaserJet 4050 TN
The HP LaserJet 4050 TN comes standard with 16 MB RAM,
a HP JetDirect 10/100Base-TX print server card for connecting to
a network, an HP Fast InfraRed (FIR Receiv er), and two 250-sheet
trays.
EN
Chapter 1: Printer Basics 3
Page 26

Printer Parts and Locations
Top cover
Tray 1
(100-sheet)
Paper level
indicator
(500-sheet, closed)
Top output bin
Tray 2
Control
panel
Additional
memory can be
installed here.
Power switch
Tray numbers
Figure 1 Printer Parts
(front view, HP LaserJet 4050/4050 N printer)
4 Chapter 1: Printer Basics
EN
Page 27

11
10
1
9
8
7
Figure 2 Printer Parts
Rear output bin (straight-through paper path)
1
Power connector
2
Dust cover
3
FIR receiver port
4
Parallel interface port
5
Network, I/O slot
6
10/100Base-TX (RJ-45) port
7
Memory (More than one DIMM can be installed.)
8
Serial port
9
Accessory interface port
10
Serial and model numbers (inside cover)
11
2
3
456
(rear view, HP LaserJet 4050/4050 N printer)
EN
Chapter 1: Printer Basics 5
Page 28

Accessories and Supplies
You can increase the capabilities of the printer with optional
accessories and supplies.
Note Use accessories and supplies specifically designed for the printer
to ensure optimum performance.
The printer supports two enhanced input/output (EIO) cards. One
of these is used in the HP LaserJet 4050 N and 4050 TN for the
HP JetDirect 10/100Base-TX print server card. Other accessories
and options are available. For ordering information, see page 8.
6 Chapter 1: Printer Basics
EN
Page 29

Suggested Accessories
Use the following accessories to optimize the printer.
1 2 3 4
6 6
HP LaserJet 4050/4050 N Printers HP LaserJet 4050 T/4050 TN Printers
Figure 3 Optional Accessories
HP JetDirect Print Server (EIO card)
1
Hard Disk (EIO card)
2
Memory or Flash DIMM
3
HP Fast InfraRed Receiver
4
Envelope Feeder
5
Duplex Printing Accessory (or duplexer, for 2-sided printing)
6
Optional 500-Sheet Tray
7
55
7
EN
Chapter 1: Printer Basics 7
Page 30

Ordering Information
Use only accessories specifically designed for this printer. To order
an accessory, contact an HP-authorized service or support
provider . (See the HP Customer Care Service and Support pages
at the front of this user’s guide.)
Ordering Information
Item Description or Use Part Number
500-Sheet Paper Feeder
and Tray
Envelope Feeder Automatically feeds up to
Duplex Printing Accessory
(duplexer)
250-Sheet Replacement
Tray
Universal Optional
500-Sheet Replacement
Paper Handling
Tray
500-Sheet Replacement
Tray
HP Multi-purpose Paper HP brand paper for a variety of uses
HP LaserJet Paper Premium HP brand paper for use
Printing Supplies
Toner Cartridge
(6,000 pages)
Paper feeder and one 500-sheet
tray.
75 envelopes.
Allows automatic printing on both
sides of paper.
Replacement paper tray for the
HP LaserJet 4050 T/4050 TN
printers (Trays 2 and 3).
Replacement paper tray is a
500-sheet tray . (Supports nine paper
sizes)
Replacement paper tray for the
HP LaserJet 4050/4050 N printers
(Tray 2). (Supports letter, A4, and
legal paper sizes)
(1 box of 10 reams, 500 sheets each,
weighing 20 lb). To order a sample,
in the U.S. call 1-800-471-4701.
with HP LaserJet printers (1 box of
10 reams, 500 sheets each,
weighing 24 lb). To order a sample,
in the U.S. call 1-800-471-4701.
Replacement HP precision toner
cartridge.
C4124A
C4122A
C4123A
C4126A
C4125A
C3122A
HPM1120
HPJ1124
C4127A
Toner Cartridge
(10,000 pages)
Replacement HP precision toner
cartridge.
C4127X
8 Chapter 1: Printer Basics
EN
Page 31

Ordering Information (Continued)
Item Description or Use Part Number
Dual In-line Memory
Module (DIMM)
Boosts the ability of the printer to
handle large print jobs (maximum
200 MB with HP brand DIMMs):
EDO DIMMs 4 MB
8 MB
16 MB
SDRAM DIMMs 4 MB
8 MB
16 MB
32 MB
64 MB
Flash DIMM Permanent storage for fonts and
forms:
2 MB
4 MB
Font DIMM 8 MB Asian MROM:
Memory, Fonts, and Mass Storage
traditional Chinese
simplified Chinese
Hard Disk Permanent storage for fonts and
forms. Also used for making multiple
original prints and Job Retention
features.
Dust Cover Dust cover, Tray 1x500
Dust cover, Tray 2x250
Dust cover, optional 500
C4135A
C4136A
C4137A
C4140A
C4141A
C4142A
C4143A
C3913A
C4286A
C4287A
C4292A
C4293A
C2985A
C4232A
C4233A
C4234A
EN
Chapter 1: Printer Basics 9
Page 32

Ordering Information (Continued)
Item Description or Use Part Number
Parallel Cables 2 Meter IEEE-1284 cable
3 Meter IEEE-1284 cable
Serial Cables 9-9 pin serial cable
(male/female)
9-25 pin serial cable
(male/female)
Serial Adapter 25-9 pin adapter
(male/female) C2809A
Macintosh Computer
Serial Cable
Macintosh Network
Cable Kit
For connecting to a Macintosh
computer.
For PhoneNET or LocalTalk
connection.
Enhanced I/O Cards HP JetDirect 600N EIO internal print
Cable and Interface Accessories
servers:
10Base-T Ethernet, single RJ-45
port
Ethernet 10Base-T and 10Base2,
LocalTalk networks
Token Ring networks
Fast Ethernet 10/100Base-TX
FIR Receiver Fast InfraRed Receiver C4103A
C2950A
C2951A
C2932A
C2933A
92215S
92215N
J3110A
J3111A
J3112A
J3113A
10 Chapter 1: Printer Basics
EN
Page 33

Ordering Information (Continued)
Item Description or Use Part Number
HP LaserJet Printer Family
Paper Specification Guide
HP LaserJet 4050, 4050 T,
4050 N, and 4050 TN User
A guide to using paper and other
print media with HP LaserJet
printers.
An additional copy of the user
documentation CD-ROM.
Documentation CD-ROM
User’s Documentation
Bundle, HP LaserJet 4050
Documentation
and 4050 N Printers
User’s Documentation
Bundle, HP LaserJet
4050 T and 4050 TN
Printer Maintenance Kit Contains user-replaceable parts
Maintenance
Getting started guide, and the
quick reference guide.
Getting started guide, and the
quick reference guide.
and instructions for routine printer
maintenance.
110 V printer:
new
exchange
220 V printer:
new
exchange
5040-9072
C4251-91001
C4251-90951
(English)
C4252-90925
(English)
C4118-67902
C4118-69001
C4118-67903
C4118-69002
EN
Chapter 1: Printer Basics 11
Page 34

Control Panel Layout
The printer’s control panel consists of the following:
Two-line
display
READY
Ready
Data
Attention
Figure 4 Control Panel Layout
Control Panel Lights
Go
Cancel
Job
Menu
Item
– Value +
Select
Printer
online
help
Light Indication when lit
Ready The printer is ready to print.
Data The printer is processing information.
Attention Action is required. See the control panel display.
12 Chapter 1: Printer Basics
EN
Page 35

Control Panel Keys
Key Function
• Places the printer either online or offline.
[Go]
• Prints any data residing in the printer’s buffer.
• Allows the printer to resume printing after being offline. Clears most
printer messages and places the printer online.
• Allows the printer to continue printing with an error message such as
x LOAD [TYPE] [SIZE]
• Confirms a manual feed request if Tray 1 is loaded and
MODE=CASSETTE
printer’s control panel.
• Overrides a manual feed request from T ra y 1 by selecting paper from the
next available tray.
• Exits the control panel menus. (T o sav e a selected control panel setting,
first press
has been set from the Paper Handling Menu in the
[Select]
or
UNEXPECTED PAPER SIZE
.)
TRAY
.
TRAY 1
[Cancel Job]
Cycles through the control panel menus. Press the right end of the key to
[Menu]
Cycles through the selected menu’s items . Press the right end of the key to
[Item]
[- Value +]
[Select]
• Saves the selected value for that item. An asterisk (*) appears next to the
Cancels the print job that the printer is processing. (Press
only once.) The time it takes to cancel depends on the size of the print job .
move forward or the left end of the key to move backward.
move forward or the left end of the key to move backward.
Cycles through the selected menu item’ s values. Press
or
to move backward.
[-]
selection, indicating that it is the new default. Default settings remain
when the printer is switched off or reset (unless you reset all factory
defaults from the Resets Menu).
• Prints one of the printer information pages from the control panel.
[+]
[Cancel Job]
to move forw ard
EN
Chapter 1: Printer Basics 13
Page 36

Using the Printer Online Help System
This printer features an online help system on the control panel that
provides instructions for resolving most printer errors. Certain
control panel error messages alternate with instructions on
accessing the online help system.
Whenever a [?]
alternates with
to navigate through a sequence of instructions.
Note To exit the online help system, press [Go].
appears in an error message, or a message
FOR HELP PRESS THE ? KEY
, press the [Item] key
14 Chapter 1: Printer Basics
EN
Page 37

Control Panel Menus
For a complete list of control panel items and possible v alues, see
page B-1.
Note
Press
[Menu]
additional trays or other accessories are installed in the printer, ne w
menu items automatically appear.
for access to all control panel menus. When
To Change a Control Panel Setting:
Press
1
2
3
4
5
Settings in the printer driver and software application override
control panel settings. (Software application settings override
printer driver settings.)
If you cannot access a menu or item, it is either not an option for
the printer, or you have not enabled the associated higher level
option, or your network administrator has lock ed the function. (The
control panel reads
network administrator.
[Menu]
Press
[Item]
Press
[- Value +]
Press
[Select]
next to the selection in the display, indicating that it is now the
default.
Press
[Go]
repeatedly until the desired menu appears.
repeatedly until the desired item appears.
repeatedly until the desired setting appears.
to save the selection. An asterisk (
to exit the menu.
ACCESS DENIED MENUS LOCKED
*
.) See your
) appears
EN
Chapter 1: Printer Basics 15
Page 38

To Print a Control Panel Menu Map:
To see the current settings for the menus and items available in the
control panel, print a control panel menu map:
1
2
3
Press
Press
Press
[Menu]
[Item]
[Select]
repeatedly until
repeatedly until
to print the menu map.
INFORMATION MENU
PRINT MENU MAP
appears.
appears.
Y ou might want to store the menu map near the printer f or reference.
The content of the menu map varies, depending on the options
currently installed in the printer. (Many of these values can be
overridden from the printer driver or software application.)
16 Chapter 1: Printer Basics
EN
Page 39

Printer Software
The printer comes with helpful software on a compact disc. See the
getting started guide for installation instructions.
Note Check the ReadMe.txt file provided on the compact disc for
late-breaking information.
Windows
Client
Macintosh
Client
Windows Software
Drivers
HP FontSmart*
Macintosh Software
Apple LaserWriter 8 Driver***
PPDs
HP LaserJet Utility*
Windows Software
HP JetAdmin
Drivers
HP FontSmart*
HP Resource Manager**
Macintosh Software
Apple LaserWriter 8 Driver***
PPDs
HP LaserJet Utility*
Fonts*
Desktop Printer Utility***
Guide files***
Network
Administrator
*These products are not supported in Traditional Chinese, Simplified Chinese, Korean,
and Japanese.
**HP Resource Manager is supported only in English, French, Italian, German, Spanish, Dutch,
Traditional Chinese, Simplified Chinese, Korean, and Japanese.
***These products are supported by English only.
Figure 5 Printer Software
Note The online user’s guide and a copy of Adobe Acrobat Reader
(English version) are on the second of the two compact discs.
EN
Chapter 1: Printer Basics 17
Page 40

The printer drivers provided on the compact disc must be installed
to take full advantage of the printer’s features. The other software
programs are recommended, but are not required f or operation. See
the ReadMe.wri file for more information.
Note Network Administrators: HP JetAdmin and HP Resource Manager
should be installed only on the network administrator’s computer.
Load all other applicable software on the server and all client
computers.
The most recent drivers, additional drivers, and other softw are are
available from the Internet (see the HP Customer Care Service and
Support pages at the front of this user’s guide). Depending on the
configuration of Windows-driven computers, the installation
program for the printer software automatically chec ks the computer
for Internet access and can obtain the latest software. If you do not
have access to the Internet, see the HP Customer Care Service
and Support pages at the front of this user’s guide for information
on obtaining the most recent software.
Included with the printer is a compact disc containing the
HP LaserJet Printing System. On the compact disc are software
components and drivers that benefit end users and network
administrators. See the ReadMe.wri file for the most current
information.
The Printing System includes software designed for end users
operating in the following environments:
•
Microsoft Windows 3.1x
•
Microsoft Windows 9x
•
Microsoft Windows NT 4.0
•
IBM OS/2 version 2.0 or greater
•
Apple Mac OS 7 or greater
•
AutoCad versions 12–15
Additional drivers for Windows NT 3.51 are a vailable on the Internet.
18 Chapter 1: Printer Basics
EN
Page 41

The Printing System also includes software for network
administrators using the following network operating systems:
Novell NetWare 3.x or 4.x
•
Microsoft Windows NT 4.0
•
AppleTalk (LocalTalk or EtherTalk)
•
Network administration software for UNIX, IBM OS/2, and other
network operating systems is availab le from the web or through your
HP distributor. (See the HP Customer Care Service and Support
pages at the front of this user’s guide.)
The drivers and software components for end users and
administrators using the environments listed above are described
in the following sections.
EN
Chapter 1: Printer Basics 19
Page 42

Printer Drivers
Printer drivers access the printer features and allow the computer
to communicate with the printer (via a printer language).
Note Check the ReadMe.wri file provided on the compact disc for
additional software included and supported languages.
Certain printer features are available only from the PCL 6 drivers.
See the printer software help for availability of features.
Drivers Included with the Printer
The following printer drivers are included with the printer . The most
recent drivers are available on the Internet. Depending on the
configuration of Windows computers, the installation program for
the printer software automatically checks the computer for Internet
access to obtain the latest drivers.
PCL 5e PCL 6 PS
Windows 3.1x
Windows 9x
Windows NT 4.0
Macintosh computer
1. PostScript Level 2 emulation is referred to as PS throughout this user’s
guide.
2. Level 1 emulation only.
✓✓✓
✓✓✓
✓✓✓
1
2
✓
20 Chapter 1: Printer Basics
EN
Page 43

Windows
Within the computer installation program, select
install the PCL 5e/6, and PS drivers and HP FontSmart. Select
Custom Install
a network administrator. Select
PCL 6 driver for basic printing.
to install only the software you pref er, or if you are
Minimum Install
Typical Install
to install only the
to
Macintosh
Click
PostScript Printer Description files (PPDs), PDF files (PDFs), online
help, HP LaserJet utility, and Desktop Printer utility. Click
to only install the software you prefer.
Additional Drivers
You can obtain the following printer drivers by downloading them
from the Internet, or by requesting them from an HP-authorized
service or support provider. (See the HP Customer Care Service
and Support pages at the front of this user’s guide.)
OS/2 PCL 5e/6 printer driver
•
OS/2 PS printer driver
•
NT 3.51 PCL 5e, NT 3.51 PS
•
1
The OS/2 drivers are available from IBM and are packaged with OS/2. They are
not available for Traditional Chinese, Simplified Chinese, Korean, and Japanese.
2
The NT 3.51 PS driver is available for English only.
to install the LaserWriter 8 driver (English only),
Install
1
1
2
Custom
Note
EN
If the desired printer driver is not on the compact disc or is not listed
here, check the software application’ s installation disks or ReadMe
files to see if they include support for the printer. If not, contact the
software manufacturer or distributor and request a driver for the
printer.
Chapter 1: Printer Basics 21
Page 44

Software for Windows
Use the Typical Install or Custom Install option (if you are a
network administrator) to install the HP software. (This includes
several printer drivers. For more information, see page 20.)
Network Administrators: If the printer is attached to a network
through an HP JetDirect EIO card, before you can print, the printer
must be configured for that network. T o configure the printer f or your
network, you can select Custom Install from the printer installation
program or use HP JetAdmin software. (See the
Server Software Installation Guide
or the getting started guide that
came with your printer.)
Note You should use the Custom Install option because it allows you to
install administration software such as HP JetAdmin and
HP Resource Manager.
Use the Disk Images option to create a set of disks with the exact
software you want the end users to use . This allows you to distribute
drivers without distributing administration software to end users.
HP JetDirect Print
22 Chapter 1: Printer Basics
EN
Page 45

Access the Windows Printer Driver
To configure the driver, access it in one of the following ways:
Temporarily Change Settings
Operating System
Windows 9x From the File menu, click Print,
Windows NT 4.0 From the File menu, click Print,
Windows 3.1x and
Windows NT 3.51
(from a software application)
and then click Properties. (The
actual steps can vary; this is the
most common method.)
and then click Properties. (The
actual steps can vary; this is the
most common method.)
From the File menu, click Print,
click Printers, and then click
Options. (The actual steps can
vary; this is the most common
method.)
Change Default Settings
(across all applications)
Click the Start button, point to
Settings, and then click Printers.
Right-click the printer icon, and
choose Properties.
Click the Start button, point to
Settings, and then click Printers.
Right-click and choose
Document Defaults or
Properties.
From the Windows control panel,
double-click Printers, highlight
the printer, and click Setup.
Note Settings in the printer driver and software application override
control panel settings. (Software application settings override
printer driver settings.)
EN
Chapter 1: Printer Basics 23
Page 46

Choose the Right Printer Driver for Your Needs
Choose a printer driver based on the way you use the printer.
•
Use the PCL 6 driver to take full advantage of the printer’s
features. Unless backward compatibility with previous PCL
drivers or older printers is necessary, the PCL 6 driver is
recommended.
•
Use the PCL 5e driver if you want print results to look
comparable to those from older printers.
•
Use the PS driver for compatibility with PostScript Level 2
needs. Certain features are not available in this driver.
•
The printer automatically switches between PS and PCL printer
languages.
For the Macintosh, use the Apple LaserWriter 8 Driver, which is a
PS driver.
Printer Driver Help
Each printer driver has help screens that can be activated either
from the Help button, the F1 key, or a question mark symbol in the
upper right corner in the printer driver (depending on the Windows
operating system used). These help screens give detailed
information about the specific driver . Printer driver help is separate
from the software application help.
24 Chapter 1: Printer Basics
EN
Page 47

HP FontSmart
Note HP FontSmart is not supported for Traditional Chinese, Simplified
Chinese, Korean, and Japanese.
Access HP FontSmart from the HP LaserJet folder. HP FontSmart
is a font management utility (for Windows only) which does the
following:
installs, uninstalls, and deletes fonts
•
manages fonts inside a single window by allowing you to
•
drag-and-drop
provides 145 TrueType™ fonts
•
provides an on-screen preview of all the fonts and prints
•
samples of them
provides web connectivity to HP FontSmart, an online resource
•
for free fonts and HP-specific font information (not available for
Windows 3.x)
provides HP LaserJet printer matching screen fonts
•
HP Resource Manager
The HP Resource Manager should be installed only on the network
administrator’s computer . The HP Resource Manager allows y ou to
control hard disk and flash memory features not found in the drivers.
Bidirectional communication is required.
Note HP Resource Manager is not available for the Macintosh.
Use the HP Resource Manager to do the following:
initialize disk and flash memory
•
download, delete, and manage fonts and macros to disk and
•
flash memory across networks
PostScript Type 1, PostScript Type 42 (True Type fonts
•
converted to PostScript format), TrueType, and PCL bitmap
fonts
Note To download Type 1 fonts, Adobe Type Manager must be loaded
and turned on.
Note HP Resource Manager is only supported in English, French, Italian,
German, Spanish, Dutch, T r aditional Chinese, Simplified Chinese ,
Korean, and Japanese.
EN
Chapter 1: Printer Basics 25
Page 48

HP JetSend Communications Technology
HP JetSend is a technology from
Hewlett-Packard that allows devices to
communicate with each other simply and
directly . HP JetSend is built into your printer ,
allowing it to receive information from any
HP JetSend-enabled sending device
anywhere on your network, whether it is in
the same office or at a remote location.
When you use the HP Fast InfraRed Receiver accessory, your
printer can also receive information from any HP JetSend-enabled
infrared device. Examples of HP JetSend sending devices include
computers or laptops running HP JetSend software or scanners
with HP JetSend built in. HP JetSend uses simple IP addressing
between networked devices and cab leless communication between
infrared devices.
Note
HP JetSend software is not supported for Traditional Chinese,
Simplified Chinese, Korean, and Japanese.
To HP JetSend enable your computer or laptop, visit the
HP JetSend website (www.jetsend.hp.com/products) for
information on HP JetSend software. With the software , you will be
able to exchange intra-company documents directly between two
or more computers and between any HP JetSend enabled printers,
without the problems of incompatible software applications or
versions. HP JetSend software will allo w your colleagues to create
documents on their computers and send copies directly to this
printer without any device-specific drivers or configuration
difficulties.
You can visit the HP JetSend website to learn which other devices
are available to communicate easily and directly with your
HP JetSend-enabled printer.
26 Chapter 1: Printer Basics
EN
Page 49

How the JetSend Communications Technology Works
Networked Devices
T o use the HP JetSend capability between networked de vices, print
a configuration page (see page 134) to find your HP JetSend IP
address, and give your address to anyone who wants to send
information to your printer via HP JetSend.
From a HP JetSend sending device, a person only needs to enter
the printer’s IP address and press “send.”
Infrared Devices
To use HP JetSend infrared capability , line up the infrared sensors
between the sending and receiving devices, and choose the “send”
option on the sending device.
The devices will automatically negotiate the best possible outcome
because they have HP JetSend in them.
Note HP JetSend software is not available for the Macintosh computer.
EN
Chapter 1: Printer Basics 27
Page 50

Software for Macintosh Computers
Apple LaserWriter 8 Driver
The driver for the Apple LaserWriter 8 comes on the compact disc
shipped with the printer.
Note Apple LaserWriter 8 Driver applies to English only.
PostScript Printer Description Files (PPDs)
PPDs, in combination with the Apple LaserWriter 8 Driver, access
the printer features and allow the computer to communicate with
the printer. An installation program for the PPDs and other software
is provided on the compact disc. Use the Apple LaserWriter 8 Driver
that comes with the computer or is installed with the HP printer
software compact disc.
HP LaserJet Utility
Note The HP LaserJet Utility is not supported for Traditional Chinese,
Simplified Chinese, Korean, and Japanese.
HP LaserJet Utility allows control of features that are not available
in the driver. The illustr ated screens make selecting printer features
from the Macintosh computer easier than ever . Use the HP LaserJet
Utility to do the following:
•
Customize the printer’s control panel messages.
•
Name the printer, assign it to a zone on the network, download
files and fonts, and change most of the printer settings.
•
Set a password for the printer.
•
From the computer, lock out functions on the printer’s control
panel to prevent unauthorized access. (See the printer software
help.)
•
Configure and set the printer for IP printing.
28 Chapter 1: Printer Basics
EN
Page 51

Software for Networks
HP JetAdmin
HP JetAdmin software is primarily for users who cannot use
HP Web JetAdmin due to the lack of browser access or because
none of the supported server platforms exist on their network.
HP JetAdmin should be installed only on the network
administrator’s computer . HP JetAdmin can be accessed by clicking
the
click the
or from the HP LaserJet program group folder. Use HP JetAdmin
software to do the following:
•
•
HP JetAdmin software works on the following network systems:
•
•
•
•
•
•
•
•
•
*The software for these systems is not included on the compact disc
with the printer, but is a vailable from the Internet. If you do not ha ve
access to the Internet, see the HP Customer Care Service and
Support pages at the front of this user’s guide to obtain this software.
button (point to
Start
HP JetAdmin
Install, configure, and manage printers that are connected to a
network with an HP JetDirect print server.
Manage and troubleshoot network HP printers and print
servers.
Microsoft Windows NT 4.0
Microsoft Windows 9x
Microsoft Windows NT 3.51*
Novell NetWare
HP-UX*
Solaris*
SunOS*
IBM OS/2*
Mac OS (via the HP LaserJet Utility)
Settings
icon) in Windows 9x and Windows NT 4.0;
, click
Control Panel,
and then
Note
EN
Network Administrators: If the printer is attached to a network,
before you can print, the printer must be configured f or that network
using HP JetAdmin or similar network software. (See the getting
started guide.)
Chapter 1: Printer Basics 29
Page 52

HP Web JetAdmin
HP Web JetAdmin is a browser-based management tool. It can be
installed and run on the following systems:
•
Microsoft Windows NT
•
HP-UX*
•
Sun Solaris*
*HP Web JetAdmin is not included on the CD-ROM with the printer ,
but is available from the Internet at http://www.hp.com/support/
net_printing. If you do not have access to the Internet, see the
HP Customer Care Service and Support pages at the front of this
user’s guide to obtain this software.
When installed on a host server, HP Web JetAdmin can be
accessed by any client through a supported web browser (such as
Microsoft Internet Explorer 3.x and 4.x or Netscape Navigator 3.x
and 4.x) by browsing to the HP Web Jet Admin host.
Use HP Web JetAdmin to do the following:
•
Install and configure printers that are connected to a network
with an HP JetDirect print server. If you install HP Web
JetAdmin 5.0 or greater, it will configure Novell NetWare
parameters on the HP JetDirect print server and NetWare
server.
•
Manage and troubleshoot network printers from any location.
Note
30 Chapter 1: Printer Basics
See the
your printer documentation CD-ROM or your networking software
to configure the printer for your needs.
HP JetDirect Print Server Software Installation Guide
on
EN
Page 53

Printing Tasks
Overview
This chapter presents basic printing tasks, such as:
Selecting the output bin.
•
Loading the trays.
•
Printing on both sides of paper with the optional duplexer.
•
Printing on special paper, such as letterhead and envelopes,
•
(including automatically feeding envelopes with the optional
envelope feeder).
This chapter also introduces some advanced printing tasks, to
help you take full advantage of the printer’s features. These tasks
are “advanced” because they require you to change settings from
a software application, the printer driver, or the printer’s control
panel.
2
EN
The printer driver allows you to:
•
Create Quick Sets to save the printer’s setup information for
•
different kinds of print jobs.
Print pages with a watermark in the background.
•
Print the first page of a document on a different kind of paper
•
than the rest of the pages.
Print multiple pages on one sheet of paper.
•
(See “Using Features in the Printer Driver” on page 59.)
Tray 1 can be used in several different ways. See “Customizing
•
Tray 1 Operation” on page 63.
If you frequently use sev eral kinds of paper or share the printer
•
with others, print by type and size to ensure that print jobs
always print on the desired paper. See “Printing by Type and
Size of Paper” on page 65.
Chapter 2: Printing Tasks 31
Page 54

Selecting the Output Bin
The printer has two output locations: the rear output bin and the top
output bin. To use the top output bin, be sure the rear output bin is
closed. To use the rear output bin, open it.
•
If paper coming out of the top output bin has problems, such as
excessive curl, try printing to the rear output bin.
•
To avoid paper jams, do not open or close the rear output bin
while the printer is printing.
Printing to the Top Output Bin
The top output bin collects paper face-down, in correct order. The
top output bin should be used for most print jobs and is
recommended for printing the following:
•
over 50 sheets of paper, continuously
•
transparencies
Figure 6 Top Output Bin
32 Chapter 2: Printing Tasks
EN
Page 55

Printing to the Rear Output Bin
The printer always prints to the rear output bin if it is open. Paper
comes out of the printer face-up, with the last page on top.
To open the rear output bin, grasp the handle at the top of the bin.
Pull the bin down, and slide out the extension.
Printing from Tray 1 to the rear output bin provides the straightest
paper path. Opening the rear output bin might improve output quality
with the following:
envelopes
•
labels
•
small custom-size paper
•
postcards
•
paper heavier than 28 lb (105 g/m2)
•
Note
Figure 7 Rear Output Bin
Opening the rear output bin disables the optional duplexer (if
installed) and the top output bin.
EN
Chapter 2: Printing Tasks 33
Page 56

Loading Tray 1
Note
To avoid paper jams, do not load trays
while the printer is printing.
T r ay 1 is a multi-purpose tray that holds
a variety of paper, including up to
100 sheets of paper, 10 envelopes, or
20 index cards. The printer might pull
paper from Tray 1 first. To change this,
see page 63. For supported sizes of
paper, see page A-3.
1 Open Tray 1.
2 Pull out the tray extension.
3 Set the side guides to the desired
width.
4 Load Tray 1.
5 Paper should fit, without bending,
under the tabs on the guides, and
below the line as indicated. For
correct orientation, see page 46.
34 Chapter 2: Printing Tasks
EN
Page 57

Loading Tray 2 (4050/4050 N)
Tray 2 is a 500-sheet tray. The optional
500-sheet tray is adjusted differently
(page 39). (Tray 2 and the optional
500-sheet tray can be interchanged in
the printer.) Tray 2 adjusts for letter , A4,
and legal sizes; these adjustments
affect printer performance.
Lock
Note
To avoid paper jams, do not load trays
while the printer is printing.
1 Pull the tray completely out of the
printer.
2 If the tray is not already set to the
desired paper size, snap the left and
right guides into place to match the
width of the paper. F or A4 size paper,
slide the lock down to secure the
guide.
3 Lift the back of the rear paper guide
and slide it to the desired paper size
until it clicks into place. If the tray is
not properly adjusted, the printer
might display an error message or
paper might jam.
Continued on the next page.
EN
Chapter 2: Printing Tasks 35
Page 58

4 Load paper into the tray. For correct
orientation, see page 46.
5 Make sure the paper is flat in the tray
at all four corners and below the tabs
on the guides. Slide the tray bac k into
the printer.
The printer automatically senses the
size of paper loaded if the tray is
adjusted correctly. To print by type and
size of paper, see page 65.
36 Chapter 2: Printing Tasks
EN
Page 59

Loading Trays 2 and 3 (4050 T/4050 TN)
Trays 2 and 3 are 250-sheet trays. For
supported sizes of paper, see
page A-3. Choose A5 and B5 ISO as
custom sizes in the printer driver for
these trays (page 56).
Note
To avoid paper jams, do not load trays
while the printer is printing.
1 Pull the tray completely out of the
printer.
2 If the tray is not already set to the
desired paper size, snap the left and
right guides into place to match the
width of the paper.
3 Locate the release tabs (indicated by
the two arrows).
Squeeze the blue tabs to release
them from the slots while sliding the
back section of the tray to the desired
paper size. Make sure the tabs lock
into the correct slots.
EN
Continued on the next page.
Chapter 2: Printing Tasks 37
Page 60

4 Load paper into the tray.
5 Make sure the paper is flat in the tray
at all four corners and below the tabs
on the guides. Gently slide the tray
back into the printer.
The printer senses the size of paper
loaded if the tray is adjusted correctly.
To print by type and size of paper, see
page 65.
38 Chapter 2: Printing Tasks
EN
Page 61

Loading the Optional 500-Sheet Tray
The optional 500-sheet tray is Tray 3 f or
the HP LaserJet 4050/4050 N printers,
or Tray 4 for the HP LaserJet 4050 T/
4050 TN printers. This tray is adjusted
differently than Tray 2 (page 35). Tray 2
and the optional 500-sheet tray can be
interchanged in the printer. For
supported sizes of paper, see
page A-5.
Note
To avoid paper jams, do not load trays
while the printer is printing.
1 Pull the tray completely out of the
printer.
2 If the tray is not set to the desired
paper size, squeeze the release on
the left guide and adjust the left and
right guides to match the width of the
paper.
EN
3 Squeeze the release on the back of
the rear paper guide and slide it to
the desired paper size.
4 Load paper into the tray.
Continued on the next page.
Chapter 2: Printing Tasks 39
Page 62

5 Make sure the paper is flat at all four
corners and below the tabs on the
guides.
6 Set the dial on the right side of the
tray to match the paper size.
Note
Setting the dial adjusts the printer’s
sensors. It does not adjust the guides
inside the tray.
7 Gently slide the tray into the printer.
To print by type and size of paper, see
page 65.
40 Chapter 2: Printing Tasks
EN
Page 63

Printing Both Sides of Paper
(Optional Duplexer)
The printer can automatically print on both sides of paper with an
optional duplex printing accessory (duplexer). This is called
duplexing.
Note See the documentation included with the duplexer for complete
installation and setup instructions. Duplexing might require
additional memory (page C-1).
The duplexer supports standard sizes from B5 JIS (7.2 by 10 inches
or 182 by 257 mm) to legal (8.5 by 14 inches or 216 by 356 mm).
Note The accessory dust cover cannot be used when the optional
duplexer is installed.
Installed Removed
Figure 8 Printer with the Optional Duplexer
EN
Chapter 2: Printing Tasks 41
Page 64

Guidelines for Printing Both Sides of Paper
Caution Do not print on both sides of labels, transparencies, envelopes, or
paper heavier than 28 lb (105 g/m
paper jamming might result.
WARNING! To avoid personal injury and damage to the printer, do not lift the
printer with the duplexer installed. Before relocating the printer,
separate the duplexer and optional trays from the printer.
•
You might need to configure the printer driver to recognize the
duplexer. (See the printer software help for details.)
•
To print on both sides of paper, make the selection from the
software or printer driver. (See the printer software help.)
•
If the printer driver does not have this option, change the Duplex
setting from the Paper Handling Menu in the printer’s control
panel to
Binding to long edge or short edge. (For more information, see
page 44.)
•
Close the rear output bin to use the duplexer (page 32).
Opening the rear output bin disables the duplexer.
DUPLEX=ON
. Also in the Paper Handling Menu, set
2
). Damage to the printer and
42 Chapter 2: Printing Tasks
EN
Page 65

Paper Orientation for Printing Both Sides of Paper
The duplexer prints the second side of paper first, so paper such as
letterhead and preprinted paper needs to be oriented as shown in
Figure 9.
Figure 9 Paper Orientation for Printing Both Sides of Paper
For Tray 1, load the first side facing down and the top toward you.
For all other trays, load the first side facing up and the top toward
the printer.
EN
Chapter 2: Printing Tasks 43
Page 66

Layout Options for Printing Both Sides of Paper
The four print orientation options are shown below. These options
can be selected from the printer driver or from the printer’s control
panel (set
BINDING
ORIENTATION
2. Long-edge
landscape*
Figure 10 Layout Options for Printing Both Sides of Paper
from the Paper Handling Menu and
from the Printing Menu).
1. Long-edge
portrait
3. Short-edge
portrait*
4. Short-edge
landscape
1. Long-edge portrait This is the default printer setting, and the most common layout
used, with every printed image oriented right side up. Facing
pages are read from top to bottom on the left page, then from top
to bottom on the right page.
2. Long-edge landscape This layout is often used in accounting, data processing, and
spreadsheet applications. Every other printed image is oriented
upside-down. Facing pages are read continuously from top to
bottom.
3. Short-edge portrait This layout is often used with clipboards. Every other printed
image is oriented upside-down. Facing pages are read
continuously from top to bottom.
4. Short-edge landscape Each printed image is oriented right side up. Facing pages are
read from top to bottom on the left page, then from top to bottom
on the right page.
Note
When using Windows drivers, select “Flip Pages Up” to get the
binding options designated with (*) above.
44 Chapter 2: Printing Tasks
EN
Page 67

Printing Special Paper
Special paper includes letterhead, prepunched (including 3-hole
punched), envelopes, labels, transparencies, and custom-size
paper.
Printing Letterhead, Prepunched, or
Preprinted Paper
When printing letterhead, prepunched, or preprinted paper, it is
important to correctly orient the paper. See the “Paper Orientation”
section for instructions.
EN
Chapter 2: Printing Tasks 45
Page 68

Paper Orientation
For Tray 1, load paper with the side-to-be-printed facing up , and the
top, short edge toward the printer.
Figure 11 Paper Orientation for Tray 1
For all other trays, load paper with the side-to-be-printed facing
down, and the top edge toward you.
Figure 12 Paper Orientation for All Other Trays
46 Chapter 2: Printing Tasks
EN
Page 69

Printing Envelopes
With the optional envelope f eeder, the printer will automatically feed
up to 75 envelopes. To order an envelope feeder, see page 8. To
print with the envelope feeder, see page 49.
Many types of envelopes can be printed from Tray 1. (Up to 10 can
be stacked in the tray.) Printing performance depends on the
construction of the envelope. Always test a few sample envelopes
before purchasing a large quantity.
Set margins at least 0.6 inch (15 mm) from the edge of the
•
envelope.
If you have problems printing envelopes, try opening the rear
•
output bin.
When you print large numbers of envelopes and standard paper,
for best printing performance print paper first, then envelopes. To
alternate paper and envelopes, from the Configuration Menu in the
printer’s control panel select
SMALL PAPER SPEED=SLOW
.
WARNING!
Caution
Never use envelopes with coated linings, exposed self-stick
adhesives, or other synthetic materials. These items can emit
noxious fumes.
Envelopes with clasps, snaps, windows, coated linings, exposed
self-stick adhesives, or other synthetic materials can severely
damage the printer.
T o a void jamming and possible printer damage, ne ver try to print on
both sides of an envelope.
Before you load envelopes, make sure they are flat and not
damaged or stuck together. Do not use envelopes with
pressure-sensitive adhesive. (For envelope specifications, see
page A-11.)
EN
Chapter 2: Printing Tasks 47
Page 70

Loading Envelopes in Tray 1
1
Open Tray 1, but do not pull out the
extension. (Envelopes feed best
without the extension.)
2
Open the rear output bin and pull out
the tray extension. (This reduces
envelope curl and wrinkling.)
3
Load up to 10 envelopes in the center
of Tray 1 with the side-to-be-printed
facing up, and the postage-end
toward the printer. Slide the
envelopes into the printer as far as
they will go without forcing them.
4
Adjust the guides to touch the
envelope stack without bending the
envelopes. Mak e sure the envelopes
fit under the tabs on the guides.
48 Chapter 2: Printing Tasks
EN
Page 71

Feeding Envelopes Automatically (Optional
Envelope Feeder)
With the optional envelope f eeder, the printer will automatically feed
up to 75 envelopes. To print envelopes without an en velope f eeder,
see page 47.
Note See the documentation included with the envelope feeder for
complete installation and setup instructions.
You might need to configure the printer driver to recognize the
envelope feeder. See the printer software help for details.
Release lever
Guides
Envelope
weight
Tray extension
Figure 13 Envelope Feeder Details
Envelope Sizes
The envelope feeder supports standard sizes from 3.5 by 6.3
•
inches (90 by 160 mm) to 7 by 10 inches (178 by 254 mm).
Other sizes of envelopes should be printed from Tray 1.
•
EN
Chapter 2: Printing Tasks 49
Page 72

Inserting and Removing the Envelope Feeder
1
Open Tray 1.
2
Open the access door on the right,
front corner of the printer, inside T ra y
1.
3
Remove the plastic cover from the
printer. (Replace the cov er when the
envelope feeder is not attached.)
4
Insert the envelope feeder into the
printer as far as it will go. (The
connector on the top right side of the
envelope feeder fits into the plug in
the printer.) Pull gently on the
envelope feeder to be sure that it is
securely in place.
5
To remove the envelope feeder,
press the release button on the left
and pull the envelope feeder away
from the printer.
50 Chapter 2: Printing Tasks
EN
Page 73

Loading Envelopes in the Envelope Feeder
Note
Print only on envelopes approved for
use in the printer (page 47 and
page A-11).
1 Fold down the tray e xtension. Lift the
envelope weight.
2 Squeeze the release lever on the left
envelope guide and slide the guides
apart.
3 Load envelopes into the envelope
feeder with the side-to-be-printed
facing up, and the postage end
toward the printer. Push the
envelopes into the envelope feeder
as far as they will go without forcing
them. Push the bottom envelope in
slightly farther than the top
envelopes. (Stack them as shown.)
Continued on the next page.
EN
Chapter 2: Printing Tasks 51
Page 74

4 Adjust the guides to touch the
envelopes without bending them.
Make sure the envelope f eeder is not
overfilled.
5 Lower the envelope weight onto the
envelopes.
Note
Select the envelope size from the
software application (if the setting is
available), the printer driver, and the
Paper Handling Menu in the printer’s
control panel (page B-5). To print by
type and size of paper, see page 65.
52 Chapter 2: Printing Tasks
EN
Page 75

Printing Labels
Use only labels recommended for use in laser printers. Make sure
that labels meet the correct specifications (page A-3).
Do:
Print a stack of 50 labels from Tray 1 or a stack of 50 to 100
•
labels from other trays.
Load labels in Tray 1 with the side-to-be-printed facing up, and
•
the top, short edge toward the printer. For orientation in other
trays, see Figure 12 on page 46.
Try opening the rear output bin (page 33) to prevent curl and
•
other problems.
Figure 14 Printing Labels
EN
Chapter 2: Printing Tasks 53
Page 76

Do not:
Caution Failure to follow these instructions can damage the printer.
•
Do not load the trays to capacity because labels are heavier
than paper.
•
Do not use labels that are separating from the backing sheet,
wrinkled, or damaged in any way.
•
Do not use labels that have the backing sheet exposed. (Labels
must cover the entire backing sheet with no exposed spaces.)
•
Do not feed a sheet of labels through the printer more than once.
The adhesive backing is designed for only one pass through
the printer.
•
Do not print on both sides of labels.
54 Chapter 2: Printing Tasks
EN
Page 77

Printing Transparencies
Use only transparencies recommended for use in laser printers. F or
transparency specifications, see page A-10.
Load transparencies face up in Tray 1 with the top toward the
•
printer.
A stack of 50 to 100 transparencies can be printed from other
•
trays. Because transparencies are heavier than paper, do not
load the other trays to capacity. For orientation in other trays,
see Figure 12 on page 46.
To prevent transparencies from becoming too hot or sticking
•
together, use the top output bin. Before using the top output bin,
be sure the rear output bin is closed (page 32). Remove each
transparency from the output bin before printing another.
Place transparencies on a flat surface to cool after removing
•
them from the printer.
Figure 15 Printing Transparencies
EN
Chapter 2: Printing Tasks 55
Page 78

Printing Cards, Custom-Size, and
Heavy Paper
Custom-size paper can be printed from Tray 1 or the optional
500-sheet tray. For paper specifications, see page A-2.
Note Choose A5 and B5 (ISO) as custom sizes in the printer driver for
Tray 2 and Tray 3 (HP LaserJet 4050 T/4050 TN printers) and the
optional 500-sheet tray. Settings for these sizes are marked in the
tray, but custom settings must be selected in the software and from
the printer’s control panel.
Tray Minimum Size Maximum Size
Tray 1 3 by 5 inches
(76 by 127 mm)
Optional 500-Sheet Tray 5.8 by 8.2 inches
(148 by 210 mm)
The maximum paper weight is 53 lb (199 g/m
28 lb (105 g/m
2
) from the 500-sheet tray.
8.5 by 14 inches
(216 by 356 mm)
8.5 by 14 inches
(216 by 356 mm)
2
) from Tray 1 and
Note To prevent curl and other problems, heavy paper and very small
custom-size paper should be printed from Tray 1 to the rear output
bin. Open the rear output bin to use it (page 33).
The printer’s control panel can be set f or one custom size at a time.
Do not load more than one size of custom paper into the printer.
For paper sizes less than 5 inches (127 mm) f eed page in a portrait
orientation (short edge first).
56 Chapter 2: Printing Tasks
EN
Page 79

Guidelines for Printing Custom-Size Paper
Do not attempt to print on paper smaller than 3 inches (76 mm)
•
wide or 5 inches (127 mm) long.
Set page margins at least .17 inch (4.23 mm) away from the
•
edges.
Feed short-edge first.
•
Setting Custom Paper Sizes
When custom paper is loaded, size settings need to be selected
from the software application (the preferred method), the printer
driver, or from the printer’s control panel.
Note Settings in the printer driver and software application override
control panel settings. (Software application settings override
printer driver settings.)
X (front edge)
Feed short-edge
first
Y (side edge)
Figure 16 Printing Custom-Size Paper
EN
Chapter 2: Printing Tasks 57
Page 80

If the settings are not available from the software, set the custom
paper size from the control panel:
1 From the Printing Menu set
CONFIGURE CUSTOM PAPER=YES
.
2 From the Printing Menu, select inches or millimeters as the unit
of measurement.
3 From the Printing Menu, set the X dimension (the front edge of
the paper) as shown in Figure 16. X can be 3 to 8.5 inches (76 to
216 mm).
4 Set the Y dimension (the side edge of the paper) as shown in
Figure 16. Y can be 5 to 14 inches (127 to 356 mm).
5 If custom paper is loaded into Tray 1 and
MODE=CASSETTE
, then set
TRAY 1 SIZE=CUSTOM
TRAY 1
from the Paper
Handling Menu in the printer’s control panel. See “Customizing
Tray 1 Operation” on page 63.
If custom paper is loaded in the optional 500-sheet tray , be sure
the paper size dial is set to Custom (page 39).
6 In the software, select Custom as the paper size.
For example , if the custom paper is 8 by 10 inches (203 by 254 mm),
set X=8 inches and Y=10 inches (X=203 millimeters and Y=254
millimeters).
58 Chapter 2: Printing Tasks
EN
Page 81

Advanced Printing Tasks
This section will help you take full adv antage of the printer’s f eatures.
These tasks are “advanced” because they require you to change
settings from the printer’s control panel or the printer driver.
Using Features in the Printer Driver
When you print from a software application, many of the printer’s
features are available from the printer driver. To access Windows
printer drivers, see page 23.
Note HP PCL 5e, PCL 6, PS, OS/2, UNIX and Macintosh drivers are
slightly different. Check the drivers f or a vailable options . The PCL6
driver takes full advantage of the printer’s features.
Settings in the printer driver and software application override
control panel settings. (Software application settings override
printer driver settings.)
Printer Collation
The Printer Collation feature, only available with 16 MB of RAM or
a hard disk, allows multiple original prints (mopying) that provides
you the following advantages:
Reduces network traffic
•
Faster return to application
•
All documents are original
•
Note See the application or printer driver help for specific steps.
EN
Chapter 2: Printing Tasks 59
Page 82

RIP ONCE
RIP ONCE allows the print job to be processed one time at the
printer. The RIP ONCE capability creates an image of the page then
saves a compressed image of the page into memory. RIP ONCE is
enabled when a minimum of 16 MB of RAM or a hard disk is installed
in the printer. Pages are printed by decompressing page images
without pausing to process the print job again. The print job will print
exactly the same ev ery time because the compressed image is not
dependent on any other printer data.
Saving Printer Setup Information
Printer drivers allow you to save the printer settings you use most
often as the default settings. For example, the driver might be set
to print on letter size paper, portrait orientation, with automatic tray
selection (from the first available tray).
Some PCL 5e/ PCL 6 printer drivers will allow you to save printer
settings for multiple kinds of print jobs. F or example, you might w ant
to create a Quick Set for en v elopes , or for printing the first page of
a document on letterhead.
Look for the
printer driver. See the printer driver help for more information on
these features.
Quick Sets
option in the Windows PCL 5e/PCL 6
Printer Driver Features
Look for
and
driver, or see the printer driver help for more information.
Quick Sets, ZoomSmart
Booklet Printing
options in the Windows PCL 5e/PCL 6 printer
(any page size to any page size),
Printing with a Watermark
A watermark is a notice, such as “Top Secret,” printed in the
background of each page in a document. Check the driver for
available options.
60 Chapter 2: Printing Tasks
EN
Page 83

Different First Page
Follow these instructions for printing a first page that is diff erent from
other pages in the print job.
1 For Windows, select “Use diff erent paper f or first page” in y our
printer driver. Choose Tray 1 (or Manual Feed) for the first page
and one of the other trays for the remaining pages. Place the
paper for the first page in Tray 1. (For man ual feed, place paper
in Tray 1 after the job is sent to the printer and the printer
requests paper.) Place the paper with the side-to-be-printed up ,
the top of the page facing the rear of the printer, and the long
edge leading into the printer.
For Macintosh computers, select “First from” and “Remaining
from” in the print dialog box.
Note Where and how you make selections depends on your software
application or associated printer driver. (Some options ma y only be
available through the printer driver.)
2 Load the paper for the remaining pages of the document into
another tray. You may select the first and remaining pages by
type of paper. F or more information, see “Printing by Type and
Size of Paper” on page 65
EN
Chapter 2: Printing Tasks 61
Page 84

Printing Multiple Pages on One Sheet of Paper
You can print more than one page on a single sheet of paper. This
feature is available in some printer drivers, and provides a
cost-effective way to print draft pages.
To print more than one page on a sheet of paper, look for a Lay out
or Pages Per Sheet option in the printer driver. (This is sometimes
called 2-up, 4-up, or n-up printing.)
Figure 17 Sample Layout Options (1-up, 2-up, and 4-up)
62 Chapter 2: Printing Tasks
EN
Page 85

Customizing Tray 1 Operation
Customize Tray 1 to fit your printing needs.
The printer can be set to print from T ra y 1 as long as it is loaded, or
to print only from Tray 1 if the type of paper loaded is specifically
requested. Set
from the Paper Handling Menu in the printer’s control panel. (Print
speed might be slightly slower when printing from Tray 1 when
1 MODE=FIRST
TRAY 1 MODE=FIRST
.)
or
TRAY 1 MODE=CASSETTE
Tray 1 Mode=First
If you do not keep paper in Tray 1 all the time, or y ou use T r ay 1 only
for manually feeding paper, keep the default setting,
MODE=FIRST
in the Paper Handling Menu.
TRAY 1
TRAY
• TRAY 1 MODE=FIRST
from Tray 1 first unless it is empty or closed.
You can still choose paper from other trays by specifically
•
choosing another tray in the printer driver.
means that the printer usually pulls paper
Tray 1 Mode=Cassette
TRAY 1 MODE=CASSETTE
internal trays. Instead of looking for paper in Tray 1 first, the printer
pulls paper either starting from the bottom tray upward (from the
tray with the highest capacity to the tra y with the least capacity), or
the tray that matches type or size settings selected from the
software.
When
•
•
TRAY 1 MODE=CASSETTE
Paper Handling Menu to configure
for Tray 1.
Through the printer driver, you can select paper from any tray
(including Tray 1) by type, size, or source. To print by type and
size of paper, see page 65.
means the printer treats Tray 1 like the
is set, an option appears in the
as well as
size
type
settings
EN
Chapter 2: Printing Tasks 63
Page 86

Manually Feeding Paper from Tray 1
The Manual Feed f eature allows y ou to print on special paper from
T ra y 1, such as envelopes or letterhead. If Manual F eed is selected,
the printer will print only from Tray 1.
Select Manual Feed through the software or printer driver. Manual
Feed can also be enabled from the Paper Handling Menu in the
printer’s control panel.
Note
When Manual Feed is selected, if
automatically prints (if paper is in the tray). If
MODE=CASSETTE
the printer prompts to load Tray 1 whether or not
TRAY 1 MODE=FIRST
TRAY 1
the printer
Tray 1 is loaded. This enables you to load different paper if
necessary. Press
[Go]
to print from Tray 1.
64 Chapter 2: Printing Tasks
EN
Page 87

Printing by Type and Size of Paper
You can configure the printer to select paper by
or letterhead) and
(a paper tray).
(such as letter or A4), as opposed to
size
(such as plain
type
source
Benefits of Printing by Type and Size of Paper
If you frequently use sev eral different kinds of paper , once tra ys are
set up correctly, you do not have to check which paper is loaded in
each tray bef ore you print. This is especially helpful when the printer
is shared, and more than one person loads or removes paper.
Printing by type and size of paper is a wa y to be sure that print jobs
always print on the desired paper. (Some printers have a feature
which “locks out” trays, to prevent printing on the wrong paper.
Printing by type and size of paper eliminates the need to lock out
trays.)
To print by type and size of paper, do the following:
Be sure to adjust and load the trays correctly. (See the sections
1
on loading paper, starting on page 34.)
From the Paper Handling Menu in the printer’s control panel,
2
select the paper
you are loading (such as bond or recycled), check the label on
the package of paper.
Select the paper
3
•
•
•
•
: If the printer has been set to
Tray 1
from the Paper Handling Menu, also set the paper size from
the Paper Handling Menu. If custom paper is loaded, set the
size of custom paper from the Printing Menu to match the
paper loaded in Tray 1. To print custom-size paper, see
page 57.
Optional envelope feeder
Paper Handling Menu.
Optional 500-sheet tray
when paper is properly loaded into the printer and the paper
size dial is set to match the paper size. If custom paper is
loaded, set the size of custom paper from the Printing Menu
to match the paper loaded in the tray. Set the paper size dial
in the tray to Custom. To print custom-size paper, see
page 57.
Other trays
properly loaded into the printer. (See the sections on loading
paper, starting on page 35.)
: Paper size settings are adjusted when paper is
for each tra y. If you are unsure what type
type
settings from the control panel.
size
TRAY 1 MODE=CASSETTE
: Set the paper size from the
: Paper size settings are adjusted
EN
Chapter 2: Printing Tasks 65
Page 88

4 From the software or printer driver , select the desired type and
size of paper.
Note The type and size settings can also be configured from HP Web
JetAdmin and HP JetAdmin software for networked printers. See
the printer driver help.
To print by type and size, it might be necessary to unload or close
Tray 1, or set
Menu in the printer’s control panel. For more information, see
page 63.
Settings in the printer driver and software application override
control panel settings. (Software application settings override
printer driver settings.)
TRAY 1 MODE=CASSETTE
from the Paper Handling
Supported Types of Paper
The printer supports the following types of paper:
•
plain
•
letterhead
•
prepunched
•
bond
•
color
•
rough
•
preprinted
•
transparency
•
labels
•
recycled
•
card stock
•
user-defined (5 types)
66 Chapter 2: Printing Tasks
EN
Page 89

Job Retention Features
T o use the job retention features listed below , you must install a hard
disk in the printer and properly configure the drivers.
Caution Make sure to identify your jobs in the printer driver before printing.
Using default names may override previous jobs with the same
default name or cause the job to be deleted.
Quick Copying a Job
The quick copy feature prints the requested number of copies of a
job and stores a copy on the printer’s hard disk. Additional copies
of the job can be printed later. This feature can be turned off from
the driver.
For more information about specifying the number of quick copy
jobs that can be stored, see the
item described on page B-18.
QUICK COPY JOBS
Printing Additional Copies of a Quick Copy Job
control panel
To print additional copies of a job stored on the printer’s hard disk
from the control panel:
1 Press [Menu] repeatedly until
2 Press [Item] until the desired user or job name appears.
Note If you are using a Macintosh computer , the user name appears on
the first line of the display and the job name appears on the second
line of the display. After you have selected the desired user name
using [Item], press [Value] until the desired job name appears.
3 Press [Select] to select the job.
4 Press [- Value +] until the desired number of copies appears.
5 Press [Select] to print the job.
EN
QUICK COPY JOBS MENU
COPIES=1
Chapter 2: Printing Tasks 67
appears.
appears.
Page 90

Deleting a Stored Quick Copy Job
When a user sends a quick copy job, the printer overwrites any
previous jobs with the same user and job name. If there is not a
quick copy job already stored under the same user and job name
and the printer needs additional space, the printer may delete other
stored quick copy jobs starting with the oldest job. The default
number of quick copy jobs that can be stored is 32. The n umber of
quick copy jobs that can be stored is set from the control panel (see
page B-18).
Note If you turn the printer off and then back on, all quick copy, proof and
hold, and private jobs are deleted.
A stored quick copy job can also be deleted from the control panel
or from HP Web JetAdmin and HP JetAdmin software.
1 Press [Menu] repeatedly until
2 Press [Item] until the desired user name appears.
Note If you are using a Macintosh computer , the user name appears on
the first line of the display and the job name appears on the second
line of the display. After you have selected the desired user name
using [Item], press [Value] until the desired job name appears.
3 Press [Select] to select the job.
4 Press [- Value] until
5 Press [Select] to delete the job.
DELETE
QUICK COPY JOBS MENU
COPIES=1
appears.
appears.
appears.
68 Chapter 2: Printing Tasks
EN
Page 91

Proofing and Holding a Job
The proof and hold feature provides a quic k and easy way to print
and proof one copy of a job and then print the additional copies.
To permanently store the job and prevent the printer from deleting
it when space is needed for something else, select the Stored Job
option in the driver.
Printing the Remaining Copies of a Held Job
The user can print the remaining copies of a job held on the printer’s
hard disk from the control panel.
1 Press [Menu] repeatedly until
2 Press [Item] until the desired user name appears.
Note If you are using a Macintosh computer , the user name appears on
the first line of the display and the job name appears on the second
line of the display. After you have selected the desired user name
using [Item], press [Value] until the desired job name appears.
3 Press [Select] to select the job.
4 Press [- Value +] until the desired number of copies appears.
5 Press [Select] to print the job.
QUICK COPY JOBS MENU
COPIES=1
appears.
appears.
EN
Chapter 2: Printing Tasks 69
Page 92

Deleting a Held Job
When a user sends a proof and hold job, the printer automatically
deletes that user’s pre vious stored proof and hold job. If there is not
a proof and hold job already stored for that job name and the printer
needs additional space, the printer may delete other stored proof
and hold jobs starting with the oldest one.
Note If you turn the printer off and then back on, all quick copy, proof and
hold, and private jobs are deleted. A stored proof and hold job can
also be deleted from the control panel.
1 Press [Menu] repeatedly until
2 Press [Item] until the desired user name appears.
Note If you are using a Macintosh computer , the user name appears on
the first line of the display and the job name appears on the second
line of the display. After you have selected the desired user name
using [Item], press [Value] until the desired job name appears.
3 Press [Select] to select the job.
4 Press [- Value] until
5 Press [Select] to delete the job.
DELETE
QUICK COPY JOBS MENU
COPIES=1
appears.
appears.
appears.
70 Chapter 2: Printing Tasks
EN
Page 93

Printing a Private Job
The private printing feature lets a user specify that a job is not
printed until that user releases it using a 4-digit personal
identification number (PIN) through the printer’s control panel. The
user specifies the PIN in the driver and it is sent to the printer as
part of the print job.
Specifying a Private Job
T o specify that a job is private from the driv er, select the Private Job
option and type a 4-digit PIN.
Releasing a Private Job
The user can print a private job from the control panel.
1 Press [Menu] repeatedly until
appears.
2 Press [Item] until the desired user name appears.
Note If you are using a Macintosh computer , the user name appears on
the first line of the display and the job name appears on the second
line of the display. After you have selected the desired user name
using [Item], press [Value] until the desired job name appears.
3 Press [Select]
4 Press [- Value +] to change the first number of the PIN, and
then press [Select]. An
Repeat these steps to change the remaining three numbers of
the PIN.
5 Press [- Value +] until the desired number of copies appears.
6 Press [Select] to print the job.
PIN:0000
COPIES=1
appears.
PRIVATE/STORED JOBS MENU
appears.
appears in place of the number.
*
EN
Chapter 2: Printing Tasks 71
Page 94

Deleting a Private Job
A private job is automatically deleted from the printer’s hard disk
after the user releases it for printing, unless the user selects the
Stored Job option in the driver.
Note If you turn the printer off and then back on, all quick copy, proof and
hold, and private jobs are deleted.
A private job can also be deleted from the printer’s control panel
before it is ever printed.
1 Press [Menu] repeatedly until
appears.
2 Press [Item] until the desired user name appears.
Note If you are using a Macintosh computer , the user name appears on
the first line of the display and the job name appears on the second
line of the display. After you have selected the desired user name
using [Item], press [Value] until the desired job name appears.
3 Press [Select] to select the job.
4 Press [- Value +] to change the first number of the PIN, and
then press [Select]. An
Repeat these steps to change the remaining three numbers of
the PIN.
5 Press [- Value] until
6 Press [Select] to delete the job.
COPIES=1
appears.
DELETE
PRIVATE/STORED JOBS MENU
PIN:0000
*
appears in place of the number.
appears.
appears.
72 Chapter 2: Printing Tasks
EN
Page 95

Storing a Print Job
The user can download a print job to the printer’s hard disk without
printing it. The user can then print the job at any time through the
printer’s control panel. F or e xample , a user may want to download
a personnel form, calendar, time sheet, or accounting form that
other users can access and print.
To store a print job permanently on the hard disk, select the Stored
Job option in the driver when printing the job.
Printing a Stored Job
The user can print a job stored on the printer’s hard disk from the
control panel.
1 Press [Menu] repeatedly until
appears.
2 Press [Item] until the desired user name appears.
Note If you are using a Macintosh computer , the user name appears on
the first line of the display and the job name appears on the second
line of the display. After you have selected the desired user name
using [Item], press [Value] until the desired job name appears.
3 Press [Select] to select the job name.
4 Press [- Value +] until the desired number of copies appears.
5 Press [Select] to print the job.
PRIVATE/STORED JOBS MENU
COPIES=1
appears.
EN
Chapter 2: Printing Tasks 73
Page 96

Deleting a Stored Job
Jobs stored on the printer’s hard disk can be deleted from the control
panel.
1 Press [Menu] repeatedly until
appears.
2 Press [Item] until the desired user name appears.
Note If you are using a Macintosh computer , the user name appears on
the first line of the display and the job name appears on the second
line of the display. After you have selected the desired user name
using [Item], press [Value] until the desired job name appears.
3 Press [Select] to select the job.
4 Press [- Value] until
5 Press [Select] to delete the job.
DELETE
PRIVATE/STORED JOBS MENU
COPIES=1
appears.
appears.
74 Chapter 2: Printing Tasks
EN
Page 97

Printing with the Optional HP Fast
InfraRed Receiver
The HP Fast InfraRed Receiv er enab les wireless printing from any
IRDA-compliant portable device (such as a laptop computer) to the
HP LaserJet 4050, 4050 N, 4050 T, or 4050 TN printer.
The printing connection is maintained by positioning the sending
infrared (FIR) port within operating range. Note that the connection
can be blocked b y objects such as a hand, paper , direct sunlight, or
any bright light shining into either FIR port.
Note For more information, see the user guide that came with the HP F ast
InfraRed Receiver.
Setting Up to Print with Windows 9x
Before launching the InfraRed Driver , complete the f ollowing steps:
1 From the Printers f older , select the HP LaserJet 4050, 4050 N,
4050 T, or 4050 DN as your default printer.
2 While in the same Printers folder , choose Pr operties/Details,
and make sure that Virtual Infrared LPT Port is selected.
3 Select the file to print.
EN
Printing a Job
1 Align your laptop computer (or other portable device equipped
with an IRDA-compliant FIR window) within 2 to 3 f eet (1 meter)
maximum of the HP Fast InfraRed Receiver. The FIR window
must be at an angle of +/- 15 degrees to ensure an effective
connection for printing.
2 Print the job. The status indicator on the HP Fast InfraRed
Receiver lights up, and, after a short delay, the printer status
panel displays
If the status indicator does not light up, realign the HP F ast InfraRed
Receiver with the FIR port on the sending device, resend the print
job, and maintain the alignment of all de vices . If you have to move
the equipment (for example, to add paper), make sure that all
devices remain within the range of operation to maintain the
connection.
PROCESSING JOB
.
Chapter 2: Printing Tasks 75
Page 98

If the connection is interrupted before your print job is complete, the
HP Fast InfraRed Receiver status indicator turns off. You have up
to 40 seconds to correct the interruption and continue the job. If the
connection is resumed within this time, the status indicator lights up
again.
Note The connection is permanently broken if the sending port is moved
out of operating range or if anything passing between the ports
blocks transmission f or more than 40 seconds. (This block could be
a hand, paper, or even direct sunlight.) Depending on the size of
the job, printing with the HP F ast InfraRed Receiv er ma y be slower
than printing with a cable connected directly to the parallel port.
Interrupting and Resuming Printing
The job interrupt and resume feature lets a user temporarily stop
the job that is currently printing in order to print another job. When
the new job is finished printing, the interrupted job resumes printing.
A user can only interrupt jobs that are printing and collating multiple
copies by connecting to the infrared (FIR) port on the printer and
sending a job to the printer. The printer stops printing the current
job when it reaches the end of the copy it is printing. The printer
then prints the job sent over the FIR connection. When the printer
is done printing that job, it resumes printing the original job with
multiple copies where it left off.
76 Chapter 2: Printing Tasks
EN
Page 99

Printer Maintenance
Overview
This chapter explains basic printer maintenance.
Managing the toner cartridge.
•
Cleaning the printer.
•
Performing routine maintenance.
•
3
EN
Chapter 3: Printer Maintenance 77
Page 100

Managing the Toner Cartridge
HP Policy on Non-HP Toner Cartridges
Hewlett-Pac kard Company cannot recommend use of non-HP toner
cartridges, either new or remanufactured. Because they are not
HP products, HP cannot influence their design or control their
quality.
To install a new HP toner cartridge and recycle the used cartridge,
follow the instructions included in the toner cartridge box.
Toner Cartridge Storage
Do not remove the toner cartridge from its package until you are
ready to use it. (The shelf life of a cartridge in an unopened package
is approximately 2.5 years.)
Caution To prevent damage to the toner cartridge, do not expose it to light
for more than a few minutes.
Toner Cartridge Life Expectancy
The life of the toner cartridge depends on the amount of toner that
print jobs require. When printing text at 5% cover age, an HP toner
cartridge lasts an average of 10,000 or 6,000 pages, depending on
which toner cartridge is installed. (A typical business letter is about
5% coverage.) This assumes that print density is set to 3 and
EconoMode is off. (These are the default settings.)
78 Chapter 3: Printer Maintenance
EN
 Loading...