

Honeywell SiXSMOKE, SiXSMOKE-CN Installation Instructions Manual
PULL
TO
CONNECT
PULL
TO
CONNECT
Serial Number Loop Number
Zone Description 1 Zone Description 2
Device Type Response Type
Alarm Report Chime Supervision
Panic Home
1
3
4
The Green LED is
ON for 3 seconds
Programming Mode > Zones >
Add New > Serial Number
The LED
Flashes for
up to about
20 seconds
30
0
45
20
10
2
Trigger the device
again to complete
enrollment
PULL
TO
CONNECT
PULL
TO
CONNECT
PULL
TO
CONNECT
PULL
TO
CONNECT
5
Press SAVE
6
-
SiXTM
Series
This wireless smoke/heat detector
is intended for use with Honeywell
controls that support SiX™ series
devices.
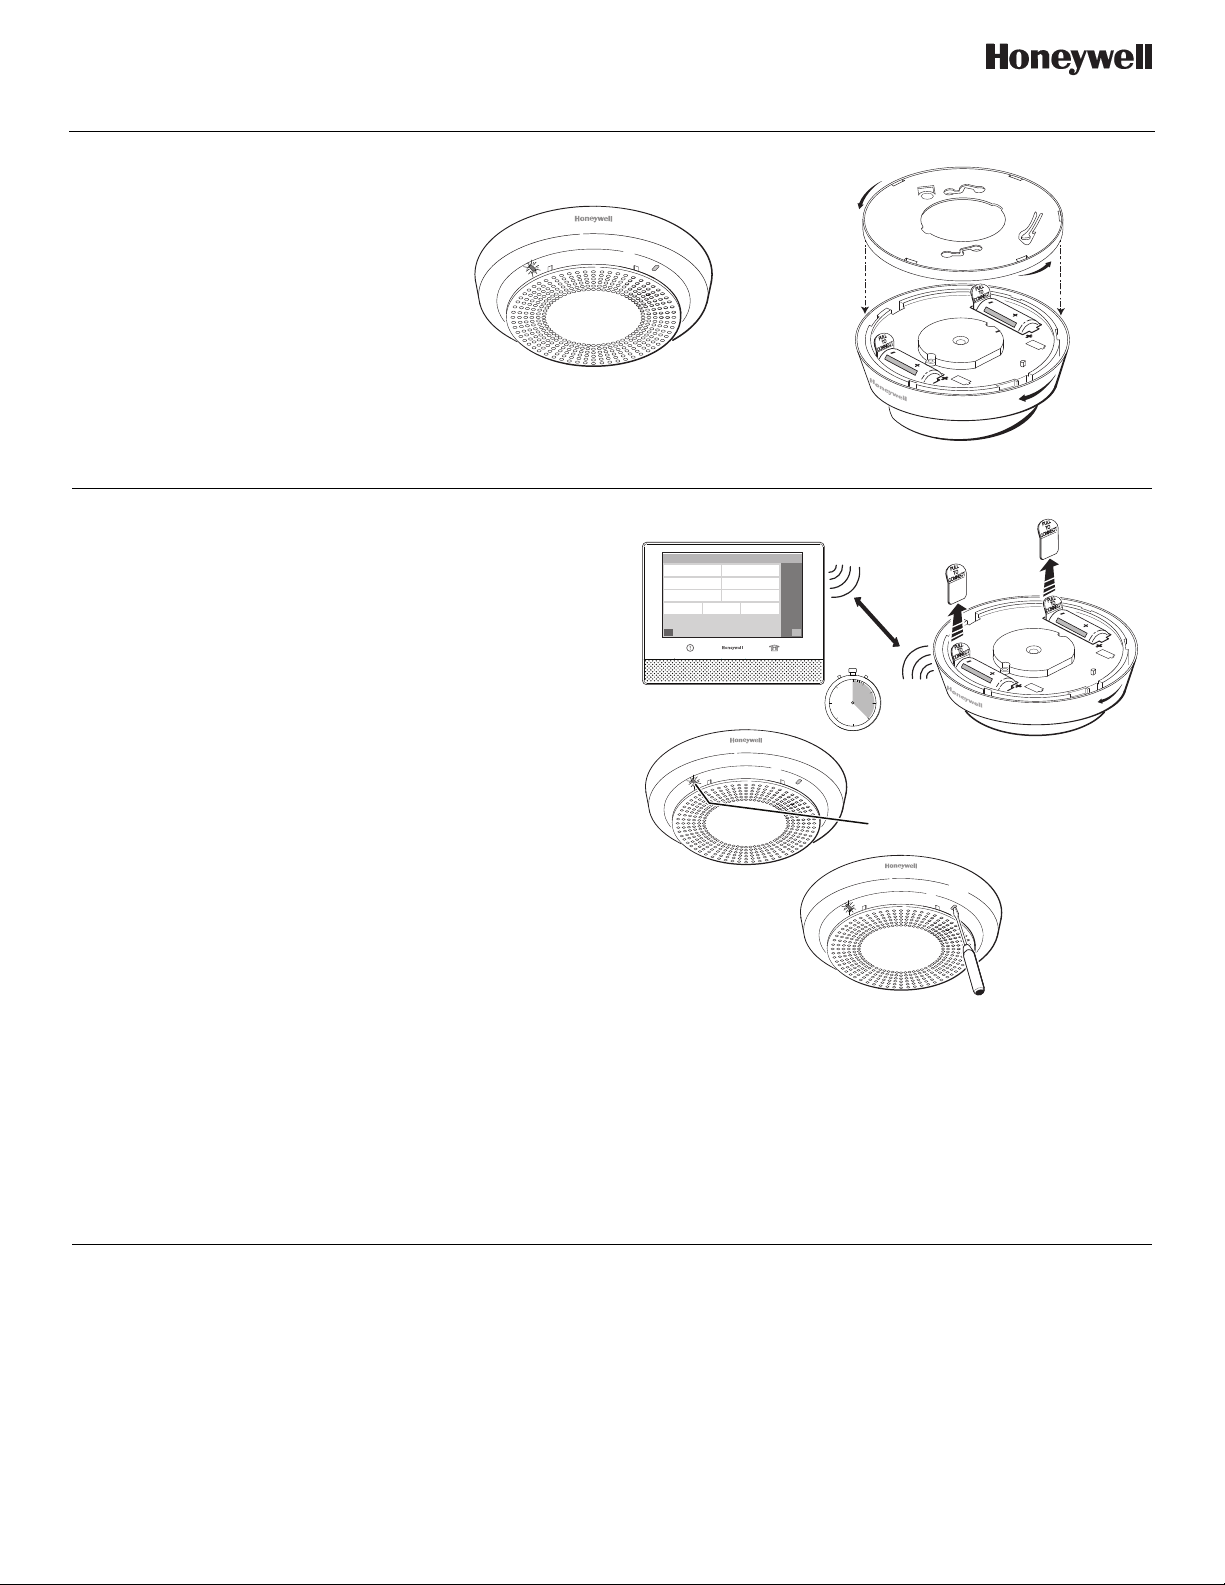
To remove the mounting bracket,
turn the top of the detector 15
degrees counterclockwise and
separate the mounting bracket and
top cover.
SiXSMOKE / SiXSMOKE-CN
Installation Instructions
SiXSMOKE /
SiXSMOKE-CN
Open
Enroll
This device can be enrolled and programmed either
before or after installation.
1. Set the Lyric Controller in Programming Mode and go
to Zone Programming. Select Add New and then
Serial Number.
2. Remove the battery tabs to activate the device and
begin the enrollment process.
3. The Green LED flashes rapidly during enrollment (up
to about 20 seconds*).
*NOTE: Enrollment time varies depending on the signal
strength between the device and the controller.
• The detector sends its unique MAC ID (Serial
Number) and Services information to the controller.
• The controller registers the device and displays the
transmitter data on screen.
4. Enrollment is confirmed when the Green LED is ON
for 3 seconds and the device chirps.
5. Repeat the process, pressing the Test Switch to start
enrollment, and select Heat Sensor Device type to
enroll the heat sensor. The device will enroll the
same MAC ID in another Zone.
6. Press SAVE.
If the detector is not successfully enrolled during the
enrollment period, the LED turns off and the device
powers down. Activate the tamper or press the Test
switch to restart the enrollment process.
The device can also be manually enrolled. See the
Controller’s Programming Guide for details.
Program
Consult the Controller’s instructions to program the device in the system.
Fault device features to learn the device Services in the controller:
- Smoke and Heat detector - Reports to panel:
• Smoke Alarm when smoke is detected
• Temperature Alarm when temperature of 135° F (57° C) or greater OR when there is a
temperature increase of 15° F (8.33° C) or greater within one minute
- Percentage of obscuration (smoke or dirt in the detector)
- Cover tamper: The 10 minute tamper timer is reset every time the tamper switch is closed and
opened or the detector cover is opened.
Supervision – 200 second check-in compatible
Enroll
After enrolling, update the detector firmware (via the
Controller) to ensure the latest version is used. See the
Controller’s instructions.
NOTE: Once enrolled in a system, the detector cannot be used
with another controller until it is removed from the current
controller. See the Controller’s instructions for details.
NOTE: If programmed in
the panel to operate in
one-go-all-go mode, all
smoke detectors
programmed as one-goall-go in the system will
sound on alarm.
HEAT
SMOKE
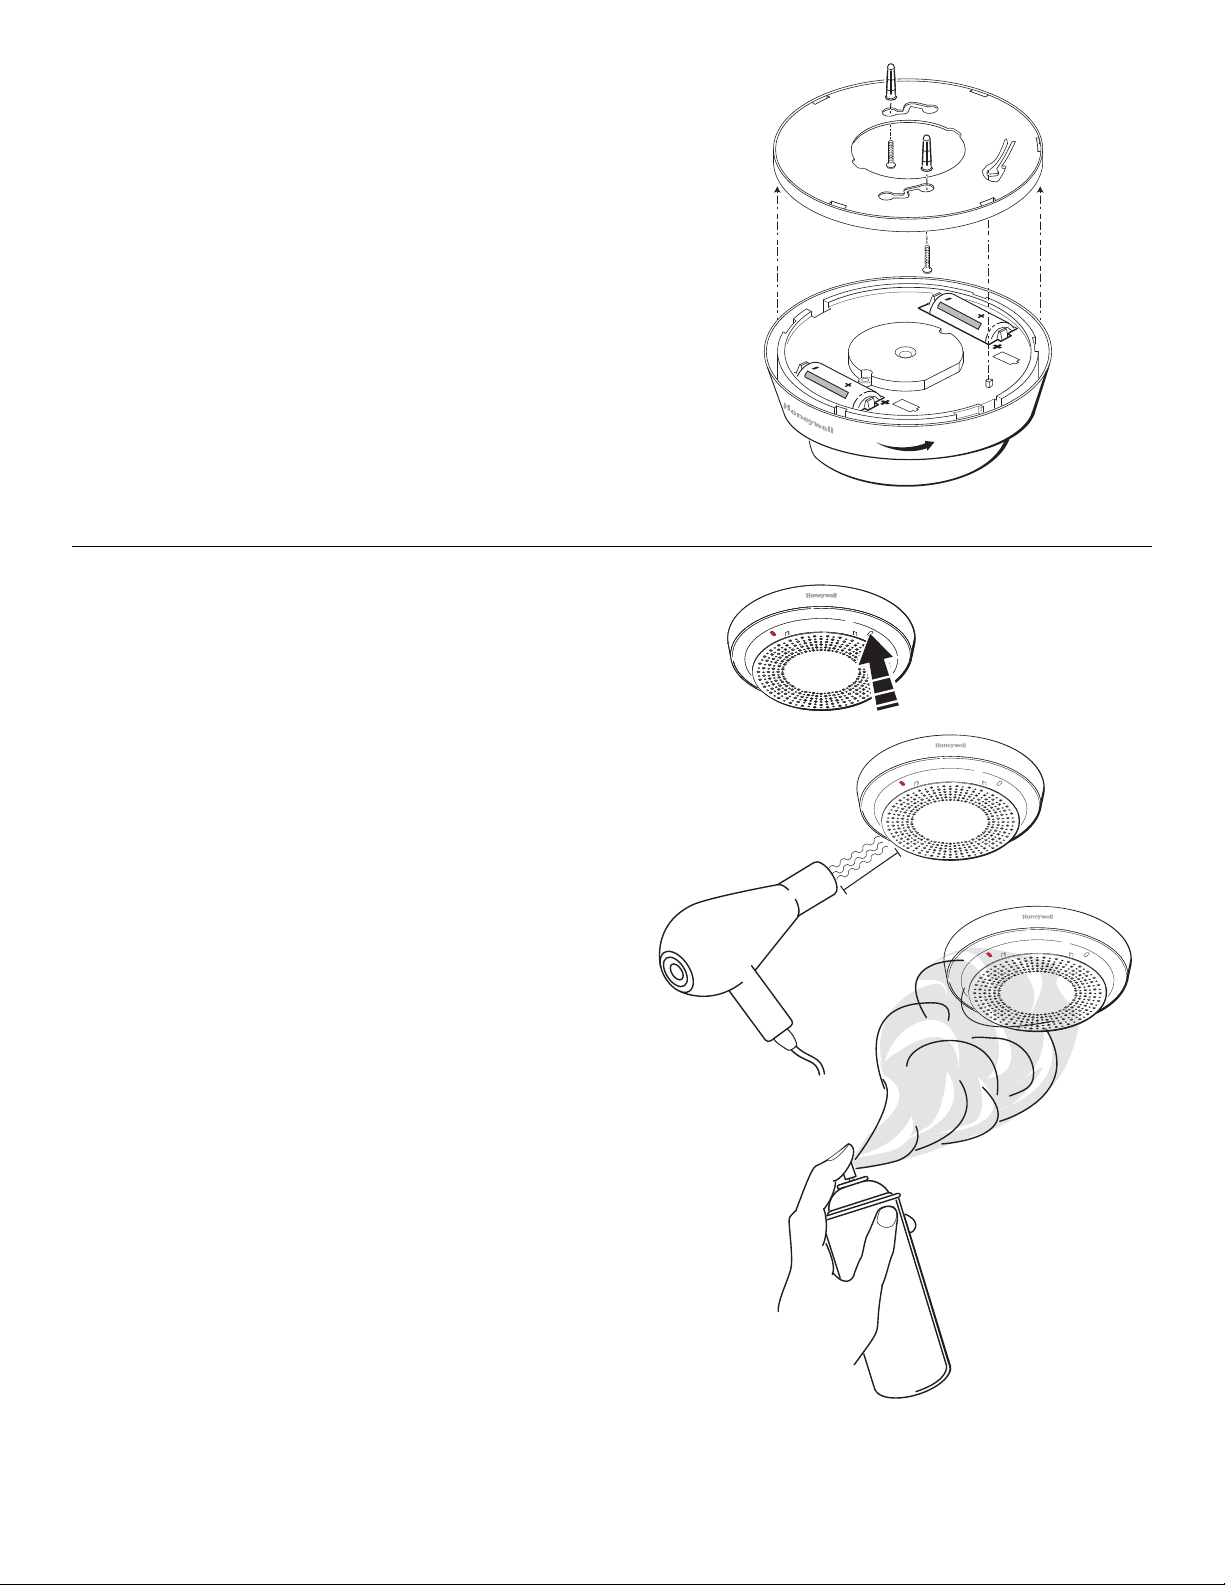
Press for 3 seconds
≥ 12” (30.48 cm)
Follow
instructions
on the can
*
Mount
Refer to the System Smoke Detectors Application Guide (P/N
SPAG9101) and the Limitations of Fire Alarm Systems (P/N
800-15144) for detailed information on detector spacing,
placement zoning and special applications. Copies of this
document are available on https://mywebtech.honeywell.com/.
NOTE: Before mounting the detector permanently, conduct
Go/No Go tests (see control’s instructions) to verify adequate
signal strength and adjust the device location and orientation as
necessary.
The detector can be mounted on the ceiling or on the wall (if
local ordinances permit). Select a location and mount using the
included mounting hardware.
Test
The detector should be tested immediately after installation
and at least once a year.
Mount
Recommended: To prevent unwanted alarms, notify the
Central Station that the smoke detector system is undergoing
maintenance before testing begins.
Test Mode can be activated remotely from the Controller (see
the Controller’s manual), or on-site by pressing the test switch.
Tests and testing methods:
- Test Switch –
• press and release to check circuitry functionality;
• press and hold for 3 seconds to test the sounder (the
device will emit a temporal tone).
- Direct Heat Test (hair dryer)
- Smoke Entry Test (canned smoke*)
- Signal Strength (signal strength information is sent with
every communication to the panel.)
- Programmed Services [Loops].
Use UL/ANSI
Approved
canned smoke.
Test
 Loading...