

Page 1

honestech
Claymation Studio
User Guide
Page 2

2. honestech
End User License Agreement
IMPORTANT : READ THE FOLLOWING TERMS AND CONDITIONS CAREFULLY BEFORE CONTINUING
THIS INSTALLATION.
IF YOU DO NOT AGREE WITH THESE TERMS AND CONDITIONS, PROMPTLY REMOVE THE
SOFTWARE FROM YOUR COMPUTER AND RETURN THE SOFTWARE, INCLUDING THE
DOCUMENTATION, TO YOUR SUPPLIER AND YOUR MONEY WILL BE REFUNDED. IF YOU
DOWNLOADED THIS SOFTWARE, PLEASE REMOVE THE SOFTWARE FROM YOUR COMPUTER AND
CONTACT YOUR SUPPLIER TO REQUEST A REFUND.
In this license agreement (the “License Agreement”), you (either individual or an entity), the purchaser of
the license rights granted by this License Agreement, are referred to as “licensee” or “You”. Honest
Technology is referred to as the “Licensor”. The current version of the accompanying software
(“Software”) and documentation (“Documentation”) are collectively referred to as the “Licensed Product”.
Licensor may furnish hardware with the Licensed Product (“Hardware”)
1. License
In accordance with the terms and conditions of this License Agreement, the Software is the property of
the Licensor and is protected by Copyright Law. While the Licensor continues to own the Software,
the Licensor grants the Licensee, after Licensee’s acceptance of this License Agreement, the Limited,
non-exclusive license to use on copy of the current version of Licensed Product as described below.
The Software is “used” on a computer when it is loaded into the temporary memory (i.e., RAM) or
installed into the permanent memory (e.g., hard disk, CD-ROM, or other storage device) of that
computer, except that a copy installed on a network server for the sole purpose of distribution to
another computer is not considered “in use”. Except as may be modified by a license addendum which
accompanies this License Agreement, the Licensee’s rights and obligations with respect to the use of
this Software are as follows:
You May,
1. Use the Software for commercial or business purposes in the manner described in the
Documentation.
2. Use the Software to share Internet connection, transfer data, files and images among the
computer in the manner described in the Documentation.
You May Not,
I. Copy the documentation that accompanies Software.
II. Sublicense or lease any portion of the Software.
III. Make illegal duplication of the software.
2. Copyright and Trade Secrets. All rights in and to the Licensed Product including, but not limited to,
copyrights and trade secrets rights, belong to Licensor, and Licensor holds title to each copy of the
Software. The licensed Product is protected by United States Copyright Laws and international treaty
Provisions.
3. Term. This License Agreement is effective until terminated. Licensee may terminate this License
Agreement if Licensee breaches any of the terms and conditions herein. Upon termination of this
License Agreement for any reason, Licensee shall return to Licensor or otherwise destroy the Licensed
Product and all copies of the Licensed Product. Upon request of Licensor, Licensee agrees to certify in
writing that all copies of the Software have been destroyed or returned to Licensor. All provisions of
this Agreement relating to disclaimers of warranties, limitation of liability, remedies, or damages, and
Licensor’s proprietary rights shall survive termination.
4. Executable Code. The Software is delivered in executable code only. Licensee shall not reverse
engineer, compile or otherwise disassemble the Software.
Page 3

3. Claymation Studio
5. Limited Warranty
a. Licensor does not warrant that the functions contained in the Licensed Product and Hardware
will meet Licensee’s requirements or that the operation of the Software and Hardware will be
uninterrupted or error-free. Licensor does warrant that the media on which the Software is
furnished and the hardware will be free from defects in materials and workmanship under normal
use for a period of thirty (30) days from the date of delivery (“Warranty Period”). This Limited
Warranty is void of failure of the media on which the Software is furnished has resulted from
accident, abuse, or misapplications.
b. EXCEPT AS PROVIDED ABOVE, THE LICENSED PRODUCT IS PROVIDED “AS IS”
WITHOUT WARRANTY OF ANY KIND, EITHER EXPRESS OR IMPLIED INCLUDING, BUT
NOT LIMITED TO, IMPLIED WARRANTIES OF MERCHANTABILITY AND FITNESS FOR A
PARTICULAR PURPOSE, AND THE ENTIRE RISK AS TO THE QUALITY AND
PERFORMANCE OF THE LICNESED PRODUCT AND HARDWARE IS WITH LICENSE.
6. Limitation of Liability
a. Licensor’s sole obligation or liability and licensee’s exclusive remedy under this agreement shall
be the replacement of the defective media on which the software is furnished and/or the
hardware according to the limited warranty above.
b. In no event will licensor be liable for any consequential, incidental or indirect damages including,
without limitation, any loss of data or information, loss of profits, loss savings, business
interruption or other pecuniary loss, arising out of use of or liability to use the software or
documentation or any hardware, even if licensor has been advised of the possibility of such
damages, or for any claim by any third party.
7. General
a. Any Software and Hardware provided to Licensee by Licensor shall not be exported or re-
exported in violation of any export provisions of the United States or any other applicable
jurisdiction. Any attempt to sublicense, assign or transfer any of the rights, duties or obligations
hereunder is void. This Agreement shall be governed by and interpreted under the laws of the
State of New Jersey, United States of America, without regard to its conflicts of law provisions.
Licensor and Licensee agree that the U.N. Convention on Contracts for the International Sales of
Goods shall not apply to this License Agreement.
b. This License Agreement may only be modified or amended by a written license addendum that
accompanies this License Agreement or by written document that has been signed by both you
and Licensor. Site licenses and other types of enterprise licenses are available upon request.
Pleas contact Licensor or your supplier for further information.
c. Any controversy or claim arising out of or relating to this Agreement, or the breach of this
Agreement, shall be settled by arbitration administered by the American Arbitration Association in
accordance with its Commercial Arbitration Rules and Judgment upon the award rendered by the
arbitrator may be entered in any court having jurisdiction thereof. The arbitration shall be held in
New Jersey, United States of America.
If you have any other questions concerning this License Agreement, or if you desire to contact Licensor for
any reason, please contact Honest Technology.
Copyright 2008
Honest Technology Inc.
All Rights reserved.
Page 4

4. honestech
Table of Contents
End User License Agreement .................................................................................................. 2
Table of Contents ..................................................................................................................... 4
1. Main features of honestech Claymation Studio 1.0 ...................................................... 6
1.1. honestech Claymation Studio 1.0 functions ..................................................... 6
1.2. Minimum System requirements ....................................................................... 8
2. Installation and Un-installation of
2.1. Installing honestech Claymation Studio ........................................................... 9
2.2. Uninstalling honestech Claymation Studio1.0 ................................................ 14
3. Project Files .............................................................................................................. 16
3.1. Create new project ........................................................................................ 16
3.2. Save project .................................................................................................. 16
3.3. Open project ................................................................................................. 16
4. Capture ..................................................................................................................... 17
5. Manage frames in the Storyboard ............................................................................. 20
5.1. Add image frame(s) ....................................................................................... 20
5.2. Cut frame(s) .................................................................................................. 21
5.3. Copy frame(s) ............................................................................................... 22
5.4. Paste frame(s) .............................................................................................. 22
5.5. Delete Frame(s) ............................................................................................ 23
honestech
Claymation Studio 1.0
..................................... 9
5.6. Insert blank frame(s) ..................................................................................... 24
Page 5

5. Claymation Studio
5.7. Disable frame(s) ............................................................................................ 25
5.8. Enable frame(s)............................................................................................. 26
5.9. Delete disabled frame(s) ............................................................................... 27
5.10. Record audio ............................................................................................... 28
5.11. Add audio file ............................................................................................... 29
5.12. Delete audio ................................ ................................................................ 30
5.13. Add introduction title .................................................................................... 31
5.14. Add ending title............................................................................................ 32
5.15. Delete Title .................................................................................................. 34
5.16. Move frames ............................................................................................... 35
6. Preview ..................................................................................................................... 36
7. Audio Recorder ......................................................................................................... 38
8. Rotoscope ................................................................................................................ 40
9. Chroma Key .............................................................................................................. 41
10. Create Output ......................................................................................................... 42
10.1. Create output in Windows Media (WMV) format .......................................... 43
10.2. Create output in AVI format ......................................................................... 45
10.3. Create output in MPEG format .................................................................... 46
Page 6

6. honestech
1. Main features of honestech Claymation Studio 1.0
1.1. honestech Claymation Studio 1.0 functions
Preview
Preview the frames in the Storyboard.
Set the frame rate to change playback speed.
Allows you to play, pause, jump to first or last frame, or move to the
previous/next frame.
Storyboard
Allows you to add image files (bmp, jpg, gif)
View frames in three different sizes (small, medium, or large)
Insert blank frame(s) with the color of your choice.
Delete frame(s) – remove directly from the storyboard.
Disable frame(s) – selected frames will NOT be played during preview or
output.
Enable frame(s) – selected frames will be played during preview and
Move frame(s) to different position.
Delete disabled frame(s) – disabled frame(s) within a group of highlighted
Copy, cut, and paste frames
Add comments to frame(s).
Allows you to save your projects.
Capture
Chroma key – using the color screen of your choice, you can easily
Rotoscope – Use a reference image to help create a new image.
output.
frames will be deleted.
change the background.
Page 7

Onionskin – Preview frames in transparent overlay to help you capture or
create the next frame/image(s).
Compatible with DV camcorder and/or web cams.
Audio
Allows you to add multiple mp3 and/or wav files.
Audio recording and dubbing.
Works with microphone input.
Output formats
WMV (Ver 7,8,9)
AVI
MPEG (MPEG1, MPEG2, DVD, VCD, SVCD)
7. Claymation Studio
Page 8

8. honestech
1.2. Minimum System requirements
• Operating system : XP, Vista
• Processor : Pentium IV 1.8GHz or equivalent
• Memory : 128MB of RAM (256MB or higher recommended)
• Microsoft DirectX 9.0 or higher
• Windows Media Format SDK 9 or higher
• Windows Media Player 7 or higher
• Image input : JPEG, BMP, PNG, GIF
• Audio input : MP3, WAV
• Video Output : AVI, WMV, MPEG
• Video Capture: Web Camera, DV-Camcorder
• Audio Capture: Microphone, etc…
Page 9
9. Claymation Studio
2. Installation and Un-installation of
honestech
Claymation
Studio 1.0
Note: To optimize performance of the product and your computer, defragmenting the
Hard Disk Drive (HDD) prior to installing honestech Claymation Studio
software is recommended. Also, if there is any security software on your PC that
may block or interfere with the installation or removal of the software, please disable
2.1. Installing honestech Claymation Studio
2.1.1. Insert the installation CD into your CD/DVD drive on your computer. The installation
should start automatically.
2.1.2. Click [Install] button to start installing honestech Claymation Studio 1.0.
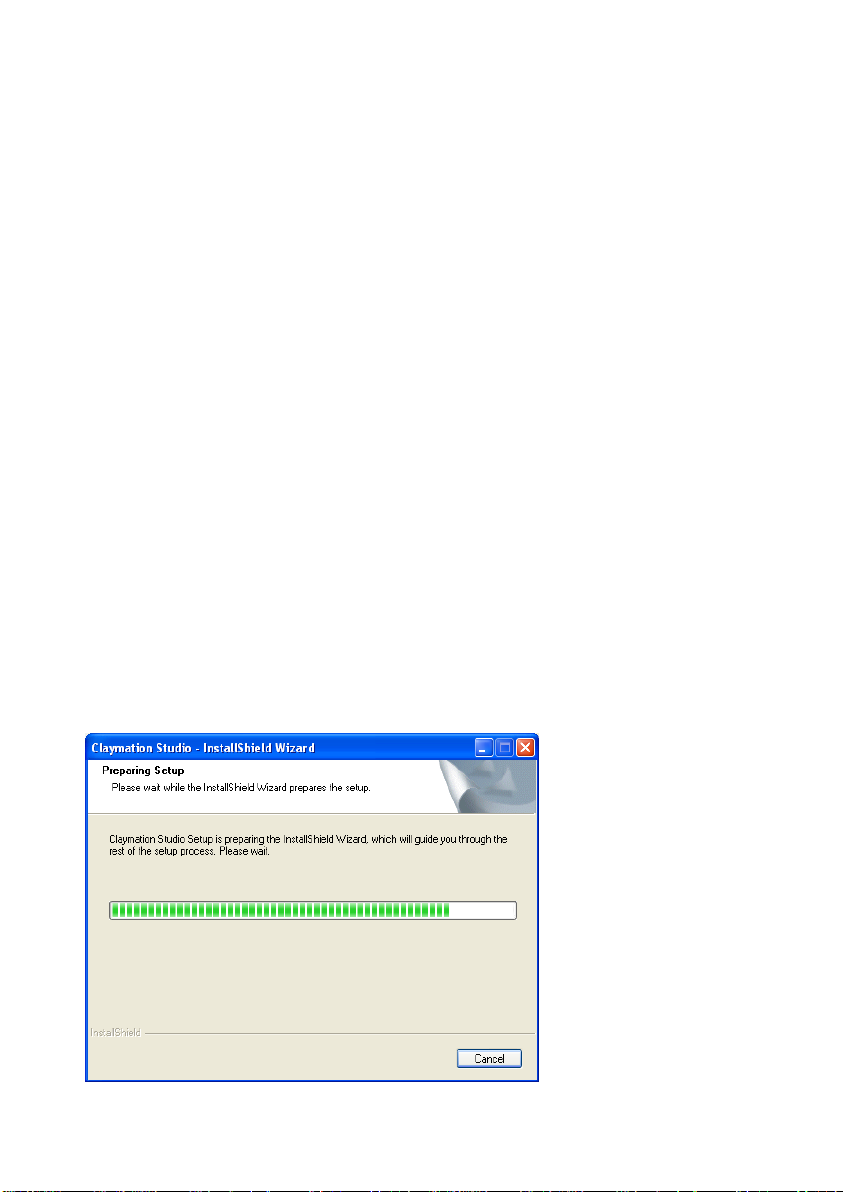
2.1.3. Installation process will begin with the following screen.
it or turn it off prior to installing or uninstalling the software.
Note: If the installation does not start automatically, choose Run from the Windows Start
menu. Then enter “d:\autorun” (assuming the installation CD is in D drive) in the run
dialog box. You can also double-click on “Setup.exe” file on the installation CD to
being the installation.
Page 10
10. honestech
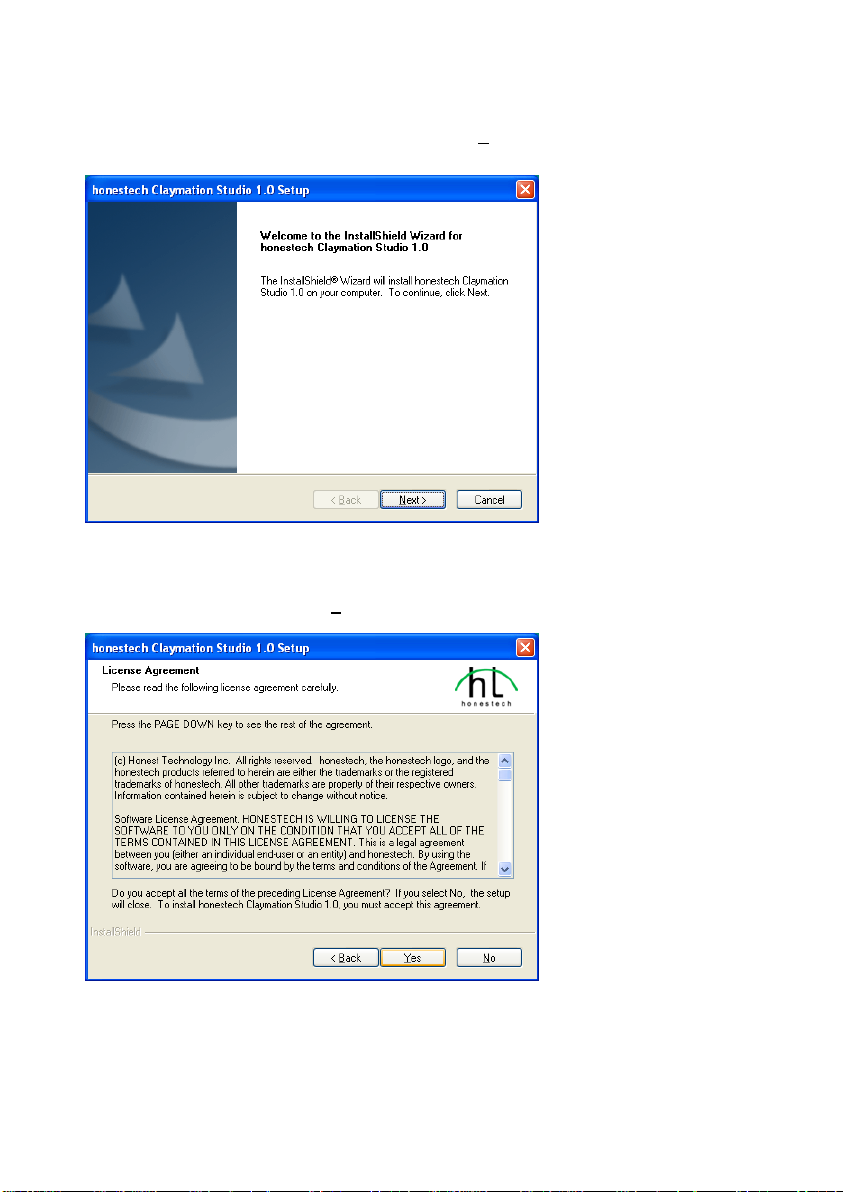
2.1.4. The following welcome screen will appear. Click [Next >] to continue.
2.1.5. End-User License Agreement will appear as shown below, read the agreement and if
you accept the agreement, select [Yes] to continue.
Page 11

11. Claymation Studio
2.1.6. Choose Destination Location screen will appear as shown below. Accept the default or
change the installation location by clicking change. When your are ready to install Claymation
Studio, click [Next >] to continue.
2.1.7. Select Program Folder screen will be displayed next. Accept the default folder or
choose your program folder then click [Next >] to continue.
Page 12
12. honestech
2.1.8. The Setup status screen will appear as shown below. This step occurs automatically.
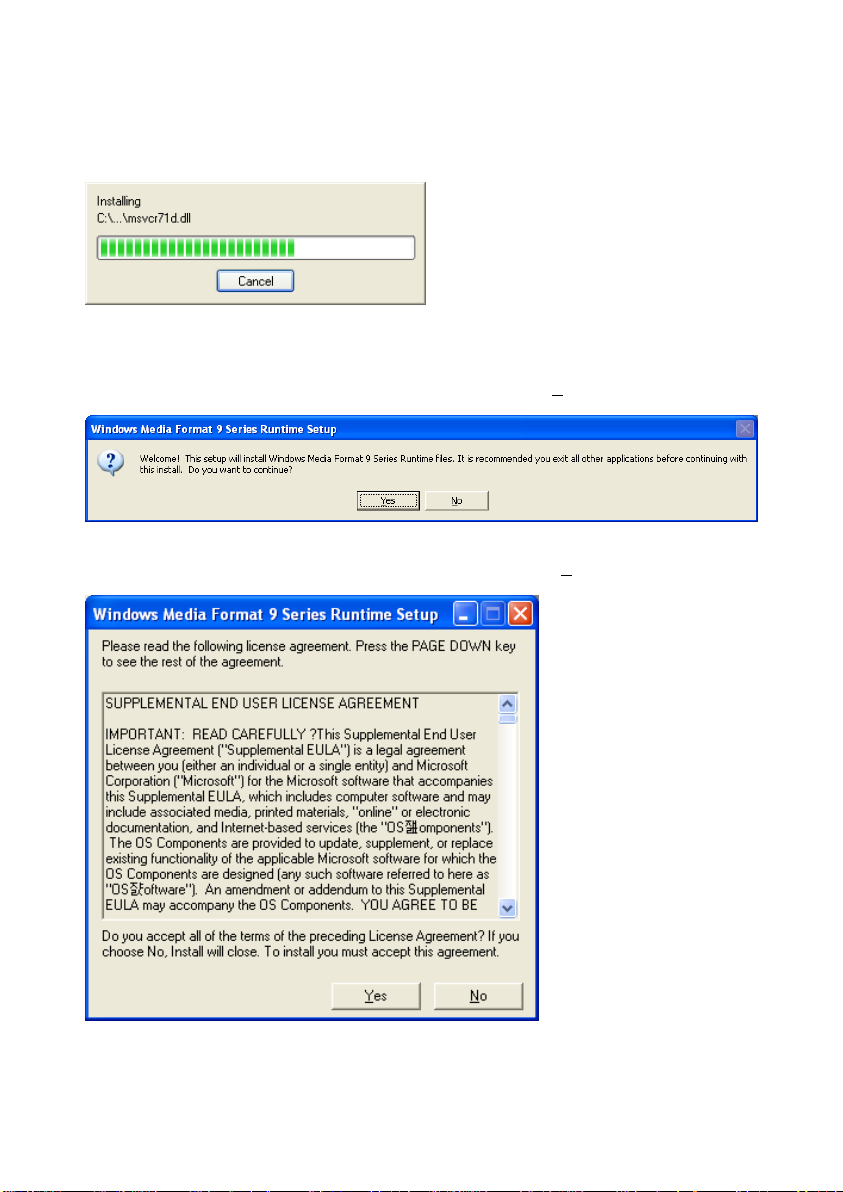
2.1.9. Windows Media Runtime Setup window will appear, click [Yes] to continue.
2.1.10. Windows Media User License Agreement will appear, click [Yes] to continue.
Page 13
13. Claymation Studio
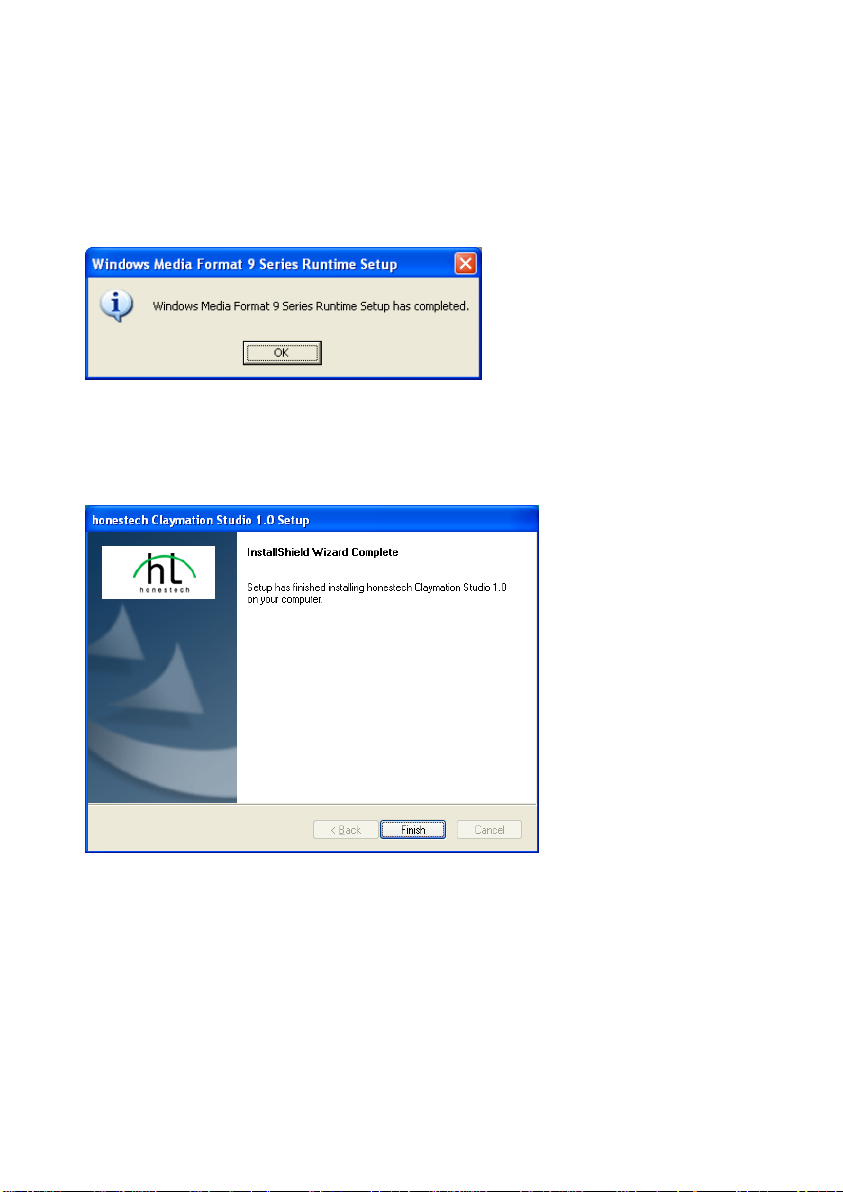
2.1.11. Files will install automatically and the following completion window will appear. Click
[OK] to finish Windows Media Runtime Setup.
2.1.12. Claymation Studio Setup is now complete; click [Finish] to complete the installation.
Page 14
14. honestech
2.2. Uninstalling honestech Claymation Studio1.0
2.2.1. Uninstall honestech Claymation Studio 1.0 using its own uninstallation file or the Add or
Remove Programs in the Control Panel.
2.2.1.1. To uninstall using the uninstallation file: from the task bar, go to Start All Programs
honestech Claymation Studio 1.0 and click on Uninstall honestech Claymation Studio
1.0
2.2.1.2. To uninstall with Add or Remove Programs: from the task bar, go to Start Control
Panel Add or Remove Programs. Select honestech Claymation Studio 1.0, and click the
Change/Remove button.
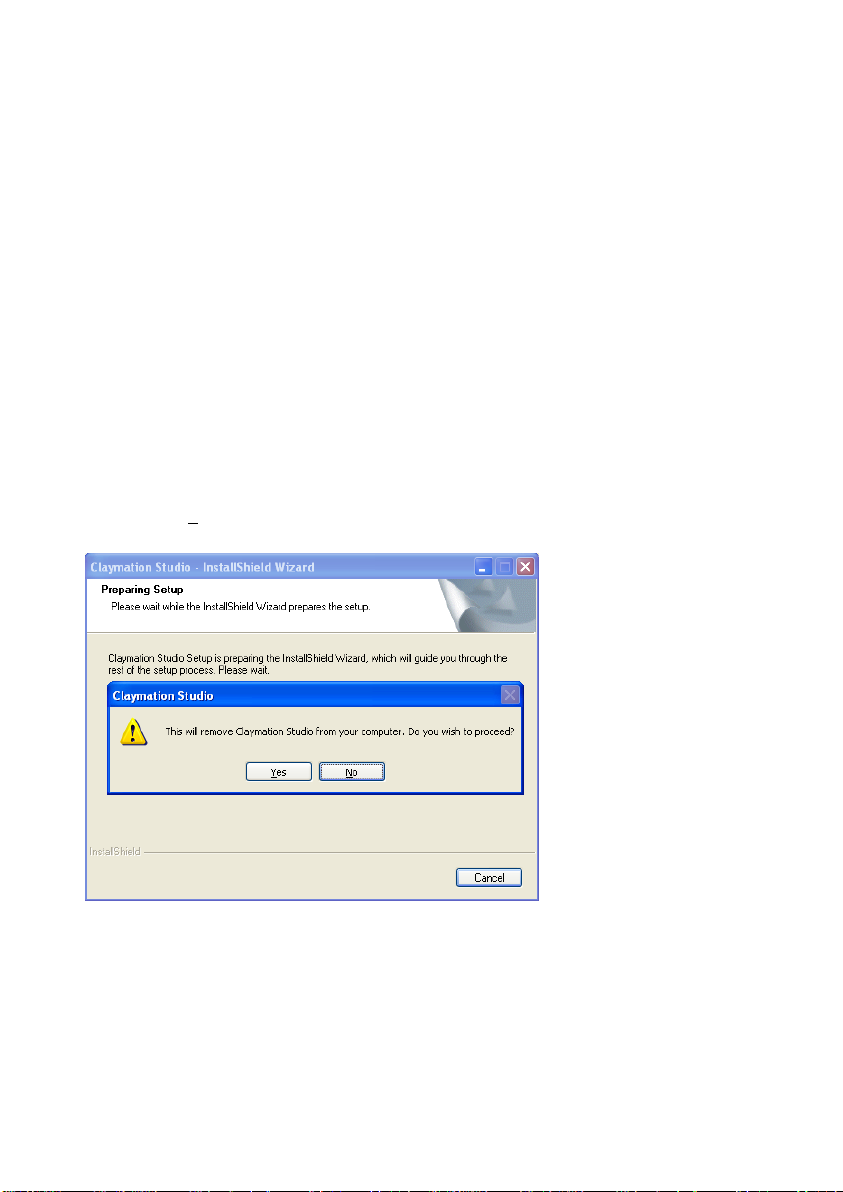
2.2.1.3. Click [Yes] to confirm and uninstall the program.
Page 15
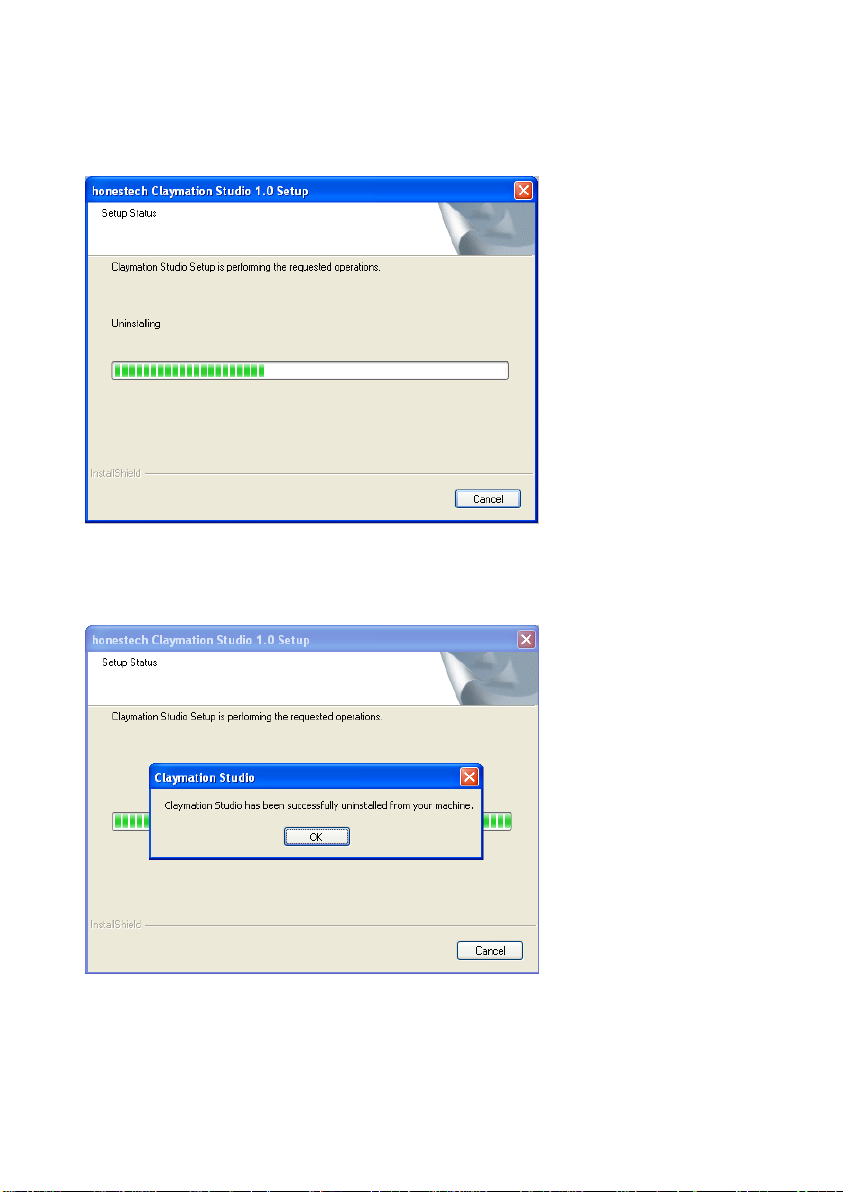
2.2.2. The uninstallation is in progress. Please wait for completion.
2.2.3. Click [Finish] to complete and exit the uninstallation process.
15. Claymation Studio
Page 16
16. honestech
3. Project Files
In this section, you will learn how to create, save and open existing projects.
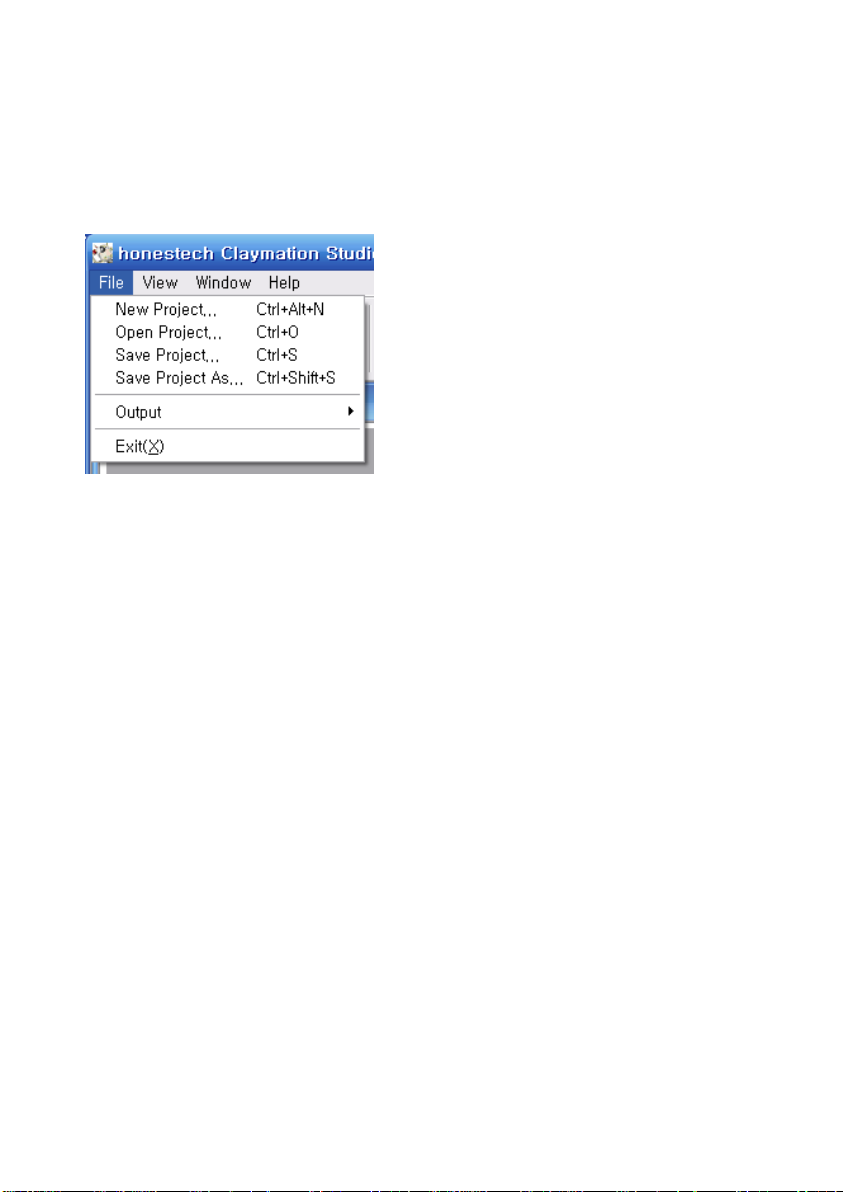
3.1. Create new project
To create a new project, go to File > New… .
If any of the project files within the work area are not saved, you will be prompted to save them.
3.2. Save project
To save the current project, go to File > Save… (If you want to save the current project under
a different name, select File > Save As… ) Then select a folder, name your project, and click
Save.
3.3. Open project
To open an existing project, go to File > Open…
If any of the project files are open in the Storyboard, you will be prompted to save the project.
Then select a project file, and click Open..
Page 17
17. Claymation Studio
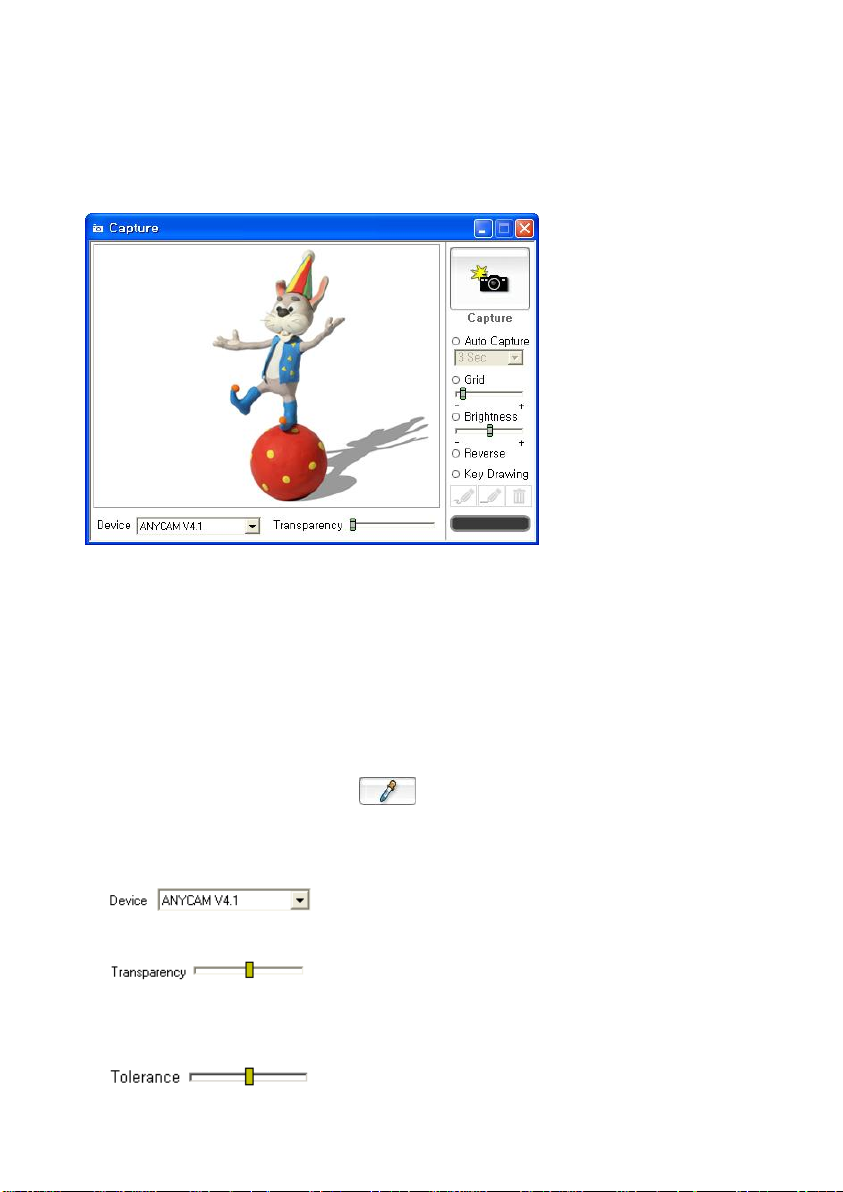
4. Capture
The Capture window allows you to capture images or frames from a PC cam or DV camcorder.
1. When using the Onionskin feature, this window enables you to view the previous frame
and next frame in overlay mode.
2. When using the Rotoscope feature, this window will display both the reference image and
next frame in overlay mode. You can use the reference image to help you create a new
image.
3. The Chroma key feature allows you to replace a colored background with another image.
(After selecting the Chroma key, click to select the color that you want to use as your
chroma key color.)
4. : select a capture device
5. : controls the overlay ratio/opacity (when using Onionskin or
Rotoscope).
6. : controls how much of the image you want to remove.
Page 18

18. honestech
7. : captures the frame. When using the Chroma Key feature, the overlay image will
be captured.
8. Grid option
A. Displays grid on the window to help users adjust the figure more accurately
9. Auto capture function
A. Automatically captures images at a pre-defined time interval without manually
clicking on the capture button
10. Capture brightness
A. Adjust the brightness of the image before capturing
11. Image flip
A. Allows you to flip images horizontally (mirror-image)
12. Key drawing
Draw an outline sketch of your character in the Capture window. You can then use
this sketch as a modeling guide for your figure/object. Adjust the transparency
slider as necessary.
A. Freehand drawing
Draw freely.
B. Line drawing
Draw straight lines.
C. Remove key drawing
Remove the key drawing that you drew.
Page 19

19. Claymation Studio
Context Menu (Capture window)
1. Foreground Image move Mouse Moves : Using your mouse, drag and move the
background image.
2. Foreground Image move Move to Origin (0,0) : Moves the background image back
to its original position.
3. Capture folder : Captured images/frames will be stored in this folder.
4. Camera Setup
Camera settings
Page 20
20. honestech
5. Manage frames in the Storyboard
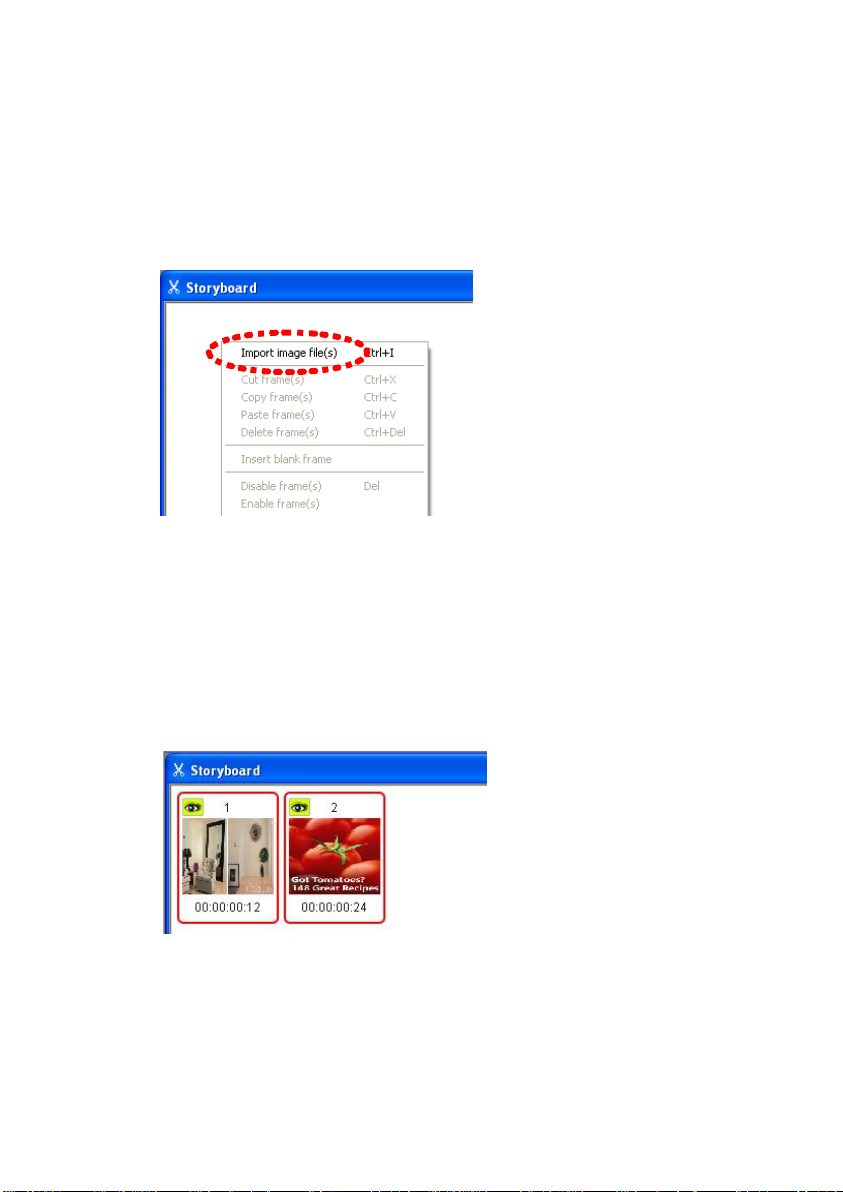
5.1. Add image frame(s)
1. Right-click on the Storyboard window.
2. Select Import image file(s) from the context menu.
3. Browse and locate the image file(s) you want to add to the Storyboard. The selected
image(s) will appear in the Storyboard.
Page 21

5.2. Cut frame(s)
1. Select the frame(s) in the Storyboard you wish to cut, and right-click on them.
2. Select “Cut frame(s)” from the context menu.
3. You can also use the hot-key (Ctrl + X) to cut frames.
21. Claymation Studio
Page 22

22. honestech
5.3. Copy frame(s)
1. Select the frame(s) in the Storyboard you wish to copy and right-click on them.
2. Select “Copy frame(s)” from the context menu.
3. You can also use the hot-key (Ctrl + C) to copy frames.
5.4. Paste frame(s)
1. Select the frame in the Storyboard you wish to place frames before, and right-click
on it.
2. Select “Paste frame(s)” from the context menu to paste frames in front of the
selected item.
3. You can also use the hot-key (Ctrl + V)
Page 23

5.5. Delete Frame(s)
1. Select the frame(s) in the Storyboard you wish to delete, and right-click on them.
2. Select “Delete frame(s)” from the context menu.
3. You can also use the hot-key (Ctrl + Del) to paste frames.
23. Claymation Studio
Page 24

24. honestech
Select a color here.
Select a color of your choice.
5.6. Insert blank frame(s)
1. Select the frame in the Storyboard you wish to insert a blank frame before, and
right-click on it.
2. Select “Insert blank frame” from the context menu.
3. Select a color for the blank frame being inserted.
Page 25

25. Claymation Studio
4. The blank frame will be inserted right before the selected frame.
5.7. Disable frame(s)
1. Select the frame(s) in the Storyboard you wish to disable, and right-click on them.
2. Select “Disable frame(s)” from the context menu.
3. You can also press the Del key on your keyboard to disable the frame(s).
4. The eye on the selected frame will change as shown below.
5. The disabled frame(s) will not be shown during preview or output.
Page 26

26. honestech
5.8. Enable frame(s)
1. Select the disabled frame(s) in the Storyboard you wish to enable, and right-click on
them.
2. Select “Enable frame(s)” from the context menu.
3. The eye on the selected frame will change as shown below.
4. Enabled frames will play during the preview and output.
Page 27

27. Claymation Studio
5.9. Delete disabled frame(s)
1. Select the disabled frame(s) in the Storyboard you wish to delete, and right-click on
them.
2. Select “Delete disabled frame(s)” from the context menu.
3. Disabled frames in the Storyboard will be deleted. Only disabled frames will be
deleted even if other frames are selected.
Page 28

28. honestech
5.10. Record audio
1. Select the frame in the Storyboard you wish to record audio to, and right-click on it.
2. Select “Record audio” from the context menu.
3. Click the button within the Audio Recorder window.
4. Audio recording will begin after a 3 second countdown.
5. When the recording begins, your project will play in the Preview window.
6. When you stop the recording, the recorded audio will be added to the selected
frame. An audio icon ( ) will appear on the frame.
Page 29

29. Claymation Studio
5.11. Add audio file
1. Select the frame in the Storyboard you wish to add audio files to, and right-click on it.
2. Select “Add audio file” from the context menu.
3. Select the audio file you want to add.
4. When you stop the recording, the recorded audio
will be added to the selected frame. An audio icon
( ) will appear on the frame.
Page 30

30. honestech
5.12. Delete audio
1. Select the frame in the Storyboard you wish to delete audio files from, and right-click
on it.
2. Select “Delete audio” from the context menu.
3. The audio icon ( ) will disappear from the frame.
Page 31

31. Claymation Studio
A
B
C
D
5.13. Add introduction title
1. This will add an introduction title frame to the beginning of the frame sequence.
Right-click anywhere within the Storyboard, and select “Add intro title” from the
context menu.
2. A “Create Title” window will open up.
Page 32

32. honestech
A : Move the text location within the frame/window by clicking on the text and
dragging.
B : Enter text here. Click on [Font] button to change the font and size.
C : Select the duration of time for the title frame will display.
D : Select the background for the title frame. Click the [Color] button to
change the background color, or click the [Image] button to select an image
for the background.
3. Click [OK] to finish entering text for the title frame(s).
A Icon will be added to the frame.
5.14. Add ending title
1. This will add an ending title frame to the end of the frame sequence. Right-click
anywhere within the Storyboard, and select “Add ending title” from the context menu.
Page 33

33. Claymation Studio
A B C
D
2. A “Create Title” window will open up.
A : Move the text location within the frame/window by clicking on the text and
dragging.
B : Enter text here. Click on [Font] button to change the font and size.
C : Select the duration of time for the title frame will display.
D : Select the background for the title frame. Click the [Color] button to
change the background color, or click the [Image] button to select an image
for the background.
3. Click [OK] to finish entering text for the title frames. Icon will
be added to the frame.
Page 34

34. honestech
5.15. Delete Title
1. Select and right-click on the frame(s) that you want to delete from the Storyboard,
and select “Delete title” from the context menu.
Page 35

5.16. Move frames
1. Select the frame(s) in the Storyboard you wish to move.
2. Click and hold, then drag the frame(s) to a different location.
3. Release your mouse button, and the frame will drop into the new location.
35. Claymation Studio
Page 36

36. honestech
6. Preview
You can preview the frames in the Storyboard using the Preview window.
1. : Play the frames.
2. : Jump to the first frame.
3. : Jump to the last frame.
4. : Move to the previous frame.
5. : Move to the next frame.
6. : Displays the selected frame and the image from the Capture
window in overlay mode. If no frame is selected, the last frame will be selected
Page 37

37. Claymation Studio
automatically and will be displayed along with the image from the Capture window.
7. : Change the speed of the video by changing the frame
rate.
Page 38

38. honestech
7. Audio Recorder
You can use the Audio Recorder to add audio to your frames.
: Record audio. (When you click on the button, a 3 second countdown will
start to help you prepare for audio recording).
: Play the recorded audio.
: Stop the audio during recording or playback.
: Change the recording options.
Page 39

39. Claymation Studio
Add Audio
1. Select and highlight a frame within the Storyboard.
2. Select in the tool bar, and the Audio Recorder window will be displayed.
3. Click the button to start recording. You can record audio while the video
is played in the Preview window.
4. Click button to stop the recording
5. The audio will be added to the selected frame within the Storyboard, and the audio
icon ( ) will appear on the frame.
Page 40

40. honestech
8. Rotoscope
Use a reference image to help create a new image
1. : Import an image to the Rotoscope window.
2. : When you click on the Rotoscope button, the image in the Rotoscope
window and the image in the Capture window will be displayed in overlay mode.
Page 41

9. Chroma Key
Using a colored screen, you can easily change the background
41. Claymation Studio
1. : Import an image to the Chroma key window.
2. : Click the eye dropper button and select the color in the frame you wish to
use as the chroma key color. (The chroma key color you select will be replaced with
the imported image).
3. : Apply the Chroma key effect to the frame in the Capture window.
Page 42

42. honestech
10. Create Output
Create a video file by combining the frames in the Storyboard.
1. Go to File menu and select Output.
2. Select your output format: WMV, AVI or MPEG.
Page 43

10.1. Create output in Windows Media (WMV) format
Select the WMV Profile of your choice.
Other related settings will be displayed.
43. Claymation Studio
1. Profile
Profile each profile contains information on the audio/video codec, video output
size, audio sampling rate, bitrate, etc…
If none of the available profiles provide a suitable solution for your needs, you
can create your own user-defined profile by using the Windows Media
Encoder’s Profile Manager.
Creating output using a user-defined profile.
a. Select [Use Custom Profile].
b. Click [Import…] button to import a profile, and click [OK].
Page 44

44. honestech
Note: For detailed instructions on the Profile Manager, please refer to the help menu in
the Windows Media Encoder.
2. Video
Video : supports NTSC and/or PAL depending on the operating system’s
language or region settings.
Resolution: displays the video resolution (horizontal lines X vertical lines).
Frame rate: displays how many frames are displayed per second.
3. Audio
Sampling Rate: displays audio sampling frequency (in Hz).
Bit rate: displays audio bit rate per second.
Stereo: displays the sound options (Stereo, Mono)
Note: Please contact Microsoft(R) for assistance on how to configure the settings on
Windows Media Format (Video/Audio CODEC).
Page 45

10.2. Create output in AVI format
1. Video
45. Claymation Studio
supports both NTSC and PAL format
Resolution: adjust the video resolution (160x120 ~ 720x576).
Frame Rate (FPS): adjust the video frame rate (Frames per Second: 10 FPS ~
30 FPS; Not available in the Smart Rendering mode).
Video CODEC: displays a list of CODECs installed on the user’s PC.
Config: allows you to configure the CODEC’s property setting (if available).
2. Audio
Sampling Rate: adjust sampling frequency (16000Hz ~ 48000Hz).
Audio CODEC: displays a list of audio CODECs installed on the user’s PC.
Note : Please contact the CODEC manufacturer/develop or refer to their user manual for
appropriate assistance on how to use/configure specific video/audio CODECs.
Page 46

46. honestech
10.3. Create output in MPEG format
1. Type – Select MPEG type
Supports MPEG-1, VCD, MPEG-2, SVCD and DVD. Both NTSC and PAL
standards are supported.
2. Video
Resolution: Select resolution (screen size).
Frame Rate: Select Frames Per Second (fps).
Bit Rate: Select Bits Per Second (bps).
3. Audio
Sampling Rate: Select Sampling Frequency (KHz).
Bit Rate: Select Bits Per Second (bps).
Page 47

47. Claymation Studio
4. Advanced encoding option
Interlace encoding mode : Interlace Encoding Mode encodes one image
page in field units by separating it into even/odd number line fields. You can
improve screen quality using this option when horizontal lines appear in the
input source screen. When the Interlace Encoding Mode is set, an MPEG file
whose frame type is interlaced is created. This option is available only in
MPEG2.
De-interlace : This option is to remove the horizontal lines on the screen
entered in the frame unitbefore encoding. If you select the Interlace Encoding
Mode above, you don’t have to use this option. In addition, if you select Deinterface, you can obtain a good quality MPEG file without selecting the
Interlace Encoding Mode.
* Interlace Encoding Mode and De-Interlace are effective in converting DV-AVI files
made by Camcorders into MPEG files.
Page 48

48. honestech
honestech Products
Page 49

49. Claymation Studio
honestech
VHS to DVD 3.0
honestech VHS to DVD 3.0 is a revolutionary
software that allows the easy and simple
production of DVD/CD movies. Now you can save
and keep your priceless home videos forever in
sharp and crystal clear DVD/CD.
Videotapes can deteriorate over time. Deteriorated
videos will have color bleed, white specks, and
other distortions. Don’t risk this happening to
YOUR home video collection!
Archive your home video collection with its
irreplaceable memories onto lasting DVD/CD with
honestech VHS to DVD 3.0.
Features
1. Adjustable Recording Time
Recording will be made for the duration of time
you set. With one click, you can capture and
burn it onto a media of your choice.
2. Various Effects and Menu Creation
Offers many different transition effects and
filters, and lets you create your own menus.
3. Convenient File Management
Movie clips are managed in a File Pool for ease
of viewing, editing, and deleting.
4. Supports Most Burning Devices
Supports CD-R/RW, DVD+/-R/RW, DVD+/-RW,
DVD+/-RW DL.
5. PSP and iPod Formats Supported
Capture and convert video into MPEG-4 format,
and watch it on your PSP, and iPod.
6. Audio Recording
Record audio from cassettes, LP records, and
video tapes; and create MP3 files or audio CDs.
System Requirements
• Capture Device:
TV/Video Capture Card or
USB Video Capture Box
• Operating system:
Windows 2000
Windows XP
Windows Vista
(http://www.honestech.com/vista)
• Processor:
Pentium IV 2.0 GHz
or equivalent
• Memory:
256MB of RAM
• Video Output:
DVD,VCD, SVCD,AVI,WMV,
MPEG-4
• Other:
DirectX 9.0 or higher
Windows Media Player 6.4
(or higher)
CD Writer for VCD, SVCD
DVD Writer for DVD
Page 50

50. honestech
honestech
VHS to DVD 3.0 Deluxe
honestech VHS to DVD 3.0 Deluxe is a
revolutionary software that allows the easy and
simple production of DVD/CD movies. Now you
can save and keep your priceless home videos
forever in sharp and crystal clear DVD/CD.
Videotapes can deteriorate over time. Deteriorated
videos will have color bleed, white specks, and
other distortions. Don’t risk this happening to
YOUR home video collection!
Archive your home video collection with its
irreplaceable memories onto lasting DVD/CD with
honestech VHS to DVD 3.0 Deluxe
Features
1. Adjustable Recording Time
Recording will be made for the duration of time
you set. With one click, you can capture and
burn it onto a media of your choice.
2. Various Effects and Menu Creation
Offers many different transition effects and
filters, and lets you create your own menus.
3. Convenient File Management
Movie clips are managed in a File Pool for ease
of viewing, editing, and deleting.
4. Supports Most Burning Devices
Supports CD-R/RW, DVD+/-R/RW, DVD+/-RW,
DVD+/-RW DL.
5. PSP and iPod Formats Supported
Capture and convert video into MPEG-4 format,
and watch it on your PSP, and iPod.
6. Audio Recording
Record audio from cassettes, LP records, and
video tapes; and create MP3 files or audio CDs.
System Requirements
• Operating System:
Windows XP Service Pack 2
Windows Vista
(http://www.honestech.com/vista)
• USB 2.0 Host Controller/Port
• Processor:
Intel® Pentium® 4 2.4 GHz,
Pentium® D, Pentium® M 1.3 GHz,
Pentium Core™ Duo or equivalent,
or AMD® Athlon® 64 processor is
recommended
• Memory:
256MB of RAM
• Video Output:
DVD,VCD, SVCD,AVI,WMV,MPEG-4
• Other:
Composite (RCA) cable
1. Audio cable (3.5mm to composite)
2. Audio cable (3.5mm to 3.5mm)
DirectX 9.0 or higher
Windows Media Player 6.4 (or higher)
CD Writer for VCD, SVCD
DVD Writer for DVD
* USB 2.0 Video Capture Device Included.
Page 51

honestech
Fireman CD/DVD Burner 3.0
honestech Fireman CD/DVD Burner 3.0 allows
you to create data, audio, or video discs. You can
also import audio from music CDs and create
system backup/recovery discs and
bootableCD/DVD.
With DVD Authoring Studio, you can create your
own stylish video DVD with ease. Create photo
slideshow DVD of using your digital photos that
you can also play on your home DVD player.
Using LightScribe discs, you can create custom
laser-etched CD/DVD labels with your own photos,
artwork, and text.
You can make and burn ISO images which provide
a way to store all files on a disc as a single file.
Erase CD/DVD RW discs and create CD/DVD
labels and covers.
Features
1. Data Burnning
- Data CD
- Data DVD
- Audio and data CD
- Bootable CD
- Bootable DVD
2. Audio Burning
- Audio CD
- MP3 CD/DVD
- WMA CD/DVD
- Audio and data CD
- Import audio from music CD
3. Video Burning
- DVD
- Video CD
- Super Video CD
- DVD-video files
4. Backup
- Create backup files
- Restore from backup files
5. Utilities
- Erase CD/DVD
- View disc information
- Create disc Label/Cover
- Supports LightScribe
51. Claymation Studio
- Can view/slideshow photo
- Create/burn ISO image
BONUS SOFTWARE
- honestech DVD Authoring Studio 2.0
System Requirements
• Operating System:
Windows XP
Windows Vista
(http://www.honestech.com/vista)
• Processor:
Pentium III 800 MHz or equivalent
• Memory: 256MB of RAM
• HDD:
Minimum 10GB of free space
• Writer:
DVD-ROM, DVD-R/RW, DVD-RAM,
DVD+R/RW, DVD-Dual, DVD-Multi,
or DVD-ROM/CD-RW drive with 1394,
USB2.0, ATAPI, or SCSI interface
• LightScribe:
requires optical drive with
LighScribe feature
• Audio device:
PCI sound card, USB audio box,
or integrated sound card
• AGP or PCI graphics card that
supports DirectDraw overlay.
• Resolution:
minimum of 1024 x 768 or
1280 x 1024 recommended.
Page 52

52. honestech
honestech
DVD Authoring Studio 2.0
With honestech DVD Authoring Studio 2.0, you
can archive up to 27 hours movie in one dual-layer
DVD. Create your own high-quality DVD movies
with thie powerful software. Simply capture video
from your web cam, digital camera or TV using
your TV tuner/capture device and convert the
video into DVD.
Features
1. Ultra-Long DVD format
Archive 16 hours of video on a DVD or 27 hours
of video on dual-layer DVD.
2. Capture
Capture videos in various formats from TV
capture card and USB camera or DV
Camcorder.
3. Import from DVD
Import videos from existing DVD movies.
4. Edit
Edit videos or photo shows, transitions, effects,
texts, audios and trims.
5. Menu
Provides various DVD menu themes, and
supports motion menu.
6. Various outputs
Support Ultra-Long DVD, DVD, VCD, SVCD,
MPEG files, VIDEO_TS folder and disc image
file.
7. Dual-Layer Support
Support dual-layer DVD burning.
8. Copy Disc
Make back up copies of your CD/DVD.
Operation System
Windows XP SP2
Windows Vista
(http://www.honestech.com/vista)
System Requirements
DirectX 9.0 or higher
Pentium IV 1 GHz or higher
256MB RAM or more
Page 53

53. Claymation Studio
honestech
Burn DVD 3.2
honestech Burn DVD 3.2 lets your convert your
video of various formats into DVD, VCD and
SVCD. The simple 3 step interface guides user
through the entire process. honestech Burn DVD
3.2 is easy enough for novice yet powerful enough
for experienced users.
Features
1. Automatic MPEG Conversion Feature
Atomatically detects and convert the original
video file into DVD, Video CD or SVCD format.
2. Audio Format Selection
Audio formats can be converted to LPCM in
order to be played at PS2.
3. Menu Creation
Create customized DVD or Video CD menus
with ease using the templates.
4. Test Recording Feature
Test your DVD/CD writer before actually
burning DVD/CD.
5. Data CD
Supports data burning on CD media.
6. UDF (Universal Disk Format, DVD Image
File) Creation
You can make and burn UDF image file which
provides a way to store all files on a disc as a
single file.
7. XVCD and XSVCD Format Support
Create high-quality video CDs using XVCD and
XSVCD formats.
Operation System
Windows XP SP2
Windows Vista
(http://www.honestech.com/vista)
System Requirements
DirectX 9.0 or higher
Pentium IV 1 GHz or higher
256MB RAM or more
Page 54

54. honestech
honestech
Video Editor 7.0
honestech Video Editor 7.0 provides user-friendly
interface which allows even beginners to create
and edit amazing videos.
Compress and save your edited videos in high
quality MPEG-1, MPEG-2, AVI, DV-AVI and WMV
video format.
Various rendering options: Full Rendering, Smart
Rendering or Fast GOP (Group of Pictures)
encoding methods.
Title, Transition, Special Effects, and Overlay
features allow you to personalize your videos with
ease.
Features
1. Cut/Merge video clips.
2. Add special effects to your video clips (82
special effects provided).
3. Add Transiton effects to your video clips (84
transition effects provided).
4. Add Title effects to your video clips (79 title
effects provided).
5. Import video from various video sources (VCRs,
camcorders, TV, etc.) using your video capture
device.
6. Create DVD, VCD, SVCD, and mini-DVD.
System Requirements
• Video Input:
AVI, DV-AVI, MPEG-1, MPEG-2,
VCD, SVCD, DVD, WMV,
DVR-MS(only Windows XP)
• Image input:
JPEG, BMP, PNG
• Audio input:
MP3, WAV
• Video Output:
AVI, DV-AVI, MPEG-1, MPEG-2,
WMV, VCD, SVCD, DVD
• Audio Output:
WAV
• Operating system:
Windows XP, Vista
• Processor:
Pentium IV 1GHz or equivalent
• Memory:
256MB of RAM
• Other:
Microsoft DirectX 9.0 or higher
Windows Media Format SDK 9
(or higher)
Windows Media Player 7
(or higher)
CD Writer for VCD, SVCD
DVD Writer for DVD
Page 55

55. Claymation Studio
honestech
Easy Video Editor 2.0
honestech Easy Video Editor 2.0 is an easy-to-use
program that allows even a novice to split and
merge video files of various formats.
Features
1. Supports various video formats: AVI, DV-AVI,
MPEG and WMV and are supported for input
and output. WMV output format is supported for
video streaming on the internet.
2. Multiple video files can be rendered
simultaneously.
3. Large files can easily be split to several smaller
video files: split by play time, number of files, or
by file size.
4. Merge multiple small files, regardless of video
formats.
Operation System
Windows XP SP2
Windows Vista
(http://www.honestech.com/vista)
System Requirements
Intel Pentium MMX or IV
64MB RAM or more
DirectX 8.1 (or above)
Windows Media Player 7 (or above)
Windows Media Format 9 (or above)
Page 56

56. honestech
honestech
Photo DVD 3.0
honestech Photo DVD 3.0 is a simple program
that allows you to create personalized photo slide
shows on CD/DVD to watch on your television or
computer. You can even add background music
or a narrated audio file to your slide show.
Features
1. Create photo slide shows to various video
formats including DVD, VCD, SVCD, mini-DVD,
MPEG, AVI, DV-AVI, and WMV.
2. Edit Pictures
honestech Photo DVD 3.0 allows you to edit
your pictures and add text or special effects.
3. Add Background Music
You can add audio files to your photo slide show.
4. Add Transition Effects
You can add transition effects between your
pictures.
5. Preview
Preview your photo slide show before burning it
to CD/DVD.
Operation System
Windows XP SP2
Windows Vista
(http://www.honestech.com/vista)
System Requirements
DirectX 9.0 or higher
Pentium IV 1GHz or higher
256MB RAM or more
15GB HDD or more
CD or DVD writer
Page 57

honestech
Video Patrol 5.0
honestech Video Patrol 5.0 provides a
comprehensive personal video monitoring
surveillance solution. You can monitor your
home or office from anywhere with broadband
internet access. You can control up to three
cameras at a time, send e-mail notices to specified
email accounts, and schedule monitoring time
slots. You can record surveillance videos in
MPEG format when a motion is detected.
Features
1. Basic Surveillance
Record video (in mpeg format) continuously or
only when a motion is detected. You can also
specify motion from certain area within viewing
area of PC camera to trigger the surveillance
system.
2. Email Notification
Send email notices to specified e-mail
adresses
3. Scheduled Monitoring
Specify desired monitoring time slots for
surveillance system to be active. (e.g…: one,
daily, or weekly)
4. Multiple PC Cameras
Supports up to three PC cameras, and you
select individual detection mode and response
action for each PC camera. In order to avoid
conflict in device recognition by your PC, we
recommend that you use different brand or
model for multiple PC camera opration.
5. Data Backup/Burning
You can create backup video files on CD or
DVD
6. File List Management
Easily manage the recorded video files with
browsing and selection feature for watching or
burning.
7. FTP Server Option
Back up your videos by uploading them to your
FTP server or burn DVD (if available)
57. Claymation Studio
8. Free Online membership (www.my-iptv.com)
View surveillance video from PDA, Sony PSP
and PDA mobile phone
System Requirements
• Capture Device:
USB Camera
• Operating System:
Windows XP
Windows Vista
(http://www.honestech.com/vista)
• Processor:
Pentium IV 2.0 GHz or
equivalent
• Memory:
256MB of RAM
• Other:
DirectX 8.1 or higher
Windows Media Player 6.4
(or higher)
CD Writer for Data-CD
DVD Writer for Data-DVD
• Video Output:
MPEG-1, MPEG-1 VBR
Page 58

58. honestech
honestech
MY-IPTV Anywhere
Deluxe
MY-IPTV Anywhere provides a sensible solution to
set up your own broadcasting company from home.
The software allows you to deliver your home or
local TV programs to anywhere in the world as
long as you have broadband internet access.
Experience your local, hometown TV programs
while traveling to another city, state or even
overseas.
Your local, hometown TV programs can be
delivered to you using MY-IPTV Anywhere's built
in MPEG-4, H.264 software compression
technology.
Once you have registered with honestech's free
online membership, connection to your home PC
and local TV programs is completely hassle free.
No need to worry about IP addresses or servers.
The connection is peer to peer so you can be
assured of a secured connection.
Features
1. Channel Changing & Surfing
Switch and search TV channels from outside
your home or anywhere else in the world.
2. PVR and Scheduled Recording
Schedule and record TV programs with an
intuitive Internet based TV programming tool.
3. DVD Burning
Burn recorded TV programs onto a DVD with
ease (DVD burner required).
4. High Quality Picture
MY-IPTV Anywhere utilizes the latest MPEG-4
H.264 giving a television quality broadcast.
Operation System
Windows XP SP2
Windows Vista
(http://www.honestech.com/vista)
System Requirements
USB 2.0 Connection
Pentium IV 1.4 GHz or higher
128MB RAM or more
2GB HDD or more
DirectX 9.0 or later
Windows Media Player 6.4 or higher
Broadband Internet Connection Required
* MY- IPBOX (USB 2.0 TV/Video Capture Box) included.
Page 59

59. Claymation Studio
honestech
MY-IPTV&CAM Anywhere
Deluxe
MY-IPTV & CAM Anywhere combines the power to
access your home TV programs and personal
video monitoring surveillance system from
anywhere in the world where broadband internet is
available!
MY-IPTV Anywhere
The software allows you to deliver your home or
local TV programs to anywhere in the world as
long as you have broadband internet access.
Experience your local, hometown TV programs
while traveling to another city, state or wherever
your travels take you. Your local, hometown TV
programs can be delivered to you using MY-IPTV
Anywhere's built-in H.264 video compression
technology.
MY-IPCAM Anywhere
Provides a comprehensive personal video
monitoring surveillance solution. With MY-IPCAM
Anywhere™, your PC becomes a powerful
surveillance system. MY-IPCAM Anywhere
records video when motion is detected, and
provides remote real-time monitoring function.
Controls up to three cameras at a time, send
e-mail notices to specified email accounts, and
schedule monitoring time slots. You can record
and burn surveillance videos in MPEG format.
You can manage watching TV and monitoring
personal surveillance from Honestech’s FREE
online membership, which also takes care of
hassle-free per-to-peer connection to your PC
from anywhere.
Features
1. MY-IPTV Anywhere
• Channel Changing & Surfing
• PVR and Scheduled Recording
• DVD Burning
• High Quality H.264 video compression
2. MY-IPCAM Anywhere
• Basic Surveillance
• Email Notification
• Scheduled Monitoring
• Multiple PC Cameras
• Data Backup/Burning
• File List Management
Operation System
Windows XP SP2
Windows Vista
(http://www.honestech.com/vista)
System Requirements
Designed for analog signals/channels only.
USB 2.0 host controller
Processor : Pentium IV 1.8 GHz or higher
Memory : RAM 256MB or higher
HDD : 2GB or more
DirectX 9.0 or later
Windows Media Player 6.4 or higher
Broadband Internet Connection Required
* MY-IPBOX - TV&CAM (USB 2.0 TV/Video Capture
Device & PC Camera) included.
Page 60

60. honestech
honestech
DVD Player 3.0
honestech DVD Player 3.0 is a small but powerful
DVD player. Supports all standard formats, and
provides complete navigation controls. You can
also customize the DVD player with various skins
provided.
Features
• Parental controls
• Various skins available
• Auto-resume playback
• Bookmark feature
Video Support
• MPEG 1 / 2 decoding
• Subtitle display
• Video always on top
Audio Support
• Dolby
• LPCM
• MPEG 1 Layer 2
Operation System
Windows XP
Windows Vista
(http://www.honestech.com/vista)
System Requirements
DirectX 8.1 or higher
Windows Media Player 6.4 or higher
Pentium III 700 MHz or higher
256MB RAM or more
DVD Optical Drive
VGA Card with H/W acceleration
Sound Card
Page 61

61. Claymation Studio
honestech
Rapid Video Blogger™
Easily create User-Generated Content from any
media type with the honestech Rapid Video
Blogger.
Compile a video blog content with your music,
photos, video and more.
Features
• Various Templates
• Photo Editing
• Supports TV/video capture cards &
USB PC cameras
• Video Editing
• Preview
• Various Output Formats
System Requirements
• Operating System:
Windows XP Service Pack 2
Windows Vista
(http://www.honestech.com/vista)
• Processor:
Pentium III 1.0 GHz or equivalent
• Memory:
512MB of RAM
• Other:
16 MB or more of video memory
Microsoft DirectX 9.0c or higher
Optional Devices
• DVD Burner
• TV/video capture card or
USB PC cam
Input/Output Formats
• Video Input:
MPEG-1, MPEG-2, WMV,
ASF, AVI
• Photo Input:
BMP, JPEG
• Audio Input:
MP3, WAV
• File Output:
MPEG-1, MPEG-2, WMV
• Disc Output:
VCD, SVCD, DVD
• Photo Editing:
BMP, JPEG, GIF, PNG, TIFF
Page 62

62. honestech
honestech
Claymation Studio
Capture images using a digital camera, webcam
or DV camcorder,
create characters, apply small changes, and add
background images
and music to create your own claymation movies.
Features
• Onionskin
• Rotoscope
• Chroma key
• Supports WMV & AVI format
• Audio Recording
• Simple Frame Editing
• Supports Project Format
System Requirements
• Operating System:
Windows XP
Windows Vista
(http://www.honestech.com/vista)
• Processor:
Pentium IV 1.8GHz or equivalent
• Memory:
128MB of RAM
(256MB or higher recommended)
• Other:
Microsoft DirectX 9.0(or higher)
Windows Media Format
SDK 9 (or higher)
Windows Media Player 7
(or higher)
Optional Devices
• Video Capture Device:
Web Camera , DV-Camcorder
• Audio Capture Device:
microphone
Input/Output Formats
• Image input:
JPEG, BMP, PNG, GIF
• Audio input:
MP3, WAV
• Video Output:
AVI, WMV
Page 63

honestech
Backpack Journalist
Powerful digital video editing software that allows
users to capture and edit audio/video and then
transmit over the internet, all in real-time.
Features
1. Capture
• DV Connection Display
• Device Control
• Auto Capture
• Manual Capture
• Batch Capture
• Scene Change Detection (SCD)
• Continuous recording and Pre-Roll playback
option
• Timer
• Audio Information Display
2. Editong
• 3 timeline tracks
• Clip source management based on Bin type
• Automatic clip insertion from Clip monitor to
timeline
• Adding still images to the beginning or the end
of a clip
• .Customizing the timeline for production of
news clips with time length restriction
3. Rendering & Transmission
• Easy Transmission
• Transmission Configuration
• Auto Error Correction
System Requirements
• Operating System:
Windows XP Service Pack 2
Windows Vista
(http://www.honestech.com/vista)
• Processor:
Pentium IV 2.4 GHz or equivalent
• Memory:
512MB of RAM
(1024 MB or more recommended)
63. Claymation Studio
• HDD:
20 GB+ hard drive space for video capture
and editing
• Screen Resolution:
1024 x 768, 32-bit color or above
• Microphone:
Required for recording voice-overs
• Video Capturing Device:
DV camcorder connected via OHCI-compliant
IEEE1394
• File Transfer:
Internet connection request for file transfer
• Other:
Microsoft DirectX 9.0c (or higher)
Windows Media Player 7 (or higher)
• Video Input:
DV-AVI
• Image Input:
JPEG, BMP, TGA
• Audio Input:
MP3, WAV
• Video Output:
WMV, DV
• Output Resolution:
720x480, 360x240
Page 64

64. honestech
Honestech, Inc.
North and Latin America
P.O. Box 26365 Austin, TX 78755
eMail :support@honestech.com
France: support@honestech-fr.com
http://www.honestech.com
Honest Technology Taiwan
Address : Room 6E08, No. 5, Sec. 5, Hsin-Yi Road., Taipei, Taiwan, R.O.C
< Taipei World Trade Center >
eMail : Taiwan@honestech.com
Honest Technology Japan
Address : MS Bldg 6F, 2-25-4, Taitou, Taitou-Ku, Tokyo, 110-0016 JAPAN
eMail : japan@honestech.com
Honest Technology Korea
Address : Kyung-Dong Bldg, 5F, 906-5 Jijok-Dong, Yuseong-Gu, Daejeon, Korea 305-330
eMail : support@honestech.co.kr
 Loading...