

Honda EMS4000, EMS4500 Owner's Manual
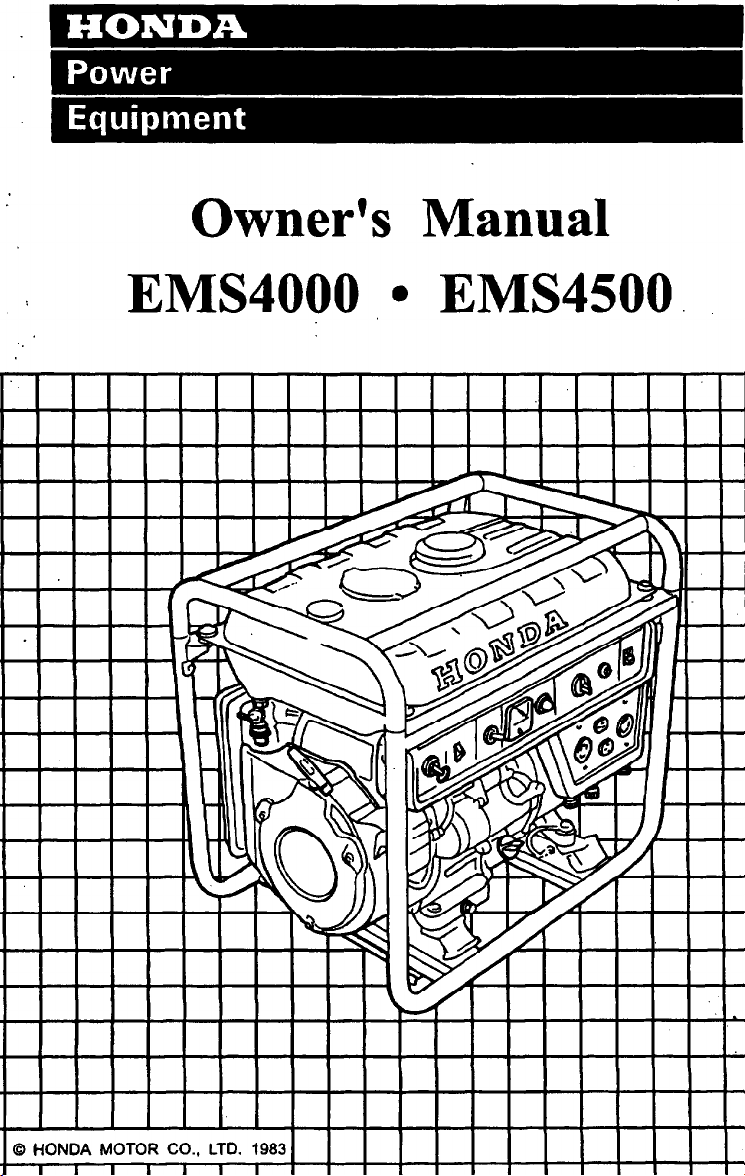
Owner’s Manual
EMS4000, l EMS4500
Q HONDA MOTOR CO., LTD. 1983

Thank you for purchasing a Honda generator.
This manual covers operation and maintenance of EMS4000 and EMS4500
generators. All information in this publication is based on the latest product
information available at the time of approval for printing.
Honda Motor Co., Ltd. reserves the right to make changes at any time without
notice and without incurring any obligation.
No part of this put :ation may be reproduced without written permission.
This manual should be considered a permanent part of the generator and
remain with the generator if it is sold.
Pay special attention to statements preceded by the following words:
w Indicates a strong possibility of severe personal injury or loss of
life if instructions are not followed.
CAUTION: Indicates a possibility of personal injury or equipment damage if
instructions are not followed.
NOTE: Gives helpful information.
If a problem should arise, or if you have any questions about the generator,
consult an authorized Honda dealer.
w Honda generators are designed to give safe and dependable service
if operated according to instructions. Read and understand the Owner’s Manual
before operating the generator. Failure to do so could result in personal injury
or equipment damage.
1
CONTENTS
CONTENTS
1. GENERATOR SAFETY
2. COMPONENT IDENTIFICATION
3. PRE-OPERATION CHECK
4. STARTING THE ENGINE
5. GENERATOR USE
6. STOPPING THE ENGINE
7,MAlNTENANCE
8. TRANSPORTING/STORAGE
9. TROUBLESHOOTING
10. SPECIFICATIONS
11. WIRING DIAGRAM
12. INSTALLATION OF OPTIONAL PARTS
13. WARRANTY SERVICE
.........................................
...................................
............................
.................................
..................................
.......................................
....
....................................
.........................................
......................................
....................................
............................
;.
...............................
.....................
3
4
6
g
16
19
21
30
32
35
36
38
43
2

1. GENERATOR SAFETY
To ensure safe operation -
l
Place the generator at least 1 m (3 ft) away from buildings or other
equipment while operating.
l
Operate the generator on a level surface.
If the generator is tilted, fuel spillage may result.
l
Exhaust gas contains poisonous carbon monoxide.
Never run the generator in an enclosed area.
Be sure to provide adequate ventilation.
l
Know how to stop the generator quickly and understand operation of all
the controls. Never permit anyone to operate the generator without proper
instructions.
l
Keep children and pets away from the generator when it is in operation.
l
Keep away from rotating parts while the generator is running.
l
The generator is a potential source of electrical shocks when misused; do not
operate with wet hands.
Do not operate the generator in rain or snow and do not let it get wet.
3
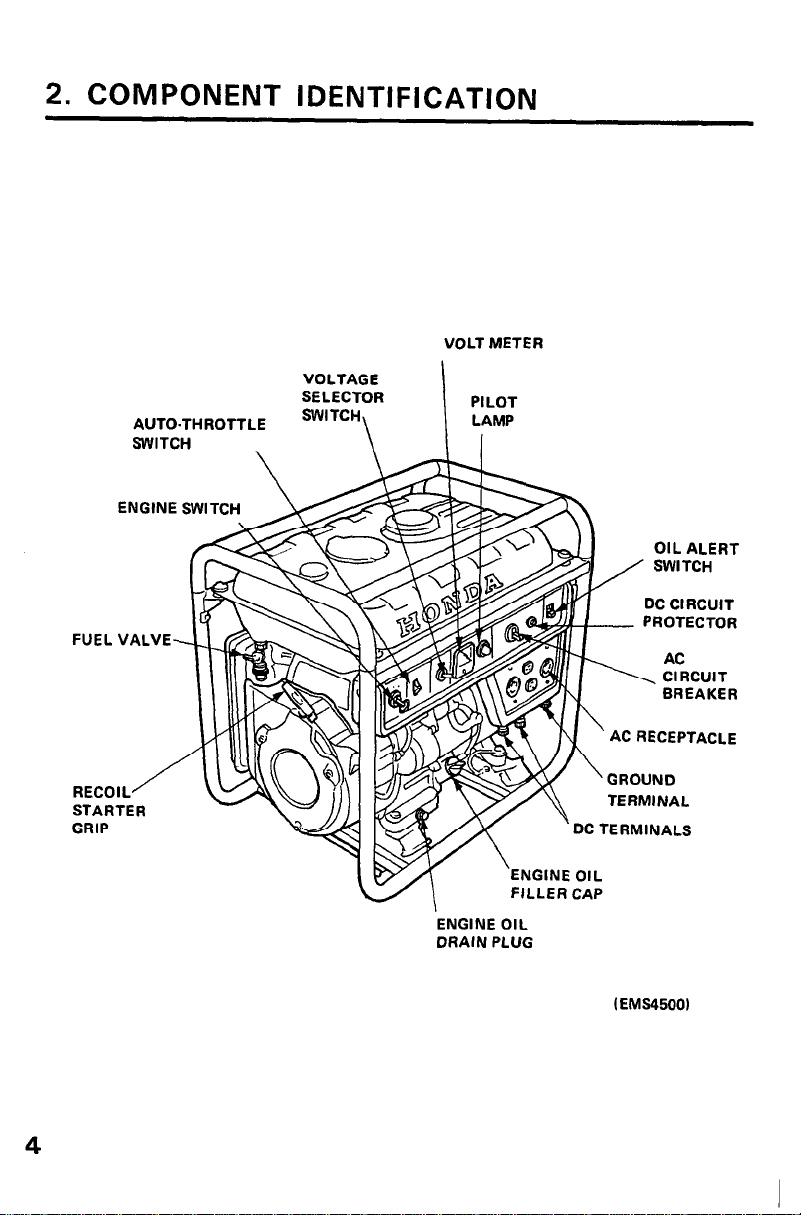
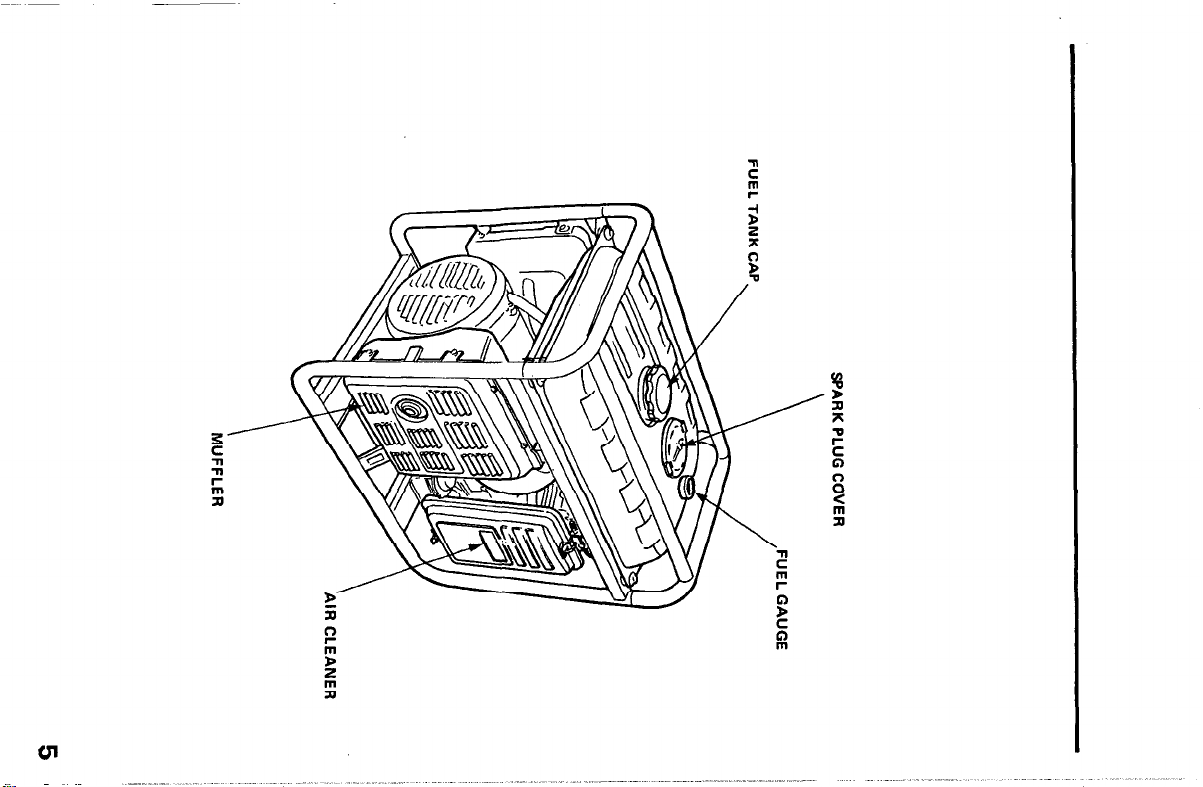
2. COMPONENT IDENTIFICATION
VOLT METER
VOLTAGE
SELECTOR
AUTO-THROTTLE
SWITCH
SWITCH
\
ENGINE SWITCU
FIIFI
VAIVF- \I
RECOIL
STARTER
GRIP
w
OIL ALERT
SWITCH
DC Cl RCUIT
PROTECTOR
AC RECEPTACLE
DC TERMINALS
ENGINE OIL
DRAIN PLUG
(EMS45001
4
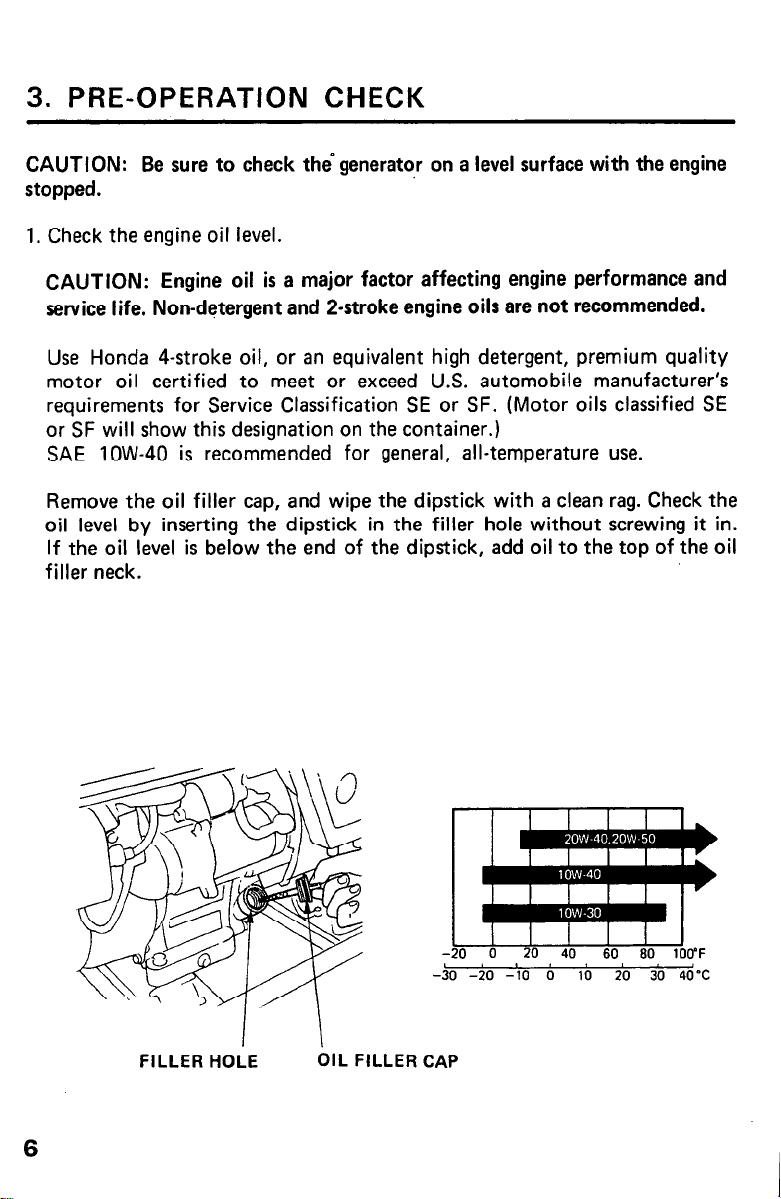
3. PRE-OPERATION CHECK
CAUTION: Be sure to check the generatot- on a level surface with the engine
stopped.
1. Check the engine oil level.
CAUTION: Engine oil is a major factor affecting engine performance and
service life, Non-detergent and S-stroke engine oils are not recommended.
Use Honda 4-stroke oil, or an equivalent high detergent, premium quality
motor oil certified to meet or exceed U.S. automobile manufacturer’s
requirements for Service Classification SE or SF. (Motor oils classified SE
or SF will show this designation on the container.)
SAE low-40 is recommended for general, all-temperature use.
Remove the oil filler cap, and wipe the dipstick with a clean rag. Check the
oil level by inserting the dipstick in the filler hole without screwing it in.
If the oil level is below the end of the dipstick, add oil to the top of the oil
filler neck.
FILLER HOLE
-20
-30 -20
OIL FILLER CAP
0 20 40 60 60 lO(rF
-10 0 10 20 30 4O'C
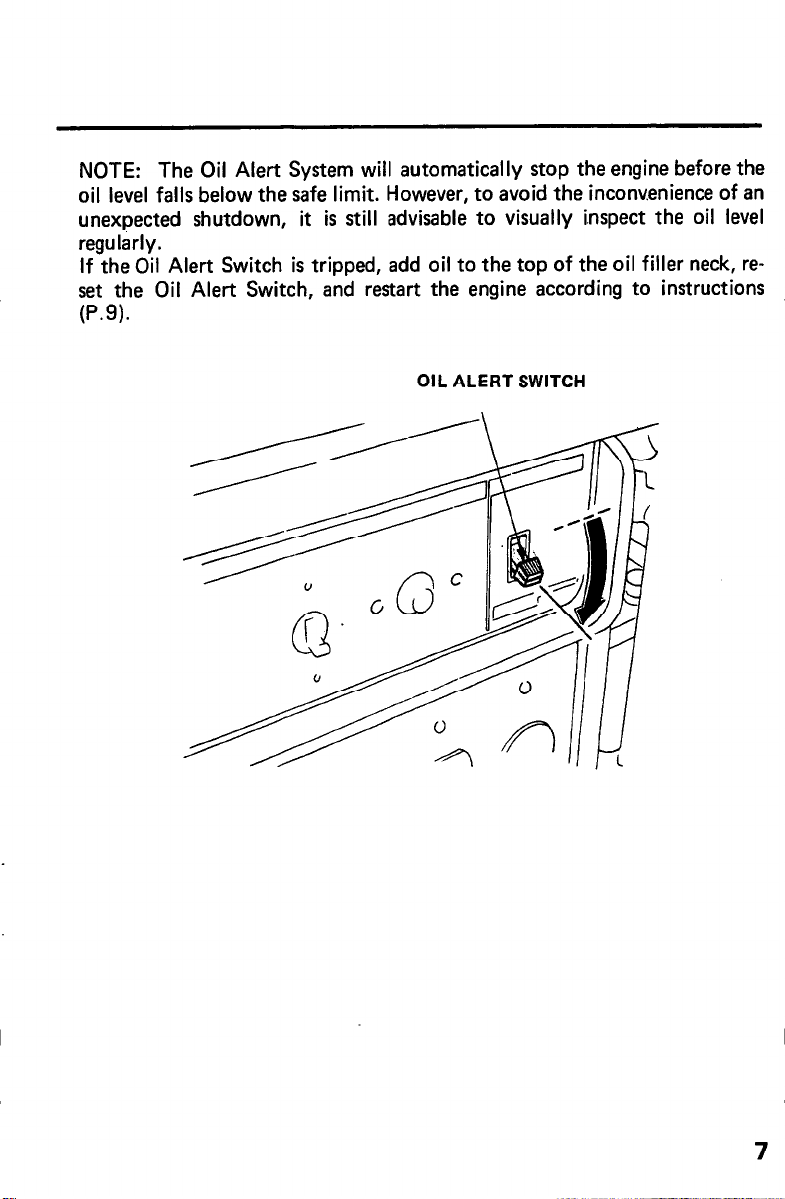
NOTE: The Oil Alert System will automatically stop the engine before the
oil level falls below the safe limit. However, to avoid the inconv.enience of an
unexpected shutdown, it is still advisable to visually Inspect the oil level
regularly.
If the Oil Alert Switch is tripped, add oil to the top of the oil filler neck, reset the Oil Alert Switch, and restart the engine according to instructions
(P.9).
OIL ALERT SWITCH
7
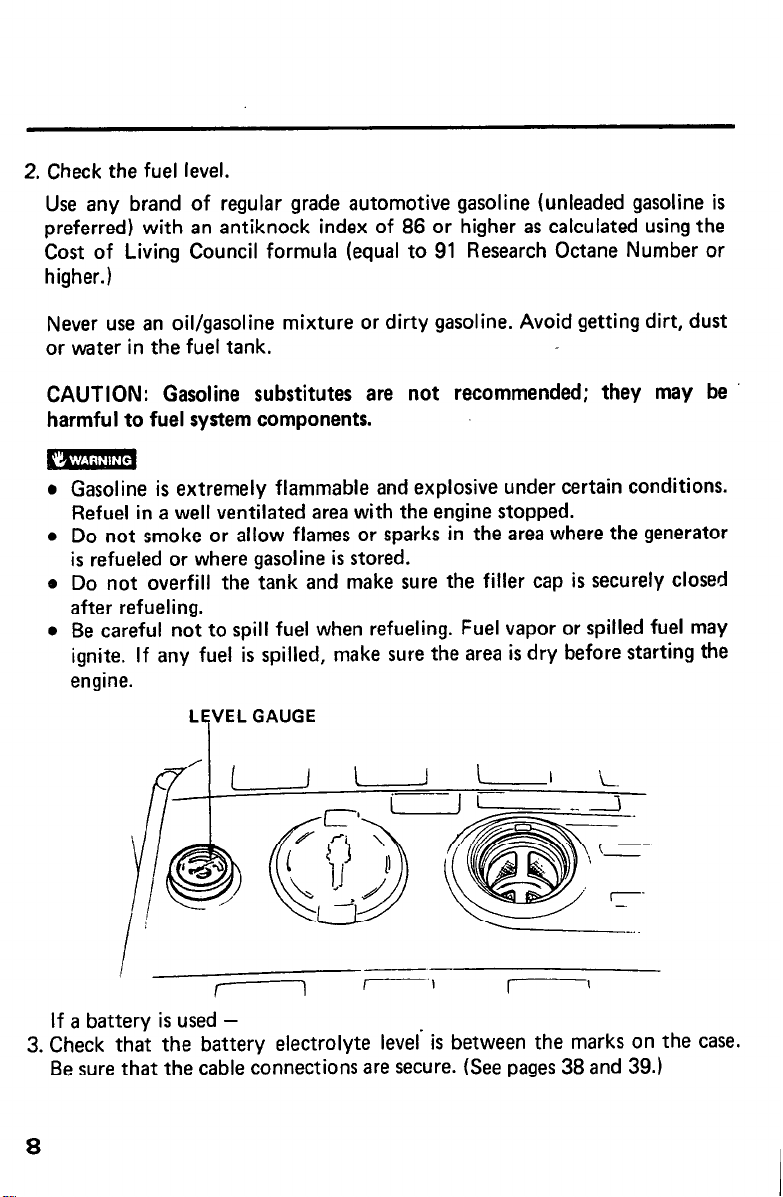
2. Check the fuel level.
Use any brand of regular grade automotive gasoline (unleaded gasoline is
preferred) with an antiknock index of 86 or higher as calculated using the
Cost of Living Council formula (equal to 91 Research Octane Number or
higher.)
Never use an oil/gasoline mixture or dirty gasoline. Avoid getting dirt, dust
or water in the fuel tank.
CAUTION: Gasoline substitutes are not recommended; they may be
harmful to fuel system components.
l
Gasoline is extremely flammable and explosive under certain conditions.
Refuel in a well ventilated area with the engine stopped.
l
Do not smoke or allow flames or sparks in the area where the generator
is refueled or where gasoline is stored.
e Do not overfill the tank and make sure the filler cap is securely closed
after refueling.
l
Be careful not to spill fuel when refueling. Fuel vapor or spilled fuel may
ignite. If any fuel is spilled,
engine.
L VELGAUGE
make sure the area is dry before starting the
i
d/ I
I
r
If a battery is used -
3. Check that the battery electrolyte level’ is between the marks on the case.
Be sure that the cable connections are secure. (See pages 38 and 39.)
1
~-
r-----.1
I
8
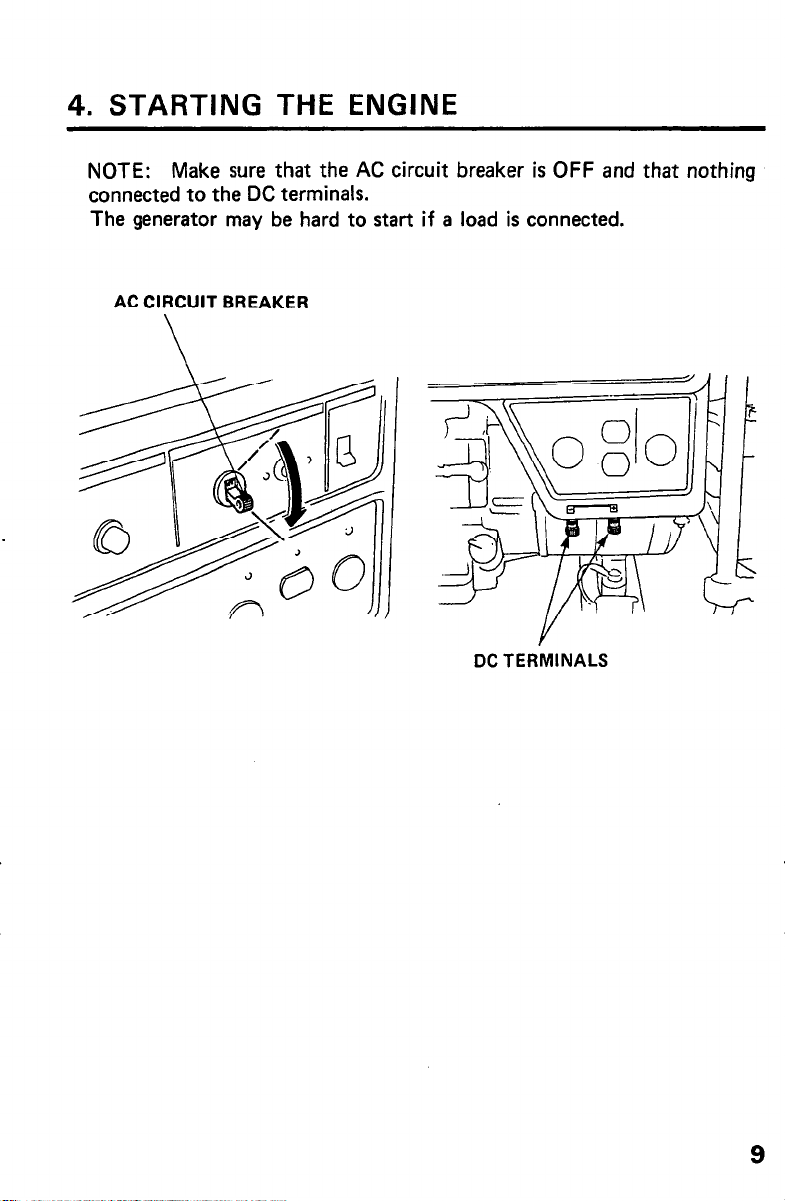
4. STARTING THE ENGINE
NOTE:
connected to the DC terminals.
The generator may be hard to start if a load is connected.
Make sure that the AC circuit breaker is OFF and that nothing
AC CIRCUIT BREAKER
DC TERMINALS
9
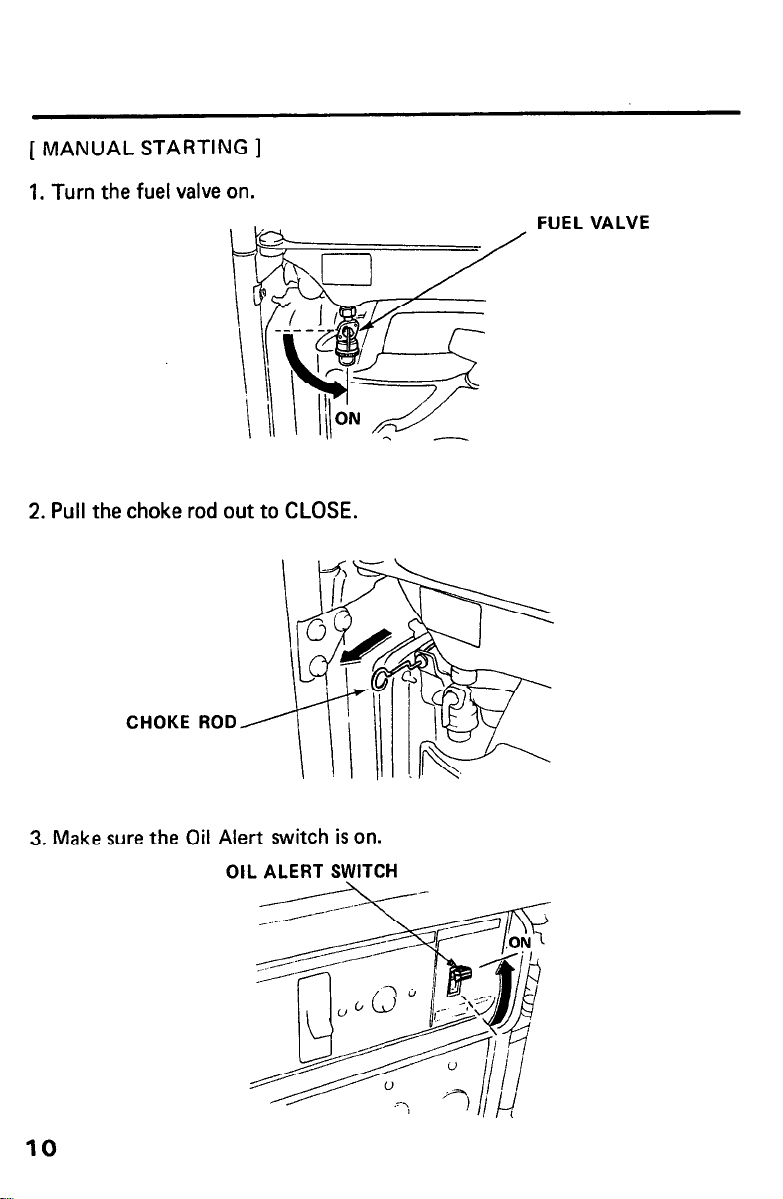
[ MANUAL STARTING ]
1, Turn the fuel valve on.
2. Pull the choke rod out to CLOSE.
CHOKE ROD
FUEL VALVE
3. Make sure the Oil Alert switch is on.
OIL ALERT @‘ITCH
10
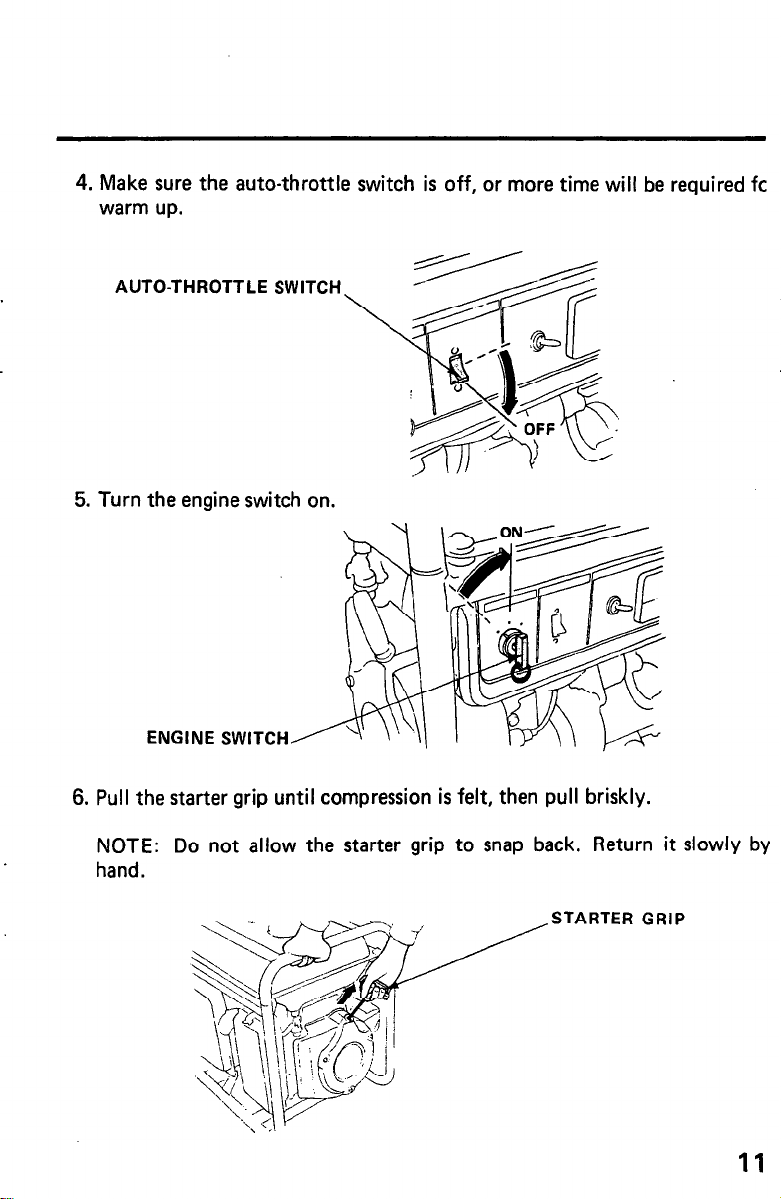
4. Make sure the auto-throttle switch is off, or more time will be required fc
warm up.
AUTO-THROTTLE SWITCH
5. Turn the engine switch on.
ENGINE SWITCH
6. Pull the starter grip until compression is felt, then pull briskly.
NOTE: Do not allow the starter grip to snap back. Return it slowly by
hand.
STARTER GRIP
11
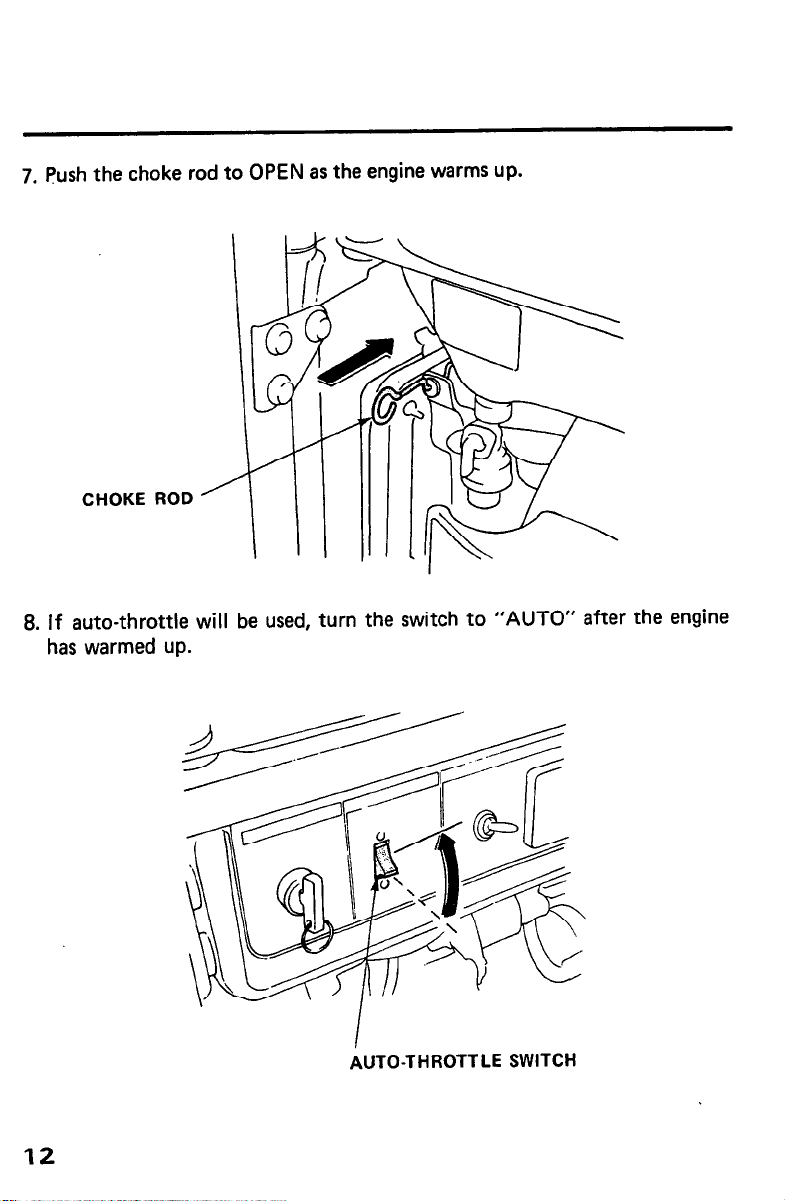
7. Push the choke rod to OPEN as the engine warms up.
CHOKE ROD
8. If auto-throttle will be used, turn the switch to “AUTO” after the engine
has warmed up.
12
AUTO-THROTTLE SWITCH
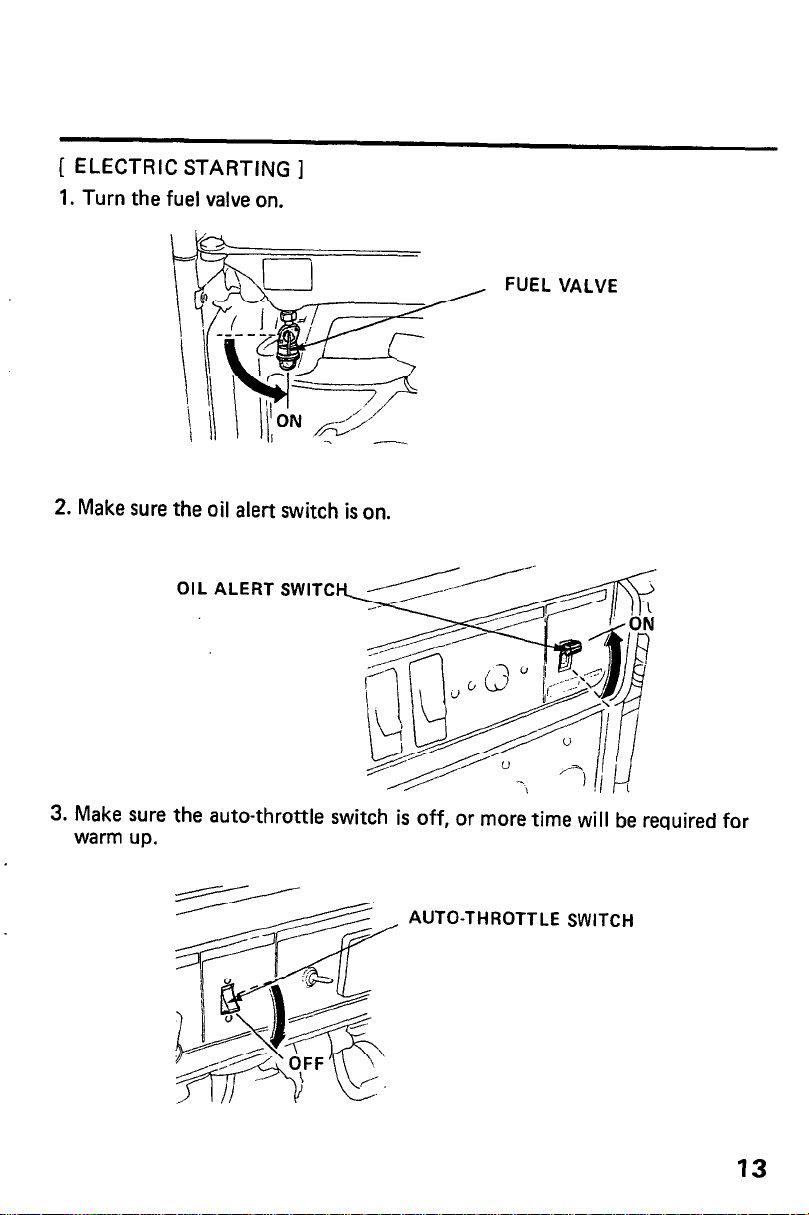
[ ELECTRIC STARTING ]
1. Turn the fuel valve on.
2. Make sure the oil alert switch is on.
FUEL VALVE
3. Make sure the auto-throttle switch is off, or more time will be required for
warm up.
AUTO-THROTTLE SWITCH
13
 Loading...