

Page 1

RC 4/36-DAB
Printed: 20.07.2018 | Doc-Nr: PUB / 5336114 / 000 / 03
English
Page 2

Printed: 20.07.2018 | Doc-Nr: PUB / 5336114 / 000 / 03
Page 3
1 Information about the documentation
1.1 Explanation of symbols used
1.1.1 Warnings
Warnings alert persons to hazards that occur when handling or using the product. The following signal words
are used:
DANGER
DANGER !
▶ Draws attention to imminent danger that will lead to serious personal injury or fatality.
WARNING
WARNING !
▶ Draws attention to a potential threat of danger that can lead to serious injury or fatality.
CAUTION
CAUTION !
▶ Draws attention to a potentially dangerous situation that could lead to slight personal injury or damage
to the equipment or other property.
1.1.2 Symbols in the documentation
The following symbols are used in this document:
Read the operating instructions before use.
Instructions for use and other useful information
Dealing with recyclable materials
Do not dispose of electric equipment and batteries as household waste
1.1.3 Symbols in the illustrations
The following symbols are used in illustrations:
These numbers refer to the corresponding illustrations found at the beginning of these operating
instructions
The numbering reflects the sequence of operations shown in the illustrations and may deviate
from the steps described in the text
Item reference numbers are used in the overview illustrations and refer to the numbers used in
the product overview section
This symbol is intended to draw special attention to certain points when handling the product.
Wireless data transfer
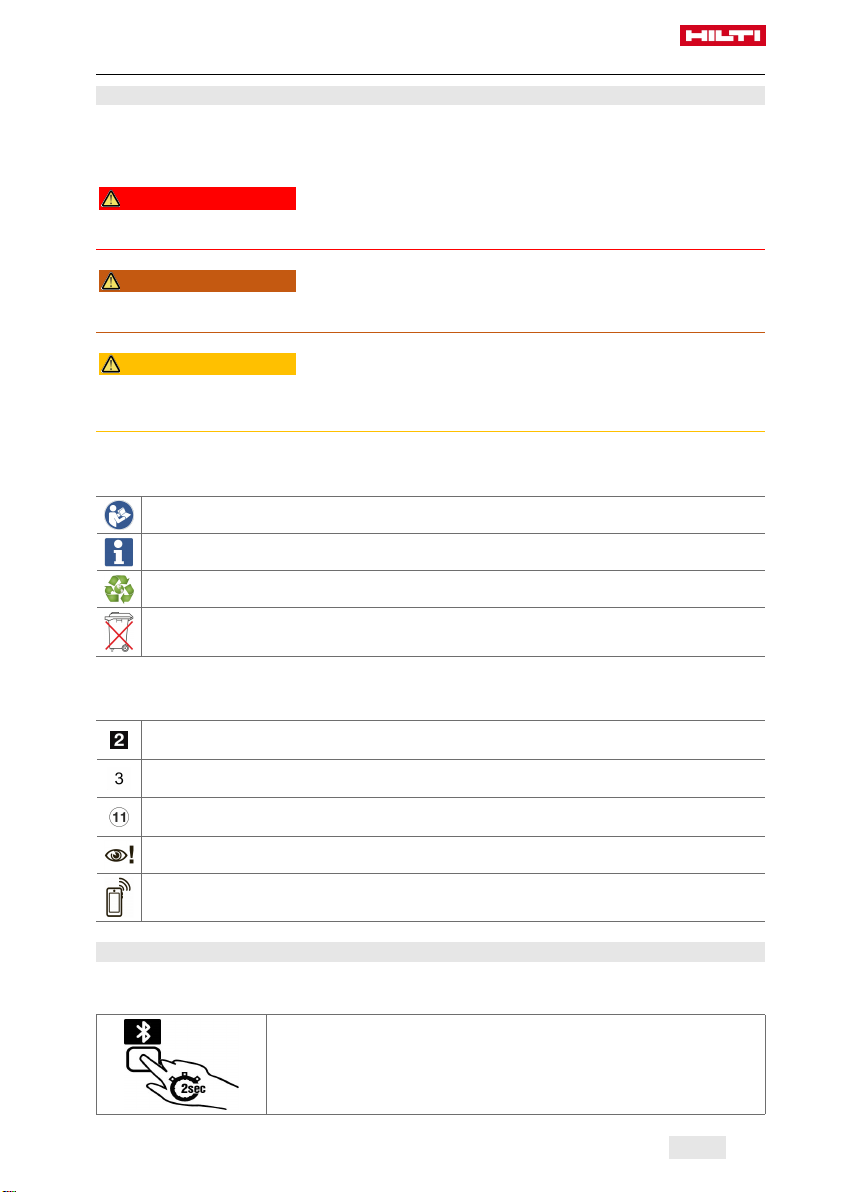
1.2 Sticker on the product
Sticker on the product → page 1
Sticker on the product
Press the Bluetooth button for 2 seconds to activate Bluetooth.
Printed: 20.07.2018 | Doc-Nr: PUB / 5336114 / 000 / 03
English 1
Page 4
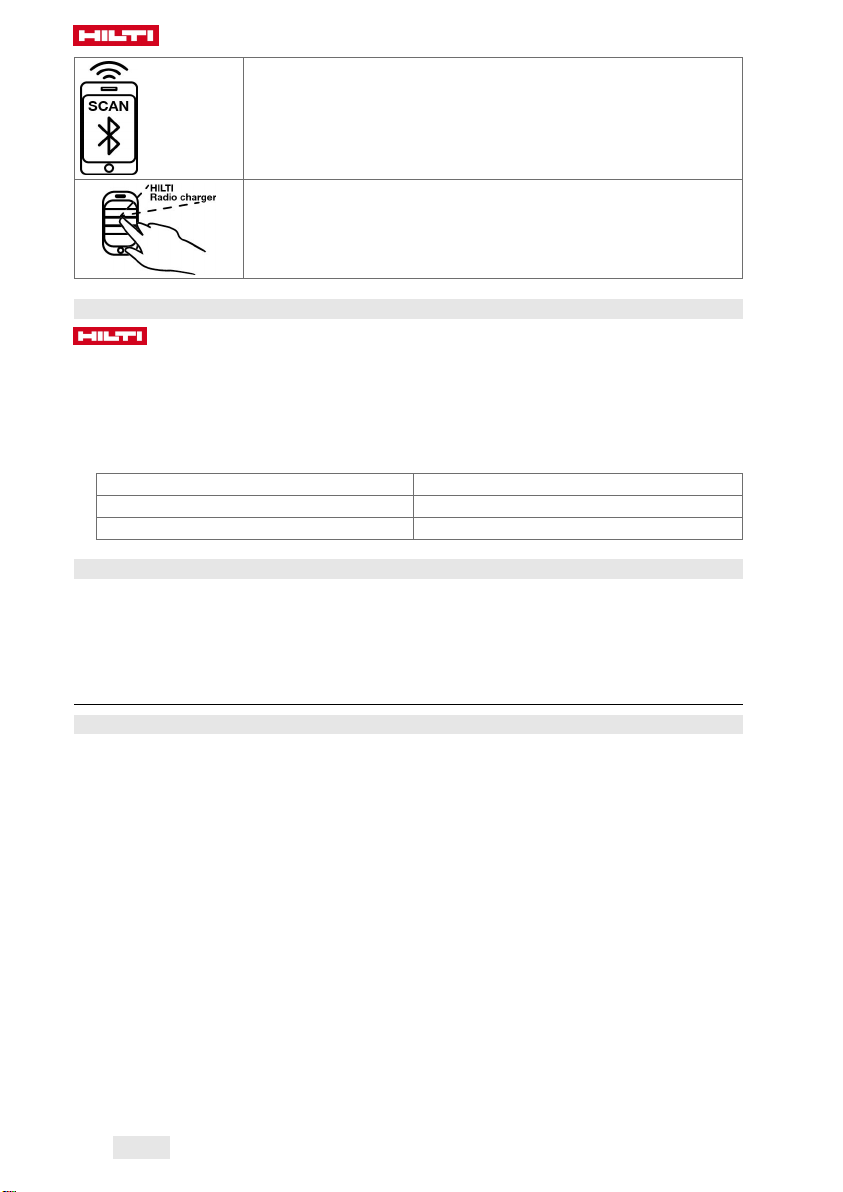
Switch Bluetooth on at your external device and wait for it to find the Hilti
Radio Charger.
Select the Hilti Radio Charger at your external device and pair the two devices.
1.3 Product information
products are designed for professional users and only trained, authorized personnel are
permitted to operate, service and maintain the products. This personnel must be specifically informed about
the possible hazards. The product and its ancillary equipment can present hazards if used incorrectly by
untrained personnel or if used not in accordance with the intended use.
The type designation and serial number are printed on the rating plate.
▶ Write down the serial number in the table below. You will be required to state the product details when
contacting Hilti Service or your local Hilti organization to inquire about the product.
Product information
Type: RC 4/36 | RC 4/36-DAB
Generation: 01
Serial number:
1.4 Declaration of conformity
We declare, on our soleresponsibility, that the productdescribed here complies with the applicable directives
and standards. A copy of the declaration of conformity can be found at the end of this documentation.
The technical documentation is filed here:
Hilti Entwicklungsgesellschaft mbH | Tool Certification | Hiltistrasse 6 | 86916 Kaufering, Germany
2 Safety
2.1 General safety instructions
WARNING! Read all instructions! Failure to follow all instructions listed below can result in electric shock,
fire and/or serious injury. Keep these instructions in a handy yet secure place.
Workplace
▶ Ensure that the workplace is well lit.
▶ Do not tamper with or attempt to make alterations to the appliance.
▶ The charger is not designed for wall mounting.
▶ Keep your work area clean and well lit. Cluttered or poorly lit work areas invite accidents.
▶ Do not operate the charger in explosive atmospheres, such as in the presence of flammable liquids,
gases or dust. Chargers can cause sparks which can ignite dust, fumes or vapors.
▶ Keep children and other persons away from the area while the charger is in use.
▶ Always stow the battery charger securely to prevent it sliding about in a vehicle during transport.
Electrical safety
▶ The plug on the supply cord of the appliance must match the outlet. Do not change the plug in any way.
Unmodified plugs and matching power outlets reduce the risk of electric shock.
▶ Avoid body contact with earthed or grounded surfaces such as pipes, radiators, cookers, stoves and
refrigerators. There is an increased risk of electric shock if your body is grounded.
▶ Do not abuse the cord. Never use the cord to carry or hang up the power tool or to pull the plug out of
the power outlet. Keep the cord well away from heat, oil, sharp edges and moving parts. Damaged or
twisted supply cords increase the risk of electric shock.
2 English
Printed: 20.07.2018 | Doc-Nr: PUB / 5336114 / 000 / 03
Page 5

▶ Use the battery charger only inside dry rooms. Water entering an electric appliance will increase the risk
of electric shock.
▶ Do not touch the supply cord or extension cord if it is damaged while you are working. Disconnect the
supply cord plug from the power outlet. Damaged supply cords and extension cords present a risk of
electric shock.
▶ Never operate the appliance when it is dirty or wet. Dust (especially dust from conductive materials) or
dampness on the surface of the appliance can, under unfavorable conditions, lead to electric shock.
Have dirtied or dusty appliances checked at regular intervals by Hilti Service, especially if they are used
frequently for working on conductive materials.
Personal safety
▶ Do not wear jewelry such as rings or chains. Jewelry could cause a short circuit resulting in personal
injury in the form of burns.
▶ Take care to ensure that the charger stands in a steady, secure position. A falling battery or charger can
endanger you and/or others.
▶ Avoid touching the contacts.
▶ Batteries that have reached the end of their life must be disposed of safely and correctly to avoid
environmental pollution.
▶ Children are not permitted to play with the appliance and must be instructed accordingly.
Battery charger use and care
▶ Use the charger only to charge the specified Hilti batteries.
▶ Maintain the appliance carefully. Check to ensure that no parts are broken or damaged in such a way
that the appliance might no longer function correctly. Have damaged parts repaired before using the
appliance.
▶ Use chargers and the corresponding batteries in accordance with these instructions and as specified for
this particular model. Use of chargers for applications other than those intended can result in hazardous
situations.
▶ Recharge batteries only with the chargers recommended by the manufacturer. A charger that is suitable
for a certain type of battery can be a fire hazard if used with other batteries.
▶ When not in use, keep the battery and the charger away from paper clips, coins, keys, nails, screws
and other small metal objects that could cause a short circuit at the battery terminals or the charging
contacts. A short circuit between the battery terminals or charging contacts can cause burn injuries and
result in fire.
▶ Misuse can result in liquid escaping from the battery. Avoid contact with the liquid. If contact accidentally
occurs, rinse off with water. If the liquid contacts the eyes, also seek medical attention. Liquid escaping
from the battery can cause skin irritation or burns.
▶ Make sure that the batteries suffer no mechanical damage.
▶ Do not attempt to charge or continue to use damaged batteries (e.g. batteries with cracks, broken parts,
bent or pushed-in and/or pulled-out contacts).
Service
▶ Have the appliance serviced by a qualified specialist using only genuine Hilti spare parts. The safety of
the appliance can thus be maintained.
Printed: 20.07.2018 | Doc-Nr: PUB / 5336114 / 000 / 03
English 3
Page 6

4 English
Printed: 20.07.2018 | Doc-Nr: PUB / 5336114 / 000 / 03
Page 7

Printed: 20.07.2018 | Doc-Nr: PUB / 5336114 / 000 / 03
English 5
Page 8

3 Description
3.1 Overview
6 English
Printed: 20.07.2018 | Doc-Nr: PUB / 5336114 / 000 / 03
Page 9

Display
@
Power button
;
Carrying handle
=
Antenna
%
Knob
&
Casing
(
Rubber armoring
)
Mode button
+
Preset button
§
3.2 Intended use
Do not use outdoors.
The device is a battery charger that can simultaneously play audio received by the built-in radio or via an
AUX input.
The device can play audio from various other devices either paired via Bluetooth or connected by an AUX
cable.
The USB port can be used to charge other devices connected to this device.
The device is designed for use under jobsite conditions. It may not be exposed to moisture or water.
Operate the device only at the voltage stated on the type identification plate. When powering the device by
battery, use only the batteries specified by Hilti.
The device can be connected to a power outlet using a plug with no earth/ground contact (i.e. two-pin plug).
The battery is charged only while the device is connected to an AC supply. When the device is not connected
to an AC supply it operates under battery power.
Interference (noise) can occur when the radio is set to AM or FM frequency reception while a battery is being
charged.
3.3 Batteries
The appliance can be powered by the following Hilti batteries: B14, B18, B22, B36.
The appliance can charge the following Hilti batteries: B12 (only with adapter), B14, B18, B22, B36.
Please note the approved batteries, as stated on the type identification plate.
Bluetooth button
/
Equalizer button
:
Time settings
∙
USB port
$
AUX port
£
Battery
|
NFC interface
¡
Battery compartment
Q
Supply cord holder
W
The battery state of charge is shown continuously in the display. The battery symbol consists of 4 bars. Each
bar stands for 25%.
To protect the battery, the appliance switches itself off when the state of charge is too low. If this happens,
connect the appliance to the AC supply or change the battery.
The battery will be charged automatically when it is inserted in the charger and the charger is connected to
the AC supply. The battery symbol in the display indicates that charging is in progress.
If a battery is too hot or too cold when inserted into the charger, charging does not start until the battery
reaches its operating temperature.
Charging time and battery life depend on battery type, state of charge and battery temperature.
If the battery symbol does not appear in the display either the battery is not correctly inserted or the battery or
the appliance is defective. Stop using the appliance and the battery and have them checked by Hilti Service.
3.4 Information shown in the display
Information shown in the display → page 7
Information shown in the display
The AM frequency band has been selected as the audio source.
The FM frequency band has been selected as the audio source.
DAB has been selected as the audio source.
DAB offers the best audio quality, so select DAB as the audio source if it can
be received.
English 7
Printed: 20.07.2018 | Doc-Nr: PUB / 5336114 / 000 / 03
Page 10

AUX has been selected as the audio source.
Indicates the battery state of charge. A bar stands for 25 %.
Indicates that the device is connected to the AC supply.
Bluetooth has been selected as the audio source.
If the pairing symbol flashes, the device is searching for a player to which it
can connect.
If the pairing symbol shows continuously, a player is connected via Bluetooth.
Indicates the bass settings.
Indicates the treble settings.
Indicates stereo playback. Stereo playback is activated automatically when
signal reception is good enough.
Indicates the memory slot of the station.
Indicates the time.
Symbols flash in setup mode.
Indicates that the DAB signal is weak.
3.5 Cradle for external devices
Via Bluetooth or AUX, the appliance can play audio from external mobile devices such as mobiles/cellphones
or tablet computers. An external device can be cradled securely on the appliance.
4 Technical data
4.1 Technical data
Voltage
Voltage (Great Britain)
AC frequency
Power input
Battery operating voltage
Battery pack
Weight (Without battery)
AM frequency range
8 English
Printed: 20.07.2018 | Doc-Nr: PUB / 5336114 / 000 / 03
220 V …240 V
110 V
50 Hz …60 Hz
160 W
14 V …36 V
Li-Ion
6.95 kg
522 kHz …1,620 kHz
Page 11

FM frequency range
DAB / DAB+
Charge voltage
Output power, charger
USB output voltage
Ambient temperature
Bluetooth radiant power
Bluetooth frequency
87.5 MHz …108 MHz
174 MHz …240 MHz
7.2 V …36 V
90 W
5.0 V / 2.1 A
−17 ℃ …40 ℃
7.30 dBm
2,402 MHz …2,480 MHz
5 Operation
5.1 Inserting the back-up batteries
Make sure that battery polarity is correct.
It is not possible to save settings unless the batteries are correctly installed.
▶ Insert the 2 AAA batteries supplied with the appliance into the battery compartment.
5.2 Inserting and removing the battery
1. Insert the battery by pushing it along the rails until it engages.
2. Remove the battery by pushing the two buttons on the sides and pulling the battery to disengage it.
English 9
Printed: 20.07.2018 | Doc-Nr: PUB / 5336114 / 000 / 03
Page 12

5.3 Switching the appliance on / off
▶ Press the power button.
5.4 Establishing a Bluetooth connection
If you are prompted for a code, enter the code 0000.
1. Short-press the Bluetooth button.
2. To pair the appliance manually for the first time, press and hold down the Bluetooth button (for about 2
seconds) until the Bluetooth symbol starts to flash.
◁
Select the Hilti Radio Charger on the external device while the Bluetooth symbol on the display is
flashing.
◁ The devices have been successfully paired when the Bluetooth and pairing symbols both show
continuously in the display.
3. Press the Bluetooth button if the appliance is already paired.
◁ Pairing starts automatically and the pairing symbol on the screen starts to flash.
◁ The appliance searches for a signal for a maximum of 3 minutes.
◁ The pairing symbol appears in the display to indicate that the devices are paired.
◁ The Bluetooth symbol appears in the display to indicate that the appliance has found a paired external
device.
10 English
Printed: 20.07.2018 | Doc-Nr: PUB / 5336114 / 000 / 03
Page 13

5.5 Making an NFC connection
1. Activate the NFC function on your mobile device (if it supports NFC).
2. Hold you mobile device close to the NFC interface of the appliance. This is on the right-hand side and is
indicated by the NFC symbol.
You must accept the NFC connection at your mobile device when the connection is established
for the first time.
5.6 Setting the audio source
Press the mode button to select the audio source: DAB, AM, FM, AUX or Bluetooth.
1. Press the mode button.
2. Select the desired audio source. You have a choice of AM, FM, AUX, Bluetooth and DAB.
5.7 Searching for and saving stations
Quickly turn the knob a short distance to start the automatic station search.
Printed: 20.07.2018 | Doc-Nr: PUB / 5336114 / 000 / 03
English 11
Page 14

1. Use the knob to select a frequency.
2. Press the preset button.
3. Press the knob to save this frequency.
5.8 Positioning the antenna
▶ Swivel the antenna to the position at which reception is clearest.
5.9 Adjusting the volume
1. Turn the power button clockwise to increase the volume.
2. Turn the power button counterclockwise to reduce the volume.
12 English
Printed: 20.07.2018 | Doc-Nr: PUB / 5336114 / 000 / 03
Page 15

5.10 Equalizer settings
This allows you to make adjustments to the bass and treble settings.
1. Press the equalizer button. It is marked “EQ”.
2. Use the knob to select either bass or treble for adjustment.
3. Use the knob to change your settings.
5.11 Audio playback from an external device via Bluetooth
1. Select Bluetooth as the play mode.
2. Press the Start/Pause button on your mobile device or press the knob to start or pause audio playback.
3. Use the arrow buttons on the external device or turn the knob to change tracks and to start.
For good audio quality, set the volume of the external device to very high. Then use the controls
on the appliance to adjust the other volume settings.
5.12 Audio playback from an external device via AUX
1. Select the play mode (AUX or Bluetooth).
2. Press the start/pause button on your mobile device to start or pause audio playback.
3. Use the arrow buttons on the external device to change tracks and to start.
For good audio quality, set the volume of the external device to very high. Further adjustment of
the volume should then be made using the controls on the appliance.
Printed: 20.07.2018 | Doc-Nr: PUB / 5336114 / 000 / 03
English 13
Page 16

5.13 Setting the clock
Automatic synchronization of clock time with radio time can be switched on or off.
1. Press the clock button.
2. Use the knob to set the time.
3. Save the time by pressing the knob briefly.
4. Use the knob to select whether you wish to synchronize the time and press the knob briefly to confirm
your choice.
5.14 USB charging function
The USB charging function is available only when the appliance is connected to an AC supply or, if in
battery mode, when it is switched on.
The USB connector provides charging power only.
▶ Use a USB cable to connect the appliance to your mobile device for recharging.
14 English
Printed: 20.07.2018 | Doc-Nr: PUB / 5336114 / 000 / 03
Page 17

6 Troubleshooting
6.1 The appliance is connected to the AC supply
Malfunction Possible cause Action to be taken
Border of the battery symbol flashes, no segment of
the state of charge indicator
filled.
6.2 Appliance in battery-powered operation
Malfunction Possible cause Action to be taken
The appliance does not start. Battery discharged ▶ Charge the battery, insert a
Border of the battery symbol
flashes, no segment of the
state of charge indicator filled
(the indicator assumes this
state for a short time before
the appliance switches itself
off).
The appliance loses the time
and the last settings.
Battery too hot ▶ Wait until the battery cools
down.
Battery too cold ▶ Wait until the battery warms up.
Battery defective ▶ Check the battery by pressing
the two buttons at the sides.
If the LEDs light up the Radio
Charger might be defective. If
the LEDs do not light up the
battery is defective.
▶ Contact Hilti Service.
new battery, or connect the
appliance to the AC supply.
Battery defective ▶ Check the battery by pressing
the two buttons at the sides.
If the LEDs light up the Radio
Charger might be defective. If
the LEDs do not light up the
battery is defective.
▶ Contact Hilti Service.
Appliance defective ▶ Contact Hilti Service.
Battery too hot ▶ Wait until the battery cools
down.
Battery too cold ▶ Wait until the battery warms up.
Battery defective ▶ Check the battery by pressing
the two buttons at the sides.
If the LEDs light up the Radio
Charger might be defective. If
the LEDs do not light up the
battery is defective.
▶ Contact Hilti Service.
Batteries discharged ▶ Replace the back-up batteries.
7 Care and maintenance
7.1 Care and maintenance of the appliance
▶ Keep the appliance clean and free from oil and grease. Do not use cleaning agents which contain
silicone.
▶ Never operate the appliance with the air vents clogged. Clean the air vents carefully using a dry brush.
Do not permit foreign matter to penetrate inside the appliance.
▶
Clean the outside of the appliance at regular intervals with a slightly damp cloth. Do not use a spray,
steam pressure cleaning equipment or running water for cleaning.
English 15
Printed: 20.07.2018 | Doc-Nr: PUB / 5336114 / 000 / 03
Page 18

7.2 Care of the Liion battery
Battery discharge is stopped automatically before the battery cells suffer damage.
A conditioning charge of the battery is not necessary.
Interruption of the charging operation has no negative effect on battery life.
Charging can be started at any time with no negative effect on battery life.
If the battery no longer reaches full charge, it may have lost capacity due to aging or overstressing. It
is possible to continue working with a battery in this condition but it should be replaced in good time.
▶ Charge batteries fully before using them for the first time.
▶ Do not allow moisture to enter the interior.
▶ For best results, batteries should be stored fully charged in a cool, dry place.
Storing the battery in places subject to high ambient temperatures (e.g. at a window) has an
adverse effect on battery life and increases the rate of self-discharge.
8 Disposal
Most of the materials from which Hilti tools and appliances are manufactured can be recycled. The
materials must be correctly separated before they can be recycled. In many countries, your old tools,
machines or appliances can be returned to Hilti for recycling. Ask Hilti Service or your Hilti representative
for further information.
▶ Do not dispose of power tools, electronic equipment or batteries as household waste!
9 RoHS (Restriction of Hazardous Substances)
Click on the link to go to the table of hazardous substances: qr.hilti.com/r6039207.
There is a link to the RoHS table, in the form of a QR code, at the end of this document.
10 Manufacturer’s warranty
▶ Please contact your local Hilti representative if you have questions about the warranty conditions.
16 English
Printed: 20.07.2018 | Doc-Nr: PUB / 5336114 / 000 / 03
Page 19

Printed: 20.07.2018 | Doc-Nr: PUB / 5336114 / 000 / 03
Page 20

Printed: 20.07.2018 | Doc-Nr: PUB / 5336114 / 000 / 03
Page 21

Printed: 20.07.2018 | Doc-Nr: PUB / 5336114 / 000 / 03
Page 22

Hilti = registered trademark of Hilti Corp., Schaan 20180703
Printed: 20.07.2018 | Doc-Nr: PUB / 5336114 / 000 / 03
 Loading...