

Hill-Rom Basic Care User manual
USER MANUAL
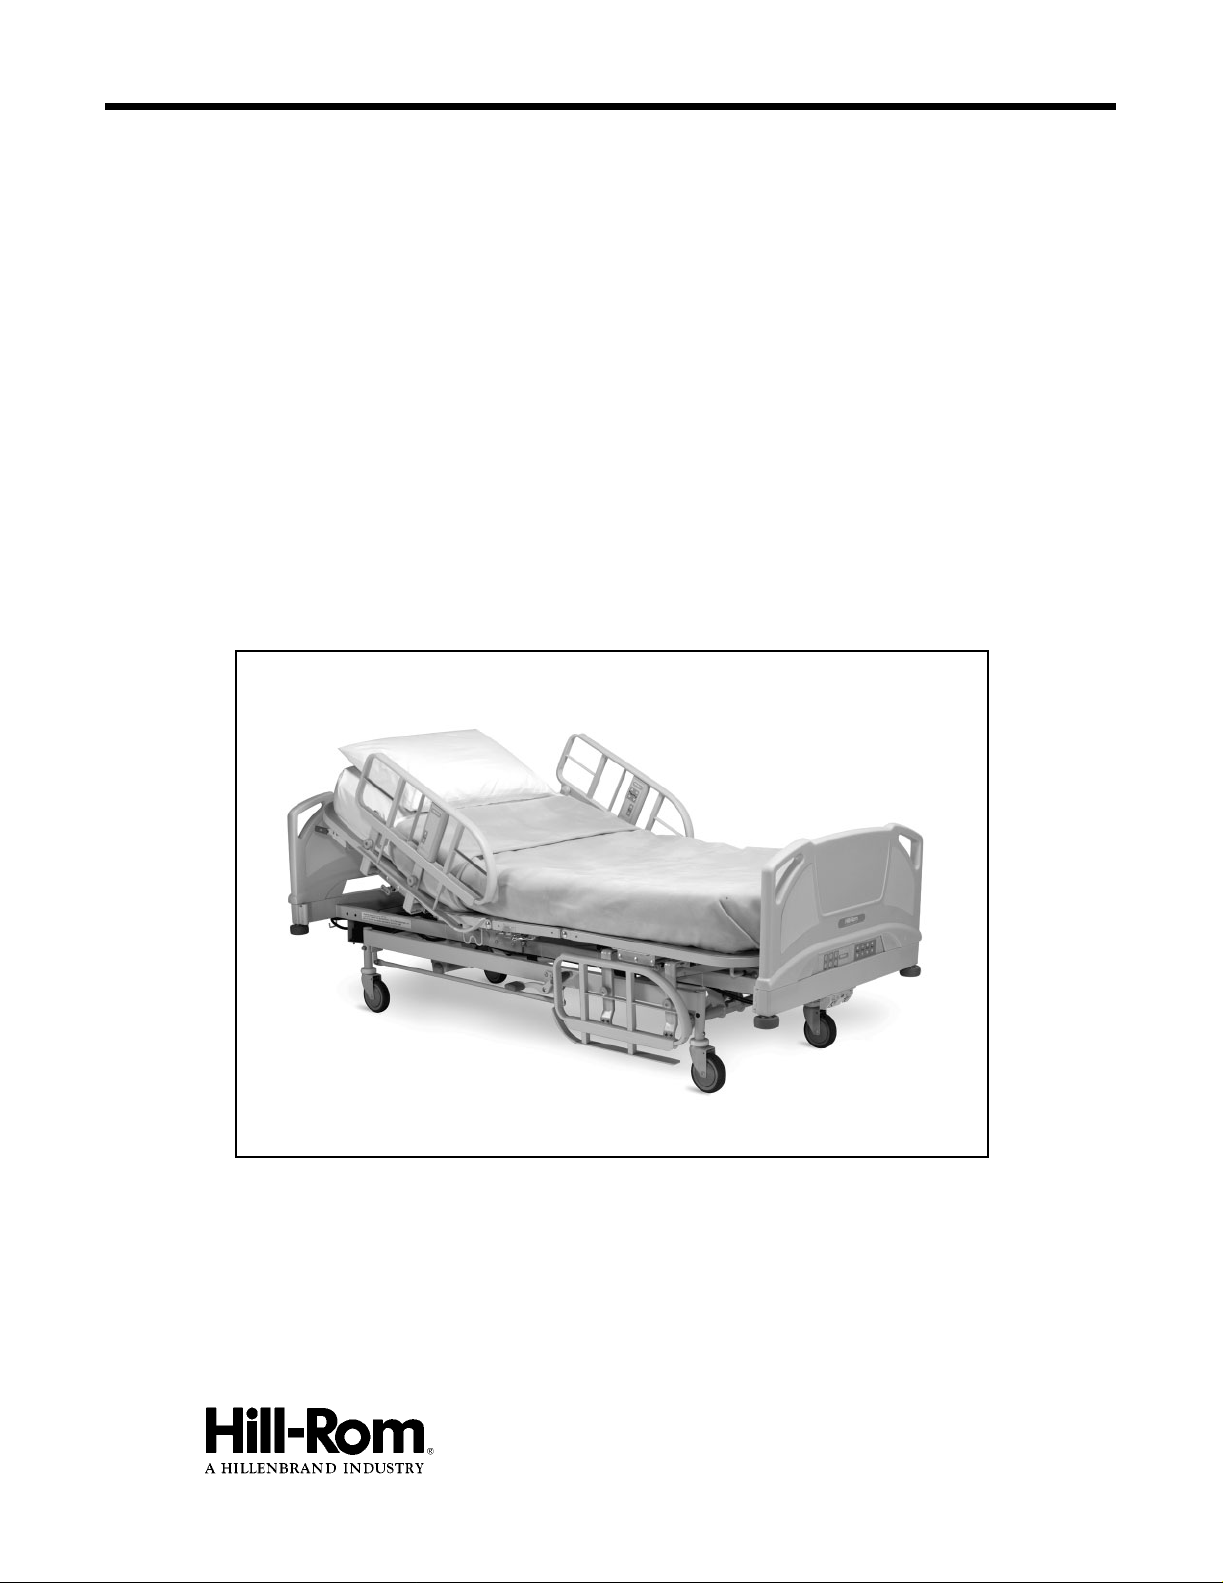
Basic Care™
Bed
From Hill-Rom
Product No. P1440 and P1441
USR124 REV 5

1

© 2005 by Hill-Rom Services, Inc. ALL RIGHTS RESERVED.
NOTE:
Manufactured for Hill-Rom by Optima Healthcare, Inc.
Distributed by:
HILL-ROM COMPANY, INC.
1069 STAT E ROUTE 46E
BATESVILLE, IN 47006-9617
Authorized European Union Representative:
HILL-ROM EUROPE
LE RABELAIS – PARIS NORD II
22 AVENUE DES NATIONS
BP 50436 VILLEPINTE
95944 ROISSY CDG CEDEX
FRANCE
TEL: +33 (0)1 49 89 40 00
No part of this text shall be reproduced or transmitted in any form or by any means,
electronic or mechanical, including photocopying, recording, or by any information or
retrieval system without written permission from Hill-Rom Services, Inc. (Hill-Rom).
The information in this manual is confidential and may not be disclosed to third parties
without the prior written consent of Hill-Rom.
Fifth Edition
First Printing 2004
Printed in Taiwan
Basic Care™ is a trademark of Hill-Rom Services, Inc.
Comfortline® is a registered trademark of Hill-Rom Services, Inc.
Hill-Rom® is a registered trademark of Hill-Rom Services, Inc.
The information contained in this manual is subject to change without notice. Hill-Rom
makes no commitment to update or keep current, the information contained in this
manual.
Hill-Rom reserves the right to make changes without notice in design, specifications, and
models. The only warranty Hill-Rom makes is the express written warranty extended on
the sale or rental of its products.
To order additional copies of this manual (usr124), refer to the back cover for contact
information. For countries not listed on the back cover, contact your distributor.
The back cover is a comprehensive list of Technical Support contact information for
Hill-Rom. The product discussed in this manual may not be available in all of the
countries listed.
i

Revision Letter Pages Affected Date
Original Issue March 2004
A All April 2004
B All J uly 2004
C All J uly 2004
5 All January 2005
ii

Table of Contents
Document Symbol Definition . . . . . . . . . . . . . . . . . . . . . . . . . . . . . . . . . . . . . . . . . . . 1
Intended Use . . . . . . . . . . . . . . . . . . . . . . . . . . . . . . . . . . . . . . . . . . . . . . . . . . . . . . . . 2
Introduction . . . . . . . . . . . . . . . . . . . . . . . . . . . . . . . . . . . . . . . . . . . . . . . . . . . . . . . . . 2
Features . . . . . . . . . . . . . . . . . . . . . . . . . . . . . . . . . . . . . . . . . . . . . . . . . . . . . . . . . . . . 2
Patien t C h aracter i st ics . . . . . . . . . . . . . . . . . . . . . . . . . . . . . . . . . . . . . . . . . . . . . . 4
Instr u ctions for U se . . . . . . . . . . . . . . . . . . . . . . . . . . . . . . . . . . . . . . . . . . . . . . . . . . . 5
Putting the Bed into the Emergency CPR Position . . . . . . . . . . . . . . . . . . . . . . . . 5
Putting the Electric Bed Model into the Emergency CPR Position. . . . . . . . . 5
Putting the Manual Bed Model into the Emergency CPR Position. . . . . . . . . 5
Raising and Lowering the Tuc k A way Side rails . . . . . . . . . . . . . . . . . . . . . . . . . . 6
Raisin g a Sidera il. . . . . . . . . . . . . . . . . . . . . . . . . . . . . . . . . . . . . . . . . . . . . . . .6
Lower i n g a Sid erail . . . . . . . . . . . . . . . . . . . . . . . . . . . . . . . . . . . . . . . . . . . . . 6
Storin g t h e Si d e rails. . . . . . . . . . . . . . . . . . . . . . . . . . . . . . . . . . . . . . . . . . . . . 7
Using the Siderail Caregiver and Patient Controls (Electric Bed Model Only) . . 7
Raising and Lowering the Head Secti o n . . . . . . . . . . . . . . . . . . . . . . . . . . . . . 8
Raising and Lowering the Kn ee Sectio n . . . . . . . . . . . . . . . . . . . . . . . . . . . . . 8
Raising and Lowering the Head and Knee Sectio n s To g e t h e r . . . . . . . . . . . . 8
Raising and Lowering the B ed. . . . . . . . . . . . . . . . . . . . . . . . . . . . . . . . . . . . . 8
Using the Fo o t En d Ca regiver Co n t ro l s ( Electric B ed Mo del Only). . . . . . . . . . . 9
Chang i n g the Positio n of the Patient or Bed . . . . . . . . . . . . . . . . . . . . . . . . . . 9
Putting the Bed into Trendelenburg or Reverse Trendelenburg . . . . . . . . . . . 9
Locki n g Out t h e Pat i e n t Controls . . . . . . . . . . . . . . . . . . . . . . . . . . . . . . . . . 10
Using the Manual Caregiver Controls (Manual Bed Model Only) . . . . . . . . . . . 11
Raising and Lowering the Head Secti o n . . . . . . . . . . . . . . . . . . . . . . . . . . . . 12
Raising and Lowering the B ed. . . . . . . . . . . . . . . . . . . . . . . . . . . . . . . . . . . . 12
Raising and Lowering the Kn ee Sectio n . . . . . . . . . . . . . . . . . . . . . . . . . . . . 12
Putting the Bed into Trendelenburg or Reverse Trendelenburg . . . . . . . . . . 12
Equip m e n t So ck e t s . . . . . . . . . . . . . . . . . . . . . . . . . . . . . . . . . . . . . . . . . . . . . . . 13
Bed End Panels . . . . . . . . . . . . . . . . . . . . . . . . . . . . . . . . . . . . . . . . . . . . . . . . . . 13
Bumpers . . . . . . . . . . . . . . . . . . . . . . . . . . . . . . . . . . . . . . . . . . . . . . . . . . . . . . . . 14
Draina g e Bag Hol d er s . . . . . . . . . . . . . . . . . . . . . . . . . . . . . . . . . . . . . . . . . . . . . 14
Brake and Steer . . . . . . . . . . . . . . . . . . . . . . . . . . . . . . . . . . . . . . . . . . . . . . . . . . 14
Centra l Brake and Ste e r. . . . . . . . . . . . . . . . . . . . . . . . . . . . . . . . . . . . . . . . . 14
Caster Brake and S teer. . . . . . . . . . . . . . . . . . . . . . . . . . . . . . . . . . . . . . . . . . 14
Patien t R estraint St raps . . . . . . . . . . . . . . . . . . . . . . . . . . . . . . . . . . . . . . . . . . . . 15
Battery Backup (Electric Model Only) . . . . . . . . . . . . . . . . . . . . . . . . . . . . . . . . 15
iii

Dispo sing of the Battery . . . . . . . . . . . . . . . . . . . . . . . . . . . . . . . . . . . . . . . . .15
Mattress . . . . . . . . . . . . . . . . . . . . . . . . . . . . . . . . . . . . . . . . . . . . . . . . . . . . . . . . 16
Cleaning . . . . . . . . . . . . . . . . . . . . . . . . . . . . . . . . . . . . . . . . . . . . . . . . . . . . . . . . . . . 17
Genera l Cl e aning. . . . . . . . . . . . . . . . . . . . . . . . . . . . . . . . . . . . . . . . . . . . . . . . . 17
Steam Cleaning . . . . . . . . . . . . . . . . . . . . . . . . . . . . . . . . . . . . . . . . . . . . . . . . . . 17
Clean i n g Ha rd to Cl ean Spot s . . . . . . . . . . . . . . . . . . . . . . . . . . . . . . . . . . . . . . . 17
Disinf ec t i n g . . . . . . . . . . . . . . . . . . . . . . . . . . . . . . . . . . . . . . . . . . . . . . . . . . . . . 17
Mainten ance. . . . . . . . . . . . . . . . . . . . . . . . . . . . . . . . . . . . . . . . . . . . . . . . . . . . . . . . .18
Safety Ti p s . . . . . . . . . . . . . . . . . . . . . . . . . . . . . . . . . . . . . . . . . . . . . . . . . . . . . . . . . 19
Bed Position. . . . . . . . . . . . . . . . . . . . . . . . . . . . . . . . . . . . . . . . . . . . . . . . . . . . . 19
Elect r i c a l Be d Mo d el Only . . . . . . . . . . . . . . . . . . . . . . . . . . . . . . . . . . . . . . 19
Siderai l s . . . . . . . . . . . . . . . . . . . . . . . . . . . . . . . . . . . . . . . . . . . . . . . . . . . . . . . . 20
Patien t R estraints. . . . . . . . . . . . . . . . . . . . . . . . . . . . . . . . . . . . . . . . . . . . . . . . . 20
Brakes . . . . . . . . . . . . . . . . . . . . . . . . . . . . . . . . . . . . . . . . . . . . . . . . . . . . . . . . . 21
Electrical Safety . . . . . . . . . . . . . . . . . . . . . . . . . . . . . . . . . . . . . . . . . . . . . . . . . . 21
Emergency CPR. . . . . . . . . . . . . . . . . . . . . . . . . . . . . . . . . . . . . . . . . . . . . . . . . . 21
Battery Backup . . . . . . . . . . . . . . . . . . . . . . . . . . . . . . . . . . . . . . . . . . . . . . . . . . 21
Mattresses . . . . . . . . . . . . . . . . . . . . . . . . . . . . . . . . . . . . . . . . . . . . . . . . . . . . . . 22
Accessories . . . . . . . . . . . . . . . . . . . . . . . . . . . . . . . . . . . . . . . . . . . . . . . . . . . . . . . . 23
Removable IV Pole (P1445A) . . . . . . . . . . . . . . . . . . . . . . . . . . . . . . . . . . . . . . . 23
Troubleshooting. . . . . . . . . . . . . . . . . . . . . . . . . . . . . . . . . . . . . . . . . . . . . . . . . . . . . 23
Bed Ove rh e ats or Shuts Down After Extens i v e Op e ration . . . . . . . . . . . . . . . . . 23
Product Symbol Definition . . . . . . . . . . . . . . . . . . . . . . . . . . . . . . . . . . . . . . . . . . . . 24
Techni c a l S p e cificati o n s . . . . . . . . . . . . . . . . . . . . . . . . . . . . . . . . . . . . . . . . . . . . . . 26
Electromagnetic Compatibility . . . . . . . . . . . . . . . . . . . . . . . . . . . . . . . . . . . . . . 29
iv
Document Symbol Definition
This manual contains different typefaces and icons designed to improve readability and
increase understanding of its content. Note the following examples:
• Standard text—used for regular information.
• Boldface text—emphasizes a word or phrase.
• NOTE:—sets apart special information or important instruction clarification.
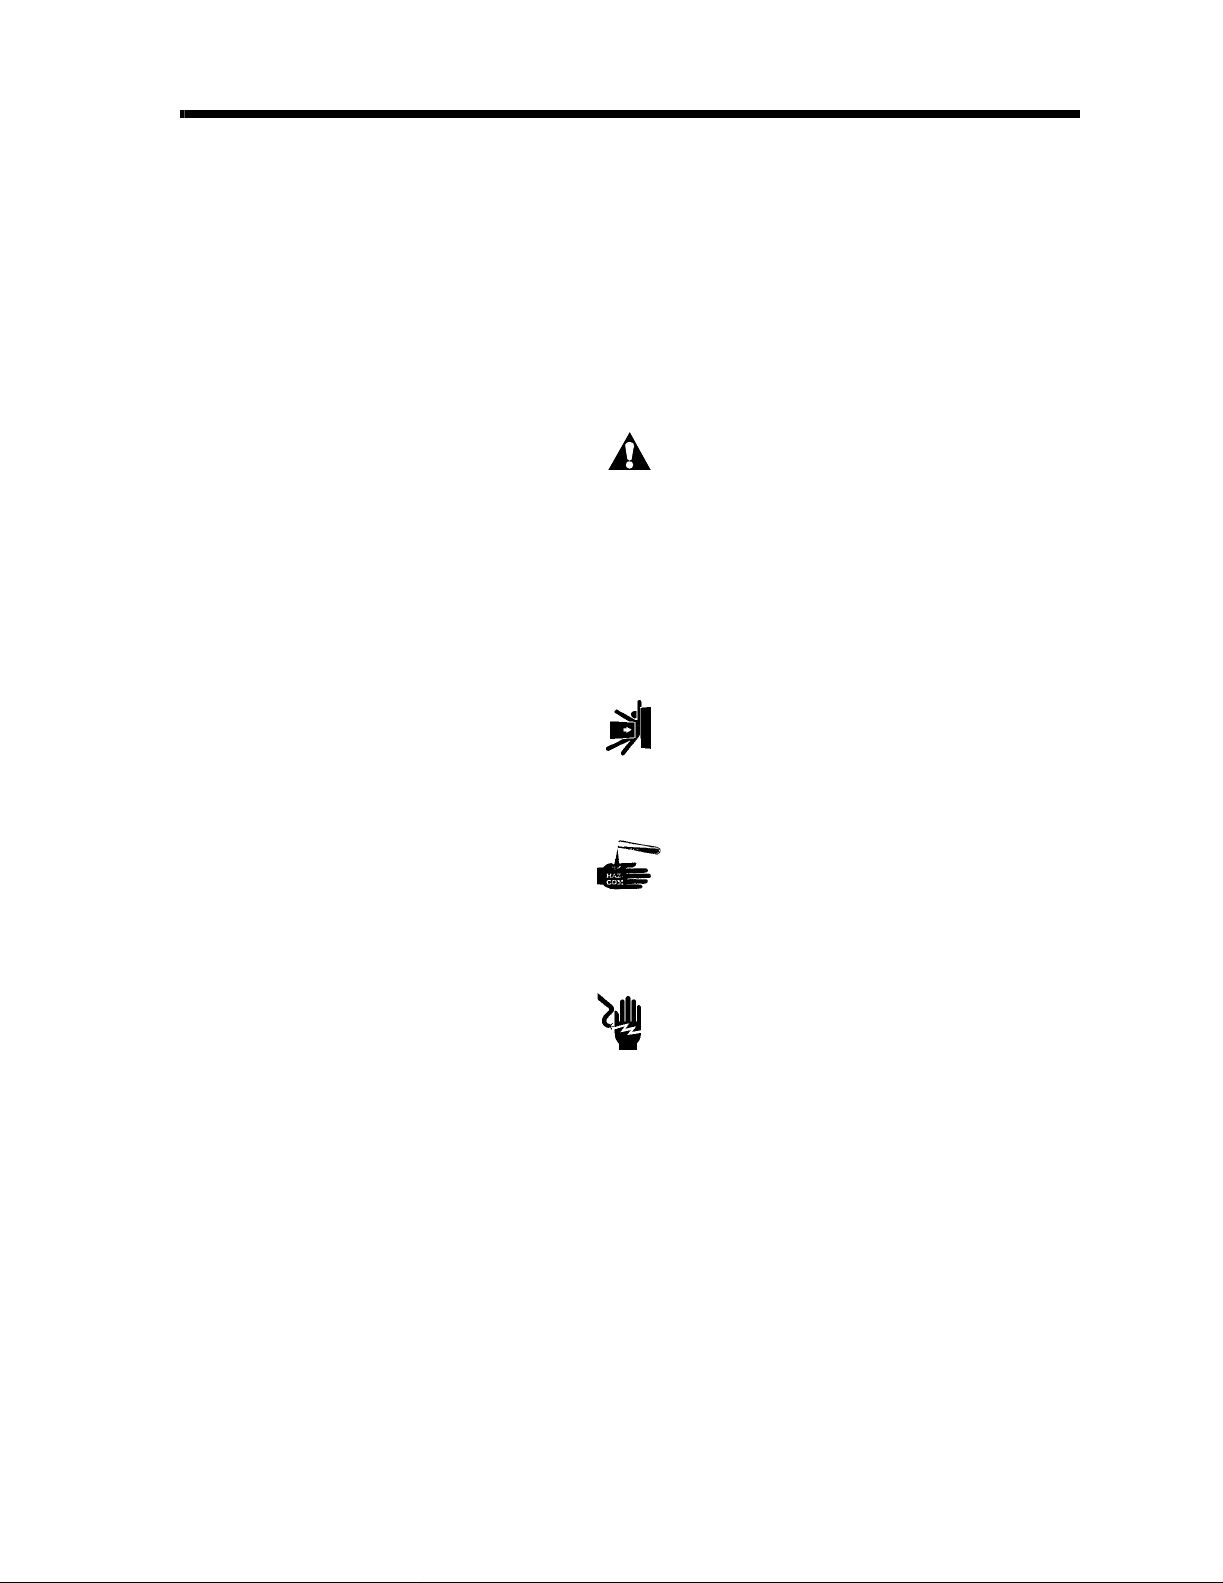
• The symbol below highlights a WARNING or CAUTION:
Warning and Caution
– A WARNING identifies situations or a ctions tha t may affect patient or us e r sa fety.
Disregarding a warning could result in patient or user injury.
– A CAUTION points out special procedures or precautions that personnel must
follow to avoid equipment damage.
• The symbol below highlights a CAUGHT HAZARD WARNING:
Caught Hazard Warning
• The symbol below highlights a CHEMICAL HAZARD WARNING:
Chemical Hazard Warning
• The symbol below highlights an ELECTRICAL SHOCK HAZARD WARNING:
Electrical Shock Hazard Warning
1
Intended Use
The Basic Care™ Bed is intended for use in health care environments such as a medical or
surgical hospital unit or ward.
Introduction
This manual provides instructions for normal operation of the Basic Care™ Bed. Before
operating the Basic Care™ Bed, be sure that you have read and understood in detail the
contents of this manual. It is important that you read and obey the aspects of safety
contained in this manual. Any reference to a side of the bed is from the patient’s view
lying in the bed on their back.
Features
Electric model
Manual model
2

Features
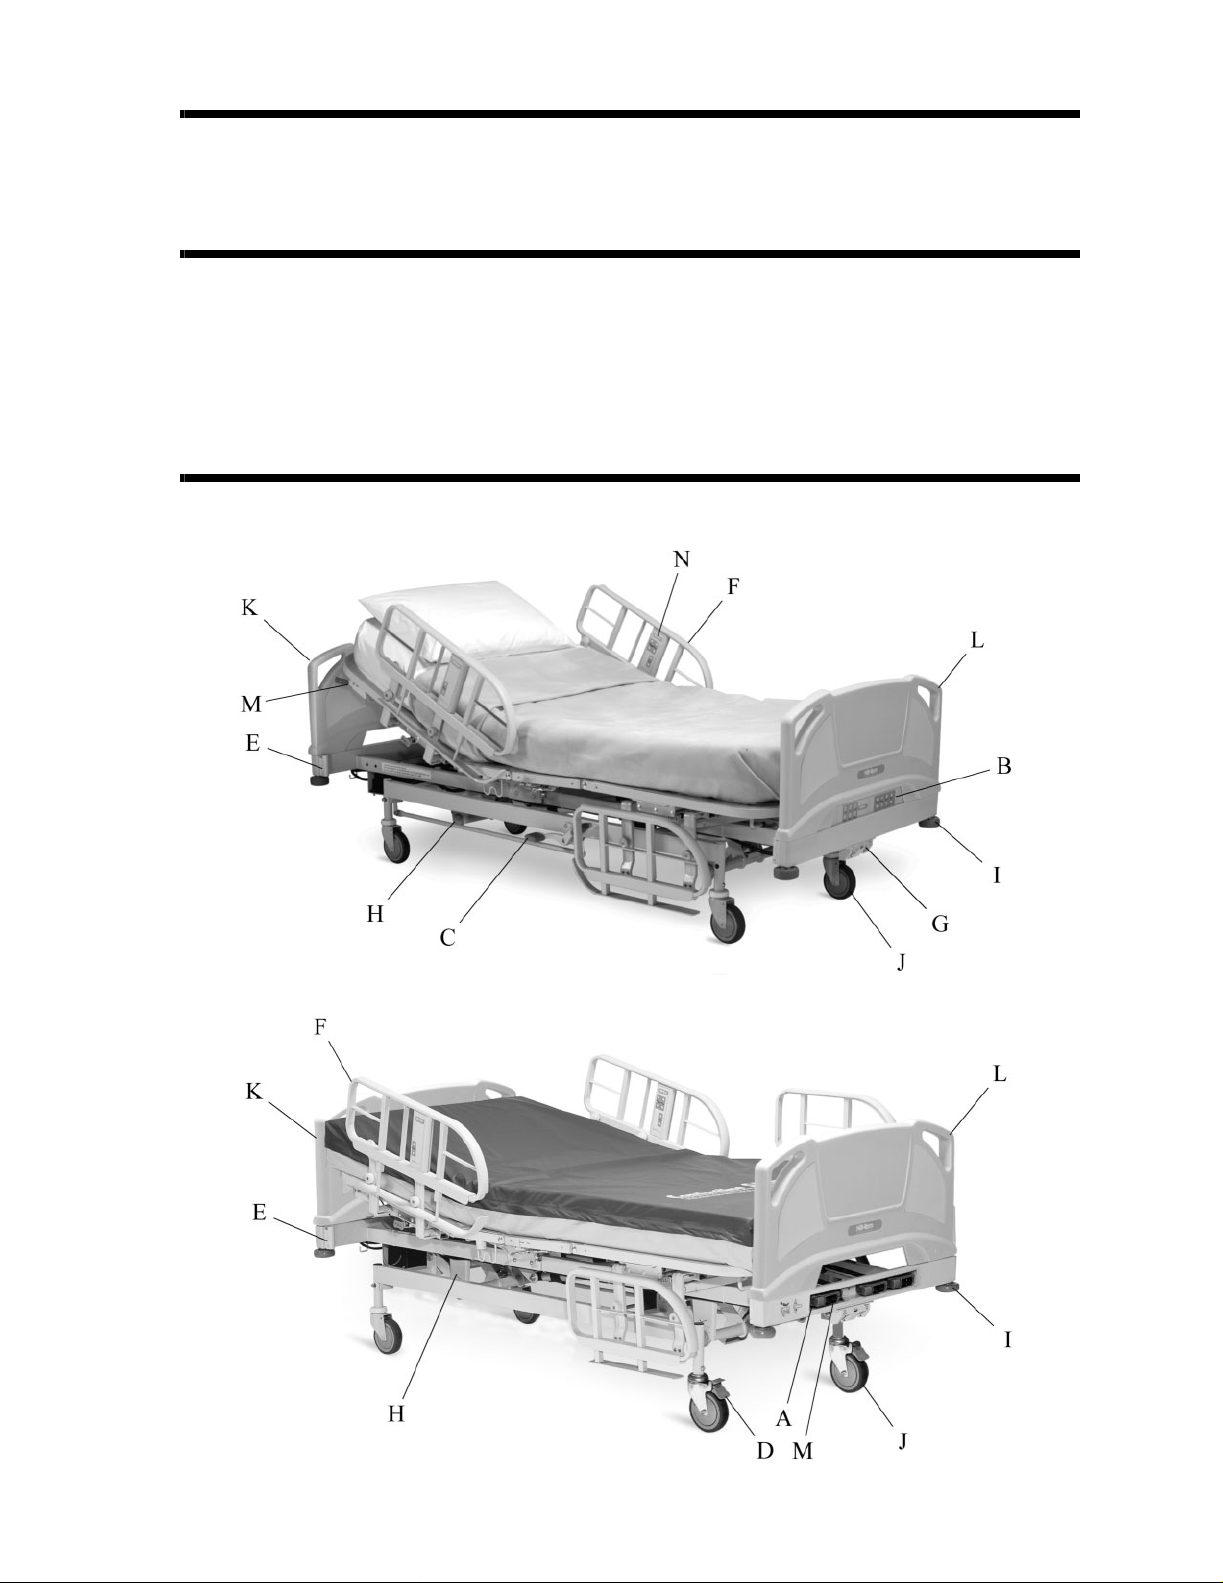
Item Description
A Manual controls (manual model only)
B Electric controls (electric model only)
C Central brake and steer
D Three-caster brake and steer
E Four equipment sockets
F Clocking TuckAway siderails with zero transfer gap
G 12° Trendelenburg and Reverse Trendelenburg controls
H Trendelenburg and Reverse Trendelenburg indicators
I Corner bumpers
J Mobile 5" casters
K Blow-molded headboard with single-step removal and push handles
L Blow-molded footboard with single-step removal and push handles
MEmergency CPR
N Patient and caregiver siderail controls (electric model only)
The Basic Care™ Bed also has the following features:
• Head elevation gauge
• Battery backup function (electric model only)
• Three DC motors (electric model only)
• Complete bed articulation: Hilow, head, knee, and automatic contour
• Lockout controls (electric model only)
• Standard color scheme from Hill-Rom
The Basic Care™ Bed can be used with the following items:
• Urinal devices
• Sling scale devices
• Foley-type bags
• Hoists
• Overbed tables in the low position
• Basic mattresses
An IV rod is available as an accessory for the Basic Care™ Bed.
The Basic Care™ Bed is available in standard length or Special (short) length
3

Patient Characteristics
WARNING:
Do not use the product outside of the recommended patient height, weight, and
width ranges. Patient injury or equipment damage could occur.
Height—56" to 74" (142 cm to 188 cm)
Width—36" (91 cm)
Maximum patient weight—300 lb (136 kg)
Safe working load—450 lb (204 kg) maximum, including patient weight, mattress, IV
pumps, poles, bags, and such.
4
Instruct ion s fo r Use
NOTE:
Putting the Bed into the Emergency CPR Position
Putting the Electric Bed Model into the Emergency CPR Position
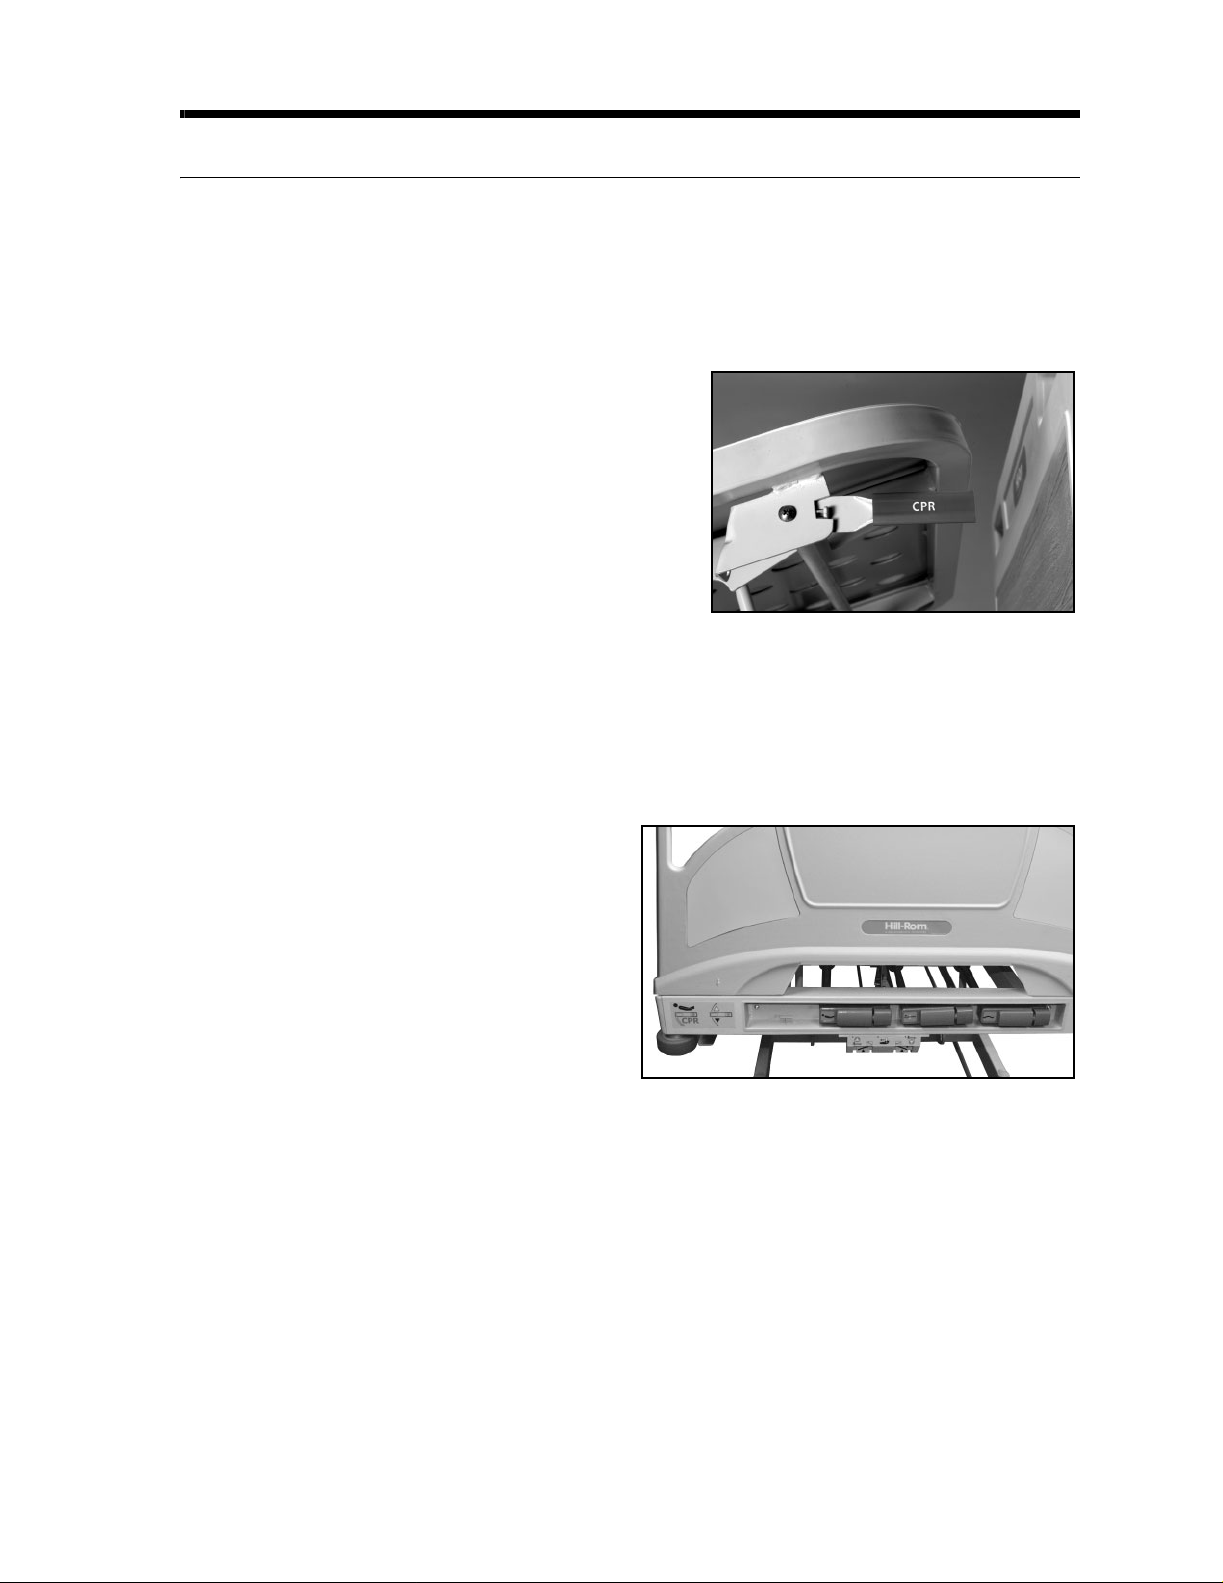
When activated, the CPR release disengages the head section actuator so that the head
section may lower to the horizontal position. This function can be used when power is not
available.
The emergency CPR controls are handles located
under the sleep deck, between the head end and
the head end siderails on both sides of the bed.
1. Pull and hold the handle. Hold the handle
until the head section come to a stop in the
flat position.
2. Release the handle.
The emergency CPR control handle must be
continually pulled until the head section of the bed reaches a flat position. Releasing the
control handle will cause the head section to stop lowering.
The head section actuator is automatically re-enabled after the CPR control handle is
released.
Putting the Manual Bed Model into the Emergency CPR Position
At the foot end of the bed, use the manual
controls to rapidly lower the head s ection
of the bed (see “Using the Manual
Caregiver Controls (Manual Bed Model
Only)” on page 11).
5
Raising and Lowering the TuckAway Siderails
NOTE:
WARNING:
Evaluate patients for entrapment risk according to facility protocol, and monitor
patients appropriately.
WARNING:
Evaluate patients for entrapment risk according to facility protocol, and monitor
patients appropriately. Make sure all siderails are fully latched when in the raised
position. Failure to do either of these could result in serious injury or death.
Siderails are intended to be a reminder to the patient of the unit’s edges, not a patientrestraining device. When appropriate, Hill-Rom recommends that medical personnel
determine the proper methods necessary to make sure a patient remains safely in bed.
WARNING:
Use of a mattress overlay reduces the effective height of the siderails above the
sleep surface. When using a mattress overlay, evaluate the patient for the risk of
falls, and take appr opria te measu res. F ail ure to do so could resu lt in pat ient injury.
When the bed is occupied, the siderails should be in the raised position.
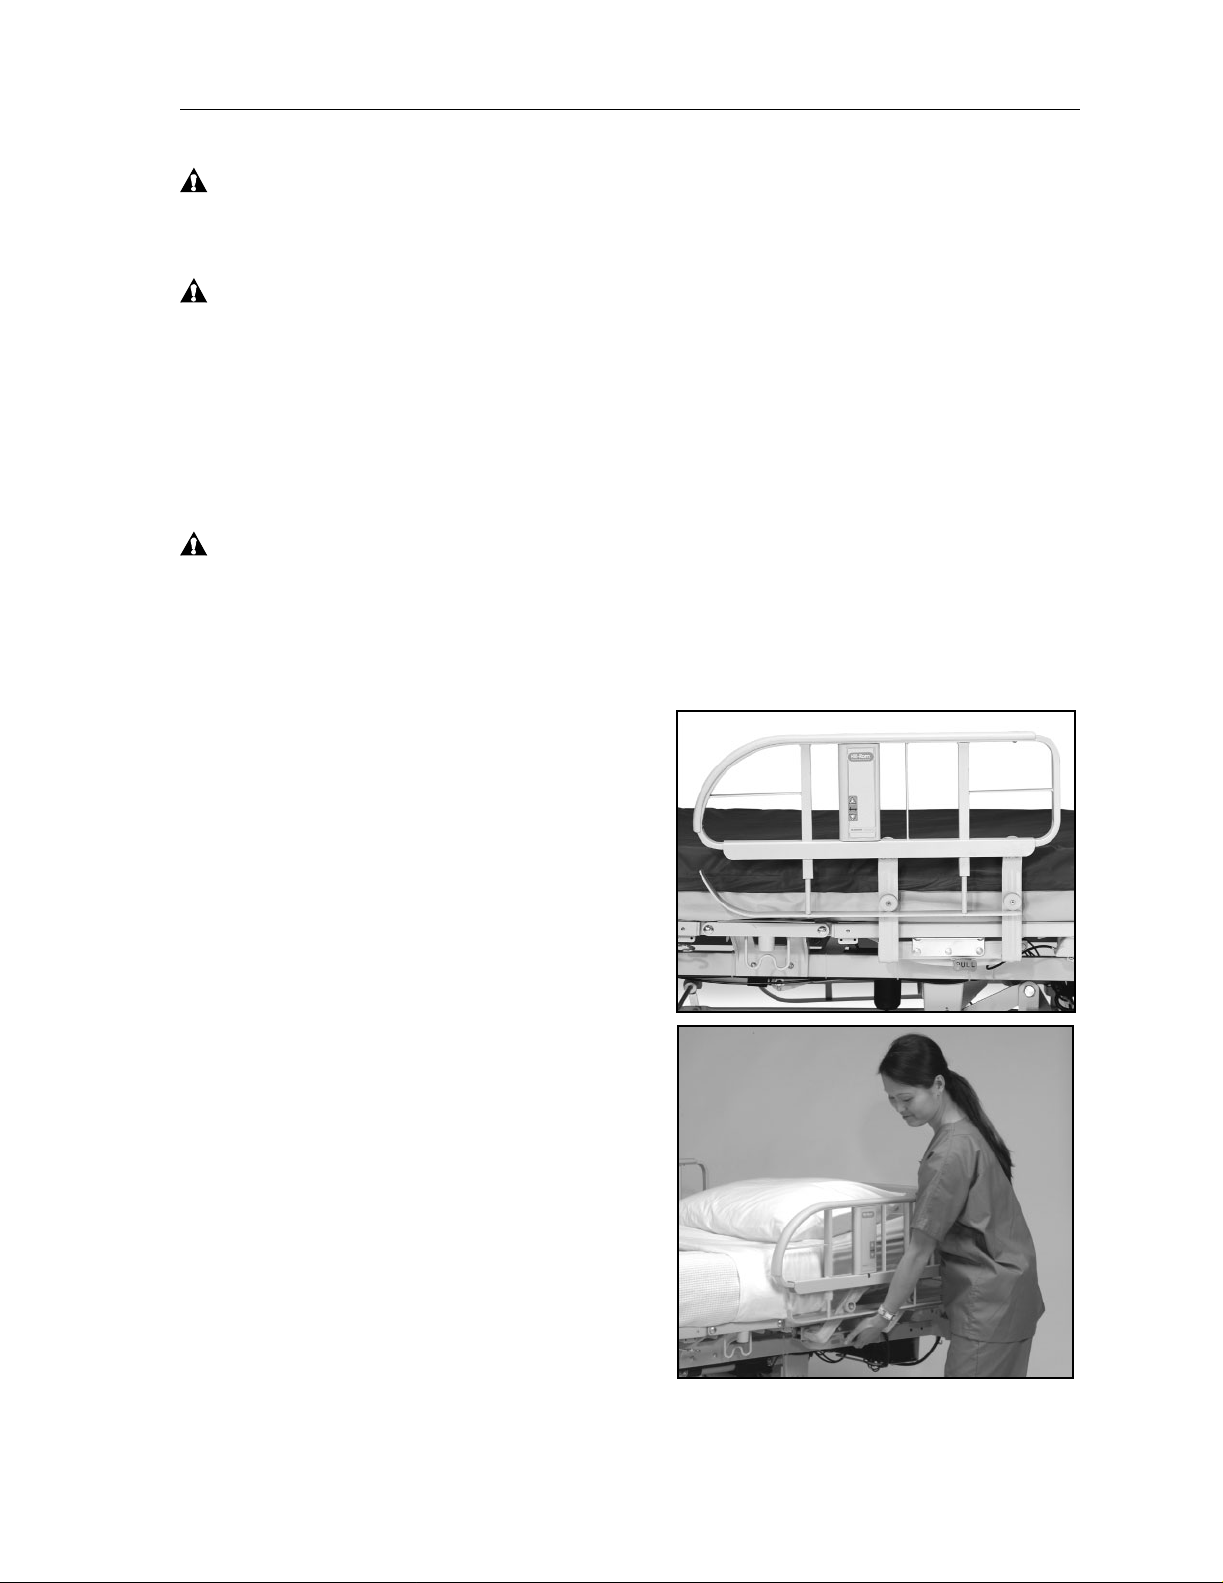
Raising a Siderail
1. Pull the siderail out from under the bed.
2. Rotate the siderail up to the raise d position
until a click is heard.
Lowering a Siderail
1. Pull the Pull siderail release lever.
2. Rotate the siderail down to the lowered
position.
3. Push the siderail under the bed to the
stored position.
6
 Loading...