

Hellwig 7805 User Manual
559-734-7451 800-367-5480 FAX 559-734-7460
INSTALLATION INSTRUCTIONS
FRONT STABILIZER BAR
82-03 (2X4) S10-15 PICK UP
90-01 2WD 4-Door S10-15 BLAZER, JIMMYAND BRAVADA
Thank youfor purchasing a quality Hellwig Product.
PLEASE READ THISINSTRUCTION SHEETCOMPLETELYBEFORE STARTING YOUR INSTALLATION
1
2
3
7509 (R-7509) 01/27/04

559-734-7451 800-367-5480 FAX 559-734-7460
TORQUETABLE
BOLT SIZE: 3/8” = 20-30 ft. lbs. – 7/16” = 35-45 ft. lbs. – ½” = 50-70 ft. lbs. – 9/16” = 70-90 ft. lbs.
SAFETY: BEFORESTARTINGYOUR INSTALLATION,BE SURE TO SETPARKING BRAKE AND CHOCK TIRES.
NOTE: TO EASE INSTALLATION AND TOPROPERLY ADJUST BAR, THEWEIGHT OF THE VEHICLE MUSTBE ON THE SUSPEN-
SION, AS IF DRIVING DOWN THEROAD. DO NOT RAISE VEHICLEBY FRAME.
NOTE: THIS KIT INCLUDESLOCK NUTS WHICH REQUIRE TIGHTENING WITH A WRENCH AFTERBEING STARTED BY HAND.
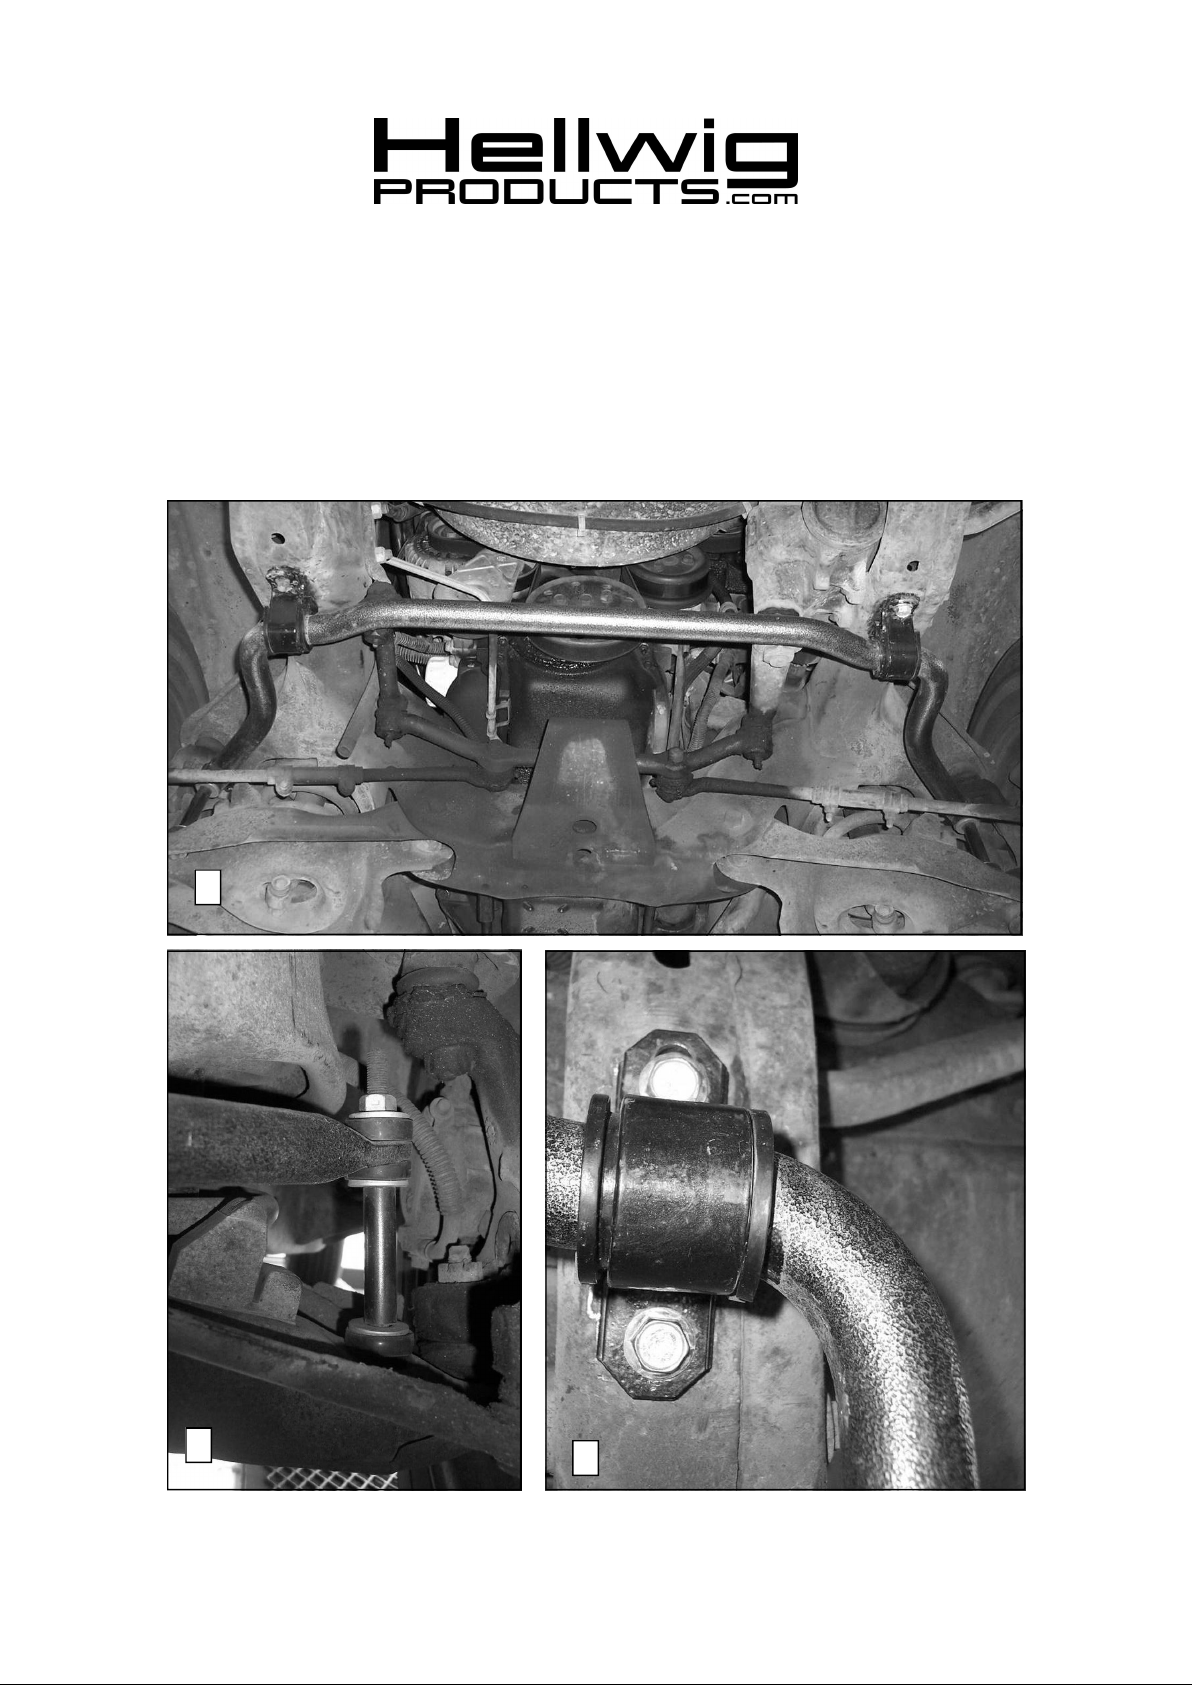
1. If your vehicle has a factory installed front anti sway bar, remove the factory mounted sway bar and save mounting hardware
for later use.
2. Lubricate and place the D-shaped poly bushings and U-plates on the sway bar as shown in photos 1 & 3. Place the sway bar
onto the frame. Locate the threaded holes on the frame and start the bolts through the U-plates on the frame (leave loose at this
time to allow for adjustment later).
NOTE: On some S-10 & S-15 models. It may be necessary to tap the existing frameholes. You will need an M10 x 1.5 tap.
Tap the holes so that you can complete your sway bar installation.
3. Install the poly end link bushings and washers on the end links and attach the end links to the holes in the lower control arms as
shown in photo two (2) . Tighten the lock nuts slightly just enough to where the bushings start to bulge.( DO NOT OVER
TIGHTEN )
4. Tighten the frame bolts to manufacturer specification.
5. Bounce the vehicle and check for clearance on all undercarriage components. Turn the front wheel full lock left and then right.
Make sure that at least (1/2”) clearance is maintained between the swaybar and all steering linkage as well as the front tires. Be
sure that all the nuts and bolts are securely fastened.
6. Recheck your installation, check for clearance to steering components, wires, exhaust pipes, fuel and brake lines etc.. After one
week of driving recheck your installation and on a monthly basis thereafter.
ATTENTION INSTALLER:BE SURE THAT THECUSTOMER RECEIVES THIS INSTRUCTION SHEET, ALL IMORTANT
NOTE CARDS ANDTHE WARRANTY FORM
7509 (R-7509) 01/27/04
 Loading...