

Page 1
559-734-7451 800-367-5480 FAX 559-734-7460
INSTALLATION INSTRUCTIONS
Rear Stabilizer Bar
2000-2006 Toyota Tundra
Thank you for purchasing a quality Hellwig Product.
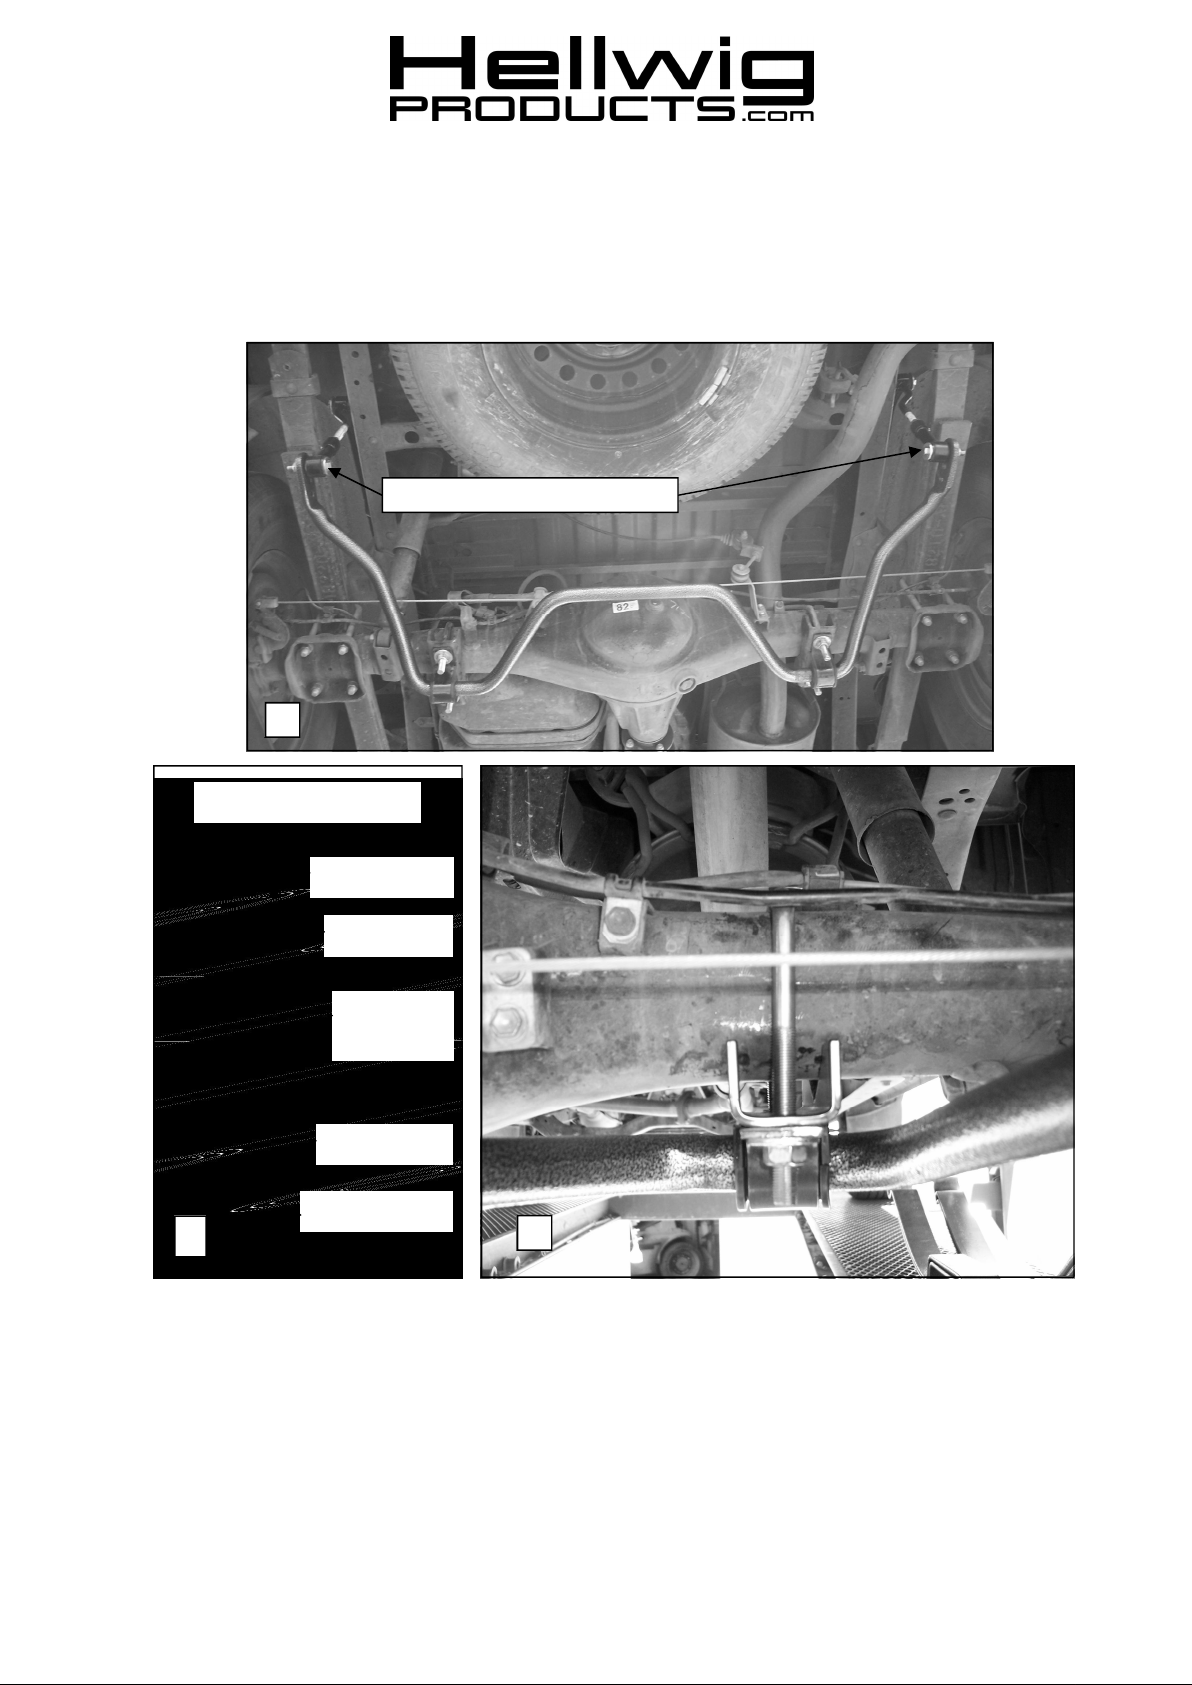
Attach end links to outermost hole
1
End LinkAssem-
3/4” Bushing
3/4” Sleeve
9/16-18
Nut
5/8” Sleeve
5/8” Bushing
2
3
7700 (R-7700) 06/12/2008
Page 2
559-734-7451 800-367-5480 FAX 559-734-7460
4
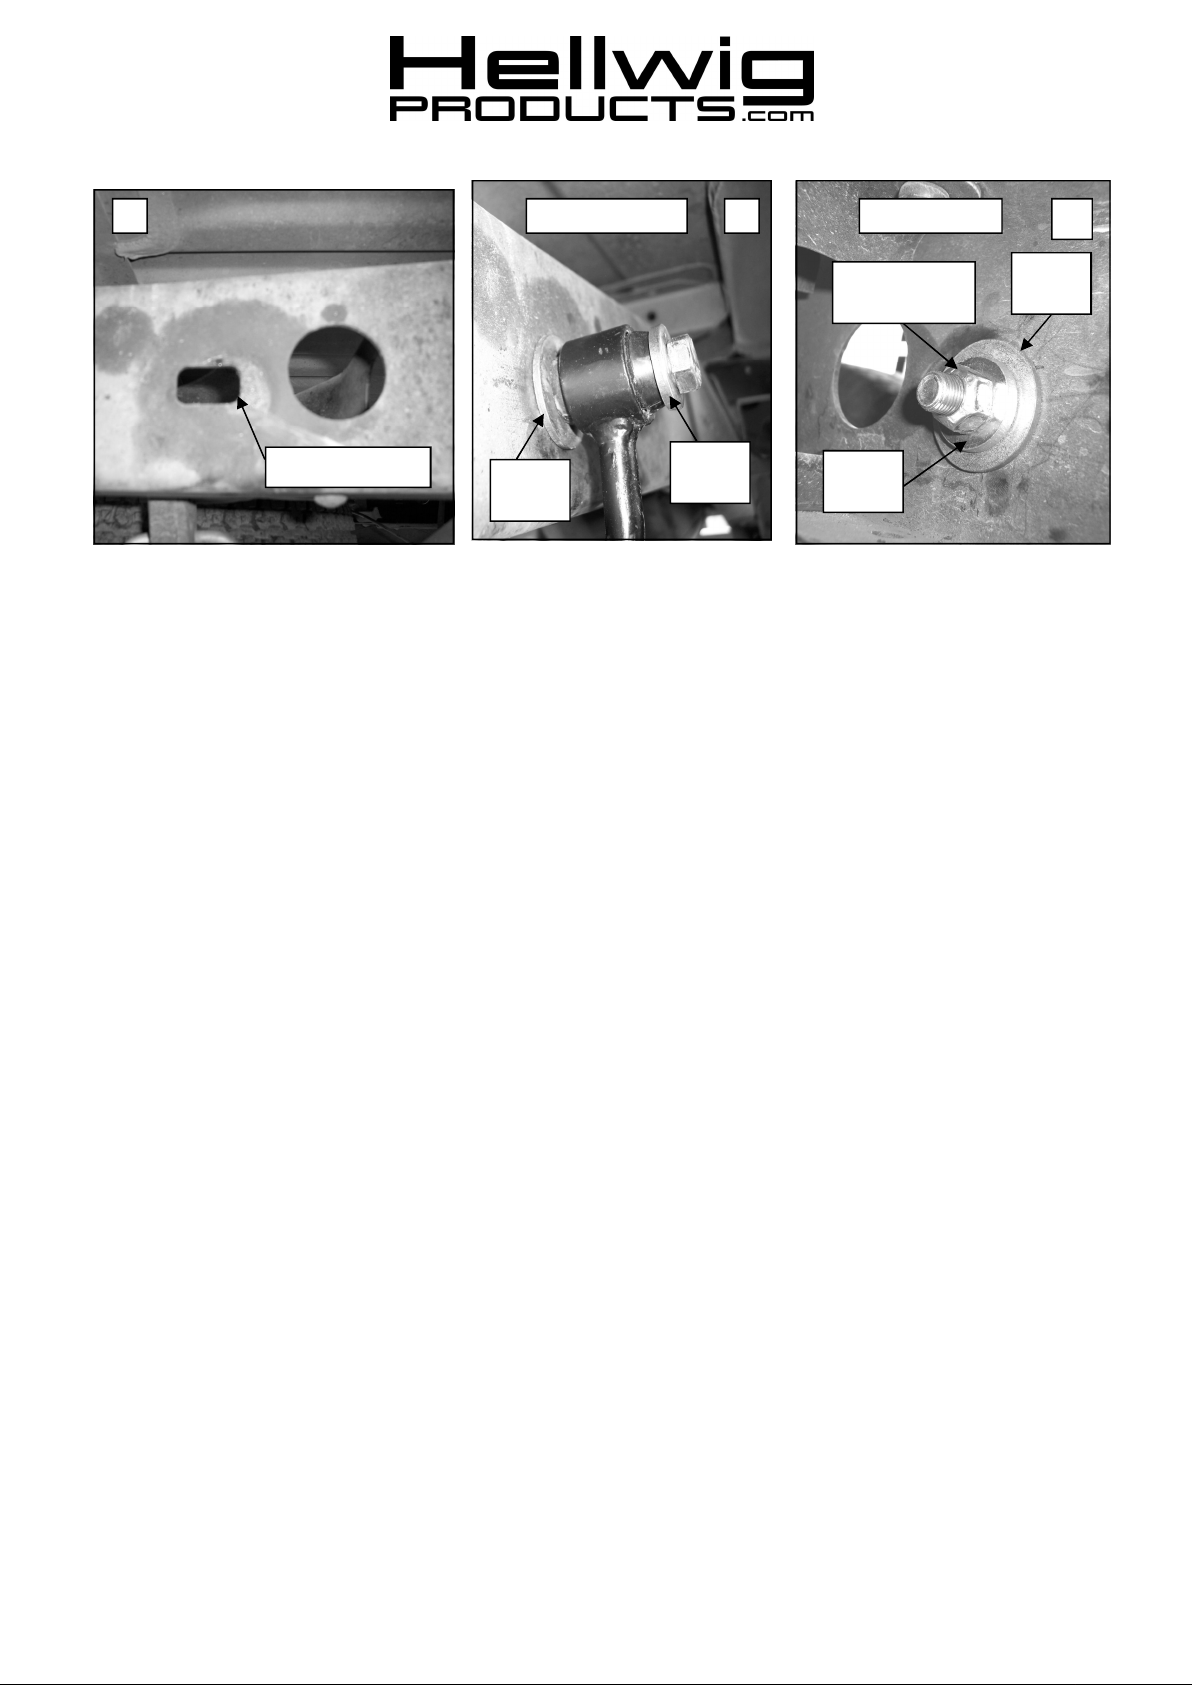
Slotted Hole
SAFETY: BEFORESTARTINGYOUR INSTALLATION,BE SURE TO SET PARKING BRAKE AND CHOCK TIRES.
NOTE: TO EASE INSTALLATION AND TO PROPERLYADJUSTBAR, THEWEIGHT OF THE VEHICLE MUST BE ON THE SUSPEN
SION, AS IF DRIVING DOWNTHE ROAD. DO NOT RAISE VEHICLE BY FRAME.
NOTE: THIS KIT INCLUDES LOCK NUTS WHICH REQUIRE TIGHTENINGWITH A WRENCH AFTER BEING STARTEDBY HAND.
Outside of Rail Inside of Rail
Large
Washer
Thick
Washer
5
Torque nut to
60-70 ft-lb
Thick
Washer
6
Large
Washer
1. Place the U-bolts over the axle tubes as shown in photos 1 & 3. Be careful to place the
U-bolts under any brake lines or wires so not to damage them when the U-bolts are
tightened.
2. Lubricate the D-shaped bushings and place them on the flat areas of the bar to line up
with the U-bolts. Place the U-plates over the D bushings.
3. Place the saddle brackets onto the U-bolts so that they lie flat against the bottom of the
axle.
4. Raise the bar up to the u-bolts and mount the bushings and U-plates to the U-bolts with
7/16” washers and locknuts. Leave loose at this time for adjustment later.
5. Assemble end link assembly by inserting 3/4” ID hourglass bushings into loops in upper end links first. Then insert 3/4” OD sleeves into bushings. Lubricate bushings and
sleeves with supplied grease before assembly. Repeat for lower end links with 5/8” ID
hourglass bushings and sleeves.
6. Locate slotted holes in frame just aft of the spare tire crossmember as shown in photo 4.
7. Attach end link to slotted hole in frame by using the 1/2” bolt, locknut and combination
of thick and large washers as shown in photos 5 & 6. Torque to 60-70 ft-lb.
8. Attach end link to outermost hole in sway bar using 7/16 X 2-3/4 bolt, thick washers
and locknut as shown in photos 1. Torque bolt to 40 ft-lb. Adjust end links so that the
arms of the sway bar are parallel with the ground. When satisfied with alignment of
sway bar, torque 9/16” nut on end links to 70 ft-lb.
IMPORTANT NOTE: The end link threads are NOT powder coated so that the end links can be threaded
together. To prevent corrosion, it is advised to lightly coat the exposed threads with black spray paint after
adjusting to desired length.
.
7700 (R-7700) 06/12/2008
Page 3
559-734-7451 800-367-5480 FAX 559-734-7460
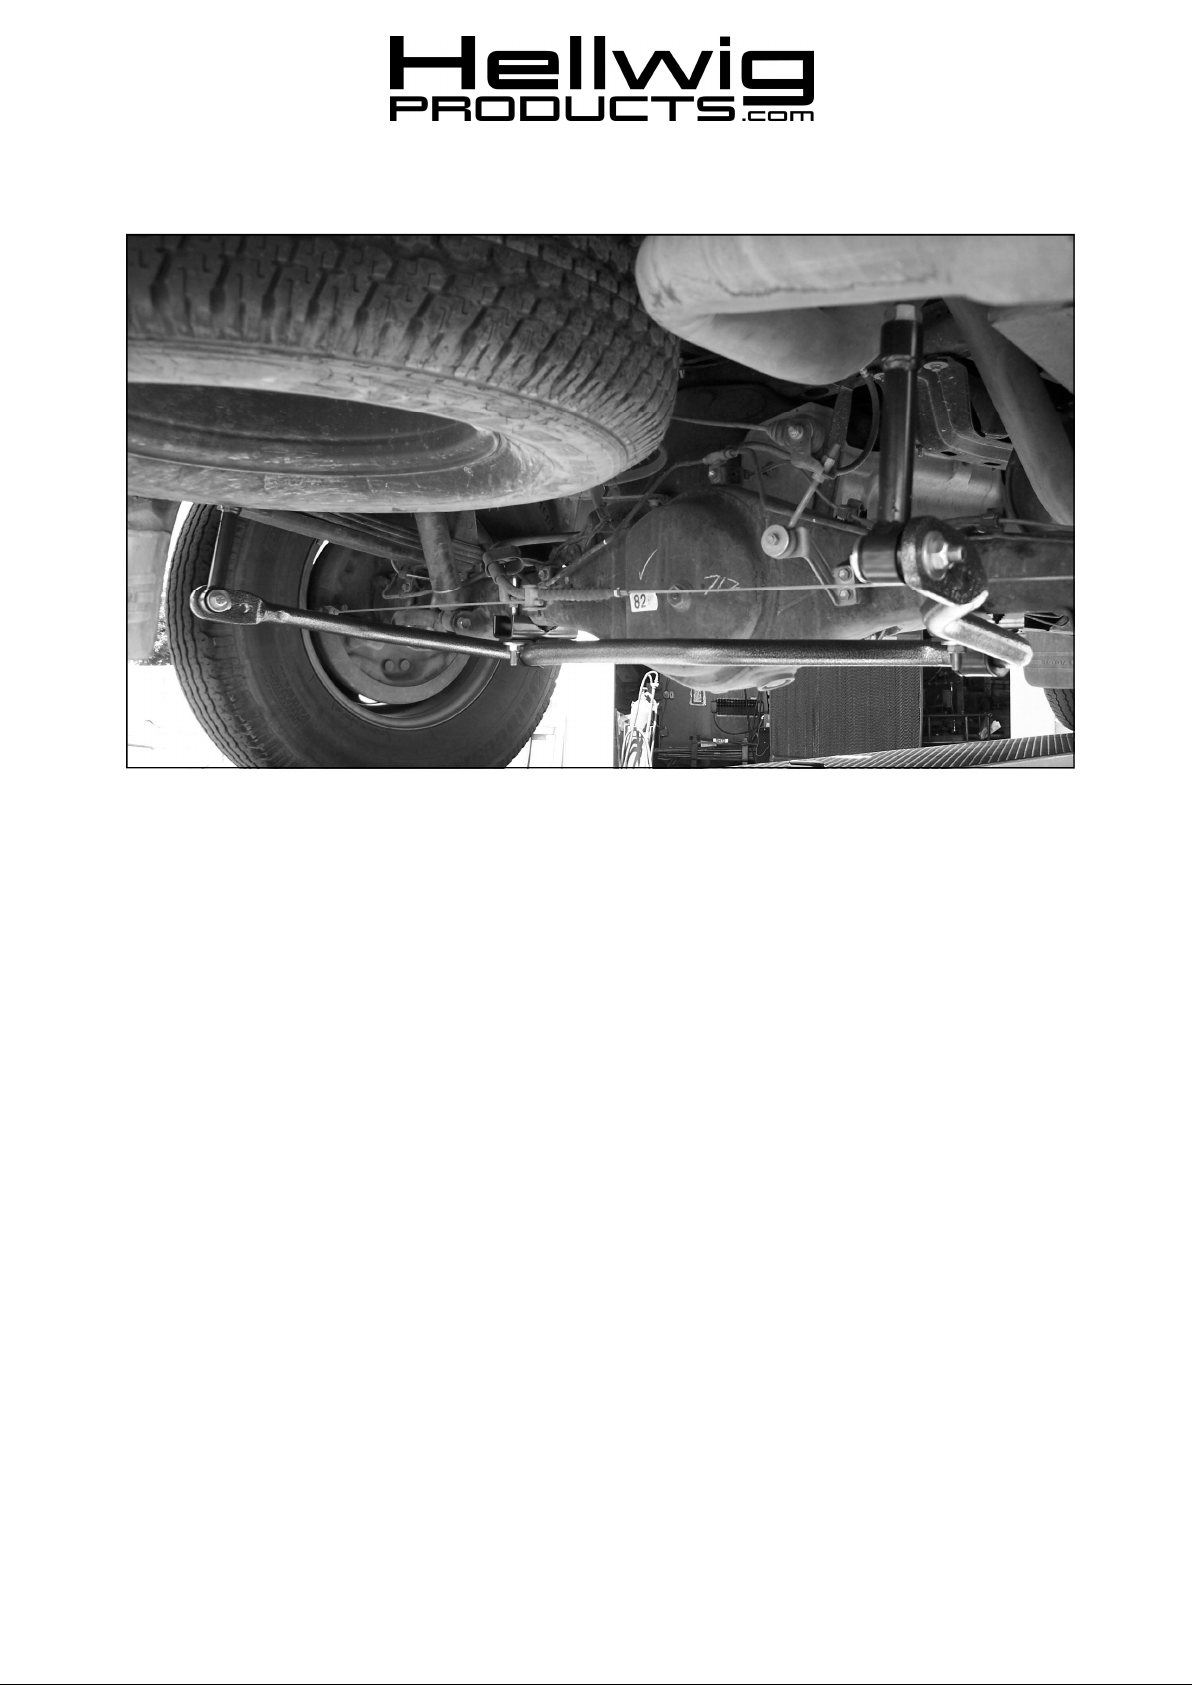
9. With the bar properly aligned, verify that all vehicle components have proper amount of
clearance, and that brake lines, wires, cables, and other components will not be pinched
or crushed when u-bolts are tightened. Torque U-bolts to 35 ft-lb.
10.Bounce the vehicle checking for clearance on all under carriage components – emergency brake cables, exhaust, shocks, differential, etc. Test drive the vehicle and recheck
all clearances and the installation alignment. Adjust as needed. Recheck your installation after one week of driving and periodically on a regular basis.
11.The sway bar arms have three mounting holes. Mounting the sway bar on the outer hole
is the nominal position. For firmer settings, use the inner holes. We recommend starting with the outer mounting hole as in photo ( 2 ) until you are accustomed to the vehicles new handling characteristics. Select the mounting point that best fits your driving
style
ATTENTION INSTALLER: PLEASE MAKE SURE CUSTOMER RECEIVES THIS INSTRUCTION SHEET,
ALL IMPORTANT NOTE CARDS, WARNING CARDS AND THE WARRANTY
FORM
7700 (R-7700) 06/12/2008
 Loading...